

Page 1

REFERENCE MANUAL
www.pinnaclesys.com
Page 2

© 2003 Pinnacle Systems GmbH. All rights reserved.
Copyright and Protective Rights
This manual or the software described herein, in whole or in part, may not be reproduced,
translated or reduced to any machine readable form without prior written approval from
Pinnacle Systems GmbH.
Pinnacle Systems GmbH AG PROVIDES NO WARRANTY WITH REGARD TO THIS
MANUAL, THE SOFTWARE OR OTHER INFORMATION CONTAINED HEREIN AND
HEREBY EXPRESSLY DISCLAIMS ANY IMPLIED WARRANTIES OF MERCHANTABILITY OR FITNESS FOR ANY PARTICULAR PURPOSE WITH REGARD TO THIS
MANUAL, THE SOFTWARE OR SUCH OTHER INFORMATION. IN NO EVENT SHALL
INNACLE SYSTEMS GMBH BE LIABLE FOR ANY INCIDENTAL, CONSEQUENTIAL OR
P
SPECIAL DAMAGES, WHETHER BASED ON TORT, CONTRACT, OR OTHERWISE,
ARISING OUT OF OR IN CONNECTION WITH THIS MANUAL, THE SOFTWARE OR
OTHER INFORMATION CONTAINED HEREIN OR THE USE THEREOF.
Pinnacle Systems GmbH reserves the right to make any modification to this manual or the
information contained herein at any time without notice.
The software described herein may also be governed by the terms of a separate user license
agreement.
YOU MAY USE THIS SOFTWARE TO ASSIST YOU IN COPYING MATERIAL IN
WHICH YOU OWN THE COPYRIGHT OR HAVE OBTAINED PERMISSION TO COPY
FROM THE COPYRIGHT OWNER. IF YOU DO NOT OWN THE COPYRIGHT OR
YOU HAVE NOT OBTAINED PERMISSION TO COPY FROM THE COPYRIGHT
OWNER, YOU MAY BE VIOLATING COPYRIGHT LAW AND YOU MAY BE SUBJECT
TO CLAIMS FOR DAMAGES AND/OR CRIMINAL PENALTIES.
Page 3

Trademarks
Pinnacle Liquid, EDITION,
Liquid silver, Liquid Edition, Liquid Edition PRO
Pinnacle Edition (DV 500), Liquid field
Processing
GmbH and Pinnacle Systems, Inc.
Pinnacle Systems and the Pinnacle Systems logo are registered trademarks of Pinnacle Systems, Inc.
Sony, ClipLink, DV, DVCAM, Digital Betacam, Betacam SP, Betacam SX, Hi8, Video8,
HDCAM, D2, Digital8, D8, i.LINK and the i.LINK logo are trademarks of
tion; D3, D5, Panasonic and DVCPRO are trademarks of
Company; Open Media Framework (r) Interchange, D9, Digital-S and D-VHS are trademarks of
ries; OMF, Avid, MediaLog are trademarks of
trademark of
trademark of
Microsystems; Photo CD is trademark of
Adobe AfterEffects are trademarks of
WindowsÒ, Windows 2000Ò, MS-DOS
Corporation; VGA
Intel
mark of
Parts of this product have been produced using LEADTOOLS
ogies Inc. ALL RIGHTS RESERVED. Parts of this product are based on the work of the
independent JPEG-Group.
Ô
, TARGA and TARGA 3000 are logo and trademarks of ©Pinnacle Systems
©JVC; Dolby A, B, C, SR and Dolby Surround are trademarks of Dolby Laborato-
©Terran Interactive - a subsidiary of Media 100, Inc.; FaderMaster Pro is
©JL Cooper - a department of Sound Technology; Java is trademark of ©Sun
Ò
Ò
and Pentium
is trademark of ©International Business Machines Corporation;
Ò
©Matrox Electronic Systems Ltd.
Liquid chrome, Liquid blue
,
,
, InTimeÔ and InTime
©Sony Corpera-
©Matsushita Electric Industrial
©Avid Technology, Inc.; Media Cleaner is
©Eastman Kodak Company; Acrobat Reader and
©Adobe Systems, Inc.; Microsoft
Ò
and Intellimouse are trademarks of ©Microsoft
are trademarks of ©Intel Corporation; Matrox DigiSuite is trade-
Ò
, Windows XP
©1991-2000, LEAD Technol-
Ô
,
All other nationally and internationally recognized trademarks and trade names are hereby
acknowledged.
Page 4

Page 5

Table of Contents
Section I
Basics
Chapter 1
Safety .......................................................1-1
Safety Notes .............................................................1-1
Additional Instructions .............................................................. 1-1
Safety Standards ......................................................................... 1-2
Implementation in Accordance with Intended Use ................... 1-3
Symbols and Conventions .......................................................... 1-3
Chapter 2
Table of Contents
Safety Instructions for Initial Startup ........................................ 1-4
Safety when Operating ............................................................... 1-5
General ......................................................2-1
Transport, Packing, Environmental Protection ......................... 2-2
System Cleaning ......................................................................... 2-2
Handling CD-ROM Discs .......................................................... 2-3
Handling Floppy Disks ............................................................... 2-5
I
Page 6

Chapter 3
Table of Contents
Setup ........................................................3-1
Delivery Package ....................................................... 3-2
Technical Specifications ............................................. 3-3
Installation .............................................................. 3-4
System Requirements .................................................................. 3-4
Installing the PCI interface card (IEEE 1394) ............................3-6
Configuring/Connecting A/V HD Subsystem
(RAID, optional) ........................................................................ 3-9
Liquid Edition and Peripherals ....................................3-11
Video/Audio Connections Liquid Edition ......................3-12
II
Configurations and Software Installation .....................3-13
After the Installation ................................................................. 3-16
Connecting the control panel
(Jog/Shuttle) (Optional) ...........................................3-18
InTime board Installation ..........................................3-19
Hardware Installation ...............................................................3-19
Software Installation ................................................................. 3-20
Device Control via RS 422 Remote ...............................3-21
Table of Contents
Page 7

Table of Contents
Chapter 4
Introduction ...............................................4-1
Chapter 5
Documentation ...........................................5-1
Preface .....................................................................4-2
Sources of Information ...............................................4-3
List of Chapters .........................................................4-4
Conventions and Symbols ............................................5-2
The Online Help .........................................................5-4
Table of Contents
Title Bar ...................................................................................... 5-5
Tabs in the Help Window ........................................................... 5-5
Toolbar ........................................................................................ 5-6
Information Window ................................................................. 5-7
III
Page 8

Chapter 6
Table of Contents
Basics .......................................................6-1
Starting and Exiting .................................................. 6-2
Menus, Dialog Boxes and Tool Buttons .......................... 6-3
Shortcut Menus ........................................................................... 6-3
Tool Buttons and Toolbars ..........................................................6-4
Dialog Boxes ............................................................................... 6-5
Tour de Pinnacle Liquid .............................................. 6-9
Inlays .........................................................................................6-10
Picons ........................................................................................ 6-11
Pinnacle Liquid Desktop .......................................................... 6-11
IV
The Project Window ................................................................. 6-22
The Timeline ............................................................................. 6-23
The Sequence Editor ................................................................. 6-24
The Logging Tool ...................................................................... 6-25
The Effect Editors ..................................................................... 6-26
The Audio Editor ......................................................................6-27
The Trim Editor ........................................................................6-28
Table of Contents
Page 9

Table of Contents
Section II
Working with Pinnacle Liquid
Chapter 7
Signup .......................................................7-1
Logging on As an Existing User ....................................7-3
New User/Initial Login ...............................................7-4
Load User Profile .......................................................7-5
User Details ..............................................................7-6
Remove User .............................................................7-8
Chapter 8
Table of Contents
Save User .................................................................7-8
Input ........................................................8-1
Logging and Digitizing (Capture) ..................................8-3
Basics .......................................................................................... 8-4
The Logging Tool and Its Functions .......................................... 8-8
Methods .................................................................................... 8-34
V
Page 10

Table of Contents
Importing Objects ....................................................8-44
Import - Where from, Where to? ............................................. 8-45
What Can Be Imported? ........................................................... 8-46
Importing Media Clips ............................................................. 8-48
Image Import (Global Settings) ............................................... 8-51
Copying/Pasting Objects from Other Projects ................8-54
Media Management and Object Import .........................8-55
Creating Objects ......................................................8-56
Creating a Color Clip ................................................................ 8-57
Generating a Signal Clip (Reference Level Tones) ................... 8-59
Creating Titles ........................................................................... 8-60
Producing Customized Effects ................................................. 8-60
Voice-Over ..............................................................8-61
VI
Importing EDL/AVID MediaLog Files ............................8-61
ALE Project Import/Export .........................................8-62
Import Project as ALE .............................................................. 8-62
Export Project as ALE ...............................................................8-63
VideoMachine DBF Import .........................................8-64
XReceive .................................................................8-66
Calling XReceive ....................................................................... 8-67
XReceive Options ..................................................................... 8-67
Starting XReceive ...................................................................... 8-67
LST Import ..............................................................8-68
Table of Contents
Page 11

Table of Contents
Chapter 9
Administration ............................................9-1
The Project ...............................................................9-3
Opening and Creating Projects .................................................. 9-3
Project Template ......................................................................... 9-5
Copy/Delete a Project ................................................................. 9-6
Project Structure ........................................................................ 9-8
The Project Browser ................................................................. 9-16
Project Properties ..................................................................... 9-18
Diagnose Project ...................................................................... 9-19
The Object ..............................................................9-20
Basics ........................................................................................ 9-21
Table of Contents
Objects in the Project ............................................................... 9-26
Searching for and Finding Objects ........................................... 9-40
Viewing and Editing Objects: the Clip Viewer ........................ 9-54
Object Information: Properties ................................................ 9-76
Preparing for Editing: Storyboarding ...................................... 9-82
Batch Digitize (Batch Capture) ................................................ 9-87
Consolidate ............................................................................... 9-97
Condense ................................................................................ 9-101
ClipSync ................................................................................. 9-102
Automatic Scene Detection (Clip Viewer) ............................. 9-107
VII
Page 12

Chapter 10
Table of Contents
Media Management ................................................. 9-112
Basics ....................................................................................... 9-113
Media Tab in the Project Window .......................................... 9-123
Media Management Settings .................................................. 9-129
Importing Media Clips ........................................................... 9-133
Media Management and Object Properties ............................ 9-133
Media Management and the Windows Explorer ....................9-138
Deleting Clips/Objects and Media Files ................................. 9-138
Vortex and Network Settings .................................................. 9-145
VIII
Edit ........................................................ 10-1
Video Editing ..........................................................10-3
Basics ......................................................................................... 10-3
Sequence Editor ...................................................................... 10-44
Timeline Editing ..................................................................... 10-63
Trim Editor ............................................................................. 10-84
Special Functions ....................................................................10-93
Editing - Examples and Illustrations .................................... 10-100
Table of Contents
Page 13

Table of Contents
Chapter 11
Audio in the Timeline ............................................10-124
“Audio” Tracks ...................................................................... 10-124
Synchronicity ....................................................................... 10-124
Volume and Panning ............................................................ 10-126
Fade-In and Fade-Out .......................................................... 10-126
Output and Monitor ............................................................. 10-127
Special Functions ..................................................10-128
Nesting Sequences (Building a Container) .......................... 10-129
Full-Size Monitor ................................................................. 10-134
Inlay Quality Menu / Inlay Size ............................................ 10-136
Table of Contents
Finish ...................................................... 11-1
Audio Postproduction ............................................... 11-3
Basics ........................................................................................ 11-3
Audio Tool .............................................................................. 11-17
Audio Monitor ........................................................................ 11-21
Audio Editor ........................................................................... 11-21
Special Functions ................................................................... 11-38
IX
Page 14

Table of Contents
Effects ................................................................. 11-53
Video Effects ........................................................................... 11-54
Linear Timewarp .................................................................. 11-159
Audio Effects ......................................................................... 11-165
Color Correction Editor .......................................... 11-174
Color Correction Editor (Overview) ................................... 11-175
What is Color? ....................................................................... 11-180
Working with the Vector and Waveform
Diagnostic Displays .............................................................. 11-182
Diagnostic Displays (Overview) ........................................... 11-190
Tools ...................................................................................... 11-197
Primary Color Correction .................................................... 11-199
X
Six Vector Color Correction ................................................. 11-213
Selective Color Correction ................................................... 11-214
Timewarp Editor ................................................... 11-221
Opening and Using the Timewarp Editor ............................ 11-222
Functions of the Timewarp Editor (Overview) .................... 11-223
Interpretation of the Diagrams and Examples ..................... 11-227
Standard Applications .......................................................... 11-236
Individual Applications ........................................................ 11-241
Table of Contents
Page 15

Table of Contents
Chapter 12
Realtime FX .............................................. 12-1
Always Maximum Performance .................................... 12-2
Rendering and Realtime ............................................12-3
When Render, When Realtime? .............................................. 12-3
Realtime and the Effect Preview ............................................... 12-4
Render Management of Realtime Software Effects .................. 12-6
Optimizing Realtime Preview .................................................. 12-7
The Render Viewer ................................................................... 12-9
Working with Render Files ....................................................... 12-9
Effects and Effect Editors........................................ 12-10
Chapter 13
Table of Contents
Preliminary Remarks ............................................................. 12-11
Realtime Clip FX .................................................................... 12-17
Realtime Transition FX .......................................................... 12-22
PlugIn FX / Hollywood FX ..................................................... 12-24
Additional Realtime Capabilities ........................................... 12-25
Titler ....................................................... 13-1
XI
Page 16

Chapter 14
DVD Authoring .......................................... 14-1
Table of Contents
Step by Step DVD Authoring ......................................14-3
DVD Menu Wizard .....................................................14-6
How Does DVD Authoring Work? .................................14-7
DVD Authoring: Reference ....................................... 14-12
Links Tab ................................................................................. 14-14
AutoLink Tab .......................................................................... 14-31
Highlight tab ........................................................................... 14-35
Templates Tab ..........................................................................14-44
Master View Tab ...................................................................... 14-45
XII
Preview Tab ............................................................................. 14-46
Options Tab ............................................................................. 14-47
Creating and Designing DVD menus ........................... 14-49
Creating DVD Menus ............................................................. 14-49
DVD Menus on the Timeline .................................................. 14-52
Designing Menus with the DVD Menu Editor .......................14-53
Designing Menus with Adobe Photoshop .............................. 14-61
Burning a DVD ....................................................... 14-64
Table of Contents
Page 17

Table of Contents
Chapter 15
Output .................................................... 15-1
Record to Tape ........................................................ 15-3
Record ....................................................................................... 15-4
Stripe Tape ................................................................................ 15-7
Exporting Sequences .............................................. 15-10
Functions in the Export Sequence Dialog Box ...................... 15-11
Exporting Single Frames ........................................................ 15-15
Exporting Movies/WAV Audio .............................................. 15-17
Exporting/importing EDLs ....................................... 15-18
Events Contained in EDLs ...................................................... 15-19
Table of Contents
Areas of Application ............................................................... 15-19
Available Formats ................................................................... 15-20
Exporting EDLs ...................................................................... 15-21
Importing EDLs ..................................................................... 15-23
OMFI Export .......................................................... 15-25
What is Exported? .................................................................. 15-25
Calling OMFI Export ............................................................. 15-26
Composition ........................................................................... 15-27
Media ...................................................................................... 15-28
Options ................................................................................... 15-30
XIII
Page 18

Table of Contents
Fuse Sequence ....................................................... 15-31
Preparing a Sequence .............................................................. 15-32
Calling Fuse Sequence ............................................................ 15-32
Starting Fuse Sequence ........................................................... 15-32
Fuse in AVI and other Formats ............................................... 15-33
ALE Project Export ................................................. 15-34
XSend To... ........................................................... 15-34
Objects permitted for the XSend To... function ..................... 15-34
Calling XSend To... .................................................................15-35
XSend To... Options ................................................................ 15-36
Export to DVD ........................................................ 15-39
Exporting Data ....................................................................... 15-40
XIV
Timeline Sequence to VCD/SVCD/DVD: Step-by-step ........15-41
Source ..................................................................................... 15-42
Destination .............................................................................15-46
Burning ................................................................................... 15-53
Compile/Start Burning ........................................................... 15-55
IPB Settings ............................................................................. 15-56
Options ...................................................................................15-61
Table of Contents
Page 19

Table of Contents
Chapter 16
Customize Pinnacle Liquid ...........................16-1
User Settings ..........................................................16-3
Basics and Definition of Terms ................................................ 16-3
Managing Property Sets ........................................................... 16-5
Customizing Toolbars .............................................................. 16-8
Assign Functions to Keyboard ............................................... 16-11
Modifiers and Keyboard Shortcuts (Defaults) ...................... 16-16
Liquid Control: Assigning Keys ............................................ 16-20
Network Settings (Vortex) ..................................................... 16-21
Chapter 17
Table of Contents
Site Settings ............................................. 17-1
Player Settings ........................................................17-2
How to Change Parameters ...................................................... 17-3
Settings Tab ............................................................................... 17-4
Connections Tab ..................................................................... 17-15
XV
Page 20

Table of Contents
System Settings ..................................................... 17-18
Changing Parameters .............................................................17-18
General Tab ............................................................................. 17-19
System Format Settings Tab .................................................... 17-21
Inputs/Outputs Tab ................................................................. 17-22
System Info Tab .......................................................................17-23
Media Management Settings ..................................... 17-24
Tab Video/Audio ..................................................................... 17-25
FX Editors Settings ................................................. 17-28
Render Quality Tab ................................................................. 17-28
Preview Quality Tab ................................................................17-28
System Tab .............................................................................. 17-29
Appendixes
XVI
Advanced Settings .................................................................. 17-29
Plug-In Settings .................................................... 17-30
Glossary .....................................................G-1
Index ........................................................ I-1
Table of Contents
Page 21

Section
Section
Basics
1
Page 22

Page 23

Safety Notes
chapter
Safety
1
This manual is an important component of
able in the vicinity of
with or managing the system.
Liquid Edition
Additional Instructions
The system operator shall add to the manual any additional operating instructions demanded by
national regulations regarding prevention of accidents and environmental protection, including
information on obligations to supervise and register with regard to special conditions, for example with reference to organization of work, work procedures and the persons engaged to perform
the work.
Also to be observed, in addition to the regulations in the manual and the currently binding regulations on accident prevention in the country concerned and at the site of implementation, are
the approved special technical regulations regarding safe and proper operation on and with the
equipment concerned.
Liquid Edition
, and is to be read and applied by every person working
.It should be permanently avail-
Page 24

Safety Standards
The
Liquid Edition
to comply with applicable standards, state-of-the-art technology and recognized safety regulations.
For customers in Europe
Conformance to European guidelines and standards is confirmed by CE certification and the CE
declaration of conformity.
For customers in the USA
The system was tested to comply with “FCC standards for home and office use”.
For more information on CE and FCC Declarations, contact Pinnacle Systems GmbH.
Safety Notes
editing system and its components were developed, produced and tested
1 - 2
Chapter Safety
Page 25
Safety Notes
Implementation in Accordance with Intended Use
Liquid Edition
Any other use shall not be deemed intended use. Any damages resulting shall be the sole responsibility of the user/system operator.
is intended exclusively for video and audio editing.
Symbols and Conventions
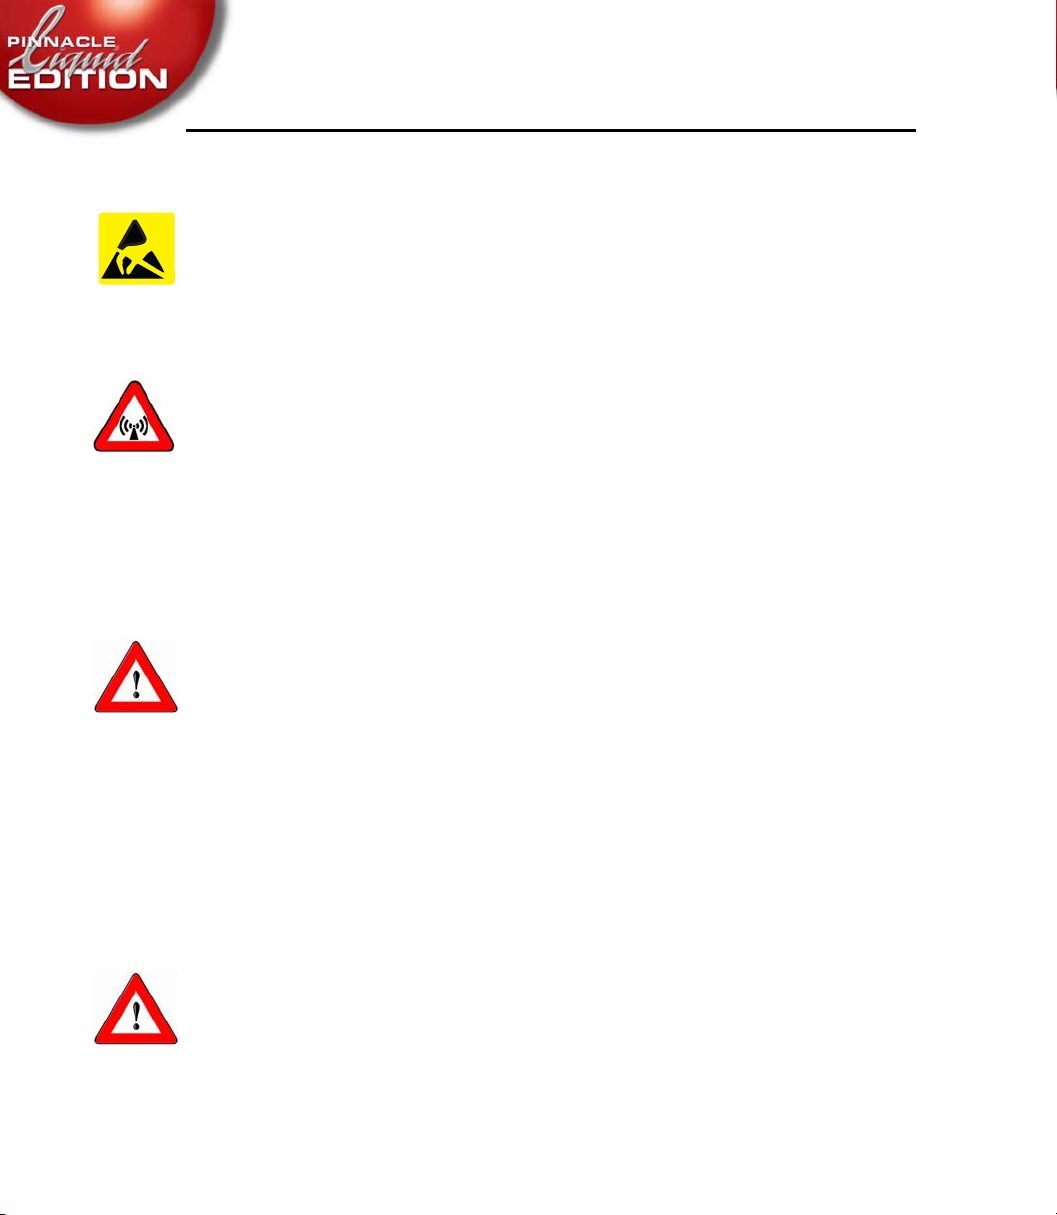
Symbols Identifying Special Texts
Caution
Calls the reader’s attention to especially “dangerous” actions, i.e. actions that could lead to
a loss of data.
Note
Calls the reader’s attention to important information and practical tips or workarounds.
Symbols Mounted on the Hardware
Chapter Safety
It is imperative to follow symbols mounted directly on system components. They must not be
removed and must be kept in a legible condition.
Danger
Indicates that under certain circumstances, there may be a danger to life or physical safety. Read
the mounted warnings and follow existing safety regulations.
1 - 3
Page 26
Attention
Indicates an electrostatically sensitive device (ESD). Improper handling can result in damage to
the product. Take precautionary measures against electrostatic discharge.
Warning
Warns of an electromagnetic field. This is a Class A device that can under certain circumstances
cause radio interference in residential areas. The device operator is required to take suitable
countermeasures.
Safety Instructions for Initial Startup
Danger
To prevent fire or shock hazard, do not expose the unit to rain or moisture.
Safety Notes
1 - 4
If a solid object or liquid gets into the inside of the system, disconnect the system from the power
supply and inform Customer Service immediately.
Do not install the unit with the
ators or hot air ducts, or in a place subject to direct sunlight, excessive dust, mechanical vibration
or shock.
Liquid Edition
interface card near heat sources such as radi-
Special Hazards
Danger
Risk of electric shock and destruction of
All local grounding and lightning protection regulations are to be observed for the system.
Liquid Edition
system components.
Chapter Safety
Page 27

Safety Notes
Safety when Operating
Warning
This is a Class A device that can under certain circumstances cause radio interference in residential areas. The device operator is required to take suitable countermeasures!
In the case of radio interference, switch the computer system off immediately and disconnect the
power supply cord. In doing so always pull on the connector and never on the cable. Troubleshoot immediately.
Chapter Safety
1 - 5
Page 28

Safety Notes
1 - 6
Chapter Safety
Page 29

chapter
General
2
Liquid Edition
editing. Its operating system is easy to use, allowing the user to focus on creating video.
Small size, low cost and high performance make
applications. Performance and expandability also enable
ond editing system for mid to high-end applications.
This section provides general information on handling the device and the associated components.
w Transport, packing, environmental protection
w Cleaning
w Handling data media
is an extremely flexible and powerful non-linear editing system for video
Liquid Edition
Liquid Edition
ideal for a wide variety of
to be used as a sec-
Page 30

Transport, Packing, Environmental Protection
Always transport the system in its original packing. Keep the cardboard box and packing material to ensure safe packing of the system for transport at a later date. Keep the packing free of
moisture. Always pack the system as indicated on the cardboard box.
If, however, you do wish to dispose of the packing, please respect the valid legislation regarding
environmental protection and waste disposal. The packing can be disposed of as standard household waste. It is recommended to sort out the paper/cardboard and plastic components for recycling.
If you wish to dispose of the system itself, please respect the valid legislation regarding the disposal of computer and electronic waste.
The housing can be recycled, the remainder is to be treated as electronic waste. This work is only
to be done by appropriately skilled persons.
System Cleaning
For cleaning the system or components use a soft cloth and non-abrasive, mild cleaning agent.
Do not use dissolvents such as diluents or petroleum spirit and scouring agents because they corrode the surface.
Ensure for environmentally correct disposal of the cleaning cloths and surplus cleaning agents in
compliance with local environmental protection laws regarding waste disposal.
2 - 2
Danger!
Risk of short circuit and electric shock.
For safety reasons always pull out the power supply connector from the wall socket before starting to clean the system.
Do not let cleaning agents get inside the devices.
Chapter General
Page 31

Handling CD-ROM Discs
If proper care is not exercised when handling the CD-ROM disc, the data may become unreadable or other errors may occur. Observe the following precautions when handling the CD-ROM:
w Do not touch the disc surface directly with your hands. Hold the disc by the edge and do
not touch the data surface.
w Do not attach paper notes or stickers to the disc surface. Label using a soft pencil; never
use a ballpoint pen.
w Be careful not to drop the disc. Protect it from the action of forces and from heat.
w Always store the disc in its case to protect the valuable data it contains.
w Do not store the disc in places which are damp, dusty, exposed to direct sunlight, or near
heaters.
Chapter General
2 - 3
Page 32

Cleaning CD-ROM discs
Dust and fingerprints on the disc surface can result in read errors. Clean the disc by wiping
lightly from the center out with soft dry cloth.
To remove severe stains, soak a cloth in a neutral solvent, wring the cloth well to remove excess
solvent, and wipe the disc lightly. After cleaning, wipe the disc dry with a soft, dry cloth.
Do not clean with benzene, record cleaner or anti-static spray. Doing so may damage the disc.
2 - 4
Chapter General
Page 33

Handling Floppy Disks
Floppy disks are convenient and easy to handle, but certain precautions are required to protect
the data on the disk.
w Do not open the shutter by hand or touch the surface of the disk media. Data errors can
result from dirt or scratches on the disk surface.
w Keep floppy disks away from televisions, speakers, and other sources of magnetism. The
contents of the disk can be erased by magnets.
w Do not leave floppy disks near heaters or in locations exposed to direct sunlight. Exces-
sive heat can deform the disk and render it unusable.
w Do not leave floppy disks near ashtrays or cups filled with liquid. Data errors can result
from dust or liquids that contact the disk surface.
Shutter
Chapter General
w To protect the data on floppy disks, store them in a case or other safe place.
2 - 5
Page 34

2 - 6
Chapter General
Page 35

chapter
Setup
3
Liquid Edition
architecture supports popular third-party graphics, paint and effects applications.
This section contains information on:
w scope of delivery ( page 3-2)
w technical specifications ( page 3-3)
w hardware installation ( page 3-4)
w system setup in studio environment ( page 3-11)
w connections (video, audio, remote, reference...) ( page 3-12)
w software setup to get your system up and running ( page 3-13)
w available options ( page 3-18)
can be easily integrated in existing video or PC peripherals. Its open software
Page 36

Delivery Package
w
Liquid Edition
log I/O (Pro version only)
w Pinnacle Liquid application software (CD-ROM); Driver CD (Pro version)
w IEEE 1394 cable
w Installation/Reference Manual, User‘s Guide, Quick Reference Card, AGP Hardware
Installation Guide (Pro version only), Support Card
w analog video/audio breakout box (Pro version only)
w Third party software
(Package content may vary due to different product versions)
Deliv er y Packag e
PCI interface board (IEEE 1394) or AGP graphics card featuring ana-
3 - 2
Chapter Setup
Page 37

Technical Specifications
Technical Specifications
Technical Specifications
* = optional
Video Inputs:
Video Outputs:
Audio Inputs:
Audio Outputs:
Remote:
Codec:
w IEEE 1394 (native DV, DVCPRO 25, Embedded Audio)
6-pin connector on PCI card; with PCMCIA 4 or 6 pin available
w Analog via CVBS (RCA) and Y/C (4-pin Hosiden) on breakout box *
w IEEE 1394 (native DV, DVCPRO 25, Embedded Audio)
w Analog via CVBS (RCA) and Y/C (4-pin Hosiden) on breakout box *
w 2 channels (16 Bit/48 kHz) or 4 channels (12 Bit/32 kHz)
IEEE 1394/DV Embedded, 6-pin connector
w 2 analog channels via RCA connectors on breakout box *
w 2 channels 16 Bit/48 kHz (i.LINK/DV Embedded)
w 2 analog channels via RCA connectors on breakout box *
w IEEE 1394 (6/4-pin)
w RS-422 (9-pin)
(use special RS 232-422 cable availabe from Pinnacle)
w - ITU.R-BT 601
- Native DV/DVCPRO 25
- Formats: PAL (720x608), NTSC (720x512)
- AVI, DIF file formats for playback and capture
- WAV audio 16 Bit/48 kHz (PCM), real time playback of 16 channels
Chapter Setup
3 - 3
Page 38

Installation
This section contains the following information:
Installation
System Requirements
Installing the PCI interface card page 3-6
Configuring/Connecting A/V HD Subsystem page 3-9
Configurations and Software Installation page 3-13
After the Installation page 3-16
Connecting
InTime board installation page 3-19
RS 422 device control setup page 3-21
Liquid Control
System Requirements
The system requirements described here are the minimum requirements.
No guarantee can be given for the proper operation of
requirements are not met. (Some recommendations given in parenthesis.)
Note: With minimum requirements only limited realtime capabilities.
Contact your Pinnacle Systems dealer for more information on certified (tested) reference systems.
OS
Microsoft Windows XP (preferred) and Windows 2000 (SP3)
page 3-4
page 3-18
Liquid Edition
if these minimum
3 - 4
IEEE 1394 Interface (i.Link/Firewire)
Generic OHCI interface or dedicated DV interface (PCI, PCMCIA)
CPU
Single or dual 1 GHz (Dual> 1.8 GHz)
Chapter Setup
Page 39

Installation
Main Memory
256 MB (512 to 1 GB) RAM
HDD for system and AV data
20 GB, minimum data transfer rate 4 MB/s for A/V
separate A/V disk(s) recommended
A/V Harddisk subsystem (optional RAID)
Controller: U2W SCSI (LVD)
PCI Busmaster: Dual Ultrawide
A/V Drives: minimum data rate transfer 8 MB/s
Free Slots
1 x PCI Ref. Nr. 2.1 for the PCI interface card
1 x PCI 2.1 for the harddisk controller (if not onboard)
1 x PCI 2.1 or AGP for the VGA card
1 or 2 PCI 2.1 for the InTime board (s) (optional)
PCMCIA slot for IEEE interface (Laptop version)
Chapter Setup
Graphic card
min. resolution 1024 x 768 pixel @ 32 bit (recommended: 1280 x 1024); 32 MB card memory (rec: 64 MB or more for realtime effect capabilities, manufacturer: ATI corp.)
Sound card (optional, but recommended)
(Required e.g. for the “Voice Over” function.)
Minimum requirements for analog capture
CPU 1,8 GHz (single or dual)
512 MB RAM
Pinnacle Liquid Pro version Analog I/O card and breakout box
Separate A/V harddisk (minimum 8 MB/s)
3 - 5
Page 40

Installing the PCI interface card (IEEE 1394)
Installation
(Note: For the installation of the AGP card provided with
the separate Hardware Installation Manual.)
Liquid Edition
Pro, please refer to
Removing the Housing Cover
Detach the power cord. then remove any other external connections on your computer.
Remove the housing cover from the host PC.
3 - 6
Chapter Setup
Page 41

Installation
Removing the Cover Plates
Remove the cover plate of the required PCI slot by unscrewing the retaining screw. Keep the
screw handy, it will be needed to secure the card once slotted.
Chapter Setup
3 - 7
Page 42

Installation
Slotting the PCI Interface Card
Attention
Always avoid touching a card’s surfaces without being properly grounded (this applies also to
your clothing). Electrostatic discharge may destruct the card.
Now carefully remove the
Align the terminal strip of the card exactly with the free PCI slot. Carefully insert the card into
the PCI slot. Now secure the card to the computer housing with the screw mentioned above.
Liquid Edition
card from its antistatic bag.
Replacing the Housing Cover
Replace the housing cover of the host PC making sure that it is properly snapped in and screwed
in. Reconnect all external connections to your computer.
3 - 8
Chapter Setup
Page 43

Installation
Configuring/Connecting A/V HD Subsystem (RAID, optional)
The harddisk subsystem (A/V storage) is connected to the SCSI controller in the host PC via a
SCSI connecting cable.
Liquid Edition
the Windows striping set technology (RAID 0) for the A/V hard disk subsystem, or a dedicated
RAID controller.
We recommend that a computer dealer or anyone else familiar with RAID and video
technology select and install the disk subsystem. Configurations other than the one
described here are possible.
At least one hard disk drive is required (two of the same type, one for each stream, when
using a dual ultrawide controller). If you connect additional hard disk drives, make sure
that the same number of hard disk drives are connected to each stream (same model,
same revision number of the firmware). Always take into account power supply and cooling.
requires at least one (two recommended) U2W SCSI stream controller and
Setting SCSI IDs
Ultrawide SCSI supports up to 16 devices (including the SCSI controller) and each device must
have a different ID number (0 to 15). The SCSI controller normally uses ID number 7, so you
should avoid this number when setting the ID numbers for the hard disk drives.
Chapter Setup
Termination
SCSI controllers must be actively terminated. You must, therefore, terminate not only the hard
disk drives, but also the SCSI controllers located at both ends of the stream. If the hard disk drive
located at the end of the stream is not terminated internally, then an external terminator is
required.
3 - 9
Page 44

Installation
Cabling
Use only high-quality, approved LVD cables. External cables must not be longer than 8 meter. A
maximum of 4 hard disk drives can be connected per stream, in which case the total length of the
cable including the internal ribbon cable must not be longer than 8 meter.
Disk Arrays (RAID)
If you want to create a Windows stripe set, please refer to the Windows manual.
3 - 10
Chapter Setup
Page 45

Liquid Edition and Peripherals
Liquid Edition and Peripherals
DV Camera (DV-In capable)
Analog
Outputs
DV connection
Analog connection
Sample setup of
RS 422 remote control for tape recorders and other devices is possible. Please contact
your Pinnacle Systems dealer.
DV i.LINK connection
Active Speakers
Liquid Edition
IEEE 1394
External Monitor
with camera and monitors
Chapter Setup
3 - 11
Page 46

Video/Audio Connections Liquid Edition
Video/Audio Connections Liquid Edition
Digital i.LINK interface (IEEE 1394)
Connection plate for the
Wit h
Liquid Edition
(IEEE 1394, e.g. on the
and audio data as well as remote control commands and operate bidirectionally, meaning that
signals can be transmitted in both directions via a cable.
Analog video and audio input and output is available with the Pro version.
Connect the interface to your recording/playing device (camera or player/recorder) via one of
the available IEEE 1394 ports on your computer. It makes no difference which port you use. The
software identifies the correct port automatically.
Monitoring via the Sound Card
If a sound card is installed in your system and is correctly configured, you can monitor the sound
both at the input and at the ouput via the connected loudspeakers. For information on the correct
cabling and on installing the sound card, refer to the manual supplied by the card manufacturer.
(See also
“Audio Monitor” on page 11-21.)
Liquid Edition
, players and recorders can be connected only via the i.LINK interfaces
Liquid Edition
interface card (PCI, sample illustration)
plug-in card). These interfaces transmit DV video
3 - 12
Chapter Setup
Page 47

Configurations an d Software Installa tion
Configurations and Software Installation
Setting Up Display Controller (VGA graphics adapter)
Select a resolution of at least 1024 x 768 pixels (1280 x 1024 or more recommended) and a color
depth of 32 bits (TrueColor); (Windows Start menu > Control Panel > Display > Settings).
When working with a two-monitor configuration, use a resolution of at least 2048 x 768 pixels
and a color depth of 32 bits (TrueColor), or higher (Pro version: use a separate PCI graphic card.
See www.pinnaclesys.com for more information).
Setting Up an IntelliMouse
Chapter Setup
We recommend using the Microsoft IntelliMouse with
It is usually not necessary to install the IntelliMouse for Pinnacle Liquid, because the IntelliMouse driver software is installed automatically when you install Windows and the IntelliMouse is
already connected.
If this is not the case, you can install the driver software via Mouse Settings in the Control Panel.
Of course you may use a different wheel mouse.
Liquid Edition
.
Installing Pinnacle Liquid
Pro version users: Please refer to the separate hardware Installation manual.
Before installing the Pinnacle Liquid software, be sure that Windows XP or 2000 (not NT) is
installed. You must have administrator rights under Windows on the installation computer.
w A note for users of Liquid purple:
Remove any existing, old FAST IEEE 1394 drivers from the system (check Windows
Device Manager > IEEE Bus Host Controller). Restart the system before installation.
3 - 13
Page 48

Configurations and S oftware Installa tion
Before you install Pinnacle Liquid: Tips on optimizing Windows
w We strongly recommend that you use a fresh Windows installation that is as “clean” as
possible as a basis for installing Pinnacle Liquid. Load the latest OS service packs, as well
as drivers for the components used, particularly graphics card drivers.
If at all possible, keep different editing software on different OS partitions (dual boot system).
w In any case, defragment your hard disk(s) before installing Pinnacle Liquid and repeat the
process periodically to ensure optimal performance (see Windows manual).
w If possible, choose separate hard disks for AV media data and Pinnacle Liquid software
installation.
w Reduce the number of programs running in the background (e.g. virus scanner, screen
saver) to the absolute minimum. Better still, get rid of them all.
w All Windows and computer (BIOS) functions that can put the system in standby or sleep
mode should be disabled.
w We strongly recommend that you use only NTFS-partitioned hard disks for video record-
ing (capture). The FAT32 file system may cause you to have problems with clips longer
than 18 minutes. The file system is specified in the drive properties (also see Windows
manual).
3 - 14
1 Install the
board) and connect the (optional)
Liquid Edition
card (if necessary or applicable; PCI or AGP Pro version
Liquid Control
.
2 Start Windows, insert the installation CD-ROM in the drive. The setup normally starts
automatically. In that case, please go to step 4. Otherwise, proceed as follows:
3 From the Windows Start menu, select Run to open the Run dialog box and click Br owse.
Select the “[product name] setup.exe” or autorun file on the CD-ROM and start this file.
4 Follow the instructions displayed on the screen and enter the required information or
select from the given options, such as installation language, serial number, name, TV
standard, program and data directories, etc.
If you have acquired options such as InTime or
ate boxes. If necessary, indicate the port to which
Liquid Control
Liquid Control
, check the appropri-
is connected.
Chapter Setup
Page 49

Configurations an d Software Installa tion
5 Setup copies the program files to the directory specified under step 4.
If the process at some point seemingly has come to a halt, there may be a hidden Windows dialog box awaiting a user confirmation. Use Alt-Tab keys to bring the box to the
foreground and click Ignore or Continue to resume the setup.
If the installation was successful, a confirmation message appears.
6 Double-click the program symbol on the desktop to start the application. The applica-
tion is also added to the Windows Start menu (Programs...).
As part of the installation process, the software copies a ReadMe file to the
tion
folder in the Windows Start menu. Please read the contents of this file, as it contains
important information that was not available when this manual was printed.
Liquid Edi-
Internet Explorer
Microsoft Internet Explorer 5.0 (or higher) is required for using (HTML) Help.
Install it on the personal computer if it is not already installed with Windows.
Adobe Acrobat Reader
Adobe Acrobat Reader is required for viewing reference manual on-line files (PDF).
Install it on the PC, if it isn’t already on your computer.
The installer for Adobe Acrobat Reader is located in the Pinnacle Liquid Program folder.
Installing Plug-ins
Chapter Setup
For installation follow the manufacturer’s instructions supplied. See also “Plug-In Settings” on
page 17-30.
3 - 15
Page 50

After the Installation
Configurations and S oftware Installa tion
It needs only a few steps to configure
Liquid Edition
. Please read on:
Device and System Settings
Connect a DV device and turn it on.
Then start
software has been loaded, click
displayed, click the Site tab. Now double-click the videorecorder icon to display the Player Set-
tings.
Settings Tab (Select Device)
the i.Link interface (a. k.a. Firewire, DV or IEEE 1394 interface).
LIVE enables live audio-video input, that is, not using a remote control (e.g., when you operate a
device from its own control panel).
In most cases no other device settings are necessary.
For further information on device settings:
Liquid Edition
Here you can define the DV device connected to the system. The dialog box
contains two tabs: Settings and Connections. Select Settings.
On the left-hand side you see two entries, LIVE and a manufacturer name.
The latter stands for the connected DV device which is remote controlled via
by double-clicking the program icon on the desktop. When the
Liquid Edition
Start menu > Control Panel. In the dialog box
“Player Settings” on page 17-2.
3 - 16
Chapter Setup
Page 51

Configurations an d Software Installa tion
Connections Tab
If you have connected a controllable DV device (camera or recorder/player) via the IEEE 1394
interface (as opposed to a live source), click the device name in the left-hand box and check that
“IEEE 1394” appears as Communication Port. This entry simultaneously defines video and audio
inputs and outputs.
If you wish to play image and sound material via a live source (i.e. not controllable), make sure
the appropriate menu options are selected:
w Video Input: 1394
w Audio Input: DV embedded.
If None is selected in the menu, the system ignores a pending signal.
Your system is now ready. Refer to the instructions under
“Signup” on page 7-1in the Pinnacle Liquid manual.
and
“Starting and Exiting” on page 6-2
Chapter Setup
3 - 17
Page 52

Connecting the con trol panel (Jog/Shuttle) (Optio nal)
Connecting the control panel (Jog/Shuttle) (Optional)
Liquid Control
nected and for navigating the material already digitized. The jog/shuttle control knob is for quick
and easy viewing and processing of audio/video material in both linear and non-linear mode.
The
Liquid Control
sonal needs.
Liquid Control
and comes with a DC power adaptor (COM version). The device can also be connected via an
USB adaptor. On first installation, the device is detected automatically.
(optional) is an control panel for remote control of the player/recorder con-
has a number of freely assignable keys for configuring it to suit your per-
Control Panel for remote control of the player/recorder
is connected to a free serial interface (COM port, RS 232) of the computer
3 - 18
If you decide to purchase and connect this device later (that is after the initial installation of Pinnacle Liquid), you need to re-install the software (when connecting to serial interface). When
using the USB variant, you need to run the program USBJS.setup.exe from the installation CD.
A more detailed description on the keyboard layout and operation of
found in the Pinnacle Liquid reference manual under "Customizing Pinnacle Liquid".
Liquid Control
can be
Chapter Setup
Page 53

InTime board Installation
InTime board Installation
This chapter is designed to help you install the InTime board delivered in the form of a PCI interface board in the PCI slot (as of Ref.No. 2.1) of your computer.
A full-length PCI slot is required for installing the InTime board.
The data transfer from and to InTime takes place via the regular PCI bus, thus making further
connections unnecessary. Each function that has used the processor performance of the CPU
host without InTime is now processed “in time” by one of the six InTime on-board processors.
This allows you to continuously work with Pinnacle Liquid and guarantees fastest results. Thanks
to the software technology referred to as “InTime Processing”, neither image quality, nor flexibility is impaired.
Hardware Installation
Make sure you are properly grounded when installing a PCI interface board.
Always avoid touching a board’s surfaces without being properly grounded (this applies
also to your clothing).
Chapter Setup
1 Removing the Housing Cover
First remove any external connections on your computer.
Remove the housing cover from the host PC.
2 Removing the Cover Plates
Remove the cover plate of the required PCI slot by unscrewing the retaining screw. Keep the
screw handy, it will be needed to secure the board once slotted.
3 - 19
Page 54

InTime board Installation
3 Slotting the InTime board
Make sure you are properly grounded as described above and carefully remove the board from its
antistatic bag.
Align the terminal strip of the board exactly with the free PCI slot. Carefully insert the board into
the PCI slot.
Now secure the board to the computer housing with the screw mentioned above.
4 Replacing the Housin g Cover
Replace the housing cover of the host PC making sure that it is properly snapped in and screwed
in.
Reconnect all external connections to your computer.
Make sure the connectors are all properly connected and tighten the screws, if necessary.
Software Installation
Insert the CD with the InTime drivers enclosed in the delivery into your CD-drive. Please follow
the instructions during the installation, which will start automatically.
(NOTE: You need to have Windows administrator rights on the computer.)
3 - 20
Chapter Setup
Page 55

Device Control via RS 42 2 Remote
Device Control via RS 422 Remote
Pinnacle Liquid can remote control professional video tape recorders and other devices that
employ an industry standard Sony Betacam RS 422 remote protocol. A special RS 232-422 cable,
however, is needed and can be obtained from your Pinnacle Systems dealer.
The cable is connected to a free serial (COM) port on the computer and to the appropriate
remote control port of the machine.
In the Player Settings (Pinnacle Liquid Start menu > Control Panel > Site > Player Settings > Con-
nections) you need to assign the correct COM port to the selected device.
Chapter Setup
3 - 21
Page 56

Device Control via RS 422 Remote
3 - 22
Chapter Setup
Page 57

chapter
Introduction
This purpose of this introduction is to provide you with an overview of Pinnacle Liquid and
familiarize you with existing documentation.
4
About Pinnacle Liquid
Sources of Information page 4-3
List of Chapters page 4-4
page 4-2
Page 58

Preface
Preface
Pinnacle Liquid is the professional solution for professional video editing on a computer. All its
functions are specifically adapted to meet the requirements of today’s video editing. Its main
focus is on the basics: image, audio and editing. Pinnacle Liquid is operated intuitively. Beginners
will quickly produce successful results and professional editors will achieve the highest productivity and precision.
Efficient Project management and extensive storyboarding functions help you develop your
ideas. The integrated video and audio viewers allow you to monitor and control active processes
(for example, when reading in video material or editing clips). A Timeline as well as effect and
audio editors provide you with options for optimally transforming your visions into reality.
Moreover, Pinnacle Liquid relies on proven, future-oriented standards, enabling the your generated results to be effectively integrated in the latest video production processes.
You can tailor the Pinnacle Liquid user interface to your own particular language, working style
and Projects. You can flexibly configure the views, tools and keyboard assignments. You can also
save your customized settings and transfer them to other systems.
Users with more sophisticated requirements can take advantage of numerous possibilities for
expanding Pinnacle Liquid.
If you have any further questions concerning options and expansions for Pinnacle Liquid, contact Pinnacle Systems GmbH or one of our authorized Pinnacle Systems GmbH partners.
4 - 2
Chapter Introduction
Page 59

Sources of Information
Sources of Information
Installation Manual
This part of the manual contains information on hardware and software installation, on how to
connect components, and on hardware-specific and product-specific settings, etc.
Pinnacle Liquid Reference Manual
This manual is available in hardcopy form and as well as Acrobat pdf. It describes all functions of
Pinnacle Liquid. It is suitable for learning the basics of operation as well as for looking up specific
functions as you need them.
Pinnacle Liquid Help
Help offers you instant access to the information you currently need. It is context-sensitive and
includes an interactive table of contents and comprehensive index with a find function. Its other
components include the Pinnacle Liquid Online Manual, a glossary and a readme file. See also
“The Online Help” on page 5-4. You can call Help either from the Pinnacle Liquid Start menu or
by pressing F1.
World Wide Web
Pinnacle Systems GmbH has set up contact and information options specifically aimed at Pinnacle Liquid users, which you can access via our Web page at www.pinnaclesys.com. For example,
you can retrieve current product information or contact other Pinnacle Liquid users through discussion forums. There is also an overview of current updates, options and trainings that keeps
our customers informed of all the latest developments.
Tooltips
All Pinnacle Liquid toolbar buttons have tooltips. These miniature information windows (popups) are displayed when you rest the mouse pointer on a button for more than one second.
Chapter Introduction
4 - 3
Page 60

List of Chapters
Introduction
This chapter provides you with an initial introduction to Pinnacle Liquid. It also tells you about
sources of information that will help you work with Pinnacle Liquid.
Documentation
This chapter familiarizes you with the user interface and Online Help and offers you tips on the
effective use of this documentation.
Basics
This chapter describes the Pinnacle Liquid user interface and introduces you to the terminology
page 6-1
used.
List of Chapters
page 4-1
page 5-1
4 - 4
Signup
Logging on to the system; working with user names and user profiles, password protection.
page 7-1
Input
This chapter describes everything you need to know about the raw materials of editing: Digitiz-
ing audio/video (capture); importing graphics, titles, etc.; transferring Projects in ALE format;
importing edit decision lists (EDLs).
Administration
Explains arranging and viewing the material inside a Project; working with Media Files (media
management); creating a rough cut (storyboarding); batch digitizing.
page 8-1
page 9-1
Chapter Introduction
Page 61

List of Chapters
Edit
Editing (cutting) films with sample applications; basics of audio editing; special functions (nesting and consolidating Sequences).
Finish
This chapter describes the finer points of working with Sequences, especially audio editing and
video and audio effects, plus advanced post production features such as color correction (optional).
Realtime FX
With realtime effects, you don’t have to wait for effect rendering to be completed, but can preview the effects immediately.
page 10-1
page 12-1
Titler
Pinnacle Liquid comes bundled with a title generator, a powerful software for creating roll, crawl
and still titles, which can easily be integrated in your Projects.
DVD Authoring
Pinnacle Liquid guides you from the importing of material to its editing and authoring and all the
way to burning it to DVD. The entire production process is seamlessly coordinated. You can even
design the DVD menus in Pinnacle Liquid.
Chapter Introduction
page 13-1
page 14-1
4 - 5
Page 62

List of Chapters
Output
How to output on tape an edited film (in Pinnacle Liquid lingo, a Sequence), exporting various
data formats (single images, animation, edit decision lists), OMF export and networking with
other postproduction applications.
Customize Pinnacle Liquid (User and Site Settings)
How to configure your Pinnacle Liquid workstation and how to create, customize and save your
own user profiles.
page 16-1
page 15-1
4 - 6
Chapter Introduction
Page 63

chapter
5
Documentation
This manual for Pinnacle Liquidcontains all information available at the time of printing of this
manual.
Conventions and Symbols
The Online Help page 5-4
page 5-2
Page 64

Conventions and Symbols
This section describes the conventions used to identify special texts, such as warnings.
Caution
Calls the reader’s attention to particularly important information, or especially “dangerous” actions, i.e. actions that could lead to a loss of data.
Note
Calls the reader’s attention to important information and practical tips.
Conventions and Symbols
5 - 2
Italics
Terms from the Pinnacle Liquid user interface are written in “italics” when they are part of
instructions on how to perform a given function (for example, the Import option in the Rack
shortcut menu).
>Click Sequence >
The symbol “>” is used to indicate a string of menus, buttons, etc. that have to be selected to
access a given function. For example:
Rack shortcut menu > Picon View > Medium. Meaning: In the Rack shortcut menu, click Picon
View. In the pop-up menu that appears, click Medium.
Chapter Documentation
Page 65

Conventions and Symbols
Keyboard Symbol
7 Many of the functions in Pinnacle Liquid can be executed by means of keyboard
shortcuts. This symbol identifies a keyboard shortcut. The key names are written
in small caps (example:
Mouse Wheel
8 If your mouse has a wheel for scrolling, you can also execute some functions using
the mouse wheel; move the Playline, for instance.
DEL, SHIFT, CTRL).
Chapter Documentation
5 - 3
Page 66

The Online Help
You can call Help either from the Pinnacle Liquid Start menu or by pressing F1.
Information
The Online Help
Title Bar
Tabs
Toolbar
Contents/
Index
Window
Simplified View of the Help Window
5 - 4
Chapter Documentation
Page 67

The Online Help
Title Bar
The title bar is the same as in all Windows windows (see Windows manual).
Tabs in the Help Window
Clicking one of the rear tabs brings to front its corresponding content:
Online Help
The “Online Help” tab contains the table of contents, the index and the contents window for
Online Help. Texts within the paragraphs that are marked in blue indicate cross-references.
Online Manual
The Pinnacle Liquid Online Manual reflects the contents of the (hardcopy) Reference Manual. To
use the Online Manual, you must have the Adobe Acrobat Reader (new version included on the
Pinnacle Liquid installation CD). Click the tab to start the Acrobat Reader and display the Online
Manual.
Glossary
The glossar y contains general terms and according information on the subject of video, compiter
and audio technology as well as termini technici concerning the art of editing.
Info
Provides product information on Pinnacle Liquid, including the version, copyright information
and trademarks.
Readme
The readme file contains important information that could not be incorporated in this document
(printed manual as well as online help).
You should read this file.
Chapter Documentation
5 - 5
Page 68

Toolbar
The Online Help
Contents/Index
Click the “display table of contents” button to view a list of topics by chapter. Then double-click a
chapter or topic to open the particular document. Under
Introduction, you will find a brief overview of the contents of each chapter.
Click the “display index” button to view a list of index entries in alphabetical order. In the entry
field above the list, enter either the entire word you are searching for or the first few letters. Double-click an index entry to display the particular topic.
If you then go back to Content view, you can see where the index topic is situated within the con-
text of the manual.
Previous Topics
The function of the “back” and “forward” buttons depends on what pages or chapters you have
already retrieved and the order in which you opened them. The left arrow (“back”) takes you
back through the pages you previously viewed.
The right arrow (“forward”) reverses this step. The “forward” button is enabled only if you previously used the “back” button to go back one or more pages.
“List of Chapters” on page 4-4 of the
5 - 6
Previous Document/Next Document
Click the up arrow to view the previous page in the chapter.
Click the down arrow to view the next page in the chapter.
Print
Click the “print” button to print out the help topic currently displayed.
Chapter Documentation
Page 69

The Online Help
Information Window
The information window displays text and illustrations of the help topics. If the topic does not fit
in the current window size, scrollbars appear along the margin. Drag the bar downward to
advance toward the end of the topic or click the top or bottom arrow.
An arrow button appears in the bottom left-hand corner of each help page. Clicking this arrow
returns you to the beginning of the help page.
Chapter Documentation
5 - 7
Page 70

The Online Help
5 - 8
Chapter Documentation
Page 71

chapter
6
Basics
This chapter features a quick introduction in Pinnacle Liquid: the most important software modules, the most important terms, the general principles behind their operation.
Starting and Exiting Pinnacle Liquid
Menus, dialogs boxes and tool buttons page 6-3
Tour de Pinnacle Liquid page 6-9
page 6-2
Page 72

Starting and Exiting
Starting Pinnacle Liquid
1 Switch on all the peripherals, including the VGA monitor(s), A/V disks, video recorder
and A/V monitor, etc.
2 Start your computer.
3 Start Pinnacle Liquid either via the program shortcut on the Windows desktop or from
the Windows Start menu.
4 The Pinnacle Liquid interface is displayed in the standard view (first launch). See also
“Pinnacle Liquid Desktop” on page 6-11.
w When you start Pinnacle Liquid for the first time after installation, the User Login dialog
box does not
w Each time you log on after this, the last Project you worked on is opened automatically.
You then have the option of logging on under a different user name or opening another
Project.
Starting and Exiting
appear. (See also “Signup” on page 7-1.) Then, a default Project is opened.
6 - 2
Exiting Pinnacle Liquid
1 In the Pinnacle Liquid taskbar, click Start and select Exit Pinnacle Liquid from the Start
menu. A dialog box is displayed containing two options:
w Select Quit Pinnacle Liquid and click OK. This terminates Pinnacle Liquid.
w Select Clear Pinnacle Liquid desktop and log on as different user? and click OK to log on as
another user (
“Signup” on page 7-1).
Chapter Basics
Page 73

Menus, Dialog Boxes and Tool Buttons
Menus, Dialog Boxes and Tool Buttons
This section provides you with an overview of elements frequently used in Pinnacle Liquid.
Shortcut Menus
In developing Pinnacle Liquid’s visual design, there was one overriding concern: keep it simple and easy to use. This was also the reason
for eliminating the traditional menu bar. Functions are called either
from a shortcut menu or by means of a tool button.
Alongside Tools, Shortcut Menus are the principal operating elements
in Pinnacle Liquid. All useful functions are grouped in these shortcut
menus specific to objects and certain areas. And that’s where you
should look first.
Chapter Basics
Calling Shortcut Menus
1 Right-click an object or an area to open the corresponding
shortcut menu.
2 Left-click an entry in the shortcut menu to call this function.
Sample shortcut menu
6 - 3
Page 74

Tool Buttons and Toolbars
In Pinnacle Liquid, functions (such as “Play”) are called and executed either via a shortcut menu
or via tool buttons.
Tool buttons are generally found in toolbars (appear horizontally or vertically in the interface).
Sometimes the button you need may not be included in the toolbar (due to restricted space).
Nevertheless, you can determine for almost each toolbar which buttons it will contain and how
these buttons will be arranged. To learn how to do this, see
16-8.
Most of the buttons in Pinnacle Liquid have tooltips, which are miniature information
windows containing a brief description of the function. Tooltips are displayed when you
rest the mouse pointer on a button for more than one second.
Button & Text Status
For all tool buttons, the following visual clues tell you the tools’ status:
Menus, Dialog Boxes and Tool Buttons
“Customizing Toolbars” on page
6 - 4
w Gray button, no glow highlight: function off, tool not in range to be selected (mouse is
not pointing at the button).
w Gray button with glow highlight: function off, tool in range to be selected (mouse is
pointing at the button). This tells you which tool is currently selected with the mouse and
will be enabled when you click the mouse button. Example: moving the mouse across the
buttons on a toolbar without clicking or dragging highlights each button as the mouse
passes over it.
w Yellow button, no glow highlight: function on, tool not in range to be selected (mouse is
not pointing at the icon). Example: Play tool remains yellow while a clip plays.
w Yellow button, yellow glow highlight: function on, tool in range to be selected. Example:
mouse is pointing at Play tool while a clip plays.
Chapter Basics
Page 75

Menus, Dialog Boxes and Tool Buttons
Dialog Boxes
Dialog boxes contain information, let you specify functions and select options.
Normal
Selected
Active selected
Active
Button & text status
Normal
Selected
Chapter Basics
Sample dialog box
6 - 5
Page 76

Menus, Dialog Boxes and Tool Buttons
Typical Elements in Dialog Boxes
Most dialog boxes have a similar layout and contain the following basic elements:
Tabs
Clicking one of the rear tabs brings its content to the front.
Sample tab
Entry Fields
Entry fields allow you to enter text. Simply click in the entry field and make your entry via the
keyboard. Usually you confirm with
ENTER.
6 - 6
Check Boxes
Click a check box or to select the corresponding option.
Circular check boxes are either-or selections.
Several square boxes can be checked at the same time.
Sliders and Knobs
Sliders and knobs allow you to set values or ranges of values. Sliders and knobs can assume various forms depending on the dialog box.
Chapter Basics
Page 77
Menus, Dialog Boxes and Tool Buttons
To set a value using a slider or knob, click the corresponding element and drag it to the desired
position. You can also enter the values in entry fields via the keyboard.
Drop-Down List Boxes
Some windows have drop-down list boxes. Click the arrow or the visible list
entry to open the list. Then select an entry by clicking it.
Sample dropdown list box
Buttons in Dialog Boxes
Chapter Basics
These buttons apply to all settings of a dialog box.
Apply and Close
Click to apply the dialog box settings to the current item and close the dialog box.
Cancel
Click to close the dialog box without applying any changes. This is the same as closing the dialog
box from the title bar or the
ESC key.
6 - 7
Page 78

Menus, Dialog Boxes and Tool Buttons
Restore Initial State
Restores all settings to the state they were in when the dialog box was first opened.
Restore Default State
Resets all changes to the default software settings.
Customize Dialog Box
Some dialog boxes can be customized. This button opens the corresponding tool box.
6 - 8
Chapter Basics
Page 79

Tour de Pinnacle Liquid
Tour de Pinnacle Liquid
If your are not familiar with Pinnacle Liquid, please have a look at the next few pages. We would
like to introduce to you some of the most important software modules, viewers and editors.
That’s how Pinnacle Liquid may look on a dual monitor setup
Chapter Basics
6 - 9
Page 80

Inlays
Tour de Pinnacle Liquid
Inlay windows let you have a look at your video (moving or still), titles and graphics, effects to be
rendered, etc. Even audio is displayed - as wave form.
Placed around the inlay windows you find all kinds of functions and displays. The example below
(a snapshot taken from the Clip View er) shows the position of the Playline and the duration of the
clip between the mark-in and mark-out points.
See also
10-137.
“Full-Size Monitor” on page 10-135 and “Inlay Quality Menu / Inlay Size” on page
Position
Mark-In
Sample inlay window (here shown with position bar
and two TC displays)
Duration
Mark-OutPlayline
6 - 10
Chapter Basics
Page 81

Tour de Pinnacle Liquid
Picons
Picon
Pinnacle Liquid Desktop
The Pinnacle Liquid desktop is the backdrop for all other elements of Pinnacle Liquid, like
Picons, for instance. Three things can always be found on the desktop:
The Trash icon, the taskbar and the Project window.
All objects in Pinnacle Liquid can also be displayed in Picon
view. Picons (picture icons) are still images that help you identify clips. Picon view is ideal, for example, for developing a sto-
ryboard.
Picons are found on the Pinnacle Liquid desktop, in the Project
window, on the Timeline and in numerous dialog boxes. For
more information on Picons, see
“Picon Play” on page 9-84.
and
“Picon View” on page 9-32
Chapter Basics
Otherwise, the Pinnacle Liquid desktop functions much like the Windows desktop
(please refer to the Windows manual for further information).
6 - 11
Page 82

Tour de Pinnacle Liquid
The Taskbar
The taskbar appears at the bottom of the desktop. On the left, you find the Start button that you
use to access the Pinnacle Liquid Start menu.
Taskbar functions
Additional functions (from left):
Error/fps Indicator
The “thumbs up” sign tells you that the system started correctly.
If a problem occurs, a flashing explanation point is displayed that is either yellow, orange or red,
depending on the severity of the problem. Left-click the symbol to obtain detailed information
on the current problem.
Right-click the symbol to display a shortcut menu with the following options:
w Show current playback s p eed -
During Timeline playback, indicates the current number of frames per second (fps; sta-
dard PAL: 25 fps, standard NTSC: 30 fps). Its main purpose is to allow you to check computer performance for realtime software effects.
6 - 12
w Show minimum playback speed -
Indicates the lowest fps value reached.
w Show latest line of error log -
Opens a text box in the taskbar displaying the latest message.
w Show error log -
Opens the list box with all the lines.
w Reset error i ndicator -
Deletes all lines.
Chapter Basics
Page 83

Tour de Pinnacle Liquid
w Reset speed indicator -
resets speed to default fps
w Reset speed indicator alwa ys a t start playback -
As soon as the Timeline is replayed, resets the last fps information identified.
w Show system info -
Displays system info (same as Start Menu > Control Panel > Site > System Sett ings >
System Info).
Render Viewer
The icon (S, the Greek letter Sigma) represents the Render Viewer window. “Rendering” means
the computation of effects. Click the S icon to open the Render V iewer window, where you can
monitor the rendering process, and start and stop rendering. (See also
page 11-93.)
The horizontal bar next to the window shows the rendering progress.
Once the rendering process begins, the Sigma icon is replaced by a miniature of the image, provided you have not disabled this function in the shortcut menu (right click). You can also use this
menu to hide the progress bar and stop the rendering process.
“Effect Rendering” on
Chapter Basics
Key Caps
Click this icon to open the Key Caps window. For any software module, this window provides you
with a quick reference showing the functions assigned to the keys of the computer keyboard.
Refer to
these assignments.
“Assign Functions to Keyboard” on page 16-11 for information on how you can change
6 - 13
Page 84

Tour de Pinnacle Liquid
Select Video Output (only Pinnacle Liquid with analog inputs/outputs)
To quickly toggle between S-video and CVBS outputs (None means inlay only.
Liquid Edition PRO
ing. Using the output selection button in the taskbar you can direct video output to a
video monitor connected to the breakout box. When you call the Record to Tape tool,
IEEE output is automatically enabled. The analog outputs will be disabled while the
recording continues.
Audio Tool
Click this icon to open the Audio Tool, which you can use to control outgoing
The adjacent rows of squares serve as an auxiliary level. The two uppermost segments in particular are displayed in red to warn of an overload. For related information, refer to
page 11-17.
Digital or analog audio scrub: Right-click
of the two modes, then enable scrub by pressing the
icon an A or D indicates active scrub mode, and the type.
For further information on this subject see
11-14.
View Switcher
only: The DV output via IEEE disabled is during timeline edit-
levels.
“Audio Tool” on
on the icon to open a shortcut menu. Select either one
SCROLLLOCK key on your keyboard: In the
“Audio Scrubbing - Digital or Analog” on page
6 - 14
To access several views for the Pinnacle Liquid interface, click the View Switcher (eye icon) and
select an available desktop view (
“Desktop Views” on page 6-15).
Chapter Basics
Page 85

Tour de Pinnacle Liquid
Audio Monitor
Click this icon to open the Audio Monitor, which you can use to monitor and control signals of
the analog output. For more information, see
Desktop Views
The Pinnacle Liquid desktop is able to display several windows at once, and you can configure
them on the desktop in different ways. The current configuration of windows visible on the desk-
top is called a “view.” The View Switcher (eye icon) on the taskbar opens a shortcut menu that sets
the current view on the VGA monitor.
You can arrange icons such as those for the Trash and for Racks via the desktop shortcut
menu.
“Audio Monitor” on page 11-21.
Chapter Basics
Single VGA Mode
To change the arrangement of windows on the desktop:
1 Click the V iew Switch er icon at the right end of the taskbar to display the selection menu.
2 Click the particular view that you want.
You have now selected the view and the desktop is arranged accordingly.
or
1 Drag an object that you want to edit in another module to the View Swit cher icon, keeping
the mouse button depressed. The selection menu is displayed.
2 Now drag the object to the particular view that you want and rest it on this view for a few
moments. The view changes and you can now continue working with the object.
6 - 15
Page 86

Views (One Monitor)
Tour de Pinnacle Liquid
- Timeline only
- Sequence Editor above, Project window below
- Project window above, Timeline below
- Project window only
6 - 16
- Sequence Editor above, Timeline below
The most common views are “Project window only” for developing Projects and “Project
window above, Timeline below” or “Se qu ence Ed it o r above, Timeline below” for the actual
editing.
Chapter Basics
Page 87

Tour de Pinnacle Liquid
Using the Project Browser
The Project Br owser proves especially useful when working on a single monitor system. When
active, the Project Browser takes up some space of the Timeline.
Toggle Rack/Folder
area visible/
invisible
Rack/Folder
area
Content area
Toggle tabs
Views
Rack shortcut menu
Project Browser
The Project Brow se r is a miniature Project window. Use the this tool button to call up the browser.
If you do not find the button on the Timeline tool bar, retrieve it from the corresponding tool box
(see
“Customizing Toolbars” on page 16-8). To close the Project Browser, click the tool button
again.
w Change size and positions of browser -
The boundaries between Timeline and Project Brow ser as well as between content area and
Rack/Folder area can be moved. Place the mouse on the separating line and drag it to the
desired position (see arrows in screen shot above).
You may also change the positions of content area and Rack/Folder area. Right-click on
the separating line between the areas and select a combination. Relative preserves the rel-
ative size of both areas when dragging bigger or smaller.
To mov e t he Project Browser to, say, top of the Timeline, right-click the separating line
between browser and Timeline Headers and select an option from the shortcut menu.
Chapter Basics
6 - 17
Page 88

Tour de Pinnacle Liquid
w To g g l e Rack/Folder area visible/invisible -
This field shows the name of the current active Rack or Rack Folder. By clicking on it you
can turn off or on the display of the Rack/Folder area, thus leaving more (or less) space for
the content area.
w Tog gl e t ab s -
Click to toggle through available Project tabs.
w Switch Project -
In case you need material from a Project other than the current, it is possible to switch
Projects. The current Sequence remains on the Timeline.
To do so, right-click
worked on (same list as in the Open/Create Project submenu). Click the Project’s name to
select it.
If you need a different Project, you will first have to open and close it the conventional way
in order to get it on the most recent list.
More information on “The Project Browser” on page 9-16.
the Toggle Tabs display. You get a list of the most recent Projects you
6 - 18
Dual VGA Mode
To change the arrangement of windows on the desktop:
1 Click the View Switcher icon at the right end of the taskbar to display the selection menu.
2 Click the particular view that you want.
You have now selected the view and the desktop is arranged accordingly.
Please read the remarks in the Readme document (also accessible via the Online Help).
Chapter Basics
Page 89

Tour de Pinnacle Liquid
Views (Two Monitors)
- The Timeline appears on both monitors
- The Project window appears on both monitors
- Left monitor: Sequence Editor above,
Project window below.
- Right monitor:
Timeline occupies entire monitor
- Left monitor: Sequence Editor above
- Right monitor: Project window above,
Timeline occupies bottom of both monitors
Chapter Basics
- Left monitor: Sequence Editor above,
Timeline below
- Right monitor:
Project window occupies entire monitor
- Left monitor:
Project window occupies entire monitor
- Right monitor:
Sequence Editor above, Timeline below
6 - 19
Page 90

The Start Menu
Click the Start button on the taskbar to access the Start menu.
Options in the Start Menu:
wProject - opens an existing Project or creates a new one.
Select Open/C reate Project in the Start menu or select one
of the most recently opened Projects from the list. See
also
“Opening and Creating Projects” on page 9-3.
wTo ol s - allows you to access various Pinnacle Liquid tools
for importing (chapter
ing (chapter on
wControl Panel - opens the area where you can enter the
basic hardware and software settings. See also
mize Pinnacle Liquid”
“Input” on page 8-1) and export-
“Output” on page 15-1) Media Files.
on page 16-1.
Tour de Pinnacle Liquid
“Custo-
6 - 20
wFind - opens a search window that lets you define searches
based on Boolean logic. See
Objects”
wHelp - opens the online help window. See also “The Online
Help”
w Minimize Pinnacle Liquid - minimizes the Pinnacle Liquid desktop on the Windows desk-
top.
w Exit Pinnacle Liquid - click Exit Pinnacle Liquid and you are presented with two choices:
quit Pinnacle Liquid completely and return to Windows, or clear the Pinnacle Liquid
desktop and log on as a different user. The User Selection dialog box lets you add a new
user, remove an existing user, and set up details for the user. See also
7-1.
on page 9-40.
on page 5-4.
“Searching for and Fin ding
“Signup” on page
Chapter Basics
Page 91

Tour de Pinnacle Liquid
The Trash
To re mov e i te ms fr om Racks, or shortcuts from the desktop, you can drag them to Trash. The can
expands to indicate that there are items in it. The Trash tooltip, which appears when the mouse
pointer rests on the icon for more than one second, indicates the number of items in Trash.
Right-click Trash to access its shortcut menu.
w Empty Trash -
removes the items in Trash from the Project. Note that this does not delete the media,
effect, etc. files on the hard drive, it just removes them from the Project.
w Clean Up Project -
The complete undo history of the current Project including all deleted objects will be
erased. This function should be used to minimize the size of a Project file, for example in
the case of having finished a program.
wOpen -
opens a window that displays Trash contents. You can
drag items from the Trash window to the Project win-
dow to restore them. Dragging an item from the Trash
window to the desktop creates a shortcut to the item,
but you cannot access the target object unless it also
exists in the Project window.
Chapter Basics
w Delete Render Files Of Project -
See
“Deleting Render Files” on page 9-141.
w Diagnose Project -
see “Diagnose Project” on page 9-19
w Paste -
puts the clipboard contents (an object you copied or cut from its original location) in
Trash. This is the same as using the Trash button or the Delete key, or selecting Delete in
the shortcut menu.
Right-click in the Trash window to select a Detail or Picon view of its contents.
6 - 21
Page 92

The Project Window
In this window, you can administer all the items needed for editing with Pinnacle Liquid. The
Project window displays all the elements for the currently open Project, including audio and video
clips, effects, graphics, etc. Similar in design and function to the Windows Explorer, the Project
window uses a hierarchy of folders that you can customize to suit the Project and your own pref-
erences.
The tree area on the left is used for creating and selecting folders and subfolders (called Racks).
The content area on the right is used for organizing and viewing objects.
Tour de Pinnacle Liquid
For more information on administration, see
Quick Finder
Rack/folder (tree) area
Tabs
Project
“The Project” on page 9-3.
Tools
window
Rack menu icon
Content area
6 - 22
Chapter Basics
Page 93

Tour de Pinnacle Liquid
The Timeline
The Timeline is the workspace in which you compile a film (in Pinnacle Liquid known as
Sequence) from the individual objects in the Project. Objects are placed on Timeline Tracks. You
can select the number and size of the Tracks. Other elements used with the Timeline include the
toolbar, Playline, Timecode Display and Timecode Bar.
For more information on the Timeline and on editing video, see
10-4.
“Timeline Layout” on page
Tracks
Zoom controller Timecode barTimecode display Scroll bars
Playline
Timeline window
Toolbar
Clips
Chapter Basics
6 - 23
Page 94

The Sequence Editor
The Sequence Editor combines the Source Viewer, Master Viewer and the Timeline. The Source
Viewer (“player”) displays the clip that you want to edit. The Master Viewer (“recorder”) lets you
play the Sequence located on the Timeline.
Tour de Pinnacle Liquid
For more information, see
“Sequence Editor” on page 10-44.
Sequence Editor
Source Viewer
Sequence Editor and Timeline
Master Viewer
6 - 24
Chapter Basics
Page 95

Tour de Pinnacle Liquid
The Logging Tool
Before you can edit a video in Pinnacle Liquid, the corresponding raw material must be available
on your computer. The Logging Tool lets you transfer the video data to your hard disk (mostly
from a tape). Plus, you can control incoming audio and name clips.
For information on working with the L ogging Tool, see the chapter
Logging Tool
“Input” on page 8-1.
Chapter Basics
6 - 25
Page 96

The Effect Editors
With the Effect Editors, you can create Transitions and clip effects (FX).
For more information on the Effect Editors for video clips, see
11-62.
Pinnacle Liquid also offers three audio Effect Editors (Equalizer, Echo and Maximizer; also see
“Audio Effects” on page 11-166).
Tour de Pinnacle Liquid
“Effect Editors (Basics)” on page
Tabs
Acceleration curve
Sample (Classic) Effect Editor
Playline position
Toolbar
FX duration
Video inlay
Toggle incoming/
outgoing
Position bar
Close
editor
Toolbar
6 - 26
Chapter Basics
Page 97

Tour de Pinnacle Liquid
The Audio Editor
Most of the work that you do with audio material requires the Audio Editor. In the standard view,
the Audio Editor replaces the Source Viewer above the Timeline and starts with the Mixer tab in
front. The second tab contains Audio Routing. It allows you to mix audio signals in subgroups
and distribute them to the available outputs.
See
“Audio Editor” on page 11-21.
Fader units
Chapter Basics
Audio Editor
6 - 27
Page 98

The Trim Editor
With the Trim Editor, you can optimally coordinate movement in the image for editing purposes
and precisely trim transitions between individual cuts. The two inlays show you the frames
before and after the edit point. You can check the edit in Preview mode. The Slip Clip function
allows you to trim the mark-in and mark-out simultaneously.
See also
“Trim Editor” on page 10-85.
Tour de Pinnacle Liquid
Duration of outgoing clip
Outgoing clip
Edit point on the Timeline
Toolbar
TC +/- of trimmed clips
Select trim points
Trim Editor
Duration of incoming clip
Shortcut menu
Incoming clip
6 - 28
Chapter Basics
Page 99

Section
2
Working with Pinnacle Liquid
Page 100

The chapters that follow are arranged to reflect the typical sequence of a video postproduction
workflow, from digitizing to mastering. With this arrangement, you have the option of either
working through the entire sequence or reading selected sections and skipping over those that
you do not (yet) need.
Signup
Logging on to the system; working with user names and User Profiles.
Input
Everything you need to know about the raw materials of editing: Digitizing audio/video; import-
ing graphics, titles, etc.; transferring Projects in ALE format; importing edit decision lists (EDLs).
Administration
Arranging and viewing the material; working with Media Files; creating a rough cut (storyboard-
ing); Batch Digitize.
Edit
The different methods for editing (cutting) films with sample applications; basics of audio edit-
ing; special functions (nesting and consolidating Sequences).
Finish
Fine editing of audio material and everything you need to know about effects (video and audio),
as well as creating titles using the integrated title generator.
Output
How to output an edited film on tape, exporting various data formats (single images, animation,
edit decision lists), OMF export and networking with other postproduction applications.
Customize Pinnacle Liquid
How you can personalize the Pinnacle Liquid user interface, for example, how to assign specific
functions to the keyboard and the optional
Liquid Control
.
 Loading...