

Page 1
Page 2
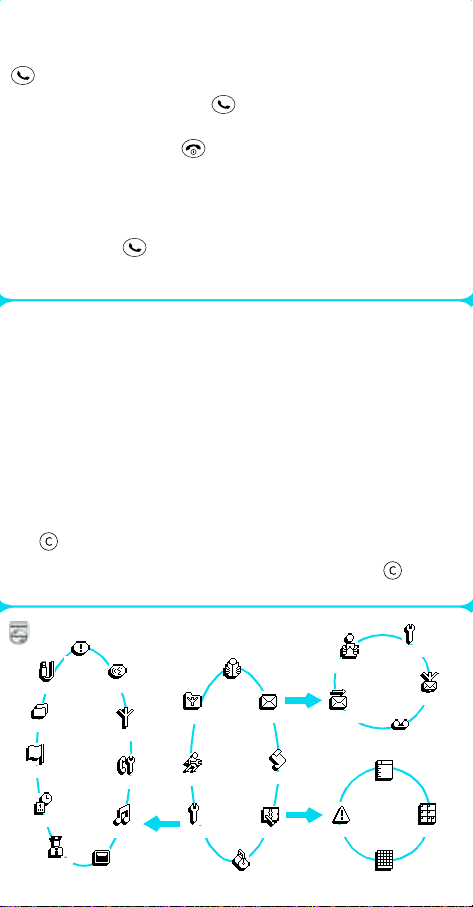
Memory jogger card
enter the number on the keypad, then press
To make a c a l l :
or press the Pilot Key and select the
To answer a call:
the
Accept call
To en d a ca l l :
End call
To use the Names list:
screen and select the
option.
Call
press or press the Pilot Key and select
option.
press or press the Pilot Key and select the
option.
press the Pilot Key from the idle
NAMES
icon .
You can scroll through the list of recorded names. To dial, select a
name and press .
In idle screen, move the Pilot Key down once to reach the Names
list.
Memory jogger card
To enter a name:
select
To access the caro usel:
a function, move the Pilot Key upwards or downwards. Then
confirm by pressing it. This gives access to the sub menu of the
selected function. Continue in the same way (s elect by movin g the
Pilot Key, confirm by pressing it) until you reach the function you
desire.
To return to the previous menu:
Pilot Key. You can also return to the previous display by pressing
the key.
To return to the idle screen:
from the Names list.
<NEW>
simply press the Pilot K e y. To select
press and hold the
press and hold
1
PHILIPS
Hotkeys
Security
Voice ke ys
Network
Call se tt ing s
Sounds
Display
Accessories
Menu type
Language
Time and Date
* Depending on the subscriber’s card.
Operator Services*
Quic k s e t ting s
OK
Settings
Nam es
Messages Send SMS
Main
Menu
Call list
Organiser
Extras
OK
OK
Read SMS
Events
SMS settings
Broadcast SMS
Ma ilb ox n o
Day view
Week view
Month view
Page 3
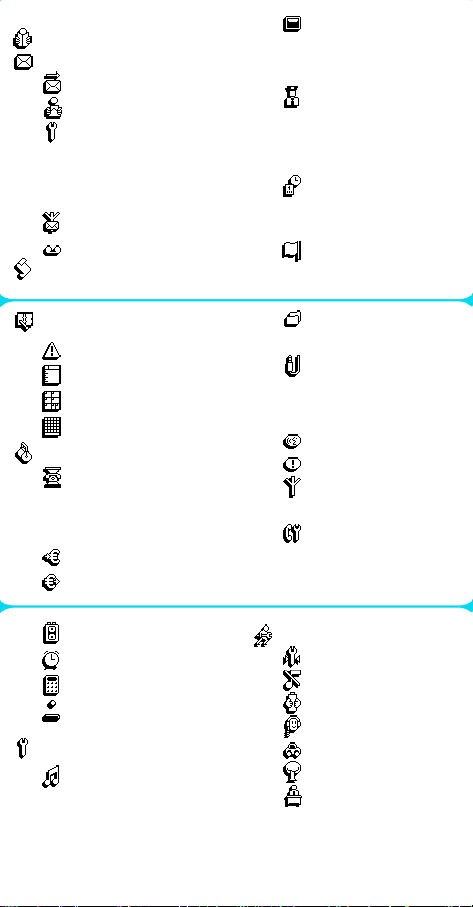
Overview of menus
Names
Messages
Send SMS
Read SM S
SMS settings
SMS centr e
Signature
Validity period
Reply path
Delivery report
Auto save SMS
Broadcast SMS
Mailbox No
Call list
Display
Zoom on/off
Backlight
Animation
Contrast
Security
Keypad lock
Public names
Call barring
Change codes
PIN protection
Time and date
Clock display
Set dat e
Set time
Language
Organiser
Events
Day vie w
Week view
Month view
Extras
Call counters
Last call information
Info at call end
Accumulated call timers
Accumulated cost
-> Euros
<- Euros
Voic e memo
Alarm clock
Calculator
Brick Game
Settings
Sounds
Ringer volume
Ringer
Key tones
Minute beep
Organiser alerts
Battery low alert
New SMS tone
Vibrator
Menu type
Simple menu
Advanced menu
Accessories
Car melodies
Speakers
Car kit command
Auto switch off
Auto answer
Voice keys
Hotke ys
Network
Register again
Preferred list
Call settings
Call forward
Autoredial
Any key answer
Call waiting
Caller ID
Quick settings
Normal
Silent
Autonomy
Heads e t
Car
Outdoors
Meeting
Page 4

Table of contents
Table of contents 1
Before first use 3
Your very first call 3
Using the carousel 5
Example 5
To adju st th e contrast 5
Activate/deactivate 6
Using the Nam es a nd oth e r lis ts 6
Glossary 7
Your phone 8
Description of the phone 8
Screen 10
Initial start up
procedure 11
The m icr o -SIM card 11
Inserting your subscr ib er card (micro
SIM card) 11
Your PIN code and PUK code 11
Your PIN2 code and PUK2 code 11
The battery 12
Clipping on the battery 12
Removing the batter y 12
Charging the battery 13
Making an emergency call 14
Using your phone 15
Switching on 15
Idle screen 15
How to enter a text or a number 15
Events in idle screen 16
Making a call 16
Answering and ending a call 16
Redial and reply 17
Voice dial 18
Flash dial 18
During a call… 18
Adjusting the earpiece volume 19
Mute th e mi c r ophone 19
Unmute the microphone 19
Writing in the notepad 19
Consulti ng the Names list 20
Locking the keypad 20
Unlocking the keypad 20
Activate/deactivate the silent mode 21
Activate/deactivate the vibrator 21
Reading your GSM phone number 21
Using the menus 22
Overview of menus 22
Names 24
<New> 24
Select a name 24
Emergency 25
Own number 25
Messages 25
Send SMS 25
Read SMS 27
SMS settings 27
Broadcast SMS 28
Mailbox No 28
Call list 29
Organise r 29
Events 29
Day view, Week view and
Month view 30
Extras 31
Call counters 31
-> Euros 32
Table of contents
1
Page 5

<- Euros 32
Voice memo 32
Alarm clock 32
Calculator 32
Brick Game 33
Settings 34
Sounds 34
Display 36
Security 37
Time and date 39
Language 39
Menu type 39
Accessories 40
Voice keys 40
Hotkeys 41
Network 42
Call se ttings 42
Quick settings 45
Use of network
services 46
Additional GSM network services
(GSM strings) 46
Query a voice server, a voice mailbox ,
a messaging service, etc.
(DTMF tones) 46
Making a second call 47
Answering a second call 48
Answering a third call 48
Explicit Call Tran s fe r 48
Conference Call 49
In-call symbols 49
Use while driving 52
Maintenance 53
Looking after your phone 53
Efficient use of your phone 53
Troubleshooting 54
Philips Authentic
Accessories 56
Index 60
Precautions 50
Radio wave safety 50
Your phone and its envi ronment 50
Efficient use of your phone 50
Battery safety 51
Safety and security 51
Responsibility 51
Respect of local laws and regulations 51
2
Table of contents
Page 6
Before first use
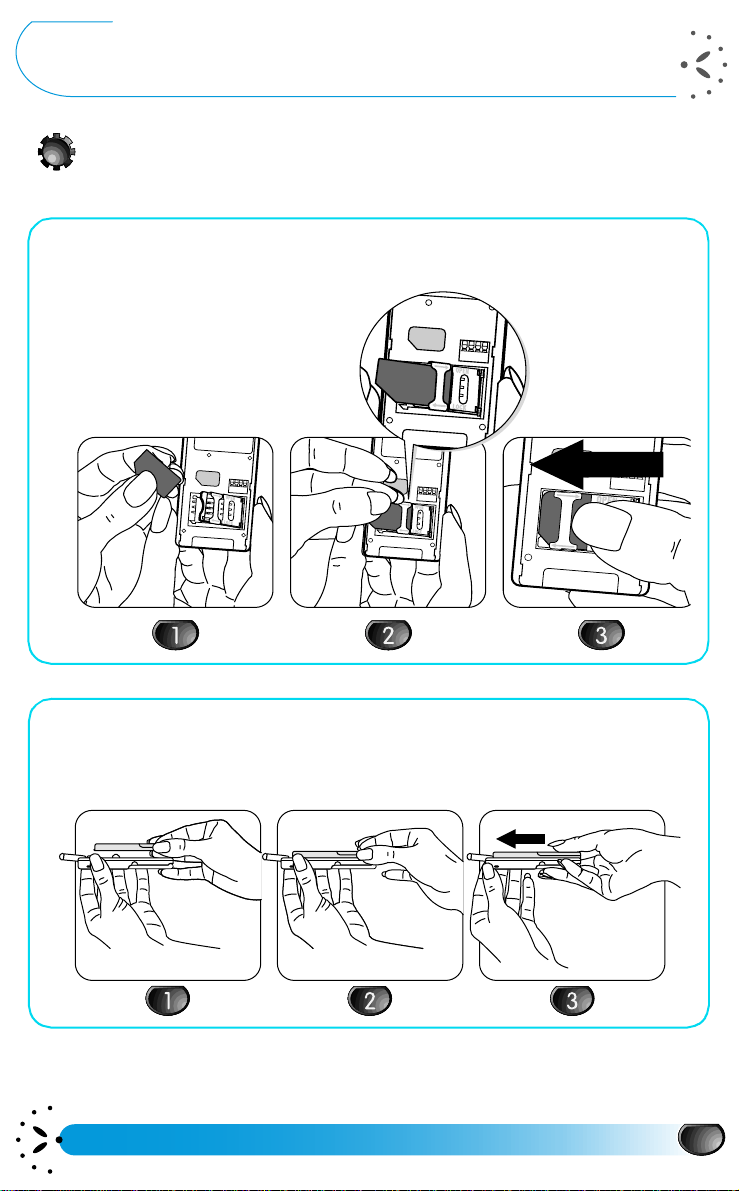
Your very fir s t call
Turn the phone face down
1 Insert the micro-SIM card.
Remov e the micro-S IM card fro m the Sim card.
Push the metal retaining clip to the right
and lift the cardholder. Slide in the SIM
card between the re taining clip and the
plasti c to n g ue w ith the cut corner of
the card as shown on the drawing.
Close the cardholder and push the
retaining clip to the le ft .
2 Insert the battery
For optimum performance follow the instructions on page 12. Place the battery on the
back of the phone (battery connectors downward, the top near the arrow inside the
case). Then push the battery into place in the direction of the antenna.
L
NOTE:
A new battery is not completely charged.
Before first use
3
Page 7
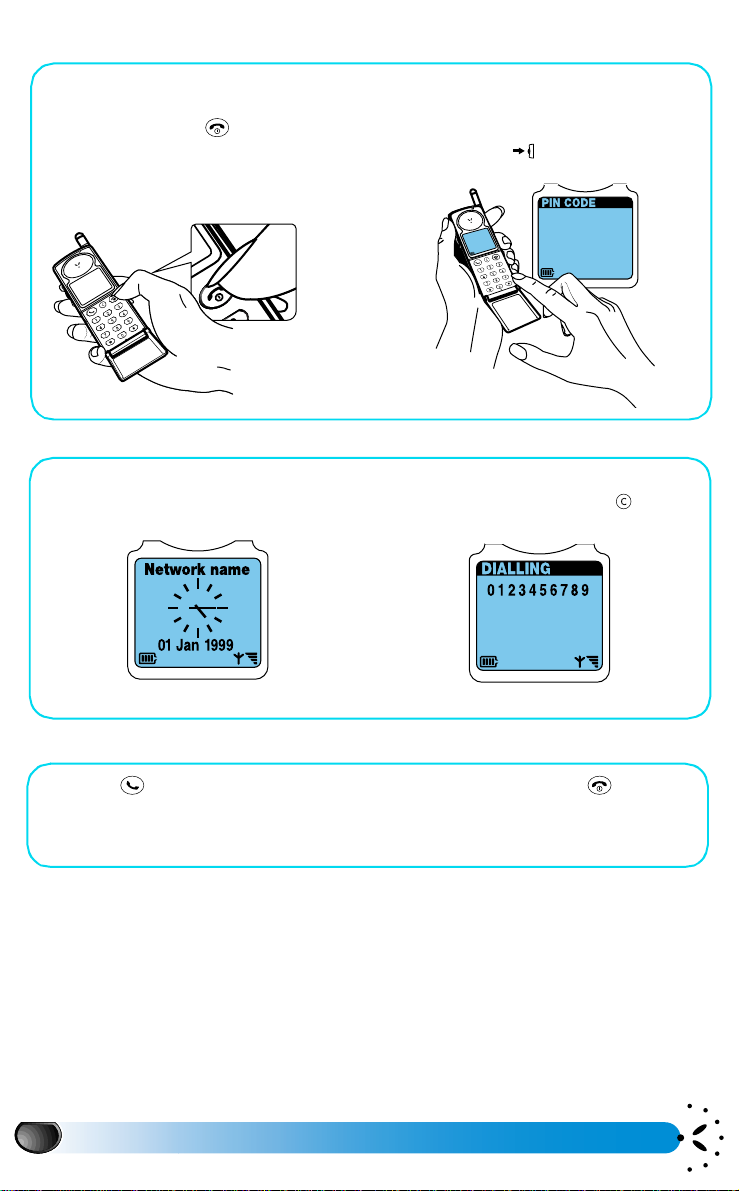
Turn the phone face up
3 To switch on the phone.
Open the flip.
Press and hold the key .
5 Wait for the 2 beeps.
The connection is established. The green
LED flashes and the screen looks like this:
4 Enter your PIN code if asked
(see page 11).
Then confirm by pressing the
Pilot Key (key ).
6 Enter the phone number.
If you make a mistake press .
To set the time and date, see page 39.
7 Press .
Once connected, your phone emits two
beeps. Fo r best rece ption pull the ante nna
out.
L
NOTES:
1. You can hold a conversation even with the flip closed.
2. If the flip is in the closed position during a call, you can open it without affecting the call in progress.
4
Before fi rs t u s e
8 After the call press .
Page 8
Using the carousel
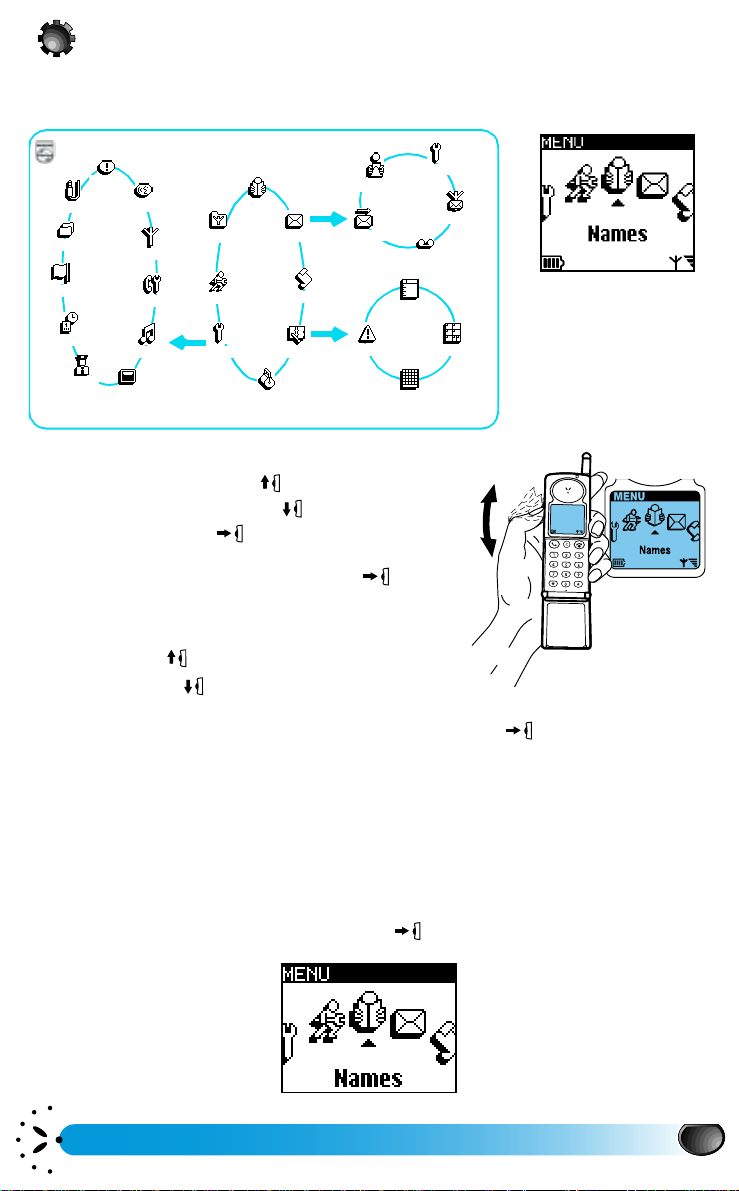
The carousel is a circular loop of icons displayed on the screen. These icons provide access to
the diffe rent men us and sub menus used to operate your phone.
PHILIPS
Hotkeys
OK
Messages Send SMS
Call list
OK
Organiser
Security
Voice ke ys
Network
Call se tt ing s
Sounds
Display
Accessories
M e nu typ e
Language
Time and Date
* Depending on the subscriber’s card.
Nam es
Operator Ser vi c es*
Main
Menu
Quic k s e t ting s
OK
Settings
Extras
You can use the Pilot Key in 3 ways:
- by moving it upwards
- by moving it do wnwards
- by pre ssing it in
When you switch on your phone , the idle sc reen appears.
To access the main men u, press the Pilot Key .
When you move the Pilot Key the carousel moves
across the screen:
- upwards the icons scroll clock wise.
- downwards the icons scroll anti clo ck wise.
The Pilot Key provides access to all the menus used to operate your phone. To select a
function, place the icon above the cursor and press the Pilot Ke y
With the Pil ot Key y ou can sel ec t or a djus t a ll t he f un cti ons of y our phon e ( see Menu Me mory
Jogger cards and see the manual for details of menus).
Read SMS
Events
SMS settings
Broadcast SMS
Ma ilb ox n o
Day view
Week view
Month view
.
Example
To adjust the contrast
After switchi ng th e phon e on, pres s th e Pilot Key to access th e main Me nu :
Before first use
5
Page 9
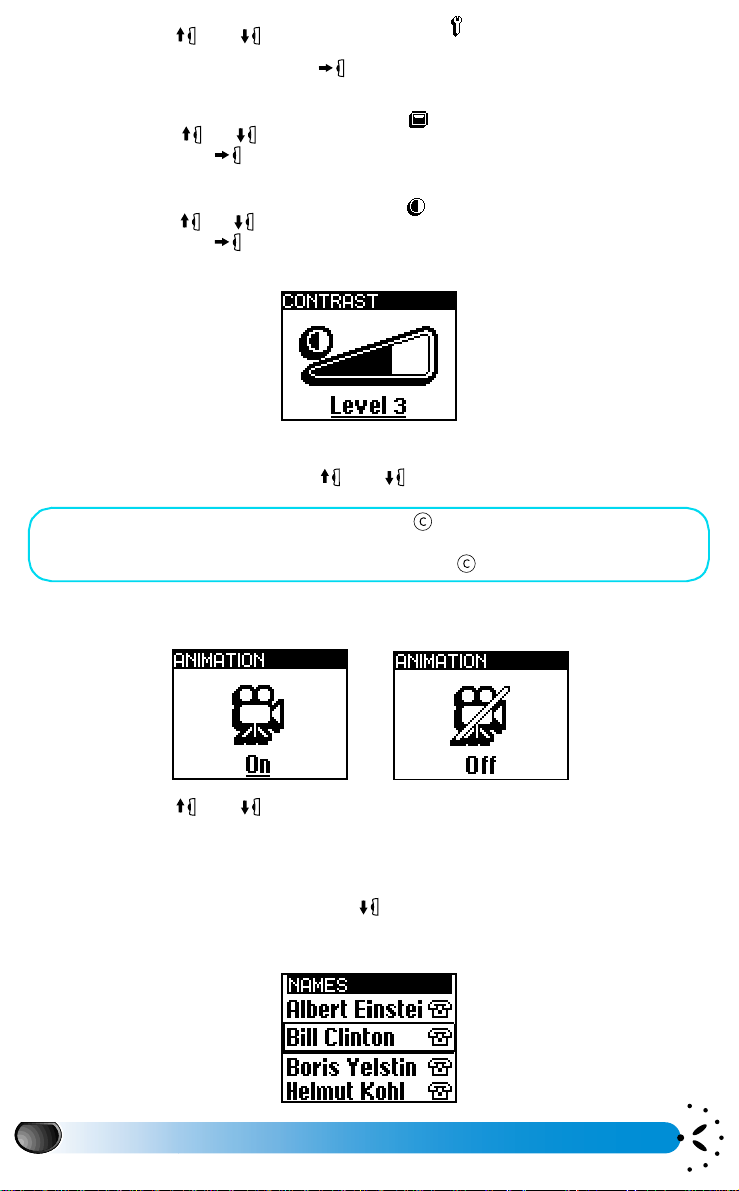
Move the Pilot Key or and position the icon above the cursor .
Settin gs
Display
Contrast
Then confirm by pressing the Pilot Key
This gives you access to the
Move the Pilot Key ( or ) and positio n the icon above the cur so r. Then confirm
by pressi ng the Pilot Key .
You enter the
Move the Pi lot Key ( or ) and position the icon abo ve the cu rso r. Then confirm
by pressi ng the Pilot Key .
You enter the
Display
Contrast
Settings
menu.
menu:
.
sub menu:
The active paramet er appears un derlined on the scr een. In the abo ve example it is
Using the Pilot Key, adjust the contrast or and confirm.
• To return to the previous menu, press or press and hold the
Pilot Key.
• To return to the idle screen, press and hold
1
Level 3
Activate/deactivate
Using the Pilo t Key, you can activate or d e -act iva t e some functions.
Move the Pilot Ke y or to select
On
or
, then confirm .
Off
Using the Names and other lists
You can also use y our Names list using the Pilot K ey .
In idle mode move the Pilot Key downwards to access the Name list. By moving the Pilot
Key down, you move down int o th e N am e s li st. Turning it u p wa rds m o ves up th e N am e s lis t.
Confirm your se lection by pressing on the Pilot Key.
.
6
Before fi rs t u s e
Page 10

Glossary
DTMF
EFR
FDN
GSM network
Home network
Local network
Multi-call
PIN code
PIN2 code
Public Names
PUK code
PUK2 code
Roaming
SIM card
SMS
Dual Tone Multi Frequency.
The tones are transmitted by the phone to the network. They are used to
interrogate answering machines, transmit codes, ...
Enhanced Full Rate. Standard for high quality sound GSM900. Y our phone will switch
EFR on automatic ally if it is supported by the GSM network you currently use.
Fixed Diallin g Numbers. See al so Pu bl ic Names.
Global System for Mo bile communications. The type of phone ne twork used by
your phone.
The network on which your SIM card is registered.
The network where you are making a call. This may be your home network or
another GSM network.
Two cal ls are in progr ess, one active and one on hold.
Personal Identificat ion Number. The secret code of the SIM card.
Secret code that allows you to access certain SIM card dependent features.
Function that allows you to restrict dialling to selected numbers.
Secret code used to unblock your SIM card if y ou, or someone else, enters the
wrong PIN code three times.
Secret code used to unblock your SIM card if y ou, or someone else, enters the
wrong PIN2 code three times.
Using your phone in a network other than your home network.
Subscriber Identification Module. The card which allows you to make phone calls
with your GSM phone.
Short Message Service. This service provided by the operator allows you to send
and receive sho rt written messages.
Before first use
7
Page 11
Your phone
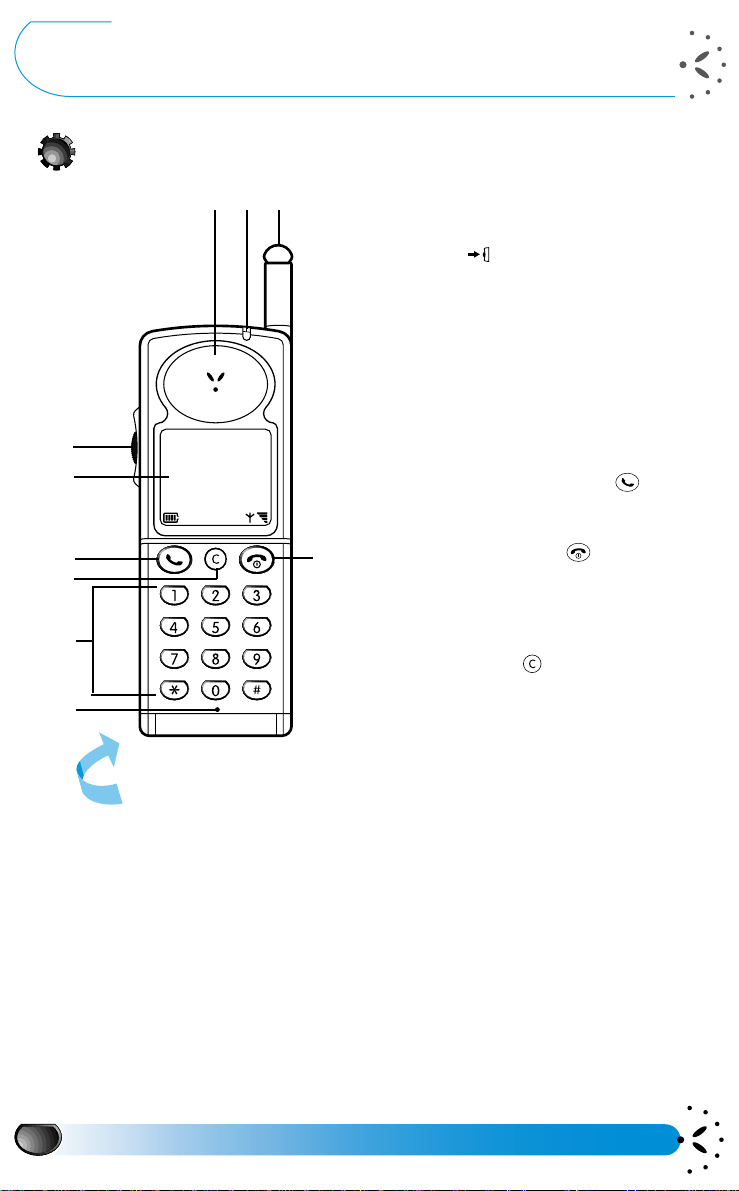
Description of the phone
1
2
3
4
5
6
8
9
10
11
1Antenna
Pull out completely when making a call.
2LED
-
Green flashing slowly -
is registered with a network.
-
Green flashing quickly -
been received but not yet answered.
-
Red flashing -
3Earpiece
means the phone
means a call has
mean s t he battery is low.
7
4Pilot Key
It allows fast and easy access to the
different menus and confirms your
choice .
- During a call, it controls the volume.
- In the Names list, menus or lists it
scrolls up or down.
- When entering a name or number, it is
used to move the cursor left or right.
- To return to t h e previ ou s menu by
pressing and holding it. To validate by
pressing and holding it in an editor
screen.
5 Graphic display
6 Green “Pick up” key
symbol
Press to accept a call or dial a number.
7 Red “Hang up” and “On /
Off” key symbol
Press to switch your phone on, press and
hold to turn your phone off.
Press to end a call.
8 Cancel key
Navigation mode:
- Press this key to return to the previous
menu.
- Press and hold it to return to the idle
screen.
Edition mode :
- Press this key to delete a character.
- Press an d hol d it to dele te a ll the
characters.
9 Alphanume ric keypad
Stand ard phon e keypad . It can al so be
used for entering alphabetic characters
and acti v a ting hotkeys.
10 Microphone
It allows you to talk even with the flip
close d.
11 Battery and micro SIM card
From the rear of the phone.
- Slide the SIM card in place.
- Fit the battery.
8
Your phone
Page 12
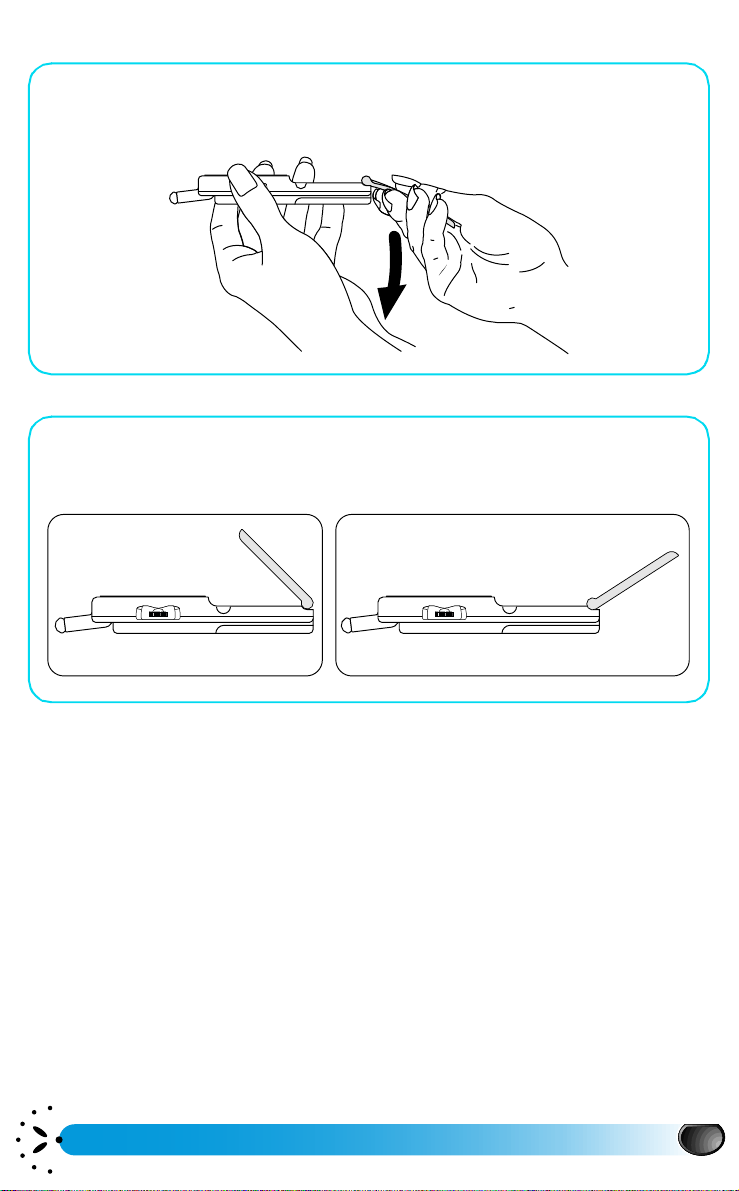
The flip:
The flip protects the keypa d of your phone. It can be used with all the acc e ssories
(Traveler’s Charger, Hands Free Kits, etc.).
To detach easily, push the flip downwards.
To reinstall the flip, first fit one side in the hinge on the phone, then the other.
INCORRECT
CORREC T
Your phone
9
Page 13
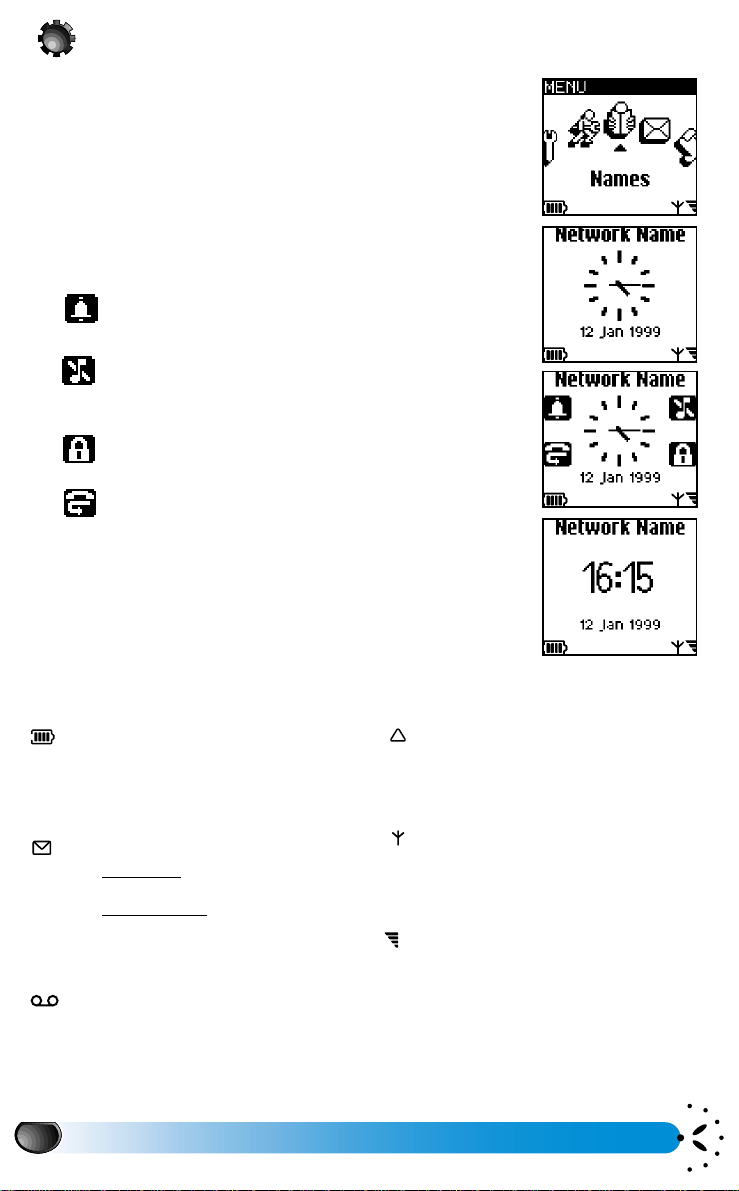
Screen
Carousel:
A loop of icons on your display which provides access to the
menu of yo ur choice.
Date and time
Displa yed in id le s cree n. To set the d ate an d time , se e
page 34.
"Settings"
Indicators
Alarm clock
Indicates that the alarm is activated.
Silent
Indica tes that the rin ger is tu rn ed o ff. Th e p hon e
will not ring. It can still receive calls.
Keypad Lock
Protects the keys from being pressed accidentally.
Call forward unconditionnal
Indica tes that the
unconditionnal to a number is set.
Call forward
Symbols
Battery charge
If the first block is dark, the battery
holds a 25% charge. Each bar
represents a ppro ximativ el y 25% of the
maximum charge.
SMS message
-
Symbol only
new message.
-
Flashing symbol
memory is full and cannot hold more
messages. Delete one or more
message to l iberate memory.
Voice mail
Indicates that you have received at
least one new voice mail (Network
dependent).
-You have received a
- The message
10
Your phone
Roaming
This indicates that you are using a
network other than your subscribed
one.
Network
The phone is connected to a network.
If the ico n flashes the phone is trying to
connect.
Reception qualit y
4 reception bars indicate optimum
quality.
Page 14
Initial start up procedure
The micro-SIM card
To use your phone, you must insert a valid SIM card that is supplied by your GSM service
provider.
Your phone requires a micro- SIM card.
The SIM card contains your subscription number and your GSM phone number. It also
contains a me mory in which you can store phone numbers and messag es. If y ou use y our SIM
card on another phone, your phone number and your Names list remain the same.
L
NOTE:
Your phone accepts plug-in micro SIM card only.
Inserting your subscriber card (micro SIM card)
(See page 3).
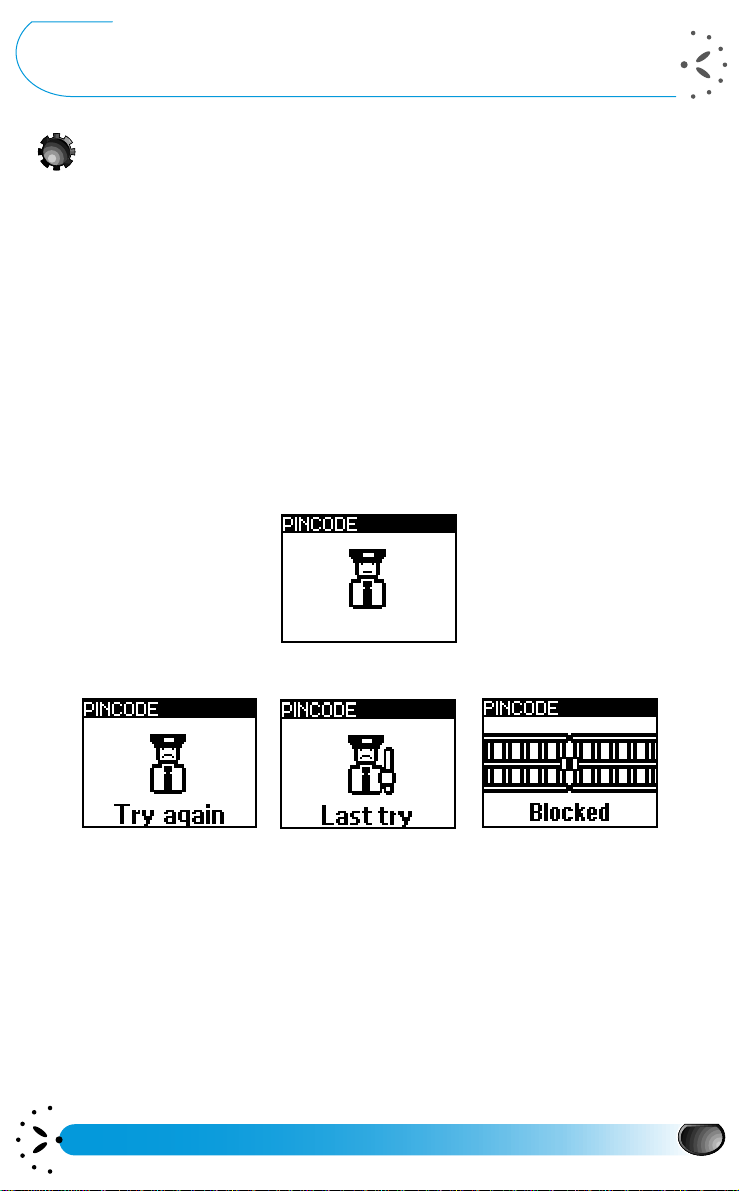
Your PIN code and PUK code
When you switch on the phone, it asks you for the PIN code. The PIN code is the 4 to 8-digit
secret code of th e SIM card.
If you enter a wrong PIN code, you can try ag ain. If you enter a wrong PIN code 3 time s, your
SIM card is blocked.
You must then enter your PUK code to unblock the phone. This code will be given to you by
your ser vice provider. If you enter a n incorrect PUK cod e ten times in a row the card will
completely be blocked and be unusable. If this happens contact your service provider.
Your PIN2 code and PUK2 code
Depending on your SIM card, you may have some featu re s o n your ph o ne th at require you to
enter a PIN2 code. This is a secret 4 to 8-digit code given to you by your service provider.
If you enter a wrong PIN2 code, you can t r y again. If you enter a w rong PIN2 cod e 3 t imes,
your SIM card is blocked and you must enter the PIN2 unblocking code (PUK2) given to you
by your service provider. If yo u enter an incorrect PUK2 code ten times in a row the card will
be completely blocked and be unusable. If this happens contact your service provider.
Initial start up procedure
11
Page 15
The battery
Your phone is powered by a rechargeable battery. A new battery is not fully charged. Charge
it by following the procedure on page 13.
A battery is only fully charged after having been charged and then totally discharged two or
three times.
The
of the maximum charge.
If the phone emits a warning signal (see page 36 ), the red LED flashes and the display shows
Battery low
The battery, attached to the phone or not, should not be exposed to tem perat ures exceeding
60°C (e.g. behi nd gla ss in direct sunlight) .
We advise you to k eep t he bat tery attached to the phone, even wh en discharged. The ba cku p
battery for the clock (inside the phone) w ill la st long er.
We do not recommend to remove the battery when the phone is switched on: you may lose
all your personal settings.
L
Clipping on the battery
(See page 3).
icon shows the level of charge in the battery. Each bar represents appr oximately 25%
b
, you should re-charge the battery.
NOTE:
Please ref er to th e i nfo rm ation on battery safety, page 51.
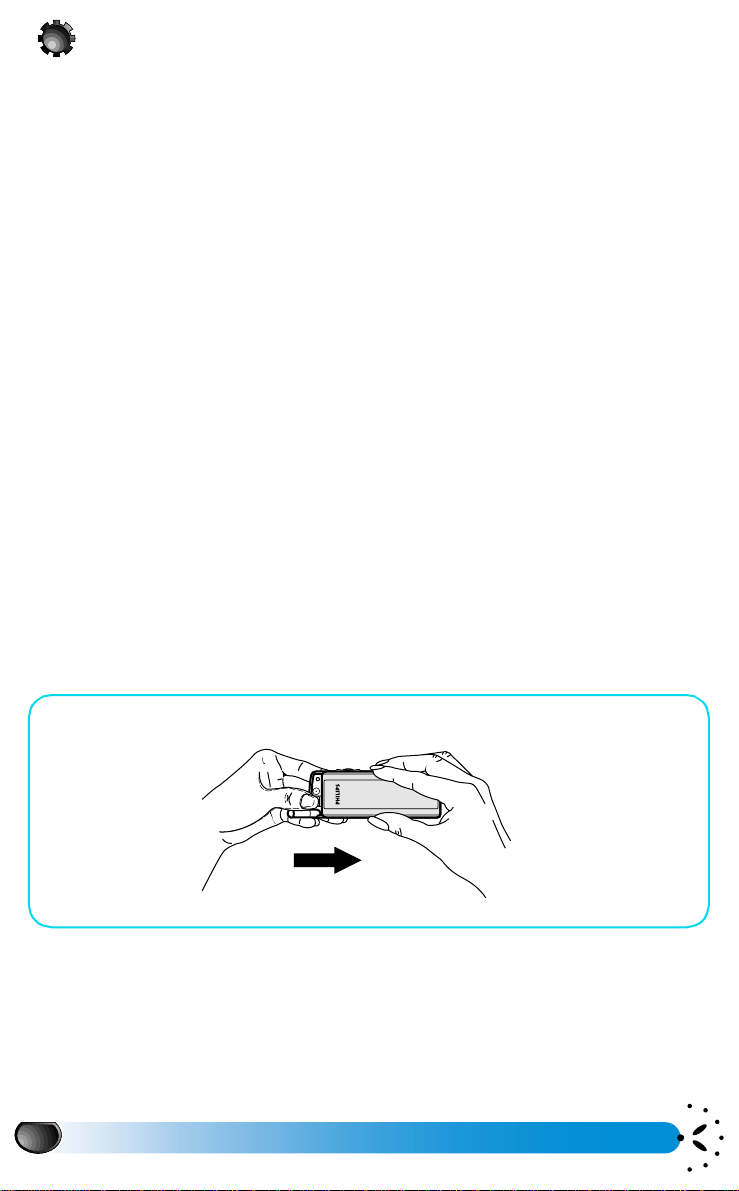
Removing the battery
• Press the locking button loca ted alon gsid e the anten n a while push in g the
batter y in the directio n of the arrow as shown on the drawing.
• Remove the batt e ry.
12
Initial start up procedure
Page 16
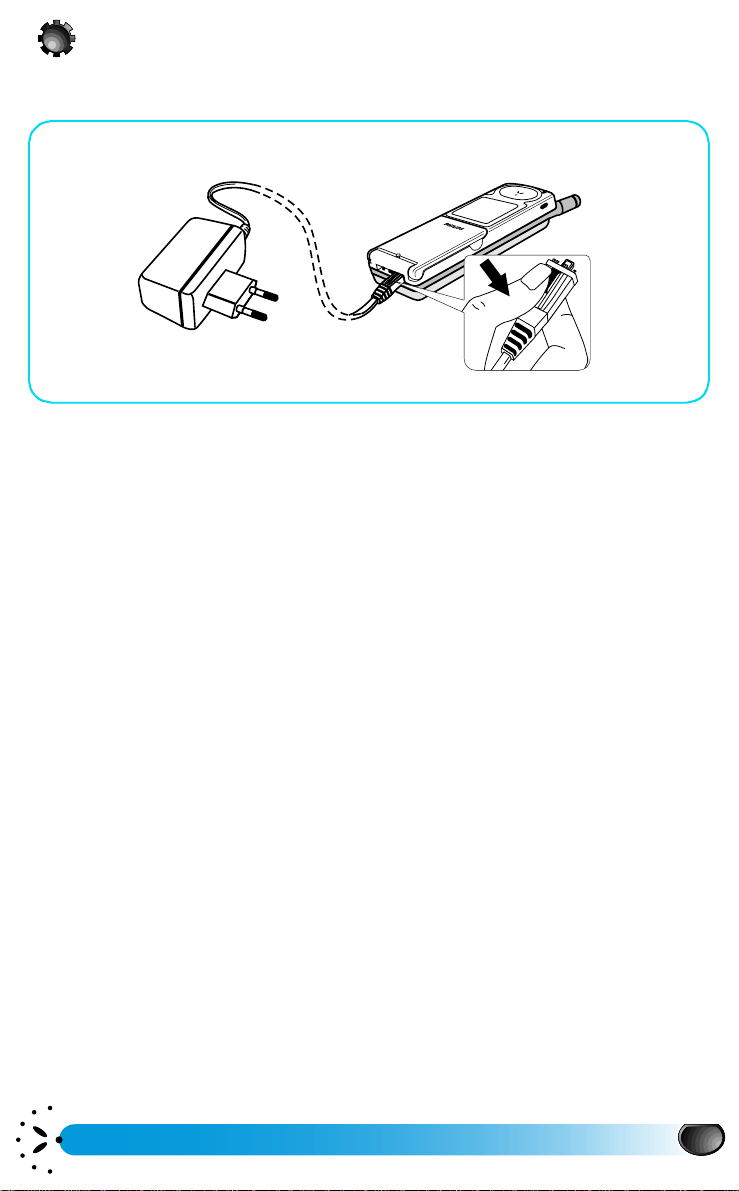
Charging the battery
A charger is supplied with the phone, in the box.
• Clip the battery on the phone.
• Plug the charger into the phone connector.
• Plug the transformer unit into a mains AC power socket.
The
• During charging the 4 char ge indicators change. If the first bar is dark, the battery already has
• The bars darken one after another during charging.
• When all 4 bars are dark the battery is fully charged. A minimum of 2 hours charging is
• When the battery is charged, press the release button to the topside of the connector to
L
1. You can turn your phone on and use it while it is charging.
2. The only way to turn the battery charger off is to unplug it from the mains outlet; for this reason use a mains
3. You can connect the charger to an IT supply (Belgium only).
4. If the battery is completely flat, the battery icon will only reappear after 2 or 3 minutes of charging.
5. If you attempt to charge your phone with an invalid charger, your phone will refuse the charge. This wi ll be
symbol indicates the state of charge:
b
a 25% charge.
required to obtain a 90% charge with a Vibra battery (capacity: 1200 mAh) and 1.5 hours
with the slim battery (capacity: 800 mAh). For the maximum charge continue charging.
remove it. In order to save battery capacity you shouldn't wait for an empty battery capacity
to charge it again.
NOTES:
outlet with easy access.
signified by:
- the fl ashing of the backlight every second
- the flashing of the battery fixed icon
- a conti nuous alert beep
- a message
screen.
This measure is designed to protect your phone. For best results, always use a Philips Authentic Ac c es sory.
Acessory not compatible. Please unplug
displayed on the
Initial start up procedure
13
Page 17

Making an emergency call
112: European emergency call
Key in the emergency number for your present location (e.g. 112 or other official emergency
number). Emergency numbers vary depending on the location.
• Switch on the phone.
The display shows the welcome screen.
Even if y ou are ask e d for your PIN code, your phone will funct ion without it.
• Enter the emergency number (112) or press Pick-up key if PIN code
asked.”
• Press .
The phone dials the number.
• After the call , press .
L
NOTE:
1. Some networks may require a SIM card for emergency calls. Check with your service provider.
2. You can also enter the emergency number using the keypad, even when the keypad is locked.
14
Initial start up procedure
Page 18
Using your phone
Switching on
• Press the key .
• Enter your PIN code if asked and press .
L
NOTE:
The PIN code requirement is a s ecurity feature t hat you can s witch on and off using the “P IN prote ction*”
menu (see page 38).
Idle screen
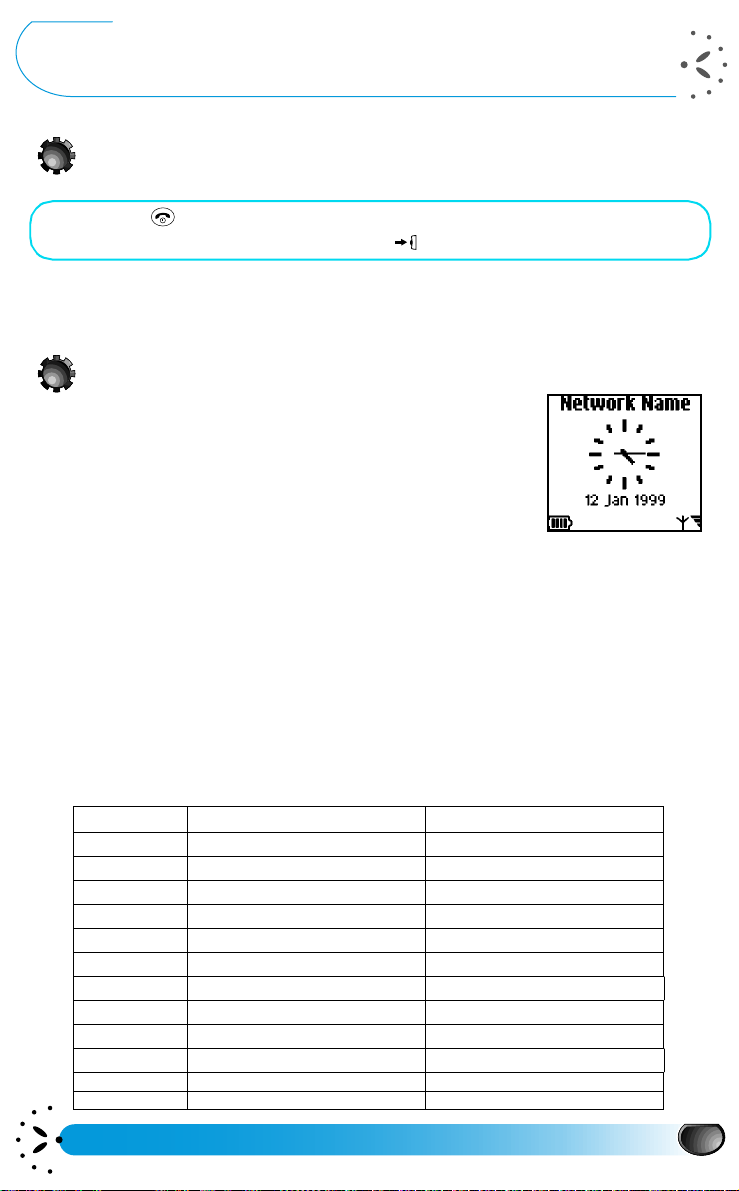
After switching on (and entering the PIN code), your phone
displays the idle screen which means that the phone is ready to use.
At the sa me time:
•the
•the
If the
You may be in a bad reception area (perha ps in a tunnel or betwe e n tall buildings). If possible,
move to a different lo ca t ion .
If you navigate into the menus or the Names list, the phone automatically returns to idle
screen if a key is not pressed for 2 minute s. During this perio d of tim e you can still receive a
call.
icon is disp layed and the L ED t o th e le ft o f t he an tenna
a
flashes, this indicates that the phone is connected to the
network. The network name appears on the screen.
symbol is displayed, indicating the quality of reception
s
(when all 4 bars appear, the audio quality is at its best).
symbol and the network name are not displayed, the network is not currently available.
a
How to enter a text or a number
Characters and numbers are located on each key as follow :
Key Label Upper case alphanumeric Lower case alphanumeric
1 space 1
2ABC A B C 2 A Â Å Æ Ç a b c 2 à ä å æ ç
3DEF
4GHI
5JKL J K L 5
6MNO M N O 6 Ñ Ò Ö Ø
7PQRS
8TUV T U V 8 Ü Ù t u v 8 ü ù
9WXYZ W X Y Z 9 Ω Ξ
0.
*+ * + - / % * + - / %
#
=
@ # = < > ( ) & £
D E F 3 É E ∆
G H I 4 Γ Ig h i 4 Γ ì
P Q R S 7 β Π Θ
. 0 ’ ’ ’ ? ! , : ; ¡ ¿
lower case upper case lower case upper case
Φ
Λ
Ψ
$ ¥
Σ
space 1
d e f 3 é è ∆
j k l 5
m n o 6 ñ ò ö ø
p q r s 7 β Π Θ
w x y z 9 Ω Ξ
. 0 ’ ’ ’ ? ! , : ; ¡ ¿
Using your phone
@ # = < > ( ) & £ $ ¥
Φ
Λ
Σ
Ψ
15
Page 19
For example, to enter “Love”, you have to press thrice, press thrice, press
1 missed
MISSED CALL
thrice and press twice. The word “Love” will appear on the screen.
L
NOTES:
1. A number c an contain a maximum of 40 digits, depending on your SI M card.
2. It is a good idea to enter all numbers, even local ones, with their international prefix, country code and area
code. Thus you can dial all numbers from any location.
3. The ‘+’ character c an o nly be inse rted at the beginn ing of a number.
4. To correct mistakes, press and releas e to delete one digit.
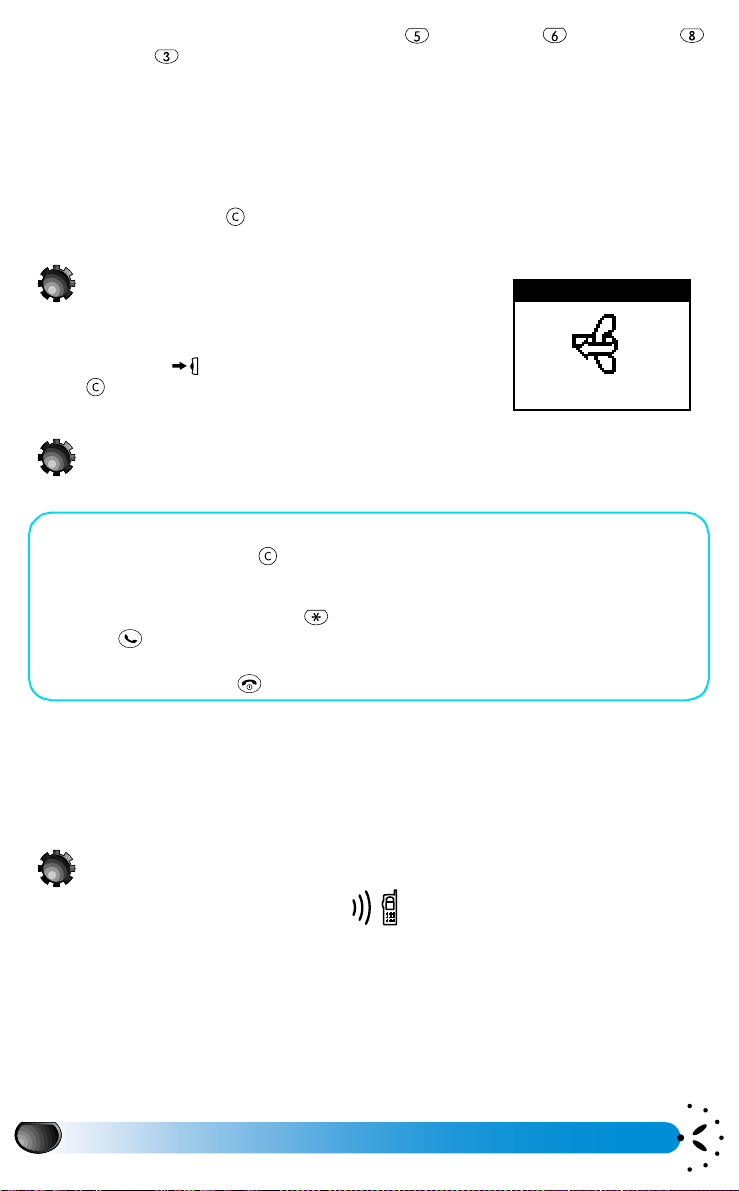
Events in idle screen
Some events may modify the idle screen (missed call, new
message , reminder from th e organiser, etc.). In this c ontext,
press the Pilot Key to access a contextual menu or press
on the key to go back to idle .
Making a call
In idle screen :
• Enter the phone num ber using th e keypad.
To correct an error , press . To move through numbers move the Pilot Key upwards
or downwards.
For an international call, you can enter the "+" k ey instead of the usual international
prefix. To do this press and hold .
• Press .
The phone dials the number.
• After the call, press to hang up.
L
NOTE:
1. You can als o make a call from the
2. If a number has bee n programmed on a direct access key, you can call this number by pressing and holding
the key (see Flash dial page 18).
3. If the called number is in the N ames list, t h e corresponding name will be displaye d instead of the number.
Names
(see page 6).
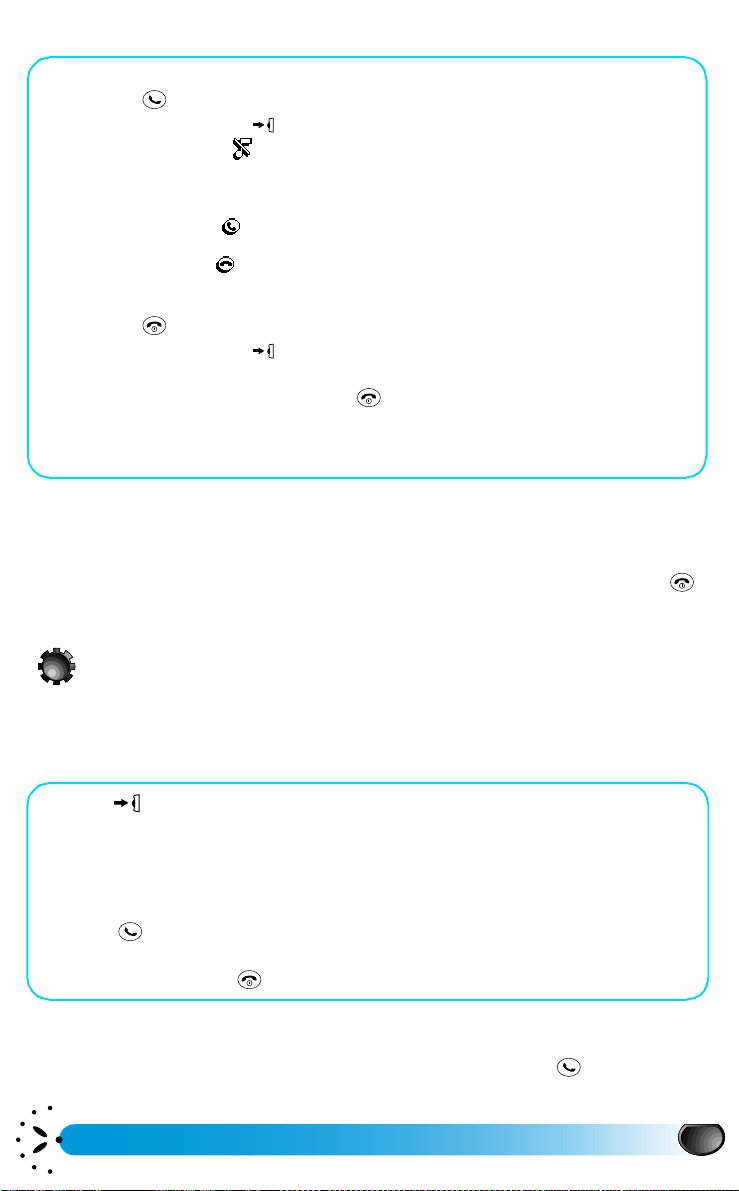
Answering and ending a call
When receiving a call, the phone rings, the animation and
appears on the displa y, and the green LED flashes. Depending on your subscription, the call er’s
number may be displayed. If this number is in the Names list, the corresponding name shall be
displayed instead of the number.
Incoming call
16
Using your phone
Page 20
• To an swer a call you can either:
• press .
• pr e ss the Pilot Key , a carousel with the following options app ears:
• Silent ringer
The ringer volume of this incoming call is set to silent and the phone goes back to
the incoming call screen.
• Accept call
• Reject call
• To hang up a call you can eith er :
• press .
• p ress the Pilot Key , a carousel app ears:
• select End Call and confirm.
• If you want to reject the call, press .
The phone returns to idle screen and the caller hears the busy tone.
If you have activated “Call forwar d whe n busy” (s ee page43 ), the call is diverted to the
selected number (your voice mailbox, for example)
L
NOTES:
1. The phone will not ring if the ringer is deactivated (see page 21).
2. If you have a Vibr a Ba ttery yo u may ac tiva te t he vibr at or func tion to be discr ete ly wa rned of i ncomin g call s (s ee
accessories page 56).
3. If you have selected Any Key Answer (see page 44), you can accept a call by pressing any key (except )
or by pressing the Pilot Key.
Silen t
Accept call
Reject call
Redial and reply
The phone stores the last 30 numbers (called or received). You can redial or reply to any of
these numbers and dial it directly. The most recent is displayed first.
In idle screen:
• Press to access the main Menu.
Select
Call list
dialled.
If a number is in your Names list, the corresponding name is displayed.
• Move the Pilot Key up or down to select the number you want to redial or
reply.
• Press .
The phone dials the number. Wait for your correspondent to answer.
• After the call, press to hang up.
L
NOTES:
1) You can directly access to the Call list by moving up the Pilot Key.
2) You can directly access to the last dialling number by pressing the pick up key .
. This displays a chronological list of the last calls either receiv ed or
Using your phone
17
Page 21
Voice dial
You can automatically dial a number by saying your correspondent’ s name.
In idle screen:
• To program a voice tag :
• To dial a number assoc iated with a voice tag:
L
1. The duration of a voice tag is 2 seconds.
2. Up to 15 vo ice tags can be define d.
Names
In the
the Pilot Key twice then select
Follow the instructions display ed on the screen which invite you to say, then to repeat
the voice tag.
Press and hold the Pilot key, then say the voice tag of the number to dial.
If the phone recognises the voice tag, it repeats it then immediately dials the number
associated with it.
NOTES:
menu, select the Name you want to ad d a Voice dial to. Press
Voice dial
Add Voice tag?
then
.
Flash dial
You can associate any of the keys to with a Names list entry to give you direct
access , through a single long key press, to a fr e que ntly used phone number (see pa g e24). Key
and are defined and cannot be changed. (See page 41).
In idle screen:
• Press and hold a key betwee n and to dial the associated entry.
The connection is established.
• After the call press to hang up.
You can use your as a redi alling key, indee d, a first p ress on this key disp lays the last
number dia lle d (or name if the n umb e r is in th e Names list), a s eco nd press on the sam e key
dials the number. The hotkey option is still available to redial the last number (see page 41).
During a call…
You ca n:
• Adj ust the earpiece volume (see page 19)
• Mute or unmute the microphone (see page 19)
• Write a number in the note pa d (see page 19)
• Consult the Names list (see page 20)
• Add a name to the Names list (see page 24)
• Write and send a message via the Names list or the Notepad (see page 24)
• Check a voice mailbox or access a voice server via the Notepad (see page 28)
• Make a second call (see page 47)
18
Using your phone
Page 22
• C onsult your Organiser (see page 29)
• C on s ult your Call lis t (se e pag e 29 )
• Transmit DTMF tones to answering machines and other devices(see page 46).
Adjusting the earpiece volume
During a call:
• Move the Pilot Key up to increase the volume or down to decrease it.
Mute the microphone
You can mute the microphone so that your correspondent cannot hear you.
During a call:
• Press and select
Confirm by .
The mi cro phone is muted .
Mute
.
Unmute the microphone
If the microphone is muted.
• Press and move the Pilot Key until
Confirm .
The m ic ro phone is unm ut ed.
Unmute
is displayed.
Writing in the notepad
The notepad is a t e mporary memory in which you can note down a number during a call.
During a call:
• Press
• Move the Pilot Key up or down to selec t
then press .
• Enter the number that you want to note.
After a wh ile, wi thout an y k e y pr e ssed , y o ur entry i s s to r ed i n th e note pad m emory a nd
the phone returns to the call options screen. When the call ends, the number reappears; you can co m plete it, dial it, or store it in the Name s list .
On the contrary if yo u pr ess the Pilot Key just after having entered t he number yo u
will be able to :
. store this number in memory
. phone this number
. send a SMS to this number
notepad
,
L
NOTE:
You can als o just enter the number during the c all and it will re-appear when the c all ends.
Using your phone
19
Page 23
Consulting the Names list
During a call:
• Press .
• Move the Pilot Key to select
Pilot Key.
NAMES
•In the
Pilot Key.
• Press to return to the In-ca ll screen .
menu, scroll through the entries by moving the
Names
, then confirm by pressing the
Locking the keypad
You can lock the keypad to protect the keys from being pressed accidentally (for example,
when the phone is in your pocket).
In idle screen:
•In the
• In idle mode, with a long press on the key, y ou can also activate the keypad
L
1. The emergency number is available even when the keypad is locked (dial 112) and you can still receive c alls.
2. To switch the phone off, you must first unlock the keypad.
3. Immediate keypad lock can be assigned to a corres ponding Hotkey (see page 41).
Settings
Key to select immediate or delayed lock. When the keypad is locked
appears on the screen.
lock.
NOTES:
menu, select
Security, Keypad lock
. Move the Pilot
Unlocking the keypad
With the keypad locked:
• Move the Pilot Key upwards then downwards.
The keypad is unlocked.
• With a long press on the key, you can also deactivate the keypad lock.
L
NOTES:
1. It is possible to accept or reject a call even when the keypad is locked. The keypad is unlocked automatically
when the phone recei ves a call, and then re-locks again once the call is finished.
2. If you choo s e to unlock the keypa d with a delay, it will be permane ntly unlocked (after that delay). If you
choose the ’unlock now’ setting, it will be temporily unlocked until you finish the action.
20
Using your phone
Page 24
Activate/deactivate the silen t mode
If you do not want your phone to ring when you receive a call, activate the silent ringer.
If you receive a call whi le the s ilent m ode is activa ted, the symbo l flash es, th e green
LED flashes quickly, and the display shows
In idle screen:
Incoming call
, but the phone does not ring.
• Press , select the
move the Pilot Key to silent.
Press to conf irm.
The ringer is deactivated. To reacti vate the ringer, repeat the above s equence and select
the required volume.
L
NOTE
Silent mode can be assigned to a hotk ey (see page 41)
Settings
menu,
Sounds
Ringer volume
,
and
Activate/deactivate the vibrator
If you have the Vibra battery and if you have set the function, your phone vibrates when you
receive an incoming call.
In idle screen:
• Press , select
Vibrator
Move the Pilot Key to select
Using the Vibra battery doesn’t mute the ringer. If you want to mute it and keep only the
vibrator functi on active, set the quick setting
L
NOTES:
1. The Vibrator option is only available if a vibrating battery is installed (see batteries page 56).
2. The Vibra Setting is independent from the ringer. You can activate both at the same time.
.
Settings
On
. Sele ct
or
Sounds
and press to confirm.
Off
Silence
(confirm) then select
.
Reading you r GSM phone number
In idle screen:
• Press
•In the
Your phone number is displayed if it is pr e sent on your SI M card. If not, then e nter the
number, then p ress to save it .
L
NOTE:
If your own number has been st ored in the Names list , you can re ad it during a call. See “Consultin g the
Names list”. pa ge 20.
.
Names
menu, move the Pilot Key until you reach
Using your phone
Own Number
.
21
Page 25
Using the menus
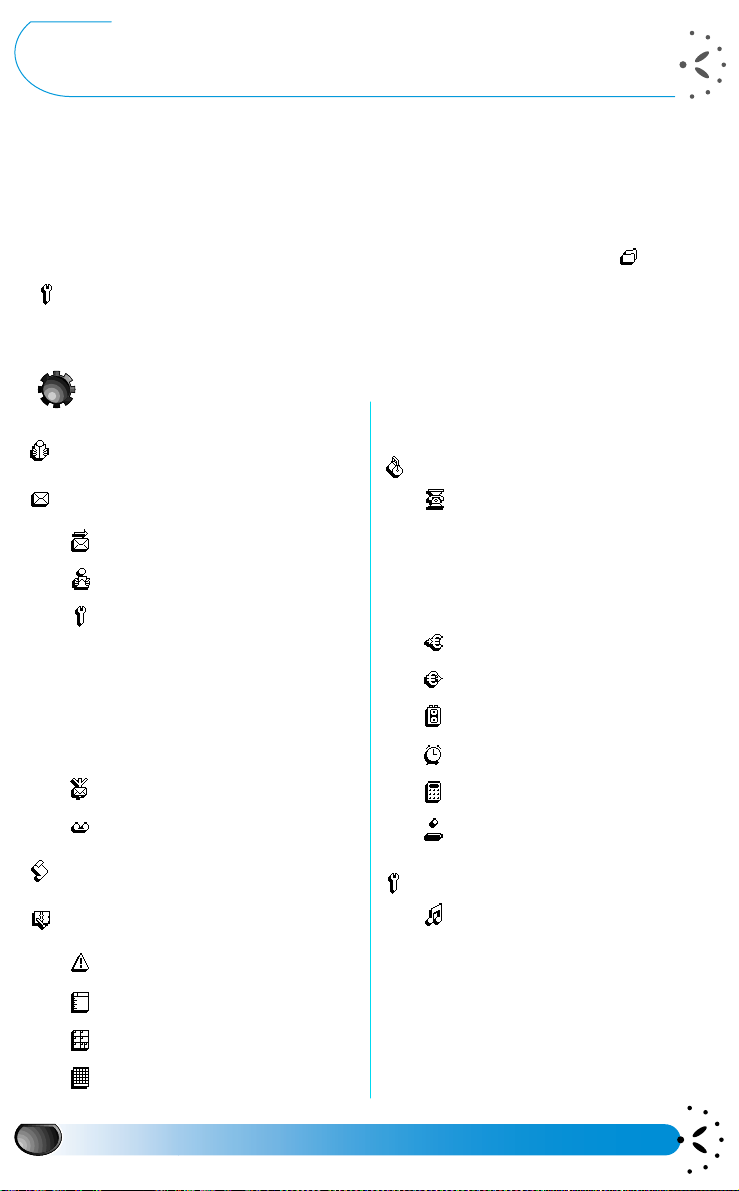
Easy to find and simple to use in either Advanced menu or Simple menu mode via the Pilot
Key, the menus contain all your GSM phone functions. All the menus have icons with
scrollable lists and are used in the same way. The messages displayed on the screen explain
what you have to do.
When turning on your phone the Simple navigation mode is proposed. To access the
Advanced mod e offering the maximum number of options, select and confirm
from the main menu.
Settings
Menu type
in the
Overview of menus
Name s 24
Messages 25
Send SMS 25
Read SMS 27
SMS settings 27
SMS centre
Signature
Validity period*
Reply path*
Delivery report*
Auto save SMS
Broadcast SMS 28
Mailbox No 28
Call list 29
Organiser 29
Events 29
Day view 30
Week view 30
Month view 30
Extras 31
Call counters 31
Last call information
Info at call end
Accumulated call timers
Accumu la ted cost
-> Euros 32
<- Euros 32
Voice memo 32
Alarm c lock 32
Calculator 32
Brick Game 33
Settings 34
Sounds 34
Ringer volume
Ringer
Key tones
Minute beep*
Organiser alerts
Battery l o w alert
New SMS tone
Vibrator
22
Using the menus
Page 26

Display 36
Zoom on/off
Backlight
Animation*
Contrast
Security 37
Keypad lock
Public names*
Call barring*
Change co des
PIN pr ot e ction
Time and date 39
Clock display
Set date
Set tim e
Language 39
Menu type 39
Simple me nu
Advanced menu
Accessories** 40
Car melodies
Speakers
Car kit command
Auto switch off
Auto ans w er
Hotkeys* 41
Network 42
Regis ter again
Preferred li s t
Call settings 42
Call forward
Autoredial*
Any key answer*
Call waiting*
Caller ID
Quick settings 45
Normal 45
Silent 45
Autonomy 45
Headset 45
Car 45
Outdoors 45
Meeting 45
Voice keys* 40
L
NOTES:
* In advanced mode only.
** When an accessory is plugged only.
Using the menus
23
Page 27
Names
Play voice
VOICE DIAL
The menu allows you to consult the list of your correspondents, add new names, write
Names
and send messages. The names are listed in alphabetical order. You can scroll through the list
using the Pilot Key or by ente ri ng th e fir st letter of the name. In the l ist you can choo se from
the following:
L
NOTE:
In idle mode, you can directly access the names list by moving the Pilot Key downwards .
<New>
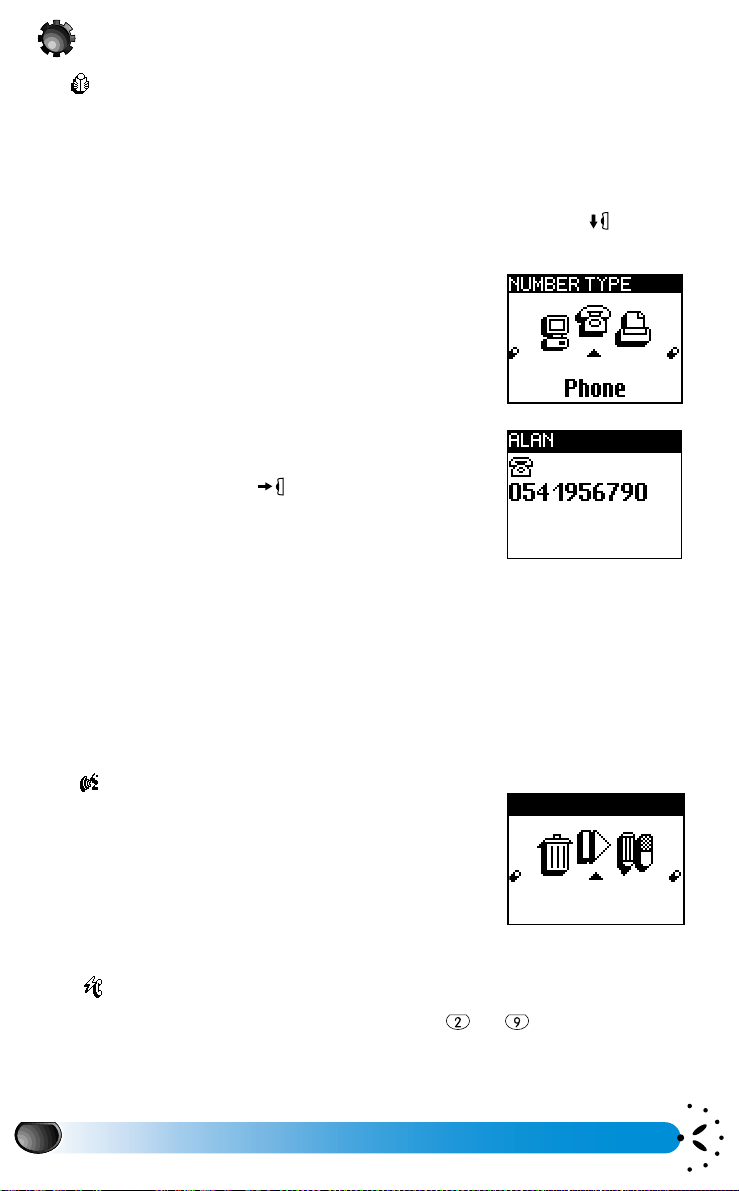
This menu allows you to enter the name and phone nu mbe r
of a new correspondent. In Advanced mode, you can select
the type of number allocated to the name:
.
data
phone, fax
Select a name
By selecting a name, you display the associated number. A
second press on the Pilot Key allows you to :
or
•call
• send message
• associate a voice dial
You can directly access the first letter of your correspondent’s name in the Names List by
pressing the righ t alphanu meric k e y. For example, if you want to access t he letter ’U’, j ust pr ess
the key number ’8’ twice.
•flash dial
• delete
•modify
Send SMS
See page 25 a nd 26 to: Send now, Add icon and Save.
Voice Dial
The allows you to autom ati call y dial the num be r of
Voice Dial
your correspondent by saying the associated tag (see page
18).
You can either associate a new voice tag to a number in the
Names list or manage the existing voice tags through the
following optio n s: de lete, play voice and chan ge.
Fla s h di a l
The menu provides you with direct access to the phone numbers that you use most
Flash dial
frequently. This is done by linking them to the keys from to .
24
Using the menus
Page 28
Delete
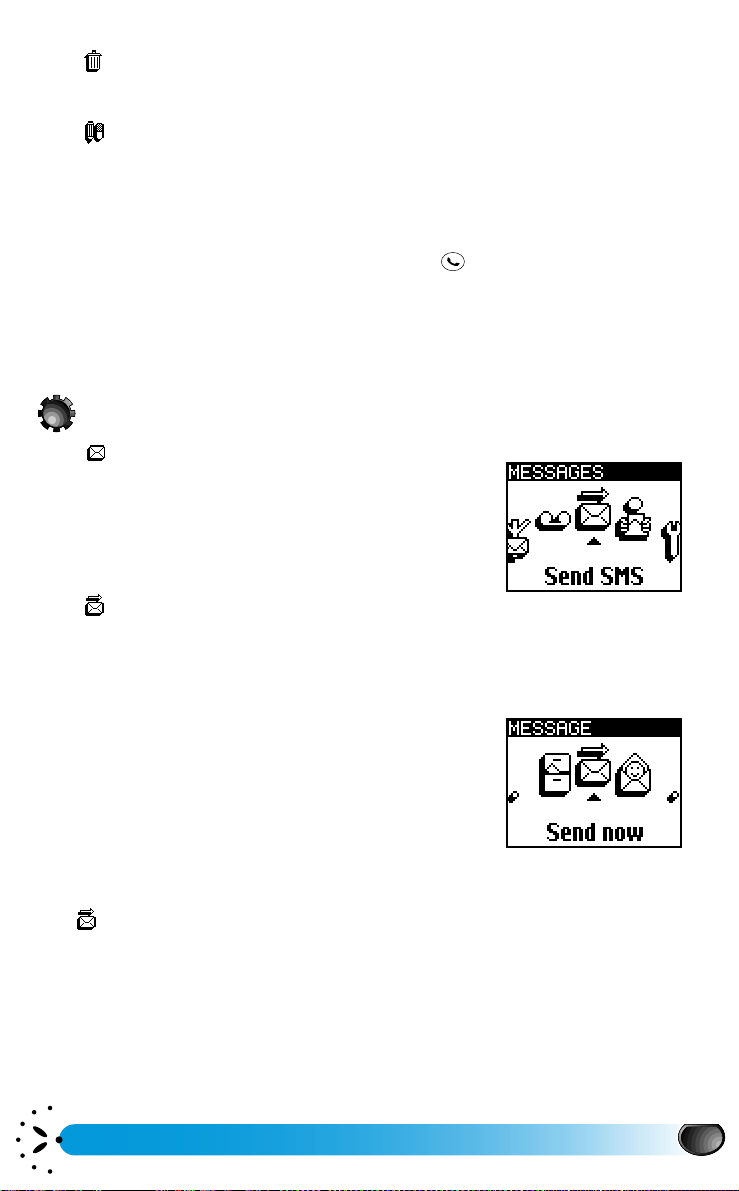
The menu allows you to delete the number and selected name.
Delete
Change
The menu allows you to modify the selected name, number and determine whether
Change
it is a fax, phone or data transmission number.
Emergency
The selection displays the emergency call number. Press to dial.
Own number
Selecting Own No. 1, Own No. 2, Own No. 3 display your own phone numbers. If your SIM
card does not contain your phone numbers, an editing screen allows you to store them.
Messages
The menu allows you to manage the messages in
Messa ges
your voice mailb ox, messages to b e sent, messages to be
read, your message settings and broadcast messages.
Send SMS
The allows you to:
Send SM S
- send it to a corresp o ndent in your Names list ,
- write a new message or select a standard one.
The Standard SMS messages are displayed one after another:
•
Please call me back at
to compose automatically a message including your own
number.
Once your t ext is wri tte n, y ou c an l ink a n emo tion ic on t o it,
send the message and save it.
for example allows you
Send now
The option allows you to send the current message.
Send now
Using the menus
25
Page 29
Add icon
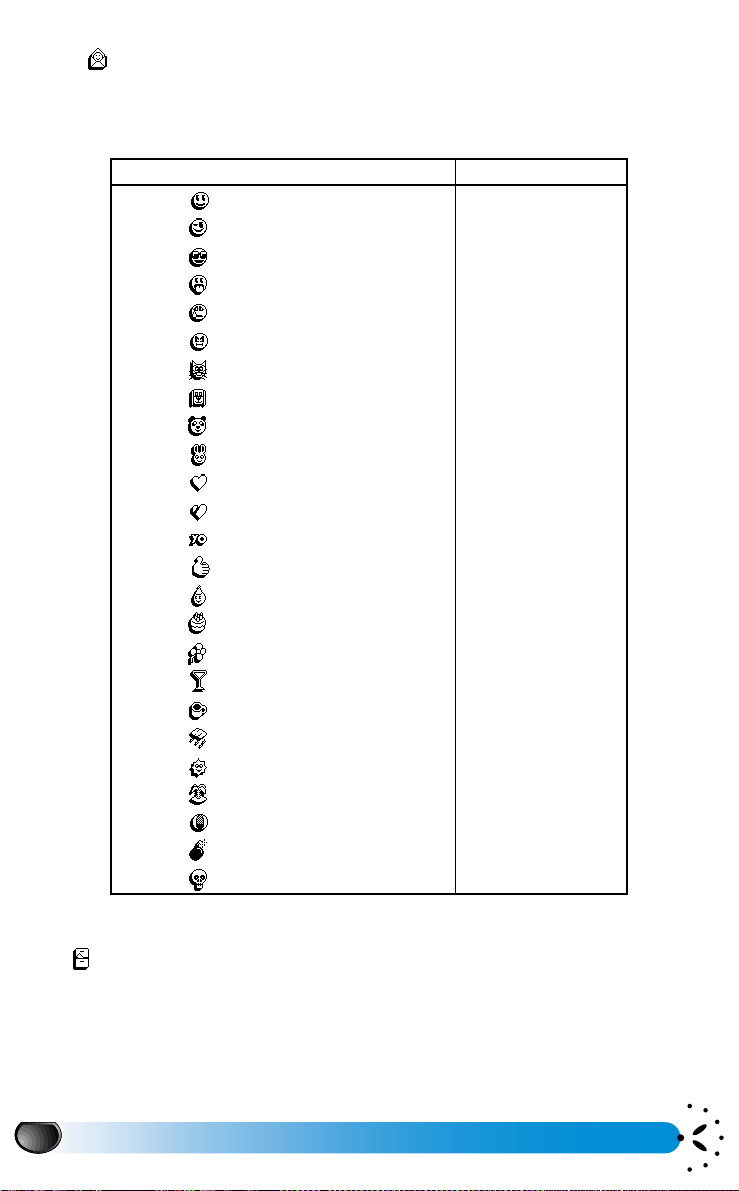
The option allows you to send an emotion icon together with your message. To see
Add icon
the image, th e receiver needs a GSM mobile ph one which suppor ts emotion icons (P hilips
Savvy f or examp le). Otherwi se the equ ivalent c ode will b e displa y ed at the en d of the r eceiv er’s
message.
Image Code sent
Smile :-)
Wink ;-)
Cool B-)
Tongue :-P
Sad :-(
Angry :-/
Meow! :<*
Woof! :>#
Teddy 8<)
Magic =:I
Heart (0)
Broken heart (X)
Yo! Yo!
Well done! ==b
Party o<I
Cake iii
Flower @>-
Drink >-I
Coffee ID
Cloudy ;:;
Sunny >o<
Holidays -Y-
Ball (I)
BOOM! >*<
Deadly %-I
Save
The option allows you to save the current message.
Save
26
Using the menus
Page 30
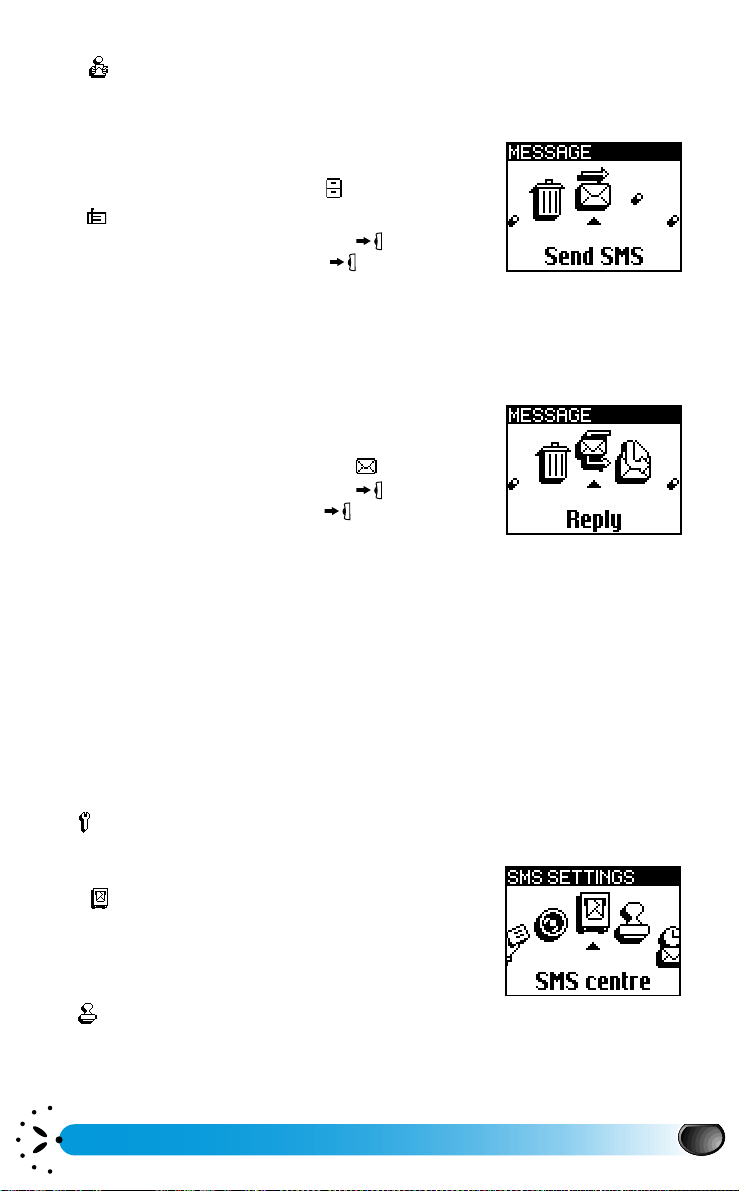
Read SMS
The m e nu allows y ou to consult the list of SMS you ha ve saved, and received.
Read S M S
Using different carousel s, y ou can also delete, reply, re-send or forward these messages.”
Saved Messages
The messages you sent are labelled with in normal mode
or with in auto save SMS mode (see page 28 ). Sel e ct the
message you want and press the Pilot key to read it.
When displayed, press the Pilot key to acess the
follo w ing options:
Send SMS
Allows you to modify the content and the addressee of the message, add or change the icon,
send it and save it (see also above to: Send now, Add icon and Save).
Delete
Allows you to delete the selected message.
Received Messages selection
The messages you receiv ed are labelled with . Select the
message you want and press the Pilot key to read it.
When displayed, press the Pilot key to access the
follo w ing options:
Reply
Allows you to r eply to the sender. Y o u can either write a new message or select a stan dard one.
Once the message is defined, you can link it with an emotion icon, send it and save it.
Forward to
Allows you to forward the selected message. You can either choose t he adressee in the Names
list or enter his phone number manually.
Delete
Allows you to delete the selected message.
SMS settings
The menu allo ws you to cus to m ise you r SMS via the follo wi ng o ptio ns :
Settings
SMS centre
The option allows you to select your default SMS
SMS centre
centre. If no t availab le on your S IM ca r d, you can e nt er you r
SMS centre number.
Signature
The option allows you to send a signature together with your SMS. This signature
Signature
consists of a series of characters showing your default account number and name. This forms
a signature that is transmitted at the end of your message. The length of the message is
consequ e ntly reduced. You can edit this si g nature, modi fy it and save it.
Using the menus
27
Page 31

Validity period
The opt ion allows you to select the length of time y our me ssage is to be stored in
Validity period
your SMS c e ntre. This is us e ful when your corresp ond e nt is not connected to the network.
Reply path
You can activ ate or deactiv ate the option (in Adva nced menu mode only). Thi s
option transmits your SMS message centre number with the message. Your correspondent can
then reply using your own SMS centre and not his. This speeds up the rate of tran smission.
Reply path
Delivery report
You can activ ate or d eac tiv ate the
that your SMS was recei ved or not (Advanced menu mode onl y).
Deliv ery report
option which informs you via a written m essage
Auto save SMS
The option activates or deactivates the automatic saving of messages sent.
Auto s a ve SMS
Broadcast SMS
The menu allows you to activate or deactivate the reception of SMS broadcast by
Broadcast SMS
the network to all subscribers.
Cell Broadcast is a service which, when activated, causes the mobile to listen to messages
which are regularly transmitted to all subscribers on the network.
The me nu allows you to ac tivate o r deactiv ate the re ception of cell broadcast
Reception
messages.
The menu allows you to define the type of messages you want to receive.
To define a new type, select
If you select an existing type in the list, you can change or delete it.
It is possible to enter up to 15 different types in the list.
The menu allows you to select a type from the Topics list, which you would like to
be permanently displayed in the idle screen. As a result, for this special handling of the message,
you must enter the type in both the menu and the menu. The
corresponding type will then be recognised in the Topics list with a .
Topics
District Code
<New>
, enter the code, and, if desired, associate a name.
District Code Topics
Mailbox No
The menu allows you to enter your voice mailbox number if not available on your
Mailb ox no.
SIM card.
28
Using the menus
Page 32
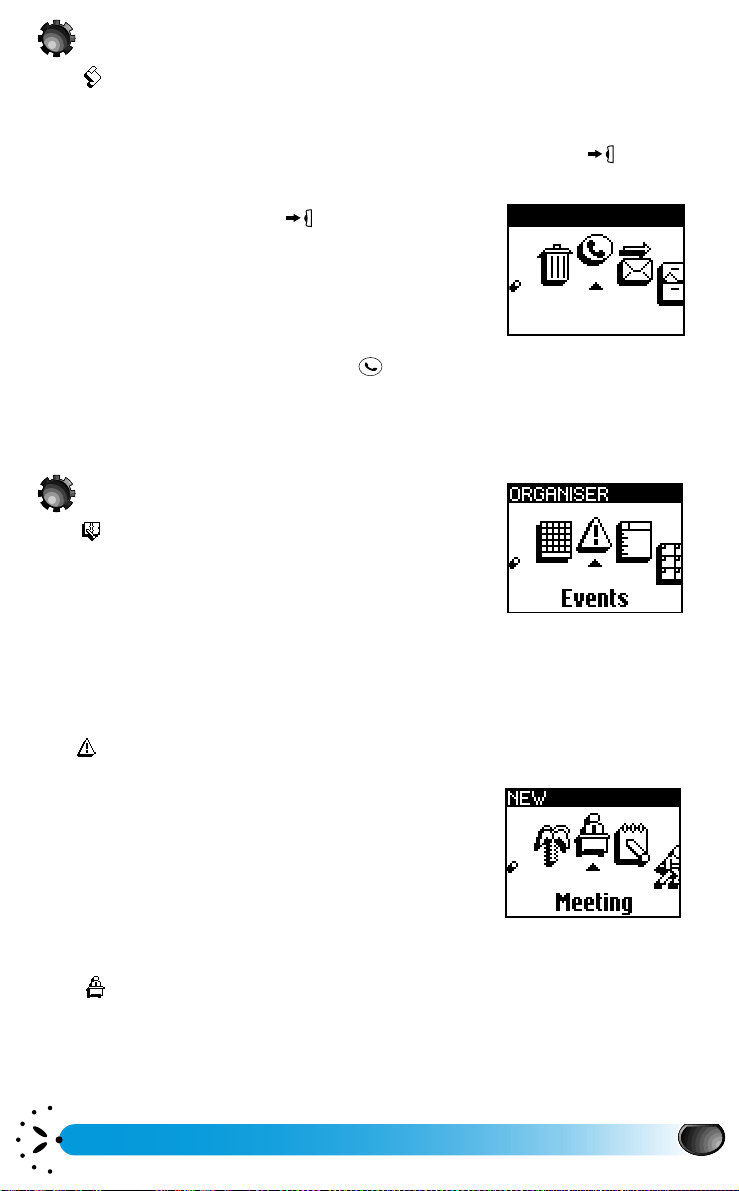
Call list
Call
CALL L IST
The menu provide s you with the lis t of calls you have received and given, as well as
Call list
attempts at auto redial and details of voice messages. The calls are displayed in chronological
order with the most recent first. When the Call List is empty the screen displays
. Otherwis e for any s elect ed call you can, b y pressing t he P ilot Key , co nsult t he
empty
date, time, number, call status and whether it was sent or received.
A seco nd press on the P ilot Key gives access to this
following carouse l which allows to s end a SMS, delete the
selected call, phone this number or store this number by
entering the associated name (if not present in your
phonebook).
Select a record in the Call list and press the to dial the co rresponding number.
L
NOTE:
Y ou can directly access to the Call list by moving the Pilot Key upwards.
List
Organiser
The menu allows you to manage up to 40 ev e nts.
Organiser
Those events appear in the lists in a chronological order,
using start times and dates, with the most recent one on top .
When memory is full the message “Memory full” appears.
Before being able to add a new event y ou have to delet e events in past day view, week view or
month view
Events
The menu is a list which enables you to consult, modify and add new events.
Events
Add a New event
This provides access to four different types of events:
Meeting, To Do, Quick Settings, Holidays. Select one to
create a new event.
Meeting
The menu allows you to enter a date , a start an d end t ime , the mai n details, and an
Meeting
alert. The event may be repeated (in Advanced mode only).
Using the menus
29
Page 33
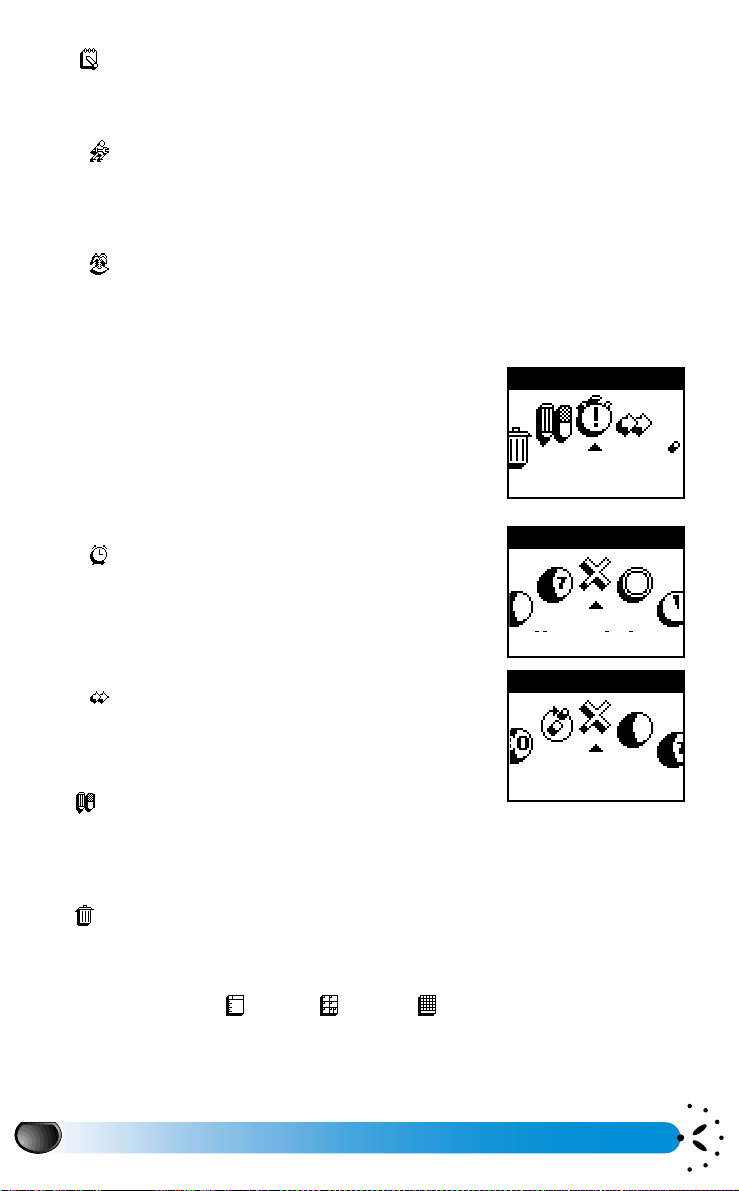
To Do
Set r eminder
MEETING
No reminder
SET REMINDER
No repeat
REPEAT EVENT
The menu allows you to enter a date, a time, general details, and an alert. The event
To do
may be repea ted (in Adva nced mode only).
Quick Settin gs
The menu allows you to program the activation of a specific Quick Setting. Select a
Quick Se ttings
date and time, and the Quick Setting to be activated (see page 45). The ev ent ma y be r epeated
(in Advanced mode only).
Holiday
The menu a ll ow s you to en te r event s rel a tin g to your H ol i days, w ith start and en d
Holiday
dates. The event may be repeated (in Advanced mode only).
Selec t an event
By selec ting a n ev ent, y ou c an be r eminde d of the detail s of an
event existin g in the list . You m ay chan ge its details , set a
reminder, repeat it at a selected frequency. You can also
delete it.
Set reminder
The menu reminds you of events via alerts
Set reminder
triggered at times you have chosen in the carousel (in
Advanced mode). Only for Meeting and To Do events.
Repeat events
The menu allows you to repeat events at a
Repeat events
frequency you hav e chosen in the carousel.
Change
The menu allow s yo u to modify dates, time s a n d th e
Chang e
type of event.
In advanced mode you can also modify the reminder and repeat option.
Delete
The menu allows you to delete the event.
Delete
Day view, Week view and Month view
In each organiser view , , moving the Pilot K ey upwards or
downwards allows you to display the next or the previous day, week and month.
Once you have selected the day, the week or the month, press the Pilot Key to display the list
of corre sponding events.
Day view Week view Month view
30
Using the menus
Page 34
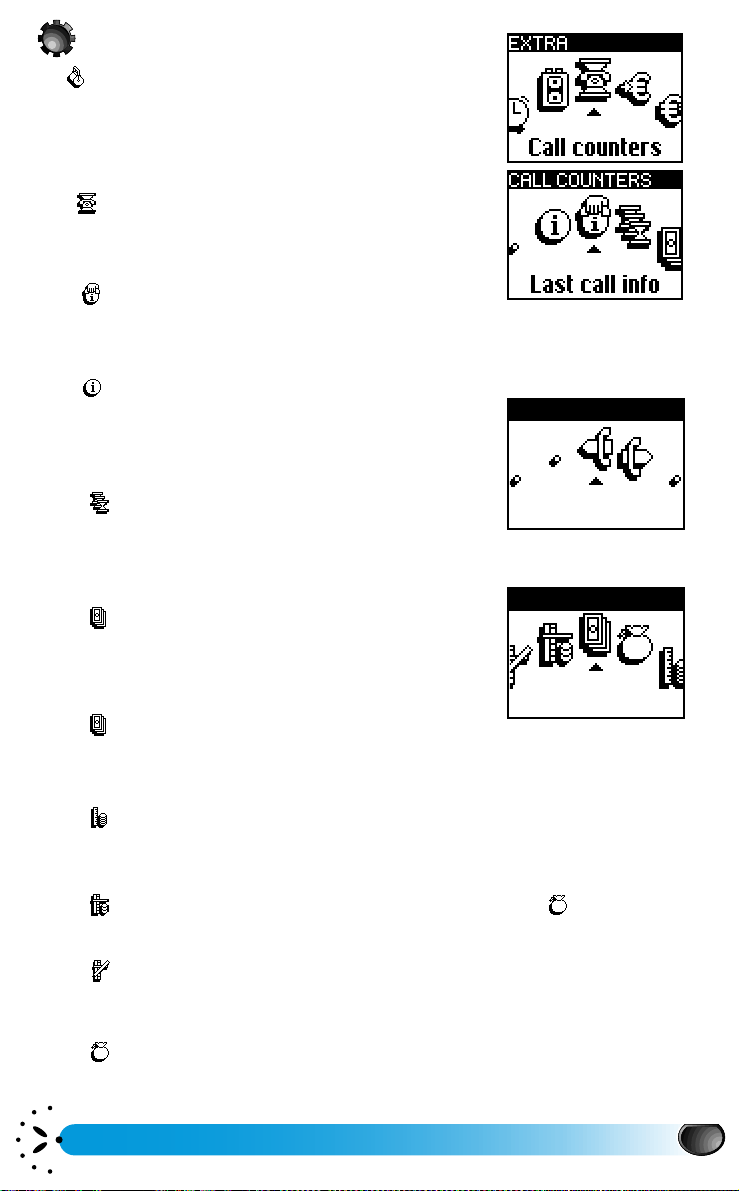
Extras
Outgoing
ACCUM.CALL TIMER
Show
ACCUM. COST
The menu enables you to manage the Call counters,
Extras
Euro converter, Vo ice memo, Alarm clock, Calculator and
game.
Call counters
The menu allows you to handle the cost and
Call counters
durati on of your ca lls.
Last call information
The menu allows you to display the duration and/or
Last call in fo
cost (depe nding on your subscripti on) of your last calls.
Info at call end
The me nu e na b le s you to activate or dea c tivate the
Info at c all en d
systematic display of the length and/or cost of each call
(depending on your subscription).
Accumulated call timers
The menu allows you to check the duration of
Accu m. ca ll \ timers
both incoming an d outgoing ca ll s a n d to set the c ou nters to
zero.
Accumulated cost
The menu allows you t o d ispl ay the ac cumu lat ed
Accum . cost
cost and to set th e co unt er t o zero. It may be prot ect ed by
PIN or PIN2 codes (depending on your subscription).
Show
The menu shows you how much has been spent
Show
after having established the charge rate.
Charge rate
The menu all ows you to set or cha ng e the ra te pe r u nit . F irst ent er the cur rency
Charge rate
used (three characters maximum) then enter the cost per unit.
Cost limit
The menu allows you to enter the cost limit used in the menu.
Cost limit Show balance
Cancel cost limit
The menu a llo ws you to can ce l th e co st lim it . It m ay be prote ct ed by PIN or PIN2
Can c el cost limit
codes (depending on your subscription).
Show balance
The menu allows you to check the remai ning credit (compared with y our previousl y
Show balance
set limit).
Using the menus
31
Page 35
Reset
Play voice memo
VOICE MEMO
Every day
REPEAT EVENT
The men u allo ws y ou t o re set the cu rr en t acc umul ated cost to 0; r equi r es y our PIN2
Reset
code
−>
−>
−>−>
Euros
The menu enables you to convert a sum into Euros.
-> Euros
<−
<−
<−<−
Euros
The menu enables you to convert a sum from Euros.
<- Euros
L
NOTE:
The currency used for the conversion is determined by the country where you have subscribed.
Voice memo
The menu allows you to record a memo of 20
Voice memo
seconds maxim um. You can sto p t he r ecor d ing a t a ny t ime b y
pressing the Pilot key . Once your memo is recorded,
you can play it back or delete it.
Alarm clock
The menu allows you to activate, deactivate and set
Alarm clock
the alarm function of your phone.
: activates the alarm at a set ho ur on a set day.
Once
Every day
On weekday
: activates the alarm at a set hour every day of the week.
: activates the alarm at a set hour on weekdays only.
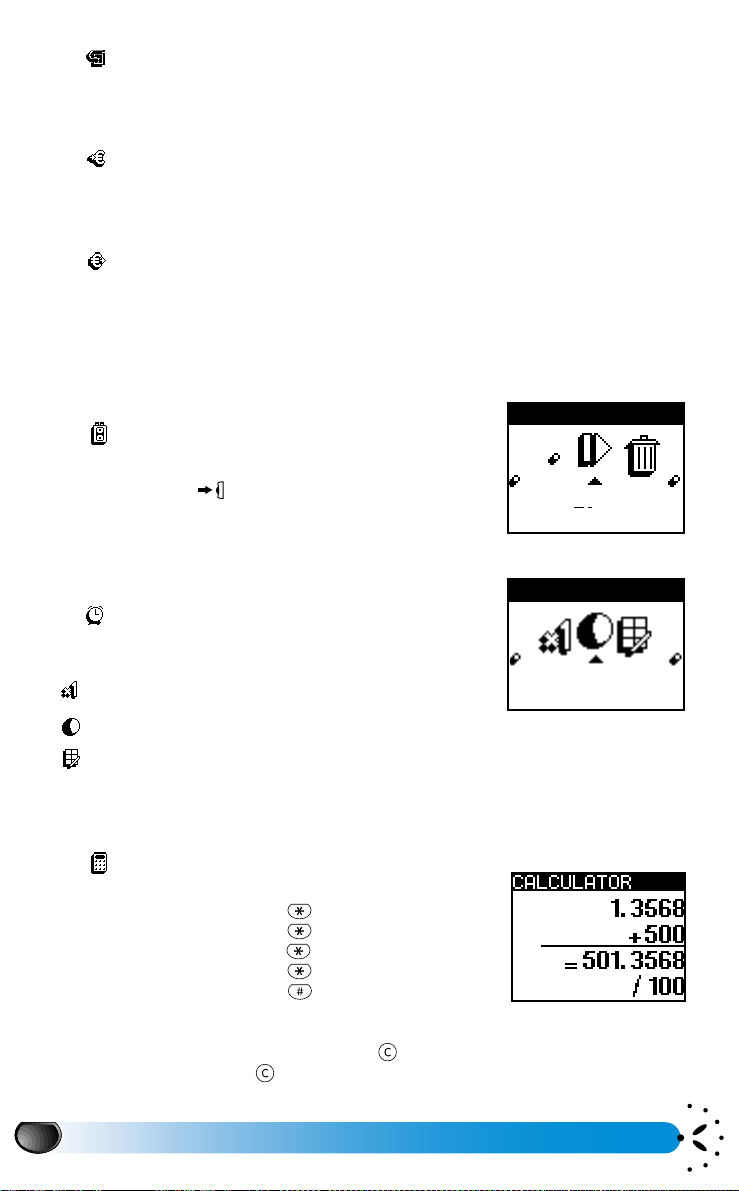
Calculat or
The menu provides the following functions:
Calculator
Addition by pressing the key
Substraction by pressing the key twic e
Multiplication by pressing the
Division by pressing the
Equals by pressing the key
The figures are entered using the keypad. Calculator accuracy is to 2 decimal places and is
rounded up to the higher decimal figure. Press to correct the numbers. Press and hold 0
to get the dot. Press and hold to re turn to the idle screen.
32
Using the menus
ke y three times
key fou r times
Page 36
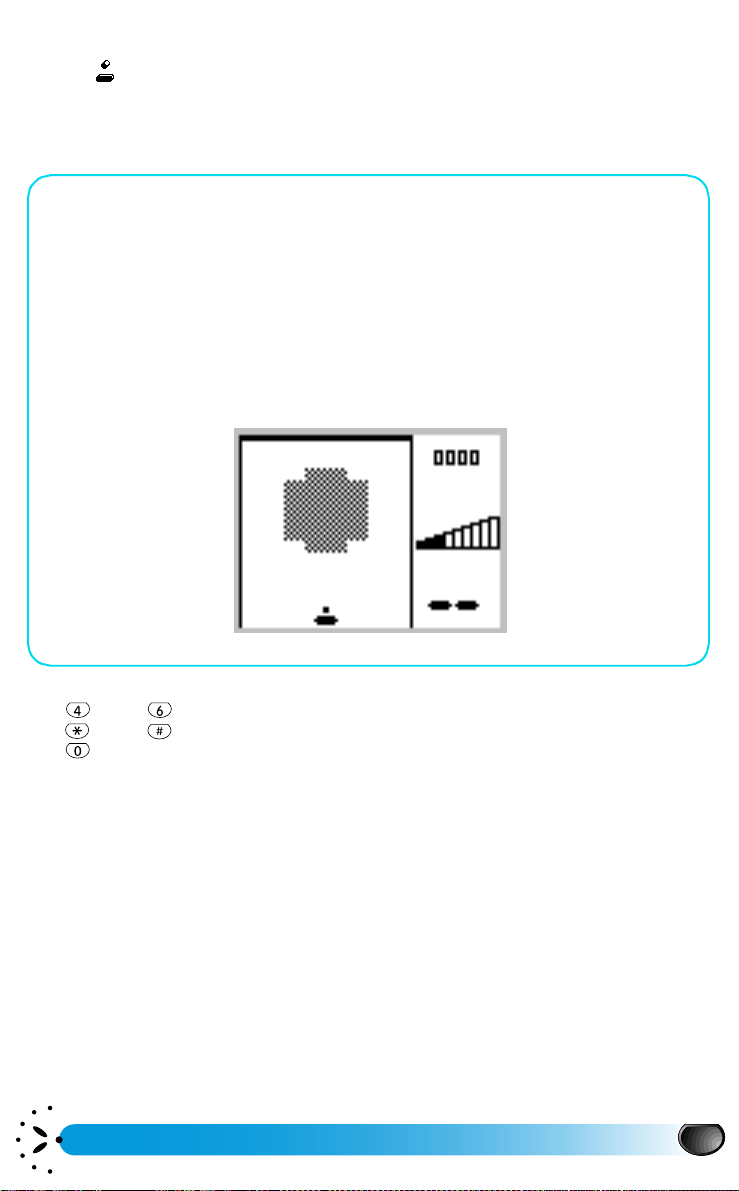
Brick Game
The con sists in brea ki n g a complete set of bri ck s w ith a ball an d a r a cket. When
Brick Game
you have broken all of them, you pl ay wi th a new set of bricks ( ne w level ).
Game principle :
• the ball is moving through the screen, rebounding on different elements. When it hits a
brick, the brick disappears and your performance increases.
• the racket moves horizontally at the bottom of the screen. When the ball reaches the
bottom of the screen, you must hit it.
• into the second level, some special bricks need to be hit twice to be broken (the black
ones), and some other are indestructible (the empty ones).
• if the ball hits the floor, you lose a credit.
• when you have lost all your credits, the 3 best scores and the corresponding players'
names are displa y ed on the screen. I f yo ur scor e is great er than the l ast one ran ked, y our
are asked to enter your name.
• You score extra credit every three level.
Keys used :
and to go left and right
and to throw the ball left and right
to do a break
Using the menus
33
Page 37
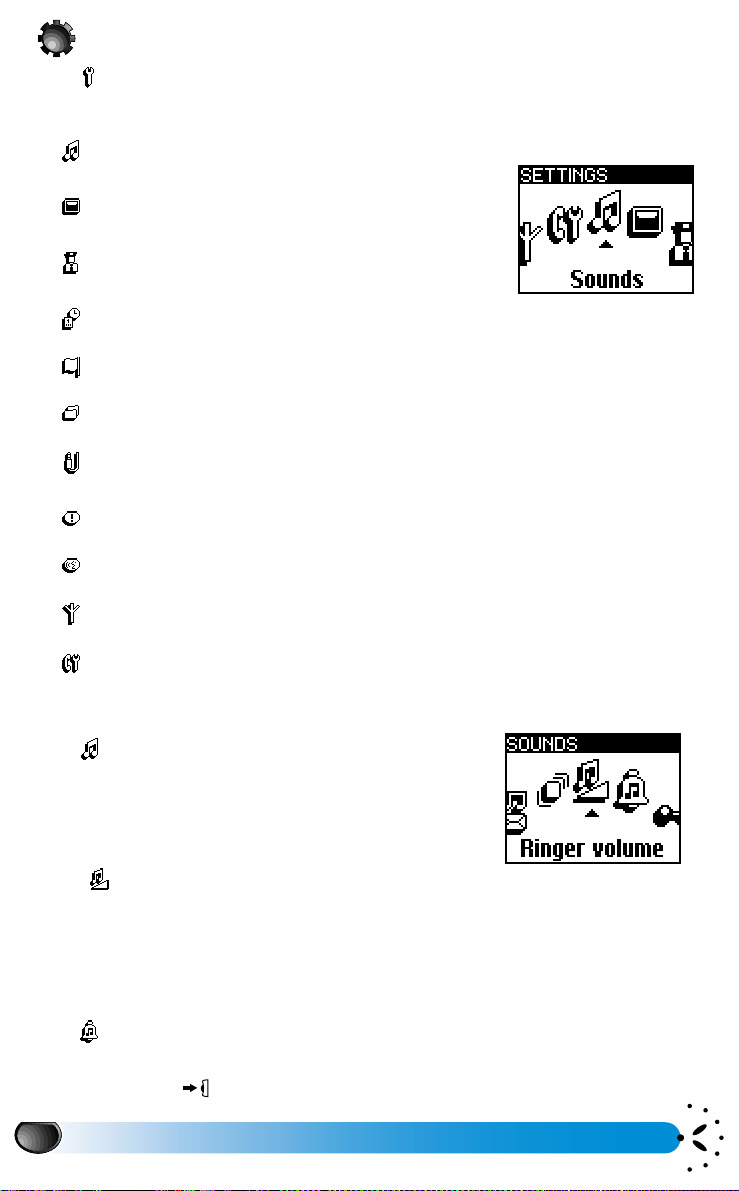
Settings
The menu allo ws y ou to customise your phone.
Settings
To select the different ringer melodies and alert
Sounds
Display
Security
beeps.
To s et th e disp lay para meter s: co ntra st, an imat ion,
backlighting and zoom
To manage security: PIN codes, keypad lock,
restrictions, etc.
Time and date
Language
Menu type
Acce ssories
To set the time and date, change the clock display mode.
To set the language used by your phone.
To select the Navigation mode: Simple or Advanced.
To set the parameters when you use your phone with hands fr e e car kit or with a
headset .
To program direct access to a function via a single key press.
Hotkeys
Voice keys
Call settings
To set a direct access to several functions by saying the associated Word.
To handle the connection between the phone and the network.
Network
To set the call options (Call Forward, call Waiting, Caller Identifier, ...).
Sounds
The menu allows you to select the different ringer
Sounds
melodies and alert.
Ringer volume
The option allows you to set the volume of your ringer: it may be Increasing, High,
Ringer volum e
Medium, Low or Silent. You can use a Hotkey to activate the silent mode (see page 21). By
default the ri nge r volume is set to ’Me diu m ’.
Ringer
The option enables you to select the ringer type from among 19 melodies. Scroll
Ringer
thro ugh the l ist and wait f ot tw o second s to hea r the hi ghligh te d mel ody played . Confi rm y ou r
choice of melody by This menu also enables you to create the 20
34
Using the menus
th
melody.
Page 38
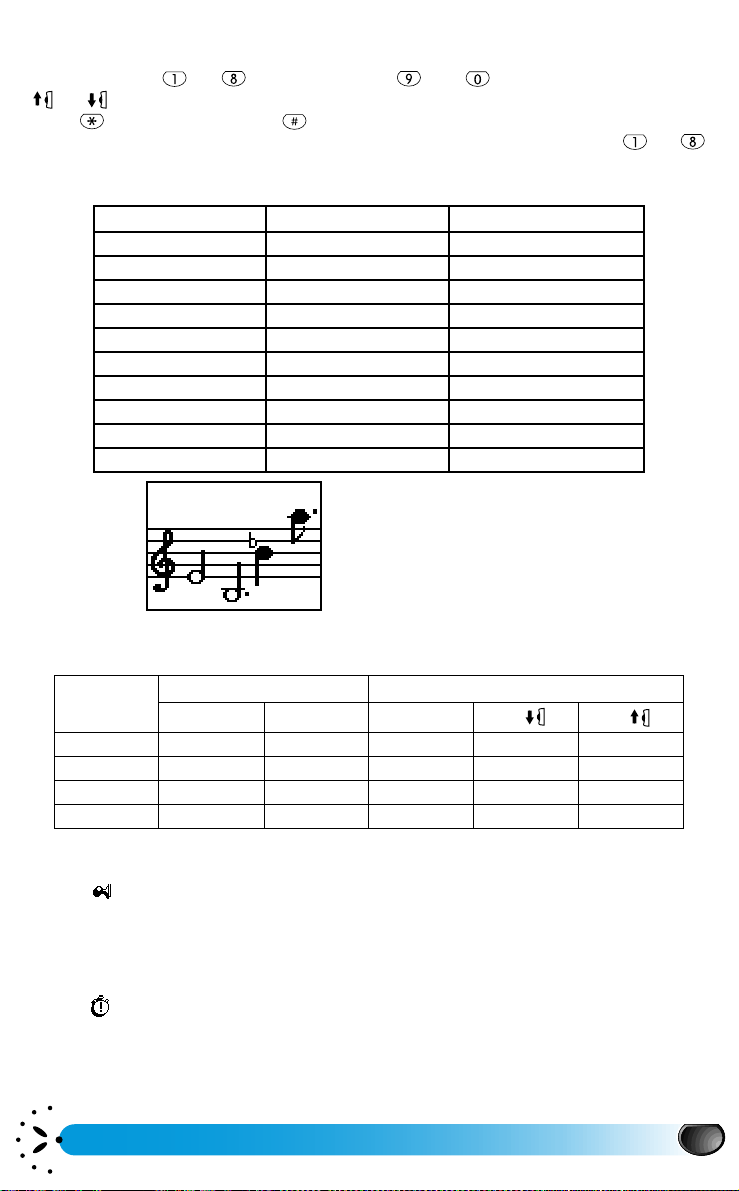
Creating a 20th melody:
Own melody
This opti on al lows yo u to c ompose a m elody wit h up to 66 notes . You select the r equir ed no tes
on the keys from to and the rests with and . The default note is B. With
or you can change the notes up or down in semitones. You can change notes to flats
by the key or to sharps by the key. Each time you press another key than a digital one,
you will hear t he note and the corr esponding effect. Press other di gital keys from to
to obtain new notes with the following values:
TYPES LENGTH/SHARP KEYS
Semi quaver 1/4 1
Quaver 1/2 2
Dotted quaver 3/4 3
Sharp 1 4
Dotted sha rp 3/2 5
Minim 2 6
Dotted minim 3 7
Whole note 4 8
Quaver rest ½ 9
Crotchet rest 1 0
Example
How to obtain such a melody
NOTES LENGTHS HEIGHTS
TYPE KEY VALUE
1st note Mini m 6 E 4
nd
note Dotted minim 7 B 3
2
rd
note Sharp 4 B-flat 7 and *
3
th
note Dotted quaver 3 B-sharp 6
4
X
Y
Key tones
This menu allows you to activate or deactivate the key tones. If you press an
Key tones
unvalid key the phone emits an error beep.
Even if Key Tones are set Off, DTMF are "played" during calls.
Minute beep
The menu allows you to activate or deactivate a beep every minute during a call. It
Minute beep
is only available in Advanced menu mode (the beep cannot be heard by your correspondent).
Each beep is emitted 15 s before the end of each minute of communication. This allows you to
manage as efficiently as possible the duration of your calls.
Using the menus
35
Page 39
Organi se r ale rts
The menu allows you to activate or deactivate an alert when an event is due.
Organiser alert
Battery low alert
The menu a ll ow s you to ac tivate or deacti va te a n alert which info r m s you th a t the
Battery low a le rt
battery is low and requires recharging.
New SMS tone
The menu allo w s you to activate or dea ctivate a n alert tone each time yo u receive
New SM S tone
a SMS.
Vibrator
The function allows you to activate or deactivate the vibrating alert when receiving a
Vibrator
call*.
L
NOTE
*If you use a Vibra battery.
Display
The menu allows you to set the zoom, the backlight, the contrast and screen
Display
animation (only in Advanced mode).
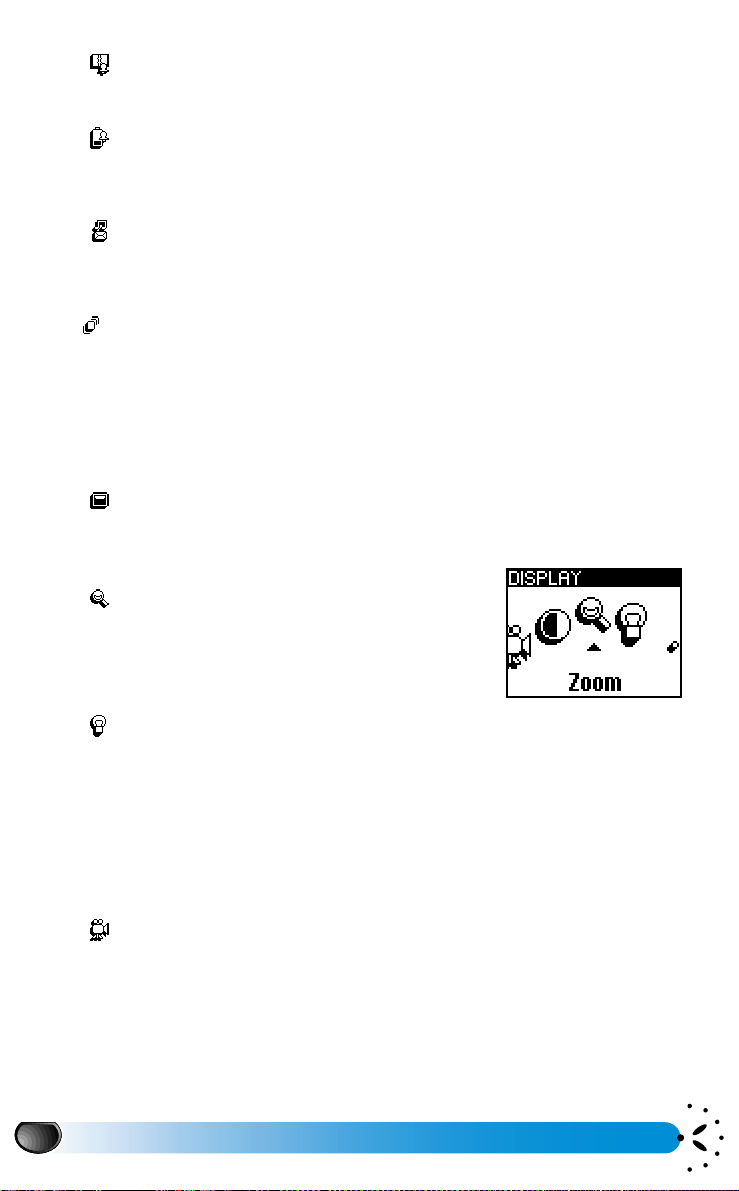
Zoom on/off
The menu allows you to activate or deactivate the
zoom function. It enlarges the size of text used in the menus.
Zoom
Backlight
The menu allows you to selec t th e backlight duration:
Blacklight
- no backlight
- 10 seconds backlight
- 30 seconds backlight
- 1 minute backlight
The backlig h t will be a cti va ted when receiving incomi n g cal ls, m essages, etc.
Animat io n
The menu allows you to activate or deactivate the animation in different menus
Animation
(only in Advanced menu). Deactivating this function increases the autonomy of your phone.
36
Using the menus
Page 40
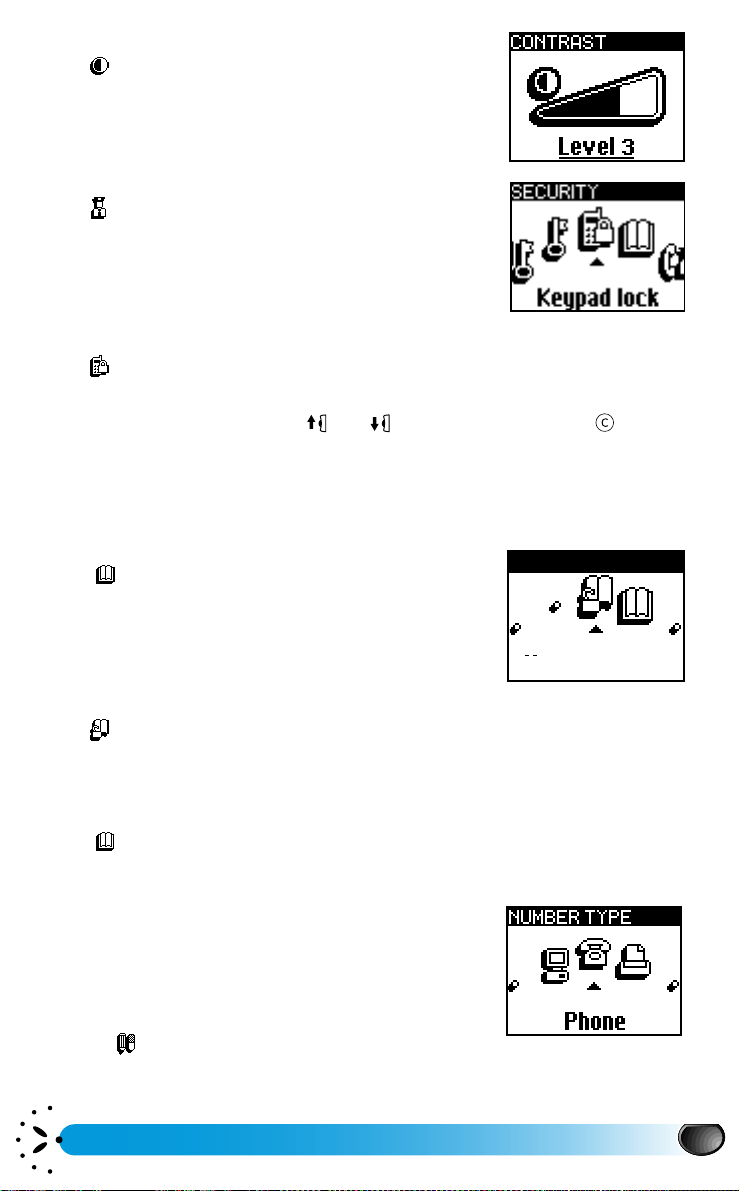
Contrast
Call restriction
PUBLIC NAMES
The menu allows you to choose among 5 levels of
Contrast
contrast.
Security
The menu ensures the security of your phone by
Security
locking the keypad, limiting calls to public numbers,
prohibiting specific incoming and outgoing calls, activating
security via PIN codes and changing those PIN codes.
Keypad lock
The menu allows you to activate or deactivate the keypad lock. The keypad
Keypad lock
automatically unlocks when you recei ve a call. W h e n your keypad is lo cked, you can u n loc k it
by movi ng up a nd d ow n the Pilot key and or via a long pres s on the #key.
L
NOTE:
You can still place an emergency call by dialling ’112’.
Public names
The
Public names
your subscriber card. It allows you to restrict calls to
numbers that you have previously defined in your Public
Names li st. This fu nction m ay depend on your subscr iption
(in Advanced mode only).
menu allows you to lend your phone with
Call restriction
The menu a llows you to activate or deactiva te the call re striction t o the Publ ic
Call restriction
Names list. In both cases you must enter your PIN2 code.
Public names
The menu allows you to consult your Public Names list. You can also enter a new
Public names
name, m odi fy o r de lete a na me in the list via P IN2 co d e.
•<New>
This menu allows you to enter the name and phone
number of a new correspondent. In Advanced mode, you
can select the type of number allocated to the name:
phone, fax
Change
The menu allows you to modify the selected name, number and determine
whether it is a fax, phone or data transmission number.
Change
or
data
.
Using the menus
37
Page 41
Delete
International
When Roaming
Fax calls
The menu allows you to delete the number and selected name.
Delete
Call barring
The menu allows you to limit the use of your phone to specific calls. This function
Call barring
is network depende nt and requir e s a call ba rring password supplied by your service provider.
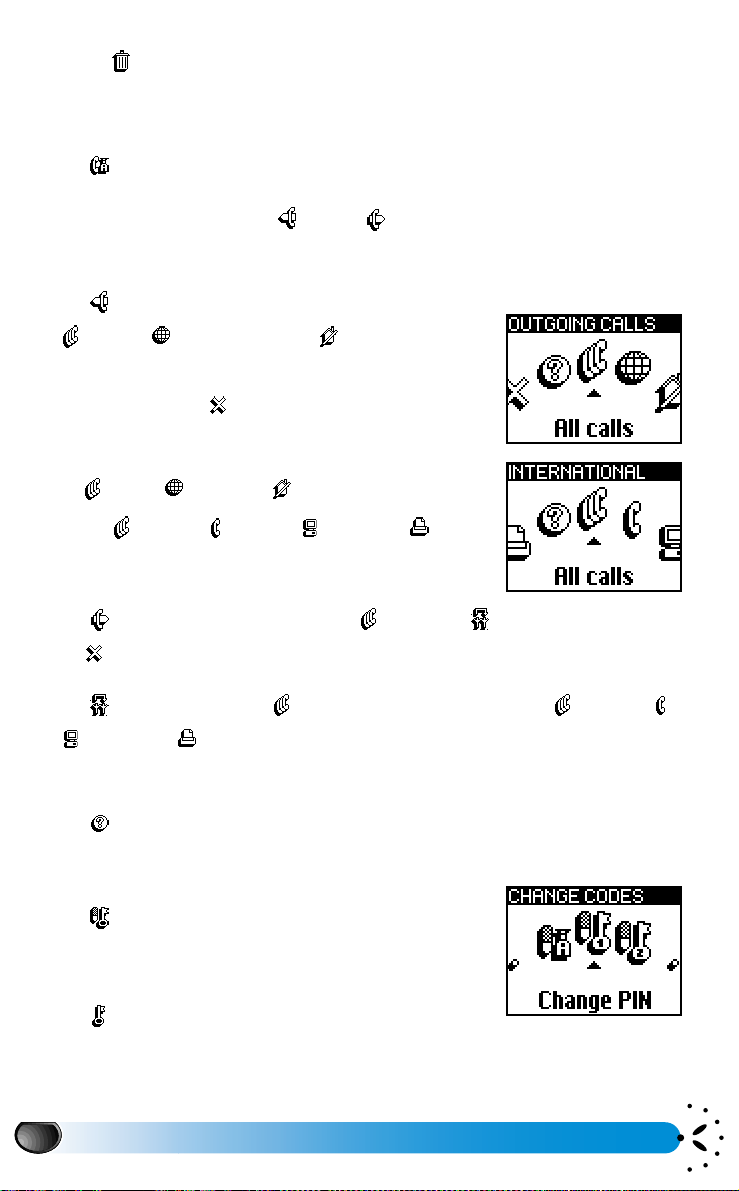
This carousel allows you to bar and c a lls.
Outgoi ng
The menu allows you to select between
Outgoing
, calls and (the latter
All calls International Inter. except/home
allowing you to call your home country when you are
abroad). You can also the bans on outgoing calls.
Deactivate
Outgoing Incoming
The
to bar , , or .
,
and menus enable you
All calls
All calls Voice calls
Inter. except/home
Data c alls
Fax calls
Incoming
The menu allows you to select or . It also provides access to
Incoming All calls
the menu that removes ban s on incoming call s.
Cancel
The menu and the menu, allow you to select , ,
When Roaming All calls All calls Voice c alls
Data c alls
and .
Status
The menu allows y ou to know whethe r a type of call is ba rred or not.
Status
Change codes
The menu allows you to change your PIN codes
Change codes
and call barring password.
PIN protection
The menu allows you to activate or deactivate the
Pin Protection
PIN protection when switching on your phone. This is carried out via the PIN code that puts
your ph one in service. If your PI N cod e is deactivate d, you cannot change it.
38
Using the menus
Page 42
Time and date
Clock display
TIME AND DATE
Analog ue
CLOC K DISPLAY
SET DATE
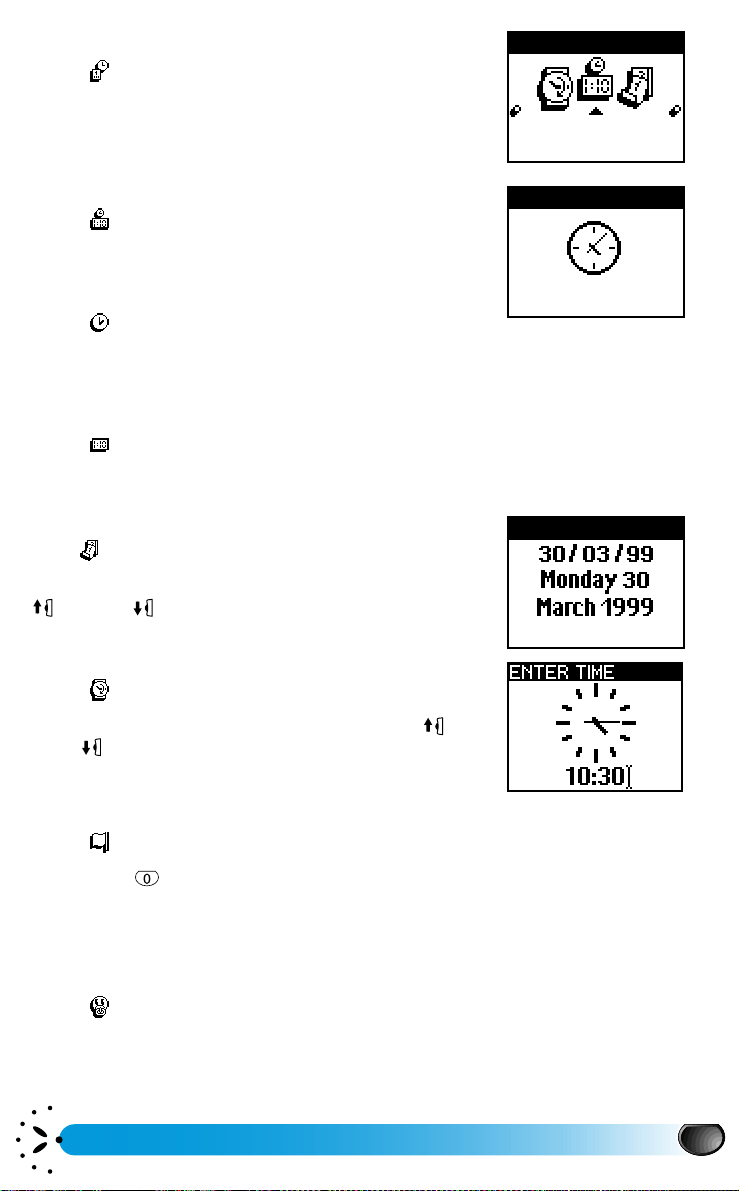
The menu allows you to set the time and date and
Time and date
choose the clock display format.
Clock display
The option allows you to select analogue or
Clock display
digital time formats.
Analogue
The option allo w s you t o di sp lay the t im e o n th e
Analogue
idle screen using a clock face. Depending on the activated services, the clock display may
automatically switch to the digital format.
Digital
The option allows you to display the time on the idle screen using a digital format.
Digital
Set date
The option allows you to set the date by pressing
Set date
the respect ive keys. You can al so se t th e date by m oving u p
or down the Pilot key.
Set time
The option allows you to set the time. You can
Set time
also set the time by k e yin g it in the k e ypad . Mo vi ng up or
down the Pilot key increases or decreases the time
minute by m i nu te.
Language
The menu allows you to select a language for the texts displayed in the menus. A
Language
long press on when in the idle scree n , provides you with a sho rtcut to this menu.
Menu type
This menu allows you to choose between the following navigation modes:
Simple menu
The mode p rovides you with a simplified acce ss to the basic functions of yo ur
Simple menu
phone. You can make and receive calls, make emergency calls, consult the Names list, swap to
Advanced mode etc.
Using the menus
39
Page 43

Advanced menu
The mode provi d e s you w ith access to all the feat ures of your phone .
Advanced m enu
Accessories
The menu becomes available the first time an
Acce ssories
accessory is plugged in (car kit). It allows you to set the
parameters linked to the accessories.
Car melodies
The optio n allow s you to sele c t th e inc o mi ng call
Car melodies
melody to be played by the car kit. 5 melodies are a v ailable : 4 melodies specific to the car kit
plus the one you hav e previo usly chosen f or your phone.
Speakers
The option allows you to listen to y our phone conv ersa tions, e ither throug h the ca r
Speakers
kit speaker or the radio speaker (if available).
Car kit command
The allows you to activate the voi ce dial via a voice tag. The phone pl ugged on th e
Car kit\com m and
car kit, use this menu t o prog ram the Voice keys by foll owing the on-sc reen ins tructions. Once
the Vo ice keys is defined, the car kit listens: as soon as you will pronounce the Voice keys the
car kit will emit a beep and activate the voice dial (see page 18).
Auto switch off
The allows you to automatically switch off the phone, either immediately,
Auto switch off
30 seconds, 5 minutes or 3 hours after turning the car ign ition off.
Auto answer
The option allows you to select the automatic answering of incoming calls. You can
Auto a nswer
set a delay for autom a t ic a n swering from 5 to 15 seconds.
L
NOTE:
This option is available with a car kit.
Voice keys
The allows you to set a direct access to sev eral functions by saying the assoc iated
Voice keys
word. Using your Hotkeys for the Quick settings, you can activate or deactivate the
correspondin g functi on. To program a Voice keys, select in the li st the fu nction to program,
then follow the on-screen instructions. Press and hold the Pilot key to use your Voice keys.
You can associate the Voice keys to the functions supported by the Hotkeys (see page 41).
40
Using the menus
Page 44
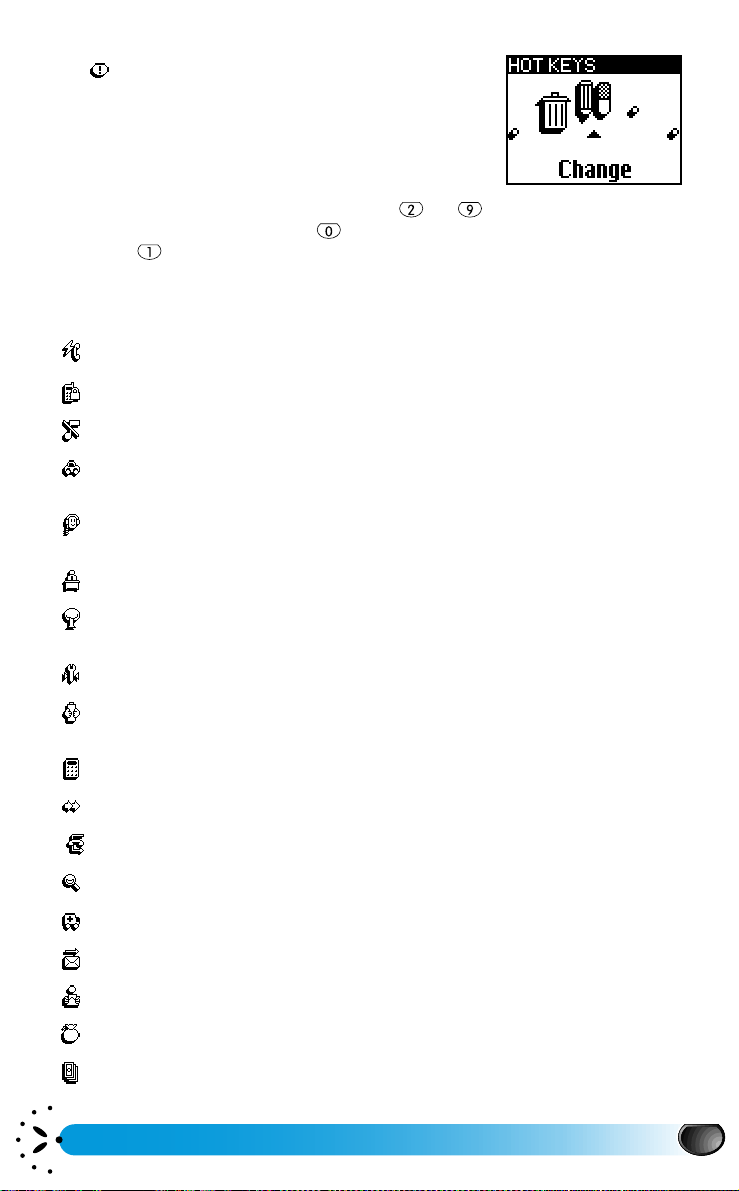
Hotkeys
The menu allows to set a direct access to several
Hotkeys
functio ns throu gh a simple l ong ke y pres s (in Advanced mod e
only).
To program a Hotkey, select a key in the list (from to ), then select a function from a
carousel displayed on the screen. The key is reserved for direct access to the language
menu and the key to call your voice mailbox.
You can reprogram each key.
You can associate the Hotkeys to the following functions:
Flash dial
Keypad lock
Activa te Silen c e
Activa te Ca r
Activate H e a dset
Meeting
Activate Outdoors
Activate Normal
Activate A u to nomy
Calculator
Redial last num.
Reply last n u m ber
Zoom on\off
SOS call
Quick dialling of a number stored in the Names list.
Immediate access to keypad lock.
Immediate access for the silent feature (vibrator on, ringer volume off, etc.).
Immediate access to the car quick setting (ringer v olume high, zoom on and any k ey
answer on).
Immediate access to the headset quick setting (ringer volume is set to medium and
any ke y answ er on).
Activates th e meet ing q ui ck sett in g (vi brat or on, ri nge r and all keys set to silen t) .
Immediate access to the outdoors quick setting. The ringer volume is high and
keypad loc k is on w i th 1 m i nu te d e l ay.
Immediate access to the normal quick setting.
Immediate access to the autonomy quick setting. This extends the usable time o f
the phone’s battery (an imati on off, Vi bra o n, back ligh t o ff, ring er vol um e medi um).
Direct acces s to the calculator.
Redials the last number dialled.
Redials the number of the last incoming call.
Immediate access to the zoom feature.
Dials the emergency call number.
Send SM S
Read SMS
Show balance
Accumulated\cost
Sends a message selected from the messages list.
Direct access to read the messages list.
Disp lays the remaining cre dit bal ance.
Displays the accumulated cost of outgoing calls.
Using the menus
41
Page 45
Add organiser event
Creates an event in the organiser menu.
Show events
Record voice memo
Play voice memo
Fwd to voice mail
Brick Game
L
Displays the ev ent list in the menu.
Records a voice memo.
Plays the voice back.
Forwards all calls to the voice mailbox.
Direct access to Brick game
NOTE:
Depending on your subscription provider some Hotkeys can be predefined and locked.
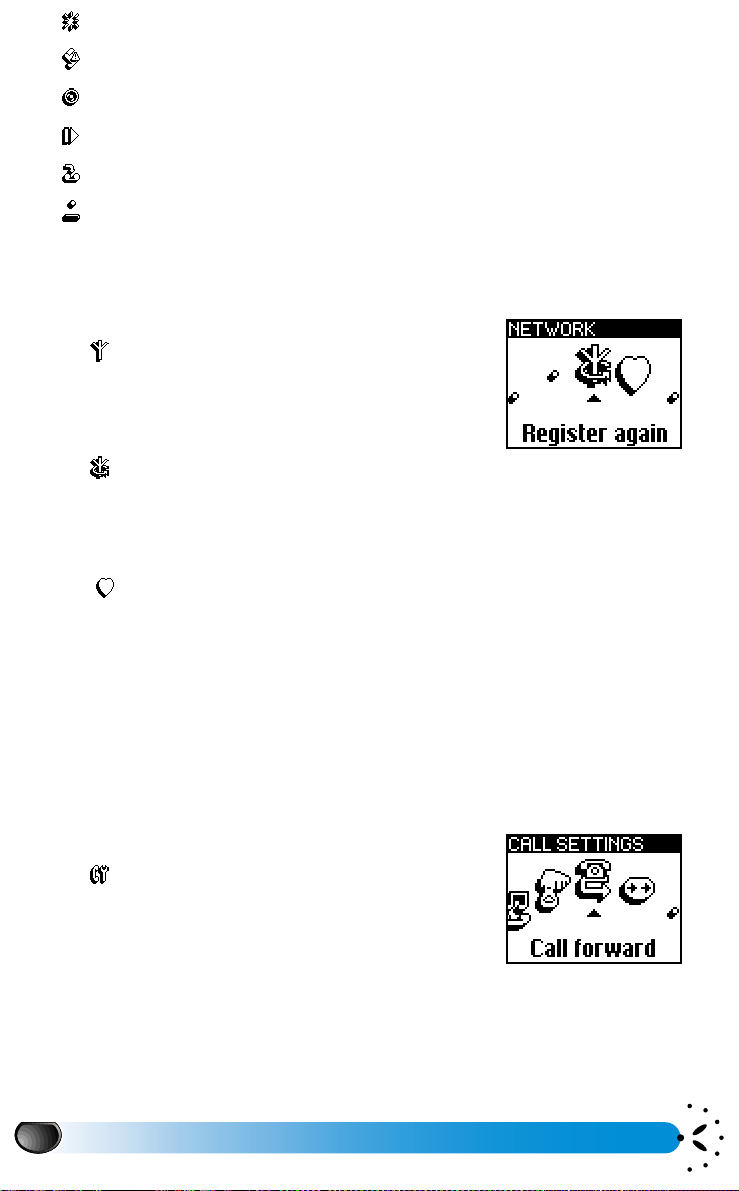
Network
The menu allows manual registering of available
Network
networks and the management of your preferred networks.
Register again
The menu provides you with a list of the networks available in the area. Select the
Register aga in
network you want to r e g ister on and pr e ss to confirm.
Preferred list
The menu allows you to build a network list in order of your preference. Once
Preferred list
defined, the phone will try to register on a network, according to your preferences.
The following settings are av ai lab l e:
• show the list of preferred networks and:
- either delete a network from the list,
- or move a network to a different position in the list,
• add a network to the preferred list from the list of available networks,
• add a network to the preferred list from the list of known networks,
• add a network to the preferred list by entering the network code. This is a 5-digit code:
- 3 digits for the country followed by 2 digits for the network (67844 for example).
Call settings
The menu allows you to set al l the param eters
Call settings
linked to the calls (Call forward , Call w aitin g, e tc . ).
42
Using the menus
Page 46
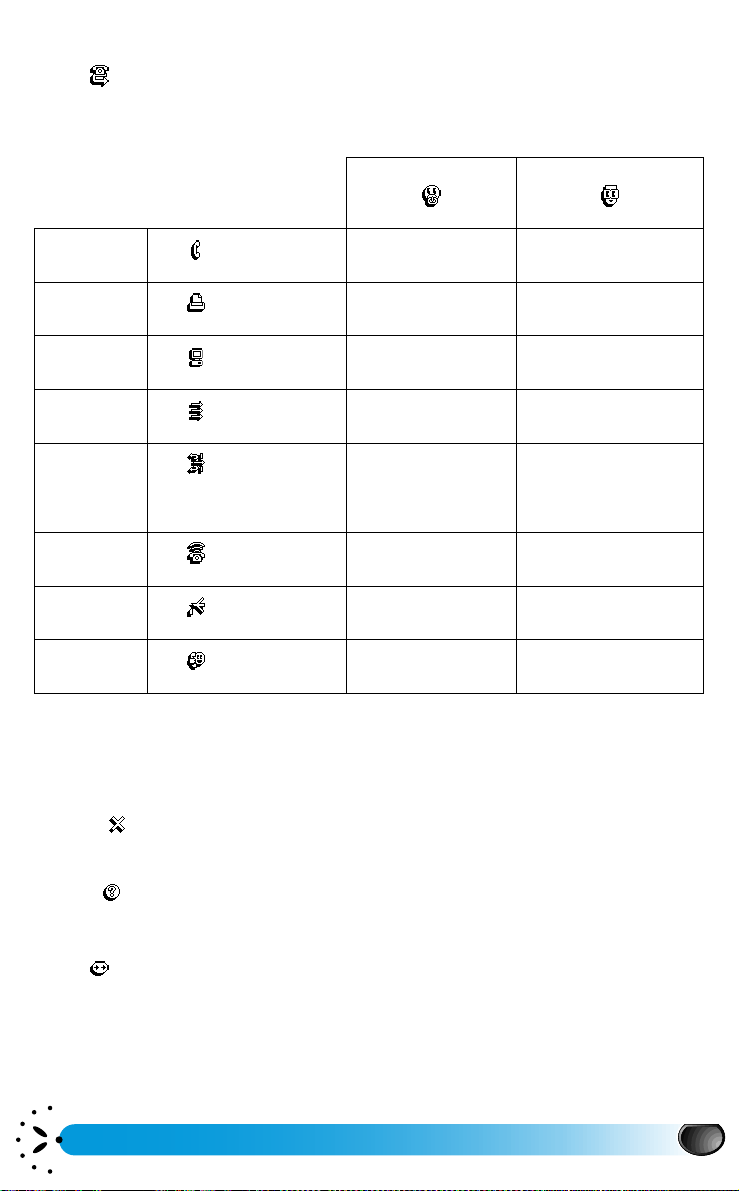
Call forward
Voice calls
Fax calls
Data c alls
Unco nditional
Conditional
No reply
No reachable
Busy
The menu allows you to divert incoming voice, fax or data calls either to a number
Call forward
in your Names list or to your mailbox.
SIMPLE MODE ADVANCED MODE
Simple menu Advanced menu
CALL TYPE X X
X
X
FORWARD
XX
OPTION
X
no reply or not re acha ble
or busy
X
X
X
In Simple mod e, activating the con ditionnal option wil l diver t in co m in g calls if you don ’t reply,
if you are not reachable or if you are busy. In Advanced mode, you can set any of these
option s independently.
• Deactivate
The option allows you to deactivate the status of all call forwarding.
Deactivate
• Status
The option allows you to display the status of all call forwar ding.
Status
Autoredial
The menu allows you to activate or deactivate the Autoredial feature (in Advanced
Autoredial
mode only).
If Autoredial is switc hed on and if the line is busy, your phone automati cally continues to
redial this nu mber until a successful connection is made , or until t he maximum n umber of
attempts is reached (10).
Using the menus
43
Page 47
The phone shall emit one beep at the beginning of each attempt and o ne special beep if the
connection is successful.
Any key answer
The menu allows you to accept a call by pressing any key, except the . This
Any ke y answer
key is used to reject a call (in Advanced mode only).
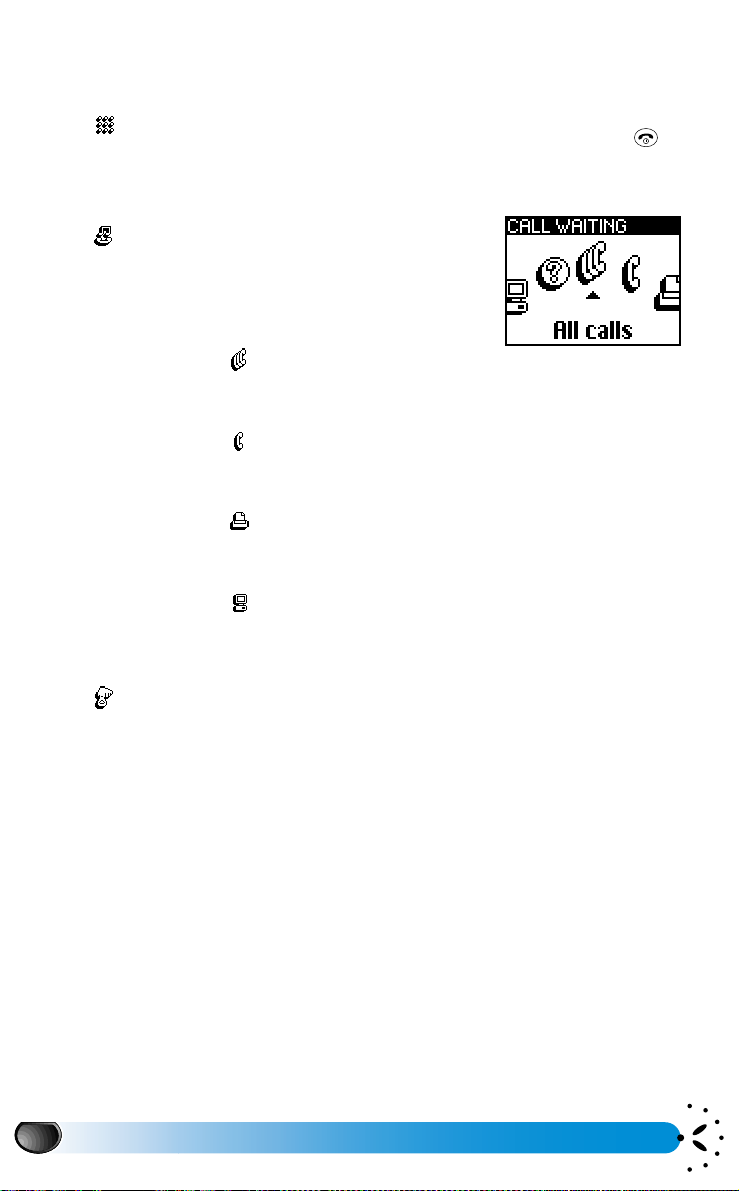
Call waiting
The menu allows you to activate or deactivate an
Call w aiting
alert beep informing y ou that you have another incoming c a ll
(in Advanced mode only).
All calls
Sets the alert beep for
All calls
Voice calls
Sets the alert beep for
Voice calls
Fax calls
Sets the alert beep for
Fax calls
Data calls
Sets the alert beep for
Data calls
Caller ID
The menu allows you to choose whether you want to show or hide your identity
Caller ID
to your corres ponde nt. The stat us o ption wi ll in form you if this func tion is acti vated or no t.
This featur e is only available if both the network and your subscription allow it.
44
Using the menus
Page 48
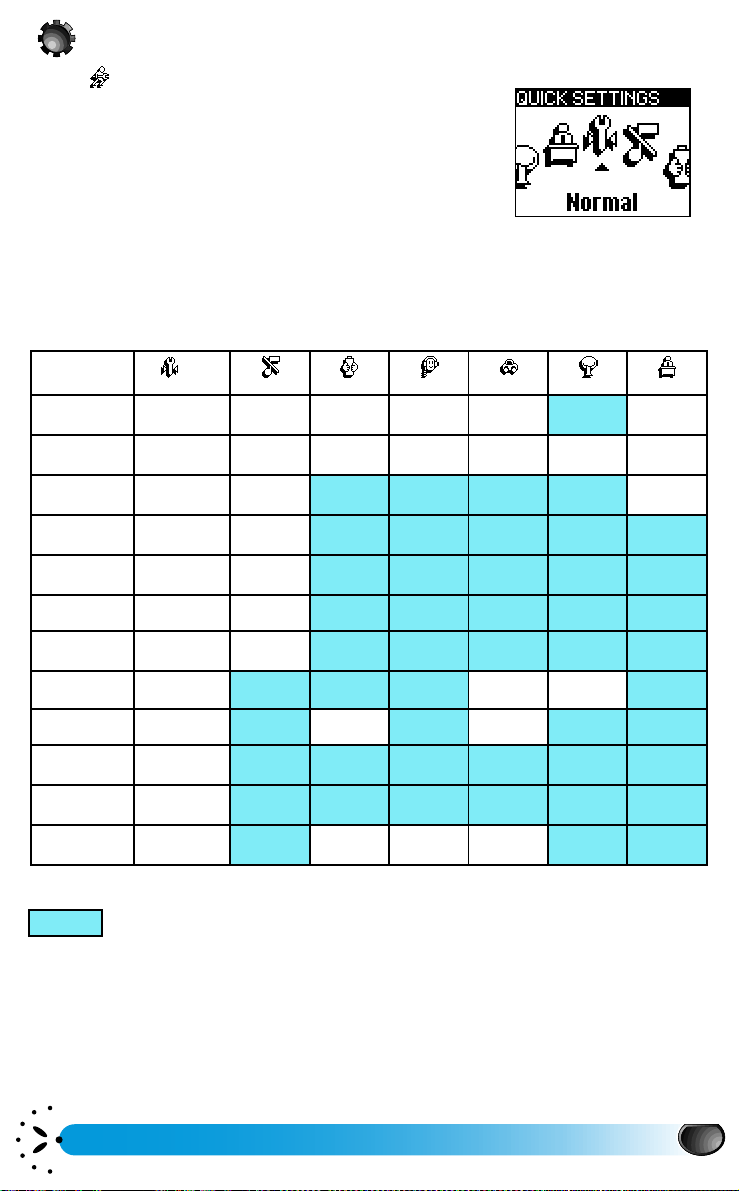
Quick settings
Headse t
The menu allows you to access a group of
Quick sett in gs
predefined settings. You can use these quick settings to adapt
your phone to you r envir onme nt. You can also assoc iate a qui ck
setting with a Hotkey (see Hotkeys, page 41).
Any change of parameter you may have made in a given quick
setting ar e lost when y ou select an other quick settings except
for the norm al se t tin g .
When selecting the normal setting, you will restore all parameters you may have already
changed and set in that mode pr eviously.
The Quick settings:
**
Normal Silent Autonomy
Vibrator* Active
Ring volume Medium
Key tones Active
Organ iser
alerts
Battery low
alert
New SMS tone Active
Alarm clock Inactive
Key pa d lock Inactiv e
Backligh t 10 sec.
Zoom Inactive
Any key
answers
Animation Active
User program.
User program.
User program.
Active
User program.
Active
User program.
User program.
User program.
User program.
User program.
User program.
Inactive
User program.
User program.
Active Inactive * Inactive * Active
Silent Medium Medium Loud Loud Silent
Inactive
Inactive
Inactive
Inactive
Inactive
* * * Inactive 1 minute *
* Inactive * Permanent * *
* * * Active * *
* * Active Activ e * *
* Inactive * * * *
* * Active * Inactive
* * * * *
* * * * *
* * * *
* * * * *
Car Outdoors Meeting
Setting ident ica l to th e one mem o r ise d in Qu ick Se tt in g Nor m al
*
L
NOTES:
* If you use a Vibra battery.
** There are settings for the parameters when you first switch on the phone. You can update these
parameters.
Using the menus
45
Page 49
Use of network services
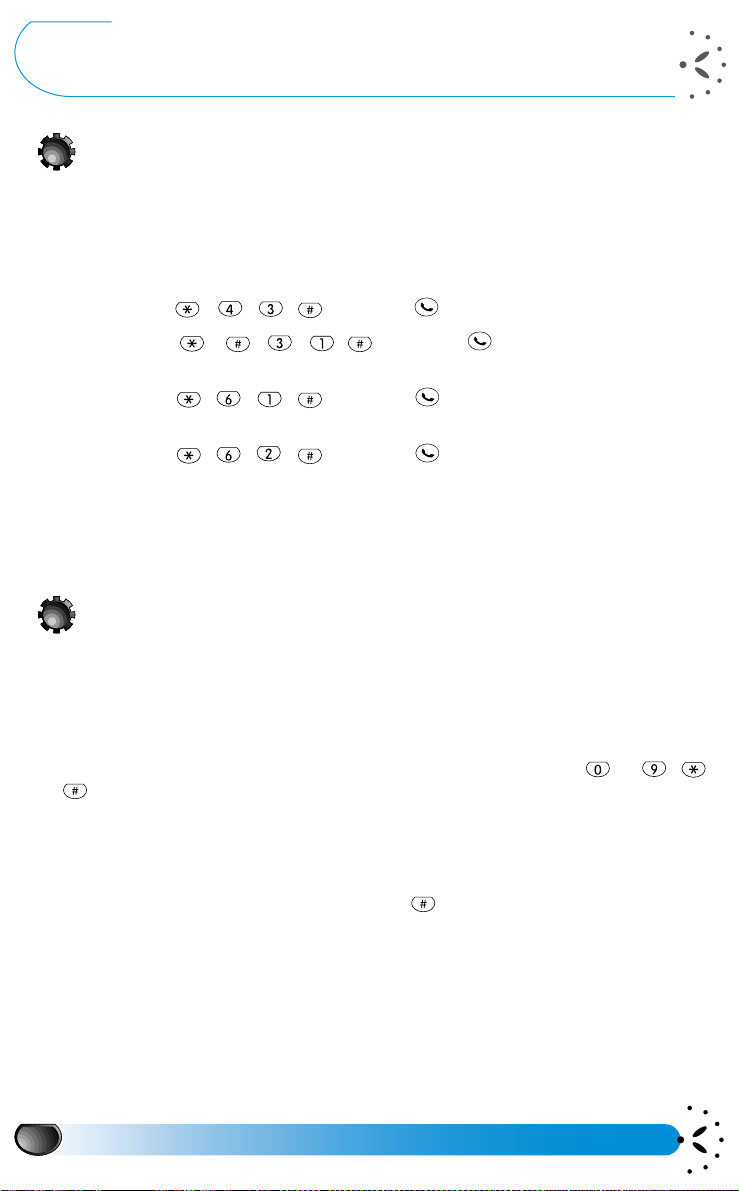
Additional GSM netw ork services (GSM strings)
The phone su pports standar d GSM strings. These can be sent from the k eypad to the netw ork.
They are used to activate all supplementary servic es provided by the network (see your service
pro vider).
Example n° 1: press then press , to activate the Call Waiting service.
Example n° 2: press
identification has been sent.
Example n° 3: press then press , to activate the feature call fo rward
if no reply.
Example n° 4: press then press , to activate the feature call fo rward
if unreachable.
Please co n tact your network opera to r for any fur t h e r in for m ation on GSM strings .
then press , to know if the mobile
Query a voice server , a v oice mailbo x, a messaging service, etc. (DTMF tones)
Some phone services (such as phone answering machines and pagers) require your phone to
transmit D TMF t ones (Dual Tone MultiF requen cy), also kn own as “t ouch tones” . Th ese are
used to communicate passwords, callback numbers, caller choices, and so on.
You can send DTMF t ones at a ny ti me during a c all by pres sing an y of t he ke ys to ,
and .
You can also append a DTMF sequence to a phone number before dialling it (or storing it in the
Names list). The phone number and the DTMF part must be separated by a wait character.
Pause and wait characters
To obtain a pause or wait character, press and hold . The display shows w for a wait and
for a pause. The phone always interprets the first pause character as a wait character.
p
When yo u dia l a numb er cont aini ng a wa it c harac ter, your pho ne di al s the f irst part ( the phon e
number) and then wait s for the call to be conne cted befo re sen ding t he rest o f th e digi ts as
DTMF tones.
Any subsequent pause character is an ordinary pause that generates a delay of 2.5 seconds.
46
Use of network services
Page 50
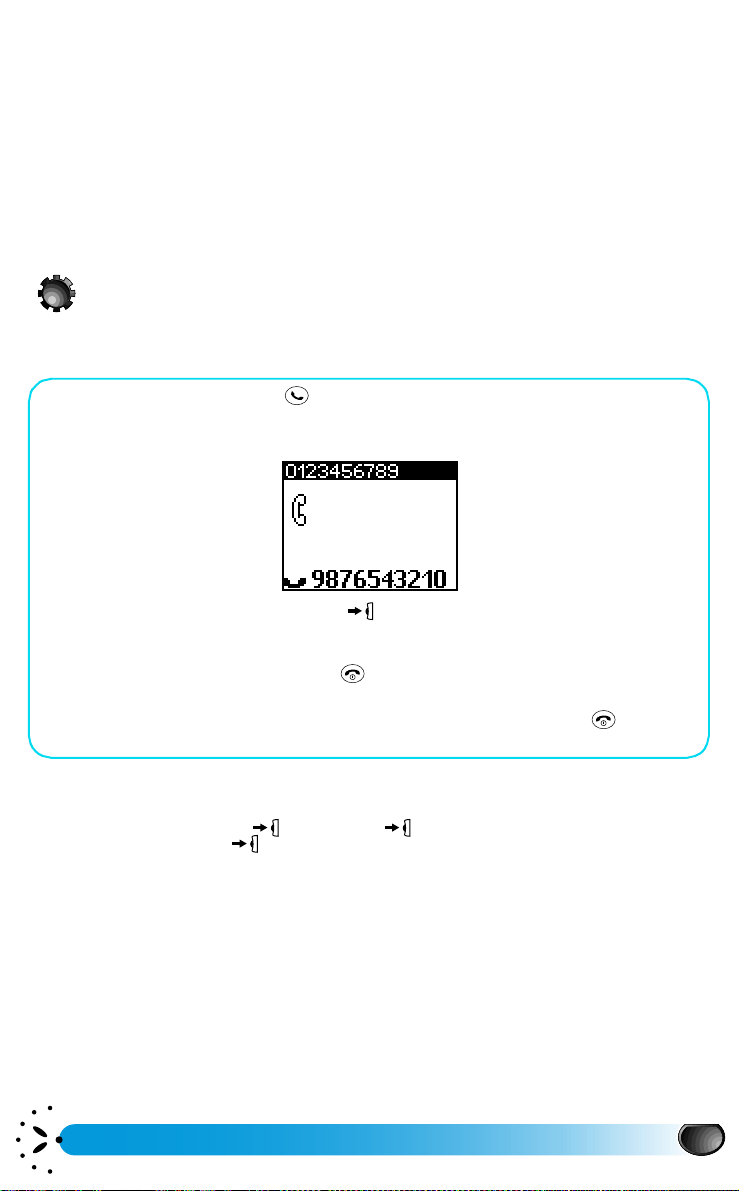
Interrogating your answering machine (example):
To hear all messages (code 3, say) on your answering machine (password 8421) at phone
number 12345678, you could call:
The phone dials 12345678 and waits for the call to connect. When connected, the phone
transmi ts 8421 (the password), pauses 2.5 second s, a nd the n sends the last di git.
If you find that 2.5 seconds is not long enough for your needs, you can enter several pause
characters one after the other to increase the pause time.
12345678w8421p3.
Making a second call
You can make a second call during an active call or during a call on hold. You can switch
between the two calls.
• Dial a number then press .
The first call is placed on hold and the n umber i s displayed at the bottom of the screen.
The second number is then dialled.
1.29 GBP
To toggle between the two calls, press then select
Each time that you toggle from one call to another, the active call is placed on hold and
the call which was on ho ld is a ct ivated.
• To hang up the active li ne, press .
The active line is hung up and th e ca ll on ho ld remain s on hold.
• To end the call on hold, use Switch calls to reach it, then press .
L
:
NOTES
The sec ond number c an be dialled either from the keypad or from:
• the Names list, by pressing then
• the Call list, by pressing , then selecting
Depending on the subscriber’s card.
Names
Call list
Switch calls
.
.
Use of network services
47
Page 51
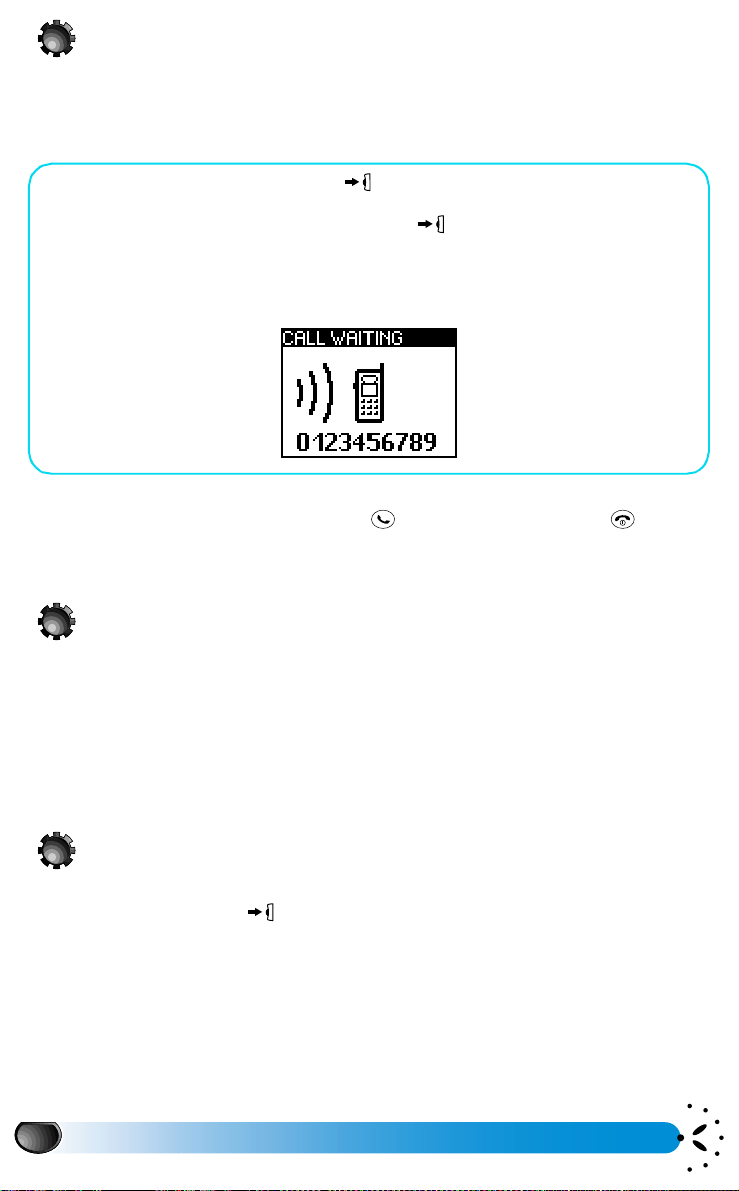
Answering a second call
You are able to receive another call when already in communication (if this feature is available
on your network). When you receive a second call the phone emits an alert beep and the
screen displays
• If you receive a second call, press . By moving the Pilot Key, you can:
- acce p t the se c on d c a ll, t he first one is put o n hold , t h e se co n d one is active. If you
- reject th e second call
- end the active call, then your incoming call is ringing.
L
NOTES:
1. If you wish also to answer the incoming call, press , to reject the incoming call, press
2. If you have activated call forwarding ‘If Busy’ (see page 43), you will never receive second calls since they are
always forwarded when the line is busy.
Call waiting
want to toggle between the two calls, press then select
Each time you toggle from one call to another, the active call is put on hold and the
call whi ch was on hold is the n activate d.
(see Call waiting menu, page 44).
Switch calls.
.
Answering a third call
While in communication and one call being on hold, you may receive a third call (if this feature
is ava ilable on your network) .
The phone emits an alert beep . You must end one of the communications before being able to
answer the third. This service is limited to two current communications (one active and one on
hold).
Explicit Call Transfer
You can conn ect a n ac tive c all and a call o n ho ld. You are d iscon nect ed w hen the t rans fer is
complete. During a call press , select
48
Use of network services
Transfer
and confirm.
Page 52
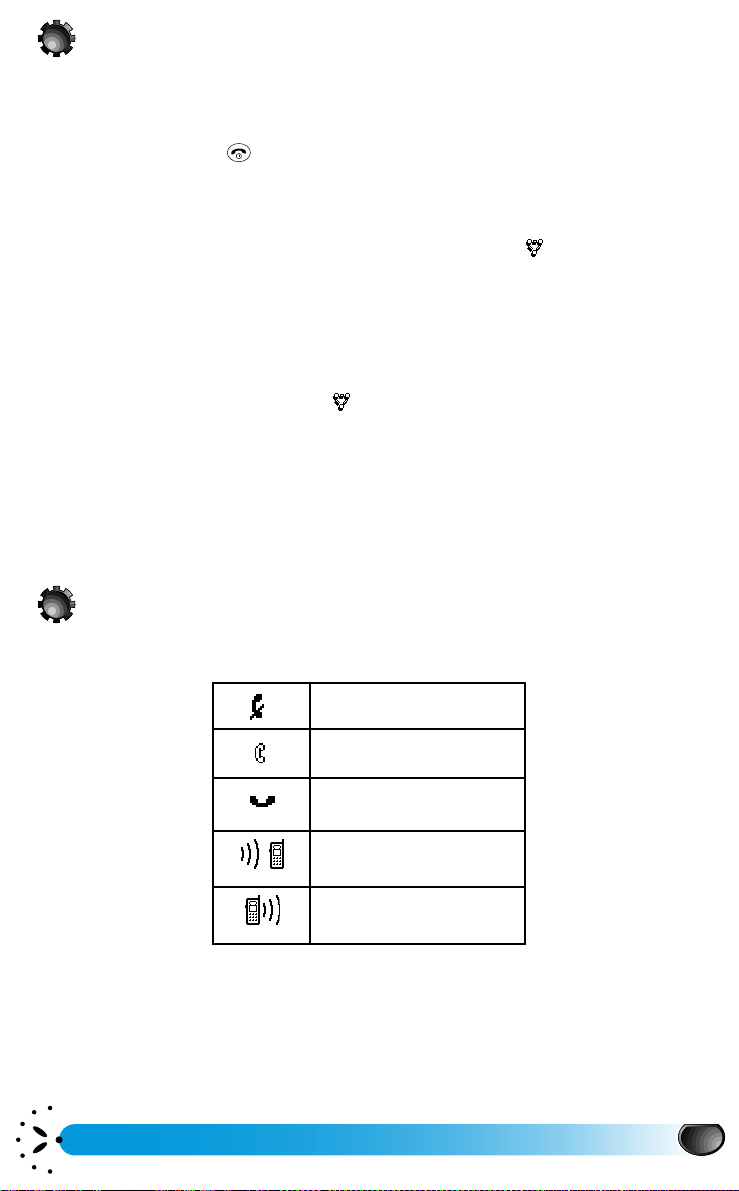
Conference Call
The user can activate the conference call by making consecutive outgoing calls, or create it
from a multiparty c all contex t. The user ma y ha v e up to fi ve me mbers at the s ame time. He can
endd the conference with . At this point all calls are disconnected.
When making consecutive outgoing calls, first initiate a normal call with the first number of the
conference. Then when the first member is on line, initiate a second call as described in making
a second call paragraph page 47.
.
When the second call is engaged, press the Pilot Key and select
process up to five members.
If there is an incoming call during the confer ence c all, and if ther e is less than the five members,
by pressi ng the Pilot key :
You can accept the second call as described in paragraph answering a second call page 47, and
Conferenc e
Repeat th e a bove
by pressing the Pilot ke y and selecting you can add this member to the conf erence
call.
If there is an incoming call during a c onfer ence and if fiv e members ar e alr eady connected, the
incoming call is automaticall y rejected with a user Busy notification (there is no ringing screen).
Conferenc e
In-call symbols
During call s, you have the following sym bols:
Mute
Call underway
Active call plac ed on
hold
Incom i n g ca ll
Outgoing call
Use of network services
49
Page 53

Precautions
Radio wave safety
You r cellular phone is a radio transmit ter/receive r. When it is sw itched on, it tr ansmit s and
receives radio waves in the frequency ranges of 880MHz to 960MHz. The GSM network
contr ols the power at which the phone transm its. This va ries between 0.02watt and 2 watts.
Publ ic conce rn has bee n focused for some ti me on the possible health hazards for users of
cellul ar phone s. The cur rent rese ar ch on radi o wav e tec hnology, including the GS M techno logy ,
has been reviewed and safety standards have been drawn up to ensure the protection from
exposure to radio wave energy . Your cellular phone complies with all safet y standards that ar e
defined for it.
The CE mark affixed to your cellular phone means that it is compliant with the European
directive on electromagnetic compatibili ty 89/336/EE C and the l ow voltage direc tive 73/23/
EEC.
Your phone and its environment
Inadequately protected or sensitiv e electr onic equipment ma y b e affected b y radio ener gy . This
interfer en ce can lea d to acci dents. Do not he sitate t o ask whe ther or not you r phone ca n affe ct
surrounding equipment.
L
NOTE:
To avoid damaging your phone, it m us t not come in contact with s and or hig h levels of dust.
Efficient use of your phone
Using your p h o ne in the most e ff icien t manner will im prove th e p e rfor m an ce o f your phone,
reduce radio energy emission (see “Radio wave safety” on page 50), and reduce battery
consumption.
• Always extend the antenna fully before using the phone.
• For your own safe ty as well a s for the optimal operation of the phone, it is advisa ble to use
it only in the no rmal operating p osition: place th e antenna up over your sho ulder while
holding the earpiece to your ear.
• For best performanc e, avoi d touching the antenna while a call is in progress.
• Do not use your phone with a damag e d antenna. If you touch a damaged antenna, you may
suffer a minor skin burn. Have a damaged antenna replaced by a qualified technician. Make
sure it is replaced with a genuine manufacturer’s replacement part.
• Avoid low reception areas (in a tunnel or between tall buildings for example). In low
reception areas the
If possible, move to a different location.
• You should use only your phone manufacturer’s accessories. The use of any other
50
symbol on the phone displa y shows less than the maximum of 4 bars.
s
Precautions
Page 54

accessories makes all guarantees null and void. Yo ur phone manufacturer will not be held
liable for any damage resulting from the use of accessories, other than your phone
manufacturer’s accessories.
• Do not use battery char gers o ther than tho se s pecif ied in the manu fac tu r er’s catalogue. The
use of another charger may be dangerous and will invalidate any type approval given to the
phone.
Battery safety
• Use only batteries specified in your phone manufacturer’s catalogue. The use of any other
accessories makes all guarantees null and void. Yo ur phone manufacturer will not be held
liable for any damage resulting from the use of accessories, other than your phone
manufacturer’s accessories, with your phone.
• Do not allow metal objects (such as keys in your pocket) to short circuit the battery
contacts.
• Do not deform or open the battery.
• Do not immerse the battery in water or dispose of the battery in a fire.
• Keep your battery attached to the phone even when discharged to avoid losing your settings,
and your back up battery for the clock in the phone will last longer.
• The b att ery should be recharged at or near room temperature. If the temperature is lower
than 0°C (32°F) or higher than 45°C (113 °F), the battery ic on flashes which means that the
battery cannot be recharged.
Safety and security
Responsibility
Your are re sponsible for yo ur GSM. Car eles s handlin g of the p hone can r esult in harm t o others
and dama ge to the pho ne itself. To avoid such problem s, read and follow all the sec urity
instructions presented here and make them known to anyone borrowing your phone. To
prevent unauthorised use of your phone:
• Keep your phone in a safe place and keep it out of smal l childre n’s reach.
• Avoid writing down your PIN code. Try to remember it instead.
• Switch off the phone i f you are g oing to leave it un used for a long time.
• Use the Security menu (s ee page 37) to ch ange th e secur ity code after pu r chasing the phon e
and to activate cal l restr iction opt ions.
Children
Your cellular phone is not a toy. Keep your phone in a safe place and keep it out of small
children’s reach. Children could hurt themselves or othe rs and they may damage the phone.
Respect of local laws and regulations
Cellular phones can interfere with their environment. Consequently, safety rules and
regu lations have be e n crea te d . You should enquire about loca l regula tions when you acquire a
cellul ar pho ne , and if you wish to us e your p hone while tr avelling , you sh ould find ou t wha t
regulations apply in the state or country you are visiting.
Precautions
51
Page 55
L
NOTE:
Regulations con cerning ve hicles and aircrafts are particularly stringent.
Do not switch on your GSM phone in states or countries where no GSM network is available.
Use while driving
Using your phone and driving at the same time can be dangerous as it lowers your
concentration.
• Avoid using your phone while driving, except in an emergency.
• In all cases, you should give your full attention to driving. Pull off the road and park before
using the pho ne whe never possible.
• If you want to use your phone while driving a vehicle, install the hands-free car kit which is
designed for that purpose.
• R e sp e ct the lo cal regula t io ns in co untries where you drive and use your cellular ph o ne .
• Check with your car manufacturer that the electro nic equipment used in your car will not be
affected by the radio energy emitted by your phone.
L
IMPORT ANT NOT E:
The use of an alarm system to operate a vehicle’s light or horn to indicate incoming phone calls is prohibited
on public roads in some countries. Check the local regulations.
ENVIRONMENTAL CARE
Please remember to observe the local regulations regarding the disposal of
your packaging materials, exhausted batteri es and old phone and where
possible promote their recycling.
Philips has marked the battery and packaging with standard symbols designed to
promote the recycling and appropriate disposal of your eventual waste.
Battery:
• the crossed- out dustbi n signif ies that the batt ery should not be disposed of with general
household waste.
Packaging:
• the mobius lo op symb ol signifies the labelle d pack ag ing material is recyclable.
• the green point symbol signifies that a financial contribution has been made to
the associated national packaging recovery and recycling system (
France).
• the chasing arr ows symbol on the plastic tray and plastic bag indicate that the materials
are recyclable and also identifies the plastic material.
52
Precautions
EcoEmballage in
e.g.
Page 56

Maintenance
Your phone will give you years of trouble-free service if you give it a
little care and attention.
Look after it carefully, keep it clean and dry, and regularly discharge
and charge the batteries.
Looking after your phone
Your phone is a highly sophisticated electronic device. Treat it with care.
• Store it in a clea n, dust free place. Its moving parts can be damaged by dust.
• Keep it out of hot areas. High temperatures can shorten the life of electronic components,
or batteries, and warp or melt certain plastics.
• Do not try to open the phone. If it is not working properly, call the Helpline.
• Use only the manufacturer’s genuine accessories, battery and chargers.
•
Treat the phone gently and avoid dropping, k nocking or shak ing it.
• Keep the phone and accessories out of the reach of small children.
• Keep the phone dry and do not use harsh chemicals (such as solvents or detergents) to clean
it. To clean the phone, wipe it with a soft cloth slightly dampened with a mild soap-and-water
solution.
• Always let your battery discharge completely before recharging it.
• If y our mobile is damp, switch it off, remove the battery(see page 12) and let them dry during
24hrs before using it again.
Efficient use of your phone
Your phone has been developed to provide you with outstanding ba ttery performance, at 155
minutes of talk time and app roxim a t e ly 20 0 h ou r s of sta n d by ti me w i th th e Sli m b a ttery.
Placing and receiving calls consumes the same amount of battery energy. However, the mobile
consumes less energy in the idle scr een when kept in the same place. When in idle screen and
while you are moving, your phone consumes energy to transmit updated location information
to the network. Setting the backlight for a shorter period of time as well as efficiently na vigating
(or a v oid ing unne ces sary na v iga ting ) in t he men us will a ls o help t o save the ba tte ry’s ener gy for
longe r phoning and stand- by performa nces.
Fixed bars indicate an approximate level of usable energy already charged in the battery. The
remaining bars that are not fully charged continue scrolling during the charge process.
Maintenance
53
Page 57
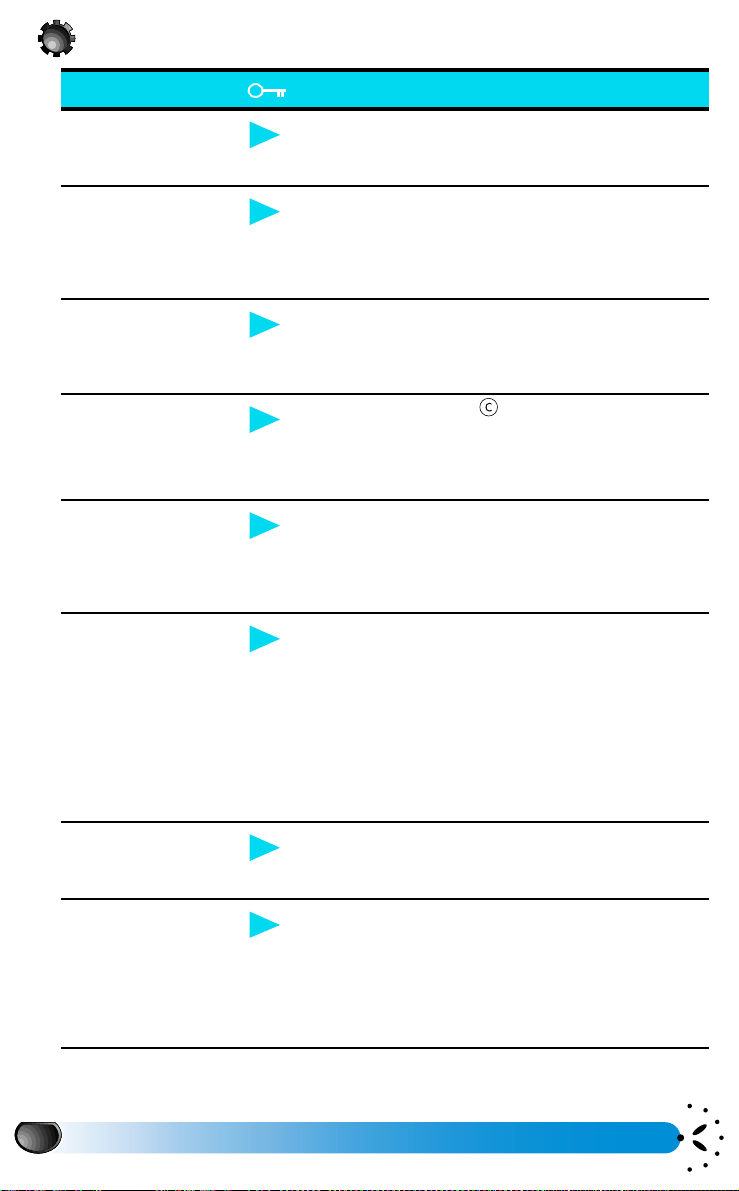
Troubleshooting
Problem Solution
The displ ay shows
BLOCKED
switch on .
The
are not displayed.
The display doesn’t
respond (or responds
slowly) to key presses.
Your phone d o e s not
go to idle screen.
When charging your
mobile phone, the
battery icon is empty
and flashing.
Flashing of the backlight
and the ba tt e ry fixed
icon. A continuous
alert beep is emitted
and the message
when you
and s symbols
a
Accessory not
compatible.
Please unplug
displaye d on the
screen.
is
Somebody tried to use your phone but didn’t know the
PIN code nor the unbl oc king code (PU K). Cont ac t you r
service provider.
The network connection is lost. Either you are in a
radio shadow (in a tunnel or between tall buildings) or
you are outside the network coverage area. Try from
another place or contact your network ope ra tor for
assistance or information about the network.
The display responds more slowly at very low
temperatures. This is normal and does not affect the
operating of the phone. Take the phone to a warmer
place and try again .
• Either press and hold .
• Or switch off the phone, check that the SIM card and
the batte ry are installed correctly, and switch it on
again.
When your battery is too low or when the temperature
is out of the ra ng e (0 to 45°C), the battery cannot be
charged. Move your phone to a place where the
temperature is in the range and wait a few minutes
before re-charging.
Unplug the charger and use a Philips Authentic
Accessory.
After switching on your
phone, the SIM lock
code is required.
Your phone d o e s not
work well in your car.
54
Your phone is configured to work only with your
service provider’s SIM card. Please contact your service
prov ide r to get further informations.
A car contains some metallic parts that absorb
electromagnetic waves which can affect the phone’s
performanc e. A car kit is avai lable to pro vide you wi th an
external antenna and enables you to phone without
handling the handset. It i s strongl y advised, however, to
check with local authorities if you are allowed to phone
while drivin g.
Maintenance
Page 58
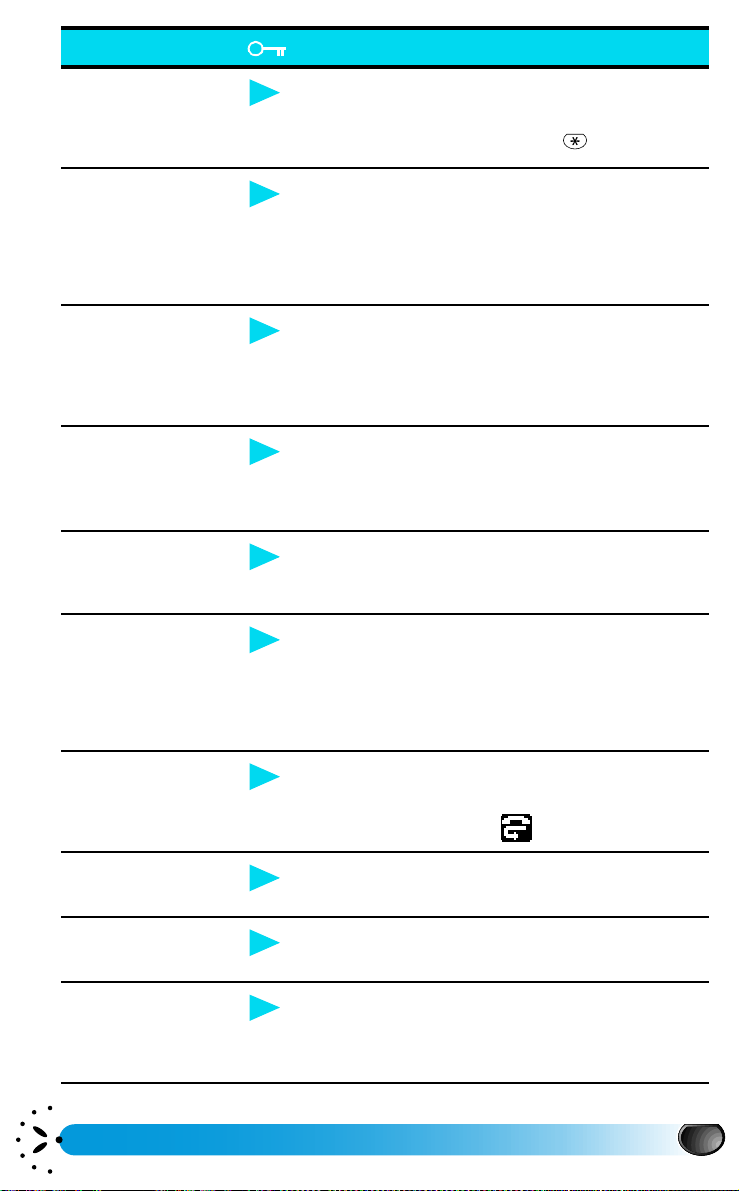
Problem Solution
Differ e nce betwee n a
long press and a short
press on n umeric
keypad.
The time and the date
are reset.
Your phone d o e s not
display the phone
number of incoming
calls.
When attempting to
use a feature in the
menu, the mob ile
displays
allowed
When trying to send a
message.
Your phone d o e s not
switch on .
not
.
A short press displa ys the number written on the key. A
long press (at least one second) c ould either activate a
Hotkey (See Hotk ey s page 41) or a special character
(such as
Your mobile phone con ta ins a small bat te ry called the
« back up battery » which is charged by your main
battery. If you unplug the main battery, the back-up
battery can supply the clock with enough energy for
approximately 7 hour s, if it is fully cha r ge d. To set time
and date, see page 39.
This feature is network dependent. The network,
therefore, may not send the caller’s number to your
mobile and the phone will display
that this feature is network de pendent. Please contac t
your operator to get further information.
Many features are network dependent. They are only
available, therefore, if the network or your subscription
supports them. Please contact your subscription
provider for m ore infor m a tio n .
Some networks do not allow message exchanges with
other networks. Please c ontact your subscriptio n
provider for m ore infor m a tio n .
Remove the battery (see page 12). Check that b oth the
contacts of the phone and those of the battery are not
damaged. Plug in the battery, making sure that it is fitted
securely (see page 3). Charge the mobile until the
battery icon h as stop ped flas hing . The n unpl ug f r om the
charger and try to switch the mobile on.
for a long pr e ss on the key).
+
Call 1
. Please note
You are uncertai n that
you are properly
receiving calls on your
mobile.
The display shows
FAILURE
The displ ay shows
IMSI FAILURE
The displ ay shows
SIM
.
.
insert your
SIM card
.
Make sure the featur e of « conditional call forward» as
described on page 43 is deactivated if y ou wish to
receive your calls. This networ k depen d ent f eature may
display the following icons: .
Your SIM card may be damaged. Please contact your
network ope rator.
This problem is related to your sub scrip t ion . P lea se
contact your network operator.
Check that the SIM card has been inserted in the right
position (see page 3).
If the pr oblem remains, your SIM card might be
damaged. Please contact your network operator.
Maintenance
55
Page 59
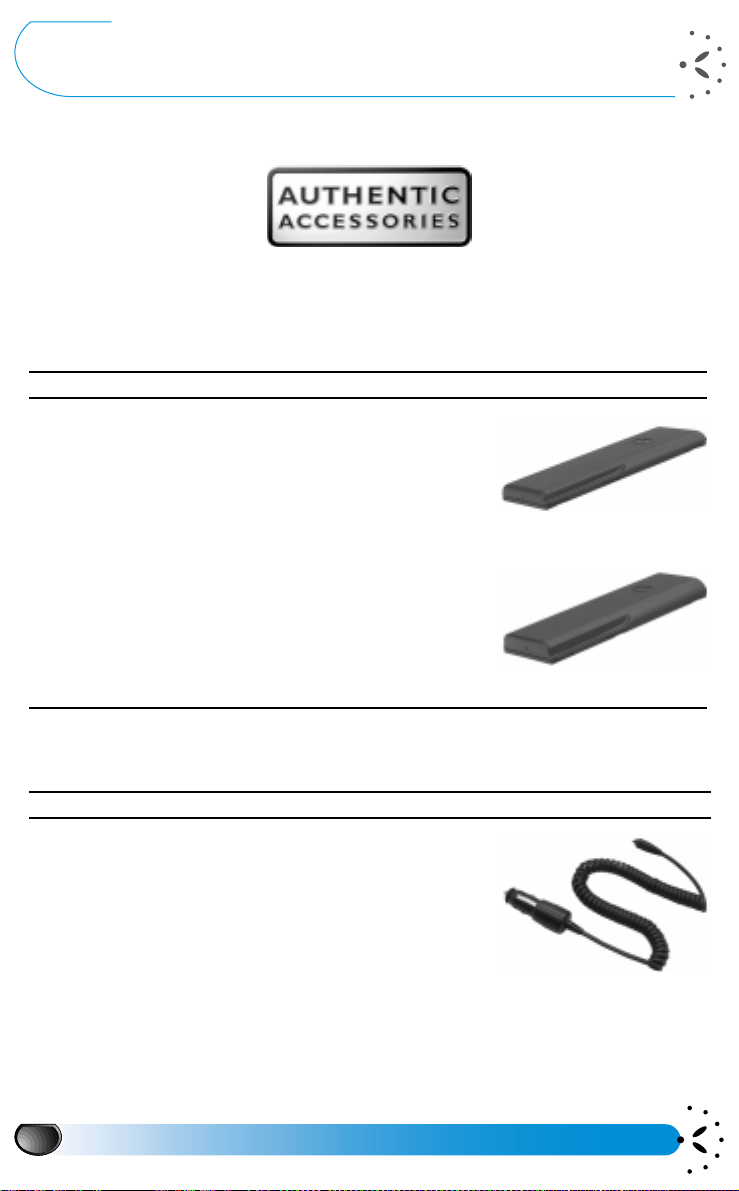
Philips Authentic Accessories
"When Performance Counts ...
Philips Authentic Accessories are Designed to Maximize the
Performance of Your Philips Phone."
BATTERIES
Slim Battery:
• A Light weight power pack-easy to insert and
go.
• Powerful Lithium Ion battery delivers at least
155 mins of talk time or 9 days of standby
time*.
BIX 158/P
9911 240 33029
Vibra Batter y
• Silent vibrati on a lerts you to incoming calls.
• Powerful Lithium Ion battery delivers at least
230 mins of talk time or 14 days of standby
time*.
*Talk and standby time are net wo rk and usage
depende nt, diff erences between networks may exist.
CHARGERS
Cigarette Lighter Adapter
12-24V
• Charges the Bat tery while you use the
phone.
• P l ugs into virtually any vehicle power outle t .
• Allows you to make an essential call if your
battery is out of power.
BVX151/P
9911 240 33032
CKLR 12/P
9911 240 34118
56
Philips Authentic Accessories
Page 60
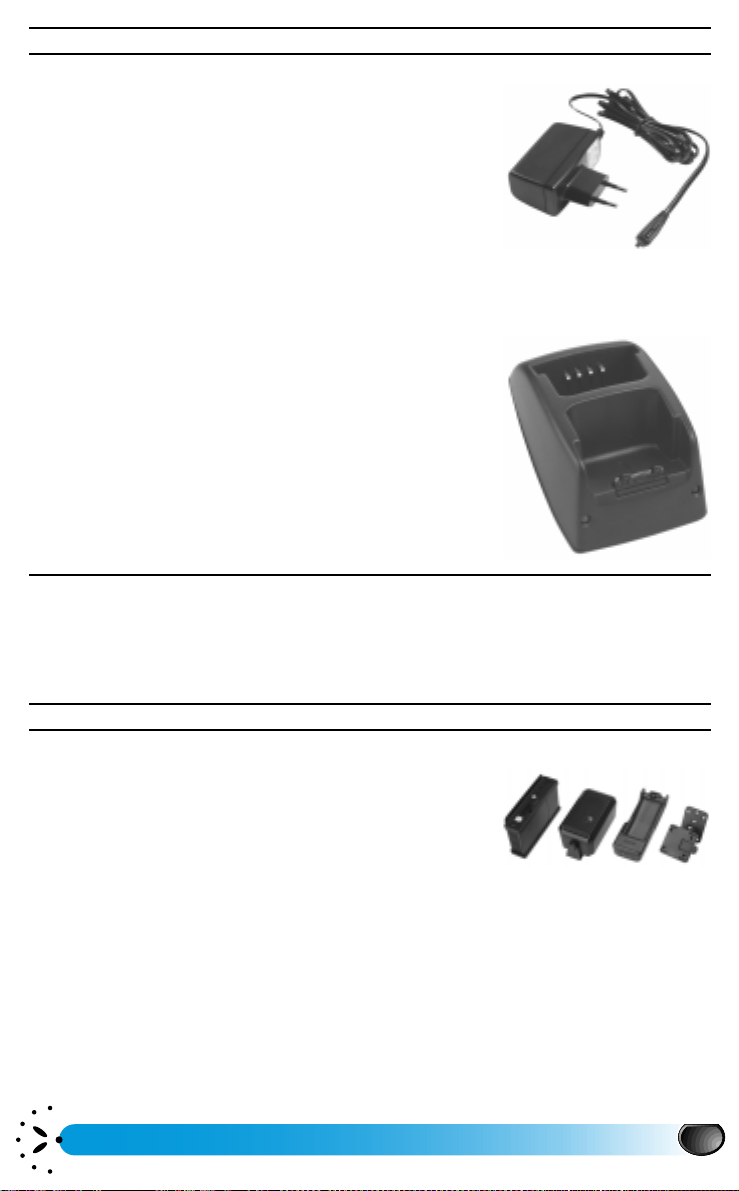
CHARGERS
Fast Travel Charger
90-240V
• Charges your battery wh erever ther e is an
AC outlet.
• Small enough to carry in a briefcase or
handbag.
• Charging time between 75 and 120 minutes*.
Europe :
ACSR 12/P
9911 240 30042
T a iwan/USA :
ACTR 12/P
9911 240 30043
UK :
ACUB 12/P
9911 240 30044
Australia :
ACAR 12/P
9911 240 30045
Desktop Charge r
90 – 240 V
• Compact and convenient solution to
charging your phone and spare battery.
• Compatible with Ph ilip s A ut h ent ic Fast
Travel Charger and Cigarette Lighter
Adapter.
• Charges th e batteri es between 75 and 120
minutes*
L
NOTE
Approximate times depending upon battery type and usage.
HANDS-FR EE K IT
Deluxe Hands-Free Car Kit
• Full duplex hands-free car kit des igned and
engineered for convenie nt and safe handsfree use.
• Features: Philips Authentic Cradle with built
in Fax/Dat a Por t, Voice recognition, Au to
V olume Control, Auto Answer , Radio Mute,
Additional Ringer Melodies and Privacy
Mode (with optional handset).
DTEX15/P
9911 240 35136
CKFX 15/P
9911 240 34422
L
NOTE
In certain countries, telephoning while driving is
prohibited.
For safe and trouble free installation, we
recomme nd that speci alized techni c ian s in s ta ll
Hands-Free Car Kits.
Philips Authentic Accessories
57
Page 61
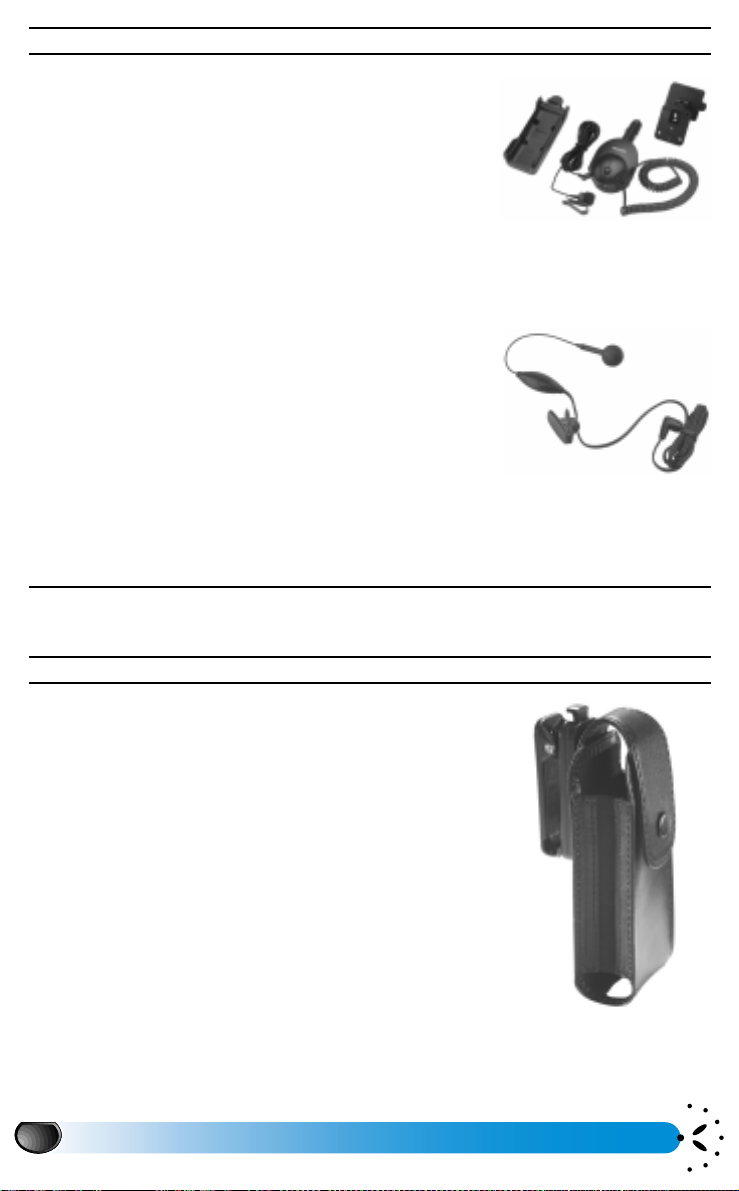
HANDS-FR EE K IT
Easy Hands-Free Car Kit
• Complete hands - f ree solution with an
advanced designed speaker and
microphone.
• E a sy to inst a ll - simply pl ug in to the vehic le
power out let.
• Fea t ures : Philips A ut h ent ic Pho n e Cra dle,
Volume and Privacy mode and Battery
Charger.
CKHX 15/P
9911 240 34421
Hands-Free Headset
• Use your phone und er almost an y cond ition
with this hand s-free very mobile solu tion.
• You can talk hands-free whether you’re at
home, in the off ice or on the move.
Deluxe Hands-Fr ee Headset
• Provides the same features as the HandsFree Headset.
• Additional In line answer button offers y ou a
simplified alternative to search for the
phone keypad : you answer an incoming call
just by pr essing the button and in idle mode
a long press on it activates the voice dial.
CARRY POUCH WITH BELT CLIP
• Protects your phone from nicks and
scratches.
• Click-Lock belt clip makes your phone
secur e and easy to carry.
• Expandable to accommodate Vibra or Slim
Batteries.
HSSR 12/P
9911 241 30017
HSSX 15/P
9911 241 30018
CBXX 15/P
9911 240 37026
58
Philips Authentic Accessories
Page 62

SINGLE DATA CARD
• When connected to a Phil ips mobile phone,
the Single Data Card allows you to send
faxes, SMS messages and access data
communications facilities on mobile
networks.
To maximize the performance of your phone and not void the warranty, always purchase Philips
Authenti c A ccessories that are s pec ia lly de s i gn e d for u se with your phone . P h ilip s C o ns u mer
Communications cannot be held liable for any damage due to use with non authorised
accessories.
Ask for Philips Authentic Accessories where you purchased your Philips Phone.
DCG7AS/ P
Philips Authentic Accessories
59
Page 63

Index
A
accessories 23, 40
accumulated call timers 22, 31
accumulated cost 22, 31
activating car kit command 40
activating network services 42
advance d menu 23, 40
alarm clo ck 10, 22, 32
alarm system 52
animation 23, 36
answering a call 16
answering a second call 48
answering a third call 48
antenna 8
any key an swer 23, 44
auto answ e r 23, 40
auto answer option 40
auto redial option 43
auto save option 28
auto sa ve SMS 22, 28
auto switch off 23, 40
autonomy 23, 45
autonomy quick setting 45
autoredial 23, 43
B
backlig ht 23, 43
backlight setting 36
battery
charging 13
fitting 3
low alert 36
removing 12
safety 51
battery low alert 22, 36
blasting areas 53
brick Gam e 22, 33
broadcast messages 28
broadcast reception option 28
broadcas t SMS 22, 28
C
C key 4, 8
calculator 22, 32
call barring 23, 38
call counters 22, 31
call forward 23, 43
call forwarding 43
call list 22, 29
call restriction 37
call settings 23, 42
call waiting 23, 44
caller I D 23, 44
caller identification option 44
calling
from the Call list 29
from the keypad 16
from the Names list 6
car 23, 45
car kit command 23, 40
car kit functions 34, 40
car melodies 23, 40
car quick setting 45
carry pouch with belt c lip 58
cell broa dcast messages 28
change codes 23, 38
character entry 8
character table 15
charge rat e 31
cigarette ligh ter adapter 56
clear key 8
clock display 23, 39
close user group 38
conference call 49
contrast 23, 37
convert from Euros 22, 32
convert into Euro 22, 32
D
date setting 39
day view 22, 30
deleting a message 27
deleting Names list entries 24
deliver y report 22, 28
deluxe hands-free car kit 57
deluxe he adset 58
desktop charger 57
dialling res tric tio ns 37
display 23, 36
diverting calls 43
driving a vehicle 52
DTMF tones 46
60
Index
Page 64

E
earpiece 8
earpiece volume 19
easy hands-free car kit 58
emergency call 14
emotion ico ns 26
entering characters 8, 15
entering phone numbers 4
events 22, 29
extra options menu 31
extras 22, 31
F
fast travel charger 57
fax number tag 37
FDN 37
flash dialling 24
forwarding calls 43
full duplex hands-free car kit 57
G
game 31
GSM strings 46
H
hands-free car kit 57
headset 23, 34, 58
headset quick setting 45
holding a call 47
home network 7
hotkeys 23, 41
functions 41
programming 41
how to enter a text or a number 15
I
icons 5
idle mode 15
in-call options 18
in-call symbols 49
incoming call 16
info at call end 22, 31
inserting SIM card 3
international dialling 16
K
key tones 22, 35
key tones setting 35
keypad description 8
keypad lo ck 23, 37
keypad unlock 20
L
language 23, 39
language se tting 39
last call info 31
last call information 22, 31
leat her pouch 58
LED 4, 8
lithiu m ion battery 56
local laws and regulat i on s 51
locking the keypad 20
low battery alert 36
lower case 15
M
mailbox No 22, 28
mailbox number 28
maintenance 53
making a c all 16
making a second call 47
medical equipment 50
meeting 23, 45
meeting quick setting 45
menu
navigation 22
menu type 23, 39
menus
advanced 40
simple 39
messages 22, 25
add icon 26
auto save 28
cell broa dcast 28
centre 27
delivery report 28
forward 27
reading 27
replying 25
save 26
sending 25
sending your centre number 27
signature 27
standard 25
storing 28
validity period 28
writing 25
microphone 8
minute beep 22, 35
missed call 16
mobile number 25
modifying a Names list entr y 24
modifying the PIN code 37
modifying the PIN2 code 37
month view 22, 30
muting a call 19
Index
61
Page 65

N
names 22, 24
Names list
add a flash dial 24
add a voice tag 18
adding an entry 24
call list 29
calling from 6
consulting 24
copying from the call list 29
deleting an entry 25
finding an entry 24, 25
modifying an entry 24, 25
sending a SMS from 24
network 23, 42
network menu 42
network registration 42
new SMS tone 22, 36
normal 23, 45
norma l qu i c k se tt in g 45
notepad 19
O
on/off butt on 8
organiser 22, 29
adding events 29
day 30
deleting an entry 30
events 29
modifying events 30
month 30
week 30
organiser alerts 22, 36
outdoors 23, 45
outdoors quick setting 45
own number 21
P
pause characters 47
personalise your pho ne 34
Pilot Key 5
PIN code 4, 11
PIN code modifying 37
PIN code protection option 38
PIN protection 23, 38
PIN2 code 7
PIN2 code modifying 37
preferred networks 23, 42
preferred networks list 42
programming Hot key s 41
public names 23, 37
public names option 37
PUK code 7
PUK2 code 7
Q
quick settings 23, 45
autonomy 45
car 45
headset 45
meeting 45
normal 45
outdoors 45
silence 45
R
radio mute 57
radio wave safety 50
read SMS 22, 27
reading your messages 27
redial from Call list 17
redialling last number 17
register again 23, 42
registering to a network 8
reminder 16
repeat op tion 30
reply from Call list 17
reply path 22, 28
replying to a message 27
restric ted dialling 7, 37
ringer 21, 22
ringer type setting 34
ringer volume 22, 34
ringer volume setting 34
roaming 7
S
safe ty information 51
screen animation 36
security 23, 37
security in general 51
security menu 37
semitones 35
send SMS 22, 25
sending a message 25
set date 23, 39
set time 23, 39
setting s 22, 34
settings menu 34
shortcuts
to the Names list 24
signature 22, 27
silence quick setting 45
silent 23, 45
silent ringer 21
SIM card 3
simple menu 23, 39
62
Index
Page 66

slim battery 13
SMS 7, 25
SMS centre 22, 27
SMS settings 22, 27
SOS call 14
sounds 22, 34
spare batteries 57
speakers 23, 40
storing a message 28
storing a name 24
storing a number 24
storing a number from the Call list 29
switching on/off 8
symbols 10
T
table of characters 15
table of emotion icons 26
tag
data number 43
fax number 43
voice number 43
text entry 15
time and date 23, 39
time setting 39
timers 31
to do 30
troubleshooting 54
W
wait characters 46
warranty 59
week view 22, 30
writing a message 25
Z
zoom 34
zoom on/off 23, 36
U
unlocking the keypad 20
unmuting a call 19
upper case 15
V
validity period 22, 28
Vibra Battery 13
vibrator 22, 36
vibrator optio n 21
voice dialling 18
voice keys 23, 40
voice mail messages 25
voice mail option 28
voice memo 22, 32
voice tag
assigning 40
changing 40
deleting 40
volume co nt rol
automatic 57
earpiece 19
ringer 34
volume keys 8
Index
63
 Loading...