

Page 1
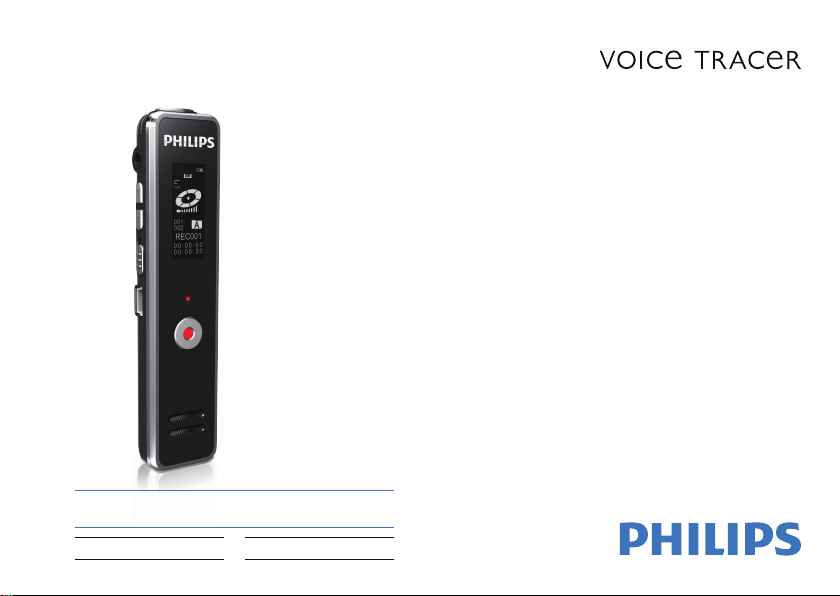
Register your product and get support at
www.philips.com/welcome
VTR5100
VTR5100
中文
使用手册
03
/ User Manual
English 23
Page 2

Page 3

目录
1 欢迎 05
136.4 播放模式
136.5 音量调节
中文
136.6 音效模式(音乐模式)
051.1 产品特点
062 重要须知
062.1 安全
062.2 听力保护
073 您的数码录音笔
073.1 供货范围
073.2 概览
084 开始使用
084.1 电源开 / 关
094.2 连接电脑
105 录音
126 语音、音乐模式
126.1 基本操作
126.2 删除
136.3 A-B 复读
157 系统设置
157.1 录音品质
157.2 录音灯开关
167.3 按键音开关
167.4 声控功能
167.5 分段录音功能
177.6 日期时间设置
177.7 定时录音设置
187.8 录音长度
187.9 语言选择
187.10 背光时间
197.11 对比度调节
197.12 自动关机
197.13 剩余时间
207.14 格式化磁盘
207.15 信息
ZH 03
Page 4

04 ZH
218 常见问题
229 技术参数
Page 5

1 欢迎
欢迎来到飞利浦世界!您能选择和购买飞利浦的产品,我们非
常高兴。您可在我们的官方网站上获得飞利浦公司的全方位技
术支持,如:使用手册、软件下载、保修信息等。
www.philips.com
1.1 产品特点
·数字降噪:能有效地对录音环境周围的噪声给予滤除,从而
可以清晰地记录有效的声音,推荐在嘈杂环境中使用该功能,
此功能为 PCM 降噪录音类型。
·高清扬声器:采用高品质跑道喇叭 , 无论播放录音文件或音
乐文件,都让人身临其境的享受。
·以常见的 MP3/WAV 格式录音。
·使用高速 USB 2.0 快速存取录音和数据。
·声控录音功能。
·可作为大容量的 USB 存储设备,确保最大的兼容性。
·锁键功能:录音中具有锁键功能,防止误操作暂停录音或退
出录音。
中文
Page 6

2 重要须知
所用符号标志
2.1 安全
·为了避免短路,切勿将产品放置在触水受潮处。
·不要将产品放在加热设备附近或阳光直射的地方。
·请注意,切勿挤压电缆,特别是插头处。
·特别声明:使用本产品前请仔细阅读本说明书,如因人为操
作或不可抗力因素而导致数据丢失,本公司一概不予负责。特
别提醒用户小心操作,注意将资料另外备份。
2.2 听力保护
使用耳机时请遵守下列原则:
·调整至合适的音量,切勿长时间使用耳机。
·特别需要注意,切勿将音量调至耳朵所能承受的范围之外。
·切勿将音量调至盖过周边环境的声音。
·在危险情况下请小心或暂停使用耳机。
·在驾驶汽车、骑自行车、玩滑板时,切勿使用耳机。否则会
导致交通意外,且违反相关法律法规。
06 ZH
提示
• 此符号标志指明帮助您更加高效简便使用设备的信息。
注意
• 此符号标志指明处理或操作设备时必须遵守的各种注意事项。
小心
• 此符号标志警告可能发生的设备损坏和数据丢失。操作不当,
可能导致损坏。
警告
• 此符号标志警告人身伤害危险。操作不当,可能导致人身伤害
或设备损坏。
Page 7
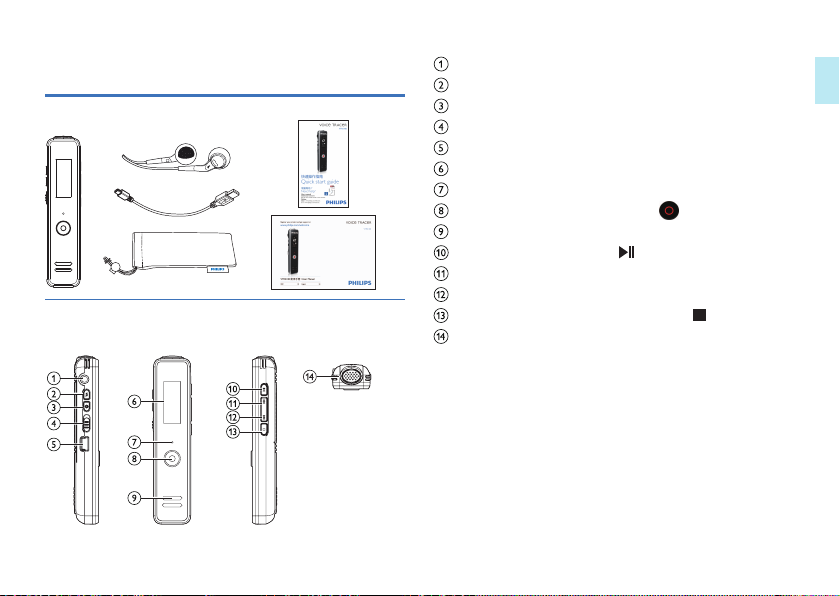
3 您的数码录音笔
3.1 供货范围:
3.2 概览:
耳机插孔
音量键
菜单键
电源开关键(ON/OFF)
USB 接口
显示屏
指示灯
录音、录音暂停、(“录音键” )
扬声器
播放、暂停 (“播放键” )
音量加、快退、上一曲、更改菜单选项
音量减、快进、下一曲、更改菜单选项
停止 , 语音文件夹切换(“停止键” )
内置麦克风
中文
Page 8
4 开始使用
4.1 开 / 关机
注意
•
第一次使用机器时,请对该机器充电三小时以确保机器有电
工作!
1 当电源开关处于“关”位置时,则本机断开电源,不能开机。
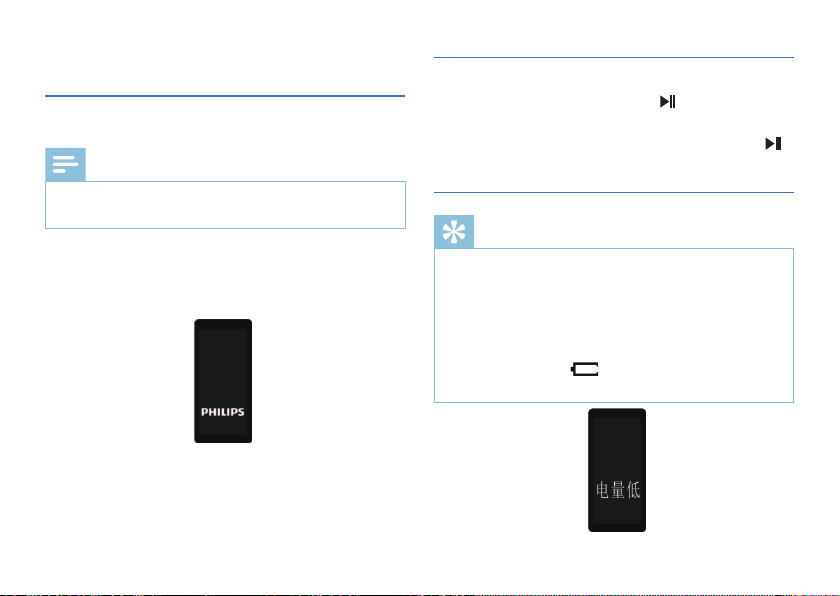
2 当电源开关由“关”拨到“开”位置后,本机立即自动开机,
然后显示“PHILIPS”,如下图所示。
然后直接进入语音模式,短按“菜单键”可以在语音模式、音
乐模式之间进行切换,长按“菜单键”进入系统设置。
08 ZH
此后,本机的开机 / 关机由播放键控制,具体如下:
开机:在关机状态下,长按“播放键” ( )约 2 到 3 秒钟开机,
直至屏幕上显示开机画面“PHILIPS”。
关机:在开机状态(录音状态除外)下,长按“播放键”( )
约 2 到 3 秒钟关机,直至屏幕上显示“PHILIPS” 字样。
提示
•
本机使用内置锂电池供电,如果长时间不使用录音笔,请
把电源开关拨到“OFF”位置。
如果录音笔无法正常工作,请确认机器是否已没电。
•
•
机器工作过程中,请勿直接把电源切断,否则会损坏文件
或导致机器导常。
当电量指示标志为“ ”时,请及时充电;低电时界面
•
提示如下图:
Page 9
充电方法
注意
•
当录音笔与电脑连接时,对录音笔的手动操作将无效。
1 使用 USB 数据线将本机与 PC 相连接。
2 使用专用充电器充电。
当采用以上方法连接后,本机进入充电状态。电量指示标志由空
到满循环变化,表示本机现正处于充电状态,充电指示灯橙色灯
常亮。一般情况下,充满电需要 3 小时左右。充满电时,电池符
号显示满格,橙色灯灭。
4.2 连接电脑
录音笔可作为大容量的 USB 存储设备,并可方便地对文件进行
存储、备份和移动。可使用 USB 数据线将录音笔与电脑相连,
且无须安装软件,录音笔会自动显示为可移动设备。
提示
•
在文件移入或移出录音笔时,请不要断开录音笔与电脑的
连接。
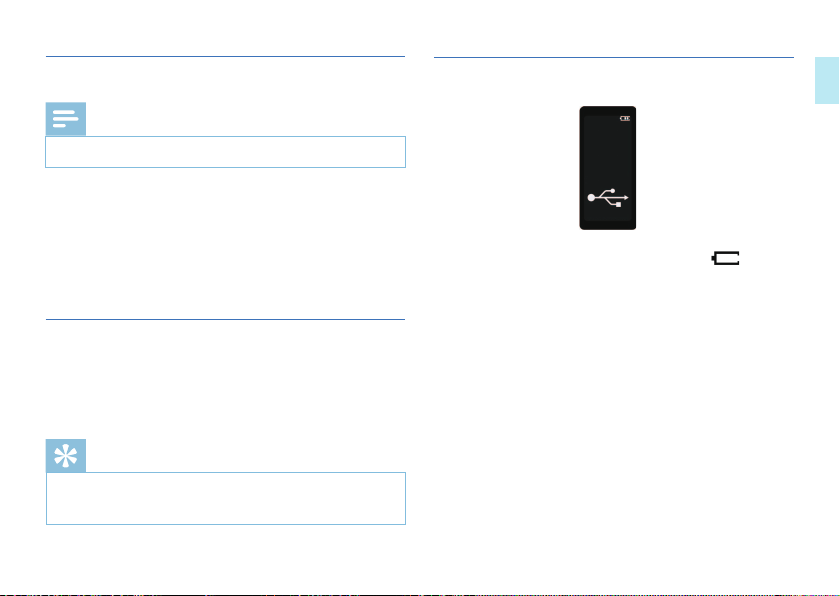
USB
联机、充电界面如下:
如果电源开关键拨到“OFF”,将不显示电池符号 。
中文
Page 10
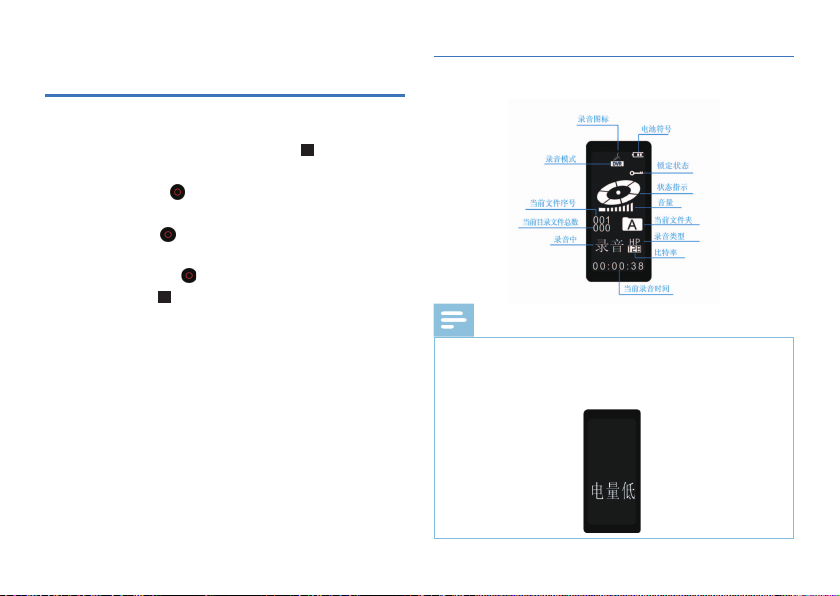
5 录音
当您初次使用录音笔录音时,请注意本节中的内容说明!
1 在语音模式停止状态下,按“停止键”( ),选择要存放
的文件夹目录 A、B、C 或者 D。
2 短按“录音键”( )开始录音,红色指示灯常亮,显示屏
显示“录音”;录音过程中请将内置麦克风对准音源。
3 按“录音键”( )暂停录音, 红色指示灯闪烁,显示屏
显示“暂停中”。
4 再次按“录音键”( ),继续录音。
5 按“停止键”( )保存录音,红色指示灯熄灭,并返回当
前录音文件的停止播放界面。
6 在休眠状态下,长按录音键可以启动录音。
7 录音中长按菜单键进入锁定,防止误触按键暂停或退出录音,
再长按菜单键退出锁定。
10 ZH
录音参考界面如下如所示:
注意
•
电池符号显示空格时,表明低电。低电时系统会自动关机。
如果正在录音,系统自动保存录音文件后再关机。电量不
足时,请及时充电;低电提示界面如下图:
Page 11

提示
•
录音前,请预先设置所需要的录音类型(请参考第 7 章 系
统设置里面“录音品质设置”)和想要保存的文件夹目录(参
考第 6 章 语音、音乐模式里面的基本操作)。
•
查询剩余录音时间是否足够保存下一段录音(请参考第 7
章 系统设置里面“剩余时间查询功能”)。
录音状态下按“ ”键可以保存当前录音并且开始下一段
•
录音。
请先测试录音,以确保录音笔设置正确。
•
•
A、B、C、D 每个文件夹最多可存储 99 个文件,总共可容
纳 396 个文件(99 文件 x 4)。
当录音时间超过录音笔可用容量或达到最大 396 个文件数
•
量的上限时,录音停止。请删除部分录音或将其移至电脑。
录音笔工作在录音模式时,请勿将电源键拨到 OFF,否则会
•
损坏当前录音文件。
如果需要长时间录音,请在录音前预先充满电。
中文
Page 12
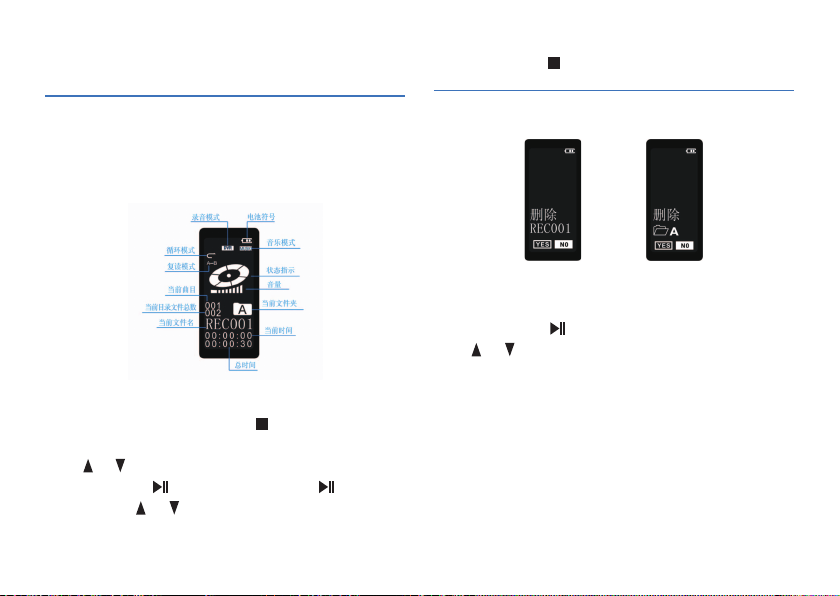
6 语音、音乐模式
5 按“停止键”( )结束播放。
语音模式:播放录音文件的模式,屏幕上显示 DVR;
音乐模式:播放音乐文件的模式,屏幕上显示 MUSIC;
语音模式与音乐模式通过短按菜单键切换,在设置界面短按停
止键或者长按菜单键返回语音模式;
6.1 基本操作
1 在停止状态下,按“停止键”( ),选择语音文件夹,
A→B→C→D→MUSIC→A…
2 按 或 键,选择要播放的文件。
3 按“播放键”( )播放,再按“播放键”( )暂停播放。
4 播放时按住 或 键进行快进或快退,松开按键自动恢复
正常播放。
12 ZH
6.2 删除
删除单个文件 删除整个文件夹里的文件
1 在停止状态下,长按“停止键”约 2 到 3 秒钟进入删除界面;
2 按“播放键”( )选择“删除单个”或“删除全部”;
3 按 或 键选择“YES”或“NO”,
4 按“菜单键”确认。
Page 13
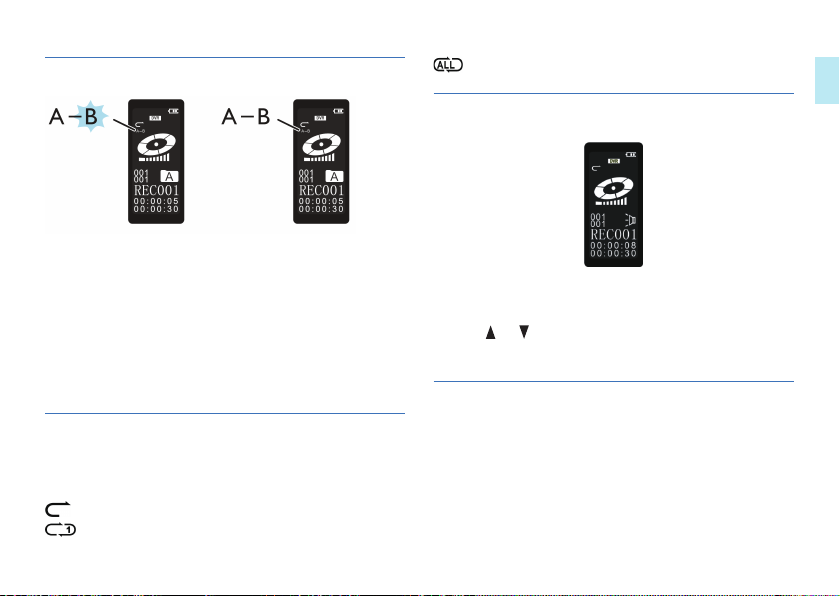
6.3 A-B 复读
图1 图2
1 在播放过程中,短按“音量键”进入 A-B 复读模式,并且确
定复读起点 A,此时屏幕显示 A-B,并且 B 闪烁,如图 1;
2 再按一下“音量键”确定复读终点 B,屏幕显示 A-B,开始复读,
如图 2;
3 再次按下“音量键”取消复读,A-B 显示消失,回到正常播放(如
果不按“音量键”取消复读,复读完 5 次后自动退出复读模
式)。
6.4 播放模式
支持三种播放模式的切换,包括顺序播放、单曲循环和全部循环。
在播放过程中,按“菜单键”在这三种播放模式之间切换。
:顺序播放,从当前文件播放到最后一个文件自动停止。
:单曲循环,只对当前播放的文件进行重复播放。
:全部循环,表示当前文件夹内,全部文件重复播放。
中文
6.5 音量调节
1 长按“音量键”进入音量调节,此时屏幕显示喇叭符号并且
闪烁,如上图;
2 再按 或 键增加或减小音量,同时屏幕上的音量条也会
相应的增减。
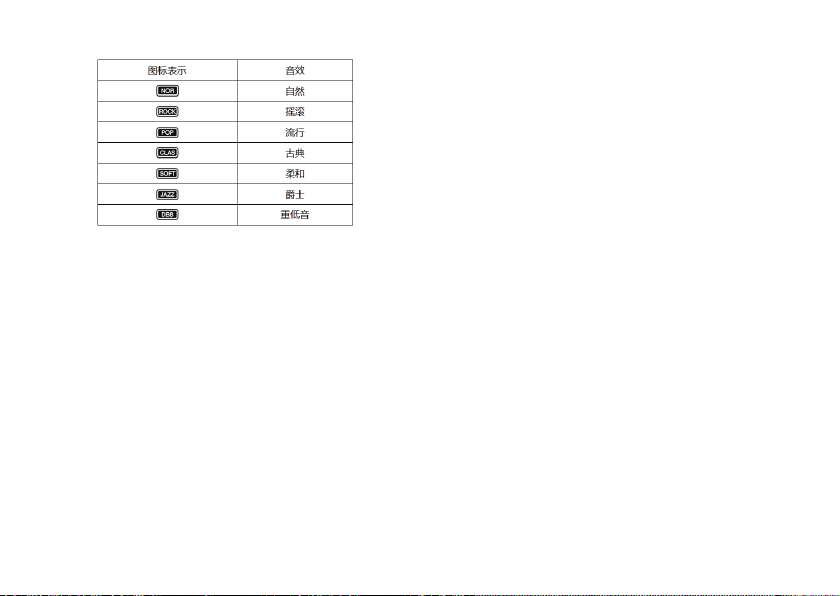
6.6 音效模式(音乐模式)
支持七种音效模式,包括自然、摇滚、流行、古典、柔和、爵士、
重低音。
1 在播放过程中长按“停止键”约 2 到 3 秒钟进行切换。
Page 14
14 ZH
Page 15
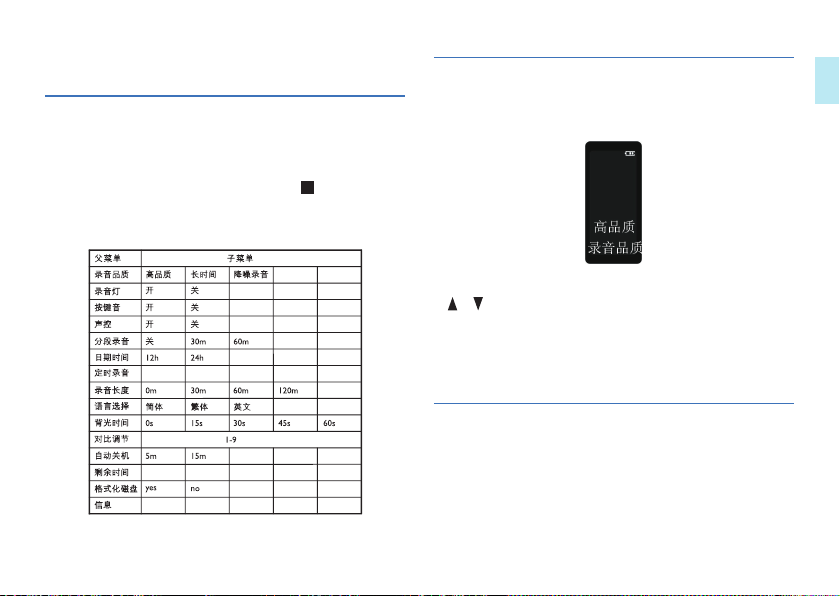
7 系统设置
1 在音乐模式或者语音模式的停止状态下,长按“菜单键”进
入系统设置。
2 在任何一个系统菜单界面按“停止键”( )或长按菜单键
都可以返回到语音模式。
菜单列表如下:
7.1 录音品质
在音乐模式或者语音模式停止界面,长按“菜单键”进入录音
类型设置界面,如下图:
有三种录音类型可供选择:高品质录音、长时录音和降噪录音,
按 或 键选择,按“菜单键”确认并进入下一个菜单。
高品质录音:MP3 格式,高品质,比特率为 128kbps。
长时间录音:MP3 格式,长时间,比特率为 8kbps。
降噪录音: WAV 格式,高品质,比特率为 384kbps。
7.2 录音灯开关
短按“菜单键”进入录音灯开关设置界面,如下图:
中文
Page 16
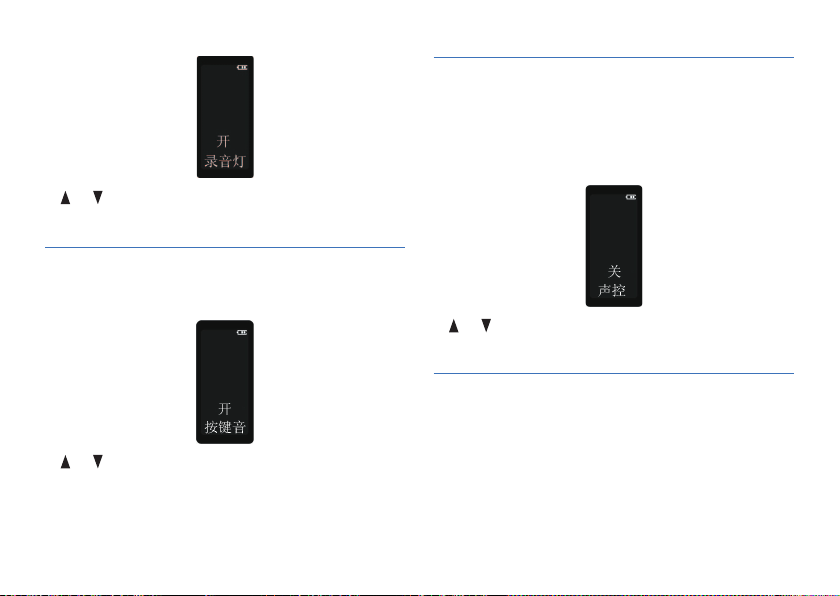
按 或 键选择“开”或者“关”,按“菜单键”确认并进入
下一个菜单。
7.3 按键音开关
短按“菜单键”进入按键音设置界面,如下图:
按 或 键选择“开”或者“关”,按“菜单键”确认并进入
下一个菜单。
16 ZH
7.4 声控录音设置
声控功能一旦被启用,录音过程中,当机器检测到有声音时,
录音笔会自动开始录音;当未检测到声音时,录音笔在 3 秒后
将自动暂停录音;再次检测到声音时,录音笔又会自动开始录音。
短按“菜单键”进入声控录音设置界面,如下图:
按 或 键选择“开”或者“关”,按“菜单键”确认并进入
下一个菜单。
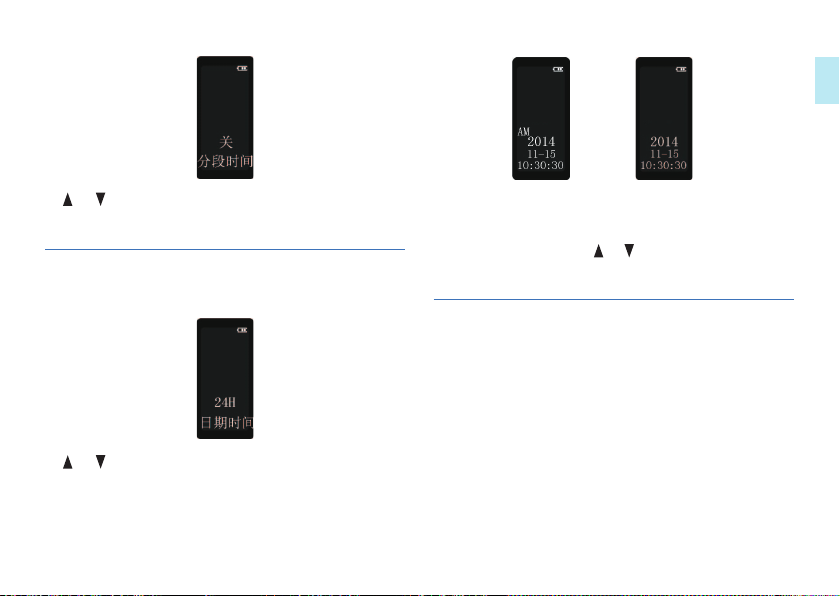
7.5 分段录音功能
分段录音功能打开时,录音过程中到预设的分段时间会自动保
存并且开始下一段录音。短按“菜单键”进入分段录音功能设
置界面,如下图:
Page 17
中文
按 或 键选择预设的分段时间“关”、“30m( 分钟)”、“60m( 分
钟 )”,按“菜单键”确认并进入下一个菜单。
7.6 日期设置
短按“菜单键”进入时间格式设置,如下图:
按 或 键选择“12H”(12 小时制 ) 或者“24H”(24 小时制),
按“菜单键”确认并且进入系统时间界面如下图:
12 小时制 24 小时制
在此状态下,按“音量键”在年、月、日、时、分、秒之间切换,
设置状态下数字闪烁,再按 或 键加减数值。按“菜单键”
保存当前设置的时间 / 日期并且进入下一个菜单。
7.7 定时录音设置
定时录音功能:先预设一个时间,当系统时间到达预设时间时,
系统将会自动录音。
短按“菜单键”进入定时录音设置,如下图:
Page 18
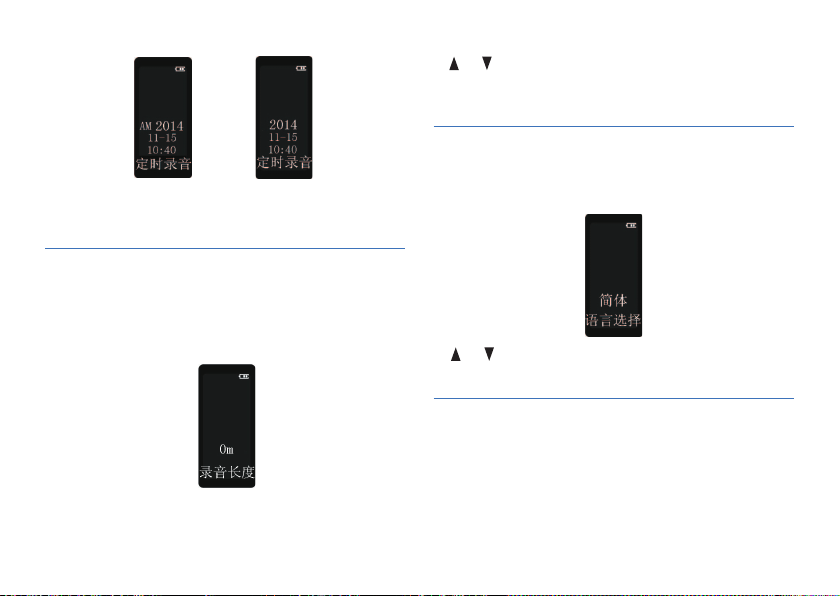
12 小时制 24 小时制
设置方法请参照“日期时间设置”。
7.8 录音长度设置
用于设置定时录音的时间长度,达到预设的时间长度自动保存
录音。
短按“菜单键”进入录音长度设置,如下图:
18 ZH
按 或 键选择“0m”( 关闭自动保存 )、“30m”(30 分 钟自
动保 存 )、“60m”(60 分 钟自动保存 )、“120m”(120 分 钟自
动保存 ),按“菜单键”确认并进入下一个菜单。
7.9 语言选择
用于设置系统语言。
短按“菜单键”进入语言设置,如下图:
按 或 键选择“简体”、“繁体”或者“EN”,“菜单键”
确认并进入下一个菜单。
7.10 背光时间
背光时间有五种时长可供选择:关,15 秒,30 秒,45 秒,60 秒。
如果在设定的时间内没对机器做任何操作,背光将会自动关闭。
如果选择“关”,背光常亮。
短按“菜单键”进入背光时间设置,如下图:
Page 19
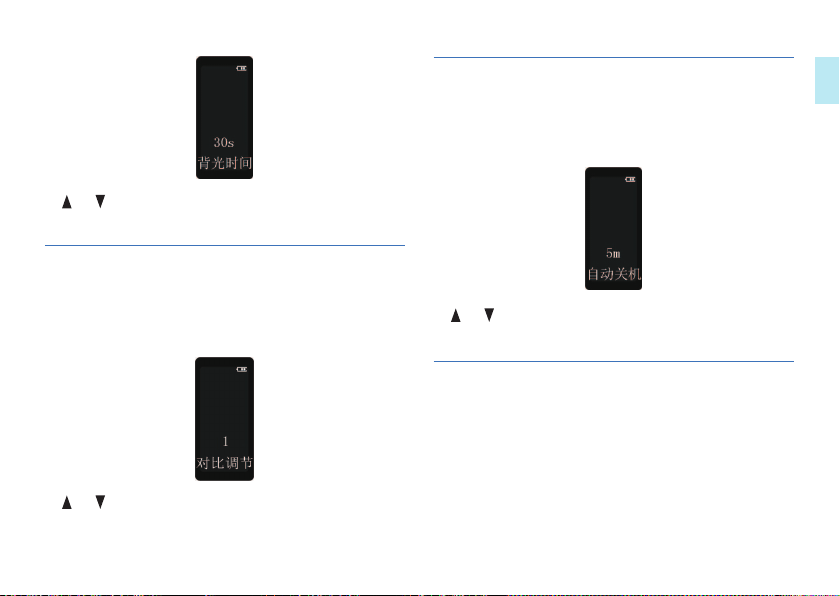
按 或 键选择“关”、“15s”、“30s”“45s”“60s”,
按“菜单键”确认并进入下一个菜单。
7.11 对比调节
用于设置屏幕对比度,可调范围 1-9,对比度值越大,背景显
示越白;对比度值越小,背景越黑。
短按“菜单键”进入对比度设置,如下图:
按 或 键增减数值,按“菜单键”确认并进入下一个菜单。
7.12 自动关机
如果在设定的时间内没对机器做任何操作,系统将会自动关机,
有两个时间可以设置:5 分钟或者 15 分钟。
短按“菜单键”进入自动关机设置,如下图:
按 或 键选择“5m”或者“15m”,按“菜单键”确认并进
入下一个菜单。
7.13 剩余时间
用于查询剩余可录音的时间。
短按“菜单键”进入剩余时间查询界面,如下图:
中文
Page 20
注意
•
不同的录音类型,剩余时间是不一样的。
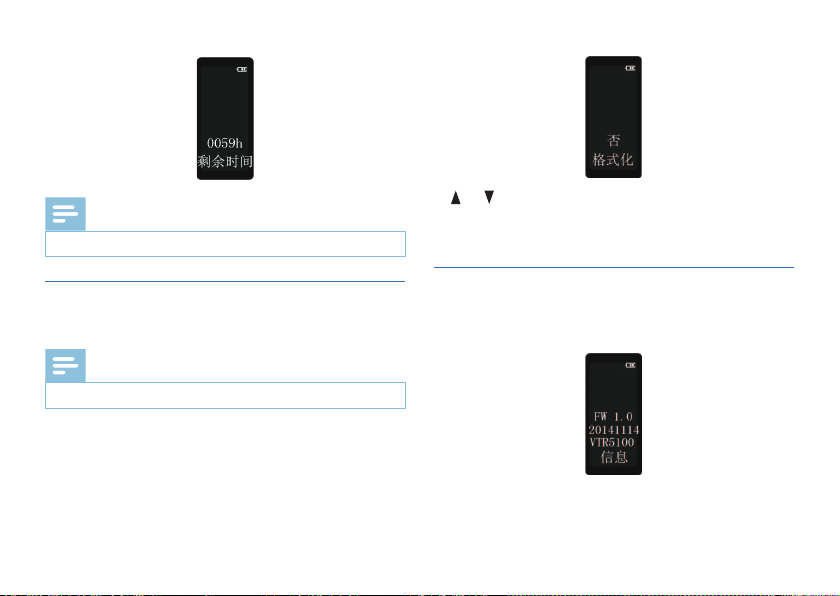
按 或 键选择“是”或者“否”,当选择“是”时,再按“菜
单键”确定格式化,如果选择“否”,再按“菜单键”,取消
格式化并且进入下一菜单。
7.14 格式化磁盘
用于格式化本机内存。
注意
•
格式化前请将存储在本机里的重要资料或者文件备份。
短按“菜单键”进入格式化磁盘界面,如下图:
20 ZH
7.15 信息
用于查看当前固件的版本、日期。
短按“菜单键”进入查看固件版本界面,如下图:
按“菜单键”返回到语音模式。
Page 21

8 常见问题
此处列举了常见问题的解答,可帮助解决录音笔出现的简单问
题。如果故障仍无法排除,请咨询经销商或访问我们的官方网站:
www.philips.com
无法启动录音笔
电池电量已耗尽请及时充电。
录音笔无法录音
超出录音笔允许的最大文件数量或录音笔存储空间已满,请删
除部分录音或将其移至外部存储设备。
录音笔无法播放录音
电池电量已耗尽,请充电。
无法用扬声器收听录音
1 耳机已插入,请取下耳机。
2 音量已设置为最低值,调整扬声器音量。
中文
Page 22

9 技术参数
存储器
参考录音时间(8GB):降噪录音模式约 48 小时,高音质录音
模式约 136 小时,长时间录音模式约 2160 小时。
内置存储器类型:NAND Flash 闪存
移动存储器 (PC):是
电池满电状态下,录音笔最长可以录音 12 个小时。
尺寸和重量
宽 × 高 × 深:22.7×97.6×14.8 mm
重量(含电池):40 g
系统要求
操作系统:Windows 7/Vista/XP/2000, Mac OS X, Linux
接口:USB 接口
录音
录音格式:MP3 / WAV
(高品质)HQ:比特率为 128kbps,格式为 MP3
(长时间)LP:比特率为 8kbps,格式为 MP3
(降噪)NR:比特率为 384kbps,格式为 WAV
22 ZH
运行条件
温度:5° – 45° C
空气湿度:10% – 90%, 不凝结
Page 23

Content
1 Welcome 24
1.1 Product features
2.1 Safety 25
2.2 Hearing protection 25
3 Your recorder
3.1 What’s in the box? 26
3.2 Overview 26
4 Start to use
4.1 Power on/off 27
4.2 Battery charging
5 Recording
6 Voice & music mode
6.1 Basic operations
6.2 Delete
6.3 A-B Replay
6.4 Play mode
6.3 Volume adjustment
6.4 Equalizer Mode (for music mode)
7.1 Quality settings 34
7.2 Record light 35
7.3 Key tone 35
24
7.4 Voice-activated recording 35
7.5 Auto divide recording 36
252 Important
7.6 Set date & time
7.7 Record timer 37
7.8 Duration 37
7.9 Language 38
7.10 Display backlight 38
26
7.11 Display contrast 39
7.12 Auto power-off 39
7.13 Remaining recording time 39
7.14 Format memory 40
27
7.15 Information 40
28
29
31
31
32
32
33
33
33
347 System settings
English
36
428 Frequently asked questions
439 Technical parameters
EN 23
Page 24

1 Welcome
Welcome to the world of Philips! We are honored by your
choice and purchase of Philips’ products. You can have
Philips’ comprehensive technical supports from our website,
e.g. user’s manuals, software downloading and warranty
information etc.
www.philips.com
1.1 Product features
Digital noise reduction: Effectively filter the ambient noise
in the recording environment and record clear sound, which
is recommended to use in noisy environment. It’s recording
type is PCM Noise Reduction.
HD loudspeaker: The adoption of high quality speaker
•
allows you to experience natural sound during playback of
recordings or music files as well.
Record in MP3 format.
•
Quick access to recordings and data by using high speed
•
USB 2.0.
Voice-activated recording.
•
•
USB mass storage, ensuring maximum compatibility.
•
Keylock function: Keylock function can prevent accidentally
touch pause or exit button during recording.
24 EN
Page 25

2 Safety information
2.1 Safety
•
To avoid a short circuit, do not expose the product to rain
or water.
Do not expose the device to excessive heat caused by
•
heating equipment or direct sunlight.
•
Protect the cables from being pinched, particularly at plugs.
•
Attention! Before using the device please read this user’s
manual carefully. The company shall not be liable for any
data loss due to erroneous operation or causes of a
force majeure nature. Special attention should be given to
careful operations and prepare backup of files.
2.2 Hearing protection
Observe the following guidelines when using your
headphones:
Adjust to suitable volume; do not use the earphone for a
•
long time.
Please do not turn the volume up beyond your tolerance.
•
Do not turn up the volume so high that you can’t hear
•
what’s around you.
•
When in dangerous conditions, please carefully use the
earphones or stop using.
Do not use the earphones when driving, cycling and
•
skateboarding to avoid traffic accident and violating laws
and regulations.
English
Page 26
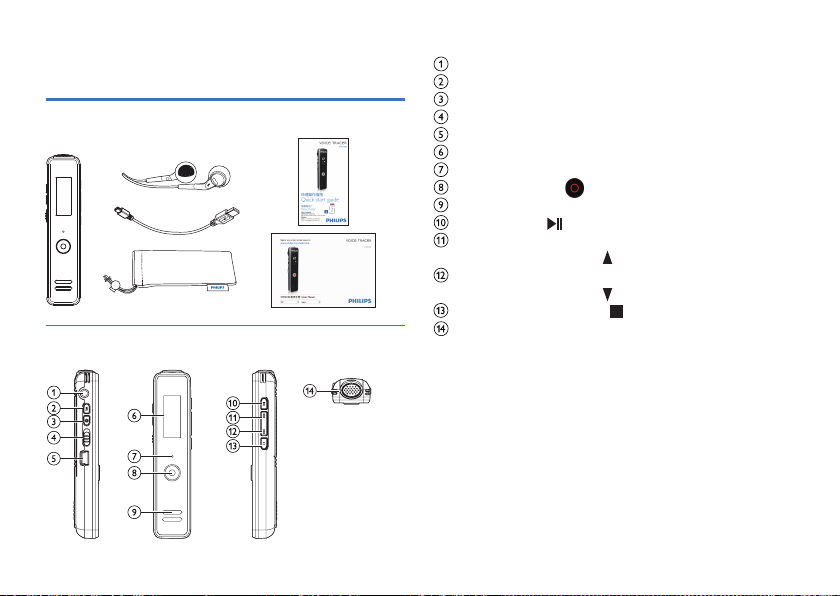
3 Your recorder
3.1 What’s in the box?
3.2 Overview:
26 EN
Headset jack
Volume (VOL)
Menu key (MENU)
Power on/off (ON/OFF)
USB port
Display
Record, Play, Charging indicator
Record, Pause
Speaker
Play, Pause
Volume up, Fast reverse, File selection previous,
Menu item selection
Volume down, Fast forward, File selection next,
Menu item selection
Stop, Folder selection
Microphone jack (MIC)
Page 27
4 Start to use
2 Press the ON/OFF switch to power the device on/off.
4.1 Power on/off
Note
•
Please recharge the device for three hours before using it
for the first time! (See also chapter 4.2 Charging battery,
page 28.)
To power on/off,
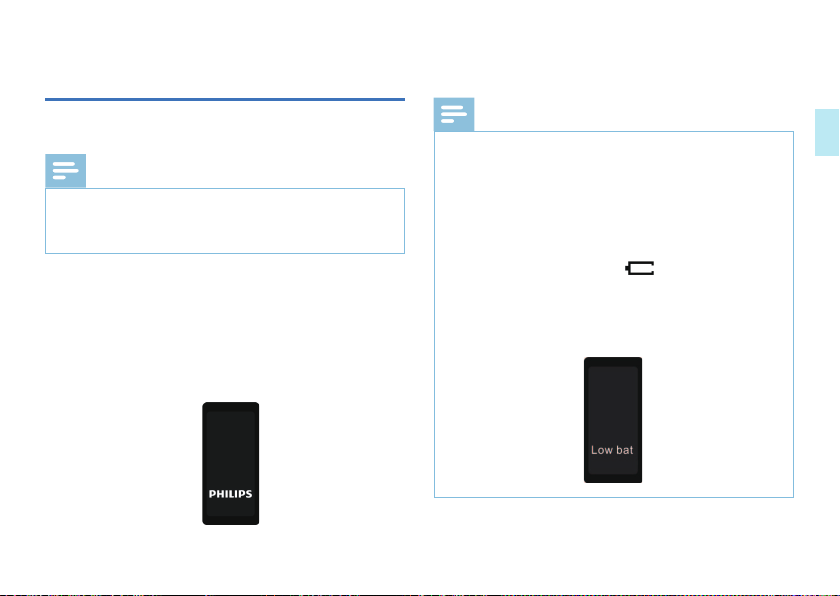
1 Slide the on/off switch on the side of the device in the ON
position,
•
The device turns on and the start-up screen is
displayed; the device starts automatically and then
displays “PHILIPS”, as shown below.
Note
If the device shall be idle for a long time, please slide the
•
power switch to OFF position.
If the device cannot work normally, please make sure the
•
device is not out of electricity.
•
When the device is recording, please do not cut off the
power, otherwise damaged file or malfunction may be
resulted.
•
When the battery indicator “ ” is displayed, please
charge the device promptly.
•
Please charge battery in advance if you need to record
for a long time. A fully charged battery will allow you to
record for approx 6.5 hours.
English
Page 28
4.2 Battery charging
1 Prior to charging, please slide power switch to ON
position.
2 Connect the device to PC through USB cable or use
special charger to recharge.
The battery indicator shows a battery icon turning from
•
empty to full repeatedly, indicating that the device is
recharging, with orange charging indicator being lit.
•
The device can be fully charged in around 3 hours.
•
The orange charging indicator is not displayed when the
device is fully charged.
Note
During charging, the device cannot be used to record or
•
playback.
Connect to computer
The device can be used as a USB mass storage to
conveniently store, back up and move files. Link the device
to a computer with a USB cable, the voice recorder can
automatically be recognized as a portable device without the
need to install any software.
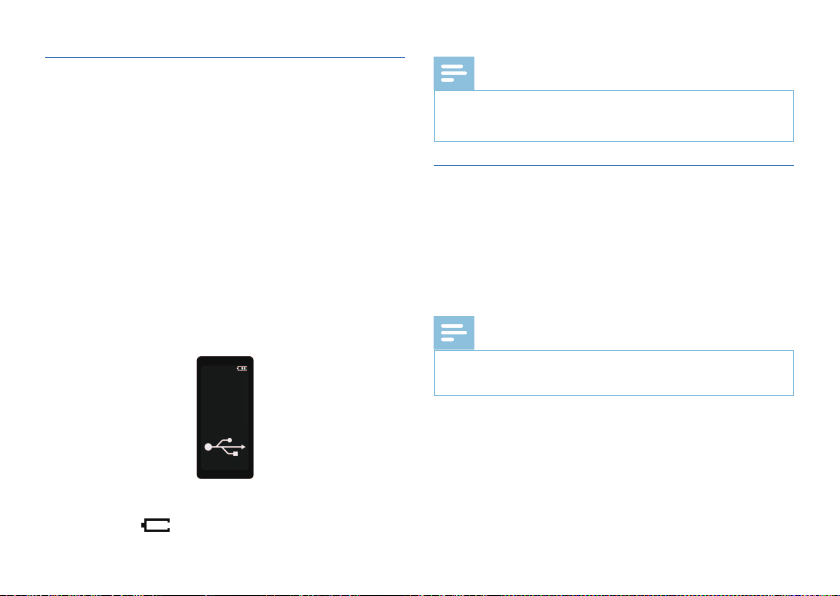
USB connection and charging interface:
When the power switch is slide to the OFF position, the
battery symbol will not be displayed.
28 EN
Note
When moving files into or out of the device, please do
•
not disconnect the device from the computer.
Page 29
5 Recording
1 In the stop state of voice mode, press STOP button to
select the folder you prefer. You can select folder A, B, C, D.
2 Press REC button to start recording,
the red indicator light will be on and the display will
•
show “REC”; please point the top of the device towards
the source of sound.
3 Press REC button to pause recording,
•
the red indicator light will flicker, and the display will
show “Pause”.
4 Press REC button again to resume recording.
5 Press STOP button to save recording,
red indicator light is turned off, and the device will
•
return to the Stop interface of current recorded file.
6 Long-press menu button to realize lock screen which can
avoid hitting pause or exit button. Long-pres menu button
to release the lock.
Note
When the device is in a dormant state, long press REC
•
button to start recording.
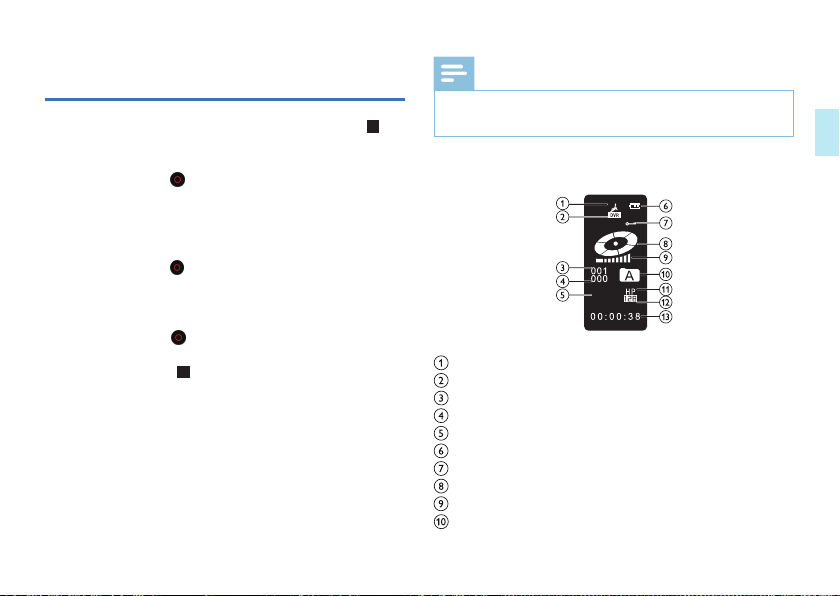
Illustration of recording interface:
REC
Record icon
Voice mode
Current file
The total files of the current directory
Record status
Battery
Lock status
Status indicator
Volume
Voice folder
English
Page 30
Record type
Bit rate
Current duration of recording
Note
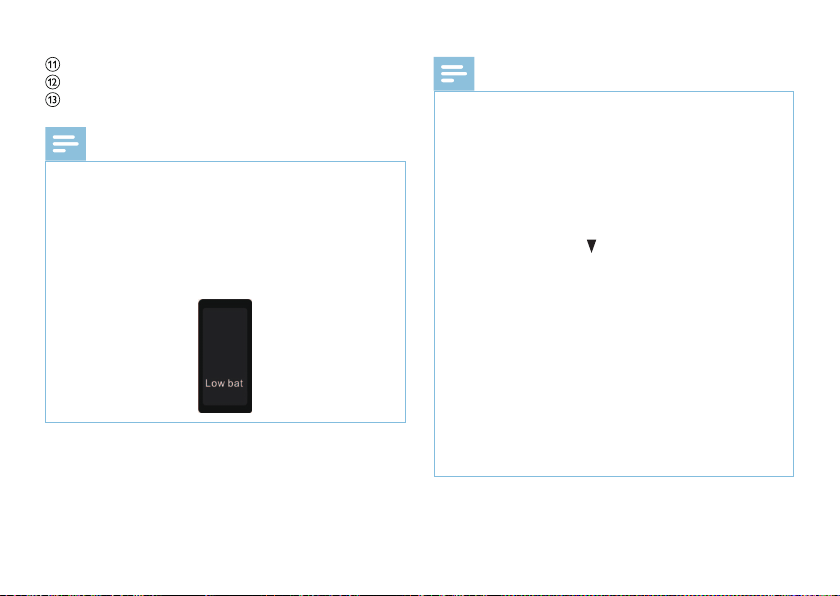
When the low battery icon occurs, it means the battery
•
is nearly empty and the system will automatically
shut down. If the device is recording, the system will
automatically save the recorded file then shut down. If
the device has low battery, please recharge promptly.
When the device is to shut down due to low battery,
the following icon will display.
30 EN
Note
Prior to recording, please preset the recording format
•
you need (See “Quality settings” in System settings,
chapter 7.1, page 34.) and the folder where you want to
save recorded files (See “Voice folder selection” in the
Voice & music mode, chapter 6, page 31).
Check if the remaining recording time is sufficient for the
•
next recording (See “Remaining recording time” in The
System setting, chapter 7.13, page 39).
•
When recording, press button to save the current
recording and start the next recording.
•
Please test recording to ensure that the Voice Tracer
setting is right.
A/B/C and D folder can store 99 files at most, with 396
•
files in total (99 x 4).
•
If the recording time exceeds the usable capacity of the
device or the number of files reaches the limit of 396, the
recording stops. Please delete part of recording or move
it to a computer.
•
When the device is in the recording mode, please do
not slide power switch to OFF, otherwise the current
recoding files will be damaged.
Page 31
6 Voice & music mode
Voice mode: the device will display DVR when it's playing
recorded documents;
Music mode: the device will display MUSIC when it's playing
music documents;
The two modes can be switched through short-pressing
menu button.
Return to voice mode by short pressing stop button or long
pressing menu button in the settings interface.
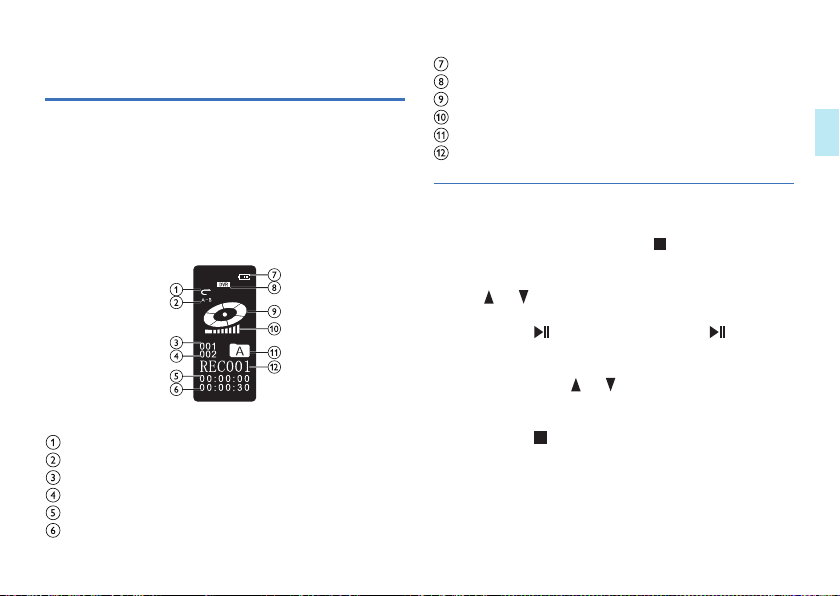
Interface of playing files
Play mode
Replay mode
Current file
The total files of the current directory
Current time
Total time
Battery
Voice mode
Status indicator
Volume
Voice folder
Current file
6.1 Basic operations
1 In stop state, press STOP button ( ) to select voice
folder, A-B-C-D-MUSIC-A…
2 Press or to select the file you want to play.
3 Press “PLAY”( ) to play and press“PLAY”( ) to stop
the playing.
4 When playing, press or to fast forward or backward,
release the button to resume playing.
5 Press“STOP”( ) to end the playing.
English
Page 32
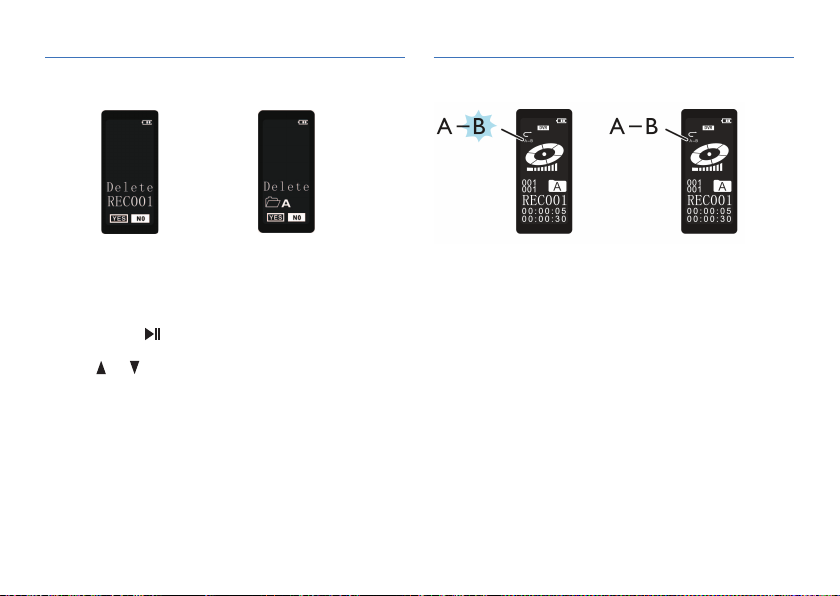
6.2 Delete
6.3 A-B Replay
Delete current file Delete all files in the folder
1 In stop state, long press “STOP”button for 2 to 3 seconds
to enter delete interface;
2 Press “PLAY”( ) to choose “Delete one”or “Delete all”;
3 Press or to choose“YES”or“NO”;
4 Press “MENU”to confirm.
32 EN
Figure 1 Figure 2
1 When playing, short press VOL button to enter A-B replay
mode, and set the start mark A, then the screen displays
A-B, and B flashes as shown in Figure 1;
2 Short press VOL button to set the finish mark B, screen
displays A-B, and start to replay as shown in Figure 2;
3 Repress the VOL button again to cancel replay, display A-B
disappears and return to normal playing (if not press VOL
button to cancel replay, device will automatically exit replay
mode after replay for five times).
Page 33
6.4 Play mode
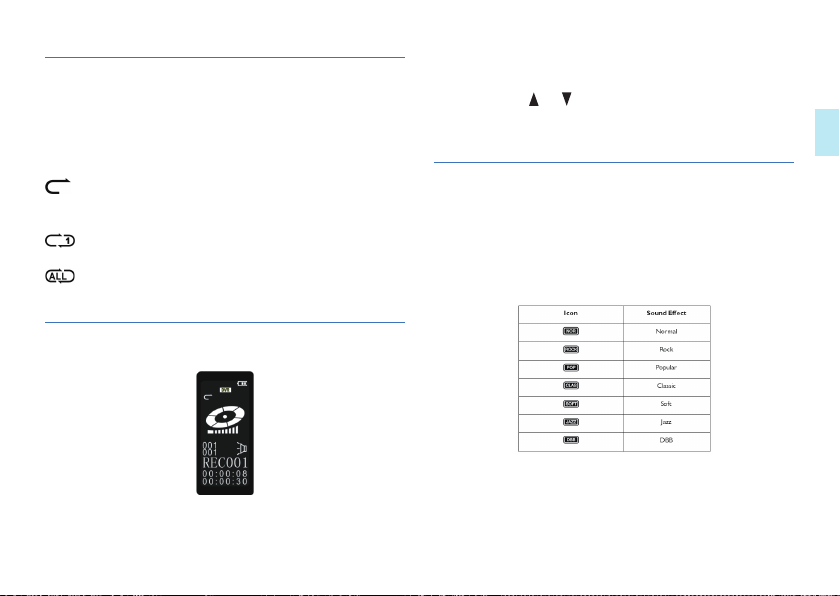
The device supports three play modes, including Sequence,
Repeat one and Repeat all. It is able to switch among those
three play modes by pressing MENU button when playing.
following figure.
2 Press button or to turn up or turn down the volume,
then the volume bar on the screen will correspondingly
increase or reduce.
English
:Sequence, it means to play in the order that from the
current file to the last one, and then it automatically stops
playing.
:Repeat one, it means to repeatedly play the current file
only.
:Repeat all, it means to play all files in the current folder
repeatedly.
6.5 Volume adjustment
1 Long press VOL button to enter volume adjustment, with
screen displaying a speaker icon flashing, as shown in the
6.6 Equalizer Mode (for music mode)
The device supports seven sound effect modes, including
normal, rock, popular, classic, soft, and jazz and DBB.
Long press STOP key for 2-3 seconds to switch among them
when playing.
Page 34
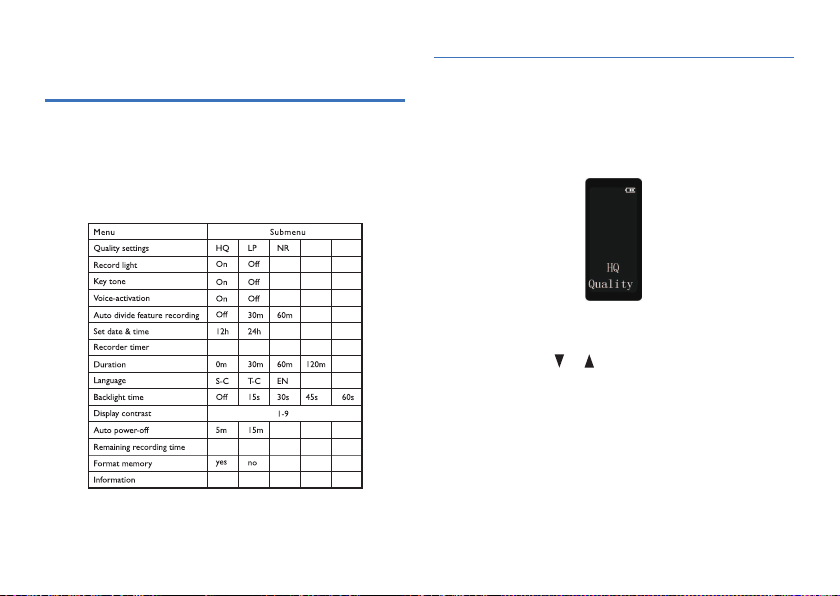
7 System settings
7.1 Quality settings
1 In the stop state of music mode, long press “MENU” to
enter system settings.
2 Return to voice mode interface by pressing “STOP” button
from any system menu interface.
34 EN
1 In the stop interface of music mode or voice mode, long
press MENU button to enter quality settings Interface as
shown in the following figure:
2 Three types of recording are available: high-quality
recording, long-time recording and noise reduction
recording. Press or to select the one you prefer.
HQ: MP3 format, high quality, with bit rate of 128kbps.
LP: MP3 format, long time, with bit rate of 8kbps.
NR: WAV format, high quality, with bit rate of 384kbps.
3 Press MENU to confirm and enter the next menu.
Page 35
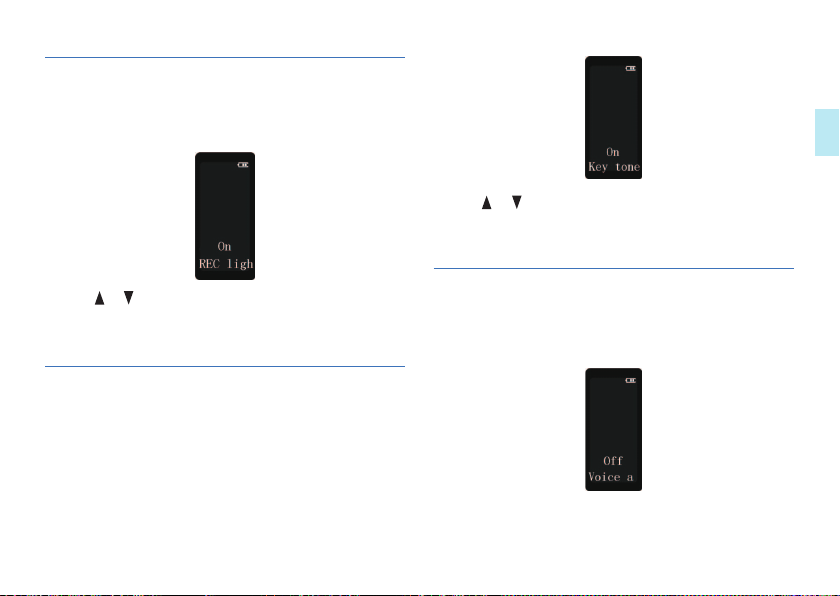
7.2 Record light
1 Short press MENU button to enter record light setting
interface, as below:
English
2 Press or to select “On” or “Off”.
3 Press MENU to confirm and enter the next menu.
2 Press or to select “On” or “Off”.
3 Press MENU to confirm and enter the next menu.
7.3 Key tone
1 Short press MENU button to enter device sounds setting
interface, as shown in the following figure:
7.4 Voice-activated recording
1 Short press the MENU to enter voice-activated settings
interface, as shown in the following figure:
Page 36
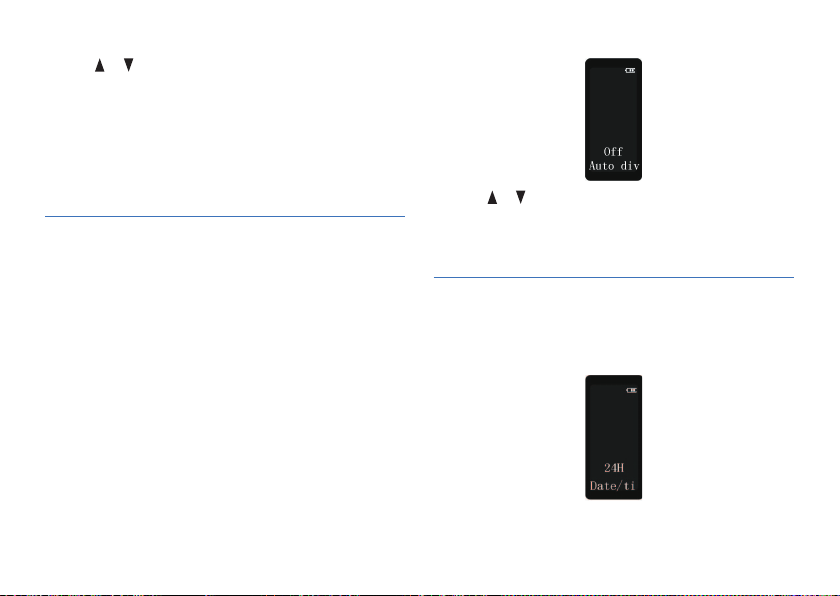
2 Press or to select “On” or “Off”,
if voice-activated recording is enabled, recording session
•
will start when you begin speaking.
when you stop speaking, the device will automatically
•
pause recording after three seconds of silence, and
resume only when you begin speaking again.
3 Press MENU to confirm and enter the next menu.
7.5 Auto divide recording
You can automatically divide large recordings, such as a multihour meeting recording. Once the set time has been reached,
the device stops the current recording and automatically
starts a new one.
1 Short press on the MENU to enter the auto divide feature
recording setting interface, as shown in the following
figure:
36 EN
2 Press or to select preset auto divide time : “Off”,
“30min” and “60min”.
3 Press MENU to confirm and enter the next menu.
7.6 Set date & time
1 Short press on the MENU to enter the time format setting
interface, as shown in the following figure:
Page 37
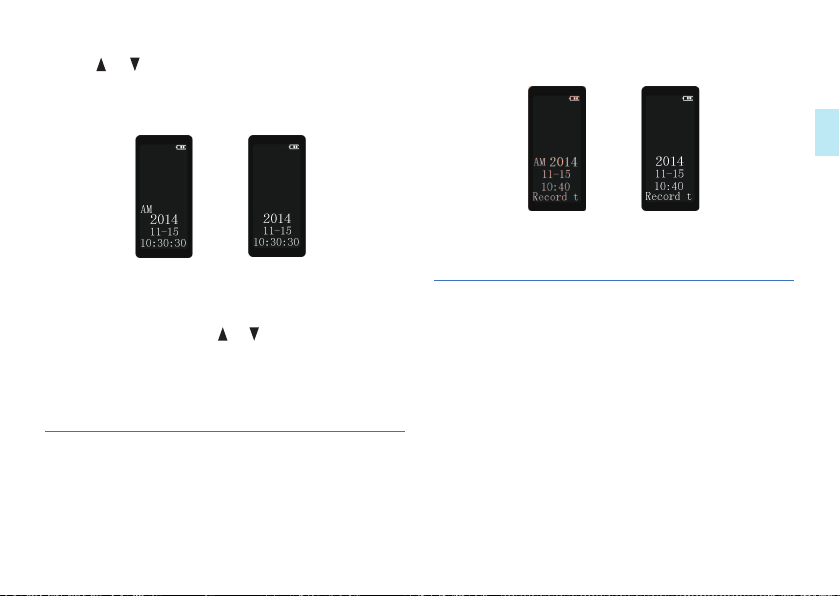
2 Press or to select “12H” or “24H” format.
3 Press MENU to confirm and enter the system time setting
interface, as shown in the following figures:
12h 24h
4 In this state, press VOL to switch among the year, month,
date, hour, minute and second. The number will flash in
the state of setting, press or to adjust the numerical
value.
5 Press MENU to save the current time/date settings and
enter the next menu.
7.7 Record timer
You can use this function to start a recording at a specified
date and time.
Short press the MENU button as shown in the following
figures:
English
12h 24h
The setting method refers to “Set date & time”.
7.8 Duration
It is used to set time duration of auto recording. Device will
automatically save recording when reachs the preset time.
1 Short press on the MENU to enter the duration setting, as
shown in the following figures:
Page 38
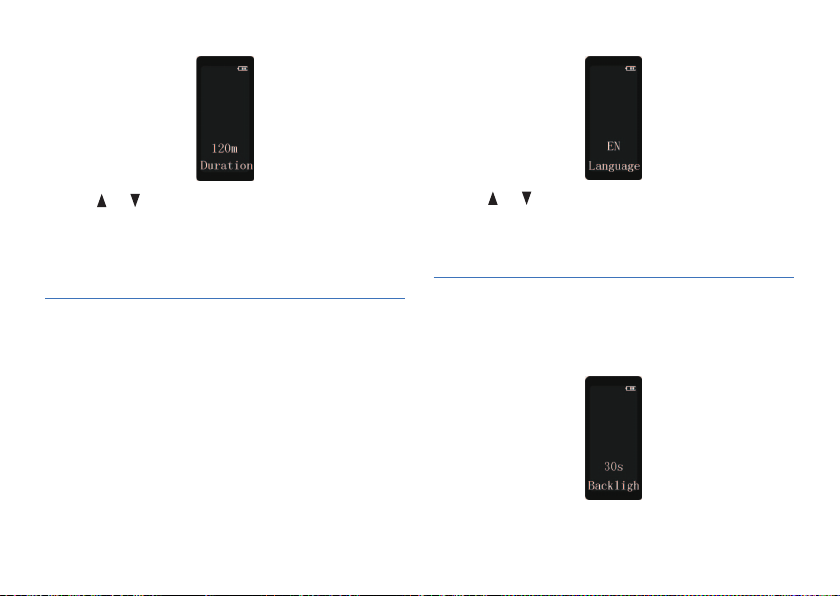
2 Press or button to select “0 m”(to disable auto save),
“30 m”(to auto save at a 30 min interval), “60 m”(to auto
save at a 60 min interval), “120 m”(to auto save at a 120
min interval), press MENU to confirm and enter the next
menu.
7.9 Language
It is used for setting the system language.
1 Short press on the MENU to enter the language setting
interface, as shown in the following figures:
38 EN
2 Press or to select “Simplified Chinese” (S-C),
“Traditional Chinese” (T-C) or “English” (EN).
3 Press MENU to confirm and enter the next menu.
7.10 Display backlight
1 Short press on the MENU to enter the backlight time
setting, as shown in the following figures:
Page 39
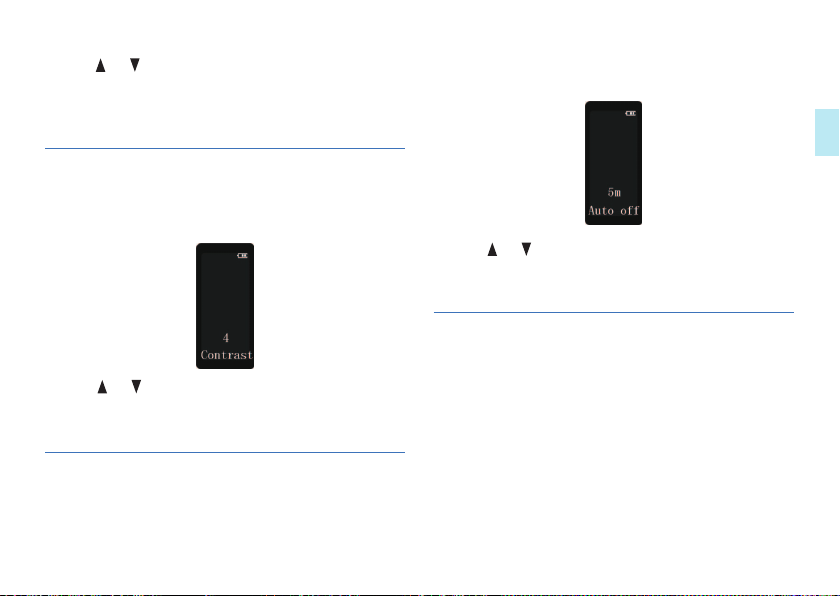
2 Press or to select “Off”, “15s”, “30s”, “45s” and
“60s”.
3 Press MENU to confirm and enter the next menu.
7.11 Display contrast
1 Short press on the MENU to enter the contrast setting
interface, as shown in the following figures:
2 Press or to adjust numerical value.
3 Press MENU to confirm and enter the next menu.
7.12 Auto power-off
The device switches off automatically if no key is pressed
within a preset period of time. This saves power.
1 Short press on the MENU to enter the auto power-off
setting, as shown in the following figures:
2 Press or to select “5m” or “15m ”.
3 Press MENU to confirm and enter the next menu.
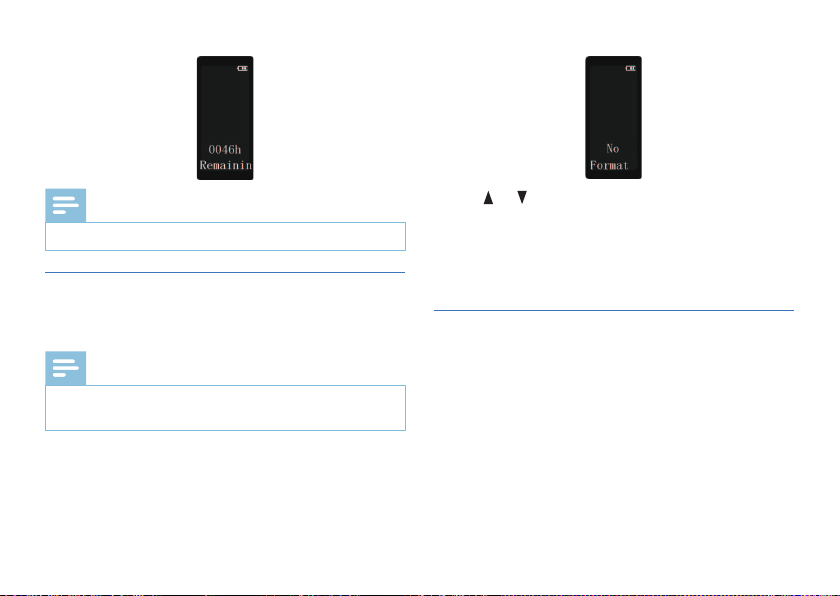
7.13 Remaining recording time
1 It is be used for check remaining time for recording.
2 To enter the remaining time checking interface,
short press the MENU, as shown in the following
•
figures:
English
Page 40
Note
Different record types vary in remaining time.
•
7.14 Format memory
It is used for formatting the internal storage of the device.
Note
Prior to formatting, please backup important data or
•
files in advance.
1 Short press on the MENU to enter the clear memory
interface, as shown in the following figures:
40 EN
2 Press or to select “Yes” or “No”.
3 Press MENU to confirm the formatting,
when you selecting “YES”;
•
if press MENU with “No”, it will cancel the formatting
•
and enter the next menu.
7.15 Information
It is used for checking the version of firmware and the date.
1 To enter the firmware version checking interface,
on the stop interface of music mode, consecutively
•
short press on the MENU as shown in the following
figures:
Page 41

2 Press MENU to return to the voice mode.
English
Page 42

8 Frequently asked questions (FAQ)
Answers to the frequently asked questions are listed here to
solve simple problems that may occur. If the problem cannot
be solved, please contact the dealer or visit our official
website: www.philips.com/support
Cannot switch on the device
The battery is empty, please recharge promptly.
Cannot record with the device
Exceed the maximum file number or the device’s storage is
full, Please delete some recordings or move them to other
storage devices.
Voice Tracer fails to play
Please recharge the battery as it has run out power.
42 EN
Unable to listen to recording via speaker
1 Please unplug the headset.
2 Adjust the volume of speaker as the volume may have been
set at the minimum value.
Page 43

9 Technical parameter
Memory
Reference recording time (8GB): About 48 hours for digital
noise reduction recording mode , 136 hours for high quality
recording mode and 2160 hours for long time recording
mode.
Type of internal memory: NAND Flash (flash memory)
Mobile storage device (PC): Yes
Recording time with fully charged battery: approx 12 hours
Dimensions
Product dimensions (W × D × H): 22.7×97.6×14.8 mm
Weight (including battery): 40 g
System requirements
Operating System: Windows 7/Vista/XP/2000, Mac OS X,
Linux
Port: USB port
Recording
Recording format:
(High quality) HQ: Bit rate 128kbps, MP3 format
(Long time) LP: Bit rate 8kbps, MP3 format
(Digital noise reduction) NR: Bit rate 384kbps, WAV format
Operational condition
Temperature: 5° – 45°C
Air humidity: 10% – 90%, non-condensing
English
Page 44
VTR5100
Page 45

© 2015 Speech Processing Solutions GmbH.
版权所有文档版本
1.0, 2015/01/26
 Loading...