


Table of contents
AIntroduction 2....................................
Dear Philips customer, 2....................................................................................
Specifications 3.....................................................................................................
Supplied accessories 3........................................................................................
Important notes regarding operation 4..........................................................
Special functions of your new video recorder 5..........................................
BConnecting the video recorder 7.....
Preparing the remote control for operation 7.............................................
Connecting your video recorder to the TV set 7........................................
Connecting with a scart cable and 'Easy Link' 8............................................
Connecting with a scart cable without 'Easy Link' 10..................................
Connecting without a scart cable 11...............................................................
Connecting additional devices 12.....................................................................
CInstalling your video recording 13...
Initial installation 13.............................................................................................
Decoder allocation 14........................................................................................
Manual TV channel search 15............................................................................
Using the satellite receiver 16...........................................................................
Sorting TV channels automatically (FollowTV) 17......................................
Automatic TV channel search (Autoinstall) 19.............................................
Monitor function 19............................................................................................
Sorting and clearing TV channels manually 20...............................................
Setting the time and date 21..............................................................................
DImportant notes for operation 22....
Navigation in the screen menu 22...................................................................
EPlayback 23........................................
Playing cassettes 23..............................................................................................
Playing back NTSC cassettes 24.......................................................................
Displaying current tape position 24.................................................................
Searching for a tape position with picture (scanning) 25............................
Still picture / slow motion 25............................................................................
Searching for tape position without picture (forward wind and
rewind) 26.............................................................................................................
Instant View 26.....................................................................................................
Automatic search for a tape position (index search) 26.............................
Automatic search for a blank space on the tape 27.....................................
Selecting picture settings (SMART PICTURE) 27.........................................
General information 29......................................................................................
Recording without automatic switch-off 29...................................................
Recording with automatic switch-off (OTR One-Touch-Recording) 30.
Preventing accidental erasing of cassettes 30................................................
Lining up recordings (assemble cut) 30...........................................................
Selecting the recording speed (SP or LP) 31.................................................
Automatic controlled recording from a satellitereceiver(RECORD
LINK) 32................................................................................................................
'Direct Record' 33...............................................................................................
Switching 'Direct Record' on or off 34...........................................................
HProgramming a recording
(TIMER) 35..............................................
General information 35......................................................................................
Programming a recording (with 'VIDEO Plus+') 35.....................................
Problems and solutions for programmed recordings 37............................
Programming a recording (without VIDEO Plus+) 38.................................
Problem solving for programmed recordings 39..........................................
Programming a recording with 'TURBO TIMER' 40....................................
Problems and solutions for programmed recordings 41............................
How to check, change or delete a programmed recording (TIMER) 42.
'NexTView Link' 42.............................................................................................
IOther functions 43............................
Changing the video (colour) system 43..........................................................
Child lock 44.........................................................................................................
Switching the on-screen display (OSD) off or on 44...................................
Switch off the clock display 45..........................................................................
Switching the remote control command 46..................................................
Continuous playback 47.....................................................................................
Automatic switch-off 48.....................................................................................
Using your video recorder remote control with your TV set 49............
Selecting the sound channel 50.........................................................................
JSuppressing interference 51.............
Optimising the modulator 51............................................................................
Switching the modulator on / off 52................................................................
KBefore you call an engineer 53.........
HOTLINE telephone numbers 53....................................................................
FEliminating picture interference 28.
Optimising tracking 28........................................................................................
Optimising still picture 28..................................................................................
GManual recording 29..........................
Table of contents
VCR
VR 870CC/07
VR 870L/07
VR 870P/07
The remote control
* SMART: To adjust the picture settings during playback
STANDBY/ON m Switch on or off: To switch set on or off, interrupt menu function,
interrupt a programmed recording (TIMER)
CLEAR (CL) Delete: To delete last entry/Clear programmed recording (TIMER)
SELECT Select: To select a function
CHILD LOCK Child lock: To switch child lock on/off
MONITOR TV monitor: To switch between TV reception and VCR playback
0-9 Number buttons:0-9
TURBO TIMER TurboTimer: To programme a recording with the function Turbo
Timer
TIMER k TIMER: To make a TIMER programming with VIDEO Plus+ or to alter
or clear a programmed TIMER
MENU Menu: To call up or end main menu
OK Store/Confirm:To store or confirm entry
P ;q Select: To select the next line or programme number
ENGLISH
P =r Select: To select the previous line or programme number
PLAY G Playback: To play a cassette
H Rewind: During STOP and STANDBY: rewind, during PLAYBACK:
reverse scanning
STOP h Pause/Stop: To stop the tape, except during TIMER-recording
I Forward wind: During STOP and STANDBY: forward wind, during
PLAYBACK: forward scanning
INDEX E Index search: In combination with H / I : to search for previous
or next recording on the cassette
RECORD/OTR n Record: To record the TV channel selected at this moment
STILL R Still picture:To stop the tape and show a still picture

Additional TV functions
qS TV volume: TV volume up
Sr TV volume: TV volume down
TV y TV sound off: To switch the sound on or off
TV m Standby: To switch off the TV
qTV TV programme number:To select next programme number
TV r TV programme number :To select previous programme number
Front of the device
STANDBY/ON m Switch on or off: To switch off or on, interrupt a function, interrupt a
programmed recording (TIMER)
PROGRAMME r Select: One line or programme number down
PROGRAMME q Select: One line or programme number up
RECORD n Record: To record the TV channel selected at this moment
STOP/EJECT ? Pause/Stop, eject cassette:To stop the tape and eject the cassette
RWD [ Rewind: During STOP and STANDBY: rewind, during PLAYBACK:
reverse scanning
PLAY G Playback: To play a cassette
FWD ] Forward wind: During STOP and STANDBY: forward wind, during
PLAYBACK: forward scanning
The symbols on your video recorder
display
These symbols can light up on your video recorder display:
This is where the current operating mode is shown as a symbol.
LP When you have switched on the LP (Long Play) function or when you
play a tape that has been recorded in LP (Long Play).
When you have switched on the child lock.
When a satellite recording has been programmed.
DEC When a decoder has been allocated to the TV channel (currently
selected programme number on the video recorder) you have currently
selected on the video recorder.
When you play a cassette that has been recorded with hifi sound, or
when a hifi sound is transmitted.
When you are making a recording.
k When you have programmed a recording or when a programmed
recording is being made.
D When you are programming daily recordings.
ENGLISH
W When you are programming weekly recordings.
When you have put a cassette in the video recorder.
DATE When the date of the programmed recording is shown.
START When the start time of the programmed recording is shown.
PROG. When the programme number of the programmed recording is shown.
END When the end time of the programmed recording is shown.
VPS/PDC Video Programming System / Programme Delivery Control: when a VPS
or PDC code is being transmitted.
Display of programme number of the TV channel / tape position /
channel name / function.
Tape position in seconds.


AIntroduction
Dear Philips customer,
Instruction manuals are usually very dry since they are technically-oriented and often poorly
translated. I have been employed by Philips for this reason.
Allow me to introduce myself.
My name is Phil. I will be guiding you through the instruction manual and try to be of help in
operating your new device. At appropriate points along the way, I will be providing you with the
following information:
Excuse me?
Here I will be
explaining seemingly
unimportant things.
I hope you have lots of fun with your new device.
Tip
Here I will be giving
you instructions on
functions that help
make it easier to
use your device.
Problem
Here I will help you
to find the cause of
problems and their
solutions.
For experts
Here I will be giving
you instructions on
functions that are
necessary for special
applications.
Phil
P.S. If you have questions or if problems come up during operation, please see the helpful
information in the chapter 'Before you call an engineer'. If this doesn't help you to resolve the
problem, please call the customer support service for your country. The corresponding
telephone numbers and e-mail addresses can be found on the last page of this instruction
manual.
2
Introduction
Welcome to the large family of owners of PHILIPS VHS video recorders.
Thank you for buying a VR870CC/L/P/07 .
Please take the time to read this operating manual before using your video recorder. It contains
important information and notes regarding operation.
The video recorder should not be turned on immediately after transportation from a
cold to a hot area or vice versa, or in conditions of extreme humidity.
Wait at least three hours after transporting the device. The video recorder needs this time in
order to become acclimatised to its new environment (temperature, air humidity, etc.).
Your Philips team hopes that you
will enjoy using your new video
recorder.
This video recorder is used for the recording and playback of VHS video cassettes.
Cassettes with the VHS-C label (VHS cassettes for camcorders) may only be used with a suitable
adapter.
This product complies with the requirements of Directive 73/23/EEC +89/336/EEC +93/68 EEC.
Specifications
ENGLISH
Voltage: 220-240V/50Hz
Energy consumption : 16W
Energy consumption (Standby): less than 4W (clock display switched off)
Rewind time: approx. 100 seconds (cassette E-180)
Dimensions in cm (B/H/T): 38.0/9.3/26.0
Number of video heads :4
Number of video heads (HIFI):2
Recording/playback time: 4 hours (SP) (cassette E-240)
8 hours (LP) (cassette E-240)
Supplied accessories
Operating instructions
Remote control and batteries
Antenna cable
Power cable
Quick install guide
Scart cable (Euro AV cable)
Introduction
3
Important notes regarding operation
Danger: High voltage!
Do not remove the top cover as there is a risk of an electrical shock!
The video recorder does not contain any components that can be repaired by the customer. Please
leave all maintenance work for qualified personnel.
As soon as the video recorder is connected to the power supply, there are some components
that are in constant operation. To switch off the video recorder completely you must disconnect
it from the power supply.
These operating instructions have been printed on non-polluting paper.
Deposit old batteries at the appropriate collection points.
Please make use of the facilities available in your country for disposing of the packaging of the video
recorder in a way that helps to protect the environment.
This electronic device contains many materials that can be recycled. Please enquire about the
possibilities for recycling your old device.
Make sure that air can circulate freely through the ventilation slots on the video recorder. Do not
place the device on an unsteady base.
Make sure that no objects or liquids enter the video recorder. Do not place vases or the like on
the video recorder. If liquid is spilt into it, immediately disconnect the video recorder from the
power supply and call After-sales Service for advice.
Do not place any combustible objects on the device (candles, etc.).
Make sure that children do not place any foreign objects within the openings or ventilation slots.
4
Introduction
Special functions of your new video
recorder
Your PHILIPS video recorder is not just for recording and playing back VHS cassettes. It also has
a whole range of special functions which will make the day-to-day use of your new video
recorder much easier.
Philips has developed a system which produces the best possible playback quality. For old and
often-used video cassettes, this system reduces interference. For new or high quality cassettes, it
emphasises the details.
This function allows you to save the playback settings that suit you best. Select your own personal
settings for this type of film you are currently watching.
Philips provides the best possible connection between your video recorder and other home
cinema equipment.
When you connect your video recorder to your television and plug it into the wall socket, you will
be welcomed with a screen menu. All you have to do is follow the instructions in the 'intelligent
help line' for the next step. Enjoy the automatic TV channel search/save function and the automatic
time setting.
ENGLISH
You can operate the main functions on your television using your video recorder remote
control, even if your television is not a Philips.
This function automatically transfers all the television channel settings onto your video recorder.
Recordings made on your video recorder can be controlled by an external satellite receiver.
Your video recorder can ascertain which channel is currently playing on your television and record
from it at the touch of a button.
The precision tape drive from Philips provides short rewind times and automatic tape length
recognition.
Introduction
5

Simple programming system for video recorders. Makes programming as easy as making a
telephone call. Simply enter the number code associated with your television programme. This
number is located in your favourite television listings magazine.
VIDEO Plus+ and PlusCode are registered trademarks of Gemstar Development Corporation. The
VIDEO Plus+ system is manufactured under licence from Gemstar Development Corporation.
So that you can identify your machine for service questions or in the event of theft, enter the
serial number here. The serial number (PROD.NO.) is printed on the type plate fixed at the
back of the device.
MODEL NO. VR870CC/L/P/07
PROD. NO. ..................
6
Introduction

BConnecting the video recorder
Preparing the remote control for
operation
The remote control and its batteries are packed separately in the original video recorder
packaging. You must install the batteries in the remote control before use - described in the
following section.
1 Take the remote control and the enclosed batteries (2 batteries).
2 Open the remote control's battery compartment and place the
batteries in it as shown in the picture and close the battery
compartment.
The remote control is now ready to use. Its range is approximately 5 meters.
Connecting your video recorder to the TV
set
ENGLISH
The necessary cable connections must be made before you can record or playback TV
programmes using your video recorder.
We recommend that you use a scart cable to connect your TV set and video recorder.
What is a scart cable?
The scart or Euro AV cable serves as the universal connector for picture,
sound and control signals. With this type of connection, there is practically no
loss of quality during the picture or sound transfer.
When you install your video recorder for the first time, select one of the following options:
'Connecting with a scart cable and Easy Link'
If your TV set is equipped with 'Easy Link, NexTView, Megalogic, Datalogic,…' and you wish to
use a scart cable.
Connecting the video recorder
7
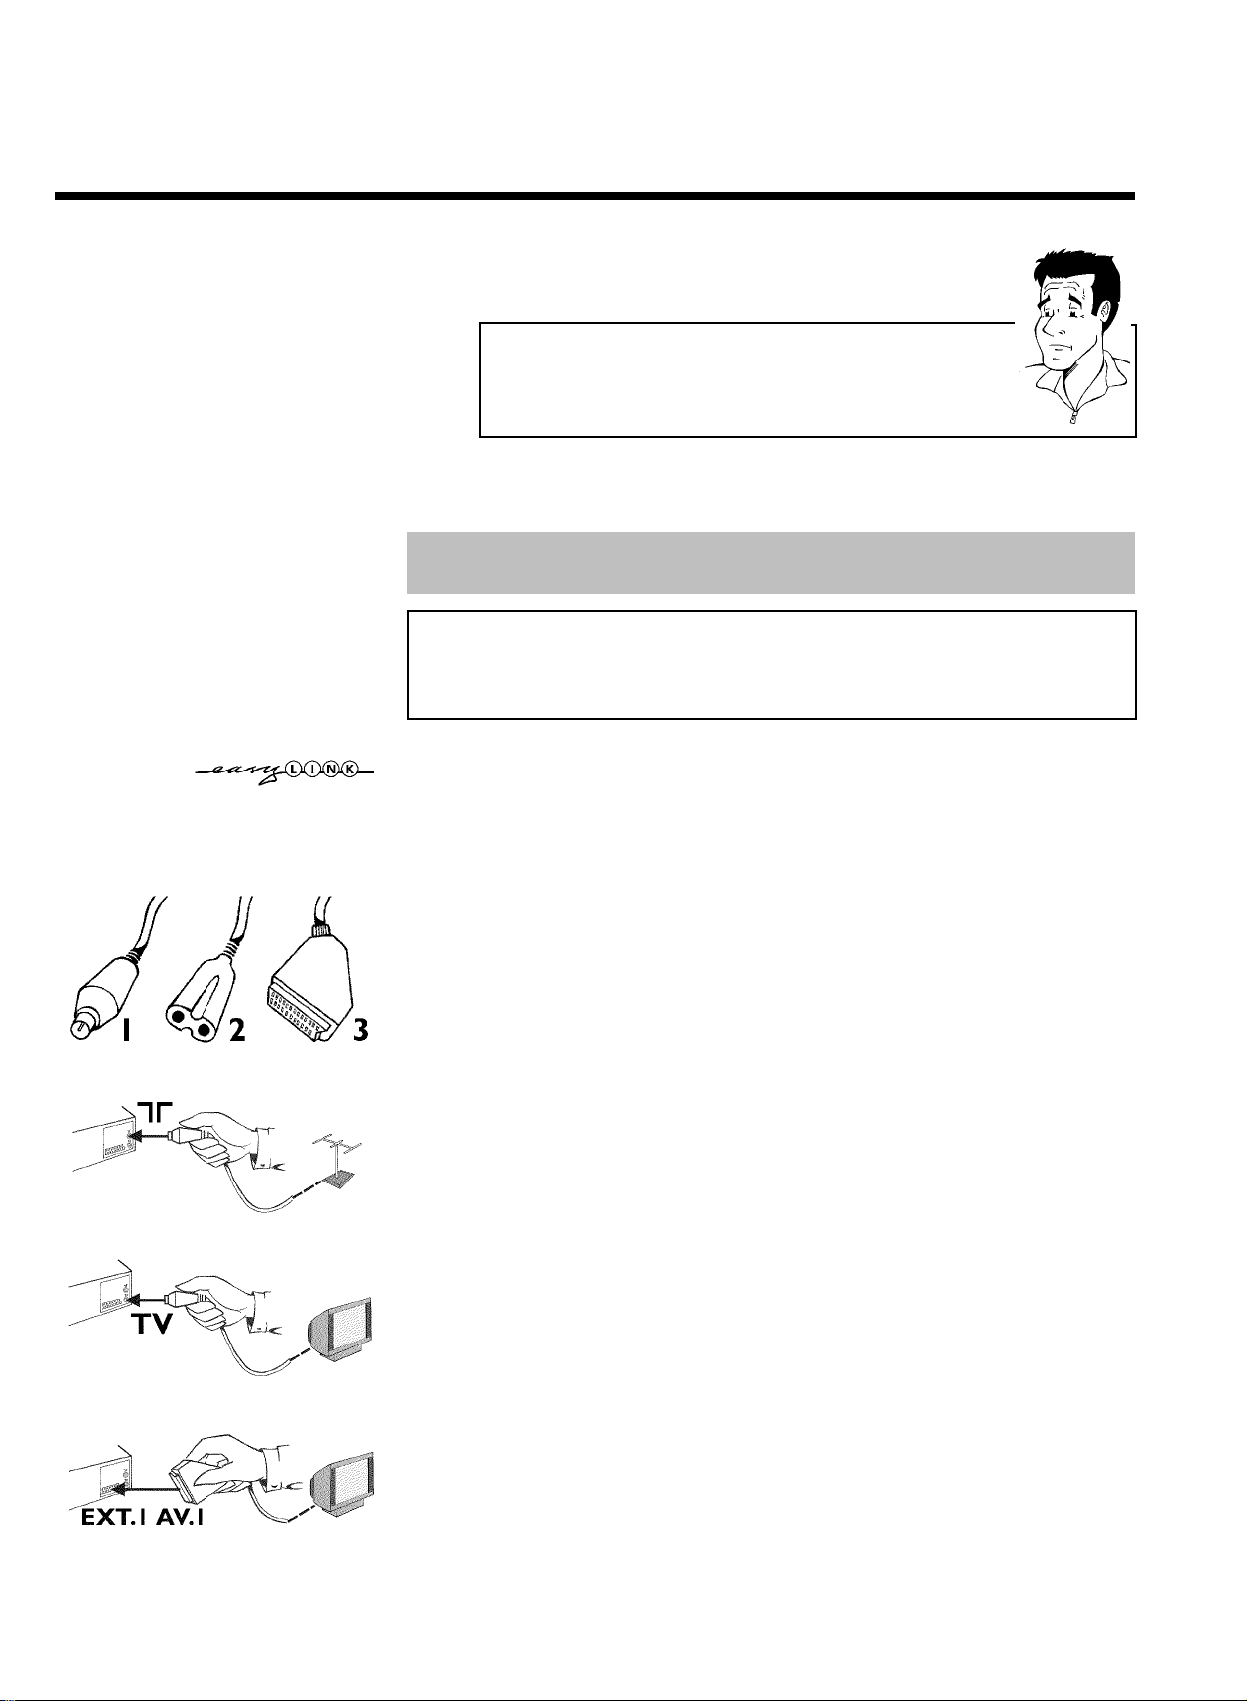
What is Easy Link?
If your TV set is equipped with the following functions, e.g. Easy Link,
NextView, Megalogic, Datalogic,… which are fully compatible with one
another (TV set, video recorder, etc.), your video recorder can exchange
information with your TV set. Please see your TV's operating instructions.
'Connecting with a scart cable without Easy Link'
If your TV set is not equipped with 'Easy Link, NexTView, Megalogic, Datalogic,…' and you are
using a scart cable.
'Connecting without a scart cable'
If you do not wish to use a scart cable.
Connecting with a scart cable and 'Easy
Link'
Your video recorder can exchange information with your TV set using 'Easy Link'. Furthermore,
your TV channels can be transferred in the same order from your TV set to your video
recorder using 'Easy Link'.
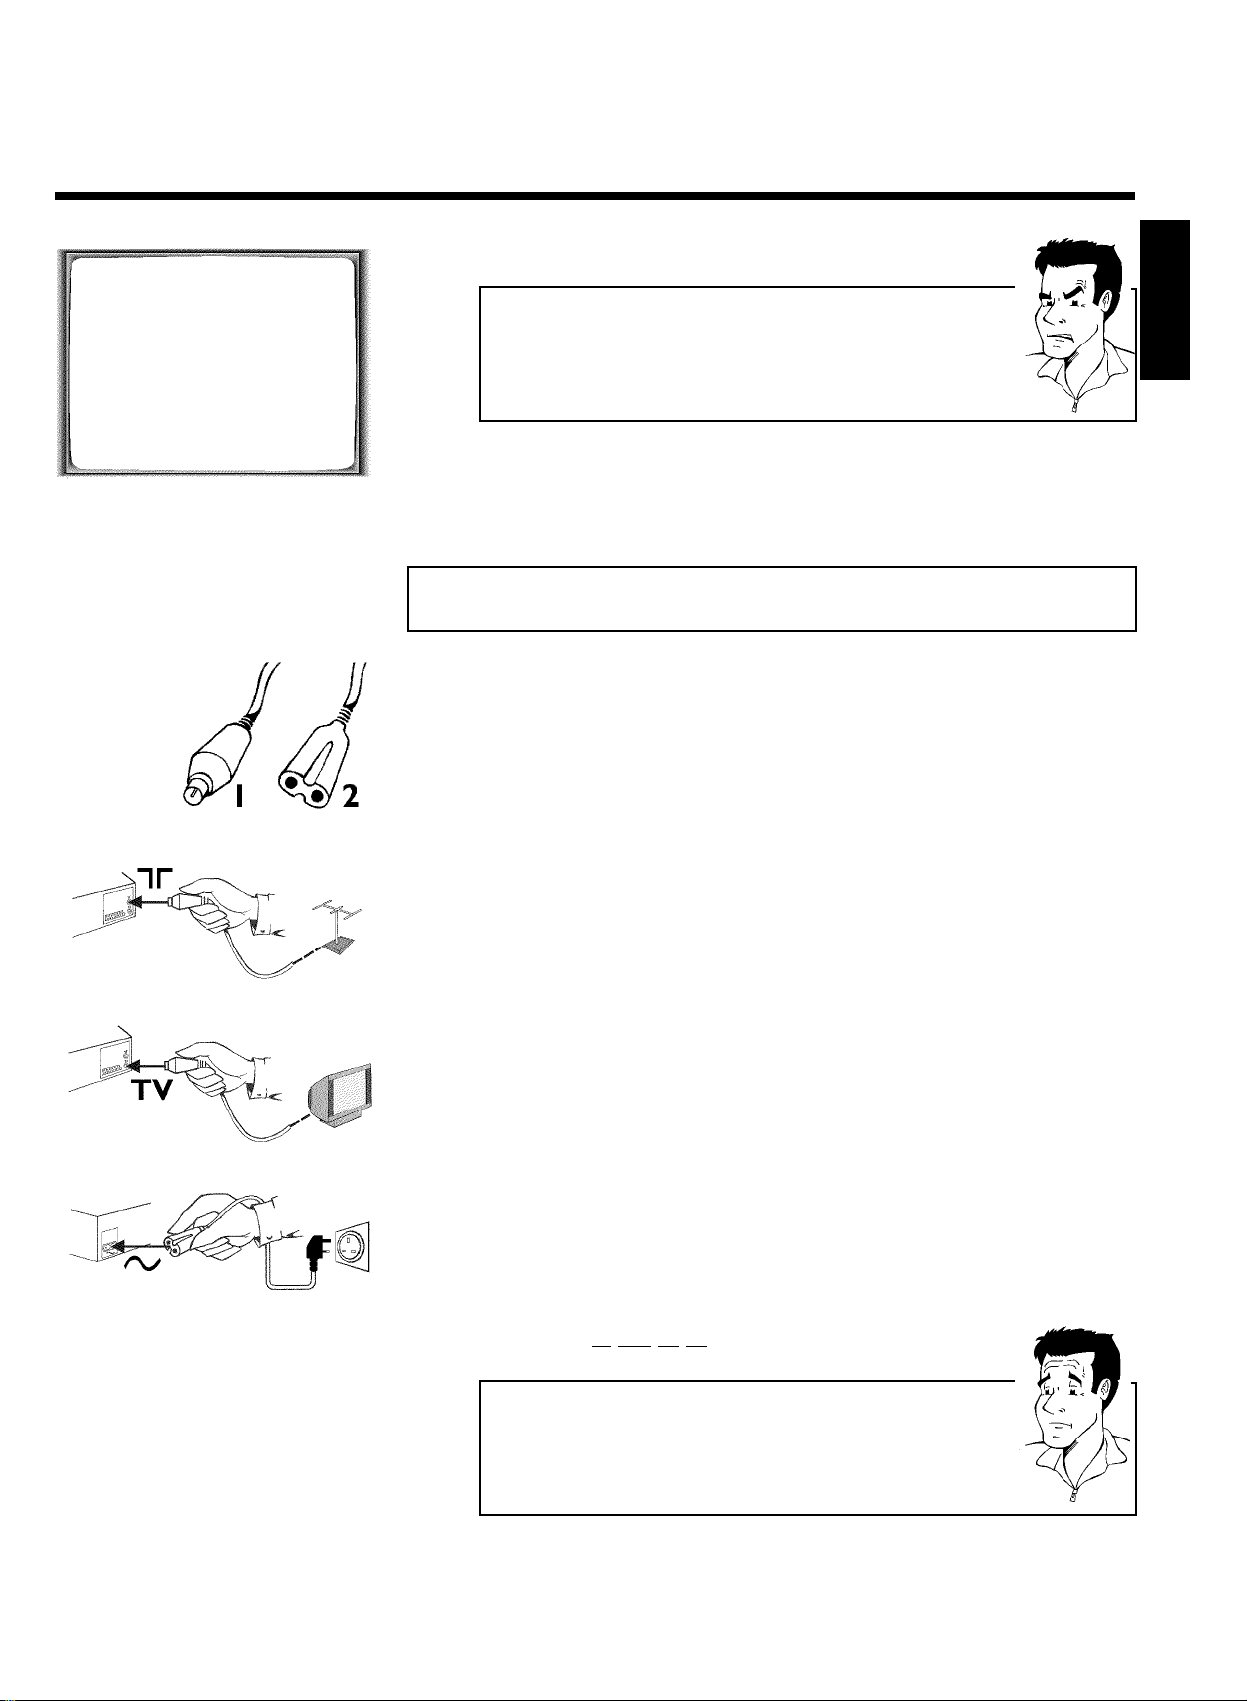
Have the following cables ready:
an aerial cable (1, supplied), a mains cable (2, supplied), a special scart cable (for Easylink) (3).
1 Switch off your TV set.
2 Remove the aerial cable plug from your TV set. Insert it into the
socket 2 at the back of the video recorder.
3 Insert one end of the supplied aerial cable into the socket TV at the
back of the video recorder and the other end into the aerial input
socket at the back of the TV set.
4 Plug in a special scart cable (for Easylink) into the scart socket
EXT.1 AV. 1 at the back of the video recorder and the scart socket
on the TV set reserved for the video recorder operation (see TV set
operating instructions).
8
Connecting the video recorder

My TV set has several scart sockets. Which one should I use?
Please see the operating instructions of your TV set to find out which socket
supports 'Easy Link'.
5 Switch on the TV set.
6 Insert one end of the supplied mains cable into the mains socket
4 at the back of the video recorder and the other end into the wall
socket.
7 A message appears on the screen announcing that the transfer has
started.
The TV set transfers all saved TV channels, in the same order, to the
video recorder.
This may take several minutes.
When all the information has been transferred, the following appears
on the TV screen: 'YEAR', 'MONTH', 'DATE', 'TIME'.
ENGLISH
CLOCK
YEAR è 2001 p
MONTH 01
DATE 01
TIME 20:00
SMART CLOCK ON
________________________________
EXITpMENU STOREpOK
8 Check the year in line 'YEAR'. If required, please change the year with
the number buttons 0-9 on the remote control.
9 Select the next line using P ;q or P =r .
0 Check 'MONTH', 'DATE', 'TIME' and if required modify in the same
way.
A When all information is correct, confirm with OK .
The initial installation is now complete.
Connecting the video recorder
9
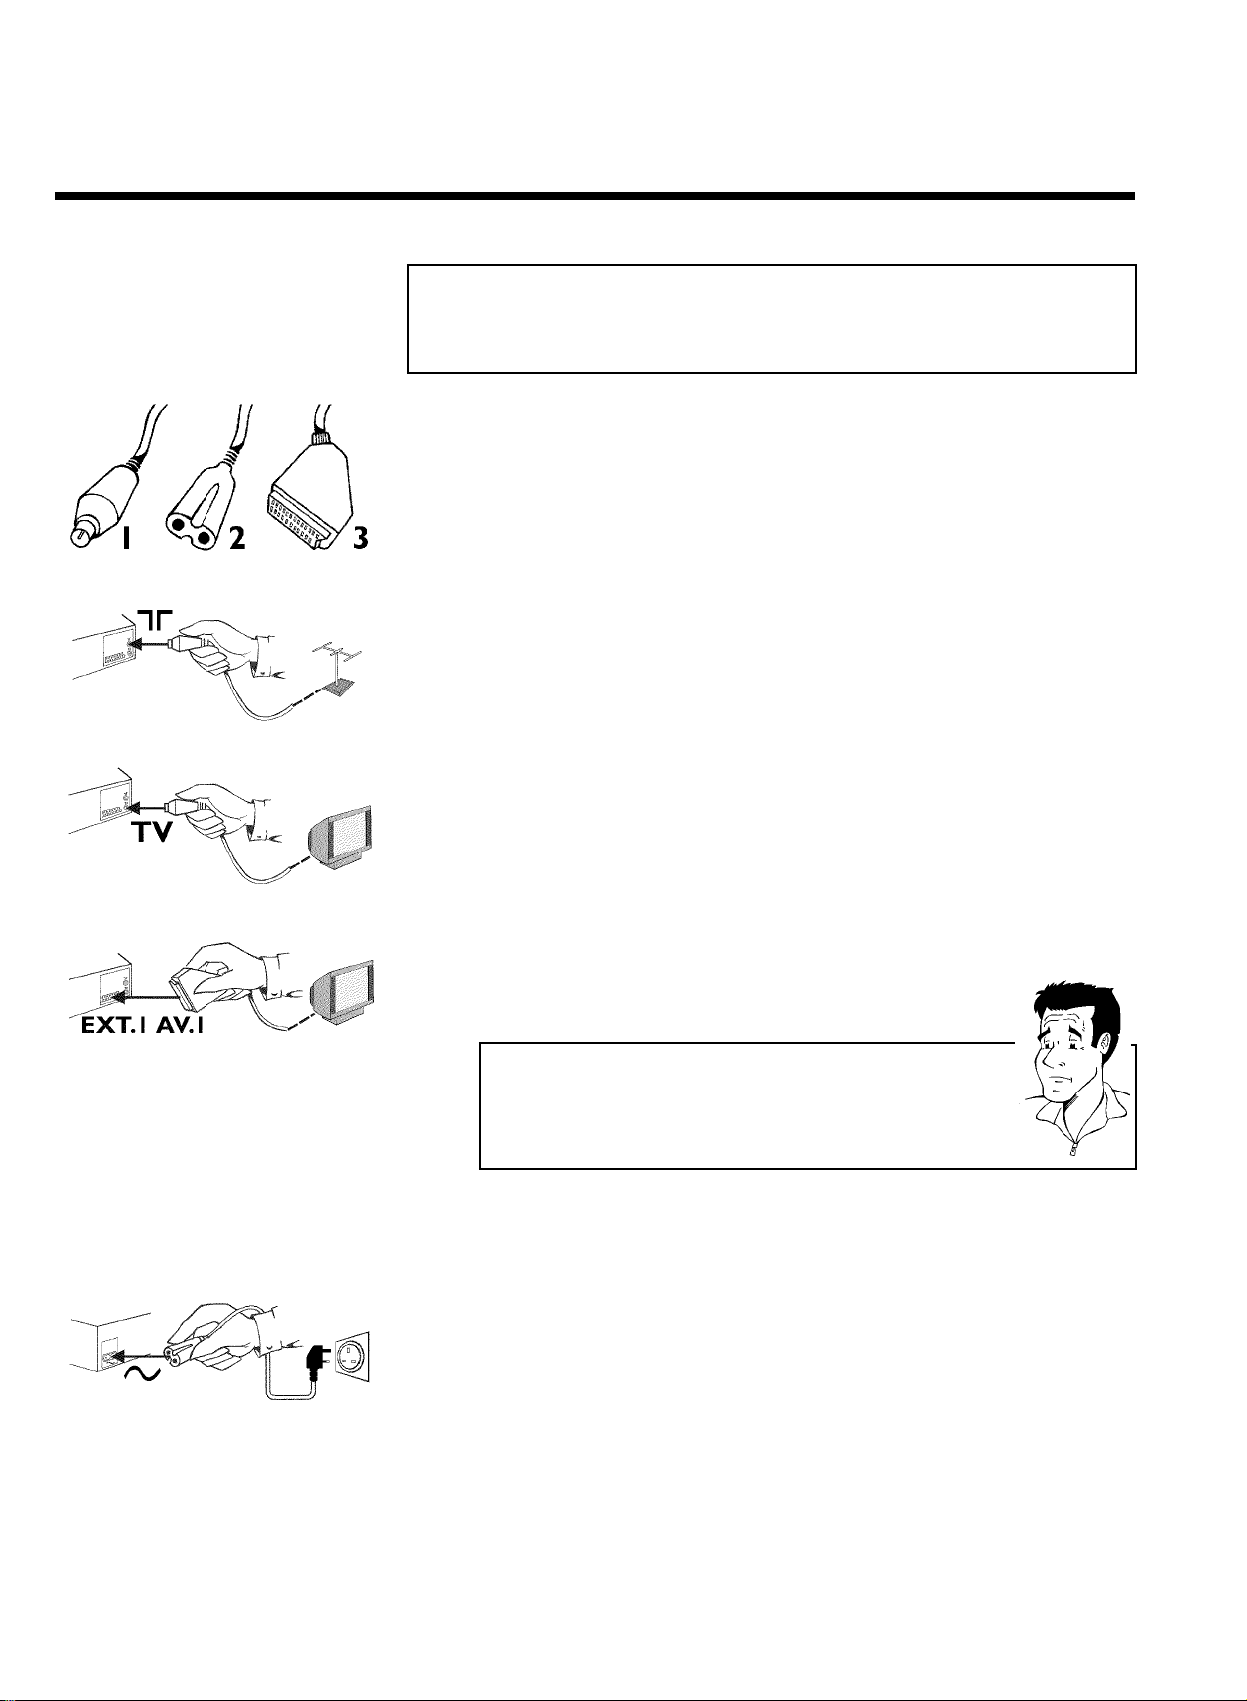
Connecting with a scart cable without
'Easy Link'
Have the following cables ready:
an aerial cable (1, supplied), a mains cable (2, supplied), a scart cable (3).
1 Remove the aerial cable plug from your TV set. Insert it into the
socket 2 at the back of the video recorder.
2 Insert one end of the supplied aerial cable into the socket TV at the
back of the video recorder and the other end into the aerial input
socket at the back of the TV set.
3 Plug one end of a scart cable into the scart socket EXT.1 AV. 1 at
the back of the video recorder and the other end into the suitable
scart socket on your TV set reserved for the video recorder
operation (see your TV's operating instructions).
My TV set has several scart sockets. Which one should I use?
Select that scart socket which is suited for the video output as well as for the
video input.
My TV offers me a selection menu for the scart socket.
Select 'TV' as a connection source of this scart socket.
4 Switch on the TV set.
5 Insert one end of the supplied mains cable into the mains socket
4 at the back of the video recorder and the other end into the wall
socket.
6 If the connection was properly made and your TV was automatically
switched to the programme number for the scart socket, e.g. 'EXT',
'0', 'AV', you will see the following picture:
10
Connecting the video recorder
CONGRATULATIONS
YOU NOW OWN A NEW
PHILIPS
VIDEO RECORDER
CONTINUEpOK
a My screen is empty
b Many TV sets are switched to the programme number for the scart socket
by way of a control signal sent through the scart cable.
b If the TV set does not automatically switch to the scart socket programme
number, manually change to the corresponding programme number on your
TV set (see your TV's operating instructions).
Then, read the paragraph 'Initial installation' in the chapter 'Installing your video recorder'.
Connecting without a scart cable
Have the following cables ready:
an aerial cable (1, supplied), a mains cable (2, supplied).
1 Switch off your TV set.
ENGLISH
2 Remove the aerial cable plug from the aerial input socket of the TV
set. Insert it into the socket 2 at the back of the video recorder.
3 Insert one end of the supplied aerial cable into the socket TV at the
back of the video recorder and the other end into the aerial input
socket at the back of the TV set.
4 Insert one end of the supplied mains cable into the mains socket
4 at the back of the video recorder and the other end into the wall
socket.
5 Switch on your TV set and select the programme number used for
video playback on your TV set (see your TV's operating instructions).
Which programme number is used for video recorder operation?
To ensure the stability of the television picture during cassette playback
(prevention of waves or streaks), special programme numbers have been set
aside on the TV for the use of video recorders. This is usually the highest
possible programme number, e.g. '12', '16', '99' or even programme number
'0'. For more information, please see your TV's operating instructions.
Connecting the video recorder
11

6 Select this programme number and manually start the TV's channel
search as if you wanted to save a new TV channel until the 'test
image' appears.
CONGRATULATIONS
YOU NOW OWN A NEW
PHILIPS
VIDEO RECORDER
CONTINUEpOK
a I do not see a 'test screen'
b Check the cable connections.
b The video recorder 'transmits' on the 583MHz frequency (channel 35)
Repeat the channel search on your TV set.
7 Save this programme number setting on your TV set for video
recorder operation.
Programme number for video recorder operation
You have now saved a programme number for use by your video recorder as
you would a regular TV channel. This programme number must now be used
in future for video recorder playback ('video recorder' TV channel).
You can find more details in chapter 'Initial Installation'.
Connecting additional devices
You can connect additional devices such as decoders, satellite receivers, camcorders, etc. to the
socket EXT.2 AV. 2 .
Two audio sockets AUDIO OUT L R are located on the back of the video recorder (audio
signal output left/right). These can be used to connect stereo systems.
12
Connecting the video recorder
CInstalling your video recording
Initial installation
AUTO INSTALL
SEARCHING
00 TV CHANNELS FOUND
ƒƒƒƒƒƒƒ__________________
PLEASE WAIT...
This chapter shows you how to start the initial installation. The video recorder automatically
seeks out and stores all available TV channels.
'Aim' correctly
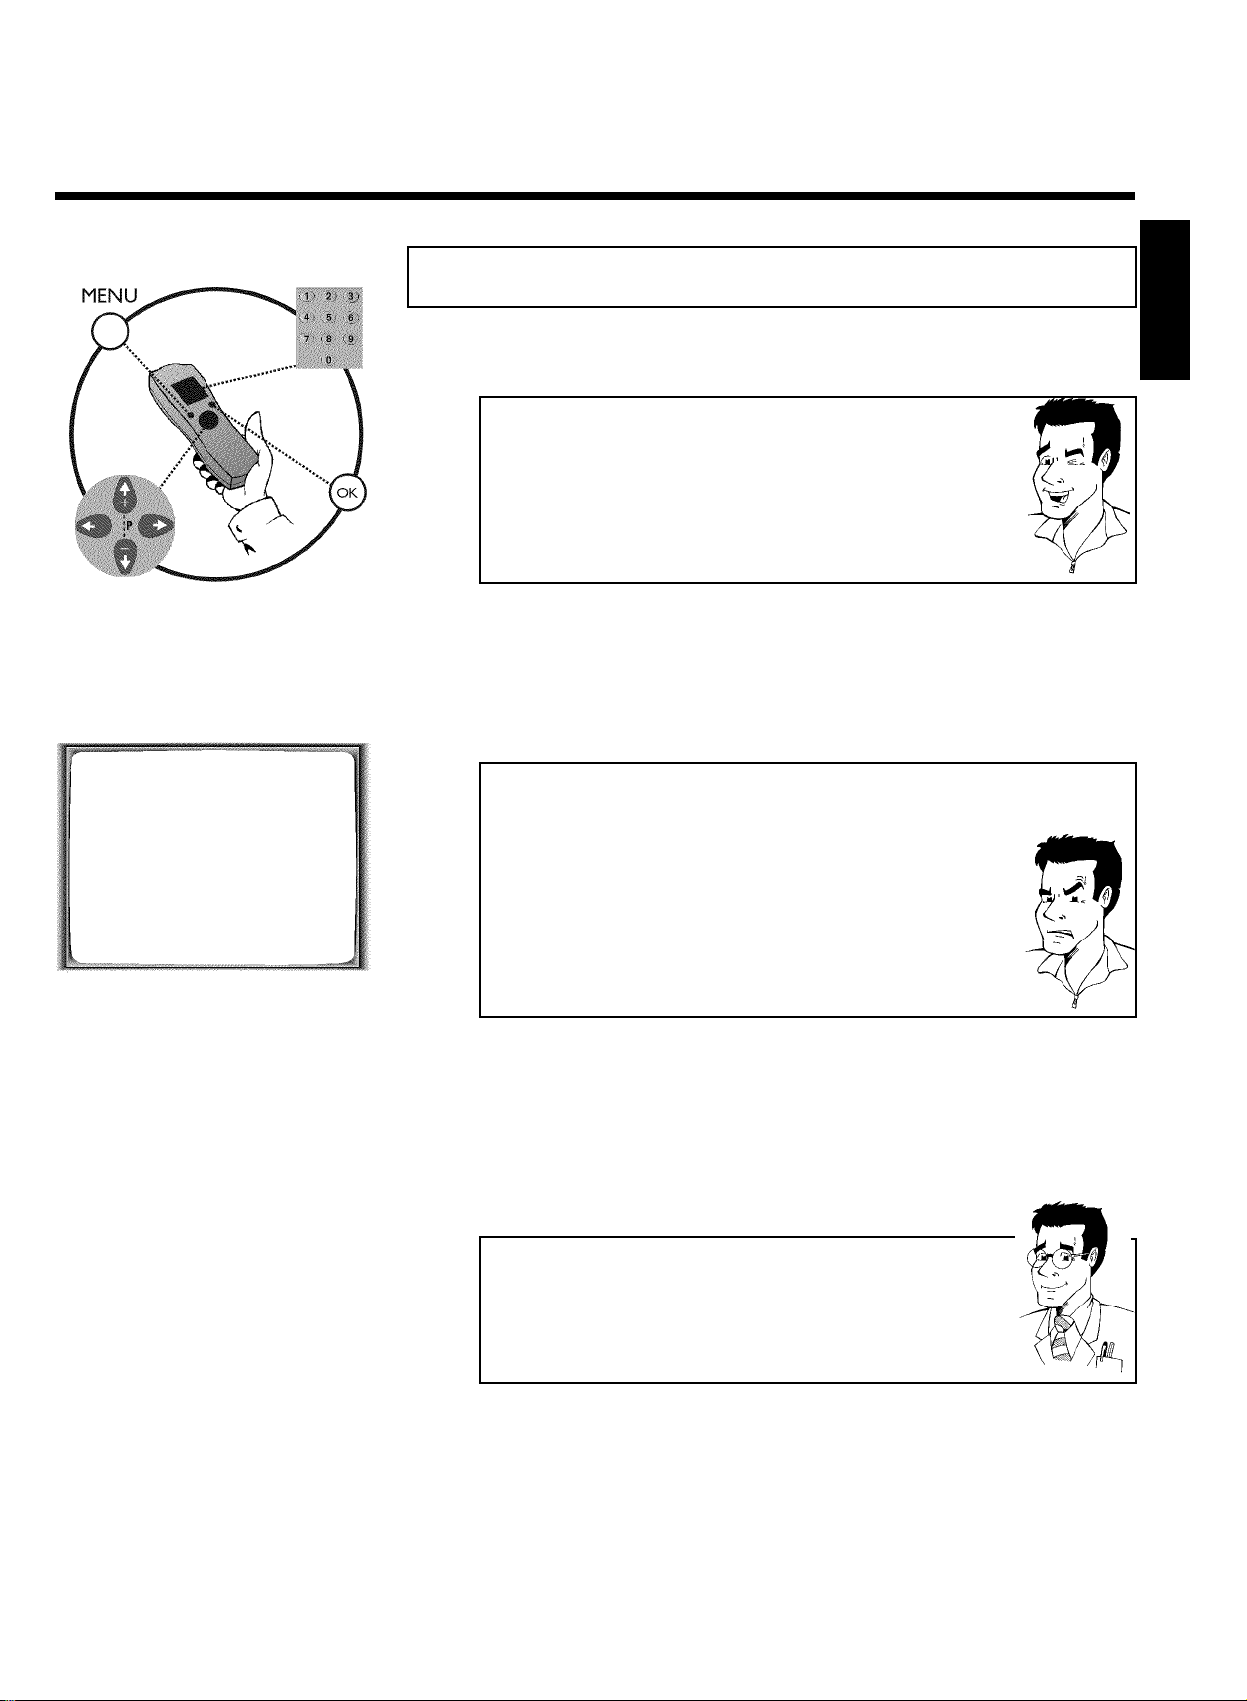
In the following sections, you require the remote control for the first time.
When using, always aim the front of the remote control at the video recorder
and not at the TV set.
Connecting additional devices
After you have connected additional devices (satellite receiver, etc.) through
the aerial cable, switch them on. The automatic channel search will recognise
them and save them.
1 Confirm the image on the TV screen by pressing the OK button on
the remote control.
Autoinstall starts. This picture will appear on the screen:
a The video recorder does not find any TV channels during the
search
b Select channel 1 on the TV set. Can you see the saved TV channel on the
TV set?
If not, check the cable connection of the aerial (aerial socket), video
recorder, TV set.
b Please have patience.
The video recorder searches the entire frequency range in order to find
and save the largest possible number of TV channels. It is possible that the
TV channels in your country are broadcast in a higher frequency range. As
soon as this range is reached during the search, the video recorder will find
the TV channels.
ENGLISH
Installing your video recording
2 When 'Autoinstall' is complete, 'STORED' will briefly appear on the TV
screen.
The initial installation is now complete.
Check the date and time. Please read 'Setting the time and date' in this chapter.
Satellite receiver
If you are connecting a satellite receiver, please read the section 'Using the
satellite receiver'.
Decoder
If you are connecting a decoder, you must install it as described in the next
section.
13
Decoder allocation
Some TV channels transmit encoded TV signals which can only be viewed with a commercially
purchased or hired decoder without disturbances. You can connect such a decoder
(descrambler) to this video recorder. The following function will automatically activate the
connected decoder for the desired TV channel.
How do I allocate the decoder with Easy Link?
If your TV supports the 'Easy Link' function, the decoder must be allocated to
the respective TV channel on the TV (see TV operating instructions).
1 Switch the TV on. If applicable, select the programme number for the
video recorder operation.
2 Use the buttons P ;q , P =r on the video recorder or the
number buttons 0-9 on the remote control to select the TV channel
which you would like to allocate the decoder to.
3 Press the button MENU on the remote control. The main menu will
appear.
MANUAL SEARCH
PROGRAMME NUMBER è P01 p
S-CHANNEL NO
CHANNEL NUMBER 21
DECODER OFF
NICAM ON
________________________________
EXITpMENU STOREpOK
BBC1
4 Use the buttons P ;q or P =r to select the line 'MANUAL
SEARCH' and confirm with OK .
5 Use the buttons P =r or P ;q to select the line 'DECODER'.
6 Use the buttons Q or P to select 'ON' (Decoder switched on).
How can I switch off the decoder?
Use the button P on the screen to select 'OFF' (Decoder switched off).
7 Confirm with OK .
8 End with the button MENU .
The decoder has now been allocated to this TV channel.
If this TV channel is chosen, the symbol 'DEC' will appear in the video recorder display.
14
Installing your video recording
 Loading...