

Philips VR 742, VR 740, VR840 User Manual

Table of Contents
1. Connecting the video recorder . . . . . . . . . . . .4
Important for the United Kingdom . . . . . . . . . . .4
Preparing the remote control for operation . . . . .4
Connecting your video recorder to the TV set . .4
Connecting with a scart cable and
‘Easy Link’ [VR840] . . . . . . . . . . . . . . . . . . . . . .4
Connecting with a scart cable . . . . . . . . . . . . . . .5
Connecting without a scart cable . . . . . . . . . . . .6
Audio output Connection . . . . . . . . . . . . . . . . . .6
Connecting additional devices . . . . . . . . . . . . . .6
2. Important notes for operation . . . . . . . . . . . . . .7
Navigation in the screen menu . . . . . . . . . . . . .7
The symbols on your video recorder display . . .7
3. Installing your video recorder . . . . . . . . . . . . .8
Preparation for use . . . . . . . . . . . . . . . . . . . . . .8
Decoder allocation . . . . . . . . . . . . . . . . . . . . . .8
Manual TV channel search . . . . . . . . . . . . . . . .9
Using the satellite receiver . . . . . . . . . . . . . . . . .9
Follow TV (Automatic TV channels sorting) . . .10
Automatic Tuning . . . . . . . . . . . . . . . . . . . . . . .10
Sorting and clearing TV channels manually . . .11
Setting the clock . . . . . . . . . . . . . . . . . . . . . . .11
Setting the RF out channel . . . . . . . . . . . . . . .12
4. Playback . . . . . . . . . . . . . . . . . . . . . . . . . . . . .13
Playing cassettes . . . . . . . . . . . . . . . . . . . . . .13
Playing back NTSC cassettes . . . . . . . . . . . . .13
Displaying current tape position . . . . . . . . . . . .13
Searching for a tape position
with picture(scanning) . . . . . . . . . . . . . . . . . . .14
Still picture / slow motion . . . . . . . . . . . . . . . . .14
Searching for tape position without picture
(forward wind and rewind) . . . . . . . . . . . . . . . .14
Index search . . . . . . . . . . . . . . . . . . . . . . . . .14
Changing the picture setting
Smart picture [VR840] . . . . . . . . . . . . . . . . . . .14
Manual Tracking . . . . . . . . . . . . . . . . . . . . . . .14
5. Manual recording . . . . . . . . . . . . . . . . . . . . . . .15
General information . . . . . . . . . . . . . . . . . . . . .15
Recording without automatic switch-off . . . . . .15
Preventing accidental erasing . . . . . . . . . . . . .15
Lining up recordings (assemble cut) . . . . . . . .15
Selecting the recording speed (SP or LP) . . . .16
Automatic controlled recording from
a satellite receiver (RECORD LINK) . . . . . . . .16
'Direct Record' . . . . . . . . . . . . . . . . . . . . . . . . .17
Switching 'Direct Record' on or off . . . . . . . . . .17
6. Programming a recording (TIMER) . . . . . . . . .18
General information . . . . . . . . . . . . . . . . . . . . .18
Programming a recording
(with the 'VIDEO Plus
Helpful Hints . . . . . . . . . . . . . . . . . . . . . . . . . .19
Programming a recording
(without the VIDEO Plus
Helpful Hints . . . . . . . . . . . . . . . . . . . . . . . . . .20
Programming a recording with
'TURBO TIMER' . . . . . . . . . . . . . . . . . . . . . . .20
Helpful Hints . . . . . . . . . . . . . . . . . . . . . . . . . .21
How to check, or delete a programmed
recording (TIMER) . . . . . . . . . . . . . . . . . . . . . .21
How to change a programmed
recording(TIMER) . . . . . . . . . . . . . . . . . . . . . .21
NexTView Link [VR840] . . . . . . . . . . . . . . . . . .21
7. Other functions . . . . . . . . . . . . . . . . . . . . . . . .22
Switching the status display off or on . . . . . . . .22
Blue Background on or off . . . . . . . . . . . . . . . .22
Automatic switch-off . . . . . . . . . . . . . . . . . . . .22
Clock display . . . . . . . . . . . . . . . . . . . . . . . . . .23
Selecting the sound channel . . . . . . . . . . . . . .23
8.Before you call an engineer . . . . . . . . . . . . . . .24
®
+
system') . . . . . . . . . . .18
®
+
system
) . . . . . . . . .19
I
nterference
The Department of Trade and industry
operates a Radio Investigation Service to
help TV licence holders improve reception
of BBC and ITC programmes where these
are being spoilt by interference.
If your dealer cannot help, ask at a Main
Post Office for the booklet 'How to lmprove
Television and Radio Reception'.
Supplied accessories
• Operating instructions
• Remote control and batteries
• Aerial cable
3
EN
VR740/07
VR742/07
VR840/07
VCR
[VR740/07]
OPERATING INSTRUCTIONS
Thank you for buying a Philips video recorder.
This video recorder is one of the most sophisticated and easy-to-use video recorders (VCR) on
the market. Please take the time to read this
operating manual before using your video
recorder. It contains important information and
notes regarding operation. The video recorder
should not be turned on immediately after
transportation from a cold to a hot area or vice
versa, or in conditions of extreme humidity. Wait
at least three hours after transporting the
device. The video recorder needs this time in
order to become acclimatised to its new environment (temperature, air humidity, etc.).
PA L
This video recorder is used for the recording and
playback of VHS video cassettes. Cassettes with
the VHS-C label (VHS cassettes for camcorders)
may only be used with a suitable adapter.
We hope you enjoy your new video recorder.
Important notes regarding operation
Danger: High voltage!
"
Do not remove the top cover as there is
a risk of an electrical shock!
The video recorder does not contain any
"
components that can be repaired by the
customer. Please leave all maintenance
work for qualified personnel.
As soon as the video recorder is connected
"
to the power supply, there are some components that are in constant operation. To
switch off the video recorder completely you
must disconnect it from the power supply.
Make sure that air can circulate freely
!
through the ventilation slots on the video
recorder. Do not place the device on an
unsteady base.
Make sure that no objects or liquids enter
!
the video recorder. Do not place vases or
the like on the video recorder. If liquid is
spilt into it, immediately disconnect the
video recorder from the power supply and
call After-sales Service for advice.
Do not place any combustible objects on
!
the device (candles, etc.).
Make sure that children do not place any
!
foreign objects within the openings or ventilation slots.
These operating instructions have been
printed on non-polluting paper.
Deposit old batteries at the appropriate collection points.
Please make use of the facilities available in
your country for disposing of the packaging
of the video recorder in a way that helps to
protect the environment.
This electronic device contains many materials that can be recycled. Please enquire
about the possibilities for recycling your old
device.
VIDEO Plus
trademarks of Gemstar Development
Corporation. The VIDEO Plus+ system is
manufactured under license from Gemstar
Development Corporation.
So that you can identify your machine for service
questions or in the event of theft, enter the serial
number here. The serial number (PROD.NO.) is
printed on the type plate fixed at the back of the
device. Also, we suggest that you put a mark
with your VCR MODEL NO..
MODEL NO. VR740/07, VR742/07,
PROD. NO. ..........................
This product complies with the requirements of
Directive 73/23/EEC +89/336/EEC +93/68 EEC.
+ and PlusCode are registered
VR840/07
Specifications
Voltage: 230-240V/50Hz
Power consumption : 20W
Power consumption (Standby): less than 3W
(PWR. in the display switched off)
Rewind time: approx. 70 seconds (cassette E-180)
Dimensions in cm (WxDxH): 43.5x22.6x9.2
Number of video heads : 4
Number of video heads (HIFI): 2
Recording/playback time:
3 hours (SP) (cassette E-180)
6 hours (LP) (cassette E-180)
2
EN
1. Connecting the video recorder
2.Open the remote control's battery compart-
Important for the United Kingdom
This apparatus is fitted with an approved moulded 10
Amp plug. To change a fuse in this type of plug proceed as follows:
1.Remove fuse cover and fuse.
1.
2.Fix new fuse which should be a
2.
BS1362 3A,ASTA or BSI approved type.
3.Refit the fuse cover.
3.
If the fitted plug is not suitable for your socket outlets,
it should be cut off and an appropriate plug fitted in its
place.
If the mains plug contains a fuse, this should have a
value of 3A. If a plug without a fuse is used, the fuse at
t
he distribution board should not be greater than 3A.
The severed plug must be destroyed to avoid a possible shock hazard should it be inserted into a 13A
socket elsewhere.
How to connect a plug:
The wires in the mains lead are coloured in accordance with the following code:
BLUE- 'NEUTRAL' ('N')
BROWN- 'LIVE' ('L')
4.The BLUE wire must be connected to the terminal
4.
which is marked with the letter 'N' or coloured
BLACK.
5.The BROWN wire must be connected to the termi-
5.
nal which is marked with the letter 'L' or coloured
RED.
6.Do not connect either wires to the earth terminal in
6.
the plug which is marked with the letter 'E' or by
the safety earth symbol
green-and-yellow.
Before replacing the plug cover, make certain that the
cord grip is clamped over the sheath of the lead-not
imply over the two wires.
or coloured green or
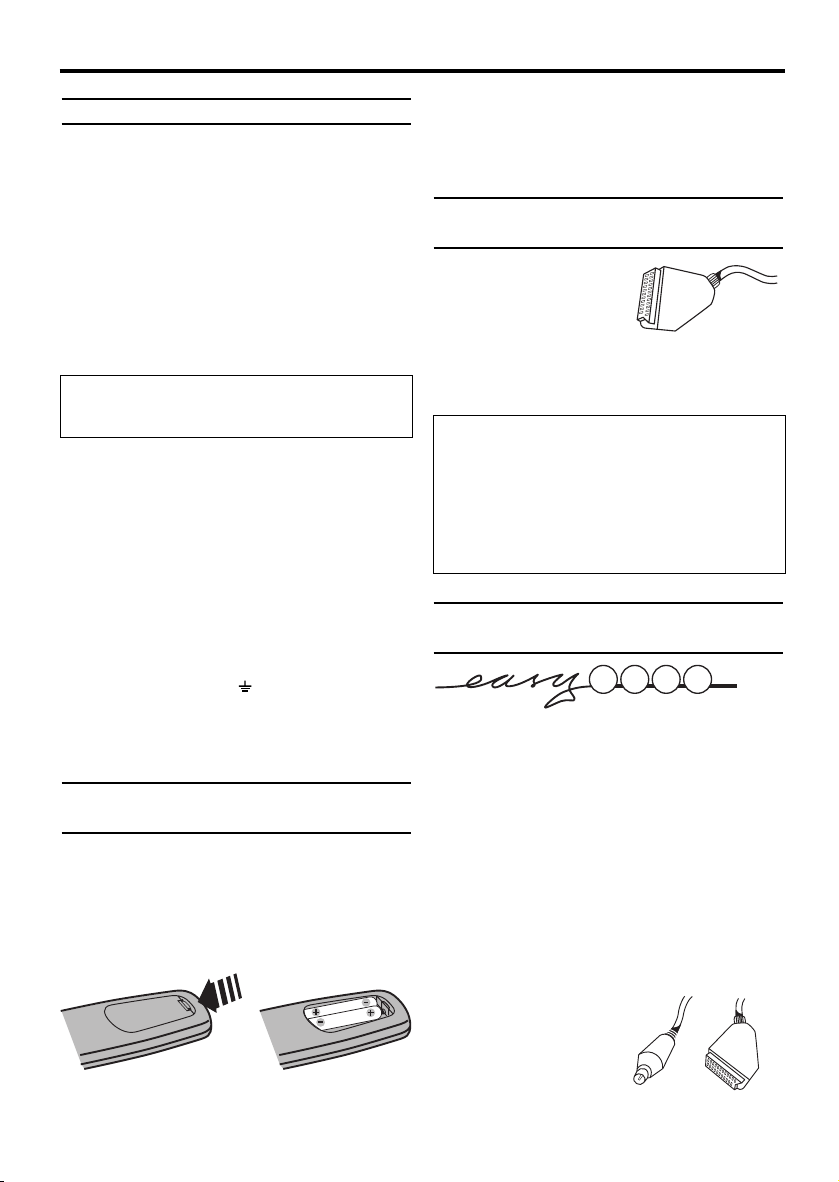
Preparing the remote control for
operation
The remote control and its batteries are packed
separately in the original video recorder packaging. You must install the batteries in the remote
control before use.
Ta ke the remote control and the enclosed
1.
1.
batteries (2 batteries).
2.
ment and place the batteries in it as shown in
the picture and close the battery component.
The remote control is now ready to use. Its
range is approximately 5 metres.
Connecting your video recorder to
the TV set
The necessary cable
connections must be
made before you can
record or playback TV
programmes using your video recorder.
We recommend that you use a scart cable to
connect your TV and video recorder.
What is a scart cable?
The scart or Euro AV cable serves as the universal connector for picture, sound and control
signals. With this type of connection, there is
practically no loss of quality during the picture
or sound transfer.
*You can have the Hi-fi sound on the TV only
with a scart cable.
Connecting with a scart cable and
'Easy Link' [VR840]
What is Easy Link?
Easy Link is a system which allows advanced
communication between the different elements
of the Audio and Video chain (TV, VCR, DVD,
Dolby Surround amplifier etc...)
If both your TV and your VCR are equipped with
one of the following features:
Easy Link, NextView Link, TV Link Smart Link, Q
Link, Cinema Link (all compatible with one
another), your VCR can exchange information
with your TV. For example, the channels will
automatically be transferred in the same order
from your TV to your video recorder during the
initial installation.
Have the following
cables ready: an aerial
cable (1, supplied), a
scart cable (2, not supplied).
L I N K
12
4
EN

1.Switch off your TV set.
RF OUT
AV 1 (TV)
AERIAL
AUDIO
OUTPUT
L
R
RF OUT
AV1(TV
)
RF OUT
AV 1 (TV)
AERIAL
AUDIO
OUTPUT
L
R
RF OUT
AV 1 (TV)
AERIAL
AUDIO
OUTPUT
L
R
RF OUT
RF OUT
AV 1 (TV)
AERIAL
AUDIO
OUTPUT
L
R
AERIAL
AV1(TV
)
RF OUT
AV 1 (TV)
AERIAL
AUDIO
OUTPUT
L
R
1.
2.Remove the aerial
2.
cable plug from your
TV set. Insert it into the
AERIAL at the back of
the video recorder.
3.Insert one end of the
3.
supplied aerial cable
into the RF OUT at
the back of the video
recorder and the
other end into the
aerial input socket at the back of the TV set.
4.Plug in a scart
4.
cable into the
scart socket AV1
(TV) at the back of
the video recorder and the scart socket on
the TV set reserved for the video recorder
operation (see TV set operating instructions).
My TV set has several scart sockets. Which
one should I use?
Please see the operating instructions of your TV
set to find out which socket supports 'Easy
Link'.
5.Switch on the TV set.
5.
6.Insert AC cable into the wall socket.
6.
7.Switch on this video recorder.
7.
8.The following screen will appear on the TV
8.
screen.
PLEASE CONNECT AERIAL OR
CABLE TO THE VCR
THEN...
+ KEY
PUSH P
OR...
FOR PLAY ONLY - PUSH PLAY
Connecting with a scart cable
Have the following
cables ready:
an aerial cable (1, supplied), a scart cable (2,
not supplied).
1.Remove the aerial
1.
cable plug from your
TV set. Insert it into
the AERIAL at the
back of the video
recorder.
2.Insert one end of
2.
the supplied aerial
cable into the RF
OUT at the back of
the video recorder
and the other end
into the aerial
input socket at the back of the TV set.
3.Plug one end of a
3.
scart cable into
the scart socket
AV1(TV) at the
back of the video
recorder and the other end into the suitable
scart socket on your TV reserved for the
video recorder operation (see your TV's operating instructions).
4.Switch on the TV.
4.
5.Insert AC cable into the wall socket.
5.
My TV has several scart sockets. Which one
should I use?
Select that scart socket which is suited for the
video output as well as for the video input.
My TV has a configuration menu for the
12
V 1 (TV)
AERIAL
A
AUDIO
OUTPUT
L
AERIAL
RF OUT
R
scart socket.
The video recorder does not find any TV
channels during the search
* Select channel 1 on the TV. Can you see the
saved TV channel on the TV?
If not, check the cable connection of the aerial
(aerial socket), video recorder, TV.
* The video recorder searches the entire frequency range in order to find and save the
largest possible number of TV channels.
Then, read the paragraph ‘Preparation for use’ in
the chapter ‘Installing your video recorder’.
Please configure this scart socket as InputOutput.
6.If the connection was properly made and
6.
your TV was automatically switched to the
programme number for the scart socket, you
will see the following picture:
PLEASE CONNECT AERIAL OR
CABLE TO THE VCR
THEN...
+ KEY
PUSH P
OR...
FOR PLAY ONLY - PUSH PLAY
5
EN
Then, read the paragraph 'Preparation for use' in
RF OUT
AV 1 (TV)
AERIAL
AUDIO
OUTPUT
L
R
AERIAL
RF OUT
AV 1 (TV)
AERIAL
AUDIO
OUTPUT
L
R
RF OUT
the chapter 'Installing your video recorder'.
My screen is empty
* Many TV sets are switched to the programme
number for the scart socket by way of a control
signal sent through the scart cable.
* If the TV set does not automatically switch to
the scart socket programme number, manually
change to the corresponding programme number on your TV set (see your TV's operating
instructions).
7.Save this programme number setting on your
7.
TV set for video recorder operation.
You can find more details in chapter 'Preparation
for use'.
Programme number for video recorder operation
You have now saved a programme number for
use by your video recorder as you would a regular TV channel. This programme number must
now be used in future for video recorder playback ('video recorder' TV channel).
Connecting without a scart cable
Have an aerial cable ready (supplied).
1.Switch off your TV set.
1.
2.Remove the aerial
2.
cable plug from the
aerial input socket of
the TV set. Insert it
into the AERIAL at
the back of the video
recorder.
3.Insert one end of the
3.
supplied aerial cable
into the RF OUT at
the back of the video
recorder and the
other end into the
aerial input socket at the back of the TV set.
4.Insert AC cable into the wall socket.
4.
5.Switch on your TV set and select the pro-
5.
gramme number used for video playback on
your TV set (see your TV's operating instructions).
6.Select this programme number and manually
6.
start the TV's channel search as if you wanted to save a new TV channel until the 'test
image' appears.
PLEASE CONNECT AERIAL OR
CABLE TO THE VCR
THEN...
+ KEY
PUSH P
OR...
FOR PLAY ONLY - PUSH PLAY
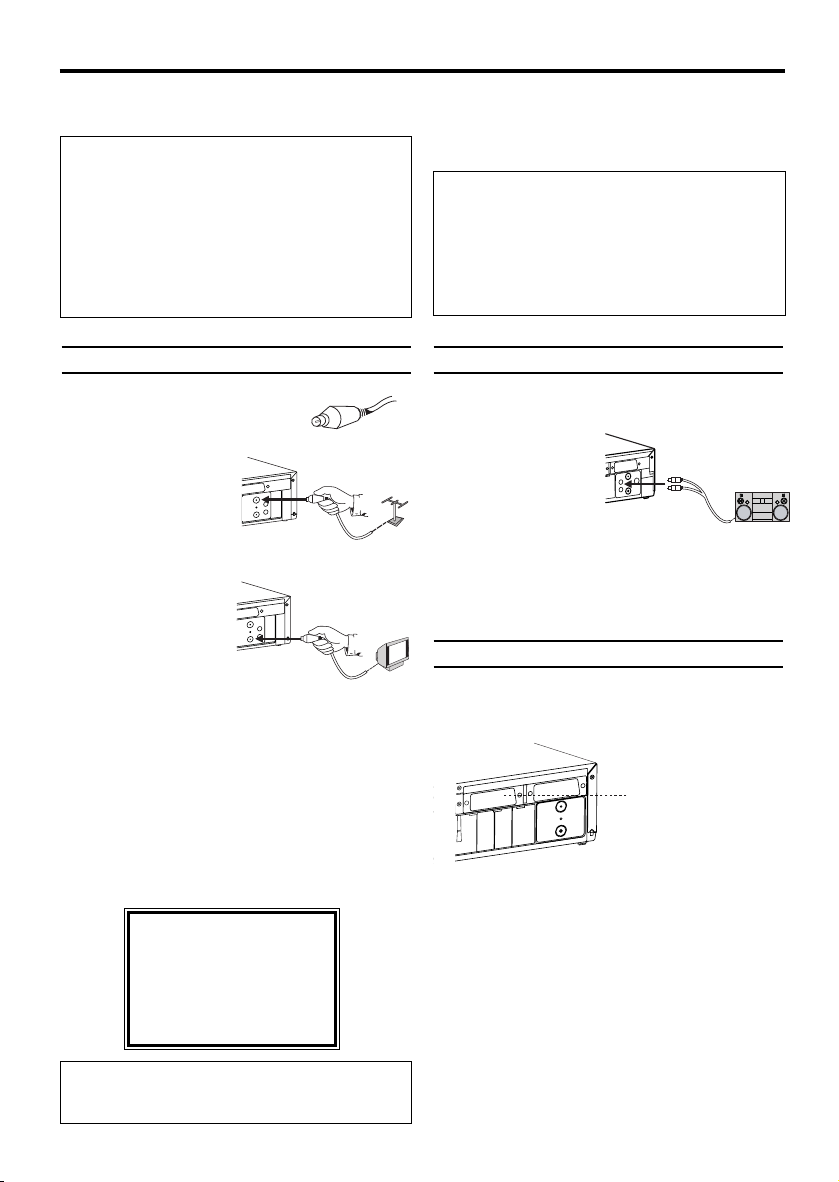
Audio output Connection
Prepare an audio cable (not supplied).
1.Switch off your audio amplifier.
1.
2.Insert one end of
2.
the audio cable into
the corresponding
red and white
AV1 (TV)
AUDIO
IR-SAT
OUTPUT
L
AERIAL
RF OUT
R
AUDIO OUTPUT
L/R socket at the
back of the video recorder and the other end
into the corresponding audio input socket at
the back of the audio amplifier.
Connecting additional devices
You can connect additional devices such as
decoders, satellite receivers, camcorders, etc. to
the socket AV2(DECODER).
AV2 (DECODER)
AV1 (TV)
L
IA
R
AE
T
U
RF O
AV2(DECODER
)
I do not see a TV channel search picture
* Check the cable connections.
* Repeat the channel search on your TV.
6
EN

2. Important notes for operation
PWR
REC
Switching on
You can switch on the video recorder with the
STANDBY/ON
yy
button.
Automatic switch-off
If the video recorder is not used for several
minutes, it switches itself off automatically. This
function can be deactivated (e.g. if you want to
use the video recorder as a TV receiver). For
more information, please read the section
'Automatic switch-off' in chapter 'Other
functions'.
Time in the display
If you have switched the video recorder off with
STANDBY/ON
yy
, the time will show in the
display, e.g. '18:00'.
If the clock has not been set, ' --:-- ' will appear.
Power consumption
The video recorder should always be connected
to the mains so as not to affect the use of the
TV or programmed recordings.
If the display has been switched off, your video
recorder consumes less than 3W in stand-by.
Power outage/no power
Channel information remains saved for up to 10
year, the time and timer information is saved for
up to 1 minute.
Navigation in the screen menu
You can check/change many functions and settings of your video recorder via the on-screen
menu. The individual functions are selected, via
the remote control as follows:
Call up the menu: with .
To select: with .
PLAY B-K
MENU
STOP C-L
To enter or change your selection: with the
number buttons or with .
0..9
To save or confirm: with .
To cancel: with .
To end: with .
CLEAR
STATUS/EXIT
SELECT KL CHOOSE B
→TIMER
RECORD SET UP
VCR SET UP
TUNER SET UP
INITIAL SET UP
END=EXIT
PLAY B-K
FWD 1- B
STOP C-L
The symbols on your video recorder
display
PWR. REC
These symbols can light up on your video
recorder display:
When you keep your video recorder on.
When you have put a cassette in the video
recorder.
Display of programme number of the TV
channel / time / RF channel.
When you record.
When you have programmed a recording.
7
EN

3. Installing your video recorder
Preparation for use
This chapter shows you how to prepare the video
recorder for use.The video recorder automatically
seeks out and stores all available TV channels.
'Aim' correctly
In the following sections, you require the remote
control for the first time. When using, always
aim the front of the remote control at the video
recorder and not at the TV.
Connecting additional devices
After you have connected additional devices
(satellite receiver, etc.) through the aerial cable,
switch them on. The automatic channel search
will recognise them and save them.
1.Press
1.
PROG P+
.
The automatic channel search starts.
PLEASE WAIT
START FINISH
❚❚❚❚❚❚❚❚❚❚❚
❚❚❚❚❚❚❚❚❚❚❚❚
If you connect the VCR to a TV equipped with
Easy Link, the preset download will automatically
be performed and the following OSD will appear
on the TV [VR840 only].
PRESET DOWNLOAD
PLEASE WAIT...
2.'TIME' and 'DATE' will appear on the TV screen.
2.
3.Check 'TIME'. If required, please change the
3.
time with the number buttons .
0..9
The video recorder does not find any TV
channels during the search
* Select channel 1 on the TV. Can you see the
saved TV channel on the TV?
If not, check the cable connection of the aerial
(aerial socket), video recorder, TV.
* The video recorder searches the entire frequency range in order to find and save the
largest possible number of TV channels. It is possible that the TV channels in your country are
broadcast in a higher frequency range. As soon
as this range is reached during the search, the
video recorder will find the TV channels.
8
TIME --:--
DATE --/--/--
SMART CLOCK [ON]
END=EXIT
4.Check if the displayed settings for 'DAY',
4.
'MONTH' and 'YEAR' are correct.
5.When all information is correct, save by
5.
pressing .
STATUS/EXIT
The preparation for use is now complete.
Satellite receiver
If you are connecting a satellite receiver, please
read the section 'Using the satellite receiver'.
Decoder
If you are connecting a decoder, you must
install it as described in the next section.
Decoder allocation
Some TV channels transmit encoded TV signals
which can only be viewed with a purchased or
rented decoder.You can connect such a decoder
to this video recorder. The following function will
automatically activate the connected decoder for
the desired TV channel.
1.Switch the TV on. If applicable, select the
1.
programme number for the video recorder
operation.
PLAY B-K
2.Use or to select the
2.
TV channel which you would like to allocate
the decoder to.
3.Press . The main menu will appear.
3.
PLAY B-K
4.Use to select 'TUNER
4.
SET UP'. Then press .
PLAY B-K
5.Use to select 'MANUAL
5.
TUNING'. Then press .
PLAY B-K
6.Use to select
6.
'DECODER'.
STOP C-L
MENU
STOP C-L
FWD 1- B
STOP C-L
FWD 1- B
STOP C-L
MANUAL TUNING
PROG. P55
CHANNEL 055
→DECODER [OFF]
SKIP [OFF]
SELECT KL CHOOSE B
END=EXIT
0..9
EN
 Loading...