

Page 1

TTaabbllee ooff ccoonntteennttss
Introduction
Connecting the
video recorder
Initial
installation
Settings
Operating
instructions
Playback
Removing picture
interference
Manual
recording
Programmed
recordings
Other
functions
Suppressing
interference
Before you
call an engineer
Important notes for operation . . . . . . . . . . . . . . . . . . . . . . . . . . . . . . . . . . . Page 4
The most important functions of your new video recorder . . . . . . . . . . . . . .Page 5
Important information for customers in Great Britain . . . . . . . . . . . . . . . . . Page 6
Preparing the remote control for operation . . . . . . . . . . . . . . . . . . . . . . . . . Page 7
Connecting to a TV set with a scart socket . . . . . . . . . . . . . . . . . . . . . . . . . . Page 7
Connecting to a TV set without a scart socket . . . . . . . . . . . . . . . . . . . . . . . Page 8
Connecting additional devices . . . . . . . . . . . . . . . . . . . . . . . . . . . . . . . . . . . . Page 9
Setting TV channels, date and time for the first time . . . . . . . . . . . . . . . . . . Page 10
Searching for a TV channel manually . . . . . . . . . . . . . . . . . . . . . . . . . . . . . . Page 11
Allocating decoder . . . . . . . . . . . . . . . . . . . . . . . . . . . . . . . . . . . . . . . . . . . . .Page 12
Using a satellite receiver . . . . . . . . . . . . . . . . . . . . . . . . . . . . . . . . . . . . . . . Page 13
Searching for a TV channel automatically . . . . . . . . . . . . . . . . . . . . . . . . . . . Page 14
Sorting and clearing of TV channels manually . . . . . . . . . . . . . . . . . . . . . . . . Page 15
Sorting TV channels automatically (Follow TV) . . . . . . . . . . . . . . . . . . . . . . . .Page 16
Changing the time and date . . . . . . . . . . . . . . . . . . . . . . . . . . . . . . . . . . . . Page 17
General information . . . . . . . . . . . . . . . . . . . . . . . . . . . . . . . . . . . . . . . . . . Page 18
Navigation in the main menu . . . . . . . . . . . . . . . . . . . . . . . . . . . . . . . . . . . . Page 18
Playing cassettes . . . . . . . . . . . . . . . . . . . . . . . . . . . . . . . . . . . . . . . . . . . . . Page 19
Playing back NTSC cassettes . . . . . . . . . . . . . . . . . . . . . . . . . . . . . . . . . . . . .Page 19
Displaying tape position . . . . . . . . . . . . . . . . . . . . . . . . . . . . . . . . . . . . . . . . Page 20
Display / reset tape position . . . . . . . . . . . . . . . . . . . . . . . . . . . . . . . . . . . . .Page 21
Searching for tape position with picture (picture search) . . . . . . . . . . . . . . Page 21
Searching for tape position without picture (forward wind and rewind) . . . Page 21
Searching automatically for tape position (index search) . . . . . . . . . . . . . . . Page 22
Still picture / slow motion . . . . . . . . . . . . . . . . . . . . . . . . . . . . . . . . . . . . . Page 22
Skipping commercials . . . . . . . . . . . . . . . . . . . . . . . . . . . . . . . . . . . . . . . . . . .Page 23
Selecting picture setting . . . . . . . . . . . . . . . . . . . . . . . . . . . . . . . . . . . . . . . . .Page 24
Optimizing tracking . . . . . . . . . . . . . . . . . . . . . . . . . . . . . . . . . . . . . . . . . . . Page 25
Optimizing still picture . . . . . . . . . . . . . . . . . . . . . . . . . . . . . . . . . . . . . . . . Page 25
Cleaning video heads . . . . . . . . . . . . . . . . . . . . . . . . . . . . . . . . . . . . . . . . . . .Page 26
Starting and stopping of recording manually . . . . . . . . . . . . . . . . . . . . . . . . Page 27
Starting recording manually and stopping automatically . . . . . . . . . . . . . . . . Page 28
Lining up manual recordings . . . . . . . . . . . . . . . . . . . . . . . . . . . . . . . . . . . . Page 29
Selecting the recording speed . . . . . . . . . . . . . . . . . . . . . . . . . . . . . . . . . . . Page 29
Activate / deactivate direct recording . . . . . . . . . . . . . . . . . . . . . . . . . . . . . .Page 30
Making a direct recording . . . . . . . . . . . . . . . . . . . . . . . . . . . . . . . . . . . . . . .Page 31
Recording automatically from a satellite receiver . . . . . . . . . . . . . . . . . . . . . .Page 32
Programming timer with VIDEO Plus+ . . . . . . . . . . . . . . . . . . . . . . . . . . . . Page 33
Problem solving (VIDEO Plus-Programming) . . . . . . . . . . . . . . . . . . . . . . . . Page 35
Programming timer without VIDEO Plus+ . . . . . . . . . . . . . . . . . . . . . . . . . . Page 36
Problem solving (Timer programming) . . . . . . . . . . . . . . . . . . . . . . . . . . . . Page 38
Delete / check / change programmed recordings . . . . . . . . . . . . . . . . . . . . Page 39
Using NexTView Link . . . . . . . . . . . . . . . . . . . . . . . . . . . . . . . . . . . . . . . . . .Page 39
Adjusting automatic switch-off . . . . . . . . . . . . . . . . . . . . . . . . . . . . . . . . . . . Page 40
Adjusting the child lock . . . . . . . . . . . . . . . . . . . . . . . . . . . . . . . . . . . . . . . . Page 40
Replaying cassette continuously . . . . . . . . . . . . . . . . . . . . . . . . . . . . . . . . . . .Page 41
Changing the TV system . . . . . . . . . . . . . . . . . . . . . . . . . . . . . . . . . . . . . . . Page 42
Adjusting the OSD information . . . . . . . . . . . . . . . . . . . . . . . . . . . . . . . . . . .Page 43
Audio recording . . . . . . . . . . . . . . . . . . . . . . . . . . . . . . . . . . . . . . . . . . . . . . .Page 43
Audio dubbing . . . . . . . . . . . . . . . . . . . . . . . . . . . . . . . . . . . . . . . . . . . . . . . .Page 44
Selecting the sound channel . . . . . . . . . . . . . . . . . . . . . . . . . . . . . . . . . . . . . .Page 46
Manual mute . . . . . . . . . . . . . . . . . . . . . . . . . . . . . . . . . . . . . . . . . . . . . . . . .Page 46
Demonstration mode . . . . . . . . . . . . . . . . . . . . . . . . . . . . . . . . . . . . . . . . . .Page 47
Energy-saving mode . . . . . . . . . . . . . . . . . . . . . . . . . . . . . . . . . . . . . . . . . . . .Page 47
Adapting remote control . . . . . . . . . . . . . . . . . . . . . . . . . . . . . . . . . . . . . . . .Page 48
Activate / Deactivate Smart Clock . . . . . . . . . . . . . . . . . . . . . . . . . . . . . . .Page 48
Using the TV remote control . . . . . . . . . . . . . . . . . . . . . . . . . . . . . . . . . . . . .Page 49
Optimizing the modulator . . . . . . . . . . . . . . . . . . . . . . . . . . . . . . . . . . . . . . Page 50
Switching the modulator on / off . . . . . . . . . . . . . . . . . . . . . . . . . . . . . . . . . Page 51
Problem solving . . . . . . . . . . . . . . . . . . . . . . . . . . . . . . . . . . . . . . . . . . . . . . Page 52
Technical data . . . . . . . . . . . . . . . . . . . . . . . . . . . . . . . . . . . . . . . . . . . . . . . Page 52
1
1
2
2
3
3
4
4
5
5
6
6
7
7
8
8
9
9
10
10
11
11
12
12
Page 2

VR 708A/07
Operating instructions
with
Page 3

REMOTE CONTROL ENGLISH
2
2
RReemmoottee ccoonnttrrooll
EEJJEECCTT JJ
ä Eject inserted cassette
SSTTAANNDDBBYY//OONN mm
ä Switch set on / off
ä Interrupt function
ä Interrupt programmed recording
CCLLEEAARR//CCLL
ä Delete TV channel / entry
SSMMAARRTT **
ä select picture adjustment
CCOOUUNNTTEERR
ä Display picture position
MMOONNIITTOORR
ä Toggle between TV reception and
video recorder reception
You will find
explanations for the
controls and the displays
on your video recorder
on the second to last
page of these operating
instructions.
TTIIPP
HH
ä In STOP or STANDBY mode: Rewind
ä In playback mode: Fast reverse
PPLLAAYY GG
ä Play back recorded cassette
II
ä In STOP or STANDBY mode:Wind forward
ä In playback mode: Fast forward
SSTTOOPP hh
ä Stop tape
RREECCOORRDD//OOTTRR nn
ä Start manual recording
IINNDDEEXX EE
ä With
HH
or II: Search for index marking
SSTTIILLLL RR
ä Stop tape and show still picture
4 Operating instructions
4 Quick Start Guide
4 Remote control
4 Batteries
4 Aerial cable
4 Mains cable
4 Scart cable
TTVV ffuunnccttiioonnss
++ SS
--
ä Increase / reduce TV volume
yy// TTVV
ä Switch sound on / off
TTVV //
mm
ä Switch TV on / off
++ TTVV --
ä Select next / previous programme number
AAcccceessssoorriieess
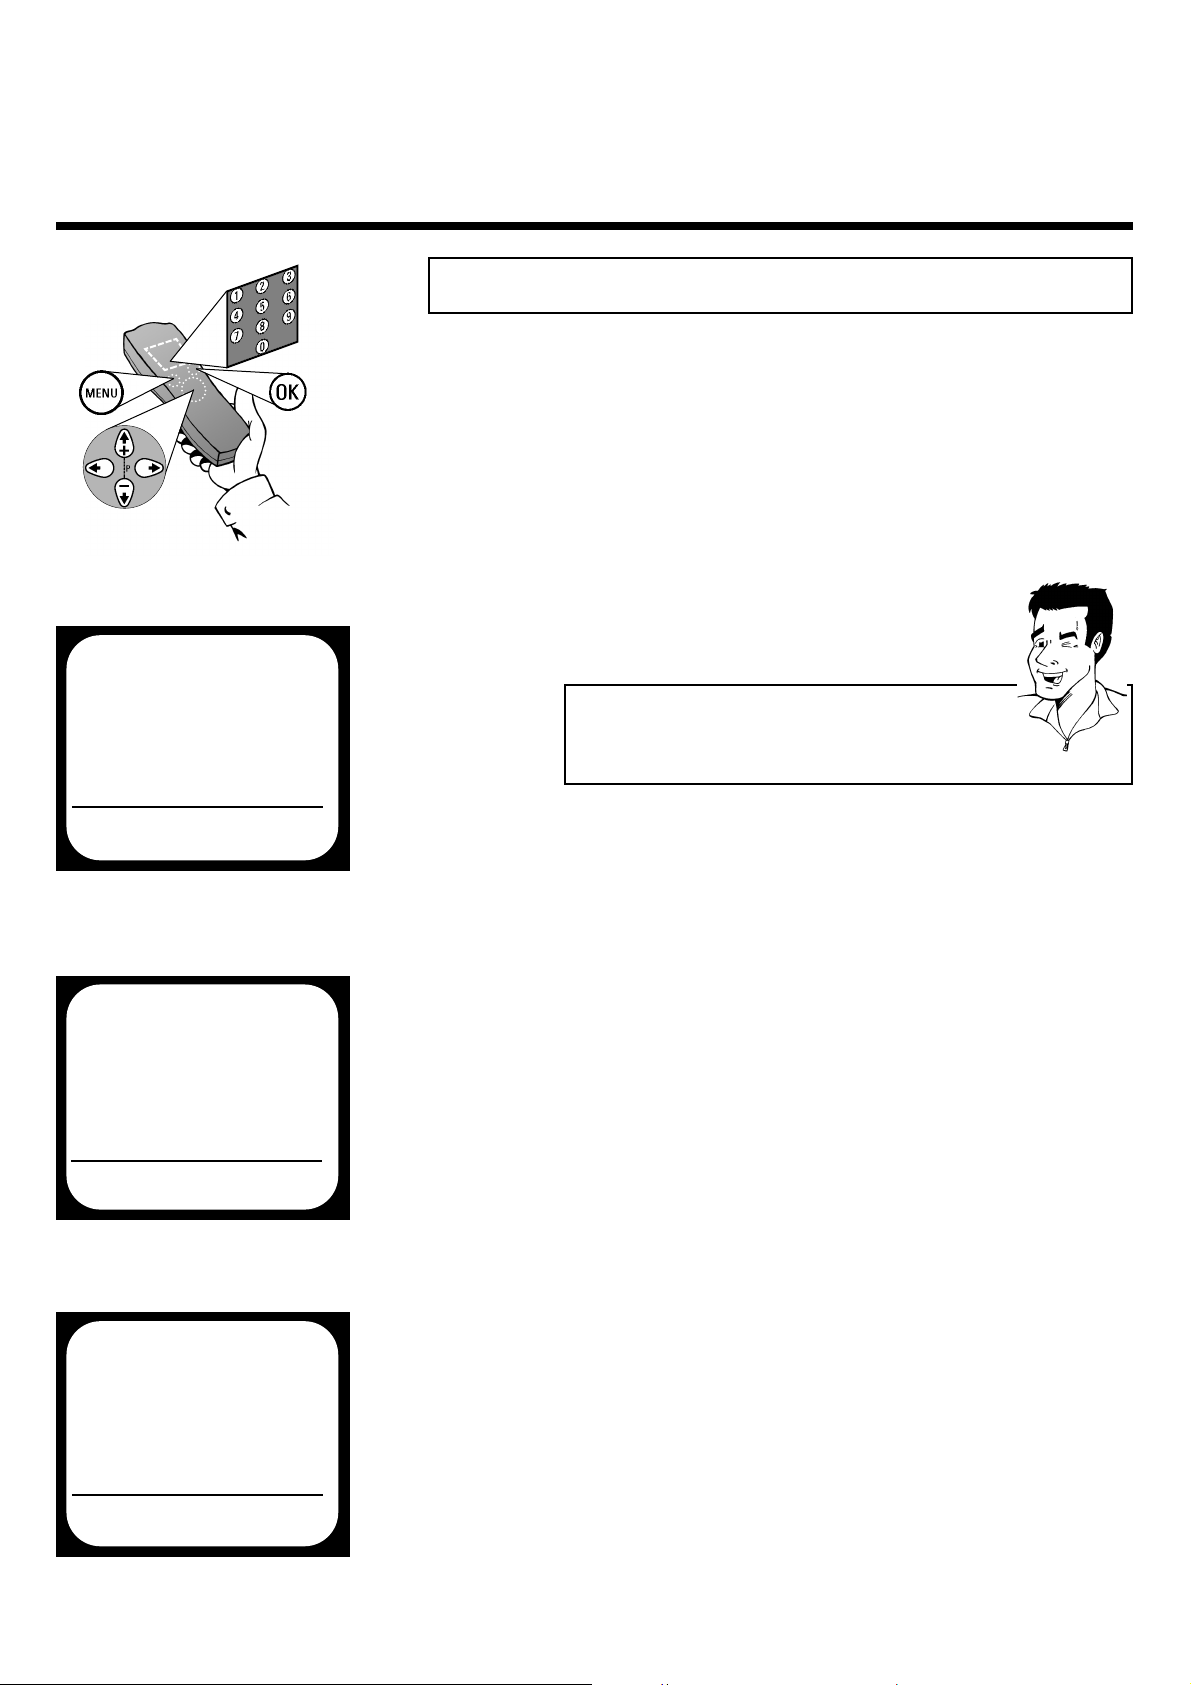
00--99
ä Enter data
ä Select programme number
TTUURRBBOO TTIIMMEERR
ä Programme Turbo Timer recordings
TTIIMMEERR kk
ä Programme recordings
ä Check / change recordings
ä Delete recordings
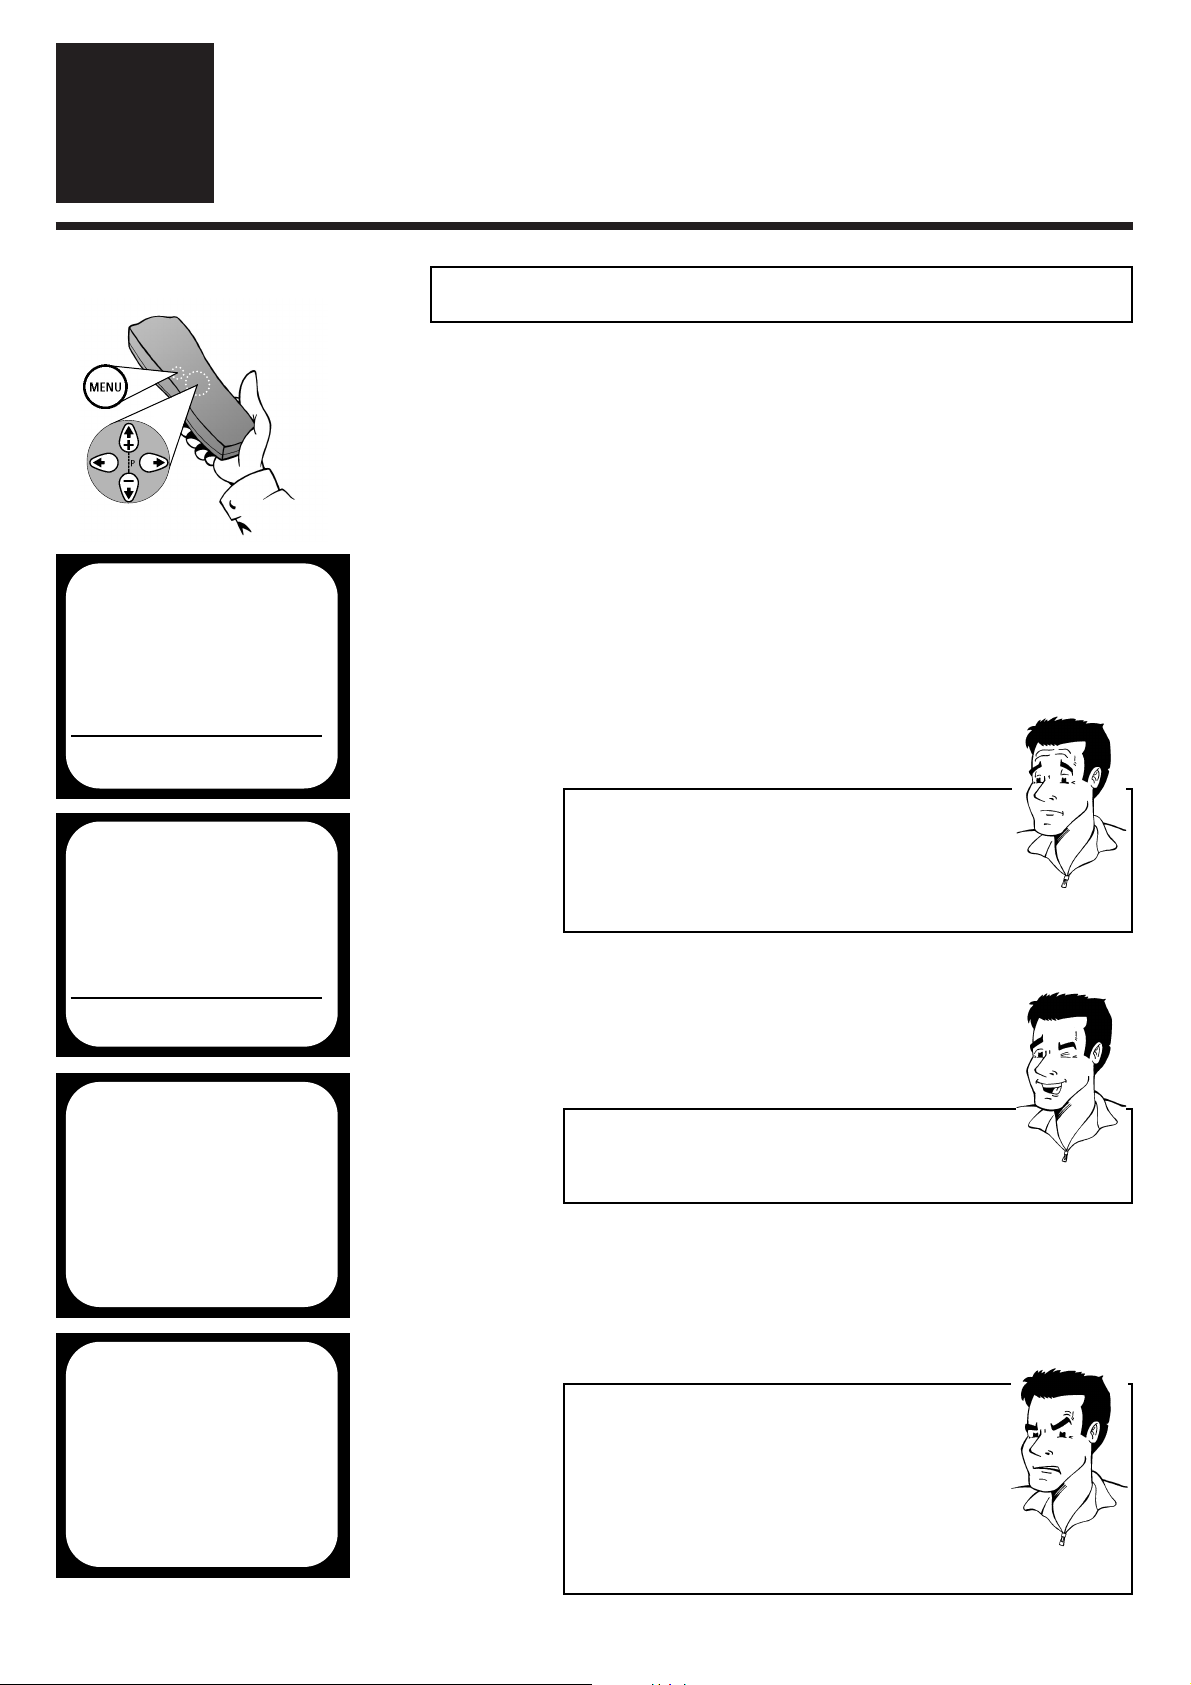
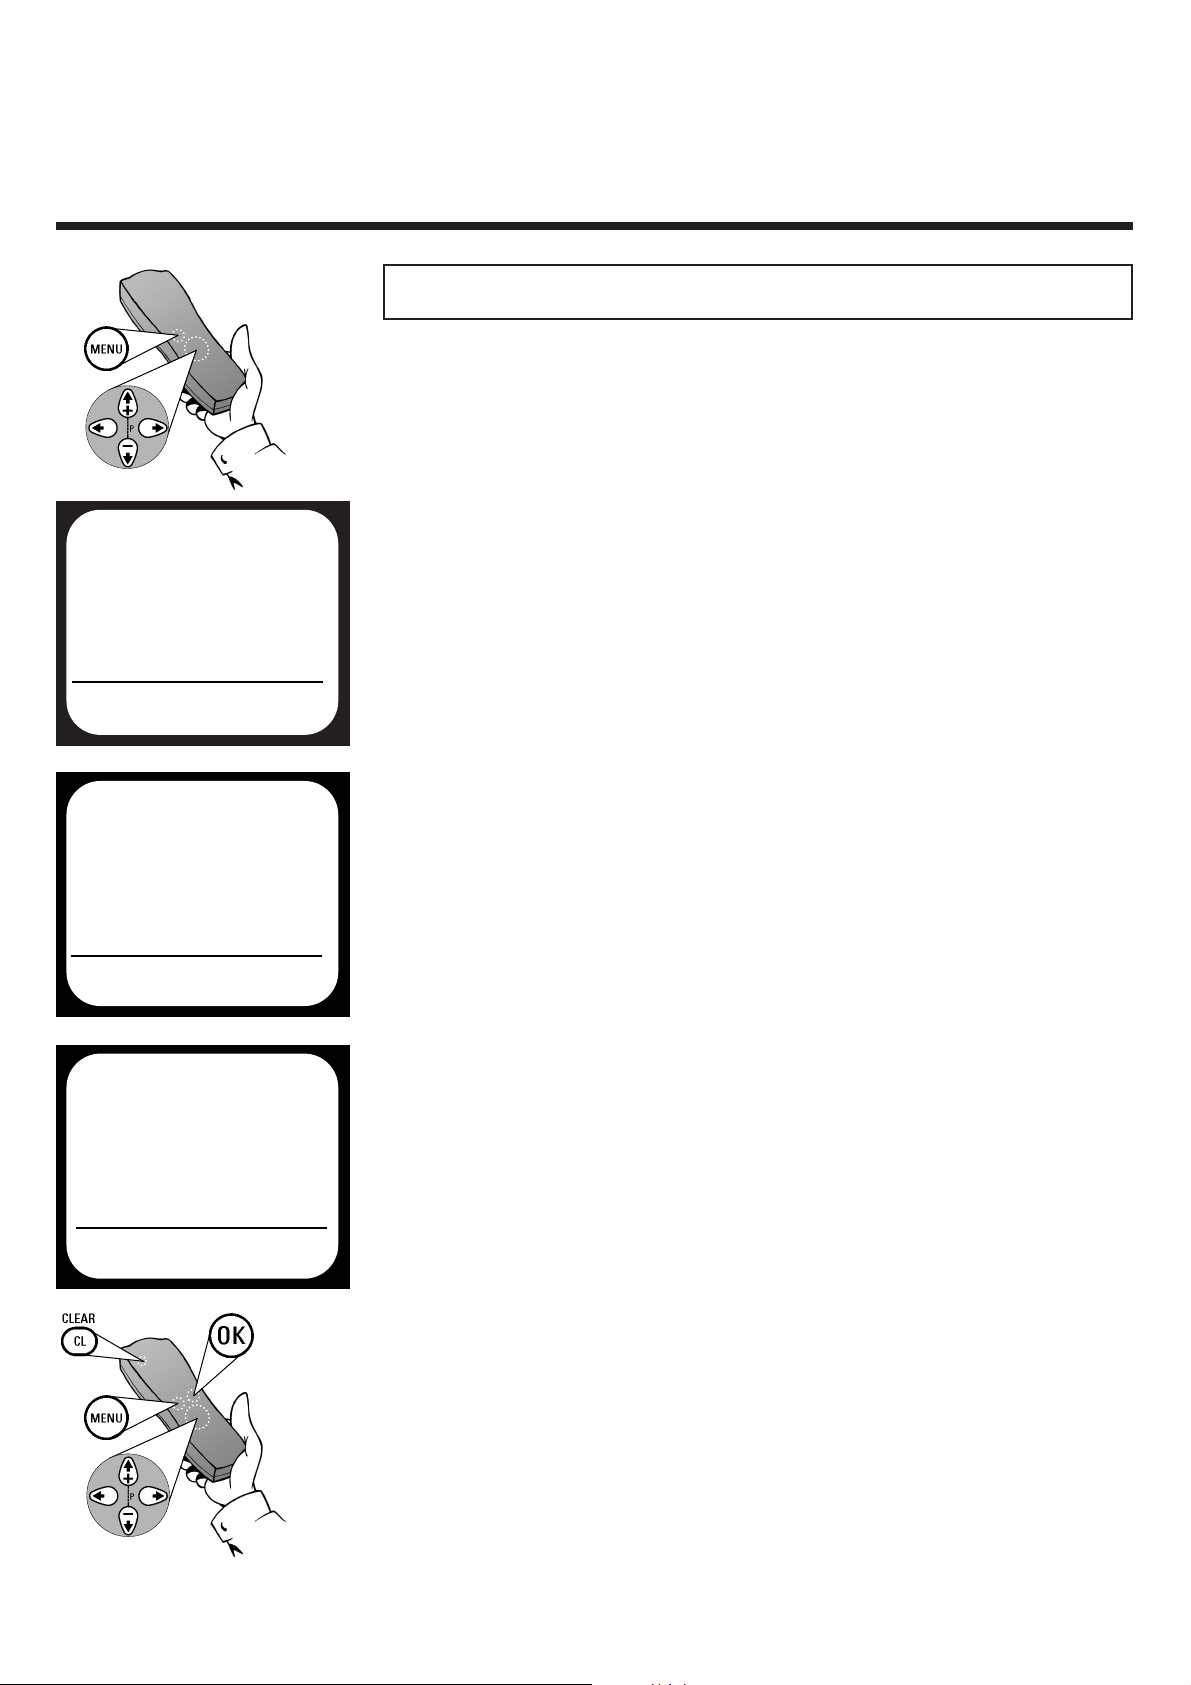
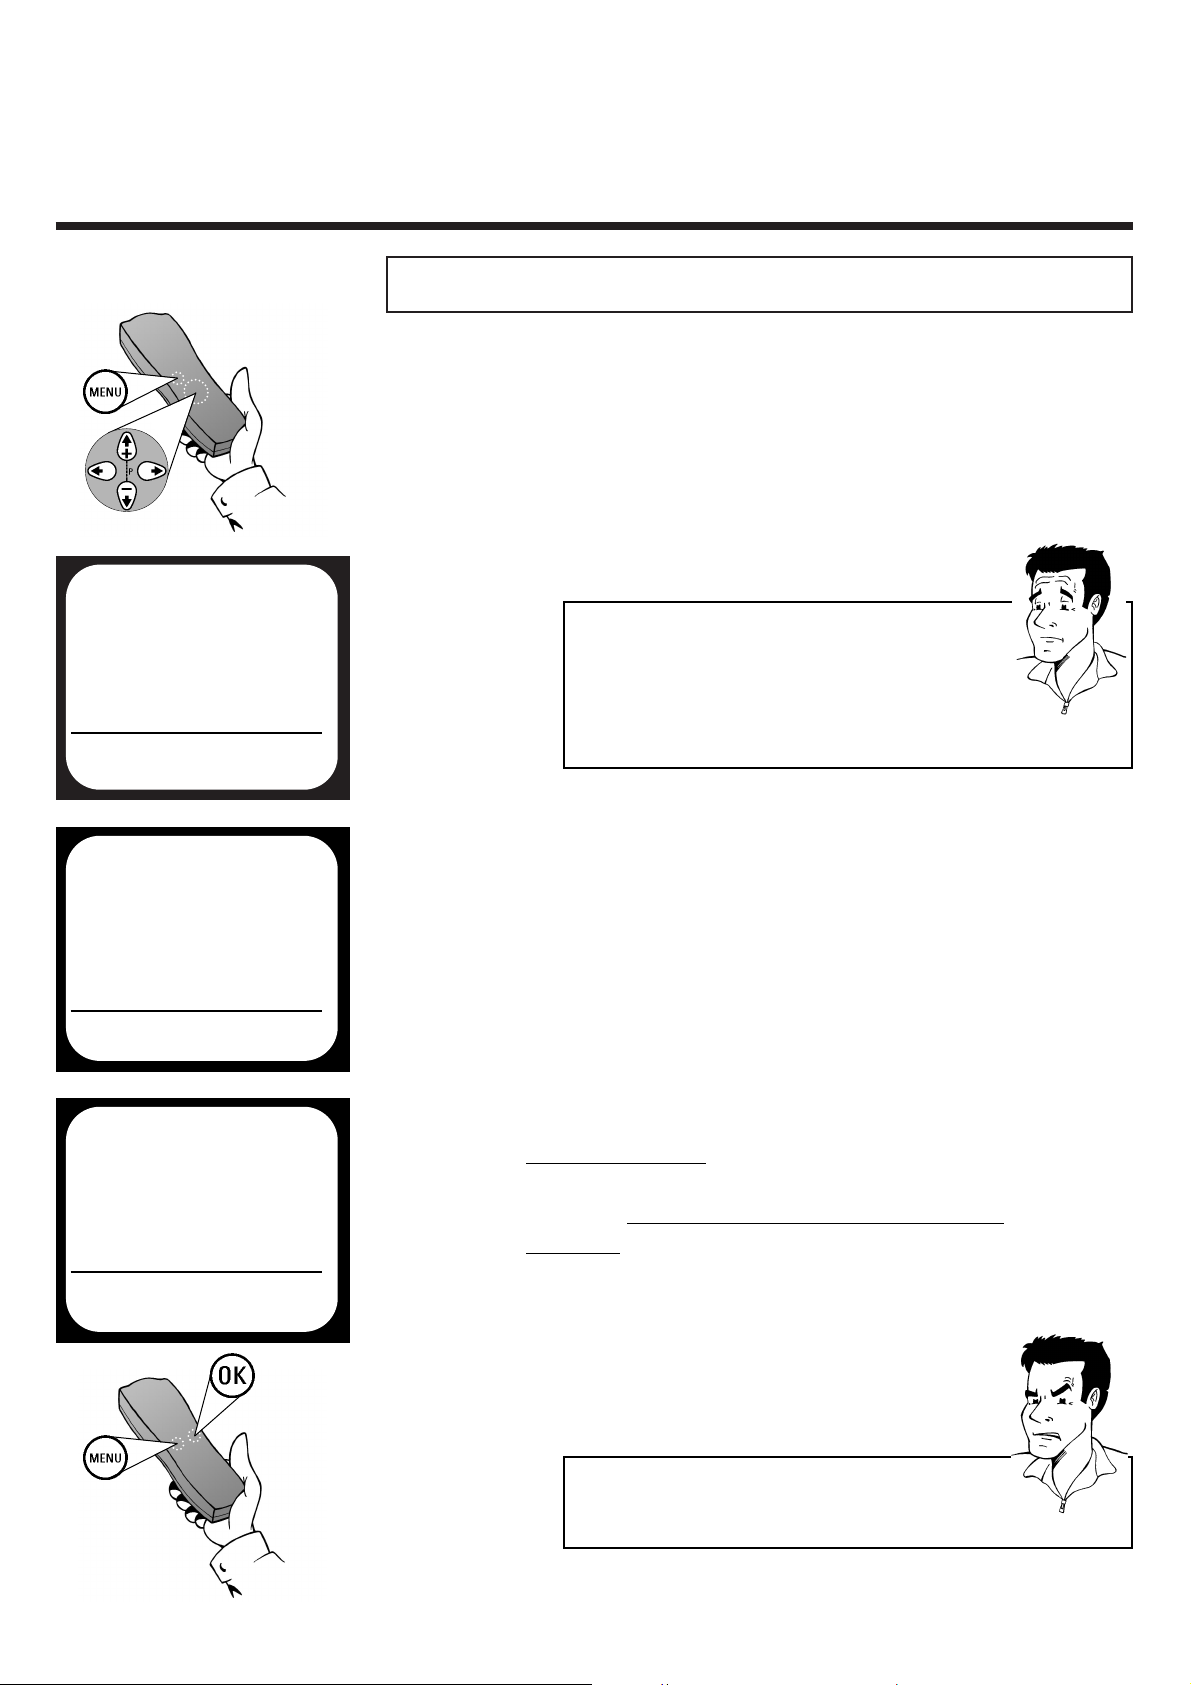
MMEENNUU
ä Switch main menu on / off
SSEELLEECCTT
ä Select function
OOKK
ä Store
ä Confirm
;; PP++ // == PP--
ä Select next / previous menu point
ä Select next / previous programme number
QQ // PP
ä Select entry field
Page 4
IMPORTANT NOTES FOR OPERATION ENGLISH
4
4
IInnttrroodduuccttiioonn
1
1
You should not under any circumstances open the set yourself.
You would expose yourself to the risk of an electric shock from
the hazardous high voltage inside.
IImmppoorrttaanntt nnootteess ffoorr ooppeerraattiioonn
WWeellccoommee ttoo tthhee ffaammiillyy ooff oowwnneerrss ooff
PPhhiilliippss VVHHSS vviiddeeoo rreeccoorrddeerrss..
Thank you for choosing to buy our product. Please wait at
least three hours after transporting the appliance before
starting installation. The set needs this time in order to
become acclimatised to its new environment (temperature, air
humidity, etc.).
YYoouurr PPhhiilliippss TTeeaamm hhooppeess tthhaatt
yyoouu wwiillll eennjjooyy uussiinngg yyoouurr nneeww
vviiddeeoo rreeccoorrddeerr!!
When the appliance is connected to the power supply, there are some
components which are constantly operational.To switch off the video
recorder completely, you must disconnect it from the power supply.
The video recorder does not contain any components that can be
repaired by the customer.
Make sure that air can circulate freely through the ventilation slots on
the video recorder.
Make sure that no objects or liquids enter the video recorder. If liquid is
spilt into it, disconnect the video recorder immediately from the power
supply and call the After Sales Service for advice.
The video recorder should not be used immediately after
transportation from a cold to a hot area or vice versa, or
in conditions of extreme humidity.
These operating instructions have been printed on non-polluting paper.
Please deposit old batteries at the relevant collection points.
Please make use of the facilities available in your country for
disposing of the video recorder packaging in a way that helps
to protect the environment.
This electronic device contains many materials which can be recycled.
Please enquire about the possibilities for recycling your old set.
This product complies with the requirements of Directive 73/23/EEC + 89/336/EEC + 93/68 EEC.
!
!
Page 5

ENGLISH THE MOST IMPORTANT FUNCTIONS
5
5
MODEL NO. VR 708A/07
PROD. NO. ..............................
So that you can identify your machine in the event of theft, enter the serial number (PROD. NO)
here.You will find it on the type plate on the back of the set.
TThhee mmoosstt iimmppoorrttaanntt ffuunnccttiioonnss ooff yyoouurr nneeww vviiddeeoo rreeccoorrddeerr
Your Philips video recorder can be used, not only for recording and playing back VHS
cassettes, but it also has a whole range of special functions which will make day-to-day
use of your new video recorder easier for you.
Plug in and off you go - getting started with your new video recorder just couldnt be simpler. Once you
have connected the cables, you will immediately see text on the screen which will assist you at all stages
of operation.
The function Smart Picture gives you the option of activating pre-defined picture settings quickly and
easily at the touch of a button.
The simple programming system for video recorders revolutionized the video world when it was
introduced. Instead of having to enter many different details (date, starting time, finish time, programme),
which was often tiresome and liable to errors, all you have to do is enter a number, up to nine digits long,
which can be found in any TV programme listing. Once you have done that, all the relevant details for the
recording are stored.
VIDEO Plus+ and PlusCode are registered trademarks of Gemstar Development Corporation.
The VIDEO Plus+ system is manufactured under licence from Gemstar Development Corporation.
Using the enclosed multi-code remote control you can, if you wish, control the main functions of your TV
set - even if your TV is not made by Philips.
Recordings can be controlled, not only by the video recorder itself but also by a connected satellite
receiver. In this way the programme from various TV stations can be recorded one after another without
the need to set the corresponding channels on the satellite receiver manually. Requirement: Your
satellite receiver must support this function.
IIff yyoouu hhaavvee aannyy pprroobblleemmss uussiinngg tthhee vviiddeeoo rreeccoorrddeerr,, pplleeaassee rreeaadd tthhee ccoorrrreessppoonnddiinngg
cchhaapptteerrss iinn tthhiiss iinnssttrruuccttiioonn mmaannuuaall.. IIff yyoouu hhaavvee aannyy qquueessttiioonnss,, tthheerree iiss aallssoo aa ccuussttoommeerr
ssuuppppoorrtt sseerrvviiccee aavvaaiillaabbllee iinn yyoouurr ccoouunnttrryy.. YYoouu ccaann ffiinndd tthhee tteelleepphhoonnee nnuummbbeerr iinn tthhee
gguuaarraanntteeee iinnffoorrmmaattiioonn eenncclloosseedd iinn tthhee ppaacckkaaggiinngg.. PPlleeaassee hhaavvee yyoouurr mmooddeell nnuummbbeerr
((MMOODDEELL NNOO..)) aanndd pprroodduuccttiioonn nnuummbbeerr ((PPRROODD.. NNOO..)) rreeaaddyy..
Page 6

IMPORTANT INFORMATION FOR CUSTOMERS IN GREAT BRITAIN ENGLISH
6
6
IImmppoorrttaanntt iinnffoorrmmaattiioonn ffoorr ccuussttoommeerrss iinn GGrreeaatt BBrriittaaiinn
This set is fitted with an approved moulded 13 amp plug.To change the fuse in this plug or to
attach a different plug, please proceed as follows:
1 Take off the fuse cover and remove the old fuse
2 Insert a new fuse. Suitable fuses are those of the type BS 1362 3A,A.S.T.A.stan-
dard or BSI standard
3 Close the fuse cover
If the attached plug does not meet your requirements, you can cut it off and replace it with a
suitable plug. Please observe the following conditions:
If your new plug uses a built-in fuse, this should be a 3A fuse.
If your new plug does not contain a built-in fuse,please do not use any fuses in your fusebox with a rating
of more than 5A.
Please destroy the old,cut-off plug so that it cannot be used elsewhere.
4 Connect the blue cable (neutral N) to the terminal in the plug which is mar-
ked with the letter N or coloured black
5 Connect the brown cable (live,L) to the terminal in the plug which is mar-
ked with the letter L or coloured red
6 Do not in any circumstances connect either of the two cables to the terminal
in the plug which is marked with the letter E,the symbol \ or coloured
green or green / yellow
Before you refit the plug cover, make sure, that the grip at the bottom of the plug is clamped
over the plastic cover of the lead, not just over the two wires.
!
!
Page 7
E
NGLISH
R
EMOTE CONTROL/ CONNECTION WITH A SCART SOCKET
7
7
CCoonnnneeccttiinngg tthhee vviiddeeoo rreeccoorrddeerr
2
2
CCoonnnneeccttiinngg ttoo aa TTVV sseett wwiitthh aa ssccaarrtt ssoocckkeett
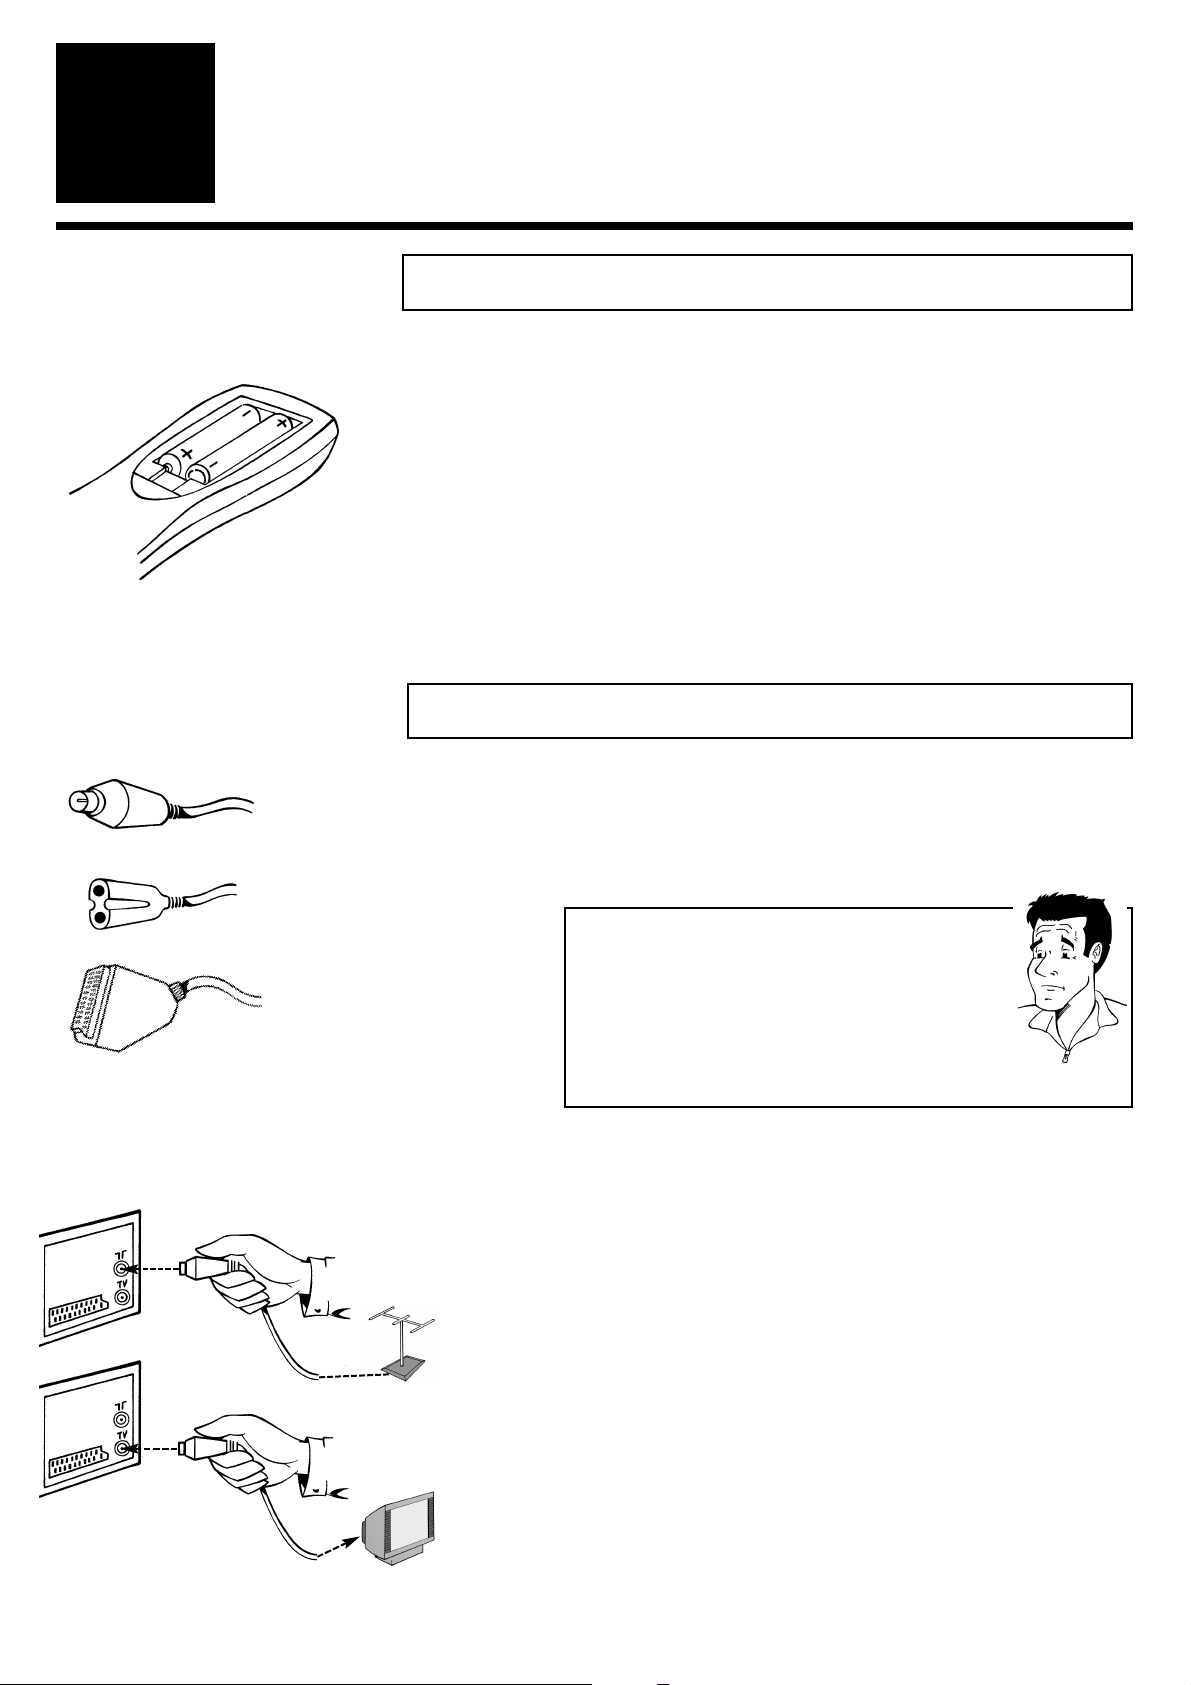
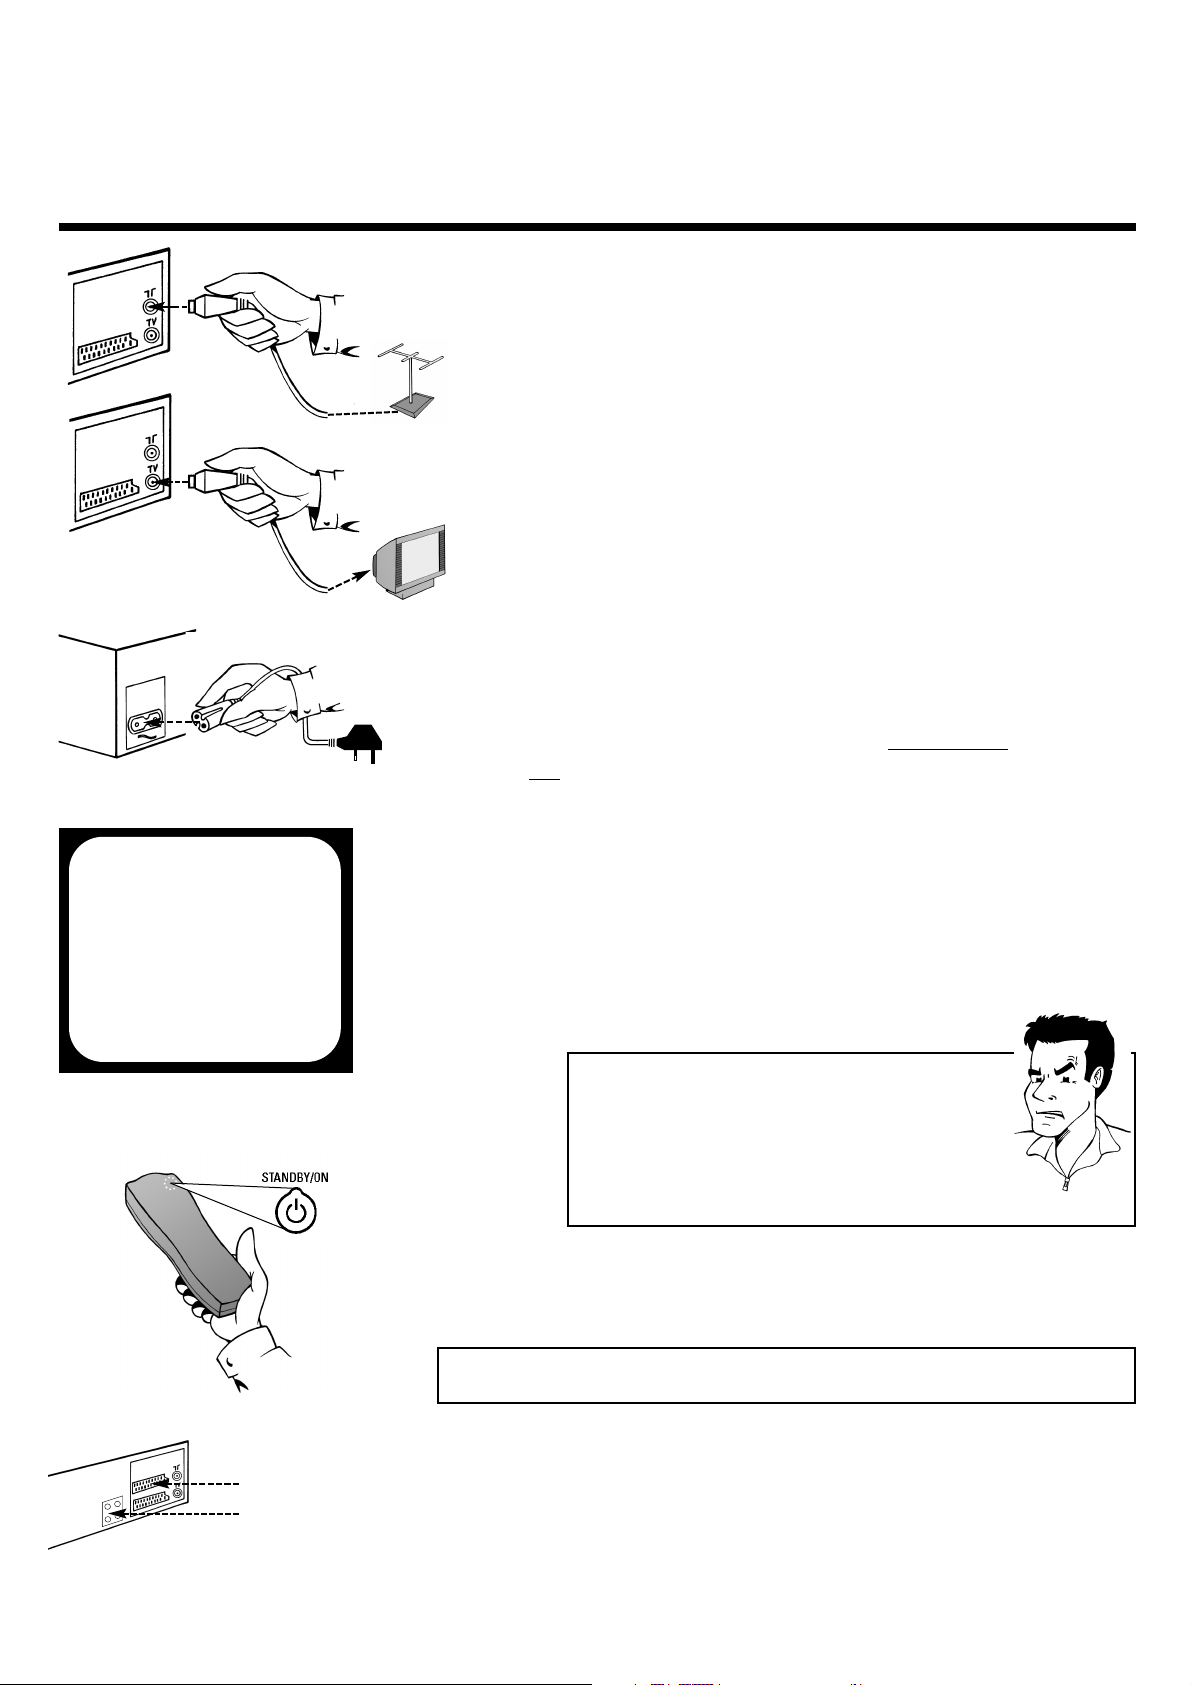
2 Switch off your TV set
3 Remove the aerial cable plug from the back of
your TV set and insert it into the aerial
socket 22on the back of the video recorder
4 Take the enclosed aerial cable and connect
the appropriate end to the aerial socket of
your TV set and to the TV socket
33
on the
back of the video recorder
1 Have the following cables ready:An aerial cable
(enclosed), a mains cable (enclosed) and a scart
cable (enclosed)
PP
AARRDDOONN
??
WWhhaatt iiss aa ssccaarrtt ccaabbllee??
The scart or Euro-AV cable serves as the universal
recording and playback connector for picture-, soundand control signals.With this type of connection,there
is practically no loss of quality during the signal
transfer. We recommend that you use a scart cable
when using this video recorder.
PPrreeppaarriinngg tthhee rreemmoottee ccoonnttrrooll ffoorr ooppeerraattiioonn
1 Take the remote control of the video recorder
and the enclosed batteries (2 batteries)
2 Open the battery compartment, insert the
batteries as shown and then close the battery
compartment.The remote control is now ready
to use
Scart cable
Aerial cable
Mains cable
Page 8
CONNECTING TO A TV SET WITHOUT SCART SOCKET ENGLISH
8
8
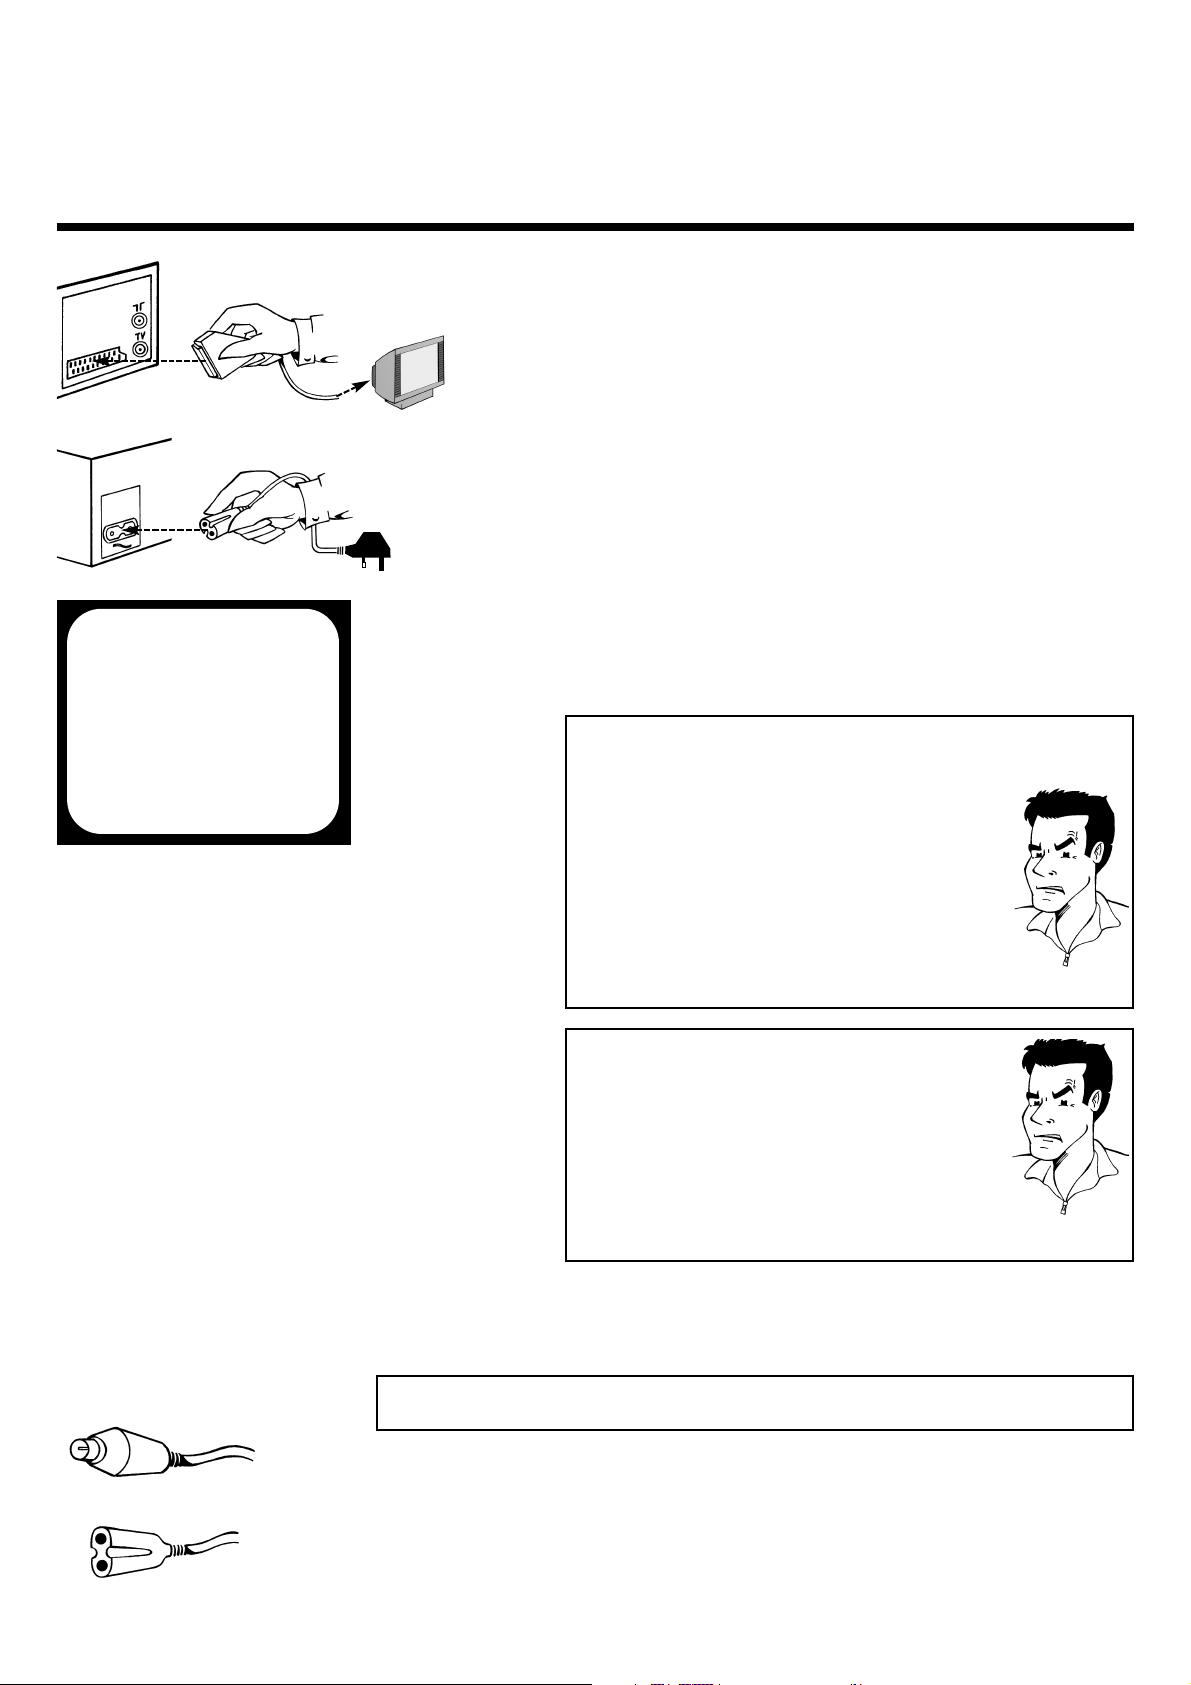
5 Take a scart cable and connect one end to the
scart socket on the back of your TV set and
the other to the scart socket
AAVV11 EEXXTT11
on
the back of the video recorder
6 Take the enclosed mains cable and connect
the appropriate end to the mains socket
44
on the back of the video recorder and the
other to the nearest free socket
1 Have the following cables (provided with your
new video recorder) ready: An aerial cable
and a mains cable
2 Switch off your TV set
CCoonnnneeccttiinngg ttoo aa TTVV sseett wwiitthhoouutt aa ssccaarrtt ssoocckkeett
8 You can find more details in the chapter Initial
Installation
7 Your set should automatically switch over to
the programme number allocated to video
recorder operation (usually:EXT, 0 or AV).You
will see the welcome screen.
PPRROOBBLLEEMM
88 MMyy ssccrreeeenn iiss ssttiillll bbllaannkk
44
If a TV set receives a signal via the scart socket, it
usually switches automatically to the corresponding programme number.This automatic function
might be adversely affected. Please switch manually to the corresponding programme number
(usually: EXT, 0 or AV)
44
Check the cable connections
Aerial cable
Mains cable
PPRROOBBLLEEMM
88 II ccaann nnoott sseeee tthhee wweellccoommee ssccrreeeenn,, oonnllyy tthhee mmeessss--
ssaaggee
EEAASSYYLLIINNKK IISS LLOOAADDIINNGG DDAATTAA FFRROOMM TTVV
44
Congratulations! The TV set supports the Easylink
function. It automatically sends the settings for the
available TV channels and the time and date information straight to the video recorder. As soon as
the transfer is complete, the current settings for
year, month, date and time appear on the screen.
Correct and/or confirm the settings with the arrow
buttons ;, =, Q and/or P the number buttons
00--99
and confirm with
OOKK
.
AV1 EXT1
CONGRATULATIONS
YOU NOW OWN A NEW
PHILIPS
VIDEORECORDER
TO CONTINUE PRESS OK
Page 9
E
NGLISH
C
ONNECTING ADDITIONAL DEVICES
9
9
5 Take the enclosed mains cable and connect
the appropriate ends to the mains socket
44
on the back of the video recorder and the
other to the nearest free socket
6 Switch on your TV set and select on y
our TV
set the programme number which will in
future be used for operation with the video
recorder. If necessary, you should refer to the
instructions for your TV set for assistance.
7 Change the settings of this programme
number on your TV set until you see the
adjacent welcome screen clearly and in
colour on the screen
PPRROOBBLLEEMM
8 You can find more details in the chapter
Initial Installation
88 TThheerree iiss nnoo tteesstt iimmaaggee
44
Your video recorder broadcasts on the
frequency 583MHz (CH35) in the UHF range (ultra
highfrequency). Repeat the matching of the
selected programme numbers on the TV set.
44
Check the cable connections
3 Remove the aerial cable plug from the back of
your TV set and insert it into the aerial
socket 22on the back of the video recorder
4 Take the enclosed aerial cable and connect
the appropriate end to the aerial socket of
your TV set and to the TV socket
33
on the
back of the video recorder
CCoonnnneeccttiinngg aaddddiittiioonnaall ddeevviicceess
Additional devices,such as a decoder, camcorder, satellite receiver, etc., can be
connected to the scart socket
AAVV22 EEXXTT22
on the back of the video recorder.
You will need a scart cable for this (available from specialist stores).
There are two audio output sockets -
AAUUXX OOUUTT LL RR
- and two input
sockets -
AAUUXX IINN LL RR
-on the back of the video recorder . You can
connect a stereo system to these.
AV2 EXT2
AUX IN L
AUX IN R
AUX OUT L
AUX OUT R
CONGRATULATIONS
YOU NOW OWN A NEW
PHILIPS
VIDEORECORDER
TO CONTINUE PRESS OK
Page 10
SETTING TV CHANNELS, DATE AND TIME ENGLISH
10
10
1 Using the
OOKK
button activate the automatic
initial installation
SSeettttiinngg TTVV cchhaannnneellss,, ddaattee aanndd ttiimmee ffoorr tthhee ffiirrsstt ttiimmee
IInniittiiaall iinnssttaallllaattiioonn
3
3
TTIIPP
2 The set seeks out and stores all available TV
channels as well as time and date. This
procedure may take several minutes
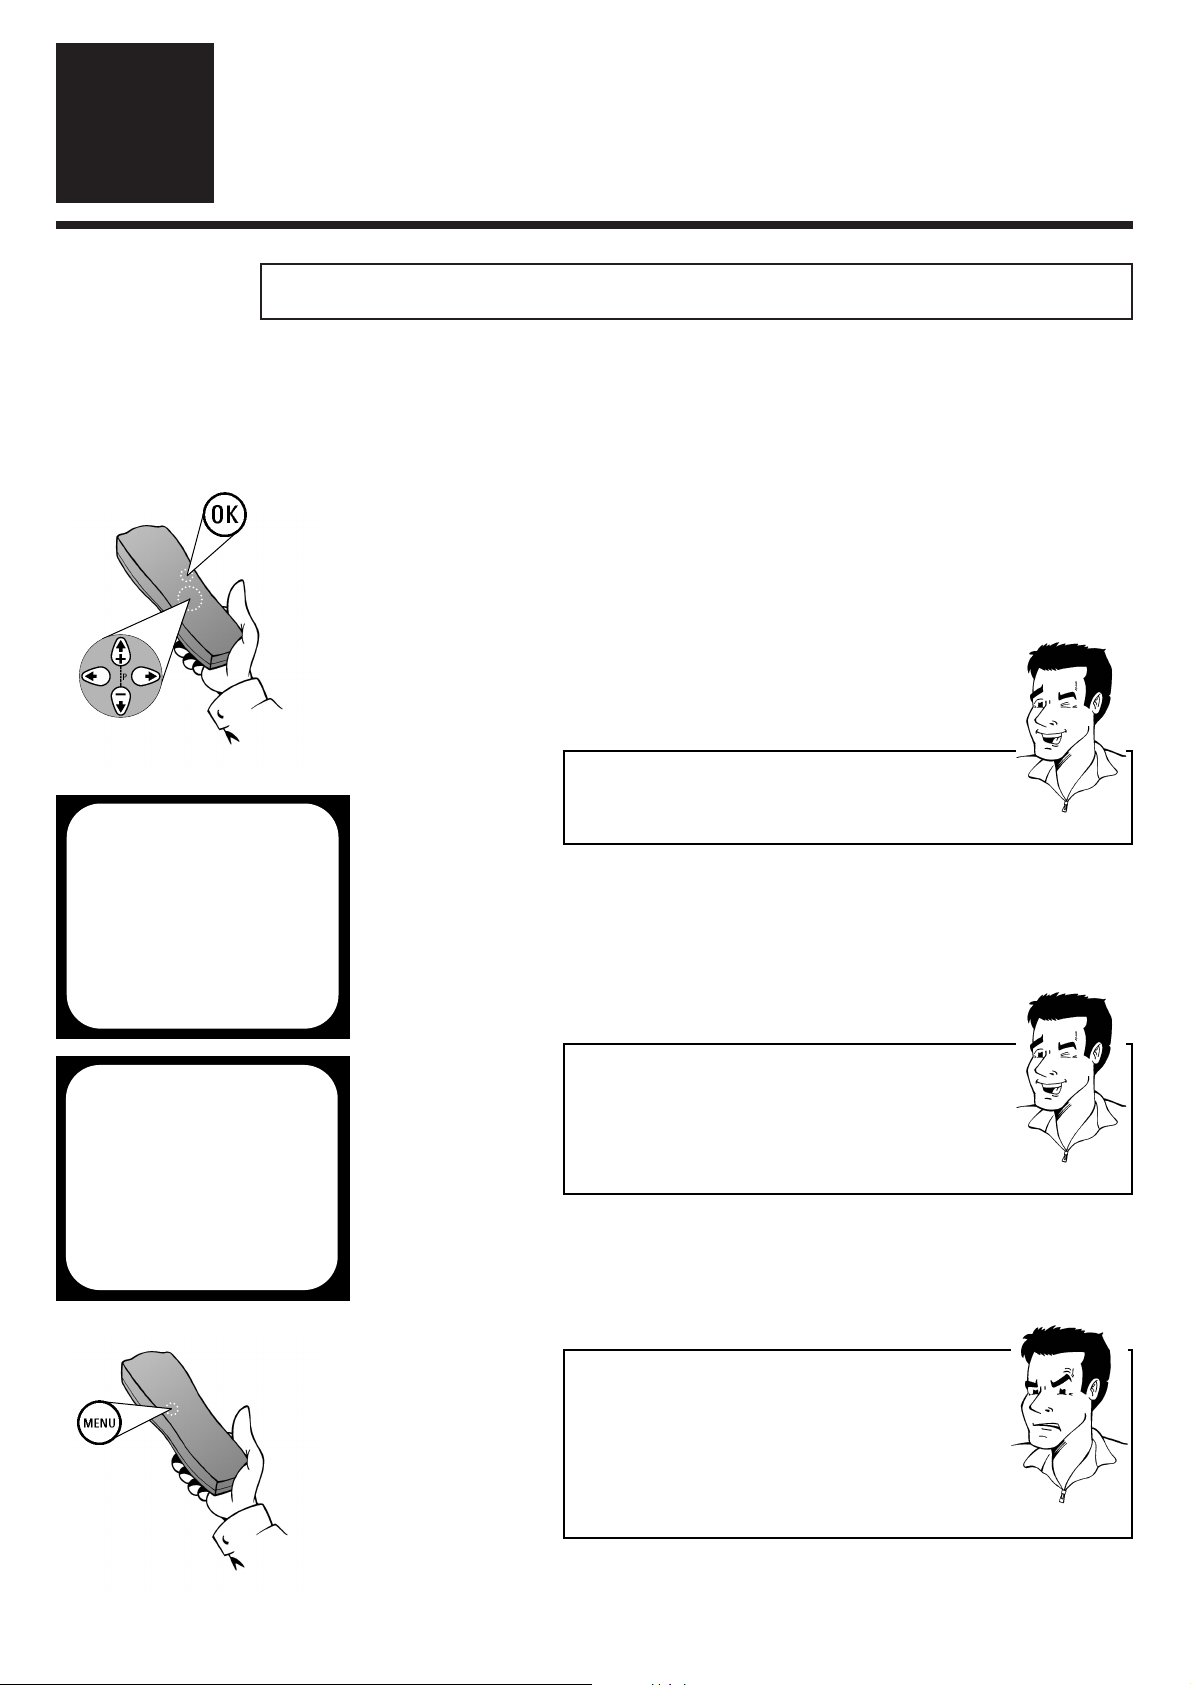
AAiimm ccoorrrreeccttllyy
Always point the remote control at the video recorder
and not at the TV set.
AUTOINSTALL
YOUR VIDEO RECORDER
IS NOW SEARCHING FOR ALL
AVAILABLE TV CHANNELS
01 TV CHANNELS FOUND
hhhh_______________
PLEASE WAIT
3 The initial setting of channel, date and time is
completed.
TTIIPP
TThhee TTeelleetteexxtt cclloocckk rreesseettss aauuttoommaattiiccaallllyy
If a TV channel which has Teletext is stored as
programme number P01, the video recorder
automatically takes in the date and time from the text
function.The change from summer to winter time and
vice versa should also occur automatically.
If your TV set supports the Easylink function and you have
already corrected and/or confirmed the settings for year, month,
date and time, you can skip this section.Your video recorder has
already stored all the necessary details. Please continue by
reading the section Searching for a TV channel manually.
PPRROOBBLLEEMM
88 TThhee ttiimmee iiss nnoott sshhoowwnn iinn tthhee ddiissppllaayy ooff tthhee vviiddeeoo
rreeccoorrddeerr ((--::--)) oorr iiss sshhoowwnn iinnccoorrrreeccttllyy
44
While initial installation was going on, the set was
unable to recognise the time. Please read the
paragraph in Section 4 Setting the time and
date to correct this problem
AUTOINSTALL
AUTOINSTALL COMPLETE
32 TV CHANNELS FOUND
TO EXIT
PRESS MENU
Page 11
ENGLISH SEARCHING FOR A TV CHANNEL MANUALLY
11
11
1 Switch on the TV set and - if necessary -
select the programme number set for video
recorder operation
SSeeaarrcchhiinngg ffoorr aa TTVV cchhaannnneell mmaannuuaallllyy
4 Use
==PP--
or
;;PP++
to select the option
MANUAL SEARCH (manual channel search)
and confirm with button
PP
6 If you already know the frequency or the
channel of the TV station you are searching for,
use
==PP--
or
;;PP++
to select the option
ENTRY/SEARCH and enter the frequency or
the channel with the number buttons
00--99
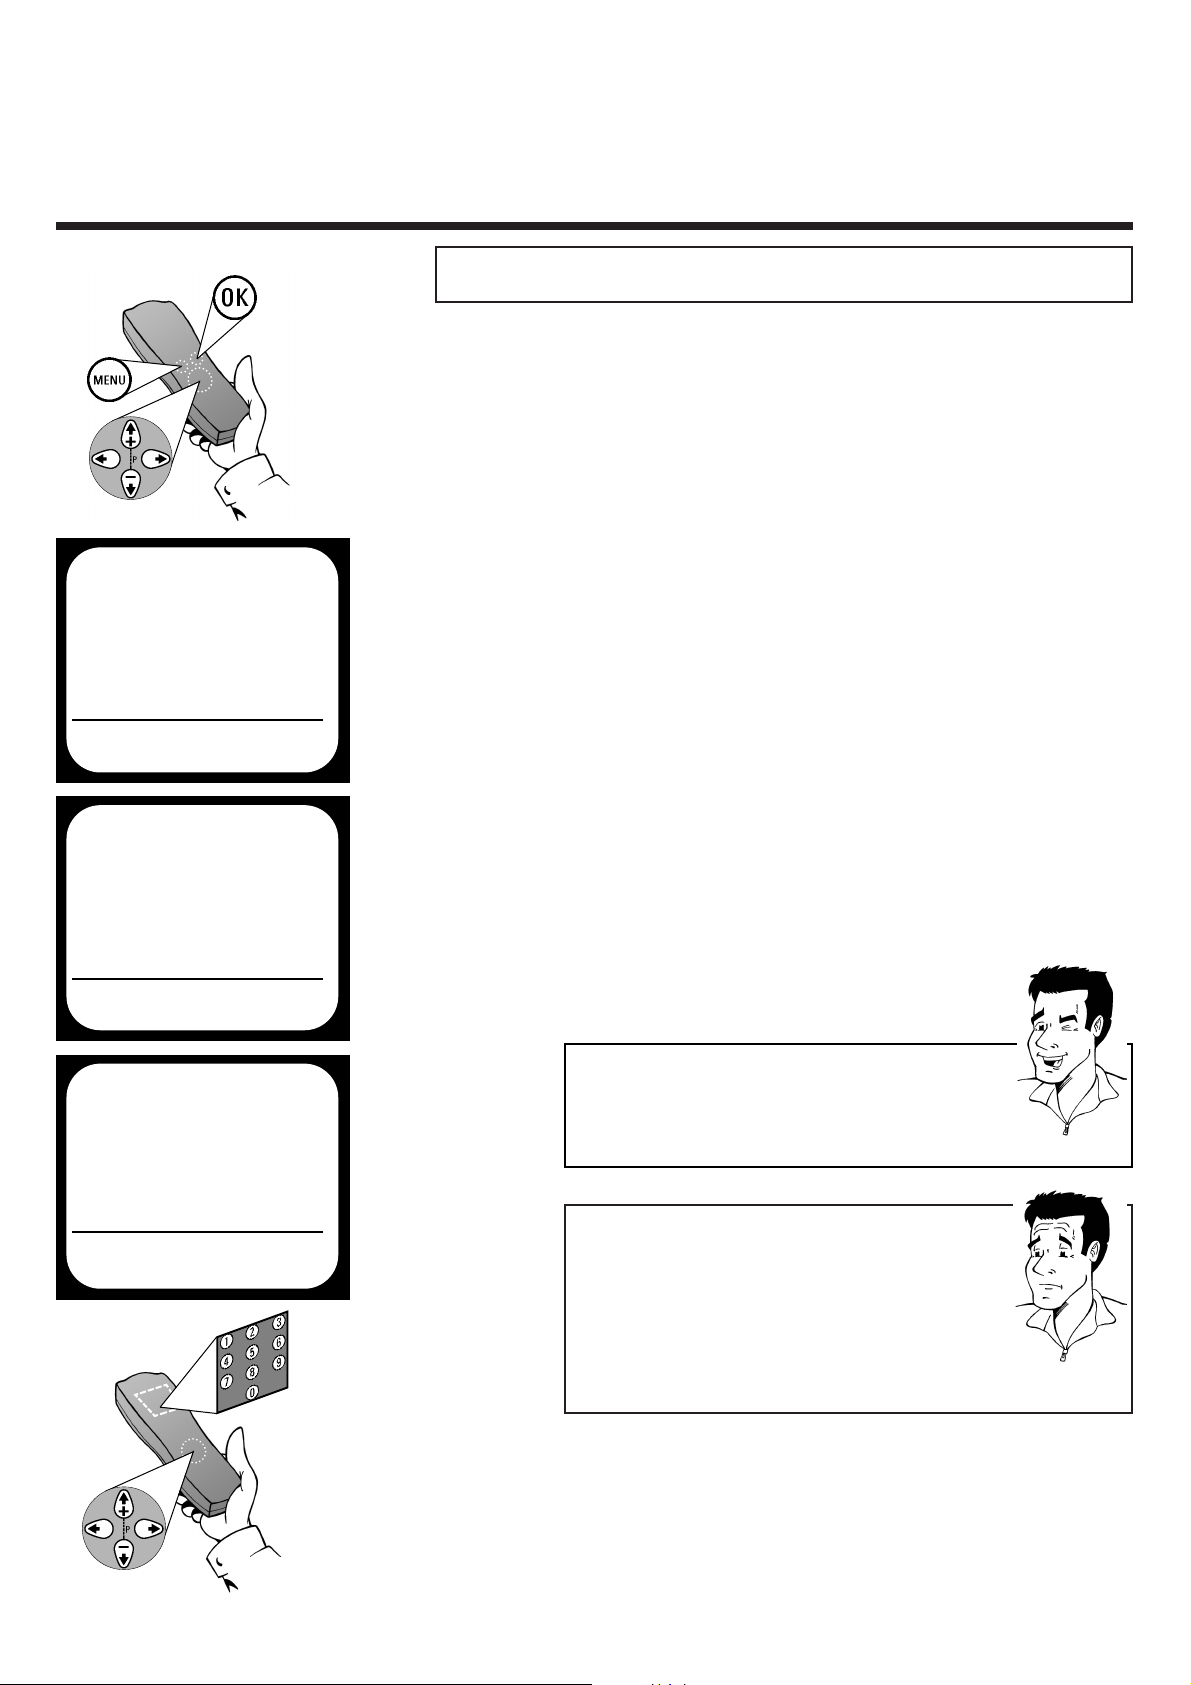
2 Press the
MMEENNUU
button on the remote
control.The on-screen menu appears
5 Use
==PP--
or
;;PP++
to select the option
CHANNEL/FREQ. and use
PP
or
QQ
to
select the type of display desired
PP
AARRDDOONN
??
WWhhaatt iiss aa cchhaannnneell,, oorr aa ssppeecciiaall cchhaannnneell??
TV channels are transmitted on precisely-defined
frequency ranges.These ranges are also referred to as
channels. Each channel has its own TV station
allocated to it. Most cable and satellite TV providers
supply tables of channel allocations. Special channels
(hyperband channels) are transmitted on special
frequencies.
In exceptional cases, it may happen that on initial installation the
set does not find all the available TV channels.In this case, the misssing TV channels must be searched for and stored manually. If your
set supports the Easylink function, you can start the
automatic transfer of channel data by means of the following steps.
MAIN MENU
ÂÅ PLAY FUNCTIONS Å
RECORDING FUNCTIONS
SPECIAL SETTINGS
INSTALLATION
TO EXIT
PRESS MENU
3 Use
==PP--
or
;;PP++
to select the option
INSTALLATION and confirm with button
PP
TTIIPP
WWhhaatt iiss hhiiddddeenn bbeehhiinndd tthhee sseettttiinnggss??
FREQ.: The frequency display
CH : The channel display
S-CH : Entering a special channel
É
MAIN MENU
INSTALLATION
ÂÅ AUTOINSTALL Å
FOLLOW TV
MANUAL SEARCH
TV CHANNEL ALLOCATION
OPTIMIZE MODULATOR
TIME/DATE
TO EXIT
PRESS MENU
É
INSTALLATION
MANUAL SEARCH
ÂÅ CHANNEL/FREQ. Ä FREQ. Å
ENTRY/SEARCH 543,3
PROGRAMME NUMBER 01
TV CHANNEL NAME BBC1
DECODER OFF
FINE TUNING 0
TO EXIT
PRESS MENU
É
Page 12
ALLOCATING DECODER ENGLISH
12
12
7 Use
==PP--
or
;;PP++
to select the option
PROGRAMME NUMBER and use
PP orQQ
to
select the programme position where you
wish to store the TV station you have found
PPRROOBBLLEEMM
88 II ccaannnnoott ffiinndd tthhee TTVV cchhaannnneellss ffrroomm mmyy ssaatteelllliittee
rreecceeiivveerr
44
These programs do not have to be stored as actual
TV channels. On your video recorder, select
programm numberE2.Individual TV channels must
be selected on the actual satellite receiver itself
9 Finish manual sorting of TV channels by
pressing the
MMEENNUU
button or return to
step
6 to allocate additional TV channels
1 Use
==PP--
and
;;PP++
or the number keys
00--99
to
select the TV channel, which will in future be
automatically decoded by your decoder
AAllllooccaattiinngg ddeeccooddeerr
PP
AARRDDOONN
??
WWhhaatt iiss aa ddeeccooddeerr??
Like a deciphering machine, a decoder (available in TV
and video stores) deciphers the TV channels for which
additional charges must be paid. Without the
appropriate decoder, you will receive these TV
channels distorted.
If your TV set supports the Easylink function you must allocate the
decoder directly to the TV set.If necessary, you should refer to the
instructions for your TV set for assistance.If your TV set does notsupport the Easylink function you must allocate the decoder on
the video recorder.
88 II ddoonntt kknnooww tthhee cchhaannnneellss ffoorr mmyy TTVV ssttaattiioonnss
44
No problem. Hold down the button PPto start
the automatic channel search. A changing channel
number will appear on-screen. Continue the
automatic channel search until you have found the
desired TV station
PPRROOBBLLEEMM
8 Store the TV channel you have found with the
button
OOKK
.The screen will show STORED
INSTALLATION
MANUAL SEARCH
ÂÅ CHANNEL/FREQ. Ä FREQ. Å
ENTRY/SEARCH 543,3
PROGRAMME NUMBER 01
TV CHANNEL NAME BBC1
DECODER OFF
FINE TUNING 0
TO EXIT
PRESS MENU
É
Page 13
ENGLISH USING A SATELLITE RECEIVER
13
13
UUssiinngg aa ssaatteelllliittee rreecceeiivveerr
Those TV channels which are received via a satellite receiver
connected (to the scart socket
AAVV22 EEXXTT22
) can be viewed on the
video recorder on programme number E2. On the remote
control press the number button 00and then the button
==PP--
to
select this programme number. The TV channels of the satellite
receiver are selected not on the video recorder itself, but
directly on the satellite receiver.
2 Press the
MMEENNUU
button.The on-screen
menu appears
6 Confirm with
OOKK
(screen will show
STORED) and leave the on-screen menu with
the
MMEENNUU
button
TTIIPP
CChheecckk ddeeccooddeerr aallllooccaattiioonn aatt aa ggllaannccee
There is no need to call up the on-screen menu to check
to which TV channel on the video recorder a decoder is
allocated. Simply use
==PP--
and
;;PP++
to select a TV channel.
If DEC appears in the display, a decoder is allocated to
this channel.
MAIN MENU
ÂÅ PLAY FUNCTIONS Å
RECORDING FUNCTIONS
SPECIAL SETTINGS
INSTALLATION
TO EXIT
PRESS MENU
É
4 Use
==PP--
or
;;PP++
to select the option
MANUAL SEARCH (manual channel search)
and confirm with button
PP
3 Use
==PP--
or
;;PP++
to select the option
INSTALLATION and confirm with button
PP
5 Use
==PP--
or
;;PP++
to select the option
DECODER and use
PP orQQ
to select the
setting ON (Decoder activated) or OFF
(Decoder deactivated)
MAIN MENU
INSTALLATION
ÂÅ AUTINSTALL Å
FOLLOW TV
MANUAL SEARCH
TV CHANNEL ALLOCATION
OPTIMIZE MODULATOR
TIME/DATE
TO EXIT
PRESS MENU
É
INSTALLATION
MANUAL SEARCH
ÂÅ CHANNEL/FREQ. Ä FREQ. Å
ENTRY/SEARCH 543,3
PROGRAMME NUMBER 01
TV CHANNEL NAME BBC1
DECODER OFF
FINE TUNING 0
TO EXIT
PRESS MENU
É
Page 14
SEARCHING FOR A TV CHANNEL AUTOMATICALLY ENGLISH
14
14
SSeettttiinnggss
4
4
1 Switch on the TV set and - if necessary -
select the programme number set for video
recorder operation
SSeeaarrcchhiinngg ffoorr aa TTVV cchhaannnneell aauuttoommaattiiccaallllyy
5 The set seeks out and stores all available TV
channels. This procedure may take several
minutes.
On initial installation, the video recorder performs an automatic
channel search. If the channel assignments of your cable or satelllite TV provider change or if you are reinstalling the video recorder, e.g. after moving house, you can start this procedure again.
The video recorder finds all the available TV channels and stores
the new settings. If your set supports the Easylink function, you
can start the automatic transfer of channel data by means of the
following steps.
4 Use
==PP--
or
;;PP++
to select the option
AUTOINSTALL and confirm with
PP
2 Press the
MMEENNUU
button on the remote
control.The on-screen menu appears
88 TThhee vviiddeeoo rreeccoorrddeerr iiss nnoott ffiinnddiinngg aallll tthhee TTVV
cchhaannnneellss
44
In exceptional cases, it may happen that the set
does not find all the available TV channels. In this
case, the missing TV channels must be searched
for and stored manually.You can look up how to
do this in the chapter Initial installation
(Searching for a TV channel manually).
PPRROOBBLLEEMM
TTIIPP
SSeeqquueennccee ooff TTVV cchhaannnneellss
TV channels are stored in the following sequence: BBC1,
BBC2, ITC, CH 4, CH 5,others.
MAIN MENU
ÂÅ PLAY FUNCTIONS Å
RECORDING FUNCTIONS
SPECIAL SETTINGS
INSTALLATION
TO EXIT
PRESS MENU
É
3 Use
==PP--
or
;;PP++
to select the option
INSTALLATION and confirm with
PP
MAIN MENU
INSTALLATION
ÂÅ AUTOINSTALL Å
FOLLOW TV
MANUAL SEARCH
TV CHANNEL ALLOCATION
OPTIMIZE MODULATOR
TIME/DATE
TO EXIT
PRESS MENU
É
INSTALLATION
AUTOINSTALL
SEARCHING FOR TV CHANNELS
01 TV CHANNELS FOUND
hhhh_______________
PLEASE WAIT
INSTALLATION
AUTOINSTALL
AUTOINSTALL COMPLETE
35 TV CHANNELS FOUND
TO EXIT
PRESS MENU
6 Finish with the
MMEENNUU
button
PP
AARRDDOONN
??
WWhhaatt iiss aann oonn--ssccrreeeenn mmeennuu??
The on-screen menu takes the mystery out of using
your new video recorder. All settings and recording
steps can be done easily via the on-screen menu by folllowing the corresponding instructions on the screen.
Page 15
ENGLISH SORTING AND CLEARING OF TV CHANNELS MANUALLY
15
15
SSoorrttiinngg aanndd cclleeaarriinngg ooff TTVV cchhaannnneellss mmaannuuaallllyy
After you have performed the automatic channel search you may
not agree with the sequence in which the individual TV channels
have been allocated to the programme positions of the video
recorder. You can use this function to individually sort the TV
channels found or to delete unwanted TV channels or those with
poor reception. If your TV set supports the Easylink function, you
will not need to rearrange the TV channels later. The sequence
corresponds to the channel allocation of your TV set.
1 Switch on the TV set and - if necessary - select
the programme number set for video recorder
operation
4 Use
==PP--
or
;;PP++
to select the option
TV CHANNEL ALLOCATION and confirm
with
PP
2 Press the
MMEENNUU
button on the remote
control.The on-screen menu appears
5 Use the buttons
==PP--
or
;;PP++
to select the TV
channel which is to be allocated to a
programme position and confirm with
PP
6
DDeelleettee::
Delete the TV channel which
has been set with
CCLL
AAllllooccaattiioonn::
Allocate the selected TV channels
with the buttons
==PP--
or
;;PP++
to
the desired programme
position and confirm with
QQ
7 Repeat the steps
5 and 6, to allocate
additional TV channels or to delete
additional unwanted TV channels
8 Use
OOKK
to store (screen will show
STORED)and finish the manual sorting/
clearing of TV channels with the
MMEENNUU
button
MAIN MENU
ÂÅ PLAY FUNCTIONS Å
RECORDING FUNCTIONS
SPECIAL SETTINGS
INSTALLATION
TO EXIT
PRESS MENU
É
3 Use
==PP--
or
;;PP++
to select the option
INSTALLATION and confirm with
PP
MAIN MENU
INSTALLATION
ÂÅ AUTOINSTALL Å
FOLLOW TV
MANUAL SEARCH
TV CHANNEL ALLOCATION
OPTIMIZE MODULATOR
TIME/DATE
TO EXIT
PRESS MENU
É
INSTALLATION
TV CHANNEL ALLOCATION
...
ÂÅ P01 BBC 1 Å
P02 BBC 2
P03 CH09
P04 CH11
...
TO SORT TO EXIT
PRESS Å PRESS MENU
É
É
É
Page 16
SORTING TV CHANNELS AUTOMATICALLY ENGLISH
16
16
SSoorrttiinngg TTVV cchhaannnneellss aauuttoommaattiiccaallllyy ((FFoollllooww TTVV))
After you have performed the automatic channel search you may
not agree with the sequence in which the individual TV channels
have been allocated to the programme positions of the video
recorder. With this function, the video recorder arranges the
stored TV channels in the same sequence as on the TV set.If your
TV set supports the Easylink function, you will not need to
rearrange the TV channels later. The sequence
corresponds to the channel allocation of your TV set.
1 Switch on the TV set and - if necessary - select
the programme number set for video recorder
operation
4 Use
==PP--
or
;;PP++
to select the option
FOLLOW TV and confirm with P
2 Press the
MMEENNUU
button on the remote
control.The on-screen menu appears
MAIN MENU
ÂÅ PLAY FUNCTIONS Å
RECORDING FUNCTIONS
SPECIAL SETTINGS
INSTALLATION
TO EXIT
PRESS MENU
É
3 Use
==PP--
or
;;PP++
to select the option
INSTALLATION and confirm with
PP
MAIN MENU
INSTALLATION
ÂÅ AUTOINSTALL Å
FOLLOW TV
MANUAL SEARCH
TV CHANNEL ALLOCATION
OPTIMIZE MODULATOR
TIME/DATE
TO EXIT
PRESS MENU
É
PP
AARRDDOONN
??
HHooww ddooeess FFoollllooww TTVV ffuunnccttiioonn??
The video recorder compares the TV channels stored
on the TV set at programme position 01 with its own
programme position memory. If it finds a match, it also
allocates the corresponding TV channel to programme
position 01
INSTALLATION
FOLLOW TV
PLEASE FOLLOW THE
INFORMATION ON THE VCR
DISPLAY AND IN THE
INSTRUCTION MANUAL
TO CONTINUE TO EXIT
PRESS OK PRESS MENU
5 Press
OOKK
.The display will show TV01.
8 Finish with the
MMEENNUU
button
PPRROOBBLLEEMM
88 TThhee ddiissppllaayy sshhoowwss
NOTV
44
Unfortunately your TV set does not support this function.
Please read Sorting / deleting channels manually.
6 On the TV set select the corresponding
programme number (e. g. 01) and confirm
with
OOKK
on the r
emote control of the video
recorder.
7 The video recorder stores the TV channel on
the programme number 01.The display will
show TV02 Repeat step
6 until all
available TV channels are allocated. If you have
selected a wrong TV channel, press
QQ
to go
back one step
Page 17
9 Leave the on-screen menu with the
MMEENNUU
button
8 Check the settings displayed for year, month,
date and time and store them by pressing
OOKK
.The screen will show STORED
ENGLISH CHANGING THE TIME AND DATE
17
17
CChhaannggiinngg tthhee ttiimmee aanndd ddaattee
6 Use
==PP--
or
;;PP++
to select the option MONTH
and - if the displayed setting is incorrect - enter
the current month with the number buttons
00--99
or with
PP orQQ
7 Use
==PP--
or
;;PP++
to select the option DATE and
- if the displayed setting is incorrect - enter the
current calendar date with the number buttons
00--99
or with
PP orQQ
If the display shows an incorrect time or --:--, the time and date
must be set manually.
TTIIPP
EEnntteerr tthhee vvaalluueess ccoorrrreeccttllyy
Numbers less than 10 must be entered with an
additional 0. For 9 thus 09 should be entered.
MAIN MENU
ÂÅ PLAY FUNCTIONS Å
RECORDING FUNCTIONS
SPECIAL SETTINGS
INSTALLATION
TO EXIT
PRESS MENU
É
3 Use
==PP--
or
;;PP++
to select the option
TIME/DATE and confirm with
PP
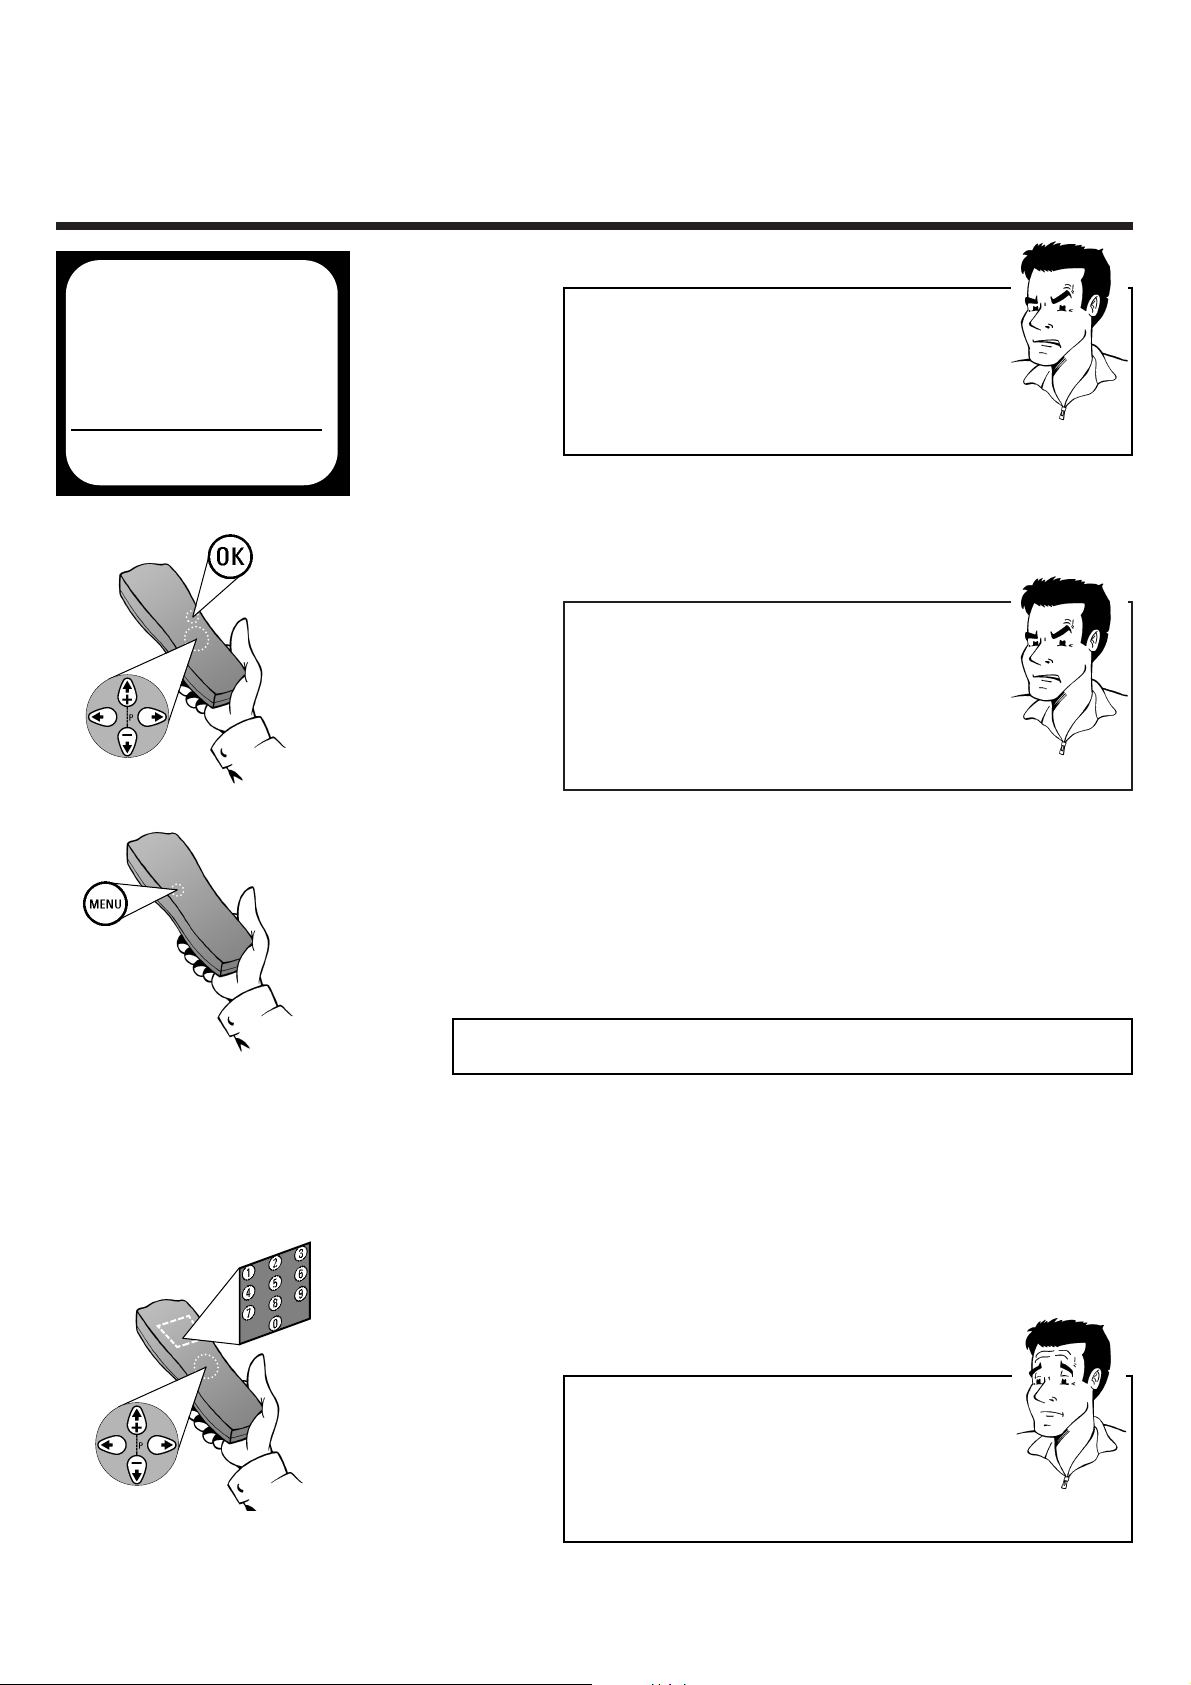
1 Press the
MMEENNUU
button on the remote
control.The on-screen menu appears
2 Use
==PP--
or
;;PP++
to select the option
INSTALLATION and confirm with
PP
4 Use
==PP--
or
;;PP++
to select the option TIME
and - if the setting displayed is
incorrect - enter the current time, with the
number buttons
00--99
or with
PP orQQ
5 Use
==PP--
or
;;PP++
to select the option YEAR
and - if the displayed setting is
incorrect - enter the current year with the
number buttons
00--99
or with
PP orQQ
INSTALLATION
TIME/DATE
 TIME Ä 15:00 Å
YEAR 2000
MONTH 08
DATE 03
SMART CLOCK ON
TO STORE
PRESS OK
É
MAIN MENU
INSTALLATION
ÂÅ AUTOINSTALL Å
FOLLOW TV
MANUAL SEARCH
TV CHANNEL ALLOCATION
OPTIMIZE MODULATOR
TIME/DATE
TO EXIT
PRESS MENU
É
Page 18

GENERAL INFORMATION / NAVIGATION ENGLISH
18
18
OOppeerraattiinngg iinnssttrruuccttiioonnss
5
5
GGeenneerraall iinnffoorrmmaattiioonn
AAuuttoommaattiicc sswwiittcchh--ooffff
If the video recorder is not used for several minutes, it switches itself off
automatically. This function can be deactivated (e.g. if you want to use the video
recorder as a TV receiver).You can find out more about this in the chapter Other
functions (Adjusting automatic switch off).
SSwwiittcchhiinngg oonn
If the video recorder is in standby mode, it can be switched on either by pressing
the Standby button mm, by pressing one of the number buttons
00--99
or by inserting
a cassette.
EEnneerrggyy ccoonnssuummppttiioonn
The video recorder should always be connected to the mains so as not to affect
programmed recordings and use of the TV set. Power consumption (in energy
saving mode) is less than 4W.
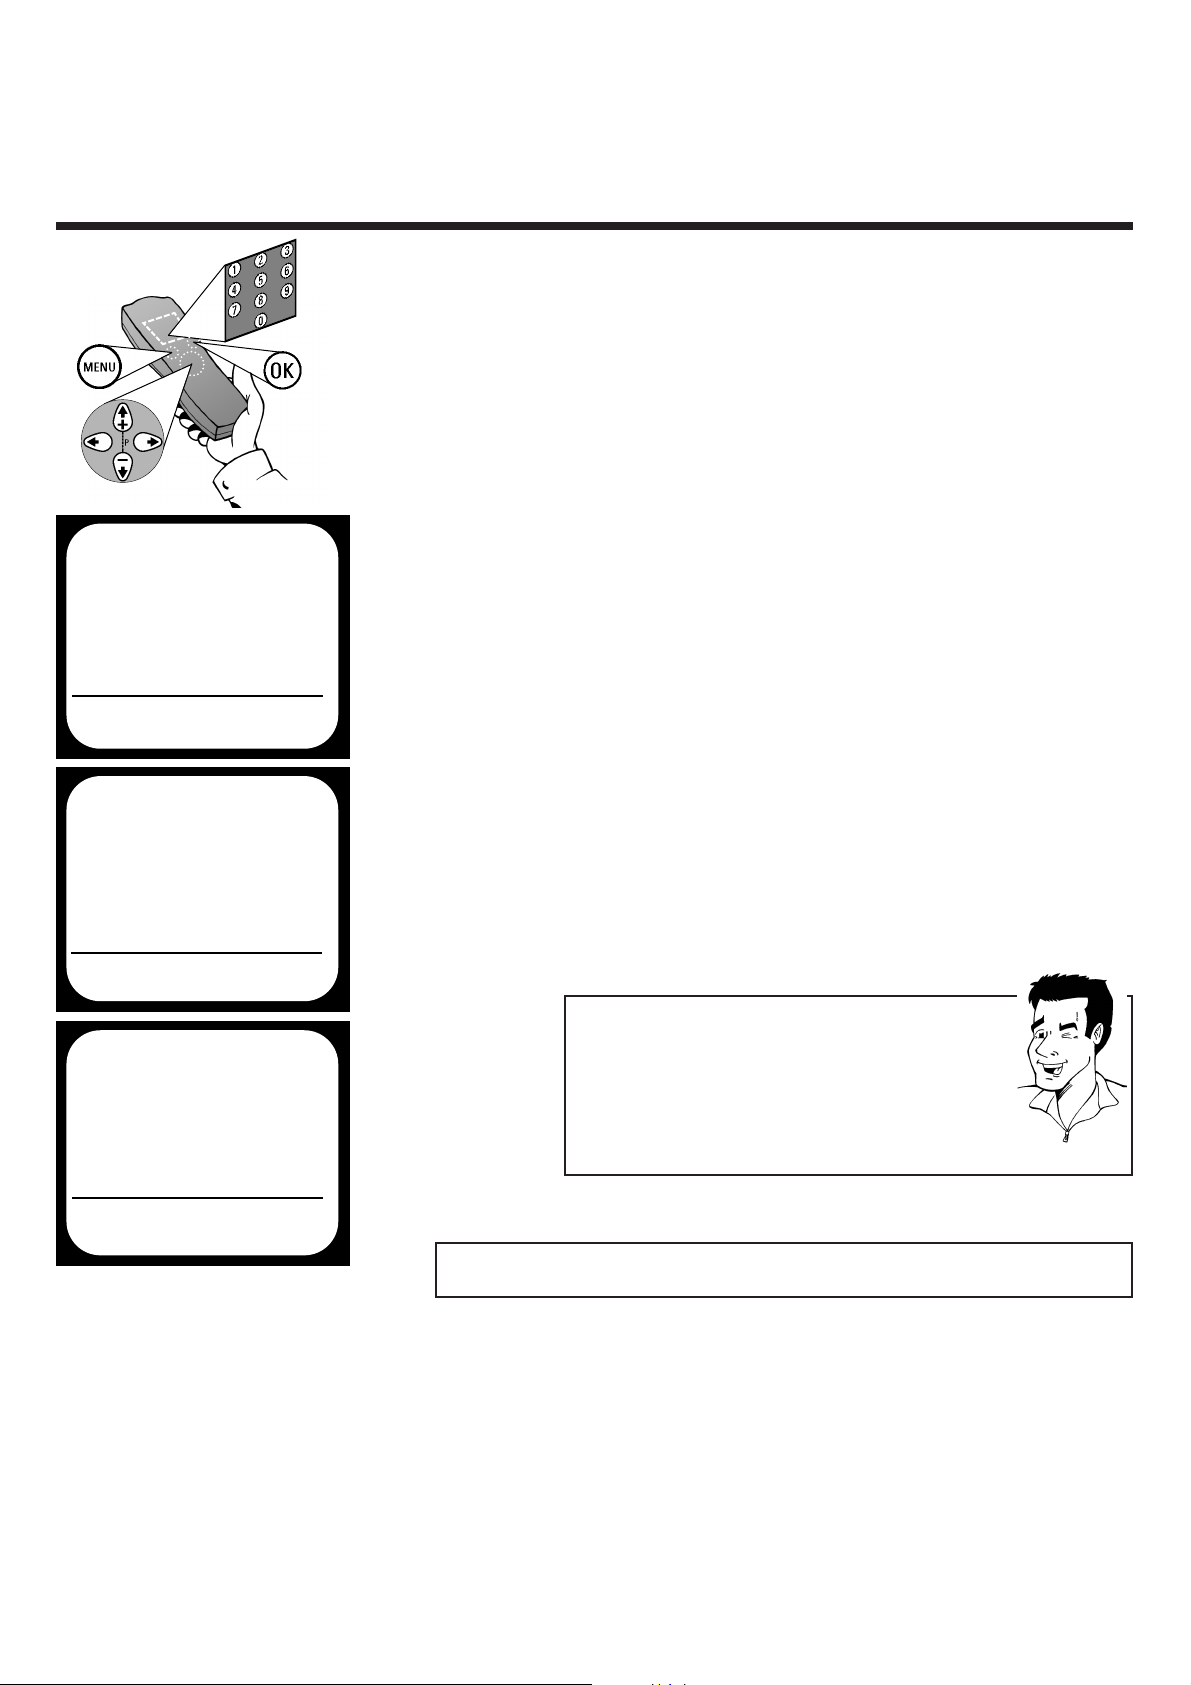
NNaavviiggaattiioonn iinn tthhee mmaaiinn mmeennuu
Call up:
MMEENNUU
Select: ;
PP++
and =
PP--
or P
Confirm:
OOKK
Enter:
00--99
or P and
QQ
Interrupt:
SSTTAANNDDBBYY//OONN mm
Abandon:
MMEENNUU
IInn tthhee eevveenntt ooff aa
ppoowweerr ccuutt
Channel data are stored for around 1 year, time and timer data remain in the
memory of the video recorder for around 7 hours.
You can check and / or change many functions and settings of your
video recorder via the main menu. The individual functions are
selected as follows via the on-screen menu of the video recorder
EEmmeerrggeennccyy eexxiitt
The video recorder and the remote control have the option of an Emergency
exit.You can use the Standby button mmto interrupt any step during use. But even
without an emergency brake your new video recorder is safe: there is no risk
whatsoever of damaging the set by performing user steps incorrectly.
SSaavviinngg eenneerrggyy
In standby mode, the display of the video recorder shows the current time.This
display can be deactivated manually, in order to reduce power consumption to a
minimum in standby mode.You can find the necessary steps in the section Other
functions (Energy-saving mode).
MAIN MENU
ÂÅ PLAY FUNCTIONS Å
RECORDING FUNCTIONS
SPECIAL SETTINGS
INSTALLATION
TO EXIT
PRESS MENU
É
Page 19

ENGLISH PLAYING CASSETTES / PLAYING BACK NTSC CASSETTE
19
19
1 Insert a VHS cassette in the cassette opening on
the front of the video recorder.The tape will be
caught and automatically placed in the correct
position.The display will show vv
2 Press the Playback button
CC
to play the tape
3 Press the Stop button h on the remote
control (or the Stop button h on the front of
the video recorder), to stop playback
PPllaayyiinngg ccaasssseetttteess
4 Press the cassette eject button Jon the
front of the video recorder to remove the
tape
PPllaayybbaacckk
6
6
PP
AARRDDOONN
??
88 PPiiccttuurree // ssoouunndd qquuaalliittyy iiss ppoooorr
44
Please read the section Removing picture
interference in this chapter.
44
When playing many rental videos or older, poorer
quality cassettes, it may not be possible to
completely filter out picture and sound
interference. There is nothing wrong with the
video recorder.
PPRROOBBLLEEMM
TTIIPP
AAuuttoommaattiicc sswwiittcchh--ooffff
Many functions (pause, still picture, search, ...) switch
themselves off automatically after a short time in order
to protect the cassette and to save energy
WWhhaatt ddooeess VVHHSS mmeeaann??
The Video Home System (VHS) has become the worldwide standard for recording and playback of amateur
video cassettes. The popular standard has since been
refined. Super-VHS (S-VHS) offers greater sharpness and
less noise, Digital-VHS (D-VHS) now only works with
digital picture and sound signals.Your video recorder can
only record and play standard VHS cassettes.
v
P01
h
PPllaayyiinngg bbaacckk NNTTSSCC ccaasssseetttteess
If you are using a PAL TV set which is capable of showing a frame
frequency of 60 Hz, you can play cassettes which have been recorded
on the NTSC standard (USA, Japan, etc.). During an NTSC playback,
some special functions (e.g. still picture) are not possible. The display
will show 60HZ
J
Page 20

SELECTING TAPE POSITION DISPLAY TYPE ENGLISH
20
20
DDiissppllaayyiinngg ttaappee ppoossiittiioonn
If the
CCOOUUNNTTEERR
button is pressed during playback and recording
the current tape position will be briefly displayed on the screen.
There are three different types of display available.
88 TThhee ccoouunntteerr ssttooppss rruunnnniinngg wwhheenn uunnrreeccoorrddeedd
ppllaacceess aarree ffoouunndd ((LLiinneeaarr ddiissppllaayy ttyyppee))
44
This is normal, and is necessary for technical
reasons.
88 TThhee ddiissppllaayy sshhoowwss aa nneeggaattiivvee ppllaayyiinngg ttiimmee
44
This may happen, for example, when you insert an
incompletely-rewound cassette into the video
recorder and rewind it to the start of the tape.
Since the display is automatically reset to
00:00:00 when you insert a cassette, the
actual start of the cassette for the set is less than
zero - thus in the negative range.The tape position
is displayed with a minus sign -.
88 AAfftteerr iinnsseerrttiinngg aa ccaasssseettttee tthhee vviiddeeoo rreeccoorrddeerr
sshhoowwss nnoo rreemmaaiinniinngg ppllaayyiinngg ttiimmee
44
The set needs a little time to calculate the remaining
playing time. After a few seconds, the display should
change from --:--:-- to the corresponding value
PPRROOBBLLEEMM
2 By pressing the button
CCOOUUNNTTEERR
the
current tape position will be displayed on the
screen. Each further press of the button
CCOOUUNNTTEERR
activates the next type of display
1 Start playback (Play button G) or recording
(Record button n)
3 As soon as the button
CCOOUUNNTTEERR
has not
been pressed for a few seconds, the display of
the tape position disappears again.
PP
AARRDDOONN
??
WWhhaatt ttyyppeess ooff ddiissppllaayy aarree aavvaaiillaabbllee ttoo mmee??
COUNTER : The display shows the number of
minutes of tape already played after
insertion of the cassette
(hours/minutes/seconds)
TIME LEFT : The display shows the remaining
playing time to the end of the
cassette (hours/minutes/seconds)
TIME USED : The actual tape position (from the
start of the tape to the present tape
position) will be displayed.
PLAY COUNTER
P08 00:00:00
Page 21

ENGLISH DISPLAY / RESET / FIND TAPE POSITION
21
21
1 During playback press H (rewind) or I
(forward)
SSeeaarrcchhiinngg ffoorr ttaappee ppoossiittiioonn wwiitthh ppiiccttuurree
((ppiiccttuurree sseeaarrcchh))
2 Interrupt the search wherever you like with
the Playback button G
DDiissppllaayy // rreesseett ttaappee ppoossiittiioonn
Call up:
CCOOUUNNTTEERR
Reset:
CCLL
(only possible in display type
TIME USED)
TTIIPP
AAuuttoommaattiicc rreesseett
Whenever a cassette is inserted the display is
automatically reset to 00:00:00.
1 Stop the tape with the Stop button h
SSeeaarrcchhiinngg ffoorr ttaappee ppoossiittiioonn wwiitthhoouutt ppiiccttuurree
((ffoorrwwaarrdd wwiinndd aanndd rreewwiinndd))
3 Interrupt the search wherever you like with
the Playback button G
2 Press H (rewind) or I (forward)
FFOORR
EEXXPPEERRTTSS
SSwwiittcchhiinngg bbeettwweeeenn rreewwiinndd // ffoorrwwaarrdd wwiinndd aanndd ppiiccttuu--
rree sseeaarrcchh ((iinnssttaanntt vviieeww))
When winding the tape backwards or forwards if you
hold down H (rewind) or I (forward wind), the
set will immediately switch without a break to picture search (with picture). When you release the
rewind or forward wind button the rewind or
forward wind process (without picture) will continue
TTIIPP
RReedduucceedd qquuaalliittyy
During picture search the picture quality is affected.
The sound is switched off.
DDiiffffeerreenntt sseeaarrcchh ssppeeeeddss
-If you press H or I twice, the tape speed will
increase. If you press it again the speed is reduced to
normal once more.
Page 22

1 To stop the picture, press the Still button R
during playback
SSttiillll ppiiccttuurree // ssllooww mmoottiioonn
2 Keep R pressed down to play back the
picture in slow motion or press R several
times in succession in order to move the
picture forward frame by frame
SEARCH FOR TAPE POSITION /
S
TILL PICTURE/SLOW MOTION
ENGLISH
22
22
1 Insert a tape recorded on this video recorder
or on another set with index marking
SSeeaarrcchhiinngg aauuttoommaattiiccaallllyy ffoorr ttaappee ppoossiittiioonn ((IInnddeexx sseeaarrcchh))
2 Press the Index button E and then I
(next index marking) or H (previous index
marking)
PP
AARRDDOONN
??
WWhhaatt iiss aann iinnddeexx mmaarrkkiinngg??
At the start of each new recording the video recorder
automatically places a magnetic marking - similar to a
bookmark - at the appropriate place on the tape.
These positions can be found again quickly and easily
later by pressing a button.
3 The video recorder searches for the desired
index marking and automatically switches to
playback
PPRROOBBLLEEMM
88 TThhee ccaasssseettttee iiss eejjeecctteedd
44
The video recorder was unable to find an index
marking on the tape inserted.
Page 23

E
NGLISH
C
OMMERCIAL SKIP
23
23
1 During playback, press button G
SSkkiippppiinngg ccoommmmeerrcciiaallss
Do you get annoyed by the commercial breaks which are
recorded along with your programmes ? With the function
Commercial Skip you can skip these quickly and easily.
2 The video recorder winds the tape forward
for about 2 minutes playing time and then
switches to playback again. Repeat step
1
until the end of the commercial break has
been reached
TTIIPP
IInntteerrrruupptt CCoommmmeerrcciiaall SSkkiipp
During winding, press the button G to switch back
immediately to playback.
3 Press I once to start automatic slow
motion playback
TTIIPP
IInnccrreeaassee ppllaayybbaacckk ssppeeeedd
In automatic slow motion mode press I several
times to increase the playback speed.
NNoo ssoouunndd dduurriinngg ssllooww mmoottiioonn
During slow motion there will be no sound
4 To resume playback press the Play button G,
to stop the tape press the Stop button h
Page 24

SELECTING PICTURE SETTING ENGLISH
24
24
SSeelleeccttiinngg ppiiccttuurree sseettttiinngg ((SSmmaarrtt PPiiccttuurree))
Using the button
SSMMAARRTT **
the picture settings can be
displayed and altered during playback. There are four different
settings available.
2 Press several times on the button
SSMMAARRTT **
to change the picture setting. Each time the
button is pressed, the next picture setting will
be displayed.
1 Press once on the button
SSMMAARRTT **
.
The current picture setting will be displayed
WWhhaatt ttyyppeess ooff ppiiccttuurree sseettttiinngg aarree aavvaaiillaabbllee ttoo mmee??
NATURAL : Standard setting
(for all types of films)
DISTINCT : Emphasises details
(e.g. for sports programmes)
SOFT : Suppression of interference
(when using rented cassettes)
SHARP: Increase in sharpness
(e.g. for animated films)
FFOORR
EEXXPPEERRTTSS
PPllaayy ccoommppaacctt VVHHSS ccaasssseetttteess
You can, of course, also use this video recorder to play
back compact VHS cassettes. To do this, you will need
the appropriate cassette adapter. Its dimensions match
those of a normal VHS cassette. The adapter is
recognised and treated by the set as a VHS cassette.
PP
AARRDDOONN
??
3 As soon as the button
SSMMAARRTT **
has not
been pressed for a few seconds, the last
selected picture setting will be accepted.
Page 25

ENGLISH OPTIMIZING TRACKING / STILL PICTURE
25
25
1 During playback press the
MMEENNUU
button on
the remote control. The on-screen menu
appears
OOppttiimmiizziinngg ttrraacckkiinngg
2 Use
==PP--
or
;;PP++
to select the option
PLAY FUNCTIONS and confirm with P
3 Use
==PP--
or
;;PP++
to select the option
MANUAL TRACKING and confirm with P
OOppttiimmiizziinngg ssttiillll ppiiccttuurree
RReemmoovviinngg ppiiccttuurree iinntteerrffeerreennccee
7
7
PP
AARRDDOONN
??
TTIIPP
WWhhaatt iiss ttrraacckkiinngg??
Tracking is the name given to the process of
optimizing picture and sound playback. During this
process the speed of the tape is adjusted in such a way
that all kinds of interference are removed or (in the
case of old VHS cassettes) minimized.
TTrraacckkiinngg aaddjjuussttmmeenntt iiss rreettaaiinneedd
The adjustments made are stored until the cassette is
removed.After that, the standard tracking adjustment
is restored.
MAIN MENU
ÂÅ PLAY FUNCTIONS Å
RECORDING FUNCTIONS
SPECIAL SETTINGS
INSTALLATION
TO EXIT
PRESS MENU
É
4 Hold down
PP orQQ
until optimal playback
quality has been achieved and confirm with
OOKK
.
The screen will show the message STORED
MAIN MENU
PLAY FUNCTIONS
ÂÅ MANUAL TRACKING Å
VERTICAL STABILITY
HEAD CLEANING
TO EXIT
PRESS MENU
É
5 Leave the on-screen menu with the
MMEENNUU
button
1 When still picture is activated, press the
MMEENNUU
button on the remote control. The on-screen
menu appears
2 Use
==PP--
or
;;PP++
to select the option
PLAY FUNCTIONS and confirm with P
3 Use
==PP--
or
;;PP++
to select the option
VERTICAL STABILITY and confirm with P
MAIN MENU
PLAY FUNCTIONS
ÂÅ MANUAL TRACKING Å
VERTICAL STABILITY
HEAD CLEANING
TO EXIT
PRESS MENU
É
Page 26

CLEANING VIDEO HEADS ENGLISH
26
26
PPRROOBBLLEEMM
88 II ccaanntt ggeett ooppttiimmaall qquuaalliittyy
44
When using rental cassettes or older tapes, it may
not be possible to get rid of all interference
completely
TTIIPP
TThhee sseettttiinngg iiss rreettaaiinneedd
The adjustments made are stored until the cassette is
removed. Then the still picture standard setting is
restored.
4 Hold down
PP orQQ
until optimal playback
quality has been achieved and confirm with
OOKK
.
The screen will show the message STORED
5 Leave the on-screen menu with the
MMEENNUU
button
1 During playback press the
MMEENNUU
button on
the remote control. The on-screen menu
appears
CClleeaanniinngg vviiddeeoo hheeaaddss
2 Use
==PP--
or
;;PP++
to select the option
PLAY FUNCTIONS and confirm with P
3 Use
==PP--
or
;;PP++
to select the option
HEAD CLEANING
MAIN MENU
ÂÅ PLAY FUNCTIONS Å
RECORDING FUNCTIONS
SPECIAL SETTINGS
INSTALLATION
TO EXIT
PRESS MENU
É
4 Press
OOKK
to start the cleaning procedure.The
screen will show HEAD CLEANING IN
PROGRESS
MAIN MENU
PLAY FUNCTIONS
ÂÅ MANUAL TRACKING Å
VERTICAL STABILITY
HEAD CLEANING
TO EXIT
PRESS MENU
É
5 Wait until the message disappears and leave
the on-screen menu with
MMEENNUU
If horizontal lines of interference appear during playback, the video
heads need cleaning.
WWhhyy iiss iitt nneecceessssaarryy ttoo cclleeaann tthhee vviiddeeoo hheeaaddss??
When playing back video tapes, microscopic particles
of the tape material build up a layer on the video head.
If too much tape material collects, this can affect
playback quality. By using the function Clean video
heads, this tape material can be gently removed from
the surface of the video heads.
PP
AARRDDOONN
??
PLAY FUNCTIONS
HEAD CLEANING
HEAD CLEANING IN PROGRESS
Page 27

ENGLISH STARTING / STOPPING RECORDING MANUALLY
27
27
3 Use the buttons
==PP--
or
;;PP++
to select the
programme number, under which your video
recorder has stored the desired TV channel
SSttaarrttiinngg aanndd ssttooppppiinngg ooff rreeccoorrddiinngg mmaannuuaallllyy
4 Start recording by pressing the Record
button n (remote control or on front of
set).The display will show .
5 End the recording by pressing the Stop
button h
2 Insert a cassette without erase protection
MMaannuuaall rreeccoorrddiinngg
8
8
PP
AARRDDOONN
??
PPRROOBBLLEEMM
FFOORR
EEXXPPEERRTTSS
SSeelleeccttiinngg tthhee rreeccoorrddiinngg ssppeeeedd
You have the option of two playback and recording
speeds: Standard Play (SP) offers the usual first-class
picture quality. By using Long Play (LP), you can (with
somewhat reduced picture quality) for example record
about 360 minutes of programmes on a 180 minute
cassette.This chapter explains how to set the desired
recording speed (Selecting the recording speed).
1 Switch on the TV set and - if necessary - select
the programme number set for video recorder
operation
WWhhaatt iiss eerraassee pprrootteeccttiioonn??
VHS cassettes can be protected from over-recording by
breaking off a thin strip of plastic (arrow). This erase
protection can be overridden by sticking one or more
strips of adhesive tape tightly over the gap which
has been created.
88 II ccaanntt ffiinndd tthhee TTVV cchhaannnneellss ffrroomm mmyy ssaatteelllliittee
rreecceeiivveerr
88 II wwaanntt ttoo rreeccoorrdd ffrroomm aann aaddddiittiioonnaall ddeevviiccee
44
Signals from additional devices - such as a
camcorder, other video recorder, PCs, etc. - are
received via the scart socket of the video recorder.
The programme numbers E1 and E2 are
allocated for these sources.
v
P01
ä
Page 28

STARTING RECORDING MANUALLY / STOPPING AUTOMATICALLY ENGLISH
28
28
2 Use the buttons
==PP--
or
;;PP++
to select the
programme number, under which your video
recorder has stored the desired TV channel
SSttaarrttiinngg rreeccoorrddiinngg mmaannuuaallllyy//ssttooppppiinngg aauuttoommaattiiccaallllyy
1 Insert a cassette without erase protection
3 Press the Record button n several times. The
time faded in corresponds to the duration of
recording to be selected. Each time the Record
button is pressed again this is increased in
regular steps. Stop pressing the Record
button n when you have reached the desired
duration. Recording will start.
PPRROOBBLLEEMM
88 II ccaanntt ffiinndd tthhee TTVV cchhaannnneellss ffrroomm mmyy ssaatteelllliittee
rreecceeiivveerr
88 II wwaanntt ttoo rreeccoorrdd ffrroomm aann aaddddiittiioonnaall ddeevviiccee
44
Signals from additional devices - such as a
camcorder, other video recorder, PCs, etc. - are
received via the scart socket of the video recorder.
The programme numbers E1 and E2 are
allocated for these sources.
SSeelleeccttiinngg tthhee rreeccoorrddiinngg ssppeeeedd
You have the option of two playback and recording
speeds: Standard Play (SP) offers the usual first-class
picture quality. By using Long Play (LP), you can (with
somewhat reduced picture quality) for example record
about 360 minutes of programmes on a 180 minute
cassette.This chapter explains how to set the desired
recording speed (Selecting the recording speed ).
FFOORR
EEXXPPEERRTTSS
TTIIPP
WWhhaatt iiss eerraassee pprrootteeccttiioonn??
VHS cassettes can be protected from over-recording by
breaking off a thin strip of plastic (arrow). This erase
protection can be overridden by sticking one or more
strips of adhesive tape tightly over the gap which has
been created.
PP
AARRDDOONN
??
DDeelleettee eennttrryy
The recording period displayed can be reset to
00:00:00 with the
CCLL
button.
ä
Page 29

E
NGLISH
L
INING UP RECORDINGS/ RECORDING SPEED
29
29
LLiinniinngg uupp mmaannuuaall rreeccoorrddiinnggss
2 Press the Stop button h at the point where
you want the new recording to start (the display
will show 9)
3 Press the Record button n in the usual way to
start the new recording
1 Look at the last minute of the old
recording (playback)
When you add a further recording to a cassette, which
already has a recording on it, a short blank (flicker) usually
appears between the old and the new recording.This is how to
avoid such an effect.
SSeelleeccttiinngg tthhee rreeccoorrddiinngg ssppeeeedd
5 Confirm with
OOKK
.The screen will show the
message STORED
6 Stop selection of recording speed with
MMEENNUU
PP
AARRDDOONN
??
SSttaannddaarrdd PPllaayy // LLoonngg PPllaayy // AAuuttoo LLoonngg PPllaayy
Standard Play (SP) offers the usual, first-class picture
quality. By using Long Play (LP),you can (with somewhat
reduced picture quality) for example record about 360
minutes of programmes on a 180 minute cassette.With
the Auto Long Play (AUTO) setting, the video recorder
calculates, before starting the programmed recording,
how much playing time remains on the cassette
inserted. Depending on the calculated remaining playing
time and the duration of the programmed recording,the
recording will be made in Standard Play or Long Play.
1 Press the
MMEENNUU
button on the remote
control.The on-screen menu appears
2 Use
==PP--
or
;;PP++
to select the option
RECORDING FUNCTIONS and confirm
with P
3 Use
==PP--
or
;;PP++
to select the option
RECORD SETTINGS and confirm with
PP
MAIN MENU
ÂÅ PLAY FUNCTIONS Å
RECORDING FUNCTIONS
SPECIAL SETTINGS
INSTALLATION
TO EXIT
PRESS MENU
É
MAIN MENU
RECORDING FUNCTIONS
ÂÅ RECORD SETTINGS Å
AUDIO ONLY
AUDIO DUBBING
TO EXIT
PRESS MENU
É
4 Use
==PP--
or
;;PP++
to select the option
RECORDING SPEED and use
PP orQQ
to
select a recording speed
RECORDING FUNCTIONS
RECORD SETTINGS
 RECORDING SPEED Ä SP Å
DIRECT RECORD ON
SAT RECORDING OFF
TO EXIT
PRESS MENU
É
Page 30

ACTIVATE / DEACTIVATE DIRECT RECORDING ENGLISH
30
30
AAccttiivvaattee // ddeeaaccttiivvaattee ddiirreecctt rreeccoorrddiinngg
5 Use
PP
or
QQ
to select the setting ON to
enable direct recordings, or OFF to
deactivate this function.
7 Leave the on-screen menu with the
MMEENNUU
button
6 Confirm the setting with
OOKK
. The screen will
show the message STORED
PP
AARRDDOONN
??
PPRROOBBLLEEMM
88 II ccaannnnoott sseelleecctt OONN oorr OOFFFF
44
If the comment N.ACT. appears in the DIRECT
RECORD option, unfortunately your TV set does
not support the Easylink function. This means
that direct recordings are not possible.
WWhhaatt iiss aa ddiirreecctt rreeccoorrddiinngg??
The Direct Record function means you can record in
seconds when the video recorder is switched off.When
the record button is pressed, the video recorder
automatically recognises which TV channel has been
selected on the TV set and starts to record the
corresponding programme.
RReeqquuiirreemmeenntt:: 11.. TThhee TTVV sseett aanndd vviiddeeoo rreeccoorrddeerr aarree
ccoonnnneecctteedd wwiitthh aa ssccaarrtt ccaabbllee!! 22.. TThhee TTVV sseett ssuuppppoorrttss tthhee
EEaassyylliinnkk ffuunnccttiioonn.. 33.. TThhee DDiirreecctt RReeccoorrdd
ffuunnccttiioonn hhaass bbeeeenn aaccttiivvaatteedd iinn tthhee oonn--ssccrreeeenn mmeennuu..
44.. TThheerree iiss aa ccaasssseettttee rreeaaddyy ffoorr rreeccoorrddiinngg iinn tthhee mmaacchhiinnee!!
1 Press the
MMEENNUU
button on the remote
control.The on-screen menu appears
2 Use
==PP--
or
;;PP++
to select the option
RECORDING FUNCTIONS and confirm
with
PP
3 Use
==PP--
or
;;PP++
to select the option
RECORD SETTINGS and confirm with
PP
4 Use
==PP--
or
;;PP++
to select the option
DIRECT RECORD
MAIN MENU
ÂÅ PLAY FUNCTIONS Å
RECORDING FUNCTIONS
SPECIAL SETTINGS
INSTALLATION
TO EXIT
PRESS MENU
É
MAIN MENU
RECORDING FUNCTIONS
ÂÅ RECORD SETTINGS Å
AUDIO ONLY
AUDIO DUBBING
TO EXIT
PRESS MENU
É
RECORDING FUNCTIONS
RECORD SETTINGS
 RECORDING SPEED Ä SP Å
DIRECT RECORD ON
SAT RECORDING OFF
TO EXIT
PRESS MENU
É
Page 31

ENGLISH MAKING A DIRECT RECORDING
31
31
MMaakkiinngg aa ddiirreecctt rreeccoorrddiinngg
1 The direct record function must be activated
in the on-screen menu (see previous page). No
direct recordings can be made unless this
function has been activated
2 Insert a cassette without erase protection
PP
AARRDDOONN
??
WWhhaatt iiss eerraassee pprrootteeccttiioonn??
VHS cassettes can be protected from over-recording by
breaking off a thin strip of plastic (arrow). This erase
protection can be overridden by sticking one or more
strips of adhesive tape tightly over the gap which has
been created.
3 Switch off the video recorder with the
Standby button
mm
4 On the
TV set, select the channel for the
programme you wish to record
5 Press the Record button n on the video
recorder. The video recorder recognises the
TV channel on the TV set and automatically
records the correct programme
PP
AARRDDOONN
??
WWhhaatt iiss aa ddiirreecctt rreeccoorrddiinngg??
The Direct Record function means you can record in
seconds when the video recorder is switched off.When
the record button is pressed, the video recorder
automatically recognises which TV channel has been
selected on the TV set and starts to record the
corresponding programme.
RReeqquuiirreemmeenntt:: 11.. TThhee TTVV sseett aanndd vviiddeeoo rreeccoorrddeerr aarree
ccoonnnneecctteedd wwiitthh aa ssccaarrtt ccaabbllee!! 22.. TThhee TTVV sseett ssuuppppoorrttss tthhee
EEaassyylliinnkk ffuunnccttiioonn.. 33.. TThhee DDiirreecctt RReeccoorrdd
ffuunnccttiioonn hhaass bbeeeenn aaccttiivvaatteedd iinn tthhee oonn--ssccrreeeenn mmeennuu..
44.. TThheerree iiss aa ccaasssseettttee rreeaaddyy ffoorr rreeccoorrddiinngg iinn tthhee mmaacchhiinnee!!
6 End the recording by pressing the Stop
button h
ä
SSwwiittcchh tthhee vviiddeeoo rreeccoorrddeerr ooffff!!
The direct record function only works if the Record
button n is pressed when the video recorder is
switched off.
TTIIPP
v
P01
Page 32

RECORDING AUTOMATICALLY FROM A SATELLITE RECEIVER ENGLISH
32
32
You can only use this function if you have a
satellite receiver which can control other devices
via a scart cable
RReeccoorrddiinngg aauuttoommaattiiccaallllyy ffrroomm aa ssaatteelllliittee rreecceeiivveerr
WWhhaatt iiss aa ssccaarrtt ccaabbllee??
The scart or Euro-AV cable serves as the universal
recording and playback connector for picture-, soundand control signals.With this type of connection, there
is practically no loss of quality during the signal
transfer. We recommend that you use a scart cable
when using this video recorder.
2 Make sure that the satellite receiver is
connected to the scart socket
AAVV 11 EEXXTT..11
or
AAVV 22 EEXXTT..22
at the back of the video recorder
1 Insert a cassette without erase protection
PP
AARRDDOONN
??
8 Programme the data on the satellite receiver
for the desired recording. If necessary, you
should refer to the instructions for your
satellite receiver for assistance.
9
SS
WWIITTCCHH OOFFFF TTHHEE VVIIDDEEOO RREECCOORRDDEERR WWIITTHH TTHHEE
SSTTAANNDDBBYY//OONN
BBUUTTTTOONN
mm.. II
FF YYOOUU DDOONN
TT DDOO
TTHHIISS
,,
TTHHEE SSEETT WWIILLLL NNOOTT RREECCOORRDD
..
When
automatic recording has been activated by a
satellite receiver,
x will light up in the display
3 Press the
MMEENNUU
button on the remote
control.The on-screen menu appears
4 Use
==PP--
or
;;PP++
to select the option
RECORDING FUNCTIONS and confirm
with P
5 Use
==PP--
or
;;PP++
to select the option
RECORD SETTINGS and confirm with
PP
6 Use
==PP--
or
;;PP++
to select the option
SAT RECORDING and use
PP
or
QQ
to
select the scart socket (E1 or E2), to
which the satellite receiver has been
connected (see step
2). Confirm with
OOKK
.
The screen will show (STORED)
MAIN MENU
ÂÅ PLAY FUNCTIONS Å
RECORDING FUNCTIONS
SPECIAL SETTINGS
INSTALLATION
TO EXIT
PRESS MENU
É
MAIN MENU
RECORDING FUNCTIONS
ÂÅ RECORD SETTINGS Å
AUDIO ONLY
AUDIO DUBBING
TO EXIT
PRESS MENU
É
RECORDING FUNCTIONS
RECORD SETTINGS
 RECORDING SPEED Ä SP Å
DIRECT RECORD ON
SAT RECORDING OFF
TO EXIT
PRESS MENU
É
7 Leave the on-screen menu with
MMEENNUU
Page 33

ENGLISH PROGRAMMING TIMER WITH VIDEO PLUS+
33
33
PPrrooggrraammmmeedd rreeccoorrddiinnggss
9
9
PPRROOBBLLEEMM
PP
AARRDDOONN
??
1 Press the
TTIIMMEERR
button
kk
PPrrooggrraammmmiinngg ttiimmeerr wwiitthh VVIIDDEEOO PPlluuss++
3 Use the
00--99
keys to enter the PlusCode
programming number of the TV programme
selected: Incorrect entries can be deleted
with the button
CCLL
4 Confirm with
OOKK
WWhhaatt iiss aa TTiimmeerr??
The timer controls the programmed recordings of your
video recorder. Requirements for a timer which works
correctly: The clock in the video recorder must be
correctly set or the reception of the TV signal must be
as free from interference as possible (for example, if
there is interference, the video recorder might not
correctly recognise the VPS signal of a TV channel).
88 II ggeett tthhee eerrrroorr mmeessssaaggee
PPRROOGGRRAAMMMMEE NNUUMMBBEERR ÄPP---- Å
44
You have entered a correct PlusCode
programming number - but automatic
recognition of the correct TV channel has failed.
Please enter the programme number under which
your video recorder has stored the
desired TV channel, using the buttons
00--99
, and
confirm with
OOKK
.
PP
AARRDDOONN
??
WWhhaatt iiss VVIIDDEEOO PPlluuss++??
A programming system which replaces the often
tiresome entry of date, starting time, finish time and
programme number by the simple entry of a number
up to nine digits long (which can be found in any TV
programme listing).
FFOORR
EEXXPPEERRTTSS
DDaaiillyy // wweeeekkllyy rreeccoorrddiinnggss
If you like, you can use
SSEELLEECCTT
to choose MO-FR
for recordings, which are repeated daily or WEEKLY
for recordings which are repeated each week on the
same day.
TIMER
VIDEOPLUS PROGRAMMING
543124---
MO-FR/WEEKLY TO STORE
PRESS SELECT PRESS OK
2 Use
==PP--
or
;;PP++
to select the option
VIDEOPLUS RECORDING and confirm
with
PP
.The VIDEO Plus screen will appear
TIMER
ÂÅ VIDEOPLUS PROGRAMMING Å
TIMER PROGRAMMING
TIMER LIST
TO EXIT
PRESS TIMER
É
Page 34

PROGRAMMING TIMER WITH VIDEO PLUS+ENGLISH
34
34
5 The data of previously entered VIDEO Plus
recordings are displayed. If necessary select
the entry fields with with
PP
or QQand enter
date, programme number, start time or end
time with
==PP--,;;PP++
or
00--99
6 Confirm with
OOKK
.The screen will show the
message STORED
7 Insert a cassette without erase protection
8
SS
WWIITTCCHH OOFFFF TTHHEE VVIIDDEEOO RREECCOORRDDEERR WWIITTHH TTHHEE
SSTTAANNDDBBYY//OONN
BBUUTTTTOONN
mm !! II
FF YYOOUU DDOONNTT DDOO
TTHHIISS
,,
TTHHEE SSEETT WWIILLLL NNOOTT RREECCOORRDD
..
The display will show k
WWhhaatt iiss eerraassee pprrootteeccttiioonn??
VHS cassettes can be protected from over-recording by
breaking off a thin strip of plastic (arrow). This erase
protection can be overridden by sticking one or more
strips of adhesive tape tightly over the gap which has
been created.
FFOORR
EEXXPPEERRTTSS
AAccttiivvaattee VVPPSS//PPDDCC
VPS (Video Programming Service) and PDC signals
(Programme Delivery Control) are transmitted by TV
channels at the start and end of transmissions and
ensure that programmes will be completely recorded,
even if they are rescheduled. In the input box,START
use
SSEELLEECCTT
to switch recognition of these signals on
(*) or off ( ).
SSeelleeccttiinngg tthhee rreeccoorrddiinngg ssppeeeedd
You have the option of two playback and recording
speeds: Standard Play (SP) offers the usual first-class
picture quality, and with Long Play (LP) you can for
example (with somewhat reduced picture quality)
record about 360 minutes on a 180-minute cassette.
In Auto Long Play (AL), the video recorder recognises
how much remaining playing time is available and
automatically selects SP or LP. In the entry field END
use
SSEELLEECCTT
to enter the required setting.
PP
AARRDDOONN
??
PPRROOBBLLEEMM
YY
OOUU WWIILLLL FFIINNDD TTIIPPSS FFOORR SSOOLLVVIINNGG
PPRROOBBLLEEMMSS TTOO DDOO WWIITTHH
VVIIDDEEOO PP
LLUUSS
RREECCOORRDDIINNGG OONN TTHHEE FFOOLLLLOOWWIINNGG PPAAGGEE
..
TIMER
VIDEOPLUS PROGRAMMING
VPS
DATE PROG. START PDC END
21 01 20:00 * 21:30 SP
LP/AUTO-LP/SP TO STORE
PRESS SELECT PRESS OK
ä
Page 35

ENGLISH PROBLEM SOLVING (VIDEO PLUS-PROGRAMMING)
35
35
PPrroobblleemm ssoollvviinngg ((VVIIDDEEOO PPlluuss--PPrrooggrraammmmiinngg))
EErrrroorr mmeessssaaggee::
PPLLUUSSCCOODDEE NNUUMMBBEERRÄPP----Å
A correct PlusCode programming number has been entered - but automatic
recognition of the correct TV channel has failed. Please enter the programme
number under which your video recorder has stored the desired TV channel using
the buttons
00--99
and confirm with
OOKK
.
EErrrroorr mmeessssaaggee::
PPLLUUSSCCOODDEE NNUUMMBBEERR
WWRROONNGG
The Pluscode programming number entered is incorrect. Please repeat the entry
or finish with the button
SSTTAANNDDBBYY//OONN
mm
.
EErrrroorr mmeessssaaggee::
WWEEEEKKEENNDD PPRROOGGRRAAMMMMIINNGG
NNOOTT PPOOSSSSIIBBLLEE
The attribute MO-FR has been selected for a recording at the weekend.This is
only possible for recordings from Monday to Friday. Please repeat the entry or
finish with the button
SSTTAANNDDBBYY//OONN
mm
.
EErrrroorr mmeessssaaggee::
SSWWIITTCCHH TTOO SSTTAANNDDBBYY --
TTIIMMEERR RREECCOORRDDIINNGG
A recording was programmed, but the video recorder was not switched into
timer mode with the Standby button mm. Press
SSTTAANNDDBBYY//OONN
mm
, in order to make
the programmed recording.Warning: if you do not do this,the video recorder will
not record.
EErrrroorr mmeessssaaggee::
NNOO CCAASSSSEETTTTEE
A recording was programmed, but there is no cassette in the machine. Insert a
cassette without erase protection ready for recording.
EErrrroorr mmeessssaaggee::
MMEEMMOORRYY FFUULLLL
All the available memory locations in your video recorder for timer and VIDEO
Plus programming are full. Delete a programmed recording (see chapter Delete
a programmed recording).
kk aanndd//oorr vv aarree
ffllaasshhiinngg iinn tthhee ddiissppllaayy
ooff tthhee vviiddeeoo rreeccoorrddeerr
A recording was programmed, but there is no cassette in the machine. Insert a
cassette without erase protection ready for recording.
A recording was programmed, but the video recorder was not switched into
timer mode with the Standby button mm. Press
SSTTAANNDDBBYY//OONN
mm
, in order to make
the programmed recording.Warning: if you do not do this,the video recorder will
not record.
CCaasssseettttee iiss eejjeecctteedd
aafftteerr pprrooggrraammmmiinngg
A cassette with erase protection was inserted. Please deactivate the erase
protection or insert another cassette which is ready for recording.
CCaasssseettttee iiss eejjeecctteedd
dduurriinngg rreeccoorrddiinngg
The end of the tape was reached during a programmed recording.The recording
could not be completed satisfactorily.
TThhee sseett ccaannnnoott bbee
uusseedd dduurriinngg rreeccoorrddiinngg..
Once started, a recording can only be interrupted by pressing the
SSTTAANNDDBBYY//OONN
button mm. WARNING: This will not only stop the recording, but it will also
delete the programmed recording from the memory of the video recorder.
PROBLEM
SOLUTION
YYeeaarr//mmoonntthh//ddaattee//ttiimmee
ssccrreeeenn aappppeeaarrss
The time has not been set or not set correctly. After entering/confirming year,
month, date and time you can continue programming.
Page 36

PROGRAMMING TIMER WITHOUT VIDEO PLUS ENGLISH
36
36
1 Press the button
TTIIMMEERR kk
PPrrooggrraammmmiinngg ttiimmeerr wwiitthhoouutt VVIIDDEEOO PPlluuss++
DDaaiillyy // wweeeekkllyy rreeccoorrddiinnggss
If you like, you can use
SSEELLEECCTT
MO-FR for
recordings which are repeated daily or WEEKLY for
recordings shown each week on the same day.
4 Use
PP
or
QQ
to select the entry field
DATE and use
==PP--
or
;;PP++
or the number
buttons
00--99
to enter the date of the desired
recording
FFOORR
EEXXPPEERRTTSS
5 Use
PPorQQ
to select the entry field PROG.
and use
==PP--
or
;;PP++
or the number buttons
00--99
to enter the programme number under
which the video recorder has stored the desired
TV channel
6 Use
PPorQQ
to select the entry field START
and use
==PP--
or
;;PP++
or the number buttons
00--99
to enter the start time of the desired recor-
ding
TIMER
TIMER PROGRAMMING
VPS
DATE PROG. START PDC END
21 01 20:00 * 21:30 SP
MO-FR/WEEKLY TO STORE
PRESS SELECT PRESS OK
TTIIPP
EEnntteerr tthhee vvaalluueess ccoorrrreeccttllyy
Numbers less than 10 must be entered with an
additional 0. For 9 thus 09 should be entered.
3 The timer screen appears
2 Use
==PP--
or
;;PP++
to select the option
TIMER RECORDING and confirm with P
TIMER
ÂÅ VIDEO PLUS PROGRAMMING Å
TIMER PROGRAMMING
TIMER LIST
TO EXIT
PRESS TIMER
É
Page 37

ENGLISH PROGRAMMING TIMER WITHOUT VIDEO PLUS
37
37
8 Check that the date, programme number, start
and finish time are shown correctly on the
screen. Confirm with
OOKK
. The screen will
show STORED
7 Use
PPorQQ
to select the entry field END.
and use
==PP--
or
;;PP++
or the number buttons
00--99
to enter the finishtime of the desired
recording
9 Insert a cassette without erase protection
0
SS
WWIITTCCHH OOFFFF TTHHEE VVIIDDEEOO RREECCOORRDDEERR WWIITTHH TTHHEE
SSTTAANNDDBBYY//OONN
BBUUTTTTOONN
mm !! II
FF YYOOUU DDOONNTT DDOO
TTHHIISS
,,
TTHHEE SSEETT WWIILLLL NNOOTT RREECCOORRDD
..
The display will show k
WWhhaatt iiss eerraassee pprrootteeccttiioonn??
VHS cassettes can be protected from over-recording by
breaking off a thin strip of plastic (arrow). This erase
protection can be overridden by sticking one or more
strips of adhesive tape tightly over the gap which has
been created.
PP
AARRDDOONN
??
PPRROOBBLLEEMM
YY
OOUU WWIILLLL FFIINNDD TTIIPPSS FFOORR SSOOLLVVIINNGG
PPRROOBBLLEEMMSS TTOO DDOO WWIITTHH TTIIMMEERR
RREECCOORRDDIINNGG OONN TTHHEE FFOOLLLLOOWWIINNGG PPAAGGEE
..
ä
FFOORR
EEXXPPEERRTTSS
AAccttiivvaattee VVPPSS//PPDDCC
VPS (Video Programming Service) and PDC signals
(Programme Delivery Control) are transmitted by TV
channels at the start and end of transmissions and
ensure that programmes will be completely recorded,
even if they are rescheduled. In the entry field,
START use
SSEELLEECCTT
to switch recognition of these
signals on (*) or off ( ).
FFOORR
EEXXPPEERRTTSS
SSeelleeccttiinngg tthhee rreeccoorrddiinngg ssppeeeedd
You have the option of two playback and recording speeds:
Standard Play (SP) offers the usual first-class picture quality,
and with Long Play (LP) you can for example (with
somewhat reduced picture quality) record about 360 minutes
on a 180-minute cassette. In Auto Long Play (AL), the video
recorder recognises how much remaining playing time is
available and automatically selects SP or LP. In the entry field
END use
SSEELLEECCTT
to enter the required setting.
Page 38

PROBLEM SOLVING (TIMER PROGRAMMING)ENGLISH
38
38
PPrroobblleemm ssoollvviinngg ((TTiimmeerr pprrooggrraammmmiinngg))
EErrrroorr mmeessssaaggee::
SSWWIITTCCHH TTOO SSTTAANNDDBBYY --
TTIIMMEERR RREECCOORRDDIINNGG
A recording was programmed, but the video recorder was not switched into
timer mode with the Standby button. Press
SSTTAANNDDBBYY//OONN mm
, in order to make
the programmed recording.Warning: if you do not do this,the video recorder will
not record.
EErrrroorr mmeessssaaggee::
NNOO CCAASSSSEETTTTEE
A recording was programmed, but there is no cassette in the machine. Insert a
cassette without erase protection ready for recording.
EErrrroorr mmeessssaaggee::
MMEEMMOORRYY FFUULLLL
All the available memory locations in your video recorder for timer and VIDEO
Plus programming are full. Delete a programmed recording (see chapter Delete
/ check / change programmed recordings).
kk aanndd//oorr vv aarree
ffllaasshhiinngg iinn tthhee ddiissppllaayy
ooff tthhee vviiddeeoo rreeccoorrddeerr
A recording was programmed, but there is no cassette in the machine. Insert a
cassette without erase protection ready for recording.
A recording was programmed, but the video recorder was not switched into
timer mode with the Standby button. Press
SSTTAANNDDBBYY//OONN mm
, in order to make
the programmed recording.Warning: if you do not do this,the video recorder will
not record.
CCaasssseettttee iiss eejjeecctteedd
aafftteerr pprrooggrraammmmiinngg
A cassette with erase protection was inserted. Please deactivate the erase
protection or insert another cassette which is ready for recording.
CCaasssseettttee iiss eejjeecctteedd
dduurriinngg rreeccoorrddiinngg
The end of the tape was reached during a programmed recording.The recording
could not be completed satisfactorily.
TThhee sseett ccaannnnoott bbee
uusseedd dduurriinngg rreeccoorrddiinngg
Once started, a recording can only be interrupted by pressing the
SSTTAANNDDBBYY//OONN
button mm. WARNING: This will not only stop the recording, but it will also
delete the programmed recording from the memory of the video recorder.
PROBLEM
SOLUTION
FFOORR
EEXXPPEERRTTSS
RReeccoorrddiinngg vviiaa eexxtteerrnnaall ssoouurrcceess
If you want to watch or record transmissions from a
satellite receiver, films from a video camera (or from
other external devices), connect the device to the
scart socket
EEXXTT11 AAVV11
or
EEXXTT22 AAVV22
and select the
programme number on your video recorder E1
or E2.
YYeeaarr//mmoonntthh//ddaattee//ttiimmee
ssccrreeeenn aappppeeaarrss
The time has not been set or not set correctly. After entering/confirming year,
month, date and time you can continue programming.
Page 39

ENGLISH DELETE/CHECK/CHANGE RECORDINGS /NEXTVIEW
39
39
DDeelleettee // cchheecckk // cchhaannggee pprrooggrraammmmeedd rreeccoorrddiinnggss
4
DDeelleettee::
Press
CCLLEEAARR ((CCLL)),,
confirm with
the button
OOKK
(screen shows
TIMER CLEARED) and finish
with
TTIIMMEERR kk
CChheecckk::
Press P, check the stored
details and (once you have
checked) end with
TTIIMMEERR kk
CChhaannggiinngg::
Press
PP
, use
==PP--
or
;;PP++
to
select the entry fields to be altered and use
00--99
to enter the new
value(s). Confirm with
OOKK
and
activate the timer again with the
Standby button mm.
1 Press the
TTIIMMEERR
button
kk
on the remote
control
3 In the display, use the button
==PP--
or
;;PP++
to
select the storage position you wish to
check/change/delete
WWhhaatt iiss aa mmeemmoorryy llooccaattiioonn??
For technical reasons, your video recorder has access
to a limited number of drawers in which you can
store your programming requirements. Drawers
occupied by programme recording details are only
available for use again after the video recorder has
successfully completed a programmed recording or if
it has been manually deleted.Your video recorder can
store up to six timer programmings
PP
AARRDDOONN
??
TIMER
TIMER LIST
VPS
DATE PROG. START PDC END
21 01 20:00 * 21:30 SP
TOTAL RECORD TIME: 01:30
TO CHANGE TO EXIT
PRESS P PRESS TIMER
UUssiinngg NNeexxTTVViieeww LLiinnkk
If your TV set supports the function NexTView Link there is
another way in which you can quickly and simply programme
recordings: With these TV sets, you can call up the transmission
schedule of the TV channel, mark the programmes to be
recorded and automatically transfer their details into the
memory of the video recorder. Please look in the instructions for
your TV set to find out whether and how you can benefit from
this function.
2 Use
==PP--
or
;;PP++
to select the option
TIMER RECORDING and confirm with P
Page 40

AUTOMATIC SWITCH-OFF / CHILD LOCK ENGLISH
40
40
AAddjjuussttiinngg aauuttoommaattiicc sswwiittcchh--ooffff
If the video recorder is not used for several minutes, it
switches itself off automatically. If you want to use the video
recorder as a TV receiver, you can deactivate the automatic
switch-off as follows:
OOtthheerr ffuunnccttiioonnss
10
10
4 Complete the adjustment of automatic switch-off
with the
MMEENNUU
button
AAddjjuussttiinngg tthhee cchhiilldd lloocckk
You can prevent unauthorised use of your video recorder with this
function. Once it is activated, the buttons on the front of the set are
locked. Previously entered programmes will of course be recorded
1 Press the
MMEENNUU
button on the remote control.
The on-screen menu appears
MAIN MENU
SPECIAL SETTINGS
 TV SYSTEM Ä AUTO Å
CHILD LOCK OFF
OSD MODE AUTO
CLOCK DISPLAY ON
VCR 1 OR 2 VCR 1
REPEAT PLAY OFF
AUTO STANDBY ON
DEMO OFF
TO EXIT
PRESS MENU
É
2 Use
==PP--
or
;;PP++
to select the option
SPECIAL SETTINGS and confirm with
PP
3 Use
==PP--
or
;;PP++
to select the option
AUTO STANDBY and use
PP orQQ
to select the
setting ON (automatic switch-off) or OFF (no
automatic switch-off). Confirm with
OOKK
4 Finish with the
MMEENNUU
button
1 Press the
MMEENNUU
button on the remote control.
The on-screen menu appears
2 Use
==PP--
or
;;PP++
to select the option
SPECIAL SETTINGS and confirm with
PP
3 Use
==PP--
or
;;PP++
to select the option
CHILD LOCK and use
PP orQQ
to select the
setting ON (Child lock on) or OFF (Child
lock off). Confirm with
OOKK
MAIN MENU
SPECIAL SETTINGS
 TV SYSTEM Ä AUTO Å
CHILD LOCK OFF
OSD MODE AUTO
CLOCK DISPLAY ON
VCR 1 OR 2 VCR 1
REPEAT PLAY OFF
AUTO STANDBY ON
DEMO OFF
TO EXIT
PRESS MENU
É
TTIIPP
PPuutt tthhee rreemmoottee ccoonnttrrooll aawwaayy iinn aa ssaaffee ppllaaccee..
Once the child lock has been activated, (u lights
up in the display) the video recorder can now only be
used with the remote control. The buttons on the
front of the set will not function. Put away the remote
control somewhere out of the reach of children.
Page 41

ENGLISH REPLAYING CASSETTE CONTINUOUSLY
41
41
RReeppllaayyiinngg ccaasssseettttee ccoonnttiinnuuoouussllyy
This function can be used to play a tape over and over again. If
the end of the cassette or of the recording has been reached, the
video recorder automatically rewinds to the start of the tape and
starts to play back again.This function is activated or deactivated
as follows:
1 Press the
MMEENNUU
button on the remote
control.The on-screen menu appears
6 Press the Playback button CCto start the
playback or continuous playback (depending
on the setting)
4 Complete the adjustment of continuous play-
back with the
MMEENNUU
button
5 Insert a cassette
2 Use
==PP--
or
;;PP++
to select the option
SPECIAL SETTINGS and confirm with
PP
3 Use
==PP--
or
;;PP++
to select the option
REPEAT PLAY and use
PP
or
QQ
to
select the setting ON (continuous playback
on) or OFF (continuous playback off).
Confirm with
OOKK
MAIN MENU
SPECIAL SETTINGS
 TV SYSTEM Ä AUTO Å
CHILD LOCK OFF
OSD MODE AUTO
CLOCK DISPLAY ON
VCR 1 OR 2 VCR 1
REPEAT PLAY OFF
AUTO STANDBY ON
DEMO OFF
TO EXIT
PRESS MENU
É
Page 42

CHANGING THE TV SYSTEM ENGLISH
42
42
CChhaannggiinngg tthhee TTVV ssyysstteemm
When playing back cassettes which have been recorded with
signals from a different TV system there may be
interference with the colour.To deactivate the automatic change to
a different TV system, you must follow these steps.
4 End the change-over to automatic TV system
changing with the
MMEENNUU
button
TTIIPP
RReeaaccttiivvaattiinngg aauuttoommaattiicc cchhaannggee--oovveerr
As soon as a cassette is ejected with the Eject
button J on the front of the video recorder the set
switches automatically back to the AUTO
setting (automatic switching). To change the setting
during playback, perform the steps 1-3 again and
select AUTO.
PP
AARRDDOONN
??
TTVV ssyysstteemmss
Other countries, other TV systems: In central Europe
transmissions are broadcast in the PAL-System (Phase
Alternation Line) Standard, while in France SECAM
(Séquentiel à mémoire) is used. In some countries
(USA and Japan), TV viewers receive their
programmes as an NTSC signal (National Television
System Committee). Many TV and video sets can
process and show several transmission systems.
MAIN MENU
SPECIAL SETTINGS
 TV SYSTEM Ä AUTO Å
CHILD LOCK OFF
OSD MODE AUTO
CLOCK DISPLAY ON
VCR 1 OR 2 VCR 1
REPEAT PLAY OFF
AUTO STANDBY ON
DEMO OFF
TO EXIT
PRESS MENU
É
2 Use
==PP--
or
;;PP++
to select the option
SPECIAL SETTINGS and confirm with
PP
3 Use
==PP--
or
;;PP++
to select the option
TV SYSTEM , use
PP
or
QQ
to select the
desired TV system or B/W for black/white
playback and confirm with
OOKK
1 Press the
MMEENNUU
button on the remote control.
The on-screen menu appears
Page 43

ENGLISH ADJUSTING OSD INFORMATION / AUDIO RECORDING
43
43
AAddjjuussttiinngg tthhee OOSSDD iinnffoorrmmaattiioonn
If this function is activated, the current operating
details of the video recorder will be briefly displayed
on the screen
WWhhaatt iiss aann OOSSDD??
The on-screen menu or OSD (On-Screen Display takes
the mystery out of using your new video recorder. Using
the main menu (MENU button on your remote control),
all settings and recording steps can be done easily via the
on-screen menu by following the corresponding
instructions on the screen.
PP
AARRDDOONN
??
TTIIPP
1 During playback press the
MMEENNUU
button on
the remote control. The on-screen menu
appears
5 Complete the adjustment of the OSD
information with the
MMEENNUU
button
WWhhaatt ggooeess oonn bbeehhiinndd tthhee sseettttiinnggss??
AUTO: For each type of operation selected
(playback, recording, etc.) the corresponding
symbol appears briefly on the screen
ON: The OSD details will be shown
OFF: OSD information is not shown
2 Use
==PP--
or
;;PP++
to select the option
SPECIAL SETTINGS and confirm with
PP
3 Use
==PP--
or
;;PP++
to select the option
OSD MODE, use
PP
or
QQ
to select the
desired setting and confirm with
OOKK
MAIN MENU
SPECIAL SETTINGS
 TV SYSTEM Ä AUTO Å
CHILD LOCK OFF
OSD MODE AUTO
CLOCK DISPLAY ON
VCR 1 OR 2 VCR 1
REPEAT PLAY OFF
AUTO STANDBY ON
DEMO OFF
TO EXIT
PRESS MENU
É
AAuuddiioo rreeccoorrddiinngg
You can record audio signals (without picture) on VHS cassettes, if you
connect the sound source with the scart or audio sockets of the video
recorder.
1 Connect the desired sound source to the
video recorder and insert a cassette ready for
recording
Page 44

AUDIO DUBBING ENGLISH
44
44
2 Use
==PP--
or
;;PP++
to select the corresponding
programme number
WWhhiicchh iiss tthhee ccoorrrreecctt pprrooggrraammmmee nnuummbbeerr??
Socket Programme number
AAVV11 EEXXTT11
(Rear) E1
AAVV22 EEXXTT22
(Rear) E2
AAUUDDIIOO
(Front) E3
AAUUXX IINN
(Rear) AUX
PP
AARRDDOONN
??
3 Press the
MMEENNUU
button.The on-screen menu
appears
4 Use
==PP--
or
;;PP++
to select the option
RECORDING FUNCTIONS and confirm
with
PP
5
Use
==PP--
or
;;PP++
to select the option
AUDIO ONLY and confirm with
PP
6 Press the Record button n in the usual way to
start the recording
7 Press the Stop button h to end the recording
8 Leave the on-screen menu with the
MMEENNUU
button
DDuubbbbiinngg ((AAuuddiioo DDuubbbbiinngg))
Of course, you can also dub existing video recordings with this video
recorder. The mono track is recorded with a new sound signal. The
original stereo signal is retained. To make dubbing audible during
playback, you must select the MIX or MONO sound channel setting.
1 Connect the desired sound source to the
video recorder and insert a cassette ready for
recording
2 Use
==PP--
or
;;PP++
to select the corresponding
programme number
MAIN MENU
RECORDING FUNCTIONS
ÂÅ RECORD SETTINGS Å
AUDIO ONLY
AUDIO DUBBING
TO EXIT
PRESS MENU
É
Page 45

ENGLISH AUDIO DUBBING
45
45
3 Press the
MMEENNUU
button.The on-screen menu
appears
4 Use
==PP--
or
;;PP++
to select the option
RECORDING FUNCTIONS and confirm
with
PP
5
Use
==PP--
or
;;PP++
to select the option
AUDIO DUBBING and confirm with
PP
0 On the connected sound source start the
playback of the sound signal and press
ssiimmuullttaanneeoouussllyy
the Record button n on the
remote control of the video recorder to start
the recording.
B Finish with the
MMEENNUU
button
6 The video recorder switches to still picture
7 Wind to the space on the tape, where the
dubbing should end
, and with the button
CCLLEEAARR ((CCLL))
set the counter to 00:00:00
8 Wind to the space on the tape, where the
dubbing should begin
, and press
RR
.The video
recorder switches to still picture
9 Press R (still picture) several times until the
desired point is reached and confirm with the
Stop button h
A The new sound signal is being recorded. As
soon as the tape position previously marked
with 00:00:00 is reached, the dubbing will
stop automatically
PPRROOBBLLEEMM
88 TThhee ttaappee ssttooppss aauuttoommaattiiccaallllyy aanndd tthhee
RREECCOORRDDIINNGG FFUUNNCCTTIIOONNSS ssccrreeeenn aappppeeaarrss
44
The end of the tape was reached during winding
or playback. Go back to step 5, to start this
procedure again.
MMaakkee dduubbbbiinngg aauuddiibbllee
To make dubbing audible, you must select the MIX or
MONO sound channel setting (see Selecting the sound
channel).
MAIN MENU
RECORDING FUNCTIONS
ÂÅ RECORD SETTINGS Å
AUDIO ONLY
AUDIO DUBBING
TO EXIT
PRESS MENU
É
TTIIPP
Page 46

SELECTING THE SOUND CHANNEL / MANUAL MUTE ENGLISH
46
46
2 Press the
SSEELLEECCTT
button several times until
the desired setting can be seen on the screen
TTIIPP
WWhhaatt ggooeess oonn bbeehhiinndd tthhee sseettttiinnggss??
STEREO: Both left and right stereo sound tracks can
be heard
LEFT: The left stereo sound track can be heard
RIGHT: The right stereo sound track can be heard
MONO: The mono sound track can be heard
MIXED: The mono sound track as well as the left and
right stereo sound tracks can be heard
TTIIPP
AAuuttoommaattiicc sswwiittcchh--oovveerr ttoo mmoonnoo
If no stereo signal is recorded on a video cassette, the
video recorder automatically switches over to the
MONO sound channel setting
MMaakkee dduubbbbiinngg aauuddiibbllee
When dubbing video recordings, the mono track is
recorded with a new sound signal.The original stereo
signal is retained. To make dubbing audible, you must
select the MIX or MONO sound channel setting.
SSeelleeccttiinngg tthhee ssoouunndd cchhaannnneell
During playback or while receiving a TV channel via the video
recorder, one or more sound channels can be selected. This
means, for example, if there are multilingual transmissions, you
can select the language you want.
1 Press the
SSEELLEECCTT
button on the remote control.
The current sound channel setting is displayed
MMaannuuaall mmuuttee
With the
MMAANNUUAALL
button on the front of the video recorder you can
regulate the signal level of the audio signals (scart sockets, audio
sockets) received by the video recorder.
1 Press the
MMAANNUUAALL
button on the front of the
video recorder until the current setting
(e.g.MAN
20) appears in the display
2 On the front of the video recorder use
PPRROOGGRRAAMMMMEE --
or
PPRROOGGRRAAMMMMEE ++
to select the
desired setting or press
MMAANNUUAALL
again, to switch
back to automatic mute (AUTO)
+
PROGRAMME
-
MANUAL
MAN
20
Page 47

ENGLISH DEMONSTRATION MODE / ENERGY-SAVING MODE
47
47
1
Press
MMEENNUU
.The on-screen menu appears
DDeemmoonnssttrraattiioonn mmooddee
In this operating mode, the video recorder automatically gives a
demonstration of its functions after switching off. Programmed
recordings are obviously performed.
2 Use
==PP--
or
;;PP++
to select the option
SPECIAL SETTINGS and confirm with
PP
3 Use
==PP--
or
;;PP++
to select the option
DEMO, use
PP orQQ ttoo sseelleecctt
ON or OFF
and confirm with
OOKK
4 Finish with the
MMEENNUU
button
MAIN MENU
SPECIAL SETTINGS
 TV SYSTEM Ä AUTO Å
CHILD LOCK OFF
OSD MODE AUTO
CLOCK DISPLAY ON
VCR 1 OR 2 VCR 1
REPEAT PLAY OFF
AUTO STANDBY ON
DEMO OFF
TO EXIT
PRESS MENU
É
1 Press the
MMEENNUU
button on the remote
control.The on-screen menu appears
4 Complete the adjustment of the clock display
with the
MMEENNUU
button
EEnneerrggyy--ssaavviinngg mmooddee
To reduce the power consumption of the video
recorder you can switch the clock in the display of
the video recorder on or off as follows:
2 Use
==PP--
or
;;PP++
to select the option
SPECIAL SETTINGS and confirm with
PP
3 Use
==PP--
or
;;PP++
to select the option
CLOCK DISPLAY, use
PP
or
QQ
ON
(time display on in standby mode) or OFF
(time display off in standby mode) and
confirm with
OOKK
. The screen will show the
message STORED
MAIN MENU
SPECIAL SETTINGS
 TV SYSTEM Ä AUTO Å
CHILD LOCK OFF
OSD MODE AUTO
CLOCK DISPLAY ON
VCR 1 OR 2 VCR 1
REPEAT PLAY OFF
AUTO STANDBY ON
DEMO OFF
TO EXIT
PRESS MENU
É
Page 48

ADAPTING REMOTE CONTROL / SMART CLOCK ENGLISH
48
48
1 During playback press the
MMEENNUU
button on the
remote control.The on-screen menu appears
4 Now press, on the remote control,
ssiimmuullttaanneeoouussllyy
on the buttons
SSEELLEECCTT
and the
number button corresponding to the
previously selected setting (thus 1 for VCR
1 or 2 for VCR 2)
AAddaappttiinngg rreemmoottee ccoonnttrrooll
If you are using two video recorders which both react to the
same remote control commands, you can use this function to
change remote control and video recorder to other commands.
2 Use
==PP--
or
;;PP++
to select the option
SPECIAL SETTINGS and confirm with
PP
3 Use
==PP--
or
;;PP++
to select the option
VCR 1 OR 2,use
PP orQQ
to select VCR
1 or VCR 2 and confirm with
OOKK
. The
video recorder has now been reset to the
desired mode
MAIN MENU
SPECIAL SETTINGS
 TV SYSTEM Ä AUTO Å
CHILD LOCK OFF
OSD MODE AUTO
CLOCK DISPLAY ON
VCR 1 OR 2 VCR 1
REPEAT PLAY OFF
AUTO STANDBY ON
DEMO OFF
TO EXIT
PRESS MENU
É
MAIN MENU
SPECIAL SETTINGS
VCR ONLY RESPONDS TO
VCR 2 COMMANDS
PRESS SELECT AND
2 SIMULTANEOUSLY
THEN PRESS OK
TO STORE
PRESS OK
5 Confirm with
OOKK
. The remote control has
now been reset to the new commands
6 Finish with the
MMEENNUU
button
AAccttiivvaattee // ddeeaaccttiivvaattee SSmmaarrtt CClloocckk
With the function Smart Clock time and date are automatically
taken from the channel stored on P01 (if this channel transmits
TXT/PDC). If time or date are - even after repeated manual
settings - not displayed correctly, you should switch this function off.
3 Use ==or ;;to select the option TIME/DATE and
confirm with
PP
1 Press the
MMEENNUU
button on the remote control.The
on-screen menu appears
2 Use ==or ;;to select the option INSTALLATION
and confirm with
PP
4 Use ==or ;;to select the option SMART CLOCK.
Use P or
QQ
to switch the function off (OFF) or
on (ON)
6 Leave the on-screen menu with
MMEENNUU
5 Confirm with
OOKK
.The display will show STORED
INSTALLATION
TIME/DATE
 TIME Ä 15:00 Å
YEAR 2000
MONTH 08
DATE 03
SMART CLOCK ON
TO STORE
PRESS OK
É
Page 49

ENGLISH USING THE TV REMOTE CONTROL
49
49
UUssiinngg tthhee TTVV rreemmoottee ccoonnttrrooll
With the enclosed multicode remote control you can control the main
functions of your TV set.To do this, you must first enter the make of your
TV set.
1 Find the make of your TV set from the list below and take note of
the corresponding remote control code(s)
3
Now you can control your TV set remotely with the following buttons:
++ SS --
(Increase / decrease TV volume)
yy// TTVV
(Switch sound on / off)
TTVV //
mm
(Switch TV on / off)
++ TTVV --
(Next / previous TV programme number)
2
Hold down the button
SS --
and enter one of the listed codes with the
number buttons
00--99
.
Acura . . . . . . . . . . . . . . . . . . . . . . . . . . . . . . . .02
Adyson . . . . . . . . . . . . . . . . . . . . . . . . . . . .05,20
Akai . . . . . . . . . . . . . . . . . . . . . . . . . . . . . . .18,33
Akura . . . . . . . . . . . . . . . . . . . . . . . . . . . . .21,25
Alba . . . . . . . . . . . . . . . . . . . . . . . . . . . .02,07,21
Allorgan . . . . . . . . . . . . . . . . . . . . . . . . . . . . . .28
Amplivision . . . . . . . . . . . . . . . . . . . . . . . . . . .20
Amstrad . . . . . . . . . . . . . . . . . . . . . . . . . . . . . .02
Anitech . . . . . . . . . . . . . . . . . . . . . . . . . . . . . .02
Arcam . . . . . . . . . . . . . . . . . . . . . . . . . . . . .19,20
Asuka . . . . . . . . . . . . . . . . . . . . . . . . . . . . . . . .21
Audiosonic . . . . . . . . . . . . . . . . . . . . . . . . . . . .15
BPL . . . . . . . . . . . . . . . . . . . . . . . . . . . . . . . . .26
BSR . . . . . . . . . . . . . . . . . . . . . . . . . . . . . . . . .28
BTC . . . . . . . . . . . . . . . . . . . . . . . . . . . . . . . . .21
Basic Line . . . . . . . . . . . . . . . . . . . . . . . . . .02,21
Baur . . . . . . . . . . . . . . . . . . . . . . . . . . . . . .03,33
Beko . . . . . . . . . . . . . . . . . . . . . . . . . . . . . . . .35
Blaupunkt . . . . . . . . . . . . . . . . . . . . . . . . . . . . .17
Blue Sky . . . . . . . . . . . . . . . . . . . . . . . . . . . . . .21
Blue Star . . . . . . . . . . . . . . . . . . . . . . . . . . . . .26
Bondstec . . . . . . . . . . . . . . . . . . . . . . . . . . . . .23
Boots . . . . . . . . . . . . . . . . . . . . . . . . . . . . . . . .20
Brandt . . . . . . . . . . . . . . . . . . . . . . . . . . . . . . .15
Britannia . . . . . . . . . . . . . . . . . . . . . . . . . . . . .19
Bush . . . . . . . . . . . . . . . . . . . . .02,07,21,26,28,36
CGE . . . . . . . . . . . . . . . . . . . . . . . . . . . . . . . . .23
CS Electronics . . . . . . . . . . . . . . . . . . . . . . . . .19
CTC . . . . . . . . . . . . . . . . . . . . . . . . . . . . . . . .23
Carrefour . . . . . . . . . . . . . . . . . . . . . . . . . . . . .07
Cascade . . . . . . . . . . . . . . . . . . . . . . . . . . . . . .02
Cimline . . . . . . . . . . . . . . . . . . . . . . . . . . . . . .02
Clatronic . . . . . . . . . . . . . . . . . . . . . . . . . . .23,35
Condor . . . . . . . . . . . . . . . . . . . . . . . . . . . .30,35
Contec . . . . . . . . . . . . . . . . . . . . . . . . . .02,07,19
Crown . . . . . . . . . . . . . . . . . . . . . . . . . .02,35,38
Cybertron . . . . . . . . . . . . . . . . . . . . . . . . . . . .21
Daewoo . . . . . . . . . . . . . . . . . . . . . . . . . . .02,36
Dainichi . . . . . . . . . . . . . . . . . . . . . . . . . . . . . .21
Dayton . . . . . . . . . . . . . . . . . . . . . . . . . . . . . . .02
De Graaf . . . . . . . . . . . . . . . . . . . . . . . . . . . . .18
Decca . . . . . . . . . . . . . . . . . . . . . . . . . . . . . . .10
Dixi . . . . . . . . . . . . . . . . . . . . . . . . . . . . . . . . .02
Dual Tec . . . . . . . . . . . . . . . . . . . . . . . . . . . . . .20
Elite . . . . . . . . . . . . . . . . . . . . . . . . . . . . . . .21,30
Elta . . . . . . . . . . . . . . . . . . . . . . . . . . . . . . . . .02
Emerson . . . . . . . . . . . . . . . . . . . . . . . . . . . . .33
Ferguson . . . . . . . . . . . . . . . . . . . . . . . . . . . . .15
Fidelity . . . . . . . . . . . . . . . . . . . . . . . . . . . .19,33
Finlandia . . . . . . . . . . . . . . . . . . . . . . . . . . .18,32
Finlux . . . . . . . . . . . . . . . . . . . . . . . . . . .10,13,32
Firstline . . . . . . . . . . . . . . . . . . .02,19,20,23,28,31
Fisher . . . . . . . . . . . . . . . . . . . . . . . . . . .18,20,35
Formenti . . . . . . . . . . . . . . . . . . . . . . . . . . . . .30
Frontech . . . . . . . . . . . . . . . . . . . . . . . . . . .23,25
Fujitsu . . . . . . . . . . . . . . . . . . . . . . . . . . . . . . .10
Funai . . . . . . . . . . . . . . . . . . . . . . . . . . . . . .25,28
GEC . . . . . . . . . . . . . . . . . . . . . . . . . . . . . .10,20
GPM . . . . . . . . . . . . . . . . . . . . . . . . . . . . . . . .21
Geloso . . . . . . . . . . . . . . . . . . . . . . . . . . . . . . .02
Genexxa . . . . . . . . . . . . . . . . . . . . . . . . . . . . .21
GoldStar . . . . . . . . . . . . . . . . . . . . . . . . .15,20,27
Goodmans . . . . . . . . . . . . . . . . . . .07,10,20,29,36
Gorenje . . . . . . . . . . . . . . . . . . . . . . . . . . . . . .35
Graetz . . . . . . . . . . . . . . . . . . . . . . . . . . . . . . .33
Granada . . . . . . . . . . . . . . . . . . . . . . . . .10,18,20
Grandin . . . . . . . . . . . . . . . . . . . . . . . . . . . . . .26
Grundig . . . . . . . . . . . . . . . . . . . . . . . . . . . . . .17
HCM . . . . . . . . . . . . . . . . . . . . . . . . . . . . . .02,26
Hanseatic . . . . . . . . . . . . . . . . . . . . . . . .01,30,33
Hinari . . . . . . . . . . . . . . . . . . . . . . . . . . .02,07,21
Hisawa . . . . . . . . . . . . . . . . . . . . . . . . . . . . . . .26
Hitachi . . . . . . . . . . . . . . . . .05,07,08,13,15,20,22
Huanyu . . . . . . . . . . . . . . . . . . . . . . . . . . . .19,36
Hypson . . . . . . . . . . . . . . . . . . . . . . . . . . . .25,26
ICE . . . . . . . . . . . . . . . . . . . . . . . . . . . . . . .20,25
ICeS . . . . . . . . . . . . . . . . . . . . . . . . . . . . . . . . .21
ITT . . . . . . . . . . . . . . . . . . . . . . . . . . . . . . . . . .33
Imperial . . . . . . . . . . . . . . . . . . . . . . . . .23,35,38
Inno Hit . . . . . . . . . . . . . . . . . . . . . . . . . . . . . .10
Interfunk . . . . . . . . . . . . . . . . . . . . . . . . . . .23,33
Intervision . . . . . . . . . . . . . . . . . . . . . . .12,20,25
Isukai . . . . . . . . . . . . . . . . . . . . . . . . . . . . . . . .21
JVC . . . . . . . . . . . . . . . . . . . . . . . . . . . . . . .07,09
Kaisui . . . . . . . . . . . . . . . . . . . . . .02,19,20,21,26
Kathrein . . . . . . . . . . . . . . . . . . . . . . . . . . . . . .01
Kingsley . . . . . . . . . . . . . . . . . . . . . . . . . . . . . .19
Koyoda . . . . . . . . . . . . . . . . . . . . . . . . . . . . . . .02
Leyco . . . . . . . . . . . . . . . . . . . . . . . . . . .10,25,28
Lloytron . . . . . . . . . . . . . . . . . . . . . . . . . . . . . .05
Luxor . . . . . . . . . . . . . . . . . . . . . . . . . . . . . . . .33
M Electronic . . . . . . . . . . . . .02,13,15,20,32,36,41
Magnadyne . . . . . . . . . . . . . . . . . . . . . . . . .12,23
Magnafon . . . . . . . . . . . . . . . . . . . . . . . . . . . . .12
Manesht . . . . . . . . . . . . . . . . . . . . . . . . .20,25,30
Marantz . . . . . . . . . . . . . . . . . . . . . . . . . . . . . .01
Matsui . . . . . . . . . . . . . . .02,04,06,07,10,18,20,28
Memorex . . . . . . . . . . . . . . . . . . . . . . . . . . . . .02
Metz . . . . . . . . . . . . . . . . . . . . . . . . . . . . . . . .34
Mitsubishi . . . . . . . . . . . . . . . . . . . . . . . .07,14,16
Mivar . . . . . . . . . . . . . . . . . . . . . . . . . . . . . .19,27
Multitech . . . . . . . . . . . . . . . . . . . . . . . .02,12,19
Neckermann . . . . . . . . . . . . . . . . . . . . . . . . . .01
Nikkai . . . . . . . . . . . . . . . . . . . .05,06,10,19,21,25
Nobliko . . . . . . . . . . . . . . . . . . . . . . . . . . . . . .12
Nokia . . . . . . . . . . . . . . . . . . . . . . . . . . . . .33,41
Normende . . . . . . . . . . . . . . . . . . . . . . . . . . . .15
Oceanic . . . . . . . . . . . . . . . . . . . . . . . . . . . . . .33
Orion . . . . . . . . . . . . . . . . . . . . . . . . . . .28,30,31
Osaki . . . . . . . . . . . . . . . . . . . . . . .05,10,20,21,25
Oso . . . . . . . . . . . . . . . . . . . . . . . . . . . . . . . . .21
Osume . . . . . . . . . . . . . . . . . . . . . . . . . . . .05,10
Otake . . . . . . . . . . . . . . . . . . . . . . . . . . . . . . . .29
Otto Versand . . . . . . . . . . . . . . . . .01,03,07,20,30
Palladium . . . . . . . . . . . . . . . . . . . . . . . . . . .35,38
Panama . . . . . . . . . . . . . . . . . . . . . . . . . . . .20,25
Panasonic . . . . . . . . . . . . . . . . . . . . . . . . . .24,34
Pathe Cinema . . . . . . . . . . . . . . . . . . . . . . .19,30
Pausa . . . . . . . . . . . . . . . . . . . . . . . . . . . . . . . .02
Perdio . . . . . . . . . . . . . . . . . . . . . . . . . . . . . . .30
Phase . . . . . . . . . . . . . . . . . . . . . . . . . . . . . . . .05
Philco . . . . . . . . . . . . . . . . . . . . . . . . . . . . . . . .23
Philips . . . . . . . . . . . . . . . . . . . . . . . . . . . . .01,36
Pioneer . . . . . . . . . . . . . . . . . . . . . . . . . . . . . .15
Profex . . . . . . . . . . . . . . . . . . . . . . . . . . . . .02,33
Proline . . . . . . . . . . . . . . . . . . . . . . . . . . . . . . .31
Protech . . . . . . . . . . . . . . . . . . .02,12,20,23,25,38
Quelle . . . . . . . . . . . . . . . . . . . . . . . . . .03,04,33
Questa . . . . . . . . . . . . . . . . . . . . . . . . . . . . . . .07
Rank Arena . . . . . . . . . . . . . . . . . . . . . . . . . . .07
Rediffusion . . . . . . . . . . . . . . . . . . . . . . . . . . . .33
Rex . . . . . . . . . . . . . . . . . . . . . . . . . . . . . . . . .25
Roadstar . . . . . . . . . . . . . . . . . . . . . .02,21,25,38
SEG . . . . . . . . . . . . . . . . . . . . . . . . . . . .07,20,25
SEI . . . . . . . . . . . . . . . . . . . . . . . . . . . . . . . .12,28
Saba . . . . . . . . . . . . . . . . . . . . . . . . . . . . . . . . .15
Saisho . . . . . . . . . . . . . . . . . . . . . . . . . . .02,04,25
Salora . . . . . . . . . . . . . . . . . . . . . . . . . . . . . . . .33
Sambers . . . . . . . . . . . . . . . . . . . . . . . . . . . . . .12
Samsung . . . . . . . . . . . . . . . . . .01,02,20,25,27,35
Sandra . . . . . . . . . . . . . . . . . . . . . . . . . . . . . . .19
Sanyo . . . . . . . . . . . . . . . . . . . . . . . . .04,07,10,18
Schaub Lorenz . . . . . . . . . . . . . . . . . . . . . . . . .33
Schneider . . . . . . . . . . . . . . . . . . . . . . . .21,23,37
Sei-Sinudyne . . . . . . . . . . . . . . . . . . . . . . . . . . .03
Sentra . . . . . . . . . . . . . . . . . . . . . . . . . . . . . . .06
Sharp . . . . . . . . . . . . . . . . . . . . . . . . . . . . . .07,11
Shorai . . . . . . . . . . . . . . . . . . . . . . . . . . . . . . .28
Siarem . . . . . . . . . . . . . . . . . . . . . . . . . . . . . . .12
Siemens . . . . . . . . . . . . . . . . . . . . . . . . . . . . . .17
Silver . . . . . . . . . . . . . . . . . . . . . . . . . . . . . . . .07
Sinudyne . . . . . . . . . . . . . . . . . . . . . . . . . . .12,28
Solavox . . . . . . . . . . . . . . . . . . . . . . . . . . . . . .05
Sonitron . . . . . . . . . . . . . . . . . . . . . . . . . . . . . .18
Sonoko . . . . . . . . . . . . . . . . . . . . . . . . . . . . . .02
Sonolor . . . . . . . . . . . . . . . . . . . . . . . . . . . . . .18
Sony . . . . . . . . . . . . . . . . . . . . . . . . . . . .03,04,07
Soundwave . . . . . . . . . . . . . . . . . . . . . . . . . . . .38
Standard . . . . . . . . . . . . . . . . . . . . . . . . .02,20,21
Sunkai . . . . . . . . . . . . . . . . . . . . . . . . . . . . .28,31
Susumu . . . . . . . . . . . . . . . . . . . . . . . . . . . . . .21
Tandy . . . . . . . . . . . . . . . . . . . . . . . . . . .10,20,21
Tashiko . . . . . . . . . . . . . . . . . . . . . . . . . . . .07,20
Tatung . . . . . . . . . . . . . . . . . . . . . . . . . . . . .10,20
Tec . . . . . . . . . . . . . . . . . . . . . . . . . . . . . . .20,23
Technema . . . . . . . . . . . . . . . . . . . . . . . . . . . . .30
Technics . . . . . . . . . . . . . . . . . . . . . . . . . . . . . .24
Telefunken . . . . . . . . . . . . . . . . . . . . . . . . . . . .15
Telemeister . . . . . . . . . . . . . . . . . . . . . . . . . . .30
Teletech . . . . . . . . . . . . . . . . . . . . . . . . . . . . . .02
Teleton . . . . . . . . . . . . . . . . . . . . . . . . . . . . . . .20
Tensai . . . . . . . . . . . . . . . . . . . . . . . . .21,28,29,30
Texet . . . . . . . . . . . . . . . . . . . . . . . . . . . . . .19,21
Thomson . . . . . . . . . . . . . . . . . . . . . . . . . . . . .15
Thorn . . . . . . . . . . . . . . . . . . . . . . . . . . .06,10,33
Tomashi . . . . . . . . . . . . . . . . . . . . . . . . . . . . . .26
Toshiba . . . . . . . . . . . . . . . . . . . . . . . . . . . .06,07
Uher . . . . . . . . . . . . . . . . . . . . . . . . . . . . . . . .30
Ultravox . . . . . . . . . . . . . . . . . . . . . . . . . . . . . .12
Universum . . . . . . . . . . . . . . . . . . . . .13,25,32,35
Videosat . . . . . . . . . . . . . . . . . . . . . . . . . . . . . .23
Videotechnic . . . . . . . . . . . . . . . . . . . . . . . . . .20
Visa . . . . . . . . . . . . . . . . . . . . . . . . . . . . . . . . .02
Vision . . . . . . . . . . . . . . . . . . . . . . . . . . . . . . . .30
Waltham . . . . . . . . . . . . . . . . . . . . . . . . . . . . .20
Watson . . . . . . . . . . . . . . . . . . . . . . . . . . . . . .30
Watt Radio . . . . . . . . . . . . . . . . . . . . . . . . . . .12
Wega . . . . . . . . . . . . . . . . . . . . . . . . . . . . . . . .07
White Westinghouse . . . . . . . . . . . . . . . . . .19,30
Yoko . . . . . . . . . . . . . . . . . . . . . . . . . . . . . .20,25
If the codes corresponding to your set do
not succeed, please try entering one of the
other remote control codes listed.
REMOTE CONTROL CODES
Page 50

OPTIMIZING THE MODULATOR ENGLISH
50
50
OOppttiimmiizziinngg tthhee mmoodduullaattoorr
If the TV set and the video recorder are only connected with an
aerial cable - rather than with an additional scart cable - it may
happen that in certain reception locations the modulator
frequency of the video recorder is occupied by a TV channel. As
soon as the video recorder is switched on, the reception quality
of the TV picture deteriorates.The following steps will show you
how to overcome this problem.
SSuupppprreessssiinngg iinntteerrffeerreennccee
11
11
TTIIPP
WWhhaatt iiss aa mmoodduullaattoorr??
The purpose of this electronic assembly inside your
video recorder is to pass on the picture and sound
information read in from the video tape via an aerial
cable like a TV signal to the TV set. The modulator
frequency determines the frequency range in which
these signals are transmitted.
1 Switch the video recorder on and make sure
there is no cassette in the video recorder
3 The display shows MON. The video
recorder will now transmit a test image on
this frequency
2 Press simultaneously the
EEJJEECCTT
button JJon
the front of the video recorder and the
button
PPRROOGGRRAAMMMMEE --
until the display
shows the modulator frequency (e.g.M583
or CH35 ).
4 Use
==PP--
or
;;PP++
to select the option
OPTIMIZE and enter a new frequency
with the number buttons
00--99
PPRROOBBLLEEMM
WWhhiicchh mmoodduullaattoorr ffrreeqquueennccyy sshhoouulldd II eenntteerr??
You can also make the video recorder search
automatically for an appropriate frequency. To do so,
simply hold down the button PP. As soon as a free
frequency has been found,it will be shown in the display.
5 Tune the programme number of your TV set
allocated for video use to the new modulator
frequency until you see the test image
sharply and in colour
M583
OPTIMIZE MODULATOR
OPTIMIZE
Q583P
MODULATOR ON
CHANNEL/FREQ. FREQ
TO EXIT
PRESS MENU
-
J
Page 51

ENGLISH SWITCHING THE MODULATOR ON / OFF
51
51
SSwwiittcchhiinngg tthhee mmoodduullaattoorr oonn // ooffff
If picture and sound interference cannot be removed by optimising the
modulator, the integral modulator can be switched off.Warning: this is
only possible if you have connected the video recorder to the TV set
with a scart cable. It is not possible to operate with the modulator
switched off without a scart cable.
FFOORR
EEXXPPEERRTTSS
7 Leave the on-screen menu with the
MMEENNUU
button
6 Confirm the new modulator frequency with
OOKK
.
SSwwiittcchhiinngg ooffff tthhee mmoodduullaattoorr
If you have connected the video recorder to the TV set
with a scart cable, you can switch off the modulator
when there is interference with the picture or sound
(see below).
1 Switch the video recorder on and make sure
there is no cassette in the video recorder
3 The display shows MON. The video recor-
der will now transmit a test image on this
frequency
2 Press simultaneously the
EEJJEECCTT
button JJon
the front of the video recorder and the
button
PPRROOGGRRAAMMMMEE --
until the display
shows the modulator frequency (e.g.M583
or CH35)
4 Use
==PP--
or
;;PP++
to select the option
MODULATOR
7 Leave the on-screen menu with the
MMEENNUU
button
6 Confirm with
OOKK
. The screen will show the
message STORED. The display shows
MOFF
5 Use
PP
or
QQ
to select the setting ON
(Modulator on) or OFF (Modulator off)
M583
OPTIMIZE MODULATOR
OPTIMIZE
Q583P
MODULATOR ON
CHANNEL/FREQ. FREQ
TO EXIT
PRESS MENU
-
J
Page 52

PROBLEM SOLVING / TECHNICAL DATA ENGLISH
52
52
TThhee sseett iiss ssttiillll nnoott rreeaaccttiinngg,,
tthhee ddiissppllaayy sshhoowwss ee..gg..
E000
44
Remove the mains plug from the socket, hold down the Standby button mmon the front
of the video recorder and reinsert the mains plug. When
--:-- or E1 appears in the display you can release mm.Warning:All data memories
of the set (TV channel, time, timer) have been deleted.
SSeett nnoo lloonnggeerr rreeaaccttss
wwhheenn bbuuttttoonnss aarree pprreesssseedd
44
The power supply has been interrupted / failed
44
A programmed recording is running.Interrupt with the Standby button
mm
44
Child lock is activated: Switch this function off
44
Technical interference: Remove the mains plug from the socket and reinsert it
RReemmoottee ccoonnttrrooll
ddooeess nnoott wwoorrkk
44
Aim the end of the remote control at the display of the video recorder
44
Remove the batteries from the remote control and wait a few seconds before replacing
them
44
Batteries weak or flat: Change the batteries
CCaasssseettttee iiss jjaammmmeedd
iinn vviiddeeoo rreeccoorrddeerr
44
Do not use force! Briefly remove the mains plug and then reinsert it
PPoooorr qquuaalliittyy ppllaayybbaacckk
ffrroomm vviiddeeoo rreeccoorrddeerr
44
Check the TV to make sure that the programme number allocated to video operation
is correct
44
Cassette worn/faulty
44
Tracking not correctly adjusted: Carry out the Optimizing tracking function
NNoo ppllaayybbaacckk ffrroomm
vviiddeeoo rreeccoorrddeerr
44
No recording on the cassette
44
Select the TV programme number allocated to video operation
44
Check that the TV channel number allocated to video operation is correct
44
Cable connection loose/missing: Check the connections
NNoo rreeccoorrddiinngg ppoossssiibbllee
44
TV channel not stored or wrongly selected
44
Cassette with erase protection inserted
PROBLEM
POSSIBLE CAUSE / SOLUTION
PPrrooggrraammmmeedd
rreeccoorrddiinngg nnoott wwoorrkkiinngg
44
Storage position incorrectly/incompletely programmed
44
Time/date not set correctly
44
Cassette with erase protection inserted
PPiiccttuurree aanndd//oorr ssoouunndd
iinntteerrffeerreennccee iinn TTVV rreecceeppttiioonn
44
Optimize the modulator or switch it off (when using a scart cable)
44
Check the aerial cable connection
TT
EECCHHNNIICCAALL DDAATTAA
BBeeffoorree yyoouu ccaallll aann eennggiinneeeerr
12
12
TTVV rreecceeppttiioonn
ssttiillll nnoott ppeerrffeecctt
44
The Department of Trade and Industry operates a specialist service to help TV licence
holders improve reception of BBC and ITC programmes and to prevent interference. If
your dealer cannot help, ask at a main Post Office for the booklet How to improve
Television and Radio Reception.
DDiimmeennssiioonnss iinn ccmm ((WW//HH//DD))::
43,5/9,3/29,0
PPoowweerr ccoonnssuummppttiioonn
18 W
EEnneerrggyy ccoonnssuummppttiioonn ((LLooww PPoowweerr SSttaannddbbyy))
< 4W
MMaaiinnss vvoollttaaggee::
198-264 V / 50 Hz
NNuummbbeerr ooff vviiddeeoo hheeaaddss::
4
NNuummbbeerr ooff aauuddiioo hheeaaddss::
1linear, 2 FM
RReewwiinndd // ffoorrwwaarrdd wwiinndd ssppeeeedd::
approx. 90 seconds (E180 cassette)
RReeccoorrddiinngg//ppllaayybbaacckk ssppeeeedd ((EE--224400 ccaasssseettttee))::
SP (Standard Play) 4 hours, LP (Long Play) 8 hours
Page 53

ENGLISH NOTES
53
53
NNootteess
Page 54

NOTES ENGLISH
54
54
NNootteess
Page 55

ENGLISH VIDEO RECORDER / DISPLAY
55
55
1
2
4
5
1 STANDBY/ON m ä Switch set on/off
ä Interrupt function
ä Interrupt programmed recording
2 AUDIO/VIDEO IN
ä Connecting the camcorder or video recorder
(Programme number E3)
3 MANUAL
ä Manual mute
4 PROGRAMME - / +
ä Select previous/next programme nummer/menu point
5 RECORD n
ä Record
6 EJECT J
ä Eject tape
7 STOP h
ä Stop tape
8 PLAY K
ä Play back recorded cassette
9 H
ä In stop or standby mode: Rewind tape
ä During playback: Reverse picture search
I
ä In stop or standby mode: Forward wind tape
ä During playback: Forward picture search
10 STILL R
ä Still picture / slow motion
VViiddeeoo rreeccoorrddeerr // ddiissppllaayy
9
7
6
VPS/PDC signal
detected
k
Current
operating
mode
Child lock
activated
Cassette
inserted
SAT recording
programmed
- Programme number
- Tape position
- Function
Tape position in
seconds
Audio
signal level
Recording
in progress
Recording
programmed
Long
Play
Decoder
activated
Tape
position
(hours)
Tape
position
(minutes)
Hi-fi
sound
Tape
position
(seconds)
Nicam
sound
3
10
8
Page 56

3103 166 28751
0353/ω
VR 708A/07 ENGLISH
 Loading...