

Philips VOIP4331, VOIP4331B - Cordless Phone / USB VoIP, VOIP4332, VOIP4332B, VOIP4332B/37 User Manual
...
User manual
Charge the handset(s) for 24 hours before use !


Contents
3Contents
4 Important Safety Instructions
5 Important information
7 What’s in the box
8 Your VOIP 433
10 Icons on the handset display
11 Connect
12 Install
13 Main menu
14 Call
19 Phonebook
23 Call log
25 Dialed list
US
26 Other features
36 Using the intercom
38 Default settings
39 Troubleshooting
40 Information
42 FCC and IC statements
45 Index
3

US
Important Safety Instructions
Some of the following information may not apply to your
particular product; however, when using telephone
equipment, basic safety precautions should always be
followed to reduce the risk of fire, electric shock and injury
to persons, including the following :
1. Read and understand all instructions.
2. Follow all warnings and instructions marked on the
product.
3. Unplug this product from the wall outlet before cleaning.
Do not use liquid cleaners or aerosol cleaners. Use a
damp cloth for cleaning.
4. Telephones should not be used while you are in a
bathtub, shower or pool. Immersion of the telephone or
handset in water could cause an electrical shock.
5. Slots and openings in the cabinet back or bottom are
provided for ventilation, to protect it from overheating.
These openings must not be blocked or covered. The
openings should never be blocked by placing the product
on the bed, sofa, rug, or other similar surface. This
product should not be placed in a built-in installation
unless proper ventilation is provided.
6. This product should be operated only from the type of
power source indicated on the marking label. If you are
not sure of the type of power supply to your home,
consult your dealer or local power company.
7. Do not allow anything to rest on the power cord. Do not
locate this product where the cord will be abused by
persons walking on it.
8. Do not overload wall outlets and extension cords as this
can result in the risk of fire or electric shock.
9. Never push objects of any kind into this product through
cabinet slots as they may touch dangerous voltage points
or short out parts that could result in a risk of fire or
electric shock. Never spill liquid of any kind on the
product.
10. To reduce the risk of electric shock, do not disassemble
this product, but take it to a qualified service personnel
when service or repair work is required. Opening or
removing covers may expose you to dangerous voltages
or other risks. Incorrect reassembly can cause electric
shock when the appliance is subsequently used.
11. Do not expose the product to extreme temperatures
such as areas near a hot radiator or stove or in a hot car.
12. Do not place lighted candles, cigarettes, cigars, etc., on
the telephone.
13. Never touch uninsulated telephone wires or terminals
unless the telephone line has been disconnected at the
network interface.
14. Never install or modify telephone wiring during a
lightning storm.
15. Never install telephone jacks in wet locations unless the
jack is specifically designed for wet locations.
16. Use caution when installing or modifying telephone lines
to prevent electrical shock and/or fire.
17. Unplug this product from the wall outlet and refer
servicing to qualified service personnel under the
following conditions:
A. When the power supply cord or plug is damaged or
frayed.
B. If the product has been exposed to rain or water.
C. If the product does not operate normally by following the
operating instructions.
D. If the product’s cabinet has been damaged.
E. If the product exhibits a distinct change in performance.
18. Avoid using a telephone (other than a cordless type)
during an electrical storm. There may be a remote risk of
electric shock from lightning.
19. Do not use the telephone to report a gas leak in the
vicinity of the leak.
20. Do not place this product on an unstable cart, stand or
table. The product may fall, causing serious damage to the
product.
IF YOUR PRODUCT UTILIZES BATTERIES, THE
FOLLOWING ADDITIONAL PRECAUTIONS
SHOULD BE OBSERVED :
1. Use only the type and size of battery(ies) specified in the
user manual.
2. Do not dispose of the battery(ies) in fire. They may
explode. Check with local codes for possible special
disposal instructions.
3. Do not open or mutilate the battery(ies). Released
electrolyte is corrosive and may cause damage to the
eyes or skin. It may be toxic if swallowed.
4. Exercise care in handling battery(ies) in order not to
short out the battery(ies) with conducting materials such
as rings, bracelets, and keys. The battery(ies) or
conductor may overheat and cause burns.
5. Do not attempt to recharge the battery(ies) provided
with or identified for use with this product that are not
intended to be charged. The battery(ies) may leak
corrosive electrolyte or explode.
6. Do not attempt to rejuvenate the battery(ies) provided
with or identified for use with this product by heating
them. Sudden release of the battery(ies) electrolyte may
occur causing burns or irritation to eyes or skin.
7. When replacing battery(ies), all batteries should be
replaced at the same time. Mixing fresh and discharged
batteries could increase internal cell pressure and
rupture the discharged battery(ies). (Applies to products
employing more than one separately replaceable primary
battery.)
8. When inserting battery(ies) into this product, the proper
polarity or direction must be observed. Reverse insertion
of battery(ies) can cause charging, and that may result in
leakage or explosion.
9. Remove battery(ies) from this product if storing over 30
days because the battery(ies) could leak and damage the
product.
10. Discard “dead” battery(ies) as soon as possible since
“dead“ batteries are more likely to leak in a product.
11. Do not store this product, or the battery(ies) provided
with or identified for use with this product, in hightemperature areas.
Batteries that are stored in a freezer or refrigerator for
the purpose of extending shelf life should be protected
from condensation during storage and defrosting.
Batteries should be stabilized at room temperature prior
to use after cold storage.
12. If your product uses rechargeable battery(ies), charge the
battery(ies) only in accordance with the instructions and
limitation specified in the User Manual.
SAVE THESE INSTRUCTIONS
4

Important information
Instructions for use for the VOIP 433
The VOIP 433 is a Windows Live™ Messenger compatible USB / landline phone, capable of voice
communication through Internet protocol as well as on a normal landline line.
For your safety
Safety information
This telephone is not designed for making emergency telephone calls when the power fails. An alternative
should be made available for access to emergency calls.
Power requirements
The product requires an electrical supply of 110 - 120 volts, single phase alternating current, excluding IT
installations defined in standard UL 60950.
Battery requirements
The handset requires power source of two rechargeable NiMH batteries, size AAA 1.2V 750mAh (HR10/44).
IF THE INCORRECT TYPE OF BATTERIES IS USED, A WARNING MESSAGE WILL BE DISPLAYED.
US
WARNING :
UL 60950. The only way to power down this product is by unplugging the power supply from the
electrical outlet. Ensure the electrical outlet is located close to the apparatus and is always easily
accessible.
CAUTION : RISK OF EXPLOSION IF BATTERY IS REPLACED BY AN INCORRECT TYPE. Never
use non-rechargeable batteries; use recommended type supplied with this telephone. NiMH batteries
must be disposed of in accordance with the applicable waste disposal regulations.
The electrical network is classified as dangerous according to criteria in the standard
Safety precautions
> Do not allow the handset to come into contact with liquids or moisture.
> Do not open the handset or base station. This could expose you to high voltages.
> Do not allow the charging contacts of the charger or the battery to come into contact with extraneous
conductive materials.
> There is a slight chance that the telephone could be damaged by an electrical storm. It is recommended
that users unplug the phone from the USB socket during a storm.
> Do not use the handset in an explosive hazard area such as where there is gas leaking.
> Young children should be supervised to ensure that they do not play with the telephone.
> Because the phone works by sending radio signals between the base unit and the handset, wearers of
hearing aids may experience interference in the form of a humming noise.
> We advise that this phone should not be used near intensive care medical equipment or by persons with
pacemakers.
> Your phone can interfere with electrical equipment such as answering machines, TV and radio sets if placed
too close. It is recommended that you position the base unit at least one meter from such appliances.
> Privacy of communications may not be ensured when using this telephone.
CAUTION :
or voltage can seriously damage the unit.
Base adapter Charger adapter
Input : 120VAC 60 Hz Input : 120VAC 60 Hz
Output : 9VDC 300mA Output: 9VDC 150mA
Use only the mains adapter supplied with this telephone. Incorrect adapter polarity
5

US
Important information
CAUTION : RISK OF EXPLOSION IF BATTERY IS REPLACED BY AN INCORRECT TYPE.
Never use non-rechargeable batteries; use recommended type supplied with this telephone. NiMH
batteries must be disposed of in accordance with the applicable waste disposal regulations.
FCC CERTIFICATION NUMBER IS LOCATED ON THE CABINET BOTTOM
The term „IC:“ before the certification number signifies that Industry Canada technical
specifications were met. This certification means that the equipment meets certain radio
communications and operational requirements.
Hereby, Philips declares that the VOIP433 is in compliance with the essential
requirements and other relevant provisions of Directive 1999/5/EC. This product can only
be connected to the analog telephone network of the country indicated on the sticker
located under the base station.
Install requirements
In order to use the phone, your computer should meet the following requirements :
®
•Microsoft
• Windows Live™ Messenger 8.0 software and account.
Visit http://get.live.com/messenger/overview to download free software and create an account.
• Broadband Internet access required for Internet calling.
Check with your Internet service provider for applicable service fees.
• PC must be switched on and connected to Windows Live™ Messenger 8.0.
• Your online contact(s) must also be connected to Windows Live™ Messenger 8.0, with compatible audio
device (including microphone and speaker).
• Microsoft Internet Explorer version 6 SP1 or later must be installed on your computer, though it does
not need to be your default browser.
Windows® XP-based PC.
Need help
For more information on troubleshooting and FAQ’s:
Online help : www.p4c.philips.com
Troubleshooting : see page 39
Updated Informations for Users are available on : www.p4c.philips.com
6
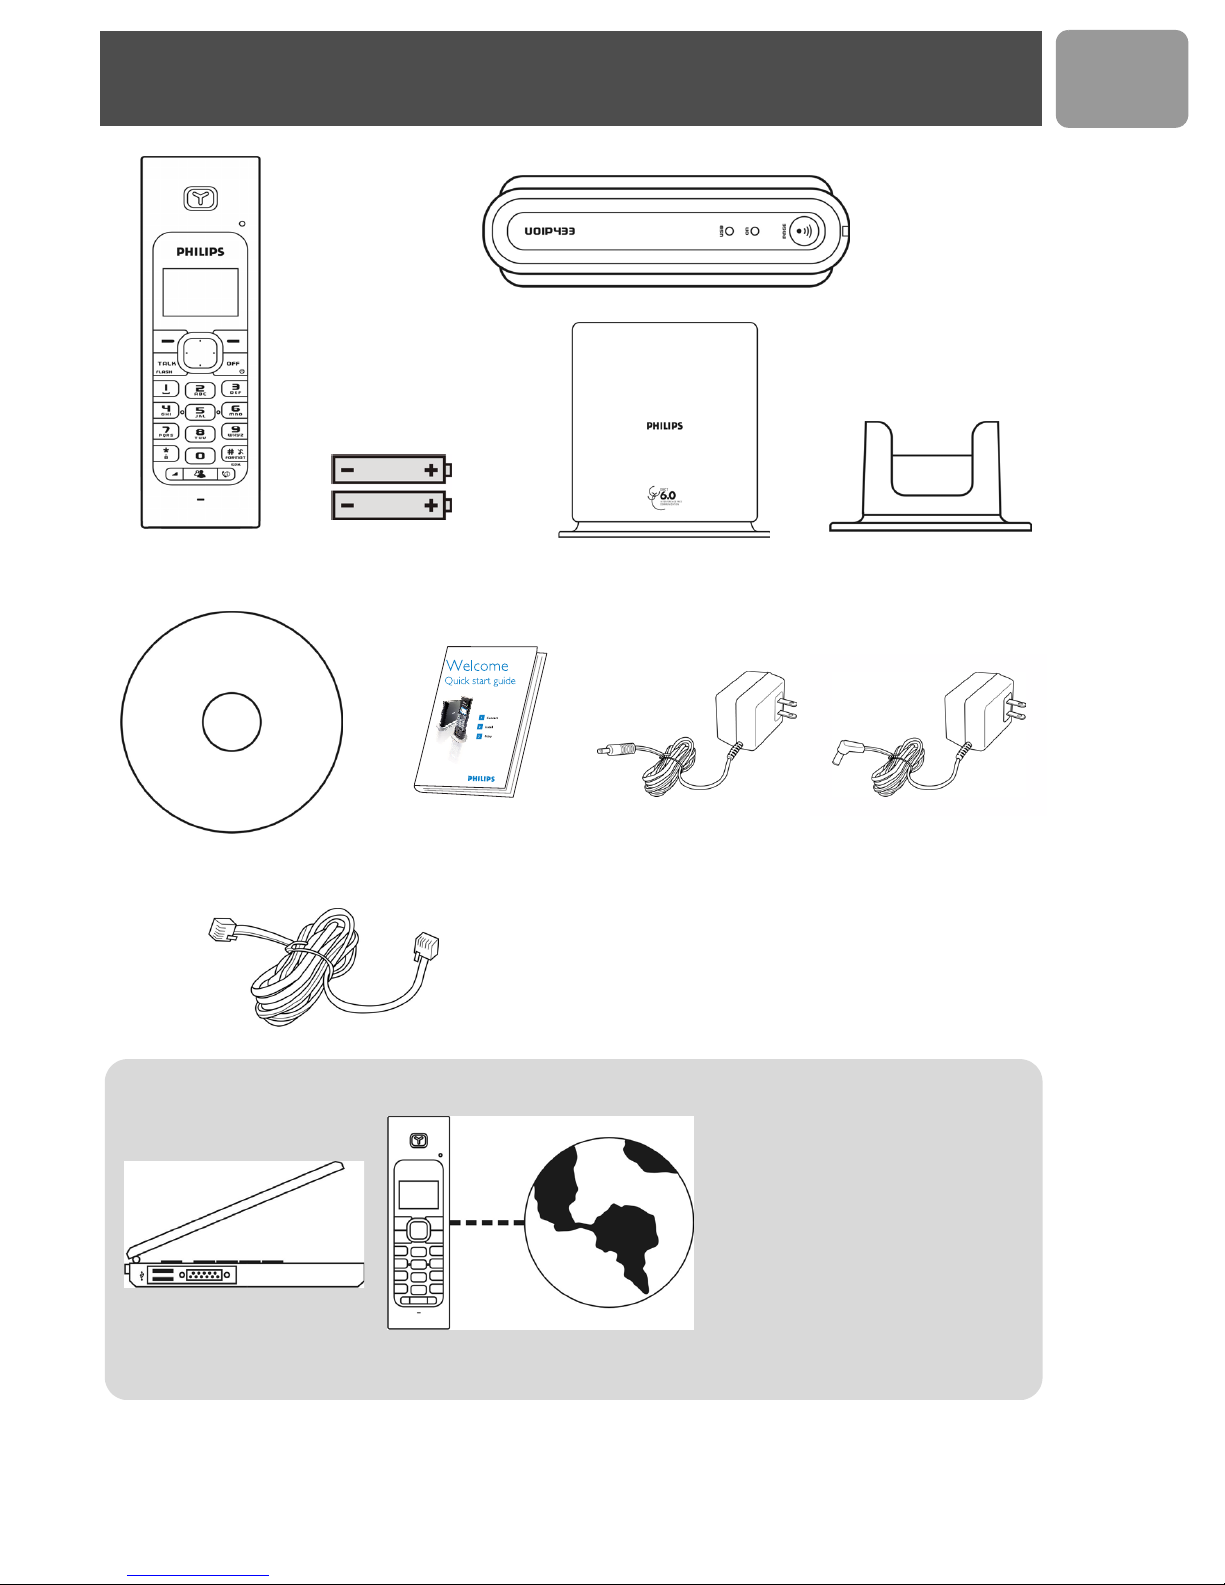
What’s in the box
US
Handset VOIP 433
CDROM
2 AAA Battery
What else you need :
A desktop or a laptop
with free USB port
Base station VOIP 433
1 power supply for
Quick Start Guide
Line Cord and line adaptor* (if relevant)
*(see note in “Connect”, page 11)
A telephone line
charger
Charger
1 power supply for
base station
• Broadband Internet connection.
•Microsoft
PC.
• Windows Live™ Messenger
installed on your PC and a
Windows Live™ Messenger
account. See http://get.live.com/
messenger/overview
Note: Microsoft Internet Explorer
version 6 SP1 or later must be
installed on your PC, though it does
not need to be your default browser.
®
Windows® XP-based
7
US
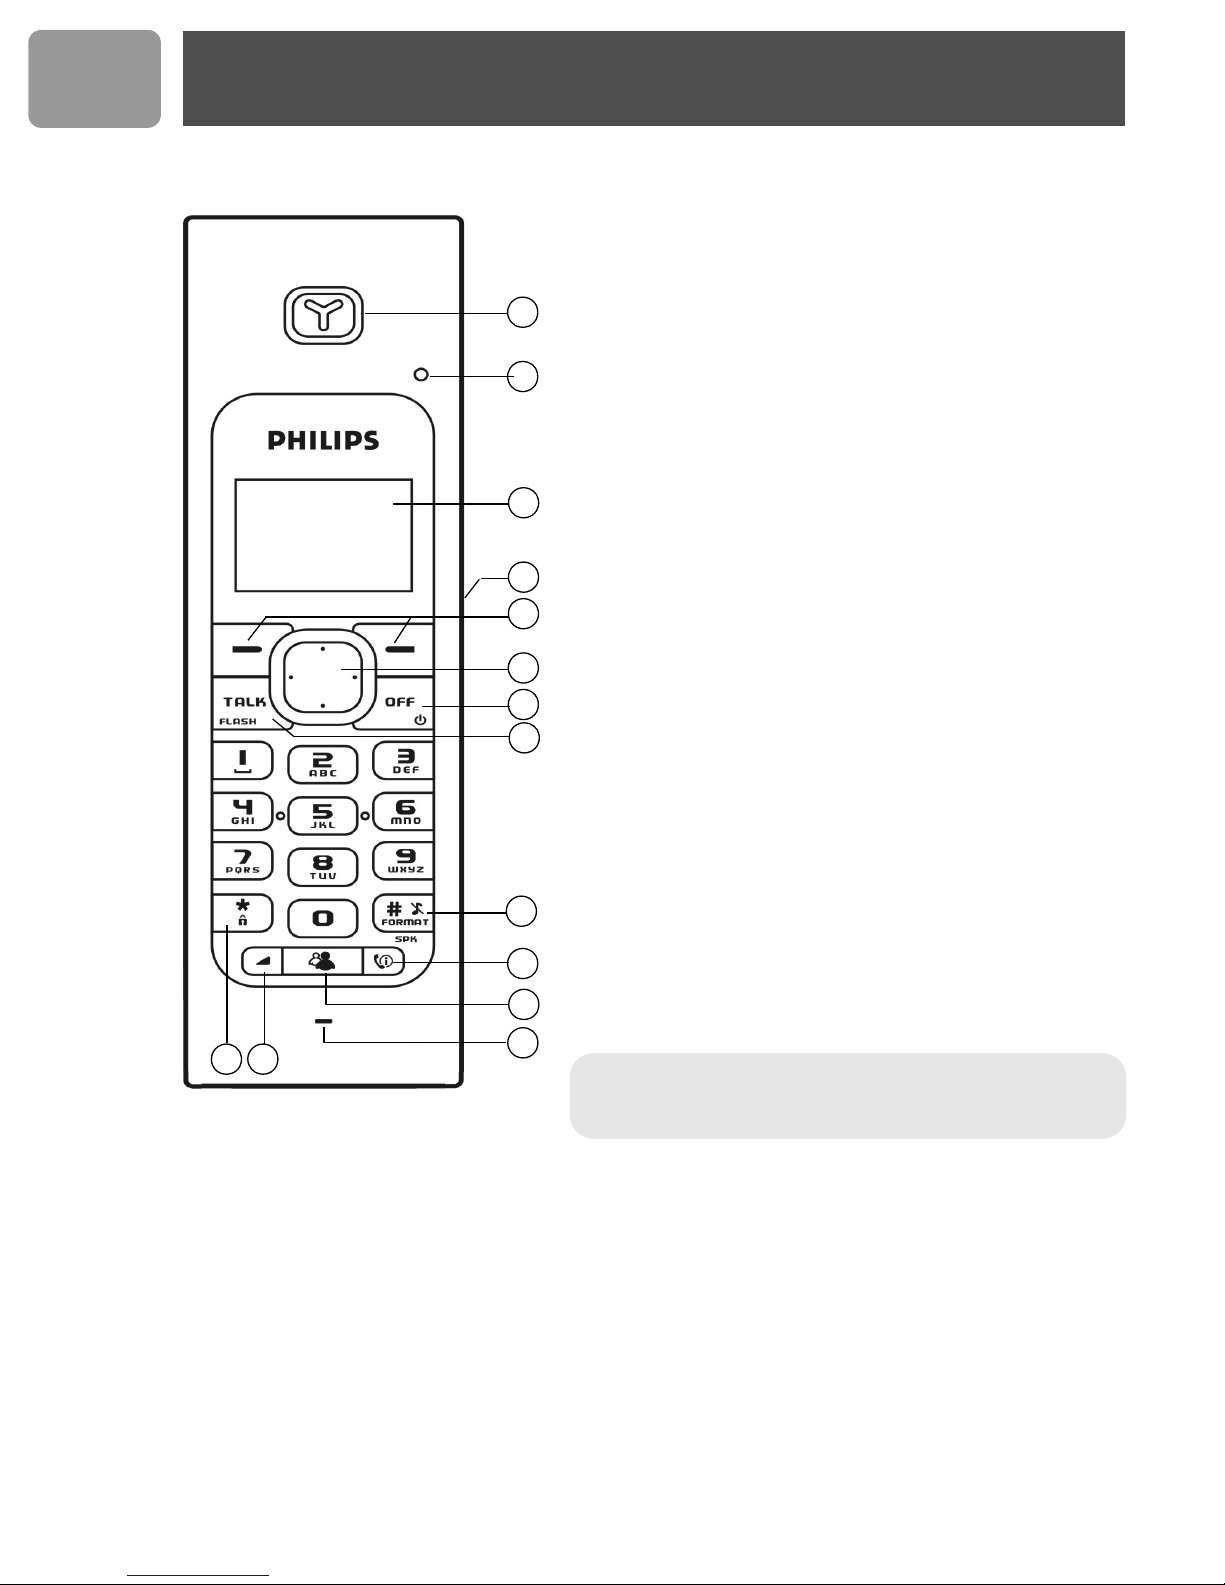
Your VOIP 433
Overview handset
1Earpiece
2LED
Blinks when there is an incoming call.
Blinks steady when there are messages waiting.
3Display, icons see page 10
4 Headset Jack
1
2
3
4
5
6
7
8
9
10
11
Allow communication through the headset.
5 Left and Right Soft keys
The functions of the soft keys are displayed right above the
soft keys.
6Rock Key
Use to navigate the menus.
Use to view PHONEBOOK by pressing up or down
during standby mode.
Use to view DIALED call log by pressing left or right
during standby mode.
7Off & Exit Key
Use to end a call.
Use to deny Windows Live™ Messenger calls.
Use to exit menus.
Use to turn the handset on/off.
8 Talk & Flash Key
Use to make and receive telephone calls.
Use to send recall signal during telephone calls.
Use to pick up call on Windows Live™ Messenger.
9 Pound, Ringer Off, Pause Key & Format Key
Use to enter a pause.
Use to turn the ringer on/off.
10 Calls/Handsfree Key
Use to enter the call record menu.
Use to turn handsfree on/off during a call.
11 Contact List Key
Use to launch Contact List.
12 Microphone
13 Volume Key
Adjust the volume.
14 Star & Key lock Key
Use to enter *.
Use to lock the keypad.
1314
8
12
*Warning ! Handsfree activation could suddenly increase
the volume in the loudspeaker to a very high level. Make
sure the handset is not too close to your ear.
Your VOIP 433
US
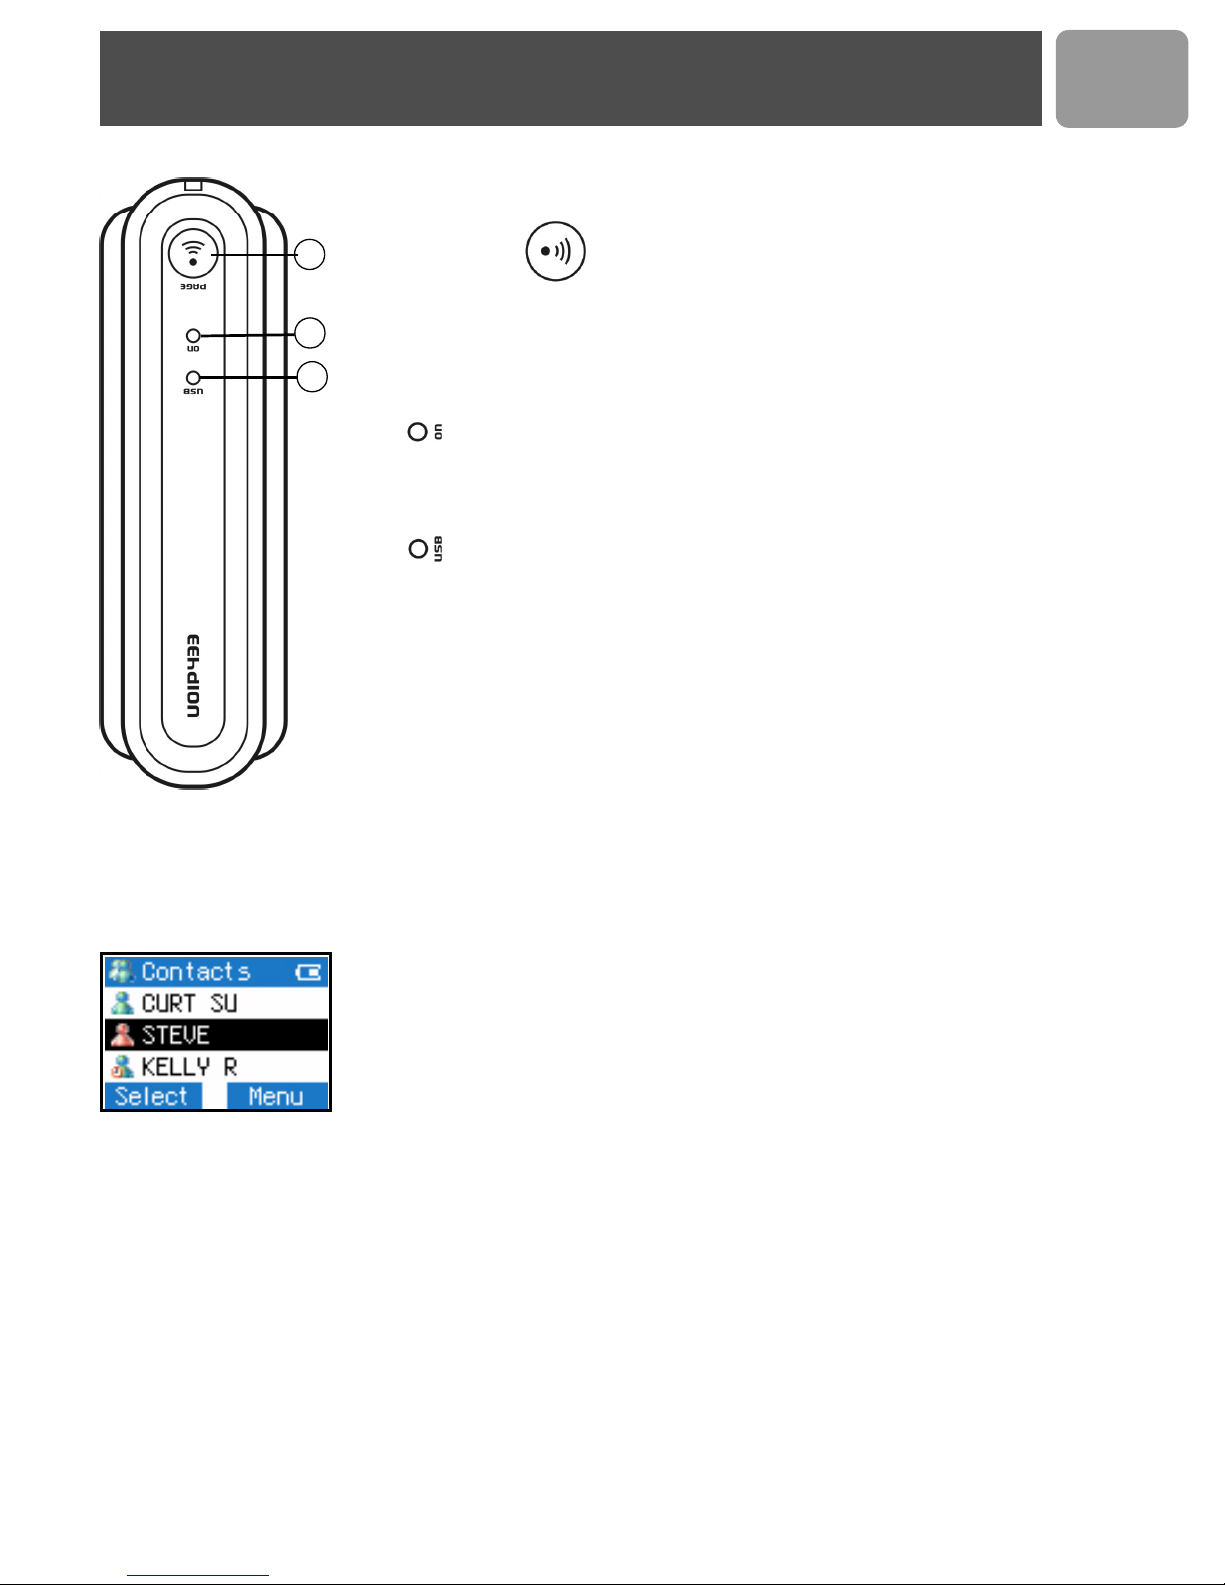
Overview base station
1
1Paging key
Use to page the handset.
2
Use to register a handset.
Main features
Contact list
3
2+3LED on base station
- ON on when the base is powered up.
- Blinks steady when there is an incoming landline call or on a
landline call.
- Blinks slowly while paging the handset.
- Blinks quickly during registration mode.
- ON when the USB is plugged in and the base is powered up.
• Sign in Windows Live™ Messenger via the handset.
• Contact list display on handset.
• Windows Live™ Messenger status display for each address on the contact
list.
• Change your online status using the handset.
• Download contacts phone numbers from PC to the handset phonebook.
• Emails, contact online, IM Invitation alerts.
Dual line phone
• Able to receive calls from Windows Live™ Messenger as well as from telephone line.
• User selectable melodies for each line for easy recognition.
• Call waiting alert when there is another incoming call from another line.
• Able to make calls using both lines at the same time with two handsets.
9
US
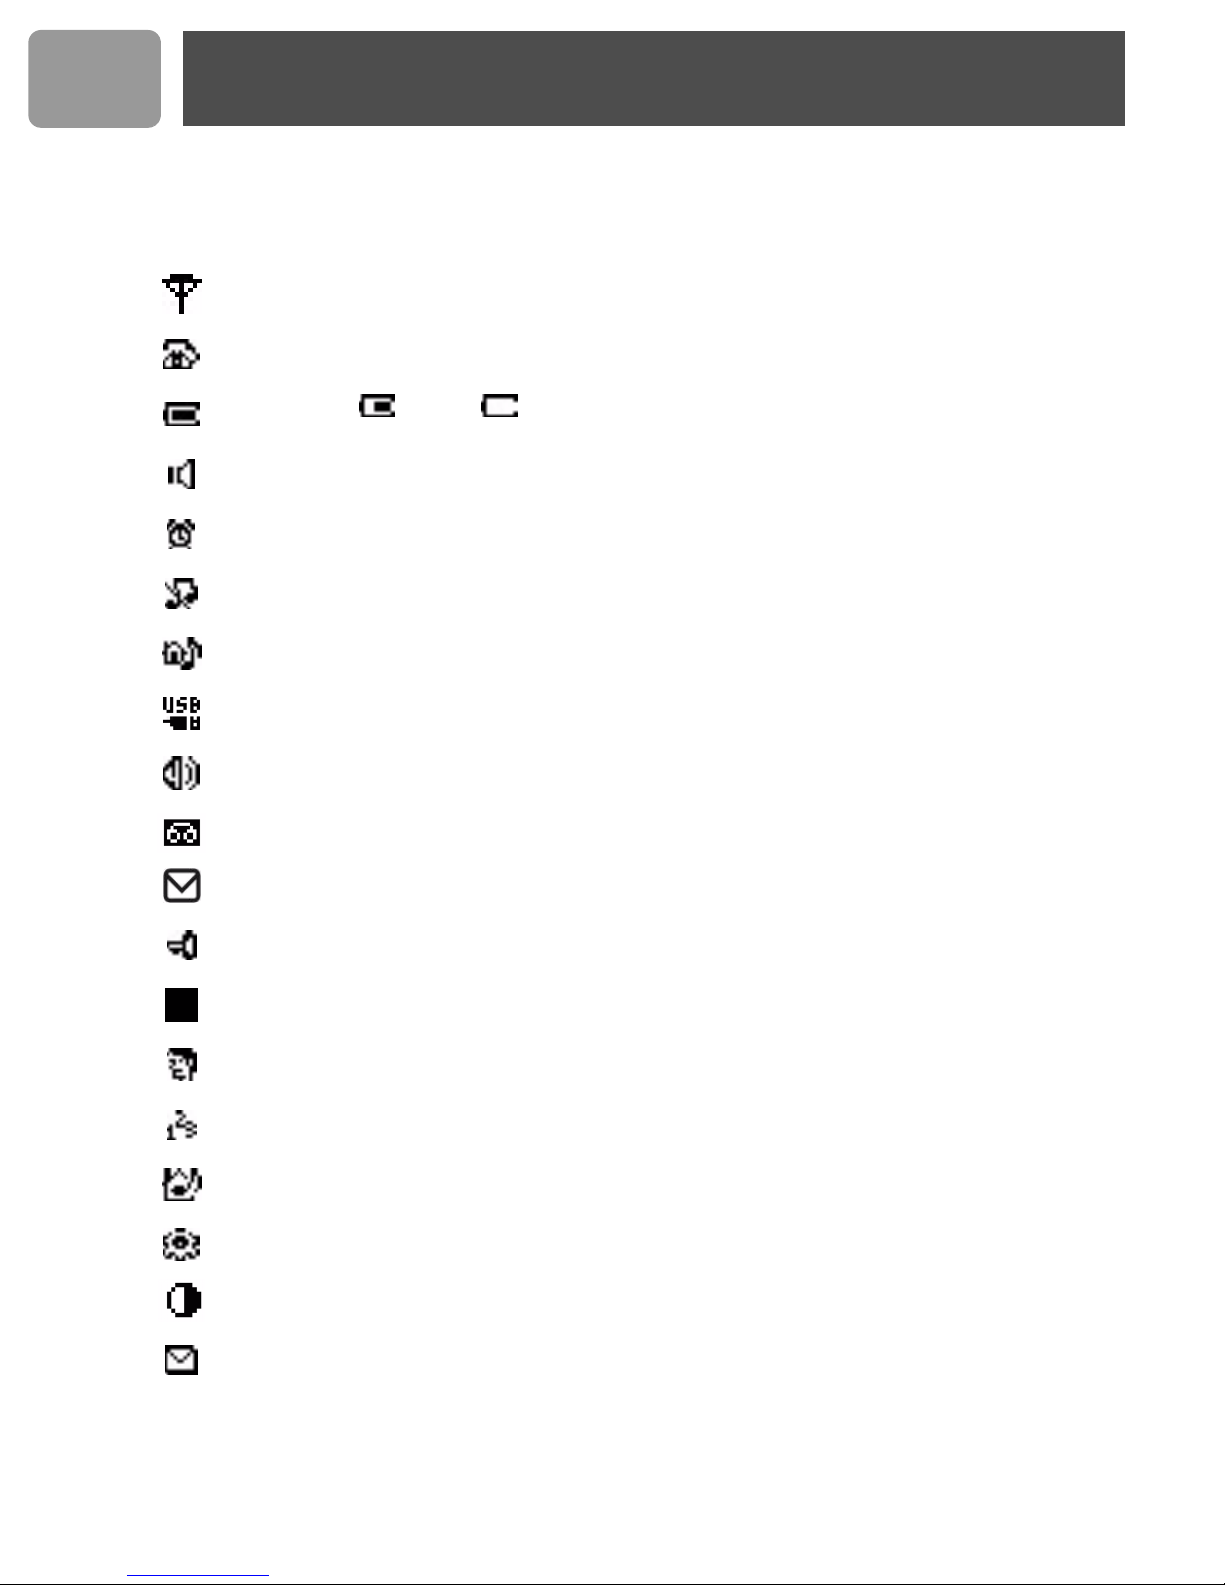
Icons on the handset display
When being used for the first time, it is sometimes necessary to wait until the battery is
sufficiently charged before the icons appear on the display.
The display gives information about the operation of your telephone. Following icons can be
shown in the headline of the display.
Base/Handset link.
Telephone call in progress.
Battery full; 1/2 full; Empty, please charge.
Loudspeaker is turned on.
The alarm clock is turned on.
The ringer is turned off.
Telephone Melody
Windows Live™ Messenger Melody
Volume
Windows Live™ Messenger voicemail
Message Waiting Indicator.
Keylock
Volume/Contrast level
Name
Number
Internal Melody
Mode
Contrast
Email Waiting
10
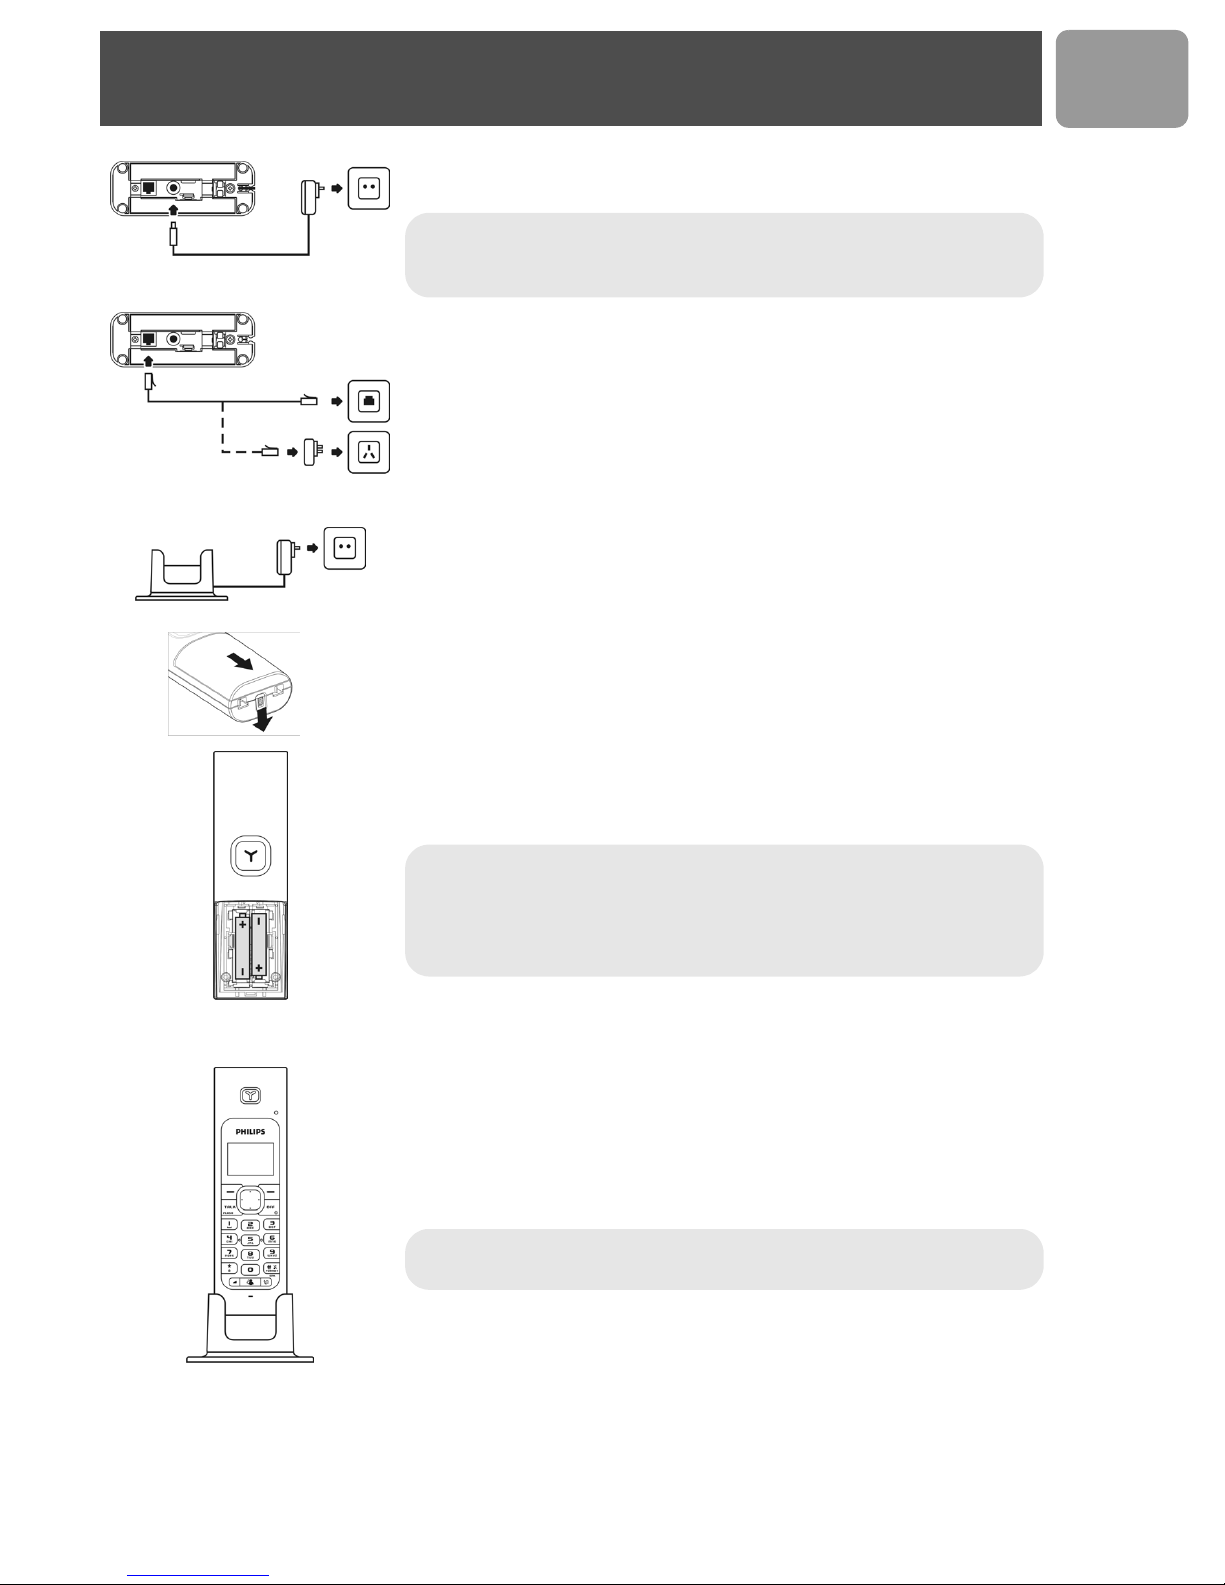
Connect
1. Insert the plug of the power cord into the socket on the bottom of
the base unit then plug the power supply unit into your power outlet.
Note : *You may find in the box the line adaptor delivered
separately from the line cord. In this case, please, first plug this line
adaptor onto the line cord before connecting it to the line socket.
2. Connect the telephone line cord to the phone socket on the bottom
of the base unit and to the wall phone socket.
3. Each handset comes with a charger and adapter. Insert the plug of the
power cord into the socket on the bottom of the charger. Plug the
power supply unit into your power outlet.
4. To remove the battery compartment, unlock the battery door lock at
the bottom of the handset.
US
5. Place the 2 rechargeable NiMH AAA batteries (included), observing
their polarities, into the battery compartment on the handset.
6. Slide the battery door firmly into place until the battery door locks.
Note : The base station or charger must always be plugged into the
mains when charging or when in use. Always use rechargeable
batteries.
The warranty does not apply to the batteries and any other
components which have a limited lifetime or are exposed to wear.
7. Please note that handset may not turn ON for up to 15 minutes if the
batteries are too low. Before first use, put the product on the charger
and charge batteries for 24 hours minimum. The handset may get
warm during the initial charge. This is normal.
Note : Always use the line cable and the adapters provided with the
product.
11
US
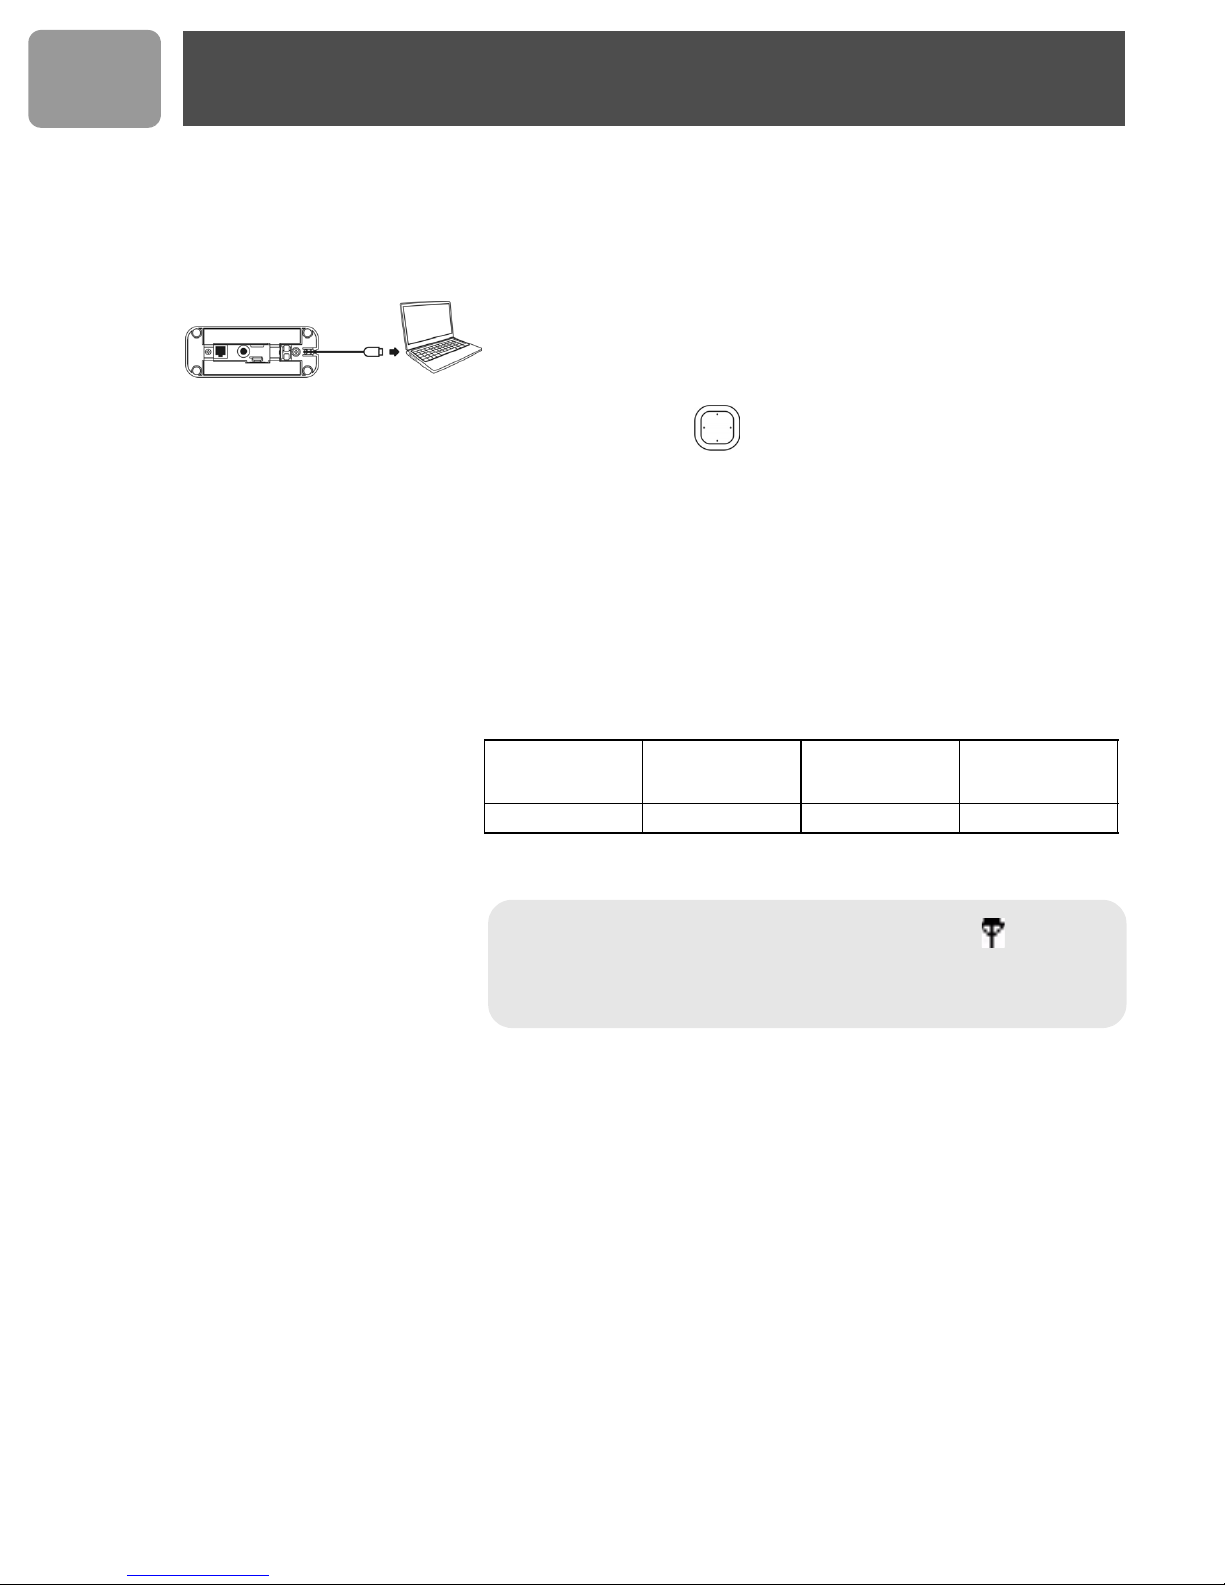
Install
Getting Ready
To start making Windows Live™ Messenger call,
1. Power up your PC and go to http://get.live.com/messenger/
overview to install Windows Live™ Messenger and create your
account (if not already done).
2. Connect the USB plug directly to your PC's USB slot.
3. Once your handset is powered up, you will see WELCOME message
on the display. Press any key to enter the Country Menu.
4. Press UP / DOWN to select the country. Press OK to confirm.
Your phone will reset after OK is pressed.
Battery life and range
Optimal battery life is reached after 3 cycles of complete charging &
discharging. When reaching the range limit and the conversation becomes
crackly, move closer to the base. To reach optimal range, place the base
station away from electrical appliances.
Battery life in
talk time
up to 10 hours up to 120 hours up to 50 metres up to 300 metres
Note : An out of range warning will be emitted and will be
flashing on the display if you move too far away from the base unit
during a call. You will need to move closer to the base unit or your
call will be disconnected.
Battery life in
standby mode
Indoor range Outdoor range
12
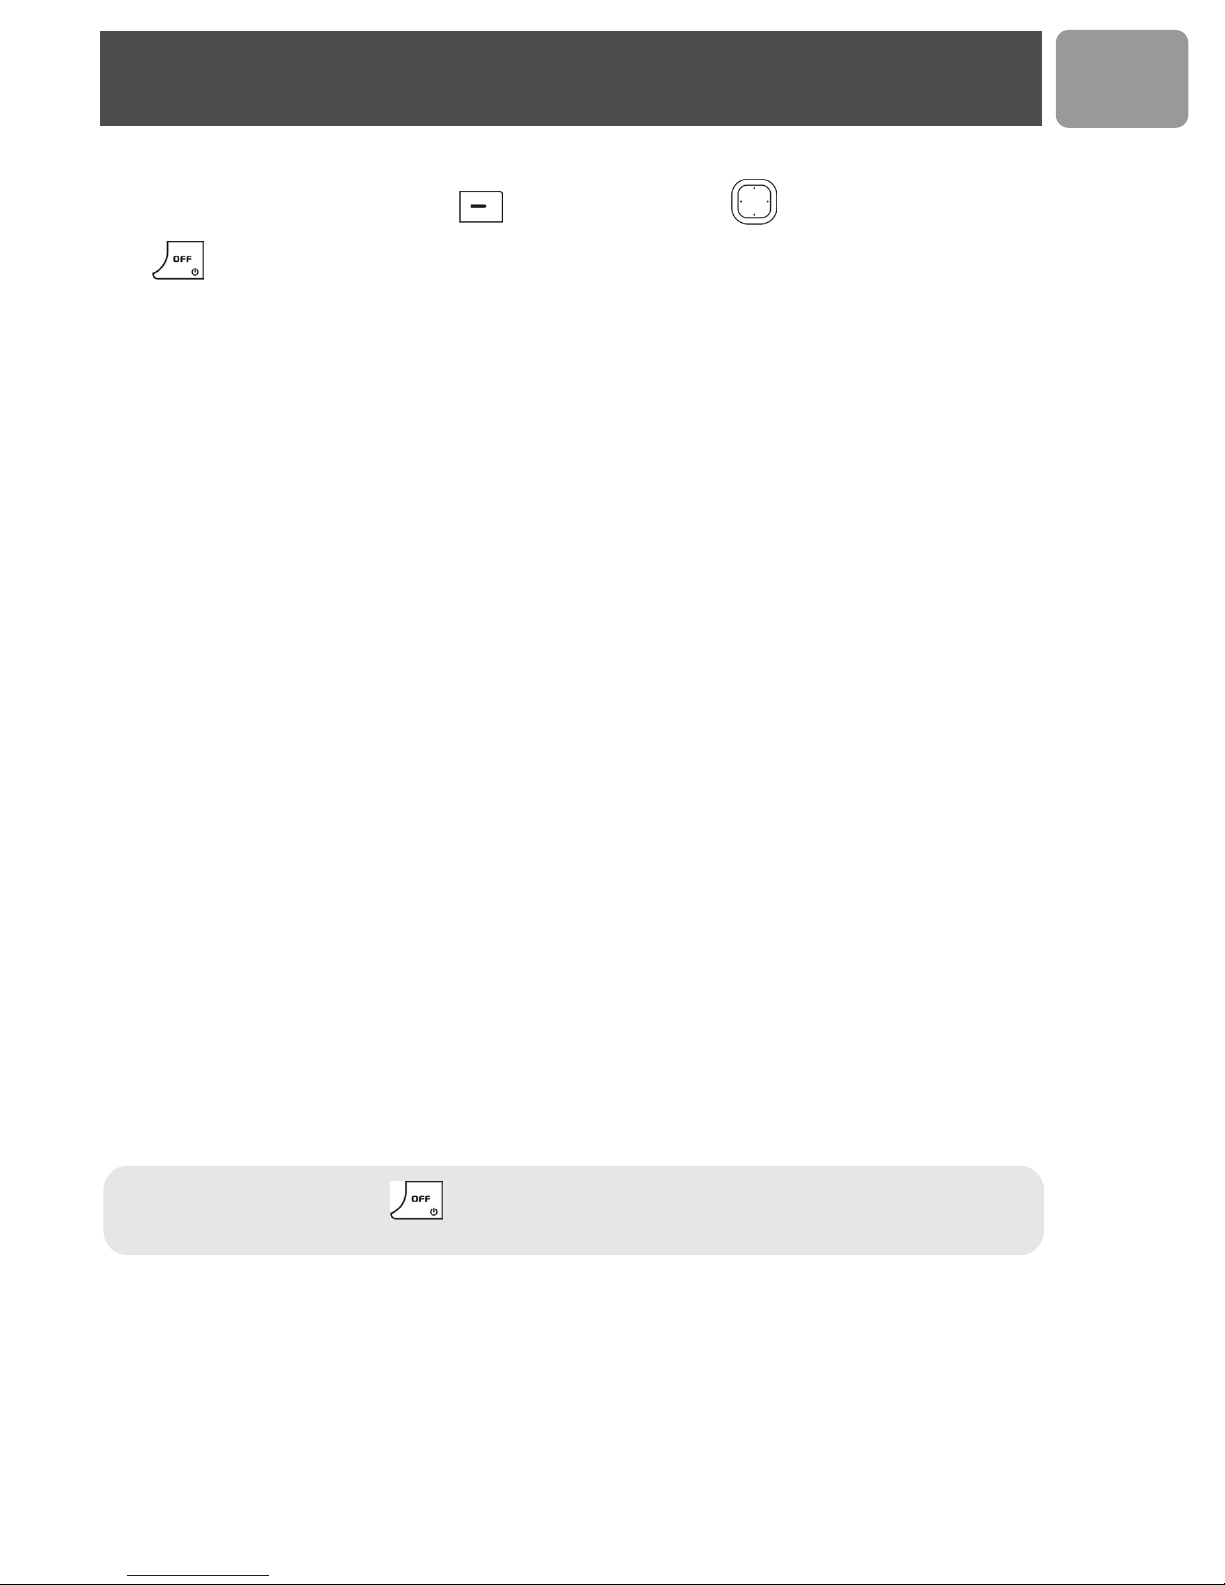
Main menu
Your phone offers a variety of functions and features that are grouped in the menus.
US
To access the main menu, press
MENU
and press UP / DOWN to browse the menu.
Press or place your phone in the charger to exit the menus.
Main menu
Display Sounds Settings System
Clock
Time Format
Handset Name
Contrast
Language
Wallpaper
Color
Handset
HS Key Tones
HS Tones
Baby Call
Auto answer
Alarm Clock
Timer
Stopwatch
Dial mode
Flash
Pause
Area Code
Register
Base Select
Delete HS
Reset
Call log menu (refer to “Call log”, page 23 for details)
Missed Received Dialed Call Timers Delete Calls
Use Number
Details
Use Number
List
To Phonebook
Delete
To Phonebook
Delete
Use Number
Details
Use Number
List
To Phonebook
Delete
To Phonebook
Delete
Use Number
Details
Use Number
List
To Phonebook
Delete
To Phonebook
Delete
Last Call
Dialed
Received
All Calls
Clear All
Missed
Dialed
Received
All Calls
Phonebook
View
Use Number
Details
Edit
Delete
Add Entry
Quick Dial
Status
Delete All
Note : In menu mode, press anytime or place your phone in the charger for charging and to exit
the menu and return to standby. Any unconfirmed changes will not be saved.
13
US
Call
General Information
Before any call is made, please note the following.
Emergency Calls
Windows Live™ Messenger does not support emergency call; please make sure you have other alternatives in
case of emergency.
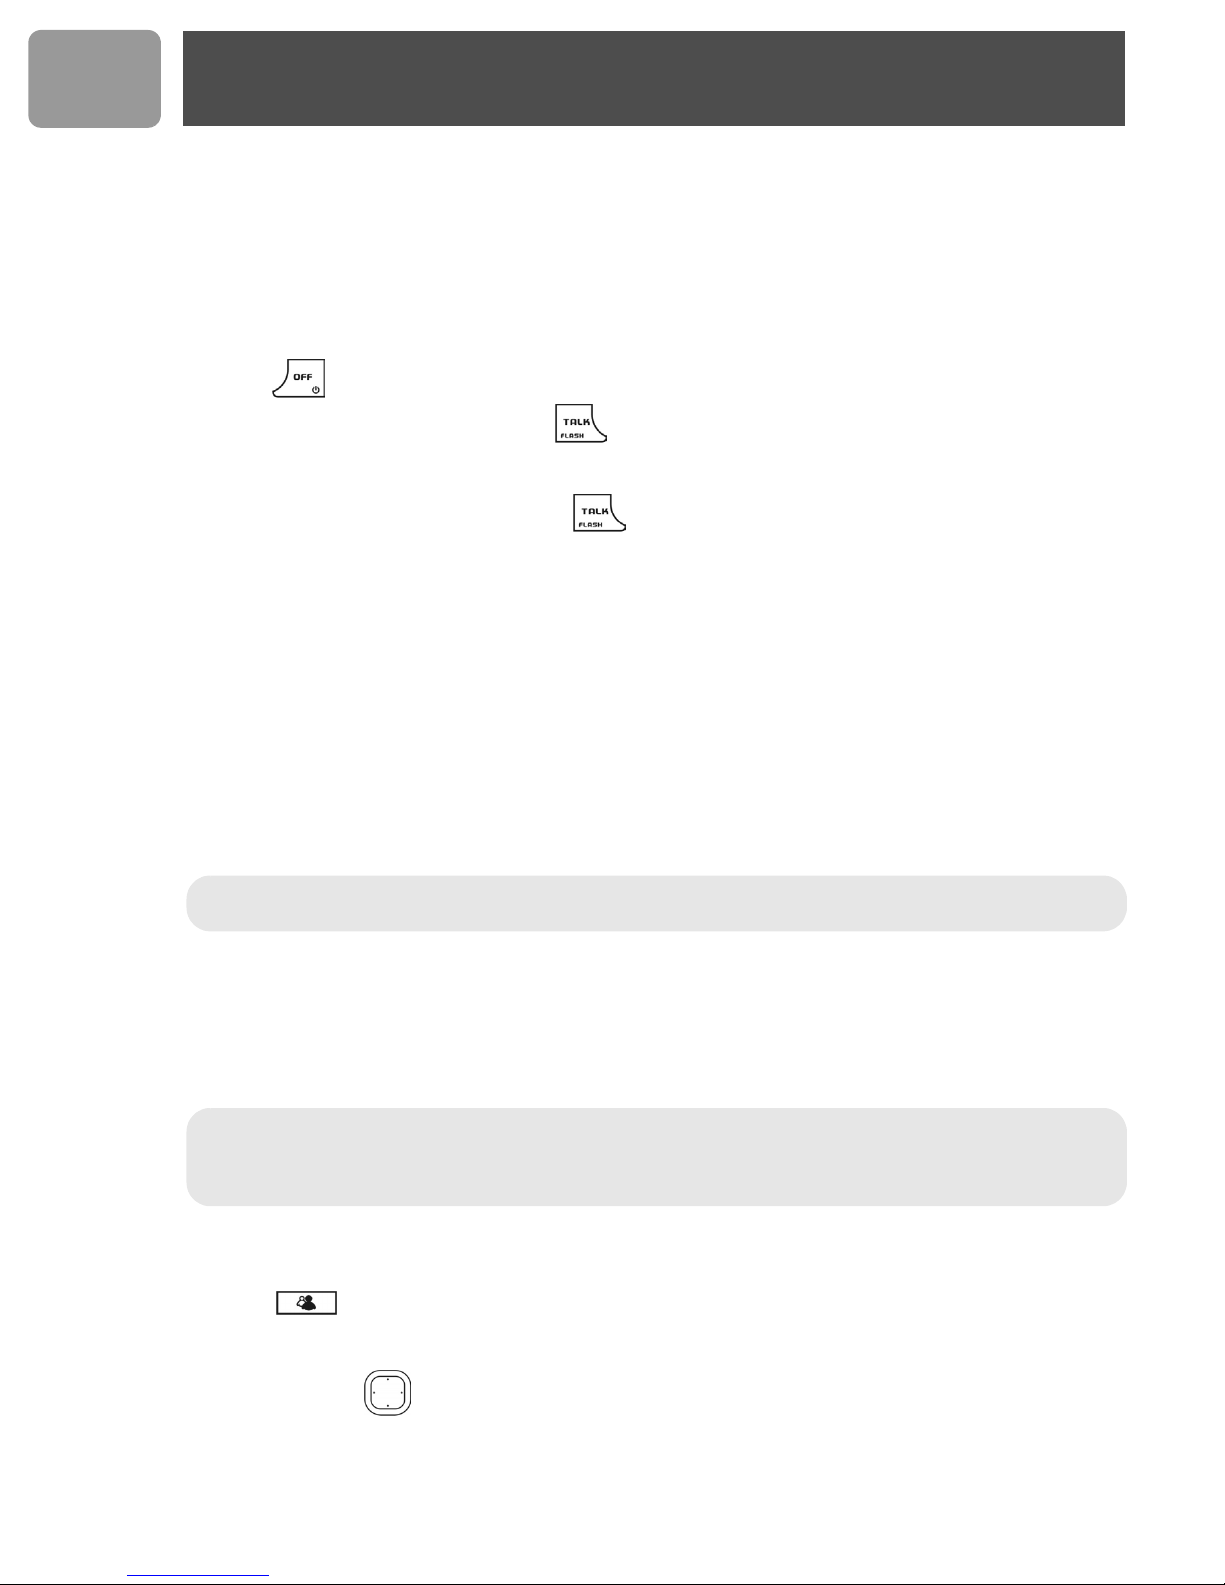
To make an emergency call using your VOIP433 phone you must be in phone mode
While in Messenger™ mode :
1. Press to exit Messenger mode. You will be returned to the phone mode.
2. Dial the emergency number and press .
While in phone mode :
Simply dial the emergency number and press .
Low battery warning
If your phone is almost out of battery during a call, it will sound an alert tone. Place your phone on the charger
for charging as soon as possible or it would turn off when it is out of battery. Placing the phone on the charger
for charging will end the current call.
Call timer
The call timer shows the duration of your current call on display. It is shown in minutes and seconds (MM-SS)
in the first hour. After that, it will be shown in hours and minutes (HH-MM). This applies to landline calls only.
Sign in to your Windows Live™ Messenger
account
Note : To be able to sign in to Windows Live™ Messenger from your handset, you must have
automatically saved on your PC the email address and password of the account you wish to use.
To store your user name (email address) and password on the PC :
1. Enter your user name (email address) and password on the Windows Live™ Messenger login page.
2. Check "Remember Me" and "Remember my Password" checkboxes.
3. Click on SIGN IN button in Windows Live™ Messenger window. After you sign in, your user name
(email address) and password will be stored in the PC.
Note :
working as long as the base is power up and the phone line cord is connected to the phone socket.
However, you will not be able to receive any call from Windows Live™ Messenger before you sign in
Windows Live™ Messenger.
Since your user name and password are stored on the PC, you can sign in your Windows Live™ Messenger
from your handset.
Before you sign in to your Windows Live™ Messenger account, your telephone line will still be
1. Press .
If you have not sign in yet, the Sign In screen is shown. A list of Messenger users on PC with saved
passwords will be shown.
2. Press Up/Down to select the Messenger ID to sign in to.
3. Press SIGN IN.
Once signed in, the contact list of the signed in user will be shown.
14
Call
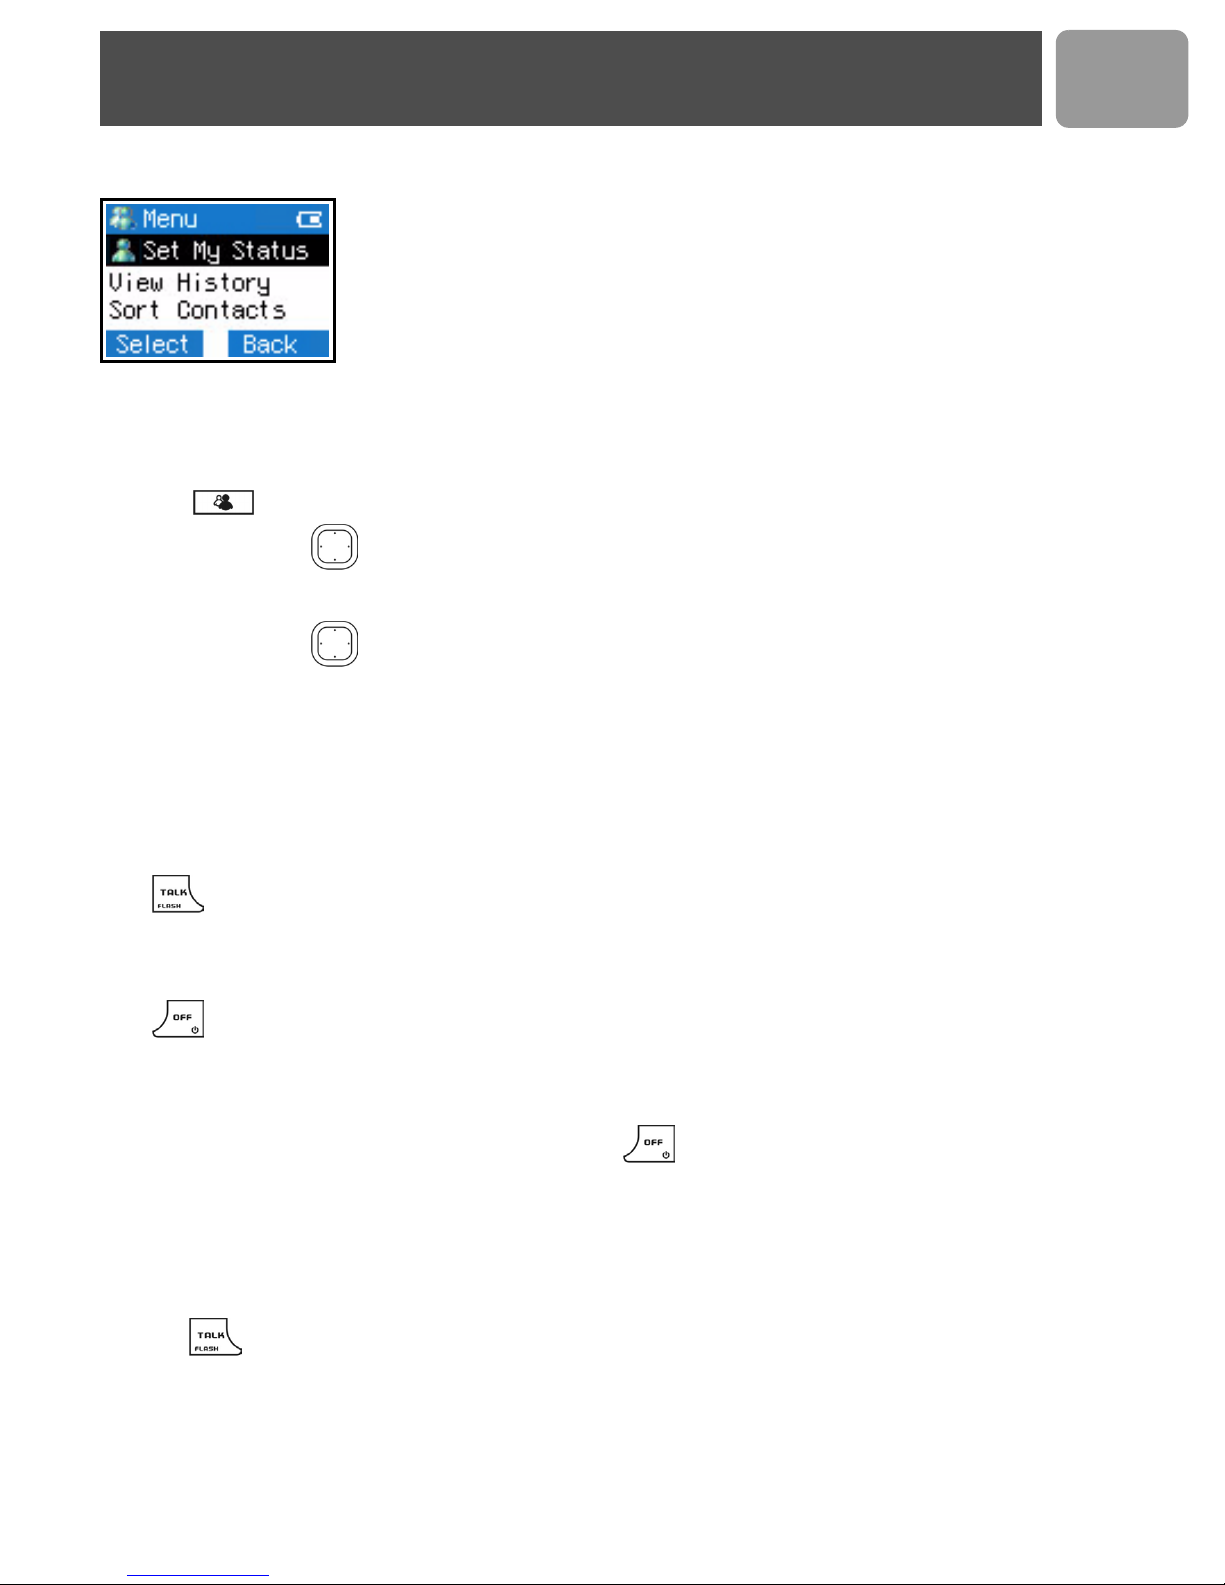
Windows Live™ Messenger Menu
After you sign in to Windows Live™ Messenger, you can access the Windows
Live™ Messenger menu by pressing the
change your online status, sort your contact list, download phonebook to your
handset, and more.
Call with Windows Live™ Messenger
Make an Windows Live™ Messenger call
1. Press . The contact list will be shown.
2. Press UP / DOWN to select the Windows Live™ Messenger user you would like to call.
MENU
softkey. In this menu, you can
US
3. Press
4. Press UP / DOWN to select the user's Messenger ID.
5. Press PC to call the user.
SELECT
to select the contact.
Answer a call from Windows Live™ Messenger
When you receive a call from the Windows Live™ Messenger line, the Windows Live™ Messenger melody
will ring and the messenger ID will be shown on the display.
Press to answer the call.
End a Windows Live™ Messenger call
Press or place the phone on the charger will end the call and return the phone to standby.
Deny a Windows Live™ Messenger call
To deny an incoming Windows Live™ Messenger call, press when the call is received on the handset.
Make a telephone call
Call from telephone line
1. Press to obtain the line; dial tone should be heard.
2. Enter the number to dial.
15
 Loading...