

Page 1
50
TPF1.3A LA
8.4 ISP Instructions
Configuration and procedure
"Easywriter " The software is provided by Novatek to upgrade the
firmware of CPU.
It is a windows-based program, which cannot be run in MS-DOS.
DDC2BI_ISP TOOL (3138 149 53161) is for the interface between
"Parallel Port of PC" and "15 pin-D-SUB connector of Monitor".
8. Alignments
System and equipment requirements
1. An i486 (or above) personal computer or compatible.
2. Microsoft operation system Windows 95/98/2000/XP.
3. ISP Software " Easywrite "
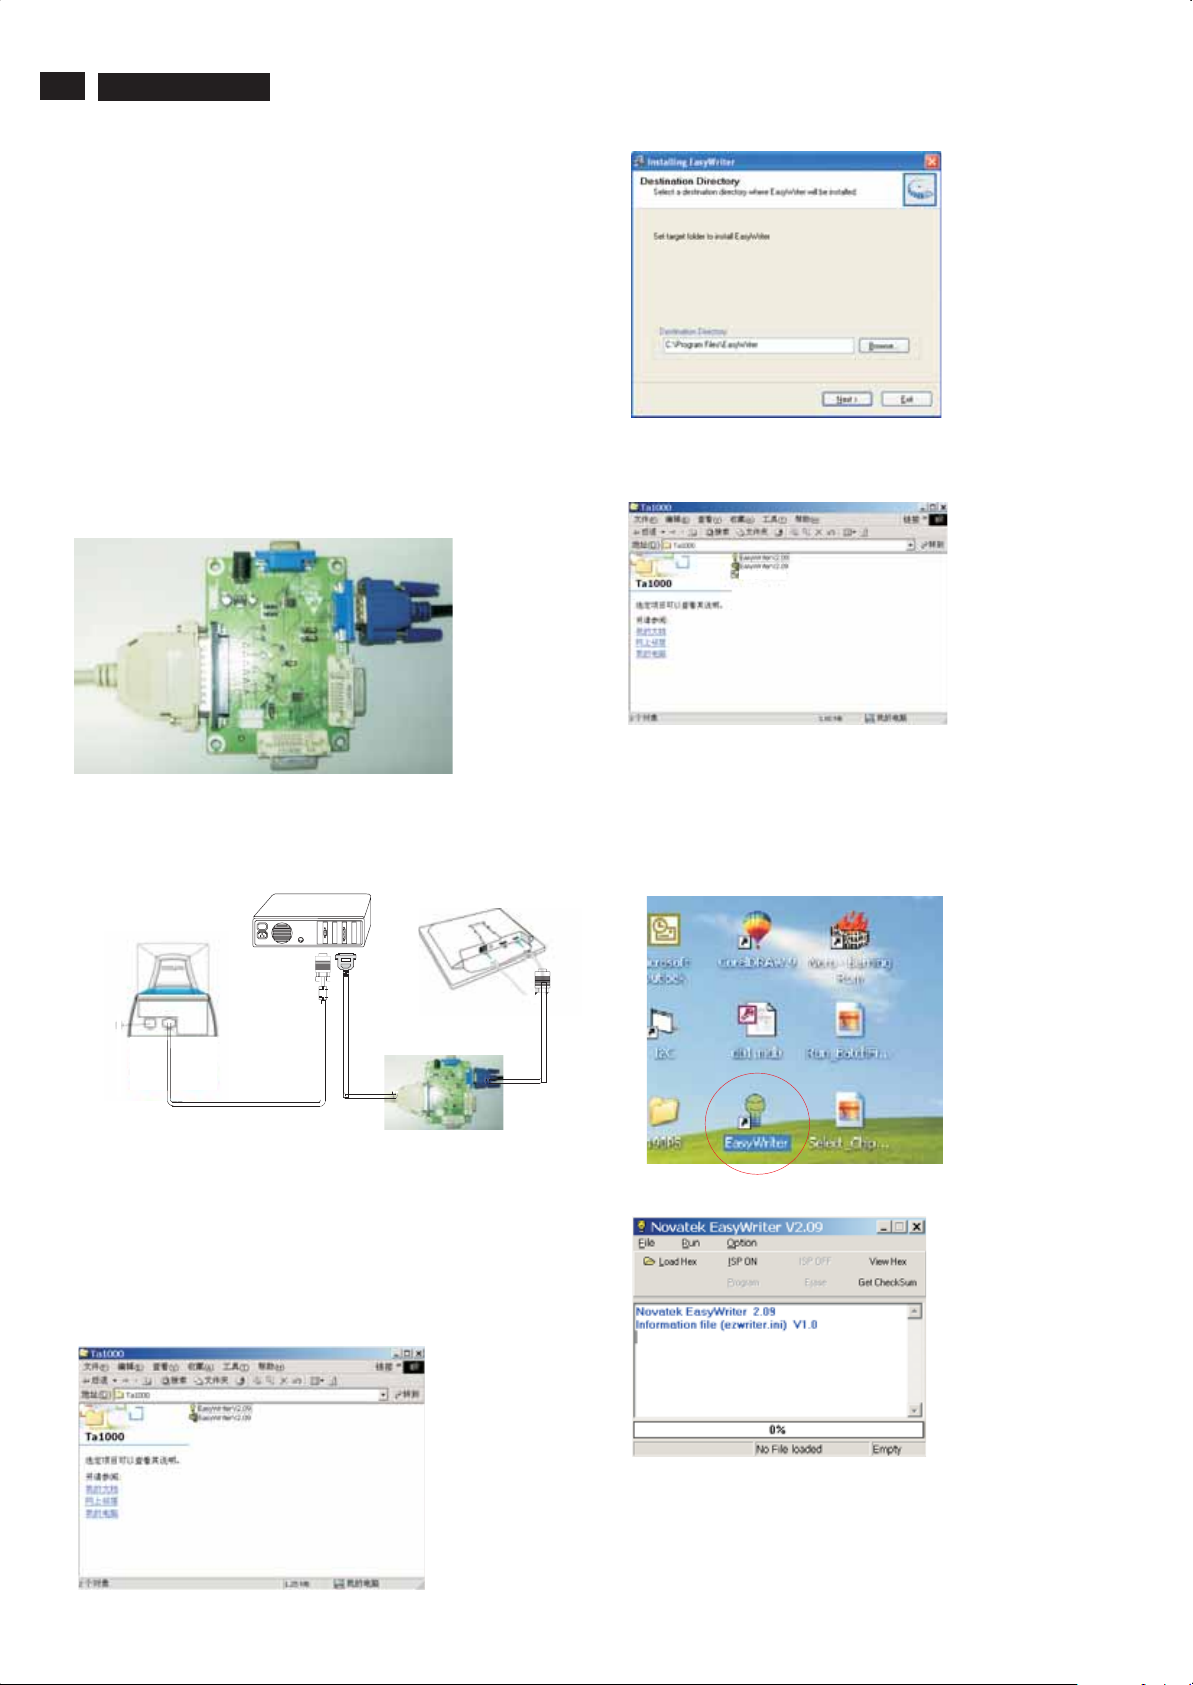
4. as shown in Fig. 1
DDC2BI_ISP TOOL (3138 106 10396)
D-SUB to monitor
Parallel Port to Print Port in PC
Fig. 1
5. Connect and Mains cord to Monitor as shown
in Fig. 2.
DDC2BI_ISP TOOL
Monitor (A)
PC
Ta1000 -Monitor (B)
D-Sub
Fig. 4
Step 5 :Copy the hex code to C:\Ta1000 as shown in Fig. 5 .
2oTA1000
Fig. 5
Update the firmware
1. Double click the Easywriter.exe icon in desktop then appears
window as shown in Fig.7 .
Connect to Mains
Connect to
Mains cord
Video cable
6. Install and setup the Easywriter program
Step 1 : Make a folder in your PC as shown in Fig. 3.
For example : C:\Ta1000
Step 2 : Copy ISP Software Easywriter into your folder
as shown in Fig.3.
Step 3 : Unzip Easywriter.zip into your folder as shown in Fig. 3.
Step 4 : Double click the EasywriterV2.09a_user.exe icon to install the
Application as Fig. 4.
To video card
Fig.2
.zip
cord at this moment.
ISP box
To printer port (LTP1)
------------------------------->
Fig. 3
Fig. 6
Fig. 7
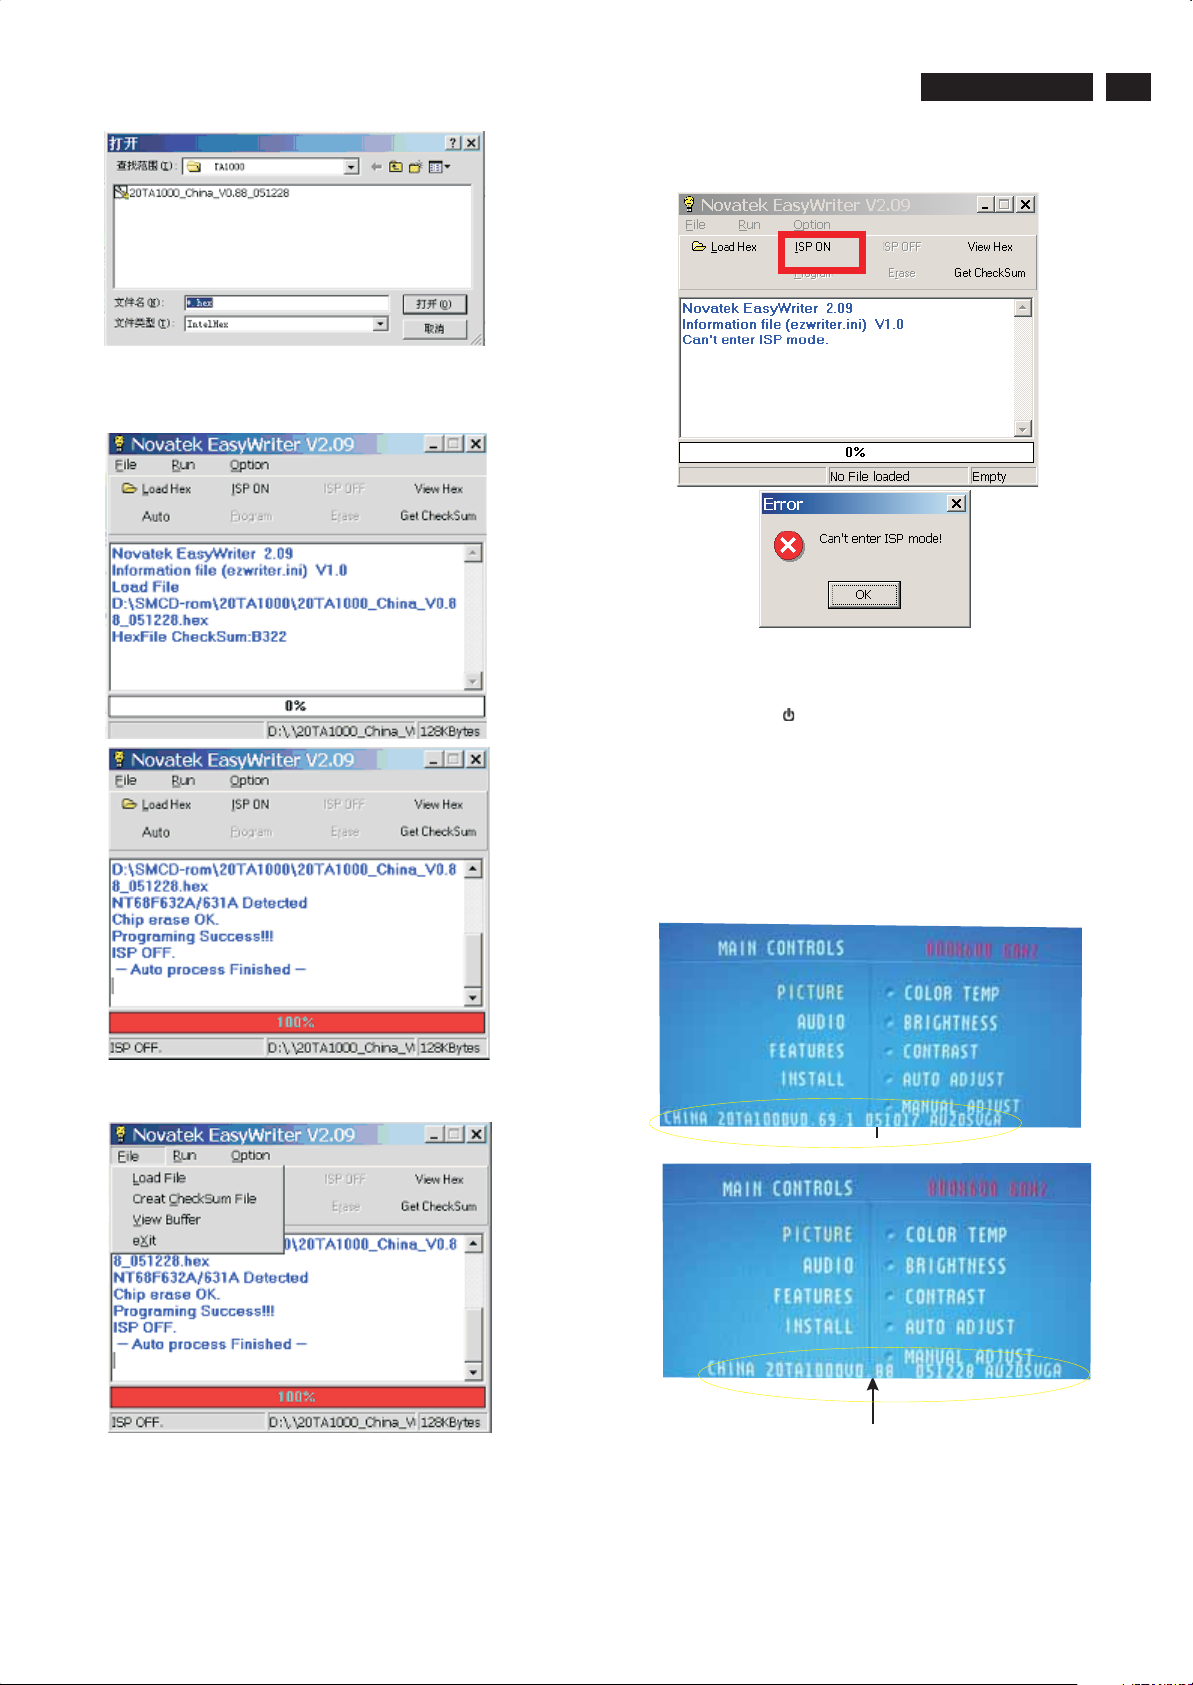
2. Press the Load hex then select the hex as shown in Fig. 8.
Page 2
8. Alignments
Fig. 8
3 Press the AUTO to running program , the firmware be updated
as shown in Fig. 9~10.
TPF1.3A LA
If there is a warring message coming as shown in Fig 12. , you
have to check the AC power, Video cable, or Novatek MCU.
Fig. 12
5 Check the firmware version
51
Fig. 9
Fig. 10
4 Press the file --> exit to end program , as shown in Fig. 11.
1). Turn off monitor.
2).
Press power " " button.Then quickly push " + " and " - "of
Volume ,and hold this two buttons , then the screen comes out
"Waiting For Automatic Adjustment ",then the screen will be black
for one second untill comes out "Windows screen"] => then
release this two buttons.
3). Press "MENU" button, wait until the OSD menu come on the
Screen of the monitor,You will find, after upgrade, the version
have already been changed as shown in
Fig. 13 and Fig. 14.
Fig. 13
Factory Mode indicator
Fig. 11
Fig. 14
Factory Mode indicator
4) Turn off the monitor, exit the factory mode.
 Loading...