

Philips TP2780C User Manual

O W N E R ’ s M Ar N U A L
COLOR
TELEVISION
OOOCmDOOOOOOOOOOOODOOO
ocoooooo
PHILIPS
IMPORTANT
Return Your VYarranty Registration Card
VYithin IO Days. See AA^hy Inside.
MAGNAVOX

Return your Warranty Registration card today to ensure you
receive all the benefits you’re entitled to.
Once your PHILIPS MAGNAVOXpurchase is registered, you're eligible to receive all the privileges of
owning a PHILIPS MAGNAVOX product So complete and return the Warranty Registration Card
enclosed with your purchase at once. And take advantage of these important benefits.
.Warranty i
Verification
Registering ymir product within
10 days con^tmsyour right to
mawnrium protection under the
terms and conditions of your ,
PHILIPS MAGNAVOX warranty..
. Owner 1
Confirmation
Your completed Wammiy
RegisMon Card serves as
verification of ovmeFship in tie
event of product theft or toss.
.Model I
Registration
Retiming your Warranty
Regis^ation Card right away guar
antees youli receive all the Infor
mation and ^cial offers whidi
you qualify for as the owner of your
model
Congratulations on your purchase,
and welcome to the “family!”
Dear PHILIPS MAGNAVOX product owner:
Thank you for your confidence in PHILIPS MAGNAVOX. You’ve selected one of the best-built, best-
backed products
available today. And we’il do everything in our power to keep you happy with your purchase for many
years to come.
As a member of the PHILIPS MAGNAVOX 'family,” you’re entitled to protection by one of the most
comprehensive warranties and outstanding service networks in the industry.
What’s more, your purchase guarantees you’ll receive all the information and special offers for which
you qualify, plus easy access to accessories from our convenient home shopping network.
And most importantly you can count on our uncompromising commitment to your total satisfaction.
All of this is our way of saying welcome-and thanks for investing in a PHILIPS MAGNAVOX product.
Sincerely,
PHILIPS
MAGNAVOX
Robert Minkhorst
President and Chief Executive Officer
Know these
saietv symbols
CAUTIOIU
RISK O P ELEC TRIC S HO CK
A
CAtffiOKTO REDUCST KE RIS K O f Е1 £Ш аС SHO CK . DO Ш Т
REMOV E C OV ER [OR SA DO. N0 US ERSER VlC EAStE РАШ
WSIDE, RE FER SERW tNC TO OttAU REO SERVICE PE RS ONNEL
DO NOT ОРЕМ 1
PHILIPS EHE 71^ Visit our World Wide Web Site at http://www.philipsmagnayox.com
A
RS. Remember, to get the most from your PHILIPS
MAGNAVOX product, you must return your
Warranty Registration Card within 10 days. So
please mail it to us right now!
A
This “bolt of lightning” indicates uninsulated materia! within your unit may cause an electrical
shock. For the safety of everyone in your household, please do not remove product covering.
The "exclamation poinf calls attention to features for which you should read the enclosed lit
erature closely to prevent operating and maintenance problems.
WARNING: TO PREVENT FIRE OR SHOCK HAZARD, DO NOT EXPOSE THIS EQUIPMENT
TO RAIN OR MOISTURE.
CAUTION; To prevent electric shock, match wide blade of plug to wide slot, and fully insert.
ATTENTION: Pour éviter les chocs électriques, introduire la lame la plus large de la fiche dans la
borne correspondante de la prise et poifêsetjusqu’au fond.
SAFETY INSTRUCTIONS - Read before operating equipment
Tliis product was designed and manufactured to meet strict quality and
safety standards. There are, however, some installation and operation
precautions which you should be particularly aware of.
Read Instructions - All the safety and operating instructions should
1
be read before the appliance is operated.
Retain Instructions - The safety and operating instructions should
be retained for future reference.
Heed Warnings - All warnings on the appliance and in the operating
instructions should be adhered to.
Follow Instructions - All operating and use instructions should be
4,
followed.
Water and Moisture * The appliance should not be used near water
- for example, near a bathtub, washbowl, kitchen sink, laundry tub,
in a wet basement or near a swimming pool. etc.
Carts and Stands - The appliance should be used only with a cart or
stand that is recommended by the manufacturer.
6A.
7.
Wall or Ceiling Mounting ■ The appliance should be mounted to a
wall or ceiling only as recommended by the manufacturer.
B.
Ventilation - The appliance should be situated so that its location or
position does not interfere with its proper ventilation. For example,
the appliance should not be situated on a bed, sofa, rug, or similar
surface that may block the ventilation openings; or, placed in a
built-in installation, such as a bookcase or cabinet that may impede
the flow of air through the ventilation openings.
9.
Heat - The appliance should be situated away from heat sources
such as radiators, heat registers, stoves, or other appliances
(including amplifiers) that produce heat.
10.
Power Sources - The appliance should be connected to a power
supply only of the type described in the operating instructions or as
marked on the appliance.
Power-Cord Proteclion - Power supply cords should be routed so
11.
that they are not likely to be walked on or pinched by items placed
upon or against them, paying particular attention to cords and
plugs, convenience receptacles, and the point where they exit from
the appliance.
An appliance and cart combination should be moved
with care. Quick stops, excessive force, and uneven
surfaces may cause the appliance and c^rt combination
to overturn.
12. Cleaning - TTie appliance should be cleaned only as recommended
by the manufacturer.
13. Power Lines - An outdoor antenna should be located away from
power lines.
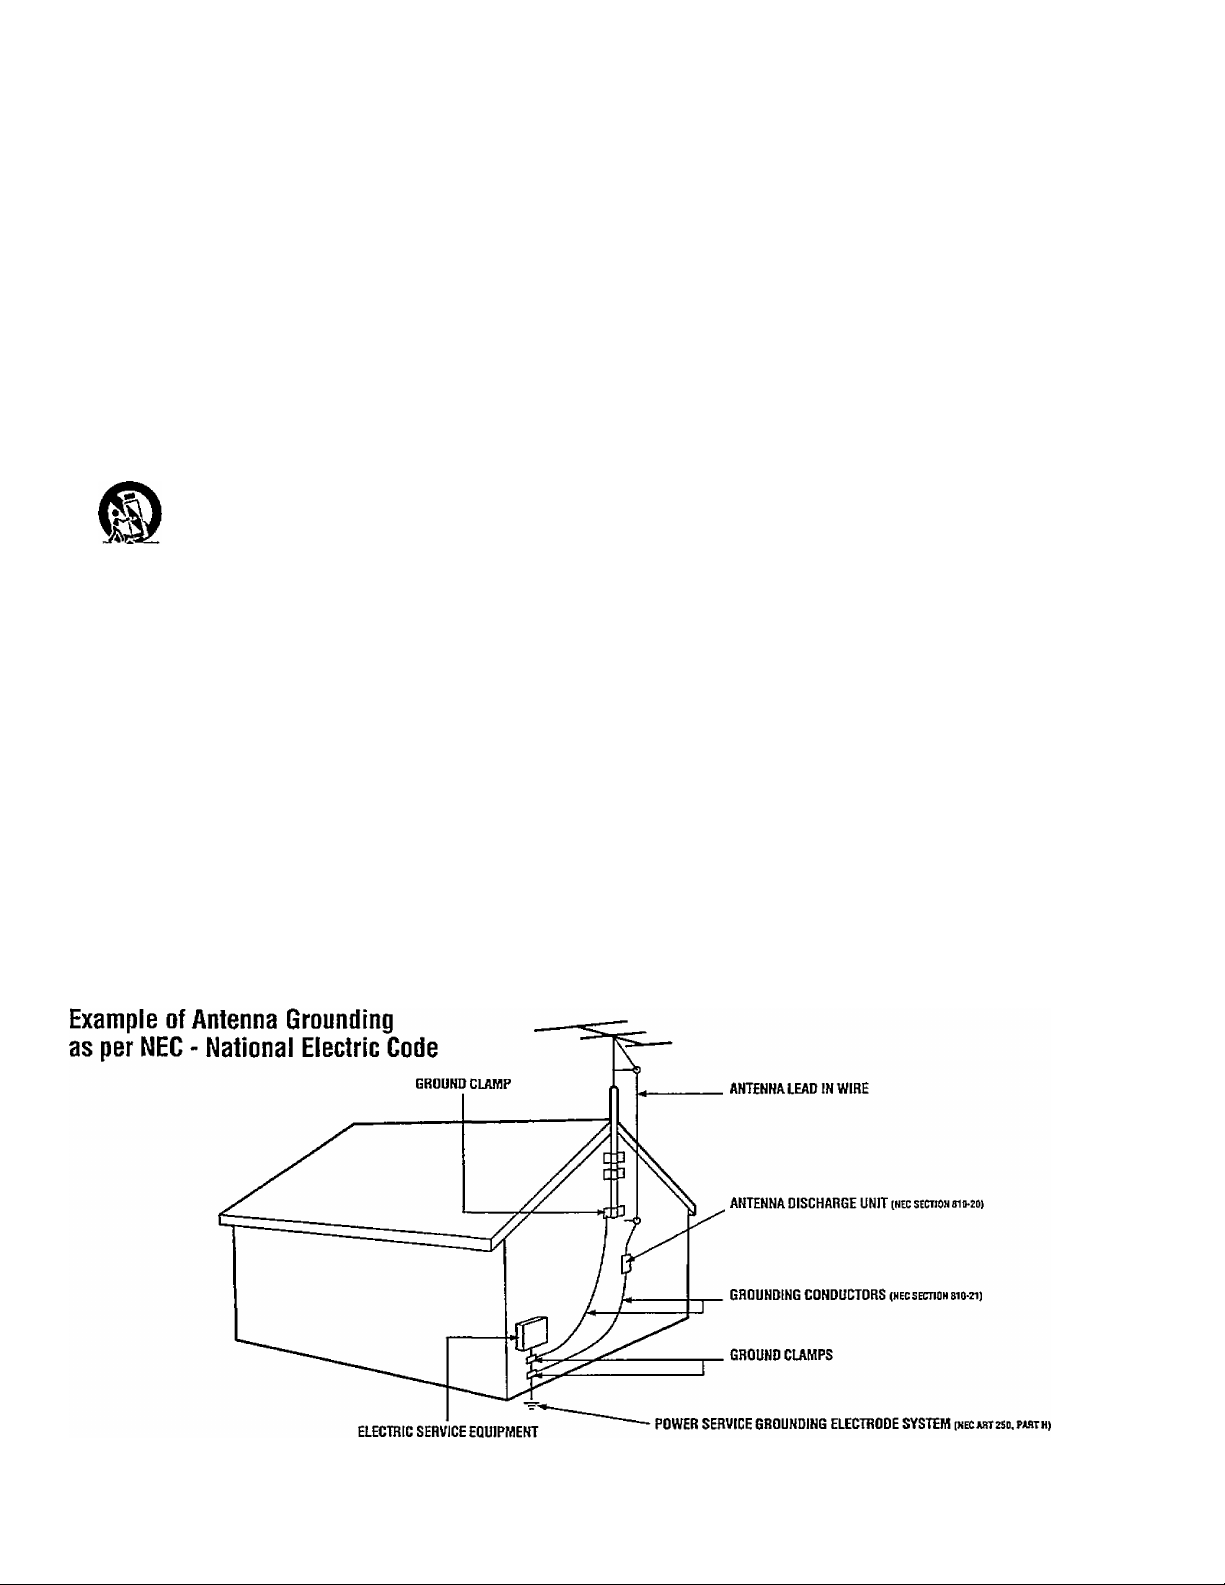
14. Outdoor Antenna Grounding - If an outside antenna is connected to
the receiver, be sure the antenna system is grounded so as to
provide some protection against voltage surges and built up static
charges.
Section 810 of the National Electric Code, ANSI/NFPA Mo. 70-1984,
provides information with respect to proper grounding of the mats
and supporting structure grounding of the lead-in wire to an
antenna discharge unit, size of grounding connectors, location of
antenna-discharge unit, connection to grounding electrodes and
requirements for the grounding electrode. See Fig. below.
15. Non-use Periods - The power cord of the appliance should be
unplugged from the outlet when left unused for a long period of
time.
16. Object and Liquid Entry - Care should be taken so that objects do
not fail and liquids are not spilled into the enclosure through
openings.
17. Damage Requiring Service - The appliance should be serviced by
qualified service personnel when:
A. The power supply cord or the plug has been damaged: or
B. Objects have fallen, or liquid has been spilled into the
appliance; or
C. The appliance has been exposed to rain; or
D. The appliance does not appear to operate normally or exhibits
a marked change in performance: or
E The appliance has been dropped, or the enclosure damaged.
18. Servicing - The user should not attempt to service the appliance
beyond that described in the operating instructions. All other
servicing should be referred to qualified service personnel.
Note to the CATV system installer: This reminder is provided to call the
CATV system installer's attention to Article 820-40 of the MEG that
provides guidelines for proper grounding and, in particular, specifies that
the cable ground shall bb connected to the grounding system of the
building, as close to the point of cable entry as practical.
EXAMPLE OF ANTENNA GROUNDING AS PER NATIONAL ELECTRICAL CODE (NEC)
MAC3964

Table of Contents
Introduction
Welcome/Registratìon of Your TV....................................2
Safety/Precautions
Table of Contents...............................................................4
Features..............................................................................4
............................................................
3
On-Screen (MENU) Features
□
4“ Adding Channels in Memory (Manually)
'v^How to Set the TV for Closed Captioning
❖ Setting the Bass, Treble and Balance
❖ Setting the TV for Stereo/SAP Programs
❖ Using the Incredible Stereo Feature
❖ Using the TV Volume Bar Control.............................11
❖ Setting the Surf/Smart Surf Control
❖ Adjusting the TV Picture
❖ Setting the TV Sleep Timer Control
❖ Adjusting the Set Clock Control
❖ Adjusting the Set Timer............................................16
❖ Setting the Timer ON/OFF
❖ Using the TV Channel Reminder
❖ Using the On-Screen Language Option..................18
❖ Using the Audio Out Jacks (with TV Speaker
On/Off Control).........................................................19
❖ Using the TV's AudioA^deo Input Jacks ,...20-21
-V" Setting the TV for Cable TV Operation .5
■4-Adding Channels in Memory (Automatically)...6
..................
................
........................
.................
.........................
.........................
..........................................
..........................
..............................
........................................
..............................
10
11
12
13
14
15
17
18
7
8
9
S Remote Control Operation
S Using the Smart Picture Control
Using the Smart Sound Control
Setting the TV Remote to Work VCRs
Setting the TV Remote to Work
Cable TV Converters
Setting the TV Remote to Work VCRs or Cable
Converters - Search Me±od
Using the Remote's VCR Buttons
..................................................
............................................
..............................
.......................
......................
..................................
24-25
26-27
22
23
28
29
Picture-in-Picture fPIP)
□
Using PIP with the TV Remote........................................32
Selecting the PIP Picture Source
More PIP Connections (Cable Converter)
Using the PIP Feature (Connections)....30-31
...................................
.....................
33
34
llUll General Information
Tips if Something Isn’t Working
Glossary of TV Terms......................................................36
Index..................................................................................37
Factory Service Locations
Warranty............................................................................40
.........................................
......................
38-39
35
NOTE: This owner’s manual is used with sev
eral different television models. Not all fea
tures (and drawings) discussed in this manual
will necessarily match those found with your
television set. This is normal and does not
require you contacting your dealer or request
ing service.
Set-up AND Quick Use Guide
Use the simple Set-Up Guide (supplied with
your TV information packet) for details on:
• Antenna Hook-ups
• First Time Set-Up
(Automatic Settings)
=
---
• Basic TV and Remote
1
Control Operation
• On-Screen Menu Use
Featüres
Infrared Remote Control works your TV set and a
variety of wireless remote control VCRs and Cable
Converters.
Standard broadcast (VHF/ÜHF) or Cable TV
(CATV) channel capability.
Stereo Ready TV with built-in audio amplifier and
twin speaker system for receiving TV programs
broadcast in stereo sound.
Closed Captioning allows the viewer to read TV
program dialogue or voice conversations as on
screen text.
Automatic Programming of Channels for quick
and easy selection of favorite stations available in
your area.
On-Screen Features (in either English, French, or
Spanish) show helpful messages for setting of TV
controls.
AudioAfideo Jackpanel for direct connections with
VCRs (or other video accessories) providing quality
TV picture and sound playback.
Smart Button for the control of TV Sound and
Picture levels. Use the Smart Button on the remote to
quickly adjust Smart Sound (to keep volume levels
consistent during program changes or commercial
breaks); Smart Picture (for automatic picture adjust
ments on a variety of program sources); and Smart
Surf (for quick one button channel selection of up to
10 of your favorite channels).
Sleep-Timer automatically turns the TV OFF at pre
set times.
Clock Timer feature can turn ON the TV at any pre
set tíme - just like an alarm clock.
Picture-in-Picture (PIP) feature allows the user to
watch two channels at one time. It also allows the
Copyright © 1997 Philips Consumer Electronics Company. All rights reserved.
4
user to swap the main viewed channel with the PIP
picture. Please note that an external tuner (such as a
VCR) is necessary for the proper operation of PIP.

How TO Set the TV for Cable TV Operation
TkJOTE: If you went through
1 T Setup (in your Quick Use
Guide), this task has already been
completed for you.
You need to make sure that the TV
is set to pick up either Cable TV
stations or Antenna signals. In
other words, the TV needs to
know whether you have connected
a Cable TV signal or a normal
antenna to its ANTENNA plug.
Cbegin)
<t>
Press the MENU (M) button
on the remote, then press the
MENU A or T buttons to select
the word CABLE with the TV’s
on-screen arrow.
STEREO
Sir
SGUtiDUiASE
SPSAKEH
iiiPUr
DCABLE
□
YES 1
<i>
Press the (+) button (on the
TV or the remote) to select either:
YES- If you m have Cable TV
connected to the TV.
Channels 1-125 can be
selected.
NO- If you have an Antenna
connected to the TV.
Channels 2-69 can be
selected.
Press STATUS to clear the
screen.
1/ Smart Help
Try it out. Press
m CHANNEL AT buttons
and scan the channels.
Remember, the TV has been set at
the factory to select certain chan
nel numbers. See the following
page on how to set the TV to
select the channels in your area.
□
TkTOTE: If you went through
L \ Setup (in your Quick Use
Guide), this task has already been
completed for you.
Your TV can automatically set
itself for local area (or Cable TV)
channels. This makes it easy for
you to select only the TV stations
in your area when the CH(annel)
AT buttons are pressed.
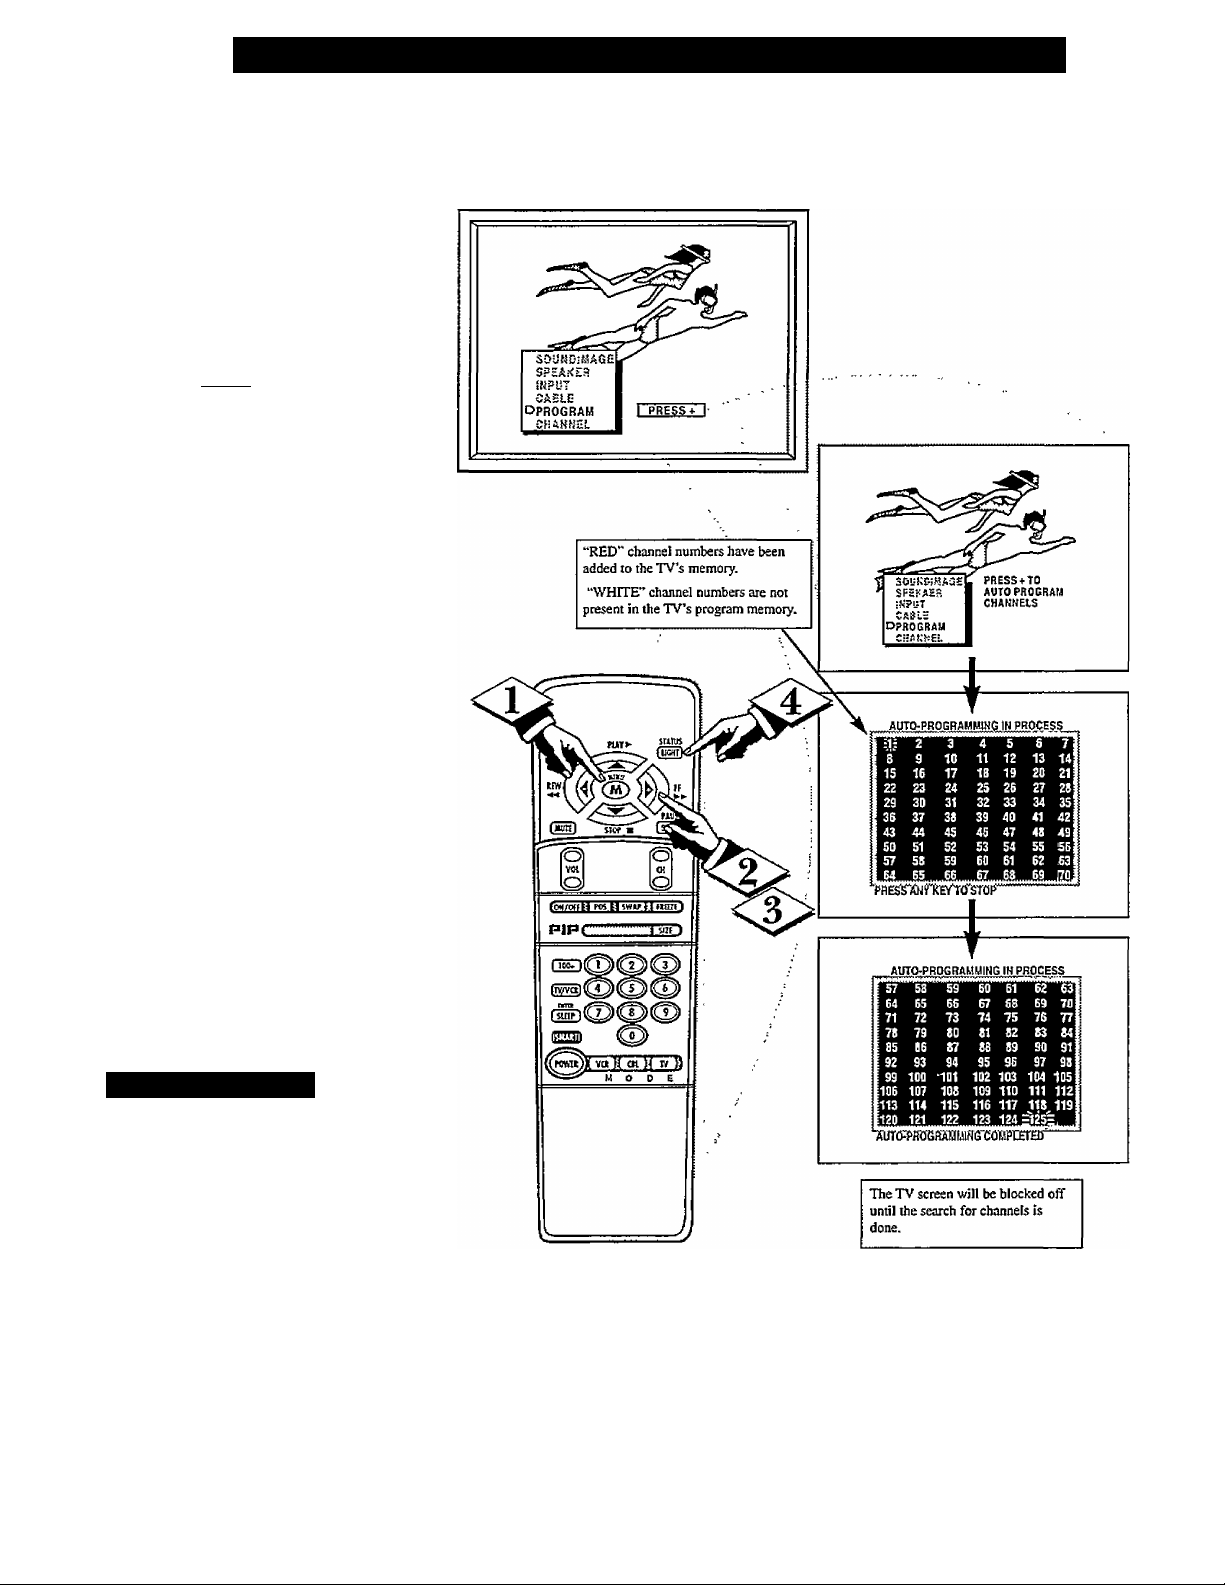
Adding Channels in Memory (Auto Programming)
Cbecin)
<t>
<l>
Press the MENU (M) button
on the remote, then press the
MENU A or T buttons to select
the word PROGRAM with the
TV’s on-screen arrow.
Press the (+) button (on the
TV or the remote) to PROGRAM.
Press the (+) button again to
start the TV search for area chan
nels.
Flashing channel numbers will
count upward on the screen as the
TV looks for channels to "ADD".
Press any button (on the TV or
remote) to stop the channel search
at any time. When the channel
search is completed the TV will
return to the last viewed channel.
Press STATUS button to clear
the screen.
\ ‘ / Smart Help
Try it out. Press CliAN-
~ NEL AT buttons and see
which channels have been added.
Remember, if you want to drop any
unwanted channels from the TV's
memory, see the next page on how
to "Manually'' add and delete chan
nels.
Note: As the TV searches for chan
nels to "ADD" into memory the on
screen display may move (or jitter
slightly). This is normal operation
and does not indicate a need for ser
vice.

uto Programming (see previous
page) adds all the channels it
A
can find (on your Antenna or Cable
TV system) into the TYs memory.
Add/Delete Channels makes it easy
for you to add other channels, or
drop unwanted channels, from the
list of channels in the TV's memory.
[BEGIN]
Press the MENÜ (M) button
on the remote, then press the
MENU A or T buttons to select
the word CHANNEL with the
TV’s on-screen arrow.
Press the CHANNEL A or T
<i>
buttons (or Channel Number but
tons on the remote) to select the
channel you want to SAVE (or
DELETE.)
Press the (+) button to SAVE
the selected channel number into
memory.
Press the (-) button to DELETE
a channel from memory.
Adding Channels in Memory (Manually)
Press the STATUS button to
<l>
clear the screen after adding all
the channels you want.
s I / Smart Help
Try it out. Press the
^CHANNELAT buttons.
The channels you SAVED should
appear. The channels you
DELETED should not appear.
Remember, you can also add the
VCR/AUX mode (see page 20)
into the TV’s channel memory.
Then by pressing the CH A T
buttons you can quickly select the
AudioA^ideo Input jacks on the
rear of the TV. Just “SAVE” the
VCR/AUX mode (located between
the lowest and highest channel
numbers) into the TV’s memory.
□
losed Captioning allows you to
read the voice content of televi
C
sion programs on the TV screen.
Designed to help the hearing
impaired this feature uses on-screen
"text boxes" to show dialogue and
conversations while the TV pro
gram is in progress.
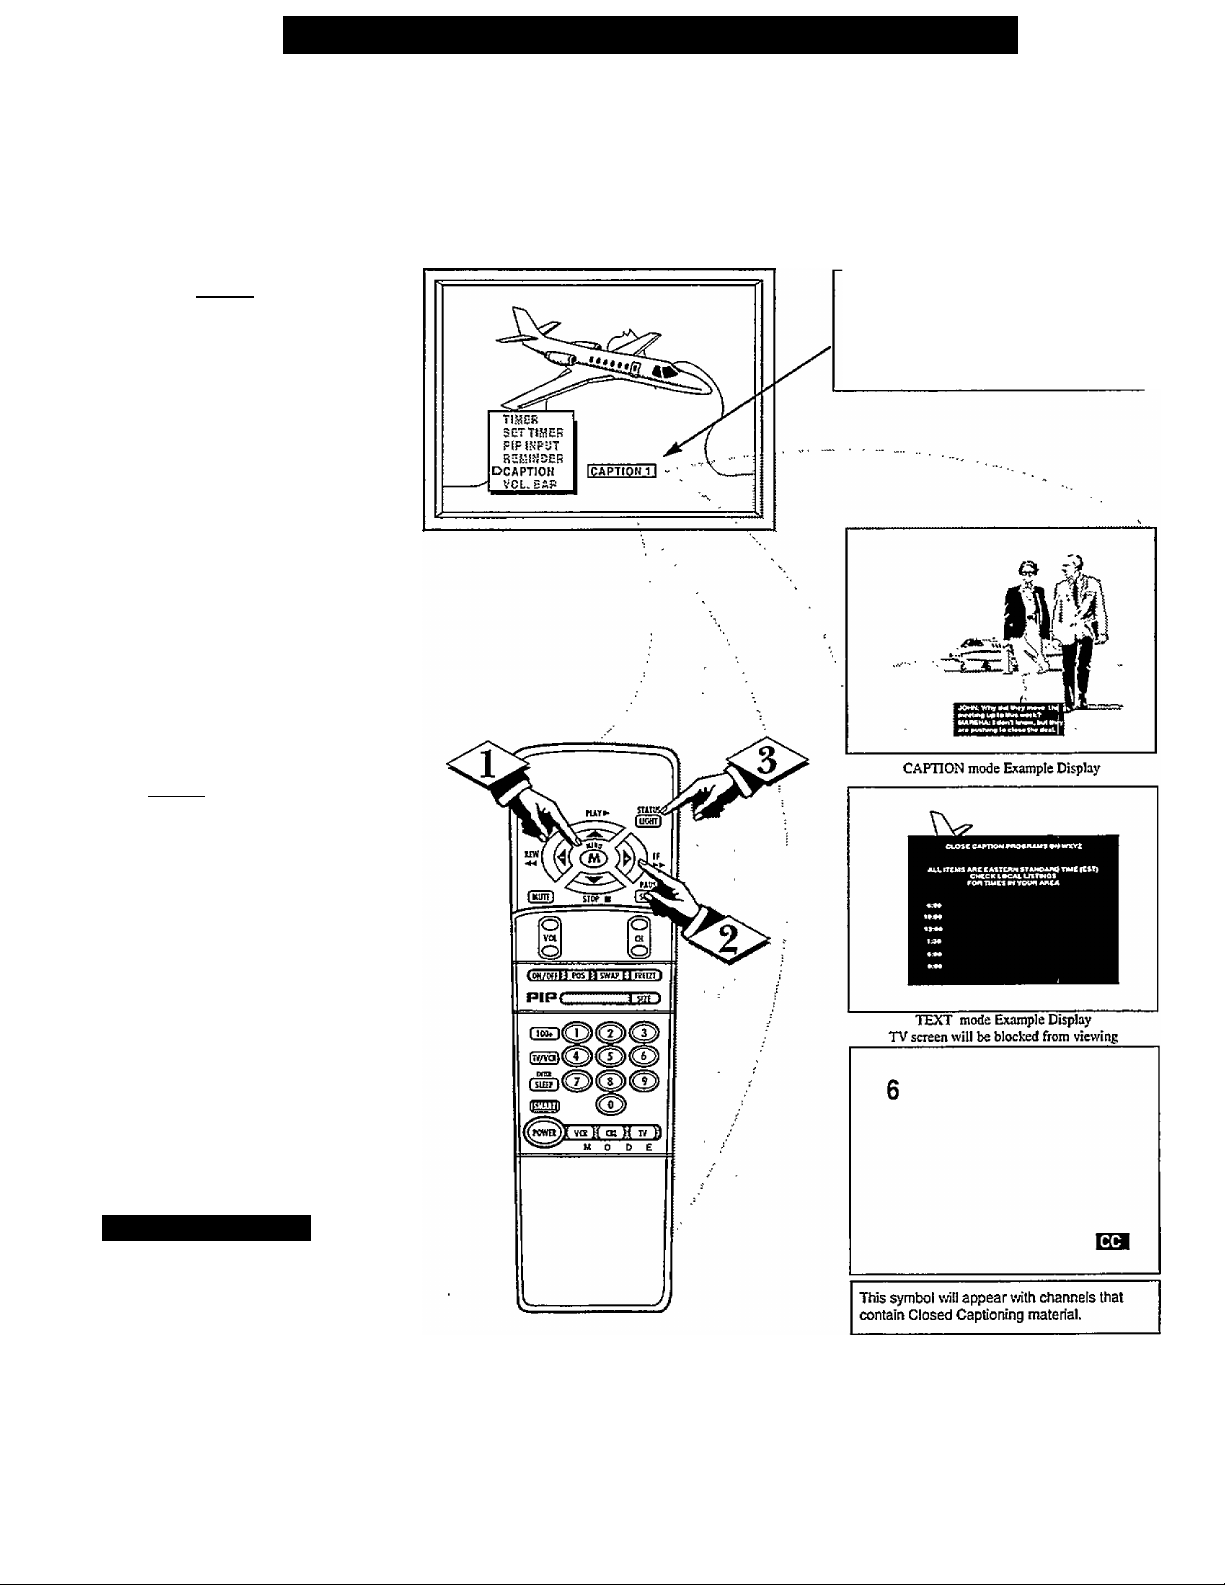
[ BEGIN]
Press the MENU (M) button
on the remote, then press the
MENU A or T to select the word
CAPTION with the TV’s on-screen
arrow.
Press the (+) button to select
<l>
the desired Closed Caption (CC)
mode - For Example: CAPTION 1.
CAPTION 1,2, 3, or 4 mode:
dialogue (and descriptions)
for the action on the captioned
TV program shows on-screen.
(See important note on this
page.)
TEXT 1,2, 3, or 4 mode:
often used for channel guide,
schedules, or bulletin board
information for CC programs.
Note: Usually “CAPTION” 1 is the
most used mode to view captioned
material.
How TO Select the Closed Caption Feature
NOTE: Not all TV programs and product commercials are made for broadcast
with Closed Caption (CC) information included. Neither are all Closed Caption
modes (CAPTION 1-4, or TEXT 1-4)) necessarily being used by a broadcast sta
tion during the transmission of a closed caption program. Refer to your area’s TV
program listings for the stations and times of Closed Caption shows.
NOTE: The “CCl WAIUTE” selling automati
cally switches the TV to the Closed Caption 1
mode whenever the MUTE button (on the remote
control) is pressed. The Closed Caption 1 mode
will mm OFF when the TV sound is returned or
un muted.
Press the STATUS button after
making your Caption mode selec
tion.
The TV display will clear and
Captioning material (if available
on the currently selected TV pro
gram) will appear on the TV
screen.
To cancel, set the CAPTION fea
ture to OFF when finished viewing.
N ' / Smart Help
Remember, broadcast sta-
M tions will often use spelling
abbreviations, symbols,
dropouts and other grammatical
shortcuts in order to keep pace with
the on-screen action. These type
factors vary upon the source of the
captioned text material and do not
indicate a need for service on the
part of the TV.
L
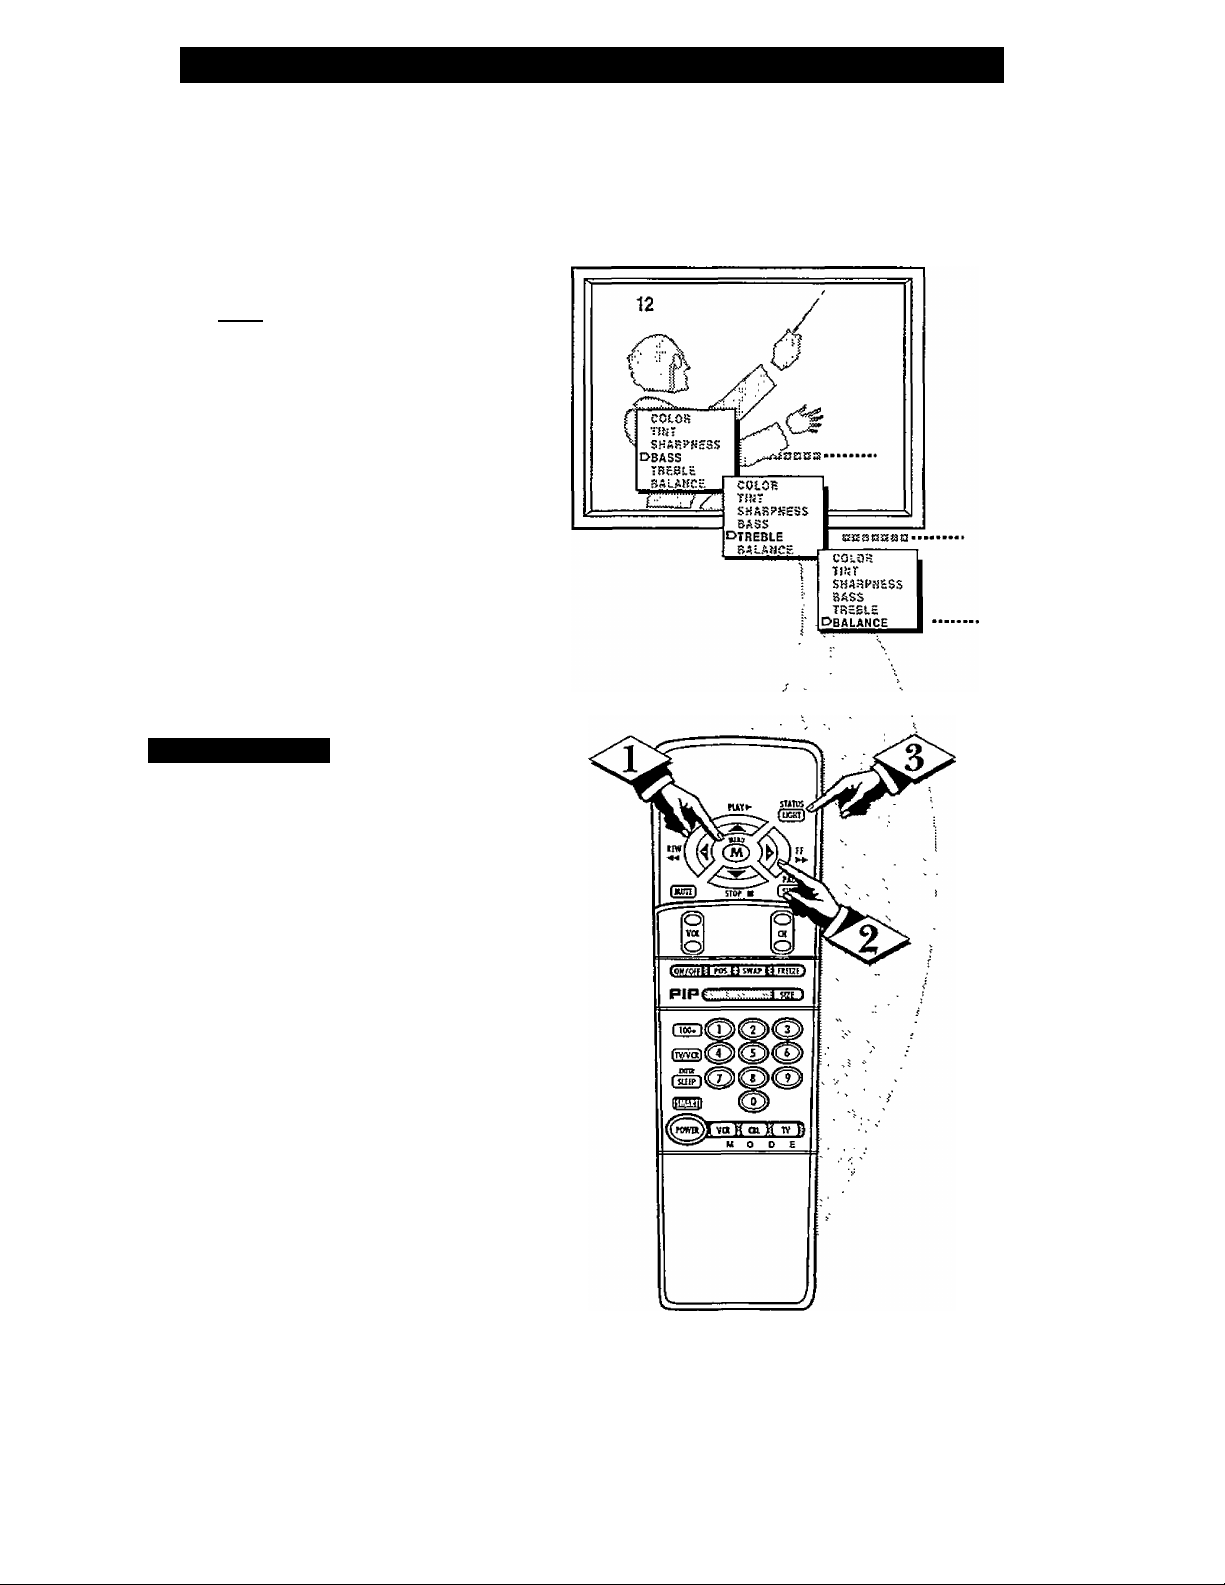
Using Bass, Treble, and Balance Sound Controls
T^esides the normal volume level
jL} controls, your TV also has
individual sound adjustment con
trols. The BASS (low frequency),
TREBLE (high frequency), and
Speaker BALANCE may all be
used to adjust the sound playback
of TV programs.
(begin]
Press the MENU (M) button
on the remote, then press the
MENU A or ▼ buttons to select
the word BASS, TREBLE or
BALANCE with the TV’s on
screen arrow.
Press the (+) or (-) buttons to
adjust the selected sound control
to levels you prefer.
Press the STATUS button to
clear the screen when finished.
□
I / Smart Help
Remember, when the
^ bar scale is centered.
Speaker BALANCE is centered
between the TV’s Left and Right
side speakers.
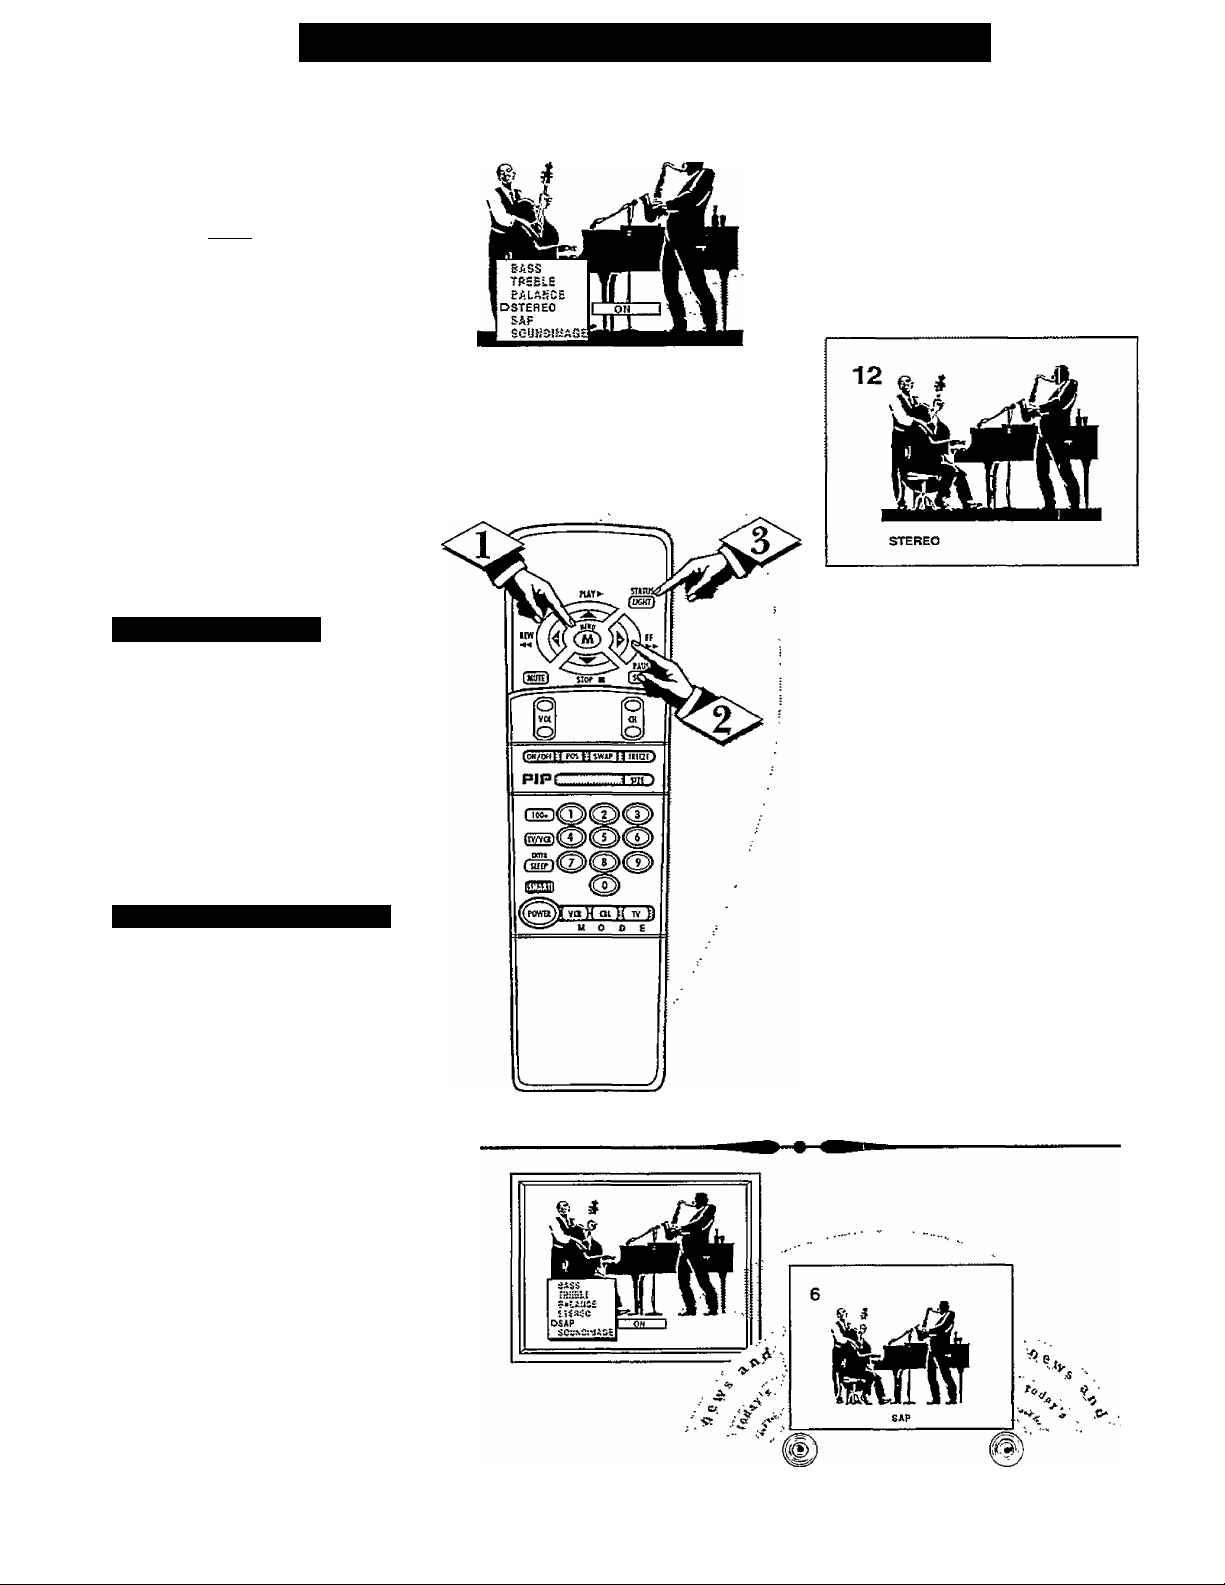
□
TV can receive broadcast
J. stereo TV programs. The TV
has both an amplifier and twin
speakers through which the stereo
sound can be heard.
[begin]
Press the MENU (M) button
<i>
on the remote, then press the
MENU A or T buttons to select
the word STEREO with the TV’s
on-screen arrow.
Press the (+) button to turn the
<l>
STEREO MODE ON.
r
Press STATUS to clear the
screen.
How TO Set the TV for Stereo Programs
\ * / Smart Help
Remember, if stereo is
^ not present on a selected
show and the TV is placed in
the STEREO mode, the sound
coming from the set will remain
monaural (mono.)
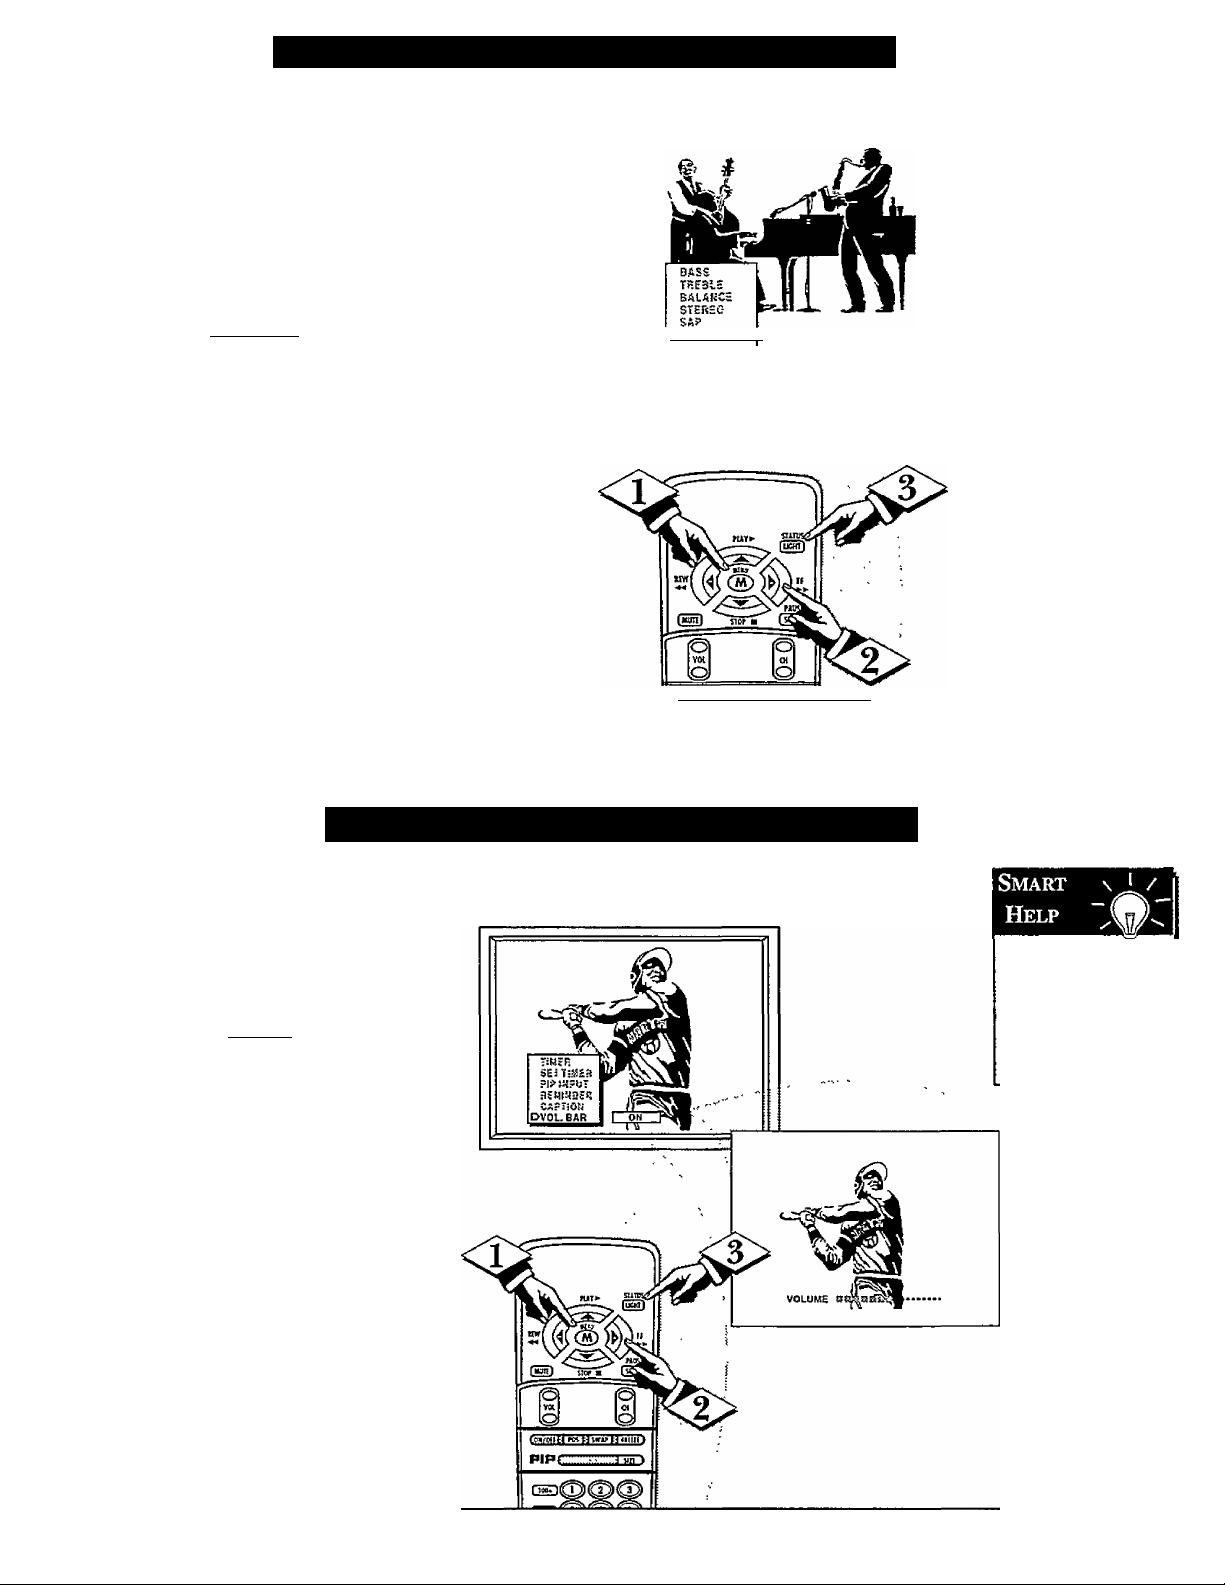
Second Audio Program (SAP)
SAP is an additional part of the
stereo broadcast system. Sent as a
third audio channel SAP can be
heard apart from the current TV
program sound. TV stations are
free to use SAP for any number
of purposes, but many experts
believe it will be used for foreign
language translations of TV
shows (or for weather and news
bulletins.)
If a SAP signal is not present
with a selected program, the SAP
option cannot be selected. Also, if
SAP is selected on a channel
(with SAP) and you select anoth
er channel, when you return to
the original channel SAP will be
OFF (and you will have to rese
lect the SAP feature.)
10
Using the Incredible Stereo Feature
^he Incredible Stereo feature
can be turned ON by using the
Z
Sound Image control. Sound Image
adds greater depth and dimension
to both monaural (MONO) and
stereo TV sound. With the control
turned ON the TV's speakers can
add even wider sound separation
to normal broadcasts.
( BEGlIMj
Press the MENU (M) button
4>
on the remote, then press the
MENU A or T buttons to select
the word SOUND IMAGE with
the TV’s on-screen arrow.
Press the (+) button to turn the
SOUND IMAGE control ON.
<|> Press STATUS button to clear
the screen.
o
DSDUNPIHASEII
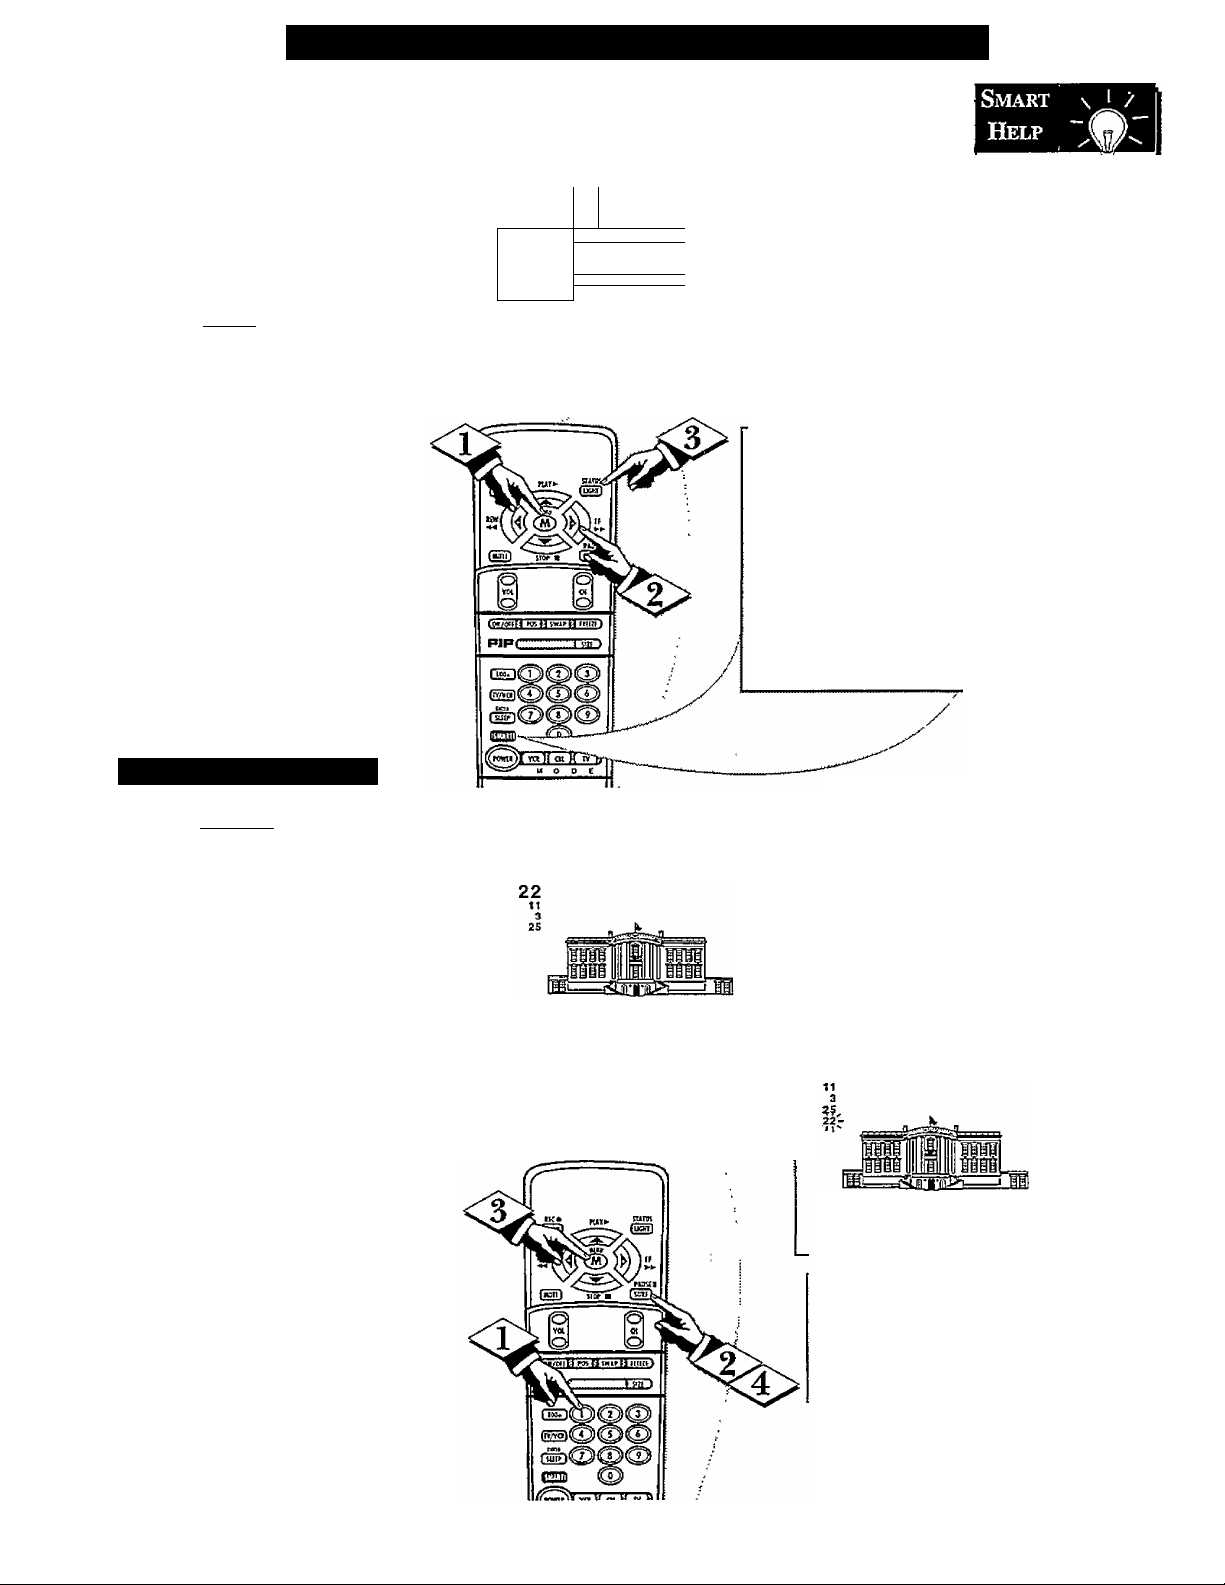
7" Tse the Volume Bar control to see
LJ the TV’s volume level settings
on the TV screen. Once set the
Volume Bar will be seen each time
the VOLUME buttons (on the TV or
remote) are pressed.
[begin)
Press the MENU (M) button on
the remote, then press the MENU A
or T buttons to select the words
VOL. BAR with the TV’s on-screen
Arrow.
Press the (+) button to turn the
^^OL BAR control ON.
Press STATUS button to clear
the screen.
[on/orf^:( KK u tw H ntimi
Using the TV Volume Bar Control
Try it out. B
Press the VOL AT
buttons. The VOL
UME BAR should
appear at the bottom
of the screen.
11
Setting the Surf and Smart Surf Control
-list” or series of previously
viewed channels can be selected
A
with the SURF button on your
remote control. With this feature you
can easily switch between different
TV programs that currently interest
you. The Smart Sutf control allows
you to set up to 10 channels in its
quick viewing “list".
CbeginJ
Press the MENU (M) button on
<X>
the remote, then press the MENU A
or T buttons to select the word
SURF with the TV’s on-screen arrow
(or press the SMART button on the
remote).
Press the (+) button to select
<P
either 2-Channel Surf or Smart Surf.
See explanation of Surf options with
the illustration on this page.
<|> Press STATUS button to clear
the screen.
How To Use Smart Surf
CBECIWJ
With the Smart Surf control
ON (see above), select a desired
channel for viewing. You can use the
number buttons on the remote (or the
Channel A or T buttons).
CARLE
-ROttRAM
CftA!(2JiL
DSURF
SLEEP
1M__
1 2CH 1
----------
1 HHI
2 CHANNELSURFCurrent md one previ
ous chaiijid.
SMARTSURFCurrent and up lo nine
additional channels
available. Note: the
Channel Surf can be
used with fewer than
ten channels. In this
way the number of
Surf channels can
match or fit your pre
sent viewing interests.
Below is the on-sereen menu that
will appear when the SMART but
ton on the remote is pressed. Then,
by using the MENU A. or T, and
the + or - buttons, adjustments can
be made to the SURF control.
SMART
PiCTUBE
SOUND
OSURF
To Use 2- n
Channel Surf:
With the 2-Channel
Surf control ON,
select the two
desired channels for
viewing with the
number buttons on
the remote control.
Press the SURF
button on the
remote to "toggle”
between the two
selected channels.
When using Smart
Surf:
A “SURF MENU
TABLE FULL"
message will appear
on-screen when the
maximum of 10
channels has been
added to the Smart
Surf list.
Press the SURF button on the
remote. (Some channel numbers may
already appear within the Surf chan
nel list.)
Press the Menu button to
ADD" the selected channel to the
Surf list.
Select the next desired channel and
repeat steps 2 and 3. Continue until
all desired channels are on the Surf
list.
Press the SURF button on the
<$>
remote to quickly review current
action on channels contained within
the Surf list.
PRESS MEHUT O A DO
PRESS UE KUTO DEL ETE
Note: To Delete a channel from the
Surf list just press the SURF button to
select the dedred channel. Then press
the MENU button and the channel will
be immediately dropped from the onsereen Surf list.
12
 Loading...