

Page 1

Combiné supplémentaire Onis 200
1
Garantie
Cher Client,
Merci d’avoir fait l’acquisition de ce matériel PHILIPS. Celui-ci a été fabriqué avec le plus grand soin pour vous donner toute
satisfaction. Si malgré nos efforts vous rencontriez des difficultés avec ce matériel, votre revendeur, après duquel vous en avez
fait l’acquisition prendra la responsabilité de la garantie. Pour le cas où vous auriez besoin de faire appel à un service
après-vente dans un pays étranger, la Garantie Internationale PHILIPS viendra compléter les engagements de garantie souscrits
à votre égard par votre revendeur, et cela pendant 12 mois à compter de la date de votre achat, pour vous faire bénéficier
d’une réparation gratuite, pièces et main-d’oeuvre.
Le bénéfice de la Garantie Internationale PHILIPS suppose que le matériel ait été utilisé conformément à son mode d’emploi et
à sa destination et vous sera accordé sur présentation du ticket de caisse ou de la facture d’achat indiquant la date de l’achat, le
nom du revendeur, le modèle et le numéro de série du produit.
Aucune garantie ne sera due dans les cas suivants :
●
Modification ou altération des documents cités ci-dessus,
●
Modèle et/ou numéro de série du produit rendus non identifiables,
●
Interventions sur le produit effectuées par une personne non autorisée,
●
Dommages, provoqués par une cause extérieure à l’appareil et notamment par foudre, incendie, dégâts des eaux ou négligence.
Il est rappelé que la modification ou adaptation du produit pour le mettre en adéquation avec des normes d’émission/réception
ou de raccordement au réseau local différentes de celles en vigueur dans le pays pour lequel il a été conçu,fabriqué et/ou
agréé, n’est pas du ressort de la garantie. En conséquence, il est recommandé de vérifier la destination géographique du
matériel lors de l’achat.
Cette garantie n’affecte pas les droits dont vous disposez le cas échéant en tant que consommateur, en vertu de la législation
en vigueur dans votre pays.
En cas de dysfonctionnement de votre produit PHILIPS,vous devez vous adresser à votre revendeur.
Dans l’éventualité où cette nécessité de faire appel à un service après-vente se produirait à l’étranger, dans un pays où votre
revendeur n’est ni présent, ni représenté, contactez le Service Consommateur PHILIPS : celui-ci indiquera les coordonnées d’un
point de service après-vente.
Plus généralement, en cas de problème avec votre matériel PHILIPS, nous vous recommandons d’étudier attentivement la notice
d’emploi avant de contacter votre revendeur. Si des questions subsistent auxquelles ce dernier ne peut répondre, écrivez ou
appelez :
SERVICE CONSOMMATEURS PHILIPS
BP 01 01
FR-75622 PARIS Cedex 13
Tél.: 0825 300 505
http://www.philips.fr
Français
1Fr onis suppl 19/07/01 11:21 Page 1
Page 2

Combiné supplémentaire Onis 200
2
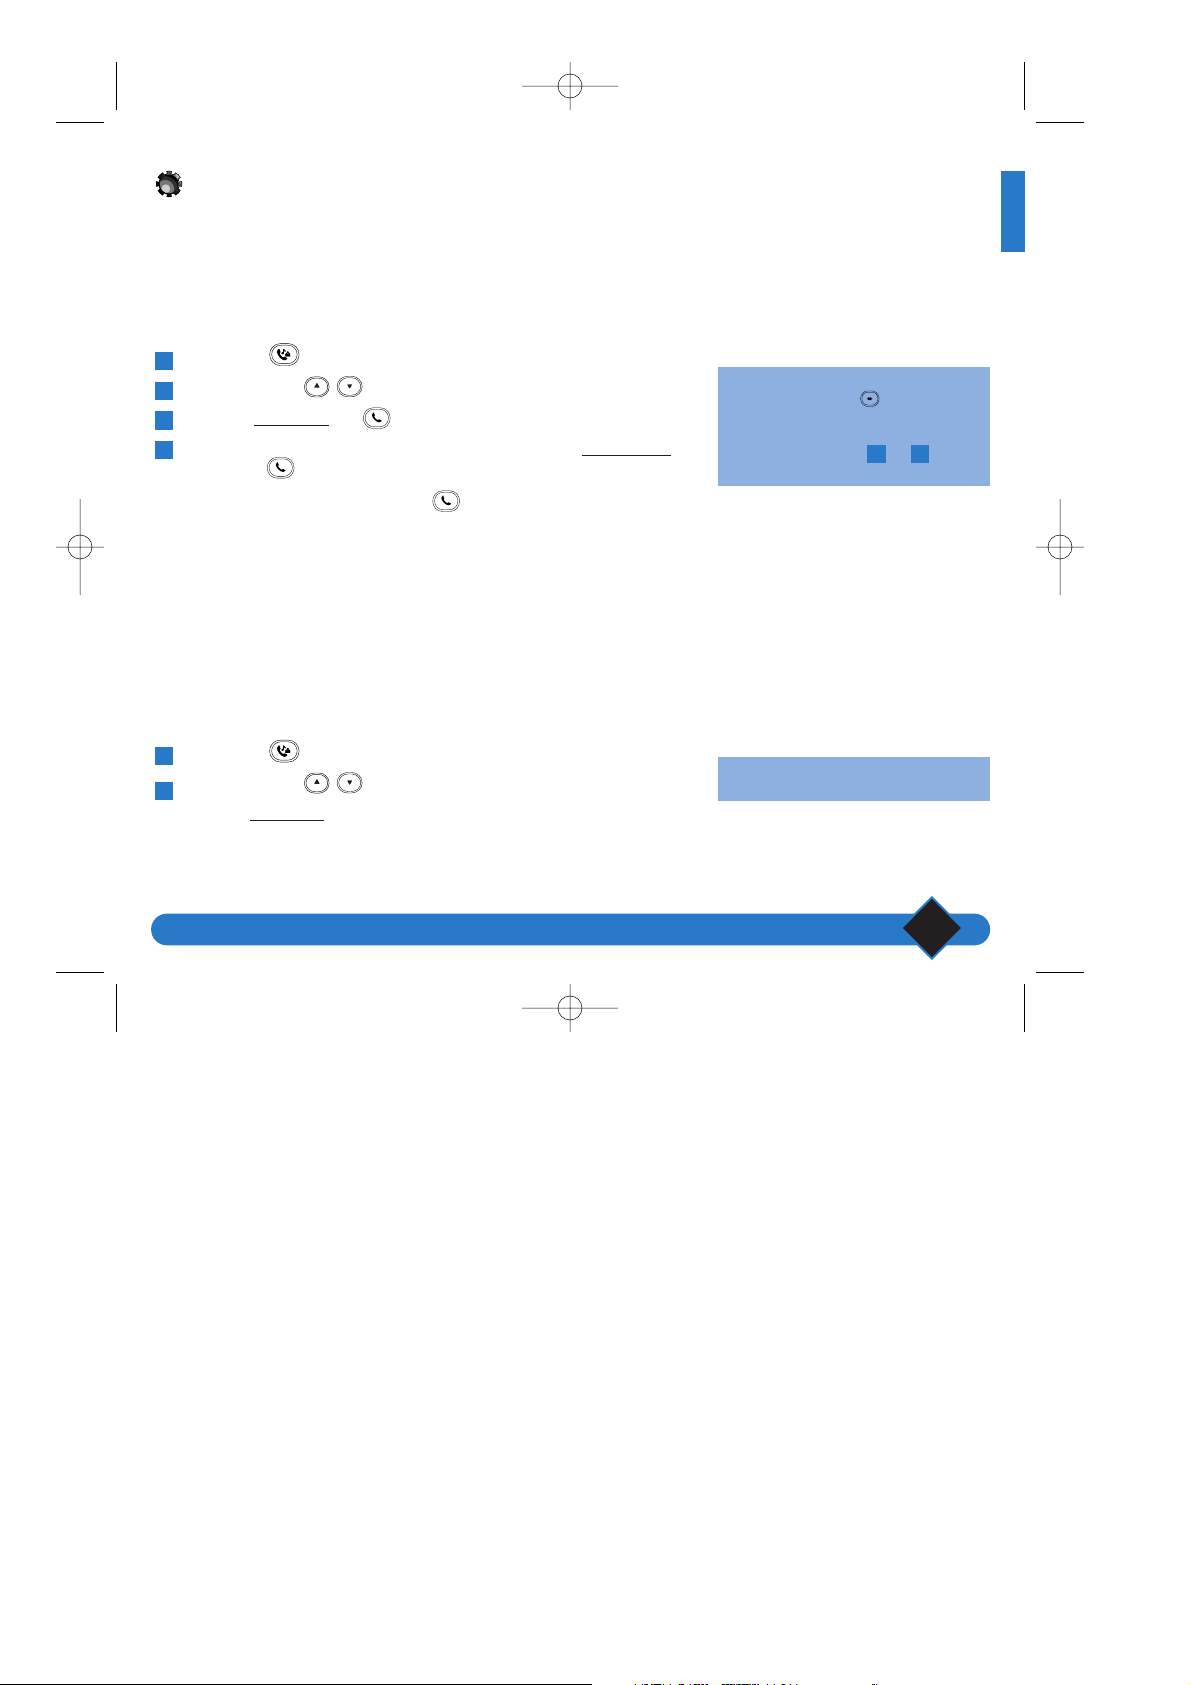
Présentation
Prise de ligne
Interphonie
Microphone
Haut-parleur
Touches de
sélection des
fonctions
Correction et “R”
Volume
PICTOGRAMMES DE L’ÉCRAN :
Etat de charge de la batterie
Répondeur activé
Indication de message sur le répondeur ou sur le Top Message
Appel interne en cours
Sonnerie combiné coupée
Haut-parleur activé
Identification appelant activée
Liaison base/combiné correcte
Touche de navigation
dans le menu
Préfixe
Opérateur
Français
1Fr onis suppl 19/07/01 11:21 Page 2
Page 3

Combiné supplémentaire Onis 200
3
Conseils et sécurité
Ce COMBINÉ supplémentaire, commun aux modèles Onis 200 et Onis 200 Vox, vient compléter votre installation et vous
permet de disposer de façon permanente d’un téléphone sans fil dans les pièces non équipées d’une prise téléphonique.
Vous pouvez utiliser jusqu’à 8 COMBINÉS sur chacun des modèles Onis 200 et Onis 200 Vox. Afin de bénéficier de toutes les
possibilités de votre COMBINÉ, nous vous conseillons de consulter la notice livrée avec la BASE et le COMBINÉ principal.
Ce COMBINÉ compatible norme GAP peut fonctionner avec toute base GAP,qu’elle soit ou non de marque différente.
Dans ce cas, nous vous invitons à lire très attentivement cette notice qui a été rédigée spécialement à votre intention,
en tenant compte des suggestions et des remarques exprimées par les utilisateurs.
Informations sécurité :
• Évitez tout contact avec des liquides.
• Pour éviter tout risque de choc électrique, ne tentez pas d’ouvrir le combiné ni la base. Confiez les réparations à
notre service après-vente.
• Évitez tout contact avec des plots de chargement et de la batterie avec des objets conducteurs (clefs, attaches métalliques,
bijoux, etc.).
Le marquage CE atteste de la conformité des produits aux règlements techniques applicables conformément à la directive 99/05/CEE
pour la sécurité usagers, pour les perturbations électromagnétiques et les essais radio.
Raccordement électrique : alimentation sur réseau 230 V,courant alternatif monophasé à l’exclusion des installations à schéma IT définies dans la
norme EN 60-950.Attention, la tension du réseau est classée dangereuse selon les critères de la même norme.Température d’utilisation entre
5° C et 45° C. En cas de danger, le bloc d’alimentation secteur sert de dispositif de sectionnement de l’alimentation 230 V.
Il doit être installé, par précaution, à proximité du matériel et être aisément accessible.
Raccordement téléphonique : les tensions présentes sur ce réseau sont classées TRT-3 (tension réseau téléphonique) au sens de la norme
EN 60-950.
Note d’information :Vous vous apprêtez à utiliser un équipement agréé de type DECT permettant l’intercommunication pour un usage privé entre
des appareils de téléphone sans fil et un autocommutateur privé (PABX) sans fil ou des bornes domestiques. Ces équipements sont utilisables sous
réserve de respecter les conditions précisées à l’arrêté du 13 janvier 1995 paru au Journal Officiel du 26 janvier 1995,qui définit les conditions
d’une licence générale d’autorisation sur la base de l’article L.89 du code des postes et télécommunications. En effet, outre l’agrément des
équipements, les conditions d’utilisation suivantes doivent être respectées, notamment compte tenu de l’utilisation de fréquences radioélectriques :
1. L’utilisation des équipements DECT n’est pas garantie contre les brouillages provoqués par les autres utilisations autorisées de fréquences
radioélectriques ;
2. Les équipements DECT ne peuvent être utilisés pour l’établissement de liaisons entre points fixes que dans la mesure où ces liaisons ne sont
pas permanentes et que la puissance isotrope rayonnée équivalente à l’antenne est inférieure à 50 mW ;
3. L’installation des équipements DECT (de type PABX sans fil comportant plus de deux lignes d’accès au réseau) doit être réalisée par un installateur
admis par le ministère chargé des télécommunications, de telles installations constituant des installations complexes au sens de l’article R. 20-22
du code des P. et T. ;
4. Les conditions d’accès à un réseau télépoint des équipements DECT doivent faire l’objet d’une convention signée avec l’exploitant du réseau
télépoint autorisé concerné.
Protection de l’environnement :
Votre combiné téléphonique a également bénéficié du programme EcoDesign de Philips, programme de conception écologique
d’un produit tenant compte de la relation qu’il entretient avec l’environnement pendant toute son existence.
Français
1Fr onis suppl 19/07/01 11:21 Page 3
Page 4

Combiné supplémentaire Onis 200
4
Mettre en service le combiné
Installer le combiné
Pour effectuer une bonne installation :
• Branchez l’adaptateur de secteur dans une prise de courant facilement accessible.
• Posez le COMBINÉ sur le CHARGEUR.
Avant la première utilisation ou après une période prolongée hors du
CHARGEUR, le COMBINÉ doit être chargé complètement pendant
au moins 12 heures.
L ATTENTION :
Après charge complète, vous devez effectuer la procédure d’ajout du COMBINÉ décrite
en page 5.
Installer et remplacer les batteries
En cas de remplacement des batteries, veuillez utiliser des batteries R03/AAA NiMh.
• Ouvrez la trappe du compartiment batterie du COMBINÉ en tirant
dans le sens de la flèche.
• Retirez les batteries.
• Insérez les nouvelles batteries dans le sens indiqué et refermez la trappe.
• Reposez le COMBINÉ sur la BASE. Laissez en charge pendant au moins
12 heures.
L ATTENTION :
N’utilisez jamais des piles non rechargeables et utilisez uniquement des modèles
préconisés (R03/AAA NiMh).
Changer la langue du combiné
A partir de l’écran de repos, faites défiler et choisissez |SETTINGS dans les
menus.
Faites défiler jusqu’à “Handset settings”.
Choisissez OK|.
Pour sélectionner la rubrique “Language”, choisissez OK|.
Faites défiler pour sélectionner la langue, puis choisissez OK|.
Appuyez longuement sur pour revenir à l’écran de repos.
6
5
4
3
2
1
Français
1Fr onis suppl 19/07/01 11:21 Page 4
Page 5

Combiné supplémentaire Onis 200
5
Ajouter le combiné sur une base
Pour pouvoir utiliser un COMBINÉ avec une BASE, vous devez avoir
préalablement suivi la procédure d’ajout de ce COMBINÉ sur cette BASE (voir
ci-dessous). Chaque COMBINÉ peut être utilisé sur deux BASES différentes.
L ATTENTION :
Avant d’effectuer les opérations suivantes, le combiné doit être chargé complètement
pendant au moins 12 heures.
Sur une base ONIS 200 ou ONIS 200 Vox
Mettez la BASE Onis 200 hors tension, puis sous tension avec le bloc
d’alimentation.
À partir du menu “Réglages”, rubrique “Réglages combiné”, faites défiler
jusqu’à “Souscrire combiné”, puis choisissez OK|.
Entrez le code de souscription de la base (4 chiffres), puis choisissez OK|.
Pendant quelques instants, l’écran indique “En cours...”, puis “Effectué !”.
En cas d’échec, recommencez la procédure à partir de l’étape .
Sur une autre base
Sur la base, effectuez la procédure décrite par le constructeur
(voir notice du constructeur de la Base).
Conformez-vous ensuite aux étapes à de la procédure décrite
ci-dessus pour le COMBINÉ.
Entretenir votre combiné
Pour entretenir votre COMBINÉ, utilisez un chiffon humidifié à l’eau légèrement
savonneuse, puis essuyez avec un chiffon sec.
• N’utilisez ni solvant, ni produit ménager. Entretenez régulièrement votre appareil,
il gardera ainsi son aspect neuf.
Important :
Évitez de placer l’appareil à un endroit qui pourrait entraîner sa chute.
42
1
4
3
2
1
Le code est inscrit sur l’étiquette situés sous
la base (RC)
Français
1Fr onis suppl 19/07/01 11:21 Page 5
Page 6

Combiné supplémentaire Onis 200
6
Utiliser le combiné avec une base ONIS 200
Ce COMBINÉ supplémentaire qui vient compléter votre installation, fonctionne
de manière identique à celui livré avec votre BASE Onis 200 ou Onis 200 Vox.
Désormais, votre installation multicombiné vous permet :
- d’établir une conférence interne,
- de rediriger une conversation,
- d’établir une communication avec l’extérieur pendant que deux autres
COMBINÉS sont en interphonie (si vous possédez au moins 3 COMBINÉS).
Pour de plus amples informations à ce sujet, consultez la notice principale.
- d’utiliser la fonction “babysit”.
Utiliser le combiné avec une autre base
norme GAP
La norme GAP garantit un fonctionnement minimum à tout combiné
et à toute base de marque différente, déclarés ensemble.
Votre COMBINÉ répond à cette norme.
Afin d’utiliser votre COMBINÉ dans les meilleures conditions, nous vous
conseillons de lire cette notice ainsi que celle du constructeur de la base.
Fixer le chargeur au mur
Percez deux trous dans le mur, espacés de 65 mm verticalement,
et installez des vis.
Engagez le socle sur la pièce en plastique, puis tirez vers le bas.
Autonomie
Elle est d’une semaine environ lorsque le COMBINÉ est au repos hors
de sa BASE et de 15 heures en communication.
• En cours de communication, lorsqu’il ne vous reste plus que quelques
secondes d’autonomie, des bips vous en avertissent.
À l’expiration de ce délai, la communication est automatiquement coupée.
2
1
Lorsque votre COMBINÉ est déclaré sur
une base de marque différente, les fonctions
utilisables garanties sont : la prise de ligne,
la réception d’appel, la numérotation.
L’icône indique un taux de charge
inférieur à 5 % (aucune barre).Vous devez
alors recharger le COMBINÉ
Français
1Fr onis suppl 19/07/01 11:21 Page 6
Page 7

Combiné supplémentaire Onis 200
7
Recharge
La durée complète de recharge, lorsque la batterie est vide, est de 12 h.
Portée
La portée du COMBINÉ est d’environ 300 m en site dégagé et dans de bonnes
conditions d’environnement radio.
• En cours de communication, la limite de portée étant atteinte, la conversation
devient hachée. Dans ce cas, rapprochez-vous rapidement de la BASE,
sinon la communication sera coupée.
Veillez respecter les conseils d’installation présentés en page 3.
Les touches du combiné Onis 200
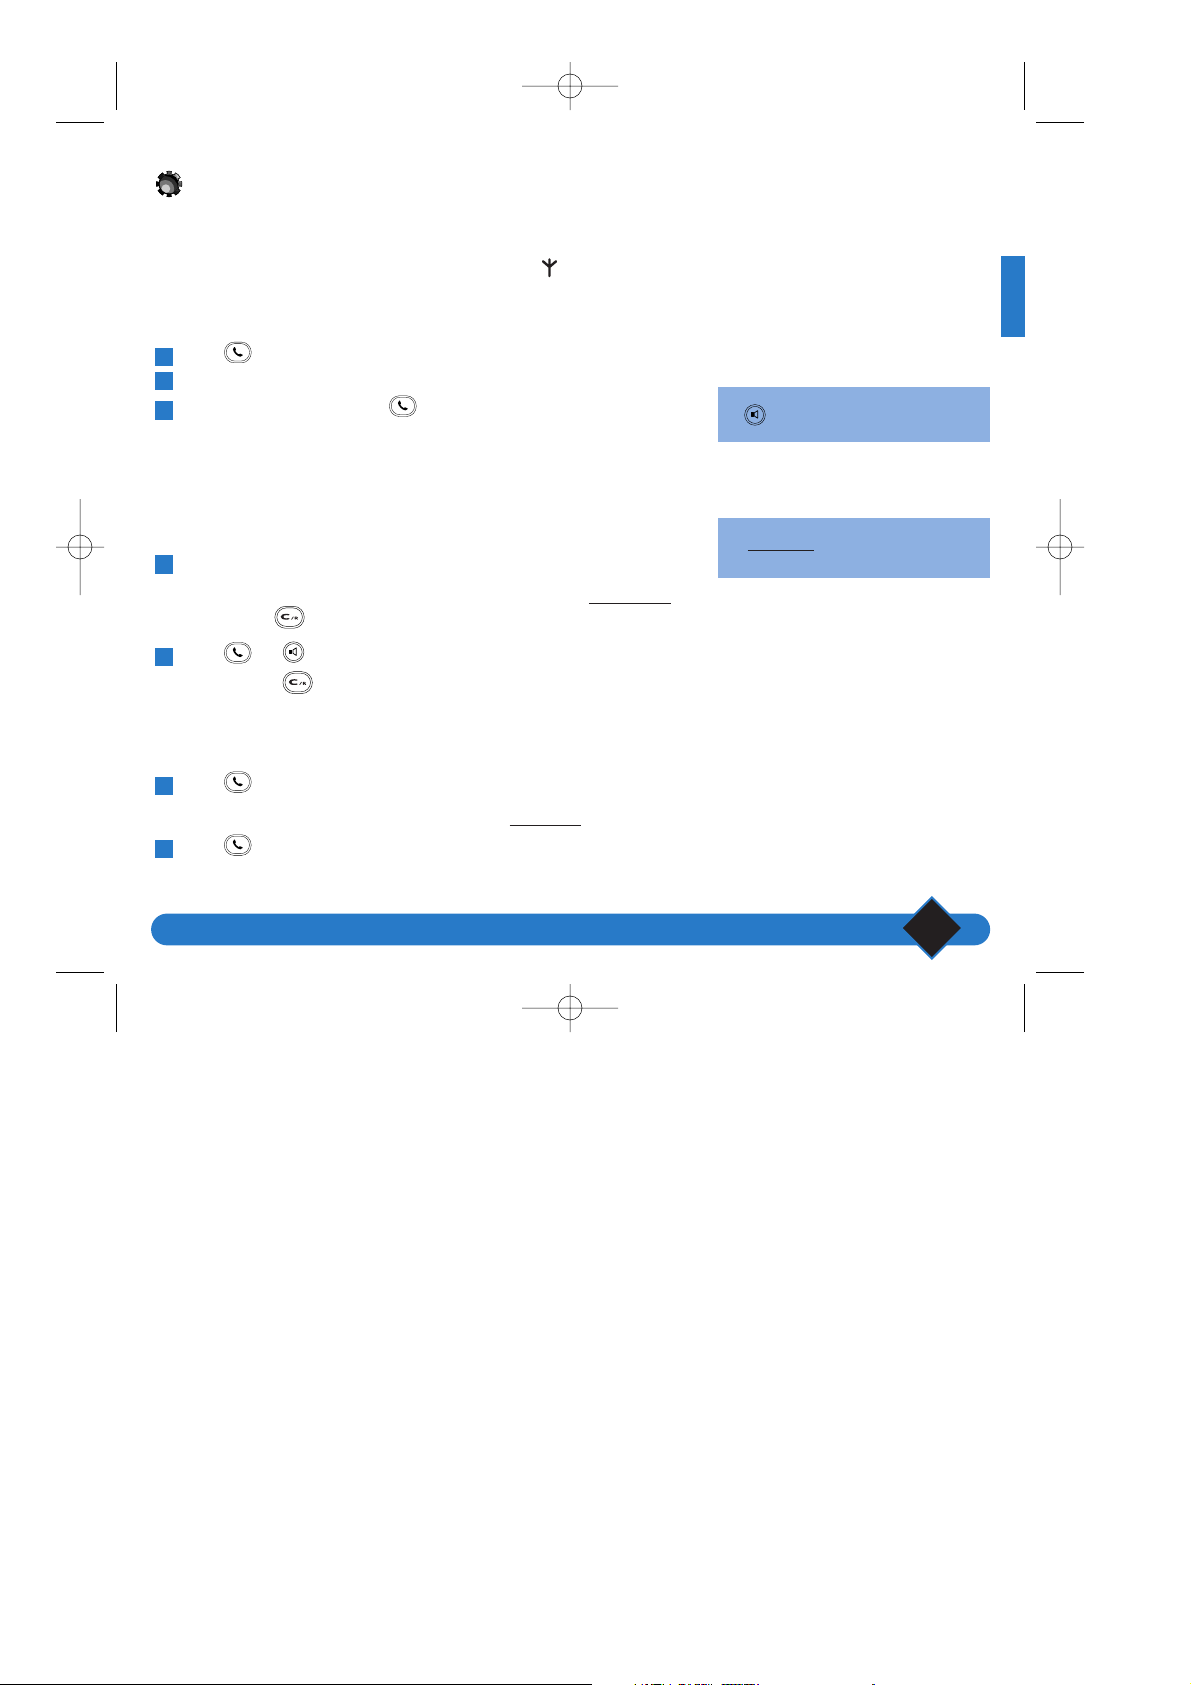
• La touche permet de passer et de recevoir vos appels.
• La touche permet d’activer ou de désactiver le haut-parleur du COMBINÉ.
• La touche permet de sélectionner l'interphonie avec un autre combiné.
• La touche permet de régler le niveau sonore de l’écouteur ou du haut-parleur
pendant une communication.
• La touche permet de supprimer un caractère lu de la saisie. Elle permet
également en cours d’appel d’utiliser la fonction “R”. Un appui long sur cette touche
permet à tout moment de revenir à l’écran de repos.
• La touche permet d’accéder à la liste des préfixes opérateurs.
Ces données sont indicatives et fournies
pour une batterie à pleine charge.
Le contour du pictogramme clignote
pour indiquer que le combiné est bien
positionné sur le chargeur.
Français
1Fr onis suppl 19/07/01 11:21 Page 7
Page 8

Combiné supplémentaire Onis 200
8
Comprendre le système de menus
La quatrième ligne de l’écran est dédiée à l’affichage de menus, alors que
la deuxième et la troisième sont réservées aux rubriques et sous-rubriques.
Cas des menus :
Les touches vous permettent d’accéder aux menus.
• À l’aide de ces touches, choisissez les menus présentés sur la ligne située
au bas de l’écran.
Par exemple : dans l’écran de repos, les menus proposés sont |BIS
et
REP. COMMUN|.
• Lorsque vous désirez accéder à des menus non présentés sur la ligne du bas,
utilisez les touches pour défiler, puis utilisez les touches
pour opérer une sélection.
• Un appui long sur vous permet d’interrompre à tout moment l’opération
en cours et de revenir à l’écran de repos.
Cas des rubriques et sous-rubriques :
• Les titres des rubriques sont indiqués en 2ème ligne sur fond noir.
• Les sous-rubriques sont indiquées sur la 3ème ligne. Utilisez les touches
pour faire défiler les sous-rubriques. Utilisez ensuite les touches pour
valider OK
| ou remonter d’un niveau |RETOUR.
• Dans certains cas, les rubriques vous permettent de modifier des options.
Lors de l’accès à une rubrique de ce type, l’option activée s’affiche en premier,
précédée de “√”.
Pour sélectionner une autre option, faites défiler à l’aide des touches
et validez votre nouveau choix comme indiqué ci-dessus.
Le pictogramme u vous rappelle que
plusieurs menus sont accessibles.
Pour les rubriques et sous-rubriques, le
pictogramme u ne figure pas sur l’écran.
Français
1Fr onis suppl 19/07/01 11:21 Page 8
Page 9

Combiné supplémentaire Onis 200
9
Mélodie externe : pour tout appel entrant.
Mélodie interne : pour tout appel en
interphonie.
Pour couper la sonnerie, choisissez l’option
Silence, le pictogramme s’affiche.
Le contraste de l’écran s’ajuste
immédiatement.
Vous entendez la sonnerie sélectionnée.
Personnaliser votre combiné
Sonneries du combiné
Le COMBINÉ dispose de 9 mélodies de sonnerie.
À partir du menu “Réglages”, rubrique “Audio combiné”, faites défiler
jusqu’à “Mélodie Externe” ou “Mélodie Interne”, puis choisissez OK|.
Faites défiler pour sélectionner une des neuf mélodies, puis choisissez OK|.
Volume des sonneries
À partir du menu “Réglages”, rubrique “Audio combiné”, faites défiler
jusqu’à “Volume Sonnerie”, puis choisissez OK|.
Faites défiler pour sélectionner le volume souhaité, puis choisissez OK|.
Contraste de l’écran
À partir du menu “Réglages”, rubrique “Réglages combiné”, faites défiler
jusqu’à “Contraste”, puis choisissez OK|.
Faites défiler pour sélectionner le contraste souhaité, puis choisissez OK|.
Activer/désactiver les bips touches
Chaque appui sur une touche du COMBINÉ peut-être signalé par un bip
d’acquittement.Vous pouvez programmer ce bip :
À partir du menu “Réglages”, rubrique “Audio combiné”, faites défiler
jusqu’à “Bip touches”, puis choisissez OK|.
Faites défiler pour activer ou désactiver les bips, puis choisissez OK|.
2
1
2
1
2
1
2
1
Français
1Fr onis suppl 19/07/01 11:21 Page 9
Page 10

Combiné supplémentaire Onis 200
10
Téléphoner
Pour appeler
Lorsque vous ôtez le COMBINÉ du CHARGEUR, l’icône doit être affichée.
Dans le cas contraire, reportez-vous au chapitre “Téléphone, un problème ?
Vérifiez...”.
Appuyez sur .
Vérifiez la présence de la tonalité, puis composez le numéro
de votre correspondant.
Pour mettre fin à la conversation,appuyez de nouveau sur ou reposez
le combiné sur la base ou sur son chargeur.
Préparer votre numéro avant d’appeler (pré-numérotation)
Si vous souhaitez pouvoir vérifier le numéro composé et éventuellement le corriger
avant envoi :
Composez le numéro au clavier.
• En cas d’erreur, vous pouvez effacer le dernier caractère avec |CORRIGER ou
en appuyant sur
*
.
Appuyez sur ou pour lancer l’appel.
*Appuyez sur et maintenez la touche pour effacer le numéro.
Répondre à un appel
Votre Onis 200 sonne, si vous n’avez pas coupé la sonnerie.
Appuyez sur pour converser.
• Vous pouvez couper la sonnerie du combiné en choisissant |SILENCE.
Pour raccrocher, appuyez de nouveau sur ou reposez le combiné
sur la base ou sur son chargeur.
2
1
2
1
3
2
1
Vous pouvez également prendre la ligne
en appuyant sur la touche , ce qui
met également en service le haut-parleur
du combiné.
Le numéro s’affiche au fur et à mesure
à l’écran. La fonction ENREG.| permet
d’enregistrer ce numéro dans un des
répertoires
Français
1Fr onis suppl 19/07/01 11:21 Page 10
Page 11
Combiné supplémentaire Onis 200
11
Utiliser l’interphonie
Votre base peut être associée à 8 combinés. L’interphonie vous permet de réaliser
des communications en interne entre deux combinés.
De plus, si vous possédez au moins trois combinés, une communication externe
peut avoir lieu en même temps qu’une interphonie (par exemple : un combiné est
en communication externe pendant que deux autres combinés sont en interphonie).
Interphonie hors communication
Appuyez sur .
Faites défiler avec pour sélectionner le ou les postes à appeler.
Choisissez APPELER
| ou pour lancer l'appel.
Pour mettre fin à l’interphonie depuis le combiné, choisissez |FIN INTER.
ou
appuyez sur .
• Sur le COMBINÉ appelé, appuyez sur pour répondre.
L REMARQUE :
Si un appel externe survient en cours d’interphonie, des bips avertissent les combinés
occupés. Il faut d'abord mettre fin à l’interphonie avant de pouvoir prendre la
communication extérieure. Mais un troisième COMBINÉ, non engagé dans l'interphonie,
peut également prendre le correspondant externe.
Interphonie en cours de communication externe et
transfert de communication
Vous êtes en communication avec l’extérieur. Prévenez votre correspondant externe
qu’il ne vous entendra plus pendant un instant, puis :
Appuyez sur .
Faites défiler avec pour sélectionner le combiné à appeler et
choisissez APPELER|.
2
1
4
3
2
1
Vous pouvez également saisir le numéro du
combiné à appeler, ou pour faire
sonner tous les combinés.
Dans ce cas, les étapes et sont
inutiles.
32
Le correspondant externe entend une
musique d’attente pendant ce temps.
Français
1Fr onis suppl 19/07/01 11:21 Page 11
Page 12

Combiné supplémentaire Onis 200
12
Choisissez |REPRENDRE pour mettre en attente l’interphonie et reprendre
la conversation avec le correspondant externe.Vous pouvez faire plusieurs
va-et-vient entre les correspondants externe et interne de cette façon.
• Choisissez TRANSF
.| si vous désirez transférer définitivement la
communication externe sur l’autre combiné et mettre fin à l’interphonie.
• Faites défiler et choisissez CONF
. INT.| pour établir une conférence entre les
deux intervenants internes et le correspondant externe.
Sur le(s) combiné(s) appelé(s) :
Pour répondre, appuyez sur .
Utiliser la fonction babysit
Il s'agit d'une fonction de surveillance d'ambiance. Un combiné "de surveillance" sert
de microphone totalement silencieux. Un autre combiné établit une interphonie
avec le combiné de surveillance pour écouter les bruits de la pièce où se trouve ce
dernier. Si un correspondant vous appelle, le combiné de surveillance reste
silencieux et ne prend pas l’appel.
Activer le mode babysit
A partir du menu “Réglages”, rubrique “Réglages combiné”, faites défiler jusqu’à
“Mode babysit”, choisissez OK|.
Faites défiler pour activer la fonction et choisissez OK|.
Désactiver le mode babysit
A partir de l’écran de repos ci-contre, choisissez ANNULER|.
Utiliser la surveillance
Pour écouter les bruits environnants le combiné de surveillance, vous devez établir
une interphonie (voir p. 11) avec le combiné, depuis un autre combiné.
L REMARQUE :
Un combiné en mode “Babysit”, vous permet de passer un appel,mais il ne sonnera pas
lors d’un appel entrant.
2
1
3
Vous pouvez également raccrocher
avec .
Vous pouvez aussi désactiver le mode
babysit en passant par le menu “Mode
babysit” comme pour l’activer.
L’indication “Mode babysit” apparaît alors
sur l’écran de repos.
Français
1Fr onis suppl 19/07/01 11:21 Page 12
Page 13

Combiné supplémentaire Onis 200
13
Téléphone, un problème ? Vérifiez...
INCIDENTS
Le pictogramme du COMBINÉ ne clignote
pas quand celui-ci est posé sur le chargeur.
Pas de tonalité.
Pas de sonnerie.
Le
pictogramme
n’est pas affiché.
Le
COMBINÉ
affiche “Echec” lors de la
procédure d’ajout du
COMBINÉ
sur la BASE.
Des parasites perturbent la communication.
CAUSES
- Mauvais contact avec les plots de charge.
- Les plots de charge sont encrassés.
- Pas d’alimentation.
- Le
COMBINÉ
n’est pas assez chargé.
- Vous êtes trop éloigné de la BASE.
La sonnerie est coupée.
- Le combiné n’est pas souscrit.
- Le secteur est débranché.
- Le
COMBINÉ
est trop éloigné de la BASE.
La procédure d’ajout du
COMBINÉ
sur la
BASE a échoué.
Le nombre maximum de combiné est atteint
(8 maximums).
- Vous êtes trop éloigné de la BASE.
- Des appareils électriques, des murs en béton
armé, des huisseries métalliques sont trop
proches de la BASE.
SOLUTIONS
- Déplacez légèrement le
COMBINÉ
.
- Nettoyez les plots de charge avec un chiffon
imbibé d’alcool.
- Vérifiez les branchements.
- Mettez en charge le
COMBINÉ
.
- Rapprochez-vous de la BASE.
Voir “Régler les sonneries”.
- Reprenez la procédure d’ajout d’un combiné
sur la base (p.5);
- Vérifiez les branchements.
- Rapprochez-vous de la BASE.
Débranchez, puis rebranchez l’alimentation
secteur de la BASE. Reprenez la procédure
d’ajout du
COMBINÉ
sur la BASE (p. 5).
- Rapprochez-vous de la BASE, contrôlez la
portée.
- Déplacez la BASE pour trouver la meilleure
position (le plus haut sera le mieux).
Français
1Fr onis suppl 19/07/01 11:21 Page 13
Page 14

Additional Onis 200 handset
1
English
Guarantee
Dear Customer,
Thank you for purchasing this Philips product which has been designed and
manufactured to the highest quality standards. If, unfortunately, something
should go wrong with this product Philips guarantees free of charge labour
and replacement parts irrespective of the country where it is repaired during
a period of 12 months from date of purchase (6 months for
replaceable/rechargeable batteries).This international Philips guarantee
complements the existing national guarantee obligations to you of dealers
and Philips in the country of purchase and does not affect your statutory
rights as a customer.
The Philips guarantee applies provided the product is handled properly for
its intended use, in accordance with its operating instructions and upon
presentation of the original invoice or cash receipt, indicating the date of
purchase, dealer’s name and model and production number of the product.
The Philips guarantee may not apply if:
- the documents have been altered in any way or made illegible ;
- the model or production number on the product has been altered,deleted,
removed or made illegible ;
- repairs or product modifications and alterations have been executed by
unauthorised service organisations or persons ;
- damage is caused by accidents including but not limited to lightning, water
or fire, misuse or neglect.
Please note that the product is not defective under this guarantee in the
case where modifications become necessary in order for the product to
comply with local or national technical standards that apply in countries for
which the product was not originally designed and/or manufactured.
Therefore always check whether a product can be used in a specific country.
In case your Philips product is not working correctly or is defective, please
return your phone to the place of purchase or the Philips National Service
Centre. In the event you require service whilst in another country a dealer
address can be given to you by the Philips Consumer Help Desk in that
country.
In order to avoid unnecessary inconvenience, we advise you to read the
operating instructions carefully before contacting your dealer.
- Methods of Transport within the UK:
Please be aware whichever method of transport is chosen it is the
consumers’ responsibility to package the faulty unit for return to a level
which prohibits accidental damage.
Philips is not responsible for damage/loss caused during carriage to the
Service Centre.
Freepost: Please write the following address onto your package.This method
of transport will take 2-3 working days to reach the Service Centre.
Philips Service Centre
FREEPOST (SCE10569)
RUGBY Warwickshire
CV21 1BR
NB: Philips recommend all parcels to be returned to the Philips Service
Centre be submitted over the counter at your Post Office and a proof of
postage requested.
Please note the Royal Mail insurance limit for lost/damage using the Freepost
service is £26. Upto £250 insurance and next day delivery can be obtained
via Royal Mail Special Delivery,however, the consumer will be responsible for
this cost.*
- Methods of Transport within IRELAND:
Please contact Philips Service Support , Dublin
IMPORTANT (For UK only):
For mobile phones please remove the SIM card from the product before it is
sent to the Philips Service Centre. Neither Philips nor its agents assumes
risk for the damage, unauthorised use/loss of your SIM card or the data
contained therein.
Please ensure the following are included when returning a genuinely faulty
product to the Philips Service Centre :
- Name.
- Return Delivery address.
- Daytime contact number.
- Proof of Purchase (copy)
- For DECT phones both handset and base have to be returned.
- Accessories :Power supply line cords.
- A brief description of the assumed fault
- Despatch note (if your phone has previously been exchanged).
Failure to include all the necessary information will cause delays in servicing
your phone.
Please allow 2-3 days from receipt at the service centre for your
replacement/repaired product to be returned to you. If an out of warranty
charge applies Philips shall contact you before the product is returned.
Philips shall pay for the return carriage on all in-warranty exchanges.
*Should you wish to return your products for service at your own cost (via a courier service or
Royal Mail Special Delivery) please ensure the items are suitably packed for transport and sent to
the following address:
Philips Service Centre
1 Great Central Way - Butlers Leap - Rugby - Warwickshire- CV21 3XH
For Philips Service Support in UK, (incl Channel Islands) please call 0870 900 9070 (Open during
normal business hours, excluding National holidays and weekends). For Philips Service Support in
Ireland please call 1850 304700
2uk onis suppl 19/07/01 11:15 Page 1
Page 15

Additional Onis 200 handset
2
Introduction
Obtaining a line
Intercom
Microphone
Loudspeaker
Soft keys
Correction and “R”
Earpiece Volume
SCREEN ICONS:
Battery charge status
Answerphone activated
Indicates message on answerphone or Operator mail box
Internal call in progress
Handset ringer deactivated
Loudspeaker activated
Withheld identity activated
Base/Handset link correct
Menu navigation keys
Operator services
English
2uk onis suppl 19/07/01 11:15 Page 2
Page 16

Additional Onis 200 handset
3
Recommendations and safety information
This additional HANDSET, compliant with both Onis 200 and Onis Vox 200 models, gives you permanent access to a cordless
telephone in rooms which do not have a telephone socket.
You may use up to 8 HANDSETS with each Onis 200 and Onis Vox 200 base station. In order to get the most out of your
HANDSET, we recommend you read the instructions supplied with your main BASE STATION and HANDSET.
This HANDSET meets GAP standard requirements and may be used with any GAP base station, irrespective of the make.
In this case, we recommend you carefully read the following information, compiled using comments and suggestions provided by
other users.
Safety information:
• Avoid contact with liquid.
• To avoid any risk of electric shock, please do not attempt to open the handset or base station. Repairs should be carried out
by our after-sales service.
• The charging contacts should be kept away from conductive objects (metal objects, keys, jewellery, etc.).
The CE mark on your telephone means that it is compliant with European directive 99/05/EC on technical regulations for user safety, electromagnetic interference and radio tests.
Electric connection: 230V mains supply, single phase AC, with the exception of IT-type equipment described in standard EN 60-950.
(NB: Excessive mains voltage limits are defined according to criteria laid out in the same standard.)
Operating temperature is between 5° C and 45° C.The mains power pack has a 230V supply sectioning feature to protect the user.
As a preventive measure, this should be close to the equipment and easily accessible.
Telephone connection: network voltage is classed as telephone network voltage in compliance with EN 60-950.
Environmental Protection:
Your HANDSET has been designed in compliance with the Philips EcoDesign program, which takes environmental factors into
consideration throughout the product’s life cycle.
English
2uk onis suppl 19/07/01 11:15 Page 3
Page 17

Additional Onis 200 handset
4
Setting up the handset
Installing the handset
Proceed as follows:
• Plug the mains adapter into an easily-accessible socket.
• Place the HANDSET on the CHARGER.
Before initial use or following a long period without charging, the HANDSET
should be fully charged for at least 12 hours.
L WARNING:
Once the handset is fully charged, you should follow the procedure described on page 5
(registering the handset with a base station).
Inserting and replacing batteries
R03/AAA NiMh rechargeable batteries should be used as replacements.
• Slide open the HANDSET battery cover in the direction indicated by the
arrow.
• Remove batteries.
• Insert new batteries as indicated and replace the cover.
• Place the HANDSET on the BASE STATION. Charge for at least 12 hours.
L WARNING:
Never use non-rechargeable batteries. Use only the recommended types (R03/AAA NiMh).
NOTE.Used batter ies should not be disposed of with household waste.
Return used batteries to your distributor or take to a suitable collection centre.
Changing the handset language
On the idle screen, scroll through the list of menus and select |SETTINGS.
Scroll to “Handset settings”.
Select OK|.
Choose OK| to select the “Language” option.
Scroll to the language you want and select OK|.
Press and hold the key to return to the idle screen.
6
5
4
3
2
1
English
2uk onis suppl 19/07/01 11:15 Page 4
Page 18
Additional Onis 200 handset
5
Registering the handset with a base station
In order to use the HANDSET with the BASE STATION, you must first follow
the procedure described below. Each HANDSET may be used with two different
BASE STATIONS.
L WARNING:
Before commencing the following, the handset must be fully charged for at least 12 hours.
ONIS 200 or ONIS Vox 200 base stations
Unplug and plug back in the power supply of the Onis 200 BASE STATION.
Scroll to “Register hdset” under “Handset settings” in the “Settings” menu and
select OK
|.
Enter the base station registration code (4 figures) and select OK|.
The screen will display “Recording...” for a short while, followed by “Set!” once
the procedure is complete.
In the event of failure, begin again from step .
Another base station
First, follow the procedure described by the manufacturer (see base station
manufacturer’s instructions).
Once this is done, follow steps to of the procedure shown above for the
HANDSET.
Cleaning your handset
Use a damp, lightly soaped cloth to clean your HANDSET.Wipe with a dry cloth.
• Never use a solvent or household product. Clean your telephone regularly to
keep it looking brand new.
Important:
Do not place your telephone in a place where it may fall.
42
1
4
3
2
1
The code is shown on the label beneath the
base station bottom (RC).
English
2uk onis suppl 19/07/01 11:15 Page 5
Page 19

Additional Onis 200 handset
6
Using the handset with an ONIS 200
base station
The additional HANDSET functions in the same manner as the handset which
comes with your Onis 200 or Onis Vox 200 BASE STATION.
With this multi-handset setup you can now:
- make conference calls,
- transfer calls,
- make an external call with two other HANDSETS in an intercom mode (if you
have 3 or more HANDSETS). See instructions for more information.
- use the “babysit” function.
Using the handset with another GAP
standard base station
The GAP standard guarantees minimum operating performance for all handsets and
base stations, irrespective of their make.
Your HANDSET conforms with this standard.
In order to get the most out of your HANDSET, we recommend you read both
these and the manufacturer’s instructions.
Charger wall-mounting
Make two holes in the wall, 65mm apart vertically and insert screws.
Mount the base using the plastic attachment and pull down.
Battery performance
The telephone will work for approximately one week when the HANDSET is away
from the BASE STATION in idle mode and around 15 hours when in use.
• During a call, beeps will provide a warning when only a few seconds of battery life
remain.
Communication will be cut off automatically when after this time.
2
1
When your HANDSET is used with a
different make of base station, line
connection, call reception and dialling
functions are guaranteed.
The icon indicates a charge level
below 5% (no bar).You should now charge
the HANDSET
English
2uk onis suppl 19/07/01 11:15 Page 6
Page 20

Additional Onis 200 handset
7
Recharging
It takes at least 12 hours to fully recharge an empty battery.
Range
The HANDSET has a range of around 300m in an open area with good radio
reception.
• During a call, reception will begin to break up as you near the range limit. Should
this happen, you should quickly move closer to the base station to prevent
communication being cut off.
Please follow the installation recommendations on page 3.
Onis 200 handset keys
• The key allows you to transfer and receive calls.
• The key allows you to activate or deactivate the HANDSET loudspeaker.
• The key allows you to select intercom with another handset.
• The key allows you to adjust the receiver or loudspeaker volume level during
a call.
• The key allows you to delete a character already entered.The same key also
enables you to use the “R” function during a call. Pressing and holding this key allows
you to return to the idle screen at any time.
• The key allows you to access the list of operator services.
This information is approximate and applies
to a fully charged battery.
The outline of the icon flashes to
show that the handset is correctly placed on
the charger.
English
2uk onis suppl 19/07/01 11:16 Page 7
Page 21

Additional Onis 200 handset
8
Understanding the menu system
Menus are displayed on the fourth line, with headings and sub-headings shown
on the second and third lines of your screen.
Using the menus:
You can access the menus using the keys:
• Use these keys to select menus shown at the bottom of the screen.
Eg: On the idle screen, the available menus are |REDIAL
and SHARED|.
• Use the keys to scroll through menus not shown on screen.
Use the keys to select, as above.
• Press and hold the key to interrupt any activated function and return to
the idle screen.
Headings and sub-headings:
• Headings are shown on the second line on a black background.
• Sub-headings are shown on the third line. Use the keys to scroll
through the sub-headings. Use the keys to select OK
| or retrace a
step |BACK.
• Some headings enable you to modify options.When accessing the heading, the
active option appears first, preceded by “√”.
To choose another option, use the keys to scroll through the list and
validate your option using.
The u icon indicates that other menus are
available.
The u icon does not appear on screen for
headings and sub-headings.
English
2uk onis suppl 19/07/01 11:16 Page 8
Page 22

Additional Onis 200 handset
9
External melody: for all incoming calls.
Internal melody: for all intercom calls.
To deactivate the ringer, select the Silence
option.The icon will be displayed.
The screen contrast will immediately be
adjusted.
You will hear the selected ringer.
Customising your handset
Ringer settings
The HANDSET has 9 ringer melodies.
Scroll to “Ext. ringer type” or “Int. ringer type” under the “Handset sounds”
heading in the “Settings” menu and select OK|.
Scroll to one of the nine melodies and select OK|.
Ringer volume
Scroll to “Ringer Volume” under the “Handset sounds” heading in the “Settings”
menu and select OK|.
Scroll to the chosen volume and select OK|.
Screen contrast
Scroll to “Contrast” under the “Handset Settings” heading in the “Settings”
menu and select OK|.
Scroll to the chosen contrast and select OK|.
Activating/deactivating the key tones
HANDSET keys can be set to sound when pressed.You can program this sound:
Scroll to “Key tones” under the “Handset sounds” heading in the “Settings”
menu, and select OK|.
Choose whether to activate or deactivate the tones and select OK|.
2
1
2
1
2
1
2
1
English
2uk onis suppl 19/07/01 11:16 Page 9
Page 23
Additional Onis 200 handset
10
Using the telephone
Making a call
When you lift the HANDSET from the CHARGER, the icon should
be highlighted.
If this is not the case, please refer to the section entitled “Telephone
troubleshooting”.
Press .
Check for a tone and dial the number you wish to call.
To end the conversation, press again or replace the handset on its
charger.
Preparing the number before calling
(predial)
To check the number and, where necessary, correct before calling:
Enter the number on the keypad.
• If you make a mistake, you can delete the last character using |CORRECT
or by pressing *.
Press or to make the call.
*Press and hold to delete the number.
Answering a call
Your ONIS 200 rings, unless you have deactivated the ringer:
Press to talk.
• You can deactivate the handset ringer by pressing |SILENCE.
Press again to hang up, or replace the handset on the base station
or charger.
2
1
2
1
3
2
1
You can also obtain a line by pressing
the key.This activates the handset
loudspeaker.
The number will be displayed on screen.
The RECORD| function allows you to store
the number in one of the phonebooks.
English
2uk onis suppl 19/07/01 11:16 Page 10
Page 24

Additional Onis 200 handset
11
Using the Intercom
Your base station may be used with 8 handsets. Intercom allows you to
communicate internally between two handsets.
In addition, if you have three or more handsets, external calls may be made while
the intercom function is in use (e.g.one handset is used to communicate externally
while two others are used for an internal call).
Internal calls
Press .
Use to scroll through the list and select the extensions you wish
to call.
Select CALL
| or to make the call.
Select |ST
OP INTER. or press to end intercom from the handset.
• On the HANDSET called, press to answer.
L NOTE:
If you receive an external call while in intercom mode, beeps will alert the handsets in use.
You must hang up the internal call before taking the external call. However, a third
HANDSET, not being used on an internal call, may also be used to take the external call.
Intercom during external call and call forward
During the external call, tell the person on the other end of the line that you will
be unable to hear them for a moment, then:
Press .
Use to scroll through the list and choose the handset you wish to
call. Select CALL|.
2
1
4
3
2
1
You may also enter the number of the
handset you wish to call or to make all
handsets ring.
In this case, steps and become
redundant.
32
The person on the other end of the line will
hear hold music.
English
2uk onis suppl 19/07/01 11:16 Page 11
Page 25

Additional Onis 200 handset
12
Select |SWITCH to place the internal call on hold and speak to the person
on the external line. Using this function, it is possible to switch between
internal and external lines.
• Select TRANSF
.| to forward the external call to your chosen handset.
• Scroll to and select CONF
. CALL| to set up a conference call between the
external caller and two internal handsets.
On the handset(s) called:
Press to answer.
Using the babysit function
Acts as a silent intercom, while another handset is used as an intercom monitoring
handset to listen to noise in the room where the former monitoring handset has
been placed. If you receive a call, the intercom will remain silent and will not take
the call.
Activating babysit mode
Scroll to “Babysit mode” under the “Handset settings” heading in the “Settings”
menu and select OK|.
Scroll to activate the function and select OK|.
Deactivating the babysit mode
On the idle screen shown, select CANCEL|.
Using the intercom
In order to listen to noises picked up by the monitoring handset, you will need to
set up the intercom (see page 11) between the handsets.
L NOTE:
Handsets in “Babysit” mode can still be used to make calls, but will not ring when a call
is received.
2
1
3
You can also hang up by pressing .
You can deactivate the babysit mode using
the “Babysit mode” menu, following the
same procedure as that used to activate the
mode.
The “Babysit mode” indicator then appears
on the idle screen.
English
2uk onis suppl 19/07/01 11:16 Page 12
Page 26

Telephone troubleshooting...
PROBLEMS
The HANDSET icon does not flash
when the handset is placed on the charger.
No dial tone.
No ringer.
The icon is not displayed.
When adding a HANDSET to the BASE
STATION, a “Failure” message is displayed on
the HANDSET.
Interference during the call.
REASONS
- Poor contact.
- Dirty contacts.
- No power.
- The HANDSET is not sufficiently charged.
- You are too far away from the BASE STATION.
The ringer is deactivated.
- The handset has not been registered.
- No mains power.
- The HANDSET is too far from the BASE
STATION.
The procedure used to add a HANDSET to
the BASE STATION has failed.
The maximum number of handsets (8) has been
reached.
- You are too far away from the BASE STATION.
- The BASE STATION is too close to
electrical appliances, reinforced concrete walls
or metal door frames.
SOLUTIONS
- Move the HANDSET slightly.
- Clean the contacts with a cloth moistened
with alcohol.
- Check connections.
- Charge the HANDSET.
- Move closer to the BASE STATION.
See “Ringer settings”.
- Begin the handset registration procedure
again (page 5).
- Check connections.
- Move closer to the BASE STATION.
Disconnect and connect the BASE
STATION mains power supply. Begin the
handset registration procedure again (p. 5).
- Move closer to the BASE STATION.
Check the range.
- Move the BASE STATION to find a better
position (the higher the better).
Additional Onis 200 handset
13
English
2uk onis suppl 19/07/01 11:16 Page 13
Page 27

Zusätzliches Mobilteil Onis 200
1
Garantie
Sehr geehrter Kunde,
Danke, daß Sie sich für ein PHILIPS-Produkt entschieden haben. PHILIPS Geräte entsprechen dem neuesten Stand der Technik
und werden nach strengsten Qualitätsnormen gefertigt. Sollten Sie ausnahmsweise einen Grund zur Beanstandung haben, so
garantiert PHILIPS - zusätzlich zu Ihren Gewährleistungsansprüchen gegenüber Ihrem Verkäufer - innerhalb von 12 Monaten ab
Kaufdatum ( 6 Monate für austauschbare/wiederaufladbaren Batterien), daß die Produkte ohne Lohn - und Materialkosten
repariert werden, unabhängig von dem Land, in dem repariert wird.
Die Ansprüche entsprechend dieser Garantiezusage setzen voraus, daß das Gerät ordnungsgemäß entsprechend der
Gebrauchsanweisung für seinen bestimmungsgemäßen Gebrauch verwendet wurde. Die Garantie wird auf Grund der Vorlage
der Originalrechnung bzw. Zahlungsbestätigung, welche das Datum des Kaufes und den Namen des Händlers, sowie die
vollständige Geräte-Typ und Geräte-Nummer zu tragen hat, gewährt.
Die Garantie wird nicht gewährt, wenn:
• die vorstehend erwähnten Dokumente auf irgendeine Art geändert oder unleserlich gemacht wurden,
• die Geräte-Typ und Geräte-nummer am Gerät geändert, gelöscht, entfernt oder auf andere Art unleserlich gemacht wurde,
• Reparaturen,Adaptierungen oder Modifikationen am Gerät von Personen oder Gesellschaften ohne entsprechende Befugnis
vorgenommen wurden, oder
• Schäden durch äußere Einflüsse (Blitz,Wasser, Feuer u. ä.) oder unsachgemäße Behandlung entstanden sind.
Wir machen Sie darauf aufmerksam, daß das Gerät nicht als defekt angesehen werden kann, wenn eine Modifikation oder
Adaptierung am Gerät vorgenommen werden muß,um einen Einsatz des Gerätes zu ermöglichen, für den das Gerät in seiner
ursprünglichen Spezifikation nicht vorgesehen war (z.B.:Anpassung an eine andere Empfangs- oder Anschlußnorm).
Diese internationale Gewährleistung beeinträchtigt nicht die gesetzlichen Rechte eines Verbrauchers.
Wenn Ihr Philips Markenprodukt nicht ordnungsgemäß funktioniert, ersuchen wir Sie, sich an Ihren Philips Händler, eine Philips
Vertragswerkstatt bzw. an eine Werkstatt zu wenden, die bereit ist, die Garantiereparatur (Lohn - und Materialkosten)
kostenfrei durchzuführen. Durch die Inanspruchnahme der Garantie wird die Garantiezeit weder verlängert noch wird eine
neue Garantiefrist für das Produkt in Lauf gesetzt. Sollten Sie im Falle eines Auslandaufenthaltes eine in Ihrer Nähe befindliche
PHILIPS-Händleradresse benötigen, so können Sie diese bei der Kundeninformation des jeweiligen Landes erfragen.
Um Ihnen unnötige Mühen zu ersparen, empfehlen wir Ihnen, die Bedienungsanleitung Ihres Gerätes sorgfältig zu lesen,
bevor Sie sich mit Ihrem Händler oder der Service-Annahmestelle in Verbindung setzen.
Deutschland ESC Philips Service Osterreich T&S
Bentheimer Str. 118b Sterneckstr. 57
48529 Nordhorn A-5020 SALZBURG
tel: 01805-115587 Tel: 0810-001204
http://www.philips.com http://www.philips.com
Deutsch
3ALL onis suppl 17/07/01 15:24 Page 1
Page 28

Zusätzliches Mobilteil Onis 200
2
Präsentation
Amt
Gespräch zwischen
Mobilteilen
Mikrofon
Lautsprecher
Tasten zum
Aufrufen von
Funktionen
Korrektur und “R”
Lautstärke
DISPLAY-BILDSYMBOLE:
Ladezustand der Batterie
Anrufbeantworter an
Anzeige einer Nachricht auf dem Anrufbeantworter
oder Netzbetreiber-Sprachbox
Internes Gespräch
Rufton Mobilteil aus
Lautsprecher an
Anonym anrufen
Verbindung Basis/Mobilteil Ok
MenüNavigationstaste
NetzbetreiberVorwahlnummern
Deutsch
3ALL onis suppl 17/07/01 15:24 Page 2
Page 29

Zusätzliches Mobilteil Onis 200
3
Tipps und Sicherheit
Mit dem Erwerb eines zusätzlichen MOBILITEILS, das gleichermaßen für die Modelle Onis 200 und Onis 200 Vox ausgelegt ist,
vervollständigen Sie Ihre Telefonanlage, und können nun auch in den Räumen ohne Telefondose ständig über ein drahtloses
Telefon verfügen.
Die Anlage Onis 200 und Onis 200 Vox kann mit maximal 8 MOBILTEILEN verkettet werden. Um sich mit allen Möglichkeiten
vertraut zu machen, die Ihr MOBILTEIL bietet, empfehlen wir,die mit der BASISSTATION und dem ersten MOBILTEIL
gelieferte Bedienungsanleitung aufmerksam zu lesen.
Dieses MOBILTEIL unterstützt den GAP-Standard und kann mit jeder BASISSTATION, egal welcher Marke, die den
GAP-Standard unterstützt, betrieben werden.
In diesem Falle lesen Sie bitte diese Bedienungsanleitung sehr aufmerksam durch: sie wurde verbraucherorientiert, unter
Einbeziehung der Vorschläge und Hinweise der Benutzer verfasst.
Informationen zur Sicherheit:
• Kontakt mit Flüssigkeiten vermeiden.
• Um eventuelle Risiken durch Stromschlag zu vermeiden, weder Mobilteil noch Basisstation öffnen.
Lassen Sie die Reparaturen durch unseren Kundendienst ausführen.
• Anschlussklemmen zum Aufladen bzw.Akku-Anschlussklemmen nicht mit leitenden Gegenständen (Schlüssel, Metallzargen,
Schmuck usw.) in Kontakt bringen.
Das CE-Zeichen bedeutet, dass das Telefon den technischen Vorgaben laut Richtlinie 99/05/EC im Hinblick auf die Sicherheit der Benutzer, die
elektromagnetischen Störungen und Funkwellenversuche entspricht.
Stromanschluss: Netzstrom 230 V,Wechselstrom mit Ausnahme der IT-Schema-Installierungen,die in der Norm EN 60-950 definiert sind.
Achtung, die Netzspannung wird gemäß der Kriterien dieser Norm als gefährlich eingestuft.
Der Temperaturbereich für den Betrieb liegt zwischen 5°C und 45°C. Bei Gefahr dient das Steckernetzgerät zum Abtrennen der
230 V-Versorgung. Es ist daher ratsam, das Steckernetzgerät leicht zugänglich in Nähe des Telefons zu installieren.
Telefonanschluss: Einstufung der Netzspannung gemäss Norm EN 60-950 in Kategorie TRT-3 (Telefonnetzspannung).
Umweltschutz:
Ihr MOBILTEIL profitiert ebenfalls vom Programm EcoDesign der Philips; dieses Programm hat zum Inhalt, das Produkt
umweltfreundlich zu gestalten, indem es die Wechselwirkung zwischen Produkt und Umwelt während der gesamten
Lebensdauer berücksichtigt.
Deutsch
3ALL onis suppl 17/07/01 15:24 Page 3
Page 30

Zusätzliches Mobilteil Onis 200
4
Inbetriebnahme
Installation des Mobilteils
Verfahren Sie dazu folgendermaßen:
• Steckernetzteil in eine leicht zugängliche Steckdose stecken.
• MOBILTEIL auf das LADEGERÄT auflegen.
Vor der ersten Inbetriebnahme bzw. nach einer langen Ruhezeit außerhalb des
LADEGERÄTS ist das MOBILTEIL mindestens 12 Stunden lang vollständig
aufzuladen.
L ACHTUNG:
Nachdem das MOBILTEIL vollständig aufgeladen wurde, muss es wie auf Seite 5
beschrieben angemeldet werden.
Einlegen und Auswechseln von Akkus
Beim Auswechseln der Akkus bitte nur R03/AAA NiMh-Akkus verwenden.
• Deckel des MOBILTEIL-Akkufachs öffnen, indem Sie den Deckel in Pfeilrichtung
ziehen.
• Akkus entfernen.
• Neue Akkus richtig gepolt einlegen und Deckel schließen.
• MOBILTEIL auf das Ladegerät auflegen. Mindestens 12 Stunden aufladen lassen.
L ACHTUNG:
Auf keinen Fall nicht aufladbare Batterien verwenden, nur empfohlene Modelle verwenden
(R03/AAA NiMh).
Auswahl der Sprache
Ausgehend vom Ruhedisplay die Menüs aufblättern und |SETTINGS auswählen.
Blättern bis “Handset settings” erscheint.
Zweimal OK| bestätigen.
Rubrik “Language” auswählen und auf OK| drücken.
Blättern bis die gewünschte Sprache (z.B. Deutsch) erscheint und mit OK|
bestätigen.
Halten Sie die Taste 2 Sekunden gedrückt um in das Ruhedisplay
zurückzukehren.
6
5
4
3
2
1
Deutsch
3ALL onis suppl 17/07/01 15:24 Page 4
Page 31

Zusätzliches Mobilteil Onis 200
5
Mobilteil an einer Basisstation anmelden
Um ein MOBILTEIL mit einer BASISSTATION verbinden zu können, müssen
Sie zuerst das MOBILTEIL an dieser BASISSTATION anmelden (siehe unten).
Jedes MOBILTEIL kann mit zwei verschiedenen BASISSTATION benutzt
werden.
L ACHTUNG:
Vor Ausführung der folgenden Schritte muss das Mobilteil mindestens 12 Stunden lang
vollständig aufgeladen werden.
An einer Basisstation ONIS 200 oder ONIS 200 Vox
Steckernetzgerät von BASISSTATION Onis 200 abziehen und wieder
anschließen..
Ausgehend vom Menü “Einstell.” in Rubrik “Einstellun. Mobilteil” gehen und bis
“Mobilteil anmelden” blättern, dann OK
| wählen.
Anmeldungscode der Basisstation (4 Ziffern) eingeben, dann OK
| wählen.
Während kurzer Zeit wird auf dem Display “In Bearbeitung..”, dann “Erledigt!”
angezeigt. Ist die Anmeldung gescheitert, erneut bei Schritt beginnen.
An einer anderen Basisstation
Führen Sie an der Basisstation die vom Hersteller beschriebenen Schritte zur
Anmeldung eines Mobilteils durch (siehe Bedienungsanleitung des Herstellers der
Basisstation).
Führen Sie anschließend auf dem MOBILTEIL Schritte bis wie oben
beschrieben aus.
Pflege des Mobilteils
Zur Pflege Ihres Telefons benutzen Sie bitte ein mit wenig Seifenwasser befeuchtetes
Tuch, trocknen Sie dann mit einem trockenen Tuch nach.
• Weder Lösungsmittel noch Haushaltsmittel verwenden. Bei regelmäßiger Pflege
sieht Ihr Gerät noch lange wie neu aus.
Wichtig:
Wählen Sie einen Standort, an dem Ihr Telefon vor eventuellen Stürzen geschützt ist.
42
1
4
3
2
1
Der Code ist dem Schild auf der
Unterseite der Basisstation zu
entnehmen (RC)
Deutsch
3ALL onis suppl 17/07/01 15:24 Page 5
Page 32

Zusätzliches Mobilteil Onis 200
6
Mobilteil mit einer Basisstation ONIS 200
benutzen
Dieses MOBILTEIL, um das Sie Ihre Telefonanlage erweitert haben, funktioniert auf
die gleiche Art und Weise wie das mit Ihrer BASISSTATION Onis 200 oder
Onis 200 Vox gelieferte MOBILTEIL. Da Sie nun über eine Anlage mit mehreren
Mobilteilen verfügen, haben Sie Zugriff auf folgende Funktionen:
- Sie können ein internes Gespräch führen,
- Sie können ein Gespräch weiterleiten,
- Sie können ein Gespräch mit einem externen Gesprächspartner herstellen,
während zwei andere MOBILTEILE ein internes Gespräch führen (dafür müssen
Sie über mindestens 3 MOBILTEILE verfügen).Weitere Informationen
entnehmen Sie bitte der Hauptbedienungsanleitung.
- Sie können die Funktion “Babysitten” benutzen”.
Mobilteil mit einer anderen GAPBasisstation benutzen
Der GAP-Standard garantiert ein Minimum an Funktionen bei der Zusammenstellung von
Mobilteilen und Basisstationen unterschiedlicher Marken. Ihr MOBILTEIL unterstützt
den GAP-Standard.Wir raten Ihnen, die Bedienungsanleitung dieses MOBILTEILS sowie
die Bedienungsanleitung des Herstellers der Basisstation aufmerksam zu lesen, um beste
Voraussetzungen für einen einwandfreien Betrieb zu schaffen.
Ladegerät an der Wand befestigen
Zwei nebeneinanderliegende Löcher in einem Abstand von 65 mm in die Wand
bohren, Schrauben anbringen.
Halterung auf Plastikteil aufsetzen und Halterung nach unten ziehen.
Autonomie
Die Autonomie beträgt eine Woche, wenn sich das MOBILTEIL außerhalb der
BASISSTATION im Ruhezustand befindet, und 15 Stunden im Gesprächszustand.
• Verbleiben während des Gesprächs nur noch wenige Sekunden Autonomie,
werden Sie durch Warntöne darauf hingewiesen.
Ist die restliche Zeit aufgebraucht, wird das Gespräch automatisch unterbrochen.
2
1
Bei der Anmeldung Ihres MOBILTEILS an
der Basisstation einer anderen Marke sind
folgende Funktionen gewährleistet: Leitung
belegen,Annahme eines Anrufs, sowie
Nummernwahl.
Das Bildsymbol zeigt an, wenn der
Akku weniger als zu 5% geladen ist (kein
Balken mehr sichtbar). Das MOBILTEIL
muss dann aufgeladen werden
Deutsch
3ALL onis suppl 17/07/01 15:24 Page 6
Page 33

Zusätzliches Mobilteil Onis 200
7
Aufladen
Bei vollständig entleerten Akkus dauert das Aufladen 12 Stunden.
Reichweite
Die Reichweite des MOBILTEILS beträgt auf freiem Raum und bei guter
Funkverbindung ca. 300 m.
• Wenn im Gesprächszustand die Reichweite erreicht ist, klingt das Gespräch
verzerrt. In diesem Fall müssen Sie sich umgehend der BASISSTATION nähern,
sonst wird das Gespräch unterbrochen.
Bitte befolgen Sie die auf Seite 3 gegebenen Anweisungen zur Installation Ihres
Telefons.
Die Tasten des Mobilteils Onis 200
• Mit der Taste werden Anrufe angenommen oder beendet.
• Mit der Taste wird der Lautsprecher des MOBILTEILS ein- bzw.
ausgeschaltet.
• Mit der Taste wird ein internes Gespräch zu einem anderen Mobilteil
hergestellt.
• Mit der Taste wird die Hörerlautstärke oder die Lautsprecherlautstärke
während des Gesprächs eingestellt.
• Mit der Taste kann ein Zeichen nach der Eingabe gelöscht werden.Während
des Anrufs gibt sie ebenfalls Zugang zur Funktion “R”.Mit einem langen Tastendruck
ist jederzeit eine Rückkehr zum Ruhedisplay möglich
• Mit der Taste wird die Liste der Netzbetreiber-Vorwahlnummern geöffnet.
Bei diesen Angaben handelt es sich um
Anhaltswerte, die für einen zu 100%
geladenen Akku gelten.
Der Rahmen des Bildsymbols blinkt
um anzuzeigen, dass das Mobilteil richtig
auf dem Ladegerät aufliegt.
Deutsch
3ALL onis suppl 17/07/01 15:24 Page 7
Page 34

Zusätzliches Mobilteil Onis 200
8
Menüaufbau verstehen
Auf der vierten, untersten Zeile des Displays werden die Menüs angezeigt, auf der
zweiten und dritten Zeile die Rubriken und untergeordneten Rubriken.
Benutzung der Menüs:
Mit den Tasten können Sie die Menüs öffnen.
• Mit diesen Tasten werden die Menüs ausgewählt, die auf der unteren Displayzeile
zu sehen sind.
Beispiel: Im Ruhedisplay sind diese Menüs zum Beispiel |W
AHLW. und
GEM.T.BUCH|.
• Menüs, die nicht auf der unteren Zeile angezeigt sind, können mit der Taste
aufgeblättert und dann mit den Tasten wie oben
beschrieben benutzt werden.
• Mit einem langen Tastendruck auf kann der aktuelle Vorgang jederzeit
unterbrochen und zum Ruhedisplay zurückgekehrt werden.
Benutzung der Rubriken und untergeordneten Rubriken:
Mit den Tasten können Sie die Menüs öffnen.
• Die Titel der Rubriken werden in der zweiten Zeile auf schwarzem Untergrund
angezeigt.
• Die untergeordneten Rubriken werden auf der dritten Zeile angezeigt.Mit den
Tasten können diese Rubriken durchgeblättert werden. Mit den Tasten
wird dann bestätigt OK
| oder zur übergeordneten Rubrik
zurückgekehrt |ZURÜCK.
• In manchen Fällen können Sie anhand der Rubriken Optionen verändern. Beim
Zugang zur Rubrik wird zuerst die aktive Option angezeigt, vor der dann “√” steht.
Um eine andere Option auszuwählen, werden die Optionen mit den Tasten
aufgeblättert und die neue Wahl wird wie oben beschrieben bestätigt.
Das Bildsymbol u erinnert daran, dass der
Zugang zu mehreren Menüs möglich ist.
Bei den Rubriken und untergeordneten
Rubriken erscheint das Bildsymbol u nicht
auf dem Display.
Deutsch
3ALL onis suppl 17/07/01 15:24 Page 8
Page 35

Zusätzliches Mobilteil Onis 200
9
Externer Rufton: Bei einem ankommenden
Anruf.
Interner Rufton: Bei einem Gespräch
zwischen zwei Mobilteilen.
Um den Rufton auszuschalten, wählen Sie
die Option Stumm, das Bildsymbol wird
dann angezeigt.
Der Kontrast Ihres Displays stellt sich sofort
ein.
Sie hören den ausgewählten Rufton.
Persönliche Einstellungen
Ruftöne des Mobilteils
Das MOBILTEIL verfügt über 9 Ruftonmelodien.
Ausgehend vom Menü “Einstell.” in der Rubrik “Ton Mobilteil” bis “Externer
Rufton” oder “Interner Rufton” springen und OK
| wählen.
In der Liste blättern, um eine der neun Melodien auszuwählen, dann OK
|
wählen.
Ruflautstärke
Ausgehend vom Menü “Einstell.” in der Rubrik “Ton Mobilteil” bis “Rufton
Lautstärke” springen und OK| wählen.
In der Liste blättern, bis die gewünschte Lautstärke gefunden ist, und OK
|
wählen.
Display-Kontrast
Ausgehend vom Menü “Einstell.” in der Rubrik “Einstellun. Mobilteil” bis
“Kontrast” springen und OK| wählen.
In der Liste bis zum gewünschten Kontrast blättern und OK
| wählen.
Tastentöne aktivieren / deaktivieren
Jeder Tastendruck auf dem Mobilteil kann von einem Quittungston signalisiert
werden. Zur Programmierung dieses Tastentons:
Ausgehend vom Menü “Einstell.” in der Rubrik “Ton Mobilteil” zu “Tastenton”
blättern und OK
| wählen.
In der Liste blättern, um die Tastentöne zu aktivieren oder deaktivieren, und
OK
| wählen.
2
1
2
1
2
1
2
1
Deutsch
3ALL onis suppl 17/07/01 15:24 Page 9
Page 36

Zusätzliches Mobilteil Onis 200
10
Telefonieren
Anrufen
Wenn Sie das MOBILTEIL von dem Ladegerät abheben, wird das Bildsymbol
angezeigt.
Ist dieses Symbol nicht zu sehen, schlagen Sie im Kapitel “Ein Problem mit dem
Telefon? Überprüfen Sie ..” nach.
Auf drücken.
Auf das Tonzeichen warten und dann die Nummer Ihres Gesprächspartners
wählen.
Um das Gespräch zu beenden, erneut auf drücken oder das Mobilteil auf
die Basisstation oder das Ladegerät auflegen.
Vorbereitung der Rufnummer vor dem Anruf (Vorauswahl)
Es besteht die Möglichkeit, die Rufnummer vor Einleitung des eigentlichen Anrufes
zu überprüfen und eventuell zu korrigieren:
Rufnummer mit den Tasten eingeben.
• Bei einem Eingabefehler können Sie das zuletzt eingegebene Zeichen mit
|K
ORRIGIER. oder durch Drücken auf löschen*.
Auf oder drücken, um den Anruf einzuleiten.
*Halten Sie die Taste 2 Sekunden gedrückt damit dem Nummer löschen.
Einen Anruf annehmen
Ihr Telefon ONIS 200 klingelt, vorausgesetzt der Rufton wurde nicht abgeschaltet.
Auf drücken und das Gespräch führen.
• Sie können den Rufton des Mobilteils ausschalten, indem Sie auf |R
UHE drücken.
Um aufzulegen erneut auf drücken oder das Mobilteil auf die Basisstation
oder das Ladegerät auflegen.
2
1
2
1
3
2
1
Sie können ebenfalls durch Drücken der
Taste , die Leitung belegen, dadurch
wird gleichzeitig der Lautsprecher des
Mobilteils eingeschaltet.
Die Nummer wird nach und nach auf dem
Display angezeigt. Mit der Funktion kann
die Nummer in einem der Telefonbücher
gespeichert werden.
Deutsch
3ALL onis suppl 17/07/01 15:25 Page 10
Page 37

Zusätzliches Mobilteil Onis 200
11
Interne Gespräche
Mit Onis können Sie bis zu 7 zusätzliche Mobilteile an Ihrer Basisstation anschließen
(als Option erhältlich). Somit können Sie in jedem Zimmer Ihres Hauses oder Büros
über ein Mobilteil verfügen. Mit der Funktion interner Anruf können Sie intern
zwischen zwei Mobilteilen telefonieren.Verfügen Sie über mindestens drei
Mobilteile, können gleichzeitig ein internes und ein externes Gespräch geführt
werden (Beispiel: ein Mobilteil führt ein externes Gespräch, zwei andere Mobilteile
telefonieren intern).
Interner Anruf ohne
Auf drücken.
Mit blättern, um das bzw. die Mobilteile auszuwählen, die angerufen
werden sollen.
ANR
UFEN| wählen oder drücken, um den Anruf einzuleiten.
Möchten Sie das interne Gespräch von dem Mobilteil aus beenden, wählen Sie
|BEENDE
oder drücken Sie auf .
• Wird Ihr MOBILTEIL angerufen, drücken Sie , um das Gespräch
anzunehmen.
L HINWEIS:
Wenn Sie intern telefonieren und ein externer Gesprächspartner ruft an, werden die
besetzten Mobilteile von Signaltönen darauf hingewiesen. Das interne Gespräch muss
beendet werden, bevor das externe Gespräch angenommen werden kann. Ein drittes
MOBILTEIL, das nicht intern telefoniert, kann jedoch den externen Anruf annehmen.
Interner Anruf während eines externen Gesprächs
und Weiterleiten des Gesprächs
Sie führen ein externes Gespräch. Informieren Sie Ihren externen Gesprächspartner,
dass er Sie für eine kurze Zeit nicht mehr hören wird, anschließend:
Auf drücken.
Mit blättern, um das Mobilteil auszuwählen, das Sie anrufen wollen,
und ANR
UFEN| wählen.
2
1
4
3
2
1
Sie können ebenfalls die Nummer des
gewünschten Mobilteils eingeben, oder
drücken, dann klingeln alle Mobilteile. In
diesem Falle entfallen Schritte 2 und 3.
Während dieser Zeit hört der externe
Gesprächspartner eine Warte-Melodie.
Deutsch
3ALL onis suppl 17/07/01 15:25 Page 11
Page 38

Zusätzliches Mobilteil Onis 200
12
|MAKELN wählen, um das interne Gespräch zu halten und das Gespräch mit
dem externen Gesprächspartner wieder aufzunehmen.Auf diese Art und Weise
können Sie mehrfach zwischen internem und externem Gesprächspartner
hin- und herschalten.
• UMLEITUNG
| wählen, wenn Sie das externe Gespräch endgültig auf das
andere Mobilteil umleiten und das interne Gespräch beenden möchten.
• Blättern und K
ONF. RUF| wählen, um eine Konferenz zwischen den beiden
internen und dem externem Gesprächspartner einzuleiten.
Das Mobilteil wird angerufen:
Drücken Sie , um das Gespräch anzunehmen.
Funktion Babysitten benutzen
Mit dieser Funktion kann die Umgebung überwacht werden. Das für die
Überwachung benutzte Mobilteil wird dann als absolut lautloses Mikrofon
eingesetzt. Ein zweites Mobilteil stellt ein internes Gespräch mit dem für die
Überwachung benutzten Mobilteil her, dadurch können die Geräusche aus dem zu
überwachenden Zimmer abgehört werden. Bei einem ankommenden externen
Anruf klingelt das für die Überwachung benutzte Mobilteil nicht und nimmt den
Anruf auch nicht an.
Babysittermodus aktivieren
Ausgehend vom Menü “Einstell.” in der Rubrik “Einstellung. Mobilteil” bis
“Babysitter Modus” springen und OK| wählen.
Blättern, um die Funktion zu aktivieren, und OK
| wählen.
Babysittermodus deaktivieren
Ausgehend vom nebenstehenden Ruhedisplay ANNUL.| wählen.
Überwachung
Um die Geräusche in Mobilteilnähe abzuhören, muss mit dem für die Überwachung
dienenden Mobilteil von einem anderen Mobilteil aus ein internes Gespräch
eingeleitet werden (siehe S. 11).
L HINWEIS:
Sie können von einem Mobilteil im “Babysitter Modus” aus telefonieren, ankommende
Anrufe werden jedoch nicht durch Klingeln signalisiert.
2
1
3
Sie können ebenfalls durch Drücken auf
auflegen.
Sie können den Babysittermodus ebenfalls
deaktivieren, indem Sie das Menü
“Babysitter Modus” verwenden wie beim
aktivieren.
Auf dem Ruhedisplay erscheint nun die
Anzeige “Babysitter Modus”.
Deutsch
3ALL onis suppl 17/07/01 15:25 Page 12
Page 39

Zusätzliches Mobilteil Onis 200
13
Ein Problem mit dem Telefon? Überprüfen Sie...
PROBLEME
Das Bildsymbol des MOBILTEILS blinkt nicht,
wenn dieses auf dem Ladegerät aufliegt.
Kein Tonzeichen.
Kein Rufton.
Das Bildsymbol wird nicht angezeigt.
Das MOBILTEIL zeigt “Gescheitert” an, wenn
die BASISSTATION um ein MOBILTEIL
erweitert wird.
Gespräch wird von Nebengeräuschen gestört.
URSACHEN
- Kontakt der Klemmen zum Aufladen ist
mangelhaft.
- Klemmen zum Aufladen sind verschmutzt.
- Keine Stromversorgung.
- Das MOBILTEIL ist nicht ausreichend geladen.
- Sie sind zu weit von der BASISSTATION entfernt.
Der Rufton ist ausgeschaltet.
- Das Mobilteil ist nicht angemeldet.
- Der Netzstecker ist nicht eingesteckt.
- Das MOBILTEIL ist zu weit von der
BASISSTATION entfernt.
Das Verfahren zum Anmelden des MOBILTEILS
an der BASISSTATION ist gescheitert.
Die Höchstzahl von MOBILTEILEN ist erreicht
(maximal 8).
- Sie sind zu weit von der BASISSTATION
entfernt.
- Elektrogeräte, Mauern aus Stahlbeton oder
Metallzargen befinden sich in unmittelbarer
Nähe der BASISSTATION.
ABHILFE
- MOBILTEIL leicht bewegen.
- Klemmen zum Aufladen mit einem
alkoholgetränkten Tuch reinigen.
- Anschlussstecker überprüfen.
- MOBILTEIL aufladen.
- Nähern Sie sich der BASISSTATION.
Siehe “Rufton einstellen”.
- Verfahren zum Anmelden eines MOBILTEILS an
der BASISSTATION wiederholen (siehe S. 5);
- Anschlussstecker überprüfen.
- Nähern Sie sich der BASISSTATION .
Netzstecker der BASISSTATION herausziehen
und wieder einstecken.Verfahren zum Anmelden
eines MOBILTEILS an der BASISSTATION
wiederholen.
- Nähern Sie sich der BASISSTATION,
überprüfen Sie die Reichweite.
- Bewegen Sie Ihre BASISSTATION , um die
günstigste Position herauszufinden (möglichst
weit oben gelegen).
Deutsch
3ALL onis suppl 17/07/01 15:25 Page 13
Page 40

Extra handset Onis 200
1
Garantie
Geachte klant,
Vriendelijk bedankt voor de aankoop van dit Philips apparaat dat ontwikkeld en gefabriceerd is naar de hoogst mogelijke
kwaliteitseisen. Mocht er ongelukkigerwijs nog iets fout gaan met dit apparaat, dan garandeert Philips een kosteloze herstelling
(of vervanging). Dit ongeacht het land waar de herstelling plaatsvindt en gedurende een periode van 12 maanden vanaf de
aankoopdatum ( 6 maanden voor oplaadbare batterjen).
Deze internationale Philips-garantie is een aanvulling op de bestaande nationale garantieverplichtingen van handelaren en Philips
in het land van aankoop en tast uw door de wet bepaalde rechten als klant niet aan.
De Philips-garantie is geldig wanneer het apparaat is gebruikt in overeenstemming met de gebruiksaanwijzing en voor het doel
waarvoor het gemaakt is.Tevens dient de originele aankoopbon (faktuur, kassabon of kwitantie) overlegd te worden met daarop
de aankoopdatum, de naam van de handelaar en het model- (type) en produktie- (serie) nummer van het apparaat.
De Philips-garantie vervalt indien :
• op een van de genoemde documenten iets is veranderd, doorgehaald, verwijderd of onleesbaar gemaakt,
• het model- (type) of produktie-(serie) nummer op het apparaat is veranderd, doorgehaald, verwijderd of onleesbaar gemaakt,
• reparaties of wijzigingen zijn uitgevoerd door niet bevoegde service-organisaties of personen,
• een defect een gevolg is van externe (buiten het apparaat gelegen) oorzaken, bijvoorbeeld blikseminslag, wateroverlast, brand,
verkeerd gebruik of onachtzaamheid,
Wij maken u erop attent dat het produkt niet als defect kan worden beschouwd als wijzigingen of aanpassingen nodig zijn
teneinde het produkt te laten voldoen aan lokale of nationale technische normen die van kracht zijn in landen waar het
produkt oorspronkelijk niet voor ontwikkeld of geproduceerd is.
Indien uw Philips apparaat niet goed functioneert of defect is adviseren wij u contact op te nemen met uw Philips dealer of een
voor Philips werkende servicewerkplaats. Mocht u service nodig.
PHILIPS CONSUMENTENLIJN
POSTBUS 102
NL - 56000 AC Eindhoven
Tel.: 0 900 84 06 (22 ct per minut)
http://www.philips.com
Nederlands
4NL onis suppl 18/07/01 15:08 Page 1
Page 41

Extra handset Onis 200
2
Presentatie
Lijn opnemen
Intercom
Microfoon
Luidspreker
Keuzetoetsen
functies
Wissen en “R”
Volume
PICTOGRAMMEN OP HET SCHERM:
Batterij laadt
Antwoordapparaat actief
Boodschap op het antwoordapparaat
Interne oproep aan de gang
Bel handset uitgeschakeld
Luidspreker actief
Identiteit beschermd
Verbinding basisstation / handset correct
Navigatietoets binnen
het menu
Toegangsnummer
operator
Nederlands
4NL onis suppl 18/07/01 15:08 Page 2
Page 42

Raadgevingen en veiligheid
Deze extra HANDSET, die dezelfde is voor de modellen Onis 200 en Onis 200 Vox, vervolledigt uw installatie en zorgt ervoor
dat u ten allen tijde beschikt over een draadloze telefoon in de kamers die niet uitgerust zijn met een telefoonaansluiting.
U kunt tot 8 HANDSETS gebruiken op elk van de modellen Onis 200 en Onis 200 Vox. Om alle mogelijkheden van uw
HANDSET te benutten, raden wij u aan om de handleiding te raadplegen die geleverd wordt bij het BASISSTATION en de
hoofdHANDSET.
Deze HANDSET, die GAP-compatibel is, kan functioneren met elk GAP-basisstation, ook als dat van een ander merk zou zijn.
Als dit het geval zou zijn, raden wij u aan deze handleiding zeer grondig te lezen. Ze is speciaal voor u opgesteld en houdt
rekening met de suggesties en de opmerkingen van de gebruikers.
Veiligheidsinformatie:
• Vermijd ieder contact met vloeistoffen.
• Om elk risico op elektrische schokken te vermijden, mag u niet proberen de handset of het basisstation te openen.
Vertrouw de herstellingen toe aan onze serviceafdeling.
• Vermijd elk contact van contactplaatjes en batterij met geleidende voorwerpen (sleutels, papierklemmen, juwelen, enz.).
Het certificaat CE garandeert de conformiteit van de producten met de technische reglementering van toepassing volgens de EEG richtlijn
99/05/EC inzake de gebruiksveiligheid, elektromagnetische storingen en radiokeuringen.
Aansluiting op het elektriciteitsnet : voeding op netspanning 230 V, eenfasige wisselstroom met uitzondering van de installaties met IT-schema zoals
omschreven in de EN 60-950 norm. Opgelet, de netspanning behoort tot de categorie “gevaarlijk” volgens de criteria van dezelfde norm.
Gebruikstemperatuur tussen 5° C en 45° C. In geval van gevaar, dient de stekker van het voedingsblok uit het stopcontact gehaald te worden.
De stekker moet zich daarom dicht bij het toestel bevinden en gemakkelijk toegankelijk zijn.
Aansluiting op het telefoonnet : de op dit net aanwezige spanning is van de categorie “TNV-3” (spanning telefoonnet) volgens de norm
EN 60-950.
Bescherming van het milieu:
Uw telefoonhandset is ontworpen in het kader van het Philips EcoDesign programma, een ecologisch programma waarbij een
product ontworpen wordt rekening houdend met de relatie die het gedurende zijn hele levensduur onderhoudt met het milieu.
Extra handset Onis 200
3
Nederlands
4NL onis suppl 18/07/01 15:08 Page 3
Page 43

Extra handset Onis 200
4
De handset in gebruik nemen
De handset installeren
Voor een correcte installatie:
• Sluit de netvoeding aan op een gemakkelijk bereikbaar stopcontact.
• Plaats de HANDSET op de LADER.
Vóór het eerste gebruik of na een lange periode uit de LADER, moet de
HANDSET volledig worden opgeladen gedurende ten minste 12 uur.
L OPGELET:
Na een volledige laadperiode, dient u de toevoegingsprocedure van een HANDSET uit te
voeren zoals beschreven op pagina 5.
De batterijen plaatsen en vervangen
Wanneer de batterijen vervangen moeten worden, gebruik dan R03/AAA NiMh
batterijen.
• Schuif het batterijklepje van de HANDSET in de richting van de pijl.
• Verwijder de batterijen.
• Plaats de nieuwe batterijen in de aangeduide richting en sluit het klepje.
• Plaats de HANDSET op het BASISSTATION. Laat ten minste 12 uur laden.
L OPGELET:
Gebruik nooit batterijen die niet kunnen worden opgeladen en gebruik enkel de aanbevolen
modellen (R03/AAA NiMh).
Kiezen van de taal voor de handset
Vanaf het rustscherm, laat u defileren en kiest U |SETTINGS in de menu’s.
Laat defileren tot aan “Handset settings”.
Kies OK|.
Om de rubriek “Language” te kiezen, drukt u op OK|.
Laat defileren om uw taal te kiezen en druk dan op OK|.
Druk lang op de toets om terug te keren naar het rustscherm.
6
5
4
3
2
1
Nederlands
4NL onis suppl 18/07/01 15:08 Page 4
Page 44

De handset aan een basisstation toevoegen
Om een HANDSET te kunnen gebruiken met een BASISSTATION, dient u
eerst de toevoegingsprocedure van die HANDSET op dit BASISSTATION te
volgen (zie hieronder). Elke HANDSET kan worden gebruikt op vier verschillende
BASISSTATIONS.
L OPGELET:
Vooraleer de onderstaande operaties uit te voeren, dient de handset volledig geladen te zijn
gedurende ten minste 12 uur.
Op een basisstation ONIS 200 of ONIS 200 Vox
Onderbreek even de stroom van het BASISSTATION Onis 200 via het
voedingsblok.
In het menu “Instellen”, rubriek “Instell handset”, laat u defileren tot u
“Handset registreren” ziet en drukt u OK|.
Geef de registratiecode van het basisstation in (4 cijfers), en kies OK|.
Gedurende enige ogenblikken, duidt het scherm “Registratie...” aan, en dan
“Ingesteld”. Als dat niet lukt, herbegin de procedure vanaf stap .
Op een ander basisstation
Voer de procedure geschreven door de producent van het basisstation uit
(zie handleiding van de producent van het basisstation).
Daarna voert u de stappen tot uit van de hierboven beschreven
procedure voor de HANDSET).
Uw handset onderhouden
Om uw HANDSET te reinigen gebruikt u een met water en wat zeep bevochtigde
doek, en droogt u met een droge doek.
• Gebruik geen reinigingsmiddelen of oplosmiddelen. Reinig uw toestel regelmatig,
zo blijft het er als nieuw uitzien.
Belangrijk:
Vermijd om het toestel op een plaats neer te zetten waar het zou kunnen vallen.
42
1
4
3
2
1
De code staat op het etiket onder het
basisstation (RC)
Extra handset Onis 200
5
Nederlands
4NL onis suppl 18/07/01 15:08 Page 5
Page 45

Extra handset Onis 200
6
De handset gebruiken met een basisstation
ONIS 200
Deze bijkomende HANDSET die uw installatie vervolledigt, functioneert op dezelfde
manier als die geleverd met uw BASISSTATION Onis 200 of Onis 200 Vox.
Nu kunt u met uw multi-handset installatie:
- een interne conferentie houden,
- een gesprek doorschakelen,
- een gesprek voeren met een buitenlijn terwijl twee andere HANDSETS in
intercom zijn (als u over ten minste 3 HANDSETS beschikt).Voor meer
informatie over dit onderwerp, raadpleeg de hoofdhandleiding.
- de babysitfunctie gebruiken.
De handset gebruiken met een ander
GAP-compatibel basisstation
De GAP-norm garandeert de basisfuncties voor iedere handset en voor ieder
basisstation van een verschillend merk, als ze samen aangegeven zijn.
Uw HANDSET beantwoordt aan die norm.
Om uw HANDSET zo goed mogelijk te gebruiken, raden wij u aan deze handleiding
te lezen en ook die van de producent van het basisstation.
De lader op de muur bevestigen
Boor twee gaten in de muur, onder elkaar op een afstand van 65 mm, en plaats
schroeven.
Schuif de sokkel op het plastic gedeelte, en trek naar beneden.
Autonomie
Ongeveer een week als de HANDSET in rust is buiten zijn LADER en 15 uur in
gesprek.
• Als er tijdens een gesprek slechts enkele seconden autonomie meer overblijven,
hoort u een waarschuwingssignaal.
Als de batterij leeg is, wordt het gesprek automatisch verbroken.
2
1
Als uw HANDSET werd aangegeven op een
basisstation van een ander merk, zijn de
gegarandeerde basisfuncties : een lijn
opnemen, een oproep ontvangen, een
nummer vormen.
Het icoon duidt aan dat het toestel
voor minder dan 5 % (geen streep) geladen
is. U dient de HANDSET te herladen
Nederlands
4NL onis suppl 18/07/01 15:08 Page 6
Page 46

Extra handset Onis 200
7
Deze gegevens zijn indicatief en geldig bij
een volledig geladen batterij.
De rand van het pictogram flikkert
om aan te duiden dat de handset goed op
de lader geplaatst is.
Opladen
Een lege batterij is na 12 u weer volledig opgeladen.
Bereik
Het bereik van de HANDSET is ongeveer 300 m in een omgeving zonder
obstakels onder optimale radio-condities.
• Indien u tijdens een gesprek buiten het bereik van de telefoon dreigt te komen,
wordt de kwaliteit van de verbinding slechter. In dat geval dient u onmiddellijk
dichter bij het basisstation te gaan, anders wordt het gesprek verbroken.
Gelieve de installatieraadgevingen op pagina 3 te respecteren.
De toetsen van de handset Onis 200
• Met de toets kunt u gesprekken voeren en ontvangen.
• Met de toets kunt u de luidspreker van de HANDSET activeren of
desactiveren.
• Met de toets kunt u intercom met een andere handset kiezen.
• Met de toets kunt u het geluidsniveau van de hoorn of de luidspreker regelen
tijdens een gesprek.
• Met de toets kunt u een letterteken wissen. Hij laat ook toe om tijdens een
gesprek de functie “R” te gebruiken. Een lange druk op deze toets laat toe om op
ieder moment naar het rustscherm terug te keren.
• Met de toets krijgt u toegang tot de lijst van de toegangsnummers van de
operators.
Nederlands
4NL onis suppl 18/07/01 15:08 Page 7
Page 47

Extra handset Onis 200
8
Het systeem van de menu’s begrijpen
De vierde lijn van het scherm geeft de menu’s weer, de tweede en de derde lijn zijn
gereserveerd voor rubrieken en sub-rubrieken.
Bij menu’s :
De toetsen geven u toegang tot de menu’s.
• Met behulp van deze toetsen kiest u menu’s voorgesteld op de lijn onderaan het
scherm.
Bijvoorbeeld : op het rustscherm, zijn de voorgestelde menu’s |NR.
HERH.en
PUBL GIDS|.
• Als u toegang wilt tot menu’s die niet op de onderste lijn staan, gebruikt u de
toetsen om te defileren, en dan de toetsen om een keuze
te maken.
• Een lange druk op laat u toe de operatie op ieder moment te
onderbreken en terug te keren naar het rustscherm.
Bij rubrieken en sub-rubrieken:
• De titels van de rubrieken worden aangeduid op de tweede lijn op een zwarte
achtergrond.
• De sub-rubrieken worden aangeduid op de derde lijn. Gebruik de toetsen
om de sub-rubrieken te laten defileren. Gebruik dan de toetsen om te
valideren OK
| of een niveau terug te keren |TERUG.
• In bepaalde gevallen kunt u via de rubrieken opties wijzigen. Bij de toegang tot
een rubriek van dit type, verschijnt de geactiveerde optie eerst, voorafgegaan
door een “√”.
Om een andere optie te kiezen, laat u defileren met behulp van de toetsen
en bevestigt u uw nieuwe keuze zoals hierboven beschreven.
Het pictogram u duidt aan dat er
verschillende menu’s toegankelijk zijn.
Bij de rubrieken en sub-rubrieken, verschijnt
het pictogram u niet op het scherm.
Nederlands
4NL onis suppl 18/07/01 15:09 Page 8
Page 48

Extra handset Onis 200
9
Extern beltype : voor iedere binnenkomende
oproep.
Intern beltype : voor iedere oproep in
intercom.
Om de bel uit te schakelen, kiest u de optie
Stilte, het pictogram verschijnt.
Het contrast van het scherm wordt dan
meteen aangepast.
U hoort het gekozen beltype.
Uw handset personaliseren
Beltypes van de handset
De HANDSET beschikt over 9 beltypes.
In het menu “Instellen”, rubriek “Geluiden handset”, laat u defileren tot
“Ext. beltype” of “Int. beltype”, en u kiest OK
|.
Laat defileren om één van de negen beltypes te kiezen en kies dan OK|.
Belvolume
In het menu “Instellen”, rubriek “Geluiden handset”, laat u defileren tot
“Belvolume”, en u kiest OK|.
Laat defileren om het gewenste volume te kiezen en kies dan OK|.
Contrast van het scherm
In het menu “Instellen”, rubriek “Instell handset”, laat u defileren tot
“Contrast”, en u kiest OK|.
Laat defileren om het gewenste contrast te kiezen en kies dan OK|.
De pieptoon van de toetsen activeren / desactiveren
Indien u dat wenst kunt u bij iedere druk op een toets van de HANDSET een
pieptoon horen ter bevestiging. U kunt deze toon instellen:
In het menu “Instellen”, rubriek “Geluiden handset”, laat u defileren tot
“Toon toetsen”, en kiest u OK|.
Laat defileren om de pieptonen te activeren of te desactiveren, en kies dan OK|.
2
1
2
1
2
1
2
1
Nederlands
4NL onis suppl 18/07/01 15:09 Page 9
Page 49

Extra handset Onis 200
10
Telefoneren
Om een oproep te doen
Wanneer u de HANDSET van de LADER neemt, dient het icoon te
verschijnen.
Indien dat niet zo is, raadpleeg dan het hoofdstuk “Telefoon, een probleem ?
Verifieer...”.
Druk op .
Verifieer of er tonaliteit is, en vorm dan het nummer van uw correspondent.
Om het gesprek te beëindigen, drukt u opnieuw op of plaatst u de
handset terug op het basisstation of op zijn lader.
Uw nummer voorbereiden vooraleer u belt (voornummering)
Als u het gevormde nummer wenst te kunnen controleren en eventueel te
verbeteren voor verzending:
Vorm het nummer op het klavier.
• Indien u een fout maakt, kunt u het laatste karakter wissen met |WIJZIGEN
of door op te drukken*.
Druk op of om de verbinding te maken.
*Als U het nummer in zijn geheel wilt wissen, drukt U lang op .
Een oproep beantwoorden
Uw Onis 200 belt, indien u de bel niet hebt uitgeschakeld.
Druk op om te praten.
• U kunt de bel van de handset uitschakelen met |STILTE.
Om in te haken, drukt u opnieuw op of plaatst u de handset terug op het
basisstation of op zijn lader.
2
1
2
1
3
2
1
U kunt ook de lijn opnemen door op de
toets te drukken, wat ook de
luidspreker van de handset inschakelt.
Het nummer verschijnt geleidelijk op het
scherm. Met de functie OPSLAAN| kunt u
dit nummer opnemen in één van de
telefoonboeken.
Nederlands
4NL onis suppl 18/07/01 15:09 Page 10
Page 50

Extra handset Onis 200
11
Intercom gebruiken
Op uw basisstation kunnen 8 handsets worden aangesloten. Met intercom kunt u
interne gesprekken voeren tussen twee handsets.
Bovendien kunt u, als u over ten minste drie handsets beschikt, tegelijk een extern
gesprek voeren (bijvoorbeeld : een handset voert een extern gesprek terwijl twee
andere handsets in intercom zijn).
Intercom als er geen externe oproep plaatsvindt
Druk op .
Laat defileren met om de te bellen post of posten te kiezen.
Kies OPR
OEP| of om de verbinding te maken.
Om de intercom te beëindigen vanop de handset, kiest u |ST
OP INTER.of
drukt u op .
• Op de opgebelde HANDSET drukt u op om te antwoorden.
L OPMERKING:
Als er een externe oproep binnenkomt tijdens een intercom, krijgen de handsets die in
gebruik zijn een waarschuwingssignaal te horen. De intercom dient te worden beëindigd
alvorens de externe oproep kan worden beantwoord. Maar een derde HANDSET, die niet
in de intercom betrokken is, kan de externe oproep ook beantwoorden.
Intercom tijdens een externe oproep en
doorschakelen van een gesprek
U voert een extern gesprek.Verwittig uw externe gesprekspartner dat hij u
gedurende enkele ogenblikken niet zal horen en:
Druk op .
Laat defileren met om de op te roepen handset te kiezen en kies
OPROEP|.
2
1
4
3
2
1
U kunt ook het nummer van de op te
roepen handset ingeven, of alle
handsets oproepen. In dat geval zijn de
stappen en overbodig.
32
Intussen hoort de externe gesprekspartner
wachtmelodie.
Nederlands
4NL onis suppl 18/07/01 15:09 Page 11
Page 51

Extra handset Onis 200
12
Kies |OMSCHAK om de intercom in de wacht te zetten en het gesprek met
de externe gesprekspartner weer op te nemen. U kunt zo verschillende keren
heen en weer schakelen tussen externe en interne gesprekspartners.
• Kies DOORSCHAK.
| als u het externe gesprek definitief wilt doorschakelen
naar de andere handset en de intercom wilt beëindigen.
• Laat defileren en kies CONF
. CALL| om een conferentie te voeren tussen de
twee interne gesprekspartners en de externe gesprekspartner.
Op de opgeroepen handset(s):
Drukt u op om te antwoorden.
De babysitfunctie gebruiken
Het gaat hier om een functie bewaking van de omgeving. Een “bewakings”-handset
dient als volledig stille microfoon. Een andere handset staat in intercomverbinding
met die bewakingshandset om de geluiden te beluisteren in de kamer waar deze
laatste zich bevindt.Als een correspondent u oproept, blijft de bewakingshandset stil
en neemt de oproep niet aan.
De babysitmodus inschakelen
In het menu “Instellen”, rubriek “Instell handset”, laat u defileren tot
”Babysitmodus”, en kiest u OK|.
Laat defileren om de functie te activeren en kies OK|.
De babysitmodus uitschakelen
Op het rustscherm kiest u ANNULEREN|.
De bewaking gebruiken
Om de geluiden in de omgeving van de bewakingshandset te beluisteren, dient u
een intercomverbinding te maken (zie p. 11) met die handset vanaf een andere
handset.
L OPMERKING:
Met een handset in “Babysitmodus” kunt u een oproep doen, maar hij belt niet bij
binnenkomende oproepen.
2
1
3
U kunt ook inhaken met .
U kunt de babysitmodus uitschakelen via
het menu “Babysitmodus” zoals voor het
inschakelen.
De indicatie “Babysitmodus ” verschijnt op
het rustscherm.
Nederlands
4NL onis suppl 18/07/01 15:09 Page 12
Page 52

Telefoon, een probleem ? Verifieer...
PROBLEMEN
Het pictogram van de HANDSET flikkert niet
als die op de lader ligt.
Geen tonaliteit.
Geen bel.
Het pictogram verschijnt niet.
Op de HANDSET verschijnt “Mislukt” bij de
procedure voor het toevoegen van een
HANDSET op het BASISSTATION.
Parasieten verstoren het gesprek.
OORZAKEN
- Slecht contact met de laadcontacten.
- De laadcontacten zijn vuil.
- Geen voeding.
- De HANDSET is niet voldoende geladen.
- U bevindt zich te ver van het BASISSTATION.
De bel is uitgeschakeld.
- De handset is niet geregistreerd.
- De stroom is uitgeschakeld.
- De HANDSET bevindt zich te ver van het
BASISSTATION.
De procedure voor het toevoegen van de
HANDSET op het BASISSTATION is mislukt.
Het maximum aantal handsets is bereikt
(max.8).
- U bevindt zich te ver van het BASISSTATION.
- Er bevinden zich elektrische toestellen,
muren in gewapend beton, metalen sloten te
dicht bij het BASISSTATION.
OPLOSSINGEN
- Verplaats de HANDSET lichtjes.
- Maak de laadcontacten schoon met een vod
en wat alcohol
.
- Verifieer de aansluitingen.
- Laat de HANDSET laden.
- Ga dichter bij het BASISSTATION.
Zie “Beltype instellen”.
- Herneem de procedure toevoegen van een
handset op het basisstation (p.5);
- Verifieer de aansluitingen.
- Ga dichter naar het BASISSTATION.
Schakel de stroom van het BASISSTATION uit
en weer aan. Herneem de procedure voor de
toevoeging van een HANDSET op het
BASISSTATION.
- Ga dichter bij het BASISSTATION, controleer
het bereik.
- Verplaats het BASISSTATION om de beste
plaats te vinden (hoe hoger, hoe beter).
Extra handset Onis 200
13
Nederlands
4NL onis suppl 18/07/01 15:09 Page 13
Page 53

Telefono senza filo supplementare Onis 200
1
Garanzia
Caro Cliente,
Grazie per aver acquistato questo prodotto Philips, progettato e realizzato secondo i più elevati standard di qualità.
La durata della garanzia Philips è di 12 mesi dall’acquisto del prodotto (sei mesi per la batteria ricaricabile), e copre la
sostituzione gratuita delle parti difettose o avariate e la prestazione della relativa manodopera. La garanzia internazionale
Philips, allo scopo di tutelare i diritti del consumatore, integra le norme nazionali di garanzia con quelle valide nel paese di
acquisto.
La garanzia è valida purché il prodotto sia trattato in modo appropriato secondo le istruzioni d’uso e venga presentato un
documento fiscale rilasciato dal rivenditore, con: la data di acquisto, la descrizione del prodotto, il modello, il numero di
matricola, il nome e l’indirizzo del rivenditore.
La garanzia Philips non è valida nei seguenti casi :
• I documenti sono stati alterati o resi illeggibili.
• Il modello e/o il numero di matricola del prodotto sono stati alterati, cancellati, rimossi o resi illeggibili.
• Precedenti interventi effettuati da personale non autorizzato.
• Negligenza o trascuratezza nell’uso, mancata osservanza delle istruzioni per il funzionamento dell’apparecchio, uso improprio
o mancanza di cautele di ordinaria prudenza,danni causati da sovratensione, da fulmini, acqua o fuoco , errata installazione,
danni da trasporto.
• Prodotti modificati o adattati per l’utilizzo in paesi diversi da quelli per cui sono stati progettati e costruiti, approvati e/o
autorizzati o per qualsiasi danno provocato da queste modifiche.
Nel caso in cui il prodotto non funzioni correttamente o sia difettoso, dovrà pervenire al Centro Assistenza Tecnica Autorizzato
(consultare l’elenco telefonico della provincia alla voce Philips Service).
Qualora vi sia la necessità di assistenza in un altro paese contattare il Servizio Consumatori locale.
Si raccomanda di leggere attentamente le istruzioni d’uso prima di interpellare il Rivenditore o il Centro di Assistenza.
Philips dichiara di essere l’unico soggetto responsabile in ordine alla prestazione della presente Garanzia.
SERVIZIO CONSUMATORI PHILIPS
Via Casati 23
IT - 20052 MONZA (MI)
Tel.: 800 820 026
http://www.philips.it
Italiano
5IT onis suppl 18/07/01 14:46 Page 1
Page 54

Telefono senza filo supplementare Onis 200
2
Presentazione
Impegnare la linea
Interfonia
Microfono
Altoparlante
Tasti di selezione
delle funzioni
Correzione e “R”
Volume
PITTOGRAMMI DELLO SCHERMO:
Stato di carica della batteria
Segreteria telefonica attivata
Indicazione di messaggio sulla segreteria telefonica o sul
Top Messaggio
Chiamata interna in corso
Telefono occupato
Altoparlante attivato
Riservatezza della chiamata
attivato
Collegamento base/telefono
corretta
Tasto di navigazione
nel menu
Prefisso
Operatore
Italiano
5IT onis suppl 18/07/01 14:46 Page 2
Page 55

Telefono senza filo supplementare Onis 200
3
Consigli e sicurezza
Questo TELEFONO supplementare, comune ai modelli Onis 200 e Onis 200 Vox, completerà la vostra linea telefonica,
permettendovi di disporre in modo permanente di un telefono senza fili nelle stanze in cui manca una presa telefonica.
Con i modelli Onis 200 e Onis 200 Vox potete utilizzare fino ad 8 TELEFONI. Per usufruire di tutte le possibilità del vostro
TELEFONO, vi consigliamo di consultare il manuale per l’uso consegnato con la BASE e con il TELEFONO principale.
Questo TELEFONO, compatibile con le norme GAP, può funzionare con qualsiasi base GAP, indipendentemente dalla marca.
In caso di marca diversa, vi invitiamo a leggere attentamente questo manuale, appositamente redatto per il vostro uso, tenendo
conto dei suggerimenti e delle osservazioni fatti dagli utilizzatori.
Informazioni di sicurezza:
• Evitare il contatto con i liquidi.
• Per evitare il rischio di scosse elettriche, non aprire mai nè il telefono nè la base.Affidate le riparazioni al nostro servizio
clienti.
• Evitare il contatto tra morsetti di caricamento e morsetti della batteria con oggetti conduttori (chiavi, elementi metallici,
gioielli, ecc.).
Il marchio CE attesta la conformità dei prodotti alle norme tecniche applicabili conformemente alla direttiva 99/05/EC per la sicurezza degli
utilizzatori, i distubri elettromagnetici ed i test radio.
Collegamento elettrico: alimentazione su rete 230 V, corrente alternata monofasica ad esclusione delle installazioni a schema IT definite dalla
norma EN 60-950.Attenzione, la tensione della rete è classificata pericolosa secondo i criteri della stessa norma.Temperatura d’utilizzazione tra
5° C e 45° C. In caso di pericolo, l’alimentatore della rete principale serve da dispositivo di sezionamento dell’alimentazione 230 V.
Per precauzione, esso va installato in vicinanza dell’apparecchio ed essere facilmente accessibile.
Collegamento telefonico: le tensioni presenti su tale rete sono classificate TRT-3 (tensione rete telefonica) ai sensi della norma EN 60-950.
Protezione dell’ambiente:
Il vostro telefono ha usufruito anche del programma EcoDesign di Philips, programma di concezione ecologica di un prodotto
che tiene conto della relazione intrattenuta con l’ambiente per tutta la sua durata di vita.
Italiano
5IT onis suppl 18/07/01 14:46 Page 3
Page 56

Telefono senza filo supplementare Onis 200
4
Messa in servizio del telefono
Installazione
Per eseguire l’installazione correttamente:
• Inserire l’adattatore della presa principale in una presa di corrente facilmente
accessibile.
• Posizionare il TELEFONO sul CARICABATTERIE.
Prima di utilizzarlo per la prima volta o dopo un periodo prolungato lontano dal
CARICABATTERIE, il TELEFONO andrà completamente ricaricato per almeno
12 ore.
L ATTENZIONE:
Dopo una carica completa, dovrete eseguire la procedura di associazione di un TELEFONO,
descritta a pag. 5.
Installazione e sostituzione delle batterie
In caso di sostituzione delle batterie, utilizzare batterie R03/AAA NiMh.
• Aprire il coperchietto del compartimento batteria del TELEFONO tirando nel
senso della freccia.
• Togliere le batterie.
• Inserire le nuove batterie nel senso indicato e richiudere il coperchietto.
• Riporre il TELEFONO sulla BASE. Lasciare in carica per almeno 12 ore.
L ATTENZIONE:
Non usare mai pile non ricaricabili e usare solo i modelli raccomandati (R03/AAA NiMh).
Cambiare la lingua del telefono
A partire dallo schermo di stand by, far scorrere e scegliere |SETTINGS nei
menu.
Far scorrere fino a “Handset settings”.
Scegliere OK|.
Per selezionare la rubrica “Language”, scegliere OK|.
Far scorrere per selezionare la lingua, poi scegliere OK|.
Premere a lungo per ritornare allo schermo di stand by.
6
5
4
3
2
1
Italiano
5IT onis suppl 18/07/01 14:46 Page 4
Page 57

Telefono senza filo supplementare Onis 200
5
Associare il telefono ad una base
Per utilizzare un TELEFONO con una BASE, dovete aver già effettuato la procedura
di associazione di tale TELEFONO con tale BASE (vedi quanto segue).
Ogni TELEFONO può essere utilizzato con due BASI diverse.
L ATTENZIONE:
Prima di eseguire le operazioni seguenti, il telefono andrà completamente ricaricato per
almeno 12 ore.
Base ONIS 200 o ONIS 200 Vox
Mettere la BASE Onis 200 fuori tensione, poi sotto tensione con l’alimentatore.
A partire dal menu “Regolaz.”, rubrica “Regolaz. principale”, far scorrere il menu
fino a “Collega princip”, poi scegliere OK|.
Digitare il codice di collegamento della base (4 cifre), poi scegliere OK|.
Il display indicherà per alcuni istanti “In corso...”, poi “Regolato !”.
In caso d’insuccesso, ripetere la procedura a partire dal punto .
Altra base
Sulla base, eseguire la procedura descritta dal costruttore (vedi manuale del
costruttore della Base).
Seguire poi i punti da a della procedura sopradescritta per il TELEFONO.
Pulizia del telefono
Per pulire il vostro TELEFONO, utilizzare un panno inumidito con acqua
leggermente saponata, poi asciugare con un panno asciutto.
• Non utilizzare nè solventi, nè prodotti di pulizia per la casa. Pulire regolarmente
l’apparecchio affinché non assuma un aspetto usato.
Importante:
Evitare di posizionare l’apparecchio in un luogo in cui rischierebbe di cadere.
42
1
4
3
2
1
Il codice è scritto sull’etichetta che si trova
sotto la base (RC).
Italiano
5IT onis suppl 18/07/01 14:46 Page 5
Page 58

Telefono senza filo supplementare Onis 200
6
Uso del telefono con una base ONIS 200
Questo TELEFONO supplementare completa la vostra installazione e funziona come
quello fornito con la BASE Onis 200 o Onis 200 Vox.
Ormai, grazie alla vostra installazione a più telefoni, potete:
- stabilire una conferenza interna,
- commutare una conversazione,
- stabilire una comunicazione con l’esterno mentre gli altri due TELEFONI sono in
interfonia (se disponete di almeno 3 TELEFONI). Per maggiori informazioni su tale
argomento, consultare il manuale principale.
- utilizzare la funzione “babysit”.
Uso del telefono con un’altra base di
norma GAP
La norma GAP garantisce un funzionamento minimo a tutti i telefoni e a tutte le
basi di marca diversa, dichiarati insieme.
Il vostro TELEFONO risponde a tale norma.
Prima di utilizzare il vostro TELEFONO nelle migliori condizioni, si consiglia di
leggere tale manuale e quello del costruttore della base.
Fissare il caricabatterie murale
Fare due fori nel muro, lasciando uno spazio di 65 mm alla verticale, e inserire
le viti.
Inserire lo zoccolo sull’elemento di plastica, poi tirare verso il basso.
Autonomia
E’ di circa una settimana, quando il TELEFONO è a riposo al di fuori della BASE e
di 15 ore in comunicazione.
• Durante una comunicazione, se vi rimangono solo alcuni secondi di autonomia,
sarete avvertiti da beep sonori.
Trascorso tale lasso di tempo, la comunicazione verrà automaticamente interrotta.
2
1
Quando il vostro TELEFONO è dichiarato su
una base di marca diversa, le funzioni
utilizzabili garantite sono: impegnare la
linea, ricevere una chiamata, selezionare un
numero telefonico.
L’icona indica un tasso di carica
inferiore al 5 % (assenza di barrette).
Il TELEFONO andrà ricaricato.
Italiano
5IT onis suppl 18/07/01 14:46 Page 6
Page 59

Telefono senza filo supplementare Onis 200
7
Ricarica
La durata completa della ricarica, quando la batteria è completamente scarica, è di
12 ore.
Portata
La portata del TELEFONO è di circa 300 m in luogo libero e in buone condizioni di
ambiente radio.
• Durante una comunicazione, se il limite della portata viene raggiunto, la
conversazione risulterà disturbata. In questo caso, avvicinatevi rapidamente alla
BASE, per evitare che la comunicazione venga interrotta.
Rispettare i consigli d’installazione descritti a pag. 3.
I tasti del telefono Onis 200
• Il tasto consente di effettuare e ricevere le chiamate.
• Il tasto consente di attivare o disattivare l’altoparlante del TELEFONO.
• Il tasto consente di selezionare l’interfonia con un altro telefono.
• Il tasto consente di regolare il livello sonoro del ricevitore o dell’altoparlante
durante una comunicazione.
• Il tasto consente di cancellare un carattere dell’impostazione.
Esso consente anche di utilizzare la funzione “R” durante una chiamata.
Una pressione lunga su tale tasto consente di ritornare allo schermo di stand by in
qualsiasi momento.
• Il tasto consente di accedere alla lista dei prefissi operatore.
Il contorno del pittogramma
lampeggia per indicare che il telefono è
posizionato correttamente sul
caricabatterie.
Questi dati sono indicativi e forniti per una
batteria completamente carica.
Italiano
5IT onis suppl 18/07/01 14:46 Page 7
Page 60

Telefono senza filo supplementare Onis 200
8
Capire il sistema di menu
La quarta riga del display è riservata alla visualizzazione dei menu, mentre la seconda
e la terza sono riservate alle rubriche e alle sottorubriche.
Caso dei menu:
I tasti consentono di accedere ai menu.
• Servendosi di questi tasti, scegliere i menu presentati sulla riga che si trova in
basso al display.
Per esempio: nel display di riposo, i menu proposti sono |RISELEZ
e RUB.COND.
• Quando si desidera accedere ai menu non presentati sulla riga in basso, servirsi
dei tasti per far scorrere i menu e dei tasti per selezionarli.
• Una pressione lunga su consente di interrompere, in qualsiasi momento,
l’operazione in corso e ritornare allo schermo di stand by.
Caso delle rubriche e delle sottorubriche:
• I titoli delle rubriche sono indicati sulla 2a riga, su fondo nero.
• Le sottorubriche sono indicate sulla 3a riga. Servirsi dei tasti per far
scorrere le sottorubriche. Poi utilizzare i tasti per confermare OK|
o risalire di un livello |RITORNO.
• In alcuni casi, le rubriche consentono di modificare delle opzioni. Quando si
accede ad una rubrica di questo tipo, l’opzione attivata viene visualizzata per
prima, preceduta da
.
Per selezionare un’altra opzione, far scorrere le rubriche per mezzo dei tasti
e confermare la nuova scelta come indicato in quanto precede.
Il pittogramma u ricorda che sono
accessibili vari menu.
Per le rubriche e sottorubriche, il
pittogramma u non figura sul display.
Italiano
5IT onis suppl 18/07/01 14:46 Page 8
Page 61

Telefono senza filo supplementare Onis 200
9
Melodia esterna: per le chiamate entranti.
Melodia interna: per le chiamate in
interfonia.
Per interrompere la suoneria, scegliere
l’opzione Silenzio, verrà visualizzato il
relativo pittogramma .
Il contrasto del display si regola
immediatamente.
Sentirete la suoneria selezionata.
Personalizzare il telefono
Suonerie del telefono
Il TELEFONO dispone di 9 melodie di suoneria.
A partire dal menu “Regolaz.”, rubrica “Audio ricevitore”, far scorrere fino a
“Melodia Esterna” o “Melodia Interna”, poi scegliere OK|.
Far scorrere per selezionare una delle nove melodie, poi scegliere OK|.
Volume delle suonerie
A partire dal menu “Regolaz.”, rubrica “Audio ricevitore”, far scorrere fino a
“Volume Suoneria”, poi scegliere OK|.
Far scorrere per selezionare il volume desiderato, poi scegliere OK|.
Contrasto del display
A partire dal menu “Regolaz.”, rubrica “Regolaz. principale”, far scorrere fino a
“Contrasto”, poi scegliere OK|.
Far scorrere per selezionare il contrasto desiderato, poi scegliere OK|.
Attivare/disattivare i beep tasti
Ogni pressione su un tasto del TELEFONO può essere segnalata da un beep di
conferma.Tale beep può essere programmato:
A partire dal menu “Regolaz.”, rubrica “Audio ricevitore”, far scorrere fino a
“Tasti suoni”, poi scegliere OK
|.
Far scorrere per attivare o disattivare i beep, poi scegliere OK|.
2
1
2
1
2
1
2
1
Italiano
5IT onis suppl 18/07/01 14:46 Page 9
Page 62

Per impegnare la linea potete anche
premere il tasto , il che metterà in
servizio l’altoparlante del telefono.
Telefono senza filo supplementare Onis 200
10
Telefonare
Per effettuare una chiamata
Quando si toglie il TELEFONO dal CARICABATTERIE, l’icona deve essere
visualizzata.
In caso contrario, vedi capitolo “Guida alla soluzione di problemi...”.
Premere .
Verificare la presenza della tonalità, poi comporre il numero del corrispondente.
Per terminare la conversazione, premere nuovamente o riporre il
telefono sulla base o ancora sul caribatterie.
Preparare il numero prima di effettuare la chiamata
(preselezione)
Se volete poter verificare il numero composto ed eventualmente correggerlo prima
di impegnare la linea:
Comporre il numero a partire dalla tastiera.
• In caso di errore, potete cancellare l’ultimo carattere con |CORREGGI
o
premendo
*
.
Premere o per avviare la chiamata.
*Premendo a lungo sul tasto cancella completamente il numero.
Rispondere ad una chiamata
Il vostro Onis 200 squilla, se non avete disinserito la suoneria.
Premere su per conversare.
• Per disinserire la suoneria del telefono, scegliere |SILENZIO
.
Per riagganciare, premere nuovamente o riporre il telefono sulla base o
sul caricabatterie.
2
1
2
1
3
2
1
Il numero viene visualizzato il numero viene
visualizzato sul display. La funzione
REGISTRA.| consente di registrare tale
numero in una delle rubriche telefoniche.
Italiano
5IT onis suppl 18/07/01 14:46 Page 10
Page 63

Telefono senza filo supplementare Onis 200
11
Uso dell’interfonia
La vostra base può essere associata ad 8 telefoni. L’interfonia consente di realizzare
delle comunicazione interne, tra due telefoni.
Inoltre, se possedete almeno tre telefoni, potrete realizzare una comunicazione
esterna contemporaneamente all’interfonia (per esempio: un telefono è in
comunicaizone esterna mentre altri due telefoni sono in interfonia).
Interfonia fuori comunicazione
Premere .
Far scorrere con poi selezionare il o i telefoni da chiamare.
Scegliere CHIAMARE
| o per avviare la chiamata.
Per terminare l’interfonia a partire dall’apparecchio senza filo, scegliere
|FINE INTER. o premere .
• A partire dal TELEFONO, premere per rispondere.
L OSSERVAZIONE:
Se durante l’interfonia interviene una chiamata esterna, i telefoni occupati sono avvertiti da
alcuni beep. Prima di poter rispondere alla chiamata esterna occorrerà terminare
l’interfonia. Ma il terzo TELEFONO, se non impegnato nell’interfonia, può rispondere al
corrispondente esterno.
Interfonia in corso di comunicazione esterna e
commutazione della comunicazione
Siete in comunicazione con l’esterno.Avvertite il vostro corrispondente che non vi
sentirà più per alcuni istanti, poi:
Premere .
Far scorrere con per selezionare il telefono da chiamare e scegliere
CHIAMARE
|.
2
1
4
3
2
1
Potete anche inserire il numero del telefono
da chiamare, o far suonare tutti gli
apparecchi senza filo. In questo caso i punti
e sono inutili.
32
Nel frattempo il corrispondente esterno
sentirà una musica di attesa.
Italiano
5IT onis suppl 18/07/01 14:46 Page 11
Page 64

Telefono senza filo supplementare Onis 200
12
Scegliere |RIPRENDI per mettere in attesa l’interfonia e riprendere la
conversazione con il corrispondente esterno. Potete passare più volte dal
corrispondente esterno e quello interno in questo modo.
• Scegliere TRASF
.| se si desidera commutare definitivamente la comunicazione
esterna ed interna in questo modo.
• Far scorrere e scegliere TEL.
CONF.| per stabilire una conferenza tra i due
corrispondenti interni e il corrispondente esterno.
L ATTENZIONE:
Se trasferite la comunicazione esterna prima che l’altro telefono abbia risposto,
il corrispondente esterno resterã in attesa fino a che tale telefono non impegni la linea.
Sul telefono/i chiamato/i:
Per rispondere, premere .
Uso della funzione babysit
Si tratta di una funzione di sorveglianza. Un telefono "di sorveglianza" serve da
microfono silenzioso. Un altro telefono stabilisce l’interfonia con il telefono di
sorveglianza per ascoltare i rumori della stanza in cui si trova quest’ultimo.
Se un corrispondente vi chiama, il telefono di sorveglianza rimane silenzioso e non
prende la chiamata.
Attivare il modo babysit
A partire dal menu “Regolaz.”, rubrica “Regolaz. principale”, far scorrere fino a
“Modo babysit”, scegliere OK|.
Far scorrere per attivare la funzione e scegliere OK|.
Disattivare il modo babysit
A partire dallo schermo di stand by qui a fianco, scegliere CANCELLA|.
Uso della sorveglianza
Per ascoltare i rumori circostanti al telefono di sorveglianza, dovete stabilire
l’interfonia (vedi p. 11) con l’apparecchio senza filo, a partire da un altro telefono.
L OSSERVAZIONE:
Un telefono in modo “Babysit”, consente di effettuare una chiamata, ma non squillerà in
caso di chiamata entrante.
2
1
3
Per riagganciare potete anche premere .
Sullo schermo di stand by apparirà
l’indicazione “Modo babysit ”.
Per disattivare il modo babysit potete anche
passare per il menu “Modo babysit”, come
per attivarlo.
Italiano
5IT onis suppl 18/07/01 14:46 Page 12
Page 65

Telefono senza filo supplementare Onis 200
13
Guida alla soluzione di problemi
PROBLEMI
Il pittogramma del TELEFONO non
lampeggia quando lo si posiziona sul caricabatterie.
Assenza di tonalità.
Assenza di suoneria.
Il pittogramma non è visualizzato.
Il TELEFONO visualizza “ERRORE” durante la
procedura di associazione del TELEFONO
alla BASE.
La comunicazione è disturbata.
CAUSE
- Cattivo contatto con i morsetti di carica.
- I morsetti di carica sono sporchi.
- Telefono non alimentato.
- Il TELEFONO non è abbastanza carico.
- Siete troppo lontani dalla BASE.
La suoneria è disattivata.
- Il telefono non è associato
- La presa è scollegata.
- Il TELEFONO è troppo lontano dalla BASE.
La procedura di associazione del TELEFONO
alla BASE non è riuscita.
Il numero massimo di telefoni è raggiunto
(massimo 8).
- Siete troppo lontani dalla BASE.
- La BASE è troppo vicina ad apparecchi
elettrici, muri in cemento armato, infissi
metallici.
SOLUZIONI
- Spostare leggermente Il TELEFONO.
- Pulire i morsetti di carica con un panno
imbevuto d’alcool.
- Verificare i collegamenti.
- Mettere il TELEFONO in carica.
- Avvicinarsi alla BASE.
Vedi “Regolare le suonerie”.
- Riprendere la procedura di associazione di
un telefono sulla base (p. 5) ;
- Verificare i collegamenti.
- Avvicinarsi alla BASE.
Scollegare e ricollegare l’alimentazione della
presa principale della BASE. Riprendere la
procedura di associazione del TELEFONO
sulla BASE.
- Avvicinarsi alla BASE, controllare la portata.
- Spostare la BASE per trovare la miglior
posizione (più in alto possibile).
Italiano
5IT onis suppl 18/07/01 14:46 Page 13
Page 66

Microteléfono adicional Onis 200
1
Garantía
Estimado cliente,
Gracias por su compra de este producto Philips, ya que ha sido diseñado y fabricado bajo los estándares de calidad más
elevados. Si, desafortunadamente, pudiera existir algún problema con este producto, PHILIPS garantiza libre de cargo la mano de
obra y las piezas, durante 12 MESES a partir de la fecha de compra (seis meses para las baterias recargables / desechables),
independientemente del país en que el producto sea reparado.Esta Garantía Internacional Philips, complementa las obligaciones
nacionales existentes sobre garantía hacia Ud., tanto de los distribuidores como de Philips en el país de compra, no afectando
los derechos que la Ley establece para los Consumidores.
La Garantía Philips es aplicable en tanto que el producto sea TRATADO CORRECTAMENTE para su uso, de acuerdo con el
contenido de las Instrucciones de Manejo y bajo la presentación de la FACTURA ORIGINAL o RECIBO DE CAJA, en donde se
indique la fecha de compra y el nombre del distribuidor, junto al modelo y número de producción del aparato.
La Garantía Philips NO será aplicable en los siguientes casos :
• Cuando los documentos hayan sido alterados de alguna forma o resulten ilegibles.
• En el caso de que el modelo y número de producción del aparato haya sido alterado, borrado, retirado o hecho ilegible.
• Cuando las reparaciones hayan sido efectuadas por personas u organizaciones de servicio NO AUTORIZADOS,o en el caso
de que se hayan producido modificaciones en el aparato.
• Cuando el daño en el aparato sea causado por accidentes que incluyan, aunque no se limiten a: tormentas, inundaciones, fuego
o evidente mal trato del mismo.
Le rogamos tenga en cuenta que, el producto amparado por esta garantía, no será defectuoso, cuando se hayan realizado
modificaciones en el mismo, para que cumpla con especificaciones técnica nacionales o locales, aplicables a países,para los que,
el aparato no fue, originalmente, desarrollado y/o fabricado. Por esta razón siempre se debe comprobar, si, un producto puede
ser utilizado en un país específico.
En el caso de que su producto PHILIPS no funcione correctamente o esté defectuoso, por favor contacte con su distribuidor
Philips, o, con un SERVICIO OFICIAL PHILIPS. En el supuesto de que Ud. requiera servicio en algún otro país, el departamento
de SERVICIO DE ATENCIÓN AL CLIENTE del citado país, puede indicarle la dirección del SERVICIO PHILIPS más próximo a
su domicilio. El número de teléfono y de fax del SERVICIO DE ATENCIÓN AL CLIENTE puede ser encontrado en la parte
inferior de este documento.
PHILIPS SERVICIO DE ATENCION AL CLIENTE
Martinez Villergas, 49
ES - 28027 MADRID
http://www.philips.com
Tel : 902 11 33 84
Español
6SP onis suppl 18/07/01 14:52 Page 1
Page 67

Microteléfono adicional Onis 200
2
Presentación
Toma de línea
Intercomunicador
Micrófono
Altavoz
Teclas de selección
de las funciones
Teclas de
corrección y “R”
Volumen
ICONOS DE LA PANTALLA:
Estado de carga de la batería
Contestador activado
Indicador de mensajes en el contestador o en el Top Mensaje
Llamada interna en curso
Timbre del microteléfono cortado
Altavoz activado
Confidencialidad de llamada activada
Enlace base - microteléfono correcto
Tecla de navegación
en el menú
Prefijo operador
Español
6SP onis suppl 18/07/01 14:52 Page 2
Page 68

Consejos y seguridad
Este MICROTELÉFONO adicional, común a lo modelos Onis 200 y Onis 200 Vox, completará su instalación y le permitirá
disponer permanente un teléfono inalámbrico en las habitaciones no equipadas con una toma telefónica.
Usted puede utilizar hasta 8 MICROTELÉFONOES adicionales con los modelos Onis 200 y Onis 200 Vox. Para poder beneficiar
de todas las posibilidades del MICROTELÉFONO, consulte las instrucciones entregadas con la BASE y el MICROTELÉFONO
principal.
Este MICROTELÉFONO compatible con la norma GAP puede funcionar con cualquier base GAP, sin importar su marca.
Lea atentamente las instrucciones en las que se tienen en cuenta las sugerencias y observaciones de los usuarios.
Informaciones de seguridad:
• Evite que el aparato entre en contacto con líquidos.
• Para eludir todo riesgo de electrocución, no intente abrir el microteléfono ni la base. Confíe las reparaciones a nuestro
servicio de postventa.
• Evite que los plots de recarga y de la batería entren en contacto con objetos conductores
(llaves, superficies metálicas, joyas, etc.).
La marca CE atesta la conformidad de los productos a las reglamentaciones técnicas aplicables conforme a la Directiva 99/05/EC para la seguridad
de los consumidores, para las perturbaciones electromagnéticas y las pruebas radio.
Conexión eléctrica: alimentación red 230 V,corriente alterna monofásica excepto las instalaciones con esquema IT definidas en la norma
EN 60-950.Atención, el voltaje de la red está clasificada como peligrosa según los criterios de la misma norma.
La temperatura de utilización debe estar entre 5° C y 45° C. En caso de peligro, el bloque de alimentación de la red sirve de dispositivo de
sección de la alimentación 230 V. Como medida de precaución, debe instalarlo cerca del material y que se pueda acceder a él fácilmente.
Conexión telefónica: los voltajes presentes en esta red están clasificados TRT-3 (tensión red telefónica) según la norma EN 60-950.
Protección del medio ambiente:
Este microteléfono ha sido concebido siguiendo el programa "EcoDesign" de Philips, un programa de concepción ecológica que
tiene en cuenta la relación del producto con el medio ambiente a lo largo de toda su existencia.
Microteléfono adicional Onis 200
3
Español
6SP onis suppl 18/07/01 14:52 Page 3
Page 69

Microteléfono adicional Onis 200
4
Puesta en servicio del microteléfono
Instalar el microteléfono
Para realizar una correcta instalación:
• Enchufe el adaptador de corriente a una toma de fácil acceso.
• Ponga el MICROTELÉFONO sobre el CARGADOR.
Las baterías del MICROTELÉFONO deben estar completamente cargadas
durante al menos 12 horas antes de su primera utilización, o después de un largo
período fuera del CARGADOR.
L ATENCIÓN:
Después de una carga completa, puede proceder a la incorporación del MICROTELÉFONO
como se describe en p. 5.
Instalar y cambiar las baterías
Cuando cambie las baterías, utilice baterías R03/AAA NiMh.
• Abra la puerta del compartimento de la batería del MICROTELÉFONO
tirando en el sentido de la flecha.
• Retire las baterías.
• Introduzca las nuevas baterías en el sentido indicado y cierre la puerta.
• Ponga el MICROTELÉFONO sobre la BASE. Déjelo cargando durante al
menos 12 horas.
L ATENCIÓN:
No utilice nunca pilas no recargables; use únicamente modelos preconizados
(R03/AAA NiMh).
Cambiar el idioma del microteléfono
A partir de la pantalla standby,haga desfilar y seleccione |SETTINGS en los
menús.
Haga desfilar hasta “Handset settings”.
Pulse ACEPTAR|.
Para seleccionar la sección “Language”, pulse ACEPTAR|.
Haga desfilar para seleccionar el idioma, luego pulse ACEPTAR|.
Pulse y mantenga la tecla para volver a la pantalla standby.
6
5
4
3
2
1
Español
6SP onis suppl 18/07/01 14:52 Page 4
Page 70

Incorporar un microteléfono a una base
Para poder utilizar un MICROTELÉFONO con una BASE, lea primero con
atención las instrucciones de instalación del MICROTELÉFONO a la BASE
(ver a continuación). Cada MICROTELÉFONO puede ser utilizado con dos
BASES diferentes.
L ATENCIÓN:
Antes de efectuar las operaciones siguientes, hay que cargar completamente el
microteléfono durante al menos12 horas.
En una base ONIS 200 u ONIS 200 Vox
Desenchufe y enchufe el bloque de alimentación de la BASE Onis 200.
A partir del menú "Ajustes", sección "Ajustes microtel.", haga desfilar hasta
“Asociar microtel.” y seleccione ACEPTAR|.
Introduzca el código de registro de la base (4 cifras) y seleccione ACEPTAR|.
Durante unos segundos, aparece en pantalla "Trabajando...", y luego "Efectuado”.
De no ser así, recomience el procedimiento desde .
En otra base
Siga el procedimiento descrito por el fabricante (ver instrucciones del fabricante
de la Base).
Efectúe a continuación las etapas a del procedimiento descrito más arriba
para el MICROTELÉFONO).
Limpiar el microteléfono
Para limpiar el MICROTELÉFONO, utilice un trapo humedecido con agua
jabonosa. Luego, seque con un trapo seco.
• No emplee disolventes ni productos de limpieza de uso doméstico.Si desea que
su aparato conserve su aspecto de "nuevo", límpielo regularmente.
Importante:
Evite colocar el aparato en un lugar del que podría caerse.
42
1
4
3
2
1
El código está inscrito en la etiqueta, por
debajo de la base (RC)
Microteléfono adicional Onis 200
5
Español
6SP onis suppl 18/07/01 14:52 Page 5
Page 71

Microteléfono adicional Onis 200
6
Utilizar el microteléfono con una base
ONIS 200
Este MICROTELÉFONO adicional completará su instalación y funciona igual que
el entregado con la BASE Onis 200 u Onis 200 Vox.
Una vez que haya instalado el multi-microteléfono podrá:
- establecer una conferencia interna,
- desviar una conversación,
- establecer una comunicación con el exterior mientras que dos otros
MICROTELÉFONOS están en intercomunicador (si posee al menos 3
MICROTELÉFONOS).Para más información, consulte las instrucciones principales.
- utilizar la función “Babysit”.
Utilizar el microteléfono con otra base
norma GAP
La norma GAP garantiza un funcionamiento mínimo a cualquier microteléfono y
base de marcas distintas declarados juntos.
El MICROTELÉFONO responde a esta norma.
Para usar el MICROTELÉFONO en las mejores condiciones, lea estas
instrucciones y las del fabricante de la base.
Fijar el cargador a la pared
Haga dos agujeros en la pared, con una separación vertical de 65 mm, y añada
los tornillos.
Acomode la base en la pieza de plástico y,luego, tire hacia abajo.
Autonomía
Este modelo dispone de una semana de autonomía cuando el MICROTELÉFONO
está en modo standby fuera de su BASE, y de 15 horas si está en comunicación.
• Durante una comunicación, cuando no le queden más que algunos segundos de
autonomía, oirá unos bips de advertencia.
Al final de este plazo, la comunicación se corta automáticamente.
2
1
Cuando el MICROTELÉFONO está
declarado con una base de marca diferente,
las funciones utilizables mínimas son: la
toma de línea, la recepción de llamada y la
marcación.
El icono indica un porcentaje de
carga inferior al 5% (ninguna barra).
Usted tendrá entonces que recargar el
MICROTELÉFONO.
Español
6SP onis suppl 18/07/01 14:52 Page 6
Page 72

Microteléfono adicional Onis 200
7
Recarga
La duración completa de recarga, cuando la batería está gastada, es de al menos
12 horas.
Alcance
El alcance del MICROTELÉFONO es de unos 300 m en un sitio despejado y con
buenas condiciones de entorno.
• Durante una comunicación, la conversación aparece entrecortada al llegar a los
límites de alcance. En tal caso, acérquese rápidamente a la BASE antes de que se
corte definitivamente la comunicación.
Respete los consejos de instalación presentados en la página 3.
Las teclas del microteléfono Onis 200
• La tecla permite enviar y recibir llamadas.
• La tecla permite activar o desactivar el altavoz del MICROTELÉFONO.
• La tecla permite seleccionar la intercomunicador con otro microteléfono.
• La tecla permite ajustar el nivel sonoro del auricular o del altavoz durante una
comunicación.
• La tecla permite suprimir un carácter al teclear. Permite asimismo utilizar
durante una llamada la función "R". Si apoya varios segundos esta tecla podrá volver
en todo momento a la pantalla en modo standby.
• La tecla permite acceder a la lista de los prefijos operadores.
Estos datos son indicativos y sólo aplicables
cuando la batería está completamente
cargada.
El contorno del icono parpadea para
avisar que el microteléfono está bien
colocado en su cargador.
Español
6SP onis suppl 18/07/01 14:52 Page 7
Page 73

Microteléfono adicional Onis 200
8
Comprender el sistema de menús
Hay menús que aparecen en la cuarta línea, y secciones y subsecciones que
aparecen en la segunda y tercera línea de la pantalla.
Menús:
Las teclas le permitirán acceder a los menús.
• Mediante estas teclas, usted puede elegir los menús presentados en la línea
inferior de la pantalla.
Por ejemplo: en la pantalla standby, estos menús son |RELLAMAD
A y AGEN
COM|.
• Cuando desee acceder a menús no presentados en la línea inferior, utilice
para que aparezcan; después, pulse las teclas como se
indica más arriba.
• Para interrumpir en todo momento la operación en curso y volver a la pantalla
standby, pulse y mantenga .
Secciones y subsecciones:
• El título de las secciones aparece indicado en la segunda línea sobre fondo negro.
• Las subsecciones están indicadas en la tercera línea. Utilice las teclas
para poder visualizar las subsecciones. Luego, pulse las teclas para
validar A
CEPTAR| o subir un nivel |VOLVER.
• En determinados casos, gracias a las secciones podrá modificar las opciones.
Cuando acceda a una sección, se visualiza en primer lugar la opción activada,
seguida de “√”.
Para seleccionar otra opción, hágala aparecer mediante las teclas y
valide su nueva elección como se indica más arriba.
El icono u recuerda que se puede acceder a
los menús.
El icono u de las secciones y subsecciones
no figura en la pantalla.
Español
6SP onis suppl 18/07/01 14:52 Page 8
Page 74

Microteléfono adicional Onis 200
9
Timbre Externo: para las llamadas
entrantes.
Timbre Interno: para las llamadas en
intercomunicador.
Para interrumpir el timbre, seleccione la
opción Silencio; aparecerá en pantalla el
icono .
El contraste de la pantalla se ajusta
inmediatamente.
Se escucha la melodía seleccionada.
Personalizar el microteléfono
Timbres del microteléfono
El MICROTELÉFONO dispone de 9 melodías de timbre.
A partir del menú “Ajustes”,sección “Audio microtel.”, haga desfilar hasta
“Timbre Externo” o “Timbre Interno” y pulse ACEPTAR|.
Haga desfilar para seleccionar una de las nueve melodías y luego pulse
ACEPTAR|.
Volumen de los timbres
A partir del menú "Ajustes", sección "Audio microtel.", haga desfilar hasta
"Volumen Timbre" y pulse ACEPTAR|.
Haga desfilar para seleccionar el volumen deseado y pulse ACEPTAR|.
Contraste de la pantalla
A partir del menú "Ajustes", sección "Ajustes microtel.", haga desfilar hasta
"Contraste" y pulse ACEPTAR|.
Haga desfilar para seleccionar el contraste deseado y pulse ACEPTAR|.
Activar/desactivar los tonos del teclado
Cada vez que se pulsa una tecla del MICROTELÉFONO se escucha un bip
(o tono) de cumplimiento. Se puede programar este bip:
A partir del menú “Ajustes",sección "Audio microtel.", haga desfilar hasta
"Tonos teclado" y pulse ACEPTAR|.
Haga desfilar para activar o desactivar los bips y pulse ACEPTAR|.
2
1
2
1
2
1
2
1
Español
6SP onis suppl 18/07/01 14:52 Page 9
Page 75

Microteléfono adicional Onis 200
10
Llamar
Para llamar
Al levantar el MICROTELÉFONO del CARGADOR, el icono debe aparecer
en pantalla. De no ser así, consulte le capítulo “¿Problemas con el teléfono?
Compruebe...”.
Pulse .
Espere a oír el tono de línea; luego, marque el número del correspondiente.
Para terminar la conversación, pulse de nuevo o deje el microteléfono
sobre la base o el cargador.
Preparar un número antes de llamar (marcación previa)
Si usted quiere comprobar el número marcado y, eventualmente, rectificarlo antes
de iniciar la llamada:
Marque el número en el teclado.
• En caso de error, se puede borrar el último carácter pulsando |CORREGIR
o *.
Apoye sobre o para iniciar la llamada.
*Pulse y mantenga la tecla para borrar el número.
Contestar a una llamada
Si usted no ha cortado el timbre, el Onis 200 sonará al recibir una llamada.
Pulse para hablar.
• Se puede cortar el timbre del microteléfono mediante la tecla |SILENCIO.
Para colgar, pulse de nuevo o deje el microteléfono sobre la base o sobre
el cargador.
2
1
2
1
3
2
1
Pulsando la tecla , se puede tomar la
línea y se activa el altavoz del
microteléfono.
El número se visualiza en la pantalla. La
función GRABAR| permite grabar este
número en una de las agendas.
Español
6SP onis suppl 18/07/01 14:52 Page 10
Page 76

Microteléfono adicional Onis 200
11
Utilizar la intercomunicación
Se puede asociar a la base hasta 8 microteléfonos. Gracias a la intercomunicación,
usted podrá efectuar comunicaciones internas entre dos microteléfonos.
Además, si usted dispone de al menos tres microteléfonos, se puede realizar una
comunicación externa al mismo tiempo que la intercomunicación (por ejemplo: un
microteléfono está en comunicación externa y los dos otros en intercomunicación).
Intercomunicación interna
Pulse .
Haga desfilar mediante para seleccionar el (los) número(s) al (a los)
que desea llamar.
Seleccione LLAMAR
| o para iniciar la llamada.
Para suspender la intercomunicación desde el microteléfono, seleccione |FIN
INTER o pulse .
• Si desea contestar a una llamada, pulse sobre el MICROTELÉFONO
que recibe la llamada.
L OBSERVACIÓN:
Si recibe una llamada externa durante la intercomunicación, oirá unos bips de advertencia
sobre los microteléfonos ocupados. Primero, suspenda la intercomunicación antes de
contestar a la comunicación externa. No obstante, un tercer MICROTELÉFONO no
vinculado a la intercomunicación puede perfectamente contestar al correspondiente
externo.
Intercomunicación durante comunicación externa y
transferencia de comunicación
Usted está en comunicación con el exterior. Advierta a su correspondiente externo
que dejará de oírle unos instantes; luego:
Pulse .
Haga desfilar con para elegir el microteléfono al que desea llamar y
seleccione LLAMAR|.
2
1
4
3
2
1
También se puede introducir el número del
microteléfono al que se desea llamar,o
pulsar para hacer sonar todos los
microteléfonos. En ese caso, las etapas
y resultan inútiles.
3
2
Mientras tanto, el correspondiente externo
oirá una música de espera.
Español
6SP onis suppl 18/07/01 14:52 Page 11
Page 77

Microteléfono adicional Onis 200
12
Seleccione |CAMBIAR para dejar en espera la intercomunicación y retomar la
conversación con el correspondiente externo. Usted puede, de este modo,
realizar varios cambios entre los correspondientes externo e interno.
• Seleccione DESVIAR
| si desea transferir definitivamente la comunicación
externa al otro microteléfono y suspender así la intercomunicación.
• Haga desfilar y seleccione CONFERENC
| para establecer una conferencia
entre los dos interlocutores internos y el correspondiente externo.
En lo(s) microteléfono(s) llamado(s):
Para contestar a una llamada, pulse .
Utilizar la función Babysit
Se trata de una función de vigilancia. Un microteléfono "de vigilancia" actúa como
micrófono silencioso. Otro microteléfono establece una intercomunicador con el
microteléfono de vigilancia para reproducir los ruidos de la habitación en donde se
encuentra. Si un correspondiente llama, el microteléfono de vigilancia permanece
silencioso y no toma la llamada.
Activar el modo Babysit
A partir del menú "Ajustes", sección "Ajustes microtel.", vaya hasta
"Modo Babysit" y seleccione ACEPTAR|.
Active la función y seleccione ACEPTAR|.
Desactivar el modo Babysit
A partir de la pantalla standby,seleccione CANCELAR|.
Utilizar la vigilancia
Para reproducir los ruidos ambientales con el microteléfono de vigilancia,hay que
establecer una intercomunicador (ver p. 11) con el microteléfono desde otro
microteléfono.
L OBSERVACIÓN:
Un microteléfono en modo "Babysit" permite pasar una llamada, pero no se oye el timbre
al recibir una llamada.
2
1
3
También se puede colgar pulsando .
También se puede desactivar el modo
Babysit pasando por el menú "Modo
Babysit" como para activarlo.
La indicación “Modo Babysit” aparece en la
pantalla standby.
Español
6SP onis suppl 18/07/01 14:52 Page 12
Page 78

¿Problemas con el teléfono? Compruebe...
INCIDENTES
El icono del MICROTELÉFONO no parpadea
al poner al microteléfono sobre el cargador.
No hay tonalidad.
No suena el timbre.
El icono no aparece en pantalla.
El MICROTELÉFONO muestra "Fracaso"
durante el procedimiento de incorporación del
MICROTELÉFONO a la BASE.
La comunicación se ve perturbada por la
presencia de parásitos.
CAUSAS
- Falso contacto con los plots de recarga.
- Los plots de recarga están sucios.
- Problema de alimentación.
- El MICROTELÉFONO no está
suficientemente cargado.
- Usted está demasiado alejado de la BASE.
El timbre está cortado.
- El microteléfono no está registrado.
- La red está desconectada.
- El MICROTELÉFONO está demasiado
alejado de la BASE.
El procedimiento de incorporación del
MICROTELÉFONO a la BASE ha fracasado. Se
ha alcanzado la cantidad máxima de
microteléfonos (8 máximo).
- Usted está demasiado alejado de la BASE.
- Hay aparatos eléctricos, paredes de
hormigón armado, bastidores metálicos
demasiado cerca de la BASE.
SOLUCIONES
- Mueva ligeramente el MICROTELÉFONO.
- Limpie los plots con un trapo mojado en
alcohol
.
- Compruebe las conexiones.
- Cargue el MICROTELÉFONO.
- Acérquese a la BASE.
Ver “Ajuste timbres”.
- Siga el procedimiento de instalación de un
microteléfono a la base (p.5);
- Compruebe las conexiones.
- Acérquese a la BASE.
Desconecte y conecte la alimentación red de la
BASE. Recomience el procedimiento de
incorporación del MICROTELÉFONO a la
BASE (p. 5).
- Acérquese a la BASE y controle la cobertura
de la llamada.
- Mueva la BASE hasta encontrar la mejor
posición (cuanto más alto posible).
Microteléfono adicional Onis 200
13
Español
6SP onis suppl 18/07/01 14:53 Page 13
Page 79

Certificat de conformité
Nous,
PHILIPS Consumer Communications
Route d’Angers
72081 Le Mans Cedex 9
France
Déclarons que le produit Onis 200 DECT handset (HS 6831) est en conformité avec l’Annexe III de la Directive 99/05/EC-R&TTE et dont les exigences essentielles
applicables sont les suivantes :
Article 3.1 a : (protection de la santé et de la sécurité de l’utilisateur) EN 60950 (92) Ed.2 + amendements 1,2 (93) ; 3 (95) ;4 (97) ; 11 (97)
Article 3.1 b : (exigences de protection en ce qui concerne la compatibilité électromagnétique) ETS 300 329 (97)
Article 3.2 : (Utilisation efficace de la bande de fréquences) TBR6 (97)
La présomption de conformité et les exigences essentielles applicables à la Directive 99/05/EC sont assurées.
Le Mans, le 19/10/00
Cordless Business Director
Certification of conformity
We,
PHILIPS Consumer Communications
Route d’Angers
72081 Le Mans Cedex 9
France
Declare that the product Onis 200 DECT handset (HS 6831) is in compliance with ANNEX III of the R&TTE-Directive 99/05/EC and then with the following essential
requirements :
Article 3.1 a : (protection of the health & the safety of the user) EN 60950 (92) Ed.2 + amendements 1,2 (93) ; 3 (95) ;4 (97) & 11 (97)
Article 3.1 b : (protection requirements with respect to electromagnetic compatibility) ETS 300 329 (97)
Article 3.2 : (effective use of the radio spectrum) TBR6 (97)
The presumption of conformity with the essential requirements regarding Council Directive 99/05/EC is ensured.
Date : 26/09/2000 Le Mans
Cordless Business Director
Konformitätserklärung
Wir,
PHILIPS Consumer Communications
Route d’Angers
72081 Le Mans Cedex 9
Frankreich
Erklären, daß das Produkt Onis 200 DECT handset (HS 6831) mit ANHANG III der R&TTE-Richtlinie 99/05/EC sowie mit den folgenden Grundanforderungen konform ist:
Artikel 3.1 a : (Schutz von Gesundheit & Sicherheit des Benutzers) EN 60950 (92) Ausg.2 + Nachsätze 1,2 (93) ;3 (95) ; 4 (97) & 11 (97)
Artikel 3.1 b : (Schutzanforderungen in Bezug auf elektromagnetische Verträglichkeit) ETS 300 329 (97)
Artikel 3.2 : (wirksame Nutzung des Radiospektrums) TBR6 (97)
Die Konformitätsvoraussetzung mit den grundsätzlichen Anforderungen der Richtlinie 99/05/EC ist gewährleistet.
Datum : 19/10/2000 Le Mans
Leiter der Abteilung für schnurlose Telefone
7certificats 13/07/01 10:41 Page 1
Page 80

Conformiteitscertificaat
Ondergetekende,
PHILIPS Consumer Communications
Route d’Angers
72081 Le Mans Cedex 9
Frankrijk
Verklaart dat het product Onis 200 DECT handset (HS 6831) voldoet aan de BIJLAGE III van de R&TTE-Richtlijn 99/05/EG en met name aan de volgende essentiële
eisen:Artikel 3.1 a : (bescherming van de gezondheid & veiligheid van de gebruiker) EN 60950 (92) 2e ed. + wijzigingen 1,2(93) ; 3(95) ; 4(97) & 11(97)
Artikel 3.1 b : (beschermingsvoorschriften met betrekking tot elektromagnetische compatibiliteit) ETS 300 329 (97)
Artikel 3.2 : (efficiënt gebruik van het radiospectrum zonder schadelijke interferentie te veroorzaken) TBR6 (97)
De conformiteitsveronderstelling van het apparaat aan de essentiële eisen van de Richtlijn 99/05/EG van de Raad wordt gegarandeerd.
Datum : 19/10/2000,Le Mans
Cordless Business Director
Certificato di conformità
Noi,
PHILIPS Consumer Communications
Route d’Angers
72081 Le Mans Cedex 9
Francia
Dichiariamo che il prodotto Onis 200 DECT handset (HS 6831) è in conformità con l’ALLEGATO III quanto alle esigenze applicabili ed in particolar modo con la direttiva
R&TTE 99/05/EC e quindi con le seguenti necessità essenziali :
Articolo 3.1 a : (protezione della salute e della sicurezza dell’utilizzatore) EN 60950 (92) Ed.2 + emendamenti 1,2(93) ; 3(95) ;4(97) e 11(97)
Articolo 3.1 b : (esigenze di protezione per quanto riguarda la compatibilità elettromagnetica) ETS 300 329 (97)
Articolo 3.2 : (corretta utilizzazione dello spettro radiomagnetico) TBR6 (97)
Viene assicurata la presunzione di conformità con le direttive essenziali relative della Direttiva del Consiglio 99/05/EC.
Data : 19/10/2000 Le Mans
Cordless Business Director
Certificado de conformidad
Nosotros,
PHILIPS Consumer Communications
Route d’Angers
77081 Le Mans Cedex 9
Francia
Declaramos que el producto Onis 200 DECT handset (HS 6831) está de acuerdo con el ANEXO III de la Directiva 99/05/EC -R&TTE y, por ende, entonces con los
requisitos esenciales siguientes:
Artículo 3.1 a: (Protección de la salud y seguridad del usuario) EN 60950 (92) + enmiendas 1,2(93); 3 (95);4(97) y 11(97).
Artículo 3.1 b: (Requisitos de protección con respecto a la compatibilidad electromagnética) ETS 300 329 (97)
Artículo 3.2: (Uso efectivo del espectro radial) TBR6 (97)
Se asegura la presunción de conformidad con los requisitos esenciales con respecto a la Directiva del Consejo 99/05/EC.
Fecha: 19/10/2000, Le mans
Director Comercial
4311 256 06513
I
NL
DUK
SP
F
7certificats 13/07/01 10:41 Page 2
 Loading...