

Philips TC20 Installation Instructions And Use

PageWriter TC20 Cardiographs
Wireless LAN Option
INSTALLATION INSTRUCTIONS
Edition 1
July 2011

Notice
About this Edition
Published by Philips Medical
Systems
Printed in USA
Publication number 453564267741
Edition History
Edition 1, July 2011
Software revision A.05 and higher
Copyright
©2011 Koninklijke Philips
Electronics N.V. All rights are
reserved. All other product names
are the property of their respective
owners.
Proprietary Notice
This document and the information
contained in it is proprietary and
confidential information of Philips
Medical Systems (“Philips”) and
may not be reproduced, copied in
whole or in part, adapted, modified,
disclosed to others, or disseminated
without the prior written permission
of the Philips Legal Department.
Use of this document and the
information contained in it is
strictly reserved for current Philips
personnel and Philips customers
who have a current and valid license
from Philips for use by the
customer’s designated in-house
service employee on equipment
locat
ed at the customer’s designated site.
Use of this document by
unauthorized persons is strictly
prohibited. Report violation of these
requirements to the Philips Legal
Department. This document must
be returned to Philips when the user
is no longer licensed and in any
event upon Philips’ first written
request.
Philips Medical Systems
3000 Minuteman Road
Andover, MA 01810 USA
(978) 687-1501
Warranty
Philips provides this DOCUMENT
without warranty of any kind,
implied or expressed, including, but
not limited to, the implied
warranties of merchantability and
fitness for a particular purpose.
Trademarks
The AmbiCom logo and the
AmbiCom name are registered
trademarks of AmbiCom, Inc.

1PageWriter TC20 Wireless LAN
1
Option Installation Instructions
The PageWriter TC20 cardiograph supports the AmbiCom WL150N USB wireless adapter,
available as option D23.
The adapter is a USB dongle that includes an integrated diversity antenna with enhanced
transmit power and receiver sensitivity, and with superior delay spread and roaming
capabilities. It delivers dependable connectivity in almost all demanding clinical
environments, including those with limited access point availability, and those with numerous
and competing wireless devices.
The AmbiCom adapter is compatible with both the 802.11b and g wireless standards, and
operates in the 2.4 GHz section of the radio frequency spectrum, providing a data transmission
rate of up to 54Mbps.
Configuration is simple, using the Microsoft NetUI utility to set up and control network
connections and security settings.
Additional information about the AmbiCom adapter is available at the AmbiCom website,
www.ambicom.com.
This document provides the following information:
Security Options . . . . . . . . . . . . . . . . . . . . . . . . . . . . . . . . . . . . . . . . . . . . . . . . 2
Configuring Wireless Adapter Settings . . . . . . . . . . . . . . . . . . . . . . . . . . . . . . 4
Before You Begin . . . . . . . . . . . . . . . . . . . . . . . . . . . . . . . . . . . . . . . . . . . . 4
Step 1. Inserting the Wireless USB Adapter . . . . . . . . . . . . . . . . . . . . . . . 5
Step 2. Loading Authentication Certificates and Keys . . . . . . . . . . . . . . . 6
Loading Authentication Certificates . . . . . . . . . . . . . . . . . . . . . . . . . . 7
Importing User Certificates and Private Keys. . . . . . . . . . . . . . . . . . . 8
Step 3. Configuring Network Connection Settings . . . . . . . . . . . . . . . . . 10
Selecting the SSID for the Wireless Network . . . . . . . . . . . . . . . . . . 10
Adding a Network Connection . . . . . . . . . . . . . . . . . . . . . . . . . . . . . 11
Configuring a WPA or WPA2 PSK Connection . . . . . . . . . . . . . . . . 12
Configuring a WPA or WPA2 PEAP-MSCHAPv2 Connection . . . . 13
Configuring a WPA or WPA2 EAP-TLS Connection. . . . . . . . . . . . 15
Configuring a WEP Connection . . . . . . . . . . . . . . . . . . . . . . . . . . . . 17
Step 4. Restarting the Cardiograph . . . . . . . . . . . . . . . . . . . . . . . . . . . . . 18
Wireless LAN Connectivity Indicator . . . . . . . . . . . . . . . . . . . . . . . . . . . . . . 19
Specifications for the AmbiCom Wireless Device (Option D23) . . . . . . . . . 20
Contacting a Philips Response Center . . . . . . . . . . . . . . . . . . . . . . . . . . . . . . 24
1

Supported Security Options
Supported Security Options
Authentication is supported through an integrated 802.1x supplicant supporting authentication
using pre-shared keys, as well as two extensible authentication protocol
EAP-TLS and PEAP-MSCHAPv2.
Data privacy is ensured via encryption and decryption using AES (WPA2), TKIP (WPA), or
WEP. A comparison of the supported EAP types used with 802.1X authentication and the
certificate requirements for the different authentication methods is included in Table 1.
You configure all wireless LAN security and connection options on the network configuration
screens accessed through the
NOTE Some authentication methods may require that a valid authentication certificate be loaded and enabled
on the cardiograph. For details, see “Step 2. Loading Authentication Certificates and Keys” on page 6.
Table 1 Popular EAP types and required credentials
Type Credential(s) Database(s) Pros and Cons
Setup button on the main tool bar.
(EAP) types,
PEAP-MSCHAPv2 Microsoft
AD Native support in Windows, CE
password
EAP-TLS Client certificate Certificate
authority (CA)
CA certificate on the network server
Very strong authentication
Native support in Windows, CE
CA, user certificates on every client
device and CA certification on the
network server
2 PageWriter TC20 Wireless LAN Installation Instructions

Table 2 describes the authentication options in the Windows NetUI utility. For details about
setting these options, see “Step 3. Configuring Network Connection Settings” on page 10.
Table 2 NetUI utility security settings
Setting Description
Encryption
802.1x
Authentication,
EAP Type
This setting specifies the type of encryption used by the wireless
adapter, and how the encryption key will be created.
None: No encryption
WEP: Wireless Equivalency Privacy (WEP) with up to four
static keys that can be 40-bit, 128-bit in ASCII, or 128-bit in
hex
WPA-PSK: TKIP with PSK, either ASCII passphrase PSK or
hex PSK
WPA-TKIP or AES: TKIP or AES with key generated during
EAP authentication
WPA2-PSK: AES with PSK, either ASCII passphrase PSK or
hex PSK
WPA2-TKIP or AES: TKIP or AES with key generated during
EAP authentication
This setting is used with EAP authentication. The available settings
include:
None
PEAP-MSCHAPv2
EAP-TLS
PageWriter TC20 Wireless LAN Installation Instructions 3

Configuring Wireless Adapter Settings
Configuring Wireless Adapter Settings
Configuring your wireless connection comprises the following steps:
Configuration Step See ...
Install the wireless adapter
1
If your cardiograph already has the adapter
installed, proceed to step
2.
“Step 1. Inserting the Wireless
USB Adapter” on page 5
2 Load an authentication certificate or network key.
If not required, proceed to step
3 Configure the network connection using the NetUI
3.
configuration utility.
4 Restart the cardiograph. “Step 4. Restarting the
“Step 2. Loading Authentication
Certificates and Keys” on page 6
“Step 3. Configuring Network
Connection Settings” on page 10
Cardiograph” on page 18
Each of these steps is described in this guide, in detail.
Before You Begin
Before you start the configuration process, ensure you have the following available:
This document.
AmbiComUSB wireless adapter. See “Step 1. Inserting the Wireless USB Adapter” on
page 5.
Authentication certificate and keys, if needed, loaded onto a USB memory stick.
Certificate requirements for each encryption method are described in Table 1, “Popular
EAP types and required credentials,” on page 2. Contact your network administrator for
any certificate files.
The PageWriter TC Cardiograph Wireless LAN Upgrade Kit includes the AmbiCom adapter
and information about the adapter.
4 PageWriter TC20 Wireless LAN Installation Instructions
Step 1. Inserting the Wireless USB Adapter
A
Step 1. Inserting the Wireless USB Adapter
CAUTION Only use AmbiCom wireless LAN adapters that have been purchased from Philips. The use of non-
approved wireless LAN devices with the PageWriter TC cardiograph is not tested or supported, and
Philips does not guarantee cardiograph operation or wireless LAN connectivity.
To enable the cardiograph for a wireless connection
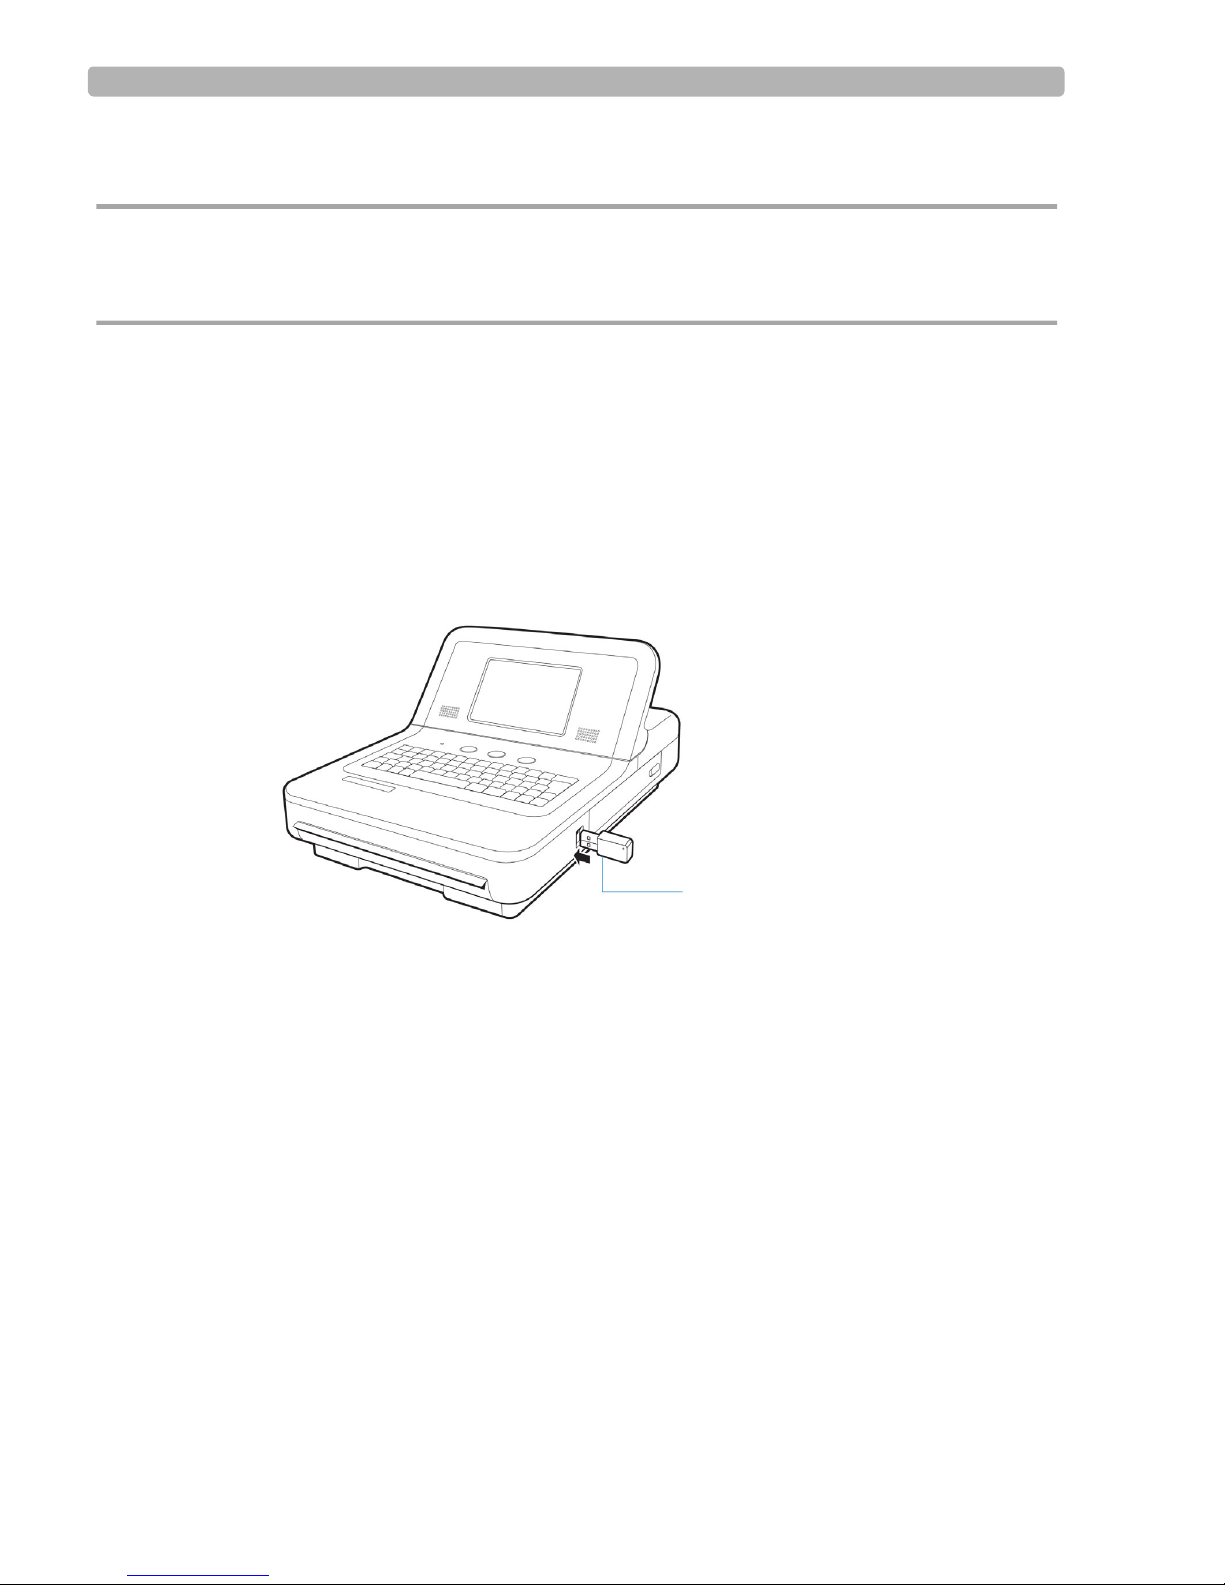
Insert the AmbiCom USB adapter (USB dongle) into the USB port on the side of the
cardiograph.
If the port is already in use, that is, a USB memory stick with ECGs or worklist entries is
currently in the port, remove the memory stick and replace it with the wireless USB
dongle.
The dongle illuminates when it is properly connected.
A Wireless USB dongle
You can now load certificates, as described in the next section, “Step 2. Loading
Authentication Certificates and Keys” on page 6.
To remove the USB dongle
Pull the USB dongle straight out from the port.
PageWriter TC20 Wireless LAN Installation Instructions 5
Configuring Wireless Adapter Settings
Step 2. Loading Authentication Certificates and Keys
The cardiograph supports two types of certificates: general and user.
For general certificates, use the Load Certs button to load and enable certificates (for
example, 509 certificates and private keys) from a USB memory stick into the NetUI
utility’s certificate directory.
For user certificates (for example, EAP-TLS), use the Import Certs button to launch the
Microsoft Certificate Utility, which allows you to import a user certificate and private key
(located in the NetUI utility’s certificate directory) into the Microsoft System store.
Table 3 Load Certs and Import Certs options
If the encryption method you are using requires a certificate or an optional private key, have
the network administrator generate the certificate/private key as required, and load these files
onto a USB memory stick.
CAUTIONS Do not insert a USB memory stick into the cardiograph, or remove a USB memory from the
cardiograph, when the cardiograph is acquiring ECG data from a patient.
The PageWriter TC cardiograph only supports the USB memory stick that is available for purchase
as an optional accessory from Philips. Philips does not guarantee that other USB memory sticks are
compatible with the PageWriter TC cardiograph.
6 PageWriter TC20 Wireless LAN Installation Instructions
Step 2. Loading Authentication Certificates and Keys
Loading Authentication Certificates
To load an authentication certificate
1
Have your network administrator put the certificate(s) onto a USB memory stick.
2 If it is in the port, remove the AmbiCom wireless USB dongle from the USB port on the
cardiograph.
3 Insert the memory stick with certificates into the USB port on the cardiograph.
4 On the main screen, touch Setup on the tool bar.
The Configuration Setup and Service Utilities menu appears.
5 Touch Configure ECG Network Settings.
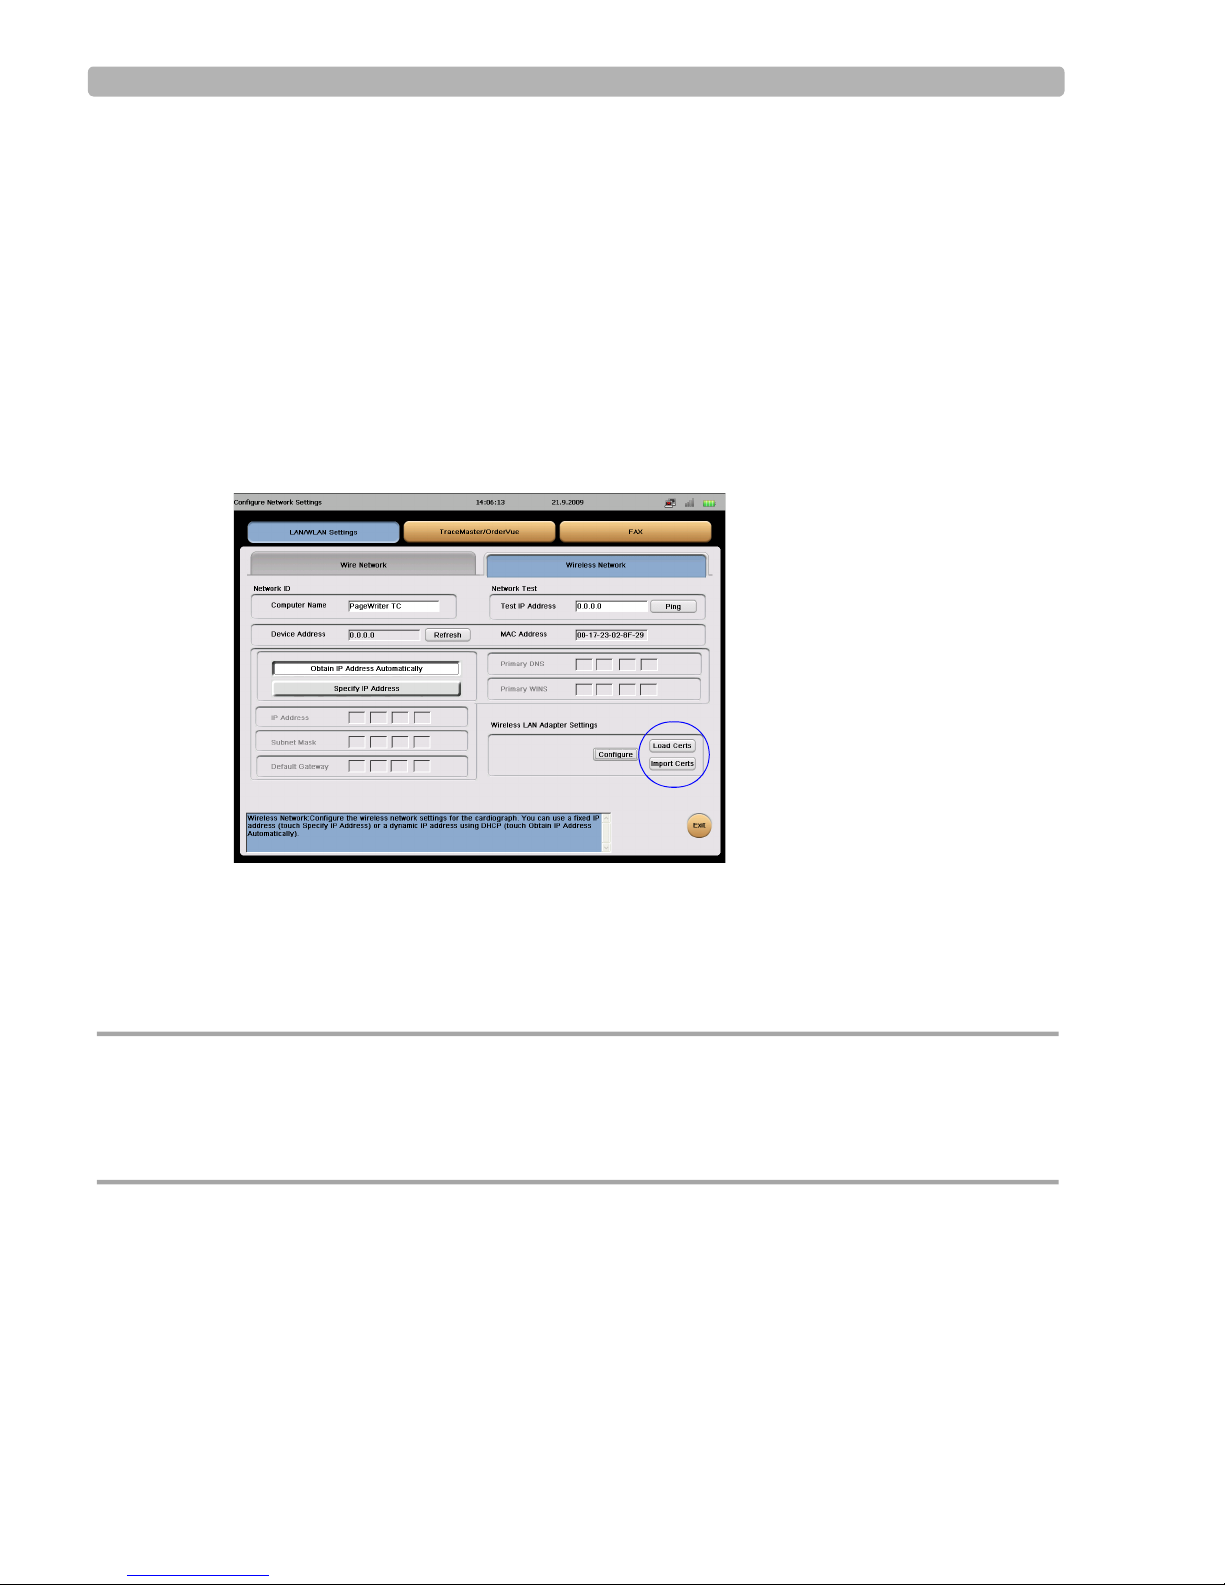
6 Touch the Wireless Network tab.
Wireless LAN Adapter Settings section provides access to the NetUI configuration
The
utility and buttons for loading certificates.
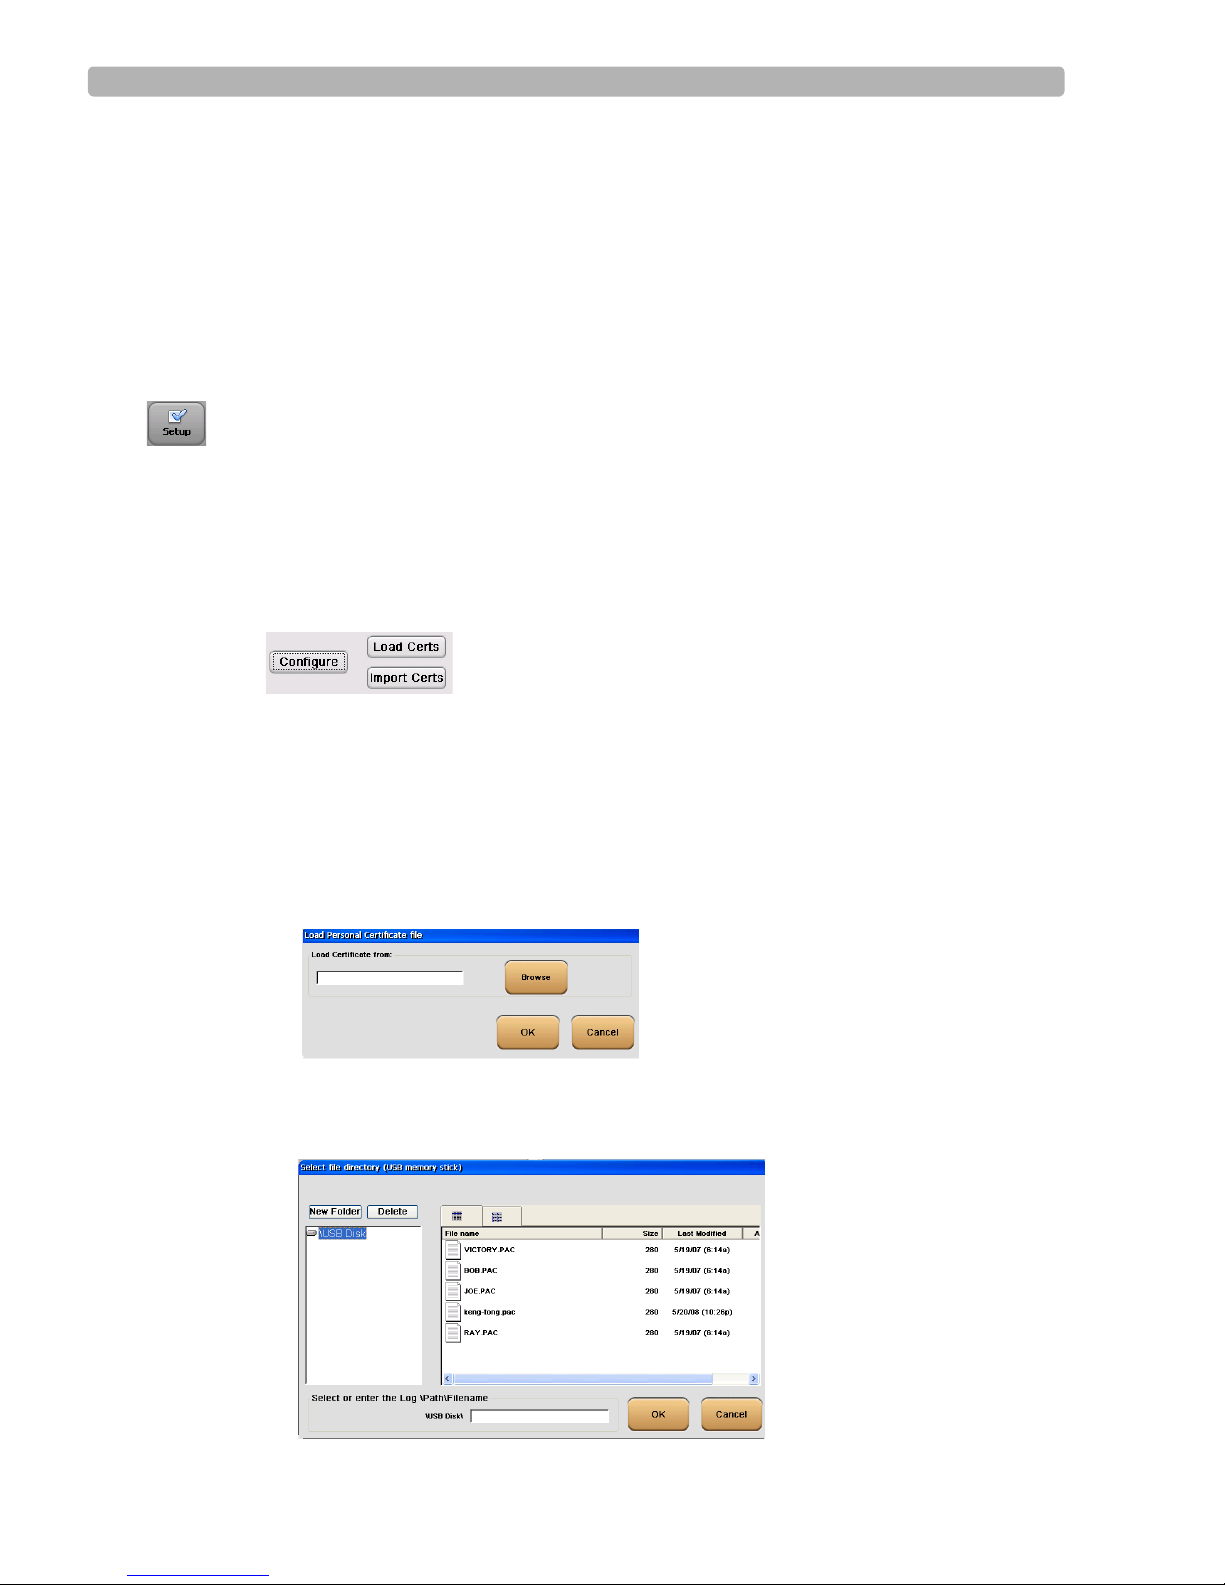
7 Touch Load Certs.
NOTE If the USB stick is not inserted in the USB port, an alert dialog box appears prompting you to
insert one.
In the Load Personal Certificate window, do the following:
a Touch Browse to show the contents of the USB drive.
b Locate and select the desired certificate, then touch OK to accept the entry and load
the certificate.
PageWriter TC20 Wireless LAN Installation Instructions 7
 Loading...