

Page 1
Register your product
and get support at
www.philips.com/welcome
SRU5106/27
EN User Manual 2
FR Mode d’emploi 14
ES Instrucciones de manejo 26
Page 2
Table of contents
1 Your Philips remote control 3
2 Button functions 4
2.1 General functions 4
2.2 Dedicated DVR functions 6
2.3 Dedicated DVD functions 6
2.4 Dedicated SAT functions 6
3 Getting started 7
3.1 Battery installation 7
3.2 Code setup 7
3.3 Programming combo devices 8
3.4 Copy Volume / Mute buttons from another device 8
4 Using the remote control 9
4.1 Controlling devices requiring separate
Power On / Off buttons 9
4.2 Controlling combo devices 9
5 Keep updated for future devices 10
5.1 Learning commands 10
5.2 Clearing commands 11
5.3 Tips on learning 11
6 Troubleshooting 12
7 Limited Lifetime Warranty 13
Notes
• The remote control powers on in TV mode.
• Codes are stored in the permanent remote control
memory so you will not lose any codes stored while you
are changing batteries
• The remote control automatically turns off if buttons are
pressed for more than 30 seconds. This will save your
batteries in case the remote control gets stuck in a place
where the buttons remain pressed (e.g.,between the sofa
cushions).
• Some buttons on the remote control might have functions
that are referred to by different names on the device
you are controlling. E.g. PREV. CH may be called RECALL
or DISPLAY. These differences depend on the brand and
model of your device. Also, this remote control can only
operate features that exist on your device. E.g., your device
must have PREV. CHAN ability for the PREV. CH button to
operate this feature.
• The RECORD (0) button must be pressed twice to record.
For some brands of DVRs, you might need to press the
RECORD (0) once, then press it again for three seconds.
2 EN
Page 3
1
3
LEARN
SETUP POWER
TV DVR DVD
VCR
SATCBL AUX
SELECT
OK
2
4
5
MUTE
LIVE TV
INPUT
PP
6
7
1
2
3
4
5
6
7
8
9
0
L1 L2
C
Q.SKIP
REPEAT
PREV.CH
ENTER
SUBTITLE
9
INST.REPLAY ADVANCE
8
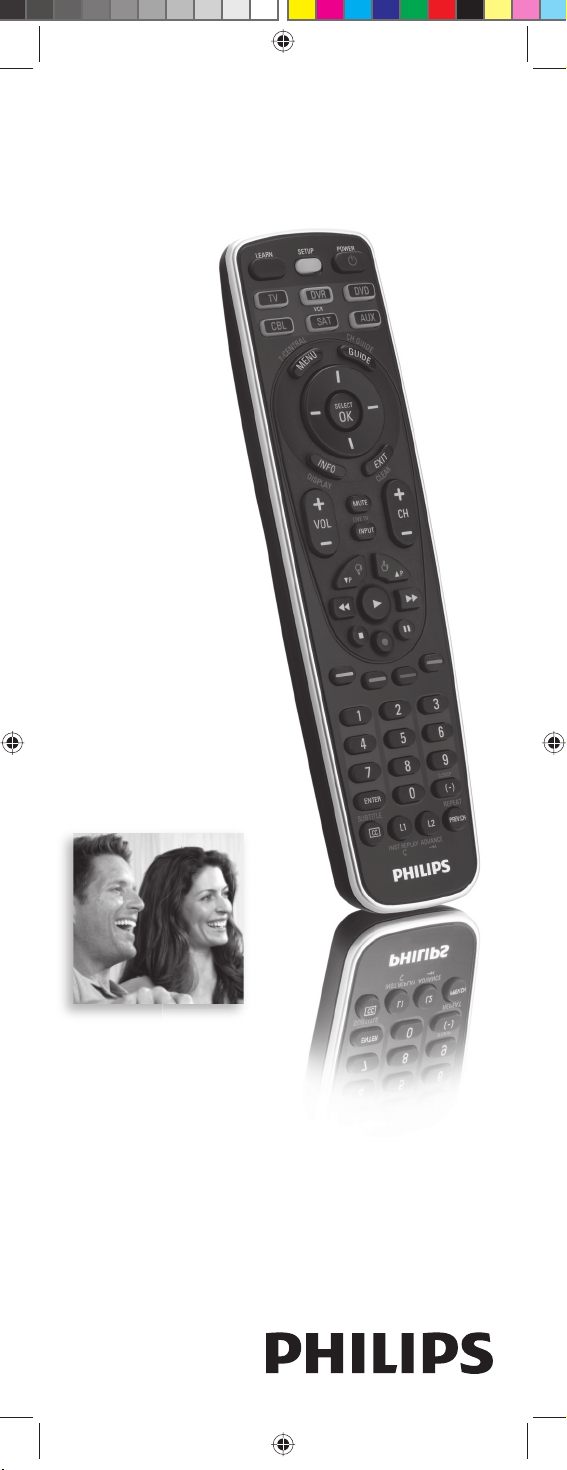
1 Your Philips remote control
Congratulations on your purchase of this Philips universal remote
control. Philips universal remote controls enable you to combine
more than one remote control into one or replace a broken or
lost remote control.
Your Philips remote control English
We focused on making this remote control consumer friendly.
We have highlighted the DVR (Tivo/Replay) buttons in blue for
easy referencing on the keypad.
In addition to DVR functionality we have included Satellite
functionality.
The remote control is equipped with the most common functions
for operating your devices. However, if you miss certain functions,
this remote control can ‘learn’ these functions from the original
remote control.
Please carefully read this user manual to become familiar with
your Philips universal remote control.
To fully benefit from the support that Philips offers, register your
product at www.philips.com/welcome.
• At ‘www.philips.com/welcome’, select ‘Register my product’
and follow the on-screen instructions for registration.
3EN
Page 4
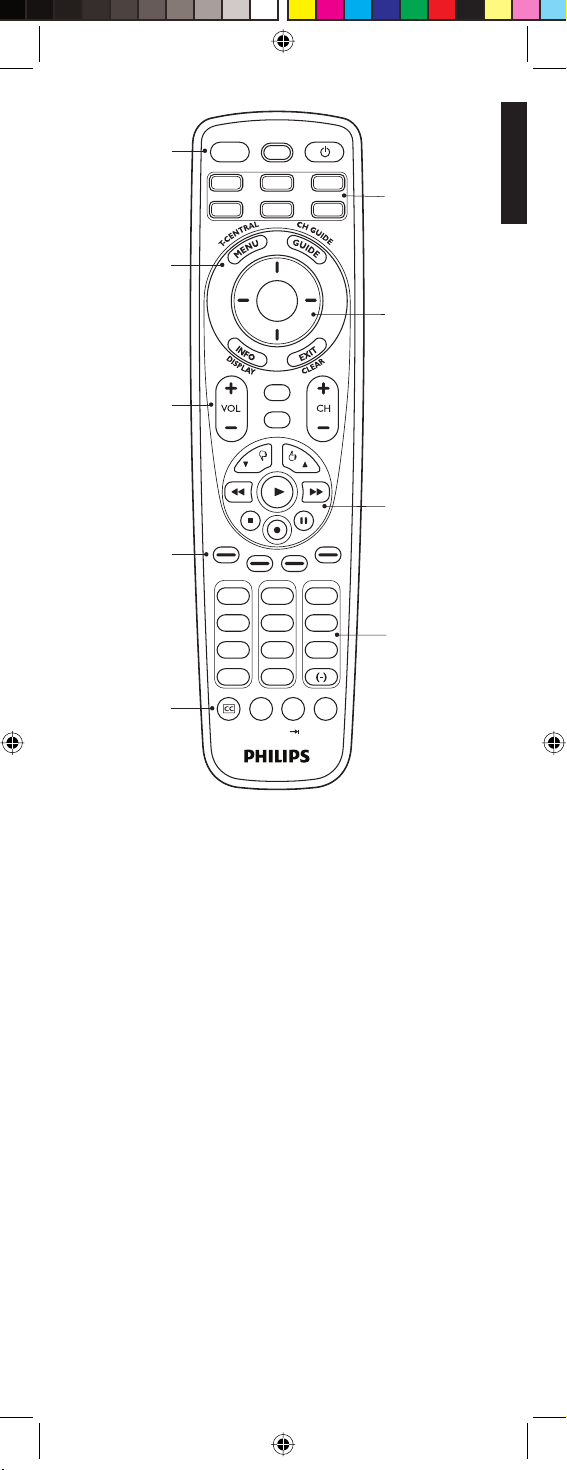
2 Button functions
2.1 General functions
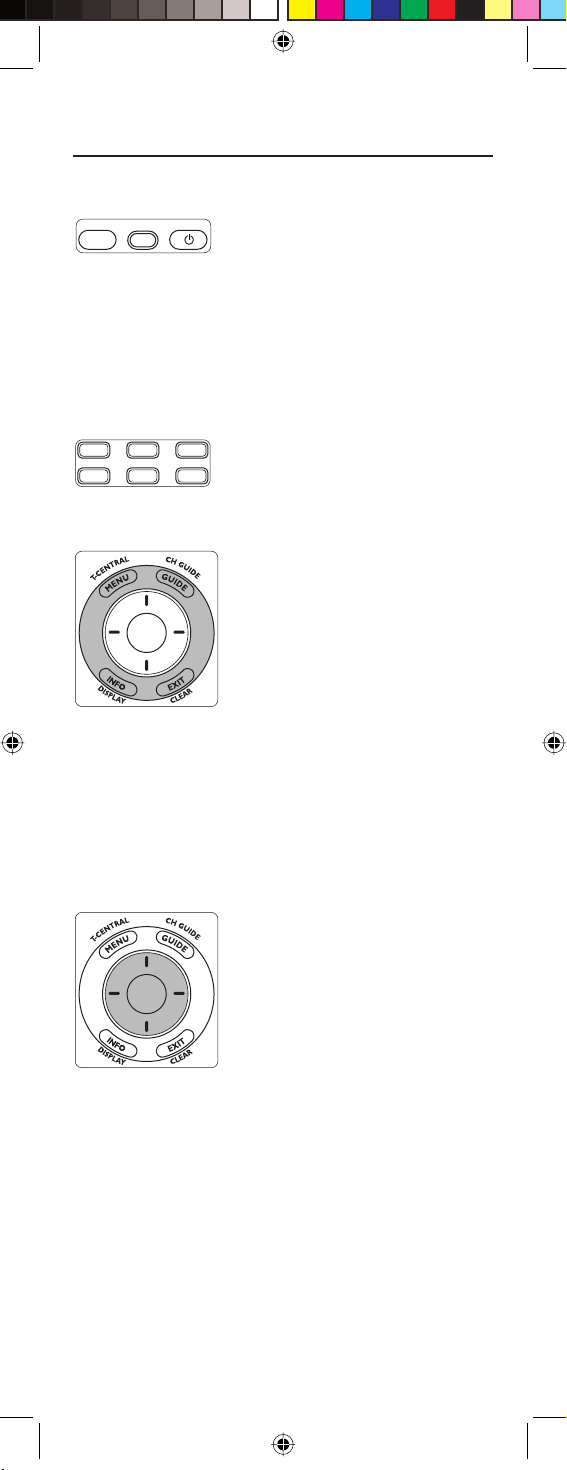
Zone 1
LEARN SETUP POWER
LEARN Used to setup learning functions.
SETUP
(Red light Indicator) ....... – Used for setting up the remote
control.
– Lights up when any button is
pressed.
POWER (y) ........................ Turns devices On / Off.
Zone 2
TV DVR DVD
VCR
SATCBL AUX
Device mode buttons ..... Selects device to be operated.
Zone 3 (Outer ring)
SELECT
OK
MENU .................................... Brings up the menu screen. Use with
the UP, DOWN, LEFT and RIGHT
navigation buttons.
GUIDE ................................... Displays on-screen program or
channel guides.
INFO ...................................... Displays / selects on-screen channel
information.
EXIT ....................................... Exits menu functions.
Zone 4 (Inner ring)
SELECT
OK
SELECT OK ........................ Selects menu items for the device
you are controlling.
(I) UP / DOWN,
(–) LEFT / RIGHT............. Navigation buttons.
4 EN
Page 5

Zone 5
MUTE
LIVE TV
INPUT
VOL + / VOL – .................... Increases / decreases the volume
level of the device, normally TV.
MUTE ..................................... Turns the TV sound Off / On while
the picture remains.
INPUT ................................... Selects available source inputs
(Antenna, Cable, etc.)
CH + / CH – ......................... Selects next / previous channel.
Zone 6
PP
4 P and 3P .......................... Select next (3) / previous (4) page
in various modes (e.g. ReplayTV
guides and menus or on-screen
guide menus used by some Satellite
systems).
0 (Record), 2 (Play), 9 (Stop),
5 (Rewind), 6 (Fast Forward),
; (Pause) ....................... Control buttons. Operate DVR,
VCR, DVD, Aux, etc.
English
Button functions
Zone 7
Colored buttons ................ Ordered following the requirements
for cable boxes.
Zone 8
1
2
3
4
5
6
7
8
9
ENTER
Q.SKIP
0
Digit buttons....................... Direct channel selection.
Some devices require ENTER to be
pressed after channel selection.
ENTER................................... Used after direct channel number
selection to immediately change to
the selected channel.
(-).............................................. Selects between one and two-fi gure
channel numbers.
Zone 9
SUBTITLE
INST.REPLAY ADVANCE
L1 L2
C
REPEAT
PREV.CH
CC............................................ TV Closed Caption (if your TV has
this feature).
L1 / L2 .................................... Store learned commands.
PREV. CH.............................. Returns to the previously selected
channel.
5EN
Page 6

Note
For some devices of certain brands, the POWER (y) button
only turns the device Off. In order to turn the device On, press
any of the digit buttons.
2.2 Dedicated DVR functions - labeled in blue
(Tivo* code is 0738 / Replay* code is 0938)
When you select DVR mode by pressing the DVR button
(zone 2) all blue DVR function buttons will become active.
• T.CENTRAL - TiVo button for TiVo Central.
• CH GUIDE - TiVo Live Guide - the TiVo Program Guide.
• DISPLAY - Brings up the Channel Banner.
• CLEAR - Exits / clears on-screen menu displays.
• LIVE TV - Goes to Live TV broadcast.
•
• P 4 and P 3 - Select previous (4) / next (3) page in Replay
TV guides and menus.
• Q. SKIP - Skips 30 seconds of a recorded or delayed show.
• SUBTITLE - Turns the subtitles On / Off.
• INST. REPLAY - Replays the last 7 seconds (Replay) or
8 seconds (Tivo) of a program.
• ADVANCE - Catches you up to the live broadcast.
• REPEAT - Repeats current chapter / track.
* Tivo and Replay are registered trade marks of their respective
owners.
Thumbs Up / Down. Set your Thumbs ratings.
-
2.3 Dedicated DVD functions
• INPUT - Activates the DVD player’s Setup menu.
• CH + / – - Selects next / previous chapter or track on a disc.
• SUBTITLE - Turns the subtitles On / Off.
• REPEAT - Repeats current chapter / track.
2.4 Dedicated SAT functions
• INPUT - Selects TV or SAT input.
• P 4 and P 3 - Select previous / next on-screen guide menu.
6 EN
Page 7
3 Getting started
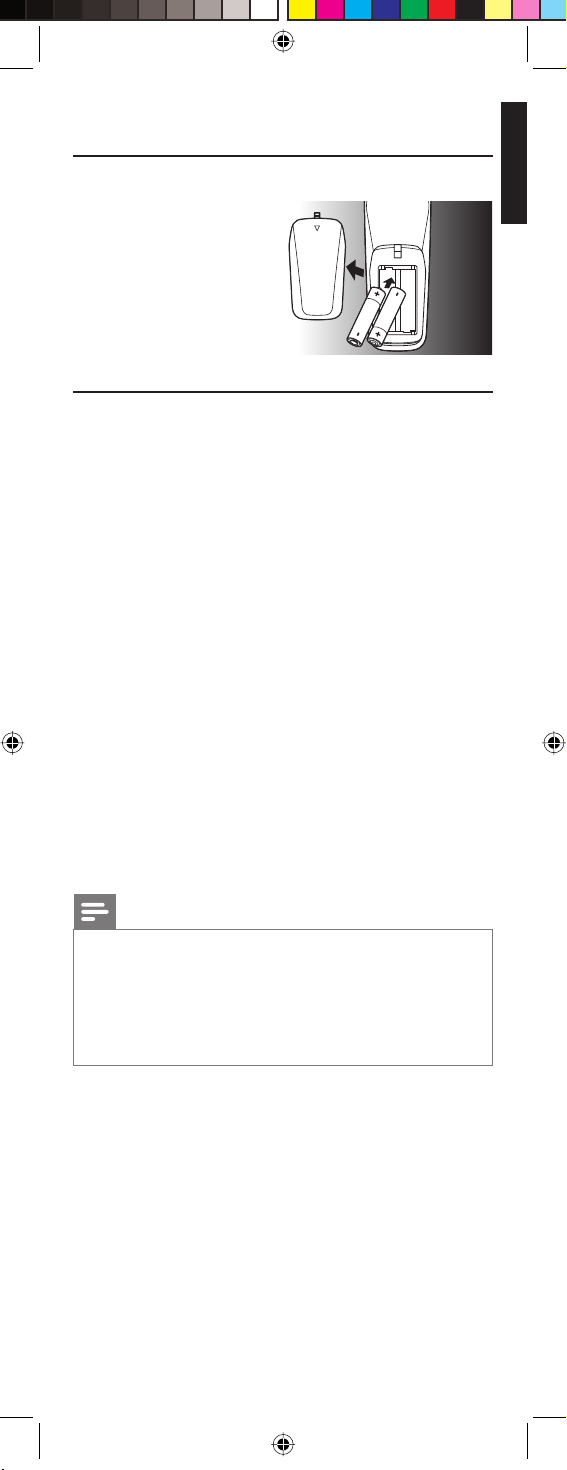
3.1 Battery installation
• Insert 2 AA type
Alkaline batteries,
noting the + and –
configuration in the
battery
compartment.
3.2 Code setup
The SETUP button is used to setup the remote control.
Refer to ‘Code Tables’ (on separate sheet) to find the code(s) for
your device(s).
3.2.1 Code search by brand
Lets you search for a code for a specific brand within the code
library for a particular manufacturer.
1 Turn on the device (TV, DVR, etc.) you wish to operate.
2 Press and hold the SETUP button until the red light indicator
remains lit, then release the SETUP button.
3 Press and quickly release the desired mode button
(TV, DVR , etc.).
• The red light indicator flashes off once.
4 Press and release the digit button (0-9) corresponding to the
desired brand (see table on code list sheet).
• The red light indicator flashes off once.
5 Press the CH + button (or POWER (
only) repeatedly until the device changes channel.
• The red light indicator flashes off with each button press.
) or PLAY (2) - DVR
y
6 Press and release the MUTE button to install (store) the code.
• Code search by brand is now complete.
English
Getting started
Notes
• When all codes under a brand have been searched for, the
red light indicator flashes rapidly for 3 seconds.
• If you accidentally overshoot the required code in step 5,
press the CH – button to backtrack through the library
until the device changes channel. Pressing the CH + button
changes the search direction to forward again.
3.2.2 Direct code entry
1 Turn on the device (TV, DVR, etc.) you wish to operate.
2 Press and hold the SETUP button until the red light indicator
remains lit, then release the SETUP button.
3 Press and release the desired mode button (TV, DVR, etc.).
• The red light indicator flashes, then remains lit.
4 Enter the 4 digit code from the code tables (on separate
sheet).
5 With the device turned on, press several buttons to test if the
device responds.
• If the device responds properly, you have successfully
found a valid code for your device.
7EN
Page 8
6 Repeat steps 1 to 4 for other devices you wish to set up the
remote control for.
Write your codes down here for easy reference later.
Device Code
TV
DVR
SAT
Notes
• After a valid code entry, the red light indicator turns off.
For an invalid code, the red light indicator flashes first, then
turns off. In this case you have to enter Setup mode again
and enter a new code.
• If some buttons do not operate your equipment, try one of
the other codes for your brand.
Note
You can store any kind of code under any mode (except
TV). For example: you can store a DVR code under the CBL
button, or a DVD code under the DVR button, etc. However,
you can only store TV codes under the TV button.
If you wish to store a DVR code under e.g. the CBL button:
• First follow the procedure for ‘Direct code entry’
(chapter 3.2.2) and press CBL in step 3.
• Enter any DVR code in step 4.
• Then follow the steps for ‘Code search by brand’ (chapter
3.2.1).
• If the device does not have a CH + button, use the
PLAY (2) - DVR only - or POWER (y) button instead.
• Code Search starts from the currently stored 4 digit
number under that mode.
3.3 Programming combo devices
For Combo Devices, in many cases a single code operates both
parts of the device (e.g. TV and DVD). In other cases you need
to set up two codes. For example, if you have a TV / DVD combo,
you need to set up one code under the TV button to control the
TV part and a separate code (under any other Mode button) to
control the DVD part.
3.4 Copy Volume / Mute buttons from
another device
When setting the remote control up for your devices, the remote
control copies the Volume / Mute settings as follows:
• If a device has its own Volume / Mute buttons in the remote
control database, then these buttons will be used.
• If a device has no Volume / Mute buttons in the remote
control database, the Volume / Mute buttons of the TV will be
used automatically.
8 EN
Page 9
You can change which Volume / Mute buttons are used for a
device (e.g. use the Volume buttons of the amplifier to control the
volume of the DVD player).
3.4.1 Setting Volume / Mute control for all
devices to any single device
You can set all devices to use the Volume / Mute buttons of a
single device without needing to change to that device mode.
1 Press and hold the SETUP button until the red light indicator
turns on, then release the button.
2 Press and hold the MUTE button until the red light indicator
flashes off, then release the button.
3 Press and release the desired device Mode button (TV, DVR,
etc.) for Volume / Mute control, the red light indicator flashes
then remains lit.
4 Press and release the MUTE button.
• The red light indicator turns off.
• The red light indicator will blink rapidly for three seconds
if the device you have selected has no Volume / Mute
control.
• All other devices will now use the Volume / Mute buttons
of the selected device.
5 Press and release the MUTE button.
• The red light indicator turns off.
• The selected device will now use its own Volume / Mute
control.
4 Using the remote control
Using the remote control English
4.1 Controlling devices requiring separate
Power On / Off buttons
Some devices (e.g. certain RCA TVs) require separate Power On
and Power Off buttons to turn the device on and off.
The equivalent button functions can be found on your Philips
remote control.
1 Turn on the device by pressing the corresponding Mode
button for more than 1 second.
2 Press and release the POWER (y) button to turn off the
device.
Notes
• This method can be applied similarly to any device and is
available for all device modes.
• Note that this feature is not supported by all codes.
4.2 Controlling combo devices
Some combo devices (e.g. TV / DVR, TV / DVD, DVD / DVR, etc.)
have separate buttons on the original remote control to select
the part of the combo device to be controlled.
For example, if your combo device is a TV / DVD then its original
remote control might have separate TV and DVD buttons for
selection of the combo part you wish to operate. The equivalent
button functions can be found on your Philips remote control by
using the device Mode and SETUP buttons.
9EN
Page 10

Example of DVD.
T
V
1 Set up the remote control for a device (in this example DVD)
as described in chapter 3.2.1 ‘Code search by brand’.
2 Select DVD by pressing the DVD mode button for more than 1
second.
• The remote control sends out the ‘Select DVD’ command.
3 Press and immediately release the SETUP button. Then press
and immediately release the DVD mode button to select DVR.
• The remote control sends out the ‘Select DVR’ command.
Notes
• This method can be applied similarly to all Combo devices
(TV / DVR, TV / VCR, DVD / DVR, etc.) and is available for
all device modes.
• Note that this feature is not supported by all codes.
5 Keep updated for future
devices
5.1 Learning commands
The learning feature allows you to ‘learn’ the remote control
functions from your original remote control.
For example: you may want to use your remote control to operate
the RANDOM PLAY feature from your original CD remote
control.
± 1 inch
X
D
AU
V
D
AT
R
S
VCR
DV
SETUP POWER
BL
C
V
T
RN
LEA
MU
ECT
OK
SEL
LI
1 Press and hold the SETUP button until the red light indicator
turns on, then release the button.
2 Press and release the desired mode button (TV, DVR, etc.).
• The red light indicator flashes, then remains lit.
3 Press and release the LEARN button.
• The red light indicator flashes, then remains lit.
4 Press and release the button on the SRU5106 that you wish
to learn a new function (e.g. POWER).
5 Point both remote controls facing each other by
approximately 1 inch apart (refer to chapter 5.4 ‘Tips on
learning’).
6 Press and hold the button from which you wish to learn on
the original remote control (e.g. POWER) until the red light
indicator flashes once and then remains lit.
• If there is a learning problem, the red light indicator flashes
for three seconds and then remains lit. If this happens,
repeat steps 4 to 6.
7 Repeat steps 4 to 6 for other buttons you wish to learn a new
function.
8 Press and release the SETUP button when all desired remote
control commands have been learned.
• Code Learning is now complete.
10 EN
Page 11

5.2 Clearing commands
5.2.1 Clearing all learned commands under
a mode
Clearing learned commands can be useful if, for example, you
replace your CD player with another brand or model. If you
had learned a feature from your old CD player’s original remote
control on to this remote control (such as RANDOM PLAY),
that feature would no longer work for your new CD player.
1
Press and hold the SETUP button until the red light indicator
turns on, then release the button.
2
Press and release the Mode button for the mode you wish to
clear learned functions from (TV, DVR, etc.).
• The red light indicator flashes off.
3
Press and release the LEARN button twice.
• The red light indicator flashes off.
4
Press and release the SETUP button.
• The red light indicator turns off. All learned commands
under that mode are now cleared.
5.2.2 Master clear - Clearing all learned
commands under all modes
1 Press and hold the SETUP button until the red light indicator
turns on, then release the button.
2 Press and release the LEARN button twice.
• The red light indicator flashes off.
3 Press and release the SETUP button.
• The red light indicator turns off. All learned commands,
stored in the remote control memory have now been
cleared.
English
Keep updated for future devices
5.3 Tips on learning
You can only learn one device type under a Mode button.
For example, you can only learn TV codes under the TV mode
button, DVR codes under the DVR mode button, etc. If you are
trying to learn from a ‘universal’ remote control, it might have
more than one code type stored under a Mode button.
Try learning from another remote control to see if there’s a
problem with the type or brand of remote control you are trying
to learn from.
• Some functions from some types of remote controls might
not be learned.
• No functions may be stored under the LEARN or SETUP
buttons.
• Only one original device type can be learned per individual
mode.
• Use fresh batteries for both the SRU5106 and the original
remote control.
• Keep at least three feet away from incandescent or low-
energy lights when learning.
• Place both remote controls on a flat surface (like a coffee
table) and aim them in such way that the IR transmitter of the
original remote control points at the IR transmitter of the
SRU5106.
• Keep about 1 inch in between the remote controls.
You may need to adjust the height of one of the remote
controls to achieve this.
11EN
Page 12

• Do not move or change the distance between the two remote
controls until you have learned all the required buttons for
the selected mode.
• When learning, do not release the button being learned until
the red light indicator has flashed off for half a second.
• Avoid learning your original remote control Volume / Mute
buttons unless you are sure these operate the same device
e.g. some original DVD remote controls include TV Volume /
Mute button control and can have two different types of code.
• Avoid learning your original remote control DVR control
buttons unless you are sure these operate the same device
e.g. some original TV remote controls include DVR button
control and can have two different types of code.
• If you have continual problems learning from your original
remote control, try clearing all learned commands as
described in chapter 5.2.1 ‘Clearing all learned commands
under a mode’.
6 Troubleshooting
Note
This remote control operates the common features of most
but not all models and brands of IR (Infrared) controlled
Audio / Video equipment. This remote control may provide
functions that are not available on your equipment.
The remote control does not operate your product.
Try the following hints to remedy the problem:
• Make sure you selected the correct device mode.
• Set up the remote control with a new code.
• Install new batteries.
• C
heck if you selected the correct device mode.
The remote control does not operate some features of
your product
• Use the L1 and L2 buttons to learn the remote control
commands that are not available.
The red light indicator flashes after you program a
product code
• The remote control did not accept the code.
• Try to program the code again or try a different code.
When you have additional questions about setup, usage, advanced
features, spare parts, warranty, etc. of the SRT5106/27, see
www.philips.com/support.
For further help with setup, please call: 919-573-7854.
12 EN
Page 13

7 Limited Lifetime Warranty
The manufacturer warrants that this product shall be free from
defects in material, workmanship and assembly, under normal use,
in accordance with the specifications and warnings, for as long as
you own this product.
This warranty extends only to the original purchaser of the
product, and is nontransferable. Defective products, together with
the dated proof of purchase, must be returned to the place of
purchase for repair or replacement.
THERE ARE NO OTHER EXPRESS WARRANTIES.
Incidental and consequential damages are disclaimed where
permitted by law.
This warranty gives you specific legal rights, and you may also have
other rights which vary from state to state.
Made in China. Quality Assured in USA.
Ledgewood, NJ 07852
FCC Compliancy
This device complies with Part 15 of the FCC Rules. Operation is
subject to the following two conditions:
• This device may not cause harmful interference.
• This device must accept any interference received, including
interference that may cause undesired operation.
Caution
User changes or modifications not expressly approved by
the party responsible for compliance could void the user’s
authority to operate the equipment.
English
Limited Lifetime Warranty
Notice for Canada / Remarque pour le Canada
This class B digital apparatus complies with Canadian ICES-003.
Cet appareil numérique de la Classe B est conforme à la norme
NMB-003 du Canada.
13EN
Page 14

Table des matières
1 Votre télécommande Philips 15
2 Fonctions des touches 16
2.1 Fonctions générales 16
2.2 Fonctions dédiées DVR 18
2.3 Fonctions dédiées DVD 18
2.4 Fonctions dédiées SAT 18
3 Mise en route 19
3.1 Insertion des piles 19
3.2 Confi guration par code 19
3.3 Programmation d'appareils combinés 20
3.4 Copie des touches volume/silence
d'un autre appareil 20
4 Utilisation de la télécommande 21
4.1 Commande d'appareils nécessitant des touches de
marche/arrêt distincts 21
4.2 Commande d'appareils combinés 21
5 Mise à jour avec de futurs appareils 22
5.1 Apprentissage de commandes 22
5.2 Annulation des commandes 23
5.3 Conseils sur l'apprentissage 23
6 Dépannage 24
7 Garantie à vie limitée 25
Remarques
• La télécommande s'allume en mode TV.
• Les codes sont enregistrés dans la mémoire permanente
de la télécommande ; ils ne seront donc pas perdus lorsque
vous changerez les piles.
• La télécommande s'éteint automatiquement lorsque vous
appuyez sur une touche pendant plus de 30 secondes.
Ainsi, les piles ne s'épuiseront pas si la télécommande est
coincée dans un endroit où des touches sont enfoncées en
permanence (par exemple entre les coussins du canapé).
• Il est possible que les noms utilisés pour les fonctions de
certaines touches de la télécommande ne correspondent
pas à ceux de l'appareil à commander. Par exemple, la
touche PREV. CH peut s'appeler RECALL ou DISPLAY.
Cela dépend de la marque et du modèle de l'appareil
concerné. En outre, seules les fonctionnalités proposées
par votre appareil peuvent être obtenues à partir de cette
télécommande. Par exemple, sans capacité PREV. CHAN
sur votre appareil, la touche PREV. CH sera inopérante.
• Vous devez appuyer deux fois sur la touche
d'enregistrement (0) pour enregistrer un contenu. Pour
certaines marques de DVR, vous devrez appuyer une
première fois sur la touche d'enregistrement (0), puis
encore une fois pendant trois secondes.
14
FR
Page 15

1
3
LEARN
SETUP POWER
TV DVR DVD
VCR
SATCBL AUX
SELECT
OK
2
Français
4
5
MUTE
LIVE TV
INPUT
PP
6
7
1
2
3
4
5
6
7
8
9
0
L1 L2
C
Q.SKIP
REPEAT
PREV.CH
ENTER
SUBTITLE
9
INST.REPLAY ADVANCE
8
1 Votre télécommande Philips
Félicitations pour l'achat de la télécommande universelle Philips.
Les télécommandes universelles Philips vous permettent de
regrouper les fonctions de plusieurs télécommandes en une seule,
ou de remplacer une télécommande cassée ou perdue.
Votre télécommande Philips
Nous nous sommes efforcés de rendre cette télécommande
conviviale. Nous avons attribué la couleur bleue aux touches pour
DVR (Tivo/Replay) pour faciliter l'utilisation de la télécommande.
La télécommande prend en charge non seulement le
fonctionnalité DVR, mais également satellite.
Elle prend en charge les fonctions les plus courantes permettant
d'utiliser vos divers appareils. Si toutefois certaines fonctions
manquaient, elle peut les copier de la télécommande d'origine par
apprentissage.
Lisez attentivement ce manuel d'utilisation pour vous familiariser
avec votre télécommande universelle Philips.
Pour bénéficier de tous les avantages de l'assistance Philips,
enregistrez votre produit à l'adresse www.philips.com/welcome.
• Sur le site 'www.philips.com/welcome', sélectionnez
'Enregistrer mon produit' et suivez les instructions
d'enregistrement qui s'affichent à l'écran.
15
FR
Page 16

2 Fonctions des touches
2.1 Fonctions générales
Zone 1
LEARN SETUP POWER
LEARN .................................. Permet de confi gurer les fonctions
par apprentissage.
SETUP
(voyant rouge) .................... - Permet de confi gurer la
télécommande.
- S'allume lorsque vous appuyez sur
une touche.
POWER (y) .......................... Permet d'allumer/éteindre les
appareils.
Zone 2
TV DVR DVD
VCR
SATCBL AUX
Touches de mode ............... Permettent de sélectionner l'appareil
d'appareil à contrôler.
Zone 3 (anneau externe)
SELECT
OK
MENU....................................... Permet d'affi cher le menu. À utiliser
avec les touches de navigation haut,
bas, gauche et droite.
GUIDE
......................................
Permet d'afficher les guides des
chaînes ou des programmes à l'écran.
INFO ......................................... Permet d'affi cher/sélectionner les
informations des chaînes à l'écran.
EXIT .......................................... Permet de quitter les fonctions du
menu.
Zone 4 (anneau interne)
SELECT
OK
SELECT OK .......................... Permet de sélectionner des options
du menu pour l'appareil que vous
contrôlez.
(I) HAUT / BAS,
(–) GAUCHE / DROITE ..Touches de navigation.
16 FR
Page 17

Zone 5
MUTE
LIVE TV
INPUT
VOL + / VOL – ....................... Permet d'augmenter/diminuer le
volume de l'appareil, normalement du
téléviseur.
MUTE ....................................... Permet de couper/rétablir le son du
téléviseur en conservant l'image.
INPUT ...................................... Permet de sélectionner les entrées
de source disponibles (antenne, câble,
etc.).
CH + / CH – ........................... Permet de sélectionner la chaîne
suivante/précédente.
Zone 6
PP
Français
Fonctions des touches
4 P et 3P ................................ Permettent de sélectionner la page
suivante (3) / précédente (4) dans
différents modes (par exemple,
guides et menus ReplayTV ou menus
du guide à l'écran utilisé par certaines
offres satellite).
0 (Enregistrement), 2 (Lecture), 9 (Arrêt),
5 (Retour rapide), 6 (Avance rapide),
; (Pause) ............................... Touches de commande. Permettent
de faire fonctionner un DVR, un
magnétoscope, un lecteur de DVD,
un appareil raccordé via la prise Aux,
etc.
Zone 7
Touches de couleur ........... Suivent l'ordre requis pour les
décodeurs.
Zone 8
1
2
3
4
5
6
7
8
9
ENTER
Q.SKIP
0
Touches numériques......... Sélection directe des chaînes.
Pour certains appareils, il est
nécessaire d'appuyer sur ENTER
après la sélection d'une chaîne.
ENTER ..................................... Touche utilisée après la sélection
directe d'une chaîne pour l'affi cher
immédiatement.
(-) ................................................ Permet de basculer entre les
numéros de chaîne à un et deux
chiffres.
Zone 9
SUBTITLE
INST.REPLAY ADVANCE
L1 L2
C
REPEAT
PREV.CH
CC .............................................. Sous-titres pour malentendants
(si votre téléviseur prend en charge
cette fonction).
L1 / L2 ....................................... Permettent de mémoriser les
commandes copiées.
PREV. CH ................................ Permet de retourner à la chaîne
précédemment sélectionnée.
FR
17
Page 18

Remarque
Sur les appareils de certaines marques, la touche POWER (y)
ne fait qu'éteindre l'appareil. Pour allumer l'appareil, appuyez
sur n'importe quelle touche numérique.
2.2 Fonctions dédiées DVR - en bleu
(code Tivo* : 0738 / code Replay* : 0938)
Lorsque vous sélectionnez le mode DVR en appuyant sur la
touche DVR (zone 2), toutes les touches des fonctions DVR
deviennent opérantes.
• T.CENTRAL - Touche TiVo pour TiVo Central.
• CH GUIDE - TiVo Live Guide, le guide des programmes TiVo.
• DISPLAY - Permet d'affi cher la bannière des chaînes.
• CLEAR - Permet de quitter les menus à l'écran.
• LIVE TV
• - Pouce vers le haut / pouce vers le bas. Permet
d'attribuer un niveau de satisfaction.
• P 4 et P 3 - Permettent de sélectionner la page précédente
(4) / suivante (3) dans les menus et guides ReplayTV.
• Q. SKIP - Permet de sauter 30 secondes d'un contenu
enregistré ou d'une émission visionnée en différé.
• SUBTITLE - Permet d'affi cher/masquer les sous-titres.
• INST. REPLAY
7 secondes (Replay) ou 8 secondes (Tivo) d'une émission.
• ADVANCE - Permet de rattraper la diffusion en direct.
• REPEAT - Permet de répéter le chapitre ou la piste en cours.
* Tivo et Replay sont des marques déposées appartenant à leurs
propriétaires respectifs.
- Permet d'accéder à la télévision en direct.
- Permet de rediffuser les dernières
2.3 Fonctions dédiées DVD
• INPUT - Permet d'activer le menu de confi guration du
• CH + / – - Permet de sélectionner le chapitre ou la piste
• SUBTITLE - Permet d'affi cher/masquer les sous-titres.
• REPEAT - Permet de répéter le chapitre ou la piste en cours.
lecteur de DVD.
suivante/précédente sur un disque.
2.4 Fonctions dédiées SAT
• INPUT - Permet de sélectionner l'entrée TV ou SAT.
• P 4 et P 3 - Permettent de sélectionner le menu du guide à
18 FR
l'écran précédent/suivant.
Page 19

3 Mise en route
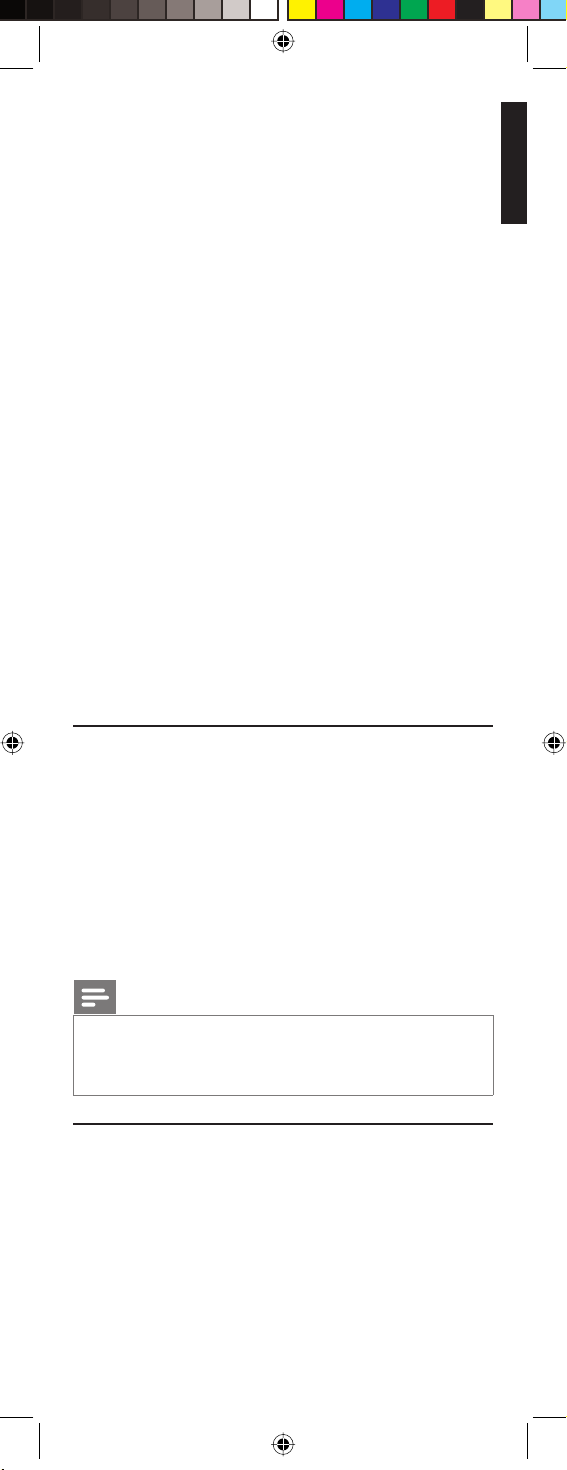
3.1 Insertion des piles
• Insérez 2 piles AA
alcalines en
respectant les
polarités indiquées
dans le compartiment
à piles.
3.2 Configuration par code
La touche SETUP permet de configurer la télécommande.
Recherchez les codes de vos appareils dans le tableau des codes
(sur une fiche distincte).
3.2.1 Recherche de code en fonction de la
marque
Vous permet de rechercher le code d'une marque précise dans la
bibliothèque de codes d'un fabricant particulier.
1 Allumez l'appareil (téléviseur, DVR, etc.) que vous souhaitez
utiliser.
2 Maintenez la touche SETUP enfoncée jusqu'à ce que le voyant
rouge reste allumé, puis relâchez.
3 Appuyez brièvement sur la touche correspondant au mode
souhaité (TV, DVR, etc.).
• Le voyant rouge s'éteint brièvement une fois.
4 Appuyez sur la touche numérique (0-9) correspondant à la
marque souhaitée (voir le tableau sur la fiche des codes).
• Le voyant rouge s'éteint brièvement une fois.
5 Appuyez à plusieurs reprises sur la touche CH + (ou POWER
(y) ou Lecture (2) - DVR uniquement) jusqu'à ce que
l'appareil change de canal.
• Le voyant rouge s'éteint brièvement à chaque pression sur
une touche.
6 Appuyez sur la touche MUTE pour configurer (mémoriser) le
code.
• La recherche du code en fonction de la marque est
terminée.
Français
Mise en route
Remarques
• Lorsque tous les codes d'une marque sont trouvés, le
voyant clignote rapidement pendant 3 secondes.
• Si vous dépassez accidentellement le code requis à l'étape
5, appuyez sur la touche CH – pour remonter dans la
bibliothèque jusqu'à ce que l'appareil change de canal.
Appuyez sur la touche CH + pour changer à nouveau de
direction de recherche.
3.2.2 Entrée directe du code
1 Allumez l'appareil (téléviseur, DVR, etc.) que vous souhaitez
utiliser.
2 Maintenez la touche SETUP enfoncée jusqu'à ce que le voyant
rouge reste allumé, puis relâchez.
3 Appuyez sur la touche correspondant au mode souhaité (TV,
DVR, etc.).
• Le voyant rouge clignote, puis reste allumé en permanence.
4 Entrez le code à 4 chiffres trouvé dans les tableaux de codes
(sur la fiche distincte).
5 L'appareil allumé, appuyez sur plusieurs touches pour vérifier
que celui-ci répond aux commandes.
• Si l'appareil répond, cela signifie que le code trouvé est
correct.
19FR
Page 20

6 Répétez les étapes 1 à 4 pour les autres appareils que vous
souhaitez contrôler à l'aide de la télécommande.
Notez les codes ici pour vous y référer ultérieurement.
Appareil Code
Téléviseur
DVR
SAT
Remarques
• Lorsque vous entrez un code correct, le voyant rouge s'éteint.
Lorsque le code est incorrect, le voyant rouge clignote, puis
s'éteint. Si c'est le cas, vous devrez accéder à nouveau au mode
de configuration et entrer un nouveau code.
• Si certaines touches sont inopérantes avec votre appareil,
essayez d'autres codes de la même marque.
Remarque
Vous pouvez mettre en mémoire n'importe quel type de
code sous n'importe quel mode (sauf TV). Par exemple : vous
pouvez mettre en mémoire un code pour DVR sous la touche
CBL ou un code pour lecteur de DVD sous la touche DVR,
etc., à l'exception des codes pour téléviseurs qui doivent être
mémorisés sous la touche TV.
Si vous souhaitez mettre en mémoire un code pour DVR sous,
par exemple la touche CBL :
• Suivez la procédure de 'Entrée directe du code' (chapitre
3.2.2), puis appuyez sur CBL à l'étape 3.
• Entrez un code pour DVR à l'étape 4.
• Ensuite, suivez les étapes correspondant à la 'Recherche de
code en fonction de la marque' (chapitre 3.2.1).
• Si l'appareil n'est pas équipé d'une touche CH +, utilisez la
touche Lecture (2) (DVR uniquement) ou POWER (y).
• La recherche de code démarre à partir du numéro à 4
chiffres actuellement mémorisé sous ce mode.
3.3 Programmation d'appareils combinés
Un unique code permet souvent de faire fonctionner les deux
parties d'un appareil combiné (par exemple, téléviseur/lecteur
de DVD). Si ce n'est pas le cas, vous devrez définir deux codes.
Par exemple, si vous êtes équipé d'un téléviseur/lecteur de DVD
combinés, vous devrez définir un code sous la touche TV pour
commander la partie téléviseur, et un autre code (sous n'importe
quelle autre touche de mode) pour commander la partie lecteur
de DVD.
3.4 Copie des touches volume/silence d'un
autre appareil
Lorsque vous configurez la télécommande pour vos appareils, la
télécommande copie les réglages du volume/silence de la manière
suivante :
• Si un appareil dispose de ses propres touches volume/silence
dans la base de données des télécommandes, celles-ci seront
utilisées.
• Si ce n'est pas le cas, les touches volume/silence du téléviseur
seront utilisées automatiquement.
20 FR
Page 21

Vous pouvez changer les touches volume/silence utilisées pour un
appareil (par exemple, utiliser les touche volume de l'amplificateur
pour contrôler le volume du lecteur de DVD).
3.4.1 Transfert sur un unique appareil du
contrôle du volume/silence de tous les
appareils
Vous pouvez régler tous les appareils de manière à ce que les
touches volume/silence d'un unique appareil soient utilisées sans
qu'il soit nécessaire de basculer sur le mode de cet appareil.
1 Maintenez la touche SETUP enfoncée jusqu'à ce que le voyant
rouge s'allume, puis relâchez.
2 Maintenez la touche MUTE enfoncée jusqu'à ce que le voyant
rouge s'éteigne brièvement, puis relâchez.
3 Appuyez sur la touche du mode d'appareil souhaité (TV, DVR,
etc.) pour le contrôle du volume/silence ; le voyant rouge
clignote puis reste allumé en permanence.
4 Appuyez sur la touche MUTE.
• Le voyant rouge s'éteint.
• Le voyant rouge clignote rapidement pendant trois
secondes si l'appareil sélectionné ne dispose pas d'une
commande volume/silence.
• Tous les autres appareils utilisent désormais les touches
volume/silence de l'appareil sélectionné.
5 Appuyez sur la touche MUTE.
• Le voyant rouge s'éteint.
• L'appareil sélectionné utilise désormais sa propre
commande volume/silence.
4 Utilisation de la
télécommande
Français
Utilisation de la télécommande
4.1 Commande d'appareils nécessitant des
touches de marche/arrêt distincts
Des touches distincts de marche et arrêt sont nécessaires pour
allumer et éteindre certains appareils (par exemple, certains
téléviseurs RCA).
Votre télécommande Philips offre les fonctions équivalentes.
1 Allumez l'appareil en appuyant sur la touche de mode
correspondante pendant plus d'une seconde.
2 Appuyez sur la touche POWER (y) pour éteindre l'appareil.
Remarques
• Cette méthode peut s'appliquer à n'importe quel appareil,
pour tous les modes d'appareil.
• Notez que cette fonctionnalité n'est pas prise en charge
par tous les codes.
4.2 Commande d'appareils combinés
La télécommande d'origine de certains appareils combinés (par
exemple, téléviseur/DVR, téléviseur/lecteur de DVD, lecteur de
DVD/DVR, etc.) propose des touches distinctes pour chaque partie
de l'appareil combiné à commander. Par exemple, si votre appareil
combiné est un téléviseur/lecteur de DVD, la télécommande
d'origine peut proposer des touches distinctes TV et DVD pour
vous permettre de sélectionner la partie de l'appareil que vous
souhaitez utiliser.
21FR
Page 22

Les fonctions équivalentes sont disponibles sur votre
T
V
télécommande Philips via les touches de mode d'appareil et la
touche SETUP. Exemple avec un lecteur de DVD.
1 Configurez la télécommande pour un appareil (lecteur de
DVD dans cet exemple) comme indiqué au chapitre
3.2.1 '
Recherche de code en fonction de la marque
'.
2 Sélectionnez le mode DVD en appuyant sur la touche de
mode DVD pendant plus d'une seconde.
• La télécommande envoie la commande de sélection du
lecteur de DVD.
3 Appuyez brièvement sur la touche SETUP. Puis appuyez
brièvement sur la touche de mode DVD pour sélectionner le
DVR.
• La télécommande envoie la commande de sélection du
DVR.
Remarques
• Cette méthode s'applique à tous les appareils combinés
téléviseur/DVR, téléviseur/lecteur de DVD, lecteur de DVD/
DVR, etc.) et est disponible pour tous les modes d'appareil.
• Notez que cette fonctionnalité n'est pas prise en charge
par tous les codes.
5 Mise à jour avec de futurs
appareils
5.1 Apprentissage de commandes
La fonctionnalité d'apprentissage permet à votre télécommande
de copier les fonctions de la télécommande d'origine d'un
appareil.
Par exemple : vous souhaitez utiliser votre télécommande
pour commander la fonctionnalité de lecture aléatoire de la
télécommande d'origine de votre lecteur de CD.
± 1 inch
X
D
AU
ECT
V
D
SETUP POWER
RN
LEA
OK
SEL
AT
S
VCR
DVR
BL
C
V
T
LI
MU
1 Maintenez la touche SETUP enfoncée jusqu'à ce que le voyant
rouge s'allume, puis relâchez.
2 Appuyez sur la touche correspondant au mode souhaité (TV,
DVR, etc.).
• Le voyant rouge clignote, puis reste allumé en permanence.
3 Appuyez sur la touche LEARN.
• Le voyant rouge clignote, puis reste allumé en permanence.
4 Appuyez sur la touche de la SRU5106 à laquelle vous
souhaitez attribuer une nouvelle fonction (par exemple,
POWER).
5 Placez les deux télécommandes face à face, à une
distance d'environ 2,5 cm (voir chapitre 5.4 'Conseils sur
l'apprentissage').
6 Maintenez enfoncée la touche que vous souhaitez copier sur
la télécommande d'origine (par exemple, POWER) jusqu'à
ce que le voyant rouge clignote une fois, puis reste allumé en
permanence.
• En cas de problème de copie, le voyant rouge clignote
pendant trois secondes avant de rester allumé en
permanence. Si c'est le cas, reprenez les étapes 4 à 6.
22 FR
Page 23

7 Répétez les étapes 4 à 6 pour les autres touches auxquelles
vous souhaitez attribuer une nouvelle fonction.
8 Appuyez sur la touche SETUP une fois que toutes les
commandes souhaitées ont été copiées sur la télécommande.
• La copie des codes est terminée.
5.2 Annulation des commandes
5.2.1 Annulation de toutes les commandes
copiées sous un mode
L'annulation des commandes copiées peut être utile si, par
exemple, vous remplacez votre lecteur de CD par un appareil
d'une autre marque ou un autre modèle. Une fonctionnalité
copiée de la télécommande d'origine de votre ancien lecteur de
CD sur cette télécommande (lecture aléatoire, par exemple) sera
inopérante pour votre nouveau lecteur de CD.
1
Maintenez la touche SETUP enfoncée jusqu'à ce que le voyant
rouge s'allume, puis relâchez.
2
Appuyez sur la touche de mode correspondant au mode pour
lequel vous souhaitez annuler les fonctions copiées (TV, DVR,
etc.).
• Le voyant rouge s'éteint brièvement.
3
Appuyez deux fois sur la touche LEARN.
• Le voyant rouge s'éteint brièvement.
4
Appuyez sur la touche SETUP.
• Le voyant rouge s'éteint. Toutes les commandes copiées
sous ce mode sont annulées.
5.2.2 Annulation totale - annulation de
toutes les commandes copiées sous
tous les modes
1 Maintenez la touche SETUP enfoncée jusqu'à ce que le voyant
rouge s'allume, puis relâchez.
2 Appuyez deux fois sur la touche LEARN.
• Le voyant rouge s'éteint brièvement.
3 Appuyez sur la touche SETUP.
• Le voyant rouge s'éteint. Toutes les commandes copiées
enregistrées dans la mémoire de la télécommande sont
annulées.
Français
Mise à jour avec de futurs appareils
5.3 Conseils sur l'apprentissage
Les commandes d'un seul type d'appareil peuvent être copiées
sous une touche de mode.
Par exemple, la touche de mode TV permet uniquement de
copier les codes d'un téléviseur, la touche de mode DVR permet
uniquement de copier les codes d'un DVR, etc. Si vous tentez une
copie à partir d'une télécommande 'universelle', il est possible
qu'elle contienne plusieurs types de code sous une touche de
mode.
Essayez de copier à partir d'une autre télécommande pour
vérifier que le type ou la marque de télécommande à la source de
la copie ne pose pas problème.
• Il est possible qu'avec certains types de télécommande,
certaines fonctions ne puissent pas être copiées.
• Aucune fonction ne peut être mémorisée sous les touches
LEARN et SETUP.
• La copie est limitée à un seul type d'appareil pour chaque
mode.
• Équipez la SRU5106 et la télécommande d'origine de piles
neuves.
• Éloignez-les d'au moins un mètre de toute ampoule à
incandescence ou basse consommation lors de la copie.
• Placez les deux télécommandes sur une surface plane (table
basse, par exemple) et orientez-les de manière à ce que les
émetteurs IR se fassent face.
23FR
Page 24

• Placez les télécommandes à environ 2,5 cm l'une de l'autre.
Pour cela, vous devrez peut-être rehausser l'une des
télécommandes.
• Ne modifiez pas la distance entre les deux télécommandes
avant d'avoir copié toutes les fonctions requises pour le mode
sélectionné.
• Pendant la copie, ne relâchez pas la touche correspondant à la
fonction copiée tant que le voyant ne s'est pas éteint pendant
une demi-seconde.
• Évitez de copier les fonctions des touches volume/silence de
la télécommande d'origine à moins d'être sûr que ces touches
commandent le même appareil. Certaines télécommandes
d'origine de lecteurs de DVD, par exemple, intègrent la
commande de la touche volume/silence du téléviseur, et
disposent de deux types de code différents.
• Évitez de copier les fonctions des touches de commande
de DVR de la télécommande d'origine à moins d'être sûr
que ces touches commandent le même appareil. Certaines
télécommandes d'origine de téléviseurs, par exemple,
intègrent la commande des touches de DVR, et disposent de
deux types de code différents.
• Si vous rencontrez continuellement des problèmes de copie à
partir de la télécommande d'origine, essayez d'annuler toutes
les commandes copiées comme indiqué au chapitre 5.2.1
'Annulation de toutes les commandes copiées sous un mode'.
6 Dépannage
Remarque
Cette télécommande prend en charge les fonctionnalités
courantes de la plupart des marques et des modèles d'appareils
audiovisuels commandés par infrarouge (IR). Il est possible
que cette télécommande prenne en charge des fonctions non
disponibles sur votre appareil.
La télécommande ne permet pas de contrôler votre
appareil.
Essayez les conseils suivants pour résoudre votre
problème :
• Veillez à sélectionner le mode d'appareil adéquat.
• Configurez la télécommande avec un nouveau code.
• Insérez de nouvelles piles.
V
érifiez que vous avez sélectionné le mode d'appareil adéquat.
•
La télécommande ne permet pas d'obtenir certaines
fonctionnalités de votre appareil.
• Copiez les commandes non disponibles de la télécommande à
l'aide des touches L1 et L2.
Le voyant rouge clignote après la programmation d'un
code de produit.
• La télécommande n'a pas accepté le code.
• Essayez de reprogrammer le code, ou essayez un autre code.
Pour toute autre question concernant la configuration, l'utilisation,
les fonctionnalités avancées, les pièces de rechange, la garantie,
etc. de la SRT5106/27, consultez le site www.philips.com/
support.
Pour obtenir de l'aide pour la configuration, appelez le
919-573-7854.
24 FR
Page 25

7 Garantie à vie limitée
Le fabricant garantit que ce produit est exempt de défauts de
matériau, de fabrication et d'assemblage, dans des conditions
normales d'utilisation, conformément aux caractéristiques
techniques et avertissements, pour toute la période où ce produit
est en votre possession.
Cette garantie est accordée uniquement à l'acheteur d'origine
de ce produit et n'est pas transférable. Les produits défectueux
doivent être remis avec une preuve d'achat datée au lieu d'achat
afin d'être réparés ou remplacés.
AUCUNE AUTRE GARANTIE EXPRESSE N'EST
PRÉVUE.
Les dommages accessoires et indirects ne sont pas couverts par
cette garantie, et ce, dans les limites autorisées par la loi.
Cette garantie vous permet de jouir de droits spécifiques.
Vous pouvez également jouir d'autres droits, selon les États.
Fabriqué en Chine Assurance qualité aux États-Unis.
Ledgewood, NJ 07852
Conformité FCC
Cet appareil est conforme à la section 15 de la réglementation de
la FCC. Son utilisation est soumise à deux conditions :
• Cet appareil ne doit pas provoquer d'interférences nuisibles.
• Cet appareil doit être capable de supporter différentes
interférences, y compris les interférences susceptibles de
provoquer un dysfonctionnement.
Attention
Français
Garantie à vie limitée
Les changements ou modifications apportés par l'utilisateur qui
n'ont pas été expressément approuvés par la partie chargée
de sa conformité peuvent priver l'utilisateur du droit d'utiliser
l'équipement.
Notice for Canada / Remarque pour le Canada
This Class B digital apparatus complies with Canadian ICES-003.
Cet appareil numérique de la Classe B est conforme à la norme
NMB-003 du Canada.
25FR
Page 26

Contenido
1 Su mando a distancia de Philips 27
2 Funciones de los botones 28
2.1 Funciones generales 28
2.2 Funciones específi cas de DVR 30
2.3 Funciones específi cas de DVD 30
2.4 Funciones específi cas de SAT 30
3 Introducción 31
3.1 Cómo colocar las pilas 31
3.2 Confi guración de códigos 31
3.3 Programación de dispositivos combinados 32
3.4 Copia de los botones de volumen/silencio de otro
dispositivo 32
4 Uso del mando a distancia 33
4.1 Control de dispositivos que requieren botones
independientes de encendido/apagado 33
4.2 Control de dispositivos combinados 33
5 Actualizaciones para futuros dispositivos 34
5.1 Aprendizaje de comandos 34
5.2 Eliminación de comandos 35
5.3 Consejos para el aprendizaje 35
6 Solución de problemas 36
7 Garantía de duración limitada 37
Notas
• El mando a distancia se enciende en modo TV.
• Los códigos se guardan en la memoria permanente del
mando a distancia por lo que nunca perderá ninguno de los
códigos guardados mientras cambia las pilas
• El mando a distancia se apaga automáticamente si se pulsan
los botones durante más de 30 segundos. Esto preserva la
duración de las pilas si el mando a distancia queda atrapado
en un lugar en el cual los botones queden pulsados (por
ejemplo, entre los cojines del sofá).
• Algunos botones del mando podrían tener funciones que se
denominen de manera diferente en el dispositivo que vaya
a controlar. Por ejemplo, PREV. CH podría denominarse
RECALL o DISPLAY. Estas diferencias dependerán de la
marca y del modelo del dispositivo. Además, este mando
a distancia sólo puede utilizar funciones que existan en el
dispositivo. Por ejemplo, el dispositivo debe contar con la
función PREV. CHAN para que el botón PREV. CH pueda
utilizar esta función.
• El botón RECORD (0) debe pulsarse dos veces para grabar.
Para algunas marcas de DVR, puede que necesite pulsar
RECORD (0) una vez y, a continuación, pulsarlo de nuevo
durante tres segundos.
26
ES
Page 27

1
3
LEARN
SETUP POWER
TV DVR DVD
VCR
SATCBL AUX
SELECT
OK
2
Español
4
5
MUTE
LIVE TV
INPUT
PP
6
7
1
2
3
4
5
6
7
8
9
0
L1 L2
C
Q.SKIP
REPEAT
PREV.CH
ENTER
SUBTITLE
9
INST.REPLAY ADVANCE
8
1 Su mando a distancia de
Philips
Enhorabuena por la adquisición de este mando a distancia
universal de Philips. Los mandos a distancia universales de Philips
le permiten combinar varios mandos a distancia en uno solo,
o bien sustituir cualquier mando averiado o que haya perdido.
Nos hemos centrado en hacer que este mando a distancia sea
fácil de utilizar. Hemos resaltado los botones de DVR (TiVo/
Replay) en azul para que sea fácil localizarlos en el mando.
Además de la funcion de DVR, hemos incluido la función de
satélite.
El mando a distancia está equipado con las funciones más
utilizadas para el funcionamiento de los dispositivos. No obstante,
si faltan determinadas funciones, este mando a distancia puede
'aprenderlas' del mando a distancia original.
Lea detenidamente este manual de usuario para familiarizarse con
su mando a distancia universal de Philips.
Para sacar el mayor partido a la asistencia que proporciona
Philips, registre su producto en www.philips.com/welcome.
• En 'www.philips.com/welcome', seleccione 'Registrar mi
producto' y siga las instrucciones en pantalla para el registro.
Su mando a distancia de Philips
27
ES
Page 28

2 Funciones de los botones
2.1 Funciones generales
Zona 1
LEARN SETUP POWER
LEARN Se utiliza para confi gurar las
funciones de aprendizaje.
SETUP
(indicador de luz roja) .... – Se utiliza para confi gurar el mando
a distancia.
– Se enciende cuando se pulsa
cualquier botón.
POWER (y) ..........................Enciende o apaga los dispositivos.
Zona 2
TV DVR DVD
VCR
SATCBL AUX
Botones de modo de dispositivo
Selecciona el dispositivo que se va a controlar.
Zona 3 (anillo exterior)
SELECT
OK
MENU....................................... Hace aparecer la pantalla del
menú. Utilícelo con los botones
de navegación ARRIBA, ABAJO,
IZQUIERDA y DERECHA.
GUIDE...................................... Muestra las guías de canales o el
programa en pantalla.
INFO ......................................... Muestra o selecciona la información
de los canales en pantalla.
EXIT ..........................................Sale de las funciones del menú.
Zona 4 (anillo interior)
SELECT
OK
SELECT OK .......................... Selecciona los elementos del menú
del dispositivo que está controlando.
(I) ARRIBA/ABAJO,
(–) IZQUIERDA/
DERECHA .............................Botones de navegación.
28
ES
Page 29

Zona 5
MUTE
LIVE TV
INPUT
VOL +/VOL – ........................ Aumenta o disminuye el nivel
de volumen del dispositivo,
normalmente el televisor.
MUTE ....................................... Activa o desactiva el sonido del
televisor mientras continúan las
imágenes.
INPUT ...................................... Selecciona las fuentes de entrada
disponibles (antena, cable, etc.).
CH +/CH – ............................. Selecciona el canal siguiente o
anterior.
Zona 6
PP
Español
Funciones de los botones
4 P y 3P .................................. Permite seleccionar la página
siguiente (3) o anterior (4) en
varios modos (por ejemplo, las guías
y menús de ReplayTV o los menús
de la guía en pantalla utilizados por
algunos sistemas por satélite).
0 (Grabar), 2 (Reproducir), 9 (Detener),
5 (Rebobinar), 6 (Avance rápido),
; (Pausa) ......................... Botones de control. Controlan el
DVR, VCR, DVD, Aux, etc.
Zona 7
Botones de color ................ Ordenados según los requisitos de
los sintonizadores por cable.
Zona 8
1
2
3
4
5
6
7
8
9
ENTER
Q.SKIP
0
Botones numéricos ........... Selección directa de canales.
En algunos dispositivos es necesario
pulsar ENTER una vez que se ha
seleccionado el canal.
ENTER ..................................... Se utiliza una vez que se ha
seleccionado el número de canal
directo para cambiar inmediatamente
al canal seleccionado.
(-) ................................................ Selecciona entre números de canales
de una o dos cifras.
Zona 9
SUBTITLE
INST.REPLAY ADVANCE
L1 L2
C
REPEAT
PREV.CH
CC .............................................. Transcripción de televisión (si el
televisor cuenta con esta función).
L1/L2 ......................................... Guardan los comandos aprendidos.
PREV. CH ................................ Vuelve al canal seleccionado
previamente.
ES
29
Page 30

Nota
Para algunos dispositivos de ciertas marcas, el botón POWER
(y) sólo apaga el dispositivo. Para poder encender el
dispositivo, pulse cualquiera de los botones numéricos.
2.2 Funciones específicas de DVR
(
marcadas en azul)
código de Replay* es 0938)
Al seleccionar el modo de DVR pulsando el botón DVR (zona 2)
se activan todos los botones de las funciones de DVR.
• T.CENTRAL: botón TiVo para TiVo Central.
• CH GUIDE:guía en directo de TiVo (la guía de programación
de TiVo).
• DISPLAY: muestra el rótulo informativo del canal.
• CLEAR: sale de la visualización de los menús en pantalla o la
cierra.
• LIVE TV: pasa a la emisión de televisión en directo.
• : pulgar hacia arriba/abajo. Permite ajustar las
califi caciones sobre gustos.
• P 4 y P 3: permite seleccionar la página anterior (4) o la
siguiente (3) de las guías y menús de ReplayTV.
• Q. SKIP: salta 30 segundos de un programa grabado o
retrasado.
• SUBTITLE: activa o desactiva los subtítulos.
• INST. REPLAY: repite los últimos 7 segundos (Replay) o los
últimos 8 segundos (TiVo) de un programa.
• ADVANCE: le pone al tanto de la emisión en directo.
• REPEAT: repite el capítulo o la pista actual.
* TiVo y Replay son marcas comerciales registradas de sus
respectivos propietarios.
(el código de TiVo* es 0738 y el
2.3 Funciones específicas de DVD
• INPUT: activa el menú de confi guración del reproductor de
DVD.
• CH +/–: selecciona el capítulo o la pista siguiente o anterior
de un disco.
• SUBTITLE: activa o desactiva los subtítulos.
• REPEAT: repite el capítulo o la pista actual.
2.4 Funciones específicas de SAT
• INPUT: selecciona la entrada de TV o SAT.
• P 4 y P 3: permite seleccionar el menú de la guía en pantalla
anterior o siguiente.
ES
30
Page 31

3 Introducción
3.1 Cómo colocar las pilas
• Inserte 2 pilas
alcalinas del tipo AA ,
teniendo en cuenta la
configuración de los
polos + y – del
compartimento de
las pilas.
3.2 Configuración de códigos
El botón SETUP se usa para configurar el mando a distancia.
Consulte las tablas de códigos (en una hoja independiente) para
encontrar los códigos correspondientes a su dispositivo.
3.2.1 Búsqueda de códigos por marca
Podrá buscar un código correspondiente a una marca específica
en la biblioteca de códigos de un fabricante concreto.
1 Encienda el dispositivo (televisor, DVR, etc.) que desea
controlar.
2 Mantenga pulsado el botón SETUP hasta que el indicador de
luz roja permanezca encendido y, a continuación, suelte el
botón SETUP.
3 Pulse y suelte rápidamente el botón de modo deseado (TV,
DVR, etc.).
• El indicador de luz roja parpadea una vez.
4 Pulse y suelte el botón numérico (0-9) correspondiente a
la marca deseada (consulte la tabla en la hoja de la lista de
códigos).
• El indicador de luz roja parpadea una vez.
5 Pulse el botón CH + (o POWER (
únicamente) varias veces hasta que el dispositivo cambie de
canal.
• El indicador de luz roja parpadea cada vez que pulsa un
botón.
) o PLAY (2), en DVR
y
6 Pulse y suelte el botón MUTE para instalar (guardar) el código.
• Se habrá completado la búsqueda de código por marca.
Español
Introducción
Notas
• Una vez que se hayan buscado todos los códigos de una
marca, el indicador de luz roja parpadeará rápidamente
durante 3 segundos.
• Si pasa accidentalmente el código requerido en el paso 5,
pulse el botón CH - para retroceder en la biblioteca hasta
que el dispositivo cambie de canal. Al pulsar el botón CH +,
la dirección de la búsqueda cambia de nuevo hacia adelante.
3.2.2 Introducción directa de códigos
1 Encienda el dispositivo (TV, DVR, etc.) que desea controlar.
2 Mantenga pulsado el botón SETUP hasta que el indicador de
luz roja permanezca encendido y, a continuación, suelte el
botón SETUP.
3 Pulse y suelte el botón de modo deseado (TV, DVR, etc.).
• El indicador de luz roja parpadea y después permanece
encendido.
4 Introduzca el código de 4 dígitos de las tablas de códigos
(en una hoja independiente).
5 Con el dispositivo encendido, pulse varios botones para
probar si el dispositivo responde.
• Si el dispositivo responde adecuadamente, habrá
encontrado un código válido para el mismo.
31ES
Page 32

6 Repita los pasos del 1 al 4 para configurar el mando a
distancia para otros dispositivos.
Anote los códigos aquí para una sencilla referencia posterior.
Dispositivo Código
TV
DVR
SAT
Notas
• Cada vez que se introduce un código válido, el indicador
de luz roja se apaga. Si el código no es válido, el indicador
de luz roja parpadea primero y después de apaga. En este
caso, deberá acceder de nuevo al modo de configuración e
introducir un código nuevo.
• Si algunos botones no controlan el equipo, pruebe uno de
los otros códigos para su marca.
Nota
Puede guardar cualquier tipo de código en cualquier modo
(salvo en el modo de TV). Por ejemplo, puede guardar un
código de DVR en el botón CBL o un código de DVD en el
botón DVR, etc. No obstante, sólo podrá guardar códigos del
televisor en el botón TV.
Si desea guardar un código de DVR en, por ejemplo, el botón
CBL:
• Siga primero el procedimiento para la 'Introducción directa
de códigos' (capítulo 3.2.2) y pulse el botón CBL en el
paso 3.
• Introduzca cualquier código de DVR en el paso 4.
• A continuación, siga los pasos de la 'Búsqueda de códigos
por marca' (capítulo 3.2.1).
• Si el dispositivo no tiene un botón CH +, utilice el botón
PLAY (2) (sólo en DVR) o el botón POWER (y) en su
lugar.
• La búsqueda de códigos se iniciará desde el número de
4 dígitos guardado actualmente en dicho modo.
3.3 Programación de dispositivos
combinados
En dispositivos combinados, en muchos casos un único código
controla ambas partes del dispositivo (por ejemplo, TV y DVD).
En otros casos es necesario que configure dos códigos. Por
ejemplo, si tiene un televisor con DVD integrado, tal vez tenga que
configurar un código en el botón TV para controlar el televisor
y un código aparte (en cualquier otro botón de modo) para
controlar el DVD.
3.4 Copia de los botones de volumen/
silencio de otro dispositivo
Al configurar el mando a distancia para sus dispositivos, éste copia
la configuración de volumen y silencio de la siguiente manera:
• Si un dispositivo tiene sus propios botones de volumen y
silencio en la base de datos del mando a distancia, se utilizarán
estos botones.
• Si el dispositivo no cuenta con botones de volumen y silencio
en la base de datos del mando a distancia, se utilizarán
automáticamente los botones de volumen y silencio del televisor.
Puede cambiar los botones de volumen y silencio que se utilizan
32 ES
Page 33

para un dispositivo (por ejemplo, los botones de volumen del
amplificador para controlar el volumen del reproductor de DVD).
3.4.1 Configuración del control de volumen/
silencio de todos los dispositivos en un
único dispositivo
Puede configurar todos los dispositivos para que utilicen los
botones de volumen y silencio de un único dispositivo sin
necesidad de cambiar a ese modo de dispositivo.
1 Mantenga pulsado el botón SETUP hasta que el indicador de
luz roja se encienda y, a continuación, suelte el botón.
2 Mantenga pulsado el botón MUTE hasta que el indicador de
luz roja parpadee y, a continuación, suelte el botón.
3 Pulse y suelte el botón de modo de dispositivo deseado (TV,
DVR, etc.) para el control del volumen/silencio; el indicador de
luz roja parpadea y después permanece encendido.
4 Pulse y suelte el botón MUTE.
• El indicador de luz roja se apaga.
• El indicador de luz roja parpadeará rápidamente durante
tres segundos si el dispositivo que ha seleccionado no
dispone de control de volumen/silencio.
• El resto de dispositivos utilizarán ahora los botones de
volumen y silencio del dispositivo seleccionado.
5 Pulse y suelte el botón MUTE.
• El indicador de luz roja se apaga.
• El dispositivo seleccionado utilizará ahora su propio
control de volumen/silencio.
4 Uso del mando a distancia
Español
Uso del mando a distancia
4.1 Control de dispositivos que requieren
botones independientes de encendido/
apagado
Algunos dispositivos (por ejemplo, determinados televisores
RCA) requieren botones independientes de encendido y apagado
para encender o apagar el dispositivo. Las funciones equivalentes
del botón pueden encontrarse en el mando a distancia de Philips.
1 Encienda el dispositivo pulsando el botón de modo
correspondiente durante más de un segundo.
2 Pulse y suelte el botón POWER (y) para apagar el dispositivo.
Notas
• Este método puede aplicarse de forma similar a cualquier
dispositivo y está disponible para todos los modos de
dispositivo.
• Tenga en cuenta que no todos los códigos admiten esta
función.
4.2 Control de dispositivos combinados
Algunos dispositivos combinados (por ejemplo, un televisor con
vídeo, un televisor con DVD, un DVD con vídeo, etc.) tienen
botones independientes en el mando a distancia original para
seleccionar la parte del dispositivo combinado que se va a
controlar.
Por ejemplo, si su dispositivo combinado es un televisor con DVD,
su mando a distancia original puede tener botones de DVD y de
televisor independientes para seleccionar la parte del dispositivo
combinado que desee controlar. En el mando a distancia de
Philips, las funciones de los botones equivalentes pueden
encontrarse utilizando los botones de modo de dispositivo y
SETUP.
33ES
Page 34

Ejemplo de DVD.
T
V
1 Configure el mando a distancia para un dispositivo (en este
caso, un DVD) tal como se describe en el capítulo
3.2.1 'Búsqueda de códigos por marca'
.
2 Seleccione DVD pulsando el botón de modo DVD durante más
de un segundo.
• El mando a distancia envía el comando 'Seleccionar DVD'.
3 Pulse y suelte inmediatamente el botón SETUP. A continuación,
pulse y suelte inmediatamente el botón de modo DVD para
seleccionar DVR.
• El mando a distancia envía el comando 'Seleccionar DVR'.
Notas
• Este método puede aplicarse de forma similar a cualquier
dispositivo combinado (televisor con DVD, televisor con
vídeo, DVD con vídeo, etc.) y está disponible para todos los
modos de dispositivo.
• Tenga en cuenta que no todos los códigos admiten esta
función.
5 Actualizaciones para futuros
dispositivos
5.1 Aprendizaje de comandos
La función de aprendizaje permite al mando a distancia 'aprender'
las funciones del mando a distancia original.
Por ejemplo: puede que desee utilizar el mando a distancia para
utilizar la función de reproducción en orden aleatorio del mando
a distancia original del reproductor de CD.
± 1 inch
D
AUX
V
D
SAT
VCR
DVR
SETUP POWER
BL
C
TV
RN
EA
L
MU
ECT
OK
SEL
LI
1 Mantenga pulsado el botón SETUP hasta que el indicador de
luz roja se encienda y, a continuación, suelte el botón.
2 Pulse y suelte el botón de modo deseado (TV, DVR, etc.).
• El indicador de luz roja parpadea y después permanece
encendido.
3 Pulse y suelte el botón LEARN.
• El indicador de luz roja parpadea y después permanece
encendido.
4 Pulse y suelte el botón de la unidad SRU5106 al que desea
asignar la nueva función (por ejemplo, POWER).
5 Coloque un mando frente al otro separados por una distancia
de aproximadamente 2,5 cm (consulte el capítulo 5.4
'Consejos para el aprendizaje').
6 Mantenga pulsado el botón del mando a distancia original cuya
función desea asignar al otro mando a distancia (por ejemplo,
POWER) hasta que el indicador de luz roja parpadee una vez
y después permanezca encendido.
• Si se produce algún problema de 'aprendizaje', el indicador
de luz roja parpadeará durante tres segundos y después
permanecerá encendido. Si esto ocurre, repita los pasos
del 4 al 6.
7 Repita los pasos del 4 al 6 para cada botón que desee que
'aprenda' una nueva función.
8 Pulse y suelte el botón SETUP cuando el mando a distancia
haya aprendido todos los comandos deseados.
• El aprendizaje de códigos ya ha finalizado.
34 ES
Page 35

5.2 Eliminación de comandos
5.2.1 Eliminación de todos los comandos
aprendidos en un modo
La eliminación de los comandos aprendidos puede ser útil si, por
ejemplo, sustituye su reproductor de CD por otro de otra marca
o modelo. Si este mando a distancia había aprendido una función
del mando a distancia original de su antiguo reproductor de CD
(por ejemplo, la reproducción en orden aleatorio), dicha función
ya no tendría efecto en su nuevo reproductor de CD.
1
Mantenga pulsado el botón SETUP hasta que el indicador de
luz roja se encienda y, a continuación, suelte el botón.
2
Pulse y suelte el botón del modo cuyas funciones aprendidas
desea eliminar (TV, DVR, etc.).
• El indicador de luz roja parpadea.
3
Pulse y suelte el botón LEARN dos veces.
• El indicador de luz roja parpadea.
4
Pulse y suelte el botón SETUP.
• El indicador de luz roja se apaga. Todos los comandos
aprendidos en ese modo se habrán eliminado.
5.2.2 Eliminación general: eliminación de
todos los comandos aprendidos en
todos los modos
1 Mantenga pulsado el botón SETUP hasta que el indicador de
luz roja se encienda y, a continuación, suelte el botón.
2 Pulse y suelte el botón LEARN dos veces.
• El indicador de luz roja parpadea.
3 Pulse y suelte el botón SETUP.
• El indicador de luz roja se apaga. Todos los comandos
aprendidos, guardados en la memoria del mando a
distancia se habrán eliminado.
Español
Actualizaciones para futuros dispositivos
5.3 Consejos para el aprendizaje
Un botón de modo sólo puede aprender funciones de un tipo de
dispositivo.
Por ejemplo, el botón de modo TV sólo puede aprender los
códigos del televisor, el botón de modo DVR sólo puede
aprender los códigos del DVR, etc. Si intenta realizar el
aprendizaje de las funciones de un mando a distancia 'universal',
puede que éste tenga más de un tipo de código guardado en un
mismo botón de modo.
Intente realizar el aprendizaje de las funciones de otro mando a
distancia para ver si existe un problema con el tipo o marca del
mando a distancia del que está tratando de realizar el aprendizaje.
• Puede que el mando a distancia no pueda aprender algunas
funciones de algunos tipos de mandos a distancia originales.
• No se pueden guardar funciones en los botones LEARN o
SETUP.
• Cada modo puede aprender las funciones de un solo tipo de
dispositivo original.
• Utilice pilas nuevas para el mando a distancia SRU5106 y para
el mando a distancia original.
• Manténgalos al menos a un metro de distancia de luces de
bajo consumo o incandescentes durante el aprendizaje.
• Coloque los dos mandos a distancia sobre una superficie
plana (como una mesita) de forma que el transmisor de IR
del mando a distancia original apunte al transmisor de IR del
SRU5106.
• Mantenga una distancia de unos 2,5 cm entre ambos mandos
a distancia. Quizá necesite ajustar la altura de uno de los
mandos a distancia para conseguir esto.
• No mueva ni cambie la distancia entre ambos mandos a
distancia hasta que haya finalizado el aprendizaje de todos los
botones necesarios para el modo seleccionado.
35ES
Page 36

• Durante el aprendizaje, no suelte el botón que se está
aprendiendo hasta que el indicador de luz roja parpadee
durante medio segundo.
• Evite el aprendizaje de los botones de volumen y silencio del
mando a distancia original a menos que esté seguro de que
éstos controlan el mismo dispositivo. Por ejemplo, algunos
mandos a distancia originales de DVD incluyen el control del
botón de volumen y silencio del televisor, que puede tener
dos tipos distintos de código.
• Evite el aprendizaje de los botones de DVR del mando a
distancia original a menos que esté seguro de que éstos
controlan el mismo dispositivo. Por ejemplo, algunos mandos
a distancia originales de televisores incluyen el control del
botón de DVR, que puede tener dos tipos distintos de código.
• Si tiene problemas continuos durante el aprendizaje de los
botones del mando a distancia original, intente eliminar todos
los comandos aprendidos tal como se describe en el capítulo
5.2.1 'Eliminación de todos los comandos aprendidos en un
modo'.
6 Solución de problemas
Nota
Este mando a distancia controla las funciones habituales de la
mayoría de los modelos y marcas de dispositivos de audio y
vídeo controlados por infrarrojos (IR), aunque no de todos.
El mando a distancia puede ofrecer funciones que no estén
disponibles en su equipo.
El mando a distancia no controla su producto.
Pruebe los siguientes consejos para solucionar el
problema:
• Asegúrese de que ha seleccionado el modo de dispositivo
correcto.
• Configure el mando a distancia con un nuevo código.
• Ponga pilas nuevas.
• C
ompruebe si ha seleccionado el modo de dispositivo
correcto.
El mando a distancia no controla algunas funciones de su
producto.
• Utilice los botones L1 y L2 para que el mando aprenda los
comandos que no están disponibles.
El indicador de luz roja parpadea tras haber programado
un código de producto
• El mando a distancia no acepta el código.
• Intente programar el código de nuevo o pruebe un código
distinto.
36 ES
Page 37

Si tiene más dudas acerca de la configuración, el funcionamiento,
las funciones avanzadas, las piezas de recambio, la garantía, etc. del
SRT5106/27, visite www.philips.com/support.
Para obtener ayuda con la configuración, llame al: 919-573-7854.
7 Garantía de duración limitada
El fabricante le garantiza que este producto no tendrá ningún tipo
de defecto de material, trabajo o montaje, si se utiliza de forma
normal siguiendo las especificaciones y advertencias, mientras
posea este producto.
Esta garantía sólo le corresponde al comprador original del
producto y no es transferible. Los productos defectuosos,
junto con una prueba de compra que incluya la fecha, deberán
devolverse al lugar donde se compraron para su reparación o
sustitución.
NO EXISTE NINGUNA OTRA GARANTÍA EXPRESA.
Siempre que la ley lo permita, se eximirá de responsabilidad por
daños accidentales y emergentes.
Esta garantía le otorga derechos legales específicos y podría tener
también otros derechos dependiendo del estado en el que se
encuentre.
Fabricado en China. Control de calidad en EE.UU.
Ledgewood, NJ 07852
Compatibilidad con la FCC
Este dispositivo cumple con la sección 15 del reglamento de la
FCC. El funcionamiento está sujeto a dos condiciones:
• Este dispositivo no puede causar interferencias perjudiciales.
• Este dispositivo debe aceptar cualquier interferencia
que reciba, incluyendo aquellas que puedan causar un
funcionamiento no deseado.
Español
Garantía de duración limitada
Precaución
Los cambios o las modificaciones que realice el usuario y
que no hayan sido aprobados de forma expresa por la parte
responsable del cumplimiento pueden anular la autoridad del
usuario para manejar este producto.
Aviso para Canadá / Remarque pour le Canada
Este aparato digital de clase B cumple la regulación canadiense
ICES-003.
Cet appareil numérique de la Classe B est conforme à la norme
NMB-003 du Canada.
37ES
Page 38

Page 39

Page 40

© 2008 Koninklijke Philips Electronics N.V.
All rights reserved. Reproduction in whole or in part is prohibited
without the prior written consent of the copyright owner.
The information presented in this document does not form part of any
quotation or contract,is believed to be accurate and reliable and may be
changed without notice. No liability will be accepted by the publisher
for any consequence of its use. Publication there of does not convey
nor imply any license under patent- or other industrial or intellectual
property rights.
November 2008
www.philips.com N’MW/RR/RD/4908
 Loading...