

Page 1

SCD620
Page 2

Page 3

1
16
2
3
4
5
13
14
12
11
6
9 1087
17
18
22
20
19
21
23
25
24
15
Page 4

Page 5

English 6
Português do Brasil 29
Page 6

6
English
Introduction
Congratulations on your purchase and welcome to Philips Avent! To fully
benefit from the support that Philips Avent offers, register your product at
www.philips.com/welcome.
The Philips Avent video babymonitor provides you with round-the-clock
support and it allows you to see your baby day and night from anywhere in
the house. The latest digital technology guarantees clear sound and the
clearest image of your baby. This gives you an additional sense of security
without entering your baby’s room and disturbing its sleep.
General description
1 Parent unit
2 Display
3 ECO light
4 Battery status light
5 Link light
6 Speaker
7 Control button (menu navigation/volume/brightness)
8 Sensitivity button
9 Lullaby button
10 Talk-back button
11 Socket for small plug
12 Mode button
13 On/off button
14 Antenna
15 Belt clip
16 Baby unit
17 Camera
18 Lullaby on/off button
19 Microphone
20 On/off slide
21 Antenna
22 Speaker
23 Socket for small plug
24 Wall mounting holes
25 Adapter(2x)
Important safety information
Read this important information carefully before you use the appliance and
save it for future reference.
IMPORTANT
This baby monitor is intended as an aid. It is not a substitute for
responsible and proper adult supervision and should not be used as such.
Never leave your baby alone in your home. Always make sure there is
someone present to look after the baby and take care of its needs.
Page 7

English
Disclaimer
Please note that you use this baby monitor at your own risk. Koninklijke
Philips N.V. and its subsidiary companies are not responsible for the
operation of this baby monitor or your use of it and therefore do not accept
any liability in connection with your use of this baby monitor.
Danger
-
Never immerse any part of the baby monitor in water or any other liquid.
Do not place the appliance where water or any other liquid can drip or
splash onto it. Never use the baby monitor in moist places or close to
water.
-
Never put any object on top of the baby monitor and do not cover it. Do
not block any ventilation openings. Install according to the
manufacturer’s instructions.
-
Cords present a potential strangulation hazard. Keep cords out of the
reach of children (more than 1 meter/3.5 feet away). Never place the baby
monitor inside the baby’s bed or playpen.
Warning
-
Check if the voltage indicated on the adapter corresponds to the local
mains voltage before you connect the appliance.
-
Do not modify or cut off any part of the adapter and its cord, as this
causes a hazardous situation.
-
Only use the adapter supplied.
-
If the adapter is damaged, always have it replaced with one of the
original type in order to avoid a hazard.
-
This appliance can be used by children aged from 8 years and above and
persons with reduced physical, sensory or mental capabilities or lack of
experience and knowledge if they have been given supervision or
instruction concerning use of the appliance in a safe way and understand
the hazards involved. Children shall not play with the appliance. Cleaning
and user maintenance shall not be made by children without supervision.
-
Protect the mains cord from being walked on or pinched particularly at
plugs, convenience receptacles, and the point where they exit from the
appliance.
-
Make sure that you place the baby monitor in such a way that its cord
does not obstruct a doorway or passage. If you place the baby monitor
on a table or low cabinet, do not let the mains cord hang over the edge
of the table or cabinet. Make sure the cord does not lie on the floor
where it presents a tripping hazard.
-
Keep the packaging materials (plastic bags, cardboard buffers, etc.) out of
the reach of children, as they are not a toy.
-
To prevent electric shock, do not open the housing of the baby unit or
parent unit.
7
Caution
-
Use the appliance at a temperature between 0°C (32°F) and 40°C (104°F).
-
Do not install the appliance near any heat sources such as radiators, heat
registers, stoves or other apparatus (including amplifiers) that produce
heat.
Page 8

8
English
-
Make sure that your hands are dry when you handle adapters, plugs and
the mains cord.
-
All required markings on the baby unit, parent unitand power adapter
are located on the bottom of the baby unit, parent unit and power
adapter.
Compliance with standards
-
This product complies with the radio interference requirements of the
European Community.
-
Philips Consumer Lifestyle hereby declares that this baby monitor is in
compliance with the essential requirements and other relevant provisions
of Directive 2014/53/EU (FHSS: frequency band 2.4GHz, maximum radiofrequency power: 100 mW EIRP). A copy of the EC Declaration of
Conformity (DoC) is available online at www.philips.com/support.
Electromagnetic fields (EMF)
This Philips appliance complies with all applicable standards and
regulations regarding exposure to electromagnetic fields.
Preparing for use
Baby unit
Put the power adapter in the baby unit and the adapter in the wall socket.
Parent unit
The parent unit runs ona built-in rechargeable Li-ion battery.
Follow the below steps to charge the parent unit:
1 Put the power adapter in the parent unit and put the adapter in the wall
socket.
-
The battery status light turns orange to indicate that the appliance is
charging.
Page 9

20°CEco
1
10 hrs=3 hrs
20°CEco
1
English
-
When the battery is fully charged, thebattery statusindicator lights up
green continuously.
-
When you charge the parent unit for 3 hours, it can be used cordlessly for
approx. 10 hours.
-
If the parent unit is switched on during charging, charging takes
approximately twice as long.
-
When the rechargeable battery of the parent unit is almost empty, the
battery status light turnsred and the parent unit beeps.
-
If the battery is completely empty and the parent unit it not connected to
the mains, the parent unit automatically switches off and loses contact
with the baby unit.
Note: The built in rechargeable battery cannot be removed from the
product.
Note: The battery gradually and very slowly discharges, even when the
parent unit is switched off.
Tip: To save battery, switch off the parent unit when you do not use it.
Note: We advise you to keep the parent unit connected to the mains during
the whole night. If the battery of the parent unit runs low during the night,
the parent unit beeps and this may wake you up.
9
Using the baby monitor
Linking parent unit and baby unit
1 Push the on/off slide on the baby unit upwards to the ON position.
Page 10

>2 .5m/8.2ft
20°CEco
1
20°CEco
1
10
English
2 When the baby unit is on, the power-on light on the baby unit lights up
green.
Note: The power-on light on the baby unit always lights up green, even
when there is no connection with the parent unit.
3 Make sure that the parent unit and the baby unit are at least 2.5 meters/
8.2 feet away from each otherto avoid acoustic feedback.
4 Press the on/off button on the parent unit to switch on the parent unit.
-
The display goes on, the linking image appears on the display and the
link light lights up red. The parent unit starts to search for the baby
unit.
-
When the parent unit and baby unit are linked, the link light lights up
green on the parent unit and one or more bars appear on the display.
Page 11

20°CEco
1
Note: It takes less than 10 seconds to establish the link between the
>1-1.5m/3.5-5ft
>2 .5m/8.2ft
parent unit and the baby unit.
When thebaby unit is turned off, the parent unit will show the out of
range image. Make sure that the baby unit is switched on.
-
If no connection has been established, the link light turns red, the
parent unit beeps three short beeps every 20 seconds and the out-ofrange image appears on the display.
Positioning the baby monitor
Warning: The cord of the baby unit presents a potential
strangulation hazard. Make sure that the baby unit and its cord
are at least 1 meter / 3.5 feet away from your baby. Never place
the baby monitor inside the baby’s bed or playpen.
1 For optimal sound detection, make sure that the baby unit is no further
than 1.5 meter/ 5 feet away from the baby. Make sure that the baby unit
is at least 1 meter/ 3.5 feet away from the baby because of potential
strangulation hazard.
English
11
2 Place the parent unit within the operating range of the baby unit. Make
sure it is at least 2.5 meters / 8.2 feet away from the baby unit to avoid
acoustic feedback.
Note: If you use a cordless phone, wireless video, Wi-Fi network,
microwave oven or Bluetooth on 2.4GHz and you experience
interference on either the parent unit or baby unit, move the parent unit
until there is no more interference.
3 There are two ways to position the baby unit
a Place the baby unit on a stable, level and horizontal surface.
b Mount the baby unit to the wall with screws.
Page 12

<300m/985ft
<50m/165ft
12
English
Tip: The wall mount template (see 'Wall mount') to mount the baby unit
to the wall can be found at the end of this user manual.
Tip: Use the provided template to mark the exact location of the screw
holes on the wall.
Tip: Position the baby unit at a higher level to get a good overview of the
baby’s bed or playpen.
4 Adjust the baby unit in a way that ensures the best visibility of your baby.
The baby unit can be rotated to position it in the desired way.
Dry materials Material thickness Loss of range
Wood, plaster, cardboard, glass (without metal,
wires or lead)
Brick, plywood < 30cm (12in) 5-35%
Reinforced concrete < 30cm (12in) 30-100%
Metal grilles or bars < 1cm (0.4in) 90-100%
Metal or aluminium sheets < 1cm (0.4in) 100%
< 30cm (12in) 0-10%
Operating range
The operating range is up to 50 meters/ 165 feet indoors and 300
meters/985 feet outdoors. The operating range of the baby monitor varies
depending on the surroundings and factors that cause interference. Wet
and moist materials cause so much interference that the range loss is up to
100%.
Page 13

Features and settings
20°C
1
20°C
1
Volume
You can adjust the speaker volume of the parent unit to the level you prefer.
1 Press the top or bottom part of the control button to adjust the volume.
Tip: Make sure that the volume is adapted to the current conditions.
Under noisy conditions, the vibration alert can be turned on as well.
The volume bar appears on the display to show the selected volume.
Note: If the volume is set to a high level, the parent unit consumes more
power.
Note: When the volume bar is at its minimum, the volume is muted. The
parent unit shows a mute icon in the status bar and you will only receive
alerts and video from the parent unit.
English
13
Brightness
You can adjust the display brightness of the parent unit to the level you
prefer.
1 Press the left or right part of the control button to adjust the brightness
of the display of the parent unit.
The brightness bar appears on the display to show the selected display
brightness.
Note: If the brightness is set to a high level, the parent unit consumes more
power.
Page 14
VIDEO
VIDEO
20°C
1
VIDEO
20°C
1
VIDEO
14
English
Modes
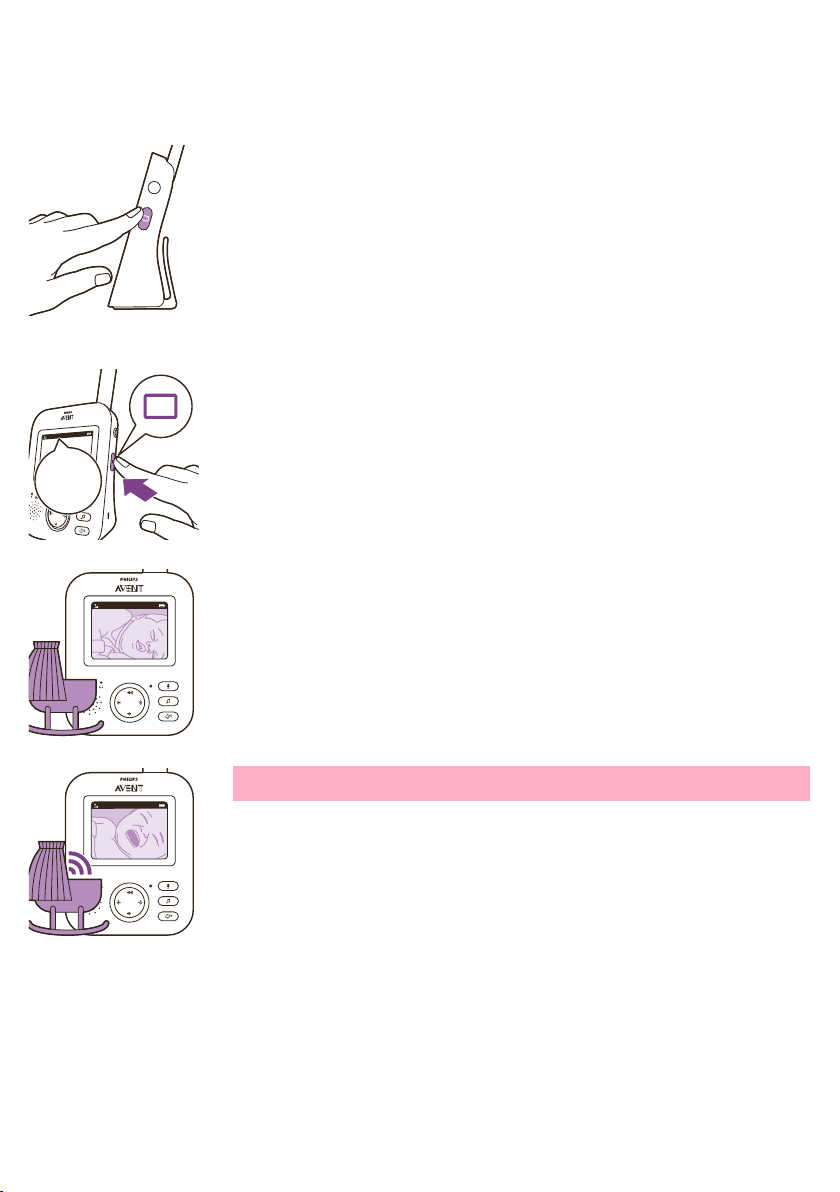
This baby monitor has four different modes that allows you to choose how
you want to look after your baby: VIDEO, AUDIO, VOX and ECO.
With the baby monitor on, you can switch between these 4 different modes
by pressing the mode button on the side of the parent unit.
The display shows the selected mode. The selected mode is also indicated
in the status bar. When turning on the device, the mode that was last used
will be active.
VIDEO mode
Press the mode button on the side of the parent unit to select theVIDEO
mode.
When the VIDEO mode is activated, the screen is always on, so you can see
your baby. All sounds are directly transmitted to the parent unit.
Note: Set the sensitivity level to 'very high' to have continuous sound on the
parent unit. Please see the Sensitivity level chapter for more information.
Page 15

AUDIO
AUDIO
20°C
1
AUDIO
20°C
1
AUDIO
VOX
VOX
20°C
1
AUDIO
English
AUDIO mode
1 Press the mode button on the side of the parent unit to switch to AUDIO
mode.
When the AUDIO mode is activated, the display of the parent unit switches
off. After 3 seconds the display will completely turn off and the status bar
will disappear.
Note: The status bar is not visible when the display is off.
Note: The link light shows that the parent unit is still on and connected to
the baby unit.
Note: Set the sensitivity level to 'very high' to have continuous sound on the
parent unit. Please see the Sensitivity level chapter for more information.
All sounds are constantly transmitted to the parent unit. If your baby cries,
the display of the parent unit is still off, but the sounds detected by
thebaby unitare transmitted to the parent unit.
15
VOX mode
1 Press the mode button on the side of the parent unit to switch to VOX
mode.
Note: When the display is on, the selected mode is shown in the status bar.
The status baris not visible when the display is off.
When the VOX mode is activated, the display and sound of the parent unit
switch off, if there is no sound detected for 20 seconds.
Page 16

20°C
1
VOX
ECO
ECO
20°C
1
ECO
ECO
20°C
1
ECO
16
English
Whensound is picked up by the baby unit, the displayand sound of the
parent unit switch on immediately.The sounds are transmitted to the parent
unit.
Note: The minimum sound level to activate sound and display is defined by
the sensitivity setting.
ECO mode
1 Press the mode button on the side of the parent unit to switch to ECO
mode.
Note: When the display is on, the selected mode will be visible in the status
bar. The status bar is not visible when the display is off.
When the ECO mode is activated the display and sound of the parent unit
switch off when no sound is detected for 20 seconds. TheECO light lights up
green to indicate that the ECO mode is activated. During ECO mode the
display and sound transmissions are turned off.
Lullabies
Whensound is picked up by the baby unit, the displayand sound of the
parent unit switch on immediately.The sounds are transmitted to the parent
unit.
Note: The minimum sound level to activate sound and display is defined by
the sensitivity setting.
You can activate the lullaby feature either from the parent unit or from the
baby unit.
To activate the lullaby feature from the parent unit, follow the instructions
below:
Page 17
Lullaby Songs
1 Rock-a-Bye Baby
2 Twinkle, Twinkle
3 Hush, Little Baby
4 Brahm’s Lullaby
5 Golden Slumbers
Lullaby Songs
1 Rock-a-Bye Baby
2 Twinkle, Twinkle
3 Hush, Little Baby
4 Brahm’s Lullaby
5 Golden Slumbers
15 min
English
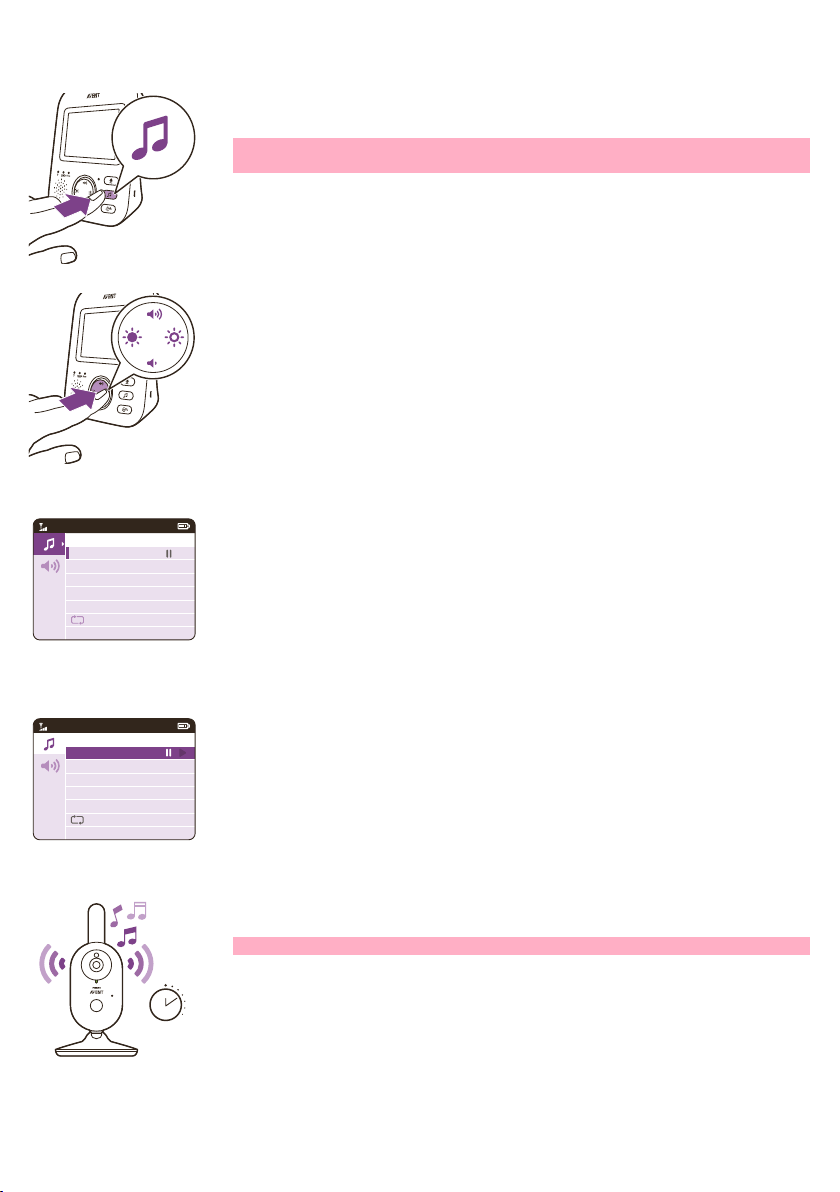
Lullaby selection
1 Press the lullaby button on the parent unit to open the menu for
lullabies.
Note: Pressing the lullaby button while the lullaby menu is already open,
will close the menu.
2 Press the right part of the control button to enter the list of lullabies.
3 Press the top or bottom part of the control button to scroll through the
list of lullabies.
17
4 Press the right part of the control button to play a specific lullaby.
If you want to pause the lullaby, press the right side of the control button
again.
5 The status barof the parent unit shows the number of lullabies thatare
being played and repeated.
The lullaby starts to play on the baby unit and it is repeated continuously
for approximately 15 minutes.
Tip: To repeat all songs that are available, select the last option in the list.
Page 18
Lullaby Songs
1 Rock-a-Bye Baby
2 Twinkle, Twinkle
3 Hush, Little Baby
4 Brahm’s Lullaby
5 Golden Slumbers
20°C
1
Lullaby Volume
VIDEO
20°C
1
Lullaby Volume
VIDEO
15 min
18
English
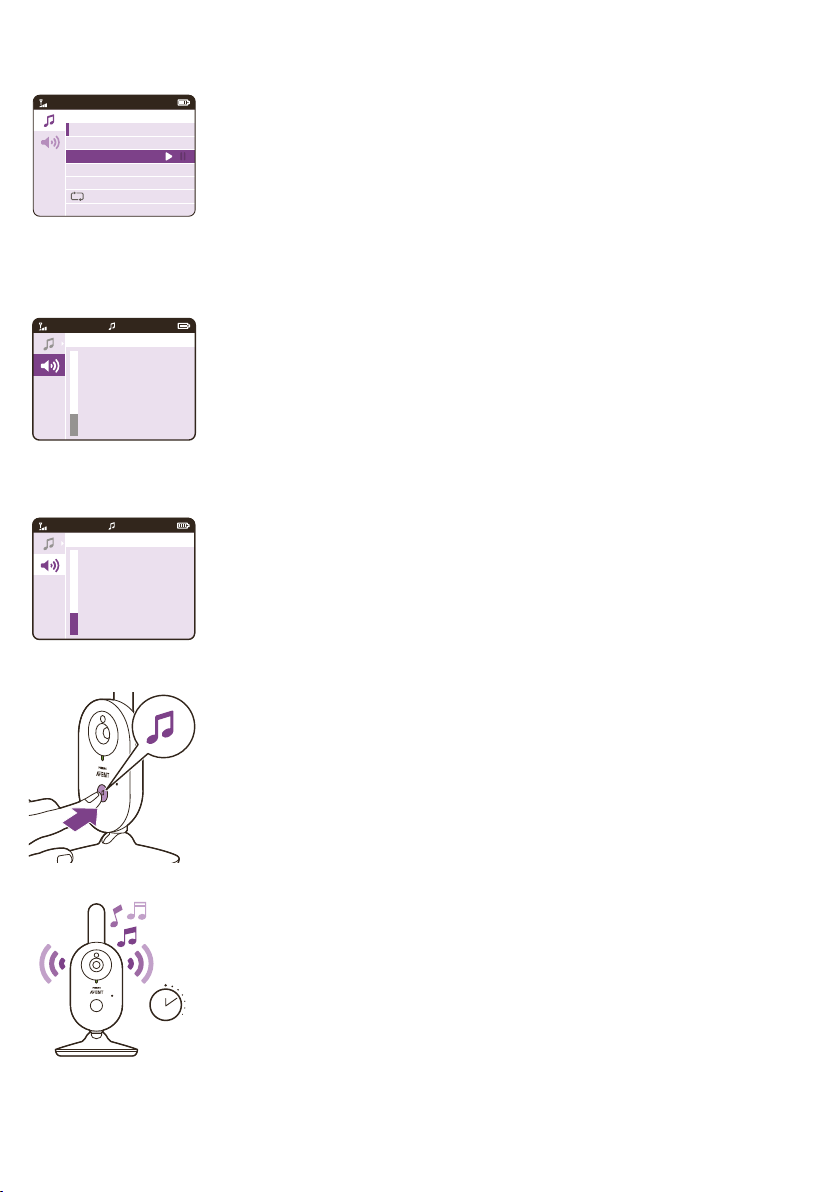
6 To select another lullaby, scroll up or down with thecontrol button to
select another song from the list.Press the right part of the control
button to start the selected song.
7 To stop the lullaby, press the lullaby button on the parent unit and pause
the song that is currently playing by pressing the right part of the control
button one more time.
Lullaby volume
1 Press the lullaby button and then press the bottom of the control button
to select the volume options of thelullaby menu. Press the right part of
the control button to access the lullaby volume levels.
2 Press the top or bottom part of the control button to adjust the volume.
To activate the lullaby feature from the baby unit, press the lullaby on/off
button on the baby unit.
The latest lullaby selected on the parent unit starts to play on the baby unit
and is repeated continuously for approximately 15 minutes.
To stop the lullaby on the baby unit, press the lullaby on/off button on the
baby unit.
Page 19
Talk-back
20°C
1
Sensitivity
English
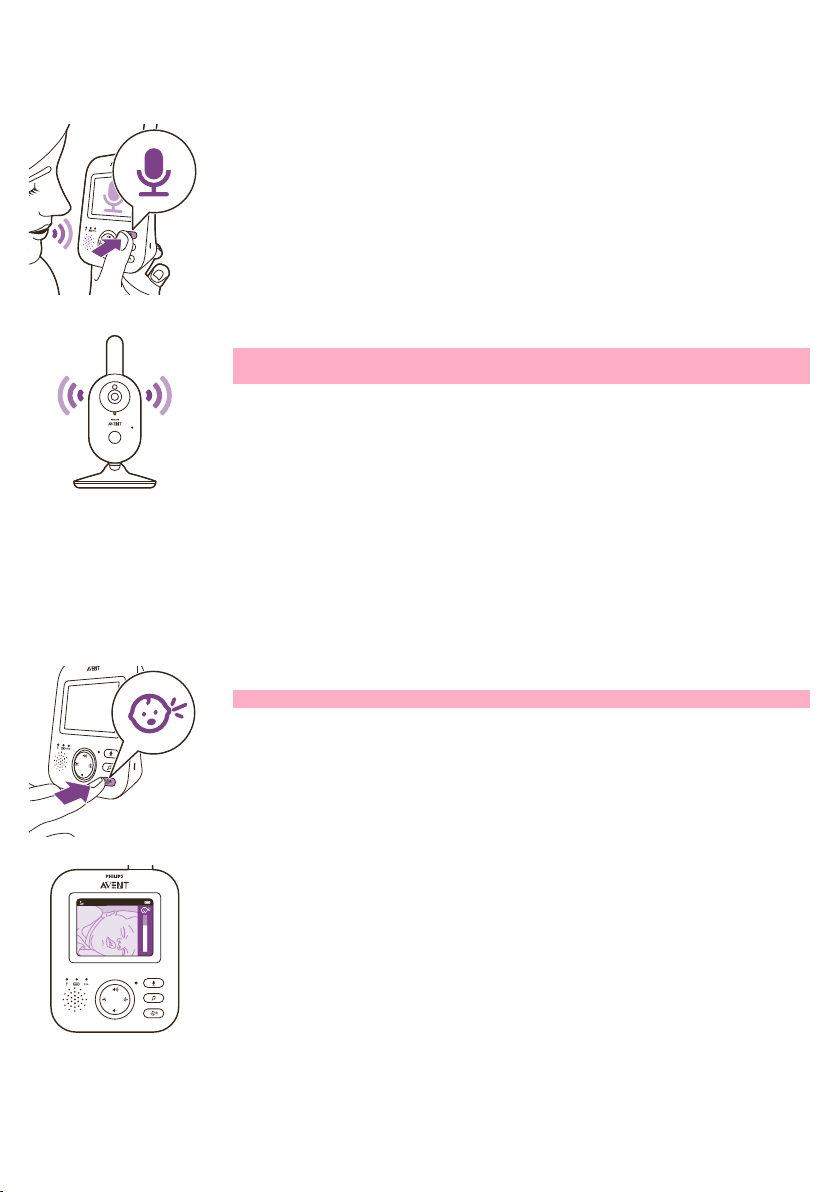
You can use the talk-back button on the parent unit to talk to your baby.
1 Press and hold the talk-back button on the parent unit.
2 Talk clearly into the microphoneat the front of the parent unit from a
distance between 15-30cm /0.5-1ft.
As long as the talk-back button is pressed, there is an open sound
connection to the baby unit. The display of the parent unit shows the
talk-back icon, indicating the active connection.
3 Release the talk-back button when you have finished talking.
Note: As long as the talk-back button is pressed, theparent unitcannot
process sounds coming from the baby unit.
The sensitivity level of the baby unit defines what you hear through the
parent unit. When the level is set high, you will hear many sounds, including
soft background sounds. When the sensitivity level is set low, you will hear
only the louder sounds.
1 Press the sensitivity button to access the sensitivity levels.
Note: When pressing the sensitivity button again, you will leave the menu.
19
2 Press the top or bottom part of the control button to select the desired
sensitivity level.
Page 20
20°C
1
20°C
1
20
English
Belt clip
If your baby only makes soft sounds, the sensitivity of the baby unit needs
to be set to a high sensitivitylevel on the parent unit.
The louder your baby sounds, the lower the sensitivity can be set on the
parent unit.
Note: In AUDIO and VIDEO mode, you will have continuous sound when the
sensitivity level is on 'very high'. Otherwise, low sounds will be muted.
Tip: The sensitivity level can be adjusted so you will always hear your baby
without the disruption of other sounds. When there is a lot of background
noise, turn the sensitivity lower so you will not hear these sounds through
the parent unit.
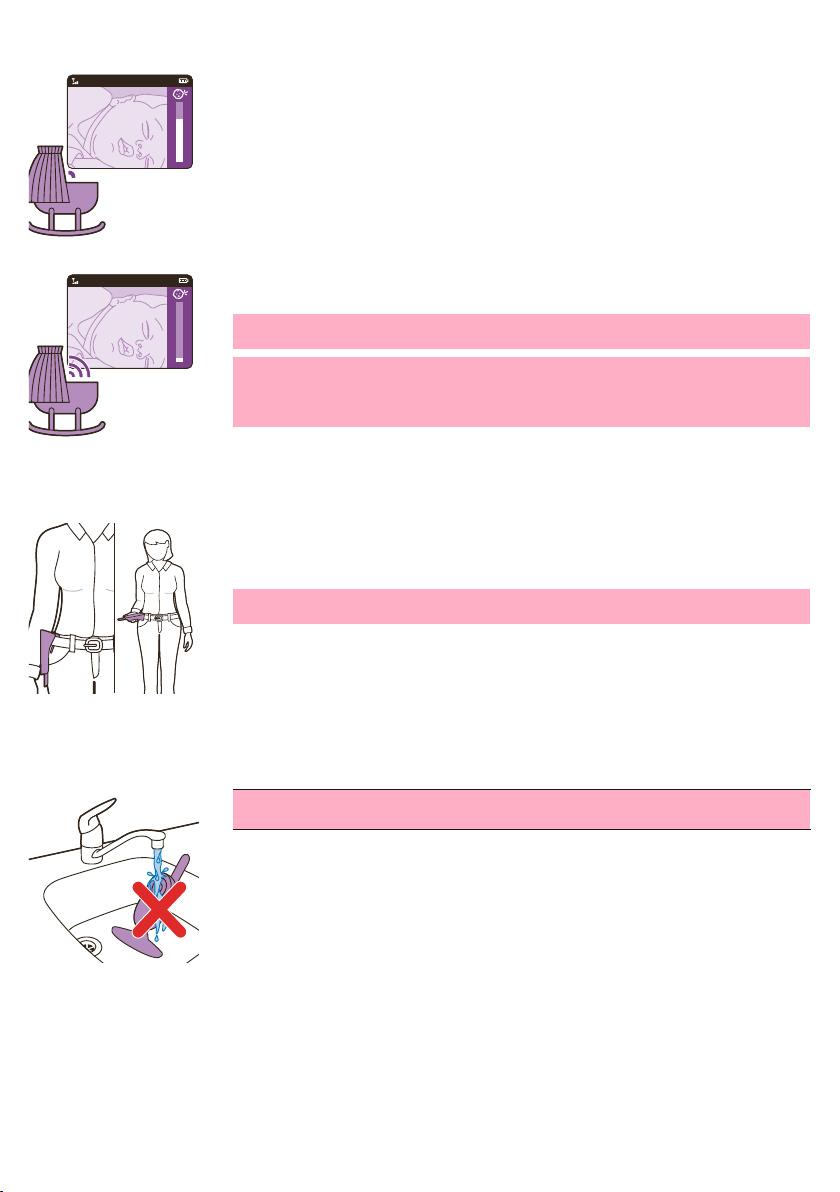
You can take the parent unit with you inside and outside the house by
attaching the parent unit to your belt or waistband with the belt clip. This
allows you to monitor your baby while you are moving around.
Note: The display is now turned upside down, which allows you to see your
baby on the screen by simply lifting up the parent unit.
Cleaning and maintenance
Warning: Do not immerse the parent unit, baby unit and power
adapters in water and do not clean them under the tap.
Page 21
English
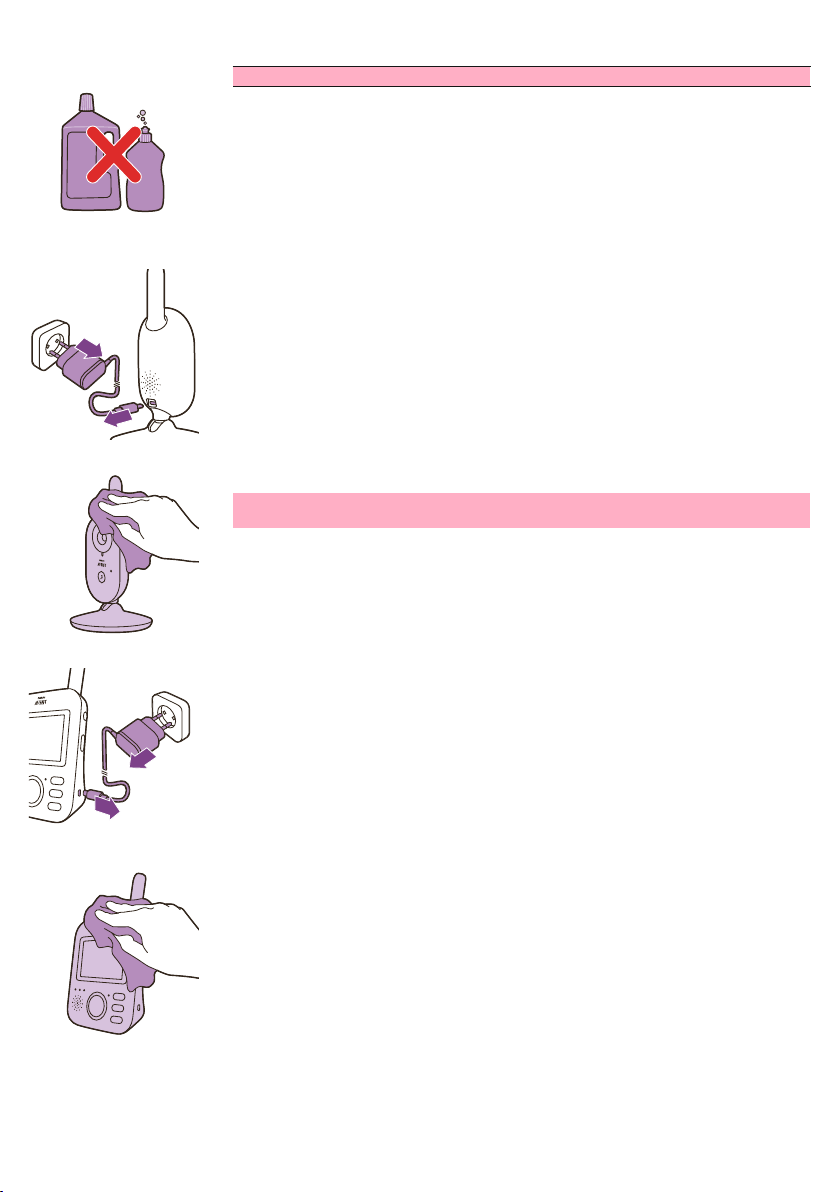
Warning: Do not use cleaning sprays or liquid cleaners.
1 Switch off the baby unit, remove the power adapter from the baby unit
and remove the power adapter from the wall socket.
2 Clean the baby unit with a dry cloth.
Note: Fingerprints or dirt on the lens of the baby unit may affect the
camera’s performance. Avoid touching the lens with your fingers.
21
3 Switch off the parent unit, remove the power adapter from the parent
unit and remove the power adapter from the wall socket.
4 Clean the parent unit with a dry cloth.
Page 22
22
English
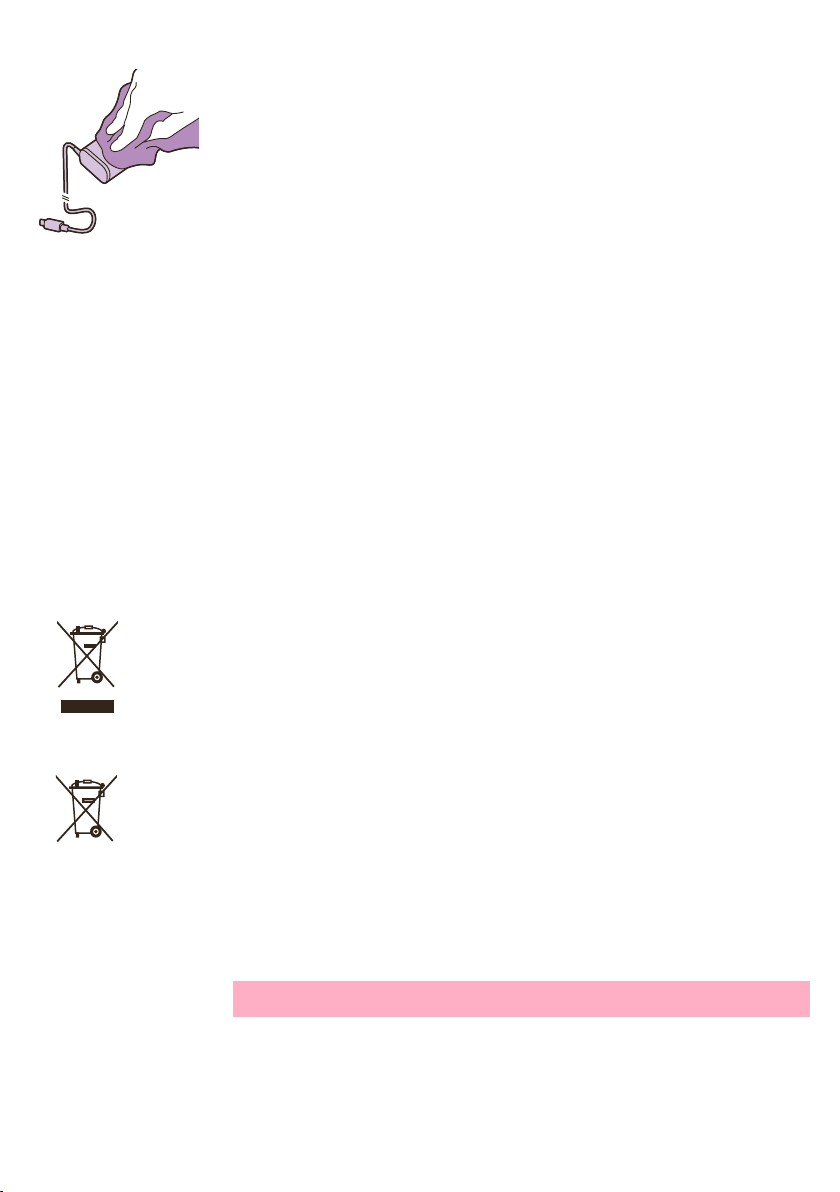
5 Clean the adapters with a dry cloth.
Storage
When you are not going to use the baby monitor fora long time, store the
parent unit, the baby unit and the adapters in a cool and dry place.
Ordering accessories
To buy accessories or spare parts, visit www.philips.com/parts-andaccessories or go to your Philips dealer. You can also contact the Philips
Consumer Care Center in your country (see the international warranty leaflet
for contact details).
Recycling
-
This symbol means that this product shall not be disposed of with normal
household waste (2012/19/EU).
-
This symbol means that this product contains a built-in rechargeable
battery which shall not be disposed of with normal household waste
(2006/66/EC). Please take your product to an official collection point or
a Philips service center to have a professional remove the rechargeable
battery.
-
Follow your country’s rules for the separate collection of electrical and
electronic products and rechargeable batteries. Correct disposal helps
prevent negative consequences for the environment and human health.
Removing the rechargeable battery
Note: We strongly advise you to have a professional remove the
rechargeable battery.
Only remove the rechargeable battery when you discard the appliance.
Make sure the battery is completely empty when you remove it. Only the
parent unit includes a battery.
Procedure:
1 Remove the 2 rubber feet at the bottom of the parent unit.
Page 23

2 Remove the 2 screws that are now visible at the bottom of the parent
unit.
3 Put the antenna in upward position and remove the screw in the back
housing that is now visible.
4 Remove the back housing from the front housing by forcing a screwdriver
in between them.
5 Disconnect the battery connector cable (black-white-red cable).
6 Remove the 4 screws from the battery holder.
7 Remove the battery.
Warranty and support
If you need information or support, please visit www.philips.com/support or
read the international warranty leaflet.
Frequently asked questions
This chapter summarizes the most common problems you could encounter
with the appliance. If you are unable to solve the problem with the
information below, visit www.philips.com/support for a list of frequently
asked questions or contact the Consumer Care Center in your country.
HOW TO USE / CONNECTING THE UNITS
Question Answer
Why does the power-on
light of the baby unit
not go on when I switch
on the unit?
Perhaps the baby unit is not connected to the mains. Connect the baby unit
to the mains. Then set the on/off switch of the baby unit upwards to the ON
position to establish connection with the parent unit.
English
23
Why doesn't the parent
unit charge when I plug
it in?
Why doesn’t the baby
unit charge when I plug
it in?
Why can’t I establish a
connection?
Why is the connection
lost every now and
then?
Why are there sound
interruptions?
Perhaps the adapter is not plugged in properly. Make sure the adapter is
plugged into the wall socket properly.
The parent unit may already be fully charged. The battery status light will be
green when the battery is fully charged and the device is connected to the
mains power.
The baby unit does not have a charging function. The baby unit only works
when it isconnected to themains.
The baby unit and the parent unit are probably close to the outer limits of
the operating range or there is interference from other 2.4 GHz wireless
devices. Try a different location, decrease the distance between the units or
switch off other 2.4 GHz wireless devices (laptops, mobile phones,
microwaves, etc) . It can take up to 10 seconds before the connection
between the units is reestablished.
If the signal is lost, then the parent unit will make a beeping sound (3 quick
beeps every 20 seconds).
Page 24

24
English
HOW TO USE / CONNECTING THE UNITS
The baby and parent unit might be too close to each other, keep them at
least 1.5 meters/ 5 feet away from each other to prevent interference.
What happens during a
power failure?
Why can the charging
time of the parent unit
exceed 3 hours?
Why do I need to keep
the baby unit and its
cord at least 1 meter/
3.5 feet away from my
baby?
What is the difference
between the various
user modes on the
parent unit: Video,
Audio, VOX and ECO?
As the parent unit works on a rechargeable battery, the parent unit
continues to work if the battery is sufficiently charged. However, the baby
unit stops working because it has no rechargeable battery and only works
on a mains power. The parent unit will give a beeping sound to indicate that
the link with the baby unit is lost.
When mains power is restored, the connection between the parent unit and
the baby unit will automatically be established.
The parent unit may be switched on during charging. Switch off the parent
unit during charging to reduce the charging time. When the display of the
parent unit is constantly on, charging of the parent unit will take more time.
To avoid strangulation with the cord and for optimal sound detection,
always place the baby unit and its cord at least 1 meter / 3.5 feet away from
the baby.
See below list for an explanation on the available modes on your baby
monitor.
* Video mode: the screen and sound of the parent unit are always on.
* Audio mode: only audio will be activated. The display of the parent unit
switches off when AUDIO mode is activated. The link light shows that the
parent unit is still on and connected to the baby unit. All normal
correspondence with the baby unit is possible via the talk back, lullaby and
sensitivity buttons.
* VOX mode: The display and sound of the parent unit switch off if there is
no sound detected for 20 seconds (or not enough sound above the
sensitivity setting). Both display and sound will be activated immediately
when your baby cries and the sensitivity threshold is passed. When the
sound drops below the sound threshold, the video will remain active for 20
seconds. When one of the control buttons is pressed (brightness or
volume), the device shall display video for roughly 5 seconds. Also the
lullaby menu is accessible.
* ECO mode: The display and sound of the parent unit switch off when no
sound is detected for 20 seconds. Eco Mode reduces power consumption
during quiet times while keeping you connected to your baby. In ECO mode
the ECO LED light is green and the device will operate on a different
connection modus. In ECO mode the parent unit uses the 2 seconds ping
mechanism to check the connection with the baby unit instead of a
continuous radio frequency connection. Therefore the Baby Unit will also
consume less energy in ECO mode.
Page 25

HOW TO USE / CONNECTING THE UNITS
English
25
How can I reset the
parent unit?
You can reset the parent unit by simultaneously press the "power on/off
button" and the round "navigation down button" at the front of the parent
unit for about 1 second. The parent unit will switch off. In order to turn the
parent unit back on, press the "power on/off button". Specific user
information stored in the memory of the parent unit such as user mode,
brightness settings, volume, lullaby selection, zoom selection and vibration
settings will not be lost.
INDICATIONS ON THE PARENT UNIT
Question Answer
The battery LED on the
parent unit turns red.
What should I do?
Why does the parent
unit beep?
What does the battery
LED colour (green,
orange, red) or no
burning LED mean for
the status of my
battery?
The battery power is low. If you do not connect the parent unit to the mains
power when the battery LED has turned red and starts to make a beeping
sound, the unit will stop working after approximately 60 minutes.
Switch to lower brightness and/or volume to save battery consumption and
connect the parent unit to the mains with the power adapter. (see chapter
‘Preparing for use’).
Your baby monitor beeps in a certain way to tell you what the problem is.
1 beep: parent unit is switched off.
1 beep, every 20 seconds for the first 3 minutes, after that, every minute:
parent unit is low in battery.
3 quick beeps every 20 seconds: connection between parent and baby unit
is lost, link icon is shown on the parent unit's screen and the link connection
button is red.
When the parent unit is connected to the mains power the color of the
battery light will show:
* Green: battery is full.
* Orange: battery is charging.
When the parent unit is not connected to the mains power the color of the
battery light will show:
* Red: battery is almost empty (<10%).
* No burning LED: parent unit is not connected to the mains.
NOISE/SOUND
Question Answer
Why does the parent
unitand/or baby unit
produce a high-pitched
noise?
The parent unit and baby unit may be too close to each other. Make sure
the parent unit and the baby unit are at least 2.5 meters / 8.2 feet away
from each other.
The volume of the parent unit may be set too high. Decrease the volume of
the parent unit.
Page 26

26
English
NOISE/SOUND
For causes of a beeping sound from the parent unit, see the FAQ "Why does
the parent unit beep?"
How can I mute the
sound?
Why don’t I hear a
sound?Why can’t I hear
my baby cry?
Why does the parent
unit react too quickly to
other sounds than my
baby makes?
Why does the parent
unit make a buzzing
sound?
Mute the device by pressing the bottom part of the control button. When
the volume bar on the screen is completely empty, the volume is muted.
The volume of the parent unit may be set too low or may be switched off.
Press the top part on the control button to increase the volume level.
Perhaps the parent unit is muted, unmute the device by pressing the top
part of the control button and adjust the volume.
The sensitivity is set too low, adjust the sensitivity in the parent unit's menu
to a higher level.
The baby unit may be too far away from your baby. Make sure the baby unit
is not further than 1.5 meters/ 5 feet away from your baby for optimal sound
detection. Closer than 1 meter /3.5 feet increases strangulation hazard.
The baby unit also picks up other sounds than those of your baby. Move
the baby unit closer to the baby (but observe the minimum distance of 1
meter/ 3.5 feet).
The sensitivity level may be set too high. When your baby makes soft
sounds, the sensitivity has to be higher. However, the louder your baby
sounds, the lower the sensitivity level can be set. You can change the
sensitivity of your baby monitor on the parent unit's menu.
Interference may occur when the parent unit is out of range of the baby
unit. Interference may also occur if there are too many walls or ceilings
between the parent unit and the baby unit or when other 2.4 GHz wireless
devices are switched on (e.g. microwave, Wi-Fi router).
How long will the lullaby
song be played by the
baby unit?
How can I increase the
volume of the lullaby?
Put the parent unit in a different place, closer to the baby unit, or switch off
other wireless devices.
If this answer does not help you, check the other FAQ on " Why does the
parent unit and/or baby unit produce a high-pitched noise?"
Once you select a lullaby, it will be continuously repeated for approximately
15 minutes. In case you want to play all songs that are available, select the
last option in the lullaby list.
You can adjust the volume of the lullaby on the parent unit, not on the baby
unit. Press the lullaby button on the parent unit to open the lullaby menu
and adjust the volume.
Page 27

OPERATING TIME / RANGE
Question Answer
Why does my baby
monitor manage a much
smaller distance than
specified in this user
manual?
The specified operating range of 300 meters /985 feet is only valid
outdoors in open air and in the line of sight. Depending on the surroundings
and other disturbing factors, the operating range may be smaller (see also
table in chapter on positioning of parent and baby unit).
Inside your house, the operating range is up to 50 meters/165 feet, which is
also limited by the number and type of walls and/or ceilings between the
parent unit and the baby unit.
English
27
The operating time of
the parent unit is
supposed to be up
to10hours. Why is the
operating time of my
parent unit shorter?
The video brightness of the parent unit may be set too high, which causes
the parent unit to consume a lot of energy. Decrease the brightness of the
parent unit.
The parent unit consumes a lot of energy when the video display is
switched on continuously. Activate the AUDIO, VOX or ECO mode in the
parent unit's menu to increase the operating time (see chapter ‘Features’,
sections 'AUDIO mode', ‘VOX mode' or ' ECO mode' ).
The volume of the parent unit may be set too high, which causes the parent
unit to consume a lot of energy. Decrease the volume of the parent unit.
As any other rechargeable electronic device, the battery capacity decreases
after a long period of usage.
VIDEO DISPLAY
Question Answer
Why do I get
interference on the
parent unit? Why does
the video display on the
parent unit flicker?
Interference may occur when the parent unit is out of range of the baby
unit. Interference may also occur if there are too many walls or ceilings
between the parent unit and the baby unit or when other 2.4 GHz wireless
devices are switched on (e.g. microwave, Wi-Fi router).
Put the parent unit in a different place, closer to the baby unit, or switch off
other wireless devices.
The rechargeable battery of the parent unit may need to be charged.
Why isn’t there any
image on the video
display while the
linklight is green?
Why isn't the image on
the video display clear?
The parent unit may be in the AUDIO, VOX or ECO mode. Press the mode
button on the right side of the parent unit to switch modes (see 'Modes').
The display brightness may be set too low. Increase the display brightness
on the parent unit using the control button in the centre.
Perhaps the lens of the baby unit is dirty. Clean the lens with a dry cloth.
Page 28
28
English
VIDEO DISPLAY
Wall mount
The baby unit may be too far away from your baby. Make sure the baby unit
is not further than 1.5 meters / 5 feet away from your baby for optimal video
quality. Closer than 1 meter / 3.5 feet increases strangulation hazard.
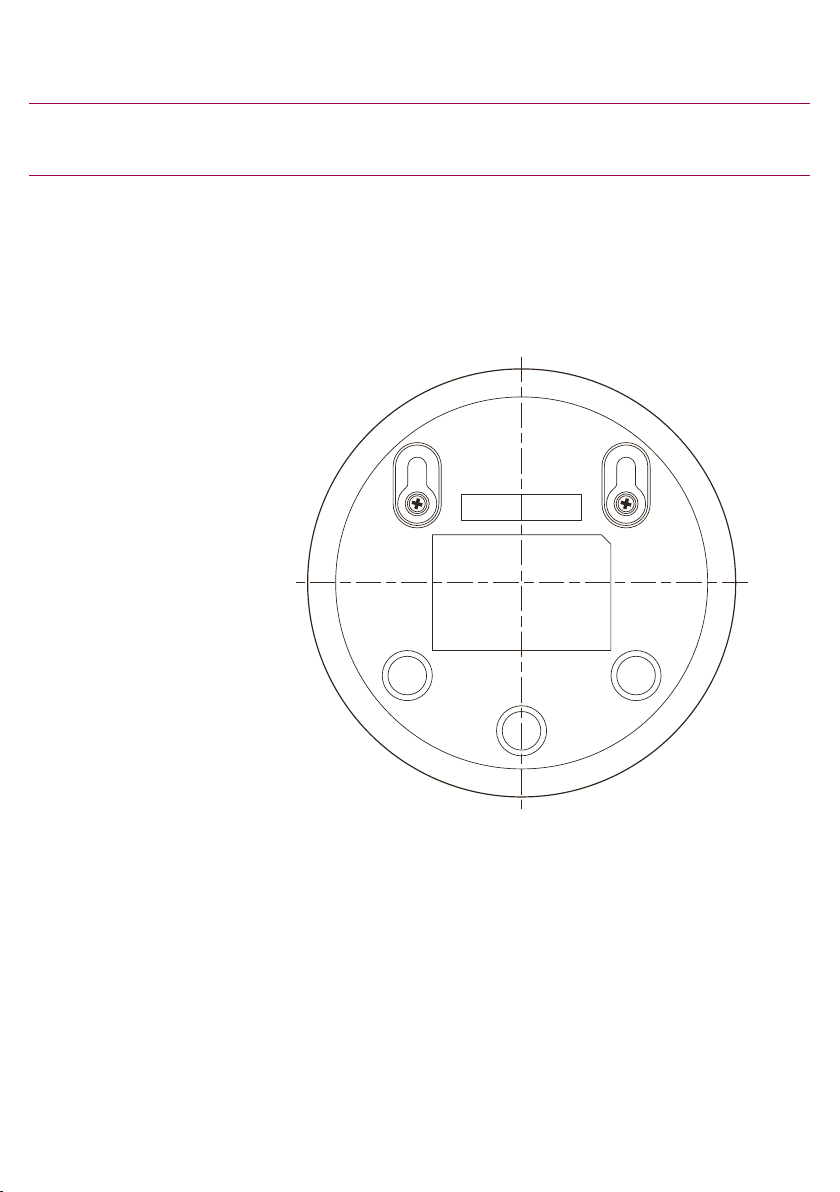
Printing instructions:
Print this page in scale 100% and use the template to accurately mark the
position of the holes for the screws on the wall.
Page 29

Introdução
Parabéns pela sua compra e bem-vindo à Philips Avent! Para aproveitar ao
máximo o suporte oferecido pela Philips Avent, registre o produto em
www.philips.com.br/clube.
A babá eletrônica Philips Avent fornece monitoramento 24horas e permite
que você veja dia e a noite o seu bebê de qualquer lugar na casa. A
tecnologia digital mais recente garante som cristalino e a imagem mais
nítida do seu bebê. Esse aparelho proporciona uma sensação adicional de
segurança sem que seja preciso entrar no quarto do bebê e perturbar seu
sono.
Descrição Geral
1 Unidade dos pais
2 Visor
3 Luz ECO
4 Luz de status da bateria
5 Luz LINK (conexão)
6 Alto-falante
7 Botão de controle (menu de navegação/volume/brilho)
8 Botão de sensibilidade
9 Botão de músicas de ninar
10 Botão da função de conversa
11 Tomada para fonte pequena
12 Botão de modo
13 Botão Liga/Desliga
14 Antena
15 Suporte para cinto
16 Unidade do bebê
17 Câmera
18 Botão liga/desliga da canção de ninar
19 Microfone
20 Controle deslizante liga/desliga
21 Antena
22 Alto-falante
23 Tomada para fonte pequena
24 Orifícios para montagem na parede
25 Adaptador(2x)
Português do Brasil
29
Informações de segurança importantes
Leia cuidadosamente estas informações importantes antes de utilizar o
aparelho e guarde-o para uma eventual consulta futura.
IMPORTANTE
Esta babá eletrônica é um equipamento auxiliar. Não substitui a
supervisão responsável e adequada de um adulto e não deve ser utilizado
como tal.
Nunca deixe o bebê sozinho em casa. Certifique-se sempre de que existe
alguém presente para cuidar do bebê e das suas necessidades.
Page 30

30
Português do Brasil
Limitação de responsabilidade
Tenha em atenção que utiliza esta babá eletrônica por sua conta e risco. A
Koninklijke Philips N.V. e as suas empresas subsidiárias não são
responsáveis pelo funcionamento desta babá eletrônica nem pela utilização
da mesma e, consequentemente, não aceitam qualquer responsabilidade
relacionada com a utilização desta babá eletrônica por parte do usuário.
Perigo
-
Nunca mergulhe qualquer parte da babá eletrônica em água ou em
outro líquido. Não coloque o aparelho num local onde possa pingar ou
ser salpicada água ou outro líquido. Nunca utilize a babá eletrônica em
locais úmidos ou próximo de água.
-
Nunca coloque objetos sobre a babá eletrônica nem a cubra. Não
obstrua nenhuma das aberturas de ventilação. Instale de acordo com as
instruções do fabricante.
-
Os cabos representam um perigo potencial de estrangulamento.
Mantenha os cabos fora do alcance das crianças (a mais de 1 metro de
distância). Nunca coloque a babá eletrônica dentro da cama nem do
berço do bebê.
Aviso
-
Verifique se a voltagem indicada no adaptador corresponde à voltagem
elétrica local antes de ligar o aparelho.
-
Não modifique e/ou corte nenhuma peça do adaptador e respectivo fio,
pois isto cria uma situação de perigo.
-
Utilize apenas o adaptador fornecido.
-
Se o transformador se danificar, só deverá ser substituído por uma peça
original para evitar situações de perigo.
-
Este aparelho não deve ser usado por pessoas (inclusive crianças) com
capacidades físicas, mentais ou sensoriais reduzidas ou com pouca
experiência e conhecimento, a menos que sejam supervisionadas ou
instruídas sobre o uso do aparelho por uma pessoa responsável por sua
segurança.
-
Crianças devem ser supervisionadas para que não brinquem com o
aparelho.
-
Evite que o cabo de alimentação seja pisado ou comprimido de algum
modo, sobretudo nas fontes, tomadas e no ponto de saída do aparelho.
-
Certifique-se de que coloca a babá eletrônica de forma que o cabo não
obstrua uma porta ou passagem. Se colocar a babá eletrônica sobre uma
mesa ou um armário baixo, não deixe o cabo de alimentação suspenso
na borda da mesa ou do armário. Certifique-se de que o cabo não fica
acumulado no chão, onde representa um risco de queda.
-
Mantenha os materiais de embalagem (sacos de plástico, proteções em
papel, etc.) fora do alcance das crianças, visto que estes não são
brinquedos.
-
Para evitar choques elétricos, não abra a unidade do bebê ou dos pais.
Cuidado
-
Utilize o aparelho a uma temperatura entre os 0 °C e os 40 °C.
Page 31
Este produto está homologado pela Anatel de acordo com os
procedimentos regulamentados para avaliação da conformidade
de produtos para telecomunicações e atende aos requisitos
técnicos aplicados, incluindo os limites de exposição da Taxa de
Absorção Específica referente a campos elétricos, magnéticos e
eletromagnéticos de radiofrequência.
Português do Brasil
-
Não instale o aparelho perto de fontes de calor como radiadores,
condutores de ar quente, fogões ou outros aparelhos (incluindo
amplificadores) que emitam calor.
-
Certifique-se de que tem as mãos secas quando manusear adaptadores,
fontes e cabos de alimentação.
-
Todas as marcações obrigatórias na unidade do bebê, na unidade dos
pais e no adaptador estão localizadas na parte inferior dos mesmos.
Conformidade com padrões
-
Este produto está em conformidade com os requisitos de interferência
de rádio da Comunidade Europeia.
-
Por meio deste documento, a Philips Consumer Lifestyle declara que
esta babá eletrônica está em conformidade com os requisitos essenciais
e outras provisões importantes da diretiva 2014/53/UE (FHSS: faixa de
frequência de 2,4 GHz, potência máxima de radiofrequência: 100 mW
EIRP). Uma cópia da declaração de conformidade CE (DoC) está
disponível online em www.philips.com/support.
Campos eletromagnéticos
Este aparelho Philips está em conformidade com todos os padrões e
regulamentos aplicáveis relacionados à exposição a campos
eletromagnéticos.
31
O valor medido de SAR é 0,055 W/kg
Preparação para a utilização
Unidade do bebê
Coloque o adaptador de energia na unidade do bebê e o adaptador na
tomada da parede.
Unidade dos pais
A unidade dos pais funciona com uma bateria Li-ion recarregável embutida.
Siga os passos abaixo para carregar a unidade dos pais:
Page 32
20°CEco
1
10 hrs=3 hrs
20°CEco
1
32
Português do Brasil
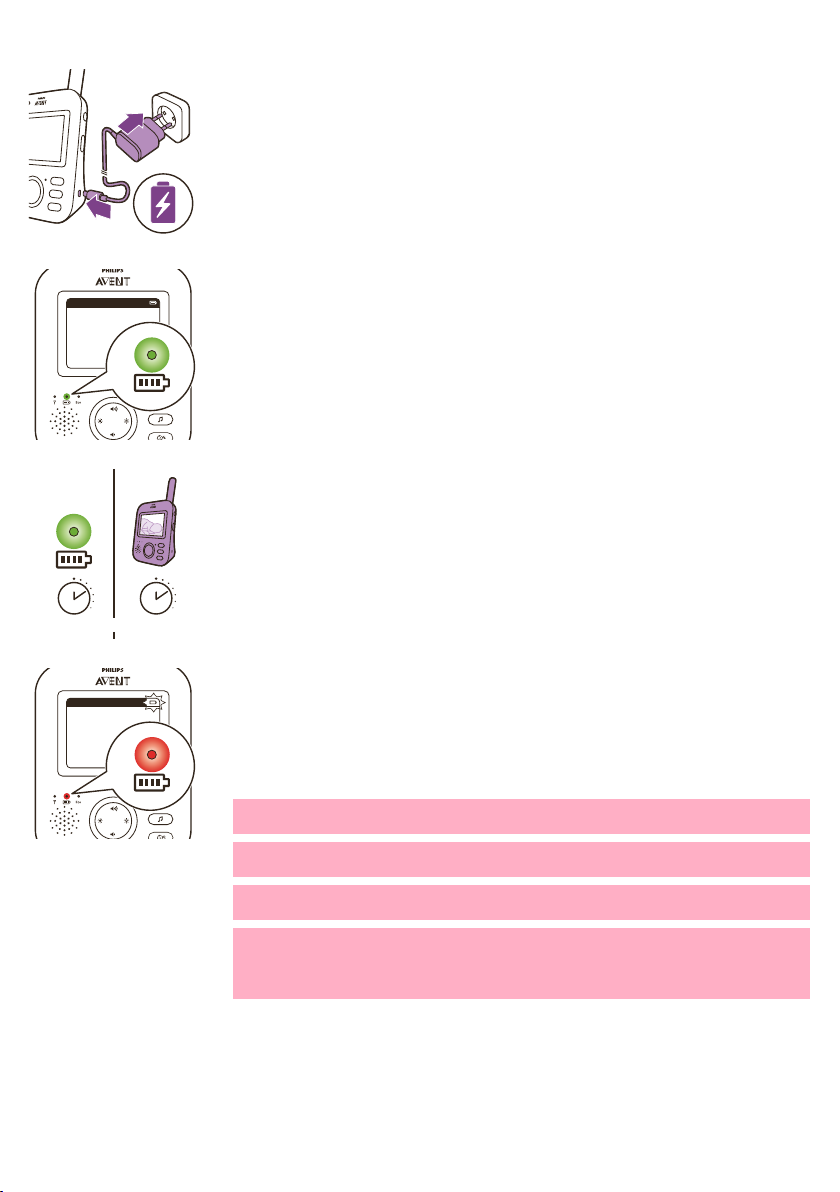
1 Coloque a fonte pequena na unidade dos pais e ligue o adaptador à
tomada elétrica.
-
O indicador de status da bateria fica laranja para indicar que o
aparelho está carregando.
-
Quando a bateria está totalmente carregada, oindicadorfica aceso
na cor verde continuamente.
-
Se carregar a unidade dos pais durante 3 horas, está poderá ser utilizada
sem fio durante, aproximadamente, 10 horas.
-
Se a unidade dos pais for ligada durante o carregamento, o processo irá
demorar o dobro do tempo.
-
Quando a bateria recarregável da unidade dos pais estiver quase sem
carga, a luz de status da bateria ficarávermelha e a unidade dos pais
emitirá um sinal sonoro.
-
Se a bateria estiver totalmente vazia e a unidade dos pais não for ligada
à corrente elétrica, irá desligar-se automaticamente e perder contato
com a unidade do bebê.
Observação: A bateria recarregável incorporada não pode ser removida do
produto.
Observação: A bateria descarrega gradualmente e de forma muito lenta,
mesmoquando a unidade dos pais está desligada.
Dica: Para poupar bateria, desligue a unidade dos pais quando não a
utilizar.
Observação: Aconselhamos que mantenha a unidade dos pais ligada à
corrente elétrica durante toda a noite. Se a bateria da unidade dos pais ficar
com pouca carga durante a noite, irá emitir um sinal sonoro que poderá
acordá-lo.
Page 33
>2 .5m/8.2ft
Português do Brasil
Utilizando a babá eletrônica
Como conectar a unidade dos pais à unidade do bebê
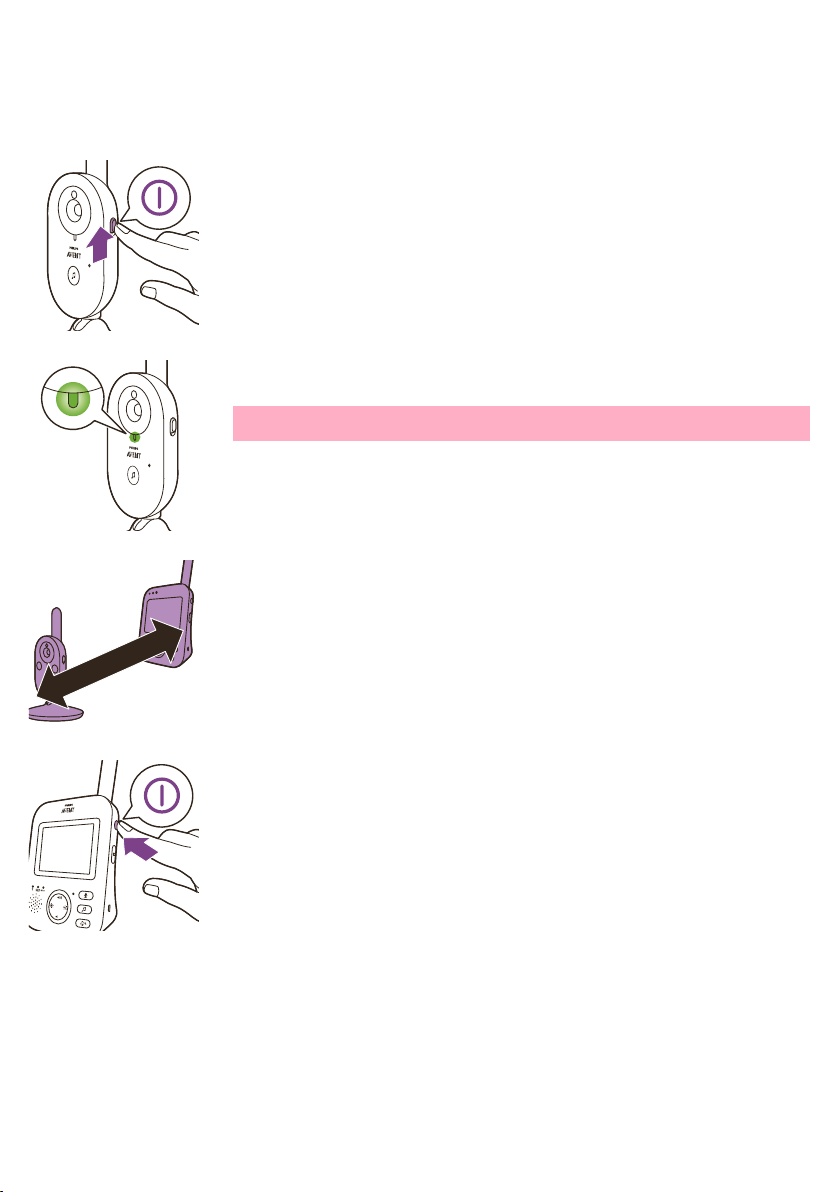
1 Desloque o botão ligar/desligar da unidade do bebê para cima, para a
posição ON (Ligado).
2 Quando a unidade do bebê estiver ligada, a luz indicadora de energia da
unidade do bebê se acenderá na cor verde.
Nota: A luz indicadora da unidade do bebê sempre se acende na cor
verde, mesmo quando não há conexão com a unidade dos pais.
3 A unidade dos pais e a unidade do bebê devem encontrar-se, no
mínimo, a uma distância de 2.5 metros uma da outra, de forma a evitar o
eco acústico.
33
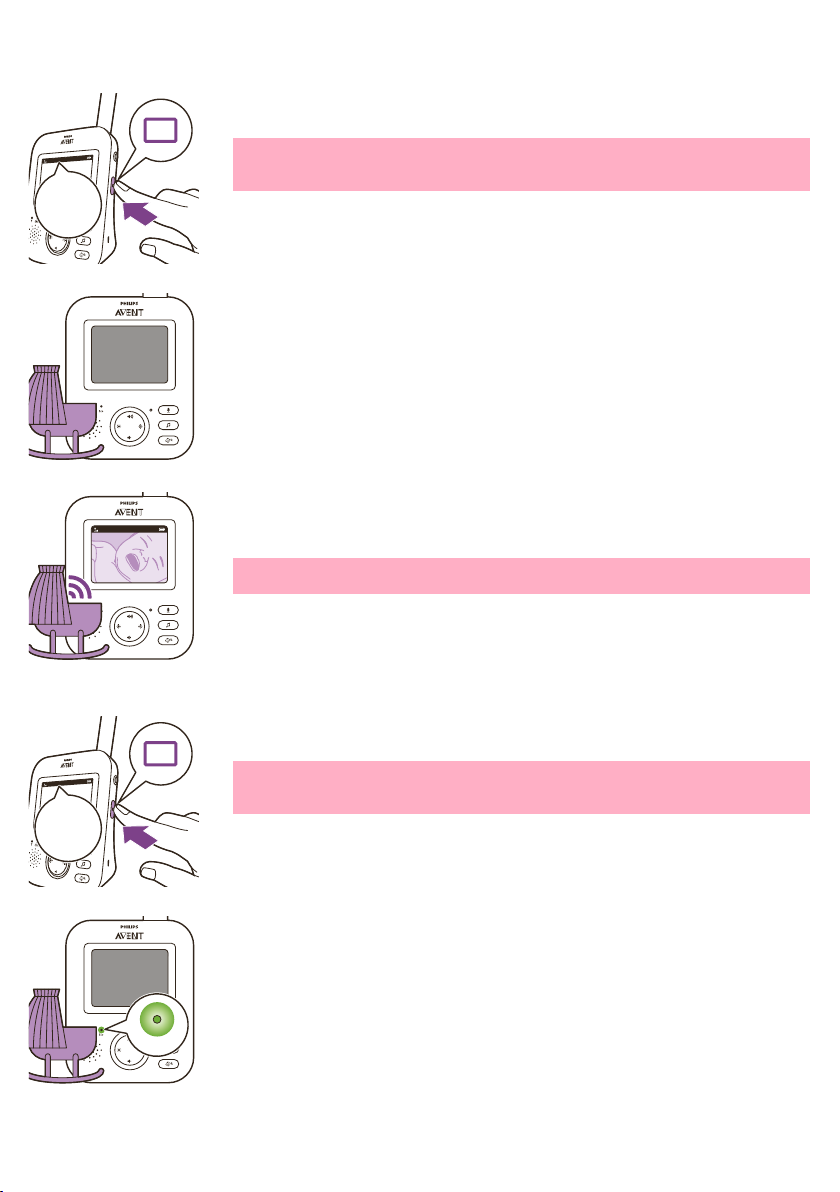
4 Pressione o botão ligar/desligar da unidade dos pais para a ligar.
Page 34
20°CEco
1
20°CEco
1
20°CEco
1
>1-1.5m/3.5-5ft
34
Português do Brasil
-
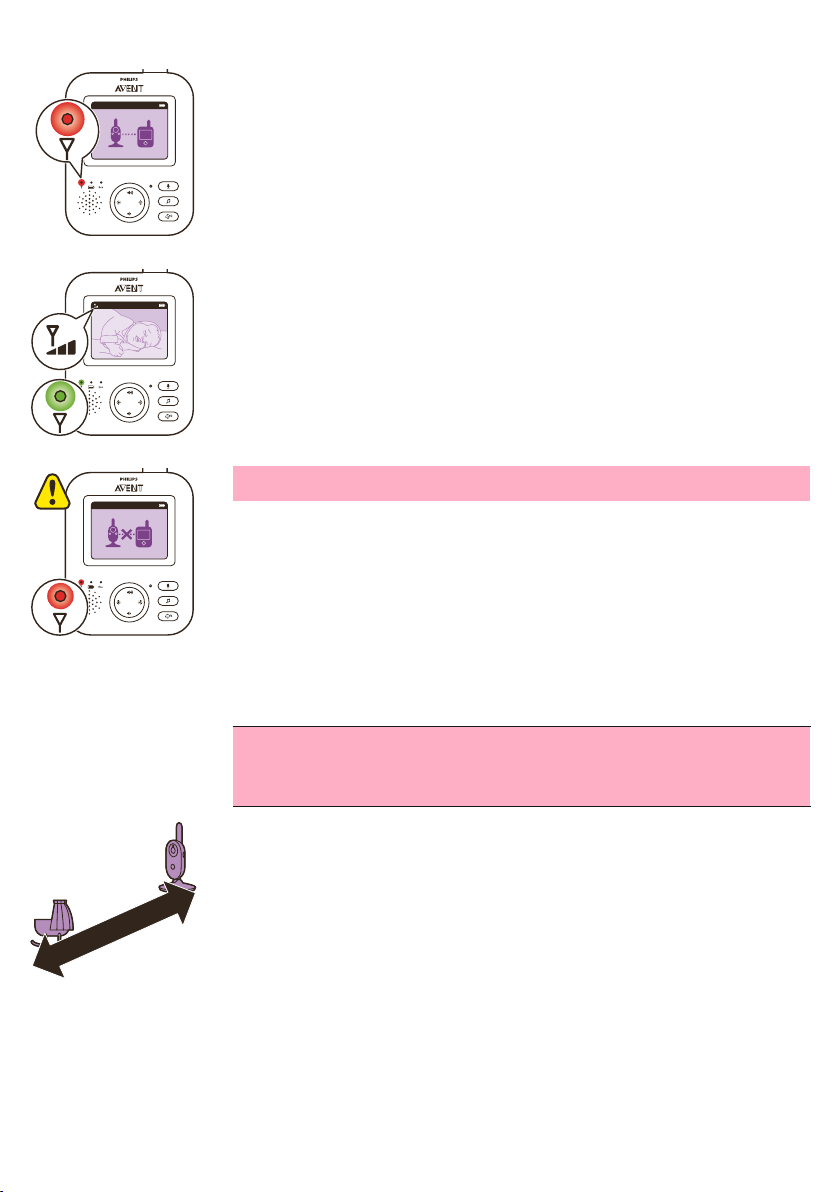
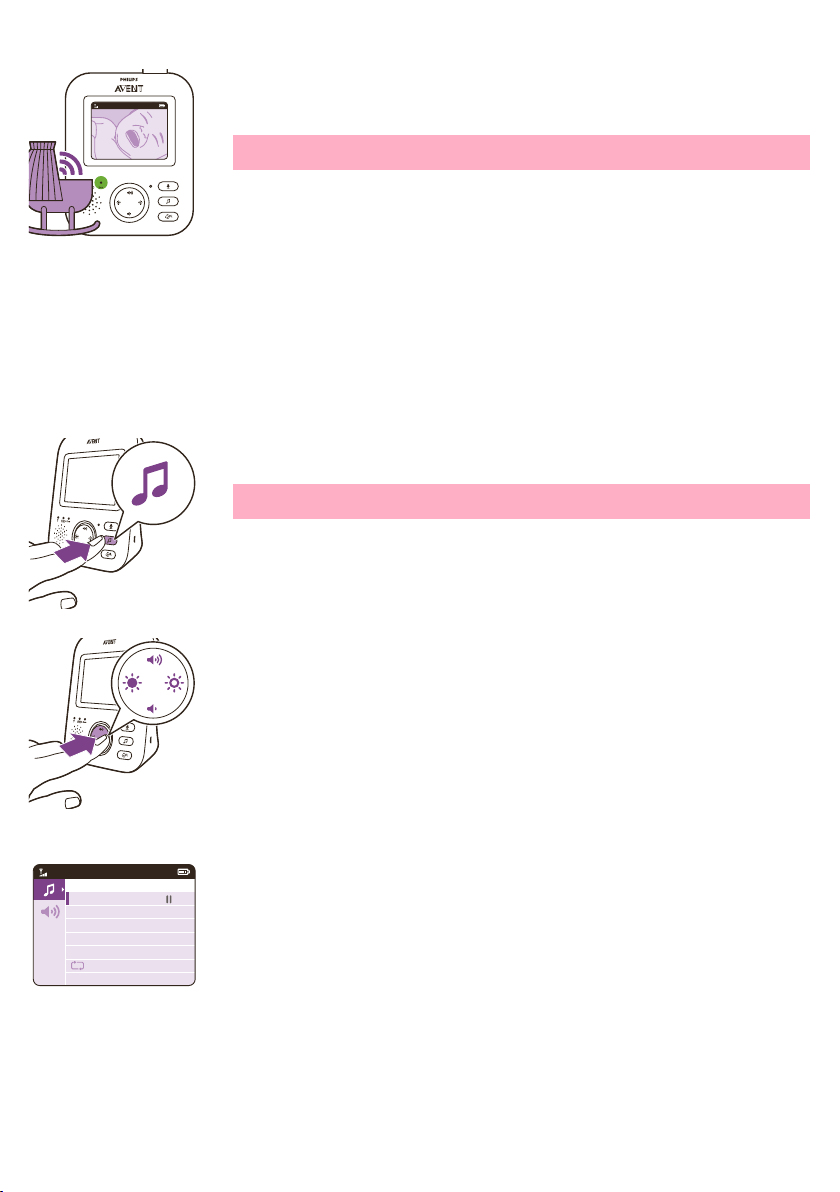
O visor acende-se, a imagem de ativação é apresentada no visor e a
luz LINK (conexão) fica vermelha.A unidade dos pais começa a
procurar a unidade do bebê.
-
Quando a unidade dos pais e a unidade do bebê estiverem
conectadas, a luz indicadora ficará verde na unidade dos pais e pelo
menos uma barra será exibida na tela.
Nota: Leva menos de 10 segundos para estabelecer a conexão entre a
unidade dos pais e a unidade do bebê.
Quando aunidade do bebê estiver desligada, a unidade dos pais
mostrará a imagem de fora do alcance. Verifique se a unidade do bebê
está ligada.
-
Se a conexão não for estabelecida, a luz ficará vermelha, a unidade
dos pais emitirá três bipes curtos a cada 20 segundos e a imagem de
fora de alcance será exibida no visor.
Posicionamento da babá eletrônica
Aviso: O fio da unidade do bebê oferece um risco potencial de
estrangulamento. A unidade do bebê e o respectivo cabo devem
estar a, no mínimo, 1 metro de distância do seu bebê. Nunca
coloque a unidade do bebê dentro do berço ou do cercadinho.
1 Para a detecção ideal de som, a unidade do bebê deve estar a no
máximo 1,5 metro de distância do bebê. A unidade do bebê deve estar a
pelo menos 1 metro de distância do bebê, por conta do potencial risco
de estrangulamento.
Page 35
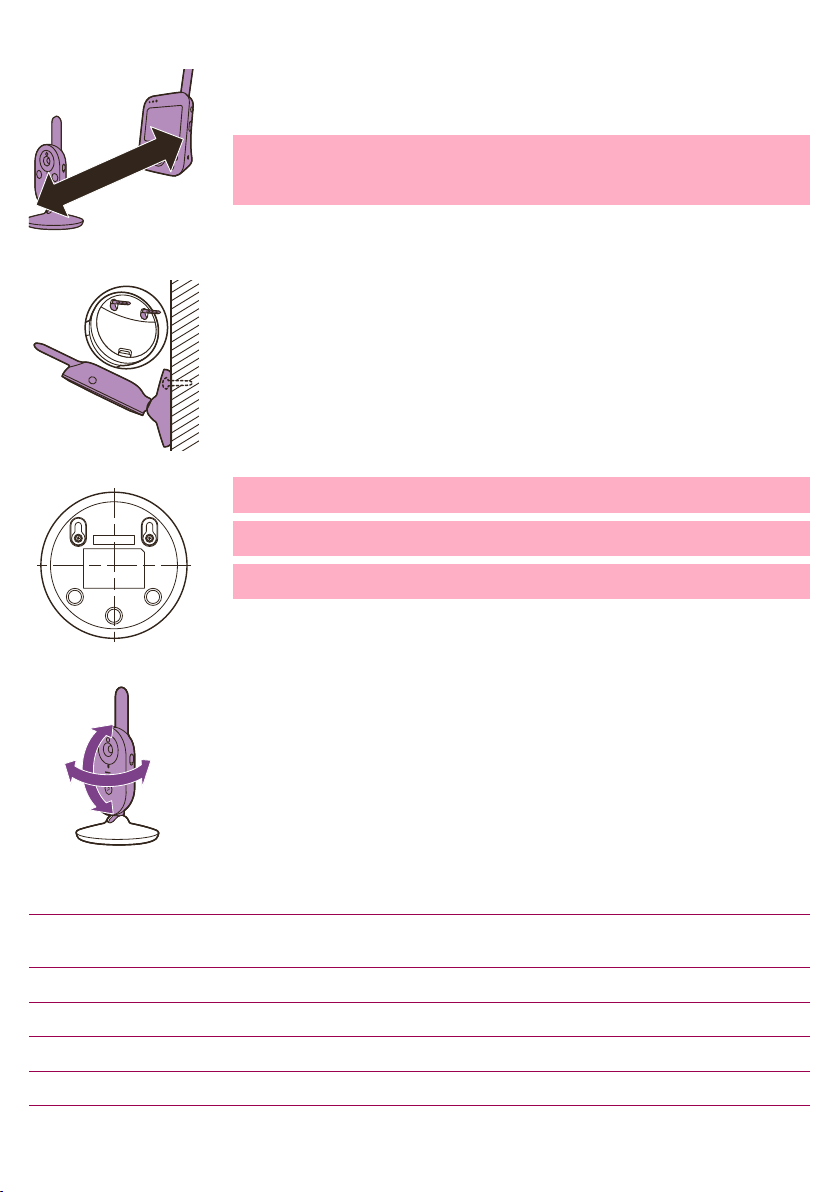
>2 .5m/8.2ft
Português do Brasil
2 Coloque a unidade dos pais dentro da faixa operacional da unidade do
bebê. Verifique se ela está a pelo menos 2,5 metros da unidade do bebê,
para evitar microfonia.
Nota: Se você usar um telefone sem fio, vídeo sem fio, rede Wi-Fi, forno
de micro-ondas ou Bluetooth na faixa de 2,4GHz e ocorrer interferência
em qualquer unidade, seja dos pais ou do bebê, afaste a unidade dos
pais até que não haja mais nenhuma interferência.I
3 Há duas maneiras de posicionar a unidade do bebê:
a Coloque a unidade do bebê em uma superfície estável, nivelada e
horizontal.
b Monte a unidade do bebê na parede usando parafusos.
Dica: A montagem na parede encontra-se no fim deste manual do
usuário.
Dica: Utilize o modelo fornecido para marcar a localização exata dos
orifícios para os parafusos na parede.
Dica: Coloque a unidade do bebê num nível superior para obter uma boa
perspetiva do berço ou da cama do bebê.
35
4 Ajuste a unidade do bebê para que você obtenha melhor visibilidade de
seu bebê.A unidade do bebê pode ser posicionada da forma desejada.
Materiais secos Espessura do material Perda de alcance
Madeira, gesso, papelão, vidro (sem metal, fios ou
chumbo)
Tijolo, madeira compensada < 30cm (12pol) 5-35%
Concreto reforçado < 30cm (12pol) 30-100%
Grades ou barras de metal < 1cm (0,4pol) 90-100%
Folhas de metal ou alumínio < 1cm (0,4pol) 100%
< 30cm (12pol) 0-10%
Page 36
<300m/985ft
<50m/165ft
20°C
1
36
Português do Brasil
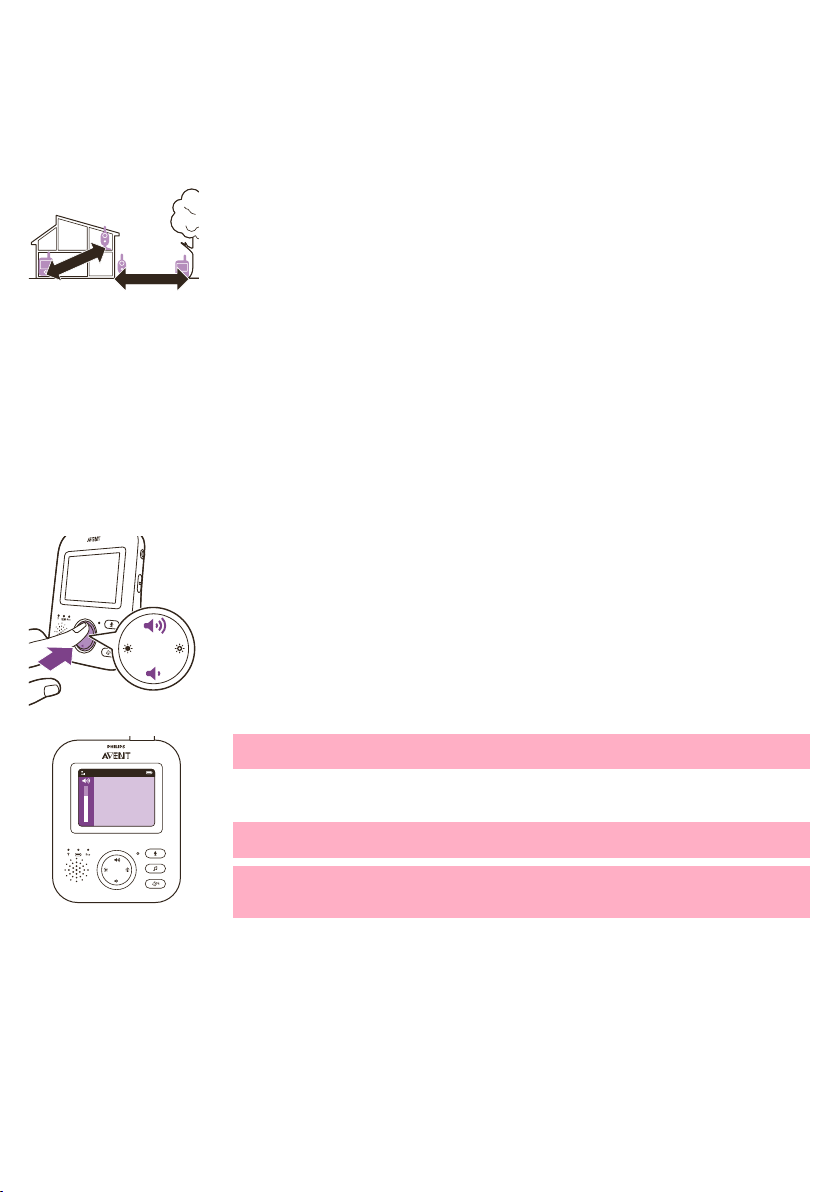
Alcance de operação
O alcance de funcionamento é até 50 metros no interior e até 300 metros
no exterior. A faixa operacional da babá eletrônica varia dependendo dos
arredores e dos fatores que causam interferência. Materiais molhados e
úmidos causam tanta interferência que a perda de alcance pode atingir os
100%.
Funcionalidades e definições
Volume
Pode ajustar o volume do alto falante da unidade dos pais para o nível que
preferir.
1 Pressione a parte superior ou inferior do botão de controle para ajustar o
volume.
Brilho
Dica: O volume deve estar adaptado às condições existentes. Em
condições de ruído, também é possível ligar o alerta de vibração.
A barra do volume é apresentada no visor para indicar o volume
selecionado.
Observação: Se o volume estiver ajustado para um nível alto, a unidade dos
pais consumirá mais energia.
Observação: Quando a barra de volume está na posição mínima, o volume
está em mudo. A unidade dos pais mostra um ícone de mudo na barra de
status e você apenas receberá alertas e vídeo nela.
Você pode ajustar o brilho da tela da unidade dos pais no nível desejado.
Page 37
20°C
1
Modos
VIDEO
VIDEO
Português do Brasil
37
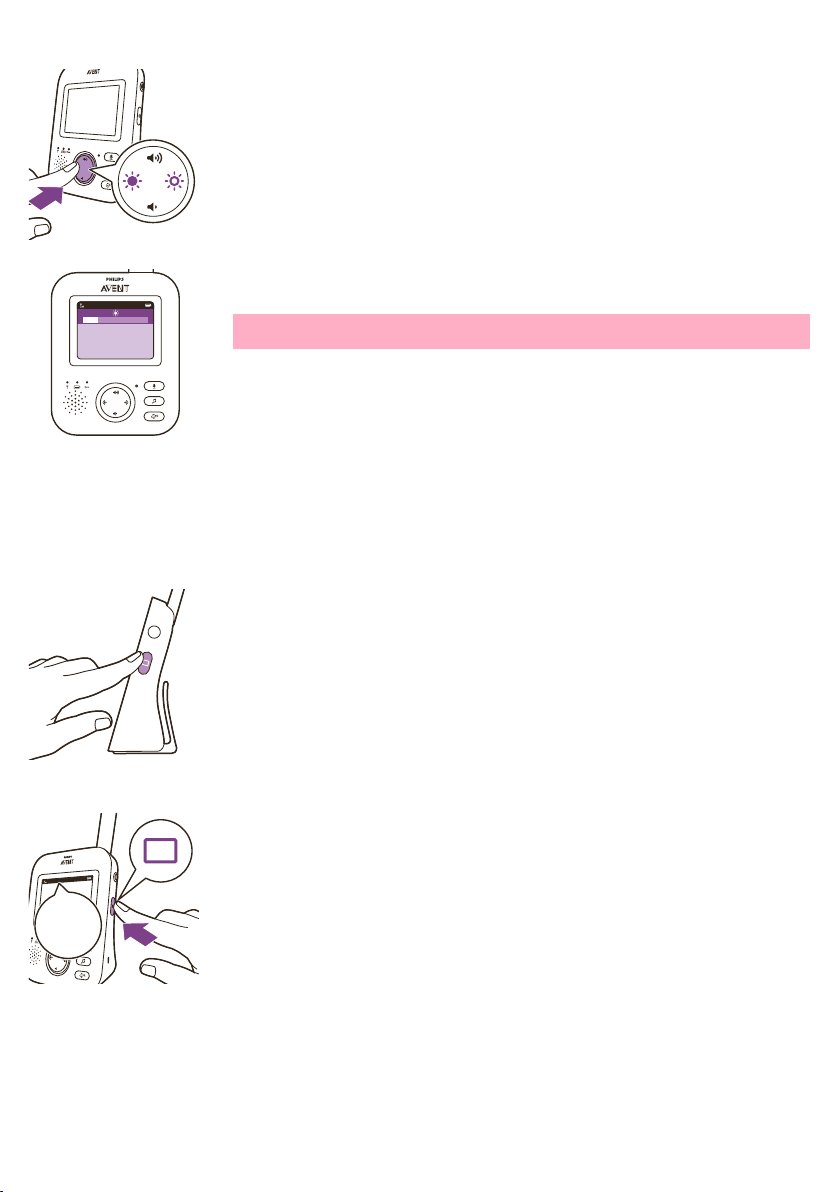
1 Pressione a parte esquerda ou direita do botão de controle para ajustar
o brilho do visor da unidade dos pais.
A barra de brilho é apresentada no visor para indicar o brilho da tela
selecionado.
Nota: Se o brilho estiver numa posição muito alta, a unidade dos pais
consumirá mais energia.
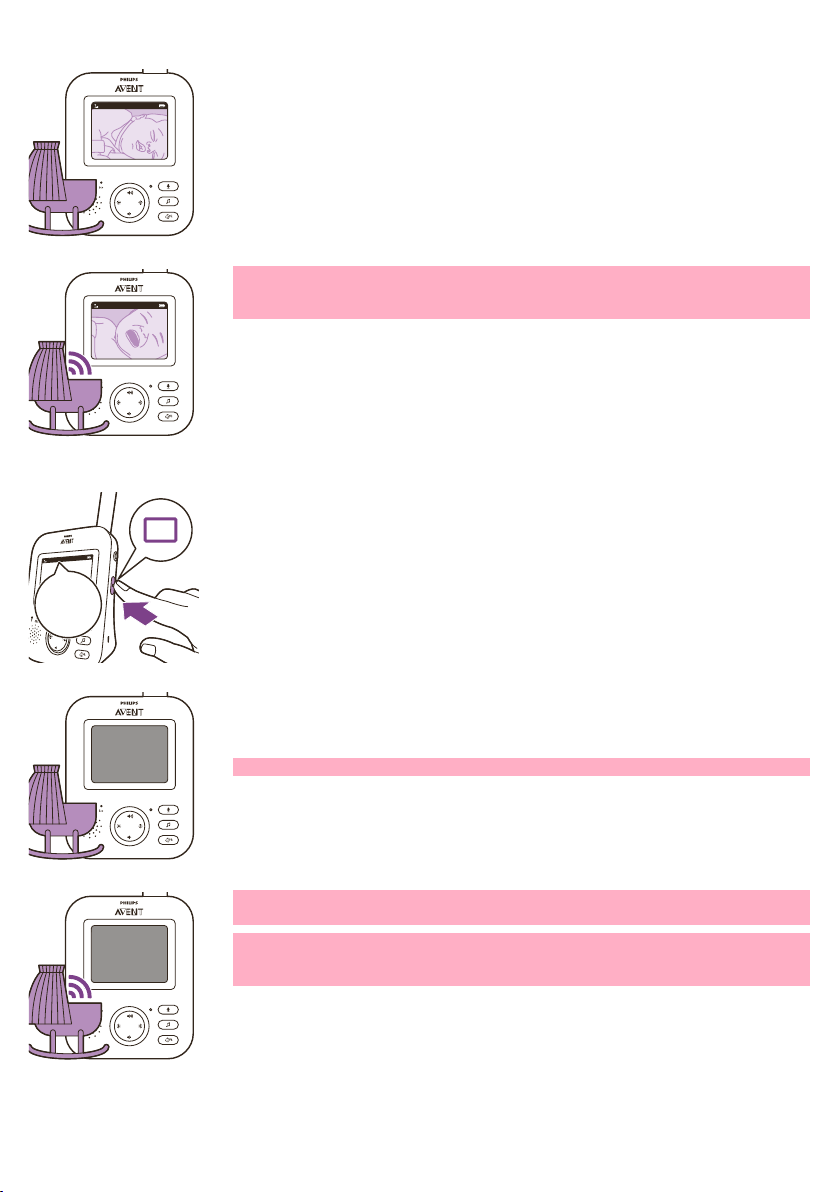
Esta babá eletrônica possui quatro modos diferentes que permitem
selecionar como pretende vigiar o bebê: VIDEO (Vídeo), AUDIO (Áudio), VOX
(Voz) e ECO.
Com a babá eletrônica ligada, é possível alternar entre os 4 modos
diferentes, selecionando o botão de modo na parte lateral da unidade dos
pais.
O visor apresenta o modo selecionado. O modo selecionado é também
indicado na barra de status. Ao ligar o dispositivo, o último modo utilizado
estará ativo.
VIDEO mode
Pressione o botão de modo na parte lateral da unidade dos pais para
selecionar o modo VIDEO (Vídeo).
Page 38
20°C
1
VIDEO
20°C
1
VIDEO
AUDIO
AUDIO
20°C
1
AUDIO
20°C
1
AUDIO
38
Português do Brasil
Quando o modo VIDEO (Vídeo) está ativado, a tela está sempre ligada, para
que possa ver o bebê dormir. Todos os sons são transmitidos diretamente
para a unidade dos pais.
Observação: Defina o nível de sensibilidade para "Very High" (Muito alto)
para ter sempre som na unidade dos pais. Consulte o capítulo Nível de
sensibilidade para obter mais informações.
Modo ÁUDIO
1 Pressione o botão de modo na parte lateral da unidade dos pais para
mudar para o modo AUDIO (Áudio).
Quando o modo ÁUDIO estiver ativado, a tela da unidade dos pais ficará
desligada. Após 3 segundos, o visor ficará totalmente desligado e a barra de
status desaparecerá.
Nota: A barra de status não estará visível quando o visor estiver desligado.
Nota: A luz de conexão mostra que a unidade dos pais ainda está acesa e
conectada à unidade do bebê.
Nota: Defina o nível de sensibilidade para "Very High" (Muito alto) para ter
sempre som na unidade dos pais. Consulte o capítulo Nível de sensibilidade
para obter mais informações.
Todos os sons são constantemente transmitidos para a unidade dos pais.
Se o bebê chorar, a tela da unidade dos pais fica continuará desligada, mas
os sons detectados pela unidade do bebê serão transmitidos para a
unidade dos pais.
Page 39
VOX
VOX
20°C
1
AUDIO
20°C
1
VOX
ECO
ECO
20°C
1
ECO
ECO
Português do Brasil
39
VOX mode
1 Pressione o botão de modo na parte lateral da unidade dos pais para
mudar para o modo VOX (Voz).
Observação: Quando o visor está ligado, o modo selecionado é
apresentado na barra de status. A barra de statusnão estará visível quando
o visor estiver desligado.
O visor e o som da unidade dos pais irão desligar-se se não for detectado
som durante 20 segundos, mas o modo VOX (Voz) é ativado.
Quando o som é captado pela unidade do bebê, o display e o som da
unidade dos pais liga imediatamente. Os sons são transmitidas para a
unidade dos pais.
Observação: O nível de som mínimo para ativar o som e o visor é definido
pelo ajuste de sensibilidade
Modo ECO
1 Pressione o botão de modo na parte lateral da unidade dos pais para
mudar para o modo ECO.
Nota: Quando o visor estiver ligado, o modo selecionado ficará visível na
barra de status. A barra de status não estará visível quando o visor estiver
desligado.
Quando o modo ECO estiver ativado, a tela e o som da unidade dos pais
ficarão desligados se nenhum som for detectado por 20 segundos. A luz
ECO se acende em verde para indicar que o modo ECO está ativado.
Durante o modo ECO, o visor e transmissões de som estarão desligados.
Page 40
20°C
1
ECO
Lullaby Songs
1 Rock-a-Bye Baby
2 Twinkle, Twinkle
3 Hush, Little Baby
4 Brahm’s Lullaby
5 Golden Slumbers
40
Português do Brasil
Canções de ninar
Quando osom for captado pela unidade do bebê, o visor e o som da
unidade dos pais se ligam imediatamente. Os sons são transmitidos para a
unidade dos pais.
Nota: O nível de som mínimo para ativar o som e o visor é definido pelo
ajuste de sensibilidade.
É possível ativar a função de canções de ninar na unidade dos pais ou na
unidade do bebê.
Para ativar a função de canções de ninar na unidade dos pais, siga as
instruções abaixo:
Seleção de canção de ninar
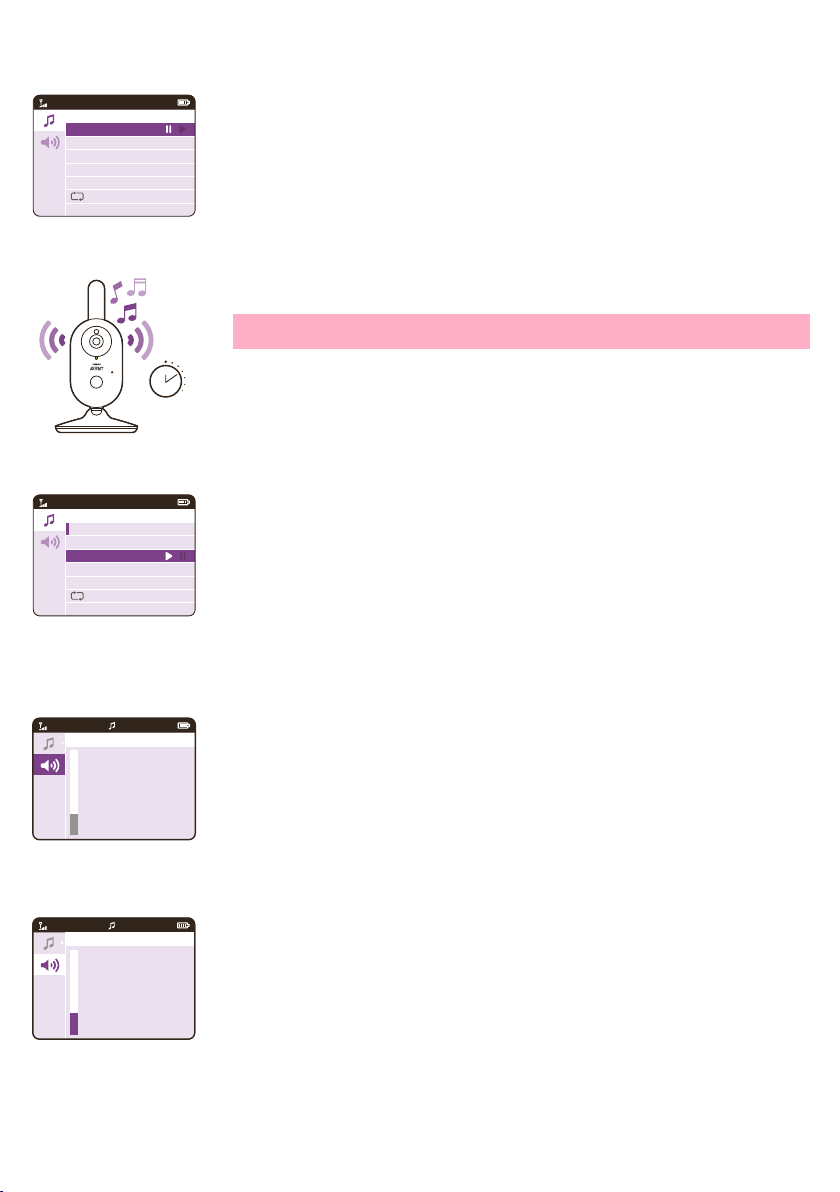
1 Pressione o botão de canções de ninar na unidade dos pais para abrir o
menu de canções de ninar.
Observação: Se selecionar o botão de canções de ninar com o menu de
canções de ninar já aberto, irá fechar o menu.
2 Pressione a parte direita do botão de controle para acessar à lista de
canções de ninar
3 Pressione a parte superior ou inferior do botão de controle para
percorrer a lista de canções de ninar.
Page 41
Lullaby Songs
1 Rock-a-Bye Baby
2 Twinkle, Twinkle
3 Hush, Little Baby
4 Brahm’s Lullaby
5 Golden Slumbers
15 min
Lullaby Songs
1 Rock-a-Bye Baby
2 Twinkle, Twinkle
3 Hush, Little Baby
4 Brahm’s Lullaby
5 Golden Slumbers
20°C
1
Lullaby Volume
VIDEO
20°C
1
Lullaby Volume
VIDEO
Português do Brasil
4 Pressione a parte direita do botão de controle para reproduzir uma
canção de ninar específica.
Se pretender colocar a canção de ninar em pausa, pressione novamente
o lado direito do botão de controle.
5 A barra de statusda unidade dos pais apresenta o número de canções
de ninar queserão reproduzidas e repetidas.
A canção de ninar é reproduzida na unidade do bebê e é repetida
continuamente durante, aproximadamente, 15 minutos.
Dica: Para repetir todas as canções disponíveis, selecione a última opção
na lista.
6 Para selecionar outra canção de ninar, desloque o botão de controle
para cima ou para baixo com obotão de controle para selecionar outra
canção na lista.Pressione a parte direita do botão de controle para
reproduzir a canção selecionada.
7 Para parar a canção de ninar, pressione o botão de canções de ninar na
unidade dos pais e coloque em pausa a canção que está atualmente
sendo reproduzida, pressionando a parte direita do botão de controle
mais uma vez.
41
Volume da canção de ninar
1 Pressione o botão de canção de ninar e, em seguida, pressione a parte
inferior do botão de controle para selecionar as opções de volume do
menu decanção de ninar. Pressione a parte direita do botão de controle
para acessar os níveis de volume da canção de ninar.
2 Pressione a parte superior ou inferior do botão de controle para ajustar o
volume.
Page 42
15 min
42
Português do Brasil
Talk-back
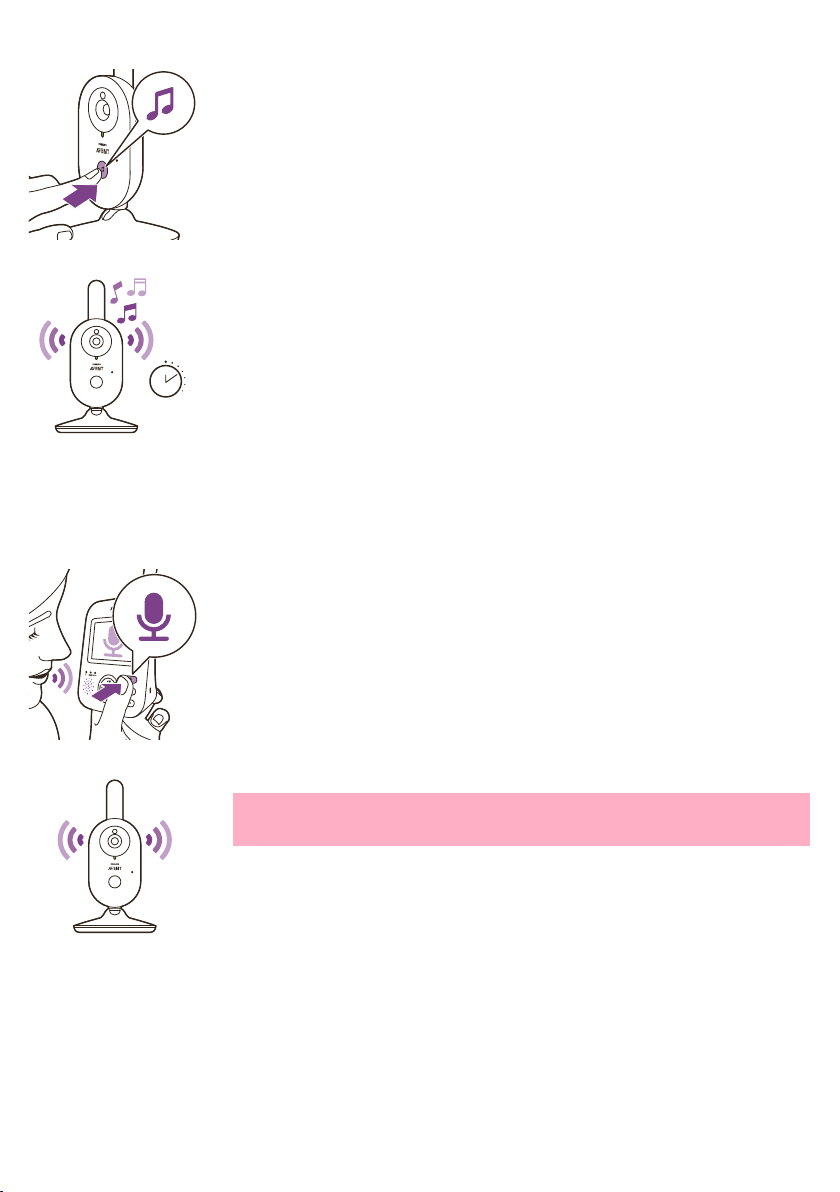
Para ativar a funcionalidade de canções de ninar na unidade do bebê,
pressione o botão ligar/desligar canções de ninar na unidade do bebê.
A canção de ninar mais recente selecionada na unidade dos pais é
reproduzida na unidade do bebê e é repetida continuamente durante,
aproximadamente, 15 minutos.
Para parar a canção de ninar na unidade do bebê, pressione o botão
ligar/desligar canções de ninar na unidade do bebê.
É possível utilizar o botão da função de conversa na unidade dos pais para
conversar com o bebê.
1 Mantenha pressionado o botão da função de conversa na unidade dos
pais.
2 Fale de forma clara para o microfonena parte frontal da unidade dos
pais a uma distância de 15 a 30 cm.
Enquanto o botão da função de conversa for pressionado, haverá uma
conexão de som aberta para a unidade do bebê. O visor da unidade dos
pais apresenta o ícone da função de conversa, indicando a conexão
ativa.
Sensibilidade
3 Solte o botão da função de conversa quanto tiver terminado de falar.
Observação: Enquanto o botão da função de conversa for pressionado, não
será possível àunidade dos paisprocessar os sons provenientes da
unidade do bebê.
O nível de sensibilidade da unidade do bebê define o que você ouve na
unidade dos pais. Quando o nível definido é alto, ouvem-se muitos sons,
incluindo pequenos sons de fundo. Quando o nível de sensibilidade é baixo,
só se ouvem os sons mais altos.
Page 43
20°C
1
20°C
1
20°C
1
Português do Brasil
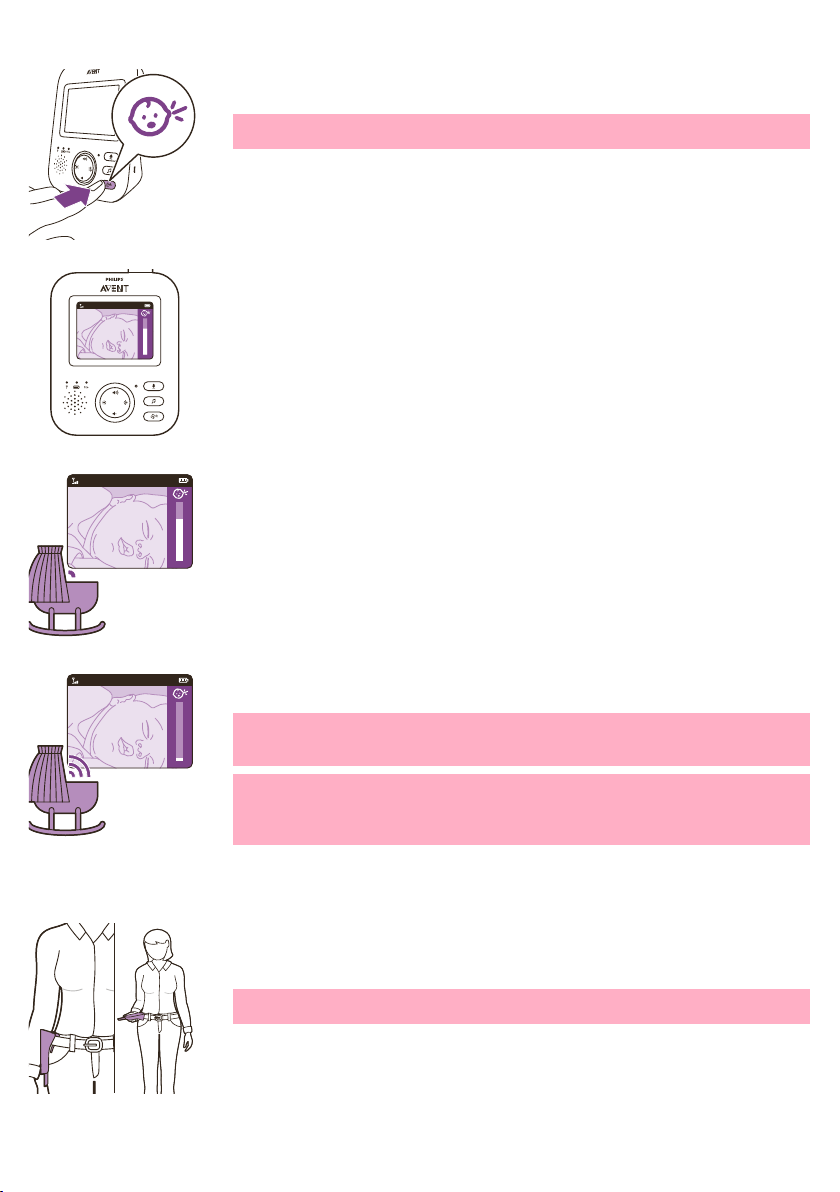
1 Pressione o botão de sensibilidade para acessar os níveis de
sensibilidade.
Observação: Ao pressionar novamente o botão de sensibilidade, você vai
deixar o menu.
2 Pressione a parte superior ou inferior do botão de controle para
selecionar o nível de sensibilidade pretendido.
Se o bebê fizer apenas pequenos barulhos, a sensibilidade da unidade do
bebê terá que ser definida para um nível de sensibilidade mais alto na
unidade dos pais.
43
Quanto mais altos forem os barulhos feitos pelo bebê, menor será a
definição do nível de sensibilidade na unidade dos pais.
Observação: No modo ÁUDIO e VÍDEO, você terá som contínuo quando o
nível de sensibilidade estiver no "muito alto". Caso contrário, sons baixos
ficarão mudos.
Dica: É possível ajustar o nível de sensibilidade para que ouça sempre o
bebê sem perturbações de outros sons. Se existir muito ruído de fundo,
reduza a sensibilidade para não ouvir esses sons através da unidade dos
pais.
Suporte para cinto
É possível transportar a unidade dos pais dentro e fora de casa, fixando-a
ao cinto ou cós da roupa com o suporte para cinto. Desta forma, poderá
monitorar o bebê enquanto se movimenta.
Observação: o visor está agora voltado ao contrário, o que permite ver o
bebê na tela, levantando simplesmente a unidade dos pais.
Page 44
44
Português do Brasil
Limpeza e manutenção
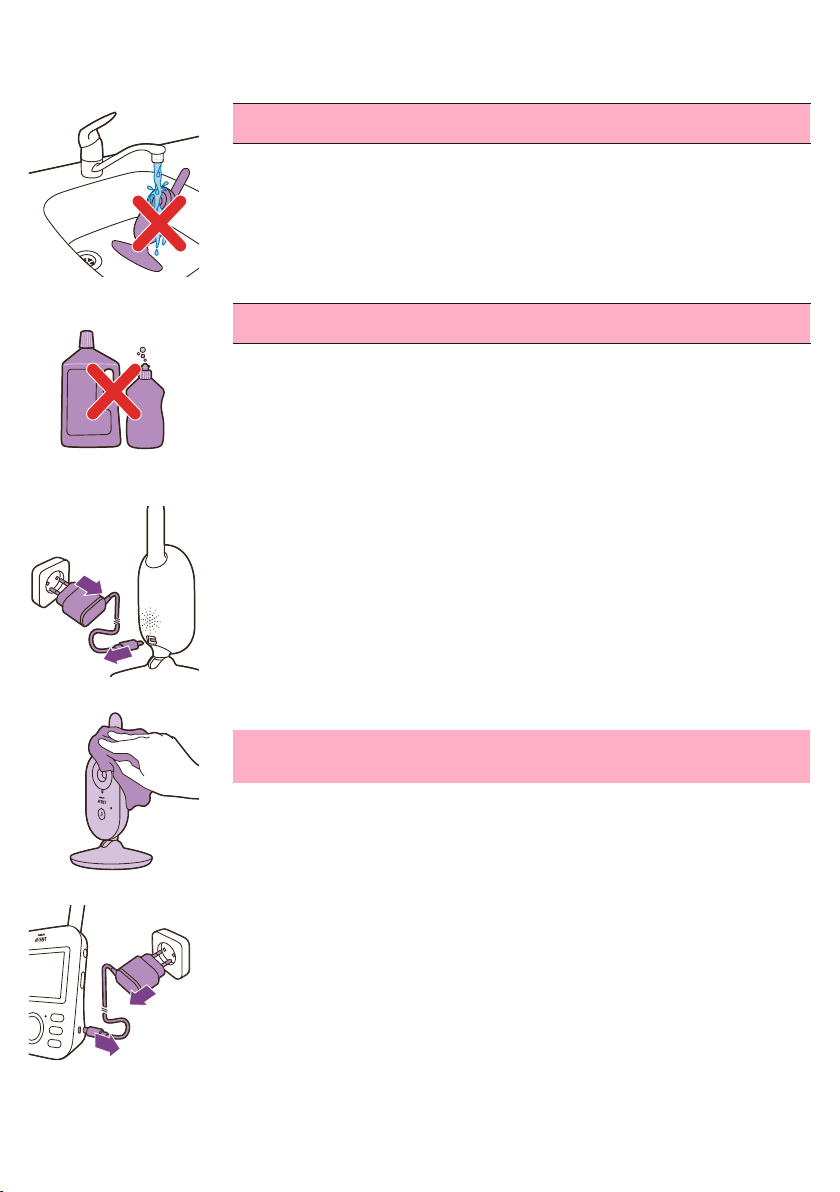
Advertência: Não mergulhe a unidade dos pais e a unidade do
bebê em água e não as lave à torneira.
Advertência: Não utilize sprays de limpeza ou produtos de
limpeza líquidos.
1 Desligue a unidade do bebê, retire o adaptador de corrente desta
unidade e retire-o da tomada elétrica.
2 Limpe a unidade do bebê com um pano seco.
Observação: Marcas de dedos ou sujeiras na lente da unidade do bebê
poderão afetar o desempenho da câmera. Evite tocar na lente com os
dedos.
3 Desligue a unidade dos pais, remova o adaptador da tomada elétrica da
unidade dos pais e remova o adaptador da tomada da parede.
Page 45
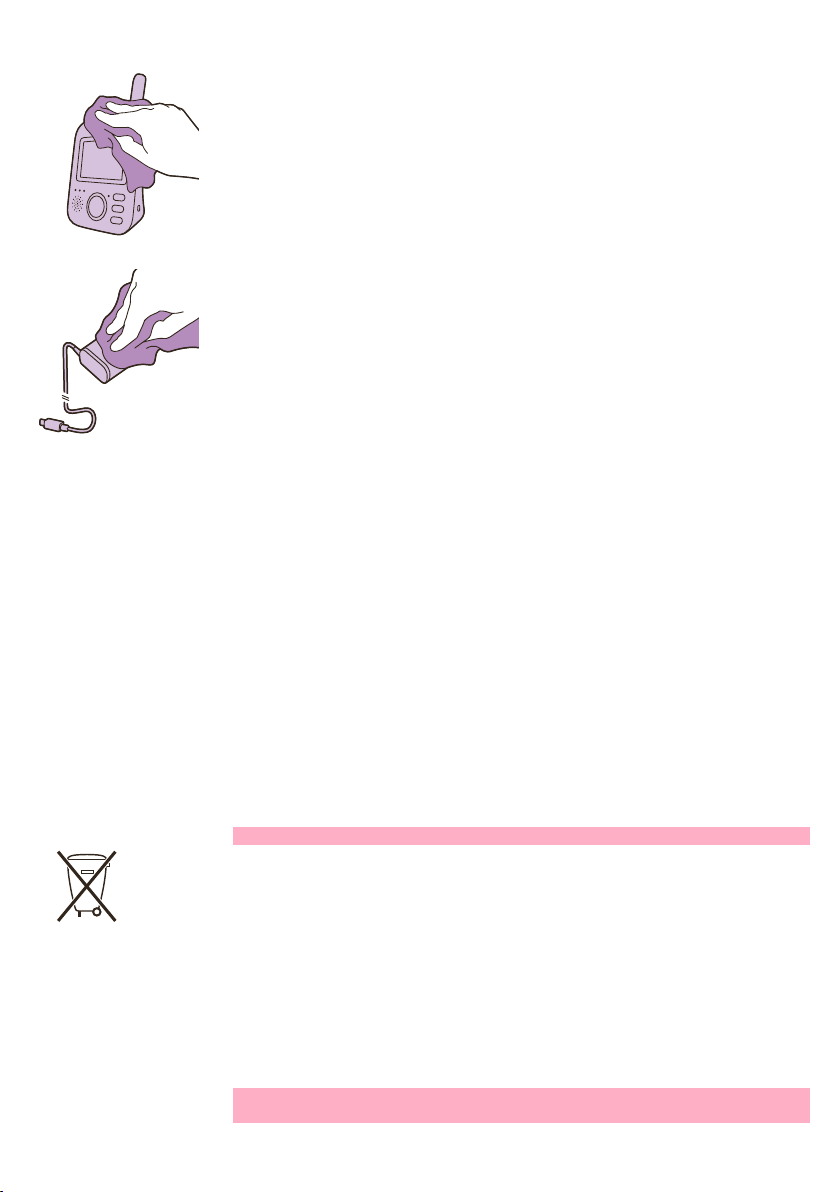
4 Limpe a unidade dos pais com um pano seco.
5 Limpe os adaptadores com um pano seco.
Armazenamento
Quando não pretender utilizar a babá eletrônica durante um longo período
de tempo, guarde a unidade dos pais e os adaptadores num local fresco e
seco.
Português do Brasil
45
Encomendar acessórios
Para comprar acessórios ou peças avulsas, visite www.philips.com/partsand-accessories ou vá até seu revendedor da Philips. Você também pode
entrar em contato com a Centro de Informações ao Consumidor Philips
(veja o folheto de garantia internacional para obter detalhes de contato).
Reciclagem
ADVERTÊNCIA: Cuidados com a utilização e descarte de pilhas e baterias.
Não descarte as pilhas e baterias juntamente ao lixo doméstico.
O descarte inadequado de pilhas e baterias pode representar riscos ao
meio ambiente e à saúde humana.
Para contribuir com a qualidade ambiental e com sua saúde, a Philips
receberá pilhas e baterias comercializadas ou fornecidas com seus
produtos após seu fim de vida, que serão encaminhadas à destinação
ambientalmente correta. A Philips dispõe de pontos de coleta em
Assistências Técnicas.
Remoção da bateria recarregável
Nota: Recomenda-se que a bateria recarregável seja removida por um
profissional.
Page 46

46
Português do Brasil
Só remova a bateria recarregável ao descartar o aparelho. Verifique se a
bateria está totalmente descarregada antes de removê-la. Apenas a
unidade dos pais contêm bateria.
Procedimento:
1 Retire os 2 pés de borracha na parte inferior da unidade dos pais.
2 Retire os 2 parafusos que ficaram visíveis na parte inferior da unidade
dos pais.
3 Coloque a antena na posição vertical e retire o parafuso que ficou visível
na parte posterior da caixa.
4 Separe a parte posterior da caixa da parte frontal inserindo uma chave
de fendas entre elas.
5 Desligue o cabo conetor da bateria (cabo preto-branco-vermelho).
6 Retire os 4 parafusos do suporte da bateria.
7 Remova a bateria.
Garantia e suporte
Caso você precise obter informações ou suporte, visite o site
www.philips.com/support ou leia o folheto de garantia internacional.
Perguntas mais frequentes
Este capítulo resume os problemas mais comuns que pode ter com o
aparelho. Se não conseguir resolver o problema com as informações
fornecidas a seguir, visite www.philips.com.br/suporte para consultar uma
lista de perguntas frequentes ou contacte o Centro de Apoio ao Cliente no
seu país.
COMO USAR/CONECTAR AS UNIDADES
Pergunta Resposta
Por que a luz indicadora
de energia da unidade
do bebê não acende
depois que ligo a
unidade?
Por que a unidade dos
pais não carrega
quando a conecto à
rede elétrica?
Por que a unidade do
bebê não carrega
quando a conecto à
rede elétrica?
Talvez a unidade do bebê não está conectado ao sistema elétrico com fio.
Conecte a unidade do bebê ao sistema elétrico com fio. Em seguida,
pressione o botão liga/desliga da unidade do bebê na posição superior
para a posição ON (LIGADO) para estabelecer conexão com a unidade dos
pais.
Talvez o adaptador não esteja conectado à tomada. Certifique-se de que o
adaptador esteja conectado corretamente à tomada elétrica.
A unidade dos pais talvez já esteja totalmente carregada. A luz de status da
bateria ficará verdade quando a bateria estiver totalmente carregada e o
dispositivo estiver conectado à rede elétrica.
A unidade do bebê não possui função de carregamento. A unidade do
bebê só funciona quando estáconectada àrede elétrica.
Page 47

COMO USAR/CONECTAR AS UNIDADES
Português do Brasil
47
Por que não posso
estabelecer uma
conexão?
Por que a conexão se
perde de vez em
quando?
Por que há interrupções
de som?
O que acontece em
caso de
faltadeenergia?
Por que o tempo de
carregamento da
unidade dos pais pode
ser superior a3 horas?
Por que eu preciso
manter a unidade do
bebê e seu cabo a pelo
menos 1 metro/3,5 pés
de distância do meu
bebê?
A unidade do bebê e a unidade dos pais provavelmente estão próximas
aos limites máximos da faixa operacional ou há interferência de
dispositivos sem fio de 2,4 GHz. Tente um local diferente, diminua a
distância entre as unidades ou desligue outros dispositivos sem fio de 2,4
GHz (laptops, celulares, microondas, etc). Isso pode levar até 10 segundos
antes da conexão entre as unidades ser reestabelecida.
Se o sinal for perdido, então a unidade dos pais emitirá um bipe (3 bipes
rápidos a cada 20 segundos).
A unidade do bebê e a unidade dos pais podem estar muito próximas uma
da outra. Mantenha-as pelo menos 1,5 metro/5 pés de distância uma da
outra para evitar interferência.
Como a unidade dos pais funciona com uma bateria recarregável, ela
continua funcionando se a bateria estiver carregada o suficiente. No
entanto, a unidade do bebê para de funcionar porque ela não tem baterias
recarregáveis e só funciona na rede elétrica. A unidade dos pais emitirá um
bipe para indicar que a conexão com a unidade do bebê foi perdida.
Quando a rede elétrica é restaurada, a conexão entre a unidade dos pais e
a unidade do bebê será automaticamente estabelecida.
A unidade dos pais talvez esteja ligada durante o carregamento. Desligue-a
durante o carregamento para reduzir o tempo. Quando a tela da unidade
dos pais estiver constantemente ligada, o carregamento da unidade dos
pais poderá levar mais tempo.
Para evitar estrangulamento com o cabo e para uma detecção ideal de
som, sempre coloque a unidade do bebê e seu fio a pelo menos 1
metro/3,5 pés de distância do bebê.
Qual é a diferença entre
os diversos modos de
usuário na unidade dos
pais: Vídeo, Áudio, VOX
e ECO?
Consulte a lista abaixo para obter uma explicação dos modos disponíveis
no monitor do bebê.
* Modo de vídeo: a tela e o som da unidade dos pais estão sempre ligadas.
* Modo de áudio: somente o áudio será ativado. A tela da unidade dos pais
desliga quando o modo de ÁUDIO está ativado. A luz de conexão mostra
que a unidade dos pais ainda está acesa e conectada à unidade do bebê.
Toda a correspondência normal com a unidade do bebê será possível por
meio dos botões retorno de chamada, canção de ninar e sensibilidade.
Page 48

48
Português do Brasil
COMO USAR/CONECTAR AS UNIDADES
* Modo VOX: a tela e o som da unidade dos pais desligará se não houver
nenhum som detectado por 20 segundos (ou sem som suficiente acima da
configuração de sensibilidade). Tanto a tela quanto o som serão ativados
imediatamente quando o bebê chorar e o limite de sensibilidade for
ultrapassado. Quando o som ficar abaixo do limite, o vídeo permanecerá
ativo por 20 segundos. Quando um dos botões de controle for pressionado
(brilho ou volume), o dispositivo deverá exibir o vídeo por
aproximadamente 5 segundos. Também estará acessível o menu de canção
de ninar.
* Modo ECO: a tela e o som da unidade dos pais desligará quando não
houver nenhum som detectado por 20 segundos. O Modo Eco reduz o
consumo de energia durante os momentos de silêncio ao mantê-lo
conectado ao bebê. No modo ECO, a luz ECO LED fica verde, e o
dispositivo operará em um modo de conexão diferente. No modo ECO, a
unidade dos pais usa um mecanismo de ping de 2 segundos para verificar a
conexão com a unidade do bebê em vez de uma conexão de frequência de
rádio contínua. Portanto, a Unidade do bebê também consumirá menos
energia no modo ECO.
Como eu posso
redefinir a unidade dos
pais?
Você pode redefinir a unidade dos pais pressionando simultaneamente o
"botão liga/desliga" e o "botão de navegação" circular na parte frontal da
unidade dos pais por aproximadamente 1 segundo. A unidade dos pais
desligará. Para ligar a unidade dos pais novamente, pressione o "botão
liga/desliga". Informações do usuário específicas armazenadas na memória
da unidade dos pais como modo do usuário, configurações de brilho,
volume, seleção de canção de ninar, seleção de zoom e configurações de
vibração serão perdidas.
INDICAÇÕES NA UNIDADE DOS PAIS
Pergunta Resposta
O LED da bateria na
unidade dos pais fica
vermelho. O que devo
fazer?
Por que a unidade dos
pais emite um bipe?
A bateria tem pouca carga. Se não ligar a unidade dos pais à corrente
elétrica quando o LED ficar vermelho e começar a emitir um sinal sonoro, a
unidade dos pais deixará de funcionar após cerca de 60 minutos.
Reduza o brilho e/ou o volume para poupar bateria e ligue a unidade dos
pais à corrente elétrica com o adaptador de corrente. (Consulte o capítulo
"Preparando para a utilização").
A babá eletrônica emite um sinal sonoro diferente consoante o problema
detectado.
1 sinal sonoro: a unidade dos pais está desligada.
1 sinal sonoro a cada 20 segundos durante os primeiros 3 minutos e, depois
disso, a cada minuto: a unidade dos pais tem pouca bateria.
3 breves sinais sonoros a cada 20 segundos: perdeu-se a conexão entre a
unidade dos pais e a unidade do bebê. O ícone de conexão aparece na tela
da unidade dos pais e o botão de conexão fica vermelho.
Page 49

INDICAÇÕES NA UNIDADE DOS PAIS
Português do Brasil
49
O que significa a cor do
LED da bateria (verde,
laranja, vermelho) ou
um LED da bateria
apagado?
Quando a unidade dos pais está ligada à corrente elétrica, a cor da luz da
bateria é:
*Verde: a bateria está totalmente carregada.
*Laranja: a bateria está carregando.
Quando a unidade dos pais não está ligada à corrente elétrica, a cor da luz
da bateria é:
*Vermelha: a bateria está quase vazia (<10%).
*LED apagado: a unidade dos pais não está ligada à corrente elétrica.
RUÍDO/SOM
Pergunta Resposta
Por que é que a
unidade dos paise/ou
do bebê produz um
ruído muito estridente?
Como posso desativar o
som?
Por que razão não ouço
qualquer som?Por que
razão não ouço o meu
bebê chorar?
A unidade dos pais e a unidade do bebê poderão estar muito próximas
uma da outra. Certifique-se de que a unidade dos pais e a unidade do
bebê se encontram, no mínimo, a uma distância de 2,5 metros uma da
outra.
O volume da unidade dos pais pode estar muito alto. Diminua o volume da
unidade dos pais.
Para saber as causas de um sinal sonoro emitido pela unidade dos pais,
consulte a pergunta frequente "Por que razão a unidade dos pais emite um
bip?"
Desative o som do dispositivo ao pressionar a parte inferior do botão de
controle. Se a barra de volume na tela estiver completamente vazia,
significa que não há som.
O volume da unidade dos pais pode estar muito baixo ou estar desligado.
Pressione parte superior do botão de controle para aumentar o nível de
volume.
Por que razão a
unidade dos pais reage
muito depressa a outros
sons do bebê?
A unidade dos pais poderá ter o som desativado. Ative o som do
dispositivo ao pressionar a parte superior do botão de controle e ajuste o
volume.
O nível de sensibilidade definido é muito baixo. Ajuste-o para um nível mais
elevado no menu da unidade dos pais.
A unidade do bebê poderá estar muito afastada do bebê. Certifique-se de
que a unidade do bebê não está a mais de 1,5 metro de distância do bebê,
para uma detecção de som otimizada. O perigo de estrangulamento
aumenta se a distância for inferior a 1 metro.
A unidade do bebê também capta outros sons além dos do bebê. Coloque
a unidade do bebê mais próxima do bebê (mas respeite a distância mínima
de 1 metro).
Page 50

50
Português do Brasil
RUÍDO/SOM
A definição do nível de sensibilidade poderá ser muito alta. Quando o bebê
faz pequenos barulhos, a sensibilidade tem de ser superior. Contudo,
quanto mais altos forem os barulhos feitos pelo bebê, menor deverá ser a
definição do nível de sensibilidade. É possível alterar a sensibilidade da
babá eletrônica no menu da unidade dos pais.
Por que é que a
unidade dos pais
produz um sinal sonoro?
Durante quanto tempo
é reproduzida a canção
de ninar na unidade do
bebê?
Como posso aumentar
o volume da canção de
ninar?
Poderão ocorrer interferências se a unidade dos pais estiver estar fora de
alcance da unidade do bebê. Poderão também ocorrer interferências se
existirem várias paredes ou tetos entre a unidade dos pais e a unidade do
bebê ou se estiverem ligados outros dispositivos sem fios de 2,4 GHz (por
exemplo, micro-ondas, roteadores Wi-Fi, etc.).
Coloque a unidade dos pais em um local diferente, mais próximo da
unidade do bebê, ou desligue outros dispositivos sem fios.
Se esta resposta não ajudar, consulte a outra pergunta frequente "Por que
é que a unidade dos pais e/ou do bebê produz um ruído muito estridente?"
Quando seleciona uma canção de ninar, esta é reproduzida continuamente
durante cerca de 15 minutos. Se quiser reproduzir todas as canções
disponíveis, selecione a última opção na lista de canções de ninar.
Você pode ajustar o volume da canção de ninar na unidade dos pais, não
na unidade do bebê. Pressione o botão de canções de ninar na unidade
dos pais para abrir o menu de canções de ninar e ajustar o volume.
TEMPO/ALCANCE DE FUNCIONAMENTO
Pergunta Resposta
Por que razão a babá
eletrônica alcança uma
distância muito inferior
à especificada no
manual do usuário?
O alcance de funcionamento especificado de 300 metros é apenas válido
no exterior, em espaço aberto e na linha de visão. Dependendo do
ambiente e de outros fatores de interferência, o alcance de funcionamento
pode ser inferior (consulte também a tabela no capítulo sobre a colocação
da unidade dos pais e a do bebê).
Dentro de casa, o alcance de funcionamento é de até 50 metros, sendo
também limitado pelo número e o tipo de paredes e/ou tetos entre a
unidade dos pais e a unidade do bebê.
O tempo de
funcionamento da
unidade dos pais
deverá ser de
até10horas. Por que
razão o tempo de
funcionamento da
minha unidade dos pais
é inferior?
O brilho do vídeo da unidade dos pais pode estar muito alto, o que faz com
que a unidade consuma muita energia. Diminua o brilho da unidade dos
pais.
A unidade dos pais consome muita energia quando o visor de vídeo está
constantemente ligado. Ative os modos AUDIO (Áudio), VOX (Voz) ou ECO
no menu da unidade dos pais para aumentar o tempo de funcionamento
(consulte o capítulo "Funcionalidades", seções "Modo AUDIO (Áudio)",
"Modo VOX (Voz)" ou "Modo ECO").
Page 51

TEMPO/ALCANCE DE FUNCIONAMENTO
O VOLUME da unidade dos pais pode estar muito alto, o que faz com que a
unidade consuma muita energia. Diminua o volume da unidade dos pais.
Como acontece com qualquer dispositivo eletrônico recarregável, a
capacidade da bateria diminui após um longo período de utilização.
VISOR DE VÍDEO
Pergunta Resposta
Por que a unidade dos
pais apresenta
interferência? Por que
razão o visor de vídeo
da unidade dos pais
cintila?
Poderão ocorrer interferências se a unidade dos pais estiver estar fora de
alcance da unidade do bebê. Poderão também ocorrer interferências se
existirem várias paredes ou tetos entre a unidade dos pais e a unidade do
bebê ou se estiverem ligados outros dispositivos sem fios de 2,4 GHz (por
exemplo, micro-ondas, roteadores Wi-Fi, etc.).
Coloque a unidade dos pais em um local diferente, mais próximo da
unidade do bebê, ou desligue outros dispositivos sem fios.
Talvez a bateria recarregável da unidade dos pais precise ser carregada.
Português do Brasil
51
Por que razão não
existe qualquer imagem
no visor de vídeo,
embora a luz
deconexão esteja
verde?
Por que a imagem na
tela não está nítida?
A unidade dos pais poderá estar nos modos AUDIO (Áudio), VOX (Voz) ou
ECO. Pressione o botão de modo no lado direito da unidade dos pais para
mudar os modos (consulte 'Modos').
O brilho do visor poderá estar muito baixo. Aumente o brilho do visor na
unidade dos pais através do botão de controle no centro.
Talvez a lente da unidade do bebê esteja suja. Limpe a lente com um pano
seco.
A unidade do bebê poderá estar muito afastada do bebê. Certifique-se de
que a unidade do bebê não está a mais de 1,5 metro de distância do bebê
para obter uma qualidade de vídeo otimizada. O perigo de
estrangulamento aumenta se a distância for inferior a 1 metro.
Page 52
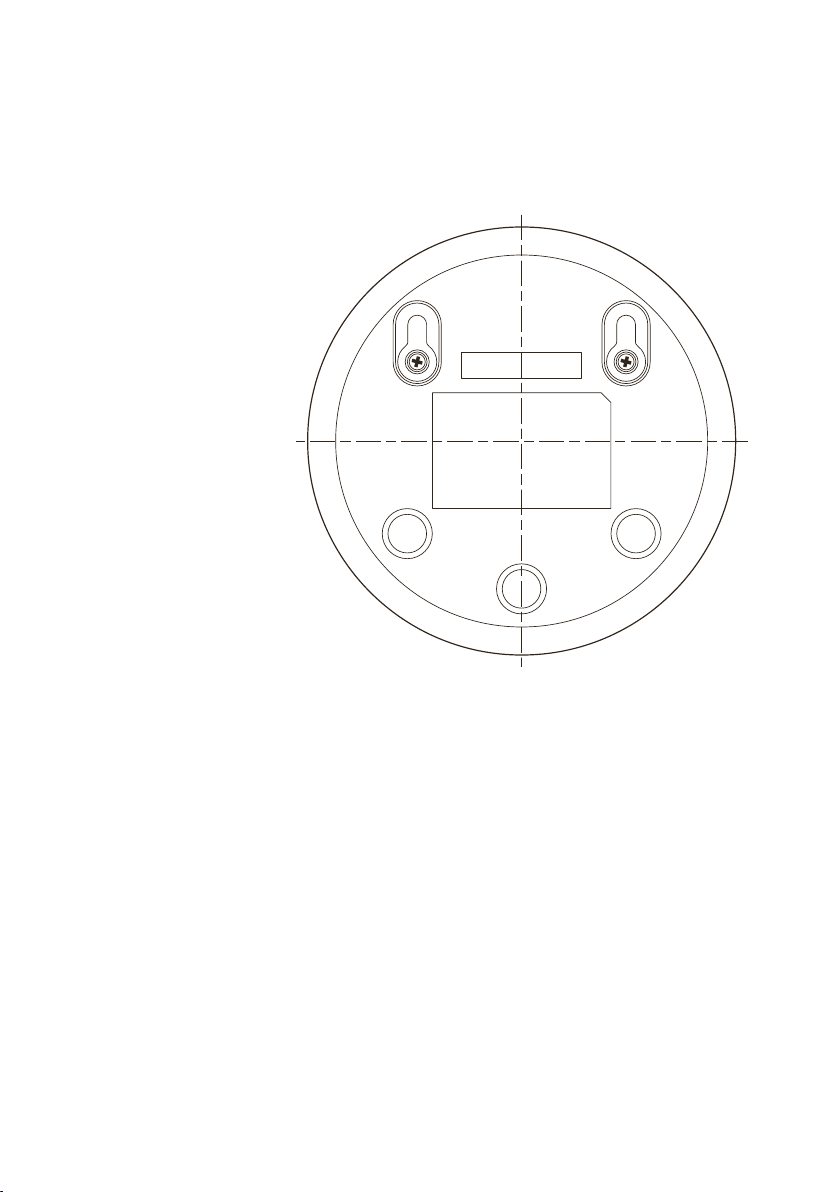
52
Português do Brasil
Montagem na parede
Instruções de impressão:
Imprima esta página na escala de 100% e utilize o modelo para marcar a
posição exata dos orifícios para os parafusos na parede.
Page 53

www.philips.com/avent
Philips Consumer Lifestyle BV
Tussendiepen 4, 9206 AD Drachten, the Netherlands/ Países Baixos
© 2019 Koninklijke Philips N.V.
All rights reserved. / Todos os direitos reservados
4213.354.3894.4 (23/9/2019)
>75 % recycled paper
>75 % papier recyclé
 Loading...