

Philips REMstar Pro C-Flex+, Respironics REMstar Pro C-Flex+ User Manual
REMstar Pro C-Flex+
USER MANUAL

© 2012 Koninklijke Philips Electronics N.V. All rights reserved.

1User Manual
Table of Contents
Intended Use ........................................................................................................................................................... 2
Important ................................................................................................................................................................. 2
Warnings ..................................................................................................................................................................2
Cautions ................................................................................................................................................................... 3
Contraindications .................................................................................................................................................. 3
Symbol Key .............................................................................................................................................................. 4
System Contents .................................................................................................................................................... 5
System Overview ................................................................................................................................................... 5
Control Buttons ..................................................................................................................................................... 6
Available Therapies ................................................................................................................................................6
Available Flex Comfort Features ........................................................................................................................6
Installing the Air Filters .........................................................................................................................................7
Connecting the Breathing Circuit ......................................................................................................................7
Where to Place the Device ................................................................................................................................. 7
Supplying AC Power to the Device .................................................................................................................... 7
Navigating the Device Screens ............................................................................................................................ 8
Starting the Device ................................................................................................................................................ 8
Ramp Feature ..........................................................................................................................................................9
Humidier Preheat ................................................................................................................................................9
Flex Screen .............................................................................................................................................................. 9
Setup Screen .........................................................................................................................................................10
Info Screen .............................................................................................................................................................11
Device Alerts ........................................................................................................................................................13
Troubleshooting ...................................................................................................................................................16
Accessories ...........................................................................................................................................................17
Traveling with the System ..................................................................................................................................18
Cleaning the Device ............................................................................................................................................18
Cleaning or Replacing the Filters .....................................................................................................................18
Cleaning the Tubing ..............................................................................................................................................18
Service ....................................................................................................................................................................18
Specications ........................................................................................................................................................19
Disposal ..................................................................................................................................................................21
How to Contact Philips Respironics ...............................................................................................................21
EMC Information .................................................................................................................................................22
Limited Warranty ................................................................................................................................... Back Page

2 User Manual
CAUTION: U. S. federal law restricts this device to sale by or on the order of a physician.
Intended Use
The Philips Respironics REMstar Pro C-Flex+ system delivers positive airway pressure therapy for the treatment of Obstructive
Sleep Apnea in spontaneously breathing patients weighing over 30kg (66 lbs). It is for use in the home or hospital/institutional
environment.
Important
The device is to be used only on the instruction of a licensed physician. Your home care provider will make the correct pressure
settings according to your health care professional’s prescription.
Several accessories are available to make your OSA treatment with the REMstar Pro C-Flex+ system as convenient and comfortable
as possible. To ensure that you receive the safe, effective therapy prescribed for you, use only Philips Respironics accessories.
Warnings
A warning indicates the possibility of injury to the user or the operator.
• This manual serves as a reference. The instructions in this manual are not intended to supersede the health care professional’s
instructions regarding the use of the device.
• The operator should read and understand this entire manual before using the device.
• This device is not intended for life support.
• The device should be used only with masks and connectors recommended by Philips Respironics or with those recommended
by the health care professional or respiratory therapist. A mask should not be used unless the device is turned on and operating
properly. The exhalation port(s) associated with the mask should never be blocked. Explanation of the Warning: The device
is intended to be used with special masks or connectors that have exhalation ports to allow continuous ow of air out of the
mask. When the device is turned on and functioning properly, new air from the device ushes the exhaled air out through the
mask exhalation port. However, when the device is not operating, enough fresh air will not be provided through the mask, and
exhaled air may be rebreathed.
• If you are using a full face mask (a mask covering both your mouth and your nose), the mask must be equipped with a safety
(entrainment) valve.
• When using oxygen with this system, the oxygen supply must comply with local regulations for medical oxygen.
• Oxygen supports combustion. Oxygen should not be used while smoking or in the presence of an open ame.
• When using oxygen with this system, turn the device on before turning on the oxygen. Turn the oxygen off before turning the
device off. This will prevent oxygen accumulation in the device. Explanation of the Warning: When the device is not in
operation and the oxygen ow is left on, oxygen delivered into the tubing may accumulate within the device’s enclosure. Oxygen
accumulated in the device enclosure will create a risk of re.
• When using oxygen with this system, a Philips Respironics Pressure Valve must be placed in-line with the patient circuit between
the device and the oxygen source. The pressure valve helps prevent the backow of oxygen from the patient circuit into the
device when the unit is off. Failure to use the pressure valve could result in a re hazard.
• Do not connect the device to an unregulated or high pressure oxygen source.
• Do not use the device in the presence of a ammable anaesthetic mixture in combination with oxygen or air, or in the presence
of nitrous oxide.
• Do not use the device near a source of toxic or harmful vapors.
• Do not use this device if the room temperature is warmer than 35° C (95° F). If the device is used at room temperatures warmer
than 35° C (95° F), the temperature of the airow may exceed 43° C (109° F). This could cause irritation or injury to your
airway.
• Do not operate the device in direct sunlight or near a heating appliance because these conditions can increase the temperature of
the air coming out of the device.
• Contact your health care professional if symptoms of sleep apnea recur.
• If you notice any unexplained changes in the performance of this device, if it is making unusual or harsh sounds, if it has been
dropped or mishandled, if water is spilled into the enclosure, or if the enclosure is broken, disconnect the power cord and
discontinue use. Contact your home care provider.
• Repairs and adjustments must be performed by Philips Respironics-authorized service personnel only. Unauthorized service could
cause injury, invalidate the warranty, or result in costly damage.
• Periodically inspect electrical cords and cables for damage or signs of wear. Discontinue use and replace if damaged.
• To avoid electrical shock, always unplug the power cord from the wall outlet before cleaning the device. DO NOT immerse the
device in any uids.

3User Manual
• If the device is used by multiple persons (such as rental devices), a low-resistance, main ow bacteria lter should be installed in-
line between the device and the circuit tubing to prevent contamination.
• Be sure to route the power cord to the outlet in a way that will prevent the cord from being tripped over or interfered with by
chairs or other furniture.
• This device is activated when the power cord is connected.
• For safe operation when using a humidier, the humidier must always be positioned below the breathing circuit connection at
the mask and the air outlet on the device. The humidier must be level for proper operation.
Note: Please see the “Limited Warranty” section of this manual for information on warranty coverage.
Cautions
A Caution indicates the possibility of damage to the device.
• Medical electrical equipment needs special precautions regarding EMC and needs to be installed according to EMC information.
Contact your home care provider regarding EMC installation information.
• Mobile RF communications equipment can affect medical electrical equipment.
• Pins of connectors marked with the ESD warning symbol shall not be touched and connections shall not be made without
special precautions. Precautionary procedures include methods to prevent build-up of electrostatic charge (e.g., air conditioning,
humidication, conductive oor coverings, non-synthetic clothing), discharging one’s body to the frame of the equipment or
system or to earth. It is recommended that all individuals that will handle this device understand these precautionary procedures
at a minimum as part of their training.
• Before operating the device, ensure that the SD card cover is replaced whenever any of the accessories such as the Link Module
or Modem are not installed. Refer to the instructions that came with your accessory.
• Condensation may damage the device. If this device has been exposed to either very hot or very cold temperatures, allow it to
adjust to room temperature (operating temperature) before starting therapy. Do not operate the device outside of the operating
temperature range shown in the Specications.
• Do not use extension cords with this device.
• Do not place the device directly onto carpet, fabric, or other ammable materials.
• Do not place the device in or on any container that can collect or hold water.
• A properly installed, undamaged reusable foam inlet lter is required for proper operation.
• Tobacco smoke may cause tar build-up within the device, which may result in the device malfunctioning.
• Dirty inlet lters may cause high operating temperatures that may affect device performance. Regularly examine the inlet lters as
needed for integrity and cleanliness.
• Never install a wet lter into the device. You must ensure sufcient drying time for the cleaned lter.
• Always ensure that the DC power cord securely ts into your therapy device prior to use. Contact your home care provider or
Philips Respironics to determine if you have the appropriate DC cord for your specic therapy device.
• When DC power is obtained from a vehicle battery, the device should not be used while the vehicle’s engine is running. Damage
to the device may occur.
• Only use a Philips Respironics DC Power Cord and Battery Adapter Cable. Use of any other system may cause damage to the
device.
Contraindications
When assessing the relative risks and benets of using this equipment, the clinician should understand that this device can deliver
pressures up to 20 cm H2O. In the event of certain fault conditions, a maximum pressure of 30 cm H2O is possible. Studies have
shown that the following pre-existing conditions may contraindicate the use of CPAP therapy for some patients:
• Bullous Lung Disease
• Pathologically Low Blood Pressure
• Bypassed Upper Airway
• Pneumothorax
• Pneumocephalus has been reported in a patient using nasal Continuous Positive Airway Pressure. Caution should be used when
prescribing CPAP for susceptible patients such as those with: cerebral spinal uid (CSF) leaks, abnormalities of the cribriform
plate, prior history of head trauma, and/or pneumocephalus. (Chest 1989; 96:1425-1426)
The use of positive airway pressure therapy may be temporarily contraindicated if you exhibit signs of a sinus or middle ear
infection. Not for use with patients whose upper airways are bypassed. Contact your health care professional if you have any
questions concerning your therapy.
4 User Manual
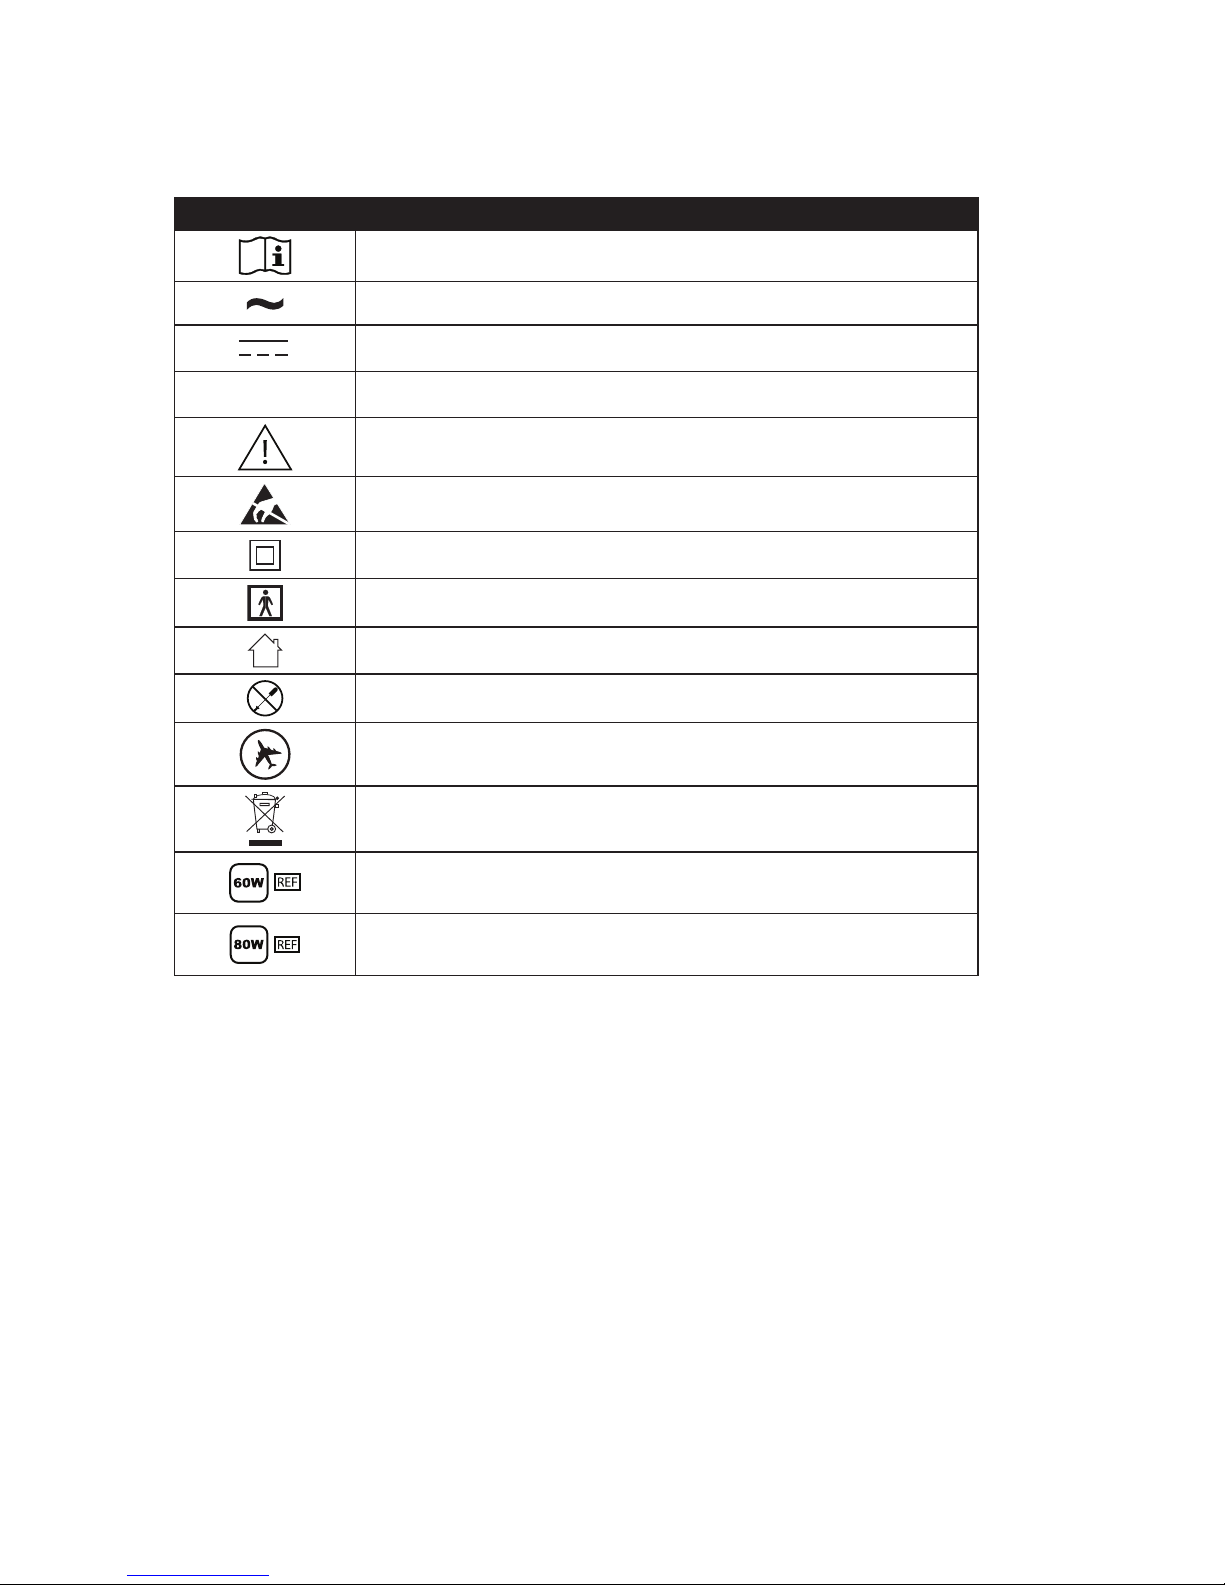
Symbol Key
The following symbols may appear on the device and power supply:
Sy m b o l De fi ni t io n
Consult accompanying instructions for use.
AC Power
DC Power
IP22
Drip Proof Equipment
Caution, consult accompanying documents.
ESD Warning symbol
Class II (Double Insulated)
Type BF Applied Part
For Indoor Use Only.
Do not disassemble.
For Airline Use. Complies with RTCA/DO-160F section 21, category M.
Separate collection for electrical and electronic equipment per EC Directive
2002/96/EC.
Use only with the standard 60W power supply 1091398.
(not for use with Heated Tubing)
Use only with the Heated Tubing compatible 80W power supply 1091399.
(can also be used when Heated Tubing is not in use)
5User Manual
System Contents
Your REMstar Pro C-Flex+ system may include the following items:
• Device • SD card
• User manual • Side cover panel
• Carrying case • Reusable gray foam lter
• Flexible tubing • Disposable ultra-ne lter (optional)
• Power cord • Humidier (optional)
• Power supply (60W 1091398, or 80W 1091399)
Note: If any of these items are missing, contact your home care provider.
System Overview
The REMstar Pro C-Flex+ is a CPAP (Continuous Positive Airway Pressure) device designed for the treatment of
Obstructive Sleep Apnea (OSA). CPAP maintains a constant level of pressure throughout the breathing cycle. If
your provider uses either the CPAP-Check or Auto-Trial modes, the device can also deliver CPAP therapy while
automatically adjusting the pressure level to meet the patient’s needs.
When prescribed for you, the device provides several special features to help make your therapy more comfortable.
The ramp function allows you to lower the pressure when you are trying to fall asleep. The air pressure will gradually
increase until your prescription pressure is reached. You also have the option of not using the ramp feature at all.
Additionally, the A-Flex (if using the Auto-Trial mode), C-Flex, and C-Flex+ comfort features provide you with
pressure relief when you exhale during therapy.
Several accessories are also available for use with your REMstar Pro C-Flex+ device. Contact your home care
provider to purchase any accessories not included with your system.
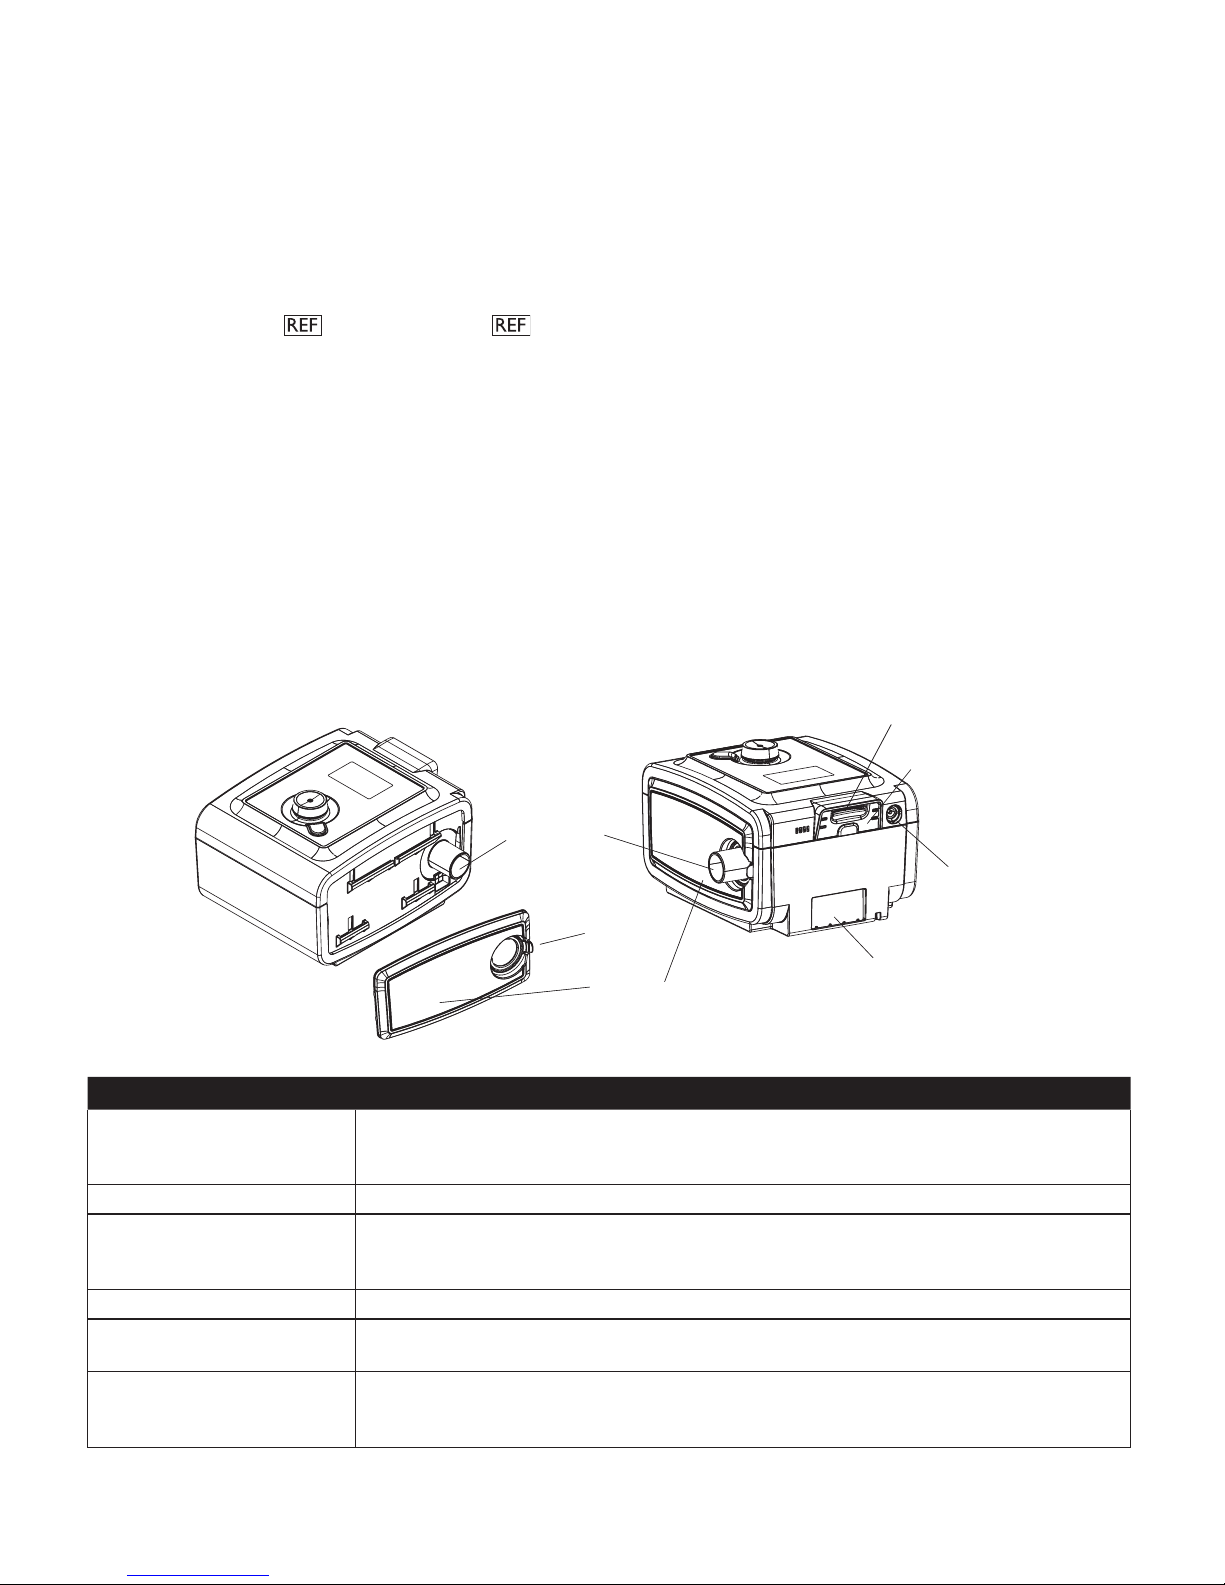
Air Outlet Port
Power Inlet
Filter Area
SD Card (Accessory) Slot
Side Cover
T a b
SD Card Cover
This gure illustrates some of the device features, described in the following table.
De v i c e fe a t u r e De S c r i p t i o n
Air Outlet Port
(conical, 22 mm)
Connect the 15 or 22 mm Philips Respironics exible tubing here.
Note: Heated Tubing should only be connected to the Air Outlet Port of the compatible
System One Heated Humidier and not to the Air Outlet Port of the therapy device.
SD Card (Accessory) Slot If applicable, insert the optional accessory SD card here.
SD Card Cover If applicable, the optional accessories such as a Link Module or Modem can be installed here.
Refer to the instructions supplied with the accessory. When not using an accessory, this
cover must be in place on the device.
Power Inlet Connect the power cord here.
Filter Area A reusable, gray foam lter must be placed in the lter area to screen out normal household dust and
pollens. A white ultra-ne lter can also be used for more complete ltration of very ne particles.
Side Cover If using a humidier with the device, this side cover can be easily removed with the release
tab before attaching the humidier. Refer to the humidier manual. When not using a
humidier, this cover must be in place on the device.
6 User Manual
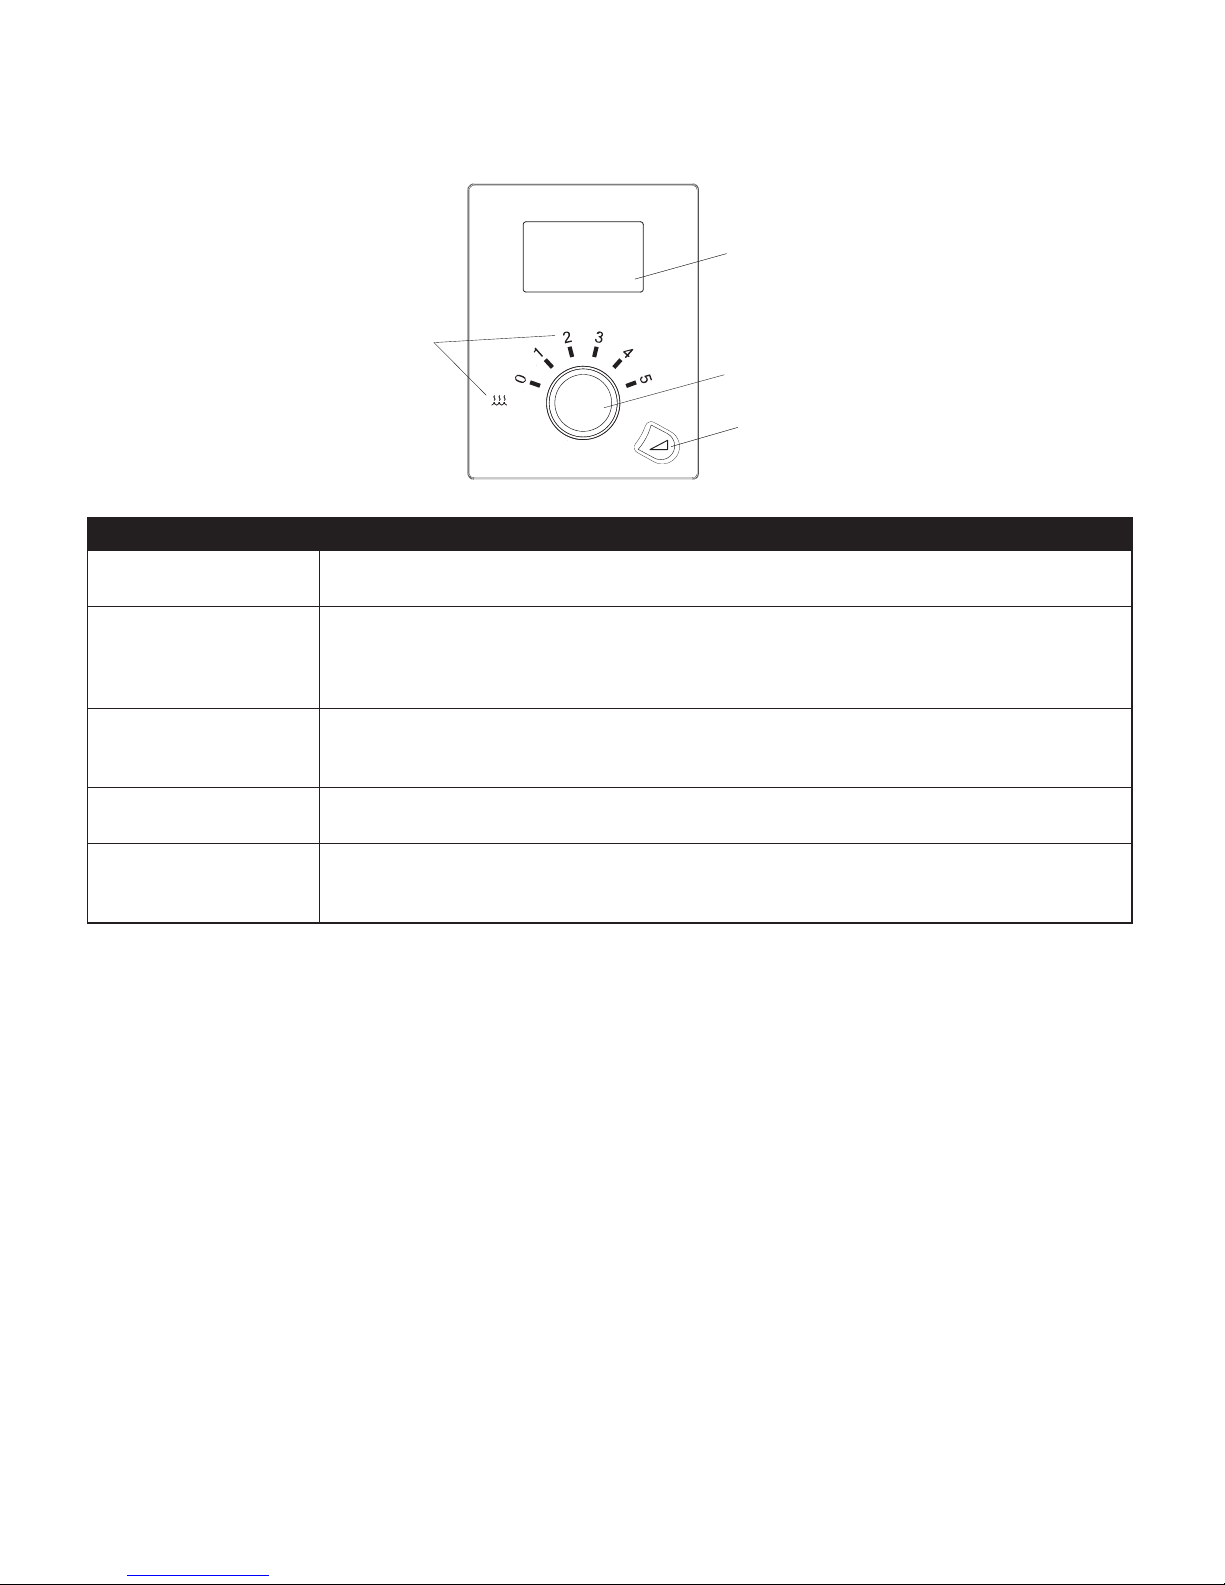
Control Buttons
LCD Display Screen
Ramp Button
Control Wheel/Push Button
Humidifier Icon &
Number Settings
This gure shows the primary control buttons on the device, described in the following table.
Fe a t u r e De s c r i p t i o n
Display Screen Shows therapy settings, patient data, and other messages. The startup screen is shown temporarily
when the unit is rst powered.
Humidier Icon This Icon lights up (different colors) when the optional humidier and/or heated tube is attached
and heat is being applied. White means classic humidication is selected. Blue means System One
humidication is selected. Orange means the heated tube is attached. Please refer to the humidier
user manual for more information.
Humidier Numbers The humidier number settings are only visible when the humidier is attached and therapy is active.
You can use the control wheel to change the number settings for the humidier. When the heated
tube is being used with the humidier, these numbers will control the heated tube setting.
Control Wheel/Push
Button
Turn the wheel to toggle between options on the screen. Press the wheel to choose an option.
Primary function is to turn airow on/off.
Ramp Button When the airow is on, this button allows you to activate or restart the ramp function. When
the airow is off, this button allows you to activate the Mask Fit Check. This button lights up when
therapy is active or during specic alerts.
Available Therapies
The REMstar Pro C-Flex+ device delivers the following therapies:
• CPAP – Delivers Continuous Positive Airway Pressure; CPAP maintains a constant level of pressure throughout the
breathing cycle.
• Auto-Trial – Delivers CPAP therapy while automatically adjusting the pressure level to meet your needs for a
specic number of days set by your physician. Your physician will set a pressure level range in which the device can
operate. Auto-Trial will typically be used if your physician is intending to eventually change you to CPAP-Check.
• CPAP-Check – Delivers CPAP therapy while automatically adjusting the pressure level to meet your needs similar
to Auto-Trial. Unlike Auto-Trial, the pressure level range is not adjustable by your physician.
Available Flex Comfort Features
The REMstar Pro C-Flex+ device offers the following optional Flex comfort features:
• C-Flex – Provides pressure relief upon exhalation to improve comfort based on your needs.
• A-Flex/C-Flex+ – Provides pressure relief taking place at the end of inhalation and at the start of exhalation to
improve comfort based on your needs. When providing Auto-Trial therapy, this comfort feature is called A-Flex.
When providing CPAP or CPAP-Check therapy, this comfort feature is called C-Flex+.

7User Manual
Installing the Air Filters
CAUTION: A properly installed, undamaged gray foam lter is required for proper operation.
The device uses a gray foam lter that is washable and reusable, and a white ultra-ne lter that is disposable. The
reusable lter screens out normal household dust and pollens, while the ultra-ne lter provides more complete
ltration of very ne particles. The gray reusable lter must be in place at all times when the device is operating. The
ultra-ne lter is recommended for people who are sensitive to tobacco smoke or other small particles.
The reusable gray foam lter is supplied with the device. A disposable ultra-ne lter may also be included. If your
lter is not already installed when you receive your device, you must at least install the reusable gray foam lter
before using the device. To install the lter(s):
1. If you are using the white disposable ultra-ne lter, insert it into the lter area rst, mesh-side facing in, towards the device.
2. Insert the required gray foam lter into the lter area after the ultra-ne lter.
Note: If you are not using the white disposable lter, simply insert the gray foam lter into the lter area.
Connecting the Breathing Circuit
To use the system, you will need the following accessories in order to assemble the recommended circuit:
• Philips Respironics interface (nasal mask or full face mask) with integrated exhalation port, or Philips Respironics
interface with a separate exhalation device (such as the Whisper Swivel II)
WARNING: If you are using a full face mask (a mask covering both your mouth and your nose), the mask must be
equipped with a safety (entrainment) valve.
• Philips Respironics 22 mm (or 15 mm) exible tubing, 1.83 m (6 ft.)
• Philips Respironics headgear (for the mask)
WARNING: If the device is used by multiple persons (such as rental devices), a low-resistance, main ow bacteria lter
should be installed in-line between the device and the circuit tubing to prevent contamination.
To connect your breathing circuit to the device, complete the following steps:
1. Connect the exible tubing to the air outlet on the side of the device.
Note: Make sure the Tubing type setting (15 or 22) matches the tubing you are using (Philips Respironics 15 or 22
mm tubing).
Note: Heated Tubing should only be connected to the Air Outlet Port of the compatible System One Heated
Humidier and not to the Air Outlet Port of the therapy device.
Note: If required, connect a bacteria lter to the device air outlet, and then connect the exible tubing to the
outlet of the bacteria lter.
Note: When using the bacteria lter, the device performance may be affected. However, the device will remain
functional and deliver therapy.
2. Connect the tubing to the mask. Refer to the instructions that came with your mask.
3. Attach the headgear to the mask if necessary. Refer to the instructions that came with your headgear.
Where to Place the Device
Place the device on a rm, at surface somewhere within easy reach of where you will use it at a level lower than your
sleeping position. Make sure the lter area on the back of the device is not blocked by bedding, curtains, or other items.
Air must ow freely around the device for the system to work properly. Make sure the device is away from any heating
or cooling equipment (e.g., forced air vents, radiators, air conditioners).
CAUTION: Do not place the device directly onto carpet, fabric, or other ammable materials.
CAUTION: Do not place the device in or on any container that can collect or hold water.
Supplying AC Power to the Device
CAUTION: Condensation may damage the device. If this device has been exposed to either very hot or very cold
temperatures, allow it to adjust to room temperature (operating temperature) before starting therapy. Do not
operate the device outside of the operating temperature range shown in the Specications.
WARNING: Be sure to route the power cord to the outlet in a way that will prevent the cord from being tripped
over or interfered with by chairs or other furniture.
WARNING: This device is activated when the power cord is connected.
IMPORTANT: If you are using your device with a humidier, refer to the instructions included with your
humidier for details on how to power the device and humidier.
 Loading...