

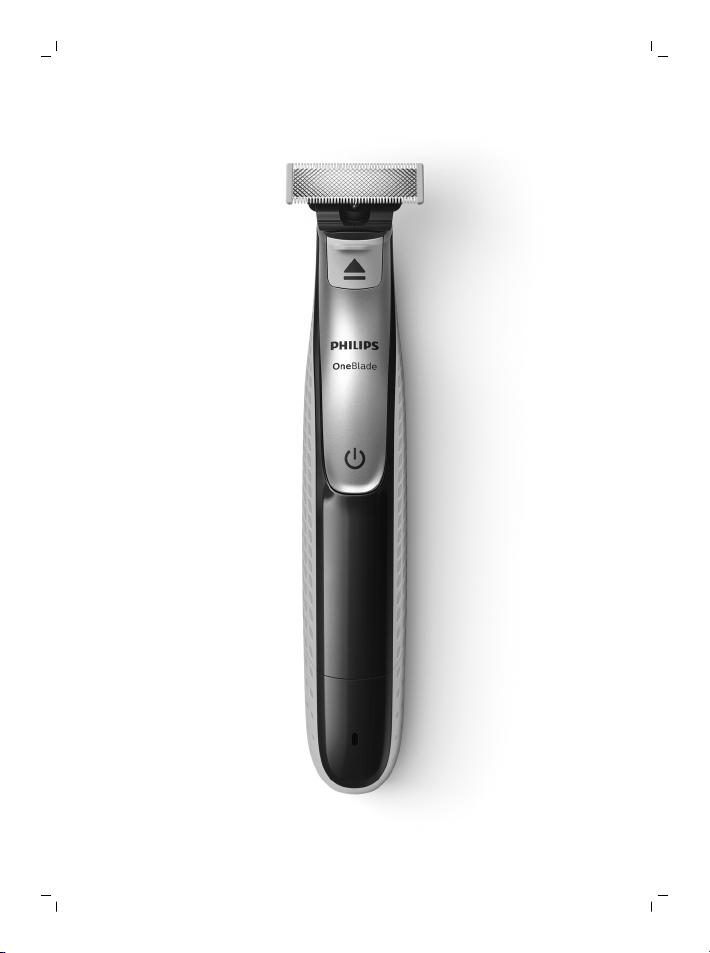
Philips QP2521, QP2522, QP2530, QP2531 User manual
QP2531, QP2530, QP2522, QP2521, QP2520
11
12
13
3
1
4
5
6
7
8
9
10
2

empty page before TOC

English 6
Čeština 23
Eesti 41
Hrvatski 59
Latviešu 77
Lietuviškai 95
Magyar 112
Polski 131
Română 150
Shqip 168
Slovenščina 184
Slovensky 202
Srpski 220
Български 236
Македонски 254
Русский 271
Українська 288
Қазақша 304

English
6
Introduction
Congratulations on your purchase and welcome to
Philips! To fully benefit from the support that
Philips offers, register your product at
www.philips.com/welcome.
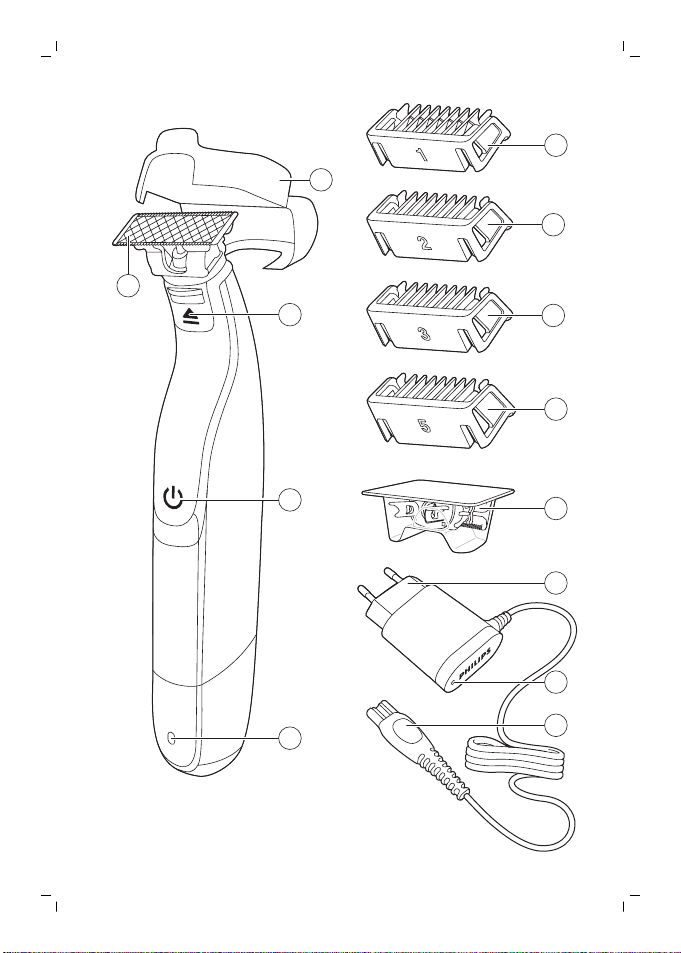
General description (Fig. 1)
1 Protection cap
2 Blade
3 Blade release slide
4 On/off button
5 Battery status indicator (QP2531, QP2530 only)
6 Small plug
7 Battery charge indicator (QP2522, QP2521,
QP2520 only)
8 Supply unit (QP2531, QP2530: adapter type
HQ850. QP2522, QP2521, QP2520: adapter type
A00390.)
9 Replacement blade (QP2531, QP2522 only)
10 Click-on stubble comb 5mm
11 Click-on stubble comb 3mm (QP2531, QP2530,
QP2520 only)
12 Click-on stubble comb 2mm (QP2531, QP2530
only)
13 Click- on stubble comb 1mm
Important safety information
Read this important information carefully before
you use the appliance and its accessories and
save it for future reference. The accessories
supplied may vary for different products.
English

Danger
Warning
English
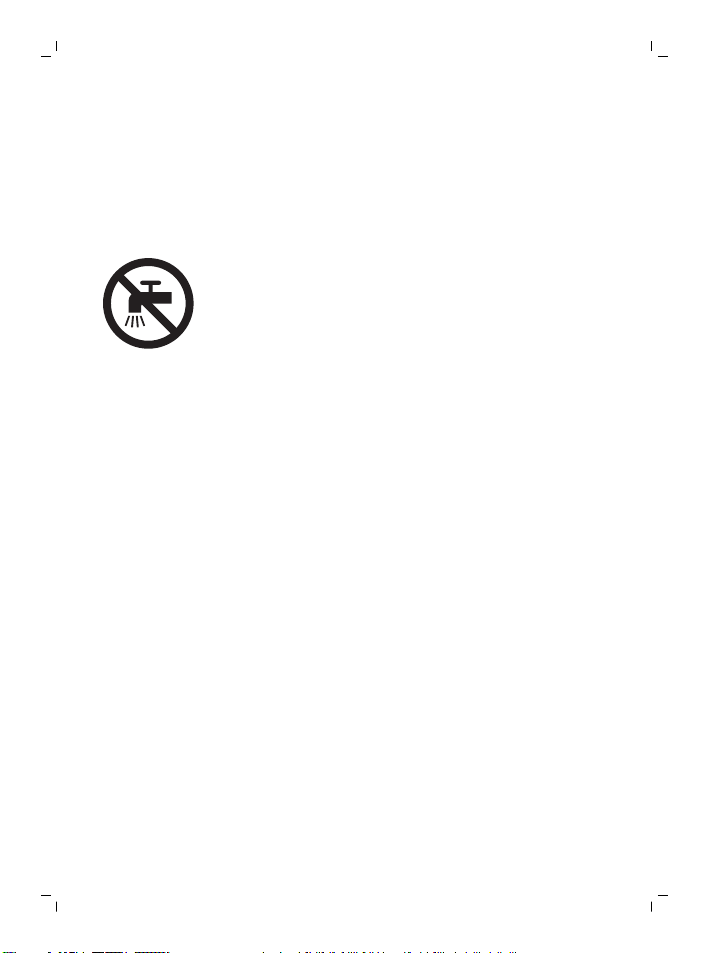
- Keep the supply unit dry.
- The supply unit contains a
transformer. Do not cut off the
supply unit to replace it with
another plug, as this causes a
hazardous situation.
- Only charge the appliance with
the supply unit provided.
7

8
English
- This appliance can be used by
children aged from 8 years and
above and persons with
reduced physical, sensory or
mental capabilities or lack of
experience and knowledge if
they have been given
supervision or instruction
concerning use of the
appliance in a safe way and
understand the hazards
involved. Children shall not play
with the appliance. Cleaning
and user maintenance shall not
be made by children without
supervision.
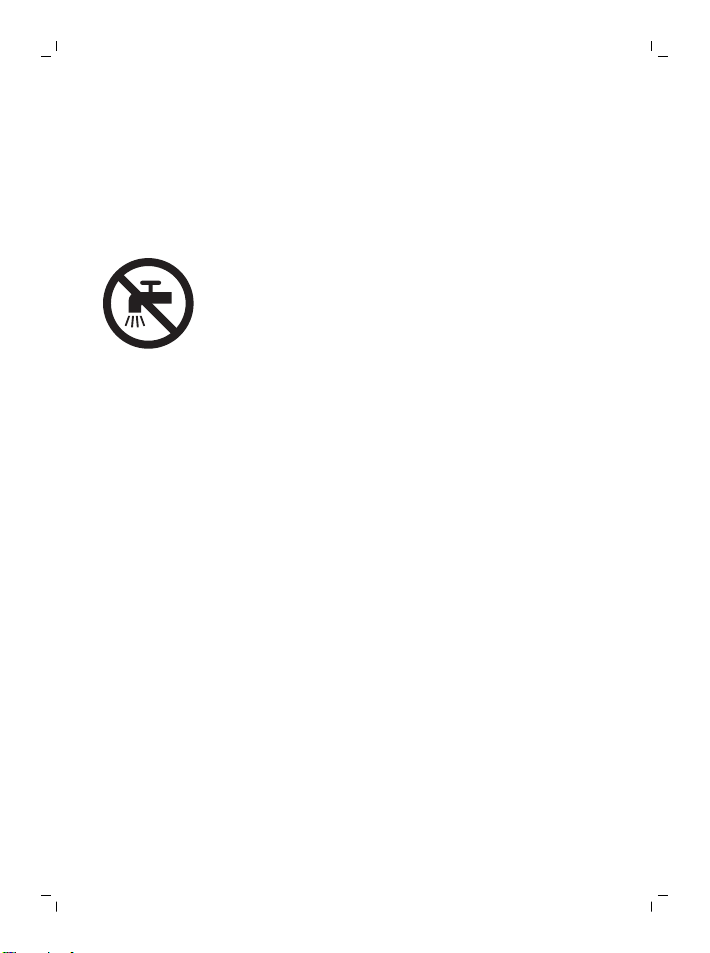
- Always unplug the appliance
before you clean it under the
tap.
- Always check the appliance
before you use it. Do not use
the appliance if it is damaged,
as this may cause injury. Always
replace a damaged part with
one of the original type.
Caution
English
- Do not open the appliance to
replace the rechargeable
battery.
- Never immerse the charging
stand in water and do not rinse
it under the tap.
- Never use water hotter than
80°C to rinse the appliance.
- Only use this appliance for its
intended purpose as shown in
the user manual.
- For hygienic reasons, the
appliance should only be used
by one person.
- Never use compressed air,
scouring pads, abrasive
cleaning agents or aggressive
liquids such as petrol or
acetone to clean the appliance.
- Do not use the supply unit in or
near wall sockets that contain
or have contained an electric air
freshener to prevent irreparable
damage to the supply unit.
9
English
10
Electromagnetic fields (EMF)
- This Philips appliance complies with all
applicable standards and regulations regarding
exposure to electromagnetic fields.
General
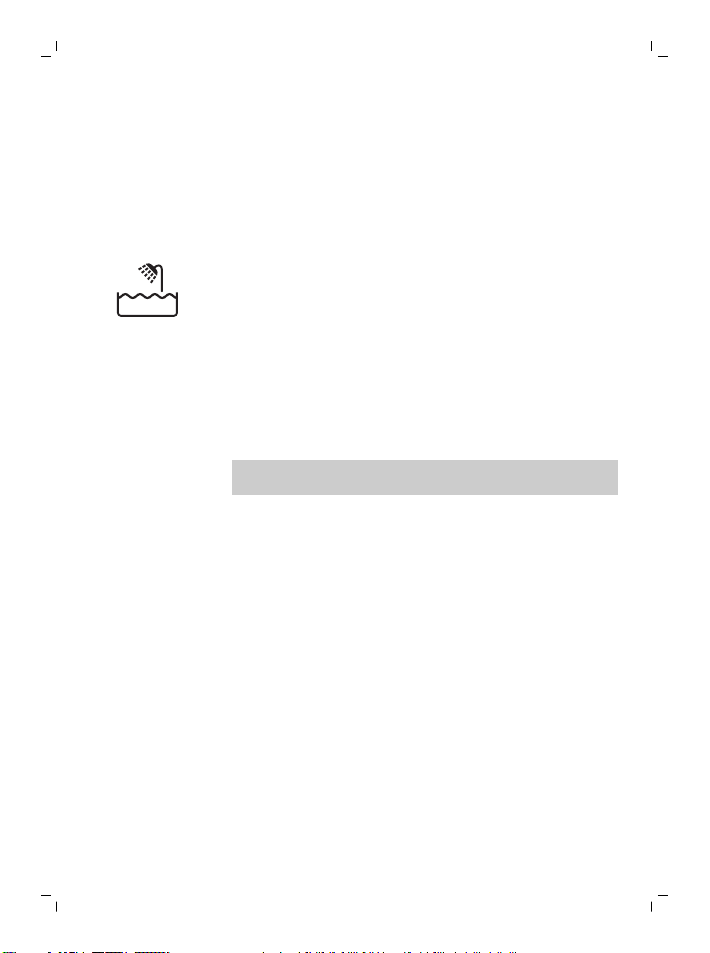
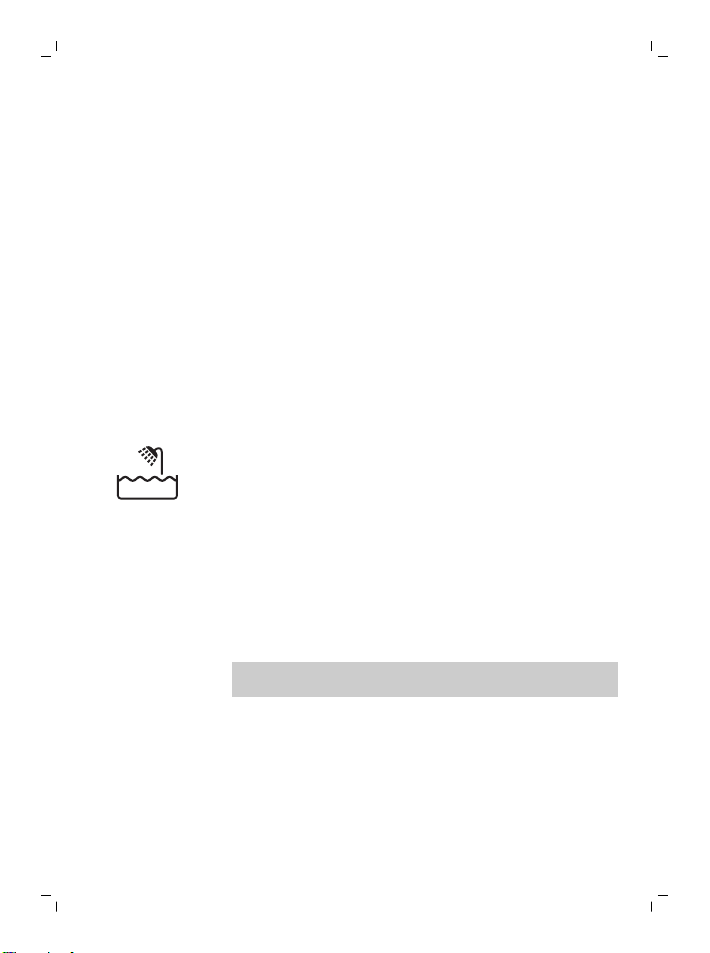
- This appliance is waterproof. It is suitable for
use in the bath or shower and for cleaning
under the tap. For safety reasons, the appliance
can therefore only be used without cord.
- The appliance is suitable for mains voltages
ranging from 100 to 240 volts.
- The supply unit transforms 100-240 volts to a
safe low voltage of less than 24 volts.
- Niveli maksimal i zhurmës: Lc = 75 dB(A).
Charging
Note: This appliance can only be used without
cord.
QP2531, QP2530: Charging normally takes approx.
4 hours.
QP2522, QP2521, QP2520: Charging normally takes
approx. 8 hours.
A fully charged appliance has an operating time of
up to 60 minutes (QP2531, QP2530) or 45 minutes
(QP2522, QP2521, QP2520).
Charge the appliance before you use it for the first
time and when the battery charge indicator
indicates that the battery is almost empty.
English
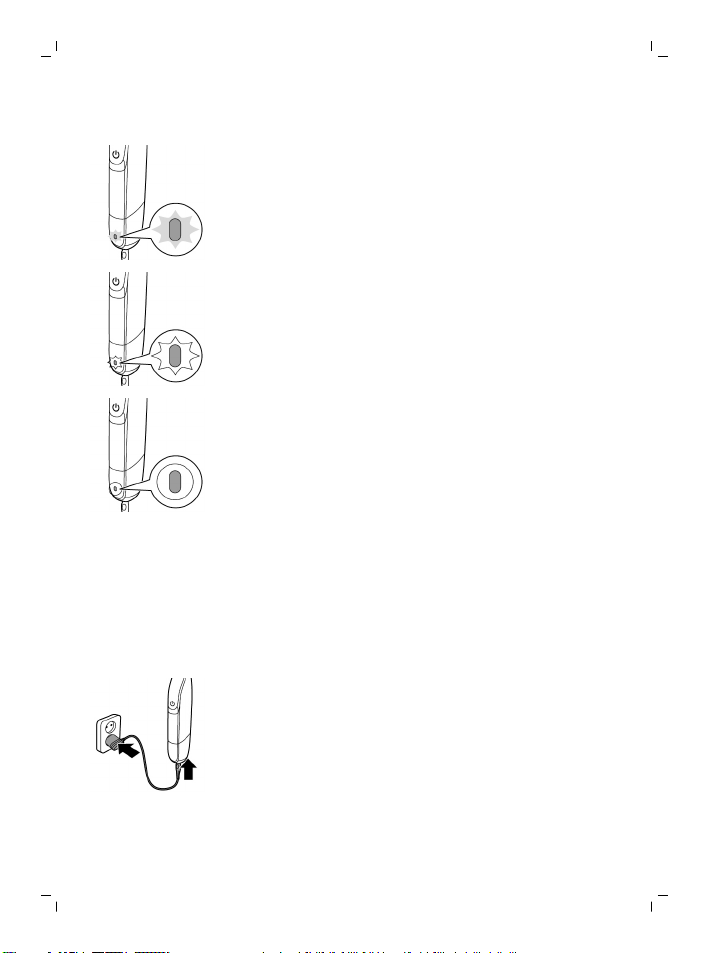
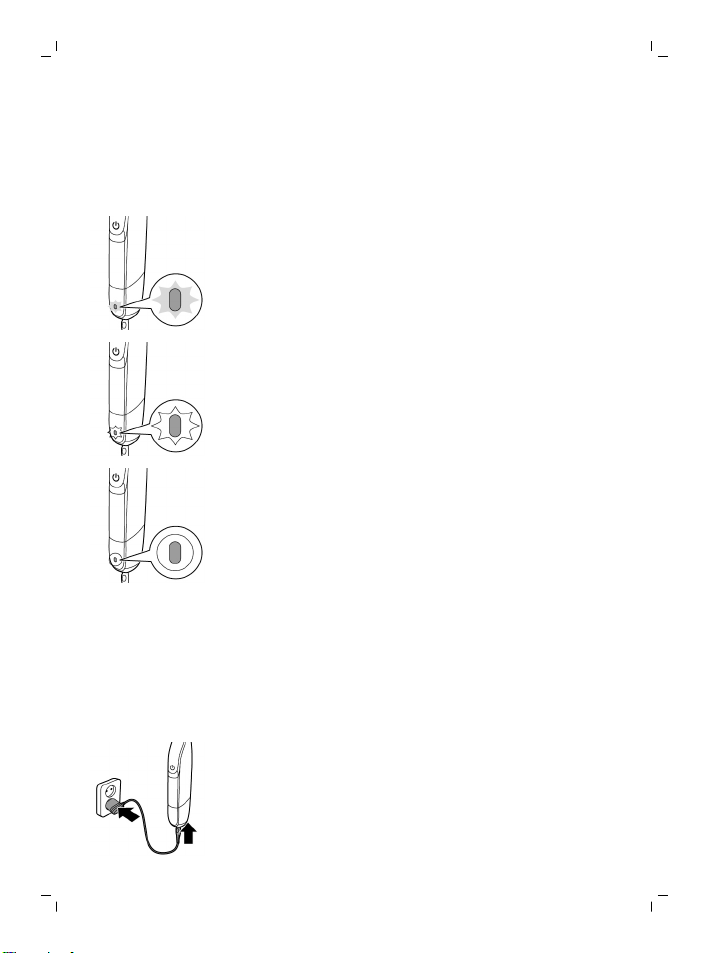
Battery status indicator QP2531, QP2530:
When the battery status indicator light flashes
orange, the battery is almost empty.
To indicate that the appliance is charging, the
battery status indicator light flashes green.
When the battery is fully charged, the battery
status light lights up green continuously.
Approx. 30 minutes after the battery is fully
charged or when you disconnect the appliance
from the mains, the light of the battery status
indicator switches off automatically.
Battery charge indicator QP2522, QP2521, QP2520:
The battery status is indicated by the performance
of the appliance. When the appliance starts
working more slowly, the battery is almost empty
and needs to be charged for optimal performance.
Charging with the adapter
1 Insert the small plug into the appliance and put
the adapter in the wall socket.
2 QP2522, QP2521, QP2520 only: The battery
charge indicator on the adapter lights up
continuously, when the appliance is connected
to the mains.
3 After charging, remove the adapter from the
wall socket and pull the small plug out of the
appliance.
11
English
12
Using the appliance
You can use the appliance to trim, edge or shave
facial hair (beard, moustache and sideburns).
Shave for a smooth result, trim to obtain a certain
length and edge to create perfect edges and sharp
lines. This appliance is not intended for shaving,
edging or trimming hairs on lower body parts or
scalp hair. Take your time when you first start to
use the appliance. You have to acquire practice
with the appliance.
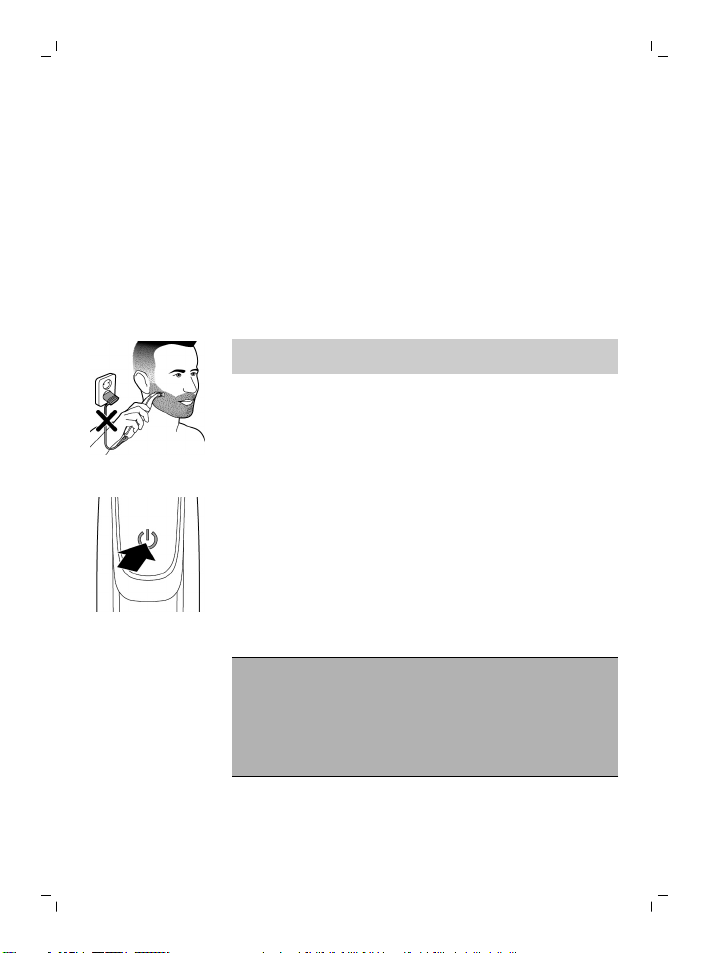
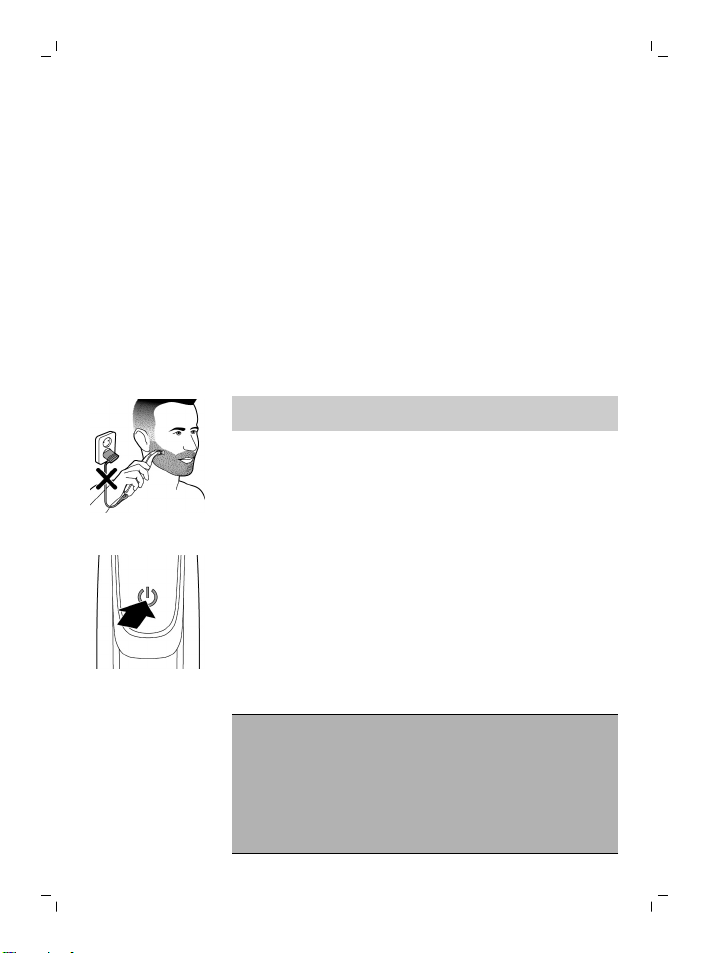
Note: This appliance can only be used without
cord.
Switching the appliance on and off
1 To switch on the appliance, press the on/off
button once.
2 To switch off the appliance, press the on/off
button once.
Shaving
Warning: Before you use the appliance,
always check the blade for damage or
wear. If the blade is damaged or worn, do
not use the appliance, as injury may occur.
Replace a damaged blade before you use
the appliance (see chapter ‘Replacement’).
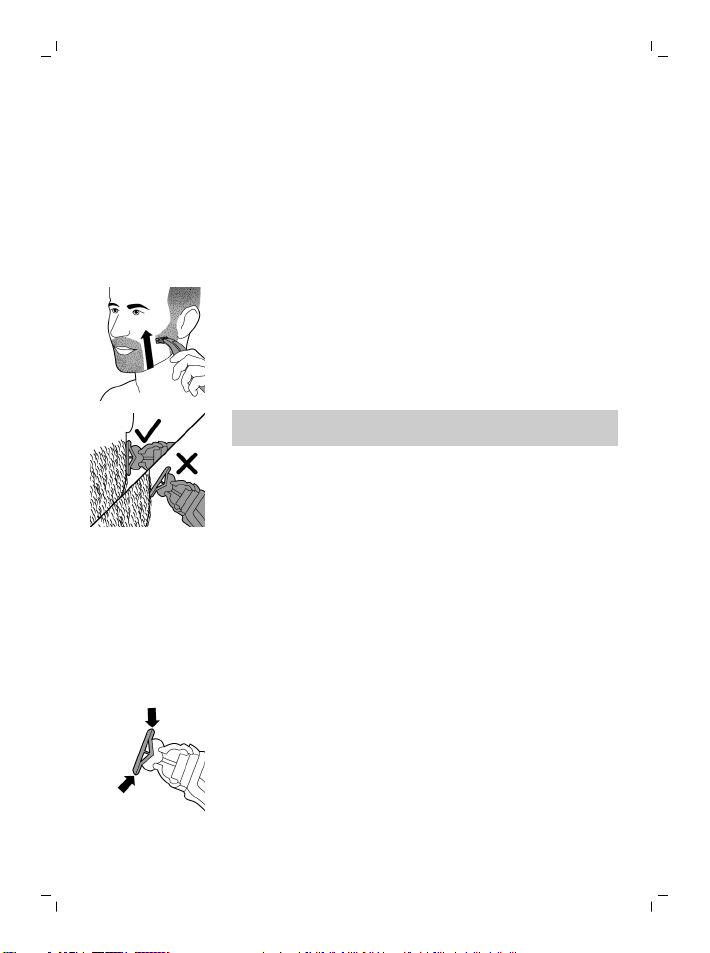
Shaving tips and tricks
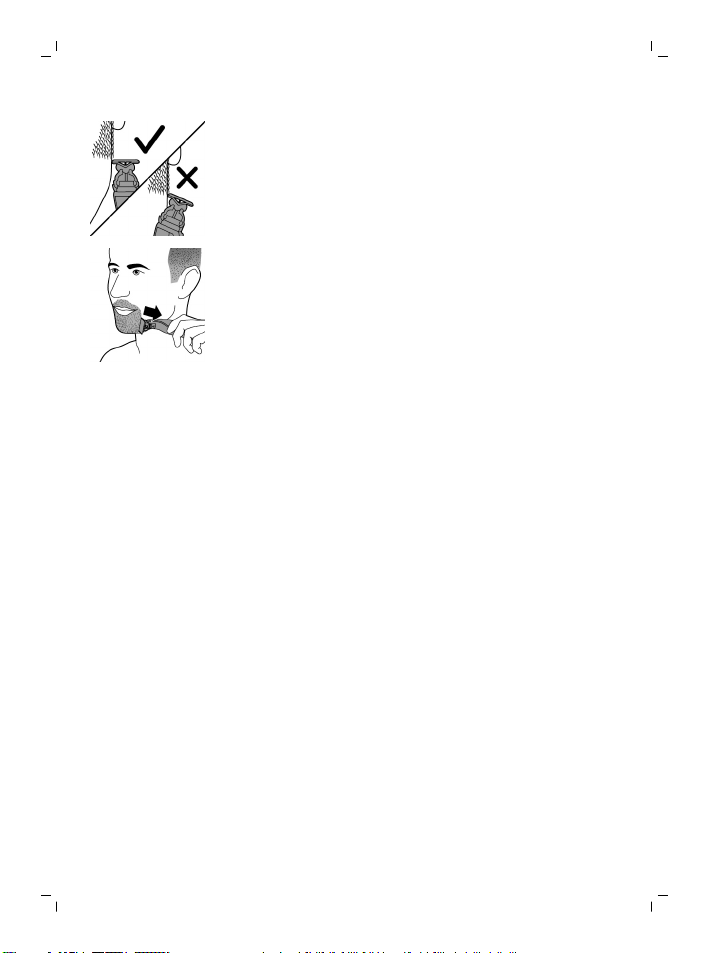
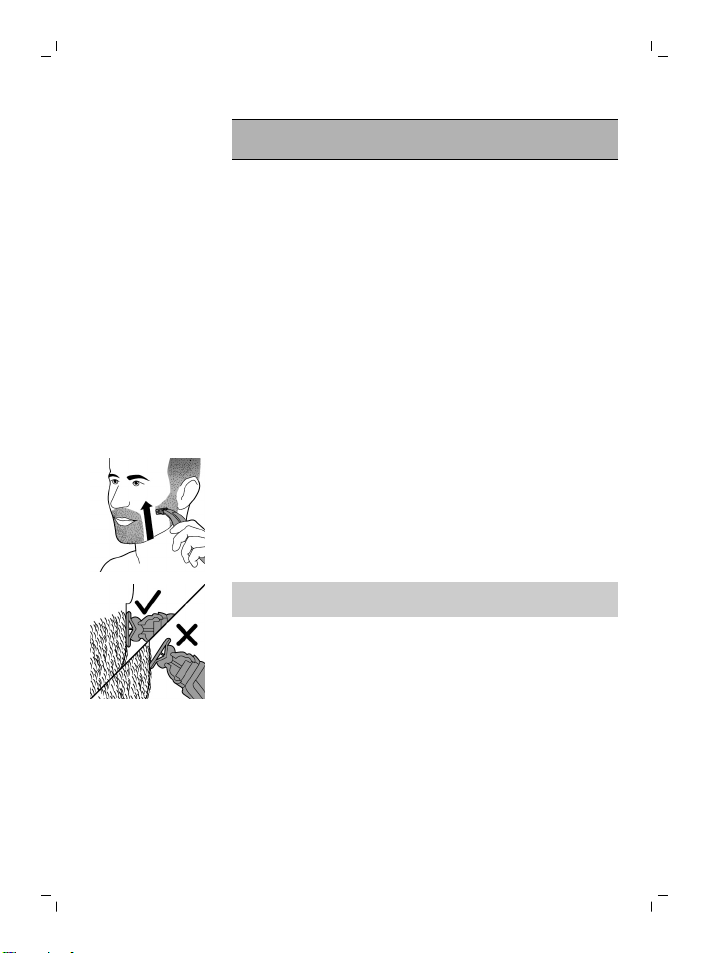
- Make sure that the blade is in full contact with
the skin by placing it flat on the skin.
Edging
English
- For the best result, move the appliance against
the grain.
- Make long strokes while you press lightly.
- You can use the appliance dry or wet with gel
or foam, even in the shower.
- Shaving a clean beard and face gives the best
results.
1 Switch on the appliance.
2 Place the blade on the skin and move the
appliance up or against the grain in long strokes
while you press it lightly.
Note: Make sure you hold the surface of the
blade flat against your skin.
3 Switch off and clean the appliance after every
use (see ‘Cleaning and maintenance’).
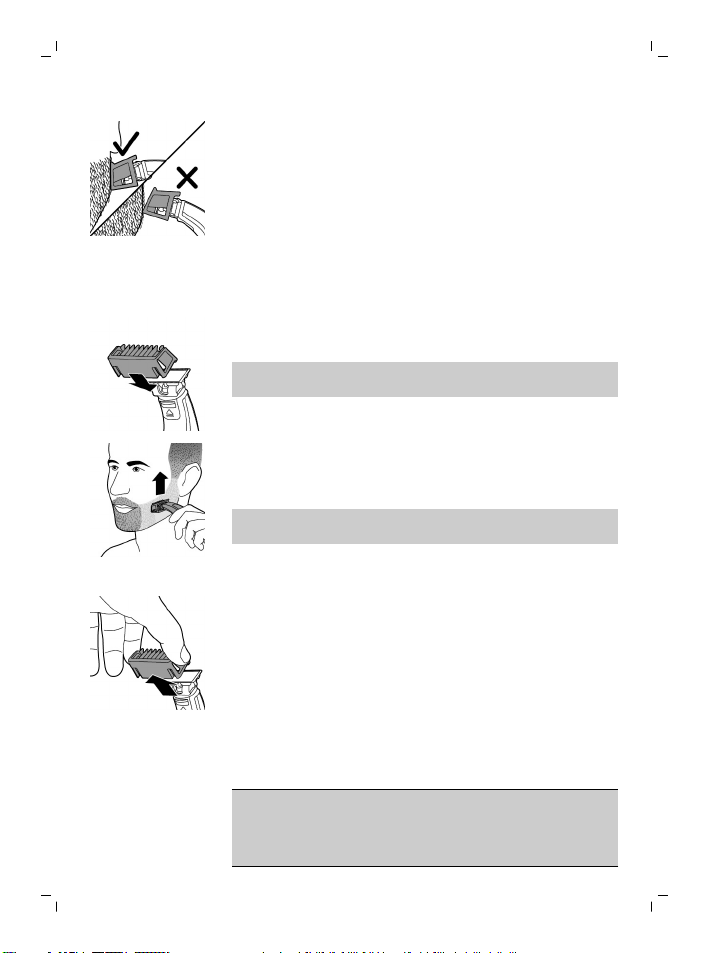
You can also use both edges of the blade to create
sharp lines and perfect edges. Hold the appliance
in such a way that the blade is perpendicular to
the skin and one of its edges touches the skin. This
allows more precise detailing of sideburns and the
area around the mouth and nose.
1 To use the blade for creating sharp edges and
lines, use either edge of the blade.
2 Switch on the appliance.
13
English
14
3 Place the edge of the blade perpendicular onto
the skin.
-
4 Switch off and clean the appliance after every
use (see ‘Cleaning and maintenance’).
Trimming with comb
The click-on stubble combs allow you to trim hair
to different lengths.
QP2531, QP2530 come with 4 click-on stubble
combs: 5mm, 3mm, 2mm, 1mm.
QP2520 comes with 3 click-on stubble combs:
5mm, 3mm, 1mm.
QP2522, QP2521 come with 2 click-on stubble
combs: 5mm, 1mm.
Start with the 5mm comb to acquire practice with
this appliance.
The indication on each comb corresponds to the
hair length in millimeters.
Tips
-
Make straight strokes while applying gentle
pressure.
Always make sure that the tips of the clickon stubble comb point in the direction in
which you move the appliance.
English
-
Make sure that the flat part of the comb is
always in full contact with the skin to obtain
an even trimming result.
-
Since hair grows in different directions, you
need to move the appliance in different
directions as well (upward, downward or
across).
-
Trimming is easier when the skin and hair are
dry.
1 Place the comb onto the blade, with the teeth
of the comb pointing upwards.
Note: Always trim in the direction of the teeth of
the comb. This will give you the best results.
2 Switch on the appliance.
3 Place the comb onto the skin and move the
appliance in the direction of the teeth of the
comb.
Note: For the best result, move it against the
grain.
4 Switch off and clean the appliance after every
use (see ‘Cleaning and maintenance’).
5 To remove the comb, hold it on both sides and
pull it off the blade.
15
Cleaning and maintenance
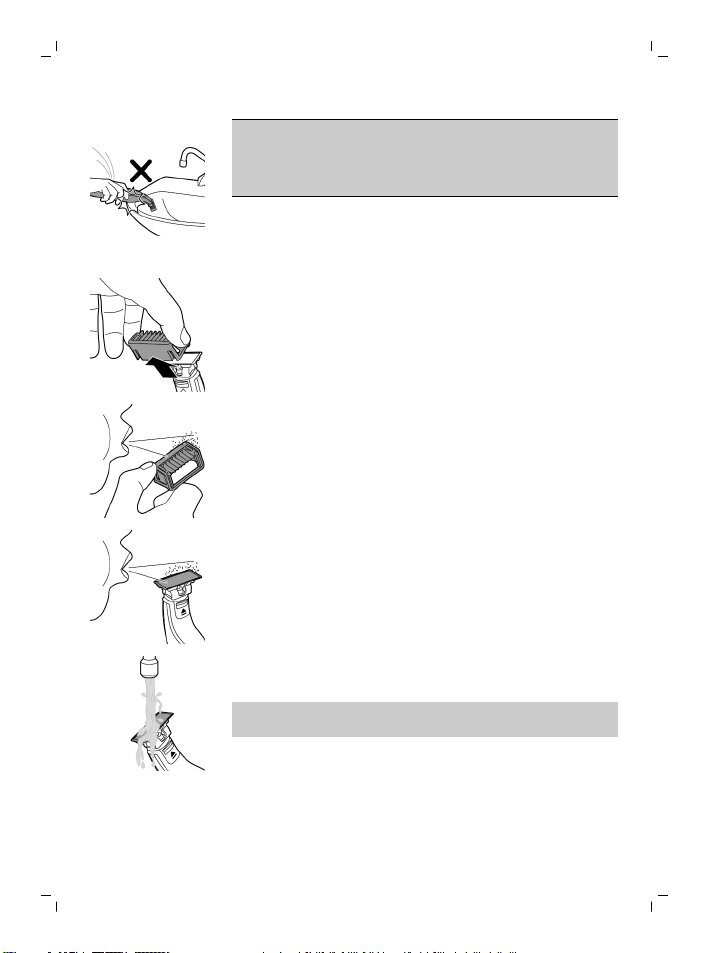
Clean the appliance after every use.
Caution: Never use compressed air, scouring
pads, abrasive cleaning agents or aggressive
liquids such as petrol or acetone to clean the
appliance.
English
16
Caution: Do not tap the appliance against a
surface to remove water from it, as this may
cause damage. Replace the blade if it is
damaged.
Cleaning the appliance
1 Remove the comb from the blade. Always turn
the appliance off before putting on or taking off
combs.
2 If a lot of hairs have accumulated on the comb,
first blow them off.
3 If a lot of hairs have accumulated on the
appliance, first blow them off.
4 Then switch on the appliance and rinse the
blade with lukewarm water.
Caution: Do not dry the blade with a towel or
a tissue as this may cause damage.
Storage
English
5 Then rinse the comb with lukewarm water.
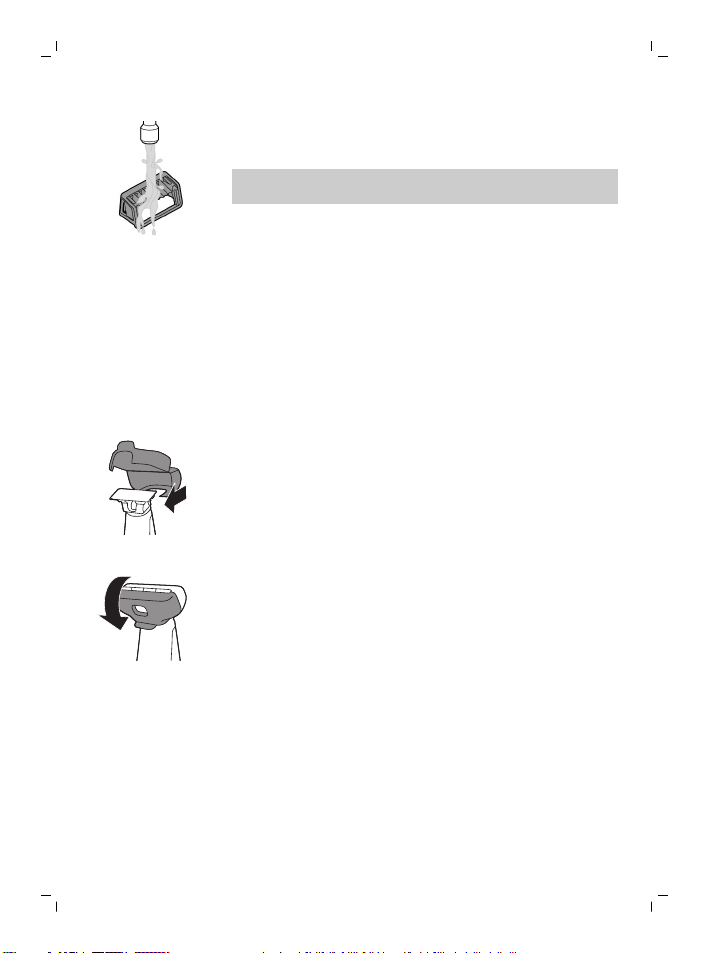
6 Let the appliance and comb dry.
Note: The blade is fragile. Handle it carefully.
Replace the blade if it is damaged.
Always attach the protection cap on the blade to
protect the blade from damage during travelling or
storage.
We advise you to let the appliance and its
attachments dry before you store them for the
next use.
1 Place the protection cap onto the edge of the
blade.
2 Close the protection cap.
17
Replacement
Replacing the blade
For optimal cutting and gliding performance of the
blade, we advise you to replace the blade every 4
months or when it no longer provides the shaving
or trimming results you expect. The advice of
replacing every 4 months is based on two full
shaves a week. Depending on your usage behavior

1
2
English
18
the exact lifetime of the blade could be longer or
shorter. Similar to what you would experience with
a manual blade, the blade becomes blunt over
time, which results in increased hair pulling and
reduced cutting performance.
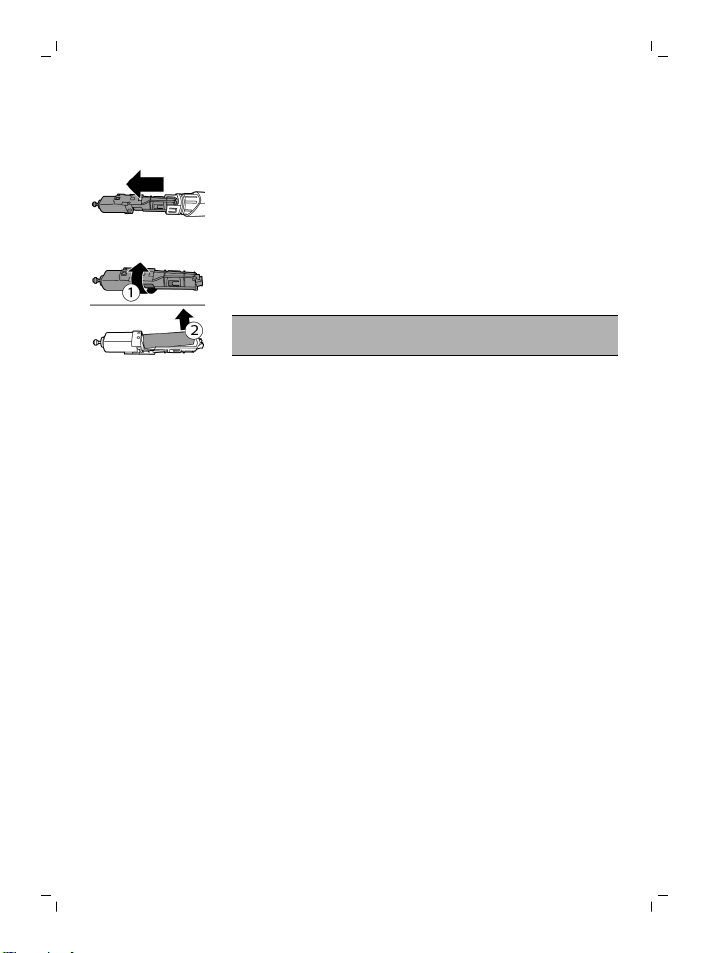
1 Push the blade release slide upwards carefully,
and hold the blade on its sides to remove the
blade and prevent it from flying away.
2 Hold the new blade on its sides and press it
onto the handle (‘click’).
Note: When you hear a click the new blade is
placed correctly and ready for use.
Ordering accessories
To buy accessories or spare parts, visit
www.shop.philips.com/service or go to your
Philips dealer. You can also contact the Philips
Consumer Care Center in your country (see the
international warranty leaflet for contact details).
The following parts are available:
- QP210 Blade 1-pack
- QP220 Blade 2-pack
Recycling
- This symbol means that this product shall not
be disposed of with normal household waste
(2012/19/EU).
- This symbol means that this product contains a
built-in rechargeable battery which shall not be
disposed of with normal household waste
(2006/66/EC). We strongly advise you to take
your product to an official collection point or a
Philips service centre to have a professional
remove the rechargeable battery.
- Follow your country’s rules for the separate
collection of electrical and electronic products
and rechargeable batteries. Correct disposal
helps prevent negative consequences for the
environment and human health.
Removing the rechargeable battery
Caution: Only remove the rechargeable battery
when you discard the appliance. Make sure the
battery is completely empty when you remove it.
Note: We strongly advise you to have a
professional remove the rechargeable battery.
1 Disconnect the appliance from the mains and
let the appliance run until the motor stops.
2 Remove the blade from the appliance.
3 Remove the bottom of the appliance by
bending it downwards and pull it off.
English
19
4 Take out the battery compartment by
separating the bottom part from the top part.
English
20
5 Separate the battery section from the bottom
part.
6 Lift the battery out of the inner body with the
screwdriver. The battery is connected with
double-sided tape.
Warning: Be careful, the battery strips are
very sharp.
Warranty and support
If you need information or support, please visit
www.philips.com/support or read the
international warranty leaflet.
Guarantee restrictions
The blade is not covered by the terms of the
international guarantee because it is subject to
wear.
Troubleshooting
This chapter summarizes the most common
problems you could encounter with the appliance.
If you are unable to solve the problem with the
information below, visit www.philips.com/support
for a list of frequently asked questions or contact
the Consumer Care Center in your country.

Problem Possible cause Solution
English
21
The appliance
does not charge
when it is
connected to the
mains.
I cannot switch
on the appliance
when it is
connected to the
mains.
The appliance
does not work
anymore.
The appliance has
to be switched off
when you charge it.
You cannot use the
appliance when it
is charging. You
can only use the
appliance without
cord.
The rechargeable
battery is empty.
The blade is
blocked by dirt.
Switch off the appliance.
Disconnect the appliance
from the mains before use.
Charge the appliance (see
chapter ‘Charging’).
QP2530: During charging,
the battery charge
indicator flashes. QP2520:
During charging, the
charge indicator on the
adapter lights up. If the
battery charge indicator
does not flash or light up,
check whether there is a
power failure or if the wall
socket is live. If there is no
power failure and the wall
socket is live but the
battery charge indicator
still does not flash or light
up, take the appliance to
your dealer or a Philips
service center.
Switch on the appliance
and rinse the blade under
the tap with warm water.
Hold the blade in a cup
with warm water (60°C and
no hotter) for approx.30
seconds.
English
22
Problem Possible cause Solution
The appliance
doesn’t cut hairs
anymore.
The appliance
makes a strange
noise.
The appliance
doesn’t function
optimally
anymore.
The blade is placed
on the handle
incorrectly.
The blade is
damaged or worn.
The blade is
damaged or worn.
The blade is placed
onto the handle
incorrectly.
The blade is
blocked by dirt.
The blade is
blocked by dirt.
The blade is
subject to wear and
therefore its
performance
decreases over
time.
The blade is a
delicate part of the
appliance and can
easily be damaged.
If the blade is
damaged, it may
not function
optimally anymore.
Push the blade onto the
appliance until you hear a
click.
Replace the blade with a
new one. See chapter
‘Replacement’.
Replace the blade with a
new one. See chapter
‘Replacement’.
Remove and reattach the
blade. Push it onto the
appliance until you hear a
click.
Remove the blade and
clean it thoroughly.
Remove the blade and
clean it thoroughly.
Replace the blade with a
new one. See chapter
‘Replacement’.
Replace the blade with a
new one. See chapter
‘Replacement’.

Úvod
Společnost Philips Vám gratuluje ke koupi a vítá
Vás! Chcete-li využívat všech výhod podpory
nabízené společností Philips, zaregistrujte svůj
výrobek na stránkách www.philips.com/welcome.
Všeobecný popis (obr. 1)
1 Ochranný kryt
2 Čepel
3 Uvolňovací posuvné tlačítko čepele
4 Vypínač
5 Ukazatel stavu baterie (pouze modely QP2531,
QP2530)
6 Malá zástrčka
7 Kontrolka nabíjení baterie (pouze modely
QP2522, QP2521, QP2520)
8 Zdroj (QP2531, QP2530: adaptér typu HQ850.
QP2522, QP2521, QP2520: adaptér typu
A00390.)
9 Náhradní čepel (pouze modely QP2531 a
QP2522)
10 Nasazovací hřebenový nástavec na vousy 5 mm
11 Nasazovací hřebenový nástavec na vousy 3 mm
(pouze modely QP2531, QP2530, QP2520)
12 Nasazovací hřebenový nástavec na vousy 2 mm
(pouze modely QP2531, QP2530)
13 Nasazovací hřebenový nástavec na vousy 1 mm
Čeština
23
Důležité bezpečnostní informace
Před použitím přístroje a jeho příslušenství si
pečlivě přečtěte tuto příručku s důležitými
informacemi a uschovejte ji pro budoucí použití.
Dodané příslušenství se může pro různé výrobky
lišit.
Čeština

Čeština
24
Nebezpečí
Varování
- Zdroj udržujte v suchu.
- Zdroj obsahuje transformátor. U
zdroje nikdy neodřezávejte a
nenahrazujte zástrčku. Mohlo
by tak dojít k nebezpečné
situaci.
- Zastřihovač nabíjejte pouze
pomocí dodávaného zdroje.

Čeština
- Tento přístroj mohou používat
děti od 8 let věku a osoby
s omezenými fyzickými,
smyslovými nebo duševními
schopnostmi nebo
nedostatkem zkušeností
a znalostí, pokud jsou pod
dohledem nebo byly poučeny
o bezpečném používání
přístroje a pokud chápou
související rizika. Děti si
s přístrojem nesmí hrát. Děti
nesmí provádět čištění
a uživatelskou údržbu bez
dozoru.
- Před čištěním pod tekoucí
vodou přístroj vždy odpojte od
sítě.
- Před použitím přístroj vždy
zkontrolujte. Přístroj
nepoužívejte, je-li poškozený,
aby nedošlo ke zranění.
Poškozenou součástku
vyměňujte vždy za původní typ.
25
Čeština
26
Upozornění
- Neotvírejte přístroj, ani se
nepokoušejte vyměnit
akumulátor.
- Dobíjecí stojan nesmíte nikdy
ponořit do vody ani ho mýt pod
tekoucí vodou.
- Pro oplachování přístroje nikdy
nepoužívejte vodu teplejší než
80 °C.
- Přístroj používejte pouze
k účelu, ke kterému je určen, jak
je vyobrazeno v uživatelské
příručce.
- Z hygienických důvodů by měla
přístroj používat pouze jedna
osoba.
- K čištění přístroje nikdy
nepoužívejte stlačený vzduch,
kovové žínky, abrazivní ani
agresivní čisticí prostředky, jako
je například benzín nebo
aceton.
- Nepoužívejte zdroj v zásuvce,
ve které je nebo byl zapojen
elektrický osvěžovač vzduchu,
ani v její blízkosti. Předejdete
tak nenapravitelnému
poškození zdroje.
Elektromagnetická pole (EMP)
- Tento přístroj Philips odpovídá všem platným
normám a předpisům týkajícím se vystavení
účinkům elektromagnetických polí.
Obecné informace
- Tento přístroje je voděodolný. Je vhodný pro
použití ve vaně nebo sprše a pro čištění pod
tekoucí vodou. Přístroj lze proto
z bezpečnostních důvodů používat pouze bez
napájecího kabelu.
- Přístroj lze připojit do sítě o napětí v rozmezí
100 až 240 V.
- Zdroj transformuje 100 V až 240 V na bezpečné
nízké napětí nižší než 24 V.
- Maximální hladina hluku: Lc = 75 dB(A).
Nabíjení
Poznámka: Tento přístroj lze používat pouze bez
kabelu.
QP2531, QP2530: Nabíjení trvá obvykle asi 4
hodiny.
QP2522, QP2521, QP2520: Nabíjení trvá obvykle
asi 8 hodin.
Při plném nabití zastřihovač pracuje až 60 minut
(modely QP2531, QP2530) nebo 45 minut (modely
QP2522, QP2521, QP2520).
Čeština
27
Čeština
28
Zastřihovač nabijte před prvním použitím a tehdy,
když ukazatel stavu baterie ukazuje, že je baterie
téměř vybitá.
Ukazatel stavu baterie QP2531, QP2530:
Když je baterie téměř vybitá, kontrolka nabití
baterie bliká oranžově.
Ukazatel stavu baterie bliká zeleně na znamení, že
se zastřihovač nabíjí.
Když je baterie plně nabitá,
kontrolka stavu baterie svítí zeleně.
Přibližně 30 minut po úplném nabití baterie nebo
po odpojení zařízení od elektrické sítě ukazatel
stavu baterie automaticky zhasne.
Ukazatel stavu baterie QP2522, QP2521, QP2520:
Stav baterie je patrný z výkonu zastřihovače.
Pokud zastřihovač začne pracovat pomaleji, je
baterie téměř vybitá a pro dosažení optimálního
výkonu je nutné ji nabít.
Nabíjení pomocí adaptéru
1 Zasuňte malý konektor do zastřihovače a
adaptér do zásuvky ve zdi.
2 Pouze modely QP2522, QP2521, QP2520: Když
je zastřihovač připojen k elektrické síti, ukazatel
stavu baterie na adaptéru svítí nepřetržitě.
3 Po nabití vytáhněte adaptér ze zásuvky ve zdi
a malý konektor vytáhněte ze zastřihovače.
Použití zastřihovače
Zastřihovač lze můžete použít na zastřihování,
tvarování a holení vousů na obličeji (bradka, knír a
kotlety). Holením získáte hladký výsledek,
zastřihováním dosáhnete určité délky a tvarováním
vytvoříte dokonalé okraje a ostré linie. Tento
zastřihovač není určen pro holení, tvarování ani
zastřihávání ochlupení na dolních částech těla
nebo vlasů. Při prvním holení nespěchejte.
V používání zastřihovače je třeba získat praxi.
Poznámka: Tento přístroj lze používat pouze bez
kabelu.
Zapínání a vypínaní zastřihovače
1 Zastřihovač zapněte jedním stisknutím
vypínače.
2 Zastřihovač vypněte opětovným stisknutím
vypínače.
Čeština
29
Holení
Varování: Před použitím zastřihovače vždy
zkontrolujte, zda není čepel poškozená
nebo opotřebovaná. Pokud je čepel
poškozena, zastřihovač nepoužívejte, aby
nedošlo ke zranění. Před použitím
zastřihovače vždy zkontrolujte, zda není
30
Čeština
čepel poškozená nebo opotřebovaná (viz
kapitola „Výměna“).
Tipy a triky holení
- Dbejte na to, aby čepel byla zcela v kontaktu
s pokožkou, proto ji k pokožce přiložte celou
plochou.
- Nejlepšího výsledku dosáhnete pohybem proti
směru růstu chloupků.
- Provádějte dlouhé tahy s použitím mírného
tlaku.
- Zastřihovač je vhodný pro použití za sucha
nebo mokra, s gelem nebo s pěnou, dokonce i
ve sprše.
- Nejlepších výsledků při holení dosáhnete,
pokud je pokožka tváře a brady čistá..
1 Zapněte zastřihovač.
2 Opatrně přiložte čepel k pokožce a s mírným
tlakem a dlouhými tahy pomalu pohybujte
zastřihovačem nahoru nebo proti směru růstu
chloupků.
Poznámka: Povrch čepele držte přiložený
plochou stranou na pokožku.
3 Zastřihovač po každém použití vypněte a
vyčistěte (viz kapitola „Čištění a údržba“).
Tvarování
Použitím obou hran čepele můžete vyvářet ostré
linie a dokonalé okraje. Přidržte zastřihovač tak,
aby čepel byla kolmo v kontaktu s pokožkou a aby
se pokožky dotýkala jedna z jejích hran. Tímto
způsobem můžete přesně zastřihovat chloupky na
kotletách a v oblasti kolem úst a nosu.
 Loading...