

Philips PMC7230, PMC7230-17B Quick start guide
Philips Portable Media Centre
Quick start guide
PMC7230
3
4
7
8
9
10
1
2
5
6
What’s in the box
USB cable
CD-ROM containing Windows Media Player
10, Arcsoft MediaConverter, User Manual,
Tutorials and Frequently Asked Questions
A/V cable
Quick start guide
Headphones
Power
adapter
1
Install
1 Insert the CD supplied with your product into the CD ROM drive of
your PC.
2 Follow the onscreen instructions to complete the installation of
Windows Media Player and Arcsoft MediaConverter.
3 If the installation program does not start automatically, browse the CD
contents via Windows Explorer and run the program by double
clicking on the file ending with .exe.
3
Transfer
1 Connect your player to the PC using the supplied USB cable.
2 Start ArcSoft MediaConverter.
Connect
2
Overview of control and selection
Record video
A
Transfer video
A
4
Enjoy
Main menu
1 Start Windows Media Player.
2 Connect the player to your computer using the supplied USB cable.
3 Select Sync tab to confirm that your player is connected.
4 In the pull-down menu on the right pane, select Philips PMC7230 as
the destination.
6 Select the Library tab to access the media library.
7 Click to highlight the song or picture you want to copy.
8 Right click on the song and select Add to > Sync List.
OR
Drag and drop the song into the Sync List on the right pane.
9 Click Start Sync button at the bottom of the screen to start
synchronization.
> The progress will be displayed just above the Start Sync button.
Transfer music and pictures
B
Playback on TV
B
Your player can record your favorite TV programs.
1 Connect the A/V cable to the Video-in jack of your player.
2 Connect the other end, with the yellow, white and red plugs to the
matching colored A/V output jacks on your TV, cable box, satellite
tuner or DVD recorder.
3 Turn on your video source and select the channel or program that you
would like to record.
4 On your player, from the main menu, select Recording.
5 On your player, select Video and press OK.
> The player will search for the video signal. Once detected, it will display the
same video signal on your player.
6 Press OK to start recording.
7 Press OK again to stop recording.
> The recording will be saved under my videos.
You can play music, videos, and view pictures on your TV.
1 Connect the player to your TV as shown.
2 On your player, press to enter the main menu and select settings.
3 Select Display from the settings menu.
4 Select TV-out.
5 Select On and press OK.
> A message will appear: To return display to the Portable Media
center, turn power off and then on.
6 On your TV , select the AV channel. (Check your TV user guide for
details on selecting AV input.)
> You should see the menu of your player on your TV screen.
Connect to PC
C
You can connect you player to PC.
1 Turn on the player.
2 Connect the player to PC as shown.
> The screen of the player indicate the connection with PC.
~
SNIAM
ANNETNA
VT
T
X
E
1
OEDIV
(
SBVC
)
OIDU
A
OEDIV-S
)C/
Y(
O
IDUA
R
L
2
TU
O
OEDIV
(
SBV
C
)
L
R
OIDUA
P
B
1 TU
O
Y
P
R
LAIXAOC
TUO OIDUA LATIGID
TV DVD recorder Set top box /
cable box
You can also schedule recordings using the Timer Recording
function. Consult the user manual on the CD for detailed instructions.
3 Once your player is connected , it will show up as Philips PMC7230 in
the box as shown.
4 In the Convert to: option at the bottom of the screen, select Current
Device, the content will be stored directly on the connected player.
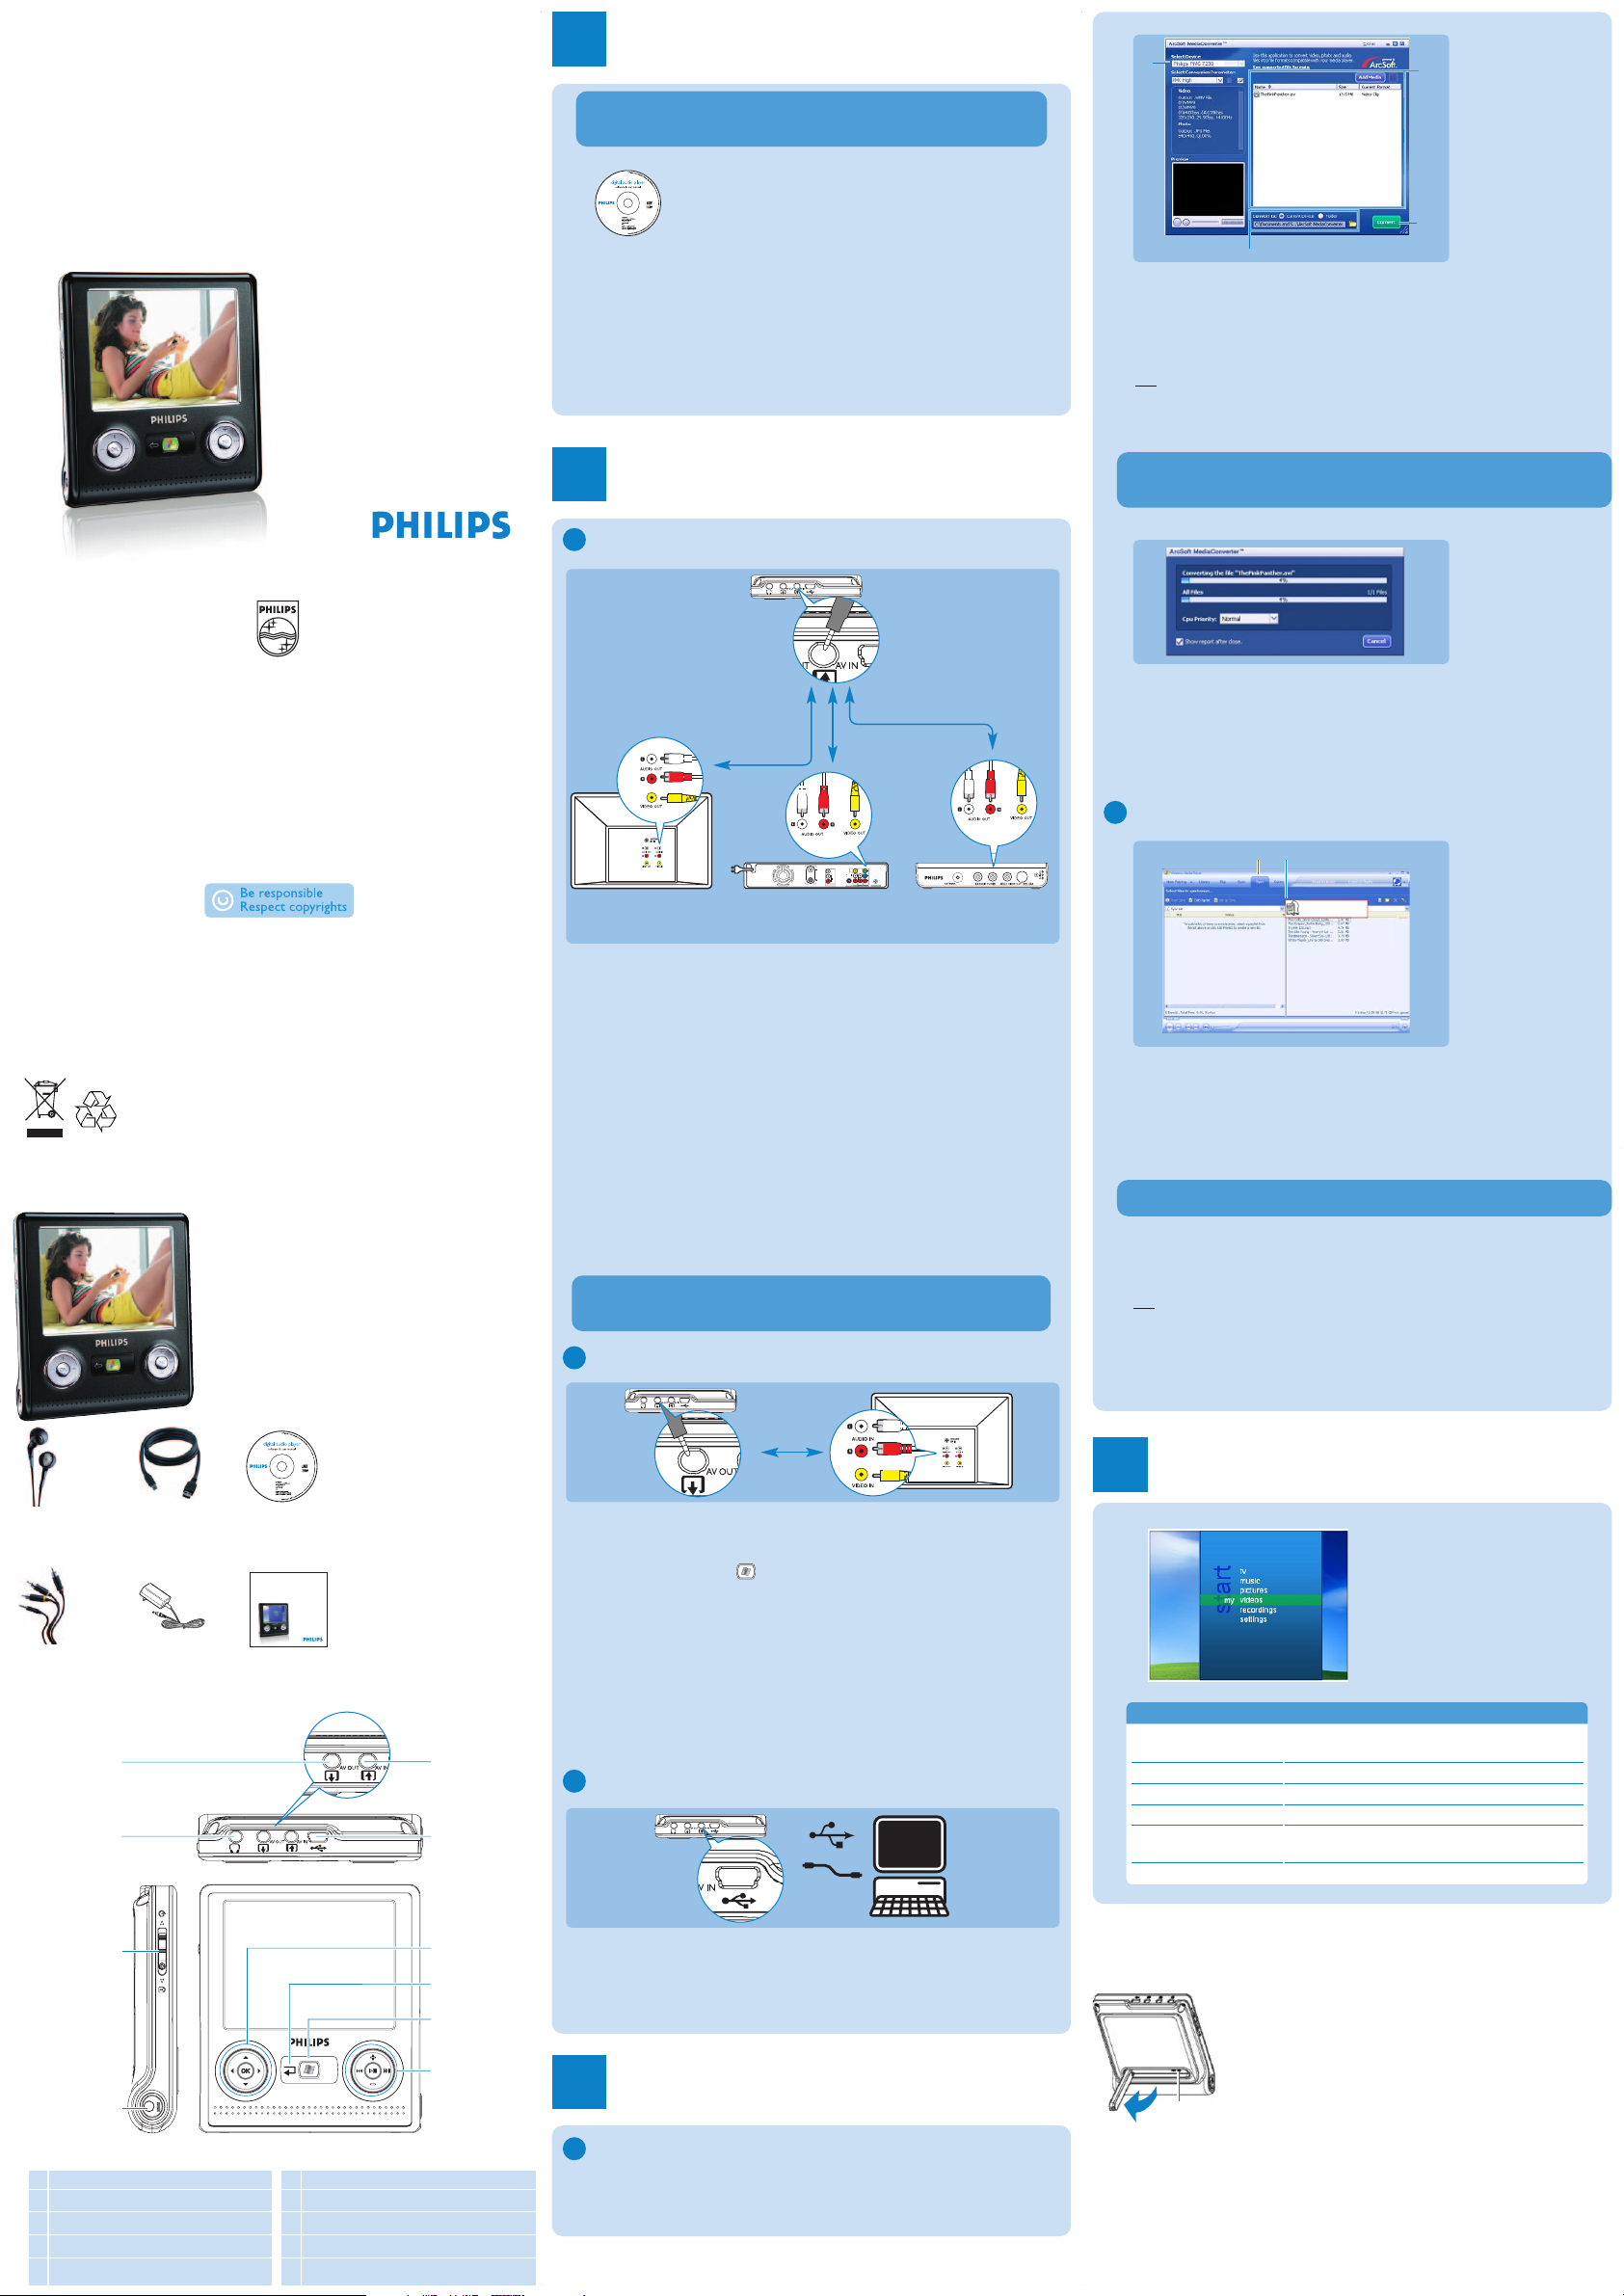
5 Press Add Media to select the Video files to be transferred
OR
Drag and drop your video files from Windows Explorer into the while
box shown.
7 Press Convert.
3
7
5
4
If needed, the files will first be converted to a format that player can
playback. The convertion takes time and please be patient.
Before you connect your player to your PC you need to install the
software.
If the player is not in the list, click F5 to refresh and try again.
> All the converted files will be transferred to the player.
8 The Progress of conversion and transfer is shown
> The files will be stored in the Videos under Main Menu -> my
videos folder of the player. You can see the result of the conversion
(if needed) and transfer by checking My Computer > Philips
PMC7230 > Media > Video when the player is attached to the PC.
34
Philips PMC7230
Select menu item
my TV
my music
my pictures
my videos
recording
settings
To
View recorded TV programs (only those
programs recorded on a Media Center PC)
Playback your music
View your pictures
View your videos and recorded TV programs
Start a video or audio recording
Schedule a video recording
Customize the settings of your player
Troubleshooting
How do I reset my player?
Reset
Insert a small pin or a sharp object into the reset hole
located at the back of the player under the desk stand.
Hold until the player restarts.
Please refer to the user manual for more troubleshooting
advice.
1 AV Out
2 Headphone jack
3 On/Off/Lock slider (key lock)
4 Charging socket
5 AV In
6 USB port
7 Menu navigation / OK
8 Menu back control
9 Main menu
10 Playback and volume control
Printed in Taiwan wk6354
Specifications are subject to change without notice.
Trademarks are the property of Koninklijke Philips Electronics N.V.
or their respective owners
2006 © Koninklijke Philips Electronics N.V. All rights reserved.
This product incorporates copyright protection technology that is protected by U.S. patents and
other intellectual property rights.Use of this copyright protection technology must be authorized
by Macrovision, and is intended for home and other limited viewing only unless otherwise
authorised by Macrovision. Reverse engineering or disassembly is prohibited.
Need help?
User Manual
See the user manual that came with your receiver.
Online
Go to www.p4c.philips.com
Philips media centre
PMC7230
Quick start guide
 Loading...