

Page 1
LCD TV
chassis PL9.0
SERVICE MANUAL
Contents
47” 47MF439B/F7 MAGNAVOX
47” 47MF439B/F7 MAGNAVOX
(Serial No. : YA1A**********)
(Serial No. : YA1B**********)
© 2009 Funai Electric Co., Ltd.
All rights reserved. No part of this manual may be reproduced, copied, transmitted, disseminated, transcribed,
downloaded or stored in any storage medium, in any form or for any purpose without the express prior written
consent of Funai. Furthermore, any unauthorized commercial distribution of this manual or any revision hereto
is strictly prohibited.
Information in this document is subject to change without notice. Funai reserves the right to change the content
herein without the obligation to notify any person or organization of such changes.
with the design is a registered trademark of Funai Electric Co., Ltd and may not be used in any way
without the express written consent of Funai. All other trademarks used herein remain the exclusive property of
their respective owners. Nothing contained in this manual should be construed as granting, by implication or
otherwise, any license or right to use any of the trademarks displayed herein. Misuse of any trademarks or any
other content in this manual is strictly prohibited. Funai shall aggressively enforce its intellectual property rights
to the fullest extent of the law.
A9PJ3UF
090608
Page 2

IMPORTANT SAFETY NOTICE
o
Proper service and repair is important to the safe, reliable operation of all
Funai Equipment. The service procedures recommended by Funai and
described in this service manual are effective methods of performing
service operations. Some of these service special tools should be used
when and as recommended.
It is important to note that this service manual contains various CAUTIONS
and NOTICES which should be carefully read in order to minimize the risk
of personal injury to service personnel. The possibility exists that improper
service methods may damage the equipment. It also is important to
understand that these CAUTIONS and NOTICES ARE NOT EXHAUSTIVE.
Funai could not possibly know, evaluate and advice the service trade of all
conceivable ways in which service might be done or of the possible
hazardous consequences of each way. Consequently, Funai has not
undertaken any such broad evaluation. Accordingly, a servicer who uses a
service procedure or tool which is not recommended by Funai must first
use all precautions thoroughly so that neither his safety nor the safe
operation of the equipment will be jeopardized by the service method
selected.
The LCD panel is manufactured to provide many years of useful life.
Occasionally a few non active pixels may appear as a tiny spec of col
This is not to be considered a defect in the LCD screen.
Page 3

TABLE OF CONTENTS
Specifications . . . . . . . . . . . . . . . . . . . . . . . . . . . . . . . . . . . . . . . . . . . . . . . . . . . . . . . . . . . . . . . . . . . . . . . . . . . 1-1
Important Safety Precautions . . . . . . . . . . . . . . . . . . . . . . . . . . . . . . . . . . . . . . . . . . . . . . . . . . . . . . . . . . . . . . . 2-1
Standard Notes for Servicing . . . . . . . . . . . . . . . . . . . . . . . . . . . . . . . . . . . . . . . . . . . . . . . . . . . . . . . . . . . . . . . 3-1
Cabinet Disassembly Instructions . . . . . . . . . . . . . . . . . . . . . . . . . . . . . . . . . . . . . . . . . . . . . . . . . . . . . . . . . . . . 4-1
Service Modes, Error Codes, and Fault Finding . . . . . . . . . . . . . . . . . . . . . . . . . . . . . . . . . . . . . . . . . . . . . . . . . 5-1
Electrical Adjustment Instructions . . . . . . . . . . . . . . . . . . . . . . . . . . . . . . . . . . . . . . . . . . . . . . . . . . . . . . . . . . . . 6-1
Firmware Renewal Mode . . . . . . . . . . . . . . . . . . . . . . . . . . . . . . . . . . . . . . . . . . . . . . . . . . . . . . . . . . . . . . . . . . 7-1
Troubleshooting. . . . . . . . . . . . . . . . . . . . . . . . . . . . . . . . . . . . . . . . . . . . . . . . . . . . . . . . . . . . . . . . . . . . . . . . . . 8-1
Block Diagrams . . . . . . . . . . . . . . . . . . . . . . . . . . . . . . . . . . . . . . . . . . . . . . . . . . . . . . . . . . . . . . . . . . . . . . . . . . 9-1
Schematic Diagrams and CBA . . . . . . . . . . . . . . . . . . . . . . . . . . . . . . . . . . . . . . . . . . . . . . . . . . . . . . . . . . . . . 10-1
Waveforms . . . . . . . . . . . . . . . . . . . . . . . . . . . . . . . . . . . . . . . . . . . . . . . . . . . . . . . . . . . . . . . . . . . . . . . . . . . . 11-1
Wiring Diagram . . . . . . . . . . . . . . . . . . . . . . . . . . . . . . . . . . . . . . . . . . . . . . . . . . . . . . . . . . . . . . . . . . . . . . . . . 12-1
Exploded Views. . . . . . . . . . . . . . . . . . . . . . . . . . . . . . . . . . . . . . . . . . . . . . . . . . . . . . . . . . . . . . . . . . . . . . . . . 13-1
Parts List . . . . . . . . . . . . . . . . . . . . . . . . . . . . . . . . . . . . . . . . . . . . . . . . . . . . . . . . . . . . . . . . . . . . . . . . . . . . . . 14-1
Revision History . . . . . . . . . . . . . . . . . . . . . . . . . . . . . . . . . . . . . . . . . . . . . . . . . . . . . . . . . . . . . . . . . . . . . . . . 15-1
Page 4
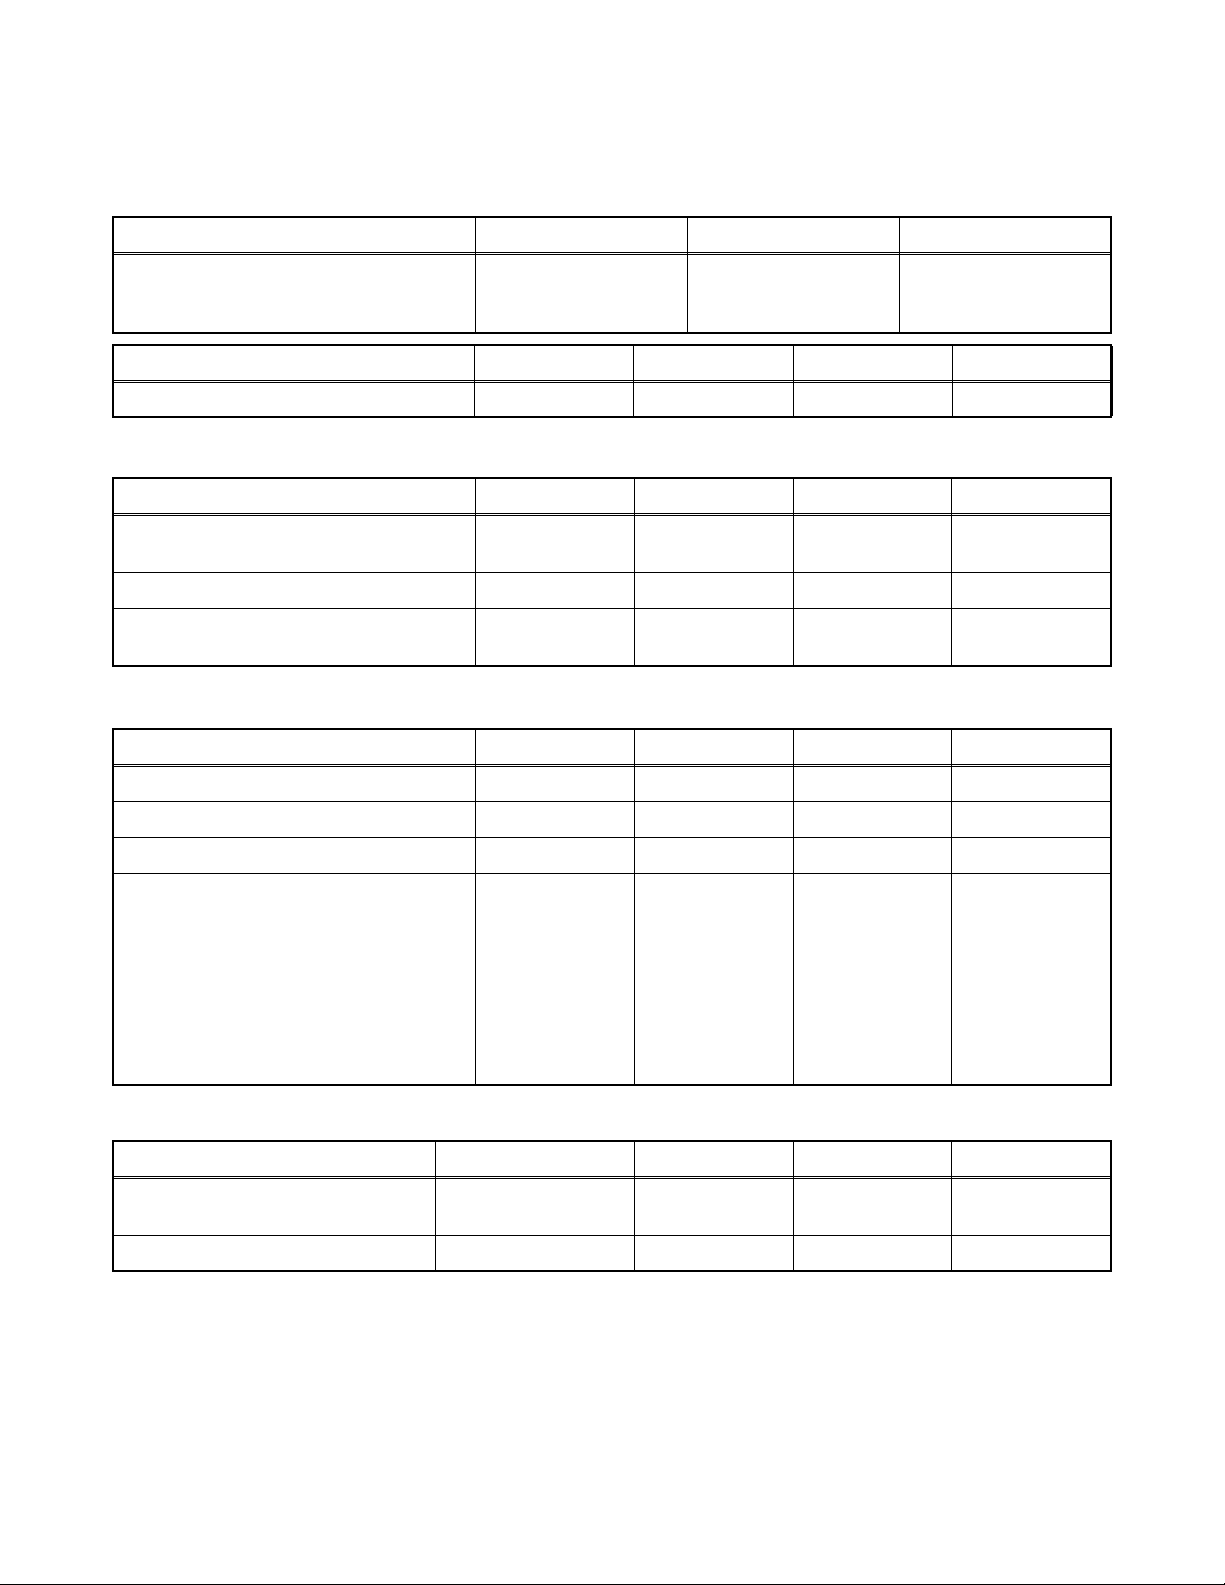
SPECIFICATIONS
< TUNER >
ANT. Input ---------------------- 75 Ω Unbal., F type
Description Band Off air channel (MHz) Cable channel (MHz)
Low Band
1. Channel Coverage
Description System Picture (MHz) Chroma (MHz) Sound (MHz)
2. Intermediate Frequencies NTSC-M 45.75 42.17 41.25
Mid Band
High Band
48.25 to 82.25
175.25 to 224.25
471.25 to 855.25
69.25 to 154.25
161.25 to 439.25
447.25 to 463.25
< LCD PANEL >
Description Condition Unit Nominal Limit
1. Pixel Format
2. Brightness (w / filter) --- cd/m
3. Viewing Angle (CR>20)
Horizontal
Ver t i cal
Horizontal
Ver t i cal
pixels
pixels
°
°
1920
1080
2
500 ---
178
178
---
---
---
---
< VIDEO >
Description Condition Unit Nominal Limit
1. Transient Response --- ns <250 ---
2. Y/C Separation --- dB >20 ---
3. Chroma (3.55 MHz) Suppression --- dB >25 ---
°K
°K
°K
11500
0.276
0.277
9000
0.289
0.291
6500
0.314
0.319
±0.004
±0.004
±0.004
±0.004
±0.004
±0.004
4. Color Temperature
Cool
x
y
Normal
x
y
warm
x
y
< AUDIO >
Description Condition Unit Nominal Limit
1. Distortion at rated Power
(ATSC 0 dBfs)
2. Audio Response Curve -3dB kHz >12.5 ---
--- % <10 ---
---
---
---
1-1 PL9.0FSP
Page 5
IMPORTANT SAFETY PRECAUTIONS
Prior to shipment from the factory, our products are strictly inspected for recognized product safety and electrical
codes of the countries in which they are to be sold. However, in order to maintain such compliance, it is equally
important to implement the following precautions when a set is being serviced.
Safety Precautions for LCD TV
Circuit
1. Before returning an instrument to the
customer, always make a safety check of the
entire instrument, including, but not limited to, the
following items:
a. Be sure that no built-in protective devices are
defective and have been defeated during
servicing. (1) Protective shields are provided
on this chassis to protect both the technician
and the customer. Correctly replace all missing
protective shields, including any removed for
servicing convenience. (2) When reinstalling
the chassis and/or other assembly in the
cabinet, be sure to put back in place all
protective devices, including but not limited to,
nonmetallic control knobs, insulating
fishpapers, adjustment and compartment
covers/shields, and isolation resistor/capacitor
networks. Do not operate this instrument or
permit it to be operated without all
protective devices correctly installed and
functioning. Servicers who defeat safety
features or fail to perform safety checks
may be liable for any resulting damage.
b. Be sure that there are no cabinet openings
through which an adult or child might be able to
insert their fingers and contact a hazardous
voltage. Such openings include, but are not
limited to, (1) spacing between the Liquid
Crystal Panel and the cabinet mask, (2)
excessively wide cabinet ventilation slots, and
(3) an improperly fitted and/or incorrectly
secured cabinet back cover.
c. Antenna Cold Check - With the instrument AC
plug removed from any AC source, connect an
electrical jumper across the two AC plug
prongs. Place the instrument AC switch in the
on position. Connect one lead of an ohmmeter
to the AC plug prongs tied together and touch
the other ohmmeter lead in turn to each tuner
antenna input exposed terminal screw and, if
applicable, to the coaxial connector. If the
measured resistance is less than 1.0 megohm
or greater than 5.2 megohm, an abnormality
exists that must be corrected before the
instrument is returned to the customer. Repeat
this test with the instrument AC switch in the off
position.
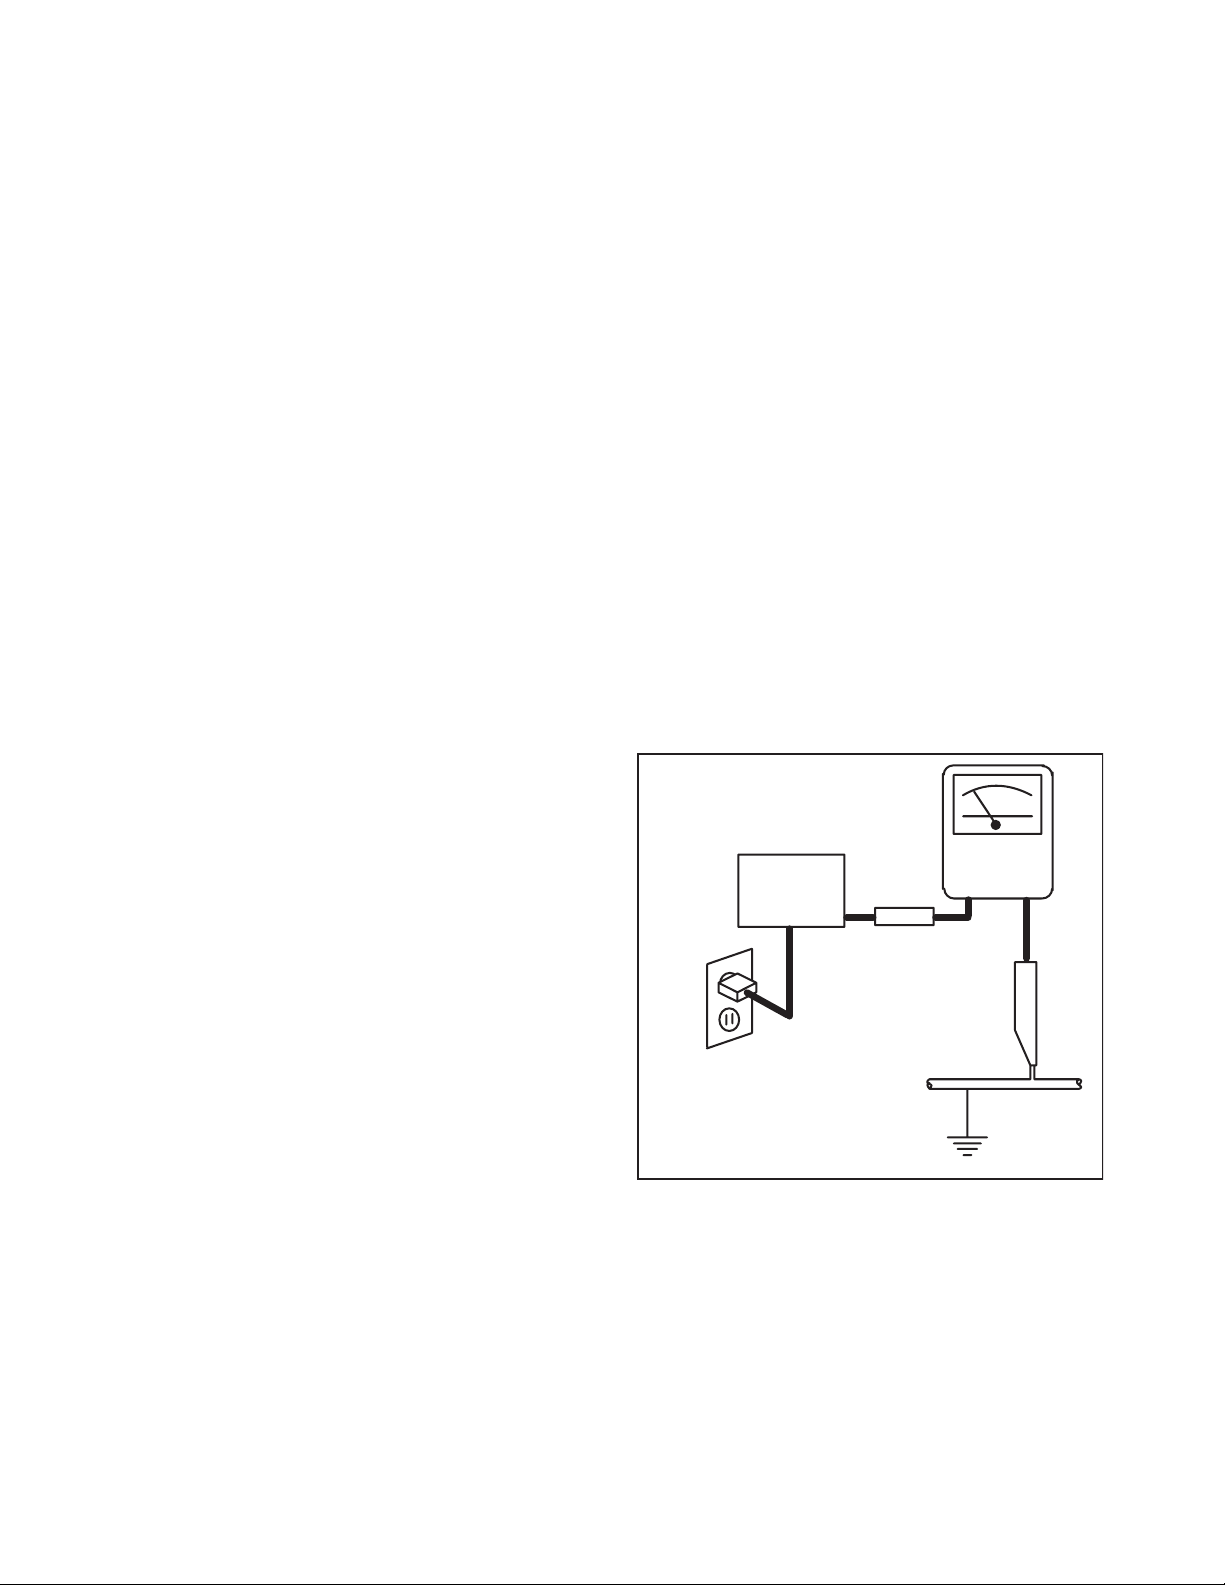
d. Leakage Current Hot Check - With the
instrument completely reassembled, plug the
AC line cord directly into a 120 V AC outlet. (Do
not use an isolation transformer during this
test.) Use a leakage current tester or a
metering system that complies with American
National Standards Institute (ANSI) C101.1
Leakage Current for Appliances and
Underwriters Laboratories (UL) 1410, (50.7).
With the instrument AC switch first in the on
position and then in the off position, measure
from a known earth ground (metal water pipe,
conduit, etc.) to all exposed metal parts of the
instrument (antennas, handle brackets, metal
cabinet, screw heads, metallic overlays, control
shafts, etc.), especially any exposed metal
parts that offer an electrical return path to the
chassis. Any current measured must not
exceed 0.5 milli-ampere. Reverse the
instrument power cord plug in the outlet and
repeat the test.
READING SHOULD
NOT BE ABOVE 0.5 mA
LEAKAGE
DEVICE
BEING
TESTED
TEST ALL EXPOSED
METAL SURFACES
ALSO TEST WITH
PLUG REVERSED
USING AC
ADAPTER PLUG
AS REQUIRED
ANY MEASUREMENTS NOT WITHIN THE
LIMITS SPECIFIED HEREIN INDICATE A
POTENTIAL SHOCK HAZARD THAT MUST
BE ELIMINATED BEFORE RETURNING THE
INSTRUMENT TO THE CUSTOMER OR
BEFORE CONNECTING THE ANTENNA OR
ACCESSORIES.
2. Read and comply with all caution and safety-
related notes on or inside the receiver cabinet, on
the receiver chassis, or on the Liquid Crystal
Panel.
CURRENT
TESTER
+
EARTH
GROUND
_
2-1 LTVN_ISP
Page 6

3. Design Alteration Warning - Do not alter or add
to the mechanical or electrical design of this TV
receiver. Design alterations and additions,
including, but not limited to circuit modifications
and the addition of items such as auxiliary audio
and/or video output connections, might alter the
safety characteristics of this receiver and create a
hazard to the user. Any design alterations or
additions will void the manufacturer's warranty and
may make you, the servicer, responsible for
personal injury or property damage resulting
therefrom.
4. Hot Chassis Warning -
a. Some TV receiver chassis are electrically
connected directly to one conductor of the AC
power cord and maybe safety-serviced without
an isolation transformer only if the AC power
plug is inserted so that the chassis is
connected to the ground side of the AC power
source. To confirm that the AC power plug is
inserted correctly, with an AC voltmeter,
measure between the chassis and a known
earth ground. If a voltage reading in excess of
1.0 V is obtained, remove and reinsert the AC
power plug in the opposite polarity and again
measure the voltage potential between the
chassis and a known earth ground.
b. Some TV receiver chassis normally have 85V
AC(RMS) between chassis and earth ground
regardless of the AC plug polarity. This chassis
can be safety-serviced only with an isolation
transformer inserted in the power line between
the receiver and the AC power source, for both
personnel and test equipment protection.
c. Some TV receiver chassis have a secondary
ground system in addition to the main chassis
ground. This secondary ground system is not
isolated from the AC power line. The two
ground systems are electrically separated by
insulation material that must not be defeated or
altered.
5. Observe original lead dress. Take extra care to
assure correct lead dress in the following areas: a.
near sharp edges, b. near thermally hot parts-be
sure that leads and components do not touch
thermally hot parts, c. the AC supply, d. high
voltage, and, e. antenna wiring. Always inspect in
all areas for pinched, out of place, or frayed wiring.
Check AC power cord for damage.
6. Components, parts, and/or wiring that appear to
have overheated or are otherwise damaged
should be replaced with components, parts, or
wiring that meet original specifications.
Additionally, determine the cause of overheating
and/or damage and, if necessary, take corrective
action to remove any potential safety hazard.
7. Product Safety Notice - Some electrical and
mechanical parts have special safety-related
characteristics which are often not evident from
visual inspection, nor can the protection they give
necessarily be obtained by replacing them with
components rated for higher voltage, wattage, etc.
Parts that have special safety characteristics are
identified by a # on schematics and in parts lists.
Use of a substitute replacement that does not
have the same safety characteristics as the
recommended replacement part might create
shock, fire, and/or other hazards. The product's
safety is under review continuously and new
instructions are issued whenever appropriate.
Prior to shipment from the factory, our products
are strictly inspected to confirm they comply with
the recognized product safety and electrical codes
of the countries in which they are to be sold.
However, in order to maintain such compliance, it
is equally important to implement the following
precautions when a set is being serviced.
2-2 LTVN_ISP
Page 7

Precautions during Servicing
A. Parts identified by the # symbol are critical for
safety.
Replace only with part number specified.
B. In addition to safety, other parts and assemblies
are specified for conformance with regulations
applying to spurious radiation. These must also be
replaced only with specified replacements.
Examples: RF converters, RF cables, noise
blocking capacitors, and noise blocking filters, etc.
C. Use specified internal wiring. Note especially:
1) Wires covered with PVC tubing
2) Double insulated wires
3) High voltage leads
D. Use specified insulating materials for hazardous
live parts. Note especially:
1) Insulation Tape
2) PVC tubing
3) Spacers
4) Insulators for transistors.
E. When replacing AC primary side components
(transformers, power cord, etc.), wrap ends of
wires securely about the terminals before
soldering.
F. Observe that the wires do not contact heat
producing parts (heat sinks, oxide metal film
resistors, fusible resistors, etc.)
G. Check that replaced wires do not contact sharp
edged or pointed parts.
H. When a power cord has been replaced, check that
5~6 kg of force in any direction will not loosen it.
I. Also check areas surrounding repaired locations.
J. Use care that foreign objects (screws, solder
droplets, etc.) do not remain inside the set.
K. When connecting or disconnecting the internal
connectors, first, disconnect the AC plug from the
AC supply outlet.
L. When installing parts or assembling the cabinet
parts, be sure to use the proper screws and
tighten certainly.
2-3 LTVN_ISP
Page 8
Safety Check after Servicing
Examine the area surrounding the repaired location for damage or deterioration. Observe that screws, parts and
wires have been returned to original positions. Afterwards, perform the following tests and confirm the specified
values in order to verify compliance with safety standards.
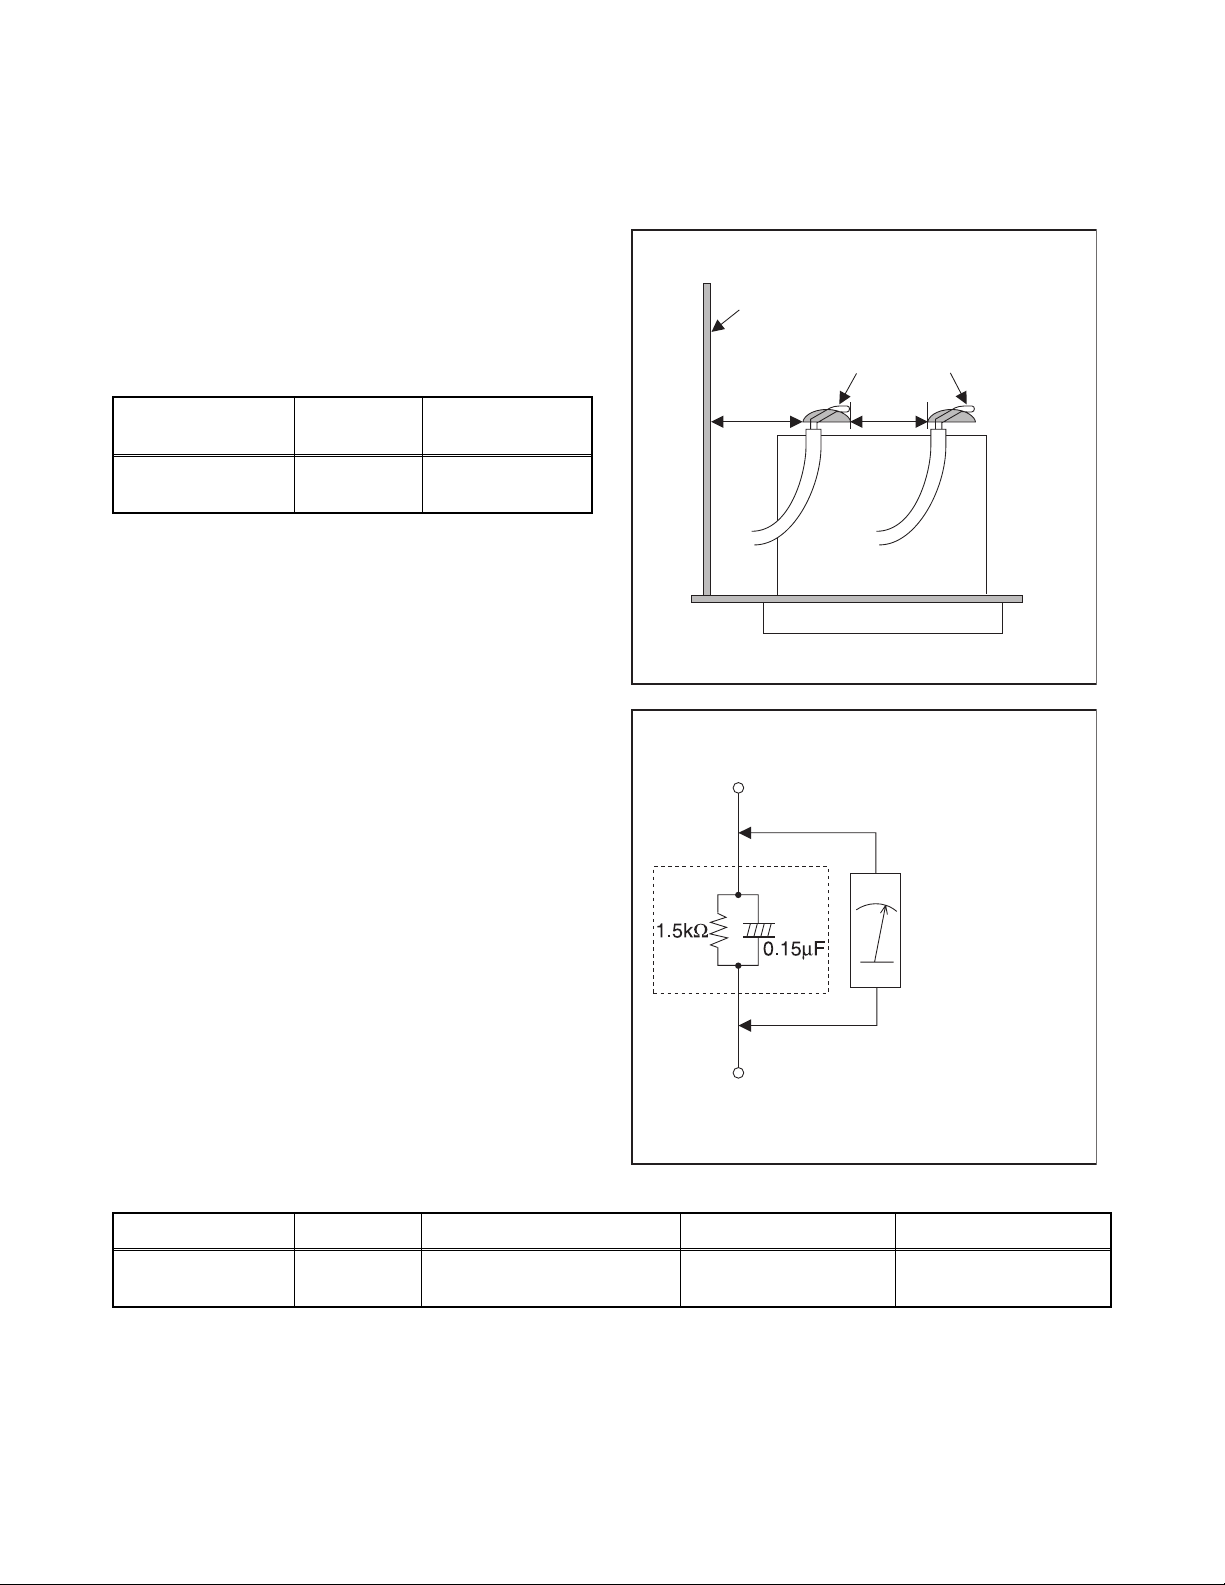
1. Clearance Distance
When replacing primary circuit components, confirm
specified clearance distance (d) and (d') between
soldered terminals, and between terminals and
surrounding metallic parts. (See Fig. 1)
Table 1: Ratings for selected area
Chassis or Secondary Conductor
Primary Circuit
AC Line Voltage Region
110 to 130 V
Note: This table is unofficial and for reference only. Be
sure to confirm the precise values.
U.S.A. or
Canada
Clearance
Distance (d), (d’)
≥ 3.2 mm
(0.126 inches)
2. Leakage Current Test
Confirm the specified (or lower) leakage current
between B (earth ground, power cord plug prongs) and
externally exposed accessible parts (RF terminals,
antenna terminals, video and audio input and output
terminals, microphone jacks, earphone jacks, etc.) is
lower than or equal to the specified value in the table
below.
Measuring Method: (Power ON)
Insert load Z between B (earth ground, power cord plug
prongs) and exposed accessible parts. Use an AC
voltmeter to measure across both terminals of load Z.
See Fig. 2 and following table.
d' d
Fig. 1
Exposed Accessible Part
Z
AC Voltmeter
(High Impedance)
Earth Ground
B
Power Cord Plug Prongs
Fig. 2
Table 2: Leakage current ratings for selected areas
AC Line Voltage Region Load Z Leakage Current (i) Earth Ground (B) to:
110 to 130 V
Note: This table is unofficial and for reference only. Be sure to confirm the precise values.
U.S.A. or
Canada
0.15 µF CAP. & 1.5 kΩ
RES. Connected in parallel
2-4 LTVN_ISP
i ≤ 0.5 mA rms
Exposed accessible
parts
Page 9
STANDARD NOTES FOR SERVICING
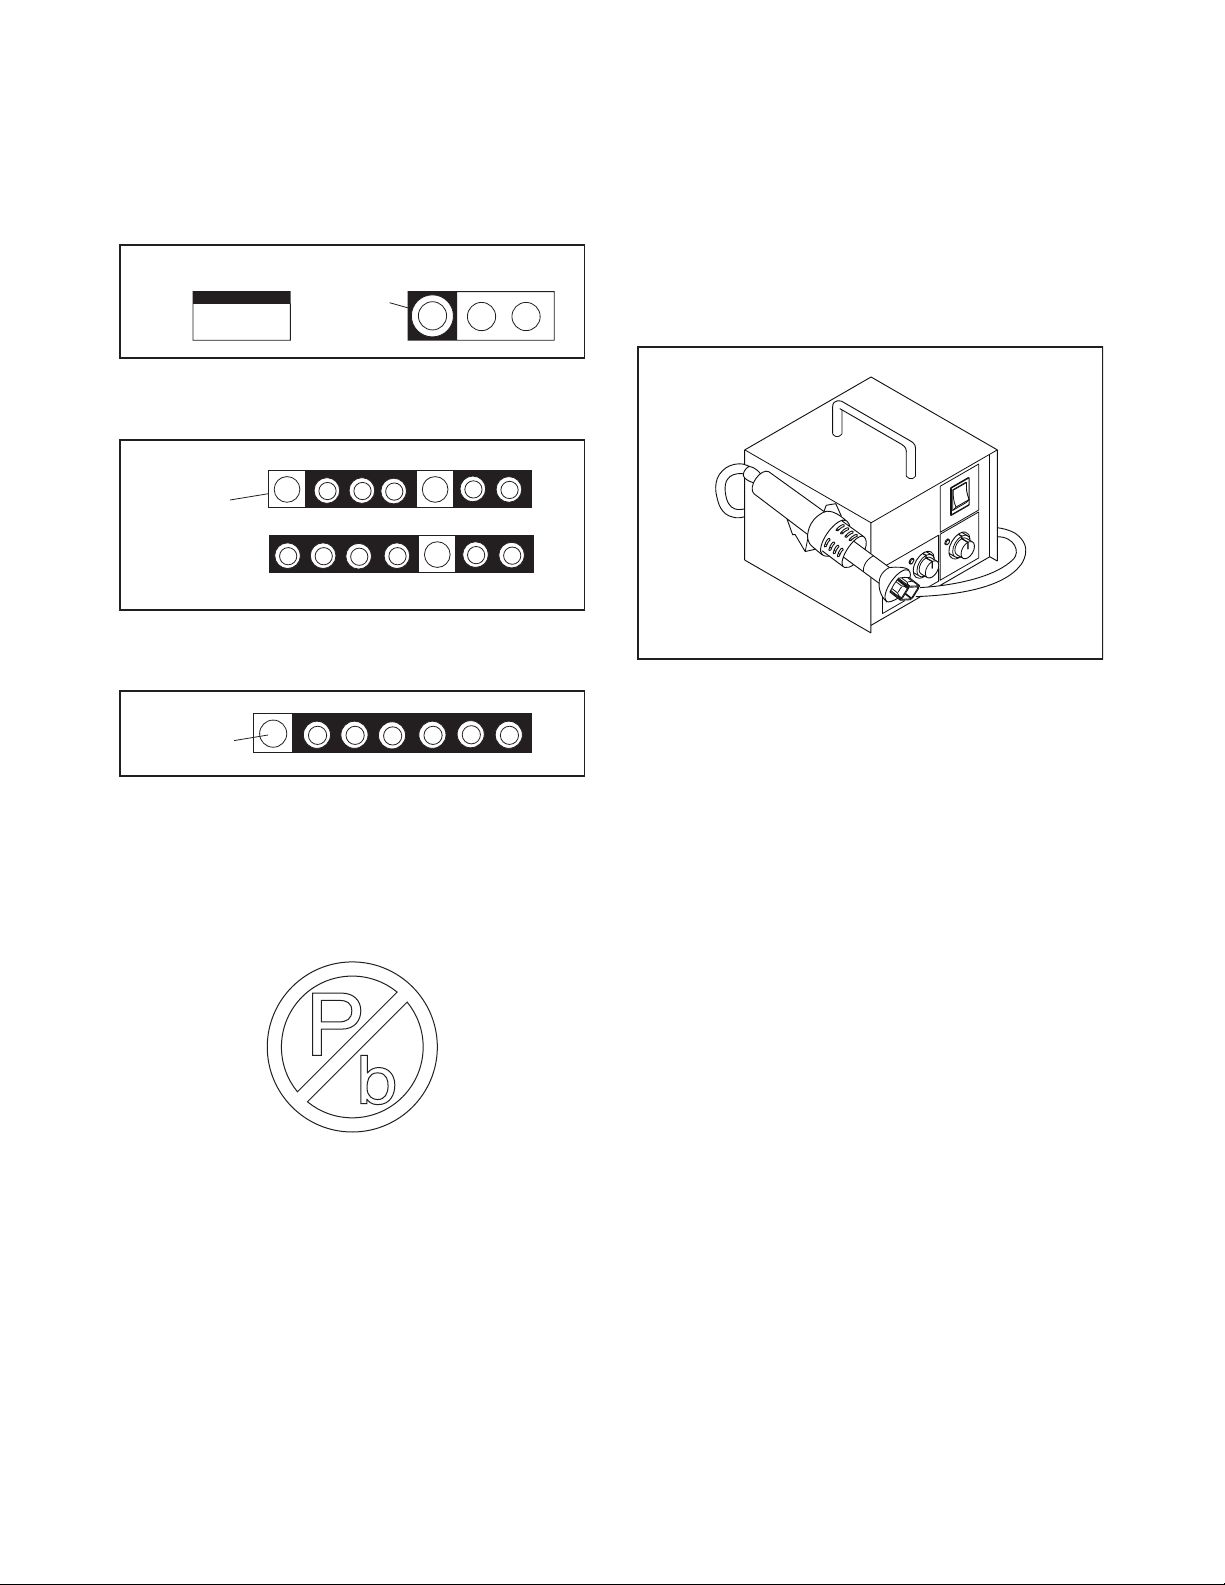
Circuit Board Indications
1. The output pin of the 3 pin Regulator ICs is
indicated as shown.
Top View
Out
2. For other ICs, pin 1 and every fifth pin are
indicated as shown.
Pin 1
3. The 1st pin of every male connector is indicated as
shown.
Pin 1
Input
In
Bottom View
5
10
Pb (Lead) Free Solder
Pb free mark will be found on PCBs which use Pb
free solder. (Refer to figure.) For PCBs with Pb free
mark, be sure to use Pb free solder. For PCBs
without Pb free mark, use standard solder.
Pb free mark
How to Remove / Install Flat Pack-IC
1. Removal
With Hot-Air Flat Pack-IC Desoldering Machine:
1. Prepare the hot-air flat pack-IC desoldering
machine, then apply hot air to the Flat Pack-IC
(about 5 to 6 seconds). (Fig. S-1-1)
Fig. S-1-1
2. Remove the flat pack-IC with tweezers while
applying the hot air.
3. Bottom of the flat pack-IC is fixed with glue to the
CBA; when removing entire flat pack-IC, first apply
soldering iron to center of the flat pack-IC and heat
up. Then remove (glue will be melted). (Fig. S-1-6)
4. Release the flat pack-IC from the CBA using
tweezers. (Fig. S-1-6)
CAUTION:
1. The Flat Pack-IC shape may differ by models. Use
an appropriate hot-air flat pack-IC desoldering
machine, whose shape matches that of the Flat
Pack-IC.
2. Do not supply hot air to the chip parts around the
flat pack-IC for over 6 seconds because damage
to the chip parts may occur. Put masking tape
around the flat pack-IC to protect other parts from
damage. (Fig. S-1-2)
3-1 TVN_SN
Page 10
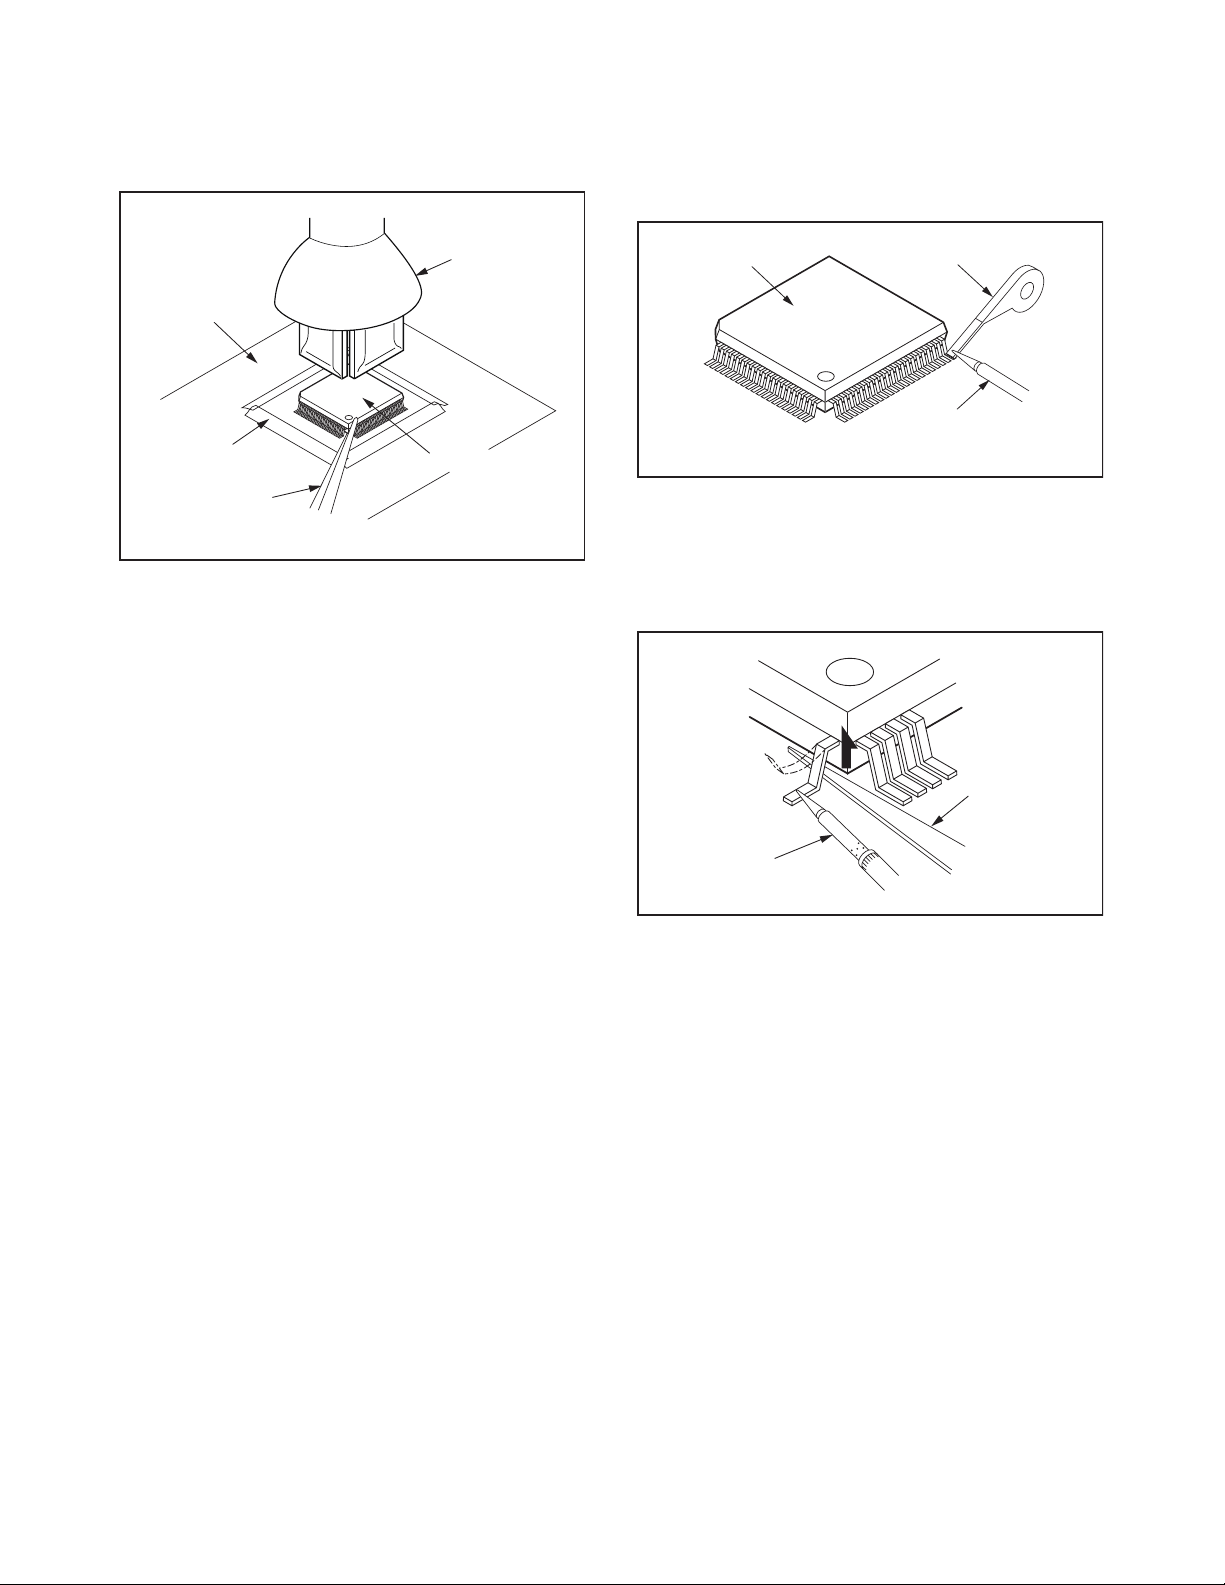
3. The flat pack-IC on the CBA is affixed with glue, so
be careful not to break or damage the foil of each
pin or the solder lands under the IC when
removing it.
With Soldering Iron:
1. Using desoldering braid, remove the solder from
all pins of the flat pack-IC. When you use solder
flux which is applied to all pins of the flat pack-IC,
you can remove it easily. (Fig. S-1-3)
CBA
Masking
Tape
Tweezers
Hot-air
Flat Pack-IC
Desoldering
Machine
Flat Pack-IC
Fig. S-1-2
Flat Pack-IC
Desoldering Braid
Soldering Iron
Fig. S-1-3
2. Lift each lead of the flat pack-IC upward one by
one, using a sharp pin or wire to which solder will
not adhere (iron wire). When heating the pins, use
a fine tip soldering iron or a hot air desoldering
machine. (Fig. S-1-4)
Sharp
Pin
Fine Tip
Soldering Iron
3. Bottom of the flat pack-IC is fixed with glue to the
CBA; when removing entire flat pack-IC, first apply
soldering iron to center of the flat pack-IC and heat
up. Then remove (glue will be melted). (Fig. S-1-6)
4. Release the flat pack-IC from the CBA using
tweezers. (Fig. S-1-6)
Fig. S-1-4
3-2 TVN_SN
Page 11

With Iron Wire:
1. Using desoldering braid, remove the solder from
all pins of the flat pack-IC. When you use solder
flux which is applied to all pins of the flat pack-IC,
you can remove it easily. (Fig. S-1-3)
2. Affix the wire to a workbench or solid mounting
point, as shown in Fig. S-1-5.
3. While heating the pins using a fine tip soldering
iron or hot air blower, pull up the wire as the solder
melts so as to lift the IC leads from the CBA
contact pads as shown in Fig. S-1-5.
4. Bottom of the flat pack-IC is fixed with glue to the
CBA; when removing entire flat pack-IC, first apply
soldering iron to center of the flat pack-IC and heat
up. Then remove (glue will be melted). (Fig. S-1-6)
5. Release the flat pack-IC from the CBA using
tweezers. (Fig. S-1-6)
Note: When using a soldering iron, care must be
taken to ensure that the flat pack-IC is not
being held by glue. When the flat pack-IC is
removed from the CBA, handle it gently
because it may be damaged if force is applied.
Hot Air Blower
2. Installation
1. Using desoldering braid, remove the solder from
the foil of each pin of the flat pack-IC on the CBA
so you can install a replacement flat pack-IC more
easily.
2. The “●” mark on the flat pack-IC indicates pin 1.
(See Fig. S-1-7.) Be sure this mark matches the 1
on the PCB when positioning for installation. Then
presolder the four corners of the flat pack-IC. (See
Fig. S-1-8.)
3. Solder all pins of the flat pack-IC. Be sure that
none of the pins have solder bridges.
Example :
Pin 1 of the Flat Pack-IC
is indicated by a " " mark.
Fig. S-1-7
To Solid
Mounting Point
CBA
Tweezers
Iron Wire
Soldering Iron
Fig. S-1-5
Fine Tip
Soldering Iron
Flat Pack-IC
or
Presolder
Flat Pack-IC
CBA
Fig. S-1-8
Fig. S-1-6
3-3 TVN_SN
Page 12
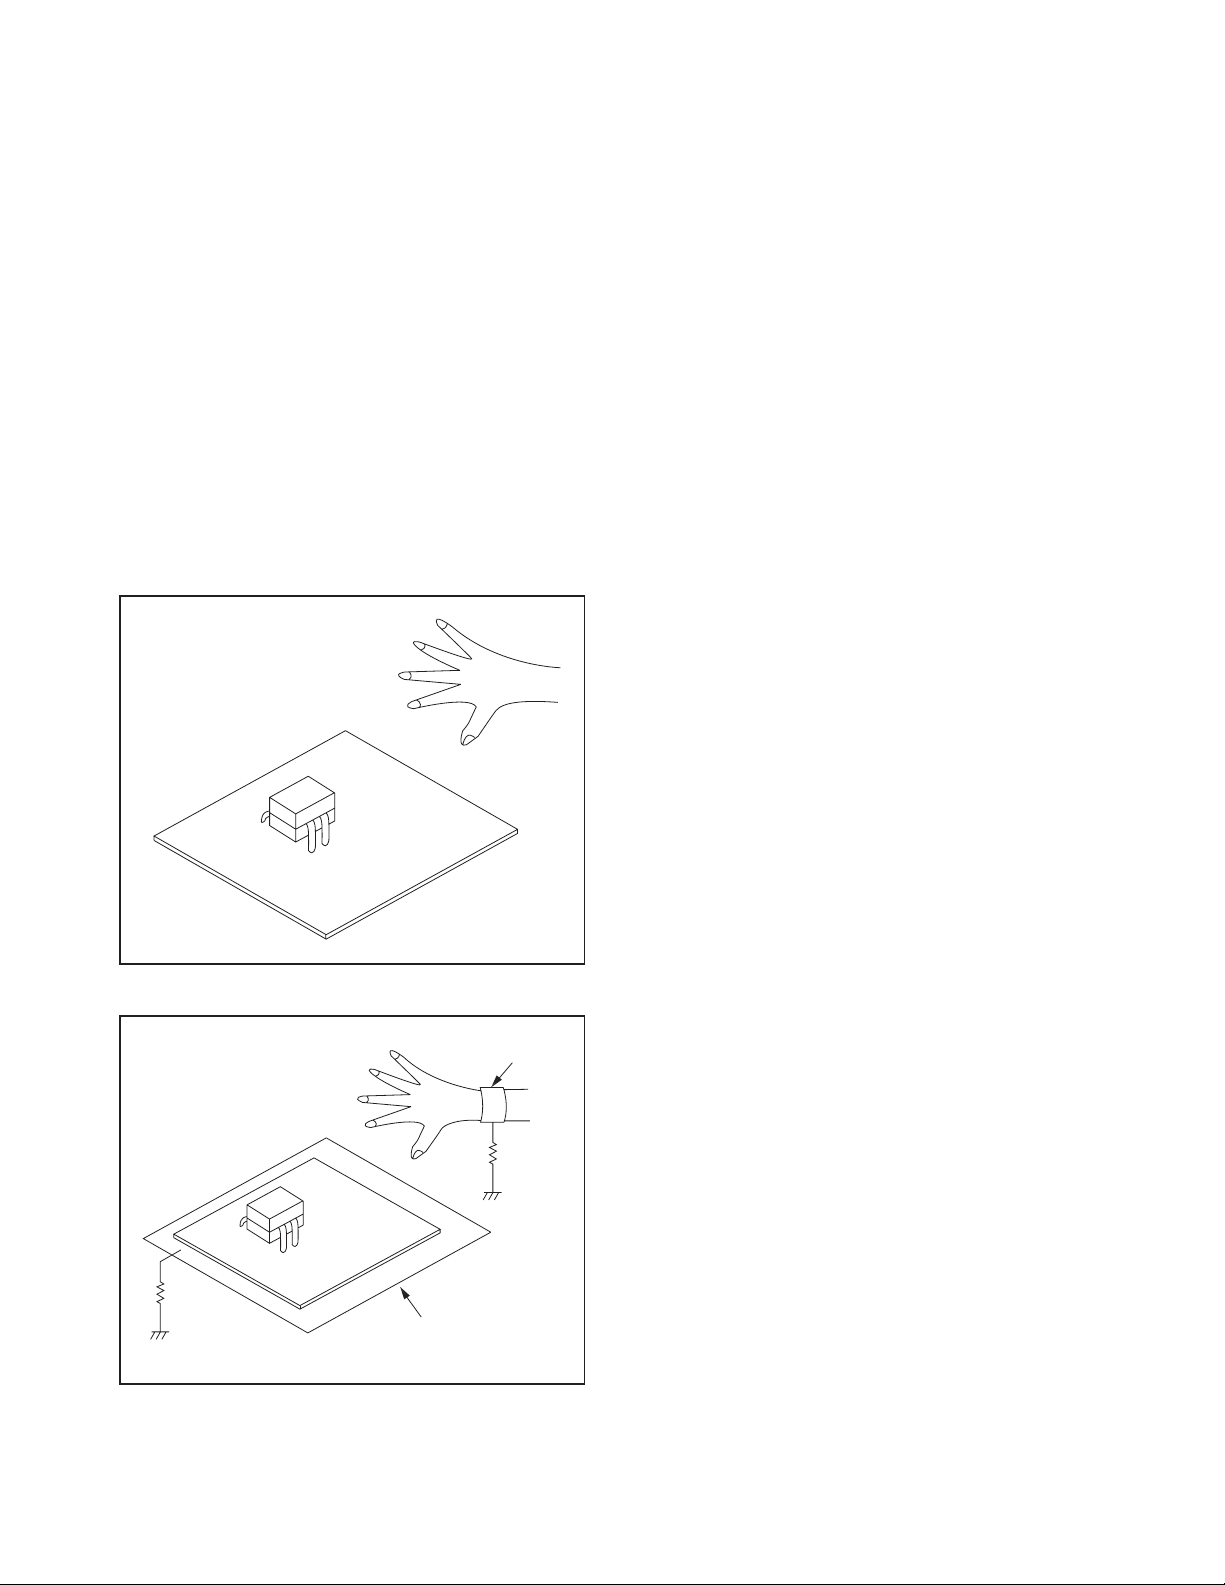
Instructions for Handling Semiconductors
Electrostatic breakdown of the semi-conductors may
occur due to a potential difference caused by
electrostatic charge during unpacking or repair work.
1. Ground for Human Body
Be sure to wear a grounding band (1 MΩ) that is
properly grounded to remove any static electricity that
may be charged on the body.
2. Ground for Workbench
Be sure to place a conductive sheet or copper plate
with proper grounding (1 MΩ) on the workbench or
other surface, where the semi-conductors are to be
placed. Because the static electricity charge on
clothing will not escape through the body grounding
band, be careful to avoid contacting semi-conductors
with your clothing.
<Incorrect>
<Correct>
1MΩ
CBA
Grounding Band
1MΩ
CBA
Conductive Sheet or
Copper Plate
3-4 TVN_SN
Page 13
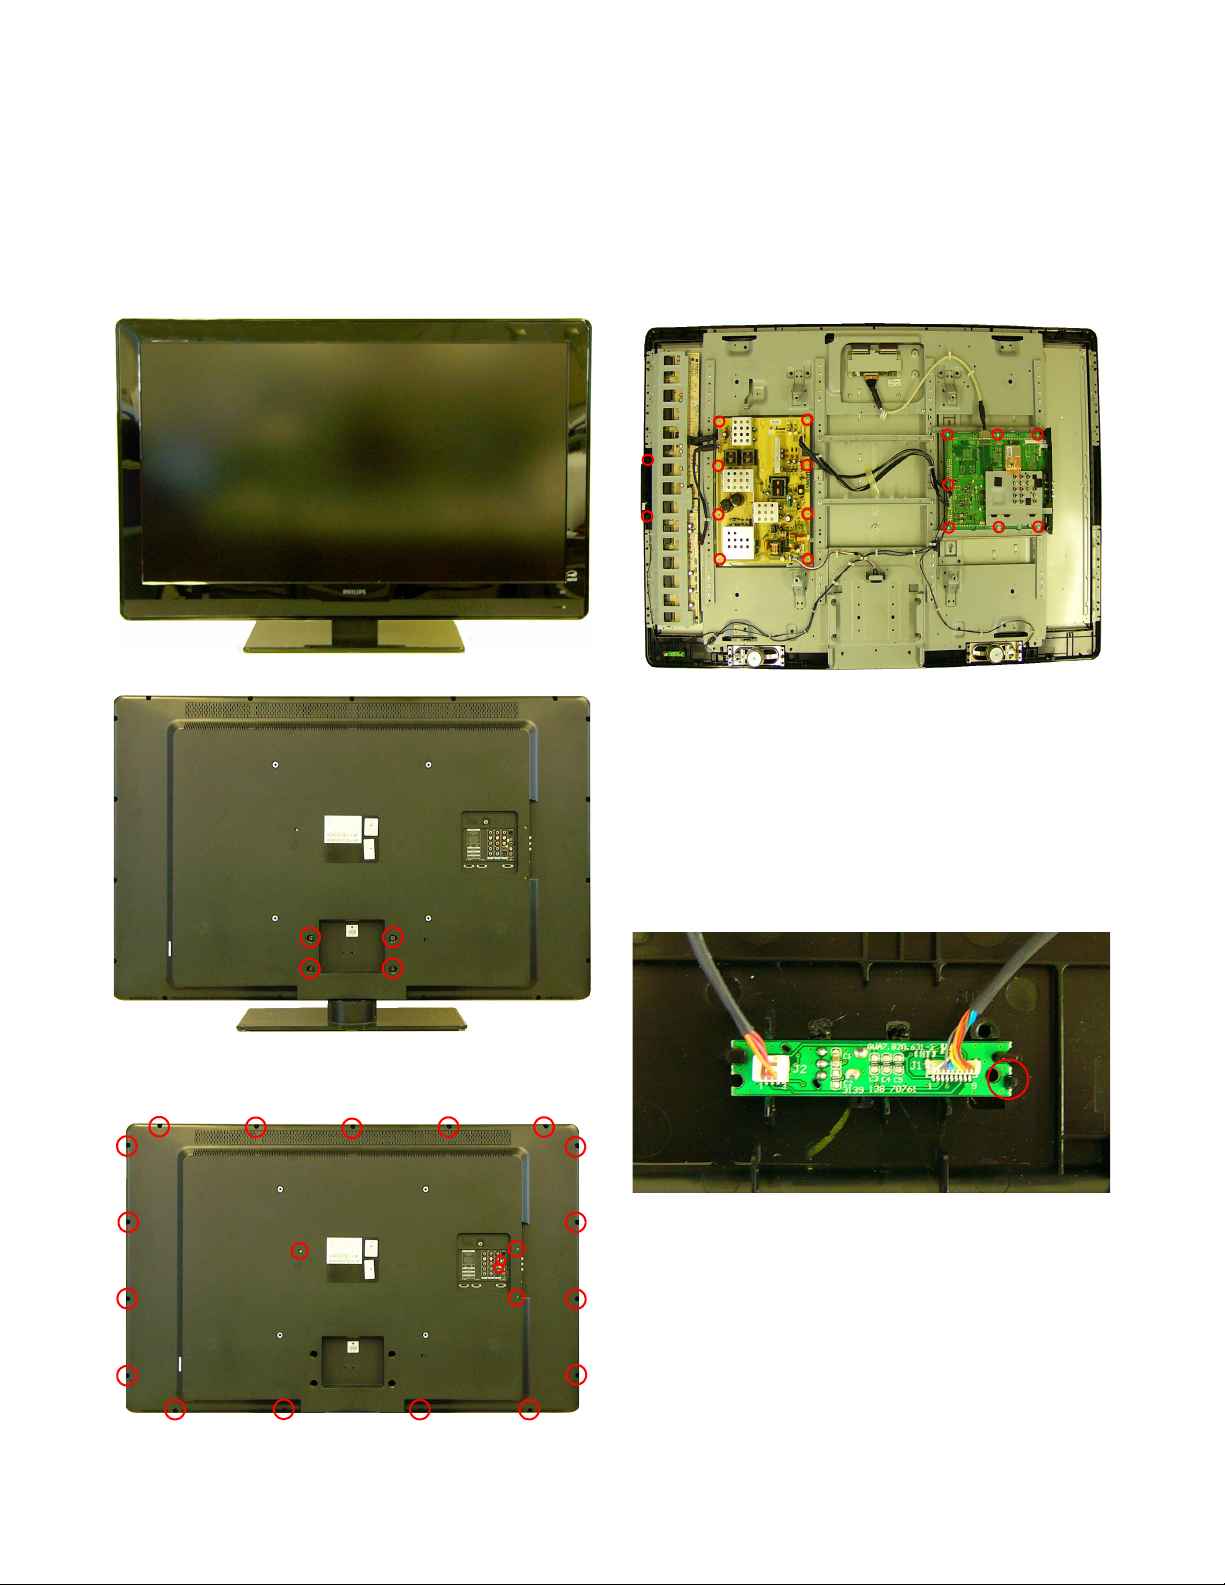
CABINET DISASSEMBLY INSTRUCTIONS
Notes: 1. Please put your machine on soft material to avoid to scrape panel when you disassemble it.
2. The installation specifications of the part are subject to change without notice.
3. By the difference of the LCD panel, the method of installing each part might be different.
1. Assembly/Panel Removal
Front view
Back view
1. Remove the stand.
Remove the 4 screws.
3. Remove the SSB.
Remove the 5 connectors. (1101, 1102, 1301,
1C02, 1D01)
Remove the 7 screws.
4. Remove the Power Supply Module.
Remove the 4 connectors. (CN2, CN3, CN6, CN7)
Remove the 8 screws.
5. Remove the ASSY Tact SW.
Remove the 2 screws and connector J1.
6. Remove the Module IR.
Release a locking tab.
2. Remove the Back cover assembly.
Remove the 22 screws.
4-1 PL9.0DC
Page 14
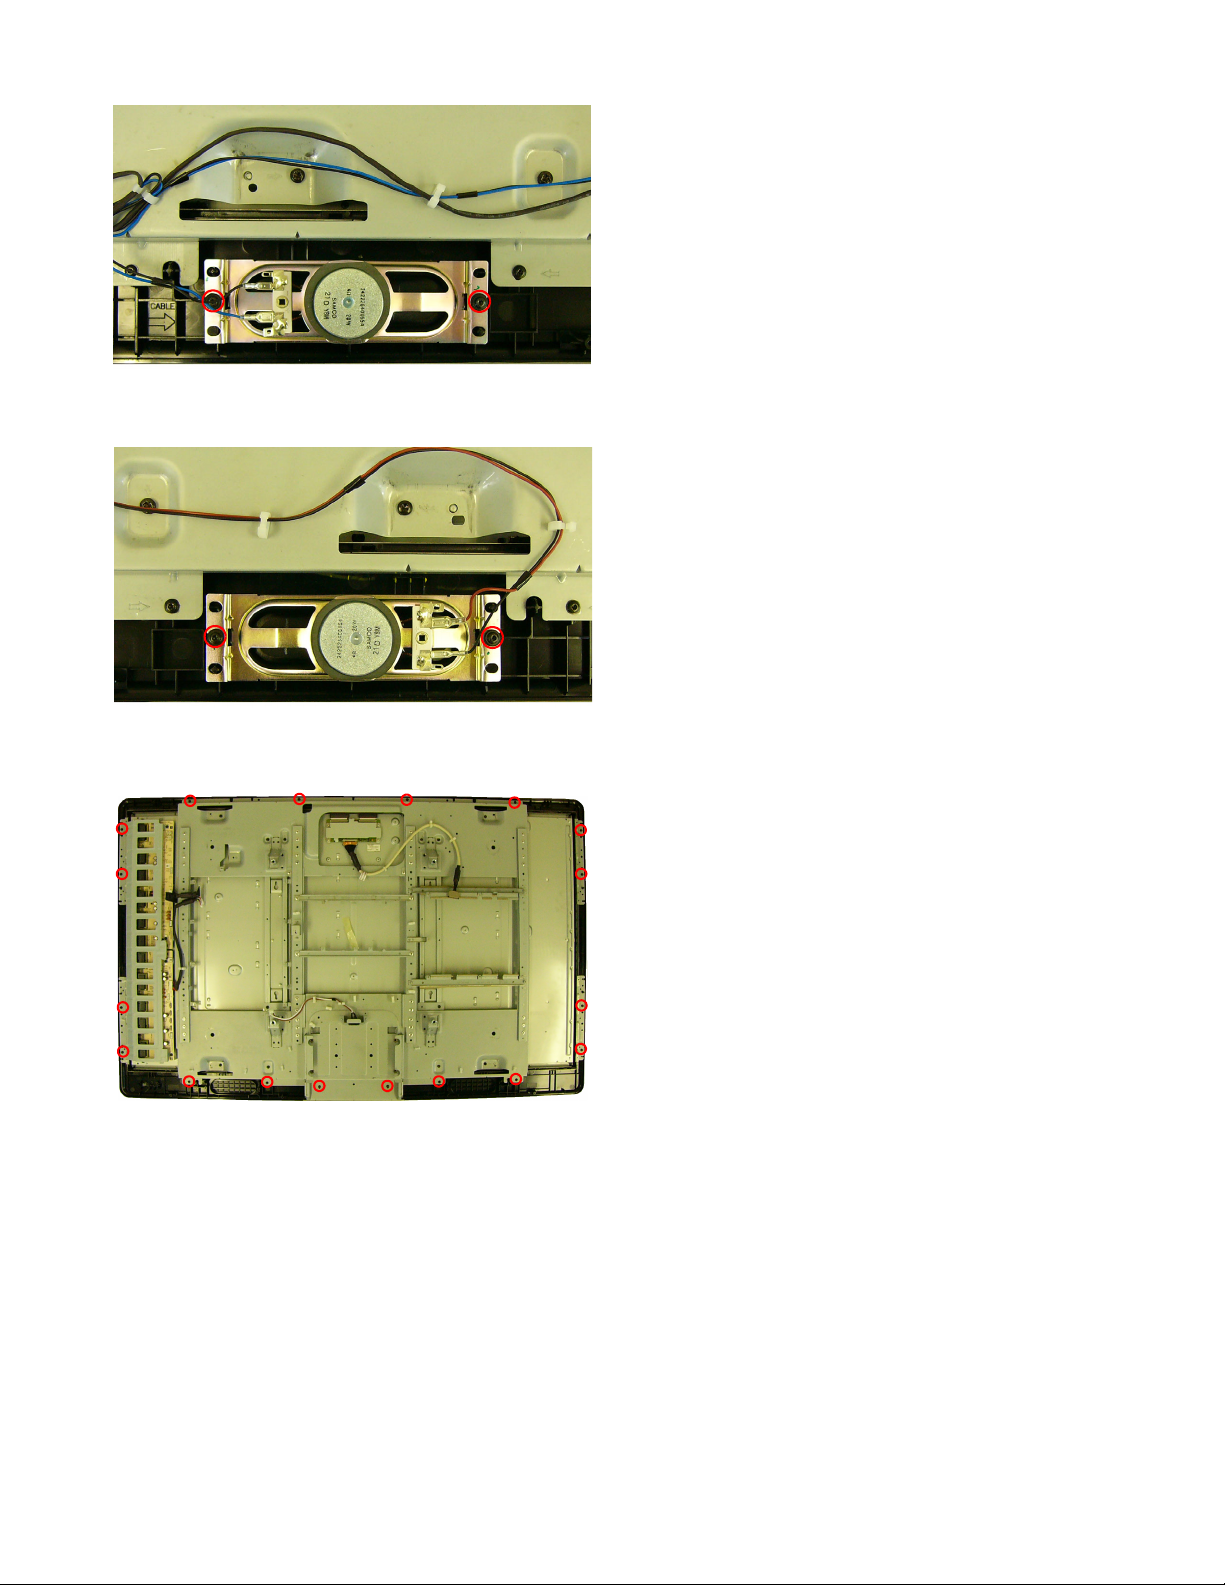
7. Remove the Left Loudspeaker.
Remove the 2 screws.
2. Set Re-assembly
To re-assemble the whole set, execute all processes in
reverse order.
Note: While re-assembling, make sure that all cables
are placed and connected in their original
position.
• The content is different according to the product.
8. Remove the Right Loudspeaker.
Remove the 2 screws.
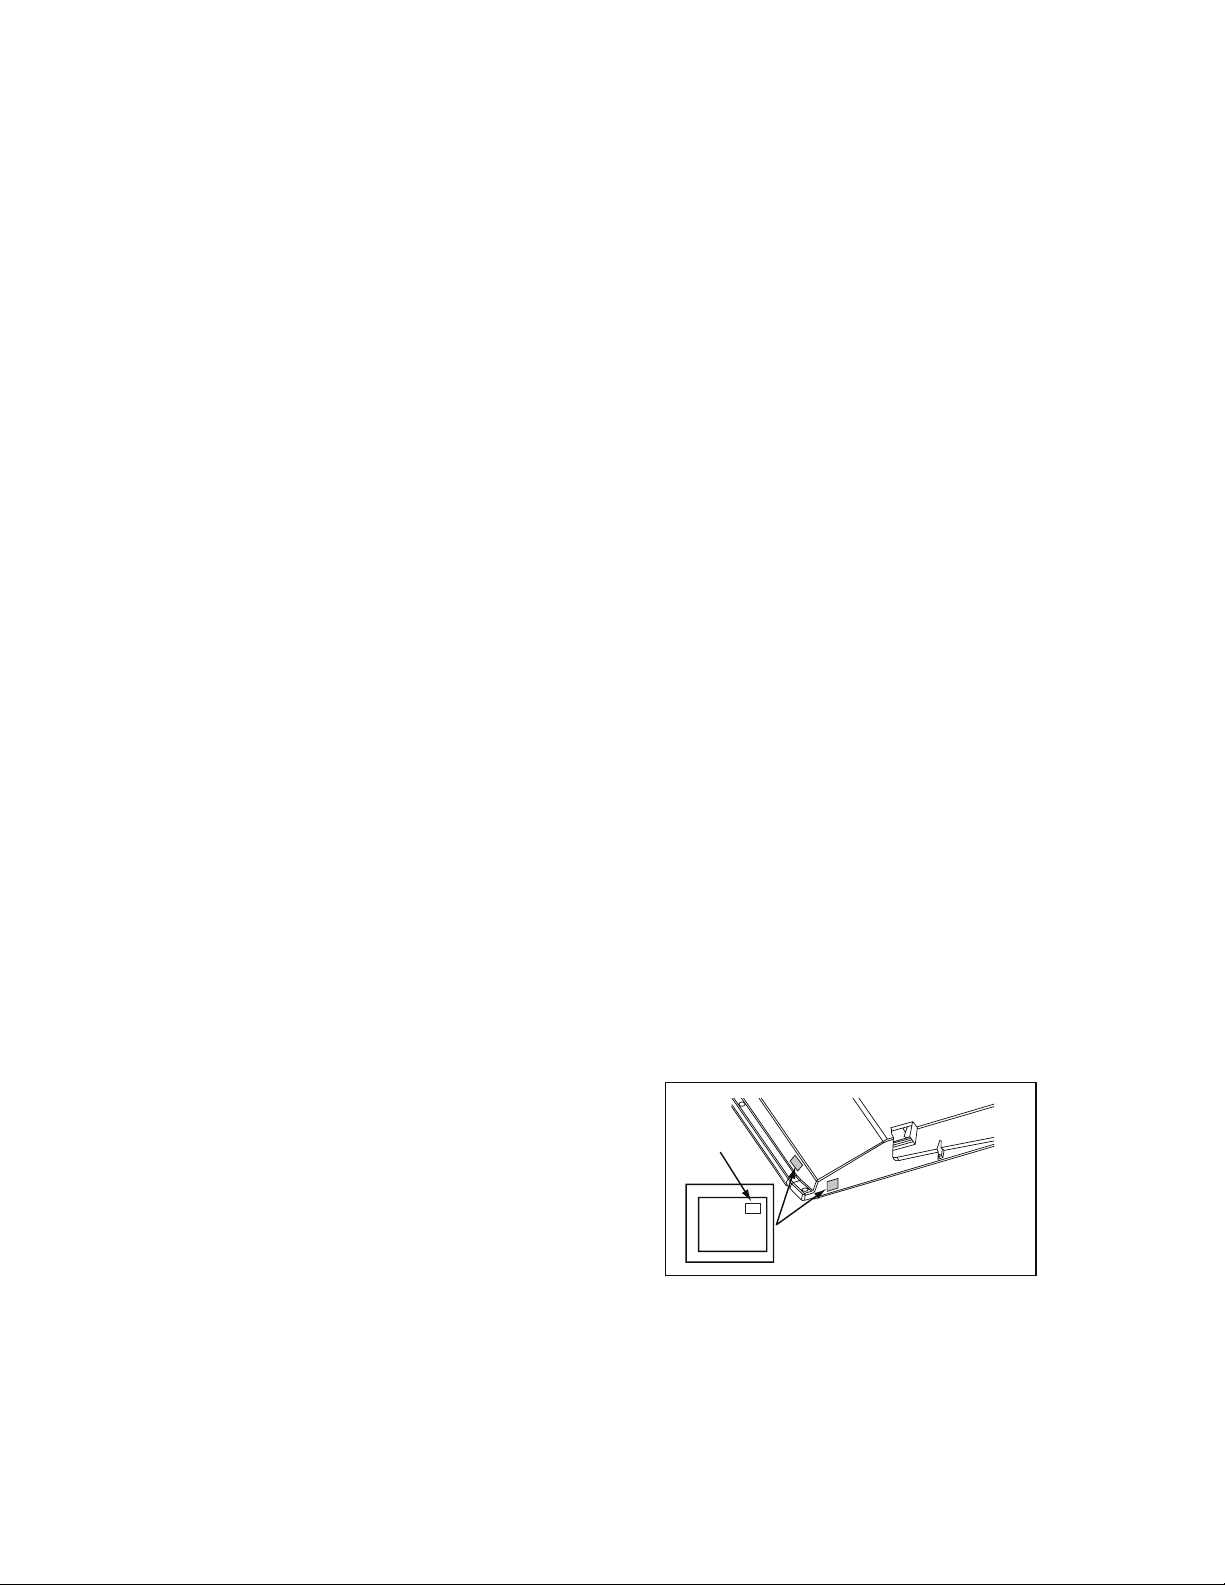
9. Remove the TFT-LCD.
Remove the 18 screws.
4-2 PL9.0DC
Page 15
SERVICE MODES, ERROR CODES, and FAULT FINDING
1Test Points
In the chassis schematics and layout overviews, the test points
are mentioned. In the schematics, test points are indicated with
“Fxxx” or “Ixxx”, in the layout overviews with a “half-moon” sign.
As most signals are digital, it will be difficult to measure
waveforms with a standard oscilloscope.
Perform measurements under the following conditions:
• Service Default Mode.
• Video: Color bar signal.
• Audio: 3 kHz left, 1 kHz right.
2 Service Modes
The Service Mode feature is split into four parts:
• Service Default Mode (SDM).
• Service Alignment Mode (SAM).
• Customer Service Mode (CSM).
• Computer Aided Repair Mode (ComPair).
SDM and SAM offer features, whic
engineer to repair/align a TV set. Some features are:
• A pre-defined situation to ensure measurements can be
made under uniform conditions (SDM).
• Activates the blinking LED procedure for error identification
when no picture is available (SDM).
• The possibility to overrule software protections when SDM
is entered via the Service pins.
• Make alignments (e.g. White T one), (de)select options,
enter options codes, reset the error buffer (SAM).
• Display information (“SDM”
right corner of screen, error buffer, software version,
operating hours, options
The CSM is a Service Mode that can be enabled by the
consumer. The CSM displays diagnosis information, which the
customer can forward to the dealer or call centre. In CSM
mode, “CSM”, is displayed in the top right corner of the screen.
The information provided in CSM and the purpose of CSM is to:
• Increase the home repair hit rate.
• Decrease the number of nuisance calls.
• Solved customers' problem without home visit.
2.1 General
h can be used by the Service
or “SAM” indication in upper
and option codes, sub menus).
Life Timer
During the life time cycle of the TV set, a timer is kept (called
“Op. Hour”). It counts the normal operation hours (not the
Stand-by hours). The actual value of the timer is displayed in
SDM and SAM in a decimal value. Every two soft-resets
increase the hour by +1. Standby hours are not counted.
Software Identification, Version and Cluster
The software ID, version, and cluster will be shown in the main
menu display of SDM, SAM, and CSM.
The screen will show: “AAAABCD X.YY”, where:
• AAAA
• B
is the chassis name: LC92. (Development chassis)
is the region indication: E= Europe, A= AP/China, U=
NAFTA, L= LATAM.
• C is the display indication: L= LCD, P= Plasma.
• D is the language/feature indication: P= Philips, M=
Magnavox.
• X is the main version number: this is updated with a major
change of specification (incompatible with the previous
software version). Numbering will go from 1 - 9 and A - Z.
– If the main version number changes, the new version
number is written in the NVM.
– If the main version number changes, the default
settings are loaded.
•
is the sub version number: this is updated with a minor
YY
change (backwards compatible with the previous versions)
Numbering will go from 00 - 99.
– If the sub version number changes, the new version
number is written in the NVM.
– If the NVM is fresh, the software identification, version,
and cluster will be written to NVM.
Display Option Code Selection
When after an SSB or display exchange, the display option
code is not set properly, it will result in a TV with “no display”.
Therefore, it is required to set this display option code after
such a repair.
To do so, press the following key sequence on a standard RC
transmitter: “062598"directly followed by MENU and "xxx"
where “xxx” is a 3 digit decimal value of the panel type: see
column “Panel Code” in table “Option Codes OP1...OP7” (ch.
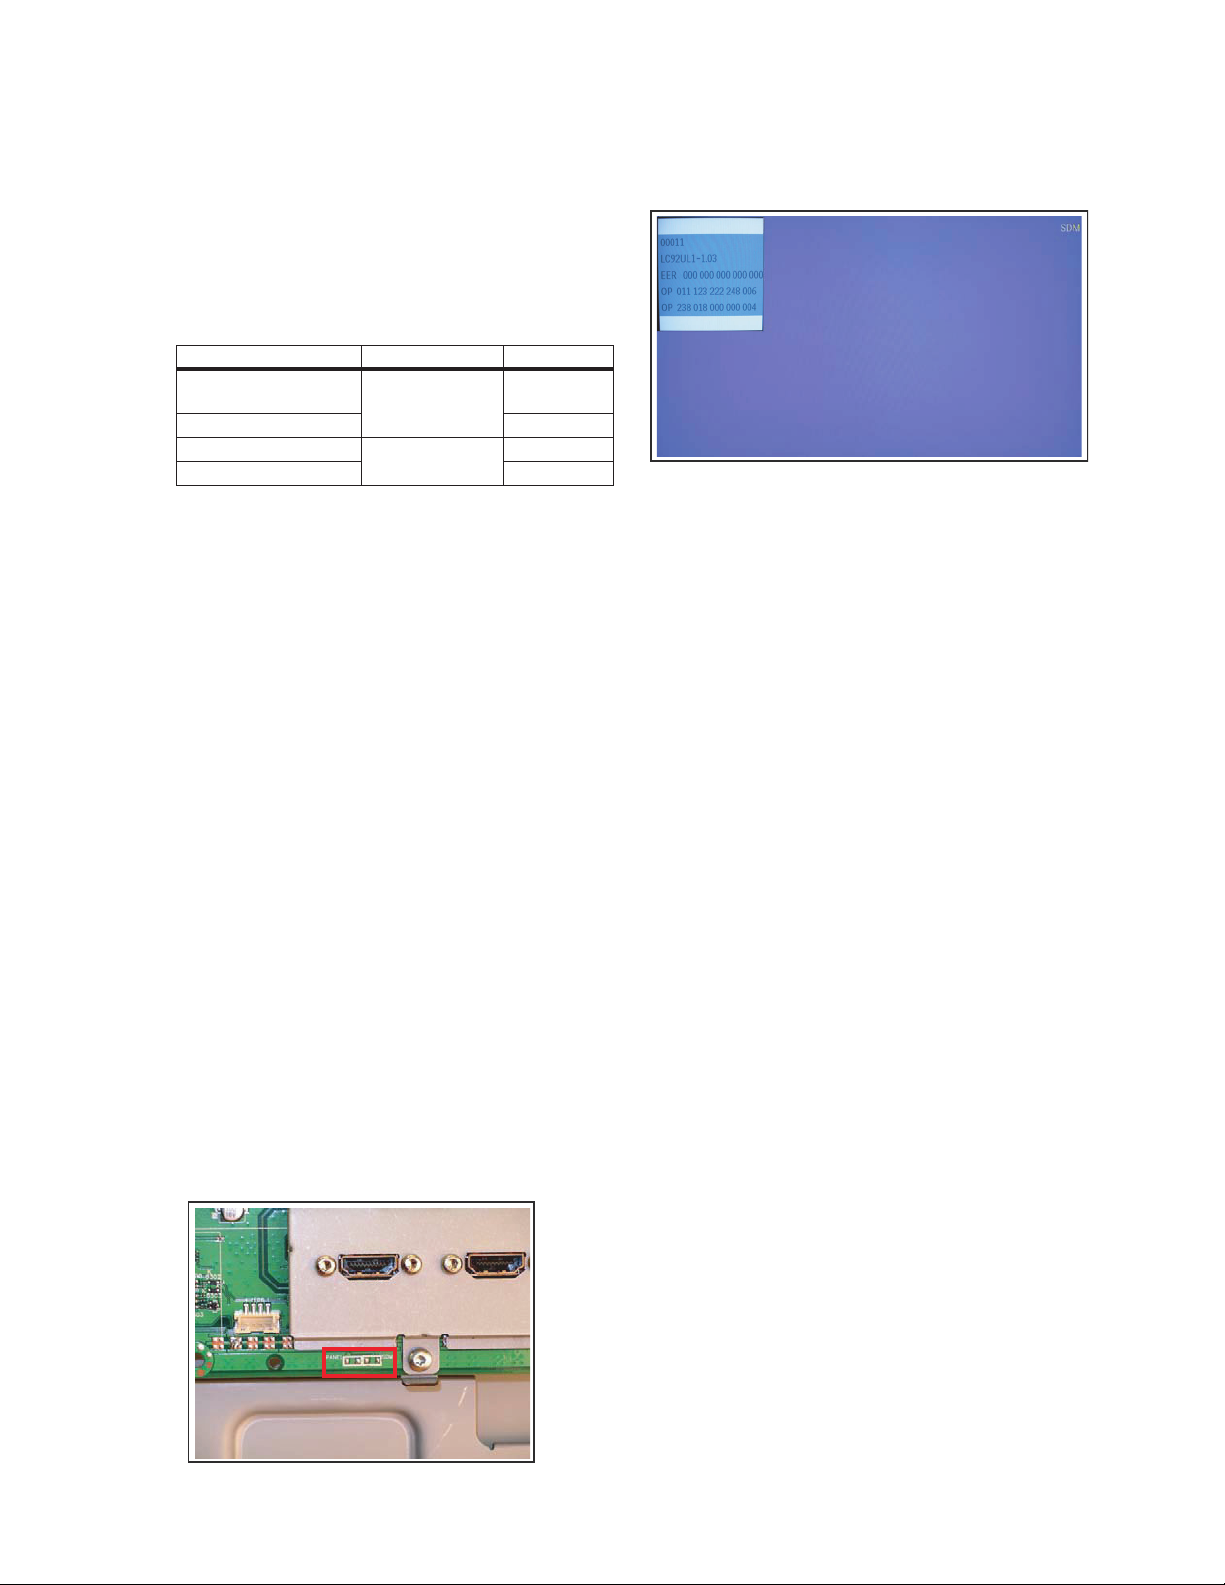
8), or see sticker on the side/bottom of the cabinet. When the
value is accepted and stored in NVM, the set will switch to
Stand-by, to indicate that the process has been completed.
Some items are applicable to all Service Modes or are general.
These are listed below.
Display Option
Code
39mm
040
PHILIPS
MODEL:
2PF9968/10
3
27mm
SERIAL NO:
PROD.
AG 1A0620 000001
(CTN Sticker)
Figure 1 Location of Display Option Code sticker
During this algorithm, the NVM-content must be filtered,
because several items in the NVM are TV-related and not SSBrelated (e.g. Model and Prod. S/N). Therefore, “Model” and
“Prod. S/N” data is changed into “See Type Plate”.
In case a call centre or cons
umer reads “See Type Plate” in
CSM mode, he needs to look to the side/bottom sticker to
identify the set, for further actions.
5-1 PL9.0FSM
Page 16
Service Default Mode (SDM)
2.2
Purpose
Set the TV in SDM mode in order to be able to:
• Create a pre-defined setting for measurements to be
made.
• Override software protections.
• Start the blinking LED procedure.
• Read the error buffer.
• Check the life timer.
Specifications
Table 1 SDM default settings
Region Freq. (MHz)
Europe (except France),
AP-PAL/-Multi
NAFTA, AP-NTSC 61.25 (channel 3) NTSC M
ATAL
475.25 PAL B/G
Default syst.
L MACESecnarF
M LAPM
On Screen Menu
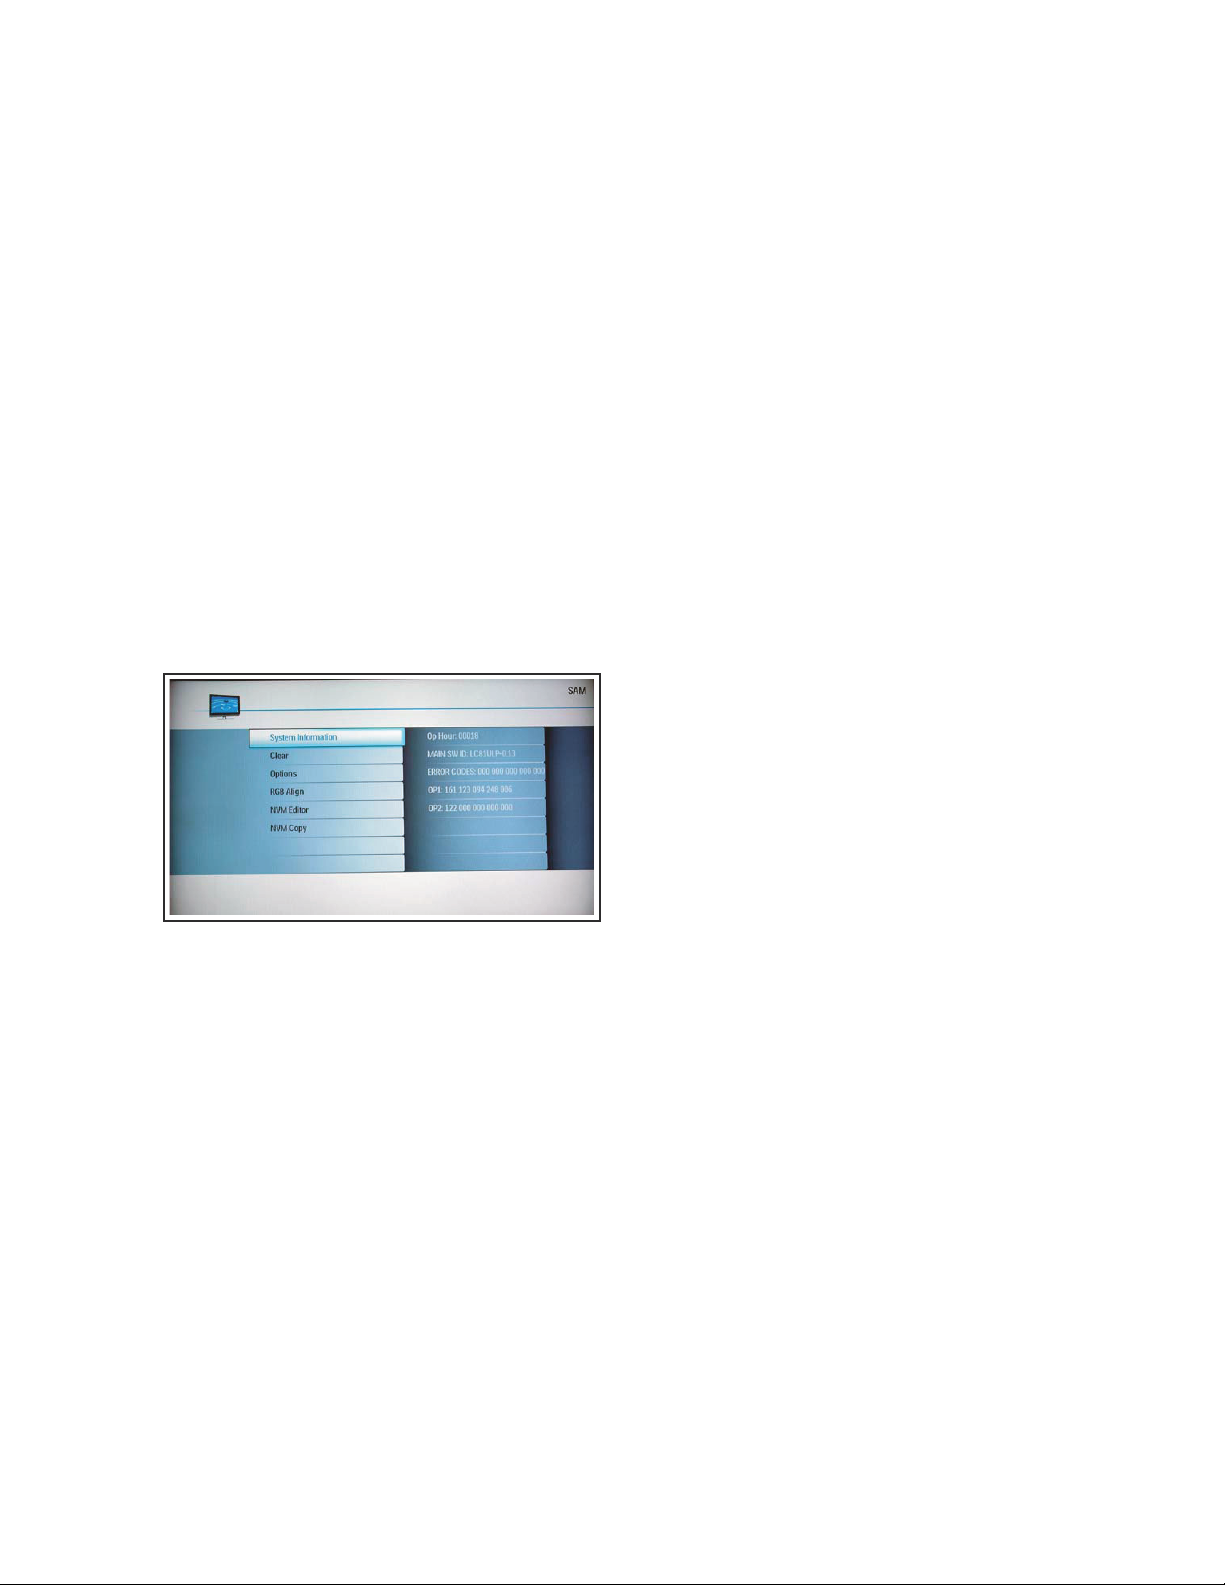
After activating SDM, the following screen is visible, with SDM
in the upper right corner of the screen to indicate that the
television is in Service Default Mode.
Figure 3 SDM menu
• Set linear video and audio settings to 50%, but volume to
25%. Stored user settings are not affected.
• All service-unfriendly modes (if present) are disabled, since
they interfere with diagnosing/repairing a set. These
service unfriendly modes are:
– (Sleep) timer.
– Blue mute/Wall paper.
– Auto switch “off” (when there is no “ident” signal).
– Hotel or hospital mode.
– Child lock or parental lock (manual or via V-chi p).
– Skipping, blanking of “Not favorite”, “Skipped” or
“Locked” presets/channels.
– Automatic storing of Personal Preset or Last Status
settings.
– Automatic user menu time-out (menu switches back/
OFF automatically.
– Auto Volume levelling (AVL).
How to Activate
To activate SDM, use
• Press the following key sequence on the remote control
transmitter: “062596” directly followed by the MENU button
(do not allow the display to time out between entries while
keying the sequence).
• Short one of the “Service” jumpers on the TV board during
cold start (see Figures “Service jumper”). Then press the
mains button (remove the short after start-up).
Caution: Activating SDM by shorting “Service” jumpers will
override the DC speaker prot
I2C error (error 4), and the Tr
(error 5). When doing this, the service-technician must
know exactly what he is doing, as it could damage the
television set.
one
of the following methods:
ection (error 1), the General
ident video processor error
Menu explanation:
• HHHHH: Are the operating hours (in decimal).
AAAABCD-X.YY
•
“General” -> “Software Identification, Version, and Cluster”
for the SW name definition.
• EER: Shows all errors detected since the last time the
buffer was erased. Five errors possible.
• OP: Used to read-out the option bytes. See “Options” in the
Alignments section for a detailed description. Ten codes (in
two rows) are possible.
How to Navigate
As this mode is read only, there is not much to navigate. To
switch to other modes, use one of the following methods:
• Command MENU from the user remote will enter the
normal user menu (brightness, contrast, color, etc...) with
“SDM” OSD remaining, and pressing MENU key again will
return to the last status of SDM again.
• To prevent the OSD from interfering with measurements in
SDM, command “OSD” or “i+” (“STATUS” or “INFO” f or
NAFTA and LATAM) from the user remote will toggle the
OSD “on/off” with “SDM” OSD remaining always “on”.
• Press the following key sequence on the remote control
transmitter: “062596” directly followed by the OSD/
STATUS/INFO/I+ button to switch to SAM (do not allow the
display to time out between entries while keying the
sequence).
How to Exit
Switch the set to STANDBY by pressing the mains button on
the remote control transmitter or on the television set.
If you switch the television set “off” by removing the mains (i.e.,
unplugging the television), the television set will remain in SDM
when mains is re-applied, and the error buffer is not cleared.
The error buffer will only be cleared when the “clear” command
is used in the SAM menu.
: See paragraph “Service Modes” ->
Figure 2 Service jumper (SSB component side)
Note:
• If the TV is switched “off” by a power interrupt while in SDM,
the TV will show up in the last status of SDM menu as soon
as the power is supplied again. The error buffer will not be
cleared.
• In case the set is in Factory mode by accident (with “F”
displayed on screen), by pressing and hold “VOL-“ and
“CH-” together should leave Factory mode.
5-2 PL9.0FSM
Page 17
Service Alignment Mode (SAM)
2.3
Purpose
• To change option settings.
• To display / clear the error code buffer.
• To perform alignments.
Specifications
• Operation hours counter (maximum five digits displayed).
• Software version, error codes, and option settings display.
• Error buffer clearing.
• Option settings.
• Software alignments (White Tone).
• NVM Editor.
• Set the screen mode to full screen (all content on screen is
visible).
How to Activate
To activate SAM, use one of the following methods:
• Press the following key sequence on the remote control
transmitter: “
STATUS/INFO/I+ button (it depends on region which
button is present on the RC). Do not allow the display to
time out between entries while keying the sequence.
After entering SAM, the following screen is visible, with SAM in
the upper right corner of the screen to indicate that the
television is in Service Alignment Mode.
” directly followed by the OSD/
062596
4.
RGB Align. Used to align the White Tone. See “White
Tone” in the “Alignments” chapter for a detailed
description.
5. NVM Editor. Can be used to change the NVM data in the
television set. See also paragraph “Fault Finding and
Repair Tips” further on.
6.
NVM Copy. Gives the possibility to copy/load the NVM file
to/from an USB stick.
How to Navigate
• In the SAM menu, select menu items with the UP/DOWN
keys on the remote control transmitter. The selected item
will be indicated. When not all
use the UP/DOWN keys to display the next / previous
menu items.
• With the LEFT/RIGHT keys, it is possible to:
– Activate the selected menu item.
– Change the value of the selected menu item.
– Activate the selected sub menu.
• When you press the MENU button twice while in top level
SAM, the set will switch to the normal user menu (with the
SAM mode still active in the background). To return to the
SAM menu press the MENU button.
• The “OSD/STATUS/INFO/i+ ” key from the user remote will
toggle the OSD “on/off” with “SAM” OSD remaining always
“on”.
• Press the following key sequence on the remote control
transmitter: “062596” directly followed by the MENU
to switch to SDM (do not allow the display to time out
between entries while keying the sequence).
menu items fit on the screen,
button
Figure 4 SAM menu
Menu explanation:
1. System Information:
Op. Hour. This represents the life timer. The timer
•
counts normal operation hours, but does not count
Stand-by hours.
MAIN SW ID.
•
“General” -> “Software Identification, Version, and
Cluster” for the SW name definition.
• ERROR CODES . Shows all errors detected since the
last time the buffer was erased. Five errors possible.
• OP1 / OP2. Used to read-out the option bytes. See
“Options” in the Alignments section for a detailed
description. Ten codes are possible.
2.
3. Options.. Used to set the option bits. See “Options” in the
Erases the contents of the error buffer. Select the
Clear.
CLEAR menu item and press the MENU RIGHT key. The
content of the error buffer is cleared.
“Alignments” chapter for a detailed description.
See paragraph “Service Modes” ->
How to Store SAM Settings
To store the settings changed in SAM mode (except the
OPTIONS and RGB ALIGN settings), leave the top level SAM
menu by using the POWER button on the remote control
transmitter or the television set. The mentioned exceptions
must be stored separately via the STORE button.
How to Exit
Switch the set to STANDBY by pressing the mains button on
the remote control transmitter or the television set.
Note:
• When the TV is switched “off” by a power interrupt while in
SAM, the TV will show up in “normal operation mode” as
soon as the power is supplied again. The error buffer will
not be cleared.
• In case the set is in Factory mode by accident (with “F”
displayed on screen), by pressing and hold “VOL-“ and
“CH-” together should leave Factory mode.
5-3 PL9.0FSM
Page 18
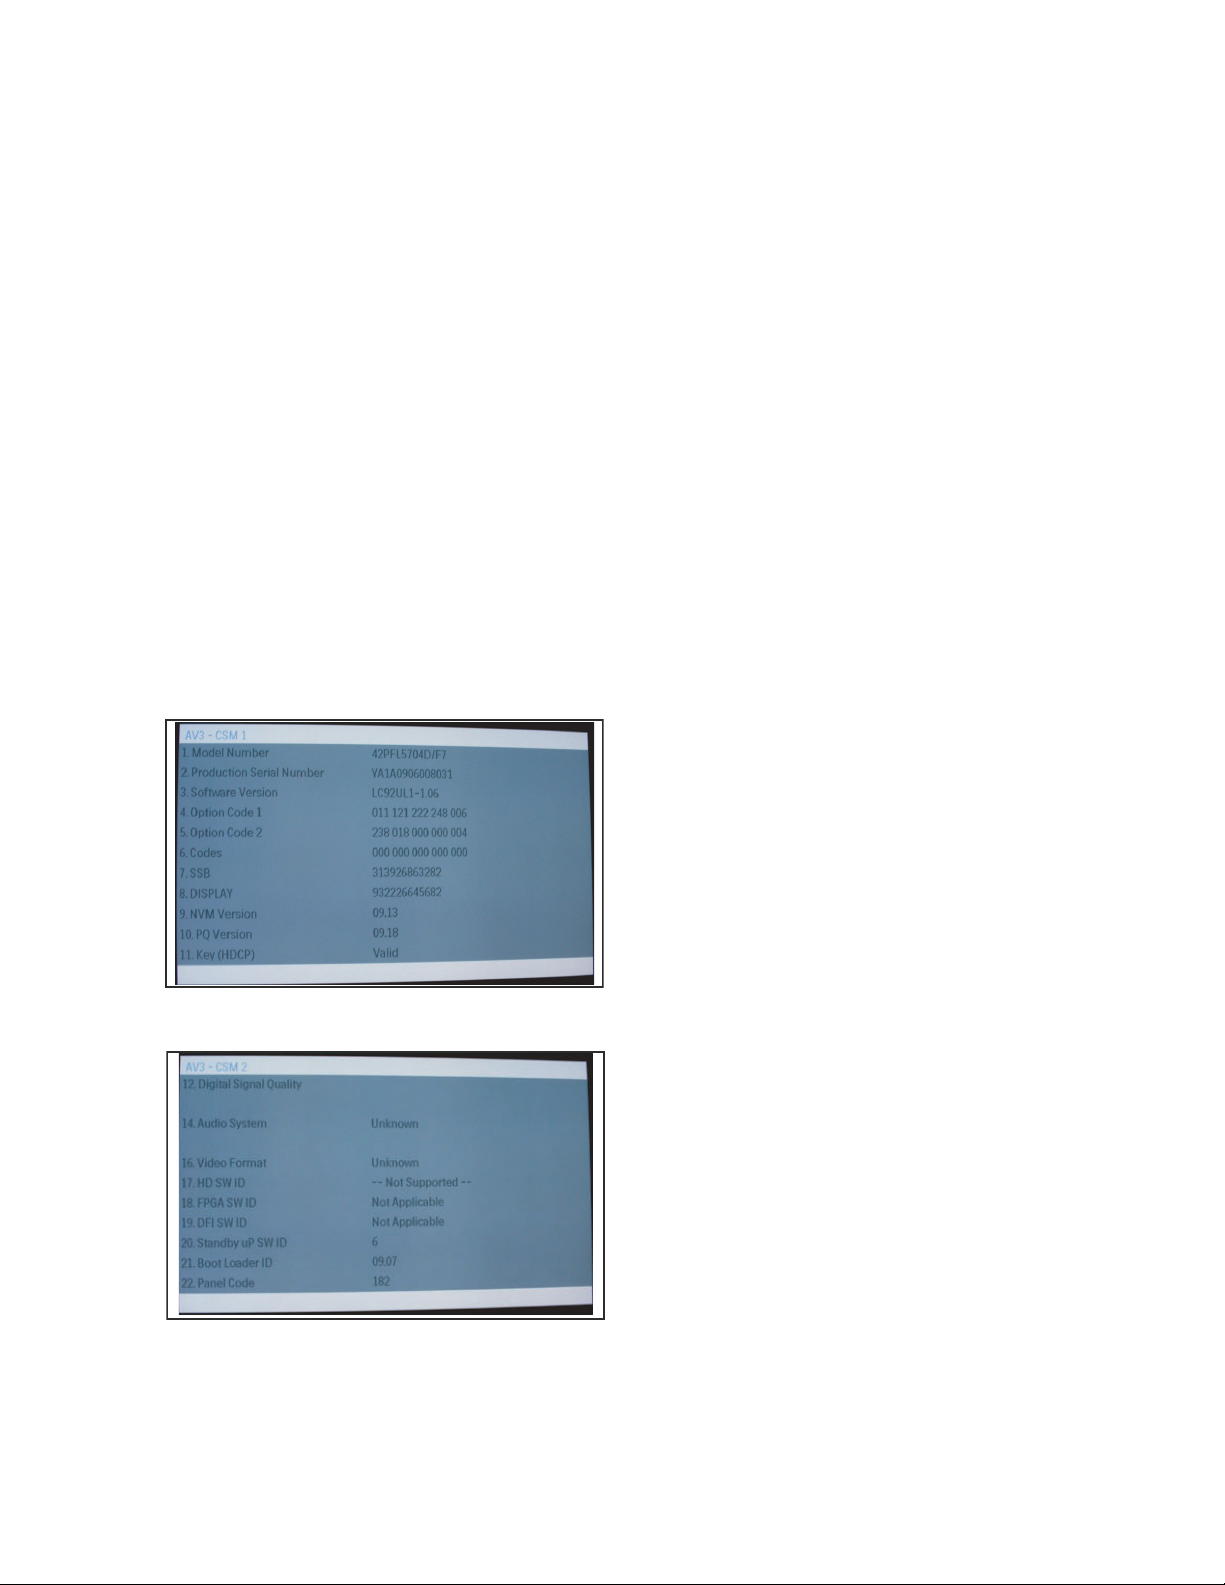
2.4 Customer Service Mode (CSM)
Purpose
The Customer Service Mode shows error codes and
information on the TV’s operation settings. A call centre can
instruct the customer (by telephone) to enter CSM in order to
identify the status of the set. This helps them to diagnose
problems and failures in the TV before making a service call.
The CSM is a read-only mode; therefore, modifications are not
possible in this mode.
Specifications
• Ignore “Service unfriendly modes”.
• Line number for every line (to make CSM language
independent).
• Set the screen mode to full screen (all contents on screen
is visible).
• After leaving the Customer Service Mode, the original
settings are restored.
• Possibility to use
enter the specific channel number on the RC.
How to Activate
To activate CSM, press the following key sequence on a
standard remote control transmitter: “123654” (do not allow the
display to time out between entries while keying the sequence).
Upon entering the Customer Service Mode, the following
screen will appear:
“CH+” or “CH-” for channel surfing, or
Menu Explanation
1. Model Number.
2. Production Serial Number. Product serial no., e.g.
SV1A0805123456 (*). SV= Production center, 1= BOM
code, A= Service version change code, 08= Production
year, 05= Production week, 123456= Serial number.
3. Software Version. Main software cluster and version is
displayed.
4. Option Code 1. Option code information (group 1).
5. Option Code 2. Option code information (group 2).
6. Codes. Error buffer contents.
7.
8. Display.
9. NVM Version. The NVM software version no.
10. PQ Version . PQ (picture quality) data version. This is a
11. Key (HDCP). Indicates if the HDMI keys (or HDCP keys)
12. Digital Signal Quality. Tuner signal condition in
13. Blank.
14. Audio System. Gives information about the audio system
15. HDAU. HDMI audio stream detection. “YES” means audio
16. Video Format. Gives information about the video format of
17. HD SW ID. Shows the HD DNM software version.
18. FPGA SW ID. Shows the FPGA software version (if
19. DFI SW ID. Shows the DFI software version (if present).
20. Standby uP SW ID. Shows the Standby Processor
Indication of the SSB factory ID (= 12nc). (*)
SSB.
subset of the main SW.
are valid or not.
percentage.
of the selected transmitter (MONO/STEREO).
stream detected. “NO” means no audio stream present.
Only displayed when HDMI source is selected.
the selected transmitter (480p30/720p60/1080i50/1080i60,
etc...). Is applicable to both HDMI and CVI sources.
present).
software version.
Type number, e.g. XXPFL5704D/F7
Indication of the display ID (=12 nc). (*)
Figure 5 CSM menu -1- (example)
Figure 6 CSM menu -2- (example)
(*)
If an NVM IC is replaced or initialized, these items must be
re-written to the NVM. ComPair will foresee in a possibility to
do this.
How to Exit
To exit CSM, use one of the following methods:
• Press the MENU button twice on the remote control
transmitter.
• Press the POWER button on the remote control
transmitter.
• Press the POWER button on the television set.
5-4 PL9.0FSM
Page 19

3 Error Codes
3.1 Introduction
Error codes are required to indicate failures in the TV set. In
principle a unique error code is available for every:
• Activated protection.
• Failing I2C device.
• General I2C error.
• SDRAM failure.
The last five errors, stored in the NVM, are shown in the
Service menu’s. This is called the error buffer.
The error code buffer contains all errors detected since the last
time the buffer was erased. The buffer is written from left to
right. When an error occurs that is not yet in the error code
buffer, it is displayed at the left side and all other errors shift one
position to the right.
An error will be added to the buffer if this error differs from any
error in the buffer. The last found error is displayed on the left.
An error with a designated error code may never lead to a
deadlock situation. This means that it must always be
diagnosable (e.g. error buffer via OSD or blinking LED
procedure, ComPair to read from the NVM).
In case a failure identified by an error code automatically
results in other error codes (cause and effect), only the error
code of the MAIN failure is displayed.
Example: In case of a failure of the I2C bus (CAUSE), the error
code for a “General I2C failure” and “Protection errors” is
displayed. The error codes for the single devices (EFFECT) is
not displayed. All error codes are stored in the same error
buffer (TV’s NVM) except when the NVM itself is defective.
3.2 How to Read the Error Buffer
You can read the error buffer in 3 ways:
• On screen via the SAM/SDM/CSM (if you have a picture).
Example:
– ERROR: 0 0 0 0 0 : No errors detected
– ERROR: 6 0 0 0 0 : Error code 6 is the last and only
detected error
– ERROR: 9 6 0 0 0 : Error code 6 was detected first and
error code 9 is the last detected (newest) error
• Via the blinking LED procedure (when you have no
picture). See “The Blinking LED Procedure”.
•Via ComPair.
5-5 PL9.0FSM
Page 20
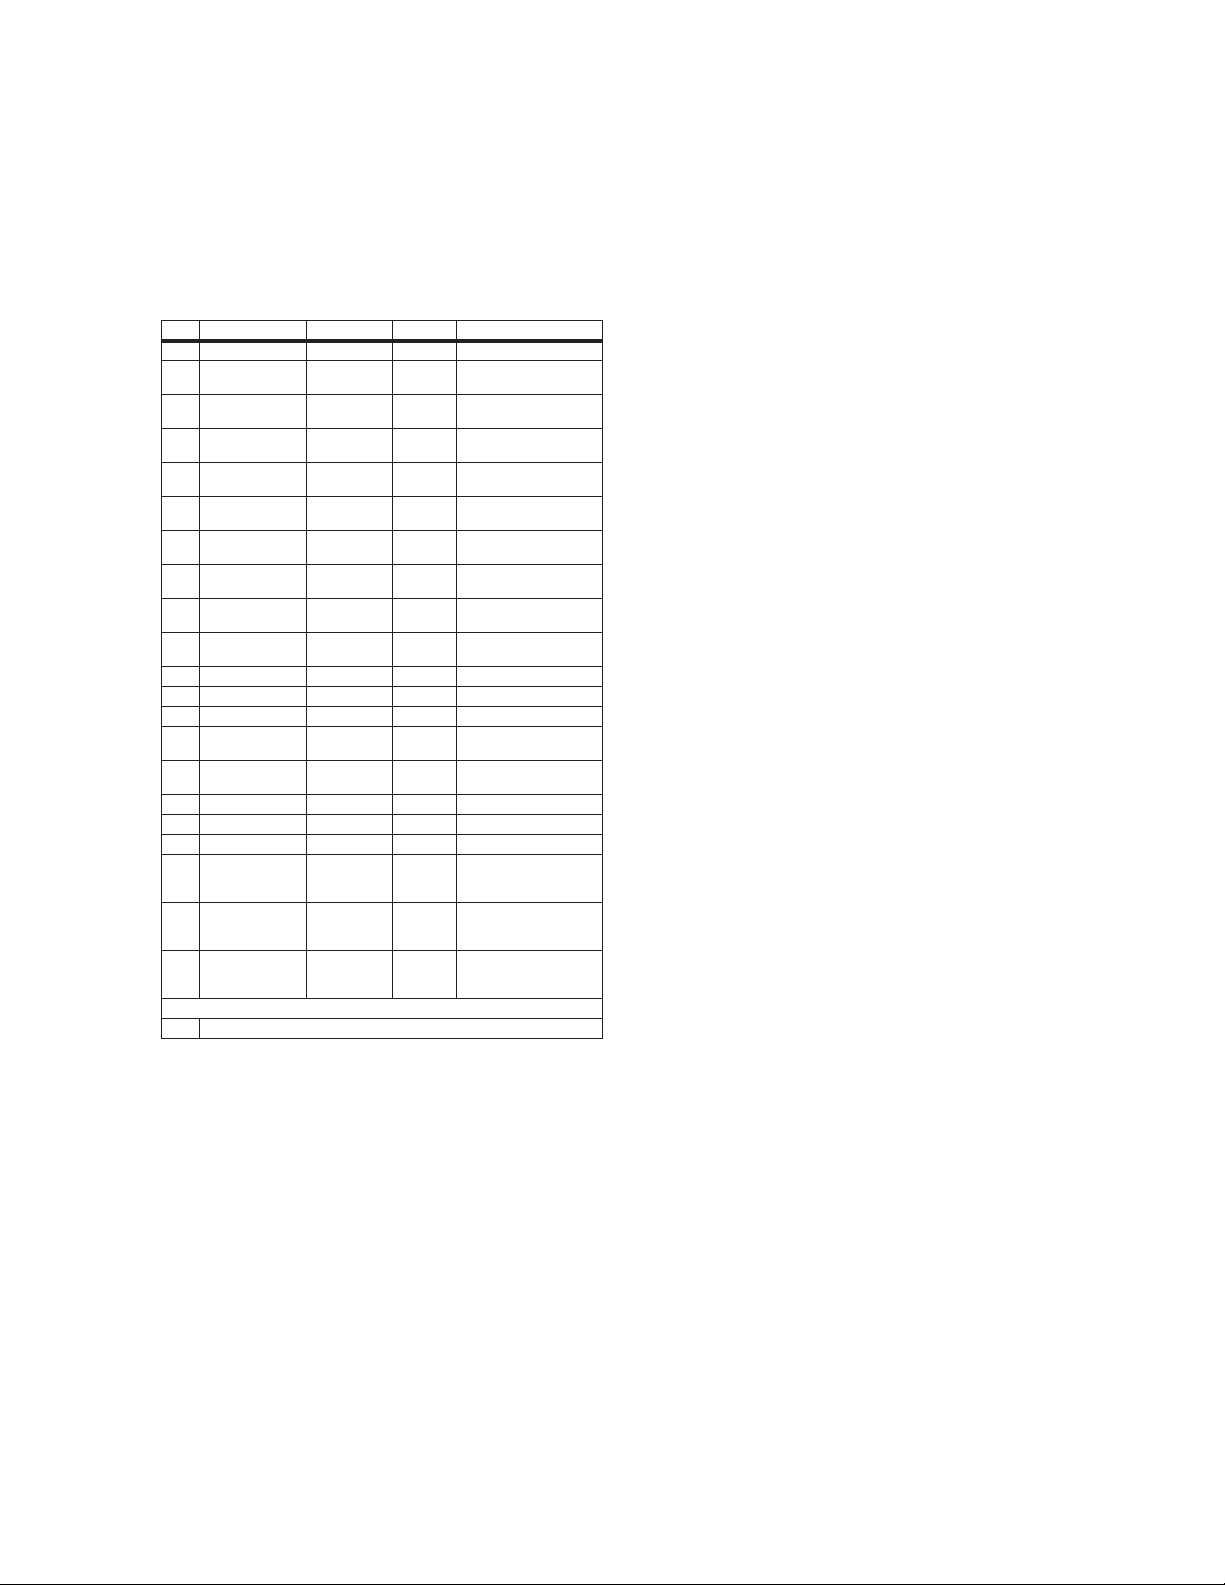
3.3 Error Codes
4 The Blinking LED Procedure
In case of non-intermittent faults, write down the errors present
in the error buffer and clear the error buffer before you begin
the repair. This ensures that old error codes are no longer
present.
If possible, check the entire contents of the error buffer. In
some situations, an error code is only the result of another error
and not the actual cause of the problem (for example, a fault in
the protection detection circuitry can also lead to a protection).
Code Error Description
0 No Error -- -- -- N/A -- -- --
1 DC Protection MT5382
2 +12V Failure WT61P7
3 Stand-by Control-
ler I2C
4 General I2C I2C0 Bus Error Log Communication Error on
5 # MT8280 I2C I2C0 Bus Error Log Communication Error with
6 System NVM I2C I2C0 Bus Protection Communication Error with
7 Tuner Tuner I2C Bus Error Log Communication Error with
8 IF/PLL Demodula-
tor
9 Ambilight FPGA I2C0 Bus Error Log Communication Error with
10 Reserved -- -- -- N/A -- -- --
11 Reserved -- -- -- N/A -- -- --
12 Reserved -- -- -- N/A -- -- --
13 HDMI Switch I2C I2C0 Bus Error Log Communication Error with
14 MT8280 DRAM1 DRAM R/W
15 Reserved -- -- -- N/A -- -- --
16 Reserved -- -- -- N/A -- -- --
17 Reserved -- -- -- N/A -- -- --
18 # Channel Decoder
I2C
19 # Pro Idiom I2C I2C0 Bus Error Log Communication Error with
21 # Bolt-On HDMI
NVM I2C
Detection via: Type
(7A01)
(7E23)
I2C0 Bus Protection Communication Error with
Tu ner I2C Bus Error L og Communication E rror with
(7B02/03)
I2C0 Bus Error Log Communication Error with
I2C0 Bus Error Log Communication Error with
Remarks
Protection DC_PROT = Low
Protection POWER_DOWN = Low
WT61P7
I2C0 Bus
MT8280
System NVM
Tuner TDQU
TDA9886
EC2S
Sil9185
Error Log R/W Error with DRAM1 or
DRAM2
MT5112 (reserved for
BDS modules)
Pro Idiom (reserved for
BDS modules)
BDS Bolt-On (reserved for
BDS modules)
4.1 Introduction
The software is capable of identifying different kinds of errors.
Because it is possible that more than one error can occur over
time, an error buffer is available, which is capable of storing the
last five errors that occurred. This is useful if the OSD is not
working properly.
Errors can also be displayed by the blinking LED procedure.
The method is to repeatedly let the front LED pulse with as
many pulses as the error code number, followed by a period of
1.5 seconds in which the LED
is “off”. Then this sequence is
repeated.
Example (1) : error code 4 will result in four times the sequence
LED “on” for 0.25 seconds / LED “off” for 0.25 seconds. After
this sequence, the LED will be “off” for 1.5 seconds. Any RC5
command terminates the sequence. Error code LED blinking is
in red color.
Example (2) : the content of the error buffer is “12 9 6 0 0”
After entering SDM, the following occurs:
• 1 long blink of 5 seconds to start the sequence,
• 12 short blinks followed by a pause of 1.5 seconds,
• 9 short blinks followed by a pause of 1.5 seconds,
• 6 short blinks followed by a pause of 1.5 seconds,
• 1 long blink of 1.5 seconds
to finish the sequence,
• The sequence starts again with 12 short blinks.
4.2 Displaying the Entire Error Buffer
Additionally, the entire error buffer is displayed when Service
Mode “SDM” is entered. In case the TV set is in protection or
Stand-by: The blinking LED procedure sequence (as in SDMmode in normal operation) must be triggered by the following
RC sequence: “MUTE” “062500” “OK ”.
In order to avoid confusion with RC5 signal reception blinking,
this blinking procedure is terminated when a RC5 command is
received.
# If IC/board available.
3.4 How to Clear the Error Buffer
The error code buffer is cleared in the following cases:
• By using the CLEAR command in the SAM menu:
• If the contents of the error buffer have not changed for 50
hours, the error buffer resets automatically.
Note:
If you exit SAM by disconnecting the mains from the
television set, the error buffer is not reset.
5-6 PL9.0FSM
Page 21

5 Fault Finding and Repair Tips
Table 2 NVM editor overview
Notes:
• It is assumed that the components are mounted correctly
with correct values and no bad solder joints.
•
any fault finding actions, check if the correct
Before
options are set.
5.1 Software Protections
Most of the protections and errors use either the stand-by or the
micro processor as detection device. Since in these cases,
checking of observers, polling of ADCs, and filtering of input
values are all heavily softwar
e based, these protections are
referred to as software protections.
There are several types of software related protections, solving
a variety of fault conditions:
• Protections related to supplies:
Protections related to breakdown of the safety check
•
check of the 12V.
mechanism. E.g. since the protection detections are done
by means of software, failing of the software will have to
initiate a protection mode since safety cannot be
guaranteed any more.
Remark on the Supply Errors
The detection of a supply dip or
playing of the set does not lead to
supply loss during the normal
a protection, but to a cold
reboot of the set. If the supply is still missing after the reboot,
the TV will go to protection.
Protections during Start-up
During TV start-up, some voltages and IC observers are
actively monitored to be able to optimize the start-up speed,
and to assure good operation of all components. If these
monitors do not respond in a defined way, this indicates a
malfunction of the system and leads to a protection.
5.2 Hardware Protections
The only real hardware protection in
an audio problem) the audio protecti
this chassis is (in case of
on circuit that will trigger
the uP to switch “off” the TV.
Repair Tip
• It is also possible that you have an audio DC protection
because of an interruption in one or both speakers (the DC
voltage that is still on the circuit cannot disappear through
the speakers).
Caution:
(dis)connecting the speaker wires during the ON
state of the TV at high volume can damage the audio
amplifier.
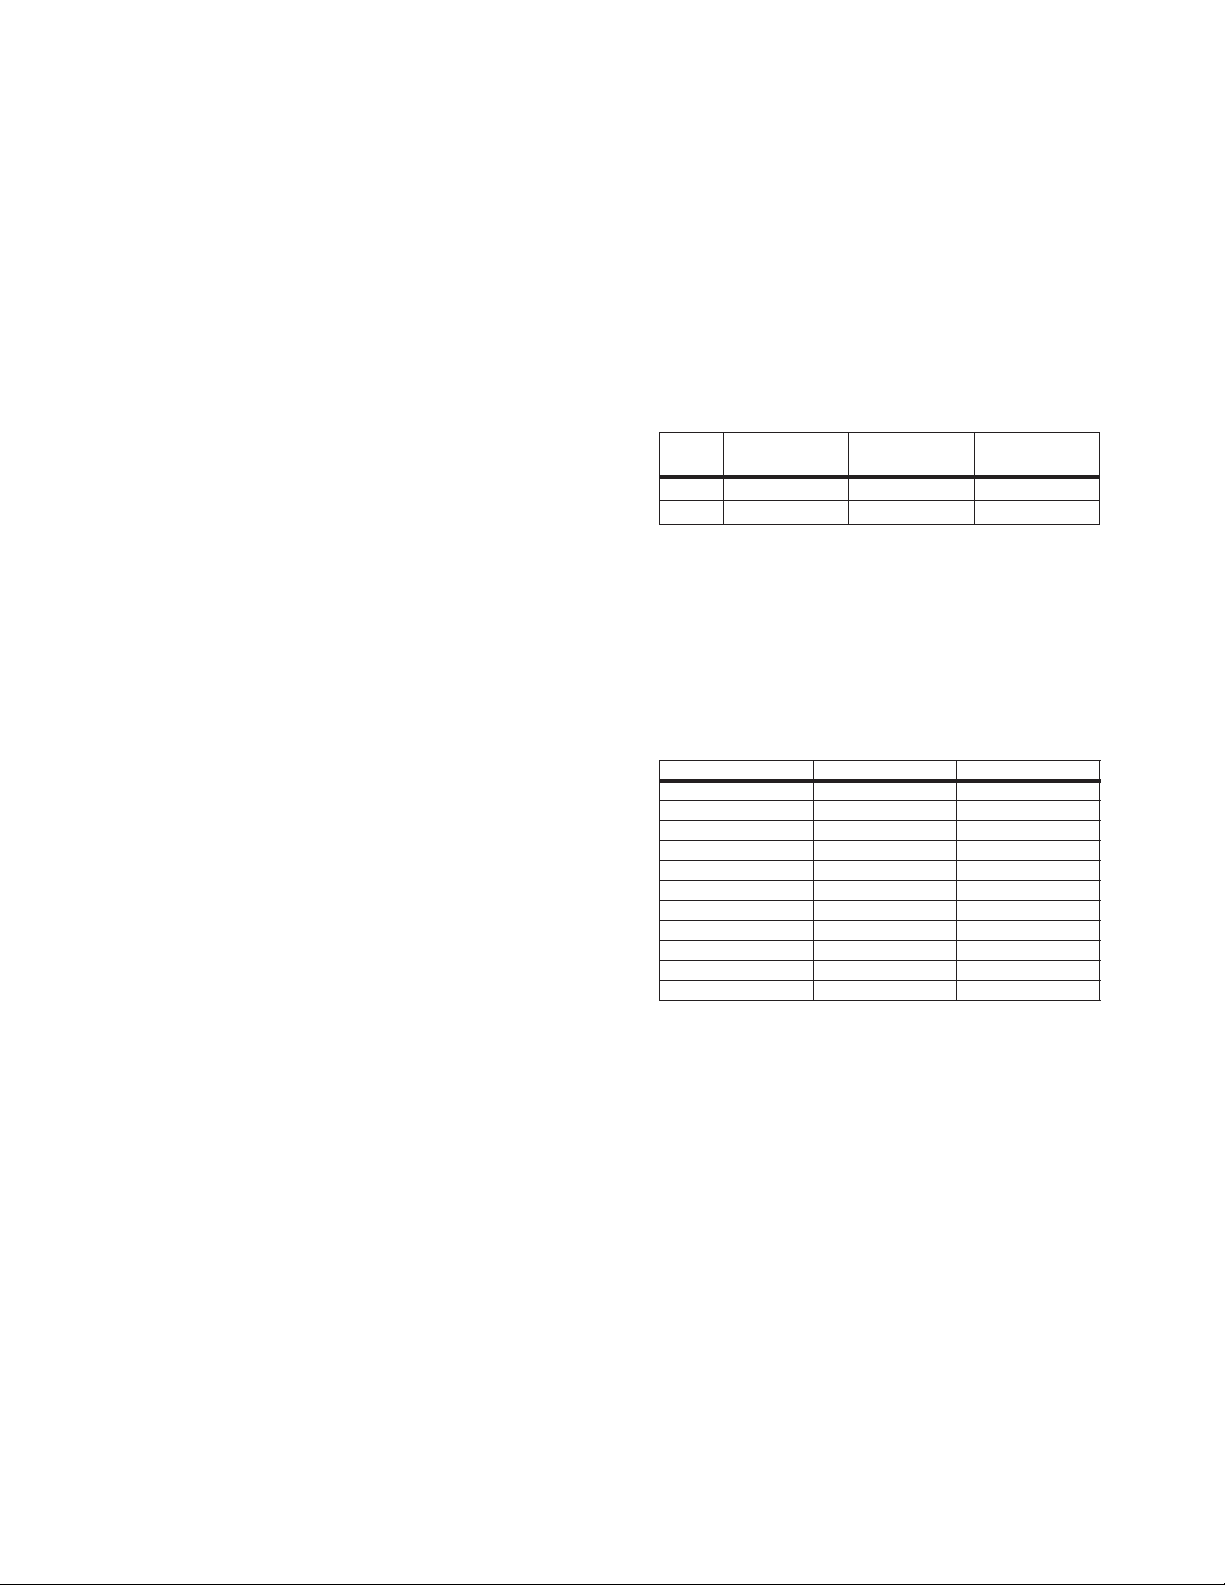
Hex Dec Description
Address 0x000A 10 Existing value
Value 0x0000 0 New value
Store Store?
5.4 Load Default NVM Values
It is possible to download default values automatically into the
NVM in case a blank NVM is placed or when the NVM first 20
address contents are “FF”. After the default values are
downloaded, it is possible to start-up and to start aligning the
TV set. To initiat e a forced default download the following
action has to be performed:
1. Switch “off” the TV set with the mains cord disconnected
from the wall outlet (it does not matter if this is from “Standby” or “Off” situation).
2. Short-circuit the SDM jumpers on the SSB (keep short
circuited).
3. Press “P+” or “CH+” on t
he local keyboard (and keep it
pressed).
4. Reconnect the mains supply to the wall outlet.
5. Release the “P+” or “CH+” when the set is started up and
has entered SDM.
When the downloading has completed successfully, the set
should be into Stand-by, i. e. red LED on.
Alternative method:
It is also possible to upload the default values to the NVM with
ComPair in case the SW is changed, the NVM is replaced with
a new (empty) one, or when the NVM content is corrupted.
After replacing an EEPROM (or with a defective/no EEPROM),
default settings should be used to enable the set to start-up and
allow the Service Default Mode and Service Alignment Mode to
be accessed.
5.5 Display option code
Caution: In case you have replaced the SSB, always check the
display option code in SAM, even if you have picture.
With a wrong display option code it is possible that you have
picture, but that in certain conditions you have unwanted
side-effects.
5.3 NVM Editor
In some cases, it can be convenient if one directly can change
the NVM contents. This can be done with the “NVM Editor” in
SAM mode. With this option, single bytes can be changed.
Caution:
• Do not change these, without understanding the
function of each setting, because incorrect NVM
settings may seriously hamper the correct functioning
of the TV set!
• Always write down the existing NVM settings, before
changing the settings. This will enable you to return to the
original settings, if the new se
ttings turn out to be incorrect.
5-7 PL9.0FSM
Page 22
6 Alignments
Note: Figures below can deviate
slightly from the actual
situation, due to the different set executions.
General: The Service Default Mode (SDM) and Service
Alignment Mode (SAM) are described in chapter 5. Menu
navigation is done with the CURSOR UP, DOWN, LE FT or
RIGHT keys of the remote control transmitter.
6.1 General Alignment Conditions
Perform all electrical adjustments under the following
conditions:
• Power supply voltage (depends on region):
– AP-NTSC: 120 V
– AP-PAL-multi: 120 - 230 V
– EU: 230 V
AC
– LATAM-N TSC: 120 - 230 V
– US: 120 V
AC
or 230 V
AC
AC
/ 50 Hz (± 10%).
/ 60 Hz (
AC
± 10%).
/ 50 Hz (± 10%).
AC
/ 50 Hz (± 10%).
/ 50 Hz (
• Connect the set to the mains via an isolation transformer
with low internal resistance.
• Allow the set to warm up for approximately 15 minutes.
• Measure voltages and waveforms in relation to correct
ground (e.g. measure audio signals in relation to
AUDIO_GND).
Caution:
It is not allowed to use heatsinks as ground.
• Test probe: Ri > 10 Mohm, Ci < 20 pF.
• Use an isolated trimmer/screwdriver to perform
alignments.
6.2 Hardware Alignments
There are no hardware alignments foreseen for this chassis.
6.3 Software Alignments
With the software alignments of the Service Alignment Mode
(SAM), the RGB alignments can be performed:
• white tone (warm, normal, cool)
• black level offset
6.3.1 RGB Alignment
Before alignment, in customer menu, choose “Movie” as
predefined picture and sound setting (“Auto Mode” button on
RC). Also in menu “TV menu” > “TV settings” > “Pict ure”, set
• “Active Control” to “Off”
• “Color Enhancement” to “Off”
• “Dynamic Contrast” to “Off”
• “DNR” to “Off”.
White Tone Alignment:
• Activate SAM
• Select “RGB Align”
• Use a 75% white screen (Fluke 54200) or “Flat73”
(Quantum Data 802BT) as input signal and set the
following values:
– All “R/G/B Gain” values initial to “128” (maximum).
– All “R/G/B Offset” values (blacklevel) to “0”.
In case you have a color analyzer:
• Measure with a calibrated (phosphor- independent) color
analyzer (e.g. Minolta CA-210) in the centre of the screen.
± 10%).
Consequently, the measurement needs to be done in a
dark environment.
• Adjust the correct x,y coordinates (while holding one of the
White point registers R, G or B on “128”) by means of
decreasing the value of one or two other white points to the
correct x,y coordinates (see table “White D alignment
values”). Toler ance: dx: ± 0.004, dy: ± 0.004.
• Repeat this step for the other color Temperatures that need
to be aligned.
• Select “Store” in the “RGB Align” menu to store the aligned
values to the NVM.
Table 3 White D alignment values
Val ue
Cool
(11500 K)
Normal
(9000 K)
Warm
(6500 K)
x 0.276 0.289 0.314
y 0.277 0.291 0.319
If you do not have a color analyzer, you can use the default
values. This is the next best so
lution. The default values are
average values coming from production (statistics).
• Set the “R/G/B Gain” default values per temperature
according to the values in the “Tint settings” table.
• Select “Store” in the “RGB Align” menu to store the aligned
values to the NVM.
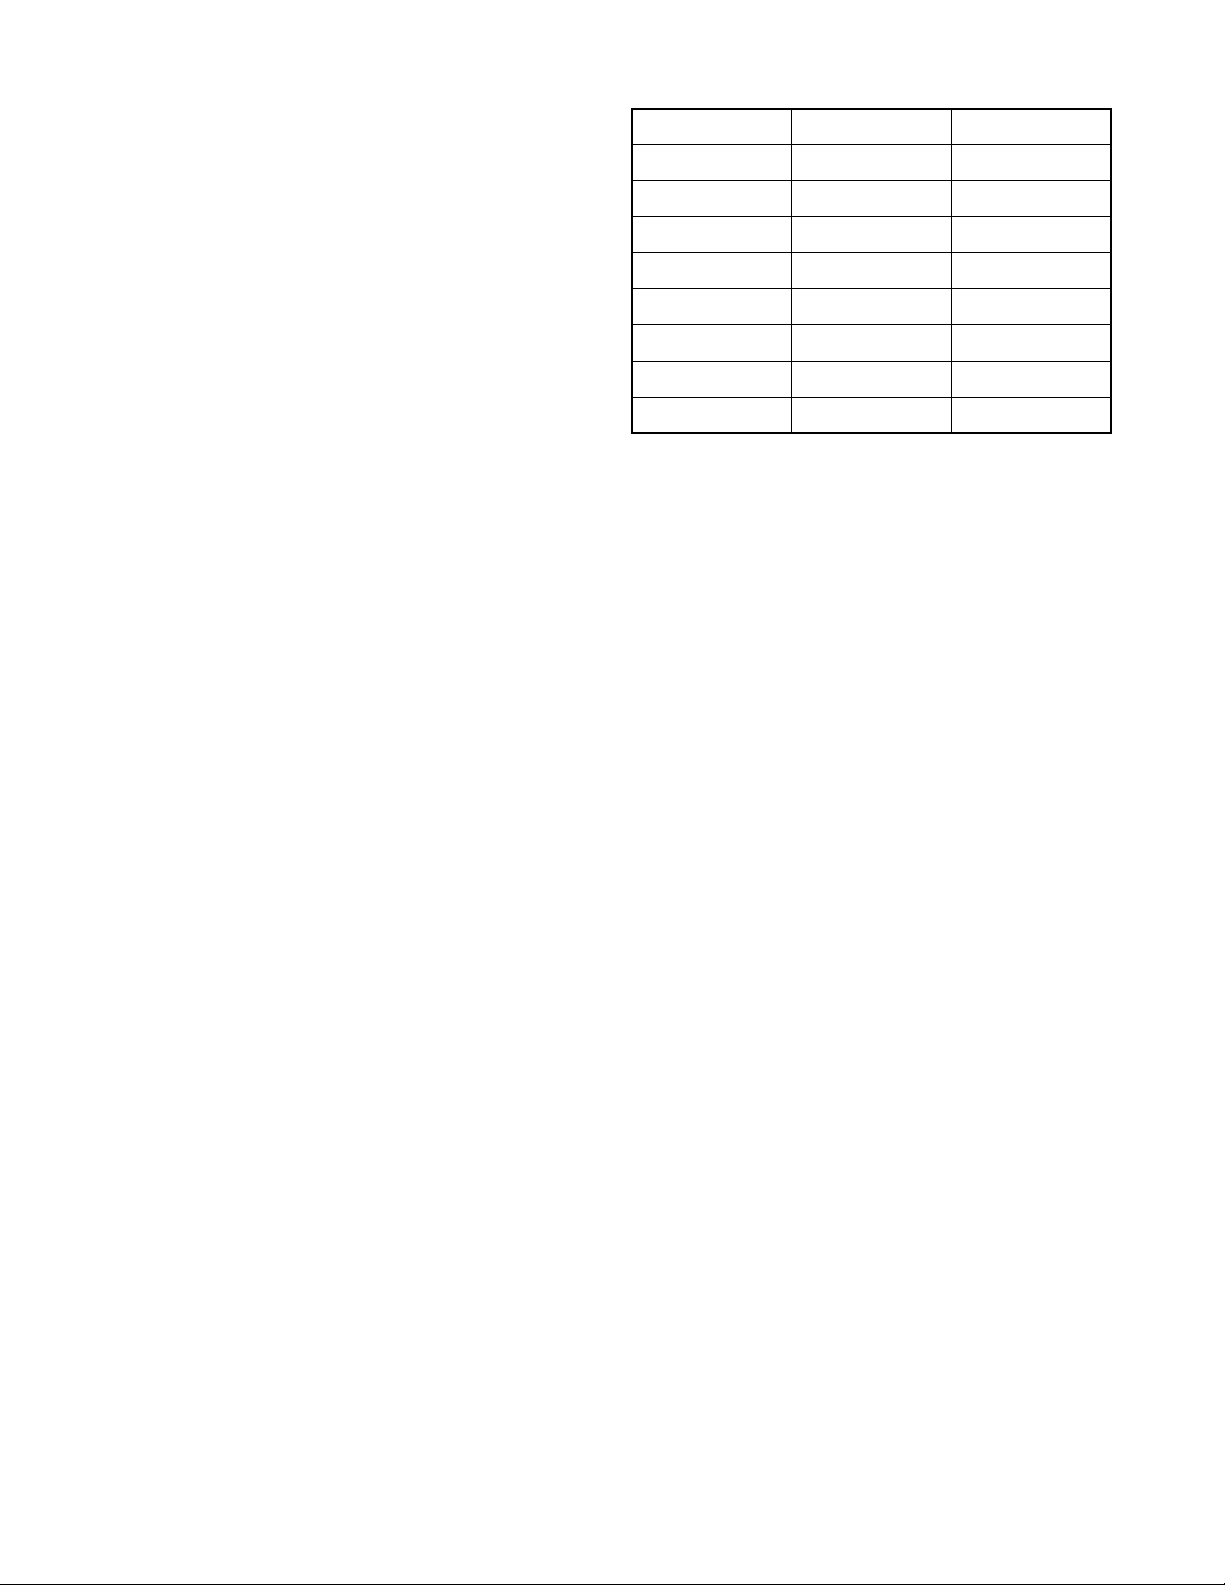
Table 4 Tint settings
t
A
nemngil
WARM_RED 255* 255*
WARM_GREEN 236* 236*
WARM_BLUE 180* 180*
NORMAL_RED 246* 246*
NORMAL_GREEN 248* 248*
NORMAL_BLUE 255* 255*
COOL_RED 210* 210*
COOL_GREEN 226* 226*
COOL_BLUE 255* 255*
"
74"24
Note: *These values were not available at the time of writing,
therefore they come from an early production sample (for
indication only). As soon as the production data become
available, a Service Info or Service Manual update will be
issued via the appropriate channels.
Black Level Offset Alignment
• Activate SAM.
• Select “RGB Align” and choose a temperature.
• For each temperature, the “R/G/B Offset” value should be
set to “0”.
• Select “Store” in the “RGB Align” menu to store the aligned
values to the NVM.
5-8 PL9.0FSM
Page 23

6.4 Option Settings
6.4.1 Introduction
The microprocessor communicates with a large number of I
ICs in the set. To ensure good communication and to make
digital diagnosis possible, the microprocessor has to know
which ICs to address. The presence/absence of these specific
ICs (or functions) is made known by the option codes.
Notes:
• After changing the option(s), save them with the “Store”
command.
• The new option setting becomes active after the TV is
switched "off" and "on" again with the mains switch (the
NVM is then read again).
6.4.2 How To Set Option Codes
When the NVM is replaced, all options except for the eighth option
indicated as "***" in table 5 will require resetting. To be certain that
the factory settings are reproduced exactly, you must set all numbers
except for the eighth option. You can find the correct option numbers
in table 5 “Option Codes OP1...OP10“ below.
How to Change Options Codes
An option code (or “option byte
”) represents eight different
options (bits). When you change these numbers directly, you
can set all options very quickly. All options are controlled via ten
option bytes (OP1... OPA).
Activate SAM and select “Options”. Now you can select the
option byte (OP#1.. OP#A) with the CURSOR UP/ DOWN
keys, and enter the new 3 digit (
decimal) value. For the correct
factory default settings, see the next table “Option code
overview“. For more detailed in
formation, see the next tables
“Option codes at bit level“. If an option is set (value “1”), it
represents a certain decimal value.
When all the correct options (bits) are set, the sum of the
decimal values of each Option By
te (OP) will give the option
code.
2
C
Table 5 Option code overview
yalpsiDedoC noitpONTC
edoC
47MF439B/F7 064 091 222 248 006 106 018 *** 000 001 135
Note: Display codes are subject to change if the display panel
changes during production.
The eighth option is not meant to be manipulated or adjusted at all when
reparing the unit;thus, described as "***" in table 5.
5-9 PL9.0FSM
Page 24

ELECTRICAL ADJUSTMENT INSTRUCTIONS
Note: Electrical adjustments are required after
replacing circuit components and certain
mechanical parts. It is important to perform
these adjustments only after all repairs and
replacements have been completed.
Also, do not attempt these adjustments unless
the proper equipment is available.
Test Equipment Required
1. NTSC Pattern Generator
2. Remote control unit
3. Color Analyzer
How to set up the service mode:
Service mode:
1. Turn the power on.
2. Press [0], [6], [2], [5], [9], [6] and [Info] buttons on
the remote control unit in the order. The following
screen appears.
"*" differs depending on the models.
SAM
System Information
Clear
Options
RGB Align
NVM Editer
NVM Copy
Op Hour: *****
Main SW ID:*******-*.**
ERR: *** *** *** *** ***
OP1: *** *** *** *** ***
OP2: *** *** *** *** ***
6-1 PL9.0EA
Page 25
The following adjustment normally are not
attempted in the field. Only when
replacing the LCD Panel then adjust as a
preparation.
1. White Balance Adjustment
Purpose: To mix red, green and blue beams correctly
for pure white.
Symptom of Misadjustment: White becomes bluish
or reddish.
Input Requirements
Input signal: CVBS (NTSC)
Pattern for White Point alignment:
- White 75%
Input Injection Point:
AV1
Alignment Method
1. Operate the unit for more than 12 minutes.
2. Set the color analyzer to the CHROMA mode and
bring the optical receptor to the center on the
LCD-Panel surface after zero point calibration.
Note: The optical receptor must be set
perpendicularly to the LCD Panel surface.
3. Enter the Service mode.
Note: To select menu or change the setting
values, use the Up/Down buttons. To enter the
setting, use the [OK] button or Right button.
4. Press the [MENU] button on the remote control
unit to select “TV Setting”, “Picture”, “Color
temperature” or “Cool” in order and set the “Color
temperature” to “Cool”.
5. Press the [MENU] button on the remote control
unit to return the service mode initial display.
6. Select the “RGB Align” and “Cool” in order and set
the “R offset”, “G offset” and “B offset” to 0.
7. Set the “R Gain”, “G Gain” and “B Gain” to
maximum value.
8. Adjust one or two of the three Red, Green, Blue
Gain to obtain the target “Cool” x,y values as
stated in the Table A keeping at least one of Red,
Green, Blue Gain value at the maximum value.
9. Select “Store” to store selected values into NVM.
10. Change the selection to “Normal” or “Warm” in
step 4 and repeat from step 5.
Table A
Cool X y
Target 0.276 0.277
To le ra nc e
Normal X y
Target 0.289 0.291
To le ra nc e
Warm X y
Target 0.314 0.319
To le ra nc e
±
0.004
±
0.004
±
0.004
±
0.004
±
0.004
±
0.004
6-2 PL9.0EA
Page 26
FIRMWARE RENEWAL MODE
Equipment Required
a. USB memory
b. Remote Control Unit
Firmware Update Procedure
1. Turn the power on.
2. Press [0], [6], [2], [5], [9], [6] and [Info] buttons on
the remote control unit in the order.
SAM mode menu screen appears.
3. Press [MENU] button on the remote control unit.
Menu screen apears.
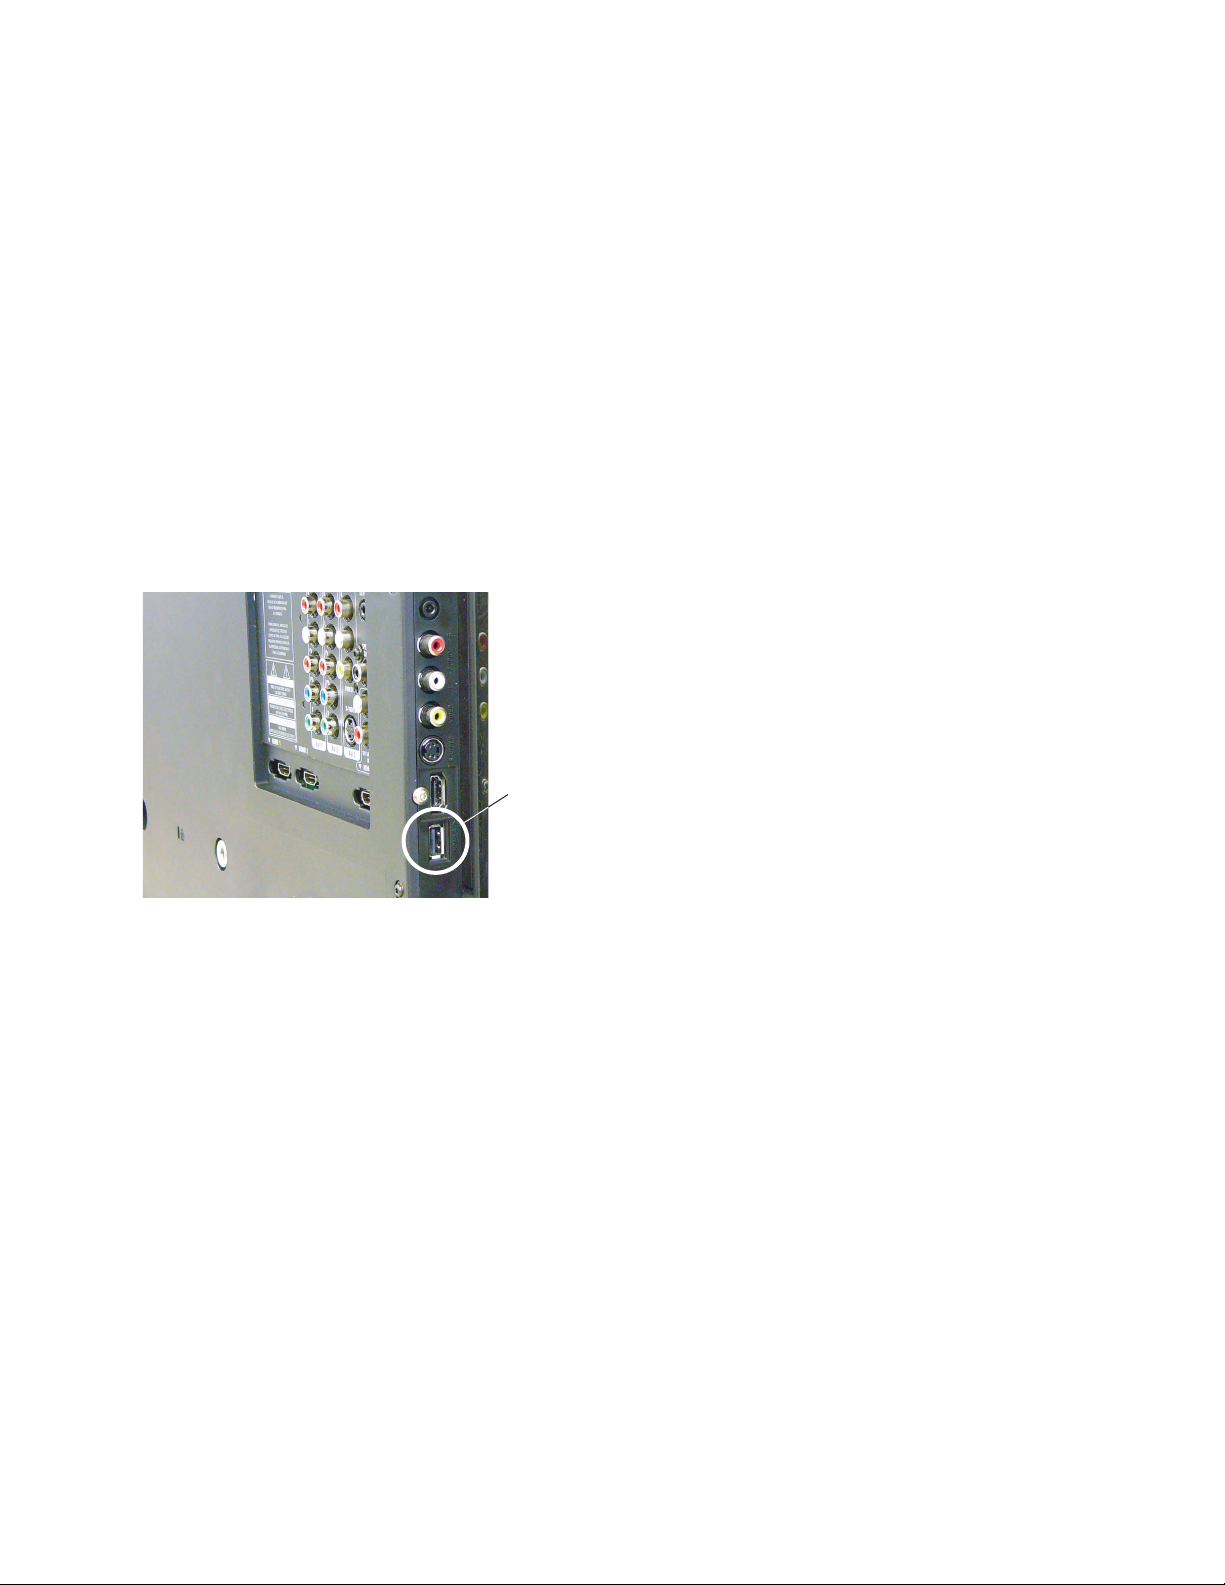
4. Insert the USB memory to the USB port as shown
below.
Software Upgrade Menu is displayed
automatically.
USB Port
Rear Cabinet
5. Press [OK] button to select “Yes” .
6. Upgrade process will start automatically.
7. Wait for the “Upgrade successful” message before
restarting the set to complete upgrade process.
7-1 PL9.0FW
Page 27
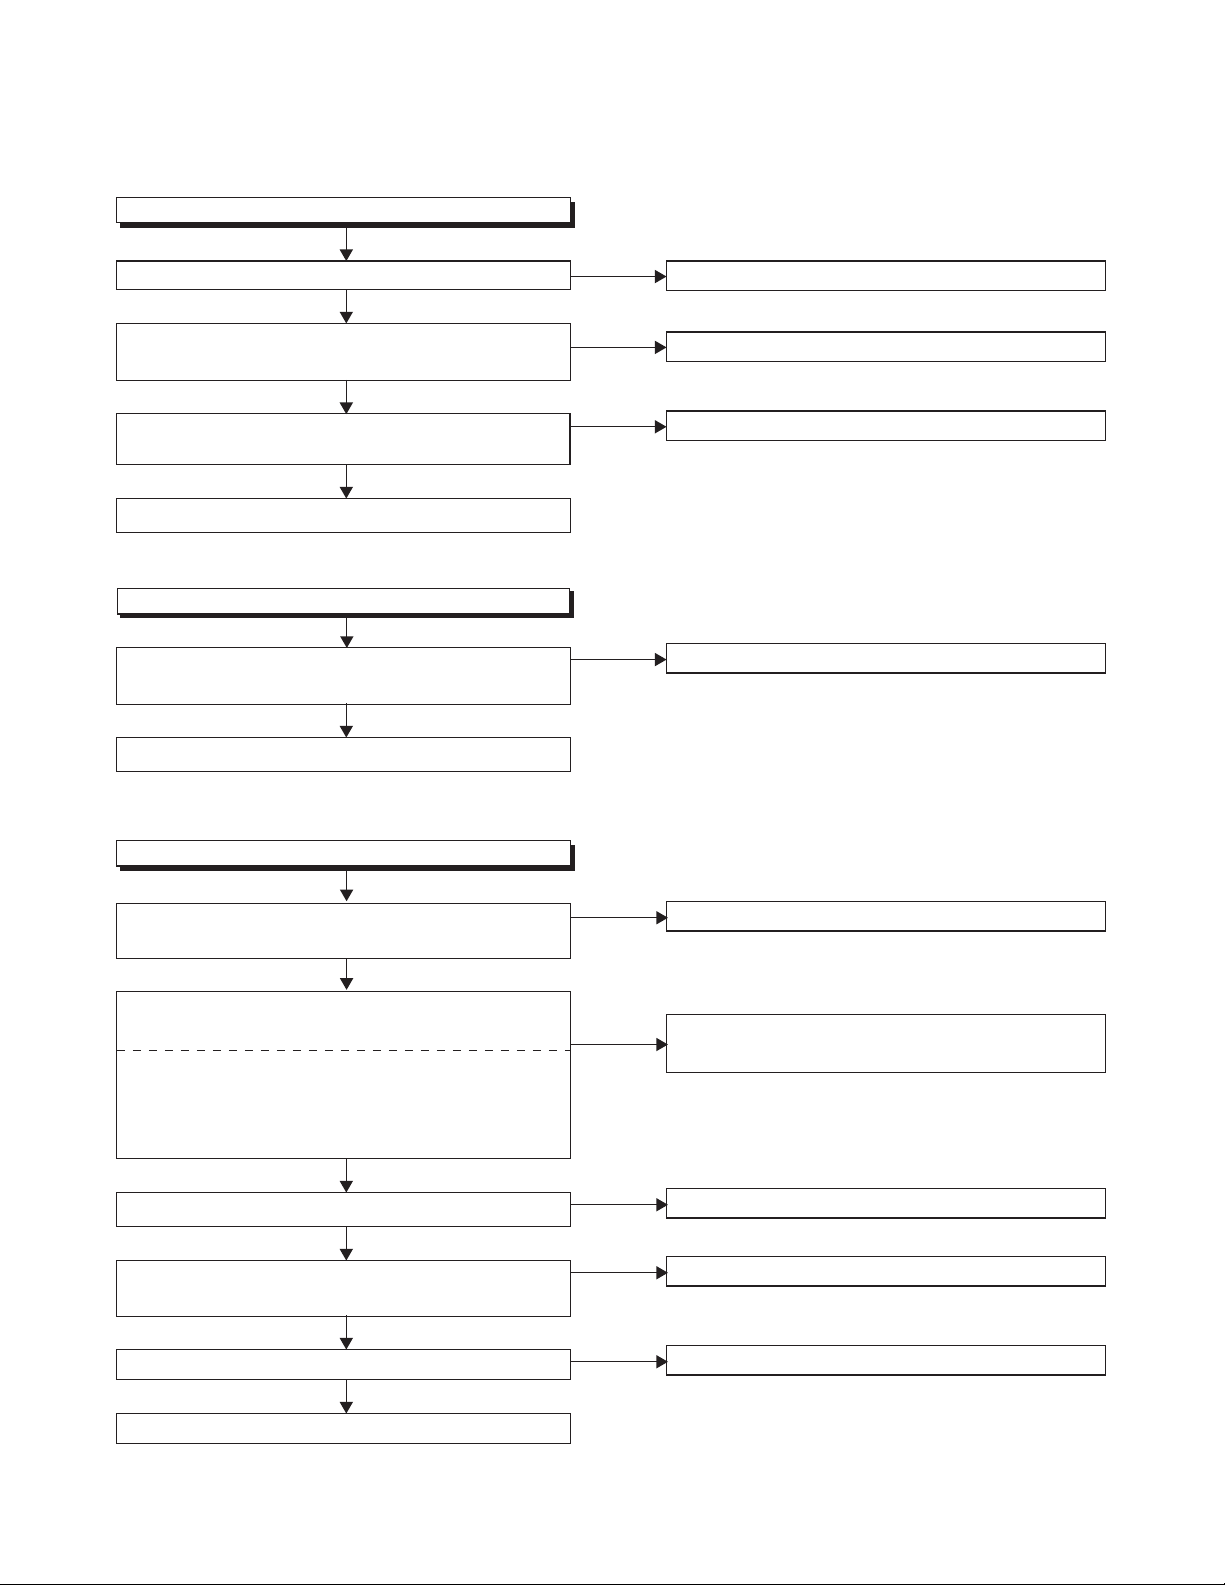
FLOW CHART NO.1
No work (LED is off)
TROUBLESHOOTING
Check if power switch is normal.
Ye s
IS 3.3V voltage supplied to Pin(3,5) of 1C02 on the
SSB?
Ye s
IS 3.3V voltage supplied to Pin(1) of 1101 on the
SSB?
Ye s
Replace SSB.
FLOW CHART NO.2
No raster (picture too dim)
Is 12V voltage supplied to Pin(1,2) of 1102 and
Pin(6,7,8,9,11) of 1101 on the SSB?
Ye s
Replace SSB.
FLOW CHART NO.3
No picture
No
No
No
No
Replace Power switch.
Check Module IR.
Replace Power Supply Module.
Replace Power Supply Module.
Is 3.3V voltage supplied to Pin(1) of 1101 on the
SSB?
Ye s
Check if working voltage each pin of 7116 and each
pin of 7117 on the SSB.
7116 Pin(1,14) 12V
7116 Pin(12) 1.2V
7117 Pin(1,14) 12V
7117 Pin(12) 3.3V
Ye s
Check if clock source 1C04.
Ye s
Check if RGB, clk, H/V and DE signal output 128 bit
TTL.
Ye s
Check line filter on LVDS signal line.
Ye s
Replace LVDS cable.
No
No
No
No
No
Replace Power Supply Module.
Check the circuit around each regulator and
eliminate short and open situation.
Replace 1C04.
Try to replace Flash Rom.
Replace bad line filter.
8-1 PL9.0TR
Page 28
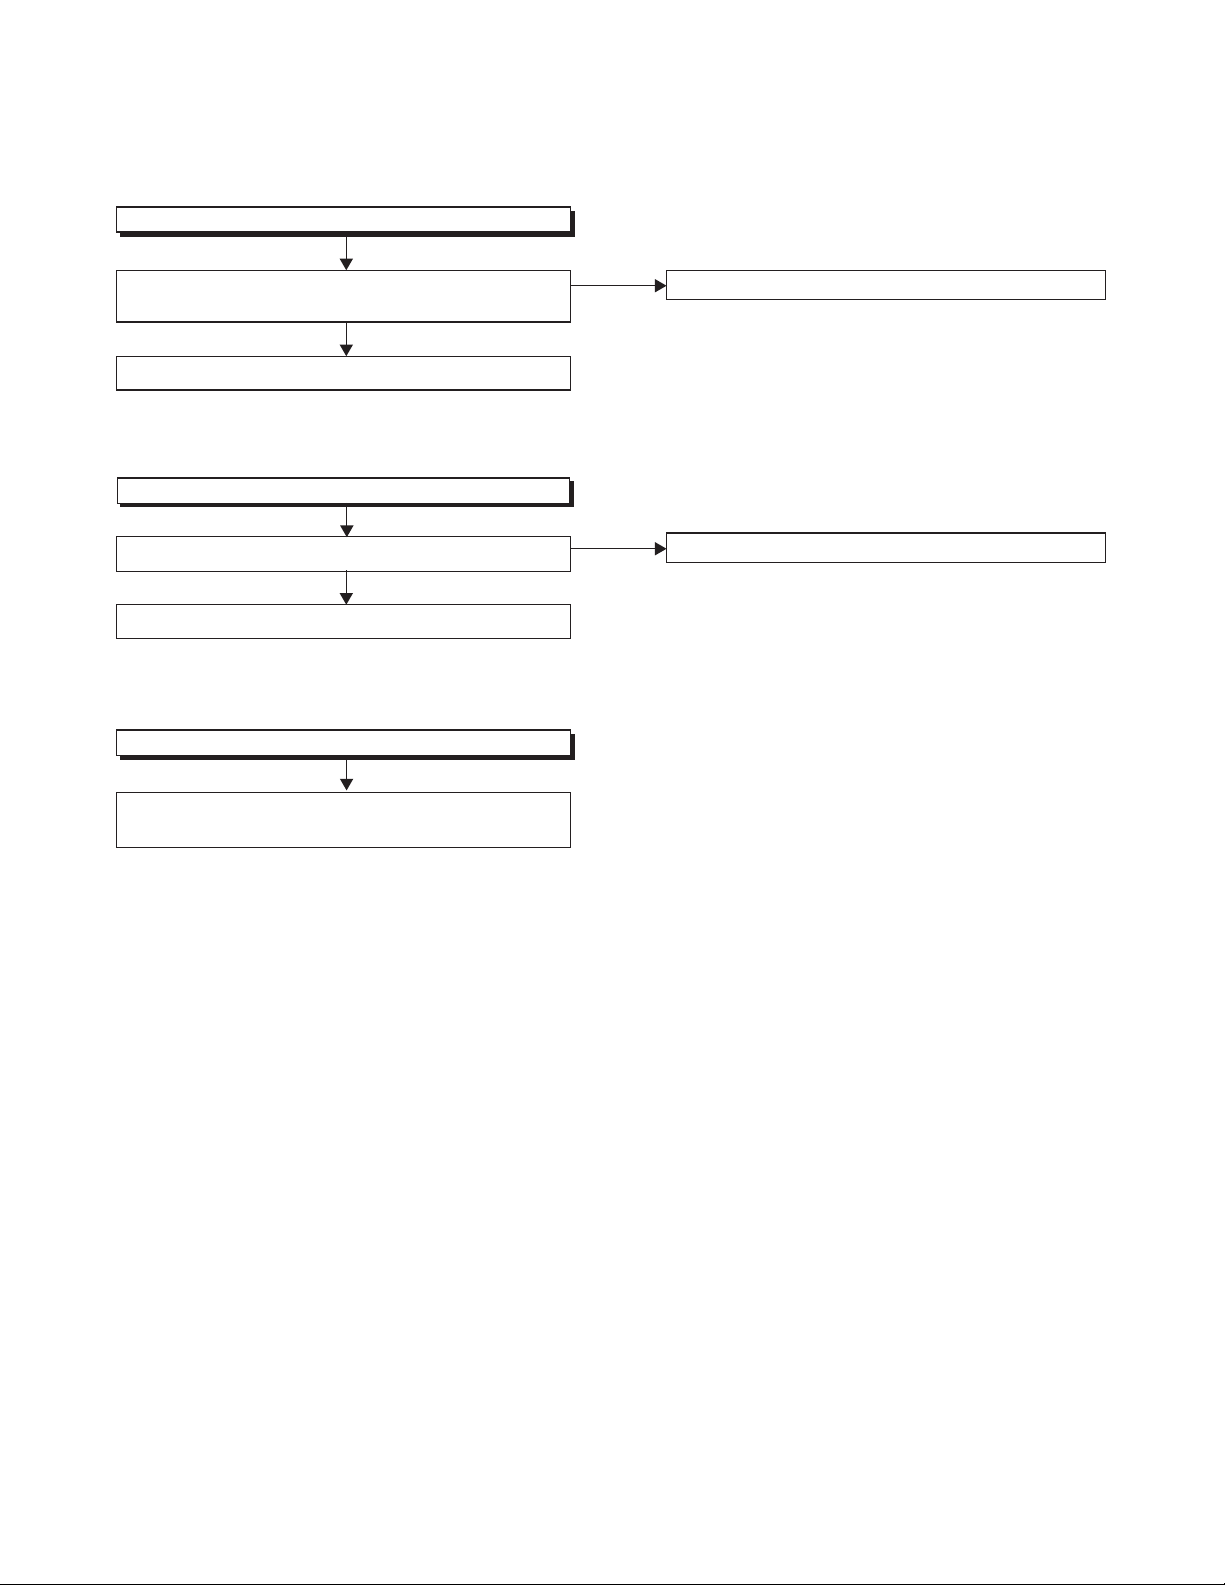
FLOW CHART NO.4
No TV sound
Is audio if signal outputted to Pin(8) of 1203(Tuner) on
the Main SSB?
Ye s
Check 7201.
FLOW CHART NO.5
No remote function
Try another remote control unit.
Ye s
Check IR receiver on the Module IR.
FLOW CHART NO.6
Function key poor
Check circuit around ASSY Tact SW and cable between
ASSY Tact SW and SSB.
No
No
Replace 1203(Tuner).
Replace one good remote control unit.
8-2 PL9.0TR
Page 29
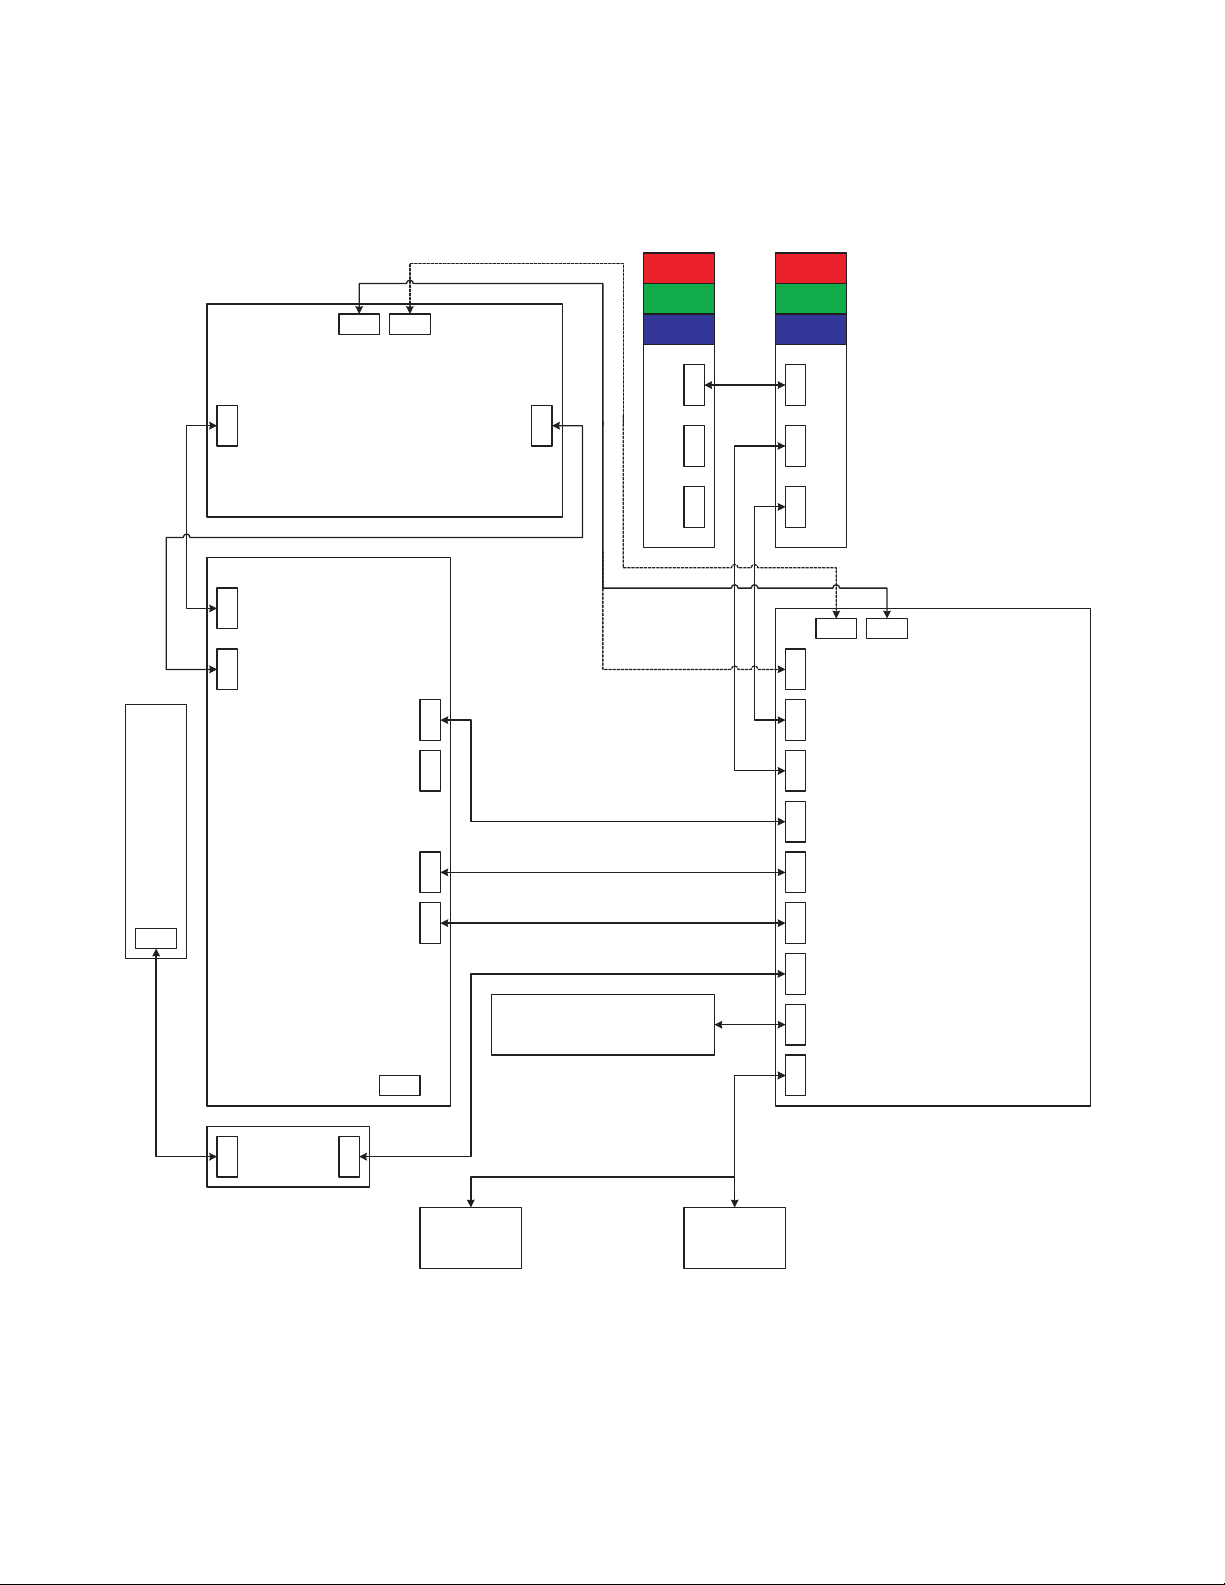
System Block Diagram
Display
BLOCK DIAGRAMS
For 120Hz Only
Power Supply Module
ASSY Tact SW
For DNM Only
Sub-Woofer
Ambilight
Ambilight
SSB
Module IR
Speaker Speaker
9-1
A9PH1BL
Page 30
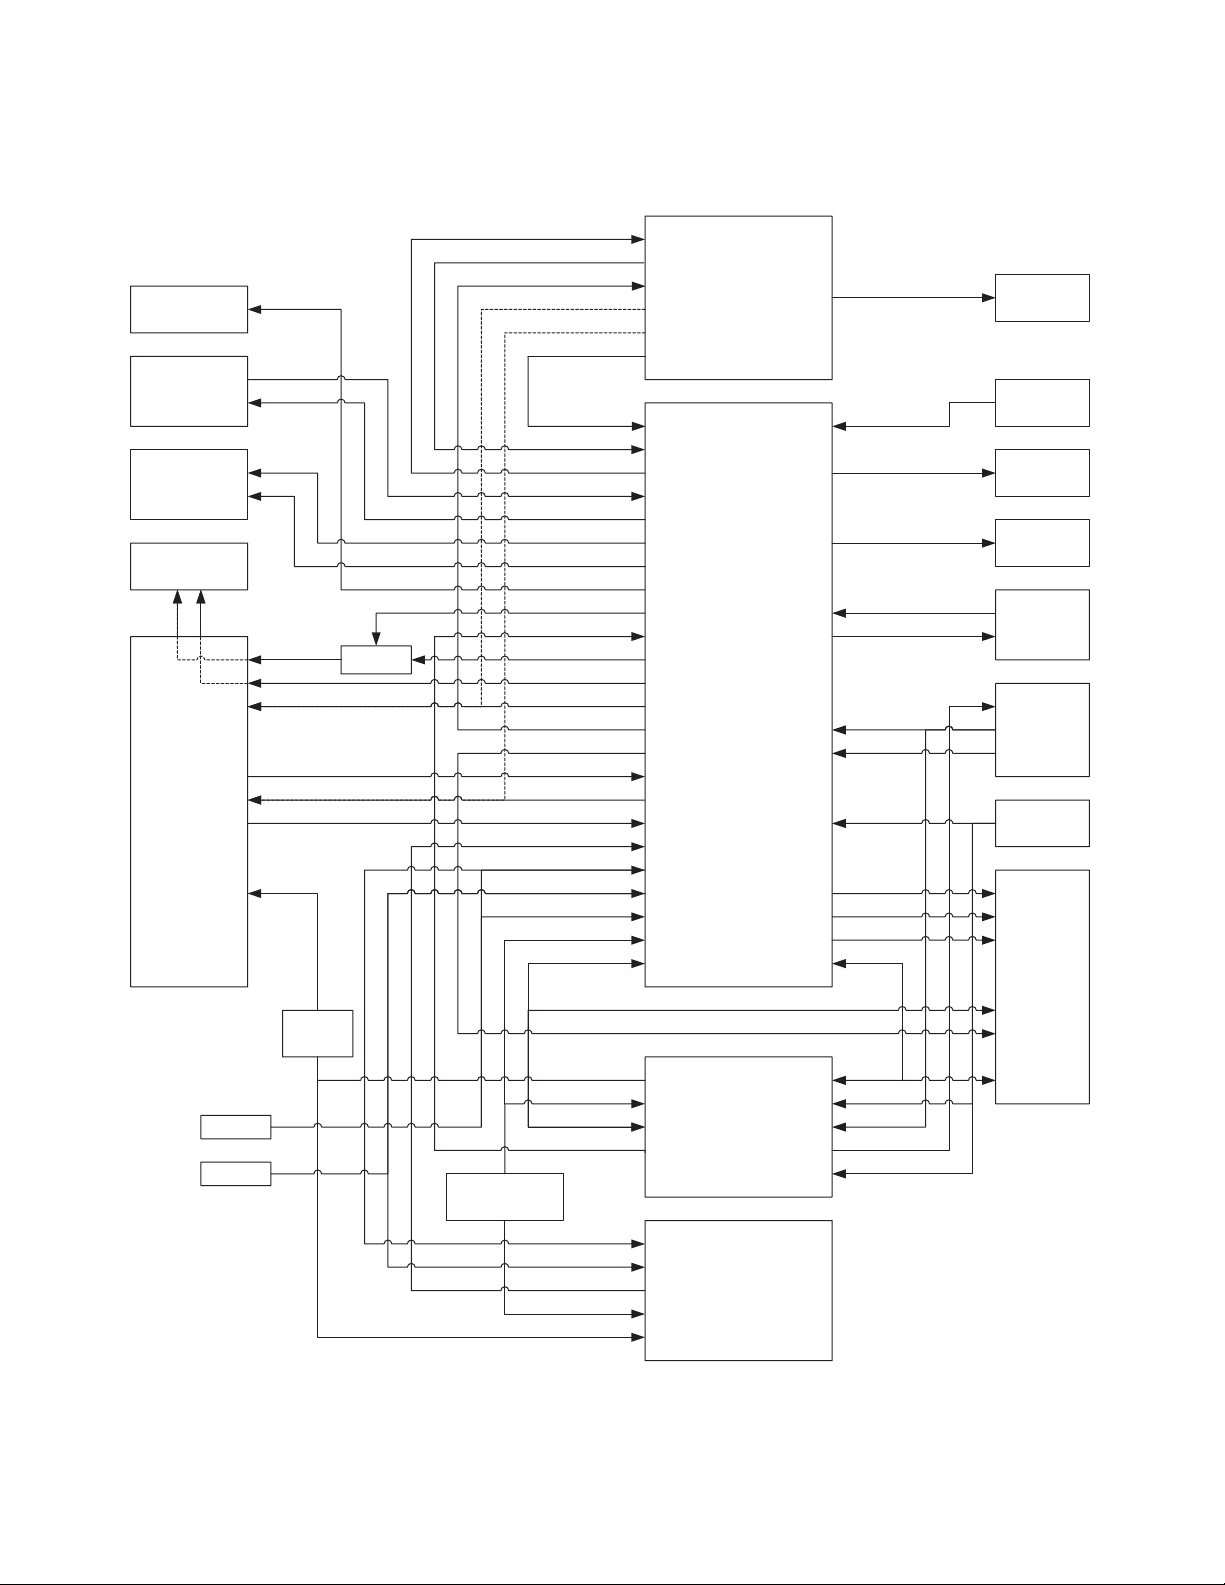
Control Signal Flow Diagram
FLASH
PWN
INT0
PRST
B/LIGHT_ON_OFF
LCD_PWR_ON
8280_DETECT
PWN
INT0
PRST
GPIO1
GPIO2
GPIO0
MT8280
FLASH_MJC_WE
GPIO3
FLASH
BDS Bolt-On
LV DS
Connectors
Display
PSU
PA NE L
SDM
STANDBY
Inverter
Circuit
SDM
PA NE L
Switch
CTRL_DISP1_uP
CTRL_DISP4_uP
ANA_DIG_DIM_SEL
PWM_DIMMING
B/LIGHT_BOOST
B/LIGHT_ON_OFF
+12Vdisp_DETECT
POWER\DOWN
POWER_DOWN
Power-down/
+12V Detection
POWER_DOWN
8280_DETECT
INT0
PWN
INTERRUPT
RESET_PI
FLASH_WE
INT_CEC
PRST
HDMI_RESET
LCD_PWR_ON
PWRDET
DC_PROT
ANTI_PLOP
MUTEn
SDM
I2C
Main I2C Bus
STANDBYn
I2C
INT_CEC
ANTI_PLOP
MUTEn
DC_PROT
STANDBYn
GPIO12
GPIO11
GPIO10
AOMCLK
PDD5
PDD2
PDD3
AOSDATA4
AOSDATA0
ALIN
PWM1
PWM2
PAR B
GPIO8
PDD6
AOSDATA2
AOSDATA1
ADIN0
OPCTRL5
OPCTRL4
OPCTRL3
OPCTRL2
OPCTRL1
SCL0,SDA0
GPIOE2
GPIOD0
DSDA/SCL1
GPIOA1
MT5382
PAALE,PARB,PDD4,
POWE,OIRO,
WT61P7
Audio Amplifier
AOSDATA3
PDD7
PWM0
GPIO7
GPIO6
ADIN3
OIRI
ADIN1
PAC L E
OWRP2
OPCTRL0
GPIOB1
GPIOC0
GPIOB2
GPIOA2/A3
H/P_DETECT
SYS_EEPROM_WE
VCXO_PWM
USB_OC
USB_PWE
LIGHT_SENSOR
IR
KEYBOARD
DDC_RESET
EDID_WE
HDMI_HPDs
CEC
CEC
KEYBOARD
IR
LED1/LED2
TACT_SWITCH_INT
Headphone
EEPROM
(System)
VCXO
USB
IR/LED
Keyboard
HDMI
Sil9185
Switch
and
Connectors
9-2
A9PH1BL
Page 31
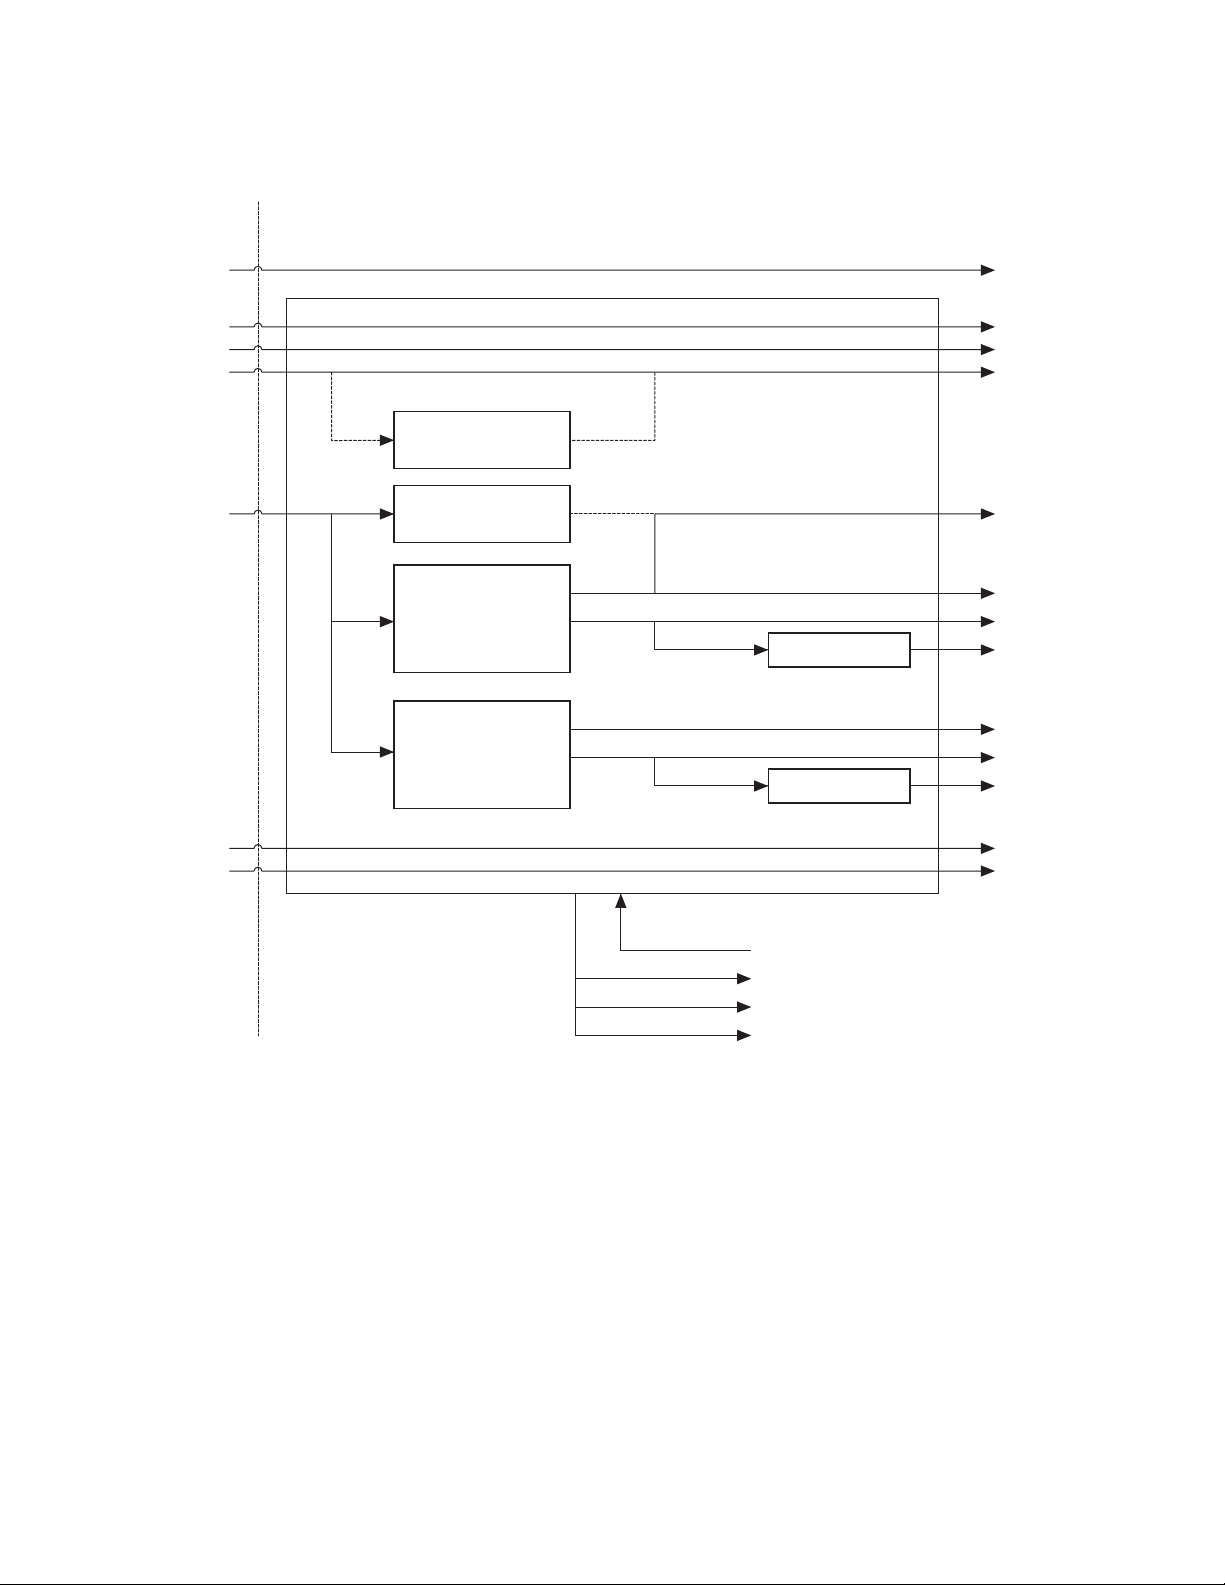
Power Management Diagram
p
SSBPSU
+3V3-Standby
+12VSND
-12VSND
+12V(TCON)
+12V
+24V
+12Va
L5973D
(provision)
L78M05DCT
(provision)
DC-DC
NCP5422ADR26
DC-DC
NCP5422ADR26
BD25KA5WFP-E2
TPS74801DRCR
+3V3STBY
+12VAudio
-12VAudio
+VDISP
+5Vtuner
+5_SW
+3V3_SW
+2V5
+1V1_SW
+1V8_SW
+1V2
+24Vbolt-on
+12Vbolt-on
STANDBY (from WT61P7)
POWER_DOWN (to MT5382 and WT61P7)
PWRDET (to MT5382)
_DETECT (to MT5382) RES
+12Vdis
9-3
A9PH1BL
Page 32
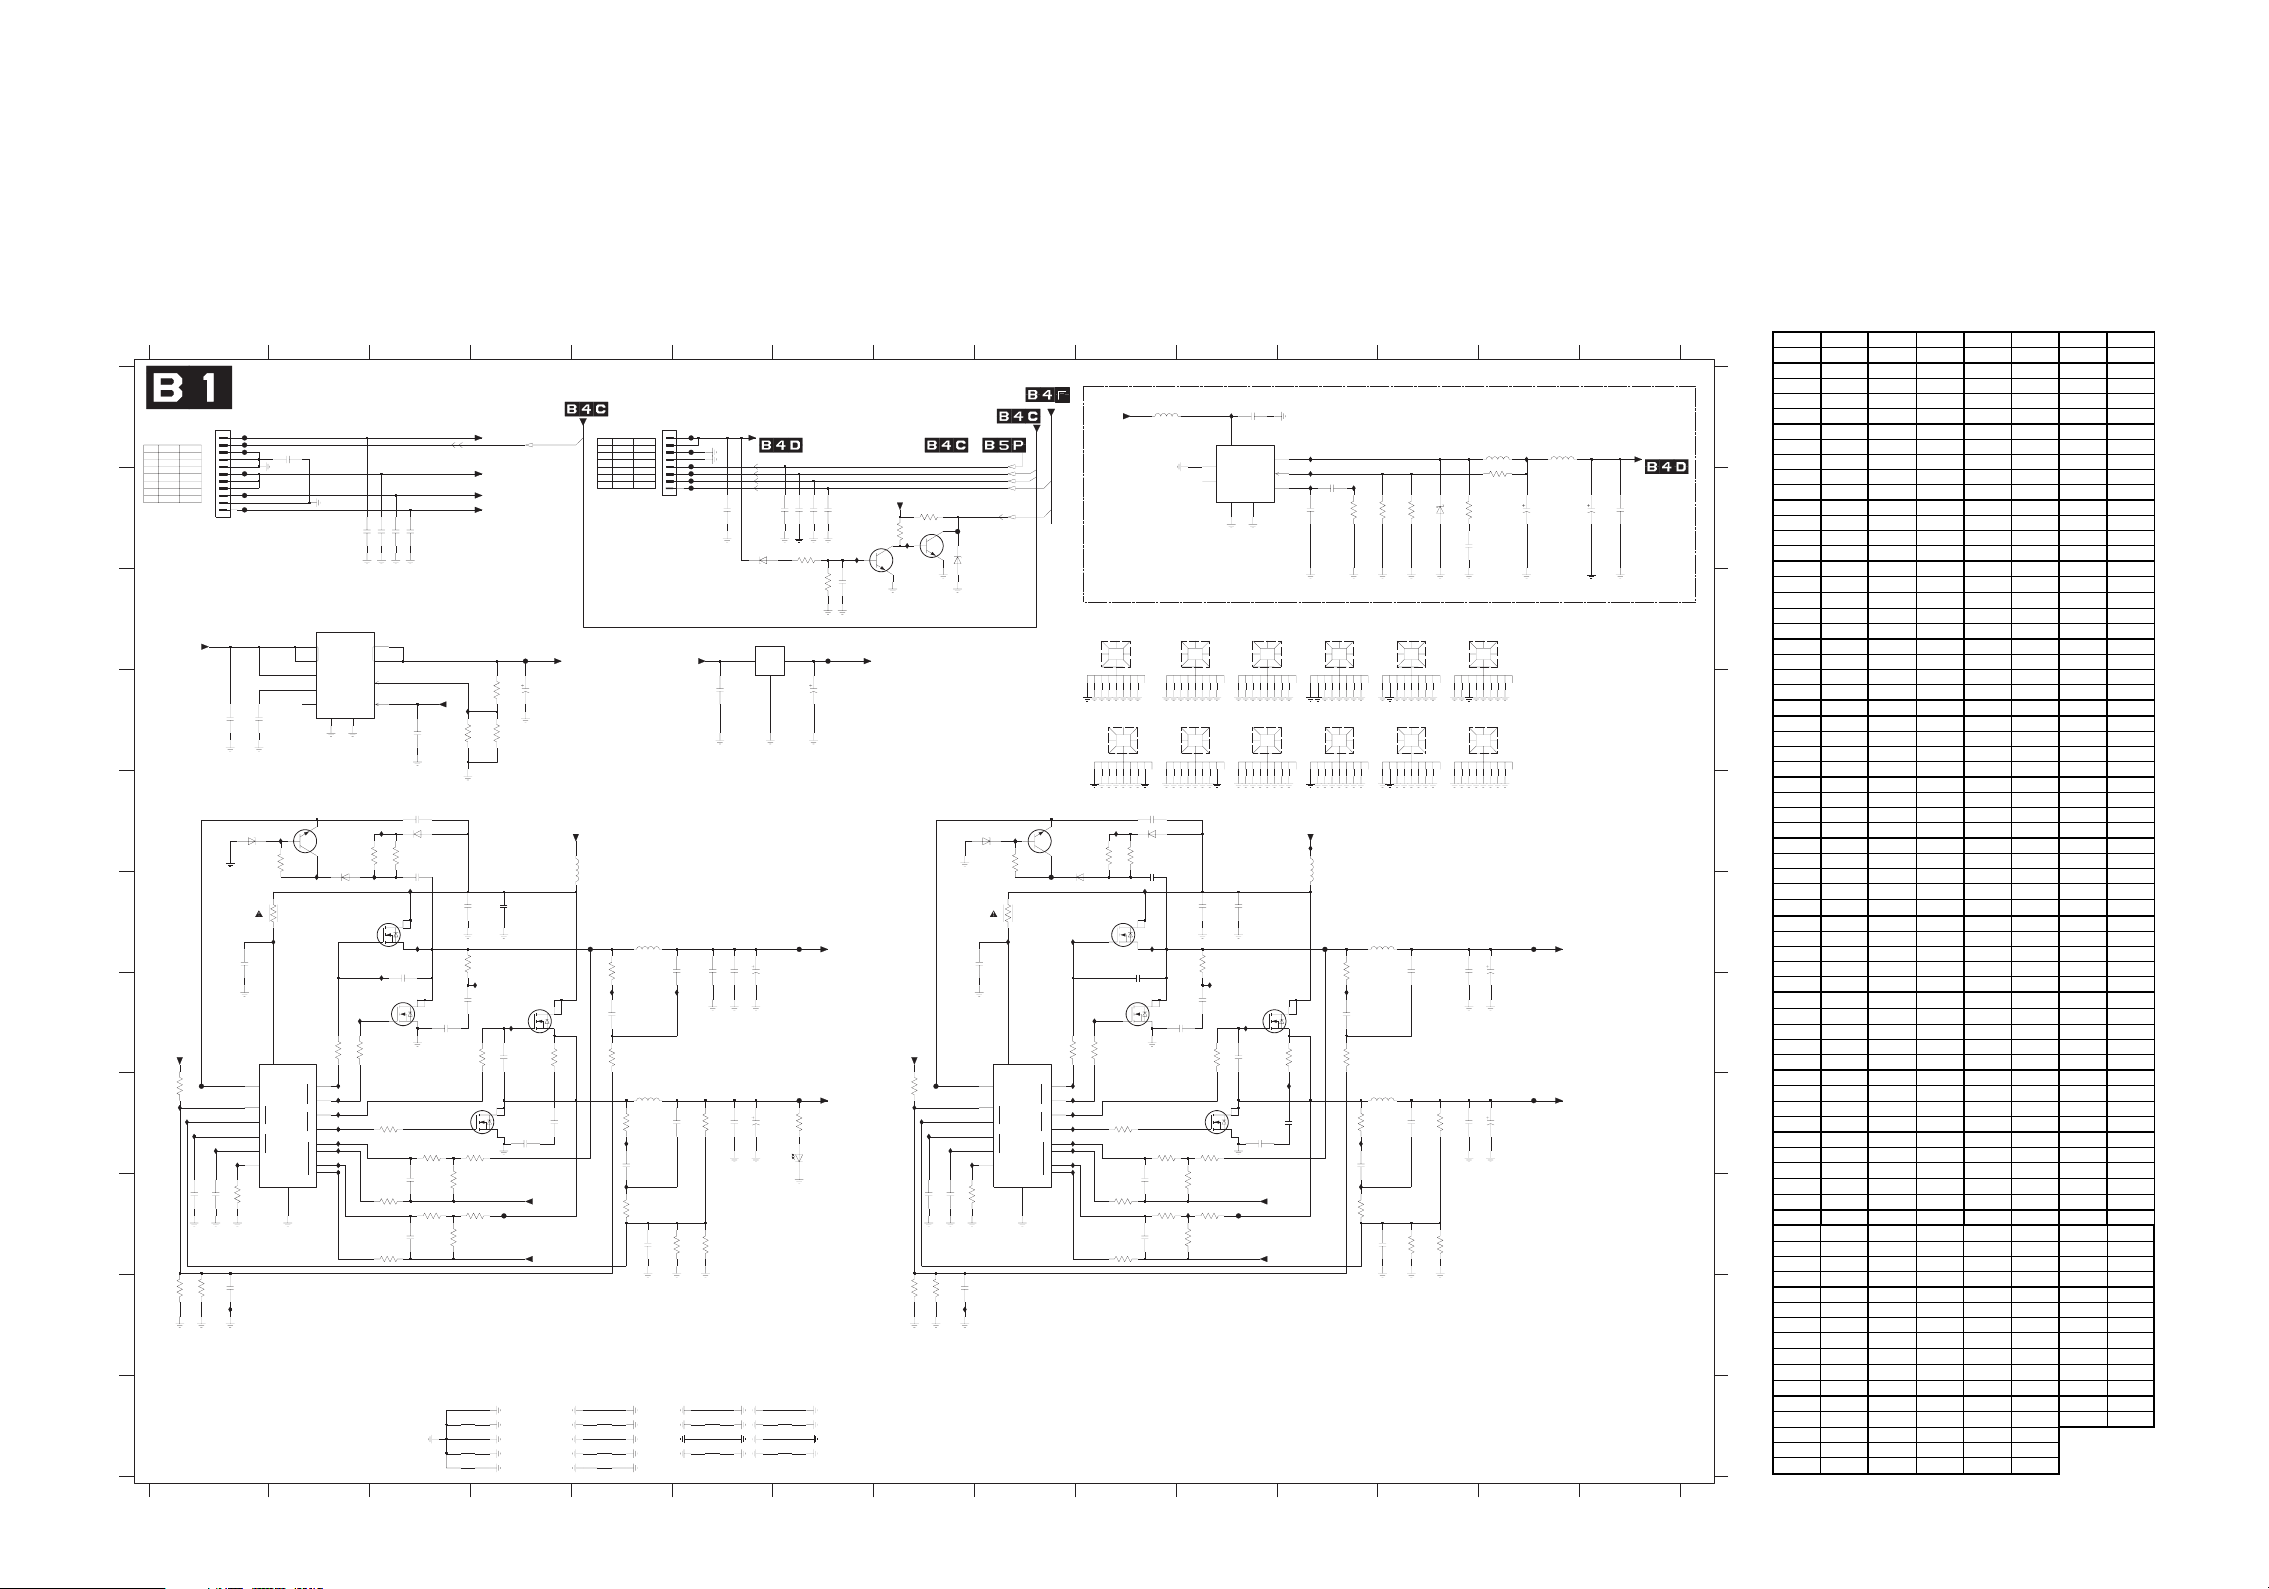
SSB 1/15 Schematic Diagram (DC/DC CONVERTER)
SSB 1/15 S chem atic Diagram
Parts Location Guide
Ref No. Posit ion Ref No. P osit ion Ref No. P osit ion Ref No. Posit ion
1101 A1 2162 D4 3158 F5 F124 C7
1102 A5 2163 D6 3159 D4 F125 B8
1188 D14 2164 D7 3160 D4 F126 F9
1189 D13 2165 A11 3161 D4 I101 E2
1190 D12 2166 B12 3162 B12 I102 E3
1191 C14 2167 B12 3163 B13 I103 F 1
1192 D11 2168 B14 3164 B13 I105 F 3
1193 D11 2169 B14 3165 B14 I106 H1
1194 D10 2170 B15 3166 B14 I107 H1
1195 C13 2171 B15 3167 B 7 I1 08 H1
1196 C12 2172 C7 3168 C7 I109 H1
1197 C11 2173 B 7 3169 B8 I 110 H1
1198 C11 2174 B 7 3170 B8 I 111 J 1
1199 C10 2175 B 7 3171 H7 I1 13 H2
2101 E3 2176 B 7 5101 E5 I 114 H2
2102 E10 2177 F 6 5102 H5 I115 H2
2103 F3 3101 E3 5103 E 12 I 116 H2
2104 F10 3102 E 3 5104 F 5 I117 H2
2105 F4 3103 E10 5105 F13 I 118 H2
2106 F4 3104 E10 5106 H13 I 119 H2
2108 F11 3105 E 2 5107 A13 I120 I2
2109 F11 3106 E 9 5108 A14 I121 G4
2111 F1 3107 F2 5 109 A10 I122 G5
2112 F9 3108 F9 6 101 E3 I 123 H5
2113 F6 3109 F4 6 102 E10 I124 I 5
2114 F6 3110 F11 6103 E1 I125 E 9
2115 F6 3111 G2 6104 E 9 I126 E 10
2116 B2 3112 G3 6105 E2 I 127 F9
2117 F13 3113 G10 6106 E10 I128 F 9
2118 F14 3114 G10 6107 B13 I130 G10
2119 F14 3115 G3 6108 B6 I 131 H8
2120 B3 3116 G4 6109 B8 I 132 H8
2121 G3 3117 G5 6110 H7 I1 33 H8
2122 G10 3118 G11 7101 E2 I 134 H8
2123 G4 3119 G12 7102 E 9 I135 H8
2124 G11 3120 G12 7103-1 F3 I 136 H10
2125 G5 3121 H1 7103-2 G3 I137 H10
2126 G12 3122 H8 7104-1 F 10 I1 38 H10
2127 G3 3123 H5 7104-2 G10 I1 39 H10
2128 G10 3124 H6 7105 -1 G4 I 140 H10
2129 G4 3125 H12 7105-2 H3 I 141 H10
2130 G11 3126 H13 7106-1 G11 I142 H10
2131 H4 3127 H3 7106-2 H11 I143 I9
2132 H6 3128 H10 7107 G1 I144 J9
2133 H6 3129 H3 7108 G9 I 145 H12
2134 H6 3130 H4 7109 C6 I1 46 G11
2135 B3 3131 H10 7110 C2 I1 47 H12
2136 H12 3132 H11 7111 B7 I 148 I12
2137 H13 3133 H3 7112 A 11 I 149 G12
2138 H14 3134 H11 7113 B8 I 150 E12
2139 H14 3135 I1 F101 H1 I1 56 F3
2140 B3 3136 I9 F102 I4 I157 F3
2141 H4 3137 I3 F103 F5 I 158 F10
2142 H11 3138 I10 F 104 F7 I 160 F10
2143 H5 3139 I5 F105 H7 I 161 D4
2144 H12 3140 I12 F 106 H8 I 162 G2
2145 I 3 3141 I3 F107 I 11 I 163 B 7
2146 I10 3142 I4 F108 F14 I 164 B 8
2147 I 1 3143 I10 F 109 H14 I166 F2
2148 I 1 3144 I11 F 110 F12 I167 F3
2149 I 8 3145 I3 F111 A1 I 168 G4
2150 I 8 3146 I11 F 112 A1 I169 G6
2151 I 3 3147 I6 F113 A1 I 170 I11
2152 I10 3148 I6 F114 B1 I 172 G11
2153 I 5 3149 I13 F 115 B1 I174 A 11
2154 I13 3150 I 13 F116 B1 I 175 A12
2155 J 1 3151 I3 F117 A6 I176 B 12
2156 J 9 3152 I10 F118 A 6 I177 B 12
2157 B6 3153 J1 F119 A6 I 178 B 12
2158 A2 3154 J1 F120 B6 I 179 A 14
2159 D1 3155 J 8 F 121 B6
2160 D3 3156 J 8 F 122 B6
2161 D2 3157 F12 F123 C4
SCHEMATIC DIAGRAMS AND CBA
A
10
11
NIP
NO
V3V02
V0V216
V0
V217
V0V218
V21+9
V0
V0V21-1
1
B
C
D
E
F
G
WS_V5+
13
12
0
K1
%1
H
I
3513
R072
%1
J
K
USP MORF
1011
111
F
1
F
211
2
Y
BTS
3V33V31
WS_8V1+
601I
701I
100n2147
2CDDNG
311F
3
4
5
6
7
8
9
01
11
1-6445371-1
12
2CDDNG
N
101F
801I
901I
011I
100n
3
2148
CDDNG
2
CDDNG
2
3
451
3K3
01
2CDDNG
2CDDNG
n
8512
001
2CDDNG
411
F
V21+
511F
611F
1
612
95
0n
1
0u1
3016
1
01I
81C-483XZB
2
3
301I
1112
0u1
2CDDNG
7017
14
G2RDA2245PC
Φ
VCC
4
TSB
7
1
B
FV
01
2
8
1
PMOC
9
2
1
SOR
C
3
5
313
K9
2CDDNG
5512
p0
111I
DUA
DNSDNG
D
UAV21-
2116 22n
0117
RCRD10847SPT
Φ
1
N
TUO
I
2
5
NE
7
3
5
013
R02
701
R01
H
ETAG
L
ETA
G
SI
+
GND
2
CDDNG
BF
SS
SAIBGP
GND
GND_HS
6
11
1017
W52-718CB
50
16
661I
B
613SA
S
2
17
S
261I
113
1
3
211
01
R
2R2
3
11I
1
1
2
411I
1
61
511I
2H
51
611I
2L
5
711I
1+
6
811I
1-
213
9
11I
2
11
2-
021I
3
22n2135
87654321
RETREVNOC CD/CD
MORF
USP
YBTS3V3+
YBDN
ATS
+
SV21
oiduAV21+
o
22n2140
2120 22n
9
01
8
WS_V5+
4
0612
0u
1
1
012
1
0u
201I
1016
B
1013
R86
761I
501I
2-30
YDB6394I
4
R2
731
613SA
2013
R86
001
2
n
301
651I
1-3017
YDB6394I
87
751I
1
1212
3n3
6
5
7212
1
3
V5DNG
S
7213
2
9213
3K3
5412
n00
1
8K6
1413
3K
3
1512
n001
8K61513
iduAV21-
321F
612
0613
2
u22
R001
V3.
6
%1
161I
1
613
9513
2K2
R022
1
%
6012
012
5
u22
u22
013
9
R
01
61I
8
3212
n1
0
0n
3
511
R01
17
2-50
YDB6394I
4
0313
8K6
3313
3K3
2413
8K6
413
5
3K3
1-5017
Y
DB6394IS
12
1I
2
9212
3n3
6
5
3
1
412
3V3DNG
0n
1
S_V5+
W
201F
S_3V3+
W
1CDDNG
V5DNG
NG
3V3DNG
8V1DNG
2V1DNG
2011
P
1
5
2V
1+
V21+
S
101
5
1
u0
301F
8
7
1
6113
R01
1312
0n1
2V1DNG
8V1D
3V3DNG
V5DNG
2011
7
11F
1
TSNONI
YB
2
V21
V0
0
V
V212
V0
V3
V0V36
V0
V37
V0V08
1
8513
8K6
1I
22
5212
n001
7113
0K
1
5
1
213
8K6
321I
3412
n001
421I
9
313
0K1
11F
8
3
4
9
11F
5
021F
6
21F
1
7
2
21F
8
8
371
-6445
WS_3V3+
4015
u0
31
12
2
u2
3n
3
961I
V5DN
G
201
u0
3
231
2
421
3
3n3
0K1
1
%
7413
413
8
3512
6K5
001
2CDDNG
D
NG
D
R074
p
%1
CDDNG
2
2CDDNG
2C
2CDDNG
2CDDNG
2CDDNG
2CDDNG
psidV21+
22n2173
22n
22n2175
2157 22n
-483
XZB
D
B
1
I
C
361
2
n
001
7712
411
2
1
u22
V5DNG
G
V5DN
3312
1
u22
3V3DNG
3V3DNG
2176 22n
2174
8016
7613
0K1
2V8C
1K0
3168
017
9
AK52
F5
P
F
1
3
TUON
MO
12
2
u22
V3.6
4
01F
5
112
u00
V61
501F
+
4312
1713
u00
R074
V61
116
0
013-LMS
V3+
13
96
K5
1
7
111
B748CB
W
361I
220n
2172
42
5V
+
2
46
WS_V5+
S_3V3
W
2
JM M
F
O
835TM MORF
R
C
/
100n
6K
2CDDN
6109
NG
601F
2150
2CDDNG
651
_
WP
M
THGILKCA
V21+
5
F
21
BZX384-C3V3
6
B
Z
2CDD
4
7
8
4
31I
9
1
531I
3
6512
001
p
441I
CDDNG
2
FFO_NO_THGILKCA
NIMMID
G
OB_
O
TS
TCELES_MID_GID
D_psid
TCE
E
T
1
40
5
21I
B
81
C
483X
6013
R022
62
F
1
80
13
R01
21I
7
2112
0u1
2CDDNG
8017
14
G2RDA2245PCN
Φ
VCC
1H
TSB
ETAG
1L
1
2H
BFV
01
ETAG
2
2L
1
1+
OC
PM
1-
2
SI
CSOR
+
2
2-
GND
3
6313
K9
2CDDNG
2CDDNG
B
B
-
A
N
A
WS_3
K22
071
3
4
61I
3117
C
748
B
WB
WS_8V1+
2213
R086
%1
1
31I
1I
23
331I
2149 100n
3
5513
5
0K1
%1
2CDDNG
G
19
P
VO
P
R
dV21+
M
1
1
ER CME
45678
123
CM
E
1I
017
2
W52
-71
C
8
6
6
16
0
613SAB
4I
S
8
21I
2
94IS
3
031I
3113
4113
R01
2
R2
631I
1
731I
2
31I
8
61
931I
51
041I
5
141I
6
241I
213
11
341I
3
"23
A
I
psi
9
9
ELOH
F
1
49
1
62
013
3
R8
2
017
1-4
DB639
Y
1
12
2
-4017
DB6
Y
4
8213
2
2R
831
OMC
EN
NT
ROF NOIS
15
90
u01
G
1CDDN
ELOH GNITNUO
DNG
9
DNG TOLS GNITNUOM
ELOH FER
2012
u1
0
1
20
6
B
SA
13
40
R86
1
n00
401
851I
7
8
06
1I
22
n3
3
6
5
3
12
82
8
DNG
V1
S
1313
3
K3
641
2
n00
1
8K6
413
3
K3
3
12
25
01
n0
8K62513
L
471I
5612
1CDDNG
u22
2117
C
N
795
6
8
D3
L
V
FE
RVCC
Φ
3
NI
H
2
CNYS
N
C
D
N
G
G
7
1
DNG
C
D
1
91
8
ELOH
E
CME
R
F
3911
F
ELOH
ER CME
613
8012
2
u
2
0113
1
R0
271I
421
2
1
0n
1I
1
0n
8113
R01
2
-6017
5
6
Y
DB6394I
4
3
G
2V1DN
13
23
K6
8
4
313
3
K3
701F
0
71I
4413
K6
8
6413
3K3
571I
1
O
U
T
67
1I
5
B
F
77
I
1
n22
6612
4
MOC
P
N
D
SH_
9
D
DNG
C
1
DNG
7
11
9
CM
ELOH FER
E
1
29
1
E
ELOH FER
CM
9012
u22
-6017
1
Y
9
DB63
4IS
7
8
64
2
1
13
91
0312
n3
3
R01
541I
6312
1
0n
41
2
2
n1
0
W
+
S_8V1
WS_1
V1+
871I
3
261
7612
p22
D
C
1
ME
C
SV21+
0
51I
3
015
u01
F
13
36
7K4
0
1
K
%1
%1
1CDD
N
G
CDDNG
1
6911
F
H
ER
0911
ER CME
H
F
011
1
1
CME
ELO
11
ELO
CME
5015
u01
7513
8K
6
941I
6212
n
001
3
021
0K1
6015
u01
5213
8K6
7
I
41
4412
n001
84
1I
3
041
K1
0
4512
p001
G
2CDDN
NG
D
5
461
3
7016
6
K5
42S
S
CDDNG
DNG
1
1CDD
NG
O
M
5
9
L
O
FER
H
E
8
9
ELOH FER
ME
1
7
12
3
3n
DNG
6213
7312
3n3
R072
%1
94
13
0513
K51
K
3
3
1
%
G
CDDN
2
2CD
971I
u
70
1
6K5
D
1
C
GNITNU
9
1
1
ER CME
F
F
C
ER
2
811
2
u2
8
V1
G
N
8312
u22
2V1DNG
8015
01
5613
K
3
3
%1
12
96
6613
1
u00
1
V6
8612
n001
1
CDDNG
NG T
D
OLS
1
E
LOH
8811
ELOH
801
F
9112
1
u00
V61
8V1D
F
901
2
931
u001
V61
2V1DNG
01987654321
10-1
51413121110
A
p
V5+
u01
1
D
DNG
C
sid
2
0712
171
u00
n01
V61
1
1
CDDN
G
B
C
D
E
F
W
V1+
S_8
G
S_1V1+
W
H
I
J
K
5141312111
PL9.0SCM1
Page 33
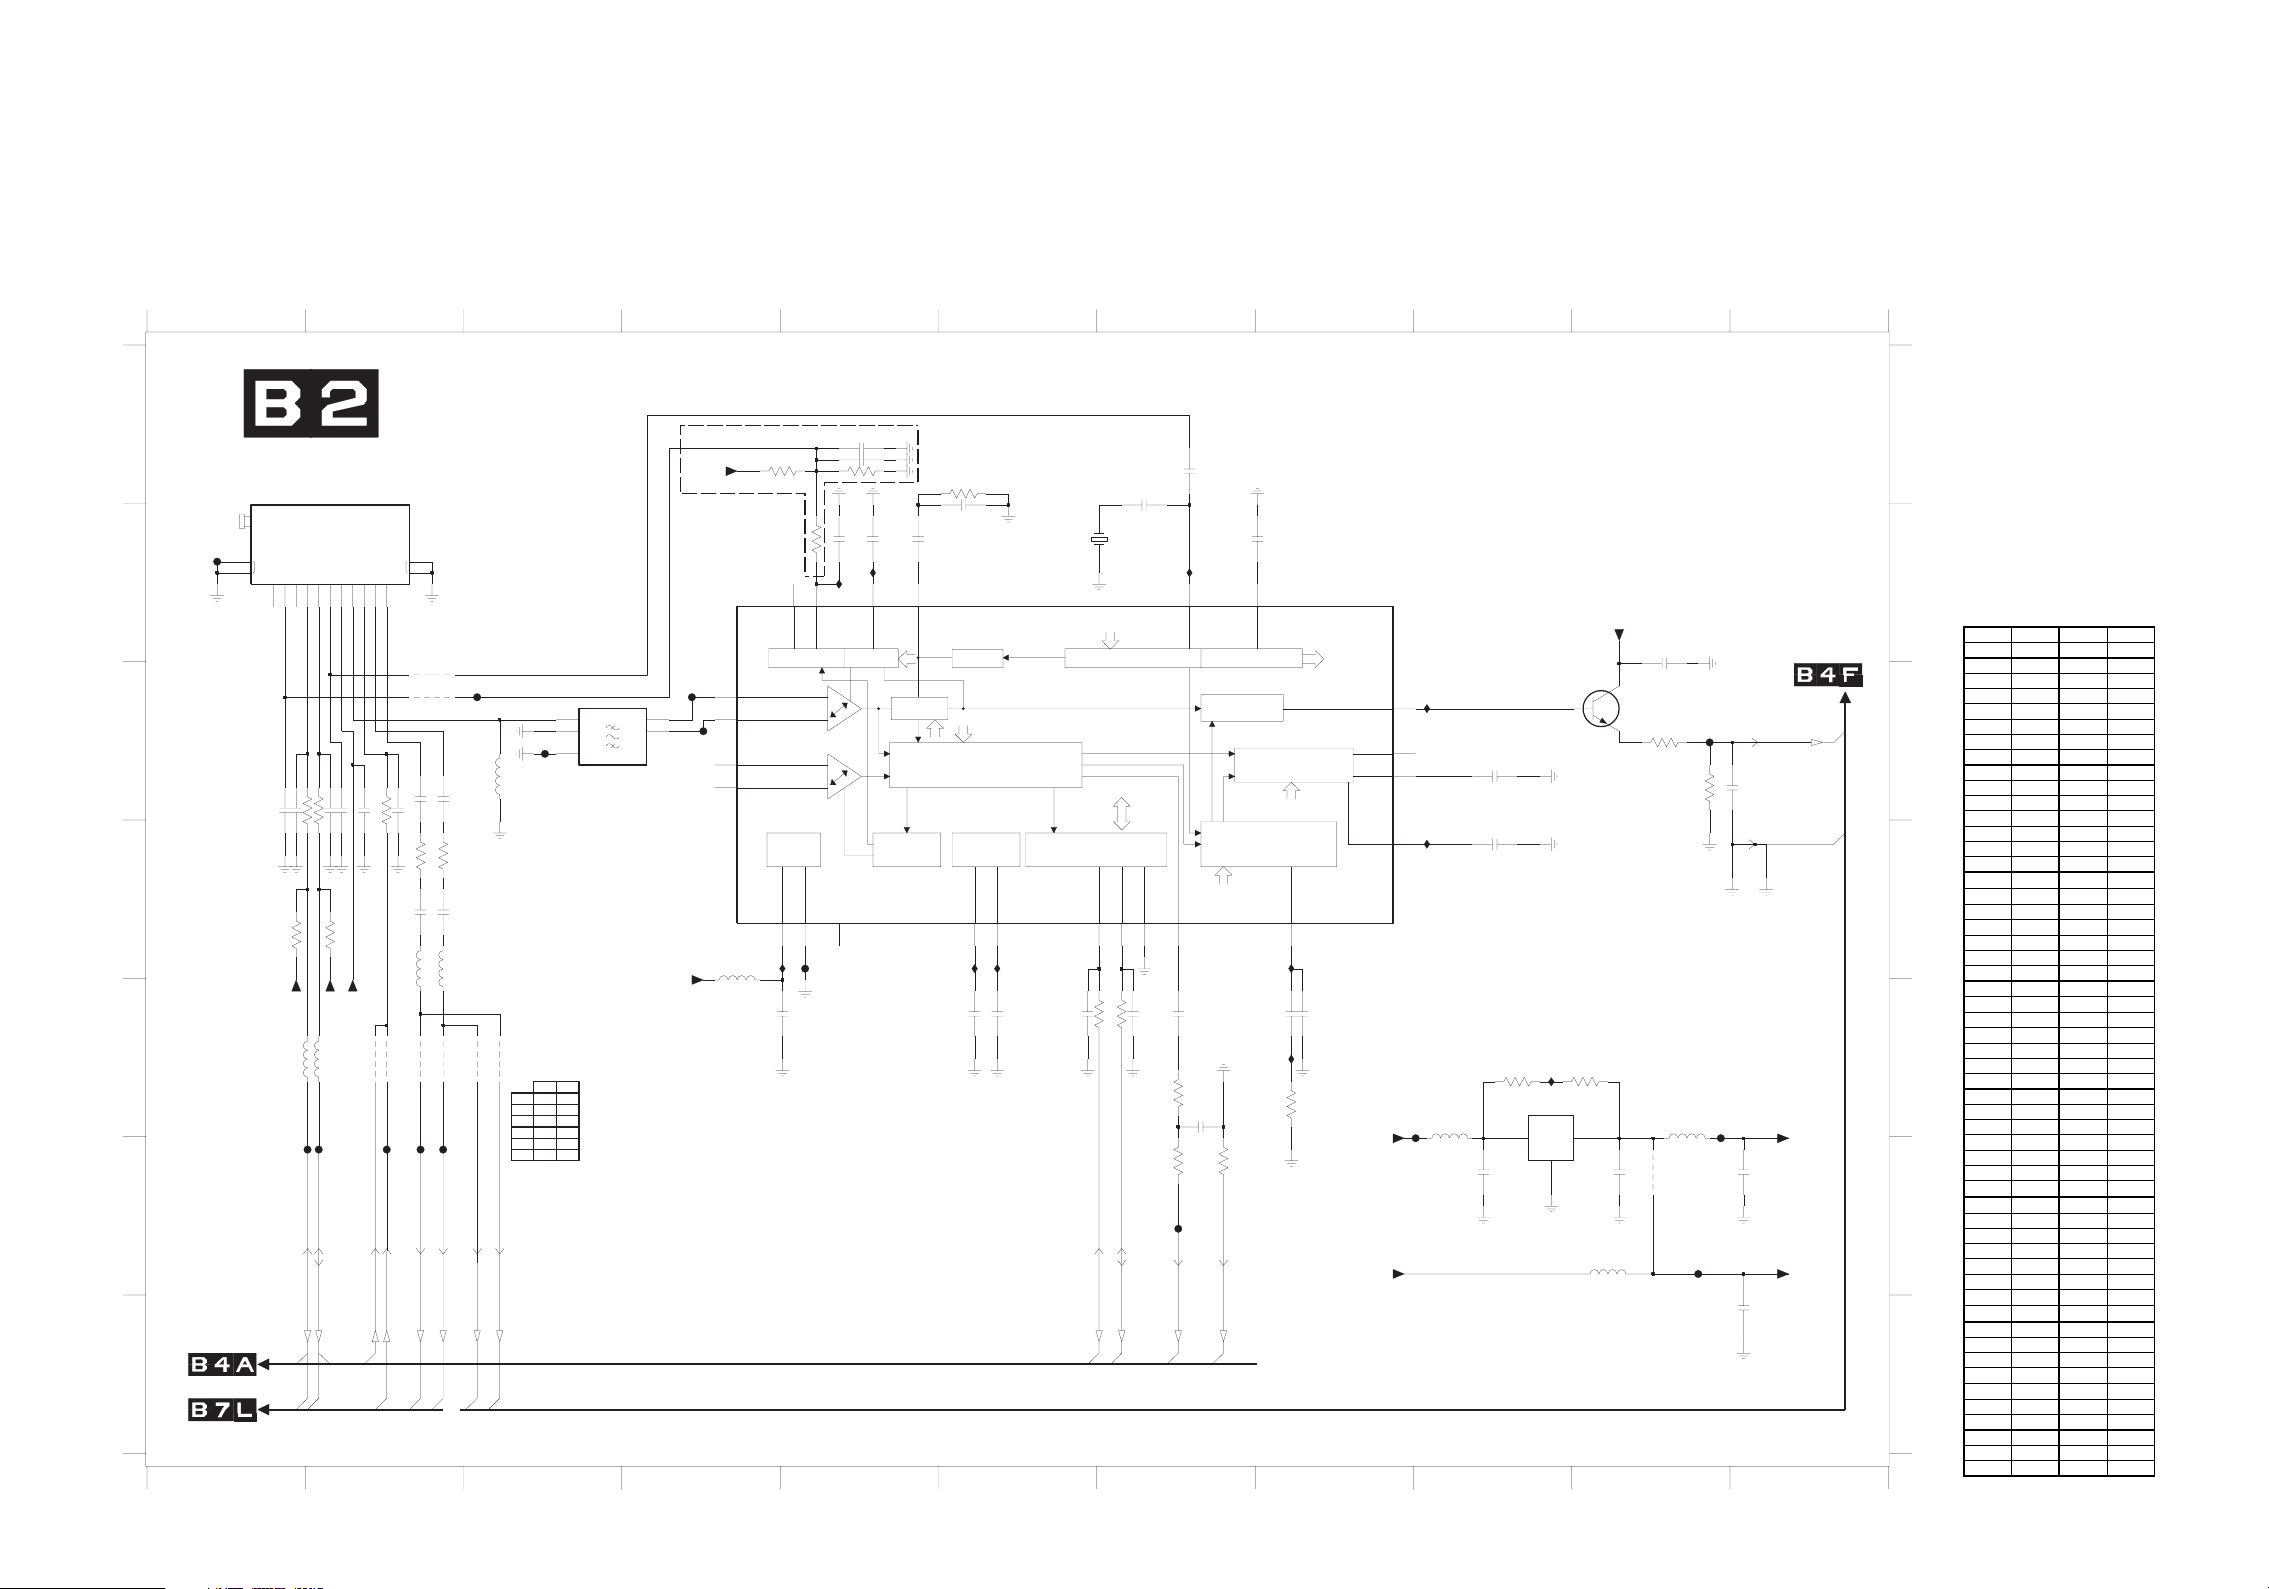
SSB 2/15 Schematic Diagram (TUNER & DEMODULATOR)
SSB 2/15 S chem atic Diagram
Parts Location Guide
Ref No. Posit ion Ref No. Pos it ion
1202 B6 3221 F7
1203 A1 3222 A 5
1204 C3 3223 E9
2200 A5 3224 E 9
2201 B5 3226 D2
2202 B7 3227 D2
2203 B5 4201 E 2
2204 B10 4202 E2
2205 E6 4203 E 2
2208 B8 4204 E 2
2209 C9 4205 E3
2211 D1 4206 E3
2212 D1 4207 C2
2213 D2 4208 F10
2214 D2 4209 C2
2215 D2 5201 E9
2216 F 9 5202 C3
2217 F10 5203 F 10
2218 D9 5204 E10
2219 G11 5205 E2
2220 F11 5206 E 2
2221 E6 5207 E 2
2222 E7 5208 E 2
2223 E7 5209 D4
2224 E8 7200 C10
2225 E8 7201 B 4
2226 E4 7202 E 9
2227 E6 F201 D5
2228 A5 F203 E9
2229 A5 F204 E10
2230 E7 F205 F10
2231 D2 F206 C10
2233 B5 F207 C3
2235 A7 F208 F7
2236 D2 F209 C4
2237 D2 F210 C4
2238 C2 F211 E 1
2239 C2 F212 E 2
2240 C11 F213 E2
3200 A5 F214 E2
3203 C10 F215 E2
3204 D2 F216 B 1
3205 D2 F217 C3
3206 C10 I201 C9
3207 D1 I202 D8
3208 D2 I203 E9
3209 D2 I204 D9
3210 E7 I 205 E 8
3211 E7 I 206 D6
3212 E7 I 207 D6
3213 E8 I 208 D4
3216 B5 I 209 B 5
3217 A4 I 210 B 5
3220 F 7 I211 B7
A
B
C
D
E
F
G
321
MED & RENUT
7
RES
100n2231
IFAGC
A-IFOUT
9
8
10n2214
+5Vtuner
RENUT
8UQDT302
31
21
TM
DIFOUT1
DIFOUT2
10
11
FIA
2215 10n
3209 4K7
220R3226
5207 390n
IF_AGC
4201
4202
F213
IF_AGC_MAIN
IF_AGC_ChDec
FATIN-
2238 1n0
33p2236
4203
F214
7024
9024
1n02239
3227 220R
2237 33p
390n5208
4204
F215
FATIN+
SER
4205
******
VIP_ATV
702F
560n
5202
4206
*
4
4
VIN_ATV
UT
102
202
3024
4024
5024
6024
CGA_FR_REN
1
2
712F
3
DFM
Y
--
--
Y
4021
I
G
SDB
-Y
Y
Y
----Y
--
1O
2ODNGI
DN
O
M1791MWF
57M54
1
R
F
NI
61
2F
41
TM
51
NUT/REWOP OT
DC
NC
RE
SCL4SDA5+B(5V)
EXT-RFAGC
3AS1
2
NC
RES
RES
22p
100R
10n2211
2212
3204
4K7
3207
+5VS
30R
5205
F211
TUNER_SCL
4MHZ-REFOUT
6
RES
22p
100R3205
2213
3208 4K7
+5VS
30R
5206
F212
TUNER_SDA
ROTALUDO
C
R
I
VORP **
S
UT
FR_REN
_
3
V5+
S
ADT
6889
9
02F
4
5
012F
CN
CN
5
R03
902
SV
5+
LANR
TX
ROF NOI
E
CGA
712
1027
V
/T
4
T
2FIV2
1FIV1
2FIS42
1FIS32
802I
GA-F
E
n
00182
22
u0192
22
0
K
1
100R3216
CN
9TOP
14TAGC
GA RE
NU
YLPPUS
18 AGND
20 Vp
2226 10n
K
4
7
2223
0
22
0
22n2233
470n2203
1
0
2I
I
VC
NC
13
N
C
102F
2201 220n
19
VPLL
VAGC 16
F
CGA
L
V
LP-FI
G
S
EL
I
N
N
I
ET
R
S
FI
CGA
654
R0330023
5
1
n
RES
4M0
1202
CR
OCV
E
CN
REFER
R
AC
LUDOM
ED-MA
PT
O
U
U
T
R
P
ST
O
3OP1
22 OP2
702I
602I
10n
1n0
2205
2227
I
ATIG
D
L
REXIM
SQ E
S
DNA REXIM REIR
R
OTA
D
A
M
2
I
ART SUB-C
N
11 SCL
RES
100R3210
2221
TUNER_SCL
2
2
0
C OCV
I
CS
V
E
SDA10
7 DGND
RES
3211 100R
2222
TUNER_SDA
7
100p2235
p
22
2
SER
I902I
15REF
L
ORTN
O
RE
12 SIOMAD
100n
2223
47R
3212
0
223
R0
F208
SIF_OUT
2
1
1
A
5
.4
RA
N
0322
p74
SIF_OUT_GND
1n0
2208
21AFC
CETED
CF
o
t
ROT
S
PART DNUOS
z
M
5.6
h
E
ORP OID
A
U
A
-WOR
D
OMED
3
122
R0
SS
G
C
I
N
E
S
HCTIWS DN
LP-MF
D
AB
U
L
N
AL
OT
R
FMPLL
4
0
2I
2
2225 390p
2224 10n
02I
5
5K6
3213
7
1SB
VC
8
DUA
CN
MEED
5
6DFA
0
2F
3
2
S
1+
V
W
S_V5+
98
1101
A
B
+
SV5
O
OT
N
0
2
01
40
n
2
0
2
1
I
0
n
9022
1
402I
1
2
n074
2
8
0
27
0
WB748CB
0
6
2F
2230
R0
2
3
47p2240
3206 220R
A
U
V
O_S
C
T
B
B
VC_dnG
sOI-G
LA
C
T
U
O_S
D
4223
74R743223
R
302I
2
2
7
0
TDC50M87
1u02216
L
31
I
TUON
M
OC
2
4208
2217 100n
1
25
0
3
R0
RES
02F
4
4025
3
R0
100n
2220
u
e
tV5
r
+
n
E
F
50
5
30
2
u
1
0
2F
2219 10u
V5+
S
G
REDOCED LENNAHC OT
110
PL9.0SCM2
10-2
987654321
1
Page 34
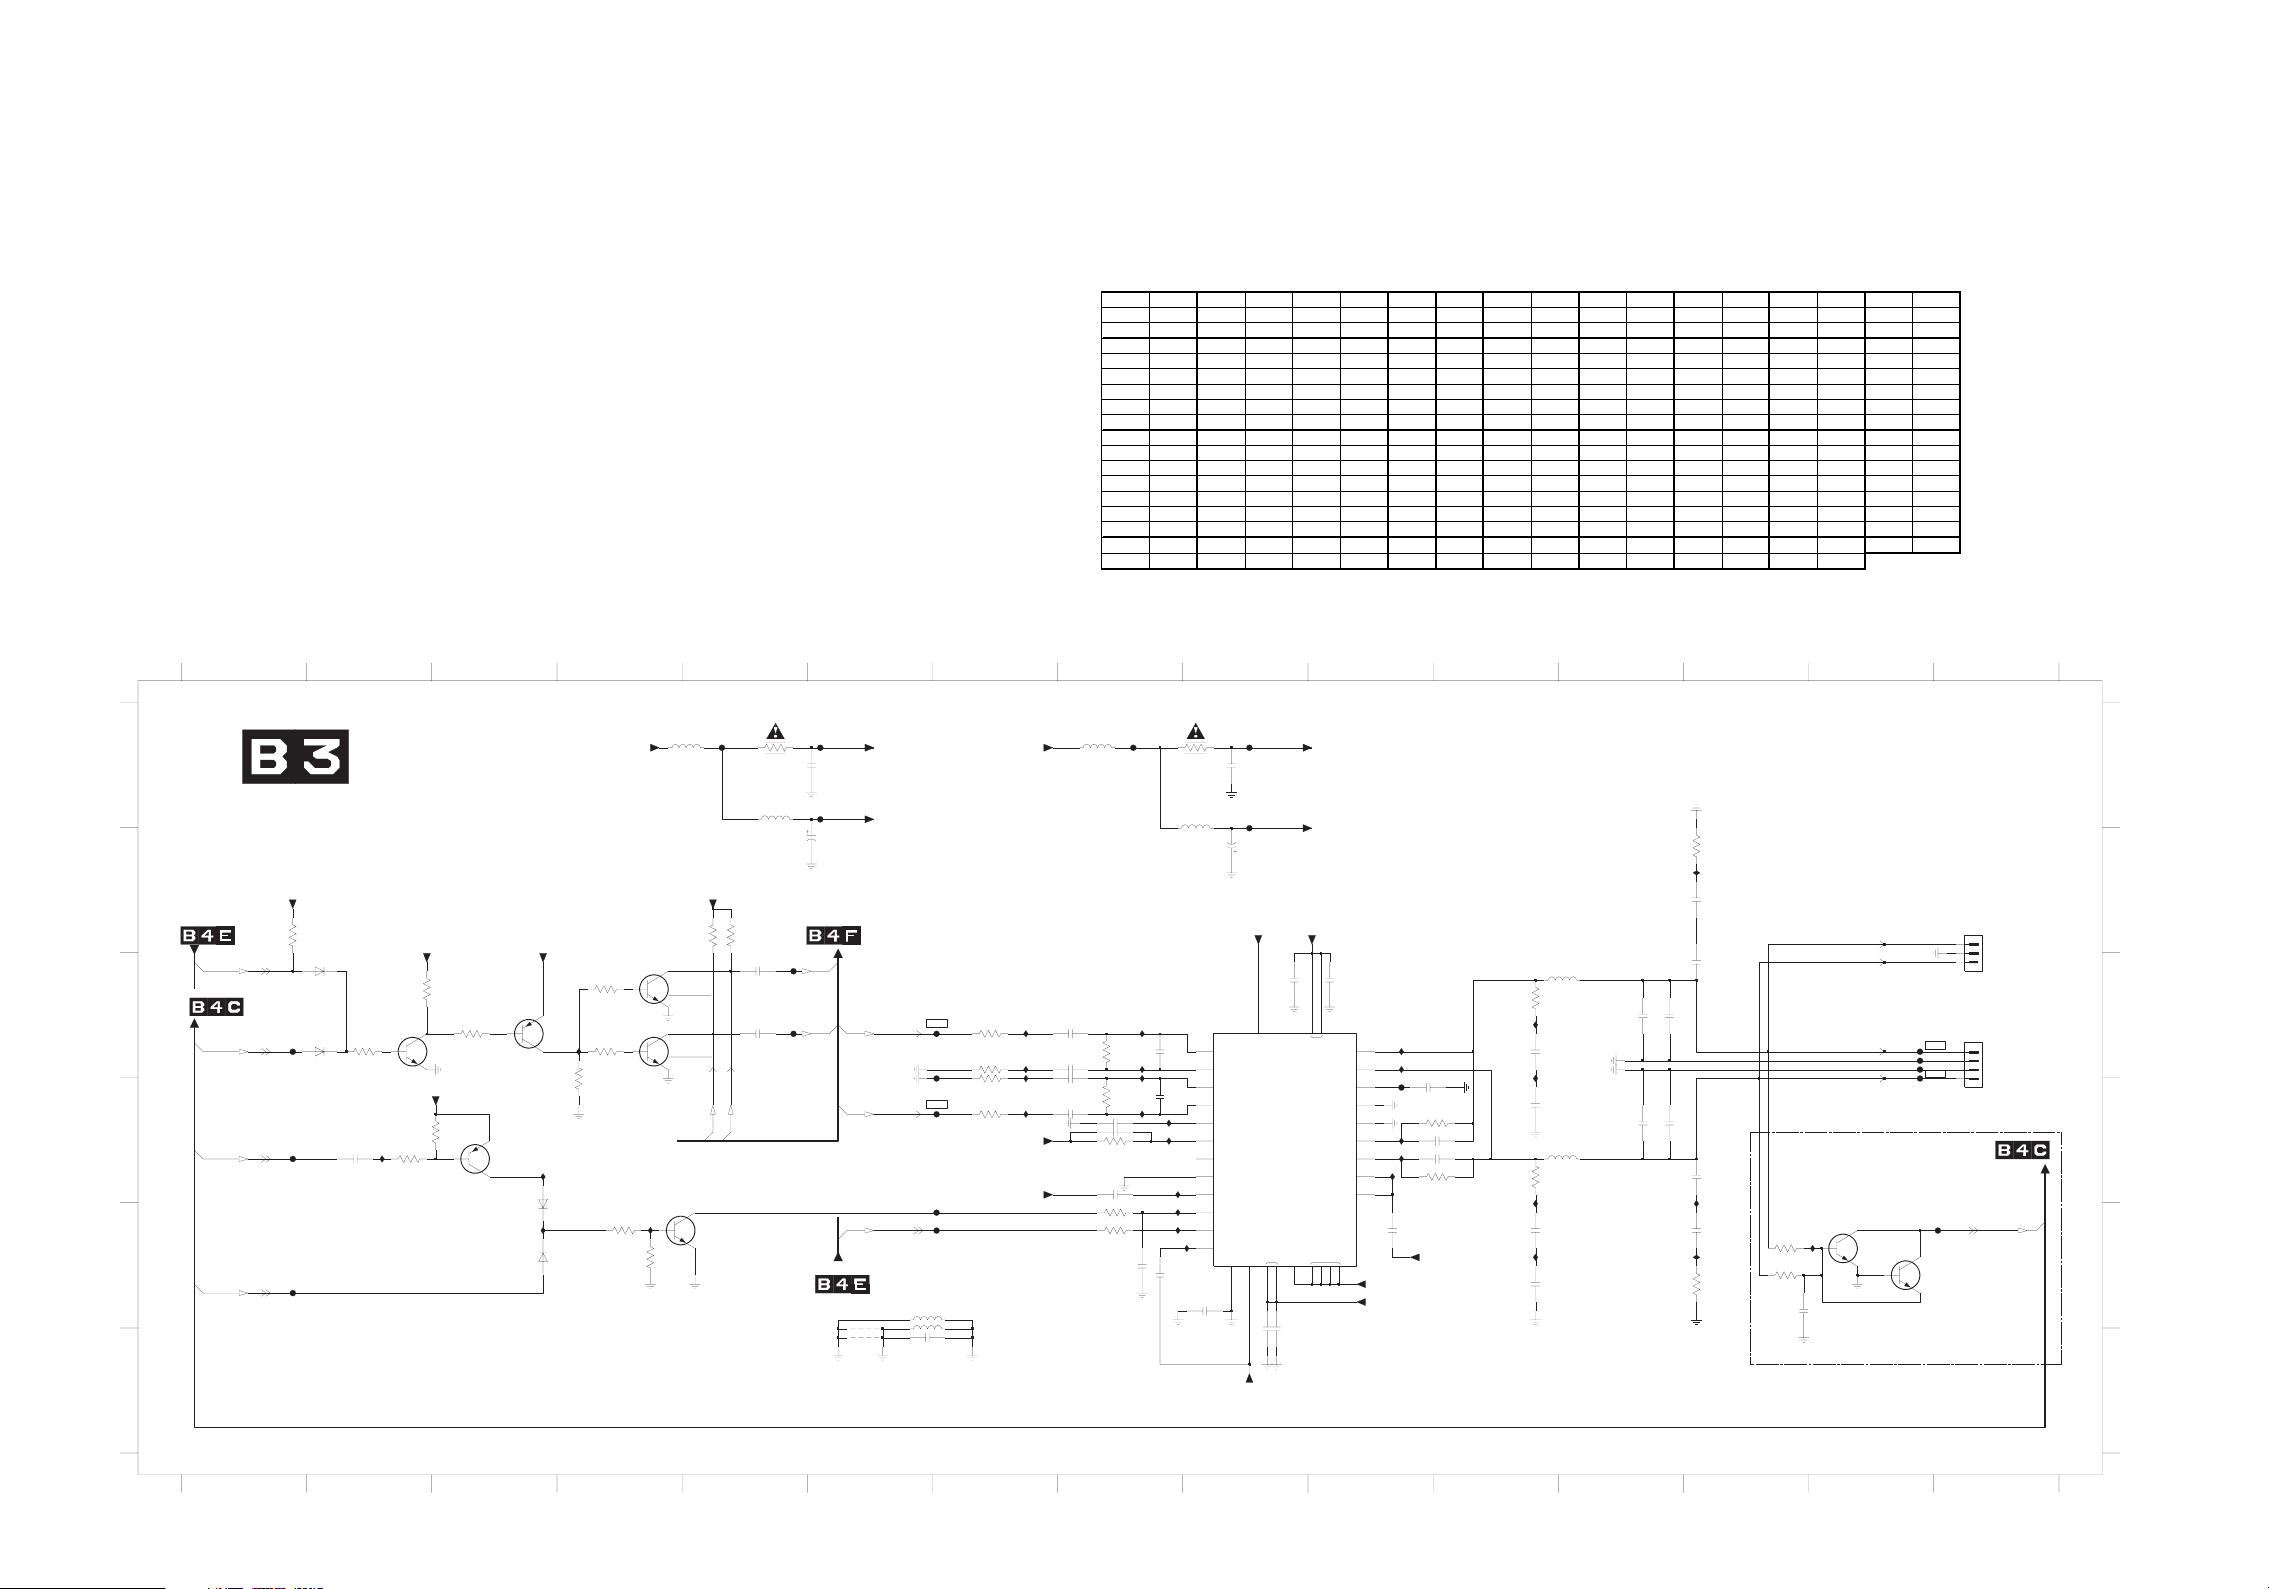
SSB 3/15 Schematic Diagram (CLASS-D & MUTING)
SSB 3/15 Schematic Diagram
Parts Location Guide
Ref No. Posit ion Ref No. Posit ion Ref No. Pos ition Ref No. Position Ref No. Position Ref No. Position Ref No. Position Ref No. P osition Ref No. Position
1301 C15 2320 D7 2337 B 13 3309 C11 3342 E4 6302 E3 F306 D7 F 336 A9 I318 D10
1302 B15 2321 C11 2338 E 13 3311 D7 3343 E 4 6303 E3 F30 7 C15 I301 C7 I319 D8
2301 A6 2322 D8 2339 D2 3312 D10 3344 C2 6304 C2 F30 8 C15 I302 C8 I321 E 8
2302 A9 2323 D13 2340 E8 3313 D8 3345 C3 6305 C2 F309 D7 I 303 C10 I 322 E 8
2304 A6 2324 D8 2341 E 13 3314 E 13 3346 B 5 7301 C9 F310 C15 I 304 B 13 I 329 E14
2308 B9 2325 D10 2342 F 6 3315 D10 3347 B 5 7302 C3 F311 C15 I 305 C7 I330 D2
2309 C9 2326 D13 2345 E 9 3317 D11 33 48 B2 7303 D3 F312 E7 I 306 C8 I333 D8
2310 C10 2327 D10 2346 C5 3319 E8 43 01 E6 7304 C4 F313 C1 I307 C10 I3 35 C11
2311 C7 2328 D12 2347 C5 3326 E 8 4302 F6 7305 C4 F314 D2 I309 C8 I3 36 D11
2312 C8 2329 D8 3301 A5 3327 E13 5301 A 5 7306 E14 F315 E1 I 310 D7 I337 D13
2313 C13 2330 E 10 3302 A8 3328 E13 5302 A8 7307 E14 F316 C5 I 311 D7 I 338 E11
2314 C12 2331 E 11 3303 C7 3332 C4 5303 C12 7308 E5 F 317 C5 I 312 D8 I 339 E11
2315 C7 2332 E8 3304 C8 3333 C3 5304 D12 7309 C2 F318 E7 I 313 D8 I340 E4
2316 C7 2333 F 9 3305 B13 3334 C4 5305 A5 F 301 A5 F 332 E 15 I 314 D10 I 342 C4
2317 C13 2334 F9 3306 C7 3335 C4 5306 A 8 F302 A 8 F333 A 6 I315 D8 I 343 D3
2318 D11 2335 D11 3307 C7 3337 D3 5307 E6 F304 D10 F334 A 6 I316 D10 I344 E3
2319 D8 2336 E11 3308 D8 3338 D2 5308 E6 F305 C7 F335 A9 I 317 E 13
21
1035
103F
10
GNITUM & D-SSALC
A
B
F
C
NA
D
E
F
YBTS3V3+
8433
K01
u Y
P
BDNATS MORF
LP_TSA
40
36
PO
613SAB
MVN&HSALF OT
5036
POLP_IT
313F
4433
613SAB
K01
YBTS3V3+
5433
01
K
333
3
V3
K01
9037
WB748CB
YBTS3V3+
2037
CB
WB758
3
V0
2
43I
YBTS3V3+
7333
NWOD_REWOP
513F
nETUM
9332
413F
033I
u1
0
7K4
3
833
7K4
303
7
3V3
WB758CB
343I
V0
6303
BAS316
443I
6302
BAS316
oiduAV21+
2
TIUCRIC GNITUM
2
333
0K
1
4
333
0K1
33
53
K01
7
7
6278522239
043I
33
24
K01
3433
K22
33
W
S_3V3+
6433
1
586278522239
403
7433
K0
01
K
32
74
u0
01
K4072DS2
K3562DS2
6432
K3562DS2
K4072DS2
HP_L
u001
HP_R
80
WB748
503
58
37
CB
333F
R01
1032
n0
01
DNSDN
G
433F
2V21
R035035
403
2
u022
V52
DNSDNG
T
TUOR_PH
613F
TUOL_P
H
7
13F
DNSDNG
76543
533
203F
9V11
oiduAAV21
+
oid
+
uADV21
V
oidu
21
A
-
2035
u22u2
2033
sOI-GOLANA O
I
503F
LpmAerP
3
603F
903F
RpmAerP
213F
813F
nYBDNATS
103I
1
2
13
K013033
503I
51
K
32
01603
K01
7033
013I
11
3I
K011133
2
3
uAA
oid
V21-
oiduAAV21-
Pu YBDNATS MORF
5
R
703
34
10
2034
03
35
R0380
n0
243
1
2
R
SE
DNGDNS
203
0u1
3
0u1
0u16132
0u1023
2232
232
4
6
233
3
01
T
403
2
213
p
022
K86
I
603
03I
9
80
33
132
9
02
p
2
K86
13I
2
n001
n001
13I
K93313
DNSDNG
913I
n0019232
R
0
913
3I
12
K
C
ME
2332
470n
2340
1
0n
F
R01
G
G
37
AD
398
2
8
V
2
3
-
8V2
5
1
I
8
V
2
1
4
V2-
8
2
1
313I
6V7
-
5
1
0
SO
1
3
C
N
S
O
11
VH
2V8
-
81
R
D
7V4
333I
5
2V3
6
6V2
-
223I
31
0n15432
DNSDNG
2V21-
2
032
n
001
N
SDN
D
F
633
2V21
+
R036035
8032
u022
V52
NSDN
D
+
oiduAA
V21+
1
100n
10
WTB2
P
1NI
1NI
N
P
2N
2NI
N
ERNI
F
C
I
R
P
FE
TSET
7
2309
SDN
G
8
V
ADD
Φ
L
SSA
D
C
R
E
WOP
REIFI
M
L
A
P
F
ERC
O
F
E
E
GAGNE
PUREWOP
PSSV
GND_HS
ASSVDNGC
9
26
23
33
100n2334
100n2333
DNSDNG
o
iduAAV21-
oiduAA
-
1
V2
oiduADV2
1-
oiduADV2
100n
2310
SDN
DN
DN
G
29
20
PDD
V
2
7
03I
UO
1T
U
2T
O
AID
G
H
1PV
V
P
2
H
1
B
OO
T
T
OO
2
B
B
S
1
T
A
2BAT
S
S
H|DS
W
V
1
16
17
32
3
2
2
70
3I
CME
2
4
V
6
403F
DNSDNG
3
0
NSDNG
D
1
2
9
33
1
2
8
8
9V
41
3I
3
32
9V
72
1
2
61
3I
8
1
3I
513
3
52
-
2
3V1
4
0332
1
n00
-
1
oidu
AAV21-
-
oiduADV21
110198
N
SDN
D
G
RESRES
3305
I304
2337
3035
u
22
9
3
03
R01
3I
53
32
12
0n1
D
G
SDN
N
N
N
SD
D
8132
n1
0
SER
n515232
n51
SER
oiduADV2
G
633I
5332
n1
0
D
DN
NG
S
035
4
22
u
3
71
3
01
R
33I
8
1332
0n1
33I
9
6
32
3
0n
1
DN
DNS
G
4
RES
2313
4
132
7
32
1
0n
1
0
n
74
-TF
E
L
R
+THGI
32
32
8232
0n1
n07
6232
ER
S
33I
7
8332
R
SE
713I
4133
ER
S
N
SDN
D
G
7
233
K0
22
82
33
K022
2341
N
SDN
G
413121
D
G
SDN
N
OT
F
3
3F
923I
1u0
D
6
7
03
W
B
B748C
D
N
D
NG
S
7
51
A
B
O R
TU
EFOOWBUS OT
1
203
1
2
3
R
SE
SREKAEPS
031
1
4-6445
1
37
703F
803F
01
11
-
1
TFEL
NG
2
D
3
DNG
4
R
+ THGI
C
D
M
N&HSALF OT
V
233F
C
T
ORP
D
_
703
W
B748CB
N
TCETE
O
D-CD
I
E
F
514131211101987654321
10-3
PL9.0SCM3
Page 35
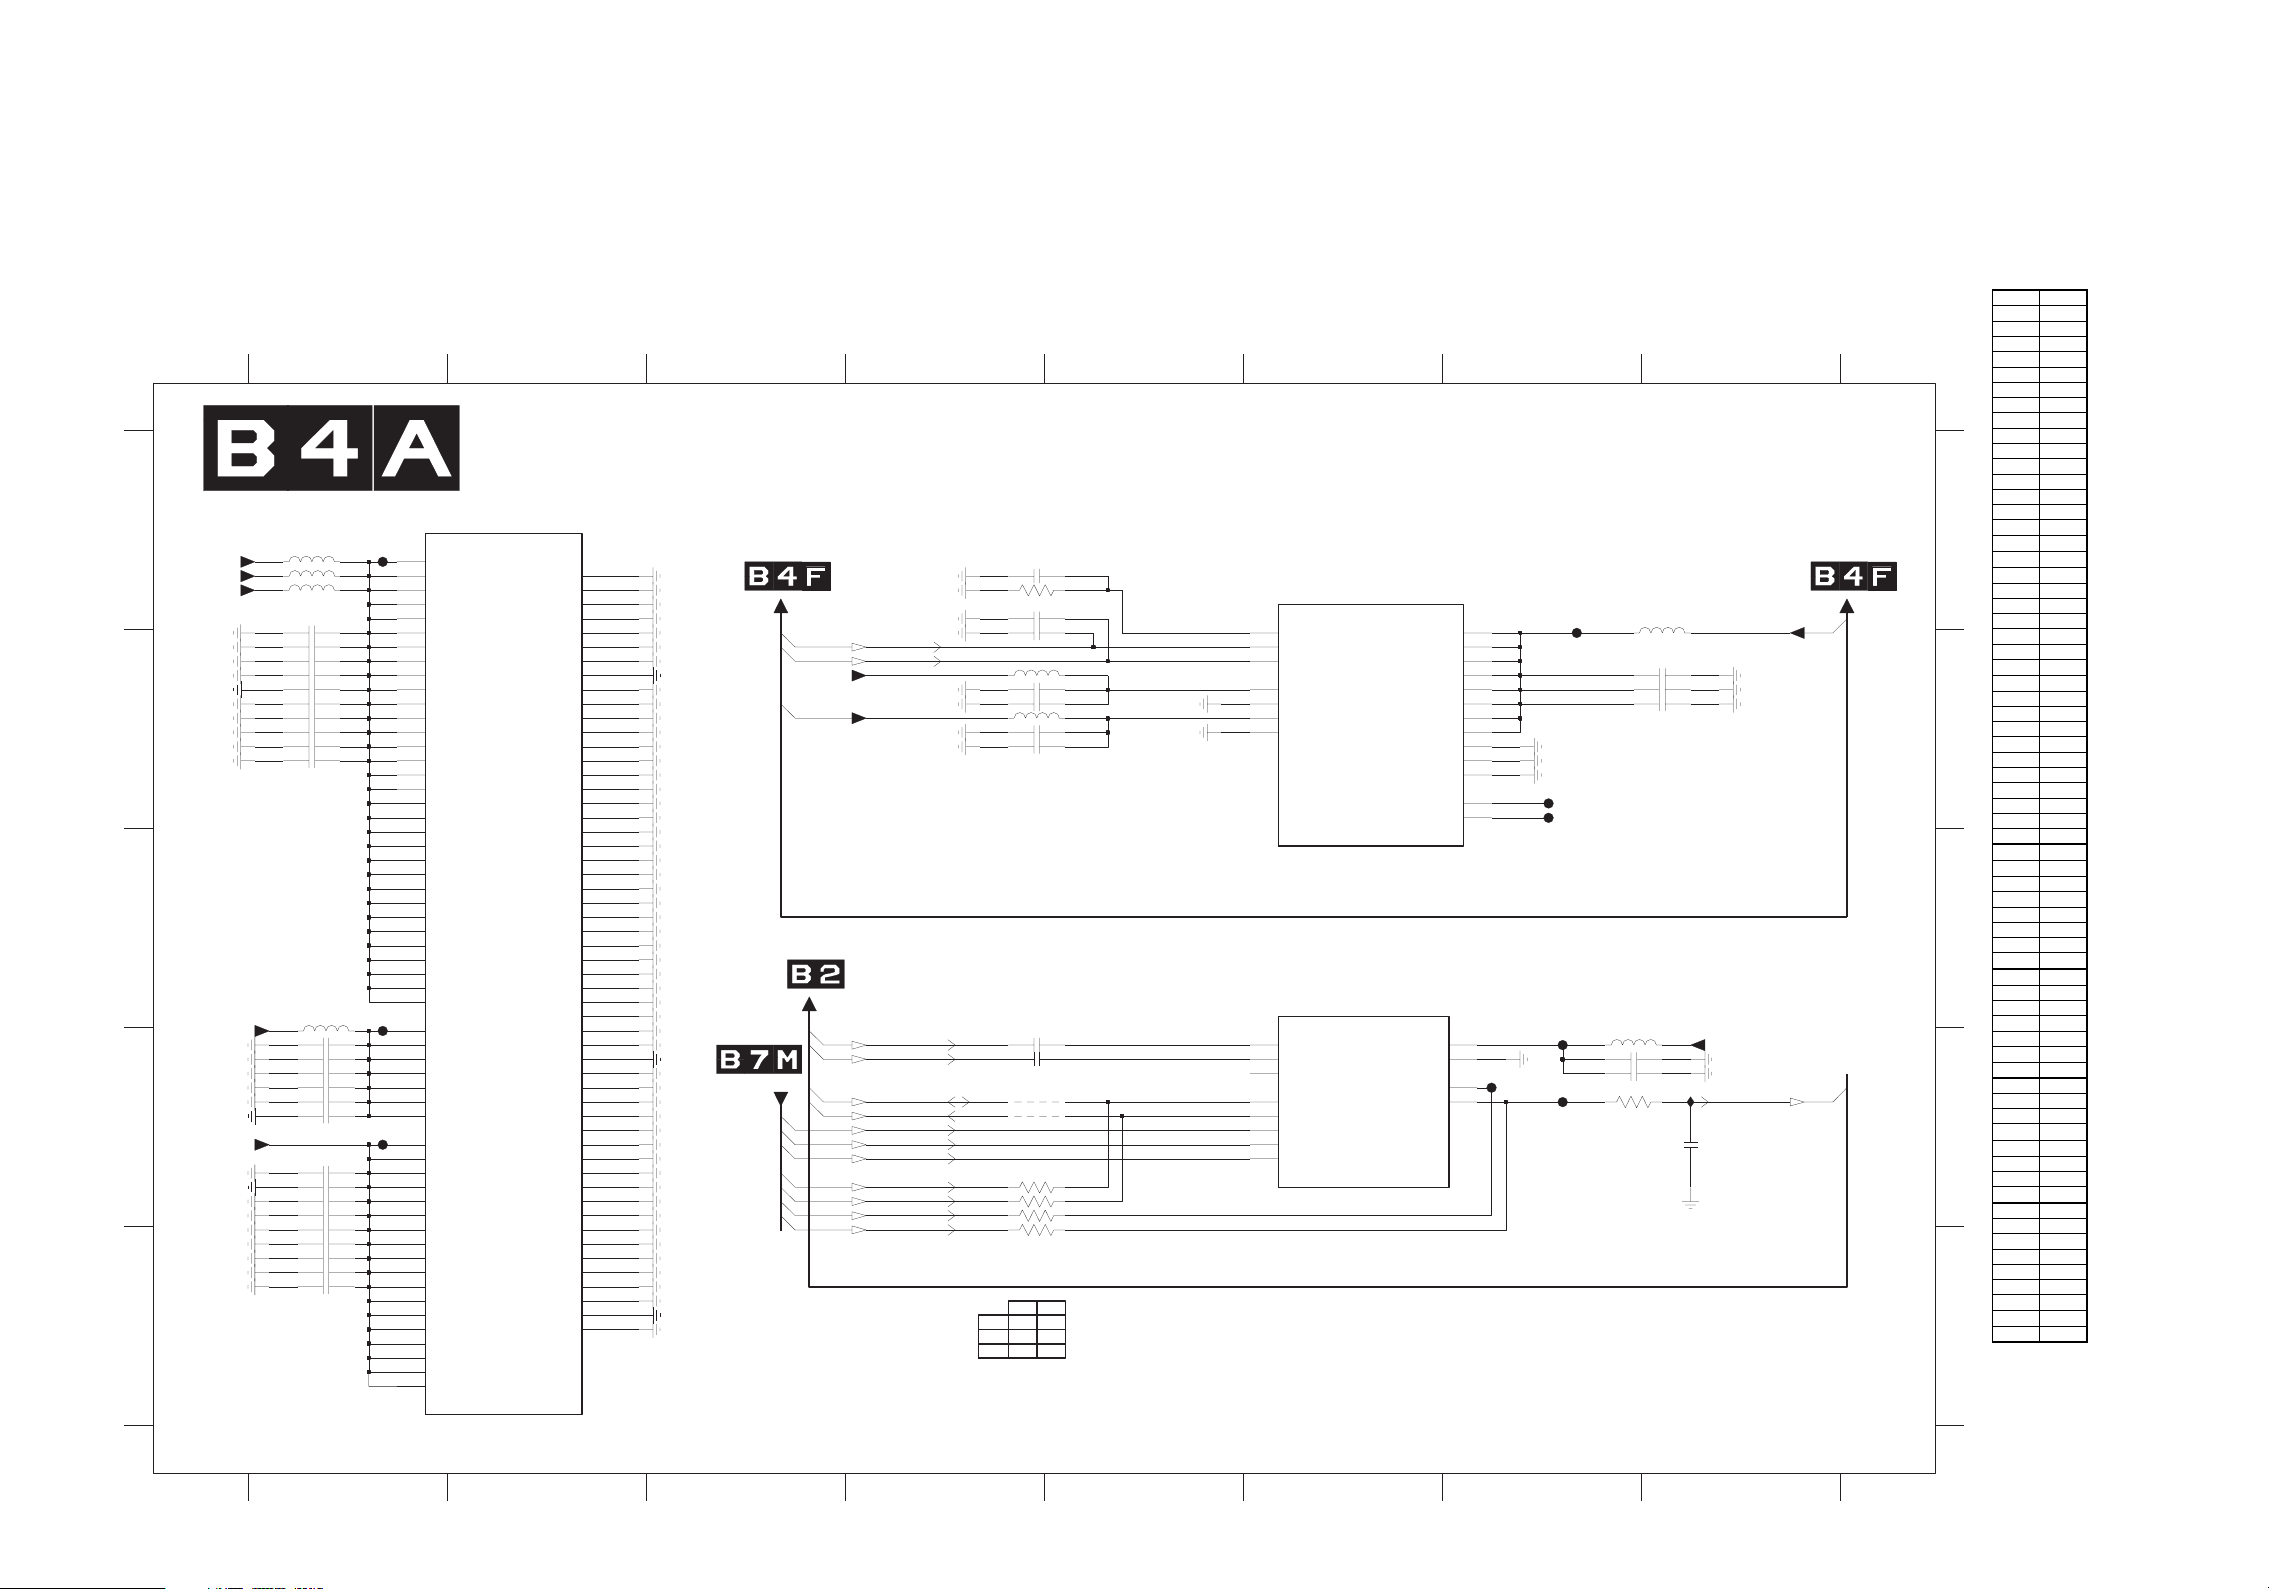
SSB 4/15 Schematic Diagram (MT5382 - POWER & TUNER)
SSB 4/15 S chem ati c Diagram
Parts Loc ation G uide
Ref No. P osit ion
2A01 B 1
2A02 B 1
2A03 B 1
2A04 B 1
2A05 B 1
2A06 B 1
2A07 B 1
2A08 B 1
2A09 B 1
2A10 B 1
2A11 D1
2A12 D1
2A13 D1
2A14 D1
2A15 D1
2A16 D1
2A17 D1
2A18 D1
2A19 D1
2A20 D1
2A21 E 1
2A22 E 1
2A23 E 1
2A24 E 1
2A25 E 1
2A26 A 4
2A27 B 4
2A28 B 4
2A29 B 4
2A30 B 4
2A31 D4
2A32 D4
2A33 B 7
2A34 B 7
2A35 B 7
2A36 A 4
2A37 B 4
2A38 D7
2A39 D7
2A40 D8
3A01 A 4
3A02 D7
4A01 D4
4A02 D4
4A03-1 D4
4A03-2 E4
5A01 A 1
5A02 D1
5A04 B 4
5A05 B 4
5A06 B 7
5A07 D7
5A08 A 1
5A09 A 1
7A01-1 A2
7A01-3 A6
7A01-6 C6
FA01 B7
FA02 B7
FA03 A1
FA04 C1
FA05 D1
FA06 A7
FA07 D7
FA08 D7
FA09 D7
IA01 D8
A
B
C
D
E
21
T
& REWOP - 2835TM
1-10A7
2835TM
30AF
3
A
WS_1V1+
80A5
WS_1V1+
5
WS_1V1+
2
2
2
2
2
2
5
WS_3V3+
WS_8V1
+
R0310A5
R0
3
R0390A
u410A
7
20A2
0u1
1
0u
30A
0u1
40A
n00150A
n001
60A2
n00170A2
180A
n00
n00190A
n00101A2
R0320A
2
2
2
7u411A
0u121A2
n00131A2
41A2
n001
n00151A2
n00161A2
7u4
1A2
7
7u481A2
u19
0
1A2
2A2
0
n001
00112A
n
n00122A2
n00132A2
n00142A2
00152A
n
V
A
C
C
L
U
40AF
F
50A
A
B
B
D
V
D
E
H
J
N
E
1KCC
4
2KCC
V
4B
3KCCV
5B
4KCCV
5
CV
5KC
6
V
6KCC
6D
7KCCV
7C
V
8KCC
11K
V
9KCC
11M
11R
11U
21L
21N
21P
21T
1KCCV
31K
V
31U
41L
41T
V
51L
5
1T
61K
6
1U
71
71N
71P
71T
V
81K
2KCCV
81M
3KCCV
81R
V
81
4BA
5AA
32F
42D
42E
01F
11F
1H
V
1W
2
OI2CCV
2
OI2CCV
3
V
3C
4C
OI2
CV
C
4
V
4M
4
5
5
5
5
5
5U
6
6F
REWOP
1E
DNG_SSVD
1
_SSVD
_SSVD
D
D
01KCCV
11KCCV
21KCCV
31KCCV
41KCCV
D
51KCCV
6
D
71KCC
D
81KCCV
91KCCV
02KCC
12KCCV
22KCCV
32KCCV
42KCCV
52KCCV
62KCCV
72KCCV
82KCC
9
0
13KCC
23KCCV
SSV
1_1_OI3CCV
2_1_OI3CCV
1_2_OI3CCV
2_2_OI3CCV
3_2_OI3CCV
1_3_OI3CCV
2_3_OI3CCV
1OI2CC
2OI2CCV
3
4
5OI2CC
6OI2CCV
7
8OI2CC
9OI2CCV
D
SSV
01OI2CCV
11OI2CCV
21OI2CCV
31OI2CCV
41OI2CCV
51OI2CCV
61OI2CCV
71OI2CCV
81OI2CCV
1BA
2DNG
4T
3DNG
Y
4
4DNG_SSVD
F
5
5DNG_SSVD
5L
6DNG_SSVD
5R
7DNG_SSV
5W
8DNG_SSVD
6H
9DNG_SSV
6
K
01DNG_SSVD
11L
11DNG_SSVD
11N
21DNG_SSVD
11P
31DNG_SSVD
11T
41DNG_SSV
21K
NG_SSVD
51D
21M
61DNG_SSV
21R
71DNG_
21U
81DNG_SSVD
31L
91DNG_SSVD
31M
02DNG_SSVD
31N
12DNG_SSVD
1P
3
22DNG_SSVD
31R
32DNG_SSVD
31T
42DNG_SSVD
41K
52DNG_SSVD
41M
62DNG_SSVD
N
41
72DNG_SSVD
41P
82DNG_SSVD
R
41
92DNG_SSVD
41U
03DNG_SSVD
51K
13DNG_SSVD
M
51
23DNG_SSVD
51N
33DNG_SSVD
51P
43DNG_SSVD
5
1R
53DNG_SSVD
51U
63DNG_SSVD
61L
73DNG_SSVD
1M
6
83DNG_SSVD
61N
93DNG_SSVD
61P
04DNG_SSVD
61R
14DNG_SSVD
61T
24DNG_SSVD
71K
34DNG_SSVD
71M
44DNG_SSVD
71R
54DNG_SSVD
7
1U
64DNG_SSVD
81L
74DNG_SSVD
81N
NG_SSVD
84D
81P
94DNG_SSVD
81T
05DNG_
12E
15DNG_SSVD
E
22
25DNG_SSVD
5
2E
35DNG_SSVD
2D
6
45DNG_SSVD
MOIDIORP MORF
RENU
SE
R
2
2
A
10A3
63A2
3
A2
D
M
B
S
_
U
B
PD_
U
S
_
WS
3V3+
V
1+
2
TUO_FIS
NG_TUO_FIS
T
A
DS_RENU
LCS_RENUT
)3(ATA
D_ST
)2(ATAD_ST
)1(ATAD_ST
DILAV_ST
KLC_ST
)0(ATAD_ST
ST
POS_
7
0
4
5
A
7
A
2
2
82A2
50A5
2
A
03A2
D
*
*
1
1-30A4
*
2-30A4
*
*
10A4
20A
4
30A
4
p
0
16
0
K5
%11
0n
1
SER
1
0
S
n
R
E
3
R0
u
0
1
n001
R
03
u492
7
n001
n01
13A2
n0123A2
10A4
4
20A
63
SER
54
8
72
DFM
SDB
--
Y
Y
--
Y
--
A
2F
B
S
U
3
EA
A
3F
B
U
S
5
A
B
DDV
A
3DA
SSVA
3
4CA
A
DDV
4DA
A
52
P
S
PFI
2
P
6
M
NFI
|
S
6
2
N
A
CN
42C
T
NU
E
2D
3
N
U
T
32E
52C
R_NTA
62C
10A7
3
283
TM
5
G
OLA
NA
TRV_
A
MD_BSU
PD_
U
S
33
B
_
3
BSU
_
1
SU_
2
B
21SSV
BSU
_
A7
T
P0XPM|
N0XP
1
XPM|F
TAD_R
A
LC_RE
K
TED_NTA
X
XT_NTA
A
1
A
_
DDV
D
2
V
DD
A
1DD
V
H
21DDVA
_
21DDVA
S
1
_
DDV
2
A
A
V
A
S
V
A
S
A
V
0
6-
1
2835TM
RENU
5
2DDVA
_
S
A
S
V
A
R
_F
A
_FI
52
R
LPC
L
T
2
6
L
LPNACSP_21
42T
LP
L
TD_2
D
62U
L
MD
L
I
P
2
4
P
_
LLPA
R
2
6
L
LPSY
52T
LPDVT_21DD
L
42R
L
LPMD_21DDVA
2
P
2
LLP_SSV
1
R
22
2LLP_
2
T
2
P_SS
3L
L
32
R
0NT
T
2
3
PT
0
52N
CDAS
4
2
N
CDAS_52
2
6
A
AF
CG
C
G
0
6
B
2
0AF
6
0
5
6
A
3
A2
4
A
5
2
3
1
0AF
)LLP(
0AF
2
L
)
P(
L
7
0AF
70A5
8
3A2
9
2
3
9
A
8
0AF
2
3
0
A
0
3
u4
7
0
K
1
1
10-4
876543
A
+
2V
0
3
01
01
1
R
7u433A2
0
n
n
B
C
R
V2+
5
n001
0AI
1
N
A
IAM_C
_FI
G
D
2A40 47n
E
8765432
PL9.0SCM4
Page 36
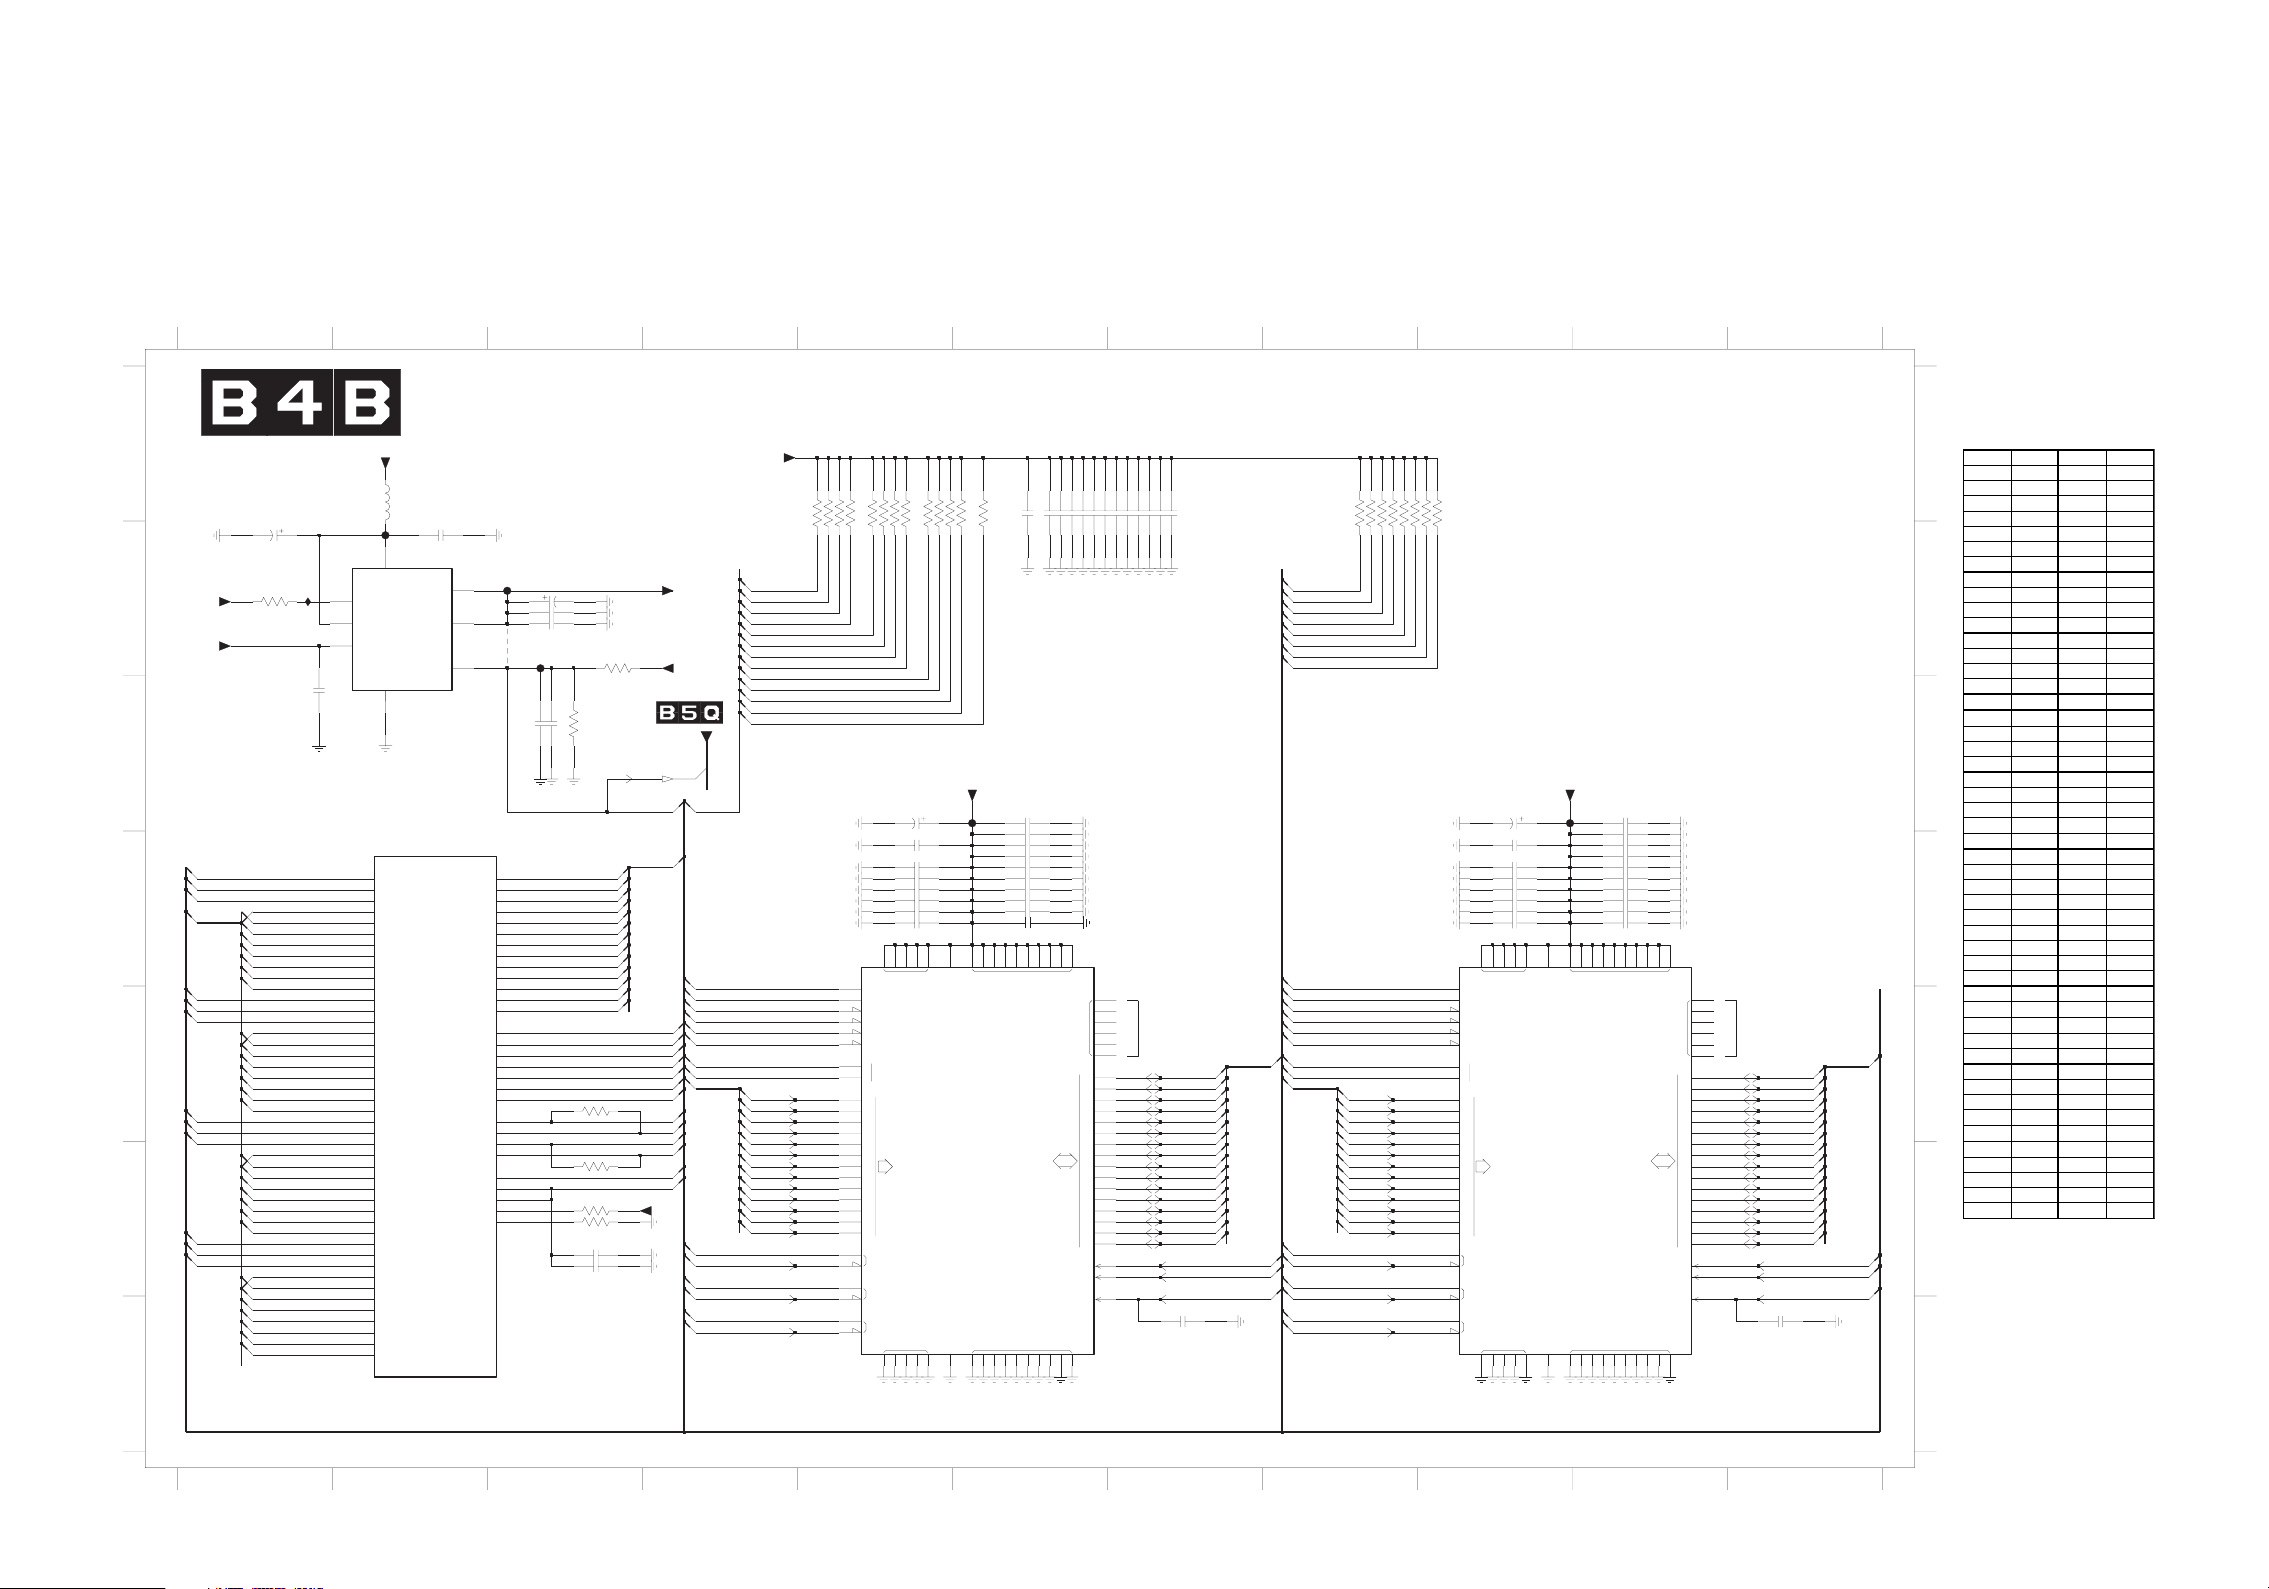
SSB 5/15 Schematic Diagram
Parts Loc ation G uide
Ref No. P osit ion Ref No. Pos it ion
2B04 C3 2B53 B6
2B05 C3 2B54 B7
2B06 B 3 2B 55 B7
2B07 B 3 2B 56 B7
2B08 B 3 2B 57 B7
2B09 F3 2B58 B7
2B10 F3 2B59 B7
2B11 C5 2B60 C9
2B12 D5 2B61 D9
2B13 C6 3B01 B1
2B14 D6 3B02 C3
2B15 D6 3B03 E3
2B16 D6 3B04 F3
2B17 D6 3B05 F3
2B18 D6 3B06 F3
2B19 D6 3B07-1 B6
2B20 D6 3B07-2 B5
2B21 D6 3B07-3 B5
2B22 D6 3B07-4 B5
2B23 D5 3B08-1 B5
2B24 D5 3B08-2 B5
2B25 D5 3B08-3 B5
2B26 D5 3B08-4 B5
2B27 D5 3B09-1 B6
2B28 D5 3B09-2 B5
2B29 G 7 3B09-3 B5
2B30 G11 3B 09-4 B5
2B31 C10 3B 10 B5
2B32 D10 3B 11 B8
2B33 D10 3B 12 B8
2B34 D10 3B 13 B8
2B35 D10 3B 14 B8
2B36 D10 3B 15 B8
2B37 D10 3B 16 B8
2B38 D10 3B 17 B9
2B39 D10 3B 18 B9
2B40 D10 3B 19 B3
2B41 D9 4B01 B3
2B42 D9 5B01 A2
2B43 D9 7A01-4 D2
2B44 D9 7B01 B2
2B45 D9 7B02 D5
2B46 D9 7B03 D9
2B47 B 6 FB 01 B2
2B48 B 6 FB 02 C6
2B49 B 6 FB 03 C10
2B50 B 6 FB 04 B3
2B51 B 6 FB 05 B3
2B52 B 6 I B01 B1
SSB 5/15 Schematic Diagram (MT5382 - DDR2 SDRAM)
A
B
C
D
E
F
G
21
543
9876
1101
MARDS 2RDD - 2835TM
WS_8V1+
0B5
1
R03
10
B2
u00
1
V61
10BI
WS_8V1+
WS_8V1+
0SQD
R
n0SQD
R
R
0MQD
)13:0(QDR
1SQDR
n1S
QDR
1MQ
DR
2SQDR
n2SQDR
2MQDR
3SQD
R
n3SQD
R
R
3MQD
7K410B3
2B03
R
)0(QD
)1(QDR
)2(QDR
)3(QDR
)4(QDR
)5(QDR
)6(QDR
)7(QDR
)8(QDR
)9(QDR
)01(QDR
)11(QDR
)21(QDR
)31(QDR
)41(QDR
)51(QDR
)61(QDR
R
)71(QD
R
)81(QD
)91(QD
R
R
)02(QD
)12(QD
R
)22(QD
R
R
)32(QD
)42(QDR
)52(QDR
)62(QDR
)72(QDR
)82(QDR
)92(QDR
)03(QDR
)13(QDR
100n
10BF
20B2
5
VDDQ
2
S
_D
7
NIVP
6
NIVA
GND
1
3
F
0
R
SQD
2
F
5G
0MQ
DR
3E
0QDR
2D
1QDR
4F
2QDR
1C
3QDR
3D
4Q
DR
2E
5Q
DR
1
D
6
QDR
4
E
7
QDR
3G
1SQDR
2G
R
G
4
R
1MQD
2H
8Q
DR
4J
9QDR
3J
R
01QD
4
H
11QDR
1G
21QDR
2J
R
31QD
K
5
41QDR
3H
51
QDR
2
V
Q
2S
R
D
3
V
4U
2MQDR
3U
61QDR
3
T
R
71QD
2U
81QDR
1T
91QDR
2
T
Q
02
R
D
T
6
12QD
R
U
1
R
22QD
5
T
R
32QD
5V
3SQDR
V
6
2A
A
3
MQDR
3
W
42
QDR
2Y
QDR
52
W
4
62QDR
1Y
QDR
72
W
2
82QDR
2BA
92Q
DR
3
Y
03Q
DR
3AA
13QDR
n001
7
10B
M6992PL
TTV
SV
ESNE
4
FERV
4-10A7
2835TM
2RDD
_0SQDR
_1SQD
_2SQDR
_3SQDR
40BF
8
3
R
RR
R
R
R
R
R
60B
2
70B2
80B2
RES
4B01
2B04
3
P
21
AR
L
2
11A
4N
01AR
2N
9A
R
M
6
8AR
1
P
7AR
3M
6AR
1N
5AR
5M
4AR
2P
3AR
M
2
2AR
N
3
1A
R
L
4
0A
R
3L
_SCR
K
1
_SA
L
1
_SAC
6P
_
EWR
4P
0
ABR
5
P
1AB
4
K
TDO
CA
2
1KLCR
1CA
_1KLCR
3K
0KLC
2K
_
0KLCR
R
4
EKCR
2R
0FERVR
3R
1FERVR
1
B
TXE
PU
C
2
NDTXER
RES
1u0
50BF
100n
2B05
7u4
75R3B02
90B2
01B2
V61u001
n001
SER
1%
RES
)21(AR
)11(AR
01(
)
AR
)9(AR
)8(AR
)7(AR
)6(AR
)5(AR
)4(AR
)3(AR
)2(AR
)1(AR
)0(AR
140B3
360B3
TTV_9V0+
WS_8V1+
R5791B3
%1
FERV_MEM
EM
FERV_M
)21:0(AR
R
SCR
n
R
nSAR
nSACR
nEWR
0ABR
1ABR
TDOR
R00130B3
KLC
1
R
n1KLCR
0KLCR
n0KLCR
R00
EKCR
FERV_MEM
WS_8V1+
R3350B3
R3
n001
7u4
SE
R
R
D
R
TV_
T
+
9V0
47R27
47R
47R
45
45
3B09-4
3B07-4
)0(AR
)1(AR
)2(AR
)3(AR
(AR
)4
)5(AR
)6(A
R
)7(A
R
)8(AR
)9(AR
RDD-CJM OT
TDO
EKCR
nSCR
0ABR
1ABR
SQD
)01(AR
)11(AR
)21(A
R
21:0(AR
)
nEWR
nSARR
nSACR
21:0(AR
)
)0(AR
)1(A
R
)2(A
R
)3(A
R
)4(AR
)5(AR
)6(AR
)7(AR
)8(A
R
)9(A
R
)01(A
R
)11(AR
)21(AR
0KLCR
n0KLCR
0SQDR
n0SQDR
1
n1SQ
47R
47R
47R27
47R
5
4
36
18
3B09-2
3B08-4
3B07-3
3B07-2
3B08-1
20
B7
A1E1J9M9R1J1A9
E-E6-ESCA6152EDE
9K
TDO
K
2
EKC
3
K
EW
8
L
SC
7K
SAR
7L
SAC
2
L
0
A
B
3L
1
8M
0
3M
1
7M
2
2N
3
8
N
4
3
N
5
7
N
6
A
2
P
7
8P
8
3P
9
2M
0
1
7P
1
1
2R
2
1
8J
K
C
8K
7
F
8
SQDL
E
B
7
U
A
SQD
8
A3
E3
47R
47R
47R
47R36
47R
36
27
18
3B10
3B09-3
3B08-2
3B07-1
3B08-3
11B2
u
001
V
61
21B2
7
u4
32B2
n001
42B2
n001
2B2
5
n001
62B2
n001
72B2
n001
82B2
n001
DV
D
VDDL
VSSDL
J3
P9J7A7H8B2
N1
47R
18
3B09-1
WS_8V1+
20BF
1B2
C1C3C7C9E9G1G3
Φ
MARDS
B8
D2
100n2B48
100n2B49
100n
4u72B47
2B50
31B2
001
n
4
n001
51B2
001
n
61B2
0
n
1
0
71B2
n001
81B2
n
001
91B2
n00
1
02B2
n001
12B2
n001
22B2
n001
G9
G7
QDDV
QD
QSSVSSV
F2
F8
E7
H2
D8
100n
2B51
CN
1
1
1
ERV
100n2B56
100n2B52
100n
100n2B58
2B55 100n
2B54
2B57 100n
2B53 100n
A
E
0
1
2
3
4
5
6
7
8
9
0
1
2
31
B
41
B
51
MDU
F
MDL
J
F
2B59 100n
EWR
n
0
ABR
1ABR
n
R
SAC
nSC
R
n
R
SAR
D
R
O
T
EKC
R
DOR
2
2
1L
CN
3R
7R
8R
8G
2G
7H
3H
1H
9H
1F
9F
8C
2C
7D
3D
1D
9D
1
9
3B
3
2
)0(QDR
)1(QDR
)2(QDR
)3(QDR
)4(QDR
)5(QDR
)6(QDR
)7(QDR
)8(QDR
)9(QDR
)01(QDR
)11(QDR
)21(QDR
)31(QDR
)41(QDR
)51(QDR
DR
DR
92B2
n0
01
T
EKC
R
R
EW
n
nSC
R
R
nSAR
nS
ACR
0ABR
)13:0(QDR
R
AB
1
R
1KLCR
R
1MQ
0MQ
SQD
2
R
R
FERV_MEM
3SQDR
1# 2RDD
7654321
47R
47R
47R
47R
47R
47R
47R
47R
3B13
3B16
3B15
3B11
3B14
3B18
3B17
3B12
WS_8V
+
1
6B2
0
2
16B
1
n00
1
n00
n00
1
2
1
n00
n
001
2
n001
B
30
7
E-E6-ESCA6152EDE
A1E1J9M9R1J1A9G9C1
9
K
2
K
3
K
8L
7
K
7L
2L
L
)21:0(A
0
(AR
)
)1(A
R
(
)
2
R
A
)3(AR
)4(A
R
(
)
5
R
A
R
)6(A
R
)7(A
)8(
AR
R
)9(A
)01(AR
R
)11(A
R
)21(A
n1KLC
n2SQD
n3SQDR
3
8M
M
3
7M
N
2
N
8
N
3
N
7
2
P
8
P
3
P
M
2
7
P
R
2
8J
8
K
7F
8
E
7
B
8
A
DDV
D
O
T
EKC
W
E
S
C
SAR
SAC
0
A
B
1
0
1
2
3
4
5
6
A
7
8
9
0
1
11
21
K
C
DL
S
Q
QDU
S
SSV
J3
A3
E3
P9J7A7H8B2
N1
30BF
13B2
001
u
6
1
V
7u4
14B2
24B2
34B2
44B
4B2
5
64B
C3C7C9E9G1G3G7
VDDL
Φ
MAR
S
D
VSSDL
B8
n001
23B
2
1
n00
33B2
n
001
B
3
4
2
1
n00
53B2
n001
63B2
n001
73B2
n001
83B2
0
n
1
0
93B2
n001
04B2
n
001
Q
DDV
V
Q
SS
F2
F8
E7
D2
D8
2
A
2
E
1L
CN
0
1
2
3
4
5
6
7
D
Q
8
9
01
11
2
1
3
1
4
1
5
1
U
MD
M
DL
ERV
F
H2
CN
3R
7R
8
R
G
8
2
G
7
H
3
H
1
H
9H
F
1
9
F
8C
2
C
7
D
3
D
1D
9
D
1
B
B
9
3
B
F
3
2
J
(
QD
R
1
Q
(
R
71
D
R
R
(
QD
R
R
(
QD
R
Q
(
D
R
R
(
QD
R
Q
(
D
R
R
D
(
QD
R
D
R
Q
R
2
03B
1
n00
)13:0(QDR
)6
)
)81(QD
)91(QD
)02
)12(QDR
)22(QD
)32
)42
)52(QD
)62
)72
)82(Q
)92
)03(
)13(QD
3M
QD
R
2MQ
R
D
FERV_
MEM
2# 2RDD
110198
10-5
A
B
C
D
E
F
G
PL9.0SCM5
Page 37
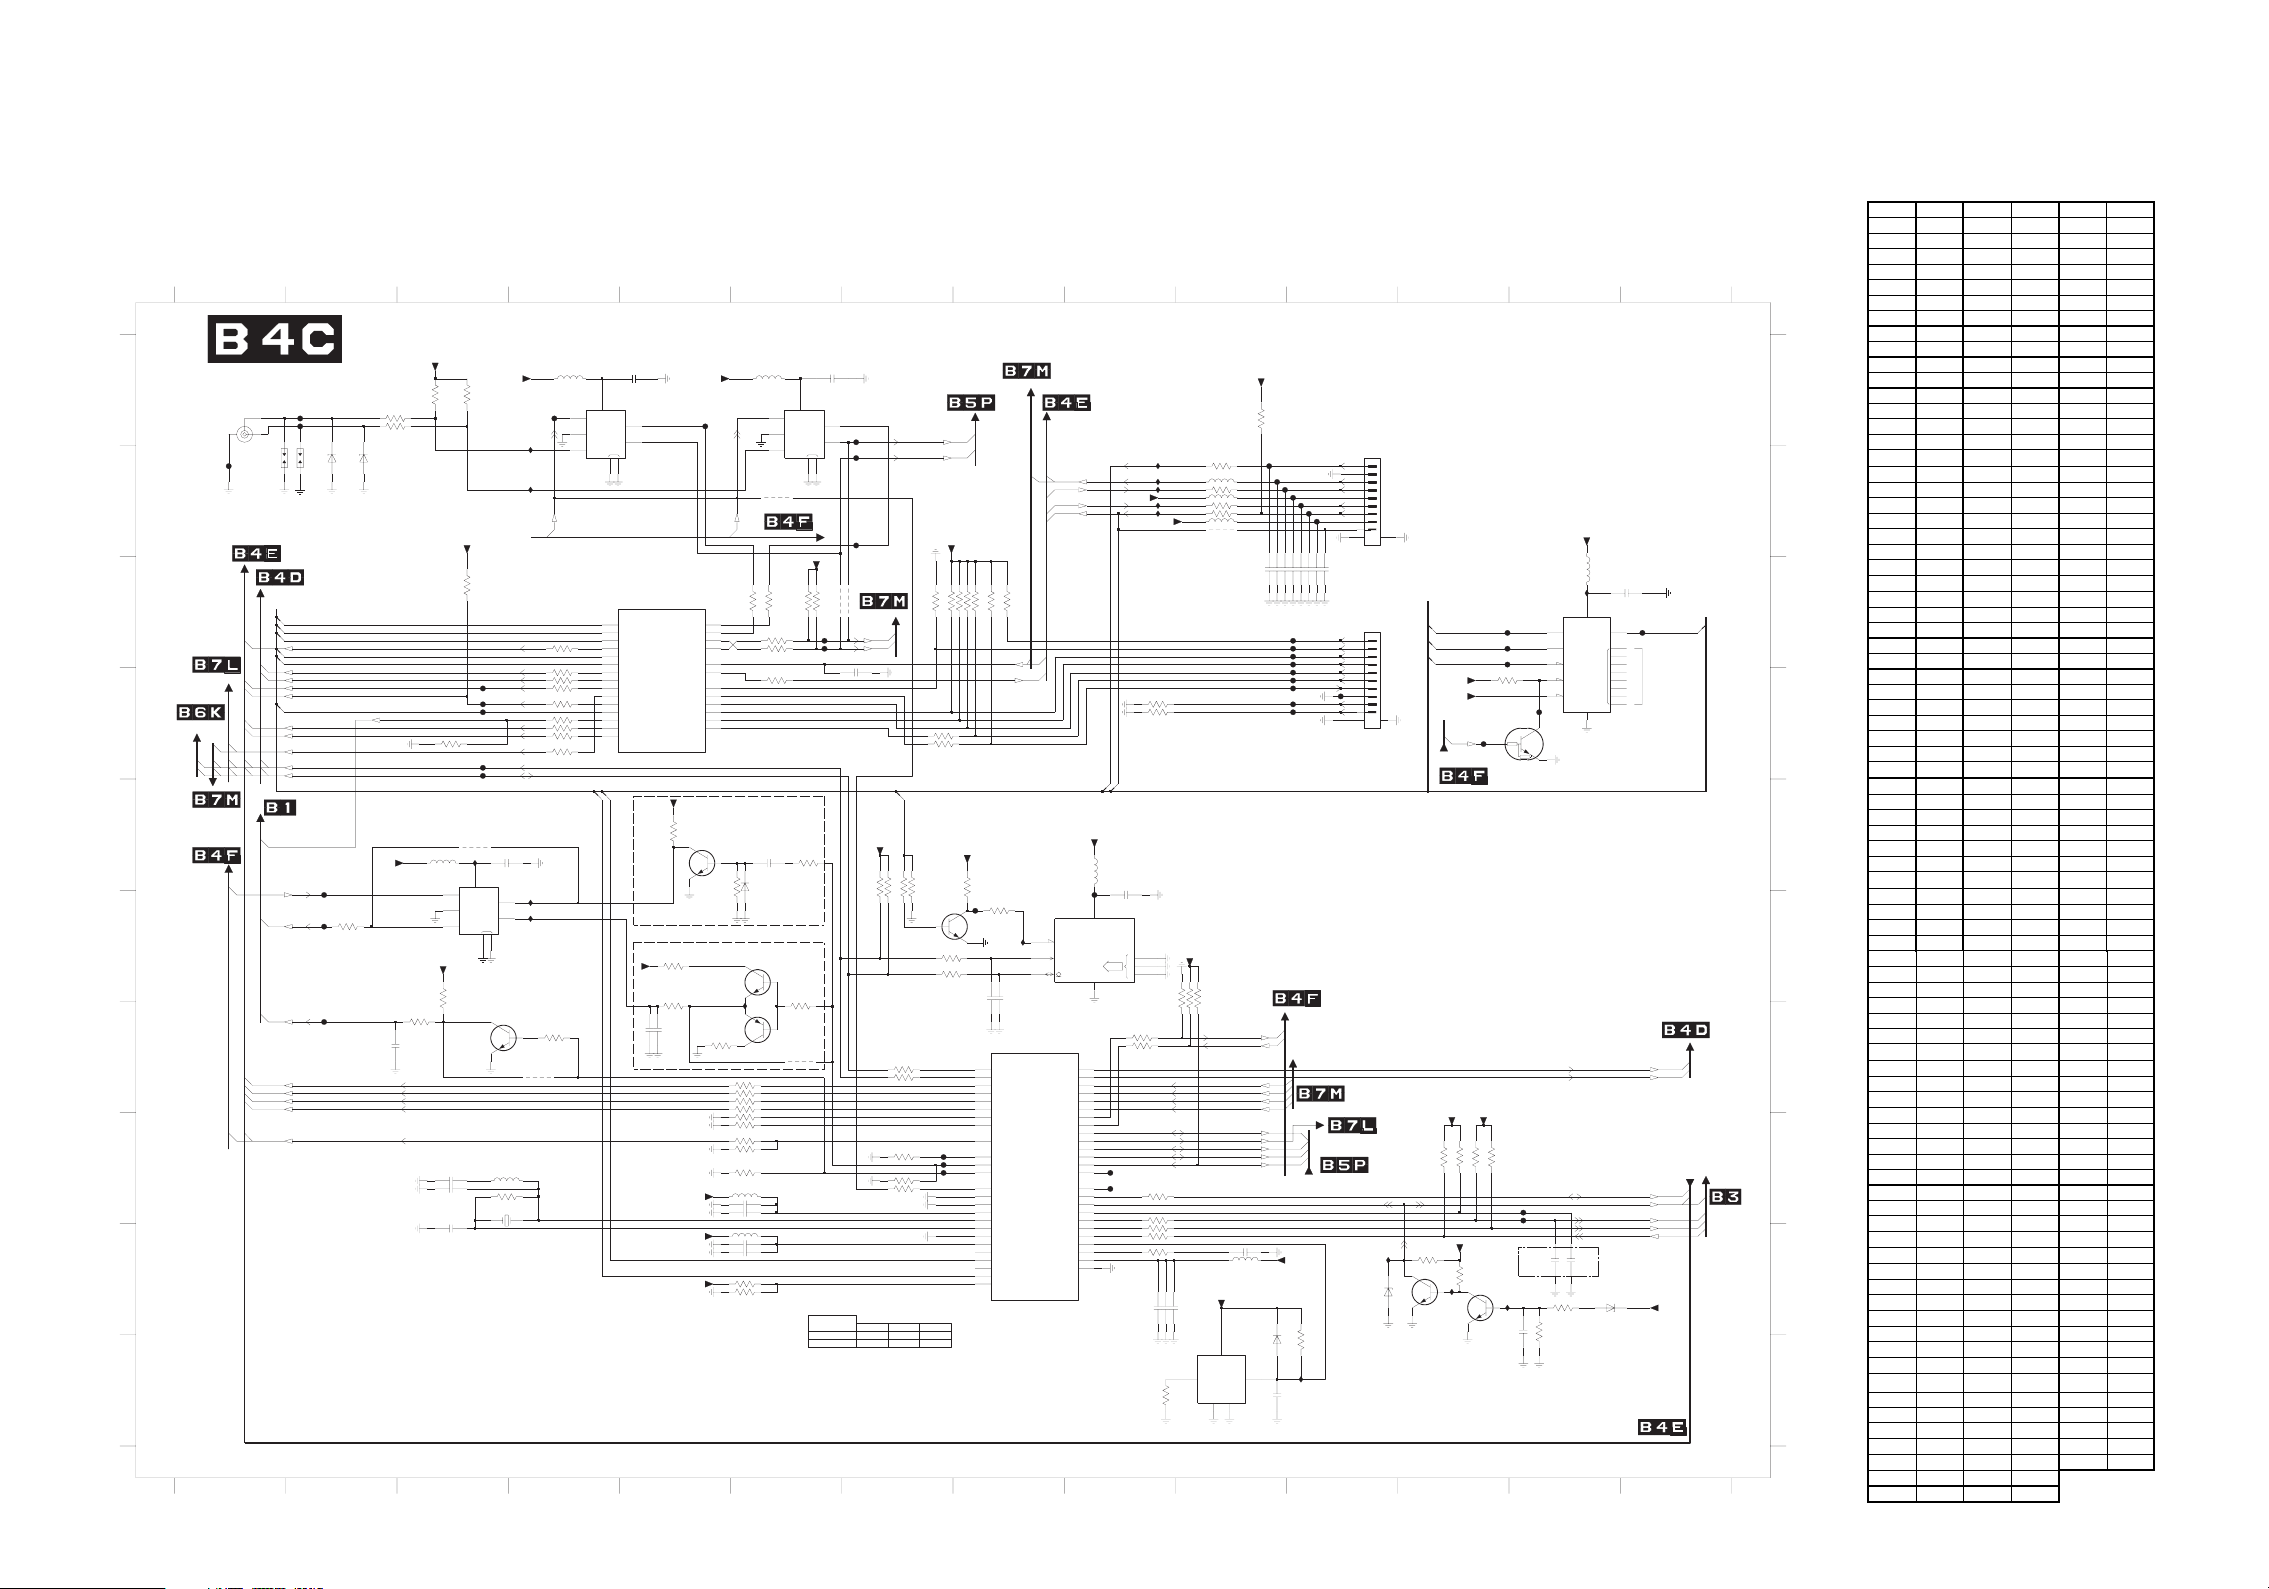
SSB 6/15 Schematic Diagram (MT5382 - FLASH & NVM)
SSB 6/15 S chem atic Diagram
Parts Location Guide
Ref No. Position Ref No. Position Ref No. P osition
1103 B2 3C39 G5 7C02 F9
1104 B1 3C40 H5 7C03-1 F6
1C01 A1 3C42 I5 7C03-2 G6
1C02 B11 3C43 I 5 7 C04 G3
1C03 C11 3C44 G7 7C05 E 3
1C04 H3 3C45 G7 7C06 F 8
2C01 D6 3C46 F7 7C08 J10
2C02 C10 3C47 F7 7 C09 E5
2C03 C10 3C48 F7 7 C10 I 12
2C04 C10 3C49 F7 7 C11 I 12
2C05 C11 3C50 E 8 7C12 A 4
2C06 C11 3C51 F8 7 C13 A6
2C07 C11 3C52 F7 7C14 D13
2C08 C11 3C53 F7 F C01 A 2
2C09 C13 3C54 H7 F C02 A 2
2C10 G5 3C55 H7 F C03 B 1
2C11 G2 3C57 H9 F C04 F2
2C17 H3 3C59 F5 FC05 F 2
2C18 H3 3C60 D3 FC06 G2
2C19 I3 3C61 J9 F C08 F8
2C20 H6 3C62 J 11 FC09 F9
2C21 H6 3C63 I12 FC10 C11
2C22 I6 3C64 J13 FC11 C11
2C23 I6 3C65 I13 FC12 C11
2C24 G8 3C66 I 12 FC13 C11
2C25 G8 3C69 H12 FC14 D11
2C26 F 9 3C70 H12 FC15 D11
2C27 I 10 3C71 H12 FC16 D11
2C28 I9 3C72 I 9 FC17 D11
2C29 I9 3C73 I 9 FC18 D11
2C30 I9 3C74 C3 FC19 D11
2C31 J11 3C75 D4 FC20 H13
2C32 E6 3C76 E5 FC21 H13
2C33 J13 3C77 G4 FC22 A4
2C34 G5 3C78 I9 FC23 A5
2C35 E3 3C79 H5 F C25 A 7
2C36 A4 3C80 C4 F C26 B 7
2C37 A6 3C81 D6 F C27 C6
2C38I133C82G9FC28C6
2C39I133C83G9FC29D3
2C40 C11 3C84 G10 F C30 D3
3C01 A3 3C85 G1 0 FC31 D3
3C02 A3 3C86 H5 F C32 D3
3C03 A2 3C87 H5 F C33 D3
3C04 A2 3C88 D4 F C34 B 10
3C05 D4 3C89 F2 FC35 B11
3C06 D4 3C91 E6 FC36 B 11
3C07 D4 3C92 F 6 FC37 B11
3C08 H9 3C94 C6 FC38 B1 1
3C09 D4 3C95 C6 FC39 B1 1
3C10 D4 3C96 C6 FC40 B1 1
3C11 D4 3C97 C6 FC41 C13
3C12 B10 3C98 C6 FC42 C13
3C13 B10 3C99 C6 FC43 C13
3C14 B10 4C01 E3 F C44 C14
3C15 B10 4C02 C7 FC46 D12
3C16 D7 4C03 G4 FC47 H9
3C17 D7 4C04 C6 FC48 H9
3C18 C7 4C05 G6 FC49 B7
3C19-1 C8 4C06 B 10 FC50 D13
3C19-2 C8 4 C07 B6 FC51 H8
3C19-3 C8 5 C01 H5 FC52 H8
3C19-4 C7 5 C02 I5 FC53 H8
3C20 C8 5C03 I 10 IC01 F4
3C21 C8 5C04 H3 I C02 F 4
3C22 D9 5C05 B10 I C06 I11
3C23 D9 5C06 B10 I C07 I12
3C24 D12 5C07 B 10 IC08 I12
3C25 H5 5C08 C13 IC10 A 4
3C26 F5 5C09 E9 IC11 B 4
3C27 F5 5C10 E3 IC14 B 9
3C28 G5 5C11 A4 I C15 B9
3C29 G3 5C12 A6 I C16 B9
3C30 F3 6C01 B2 IC17 B 9
3C31 A10 6C02 B2 IC18 C13
3C32 G10 6C03 F6 IC19 E3
3C33 H7 6C04 I 13 IC21 B 9
3C34 H12 6C05 J10 I C23 J 11
3C35 H3 6C06 I 11 IC24 G6
3C36 G5 7A01-2 G8 IC25 F8
3C37 G5 7A01-5 C5
3C38 G5 7C01 C13
A
)ECIVRES( TRAU
10C
1
2
3
1
1104
30CF
B
IMDH MORF/OT
T
C
M OT
2115T
D
E
F
G
H
I
J
IBMA-AGPF OT
MOIDIORP OT
sOI-GOLANA MORF/OT
A
21
9876543
4131211101
MVN & HSALF - 2835TM
+
WS_3V3
V
WS_3
3+
10C3
20C3
7
K4
)THP( OPP D92-530-JSM
10CF
0C3
6C02
BZX384-C6V8
3
6C01
BZX384-C6V8
20CF
1103
7K4
R33
R3340C3
W
V3+
S_3
1CI
XT_TRA
U
XR_TRAU
C5
VL47NS
22CF
0
11CI
11
21C7
D35G2C
U
C
5
2
1
HP_DETECT
R03
n00163
C2
8
C
V
C
A
I
N
U
7
Φ
1Y
H
6
2Y
MOC
G
D
N
3
4
10K
SDVL O
n0EC
OP
n1ECOP
EOO
n
P
1_DPH_IMDH
0DD
P
1DDP
Pu_1PSID_L
RTC
RTC
Pu_4PSID_L
3_DPH_IMDH
TESER_IMDH
EW_MORPEE_SYS
B
TESER_CDD
2_DPH_IMDH
IP_TESER
LC
S
A
DS
C
D-CD MORF/OT
WS_3V3+
MID_GID-AN
MMID_MWP
GNI
EW
_DIDE
S
TCELES_
50CF
8C3
9
40CF
R001
TSOOB_THGILKCAB
60CF
1u02C11
XUM_IMDH_ADS_CDD
XU
MDH_LCS_CDD
M_I
MDH_ADS_CDD
1_I
1_IMDH_LCS_CDD
3C74
7K408C3
0C3
R001
5
0160C
R0
3
7K
92CF
03CF
O_TH
GILKCA
0
6C3
01C5
VL47N
D35G2C
V3+
92
C3
0K1
13CF
FFO_N
K01
23CF
33CF
10C
4
SER
R03
91CI
0C7
5
8
UC
CCV
5
A
7
Φ
1
Y
2
H
NI
6
2
Y
1
C
MO
NG
D
3
4
S_3
W
3C3
0
K1
0
3
40C7
WB748C
B
2
0n171C2
7p481C2
C3
7p491C2
470C3
7C3
R001
5
R00190C3
R00101C3
7K411C3
188C
R00
3
n00153C2
10CI
20CI
77C3
1
K01
4
SER
30C
n02840C5
K02853
M0640C1
8C
8B
A
8
_EOOP
9
E
_EWOP
9D
0DDP
9C
1DDP
9B
2DDP
01E
P
3DD
01D
4DD
P
01C
5DDP
01B
P
6DD
01A
7DD
P
11E
_BRAP
11D
ELCAP
11C
ELAAP
KEYBOARD
LIGHT_SENSOR
7
_0ECOP
_1ECOP
1u02C10
2C34 10u
4321
W
_
S
3+
3V
C5
21
C7
31
C
UC
2
VL47NS
D35G
5
UART_RX
HP_DETECT
69C3
R001
89C3
99
C3
18C3
WB748CB
C2
A
2
1
C
70
C4
MORF
C3
9
R001
1
u223
2
RA
X
T0_T
RAU
32CF
X
_T
T1
T
CETED_PH
5-10A
2835TM
TRAU
51B
A
XR0
U
51CA
U
XT0
12D
XR2
U
12C
XT2U
51DA
IRIO
91
E
ORIO
5
A
RTJ
_TS
6A
ODTJ
B
6
KCTJ
B
7
IDTJ
7A
SMTJ
D
8
KCTR
J
W
V3+
S_3
7C3
6
086
R
90C7
1
%
1K03C59
RES
BAS316
6C03
A
WS_3V3+
62C3
K1
0
72C3
0K1
+
6
2
1-30C7
B
NPB748C
1
42CI
4
2-30C7
NPB748
CB
82C3
S_3V3+
W
WS_3V3
WS_3V3+
5
3
0K1
R00163
C3
00173C3
R
R00183C3
R00193C3
R00168C3
R
3
00178C
K01
04C3
K01
97C3
SER
K0152C
3
R0310C5
0u102C2
n0011
2C2
320C5
R0
22C2
0u1
n0013
2C2
7
24C
K4
3
K
34C3
001
SER
n001
73
C2
R03
8
C
CV
Φ
Y
HNI
Y
MO
D
NG
3
4
U
A
sO
I-GOLANA
W
S_3V3+
10K3C95
10K
7
3C94
R00
R001
7
K4
NIMMID MWP
G
19C3
7
K4
29C3
K01
50C4
R0_TRA
X
U
7
1
2
ES_TR
L
72CF
82
C
F
)DEVRESER( GNIMMID GOLAN
6
4C04
C2
4C02
U
10
LATX_CCVA
0LATXO
1LATXO
VRS_CCVA
U
A
XR1_
R
T
52
C
F
CF
P
T
O
TRAU
A
_TR
01
R
SE
L
CS
AD
S
3
62CF
94
R2_
X
T2
X
n0
WS_3V3+
10K3C47
3C46 10K
C3
33C3
X
RAU
1_T
T
10K
MOIDIOR
3C18
61
C3
71
C3
SYS_EEPROM_WE
RES
3C49 10K
3C48 10K
R2244
R2254C3
K
0145C
K0155C3
K01
WS_3V3+
10K
45
36
3C19-4
3C19-3 10K
R33
R33
15CF
25CF
35C
F
TEDRWP
EDOM PART
0MWPO
)0(
TOO
ON
B R
-
ECI
ULA
AFED ) (
E
V TLU
2MWPO
1MWP
O
)0
0
(
-
(
)0
C
JM OT
10K
10K3C19-2
7
2
18
3C20
3C19-1 10K
H
WS_3V3+
05C
3
1
K0
3
80CF
60C7
2225C3
R
R2235C3
10p
2C24
22A
12
B
3CA
BA
3
2
DA
1
DA
2EA
1FA
1EA
O
52D
02E
02D
32U
2W
4
52
Y
A
6
2W
A
62Y
52W
X
22U
32V
52U
42U
62V
CN
A
52V
42V
T
WB748CB
10p
2C25
SO
SO
SO
SO
O
10K
3C21
15C
OXCV
4NIDA
3NIDA
2NID
1NIDA
0NIDA
I
MO
ID
P
OR
I
X
MD
M
OT
U
&
H
HGIL
ROSNES_T
CI
12
C3
41
RI
EL
D
DE
L
R
O
D
YEK
A
B
CI
50
C5
51
CI
2
V3
+
1
C3
60
C5
TS3
YB
6
1
CI
C3
71
CI
C3
C5
S_V5+
W
4
C
60
RI
_
P
EDIS
D
_IMD
H
LIGHT_SENSOR
S_3
W
V3+
C5
90
R03
MVN
C2
90CF
20
C7
R33
-
42M
WDR
C
46
84
Φ
K8(
x
7
52CI
6
5
A7
0ADSO
0LC
1ADSO
1LC
2ADSO
2LC
3ADSO
3LC
2PRW
0MWPO
1MWPO
2MWPO
1
_LATX_33SSVA
2_LATX_33SSV
LATX_33DDV
OLATX
ILAT
VRS_33SSVA
VRS_33DDVA
A
VA
)8
CW
R
E
MO
E
P
LC
S
DA
ADS
2-10
2835TM
LAREHPIREHP
21D
0OIPG
21C
1OIPG
02C
2OI
PG
91D
3O
IPG
A
12
4OIPG
02B
5OIPG
5
Y
6OIPG
A
4A
7OIPG
91C
8OIPG
A
02
9OIPG
91B
0
1OIPG
81B
11OIPG
81A
21OIP
G
1B
7
31OIPG
84CF
5DA
BSRWPO
41BA
0LRTCPO
41CA
1LR
TCPO
7DA
2LRTCPO
7CA
3LR
TCPO
A
41D
PO
4LRTC
31C
A
5LRTC
PO
5CA
_TESE
RO
31BA
GERX_C
61B
A
G
ER_33DDV
A
61D
GER_33SS
22
C3
32
C3
KEYBOARD
62
n001
0
R
1
2
2
8C3
CF
74
75C3
3
37C3
#TESER
GERX_C
DDVGERX
K01
K01
1
2
3
10K3C32
10K3C84
3C85 10K
R001
R0
0138C3
R00180C3
R
001
R00127C
01
R0
0R187C3
100n2C29
100n
2C30
2C28 1u0
80C7
G29254DB
1
E
R
16C3
K01
YBTS3V3+
680R
1%
O
OR
RTNOC TN
3C31
R00121
R03
R00131
R03
R00141
R00151
370
R0
R
SE
1n0
2C02
F
1#
T
ERV
nTSR
TJ
IDTJ
SMTJ
KCT
J
K
J
R
T
C
T
D
J
O
G
ATJ
J
F
F
C
43
3
5
CF
F
C
63
73CF
83CF
F
C
93
04CF
TN
I
MB
RES
1n0
1n0
1n0
1n0
1n0
1n0
1n0
2C07
2C04
2C06
2C03
2C05
2C40
2C08
F
1C
0
C
1
F
1
C
2
F
1
3
1C
F
F
1C
4
1
5
F
C
C
6
F
1
Q
RGBD_
81CF
CAGBD_GAT
K
1
CF
9
B
1
L
20
C1
1
2
3
4
5
6
7
8
9
1
011
B
B90
T
T-SSRS-
JE
G
A
T
1
C
30
P
1
2
3
4
5
6
7
C
7
F
1
8
9
01
1121
B0
S
P-
T-4M
H
S
E
R
1DD
O
P
O
P
+
S_3V3
S_
3V3+
T
)FL(
B
R
F
CF
nE
CF
n0ECO
C3
W
W
S
F
EW_H
AL
64CF
s
GOL
OI-
ANA MO
V3+
WS_3
80C5
R03
90
C2
01
n0
CI
81
10
C7
2M
210
FMV-46P5
CCV
1
5
14
1
6
24CF
7
34
K0142
9
1
05CF
C7
41
CTDP
8
44
C
F
Φ
Q
D
M8
8x
3
C
L
S
H
F
A
4
5
S
6
U
1
1
D
W
1
2
1
3
LOH
D
4
1
SSV
T
E411
0DDP
CN
A
B
C
D
E
WS_
3V3+
O
O
I-GOLANA
T
s
O
SDVL
EWP_BSU
C
O_BSU
DVL
DV
)4
(ATAD_ST
)5(ATAD_ST
)6
(ATAD_ST
(ATAD_ST
)7
TSRP
TESER_CEDHC
NWP
0TNI
TCETED_0828
7u472
C2
R0330C
5
S_3
W
V3+
5
DDV
6C05
Φ
BUS
2
BAS316
4
TUOV
DNG
3
U
O
IDIO
T
RP
RF/O
M
M
DOCED-HC OT
RE
C
SD
JM OT
VL-
CI
0
S_3
W
V3+
6
6C06
3C62 10K
2CI
3
13C2
n001
+
C3
01
C7
BZX384-C3V3
S_
W
3V3
B
Y
S3V3+
T
10K3C69
10K3C70
3C34 10K
3C71 10K
CF
2
CF
2
3
WS_
V3+
0K166
C3
CI
70
WB748CB
C2
6
K51
ENAP
3
C7
11
C
8
WB74
B
CI
80
C
3
1K0
2C33 220n
3C64
L
REW
P
O
1
0
93
A
N
N*
C2
83
DS
M
L
C6
56
K1
0
XZB
T
p0eXT_S
S
n0e
T_
X
O
T
C
C
E
NWOD_
nETUM
OL
P
_IT
P
TORP_CD
40
V21+
2V8C
-483
FUTS TON OD : ETO
F
S
IMDH O
T
F
G
H
D-SSALC
I
J
413121110198765
10-6
PL9.0SCM6
Page 38
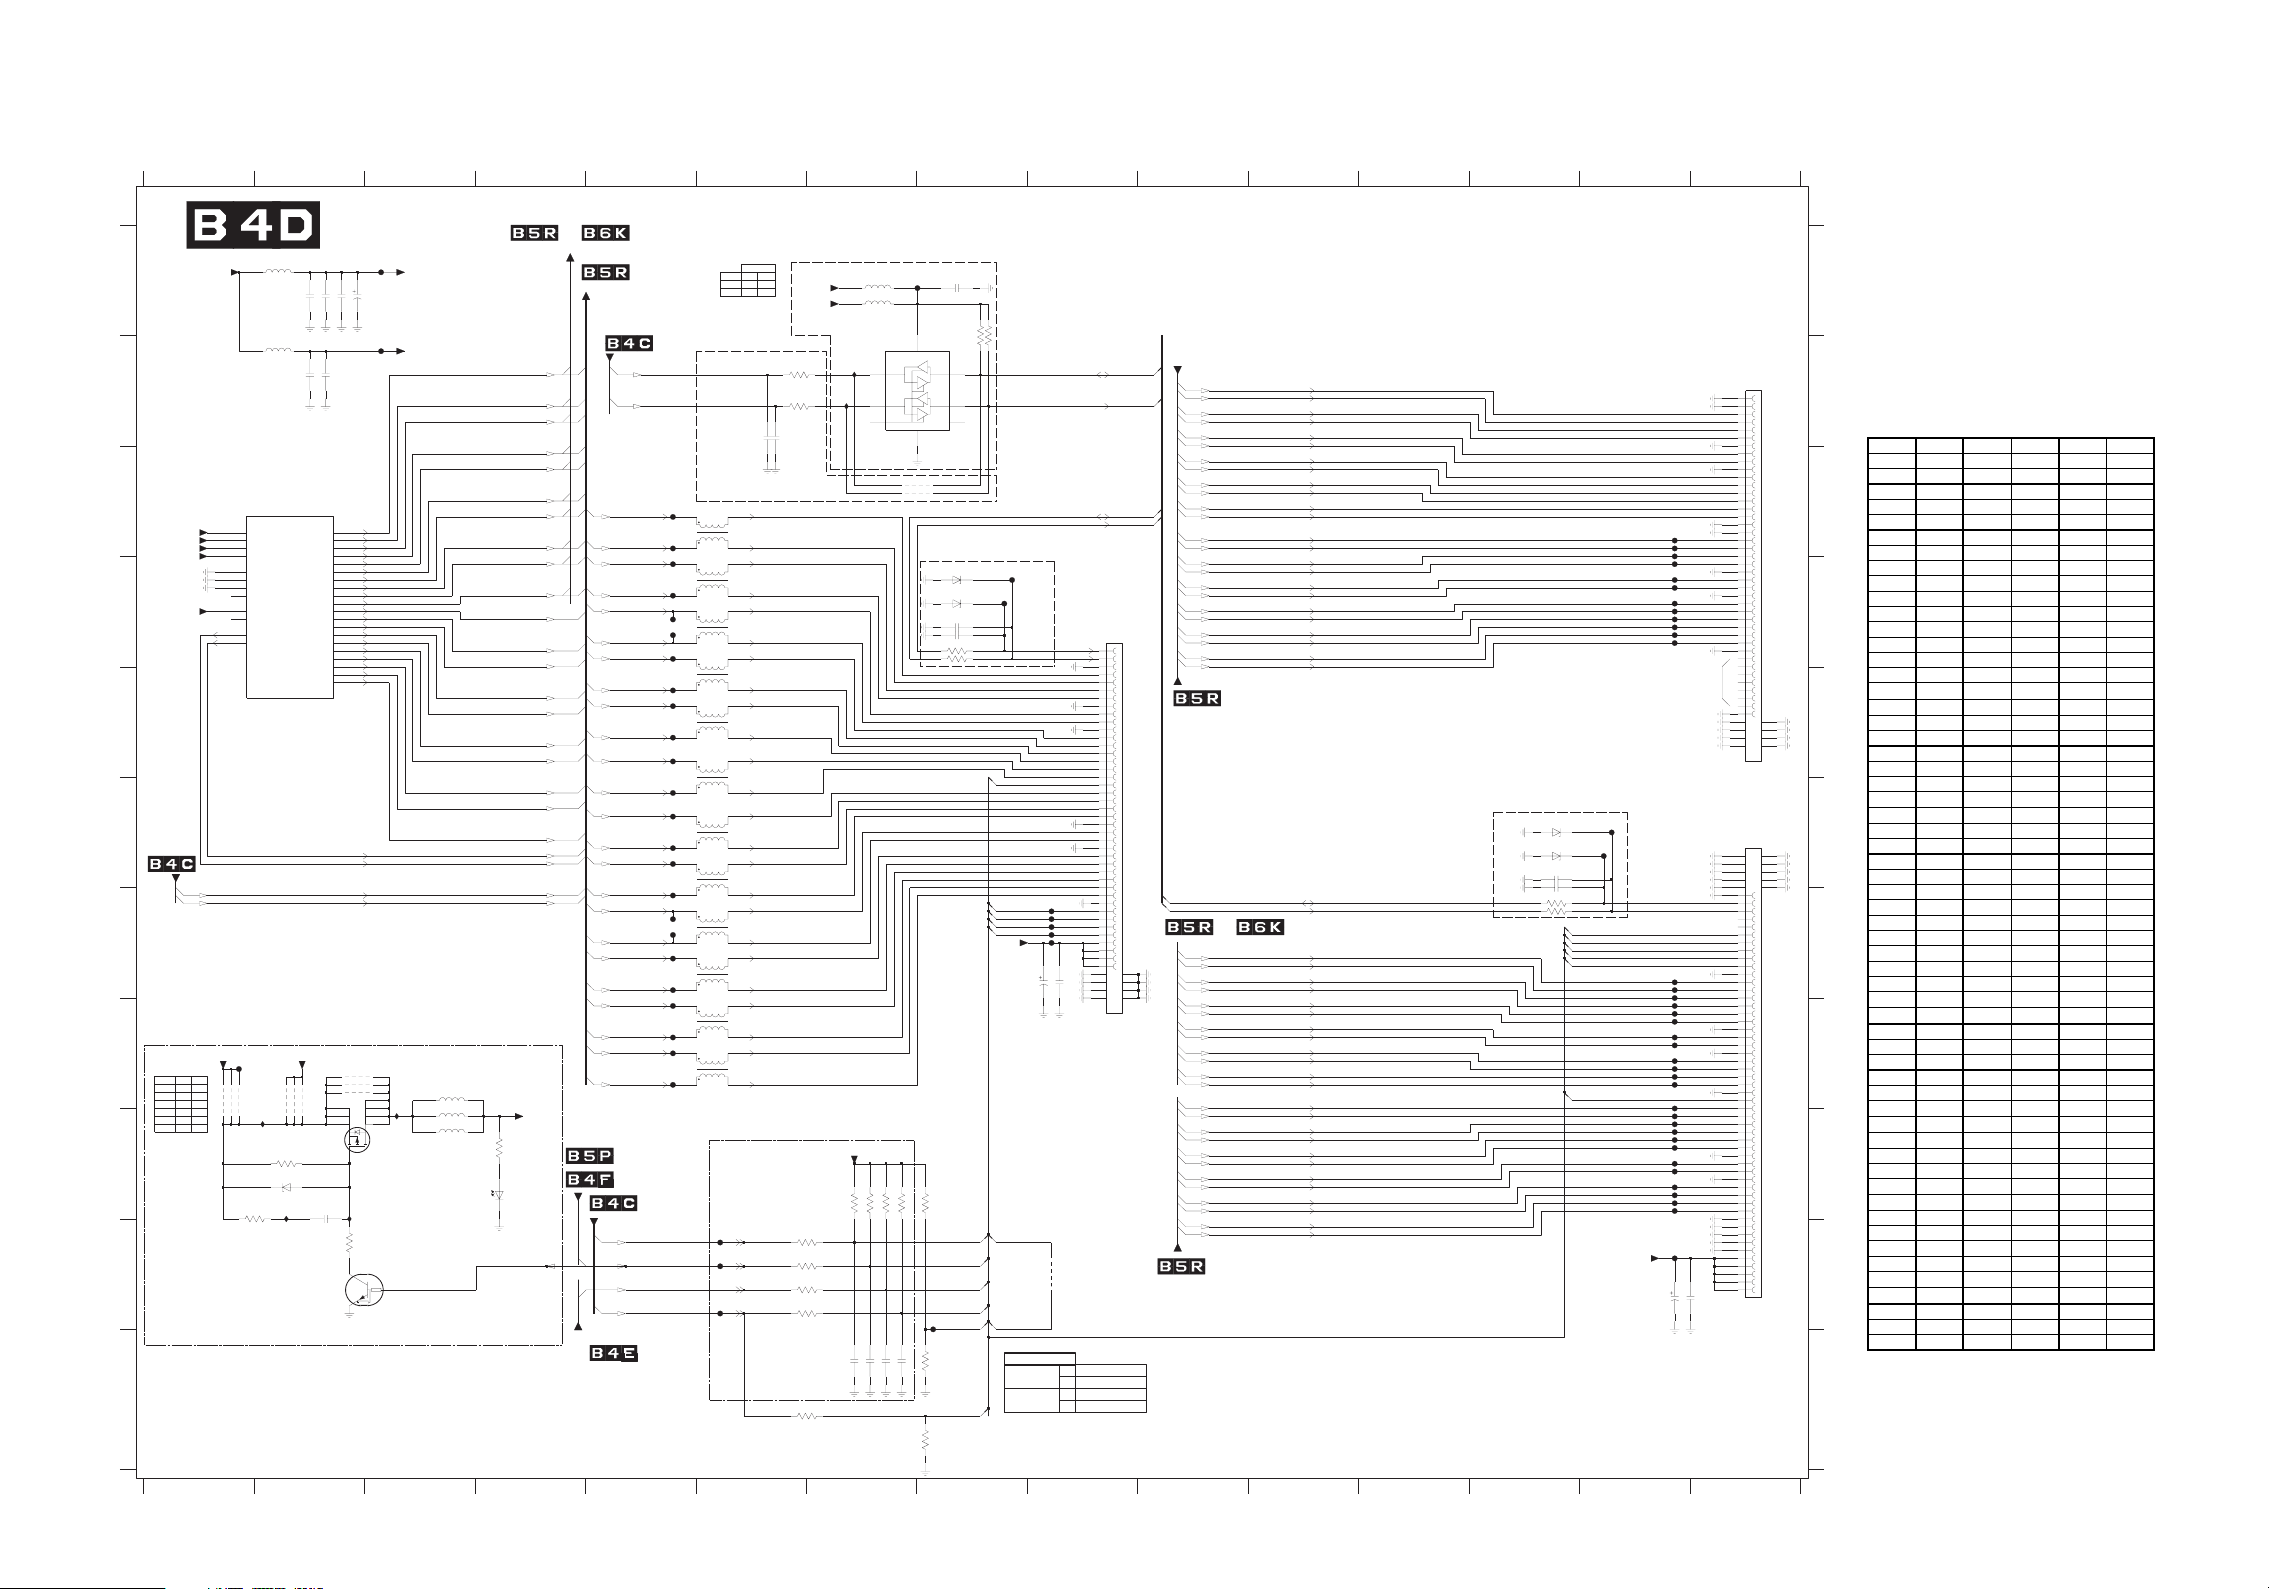
SSB 7/15 Schematic Diagram (MT5382 - LVDS)
SSB 7/15 S chem atic Diagram
Parts Location Guide
Ref No. Position Ref No. Pos ition Ref No. P osition
1D01 D9 3D58 K6
FD28 G5
1D02 B15 3D59 K8 FD3 0 G5
1D03 F15 3D60 K 8 FD31 H5
1D04 D5 4D01 J 9 FD32 H5
1D05 E5 4D02 C8
FD33 H5
1D06 E5 4D03 C8 FD 34 H 5
1D07 E5 4D04 H1 FD 35 J6
1D08 F 5 4D05 H2
FD36 H1
1D09 F 5 4D06 H2 FD41 F14
1D10 G5 4D07 H2 FD 42 F14
1D11 G5 4D08 H2 FD 43 J6
1D12 H5 4D09 H1
FD44 J6
1D13 H5 4D10 H1 FD45 J8
1D38 C5 4D11 H2 FD55 C1 4
1D39 D5 4D12 H2 FD56 C1 4
2D02 A2 5D01 A1
FD57 C14
2D03 A2 5D02 B1 FD58 D1 4
2D04 A2 5D03 A7
FD59 D14
2D05 A2 5D04 A7 FD60 D1 4
2D06 B2 5D05 H3 FD 61 D14
2D07 B2 5D06 I3 FD62 D1 4
2D09 A8 5D07 I3
FD63 D14
2D10 C6 6D01 D8 FD64 D1 4
2D11 C6 6D02 D8 FD65 D1 4
2D14 I2 6D03 I2
FD66 D14
2D15 H9 6D04 I 4 FD 67 G14
2D16 H9 6D07 F13 FD6 8 G1 4
2D17 K7 6D08 F13 FD69 G14
2D18 K7 7 A01-8 C2
FD70 H14
2D19 K7 7D01 B7 FD71 H14
2D20 K7 7D02 I3 FD72 H14
2D21 D8 7D03 J2 FD73 H14
2D22 D8
FD01 A3 FD74 H14
2D23 F13 FD02 B3 FD75 H14
2D24 F13 FD03 G9 FD76 H14
2D27 J14 FD04 G9 FD77 H14
2D28 J14 FD05 G9 FD78 H14
3D05 G13 FD06 G9 FD79 H14
3D06 G13
FD07 G9 FD80 I14
3D37 D8 FD08 A8 FD81 I14
3D38 D8 FD09 D8 FD82 I14
3D39 B6 FD10 D8 FD83 I14
3D40 B6
FD11 C5 FD84 I14
3D41 B8 FD12 C5 FD85 I14
3D42 B8
FD13 D5 FD86 I14
3D45 I2 FD14 D5 FD87 I14
3D46 I1 FD15 D5 FD88 I14
3D47 J 7 FD16 D5 FD89 I14
3D48 J 7
FD17 D5 FD90 I14
3D49 J 7 FD18 E5 FD91 E5
3D50 J 7 FD19 E5 FD92 J14
3D51-1 J6
FD20 E5 FD93 G5
3D51-2 J6 FD 22 F5 ID01 J2
3D51-3 J6 FD 23 F5 ID02 I2
3D51-4 J6
FD24 F5 ID03 B7
3D55 J 2 FD2 5 F5 ID 04 B7
3D56 I4 FD26 G5 ID05 I2
3D57 J 8
FD27 G5 ID06 H3
A
WS_3V3+
0D5
B
C
L_3V3+
SDV
SDVL_3V3+
SDVL_3V3
+
SDVL_3V3+
LLP_3V
3+
D
E
F
SDVL MORF
L
VL
G
H
*
V2
V5+
NOCT
1+
-
Y
-
40D4
-
-
Y
4
50D
-
Y
-
60D4
Y
70D4
--
4
90D
--
Y
*
0
Y
--
1D4
I
J
K
21E
33DDVA
31E
_33DDVA
41E
33DDVA
51E
A
61E
A
_33SSV
71E
81E
81D
CN
71A
33DDVA
81C
CN
61A
NT
2
61B
2PT
eXT
p0
_SDV
n
0eXT_SD
psidV5+
63DF
RES
RES
RES
4D04
4D10
4D09
50DI
**
30D6
R
7464D3
7
VL
4D05
4321
98765
1
1110
312
5141
SDVL - 2835TM
&
VL-C
M O
SD
T
0DF
R0310D5
100n2D03
100n
2D02
32
R0
100n2D06
2D07 4u7
8-10A
28
35TM
SD
1SDVL_
N0A
2SDVL
P0A
3SDVL_
N1A
4SDVL_33DDV
P1A
N2A
1SDVL
P2A
N1KC
2SDVL_33SSVA
P1KC
3SDVL_33SSVA
N3A
4SDVL_33SSVA
P3A
N4A
LLPV_
P4A
5SDVL_33SSVA
N5A
P5A
N6A
P6A
N2KC
P2KC
N7A
P7A
psidV21+
4D07
4D06
K7454D3
10DI
TDP
1
16V
2D04 4u7
2D05 100u
0DF
11A
11B
21A
21B
31A
31B
41A
41B
51A
51B
3
1C
31D
41C
4
1D
51C
51D
1C
6
61D
71C
71D
S
80D
ER
4
SER
11D4
SER
4
21D
8
7
3
6
2
5
1
20D7
4
8V6C-483XZB
0
u141D2
20DI
55D3
K74
0
V
30D7
TE411C
SDVL_3V3+
2
LP_3V3+
L
60DI
60D5
7
0D5
B5384IS
YD
2V3
J
n0oXT_SDVL
p0oXT_SDVL
n1oXT_SDVL
1oXT_SDV
p
L
n2oXT_SDVL
p2oXT
L
_SDV
KLCoXT_SDV
n
L
pKLCoXT_SDVL
3oXT_SDV
n
L
p
L
3oXT_SDV
n1eXT_SDV
L
p1eXT
L
_SDV
n2eXT
VL
_SD
2eXT_SDV
p
L
nKLCeXT_SDVL
pKLCeXT
L
_SDV
n3eXT
L
_SDV
SDV
p3eXT_
L
4eXT_SDV
n
L
p
4eXT_SDVL
p4oXT
L
_SDV
n4oXT_SDVL
p0eXT_SDVL
0eXT_SDV
n
L
R0350D5
R03
R
03
PSIDV
+
65D3
0K1
40D6
0
13-LMS
L
YLNO DCL
M
IB
P
O
F
A-AG
T
L
C2
I
+
3V
3+
-
30D5
SDVL-CJM OT
ADS
LCS
-
Y
40D5
ESER #
1
1DF
p4oXT_SDVL
1
2
1D38
1DF
L
L
L
T_SDV
_SDV
L
L
L
T_SDV
_SDV
L
_SDV
L
L
L
SDV
L
T_SDVL
L
T_SDV
_SDV
L
4
1DF
3
p3oXT_SDV
1
1D39
1DF
4
n3oX
4
pKLCoXT_SDVL
1
5
1DF
61DF
1D04
nKLCoXT_SDVL
4
1DF
7
p2oXT
1
1D05
1DF
8
n
2oXT_SDV
4
1DF
9
p1oX
1
1D06
02DF
n1oXT_SDVL
4
19DF
p0oXT_SDVL
1
1D07
22DF
n0oXT_SDVL
4
32DF
p4eXT_SDVL
1
1D08
42D
F
n4eXT
4
F
52D
p3eXT
1
1D09
2DF
6
n
3eXT_SDV
4
p
KLCeXT_SDV
1
2DF
7
82DF
1D10
nKLCeXT_SDVL
4
9DF
3
p2eXT_
1
1D11
3DF
0
n2eX
4
3DF
1
p
1eXT_SDVL
1
1D12
23DF
n1eX
4
33DF
p0eXT_SDVL
1
1D13
43DF
n0eXT
4
2
_SDV
n4oXT
3
2
3
2
3
2
3
2
3
2
3
2
3
2
3
2
3
2
3
2
3
2
3
DLW21S
DLW21S
DLW21S
DLW21S
DLW21S
DLW21S
DLW21S
DLW21S
DLW21S
DLW21S
DLW21S
DLW21S
L
L
VL
L
L
L
VL
VL
VL
L
L
VL
L
L
/
HSALF MORF
TC
TC
F
Pu YBDNATS MOR
F
34D
Pu_1PSID_LR
53DF
O
_RWP_DCLNO_RWP_DC
N
YBDNATS
n
Pu_4PSID_LR
3
3
4DF
4
54321
5
Y
-
EVE
V
-
10p
2D10
DEVR
OC C2I YALPSID
5D3
5D
IVO
2I RO
FFUB C
L
3
3D
4D3
10p2D11
ROF
SDV
_1
_1SD
_1SD
1SD
1SD
1SD
1-1
2-15D
1
3-
4
-15D3
5
0D
S_V
5
W
+
W
3V3
_
+
S
30DI
R
229
40DI
220
R
N
LORTN
4
oXT_1SDVL
p
n
T
X
4
o
p3oXT_1SDV
n3oXT
pKLCoXT_1SDV
nKLCoXT_1SDVL
p2oXT_1SDV
n2oXT_1SDV
p1oXT
1oXT_1SDVL
n
p0oXT_
n0oXT_
4eXT_1SDVL
p
n4eXT_1SDVL
p3eXT_1SDV
n3eXT_1SDV
pKLCeXT_1SDVL
nKLCeXT_1SDVL
p2eXT_
n2eXT_1SDV
p1eXT_1SDVL
1eXT_1SDVL
n
p0eXT_1SDVL
n0eXT_1SDV
RES
3D47
81
50R0
72
50R0
63
50R0
54
50R
0
100p2D17
0R1
85D3
F NOIS
RP **
RE
80DF
R
033
0
340D5
R
0
D7
1
5
A5
9ACP
1
0ADS
3
0LCS
NE5
C
PDP ROF DEVRESER
WS_3V3+
RES
RES
RES
3D49
3D50
3D48
100p2D19
2D20 100p
2D18 100p
n00190D
2
10K
8
4
0D4
0D4
10K
CCV
DNG
2
3
10K
3D57
10K
3D59
10K
3D60
3D42
3D41
61ADS
72
1LCS
1
CN
CN
DEVR
#
ESER
RO
F
C
2I
LPSID
YA
1
0D6
ZB
83X
6
2
0D
ZB
4
3X
8
1
2D2
0
1
2D
2
2
0
1
3
3D
3
2283D
RES
TC
_LR
TC
4DF
5
S_SDV
L
LORTNOC
90D
F
8V6C-4
01D
F
8V6C-
p
ER
S
p
S
ER
R227
R
S_TIB
LRTC
IDV+
1PSID_LR
2PSID_LRTC
3PSID_LRTC
4PSID
LE
VL
TCELES_TIB
SID_ADS_
1DSVL
L
V
E
PS
P
_
P
_1SD
ID
LCS
S
L
TCE
4PSID_LRTC
30DF
3PSID_LRTC
F
40D
2PSID_
50DF
1PSID_LRTC
60DF
0DF
7
16V
100u
2D15
2D16 100n
1PSID_LRTC
4D01
LES_SDVL
DCL ROF
0
SN
_SD
LES
1
0
TCELES_TIB
1
P
S
SID_AD
P
S
SID_
LC
P
S
ID_
LC
S
SID_AD
P
S
1#
SDV
L
0D1
1
1
2
3
4
5
6
7
8
9
01
11
1
2
3
1
4
1
1
5
1
6
7
1
1
8
1
9
0
2
2
1
22
3
2
42
52
62
72
82
92
03
3
1
23
3
3
43
53
63
7
3
M
MORF
83
93
04
14
3424
5444
7464
84
HS5.0-S14-CS51XF
ADIEJ
tib8
CRF + tib8 / tib01
_
DVL
p4eXT
B_S
D
B_S
L
n4eXT
V
_
_
_B
DVL
p3eXT
S
_
_B
DVL
n3eXT
S
pKLC
_
L
eX
B_SDV
T
L
L
L
L
L
L
L
L
L
L
L
JM MORF
J
L
L
L
L
L
L
SDVL-CJM MORF
n
eX
_B_SDV
LC
T
K
_
DVL
p2eXT
B_S
eX
_B_SDV
2
T
n
e
D
p
B_S
XT
1
V
_
e
DVL
1
S
n
XT_B_
B
p0eXT
_SDVL
_
e
0
SDV
n
XT_B_
B
p4oXT
_SDVL
_
o
n
T_B
X
_SDVL
4
o
D
B_S
p
XT
3
_
V
3
_
oX
B_SDV
n
T
DVL
o
S
pKLC
XT_B_
n
oX
LC
_B_SDV
K
T
B
p2oXT
_
_
SDV
oX
2
_B_SDV
n
T
p1oXT_B_SDVL
_
oX
B_SDV
1
T
n
B
p0oXT
_SDVL
_
_
_B
V
n0oXT
SD
L
SDV
-C
#
PSID_ADS
P
LCS
SID_
&
SDVL-C
_SDVL
_SDV
_
SDVL
_
DVL
S
SDV
_SDV
SDV
SDV
SDV
IB
MA-AGP
OT
F
n0oXT_A
p
T
oX
0
_A
X
n1
T_A
o
X
p1
T_A
o
2
_
oX
A_SDVL
n
T
p
oXT_A_SDVL
2
nKL
CoXT_A_
pKLCoXT_A_SDVL
n3oXT_A_SDVL
p3oXT_A_SDVL
n4oXT_A_SDVL
p4oXT_A_SDVL
n
0eXT_A
p0eXT_A_SDVL
n
1eXT_A_SDVL
p1eXT_A_SDVL
n2eXT_A_SDVL
2eXT_A_
p
LCeXT_A_SDVL
nK
LCeXT_A_
pK
3eXT_A_
n
p3eXT_A_SDVL
n4eXT_A_SDVL
p4eXT_A_SDVL
DEVR
ESER
RO
F
A
LPSID
6
2D
2
2D
2
3
3
ORTNOC
I
L
C
Y
2
70D6
B
Z
80D
3
4
14DF
8
8V6C-
3X
4
24DF
8V6C-483XZB
0
SER
1
p
p
1
0
SER
R
250D
2
R
2260D
C
LRT
1PSID_
SDVL
LES
_
L
2PS
C
ID
RT
_
LR
3PSID_
C
T
C
ID_LRT
4PS
B
TCELES_T
I
F
F
F
F
F
F
D
_3
V
L
S
_
L
3SDV
F
F
F
F
F
F
F
F
F
F
F
S
+
IDV
P
100u
2D27
41312111019876
L
2
1
0D
55D
6
5DF
75D
5DF
8
5D
9
6D
0
16DF
6D
2
36DF
6D
4
5
6DF
66DF
CN
3
24
4
4
54
4
4
746
84
F
5
1X
-CS
30D1
6
06
1
9
85
5
5
65
7
5
45
5
3
5
5
2
PSID_ADS
PSID_LCS
CN
CN
7
6DF
6
D
8
96D
07DF
7D
1
7D
2
37DF
4
7D
57DF
6
7D
7
7DF
8
7DF
9
7DF
8D
0
8D
1
28D
38DF
48D
58DF
8DF
6
78DF
8DF
8
98DF
9D
0
29DF
16V
2D28 100n
5ER
F
-
1
I
1
5
10-7
A
#SDV
2
B
1
2
3
4
5
6
7
8
9
0
1
11
21
31
41
C
51
61
71
81
91
02
12
22
3
2
42
5
2
2
6
7
2
8
2
D
2
9
0
3
13
23
3
3
43
53
63
73
83
93
0
4
4
1
E
5
.0
HS
-S14
#SDVL
2
F
1
5
0
5
4
9
84
7
4
4
6
54
G
4
4
4
3
2
4
1
4
4
0
9
3
83
73
63
53
43
33
23
13
H
3
0
9
2
8
2
7
2
2
6
52
42
2
3
22
12
02
9
1
81
7
1
I
1
6
5
1
41
1
3
2
1
11
01
9
8
7
6
5
4
3
J
2
1
-
S
FH
K
PL9.0SCM7
Page 39
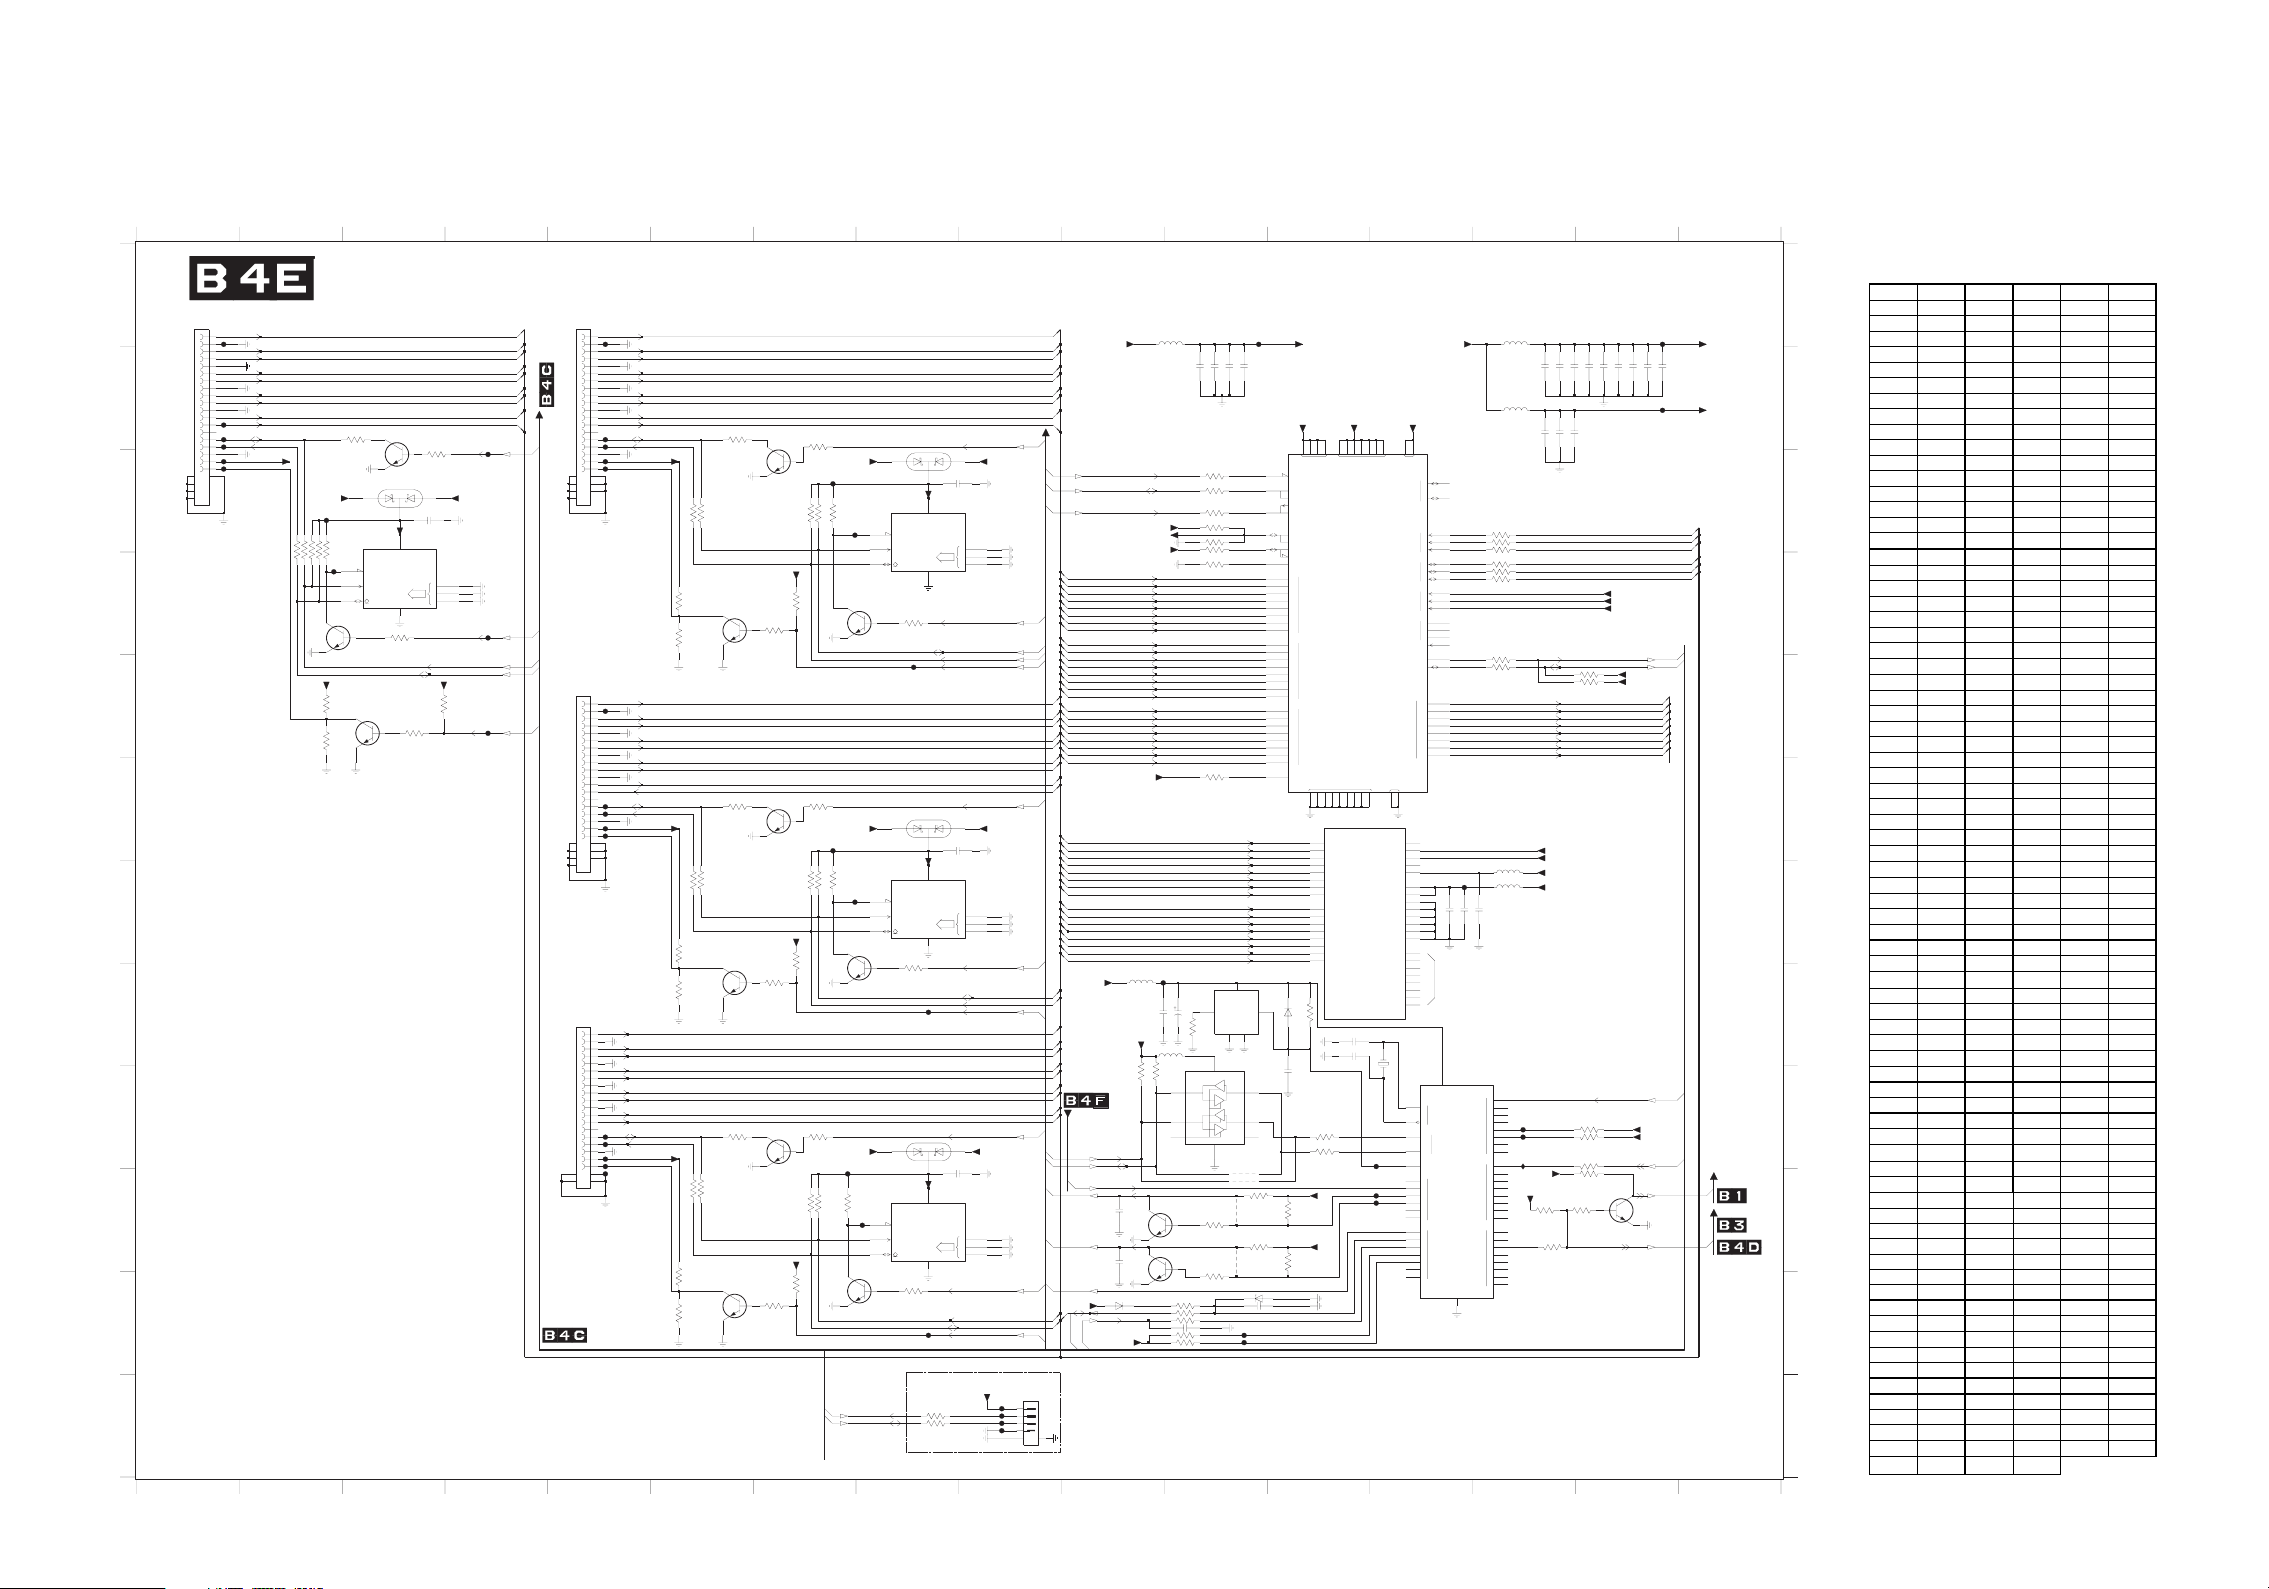
SSB 8/15 Schematic Diagram (MT5382 - HDMI & MUX)
SSB 8/15 S chem atic Diagram
Parts Location Guide
Ref No. Position Ref No. Position Ref No. Posit ion
1E01 A 1 3E24 H11 7E02 C9
1E02 A 5 3E25 J12 7E03 C3
1E03 E 5 3E27 D6 7E 04 D3
1E04 H5 3E28 D6 7E05 E3
1E06 L9 3E29 D7 7E 06 C7
1E07 H12 3E 30 D7 7E 07 D8
2E01 C3 3E33 F6 7E08 G 9
2E02 G13 3E34 F7 7E09 D6
2E03 G13 3E35 G6 7E 10 F7
2E04 C8 3E36 G6 7E 11 H8
2E06 G14 3E37 C7 7E12 J 9
2E07 B 14 3E38 D8 7E13 H6
2E08 B 14 3E39 G7 7E14 I7
2E09 B 14 3E40 G7 7E15 K8
2E10 B 15 3E41 G6 7E17 K6
2E11 B 15 3E42 H6 7E18 B 12
2E12 B 15 3E43 H7 7E23 I13
2E13 B 15 3E44 G7 7E24 H11
2E14 B 15 3E47 I 6 7E 25 J11
2E15 B 15 3E48 I 7 7E 26 J11
2E16 B 14 3E49 J6 7 E27 J15
2E17 B 14 3E50 J6 7 E28 H11
2E18 B14 3E51 G7 FE01 A1
2E19 B11 3E52 H8 FE02 B1
2E20 B11 3E53 J7 FE03 B1
2E21 B11 3E54 J7 FE04 C1
2E22 B11 3E55 J6 FE05 C1
2E23 H11 3E 56 K6 FE06 A 5
2E24 H10 3E 57 K7 FE07 B 5
2E25 H12 3E 58 K7 FE08 B 5
2E26 K 11 3E59 C11 FE 09 C5
2E27 F8 3E60 C11 FE 10 C5
2E28 J 8 3E 61 C11 FE 11 E 5
2E29 H12 3E 62 J7 FE 12 F5
2E32 I12 3E63 D11 F E13 F5
2E33 K 11 3E64 F 11 FE 14 F5
2E35 J1 0 3E65 K8 FE15 F5
2E36 J1 0 3E66 C14 FE16 I5
3503 I 14 3E 67 C14 FE17 I5
3504 L8 3E 68 C14 FE18 I 5
3505 L8 3E 69 D14 FE19 I 5
3507 I 14 3E 70 D14 FE20 J5
3508 I 14 3E 71 D14 FE26 A 15
3509 E14 3E72 D14 FE27 B15
3510 E14 3E73 E14 FE28 A11
3511 J 14 3E 88 K11 FE 31 G 13
3512 J 14 3E 89 K1 1 FE32 D2
3513 J 11 3E 90 I 12 FE33 C7
3514 J 12 3E 92 K11 FE 34 G 7
3515 J 11 3E 93 I 12 F E35 J8
3516 J 12 3E 94 K11 FE 36 L9
3517 J 14 3E 95 C11 FE37 K 11
3518 J 15 3E 96 C11 FE38 K 11
3E01 C7 3E97 K11 FE39 L9
3E02 C7 3E99 J 12 FE 40 L9
3E03 I10 4E01 J 11 FE 41 L9
3E04 I10 4E02 J 11 FE 42 I14
3E05 B 2 4E 03 J11 FE43 I 14
3E06 C3 4E04 J 11 FE 44 B 1
3E07 D2 5E01 A14 FE45 C2
3E08 D2 5E02 B14 FE47 C4
3E09 D2 5E03 A10 FE48 C7
3E10 D2 5E04 H10 FE 49 F7
3E11 D2 5E05 G14 FE50 J8
3E12 D3 5E06 G14 FE51 H10
3E13 E 2 5E 08 H11 FE52 D4
3E14 E 2 6E 02 C3 FE 53 E 4
3E15 E 3 6E 05 K10 FE 54 E 8
3E16 E 4 6E 06 K11 FE 55 H8
3E17 C11 6E 11 C8 FE56 K8
3E19 B 6 6E 12 F8 FE 57 I13
3E20 B 7 6E 13 I8 FE58 J13
3E21 C6 6E14 H12 FE 59 J 13
3E22 C6 7A01-7 F12 I E06 I 14
3E23 H12 7E 01 D3
A
B
C
1 IMDH
10E1
022REBW910R1CD
1
F
10E
2
3
4
5
6
7
8
9
01
11
1
2
44EF
31
C
N
41
20EF
51
61
71
81
1
9
2
52
62
D
30E
F
40E
F
50EF
0
212
223
42
D
E
F
G
H
I
J
K
L
321
4
65
01987
1
1211
51413
6
1
XUM & IMDH - 2835TM
2
IMDH
0
1
2
E
2
0
1
REBW910
C
2
R
D
p2_1XR
1
60EF
2
n2_1X
R
R
R
C_1X
R
R
C_1X
1_LCS_CDD
50E3
01
1_ADS_CD
1_IMDH_V5+
47K
100R
100R
3E10
3E07
3E09
3E08
R0
30E7
WB748C
B
WS_V5+
20E6
C45TA
B
54EF
47K
10K
23EF
7
CW
3E11
E
6
LCS
5
AD
S
40E7
WB748C
B
1_IMDH_V5+
31E3
0K1
41E3
01
K0
50E7
8CB
60E3
2K2
21
n00110E2
3
+
1_IMDHV5
84
Φ
M
)8x652(
MORPE
0
1
RDA
2
21E3
K74
D
51E
3
0K1
WB74
CEC
ESER_CDD
T
74EF
1_IMDH_V5+
10E7
NMW-20C42
6
1
2
3
EW_DIDE
F
25E
1_IMDH_LCS_CDD
1_IMDH_ADS_CD
1_IMDHV5+
61E3
K22
SER
1_DPH_IMD
H
35EF
p1_1X
n1_1X
p0_1XR
n0_1XR
p
n
TO FLASH&NVM
3
4
5
6
7
8
9
0
1
11
2
1
31
N
CN
C
4
1
51
61
71
8
1
91
0212
2232
2
425
62
3 IMDH
30E1
1
2
3
4
5
6
7
8
9
01
11
2
1
31
4
1
51
6
1
71
81
9
1
2
021
2232
4252
62
40E1
ABJ910R1CD
1
2
3
4
5
6
7
8
9
0
1
11
21
3
1
4
1
51
6
1
71
81
91
0212
2232
N&HSALF OT
MV
D
D
F
70E
D
D
F
0E
8
_
5+
H
V
90EF
01EF
022REBW910R1CD
11EF
CN
21EF
31EF
F
41E
F
51E
)EDIS( IMDH
091R
CN
CN
D
61E
F
71E
F
V5+
81EF
91EF
F
02E
91
S
E3
_
2_LC
C
C
2_AD
_
S
2_IMD
100R
100R
3E21
3E22
72E
3
0K1
82E3
K00
1
3_LCS_CDD
3_ADS_CDD
3_IMDH_V5+
100R
100R
3E35
3E36
14E3
0K1
24E3
K
001
EDIS_
LCS_CD
EDIS_ADS_CDD
EDIS_IMDH_
100R
100R
3E49
3E50
55E3
1
0K
65E3
001
K
R0
0
1
60E7
WB74
B
8
C
90E7
WB748
CB
33E3
1
R00
01E7
WB748CB
31E7
WB748C
B
74E3
R001
41E7
WB748CB
+
71E7
8CB
WB74
02E3
2
2K
47K
47K
3E02
3E37
3E01
D
2_I
HV5+
M
03E3
22
K
SER
3
92E
0K1
43E3
2K2
47K
47K
3E51
3E40
3E39
HV5+
3_IMD
44E3
K22
SE
R
34E3
0
K1
84E3
2K2
47K
47K
3E53
3E54
EDIS_IMDHV5
85E3
K22
R
SE
75E3
0K1
1
S_V5+
W
11E6
45TA
B
84EF
10K
33EF
7
W
C
6
LCS
5
3
E
7
7
0
B
B
748C
W
+
WS_V5
21E6
F
94E
10K
43EF
7
C
W
6
LC
S
5
25E3
11E7
B
WB748C
1
WS_V5+
31E6
10K
53E
F
7
CW
3E62
6
S
LC
5
51E7
B748CB
W
2
C
2
3
+
DH
5
2_IM
V
84
7
Φ
)
(
8x6
5
2
MORP
EE
0
R
DA
1
2
ADS
K7483E
S
D
_
D
C
S
D
_
D
C
H
E
4
F
5
21
C45TAB
3
3_IMDHV5+
84
Φ
M
)8x652(
MORPEE
0
1
RDA
2ADS
K7
4
H
55EF
2
C45TAB
3
84
Φ
)8x652(
M
ORPEE
0
RDA
1
2ADS
K7456E3
D
65EF
H
DEVRESER
LCS_YBTS
ADS_YBTS
R
3
001505
R
001
4053
87654321
2_2XR
p
R
n2_2X
2
p1_
XR
R
n1_2X
0_2XR
p
0
n
_2XR
pC_2X
R
n
2
R
C
X
_
C
C
E
D
T
SER_CD
E
IMDH_V
2
+
_
5
n00140E
0
2
E
C
42M
6NMW-2
0
1
2
3
E
EW_DID
D
_LC
2_IM
H
2_IMDH_A
D
D
H_IMD
_
P
2
3
p2_
XR
2
X
n
_
R
3
1_3XR
p
3
n1_
XR
p0_
3XR
_
n
3XR
0
pC_3
XR
X
R
nC_3
C
CE
_
TES
DD
R
C
E
H
3_IM
_V5+
D
n00172E2
80E7
6NMW-20C42
1
2
3
EW_DIDE
D
D
3_IMDH_LCS_CDD
3_IMDH_ADS_CD
3_DPH_IMD
p2_ediSXR
2_e
R
n
diSX
p1_ediSXR
n1_ediSXR
0_ediSXR
p
n0_ediSXR
pC_ediSX
R
n
C_ediSXR
CEC
TESER_CD
EDIS_IMDH_V5+
n00182E205EF
EDIS_IMDHV5+
21E7
6NMW-20C42M
1
2
3
EW_DIDE
EDIS_IMDH_L
CS_CDD
EDIS_IMDH_ADS_CD
EDIS_DPH_IMD
GNIMMARGORP PSI
YBTS3V3+
60E1
93EF
1
TW_DXR
04EF
2
TW_DXT
14EF
3
63EF
4
56
S
V
_
3+
3
S
DH
ER_IM
ADS
LCS
C_2XR
p
2
nC_
XR
p
0_2X
R
n0_
2XR
2XR
p1_
2
n1_
XR
p
2_2X
R
n2_
2XR
pC_3XR
X
nC_3
R
X
_
R
0
3
p
n0_3
XR
p
1_3XR
n
1_3XR
X
p2_3
R
_
XR
2
3
n
S
pC_ed
XR
i
nC_ediSXR
0_e
XR
p
diS
XR
n0_ediS
p
diS
1_e
XR
1
X
_edi
R
n
S
2_e
XR
p
diS
R
n2_ediS
X
8
H
1+
V
nC_xuMXR
uMX
p
_x
R
C
uMXR
n0_x
0
_x
uMXR
p
1_xuMXR
n
uMX
p1_x
R
uMXR
n2_x
2_xuMXR
p
nC_1XR
_1X
pC
R
n0_1XR
0_1X
p
R
n1_1X
R
p1_1XR
n2_1XR
_1X
p2
R
BTS3V3+
OT
sOI/GOLANA
LCS
DS
A
2DEL
63E2
n001
1DE
L
53E2
n001
P
TSAF
OLP_
YBTS3V3
+
CEC
RI
)FL(TBT-4MS-HP-B4B
3
0
R
30E5
W
82EF
+
XUM
MDH3
3
A_I
V
1+
100n
2E19 10u
2E20 10u
2E22 100n
2E21
+
1
6172937495769
63
33C
A
2026404660
2
21F
0
_
R
X
3
_0XR
31F
R
4
_0XR
4
R
5
_0X
R
51F
R
R
X
R
_1X
R
0
_1X
R
01F
R
1
XR
11F
1
_
X
R
E
2
YBTS3
YB
XUMA_IMDH8V
1+
D_IMDH8V
XUM
33
73
8
V
1C
A
C
Φ
D
H
TI
S
W
DNG
7
BC_0XR
C
B
0
0_0X
1
B
1_0X
B2
2_0X
B
C_1X
C_1
B0
0_1XR
B
1
1_1X
B2_1
2
92E2
2
5
R2209E
R2239E3
81CCV
D
A
I
M
C
C
E
HC
D
0
1
L
CSD
2
0
1
S
D
AD
2
0
RWPR
1
2
0
H
P
1
D
2
P
H
NI
D
ST
L
C
ST
A
D
C
+
C
+
0
-
0
T
X
1
+
-
1
2
+
-
2
D
NG
D
34
74
66
80
7-10A
2
835TM
IMDH
8CA
S
_TX
E
E
R
N
C
6
DA
O
0RWP
V5_
7BA
1
V5
O
RWP
_
6
CA
O
2RWP
V5_
8BA
C
V
CVC_21D
A
D
A
21C
1H_33DDV
A
2
1DA
2
H_33DDVA
A
9
C
3
_
SSVA
1H
3
1CA
0
3
_
SSVA
2H
3
1CA
1
3H_33
SSVA
9
DA
SSV
4H_33
A
0
1DA
S
H_3
SVA
5
3
1DA
1
3
_
SSVA
6H
3
A
4
E
B
C_2XR
4FA
C
R
_2X
5E
A
_2X
B0
R
A
5F
0
_2XR
6EA
N
B
R
_2X
1
6FA
_2X
1
R
A
7E
_2XR
B2
7F
A
_2XR
2
p22
p22
1E07
12M0
1
DV
4
I
CSO
3
O
Y
LCS
S
B
_
1
T
2
L
C
1S
T
S
D
D
_YB
A
02
S
D
A
5EF
7
34
TSR
N
72
0
62
1
52
85EF
2
4
2
E
F
9
5
3
3
2
4
22
5
1
1
0
01
1
9
2
8
3
OIPG
7
4
6
5
5
6
_
H3V3
UMA
+
X
IMD
E
8
7
1
UTCA581
23
43
S
9I
I
T
E
H_V5+
D
A_IMD
Y
10K
CEC_TNI
50E6
AB
YBTS3V3+
40E5
3E03
95
E3
1
R00
R
E
9
225
3
R2269E3
3
0
E
1
6
K0
SE
WS_V5+
x
uM_IM
WS_3V3+
XUM
R
03
E
1
F
5
10n
22u
2E24
2E23
WS_3V3+
80E5
R03
10K
3E04
2
N
C
62E7
3
1
2
3
1
2
29E3
6
13S
98E3
79E3
E3
R
0116E3
K
0
171E3
K
7K436E3
R07446E
3
E
2
4
7
G57
B
254
D
5
V
D
D
6.3V
Φ
1
T
UOV
10K
B
G
USREDN
3E24
2
3
8
82E7
CP
A5159A
V
CC
0ADS61ADS3
0LCS
71LCS
NE5
WB748CB
1
52E7
1
1
1
CN
DNG
4
40E4
SE
R
30E4
S
ER
RES
4E02
3153
K0
WB748CB
RES
4E01
153
5
K0
72
K
R001
R2249E3
0162E2
n
K0
SE
R
SER
K0188
55
C
A
V
1
3
ESER
T
1
4
L
ADS
LESP
0
E
1
E
LESP
51
L
LCS
7
9
DAC2I
RD
T
R
P
W
53
SC2I
LE
T
NI
57
LDVSR
9
1
C
+
81
-C
22
0
+
1
2
-0
52
X
0
R
+1
2
4
1
-
82
2
+
72
2
-
93
+C
8
3
-C
24
0
+
14
0
-
54
X
1
R
+
1
4
4
1
-
8
4
2
+
4
7
2
-
9
5
+C
85
-C
26
0
+
16
-
0
5
X
6
2
R
+
1
6
4
-
1
86
2
+
76
2
-
21
NIW
G
_TX
S
E
3
9
1EA
A
1EA
A
1EA
1F
A
1E
A
A
8E
A
FA
8
9EA
9F
A
1EA
A
1
EA
A
10K
4
6E14
3E23
BAS316
23E2
n001
3
N
C
99E3
K01
V3+
4153
1
K0
+
TS3V3
52E3
K01
6
153
K01
8V6C-483XZB60E6
p00133E2
83EF
73EF
E
R031
5
0
WS_8V
10u2E07
2E10 100n
2E09 100n
2E11 100n
2E12 100n
2E08 10u
R03
20E5
10u2E16
100n
100n2E17
2E18
5
4
CN
3
5
CN
3
1
3
1
5
7
1
0
3
5
0
0
7
2
3
5
2
7
2
1
6
C
N
3
6
CN
6
5
N
C
6
7
C
N
7
8
7
7
0
1
1
1
7
8
4
5
1
2
13EF
R00166E
R
7
E3
001
6
86E3
R00
1
6
3
0019
E
R
1
R00
E
0
3
7
17E3
R00
1
E
R00127
3
1
R00
E
3
3
7
50E
5
3
5
3
5
_
H
5
V
+
+
R0360E5
V1+
2
R0
3
3
_
3+
S
V
D
D
D
D
C
D
_
+
5
5
+
_
5+
H
V
I
C
D
H
L
_
D
S_CD
_
M
D
K
0190
+
K
0
0
1
1
R
R
R
R
R
R
R
R
u
M_IMD
x
_IMDH_V5
1
W
100n
2E02
2E03 10u
2E06 100n
C
2
7
3
E
4
W
7
16T
4GR-
P
D
AOIPG
B
TW0
Φ
91
0
81
1
7
1
2
61
3
51
OIP
G
C
24EF
4
41
34EF
5
31
6
1
2
7
0EI
6
5
3
0
4
3
1
YBTS3V3+
33
2
23
3
YBTS3
+
3
V
13
DOIP
G
4
3
0
5
6
7
0
1
2
3
OIP
E
G
4
5
6
7
SV
S
2
7
153
92
8
2
0
1
K
44
4
2
3
215
1
4
R
001
0
4
93
83
73
6
3
EK
7
4
K
S
ER
7053
K480
3
7
5
3
3
5
S
ER
O
P
001305
R
7
411
K
8153
K01
100n
2E13
DD
D
S
5
X
X
H8V1
UMA_IM
X
D
+
62EF
100n
2E14 100n
2E15
2
E
F
_
CS
C
L
C
S_CD
L
CS_CD
ADS_CDD
C
D
_
S
D
IMDH_V
2
_
_IM
3
DH_V
EDI
S_IMD
XUM
UM_IMDH_ADS_CD
X
_
WS
V
W
S_V5+
C
_x
p
uMX
nC_xuMX
p0_xuMX
n
0
_xuMX
p1_xuM
_xuM
1
n
_x
2
p
uMX
n
2
_xuMX
RAOBY
D
V
3+
TS3
_
D
REW
O
S
YB
DNAT
72E7
8
B
C
DNATS
UM
MDH8
1+
X
D_I
V
7
I
2
_
MDH_
3
_IMDH_L
IMDH_
EDIS_
I
2
_
MDH_
3_IMDH_A
S_IMDH_A
EDI
YBTS3V3+
Y
B
N
W
T
O
WB74
A
T
O
nYB
615141312111019
10-8
A
B
C
D
E
F
G
H
I
CD
CD-
OIDU
J
&
DVL OT
S
K
L
PL9.0SCM8
Page 40
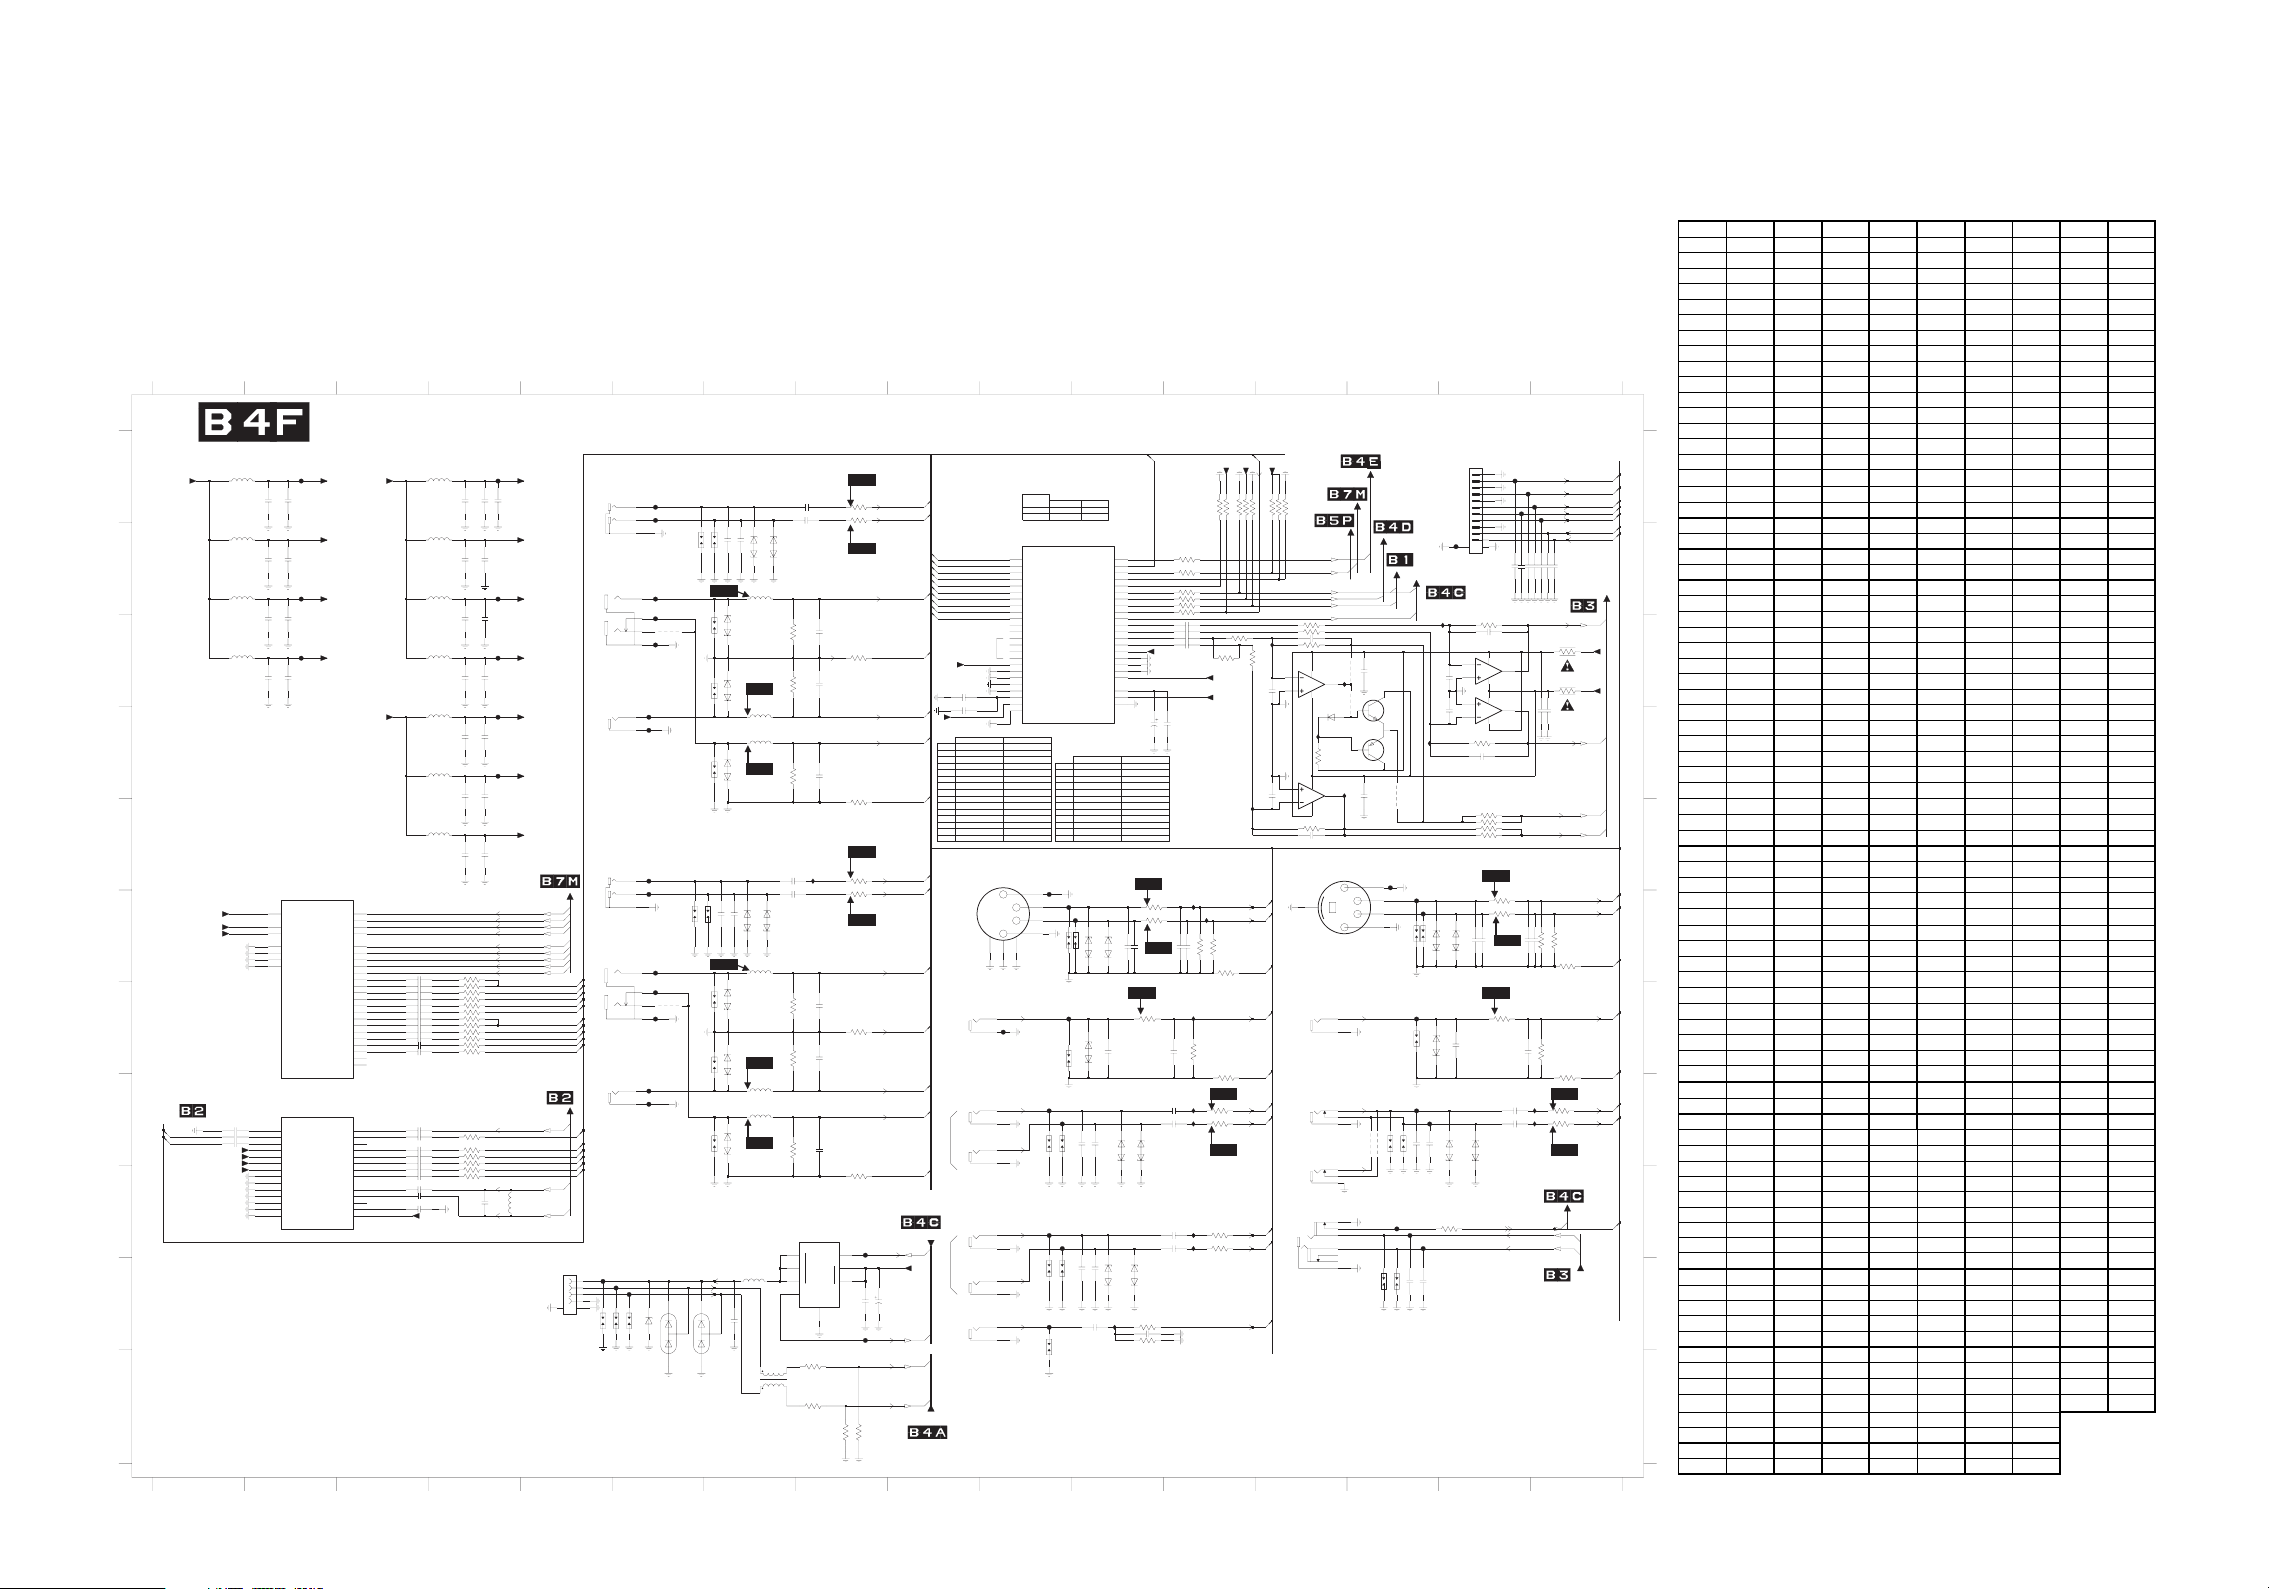
SSB 9/15 Schematic Diagram (MT5382 - ANALOG I/Os)
SSB 9/12 S chem atic Diagram Parts Loc ation Guide
Ref No. Position Ref No. Position Ref No. Posi tion Ref No. Position Ref No. Position
2401 H15 2F18 B 7 3F15 I8 4F05 D14 FF20 H10
2402 H15 2F19 C2 3F18 G7 4F07 C6 FF21 I10
2403 F12 2F20 C2 3F19 G4 4F08 G6 FF22 I10
2404 F12 2F21 J8 3F20 G4 5F01 D3 FF23 J10
2405 G12 2F22 J9 3F22 H7 5F02 D3 FF25 A6
2406 H11 2F24 A 4 3F23 G4 5F03 E3 FF26 A6
2407 H11 2F25 A 4 3F25 F4 5F04 A1 FF27 D6
2408 I11 2F26 F7 3F26 G4 5F05 B1 FF28 B6
2409I112F27B43F27G45F06A3FF29D6
2410 J11 2F28 B 4 3F28 G4 5F07 B3 FF30 C6
2411 J11 2F30 C4 3F29 G4 5F08 B3 FF31 E6
2419 B15 2F31 C4 3F30 G4 5F09 C3 FF32 F6
2420 B15 2F33 C4 3F31 H4 5F10 C1 FF33 H6
2421 B15 2F34 C4 3F32 H4 5F13 D7 FF34 G6
2422 B16 2F36 C2 3F33 H4 5F15 B7 FF35 H6
2423 B16 2F37 C2 3F34 H4 5F17 D7 FF36 G6
2424 B16 2F38 C14 3F35 E 8 5F19 H7 FF37 J 6
2425 B16 2F39 E 14 3F36 F 8 5F21 F7 FF38 J 6
2426 J 11 2F41 A7 3F37 B13 5F23 H7 FF39 J 6
2427 F 7 2F42 A 7 3F38 B 12 5F24 J 7 FF40 I 8
2429 J 11 2F43 F15 3F39 B12 5F25 B 1 FF41 J8
2430 H11 2F44 D8 3F40 B12 5F31 I4 FF 42 A 15
2431 H14 2F46 F11 3F41 G4 6F01 B7 FF43 A15
2432 H14 2F47 C8 3F43 B12 6F02 B7 FF44 A16
2433 J 14 2F49 G11 3F44 B 12 6F03 D7 FF46 A16
2434 J 14 2F50 C8 3F45 B 12 6F04 C7 FF47 B15
2435 H11 2F52 E7 3F46 C13 6F05 C7 F F49 E 10
2436 A4 2F53 F7 3F47 C13 6F06 F7 FF50 G10
2437 H3 2F54 G15 3F48 C12 6F07 F7 F F51 E 14
2438 I3 2F55 I 8 3F49 C13 6F08 H7 I F24 E8
2439 I3 2F57 F 15 3F50 C13 6F09 G7 IF27 J11
2440 I4 2F58 G 8 3F51 E15 6F10 G7 I F28 I12
2441 D11 2F60 F11 3F52 E15 6F11 F11 IF29 I 12
2442 D12 2F61 G8 3F 53 E 13 6F12 F11 IF30 H12
2443 I3 2F63 F3 3F5 4 E15 6F13 G11 I F31 H12
2444 I3 2F64 G 3 3F55 E15 6F14 H11 I F32 G12
2445 H1 2F65 G 3 3F56 C15 6F15 H11 IF 33 F12
2446 H1 2F66 G 3 3F57 D15 6F16 J 11 IF34 F12
2447 H1 2F67 G 3 3F58 F11 6F17 J 11 IF38 H16
3401 I4 2F68 G 3 3F59 F11 6F18 F14 IF39 H16
3402 I4 2F69 G 3 3F60 F12 6F19 F15 IF40 E 13
3408 B12 2F70 G3 3F61 F12 6F20 G14 I F41 D13
3409 B12 2F71 G 3 3F62 G11 6F21 H15 I F42 D13
3412 H16 2F72 G3 3F 63 G 12 6F22 H15 IF 43 C13
3413 H16 2F73 G3 3F 64 H12 6F25 J6 IF44 C13
1F01-1 B5 2F 74 G3 3F 65 H12 6F26 J6 IF45 C15
1F01-2 D6 2F75 H3 3F66 I12 6F27 J6 IF46 D14
1F01-3 A6 2F 76 H3 3F67 I 12 6F28 D13 S 401 B 6
1F02-1 F5 2F77 H3 3F68 J11 7A01-10 H2 S402 B7
1F02-2 H6 2F78 H3 3F69 J11 7A01-11 B 10 S 403 D7
1F02-3 E6 2F 79 I3 3F70 F15 7A01-9 F 2 S404 C7
1F03 E 10 2F80 C9 3F71 F 15 7F01 I 8 S 405 C7
1F04-1 G10 2F81 D9 3F72 F16 7F03-1 C13 S406 F6
1F04-2 H10 2F82 C12 3F7 3 F16 7F03-2 E13 S 407 F7
1F04-3 H10 2F83 C12 3F7 4 G15 7F04-1 C15 S 408 H7
1F05-1 J 10 2F84 C12 3F75 G4 7F04-2 D15 S409 G7
1F05-2 I10 2F85 C12 3F76 F12 7F05 D14 S410 G7
1F05-3 J 10 2F86 C13 3F77 H12 F424 F14 S411 F10
1F06 I13 2F87 C13 3F78 F 16 F442 F 14 S 412 F11
1F07 E 13 2F88 D13 3F 79 K7 F443 G14 S 413 G10
1F08-1 G13 2F91 E 13 3F80 K7 F444 H14 S414 H10
1F08-2 H13 2F92 C14 3F8 1 K8 F 445 H15 S415 H10
1F08-3 I13 2F93 C14 3F 82 K8 F446 I 14 S416 J 10
1F10 J5 2F94 D16 3F8 3 G16 F447 I14 S 417 J10
1F12 A 15 2F95 D16 3F8 4 B13 F448 I14 S418 J10
1F13 K 7 2F96 F16 3F85 B13 FF02 D4 S419 F14
2F04 D4 2F97 G15 3F86 H16 F F03 D4 S420 F 14
2F05 D4 2F98 J7 3F91 C16 FF 05 A2 S421 G14
2F07 E 4 2F99 F15 3F92 C16 F F07 B2 S422 H14
2F08 E 4 3F01 A 8 3F93 B 12 FF09 A 4 S423 H14
2F09 D15 3F02 A8 3F94 B12 FF11 B4 S 427 J5
2F10 E 4 3F03 D7 3F 95 I 14 FF12 C4 S428 J 6
2F11 E 4 3F04 E 8 3F96 C12 FF 13 C2 S 429 J6
2F12 C15 3F07 C7 3F97 D13 FF14 B6 S430 J14
2F13 A 2 3F08 C8 3F 98 B 12 F F15 F6 S 431 J14
2F14 A 2 3F09 G 4 4F01 H14 F F16 F1 0
2F15 B 7 3F11 C8 4F 02 H14 FF17 G10
2F16 B 2 3F12 G 8 4F03 C13 F F18 F1 1
2F17 B 2 3F14 I 7 4F04 C13 F F19 H10
21
43
sO/I GOLANA - 2835TM
50FF
03
5
R
A
B
C
D
E
F
G
H
I
J
K
40F
WS_3V3+
0F5
R035
4u72F17
2F16 100n
0352F5
R
100n2F19
03
5
R
01F
100n2F36
2F37 4u7
AGV_1V1+
C
_1V1+
DABGR
EFBGR_1V1+
TUO_SBVC_dnG
0u15442
52CA
G
42DA
0u174
42
42FA
42Y
D
52AA
CDAVA_5V2+
4
2AA
FER_5V2+
32AA
EFV_5V2+
22
W
22AA
22B
A
A
32W
32Y
32CA
D
3
A
2
A
GID_3V3+
5V2
+
CDA_3V3
+
CAD_3V3+
31FF
PFER_3V3+
2V1+
RPBPY
CN
C
N
01-10A7
2835TM
NI_
VA
62CA
NUT_DN
RE
0SBVC
62DA
SBVC_DNG
1
SBVC
52DA
2SBVC
VS_
DNG
DDVA
2
SSVA
62EA
3SBVC
CDAV_52DDV
62FA
CDAV_5
0
YS
52FA
FER_52DDVA
1
YS
52EA
0C
EFV_52DDVA
S
2EA
4
CS
1FI_SBVC_SSVA
1
2FI_SBVC_SSVA
42BA
VTA_PI
V
3FI_SBVC_SSV
CA
42
VTA_NIV
4FI_SBVC_SSVA
22Y
N
C
A
S2D
I_SBVC_
5
F
52BA
CDNIV
6FI_SBVC_SSVA
32BA
CN
52V_
7FI_SBVC_SSV
R0360F5
100n2F24
2F27 100n
R0380F5
2F30 100n2F04 100n
R0390F5
100n2F33
10F5
R03
0F5
R032
100n2F07
R0330F5
F2
7n43
6
6
n0156F2
2F3
n0166F2
n0186
F2
82F3
n0107F2
3
n0117F2
n0137F2
n747342
3
n7467F2
7
77F2
n
4
2
n7487F
n743442
43
n01
8342
n019342
22
n00197F2
EFV_5V2+
98765
( V
E
V
ER
DIS
RE
-
S
3
WS_3V
+
F
V_5V2+
E
2436 100n
2F25 4u7
4u72F28
4u72F31
2F34 4u7
4u72F05
2F08 4u7
4u72F11
R
0
R8691F3
R8632F3
8690F3
R
R0
R8602F
R
8614F3
00120
0442
p
FER_5V2+
11FF
CDAVD_5V2+
21FF
CDAVA_5V2
+
20FF
AGV_1V1+
30FF
CDABGR_1V1+
EFBGR_1V1+
R001
R00172F3
R00192F3
R00103F3
R00113F3
R00123F
R00143F3
R0011043
R
13F5
2
n07
1
2
3
4
1VA
-10F1
3
2
52FF
6
4
E
R/
HW
D
ETI
10-H50
F
N
-JTM
L
5
I
1-10F1
7
11
8
C
N
SER
7
1
EULB/NEERG
FL IN 10-H505-JTM
2-10F1
51
9
DER
FL IN 10-H505-JTM
2VA
MOIDIORP OT
1-20F
1
7
1
1
8
C
N
SER
71
G
EULB/NEER
FL IN 10-H505-JTM
2
-20F1
1
5
RENUT MORF
9
DER
FL IN 10-H505-JTM
BSU
01F1
73FF
83FF
56
4
-303292
93FF
S429
S428
S427
6F25
41FF
82FF
70F4
03FF
72FF
23FF
43FF
80F
4
63FF
53FF
BZX384-C6V8
WF2
6F04
S404
6F05
S405
6F03
S403
1n0
S406
2F26
WF2
6F09
S409
6F10
S410
6F27
NUP1301ML3
1n0
1n0
2F18
2F15
PESD5V0S1BA
PESD5V0S1BA
PESD5V0S1BA
1n0
6F06
2427
PESD5V0S1BA
PESD5V0S1BA
2F98 10u
6F02
6F01
PESD5V0S1BA
F5
1
5
R0
6
WF3
1F5
7
R0
6
31F5
R06
WF1
2
6F07
PESD5V0S1BA
12F5
R06
WF3
32F5
0
R
6
1F5
9
06
R
WF1
R0342F5
4
1F13
1
2
F
PESD5V0S1BA
75R3F07
75R
3F03
PESD5V0S1BA
75R
3F18
75R3F22
75R3F14
6
7
8
5
3
3
2
DLW21S
WF7
PA
T
u0114F2
u0124
K2210F3
22
20F3
K
WF7
1%
R
0
3
8
0
F
05
F2
22
p
1%
R0
40F3
2F44 22p
WF7
42FI
0125F
u
u0135F2
K2263F3
3V3+
CDA_
0108
F2
+
4
8F2
8F
2
5
68F
2
F2
78
8
8F2
2
1
9F
49F
2
2
59F
4F
3
8
9
4F3
F
3
05
15
3
F
F
3
25
3
5F3
F3
4
5
O
T
-SHVS
WF7
1%
R0
21F3
2F58 22p
1%
22p2F55
1%
3
R0
51F
10F7
T
1
E
2
TUO
NI
3
_
CO
GND
1
R0
97F
R0
08F3
T
DB1402SP
4
_N
2
1
3
2
100n2F21
RES
RES
15K3F81
3F82 15K
SBVC
L
R
HSALF O
MVN&
L
R
FIDP
S
RENUT&REWOP OT
R
EDOM
N
MRO
I
C
E
2J
3
L_0NIA
4
2J
_
0
R
NIA
J
5
2
L_1NIA
6
2J
1
_
R
NIA
32K
L_2NIA
K
42
R_2NIA
52
K
L_3NIA
2K
6
R_3NIA
2
L
3
L_4NIA
42
L
_
4
R
NIA
52
L
L_5NIA
2L
6
_
5
R
NIA
2M
3
_
6
L
NIA
2M
4
R_6NIA
C
N
52M
7
L_
NIA
2M
6
R_7NIA
2
N
3
33DDVA
2
J
2
33SSV
A
22K
22
L
SVA
2
2M
S
VA
0
H
n
42
A_DIMV
52
H
R
A_PFE
H
62
R
PFER_3V3
ENO
HPDAEH
Y
Y
Y
Y
Y
Y
Y
Y
Y
Y
Y
Y
Y
Y
P
0F1
1
D
ER
1
MR-HTAB W1
Y
Y
Y
Y
-
-
-
Y
Y
Y
-
Y
Y
-
-
-
-
30
F1
FL A-H660-CDM
1
3
4
2
756
3VA
WOLLEY
2
05FF
1
1-4
N0406-12CKY
ETIHW
4
3
2-40F
N0406-12CKY
6
5
3-40F1
N0406-12CKY
OIDUA-CP
4
ETIHW
3
2-50F1
7365-12CKY
KCALB
2
1
1-50F
7365-12CKY
KCBOA
KCRLOA
0
0
0(
)1
)
(
LAV
EU
TLUAFED ) (
0A7
-1
11
2
TM
8
35
A
NI_OIDU
A
P
S
A
LO
BOA
A
A_33DD
V
D
3S
A_
SVA
3
3
_3
SVA
CDA
S
A
_
1CDA
SVA
A
_
3
A
A
A
3DD
2CD
_33SSVA
_
V
A
3
CDAA_33S
V
_CADA
D
C
A_33S
4
A
D
A
C
3DD
A
3
V
D
VA
C
A
DAA_NFE
C
H
HPDAE
5F3
Y
5
19F
3
Y
F
3
Y
2
9
-69F
-
3
F
3
--
7
9
0F
Y
4
3
-
-
40F
4
-
50F
-
4
-Y
82F
-
6
Y
1-30F
7
F
7
Y
2-30
0F
--Y
7
5
94FF
81FF
6F11
S412
PESD5V0S1BA
R
SE
22
C
NILA
22
B
FID
43
A
42
KLCMOA
32B
KCR
A
32
K
C
2
D
2
0ATADSOA
C
32
1ATADSOA
42
B
2ATADSOA
52A
3ATADSOA
52B
4
ATADSOA
62
F
1
LA
2G
5
1
RA
62E
2
L
A
F
52
2
RA
H
32
1CAD
G
42
_
0CA
2
22H
1CADA
G
32
0CADA_33S
1_
42F
0CAD
2
G
6
M
C
32P
GI
D_
22
N
ID_33SS
G
TAB
W1
ENO
Y
Y
Y
Y
Y
Y
Y
Y
Y
WF4
33p2F46
RES
RES
2F60 33p
--
--
--
2441 6.3V
H
WF5
R00190
134
R00
F3
01
R0
44
F3
0
n
74
F2
8
3
4
n07
48
F2
74
n0
58F
2
C
_3V3+
DA
22u
100n
2442
R
M
-
I
3
F
3
R7285F3
%1
43FI
1
%
1%
47p2403
2404 47p
WF6
I
23F
R7226
F3
%1
1%
47p2405
6F15
PESD5V0S1BA
PESD5V0S1BA
47R3F63
03FI
u016042
1
3FI
2FI
8
u
018042
3
u
019042
I
92F
R001
3
p3
R001
RES
6F13
S413
2F49 33p
PESD5V0S1BA
F
91F
02FF
1n0
1n0
S414
2FF
1
F
S416
F
32F
6F14
2430
2435
PESD5V0S1BA
22F
1n0
S417
6F17
6F16
2429
PESD5V0S1BA
I
72F
n001014
86F3
2
1142
96F3
3
R
+
47R3F61
WF7
WF7
3V3+
WS_
+
WS
_3V3
10K3F85
10K3F37
10K3408
3F94 10K
3F38 10K
3F40 10K
3F84 10K
RES
RES
3
F
3
F
74
K2
8
F
2
4
44
FI
69
F3
94
F3
2
K2
SE
K7
4
CA
D_3V3
2
F2
78
3
p00
1
D
I
_3V3+
G
5
F
88
2
01
p0
6
F
04
I
F2
5
1%
F3
67
R0
TM
B
C
S
V
R
0
TM
K2256F3
L
0-J
TM
R
K2266F
K2276F3
HEADPHONE
O
T
F
K2264
K2
2
p3368F2
K02105F3
I280LT
84
1-30
7
F
2
6
F
R
2
I
4
F
7
F3
9
7K
4
SER
8
4
-30F7
2
02135F3
K
p3319
-EDIS
VA
1
F
-SHVS
DIS
E
WOLLEY
2
1
1
F1
-80
IHW
ET
5
6
4
1
2
F
-80
-23
3
DE
R
8
9
7
1
3-80F
IM
T
DH O
OID
IORP
M
T
YALPS
D O
I
CJM MOR
D OT
D/C
100n
4F03
34FI
2F38
1
D
4
3
RES
4F04
8
613SAB
5
F7
0
SE
A1
TMI
2
SER
1
5
I
4F
1
100n2F39
7
4F05
DI280LT
0
7
FKY
-AAB73-230-J
4
-AAB73-230-J
-AAB7
4
RES
4655-15
15FF
1
3
4
2
IN
234
S421
N 23
I
4F01
4F02
S422
S423
3
N 2
I
F
6
4
4
F
1n0
S431
S430
2433
A
1
2
F
1
1
2
3
4
5
6
7
8
9
0
1
74
F
F
1
1
3
1
2
1
C
-
B
)FL
T-4MS-HP
1
(TB
B1
100p
MV
O
N&HSALF
T
F
54
I
2
9F
2
001
p
3
9F2
01
p0
2419
6
65F
K
5
3
p7421F2
2
1
3
D85
ML
3
84
4
F7
1-
0
84
5
7
6
3ML
2-40F7
K6575F3
p
0
9
2
74
F
F3
R3315
R33
25F3
R3345F3
WF4
44F
2
F
3
%
1
%1
WF5
RES
RES
6F19
6F18
S419
S420
PESD5V0S1BA
PESD5V0S1BA
2F57 33p
2F43 33p
WF6
344
F
F
44
1n0
2434
6F20
444
1n0
2432
7
F
PESD5V0S1BA
4F
54
844
7247
F3
%1
RES
2F54 33p
6F22
PESD5V0S1BA
R
00159F3
61514131211101
)D
E
4FF
4
F
F
64
100p
100p
100p
100p
2424
2420
2422
2421
C OT
119
R0
F3
1
-
R
F3
01
29
100n2F94
D85
2F95 100n
A
B
D
-SSAL
o
iduAV2
C
D
E
R7207
R7217F3
1%
1%
47R3F72
7
3
8
F
2F99 47p
3F73 47R
R0
R
47p2F97
3
8F
6
R0
WF7
F
3
I
8
u011042
3
K22314
93
FI
F
G
H
WF7
F
MV
HSAL
OT
N&
I
UM
MOR
N
-SSAL
F
T
G
D
C
I
J
K
61514131211101987654321
10-9
PL9.0SCM9
Page 41
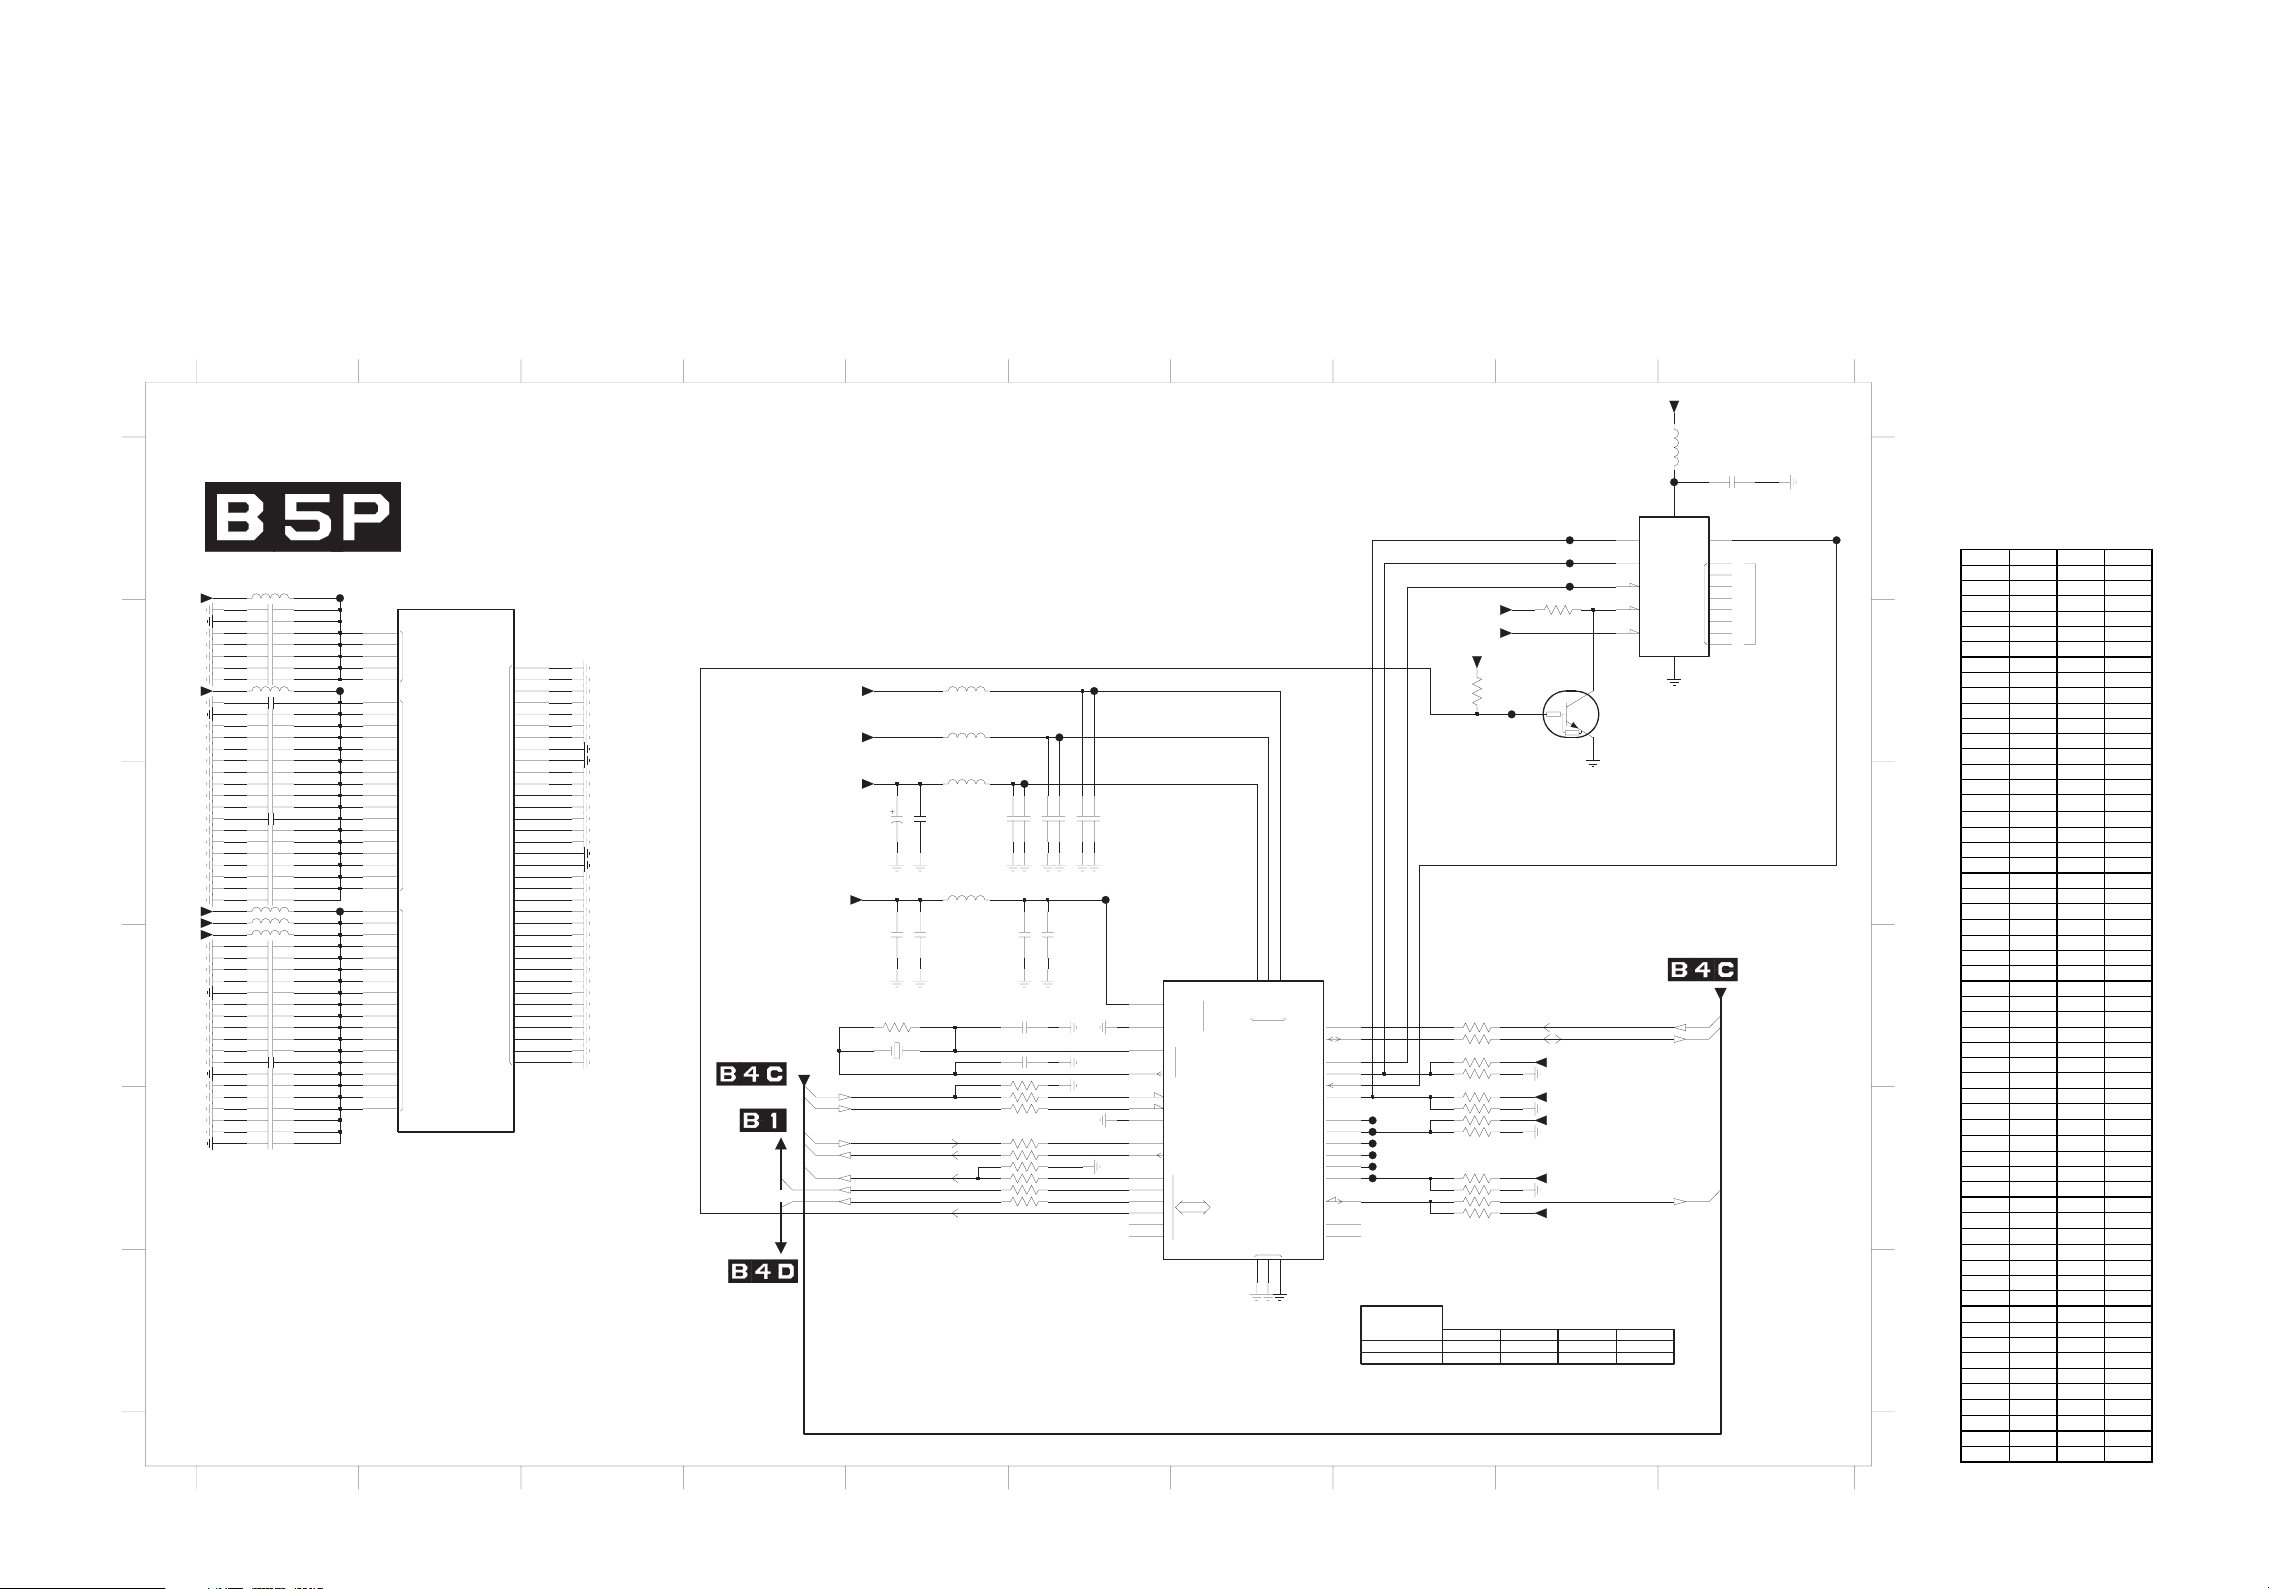
SSB 10/15 Schematic Diagram (MJC MT8280 - POWER)
SSB 10/15 S chem atic Diagram
Parts Location Guide
Ref No. Posit ion Ref No. Pos it ion
1P01 D5 2P89 A10
2P01 B 1 3P01 E8
2P02 B 1 3P02 E8
2P03 B 1 3P04 E8
2P04 B 1 3P05 E8
2P05 B 1 3P07 E8
2P06 B 1 3P 09 D5
2P07 C1 3P12 D8
2P08 C1 3P13 D8
2P09 C1 3P14 E8
2P10 C1 3P15 E8
2P11 C1 3P16 B9
2P12 C1 3P17 E5
2P13 C1 3P18 E5
2P14 C1 3P19 D8
2P15 C1 3P20 D8
2P16 C1 3P21 E8
2P17 C1 3P22 E5
2P18 C1 3P23 E5
2P19 D1 3P24 D5
2P20 D1 3P25 E5
2P21 D1 3P29 E5
2P22 D1 3P30 E5
2P23 D1 3P31 E5
2P24 D1 3P32 B8
2P25 D1 5P01 B1
2P26 D1 5P02 C1
2P27 D1 5P03 A1
2P28 D1 5P04 C5
2P29 D1 5P05 C5
2P30 D1 5P06 B5
2P31 D1 5P07 B5
2P32 E 1 5P 08 C1
2P33 E 1 5P 09 D1
2P34 E 1 5P14 A10
2P35 E 1 7P01-1 A2
2P36 E 1 7P01-5 D6
2P37 B 1 7P02 A9
2P38 B 1 7P03 B9
2P39 B 1 F G18 A10
2P40 B 1 FP 01 B 1
2P41 B 1 FP 02 C1
2P42 B 1 FP 03 A 1
2P43 B 1 FP 04 C6
2P44 C5 FP05 C6
2P45 C5 FP06 B6
2P46 C6 FP07 B6
2P47 C6 FP14 A9
2P48 C6 FP15 A9
2P49 C6 FP16 A9
2P50 C6 FP17 A 10
2P51 C6 FP18 E8
2P77 D5 FP19 E8
2P78 D5 FP20 E8
2P79 D6 FP21 E8
2P80 D6 FP22 E8
2P81 D5 FP23 E8
2P82 D5 FP24 B9
A
WS_3V3+
B
C
D
E
WS_8V1+
S_1V1+
F
4321
5
6
87
S_3
V3
W
+
R03
HSALF
F
REWOP - 0828TM CJM
S
0S_
F
K
C_FS
0
FS
30PF
R0330P5
7u473P2
n00183P2
93P2
04P2
14
P2
10P2
40P2
P2
60
70P2
80
P2
90P2
P2
P2
41
20P5
WS_1V1+
P5
80
W
90P5
WS_1V1+
P2
91
P2
42P2
62P2
82P2
03P2
13P2
23
P2
P2
33
P2
n001
n001
n001
n00124P2
0u134P2
R0310P5
7u4
n00120P2
n00130P2
n001
n00150P2
n001
n001
n001
n001
n0101P2
n0111P2
n0121
n0131P2
n01
n0151P2
n0161P2
0u171P2
0u181P2
20P
F
R03
R03
R03
7u4
n00102P2
n00112P2
n00122P2
n00132
n001
n00152P2
n001
n00172P2
n001
n00192P2
n001
n001
n01
n01
0u143
0u153P2
0u163P2
-10
1
P7
0828TM
8C
D
9
7
W
1W
9
02Y
10PF
1A
2B
6C
7
D
3F
1G
4
G
2H
1M
4
M
3N
U
2
1V
4V
3W
4
AA
3B
A
01
J
31
J
41J
9K
11
K
21K
41K
01L
31L
01M
31
M
N
9
11
N
21N
41
N
01P
31P
41
P
Φ
REW
OP
33DDVD
D
81DDVD
81DDVD
81
D
DDV
01DDVD
01
D
DDV
01DDVD
4A
5
B
3
C
1D
SSV
4D
2E
3J
9
J
11J
21J
1K
SSVD
4K
01K
31K
9L
11L
21L
41L
SSVD
M
9
11M
21M
1M
4
0
1N
31N
2P
SSVD
9P
11P
21P
R
1
4
R
3T
6W
SSVD
2
Y
5Y
1AA
MVN&HSALF OT
2V1+
2V1+
2V1+
S_3V3+
W
90
P3
P1
TSRP
NWP
F
70P5
P5
60
P5
50
16V
10u2P44
2P45 1u0
40
P5
1u02P78
2P77 10u
K028
0M7210
XR1_TRAU
XT1_TRAU
TCETED_0828
GILKCAB
NO_RWP_DCL
EW_CJM_HSAL
R03
R03
R03
100n2P46
2P47 4u7
03
R
10u2P80
28P2
18P2
42P3
22P3
32P3
71P3
P3
P3
92
52
P3
FFO_NO_TH
P
F
70
60
PF
50PF
4u72P49
100n2P50
2P51 4u7
2P48 100n
40PF
100n2P79
5
P7
-10
0828
M
T
02V
33
DDVA
ATX
p22
p22
K01
R0
R0
R001
R00181
K01
S
ER
R001
R00103P3
S
ER S
R00113P3
SE
R
02U
1
2V
22V
81W
Y
81
51W
A
12B
A
02A
6Y
Y
7
Y
61
61W
71W
61V
L
33SSVA
I
N
TX_S
LA
O
REH
P
TSRP
NWP
ESUFE
DX
R
D
XT
0
1
2
PG
OI
3
4
5
W_CJM_HSAL
T22
T20
SYSPLL
DVA
R20
R21
T21
DMPLL
MJCPLL
21D
LAREH
LLP_SSVA
R22
E
91Y
S
LC
02BA
D
A
S
7A
S
FS
C
8
D
KC
FS
8
B
F
I
S
D
8A
FS
OD
22Y
T
S
J
M
2
1
W
R
TS
TJ
A
22A
K
TRJ
C
12Y
KC
TJ
02W
IDT
J
A
12A
TJ
OD
71
V
0TNI
U
12
CN
0
NT
U
22
C
N
PT
0
F
Φ
I
P
SC_
61
P3
W
S_3V3+
W
V3+
S_3
W
+
S_3V3
23P3
K01
42P
F
P3
P3
P3
81PF
PF
91
02P
F
12P
F
22PF
PF
32
P3
EDOM PA
RT
MUPC_TSET
MRON
M TLUAFE
D ) (
R00191
R00102P3
SE
7K4
21
31P3
41
51P3
20P3
70P3
40P3
50P3
12
10P3
R
7K4
K4
7
ER
S
K4
7
K01
SE
R
V3+
K01
7
K4
K4
7
E
R
R0
K01
SER
V3+
D
TJ
O
X
)1(
T
SR
TJ
0
)0(
EDO
P7
51
F
41P
61
51PF
7
61PF
7K4
9
1
30P7
TDP
WS_3V3+
W
V3+
S_3
S_3
W
WS_3V3+
S_3
W
CFS
K
1
)1(
P
20
210
FMV-61P52M
V
CC
Φ
D
8x
M2
HSAL
C
F
S
D
U
W
OH
DL
SSV
E411C
T
ALF OT
LCS
AD
S
T
NI
0
S
ODF
1
)1(
019
41P5
98
P2
71
Q
n001
A
D_
O
S
F
8
3
4
5
6
CN
11
21
31
41
81GF
B
C
MVN&HS
D
E
F
01987654321
10-10
PL9.0SCM10
Page 42
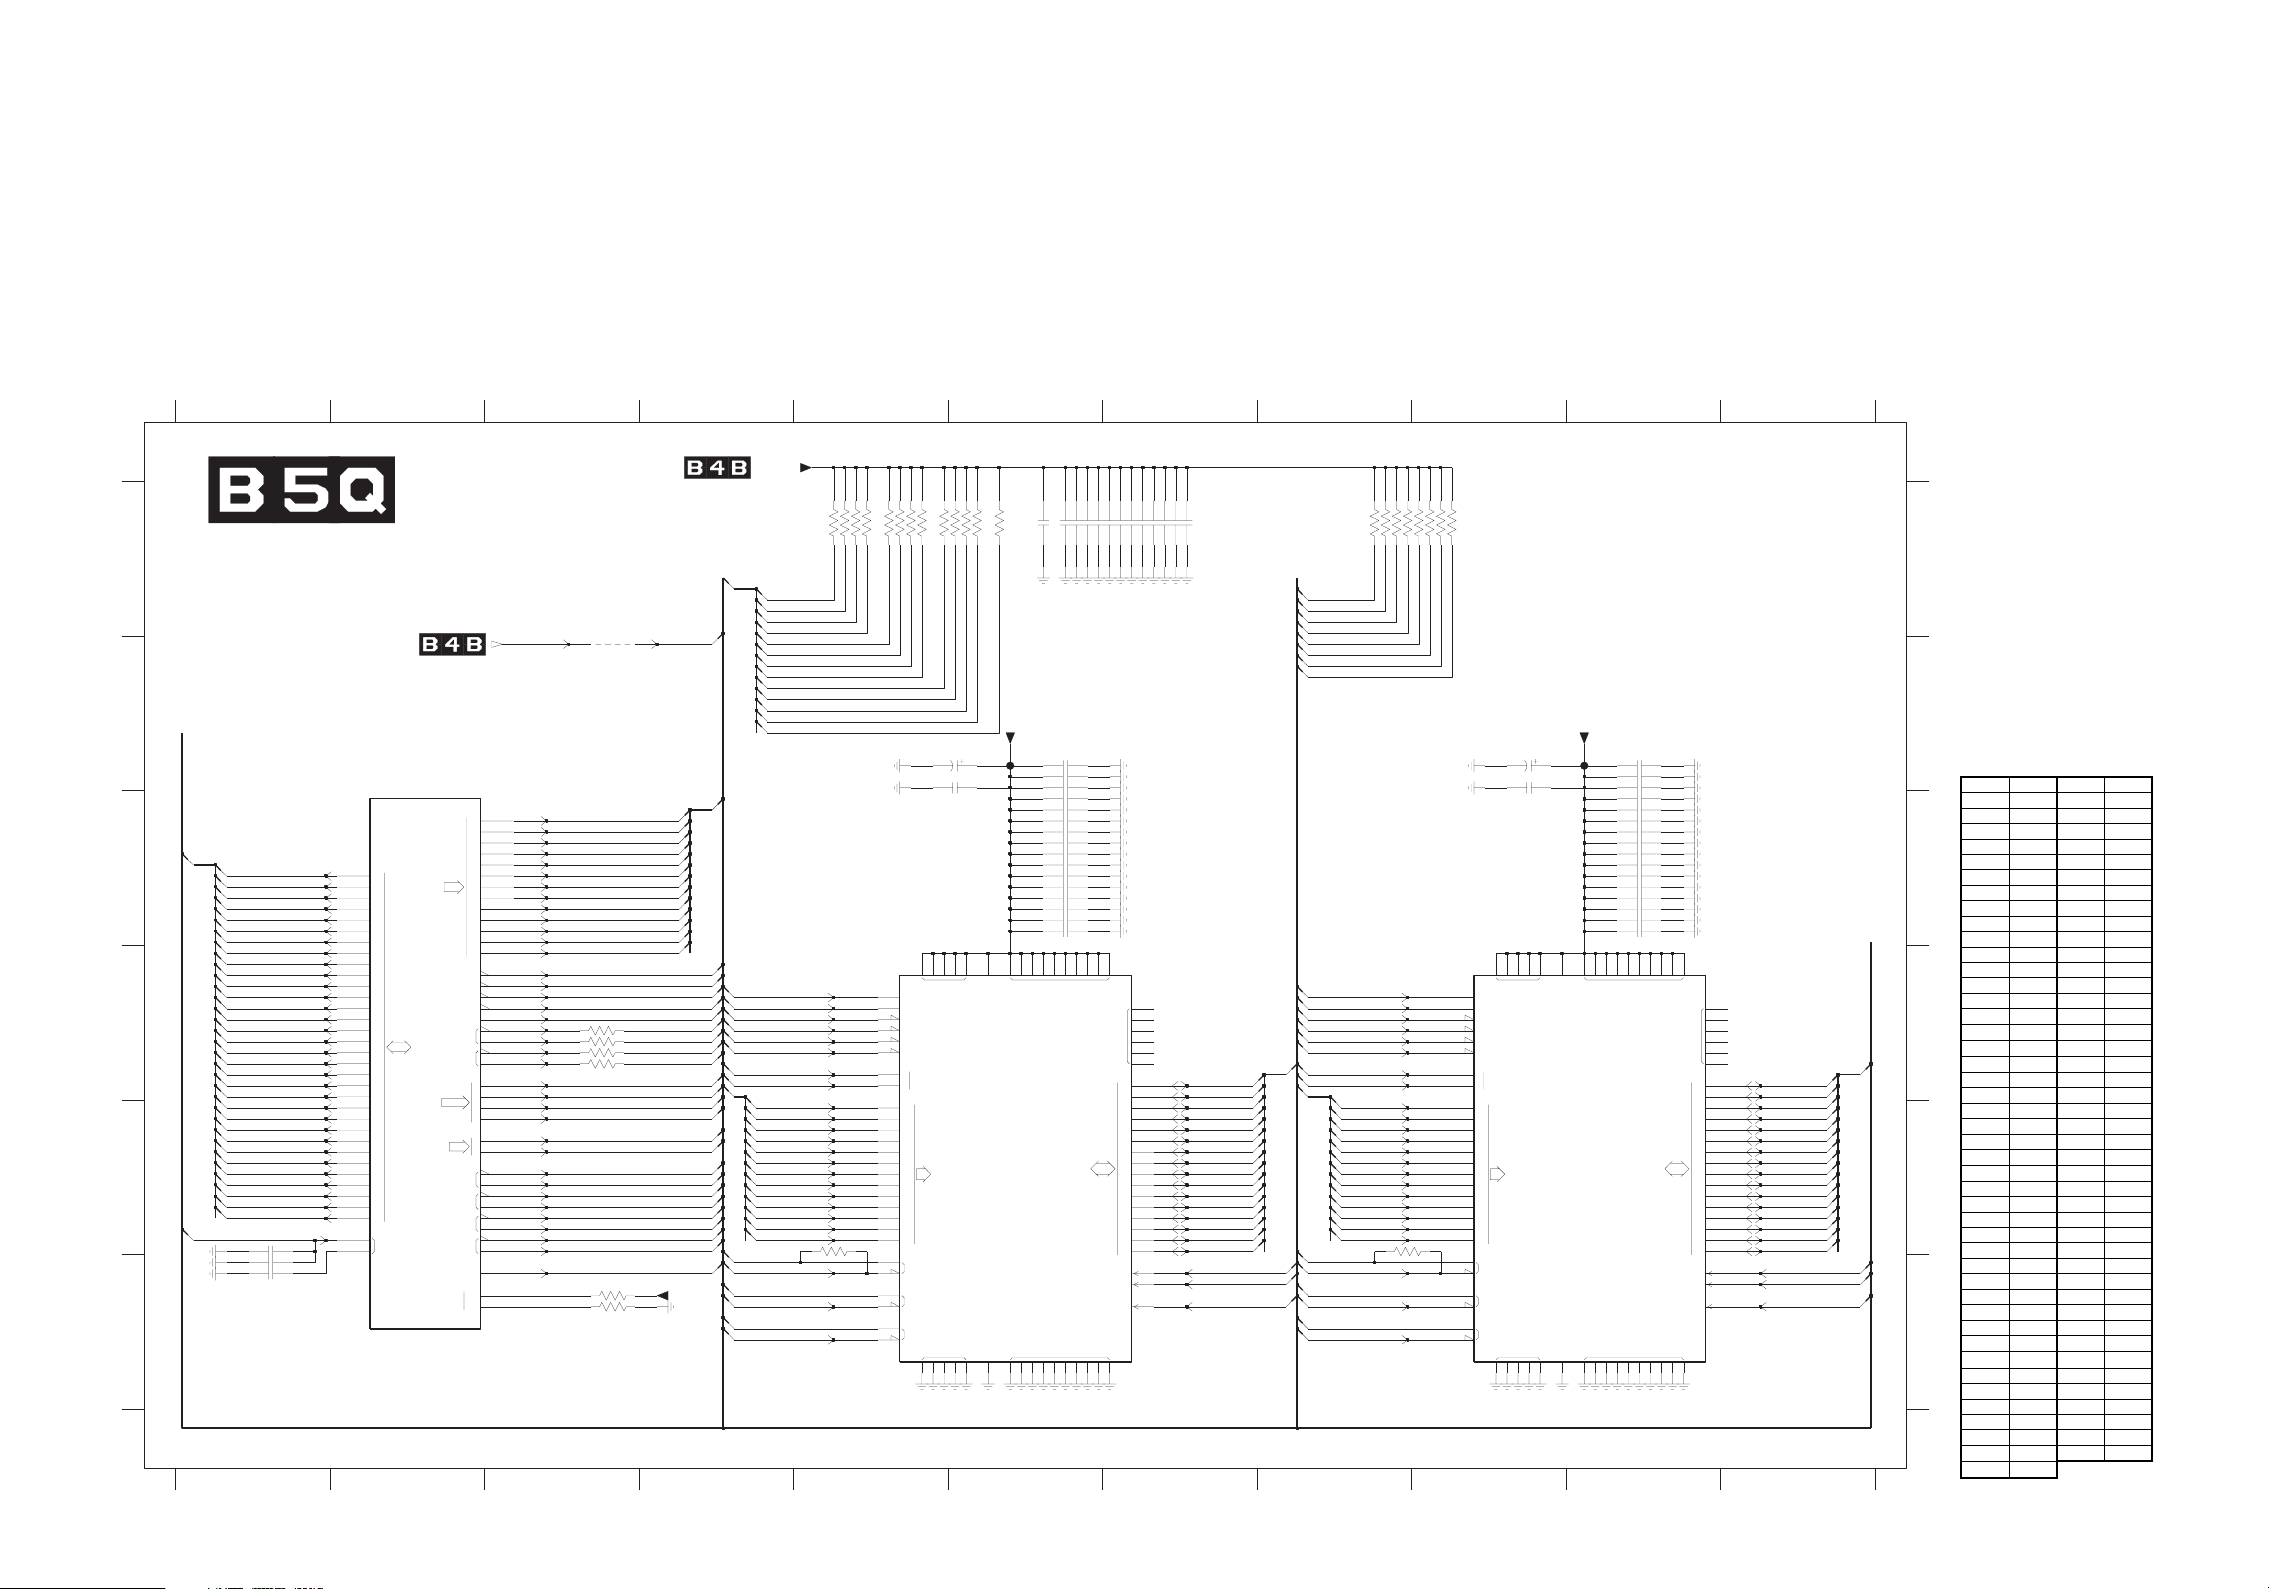
SSB 11/15 Schematic Diagram (MJC MT8280 - DDR2)
SSB 11/15 S chem atic Diagram
Parts Location Guide
Ref No. Posit ion Ref No. P osit ion
2Q01 E 1 2Q58 A7
2Q02 F1 2Q59 A7
2Q03 F1 2Q60 A7
2Q17 B 5 2Q61 A7
2Q18 B 5 2Q62 A7
2Q19 B 9 2Q63 A7
2Q20 B 9 2Q64 A7
2Q21 B 6 2Q65 A7
2Q22 B 6 3Q01 F3
2Q23 B 6 3Q02 D3
2Q24 C6 3Q03 D3
2Q25 C6 3Q04 D3
2Q26 C6 3Q05 D3
2Q27 C6 3Q06 E5
2Q28 C6 3Q07 E8
2Q29 C6 3Q08 F3
2Q30 C6 3Q09-1 A5
2Q31 C6 3Q09-2 A5
2Q32 C6 3Q09-3 A5
2Q33 C6 3Q09-4 A5
2Q34 C6 3Q10 A8
2Q35 C6 3Q11-1 A5
2Q36 C6 3Q11-2 A5
2Q37 B 10 3Q11-3 A 6
2Q38 B 10 3Q11-4 A 6
2Q39 B 10 3Q12-1 A 8
2Q40 C10 3Q12-2 A8
2Q41 C10 3Q12-3 A6
2Q42 C10 3Q12-4 A5
2Q43 C10 3Q13-1 A6
2Q44 C10 3Q13-2 A5
2Q45 C10 3Q13-3 A8
2Q46 C10 3Q13-4 A5
2Q47 C10 3Q14-1 A9
2Q48 C10 3Q14-2 A9
2Q49 C10 3Q14-3 A9
2Q50 C10 3Q14-4 A9
2Q51 C10 4Q01 B 3
2Q52 C10 7 P01-2 B2
2Q53 A 6 7Q01 D5
2Q54 A 6 7Q02 D9
2Q55 A 6 F Q01 B6
2Q56 A 6 F Q02 B10
2Q57 A 6
A
B
C
D
E
F
4321
0
V
9V
+
2RDD - 0828TM CJM
FERV_ME
M
-10
2
P7
TM
0828
Φ
MARD
)13:0(QDR_CJM
)0(QDR_CJM
)1(QDR_CJM
)2(QDR_CJM
)3(QDR_CJ
M
)4(QDR_C
JM
5(QDR_CJM
)
)6(QDR_CJM
)7(QDR_CJM
)8(QDR_CJM
)9(QDR_CJM
01(QDR_CJM
)
)11(QDR_CJM
)21(QDR_CJM
)31(QDR_CJM
)
41(QDR_CJM
1(QDR_CJM
)5
)61(QDR_CJM
71(QDR_CJM
)
)
81(QDR_CJM
)91(QDR_CJM
)02(QDR_CJM
)12(QDR_CJ
M
)22(QDR_CJM
)32(QDR_CJM
2(QDR_CJ
)4
M
JM
)52(QDR_C
)62(QDR_CJ
M
)72(QDR_CJM
)82(
_CJ
QDR
M
)92(QDR_CJM
)03(QDR_CJM
3(QDR_CJM
)1
FERV_CJM
n001 R00
SER
7u
4
n001
7C
0
4
B
1
5D
2
5A
3
6
B
4
5C
5
4C
6
6D
7
G
3
8
3E
9
2
D
0
1
4E
11
3D
21
1E
31
4
F
41
4H
1
5
3
U
T
V
V
W
A
A
P
10Q2
30Q2
20Q2
QD
61
1U
71
4U
8
1
2
91
1T
02
4T
12
3
2
2
2
32
4Y
42
AA
3
5
2
5BA
62
3Y
7
2
4
82
A
5
2
9
5W
03
4B
13
4
5P
FERVR
3
K
0
L
1
1
L
2
2
2M
3
3L
4
3P
5
2K
AR
6
3
M
7
2
J
8
4N
9
4
L
01
1J
11
3R
21
4J
SCR
1H
SAR
3
H
SAC
1
P
EWR
2R
EKC
1F
2F
0KLCR
6AA
6
BA
1KLCR
2
A
0
1
B
1
MQD
Y
1
2
1
BA
3
2N
0
AB
1N
1
3
A
0SQD
3B
2
C
1SQD
1C
1W
2SQD
2W
2AA
3SQD
2BA
2G
TDOR
6A
U
P
TXER
B
7
ND
0Q4
1
M
M
JM
JM
JM
JM
M
M
R2220Q3
2
3
R2
30Q
R
4
22
0Q3
R2250Q3
R331
0Q3
80Q3
R33
FERV_CJM
)21:0(AR_CJM
)0(AR_CJM
)1(AR_CJ
)2(AR_CJ
)3(AR_C
)4(AR_CJM
)5(AR_C
)6(AR_C
)7(AR_C
)8(AR_CJM
)9(AR_CJ
)01(AR_CJM
)11(AR_CJ
)21(AR_CJM
nSCR_CJM
nSARR_CJM
nSACR_CJM
M
nEWR_CJ
EKCR_CJM
n0KL
CR_CJM
0KLCR_CJM
n1KLCR_CJM
1KLCR_CJM
MQDR_CJM
0
1MQDR_CJM
QDR_CJM
2M
3MQDR_CJM
0ABR_CJM
1ABR_CJM
n0SQDR_CJ
M
QDR_CJM
0S
n1SQDR_CJ
M
1SQDR_CJM
n2SQDR_CJM
2S
QDR_CJM
n3SQDR_CJ
M
M
3SQDR_CJ
T
DOR_CJM
WS_8V1+
_
_CJ
M
0(AR
CJ
M
M
M
M
M
M
M
M
M
JM
TDOR_CJM
EKCR_CJM
n
EWR_CJM
nSCR_CJM
SAR
M
n
R_CJ
nSACR_CJM
0ABR_CJM
ABR_CJM
1
_CJM
M
M
M
JM
0KLCR_CJM
0SQDR_CJM
1
SQDR_CJM
TT
)21:
_CJ
R_CJ
A
_CJ
_CJM
AR_CJM
)21:0(AR_CJM
)0(AR
)1(AR_CJM
)2(AR_CJM
)3(AR_CJM
4(AR_CJM
)
5(AR_CJM
)
)6(AR_CJM
)7(AR_CJ
)8(AR_CJ
)9(AR_CJ
01(AR_C
11(AR_CJM
n0KLCR_CJM
n0SQDR_CJM
n1SQDR_CJM
47R
45
3Q09-4
)0(AR_
)
1(AR_CJ
)2(AR
(AR_CJ
)
3
)4
(
)5(AR_CJ
)6(AR_CJ
)7(AR
)8(AR
9(AR_CJM
)
(
)0
1
(AR_CJ
)11
)21
(AR_C
)
)
)21(AR_CJM
0Q3
6
47R45
47R
47R
47R
47R36
18
27
27
3Q09-1
3Q13-4
3Q13-2
3Q11-2
3Q09-3
1
0Q7
-E6
E
-ESCA6152EDE
9K
2K
3K
W
L
8
7K
7L
L
2
0
3L
1
8M
0
3M
1
7M
2
2N
3
N
8
4
N
3
5
N
7
6
2P
7
8P
8
3P
9
2M
7P
R
2
1
8J
8K
7F
8E
7B
8A
47R18
47R45
1847R
2747R
4547R
3Q11-1
3Q09-2
3Q11-4
3Q13-1
3Q12-4
1
Q
7
2
1
1
6
81Q2
4
E1J9M9R1J1
A1
DDV
TDO
EKC
E
SC
SAR
SAC
AB
A
01
11
21
KC
S
QDL
QDU
S
S
SV
J3
P9J7A7H8B2
A3
E3
N1
47R36
3647R
3Q11-3
3Q12-3
V1+
0
u
0
V
u
7
VDDL
VSSDL
_
W
8
S
10Q
F
2
2
2
2
2
2
A9G9C1C3C7
Φ
MARDS
B8
2Q53 4u7
2Q54 100n
Q
2
1
22Q2
32Q2
42Q2
52Q
62
Q
72Q2
2Q2
8
92Q2
Q
03
1
Q2
3
2
3
Q
Q
33
3
Q2
4
Q2
53
63Q2
C9E9G1G3G7
QDDV
QSSV
E7
D2
D8
1# RDD
100n2Q55
1
1
1
1
1
1
1
1
F2
01
01
0
0
0
01
0
01
0
F8
2Q56 100n
0
n
n0
n0
n0
n001
n001
001
n
0
n
n00
n0
n0
n00
n
00
n001
n
0
n0
100n2Q57
2Q58 100n
D
Q
H2
10-11
0198765
47R
47R3
47R
47R
47R
47R
27
18
3647R
3Q13-3
3Q12-1
3Q10
E
)0
(
AR
)1(AR_
)2(AR
)3
(
A
)4(AR_
5(AR_
)
)6(AR_
)
7(AR
)8(AR_
9
(
)
AR_
)
01(AR_
)11(
AR
2
)
1(AR
0
Q
7
3
6
18
45
2747R
3Q14-4
3Q14-3
3Q14-1
3Q14-2
3Q12-2
Q
7
SCA6152ED
K
K
K
8
L
K
L
7
2
L
L
3
M
M
M
N
N
N
N
P
P
P
M
P
R
001
R
8J
K
F
7
B
A
2
0
2
A1E1J9M9R1J1A9
E-E6-E
9
TDO
2
EKC
3
W
E
S
C
7
SAR
SAC
0
B
A
1
8
0
3
1
7
2
2
3
8
4
3
5
7
6
A
2
7
8
8
3
9
2
01
7
11
2
1
2
K
C
8
L
8E
SQD
7
SQD
U
8
A3
E3
91Q2
02Q
D
D
V
J3
N1
1+
F
1
u00
6
1
V
7u4
VDDL
Φ
VSSDL
P9J7A7H8B2
WS_8V
2
0Q
Q
3
7
2
8
Q2
3
1
9
2
Q
3
1
0
2
Q
4
4
Q2
1
24Q2
1
3
2
Q
4
1
44Q2
54Q2
1
4
Q
6
2
Q
74
2
84Q2
1
9
2
4
Q
1
5
Q2
0
1
Q2
15
25Q2
C1C3C7C9E9G1G3
Q
DDV
MARDS
VSSV
QSS
F2
B8
E7
D2
D8
001
n
n00
n00
n
01
0
0
01
n
n00
n00
n
01
0
n
00
001
n
n
001
n00
n00
0
n
0
n
01
0
n
001
G9
G7
A
2
N
E
2
N
L
1
N
N
C
3R
N
R
7
N
8R
N
G
8
0
G
2
1
7H
2
H
3
3
1H
4
9H
5
F
1
6
9F
7
D
Q
C
8
8
2C
9
7D
0
1
D
3
1
1
D
1
1
2
9D
1
3
B
1
4
1
9
B
5
1
3
B
MDU
3F
M
D
L
2J
ERV
F
F8
H2
100n2Q63
100n2Q65
100n
100n2Q61
100n2Q59
2Q62 100n
2Q64 100n
2Q60
M
ABR_CJ
1
0ABR_CJM
n
EWR_CJ
M
EKCR_CJM
SACR_CJM
n
nSARR_CJ
M
nSCR_CJM
TDOR_CJM
D
T
R_CJ
O
M
A
2
C
N
E
2
N
C
L
1
C
N
N
R
C
3
C
N
7R
C
N
8
R
C
N
M
(
_CJ
Q
8
G
0
2
G
1
7H
2
3H
3
1H
4
9H
5
1F
6
9F
7
8C
8
2C
9
7D
0
1
3
D
11
1D
21
9D
1
3
1B
4
1
9B
1
5
3B
MDU
3
F
MDL
2J
FERV
DR
)0(QDR_CJM
M
)1(QDR_CJ
2(QDR_CJM
)
)3(Q
M
DR_CJ
R
)4(Q
_CJ
D
M
(
5
R_CJ
)
QD
M
)6(QDR_CJ
M
R_CJ
)7(QD
M
R_CJ
)8(QD
M
)9(QDR_CJM
)
01(QDR_CJM
)11(QDR_CJM
)21(QDR_CJM
)
31(QDR_CJM
)
41(QDR_CJM
)51(QDR_CJM
DR_CJM
JM
_
CJM
KCR
E
_
CJM
nEWR
R_CJ
nSC
M
_
CJM
nSARR
_
SAC
CJM
n
R
M
0
R_CJ
B
1
0
:
3
1MQ
0MQDR_C
FERV_CJM
A
)
_
CJM
1ABR
0(AR_CJ
)21:
M
M
_
CJ
M
CJ
_
CJM
M
R_
CJ
M
CJ
CJM
CJ
M
_
CJM
M
CJ
M
CJ
M
CJ
_
CJM
M
_
CJ
1KLCR_CJM
n1KLCR_CJM
2SQDR_C
JM
n2S
QDR_CJM
3SQDR_CJM
n3SQDR_CJM
11
A
B
C
C
C
C
C
C
C
J
M
J
M
M
M
M
0(QDR
M
C
C
R_CJ
R_CJ
R_CJ
)13:
_CJ
(QDR_CJM
)61
)
71(QDR_CJM
(QDR_CJM
)81
)
91(QDR_
(QDR_CJM
)02
)12(QDR_CJM
)
22(QDR_
D
)32
(Q
D
42(Q
)
(QDR_CJM
)52
)
62(QDR_CJM
7
)
(QDR_CJM
2
(QDR_CJM
)82
(QDR_CJM
2
9
)
(QDR_CJM
)03
D
)13
(Q
3
CJM
MQDR_
MQDR_
2
CJM
FERV_CJM
D
E
F
2# RDD
1101987654321
PL9.0SCM11
Page 43
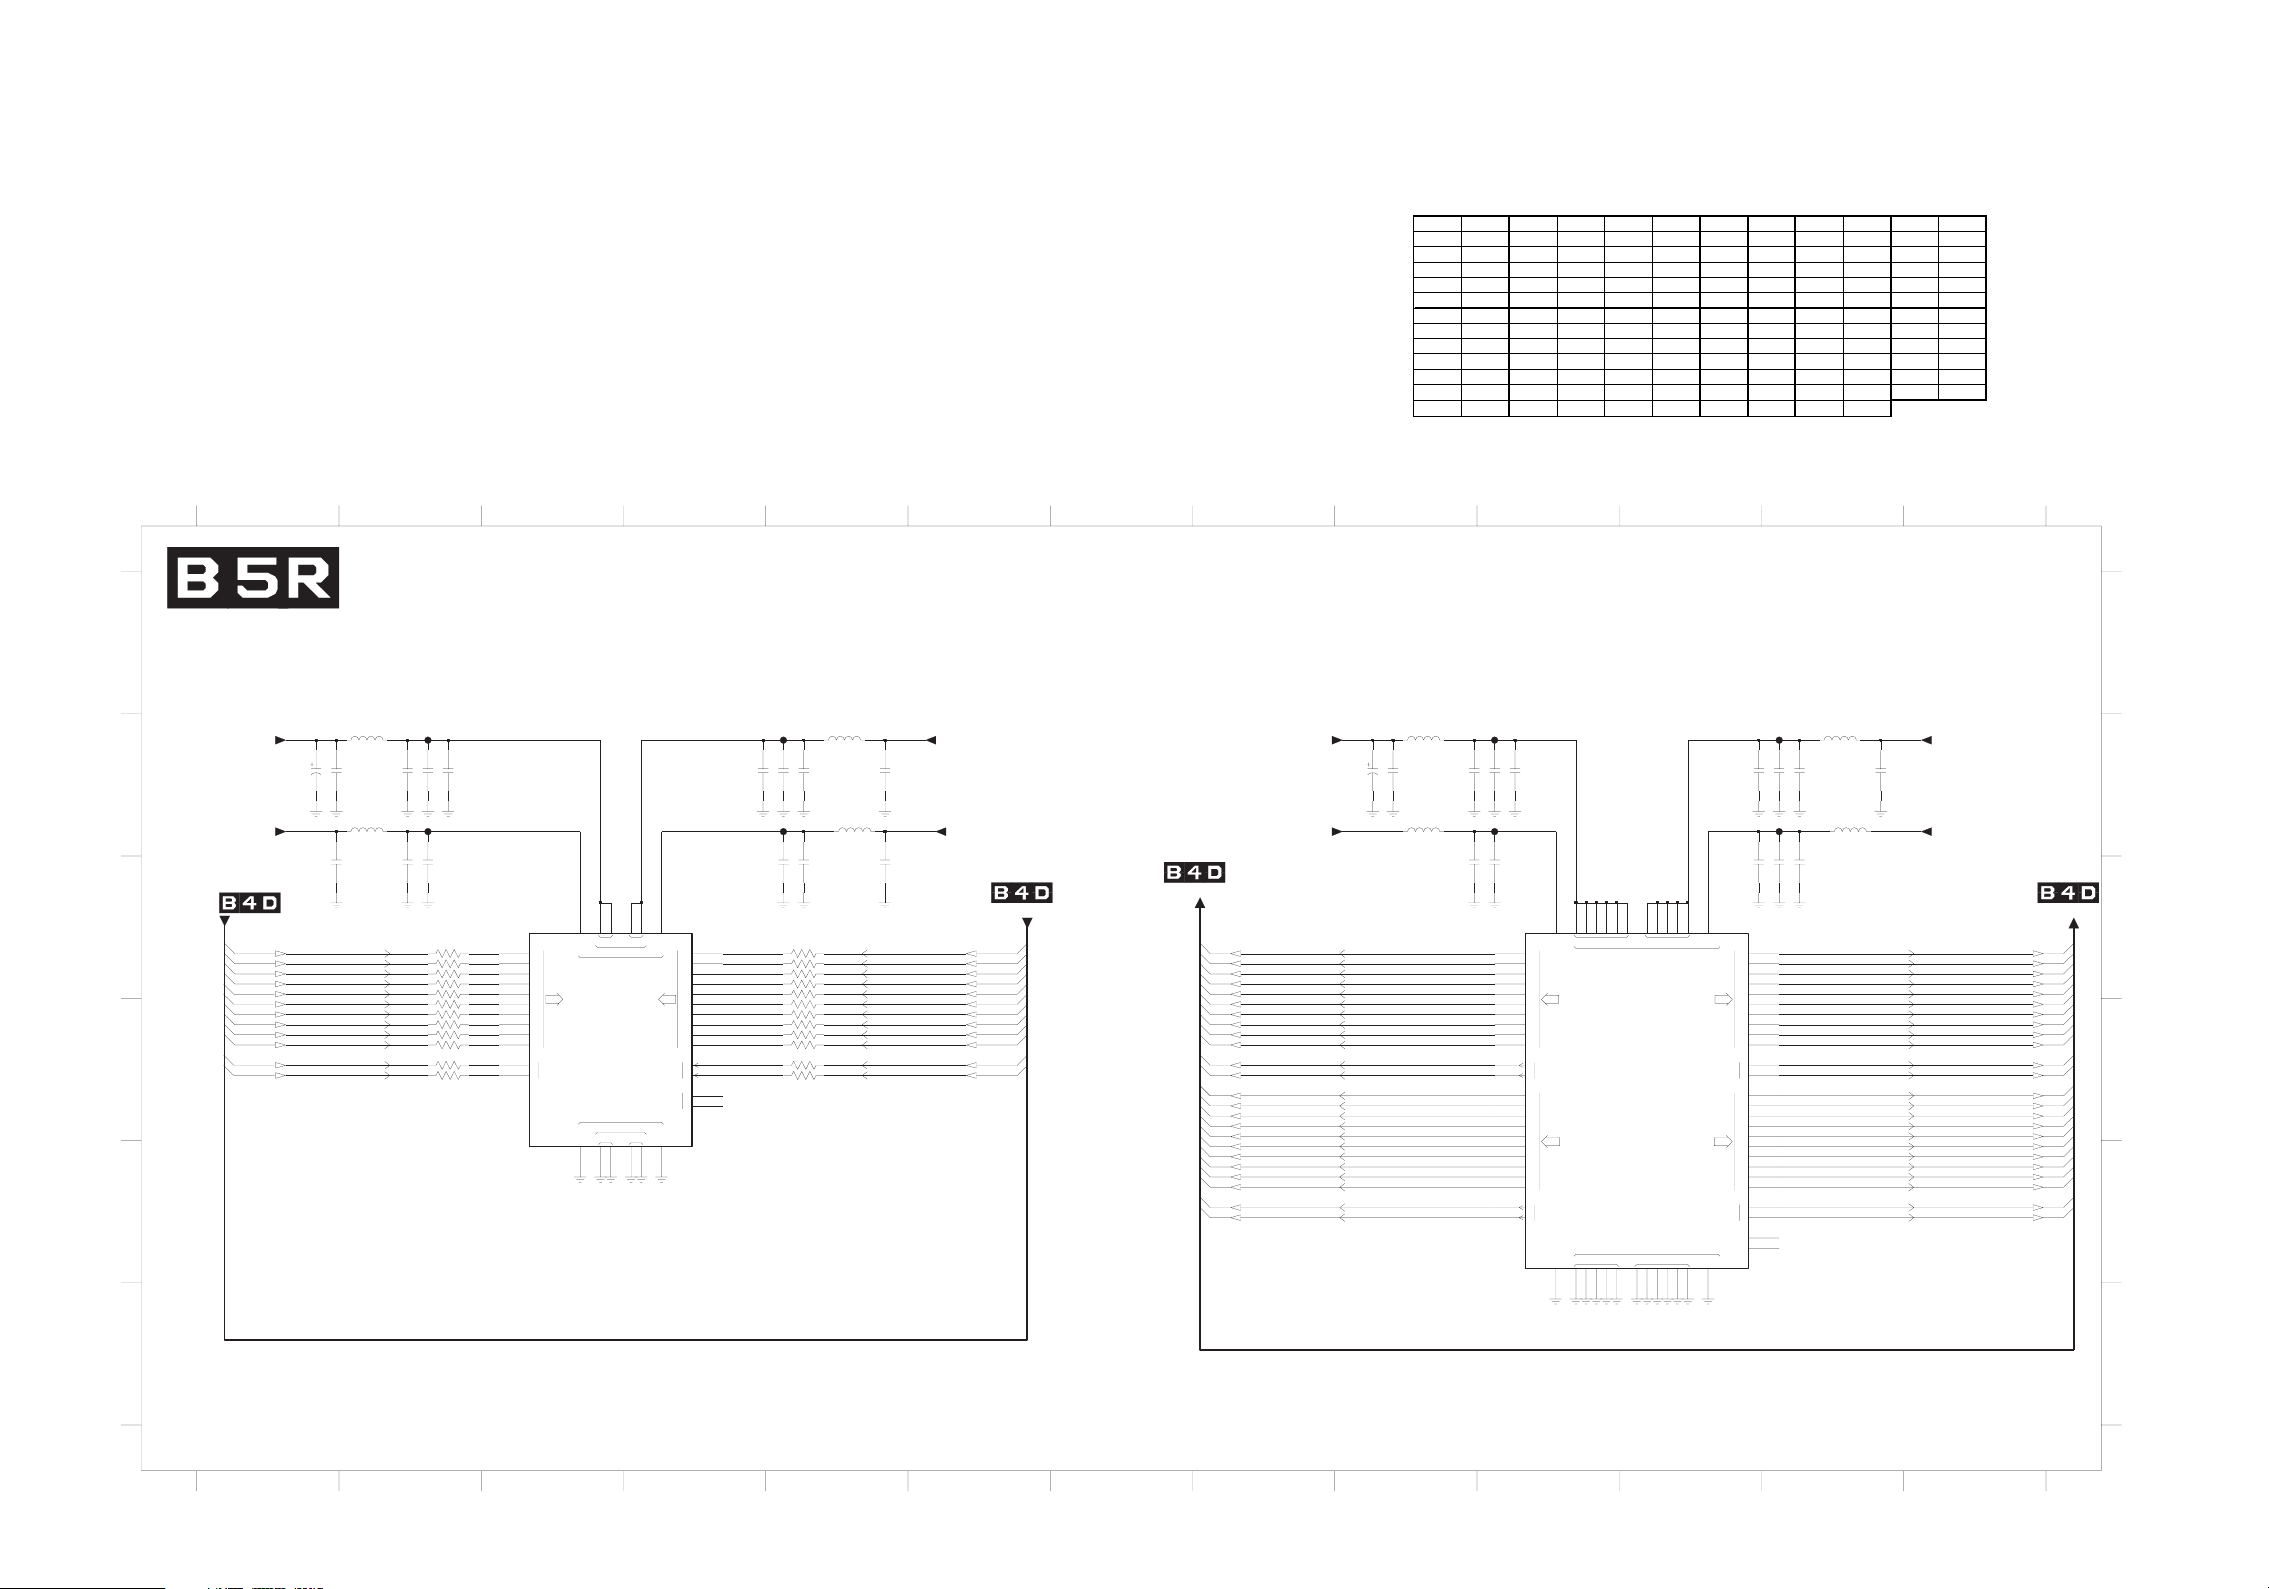
SSB 12/15 Schematic Diagram (MJC MT8280 - LVDS)
SSB 12/15 S chem atic Diagram Parts Loc ation Gui de
Ref No. Posit ion Ref No. Posit ion Ref No. Posit ion Ref No. Posit ion Ref No. Posit ion Ref No. Posit ion
2R01 B1 2R13 C5 2R25 C11 3R50-4 D2 3R53-4 D4 5R09 B1
2R02 B1 2R14 C5 2R26 C12 3R51-1 D2 3R54-1 D4 7P01-3 C10
2R03 B2 2R15 C5 2R27 C12 3R51-2 D2 3R54-2 D4 7P01-4 C3
2R04 B2 2R16 B 9 2R28 C9 3R51-3 D2 3R54-3 D4 FR01 B 2
2R05 B2 2R17 B 9 2R29 C10 3 R51-4 D2 3R54-4 D4 FR02 B5
2R06 B5 2R18 B 9 3R49-1 C2 3R52-1 C4 5R02 B5 FR03 B2
2R07 B4 2R19 B 10 3R49-2 C2 3R52-2 C4 5R03 B5 F R04 B 5
2R08 B5 2R20 B 10 3R49-3 C2 3R52-3 C4 5R04 B9 F R05 B10
2R09 B5 2R21 B 12 3R49-4 C2 3R52-4 C4 5R05 B9 F R06 B12
2R10 C1 2R22 B11 3R50-1 C2 3R53-1 D4 5R06 B 12 F R07 B12
2R11 C2 2R23 B12 3R50-2 D2 3R53-2 D4 5R07 B 12 F R08 B10
2R12 C2 2R24 B12 3R50-3 D2 3R53-3 C4 5R08 B 1
2 8
3
4
61
75
9
01
11
21
31
SDVL - 0828TM CJM
A
10RF
W
+
S_3V3
B
+
S_3V3
C
D
16V
2R01 10u
2R02 1u0
W
SDVL MORF
1u02R10
L
DVL
2oXT_SDVL
L
L
L
R0390R5
10u2R05
2R03 100n
2R04 10n
30RF
R0380R5
100n2R11
2R12 10u
4-10P7
828TM
Y8
Y14
Y15Y9Y10
0
n0oXT_SDVL
p0oXT_SDVL
n1oXT_SDVL
p1oXT_SDV
n2oXT_S
p
n3oXT_SDV
p3oXT_SDVL
n4oXT_SDVL
p4oXT_SDVL
nKLCoXT_SDV
pKLCoXT_SDV
1
1-94R3
2-94R3
3-94R3
R3
4-94
1
3
1-05R
2
2-05R3
1-15R3
R3
2-15
3
R3
3-15
4-15R3
3
3-05R3
R3
4-05
8AA
8
50R0
8BA
50R072
A
63
50R0
9A
50R054
9BA
50R0
01AA
8
7
A
50R0
01B
81
50R0
21AA
50R0
21BA
72
31AA
50R0
6
31BA
50R054
11AA
6
50R0
50R054
11BA
LLPNE
GKLC
N0
P0
N
1
P1
N2
OR
P2
N3
P3
N4
P4
N
KLCOR
P
LLPNEGKLC
W8
Y12
Y11
LLPIV
OXREXR
SDVL
33DDV
A
Φ
XR
_SDVL
33SSVA
SDVL
OXREXR
IV
W9
Y13
W10
W11
41AA
N0
A
41B
P0
51AA
N1
51BA
P1
61AA
N2
61BA
ER
P2
81AA
N3
A
81B
P3
91AA
N4
A
91B
P4
71AA
N
A
71B
KLCER
P
7AA
N
7BA
KC_NEGKLC
P
LLP
E
20RF
10n2R08
100n2R07
2R09 10u2R15 10u
40RF
2R14 100n
3
3-25R3
4
4-25R3
1-25R3
R3
2-25
3
3
3-35R
4
4-35R3
3-45R3
R3
4-45
1
R3
1-45
2
2-45R3
1
1-35R3
R3
2-35
CN
CN
R
0
320R5
1u02R06
R0330R5
2R13 1u0
6
50R0
5
50R0
81
50R0
72
50R0
50
R06
5
50R0
50R063
50R0
54
8
50R0
7
50R0
50R0
8
50R0
72
L
L
L
WS_3V
3+
3
WS_3V
+
M
S
ORF
VL
D
D
V
ORF
S
L M
n0eXT_SDVL
p0eXT_SDVL
1eXT_SDVL
n
p1eXT_SDVL
n2eXT_SDVL
p
2eXT_SDVL
3eXT_SDVL
n
p3eXT_SDVL
n4eXT_SDV
p4eXT_SDV
KLCeXT_SDVL
n
pKLCeXT_SDV
VL
VL
VL
VL
VL
VL
VL
VL
VL
VL
L
S_3V3+
W
2V1+
X
_A_SDVL
e
T
n0
X
p
e
_A_SD
0
T
e
_A_SD
n1
T
X
e
p1
_A_SD
T
X
e
n2
_A_SD
T
X
e
p2
_A_SD
T
X
_A_SDVL
n3eXT
_A_SDVL
p3eXT
n
_A_SDVL
4eXT
X
p
_A_SD
e
T
4
K
e
_
C
T
L
X
A_SDVL
n
KLCe
_
T
X
p
A_SDVL
_A_SDVL
n0oXT
X
_A_SD
o
T
p0
o
_
n1
T
X
A_SDVL
_A_SDVL
p1oXT
X
o
n2
_A_SDVL
T
X
p
_A_SD
o
T
2
_A_SDVL
n3oXT
_A_SDVL
p3oXT
X
o
_A_SD
n4
T
X
p4o
_A_SD
T
_A_SDV
nKLCoXT
X
p
KLCo
_A_SDVL
T
50R5 R
16V
10u
2R16
2R17 1u0
R
4
5
0
0RF
5
R03
10u2R20
2R18 100n
2R19 10n
8
RF
0
R
0
3
1u02R29
100n2R28
7
3-10P
M
D19C9C10
C11
C12
AVDD12
AVSS12
C15
C13
AXT
L
XT
A
C16
C17
C18
C19
0828T
51B
0
N
51A
P
0
61B
N
1
61A
1
P
71B
2
N
EA
71A
P
2
9
1
B
3
N
91A
P
3
02B
4
N
A
2
0
4
P
8
1
B
N
8
1
A
KCEA
P
B
9
0
N
A
9
0
P
B
1
0
1
N
0
1
A
P
1
11B
N
2
11A
OA
2
P
31B
3
N
31A
P
3
41B
4
N
41A
4
P
21B
N
2
1
A
K
A
CO
P
C20
G20
H20
C14
D20
Φ
V
D
J20
K20
A22
E20
F20
V
LLP
T
X
B
3
3DDVA
XT_S
E
B
B
O
3SSVA
3
B
XT
V
LLP
L20
P20
B22
N20
M20
6
0R
F
R
5
10u2R24
2R23 10n
2R22 100n
7
0RF
100n2R26
2R25 100n
2R27 10u
1
2J
N
0
2
2J
P
0
12K
1
N
22K
1
P
12L
N
2
22L
P
2
2N
1
3
N
N
2
2
3
P
P
2
1
N
4
22P
4
P
M
12
N
M
22
KCEB
P
2C
1
0
N
2
2C
0
P
1
2D
1
N
2D
2
P
1
12E
N
2
E
2
2
2
P
1
G
2
3
N
G
22
3
P
H
1
2
4
N
22H
P
4
2
1
F
N
2F
2
CEB
K
P
B
2
1
C
2NT
N
1
2
A
P
2
C
T
N
0
6
3
0
2R21 1u0
7
0R
5
R0
3
S_3V3+
W
WS_3V3+
VL
VL
VL
VL
L
VL
VL
VL
n0eXT_B_SD
p0eXT_B_SD
n1eXT_B_SDVL
p1eXT_B_SDVL
n2eXT_B_SDVL
p2eXT_B_SDVL
n3eXT
_B_SDVL
p3eXT_
B_SDVL
n4eXT_B_SDVL
p4eXT_B_SDVL
X
T
nKLC
_B_SD
e
X
pKLC
T
e
_B_SD
n0oXT_B_SDVL
p0oXT_B_SDVL
n1oXT_B_SDV
p1oXT_
B_SDVL
n2oXT_B_SD
p2oXT_B_SDVL
n3oXT_B_SDVL
p3oXT_B_SD
n4oXT
_B_SDVL
p4oXT_
B_SDVL
nKLCo
_B_SD
T
X
pKLCoXT_B_SDVL
A
B
DVL
ORF
M
S
C
D
E
F
1
2
3
F
4
5
6 3121
7
98
01
11
10-12
PL9.0SCM12
Page 44
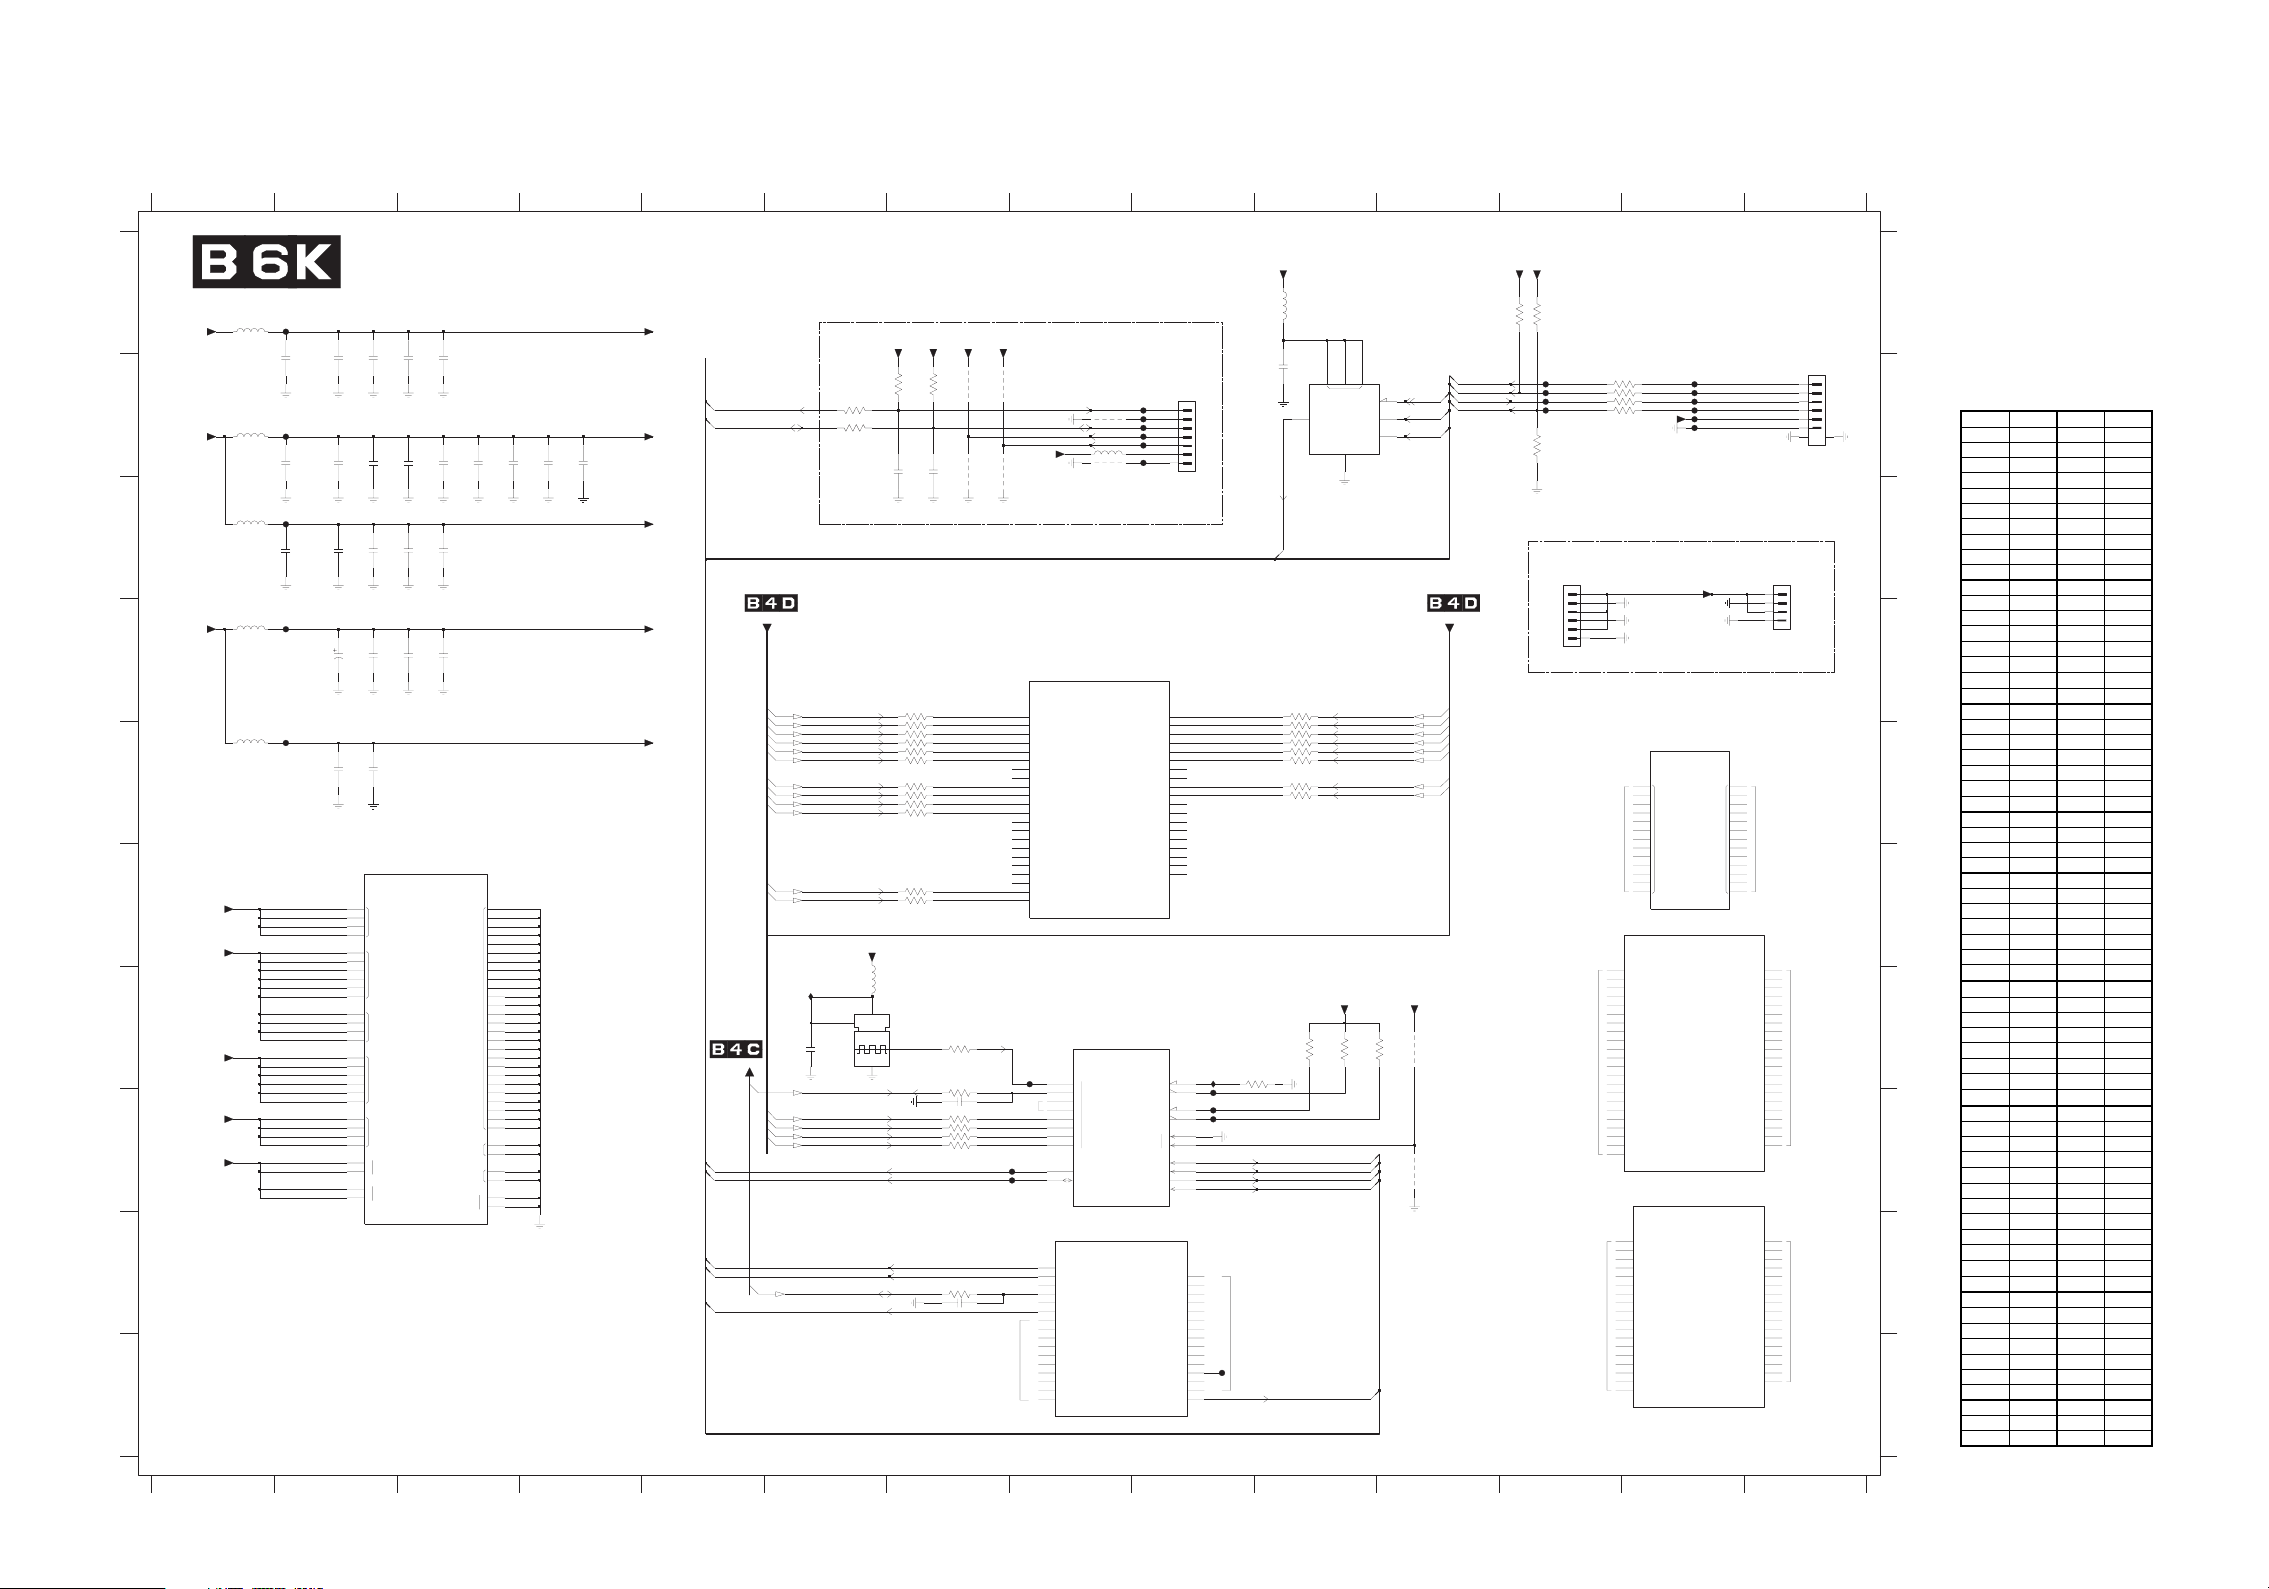
SSB 13/15 Schematic Diagram (FPGA - AMBILIGHT)
SSB 13/15 S chem atic Diagram
Parts Location Guide
Ref No. Posit ion Ref No. Pos it ion
1K01 B 9 3K 32 D10
1K02 B 14 3K33 E 10
1K03 C12 3K 34 E 10
1K04 C14 3K 35 E 10
1K05 G6 3K 36 E10
2K01 B 2 3K 37 E10
2K02 A 2 3K 38 E10
2K03 A 2 3K 39 E10
2K04 A 3 3K 40 H7
2K05 A 3 3K 41 H7
2K06 B 2 3K 42 H7
2K07 B 2 3K 43 H7
2K08 B 2 4K 01 B7
2K09 B 3 4K 02 B7
2K10 B 3 4K 03 B7
2K11 B 3 4K 04 B7
2K12 B 4 4K 05 B8
2K13 B 4 4K 06 B8
2K14 B 4 4K 31 G 11
2K15 D3 4K32 H11
2K17 C2 5K01 A1
2K18 C2 5K02 B1
2K19 C2 5K03 C1
2K20 C3 5K04 D1
2K21 C3 5K05 E1
2K22 D2 5K07 B8
2K23 D2 5K08 A10
2K24 D3 5K09 G7
2K25 E 2 7K01-1 G8
2K26 E 2 7K01-2 I8
2K27 B 6 7K01-3 F13
2K28 B 7 7K01-4 H13
2K29 B 10 7K01-5 D8
2K30 H7 7K01-6 F3
2K31 I 7 7K01-7 E13
2K32 G6 7K 02 B10
3K01 B 6 FK 01 A 2
3K02 B 6 FK 02 B 2
3K03 B 6 FK 03 C2
3K04 B 7 FK 04 D2
3K05 A 12 FK05 E2
3K06 A 12 FK06 B9
3K07 B 12 FK07 B9
3K08 B 12 FK08 B9
3K09 B 12 FK09 B9
3K10 B 12 FK10 B9
3K11 B 12 FK11 B9
3K12 G7 FK 12 B13
3K13 H7 FK13 B 13
3K14 I 7 FK14 B13
3K16 G10 FK15 B 13
3K17 G10 FK16 B 13
3K18 G11 FK17 B 13
3K19 G9 FK 18 G8
3K20 D7 FK19 B 12
3K21 E 7 FK 20 B12
3K22 E 7 FK 21 B12
3K23 E 7 FK 22 B12
3K24 E 7 FK 23 H9
3K25 E 7 FK 24 H9
3K26 E 7 FK 25 H8
3K27 E 7 FK 26 H8
3K28 E 7 FK 27 H9
3K29 E 7 FK 28 J9
3K30 F7 IK 01 G6
3K31 F7 IK 02 G9
A
B
C
D
E
+
F
G
H
I
J
21
ILIBMA - AGPF
THG
D THGILIBMA
P
G
F_3V3+
10K
F
10K
5
WS_3V3+
R03
20KF
5
20K
5V2+
R03
F
30K
30K
5
R03
7u4
40K5
2V1+
40KF
03
R
50K5
50KF
R03
20K2
30K
10K2
0u1
60K2
71K2
2
1
n00
80K2
70K2
1
001
n00
n
91K2
81K2
n001
1
n00
22K2
2
32K
u22
n001
V3.6
50K2
40K2
n001n001
n00
1
2
90K
2
n001
02K2
1
n00
42K2
1
n00
11K2
01K2
n0017u4
n001
12K
2
n001
51K2
n001
31K2
21K2
1
n00
41K
n001
001
n
+
62K
2
2K2
5
n001
7u4
A
A
LCS_IBM
ADS_IB
A
M
t
+
uoAGPF_5V2
n
iAGPF_5V2+
+
AGPF_2V1
LLP_AGPF_2V1
SDVL MORF
L
L
6-10K7
N7C652F5C2PE
Φ
REWOP
A
AGPF_3V3
tuoAGPF_5V2+
niAGPF_5V2+
AGPF_2V1+
LLP_AGPF_2V1+
1B
3
G
1OICCV
3K
1R
51A
2A
01C
7C
2OICCV
01E
7E
6
1B
41
G
3OIC
CV
1K
4
61R
0
1M
7M
01P
7P
4OICCV
T
51
2
T
9
G
01H
7H
T
NICCV
7J
M
5
1
21E
LLP_ACCV
2
6L
1
11F
LLP_DCCV
2
1
61A
51B
2
B
8C
G
DN
9C
8E
9E
8
G
H
41
H
3
H
8
9H
41J
DNG
3J
8J
9J
9
K
8
M
9
M
8P
9P
DN
G
51R
2
R
1T
61
T
5L
5
N
1LLP_DNG
D
21
21F
2LLP_DNG
6
M
1
11E
G
LLP_ADN
2
HSALF MOR
F
L
0ATAD
D
KLC
ODSA
OSC
n
EVIRD OT
PF_3V3
G
+
30K3
7K4
01
R0
10K3
20K3
R
00
1
72K
2
2
0n
1
p1oXT_SDVL
3
n1oXT_SDVL
3
12K
p4oXT_SDVL
3
22K
n4oXT_SDVL
32K
3
3oXT_SDV
p
42K
3
n3oXT_SDVL
p2oXT_SDVL
3
n2oXT_SDVL
72K3
p
0oXT_SDV
n0oXT_SDVL
92K
3
p4oXT_A_SDVL
3
n4oXT_A_SDVL
K3
+
AGPF_3V3
90K5
10KI
2
u01
LCS
R03
50K1
D
1
4
23K
3
2
0M
72
pKLCoXT_A_SDVL
nKLCoXT_A_SDVL
pKL
CoXT_SDV
nKLCoXT_SDVL
ADS
A
ADS_IBM
SREV
I
R
+
P
G
F_3V3+
A
+
A
n1
V
S157OS
AGPF_3V3
40K3
7K4
RES
4K01
4K03
82K
0
3
3
3
3352K3
R3303K
R3313
3
3
4K04
4K02
R3302K
R3
R3
R33
R3
R
R3362K
R33
R3382K3
R33
21K3
R74
R22
31K
03K2
0n1
SER
04K3
R33
14K3
R33
24K3
R33
34K
R33
2241K3
R
13K2
SER
N
876543
9
1
0
A
F_3V3+
G
P
80K5
R
03
AGPF_3V3
92K2
01
n
10K
T
I
A
_LCS_
U
BM
O
_AD
A
S_IBM
S2I
1LES
_
2LES_S2I
WS_3V3+
50K
4
TUO
70K5
60K4
RES
1
1
K
60
F
2
70K
F
3
F
80K
4
90K
F
5
01K
F
R
03
6
7
F
11K
2
7-6445371
7
3
E
7
8
V
CC
SC
_
Φ
C
D
S
AD
D
AT
KLC
S
A
ID
D
N
G
4
DATA0
KNAB
TUPNI
K
0
5-
7
1
6
5
N
52F
7C
C2PE
Φ
4K
M
11
OI
11L
I
41T
4
1R
I
3
1T
31R
T
21
I
1R
2
I
P
21
I
1P
3
K
11
OI
01K
I
01R
01T
L
9
01L
11T
I
11R
9T
R
9
T
8
8R
N
C
52K
F
62KF
C
N
N
C
C
NAB
4
1M_
p
SDVL|1
3
n34SDVL|11L_O
p44SDVL|
41T_OI
|
n44SDV
41R_O
L
31
_OI
T
31
_OI
R
21T_O
|
21R_O
|
_OI
01K_O
|
0
|
R_OI
1
81KF
1
H
2
J
1J
61H
1H
5
51J
61J
1
F
4
H
3
C
4F
1
P
2
P
1
N
2
N
1L
2L
4K
5K
1
K
2K
1E
2E
3D
4D
I
p54SDVL|
I
n54SDVL|
O
I
L
p64SDV
I
L
L
L
I
I
I
I
O
n64SDV
p74SDVL|21P_O
4
7
I
n
DVL|31P
S
p84SDVL|11K_
OI
4
n
SDV
8
V
p94SD
4
9
DVL|01T_OI
n
S
0
5SDVL|9L_OI
I
p
0
I
n
SDVL|01L_OI
O
5
p15SDVL|11T_O
n15SDVL|11R_OI
p25SDVL|9T_OI
n25SDVL|9R_OI
p35SDVL|8T_OI
n35SDVL|8R_OI
E
Φ
OC
0
1
2
3
C
KL
4
5
6
7
0ATAD
KLCD
PE
Φ
NAB
ODSA|3C_OI
_OSC|4F_OI
p0SDVL|1P_O
n0SDVL|2P_O
1SDVL|1N_OI
p
n1SDVL|2N_OI
p2SDVL|1L_OI
n2SDVL|2L_OI
p3SDVL|4K_O
n3SDVL|5K_OI
n4SDVL|1K_O
p4SDVL|2K_OI
p5SDVL|
1E_OI
n5SDVL|2E_OI
p6SDVL|3D_OI
n6SDVL|4D_OI
T
7
4
7T_OI
5SDVL|
p
7R
4
7R_OI
5SDVL|
n
T
5
_
p55SDVL|5T
OI
_OI
OI
5R
_O
n55SDVL|5R
4T
D
|
p65S
L
T_O
V
4
4R
|
n65SDV
4R_OI
L
P
5
p75SDVL|5P_
4
P
5
L
P
n
SDV
7
4
|
_
3
T
L
p85SDV
3T_OI
|
3R
R_O
n85SDVL|3
9
N
95SDVL|9N_
p
0
1N
S
5
1N
n
DVL|
9
0
7
L
6
p
SDVL|7L_OI
0
8
L
V
8
L
L
n06SD
|
_
11N
4
BFERV|11N_O
0N
N
8
1N4
|
BFER
8N_
V
21L
21L_OI
11P
11P_
O
I
T
6
6T_
OI
1-10K7
N7C652F5C2P
LORTN
C
LES
M
2-10K7
N7C652F5C2
1K
I
I
20KI
5G2H
C
E
1M
3
SUTATS
GIFNO
ENOD_FNOC
0
1
KCT
SMT
ODT
IDT
_OI
72KF
J
5
32KF
L
31
42KF
31J
21K
F
2
1G
2
G
H
5
3E
p7SDVL|3E_OI
4E
n7SDVL|4E_OI
5D
p8SDVL|5D_OI
5E
n8SDVL|5E_OI
1
C
p9SDVL|1C_OI
2C
n9SDVL|2C_OI
4L
pTUO_1LLP|4L_OI
4M
C
N
nTUO_1LLP|4M_O
F
3
0N1BFERV|3F_O
4J
1N1BFERV|4J_OI
3
L
3L_OI
82KF
1M
1M_OI
2M
2M_OI
3M
3M_OI
3P
3P
R
K3
3323
3333
R
K
3
R3
43K3
3
R3
353K3
R3
63K3
3
L
R3
73K3
3
3
R
83K
3
3
93K3
VL
3
3
R
GP
F
A
_3V3+
71K
61K
3
3
K0
1
K0
1
K0191K3
AGPF_KCT
AGPF_SMT
AGPF_ODT
AGPF_IDT
LCS_IBMA
11
RES
3K06
RES
AGPF_3V3+
3
22K
F
91KF
02K
F
11K3
12K
F
+
AGPF_3V3
1K03K05
20K
P
8IS4SC
1
OSC
n
6
K
LC
D
5
ODS
A
A
F_S
G
MT
P
AGPF_IDT
P
G
OD
A
F_
T
T
AGP
F_K
C
3121
TF
OS
R
00180K
0101K3
01
KF
21
AGPF
31K
F
R00190K3
R0
R0
AGPF_3V3+
AGPF
4
1
KF
GP
F
F
51K
61K
F
71KF
3K07
O
RF
M
U
P
S
30K1
1
2
S
L M
D
ORF
V
p
3oX
T_A_SDVL
n
T_A_SDVL
3oX
p
T_A_SDVL
2oX
n
2oX
T_A_SDVL
o
p
XT_A_SDVL
1
o
n
XT_A_SDV
1
T_A_SDVL
p
0oX
0oXT_A_SD
n
3
4
5
6
AGPF_3V3+
81K3
13K4
1
K0
4
23K
ER
S
+
V
_
2
DNG
4
V42_DNG
2
V
_
G
4
N
D
6-
6445371
8
B
51C
1
6
C
1
D
2
D
D
7
D
9
CN
C
N
1E
3
5
1E
1F
3
4
1
F
5F
G
4
4C
V
4C
L
_OI
|
C
5
O
I
G
7
6
G
OI
F
9
_
1
O
SDVL|9F
I
01F
L
I
01F_O
|
E
6
SDVL|6E_
O
I
F
6
O
I
3A
I
O
B
3
N
C
A
4
_
I
1SDVL|4A
O
4B
|
_OI
SDV
4
1
L
B
5A
V
|5A_OI
L
5
B
V
5
|
_OI
L
B
C
6
OI
SDVL|6C_
D
6
_OI
D
6A
|
_OI
6
L
A
6
B
F
8
V
8F_
L
OI
|
7F
V
7F_
L
OI
|
7
B
I
O
SDVL|7B_
A
7
_
|
D
O
A
I
L
7
V
3
1D
_
31D
I
O
4
1C
_OI
6
1
D
D
I
O
_
51D
|
1D_OI
L
5
V
3
1G
_OI
G
2
1
L
1
I
|
G_O
V
2
11H
L|11H_
V
OI
11J
1
V
I
|
J_O
1
L
1F
6
CN
F
I
O
_
51F
5
1G
_OI
6
1G
O
1
_
I
G
1J
2
I
21H
|
L
1H_
2
OI
5
1
K
I
61K
L|61K_OI
V
1L
6
O
V
6
_
L
1
I
|
L
5
1L
V
5
_
O
|
L
L
1
I
GILIBMA
T
OT USP
H
TL
NO
OB_V42
-
V
D
42_
NG
V42_DNG
7
7-10K
C652
7
N
F5C2PE
Φ
C
N
H
6
0
J
1
6J
31
K
6K
7K
K
8
C
N
N
3
4
N
N
6
N
7
6
P
6
R
1
7
3
0
-
K
2
5
N7C
F5C2PE
6
Φ
NAB
2K
|
_OI
p01SD
9
L
B
n01SDVL|5C_
L
1D
|
OI
V
0
_
p11SDVL|7G_OI
11D
_OI
1
1SDVL|6G_
n
L
1
V
0
_OI
D
|
A
p
2
_OI
n21SDV
p
3
1
_OI
|
1G_OI
L
n31SDVL|6F_
0
V
L
1
OI
|
A
V
2
_
p41SDVL|3A_
n41SDVL|3B_OI
_OI
p
5
5
n
p61SD
n61SD
7
p
1
n71SDVL|6
p
81SDV
n81SDVL|6B_OI
p91SD
n91SD
2
0
p
n
02S
E
SDVL|
D
SDVL|31G
SDVL|51G
DV
SD
SD
V
3
_O
|
A
L
1
I
V
3
L
1B_OI
|
L
I
21C_O
|
_OI
V
4
L
1B_O
|
I
_
O
I
_OI
I
I
I
1
7
4-
K
0
N
5
7C6
5C2
F
P
2
Φ
3KNAB
|
61M_O
p
L
I
9
2
|
_
51M
n92SDVL|41C
L
I
O
_
O
1N
I
p03SDVL|61
1N_OI
DVL|5
n03S
V
6
L
1P_O
|
I
p
1
3
_OI
n13SD
|
L
1N_OI
V
4
p23SD
1
I
L
3
O
N_
|
2
3SD
n
p33SDVL|61
DVL|
21M_OI
n33SDVL|51F_OI
|
I
p
BFER
41M_O
4
V
3
43SDVL|6
V
I
BFER
31H_O
n
|
L
4
_
P
1
O
p53SDVL|21J_O
L
|
E
I
n53S
L
|
L
41D_O
2
P
I
p63SDVL|51K_O
n
6
3
3
OI
I
7
p
n73SD
41
A
RA
UB
E
W
D
R
E
EGG
NIMMA
RGORP ROF
J_AGPF
T
_
GATJ_
GATJ_
_
T_
G
ATJ_A
AGPF
G
NEMPOLEVED ROF(
)T
20K1
SMT_GA
1
IDT
2
ODT
3
KC
4
5
6
7
8
B
)FL(TBT-4MS-HP-B6B
C
A
GILIBM
TH
40K1
1
2
3
4
4
537
6
1
4
4
-
D
E
C
N
F
B
9
1
p
SDV
2
A
9
1
n
SDVL|9A_OI
2
01D
p22SD
1D
1
n22SDVL|
01A
p32S
0
1
B
n32SDVL|01B
11
G
p
SDVL|11G
4
2
G
01
n
SD
4
2
21A
p52SD
1
2
B
n52SDVL|21B
N
C
31A
p62SD
B
1
3
2
6
n
SD
21C
p72
SDV
1C
3
n72SDVL|31C_OI
4
1
A
p82SDVL|41A
41B
n82SD
8D
1
2BFERV|8D
N
11C
0
N2BFERV|11C
A
8
8A_O
1
1
A
1
A_O
1
1
1B
1
B_O
1
1
M
6
p83SDV
1
M
5
n83SDV
6
1N
p93SDVL|6
5
1N
S
3
n
9
61P
p04SD
5
1
P
n04SDVL|51P
4
1
N
p14SD
3
1
N
4
n
SDV
1
C
N
M
21
p24S
N
1
2
2
4SDVL|21N_OI
n
M
1
4
1N3
31H
3
0N
41
E
TUO_2
p
4
1D
UO_
nT
E
61
61E_OI
1
L
4
41L_
4
P
1
1
P_O
4
G
H
I
J
4131211101987654321
10-13
PL9.0SCM13
Page 45
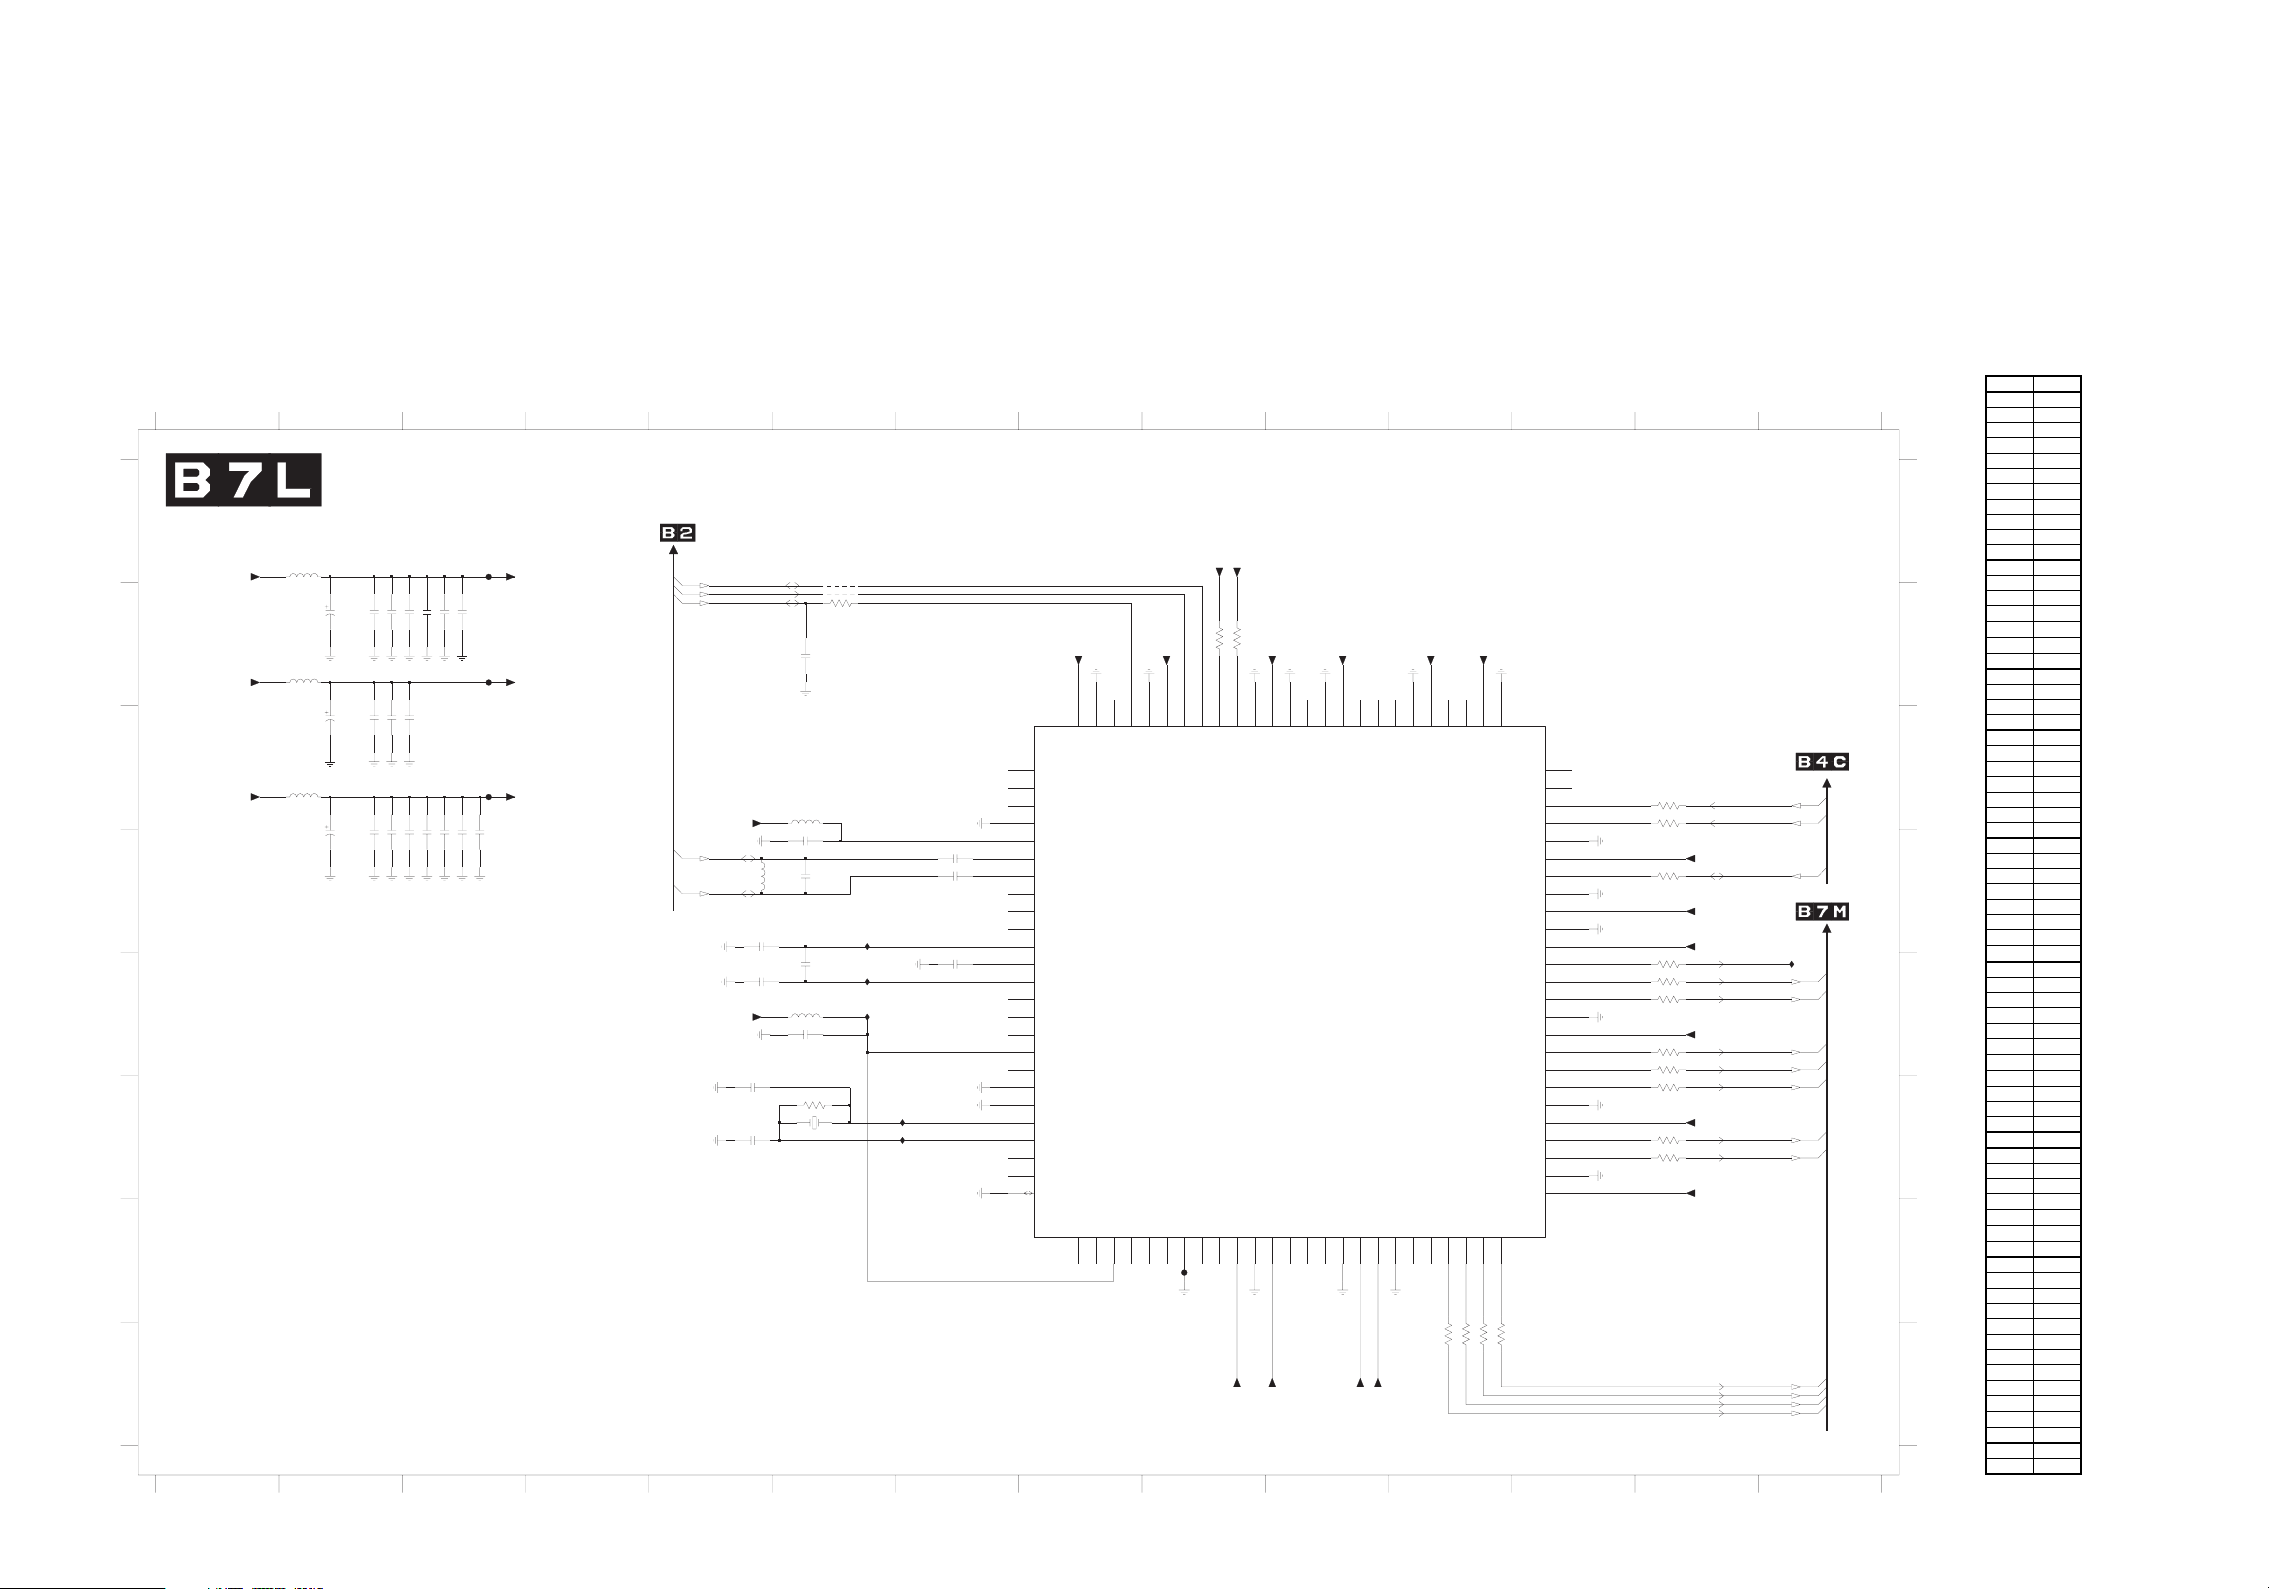
SSB 14/15 Schematic Diagram (HOTEL TV - CHANNEL DECODER)
SSB 14/15 S chem atic Diagram
Parts Location Guide
Ref No. P os it io n
1L01 F 6
2L01 B2
2L02 C2
2L03 C2
2L04 D2
2L05 D2
2L06 D3
2L07 D3
2L08 D3
2L09 D3
2L10 D3
2L11 D7
2L12 D5
2L13 E5
2L14 E6
2L15 E7
2L16 D6
2L17 F 5
2L18 F 5
2L19 B2
2L20 B2
2L21 B3
2L22 B3
2L23 B3
2L24 B3
2L25 C2
2L26 C2
2L27 C3
2L33 E6
2L34 B6
2L39 D6
2L40 D7
3L04 B6
3L05-1 E12
3L05-2 E12
3L05-3 E12
3L05-4 E12
3L06-1 E12
3L06-2 F12
3L06-3 F12
3L06-4 F12
3L07-1 H11
3L07-2 H11
3L07-3 H11
3L07-4 H11
3L09 F 6
3L10 C13
3L11 C13
3L12 D13
3L13 B9
3L14 B9
4L01 B6
4L02 B6
5L04 D6
5L05 C6
5L06 A2
5L07 B2
5L10 E6
5L11 C2
7L02 C8
FL01 A 3
FL02 B 3
FL03 C3
FL04 G9
IL01 D6
IL02 E6
IL03 E6
IL04 F7
IL05 F7
IL06 E14
A
B
C
D
E
F
G
H
1 9
2
3
5
6
REDOCED LENNAHC - VT LETOH
F/O
U
MOR
REN
T
T
WS_3V3
+
WS_3V3
+
2V1+
1
R0360L5
10u2L19
100n
100n2L21
100n
1
0L2
u001
61
V
5
u0170L
20
L2
u001
V61
2L22
2L20
2L27 100n
2L25 10u
2L26 100n
R0311L5
100n
100n2L06
100n2L04
30L
2
u001
V61
2L05 100n
2L07
2 93111
10LF
2L23 100n
2L24 100n
20LF
30LF
100n2L10
100n2L08
100n2L09
3 2101
DCD_3V3+
DCA_3V3+
DC_1V1
+
4
U
DS_REN
A
T
T
LCS_REN
U
ceDhC_CGA_FI
DCA_3V3+
L2
-NI
TAF
40L5
u01
SER
+NITAF
21L2
n001
3
1L2
n001
5
DCA_3V3+
171
p8
L2
1
p8181L2
5
1
4
0L
20L4
K0140L3
4n7
2L34
L7
20
B
M
L-
2115T
D
6
7
N
C
7
7
8
7
7
R0350L5
61
n001
93L2
n01
SER
10
LI
41
L2
u01
LI
20
30LI
0301L
R
33L2
n001
0
0L3
M19
5210L
0M
6
L2
04
11L2
51L2
I
40L
50
LI
7
9
8
0
8
1
n01
2
8
1
n0
8
3
CN
48
58
CN
68
78
n001
88
9
8
CN
09
N
C
19
N
C
29
9
3
CN
49
59
69
79
89
CN
99
CN
001
+1V1_CD
NC
4757
VDD1.6
RF_AGC
DGND1.6
.
D
3DD
A
3
V
CN
VN
A
SSV
8
8DDVA
-
NI
I
+N
1DD
V
A
N
C
SSVA
OBFER
T
TXEMCV
POTFER
7SSVA
.1DDVA
6
7DDVA
3DDVA
6DDVA
3SSVA
6SSVA
2LATX
X
1LAT
4SSVA
4DDVA
2SSV
A
NCNCAVDD2NCNCNCAVSS9NCNC
2
3
8
IF_AGC
4
DGMD3.3
5
+3V3_DCD
07172737
VDD3.3
6
10-14
6
69
8
TUNER_CLK
TUNER_DATA
7
8
4
0LF
+3V3_DCD
+3V3_DCD
1%
4K73L13
3L14 4K7
6
SA1
SA0
AVDD9
011
9
+3V3_ACD
1%
667
DGND1.6
AVSS5
+1V1_CD
64656
VDD1.6
DGND1.6
AVDD5NCNC
2111
+3V3_ACD
NC
263
ANT_TX
01
DGND3.3
AVDD3.3
CN
+3V3_DCD
NC
0616
5
VDD3.3
ANT_RX
DGND3.3
VDD3.3
61514131
+3V3_DCD
NC
NC
GPIO3
ANT_DET
VDD1.6
DGND1.6NCGPIO0
18
171
9
+1V1_CD
575859
DGND1.6
2
117
+1V1_CD
NC
GPIO2
VDD1.6
TSDATA7
22120
47R
47R27
18
3L07-1
3L07-2
+3V3_DCD
NC
5
3545556
NC
VDD3.3
TSDATA6
TSDATA5
3
2
4
2
47R
36
3L07-3
152
DGND3.3
CN
OIPG
1
TESER
KLC_
SO
T
H
GD
6.1DN
1DD
6.
V
A
AT
H
D_TSO
G
3.3DN
D
.
3DD
3
V
GD
6.1DN
6.
1DD
V
RREST
AVST
L
L
K
ST
C
3DN
.
GD
3
3.
V
3DD
CNYSST
TADST
A
0
1ATADST
6.
GD
1DN
6.1DD
V
TADST
A
2
3ATADST
.
D
3DN
3
G
3.3DD
V
TSDATA4
2
5
47R45
3L07-4
2148
31
41
A
B
MOR
HSALF
5
0
94
4
8
4
7
6
4
4
5
4
4
4
3
2
4
4
1
0
4
9
3
3
3
3
3
3
3
3
3
3
2
2
2
2
L3
8
L3
7
3
6
5
4
3
3
L
2
3
1
0
9
3
8
7
6
R0
L3
0101
3
R2211L
V1
+
DC_1
R22
2
L3
1
V
1+
DC_1
8
74
1
R
1-50
2
7
4
R7
2
-50
74
R
6
3
-50L
3
CD_3
+
V3
4
7
5
R
4
4-50L3
1-60
2
2-60L
3
-60L
3
4
4-60L3
T
81
4
R7
T
R74
7
V1
DC_1
+
T
R74
6
T
R745
+
F
C
E
T
HC
SER_CED
S
LC
S
AD
DIO
R
T
MOI
O
DCD_3V3+
T
T
T
P
R
E_EF
R
_NU
60
LI
D
LAV_EF
I
_NU
_
_NU
KLC
F
E
D
E
D
P
E
OS_
_NUT
F
)
0
TAD_EF_NU
(
A
A
)1(
A
E
T
_
_NU
D
F
)2(ATA
E
_
_NU
D
F
)
D
F
3(AT
_
_NU
A
E
DCD_3V3
F
G
A
)4(
T
TAD_EF_NU
)5(ATA
E
T
_
_NU
D
F
TAD_EF_NU
)6(
T
A
TAD_EF_
)7(
T
A
NU
H
41
PL9.0SCM14
Page 46
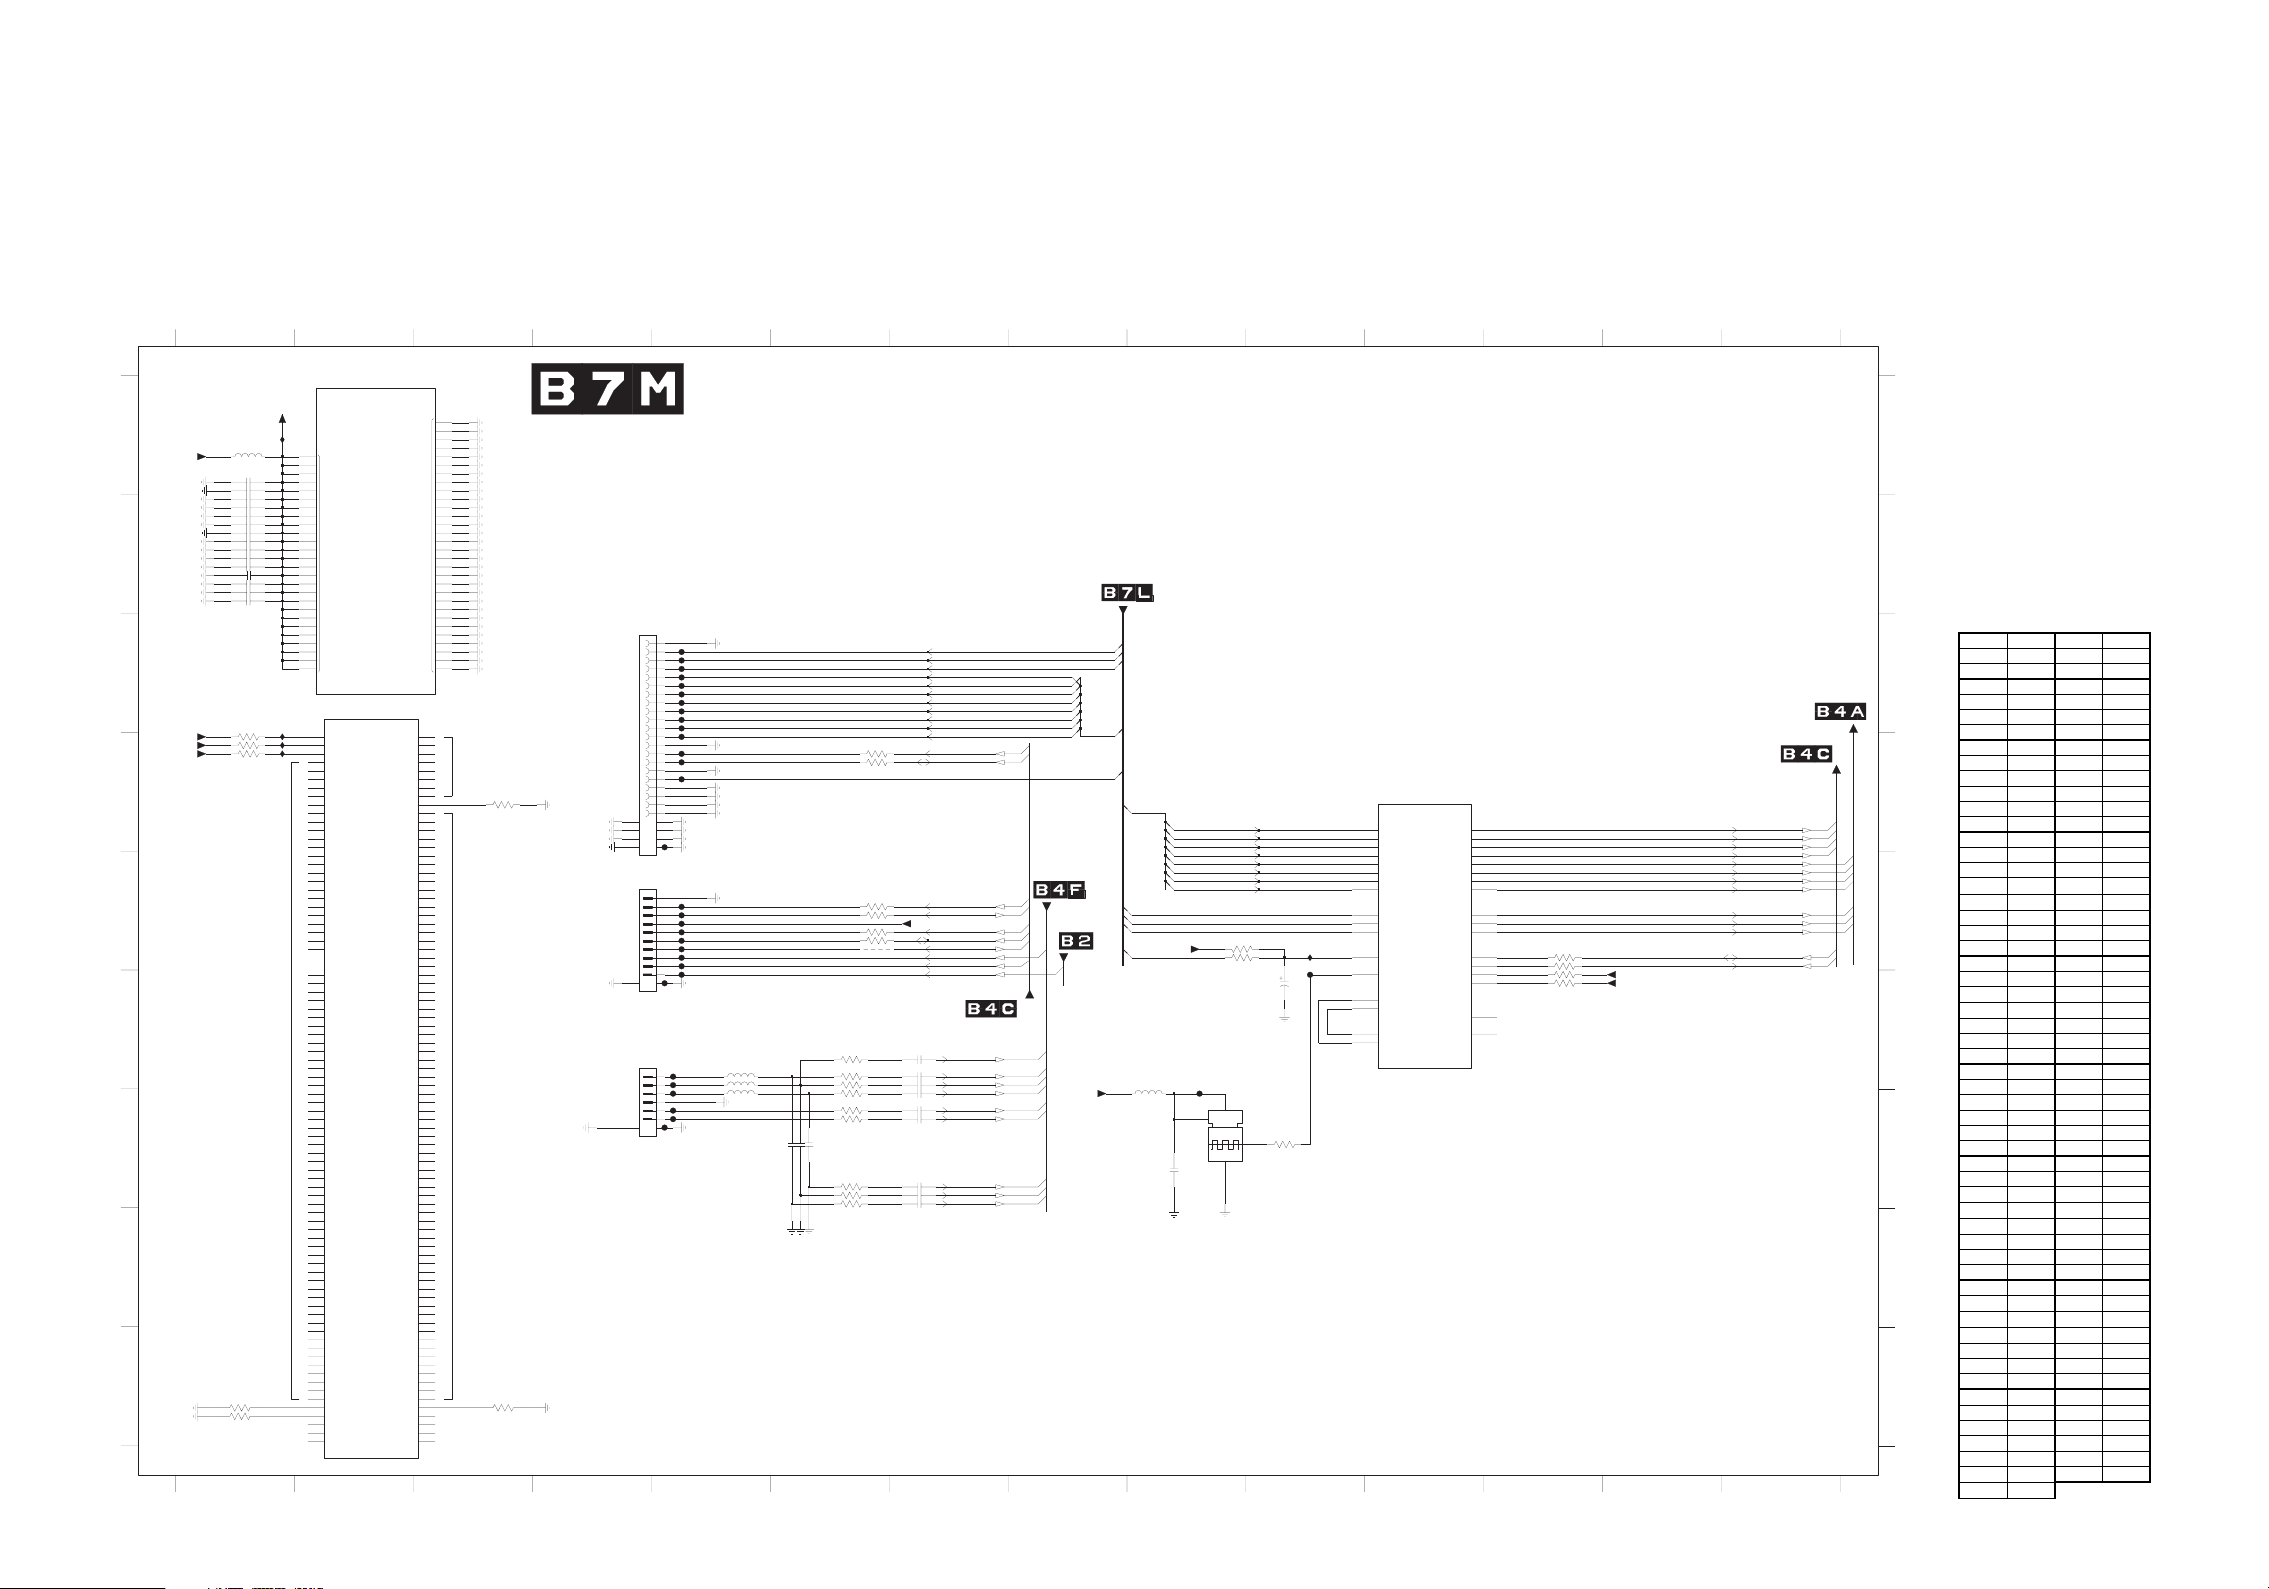
SSB 15/15 Schematic Diagram (HOTEL TV - PROIDIOM)
SSB 15/15 S chem atic Diagram
Parts Location Guide
Ref No. Posit ion Ref No. Pos it ion
1M01 C4 3M27 G6
1M02 E4 3M28 G6
1M03 G9 3M29 G6
1M04 F4 3M30 F6
2M01 A1 3M31 G6
2M02 A1 3M32 G6
2M03 B1 3M33 G6
2M04 B1 4M01 E6
2M05 B1 5M01 A1
2M06 B1 5M02 G8
2M07 B1 5M03 F5
2M08 B1 5M04 F5
2M09 B1 5M05 G5
2M10 B1 7M01-1 D11
2M11 B1 7M01-2 A 2
2M12 B1 7M01-3 C2
2M13 B1 FM01 D5
2M14 B1 FM02 C5
2M15 B1 FM03 C5
2M16 G9 FM04 C5
2M17 F7 FM05 C5
2M18 F7 FM06 C5
2M19 G7 FM07 C5
2M20 G7 FM08 C5
2M21 G7 FM09 C5
2M22 F7 FM10 C5
2M23 G6 FM11 C5
2M24 G6 FM13 D5
2M25 G6 FM14 D5
2M26 G7 FM15 D5
2M27 G7 FM16 E 5
2M28 G7 FM17 E 5
2M29 F10 FM18 E 5
3M01 D1 FM 19 E5
3M02 D1 FM 20 E5
3M03 D1 FM 21 E5
3M04 D3 FM 22 E5
3M05 I1 FM 23 E5
3M06 I1 FM 24 E5
3M07 I3 FM 25 F5
3M08 D6 FM 26 F 5
3M09 D6 FM 27 F 5
3M10 G10 FM 28 F 5
3M15 E12 FM 29 G5
3M16 E12 FM 30 G5
3M17 F12 FM31 G 5
3M18 F12 FM32 G 5
3M19 E9 FM33 G 9
3M20 E9 FM34 F 10
3M21 E6 IM01 A 1
3M22 E6 I M02 C1
3M23 E6 I M03 D1
3M24 E6 I M04 D1
3M25 F6 IM05 E10
3M26 F6
A
WS_3V
3+
B
C
P_3V3+
P_3V3+
D
E
F
G
H
I
14
1
0MI
R0310M5
01
0M2
u
1
2
2
2
2
3
I
IP_3V3+
I
n00120M
13
n00
0M2
0M2
n0014
n
5
001
0M2
n00160M2
70M2
n001
n00180M
n001
90M2
n00101M
n00111M
n00121M2
n001
1M2
3
n00
41M2
1
n001
51M2
K0110M
K
20M3
01
I
K0130M3
N
C
K0150M3
K0160M3
2
2
-10M
7
2F5C2PE
N7C65
Φ
IP_3V3+
3
A
7
A
01A
41A
1
C
61C
7
F
01F
3
6G
8
G
01G
7H
9H
8J
1J
0
01L
61P
3T
T
41T
20MI
1L
2
30MI
31L
40M
4
1L
1L
6
1M
2M
M
3
M
4
5
M
6M
7M
8
M
9M
M
01
11M
M
21
31M
41
M
51
M
M
61
11N
21N
31N
N
41
51N
61N
31R
51T
31T
11T
9T
8
T
T
6
4T
2
T
61R
51R
21R
R
01
7R
6R
5R
R
4
R
2
1R
51P
41P
31P
4P
3P
2P
01N
N
9
N
8
7N
6N
5N
4N
3N
2N
1N
1L
5
4L
3
L
2L
1L
61K
51K
41K
31K
21K
5K
4K
3K
2K
1K
61J
51J
41J
3
1J
N
C
4J
CN
J
3
CN
REWOP
V3.
3-10M7
N7C652F5C2PE
Φ
QER_TSET
C
N
N
HSALF
LES_
NE_NACS
N
EDOM_TSET
N
5RDDAF
N
4RDDAF
CN
3RDDAF
CN
2RDDAF
N
1RDDAF
0RDDAF
EAF
E0
F
1NERFI
F
2NERFIF
N
TSVNF
R
GORPF
RESF
A
ESAMF
B
F
NEXUM
F
T
RM
F
F
EM
HF
OLI
F
T
3M
F
2MT
1MTF
0MTF
931CN
831CN
731CN
631CN
531CN
431CN
31C
3
N
231CN
131CN
031CN
921CN
821CN
721CN
621CN
521CN
421CN
321CN
221CN
121CN
0
N
21C
9
N
11C
811CN
7
N
11C
611CN
511CN
411CN
311CN
11C
2
N
1
N
11C
011CN
901CN
8
N
01C
7
N
01C
601CN
5
N
01C
4
N
01C
301CN
201CN
101CN
001CN
99C
N
89CN
79CN
69CN
N
59C
N
49C
39CN
29CN
N
19C
09CN
98CN
88CN
78CN
N
68C
58CN
48CN
2CN
N
N
3CN
3CN
N
N
CN
3
CN
CN
CN
5
5CN
CN
N
N
6CN
7CN
CN
N
N
N
N
3
1A
5A
21A
61A
F
6
F
8
9F
11F
7
G
G
9
11G
DNG
H
8
01H
5J
6J
J
7
9J
11J
21
J
K7K
6
8
K9K
01K11K
L7L
6
8L
9L1P
1L
1
T
1
5T7
21T01T
T
61
2A
0CN
4A
1C
6A
2CN
8A
3C
CN
9
A
4C
11A
5C
31A
6
51A
7
1
B
8C
4
B
9CN
5B
01CN
6
B
11CN
7B
21CN
01B
31CN
11B
41C
21B
51CN
31B
61CN
51B
71CN
6
1B
81CN
C
2
91CN
3C
0
4
C
12CN
31C
22CN
C
41
32CN
C
51
42CN
D
1
52CN
2D
62CN
3D
72CN
D
4
82C
5D
92C
6
D
03CN
7D
13CN
D
8
2
9D
3
0
D
1
43C
11
D
53C
2
1D
6
3
1D
73
E
1
83
2E
93CN
E
3
04CN
E
4
14CN
6E
24CN
7E
34CN
E
8
44CN
9E
N
54CN
01E
64CN
11E
74CN
21E
84CN
31E
94CN
51E
05CN
61E
1
1
F
2
F
2
35
3F
45CN
4F
55CN
F
5
65CN
21F
75CN
31F
85CN
1F
4
95CN
1F
5
06CN
61F
16C
2G
26C
3G
36CN
4G
46CN
5G
56CN
21
G
66CN
31G
76CN
41G
86CN
51G
9
G
61
0
2H
17
3H
27CN
4H
37CN
5H
47CN
6
H
57CN
1
1H
67CN
2
1H
77C
31
H
87CN
41H
97CN
51H
08C
61H
18C
1J
28CN
2J
38C
0140M
K
3
C
K0170M
3
3215
F
1
2
3
4
5
6
7
8
9
0
1
1
1
21
31
41
1
5
6
1
71
1
8
TO DMMI DIGITAL BOLT-ON
9
1
02
12
2
1
2
3
4
5
6
7
8
9
01
TO DMMI ANALOG BOLT-ON
1
2
3
4
5
6
B
4
5
LETOH
10M1
0031R-FV-S12ER-I
90MF
1MF
1
01MF
8
0MF
70MF
60MF
F
50M
40M
F
30MF
20MF
F
10M
31MF
41MF
6
IORP - VT
51MF
2
232
4252
6272
829
61MF
20M1
71MF
81MF
91MF
02MF
12MF
22MF
32MF
42MF
52MF
2111
62MF
T
BT-SSRS-B01MB
4
0M1
5
72MF
82MF
92MF
5
03MF
13MF
87
F
23M
TBT-SSRS-B60M
R0330M
R0
0M5
34
R0
50M
3
2M23 15p
15p2M24
2M3
4
03M
3
3
82M3
2M25 15p
3
6
7
8
9
1101
21
31
41
MOID
A
B
M
KL
L
DI
POS_EF_N
)7:0(AT
I
RENUT MORF
10-15
EDOCED-HC
R
C
R
REW
OT
ENUT&
OP
MVN&HSALF OT
-10
1
M
7
N7C65
P
C2
F5
2
:
)7
A
E
0(
D_
A
T
T
F_NU
T
T
T
T
T
S
E
T
_
NU
_
F
T
E
C_
T
F_NU
I
_TESER
P
R0320M5
7
)
(ATAD_EF_NU
6(ATAD_EF_NU
)
A
)
T
5(A
_
D
NUT
F_
E
4
)
TAD_EF_NUT
(A
3(
_
)
AD
T
F
A
E
U
N
_
2
)
(ATAD_EF_NU
1(
)
F
_E
ATAD
_NU
0(ATA
)
_EF_NUT
D
PO
LAV_EF_NU
DI
KL
WS_3V3+
1
K0
M3
1
9
0102
0
M3
61
33MF
0M1
3
0M72
4
1
3
2
50
MI
R
001
V
4
3MF
92M2
u
01M
3
R74
VS157OSD
E
Φ
L
21C
11C
01C
9C
8C
7C
6
C
5
C
9B
8B
H
1
2B
1
G
3B
4
1B
3R
41R
ORTNOC
2
1P
7
_PM
T
_
PC
T
PC
T
P
C
PC
P
C
_
PC
T
PC
T
P
C
C
_T
P
_T
P
C
C
R
T
S
ZH
M72
O
1BS
O
U
2BS
N
I2BS
N
I1BS
S
ST
7
6ST_
5ST_T
4ST_T
3ST_T
ST
2
1ST_
0ST_T
_ST
POS
VD_PT
C_ST_TP
K
L
TU
T
1
1P
_PM
6
T
S
0
1P
5ST_PM
9P
4ST_PM
8P
_PM
3
T
S
7P
_PM
2
T
S
6P
_
1
T
PM
S
5P
_
0
T
PM
S
R
9
P
OS_ST_
PM
R
8
V
D_ST_
PM
11R
KLC_ST_PM
1
4
E
DS
A
41D
LCS
51D
R
DDA_C21
0
61D
1R
DDA_C21
5
L
D
K
IS
O
N
C
5E
T
R
NE_
N
I
C
R
5
M
22
1
3
3
22
1M
R
6
1
K0
3
1M
7
8
M
1
3
S_
W
V3+
3
K01
S_3
W
V3+
)
(
7
T
TAD_S
A
)6
(ATAD_ST
(
)5
T
T
A
S
D_
A
T
)4(ATAD_S
T
(A
)3
T
AD_S
)2
D
TA
A
S
(
_
T
)1(ATAD_ST
)0
S
D_
(ATA
T
P
S
O
ST
_
DI
LAV_ST
C
KL
S
_
T
ADS
L
C
S
D
E
F
G
2M16 10u
H
I
9
01
11
217
31
41
PL9.0SCM15
F
R
O
C_EF_NUT
V
N
A
_
EF
_
U
T
UT
D
N
0(ATA
_
)
EF
_
U
T
ATAD_
1(
NUT
)
F_
E
2
D
)
A
AT
E
(
_
_NUT
F
T
AD_EF_NU
)3(AT
4
D
)
A
T
AT
U
(
_EF_N
UT
T
R
2280M3
R2290M3
R2232M3
R
2242M3
R2212M3
R2
22
10M
T
L
CS
ADS
XR2_TRAU
XT2_
TRAU
YBTS3V3+
S
LC
A
DS
RI
TPURRETNI
BDNAT
Y
S
TUO_SBVC
TM MORF
7n422M2
R0
R8
652M3
1M2
R8662M3
R8672M
1M2
R2
02M2
2
2M2
2292M3
R
R00123M3
GOS_AGV
n017
R_AGV
n0181M2
G_AG
V
n019
B_AGV
n01
CNYSH_AGV
n011
V_AGV
CNYS
n0162M2R00113M3
nB_AGV
n0172M2
nG_AGV
n0182M2R00133M
nR_AGV
)5(ATAD_EF
N
_
6
)
A
E
(
D_
A
T
F_NU
F
)7(ATAD_E
_NU
A
_EF_N
D
UT
P_TES
R
E
F
sOI
-GOLANA MOR
2835
+
WS_3V3
8
Page 47
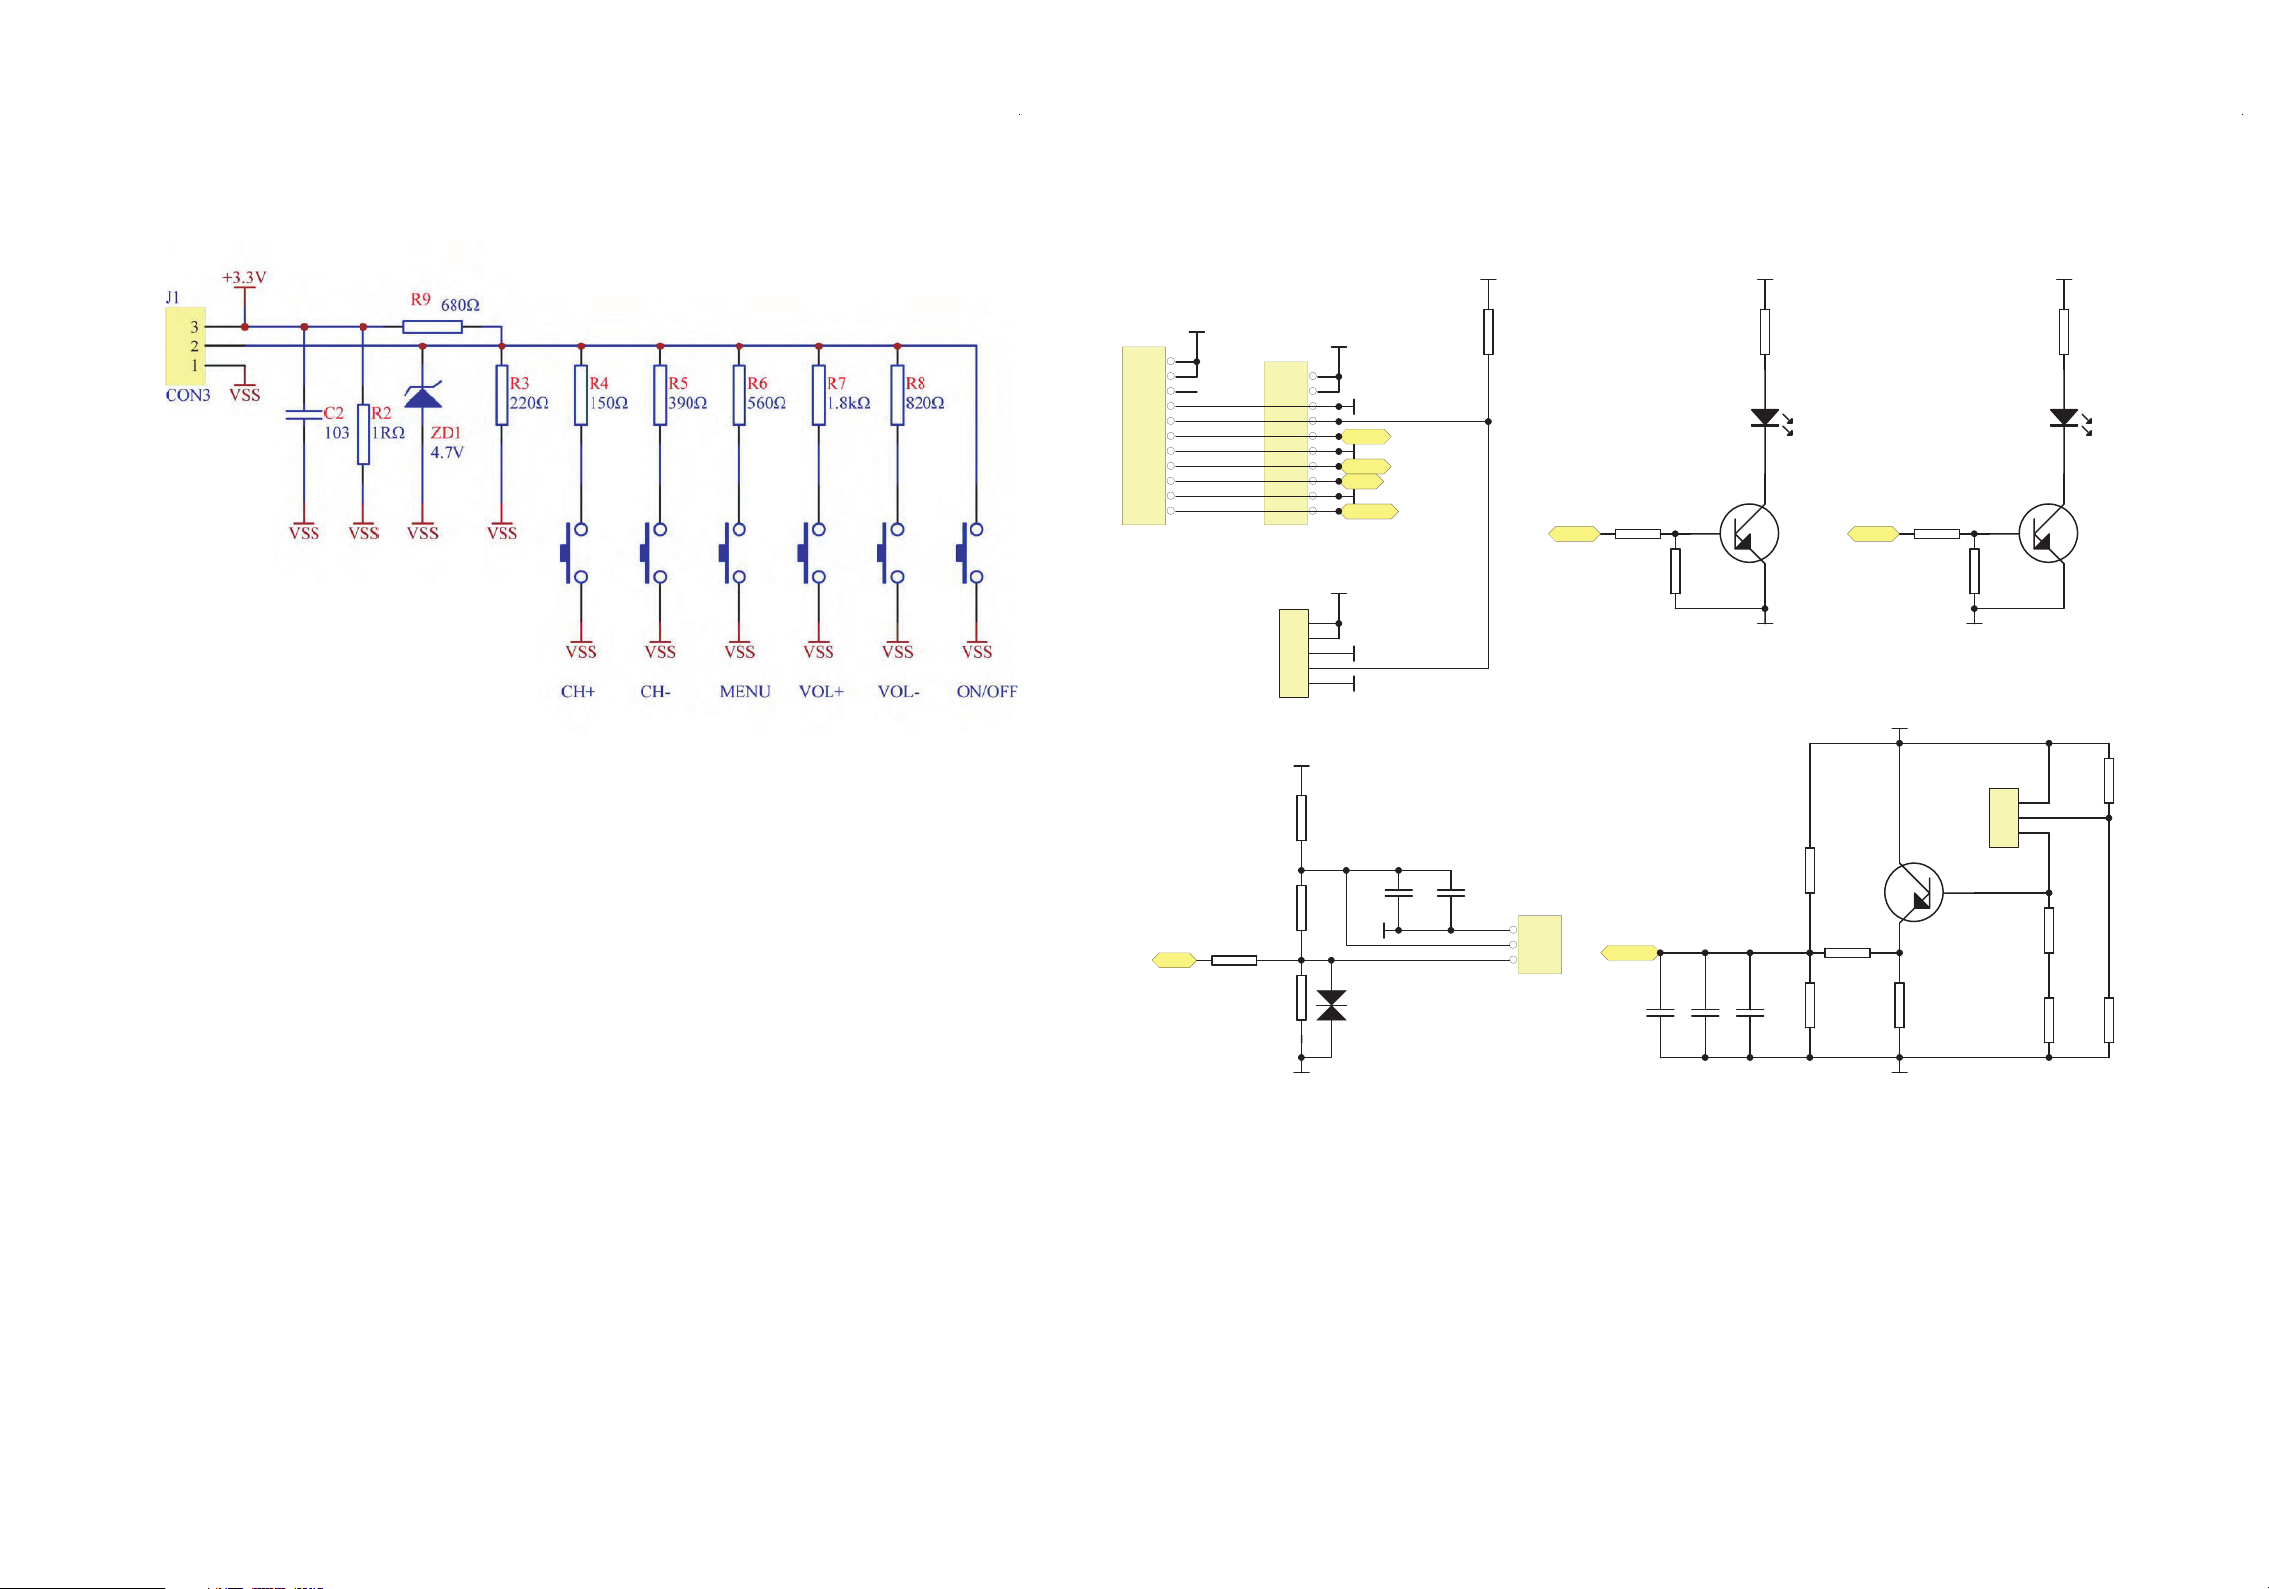
ASSY Tact SW Schematic Diagram
Module IR Schematic Diagram
PL9.0SCF
J1
JST 1.0
11
10
G1
+3.3V+5V
R12
1.8k
D2
LED2
1
Q2
C
2
3
2
1
BC847
B
E
3
R19
100k
R17
270k
R20
R18
10k
270k
+3.3V
VSS
J1
9
NC
8
7
6
5
4
3
2
1
Molex 1.25
R6
IR
100
100k
10
9
8
7
6
5
4
3
2
1
J2
5
4
3
2
1
Molex 1.25
+3.3V
R3
100
R4
6.8k
R5
VSS
VSS
12
+5V
LED1
+3.3V
LED2
IR
VSS
LIGHT
+3.3V
VSS
VSS
C2
10u
R1
680
C1
10u
U1
GP1UE260RKVF
R7
LED1 LED2
10k
3
2
1
LIGHT
R8
10k
C3
10u
2
R11
8.2k
1
C
B
E
3
VSS
C4
10uC510u
D1
LED1
Q1
BC847
R13
22k
R14
10k
R15
39k
+5V
1
3
C
E
R16
10k
R9
10k
Q3
B
BC847
R10
10k
VSS
TEMT6000X1
2
VSS
VSS
PL9.0SCIR
10-16
Page 48
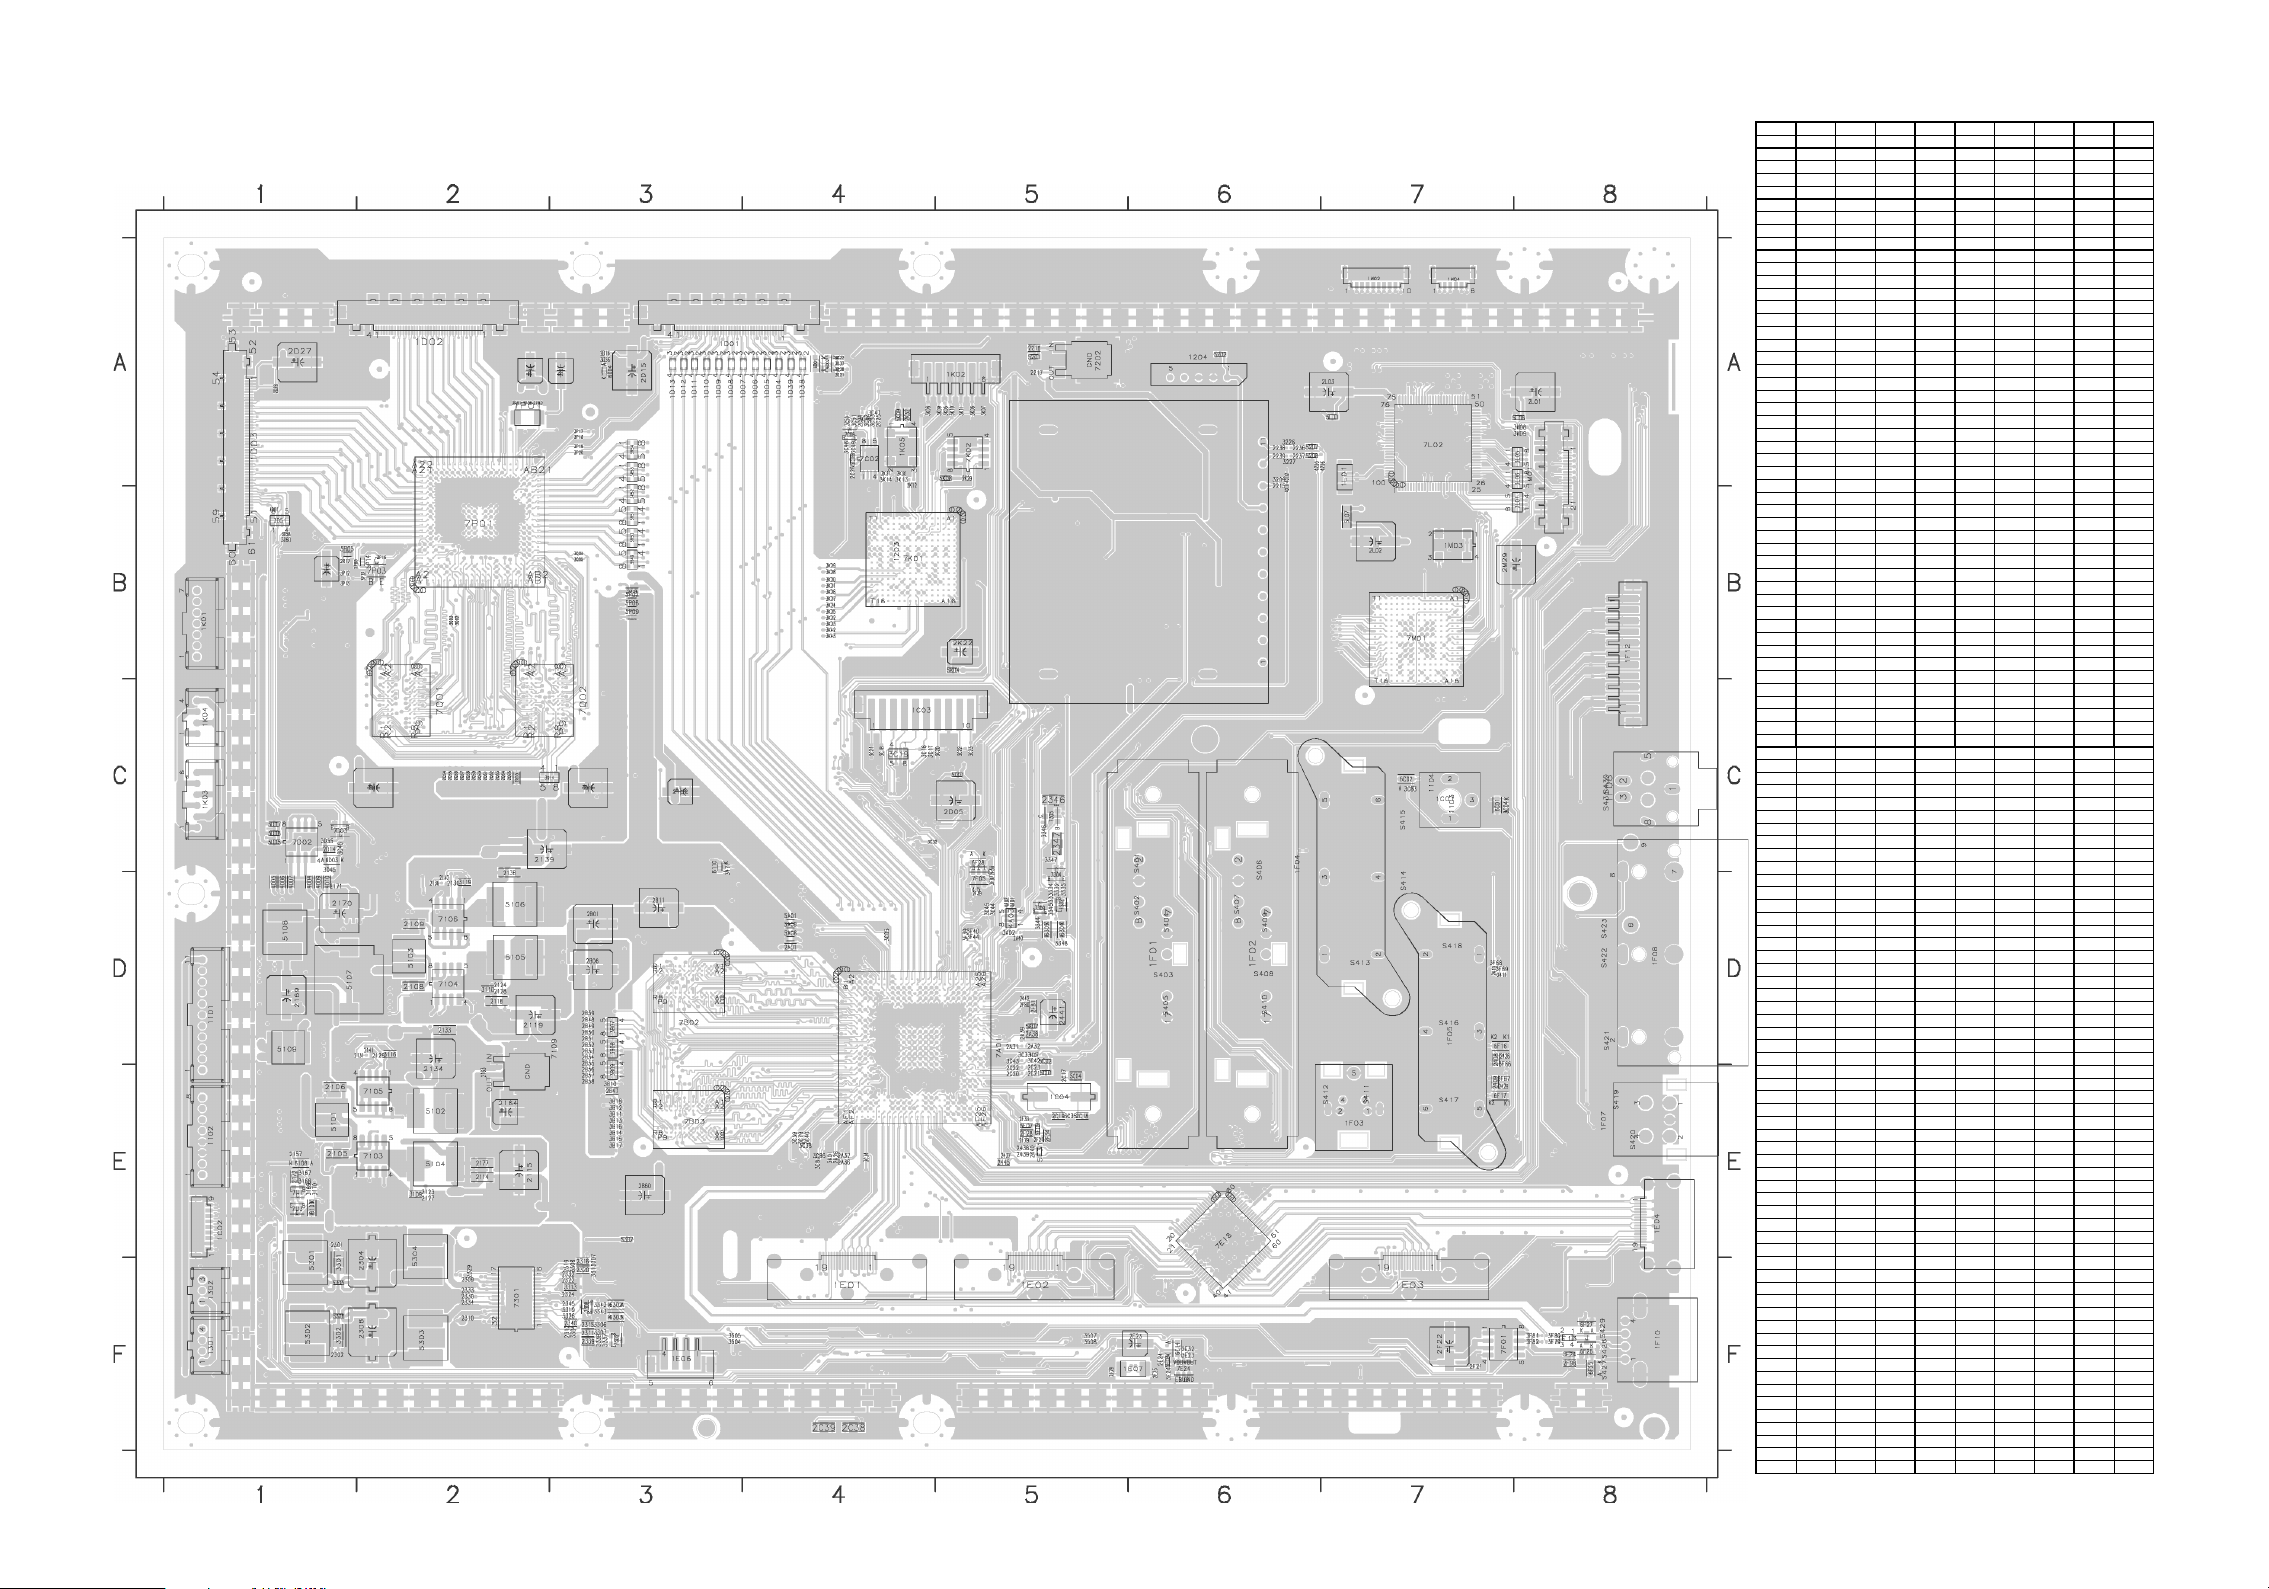
SSB CBA Top View
SSB CBA Top View Parts Location Guide
Ref No. Pos ition Ref No. P osit ion Ref No. Pos ition Ref No. P ositi on Ref No. Posit ion
1101 D1 2304 F2 2L03 A7 3C50 A4 5301 F 1
1102 E 1 2308 F2 2M29 B8 3C51 A4 5302 F1
1188 A4 2309 F2 2P19 B 3 3C52 A 4 5303 F2
1189 A3 2310 F2 2P44 A 2 3C53 A 4 5304 E2
1190 A1 2311 F3 2P81 A 2 3C79 E 4 5305 F1
1191 D1 2312 F3 2P82 A2 3C86 E 4 5306 F 1
1192 F1 2315 F 3 2P 89 B 1 3C87 E 4 5307 E3
1193 F3 2316 F 3 2Q17 C2 3D37 A4 5A01 D4
1194 F4 2319 F 3 2Q19 C3 3D38 A4 5A07 D5
1195 F8 2320 F 3 2Q53 C2 3D45 C1 5A08 D4
1196 F6 2322 F 3 2Q54 C2 3D46 C1 5A09 D4
1197 A6 2324 F3 2Q55 C2 3D51 B1 5C01 E5
1198 A8 2329 F2 2Q56 C2 3D55 C1 5C02 D5
1199 A8 2330 F2 2Q57 C2 3D56 A3 5C04 E5
1203 B6 2332 F3 2Q58 C2 3D58 B1 5C09 A4
1204 A6 2333 F2 2Q59 C2 3D60 B1 5D01 C5
1301 F1 2334 F 2 2Q60 C2 3E23 F6 5D05 C1
1302 F1 2339 F 3 2Q61 C2 3E24 F6 5D06 C1
1C01 C7 2340 F 3 2Q 62 C2 3F 39 D5 5D07 C1
1C02 E1 2345 F3 2Q63 C2 3F 40 D5 5E 04 F6
1C03 C4 2346 C5 2Q64 C2 3F44 D5 5F07 E 5
1C04 E5 2347 C5 2Q65 C2 3F66 D7 5F 09 E 5
1D01 A3 2408 D7 2R01 A 3 3F67 E7 5F24 F8
1D02 A2 2409 E 7 2R16 B1 3F68 D7 5F 31 E 5
1D03 A1 2410 D7 2R17 B 1 3F69 D7 5K04 B 5
1D04 A4 2411 D7 3109 E2 3F79 F 8 5K 08 A5
1D05 A4 2426 D7 3110 D2 3F80 F8 5K 09 A4
1D06 A4 2429 E 7 3116 D2 3F81 F8 5L06 A8
1D07 A4 2437 E 5 3119 D2 3F82 F8 5L07 B7
1D08 A3 2438 E 5 3167 E1 3F97 D5 5L11 A7
1D09 A3 2439 E 5 3168 E1 3 K05 A5 5P02 B3
1D10 A3 2440 E 5 3169 E1 3 K06 A5 5P08 B3
1D11 A3 2441 D5 3170 E1 3K07 A 5 5P09 B3
1D12 A3 2442 D5 3171 C3 3K08 A4 5P 14 B2
1D13 A3 2445 E 5 3209 A6 3 K09 A5 5R05 B1
1D38 A4 2A01 D4 3226 A6 3K 10 A 5 6108 E 1
1D39 A4 2A26 E 4 3227 A 6 3K 11 A5 6109 E1
1E01 F4 2A31 D5 3301 F1 3K 12 A4 6110 C3
1E02 F5 2A32 D5 3302 F1 3K 13 A4 6302 F3
1E03 F7 2A36 E 4 3303 F3 3K14 A 4 6303 F3
1E04 E8 2A 37 E4 3304 F3 3 K20 B4 6304 D5
1E06 F3 2A38 D5 3306 F3 3K 21 B4 6305 D5
1E07 F6 2A 39 D5 3307 F 3 3K 22 B 4 6C01 C7
1F01 D6 2A40 D5 3308 F 3 3K 23 B 4 6C02 C7
1F02 D6 2B01 D3 3311 F 3 3K 24 B 4 6D01 A 4
1F03 E7 2B06 D3 3313 F3 3K25 B 4 6D02 A 4
1F04 D7 2B11 D3 3319 F 3 3K 26 B 4 6D03 C1
1F05 D7 2B47 E3 3326 F3 3K27 B 4 6D04 A 3
1F06 C8 2B48 D3 3332 D5 3K28 B4 6E 14 F6
1F07 E8 2B49 D3 3333 D5 3K29 B 4 6F16 D7
1F08 D8 2B50 D3 3334 D5 3K42 B4 6F17 E7
1F10 F8 2B 51 D3 3335 D5 3K 43 B 4 6F25 F8
1F12 B8 2B 52 D3 3337 F 3 3L05 A8 6F26 F8
1F13 F 8 2B 53 D3 3338 F3 3L06 A 8 6F27 F 8
1K01 B1 2B 54 D3 3342 F3 3L07 B 8 6F28 C5
1K02 A5 2B 55 D3 3343 F3 3M08 A8 7103 E2
1K03 C1 2B56 E 3 3344 D5 3M09 A8 7104 D2
1K04 C1 2B57 E 3 3345 D5 3P 09 A2 7105 E2
1K05 A4 2B 58 E3 3346 C5 3P12 B 1 7106 D2
1L01 A7 2B 59 D3 3347 C5 3P 13 B 1 7109 E2
1M01 A8 2B60 E3 3348 D5 3P16 B 2 7111 E1
1M02 A7 2C17 E5 3504 F 3 3P 17 A 3 7113 E1
1M03 B7 2C18 E5 3505 F 3 3P 18 A 3 7202 A5
1M04 A7 2C19 E5 3507 F 5 3P 19 A 3 7301 F 2
1P01 A2 2C20 E 5 3508 F5 3P20 A3 7302 D5
2105 E1 2C21 E 5 3A 01 E 4 3P 32 B 2 7303 F3
2106 E1 2C22 E 5 3A 02 D5 3Q02 B2 7304 D5
2108 D2 2C23 E5 3B07 D3 3Q03 B2 7305 C5
2109 D2 2C24 A4 3B08 D3 3Q04 B3 7308 F3
2114 E2 2C25 A 4 3B 09 E 3 3Q05 B3 7309 D5
2115 E2 2C26 A 4 3B 10 E 3 3Q14 C2 7A01 D4
2118 D2 2C38 F 4 3B 11 E 3 3R49 B 3 7B 02 D3
2119 D2 2C39 F 4 3B 12 E 3 3R50 B 3 7B 03 E 3
2123 E2 2D05 C5 3B13 E 3 3R51 B 3 7C02 A 4
2124 D2 2D14 C1 3B14 E3 3R52 B 3 7C06 A 4
2127 E2 2D15 A 3 3B 15 E 3 3R53 A 3 7D02 C1
2128 D2 2D16 A3 3B16 E 3 3R54 A 3 7D03 C1
2129 D2 2D21 A4 3B17 E 3 4201 B6 7E 18 E 6
2130 D2 2D22 A4 3B18 E 3 4202 A6 7E 24 F6
2131 D2 2D27 A1 3C03 C7 4205 A6 7F01 F7
2133 D2 2D28 A1 3C04 C7 4206 A7 7F05 D5
2134 D2 2E23 F6 3C05 D4 4A01 D5 7K01 B 4
2136 D2 2E24 F6 3C16 C4 4A02 D5 7K02 A 5
2138 D2 2E25 F6 3C17 C4 4A03 D5 7L02 A7
2139 C2 2E29 F5 3C18 C4 4C07 D5 7M01 B 7
2141 D2 2E32 F6 3C19 C4 4D01 B1 7P01 B 2
2142 D2 2F21 F7 3C20 C5 4D04 D1 7P03 B 2
2157 E1 2F22 F7 3C21 C4 4D05 D1 7Q01 C2
2162 C3 2F27 E5 3C22 C5 4D06 D1 7Q02 C2
2163 E2 2F28 E5 3C23 C5 4D07 D1 S427 F8
2164 E2 2F33 E5 3C32 C4 4D09 D1 S428 F8
2169 D1 2F34 E5 3C33 D5 4D10 D1 S429 F8
2170 D1 2F38 C5 3C34 E4 5101 E1 U1 D2
2171 D1 2F39 D5 3C35 E5 5102 E2 U9 C2
2172 E1 2F79 E5 3C38 E 4 5103 D2 U10 E2
2177 E2 2F80 D5 3C39 E4 5104 E 2 U11 D2
2215 A6 2F81 D5 3C40 E4 5105 D2 U12 D2
2216 A5 2F98 F8 3C42 D5 5106 D2 U13 C2
2217 A5 2K 22 B 5 3C43 D5 5107 D1 U16 D2
2236 A6 2K 29 A 5 3C44 D5 5108 D1 U17 E2
2237 A6 2K 30 A 4 3C45 D5 5109 D1 U18 A8
2238 A6 2K 31 A 4 3C46 A 4 5201 A5 U20 A3
2239 A6 2K 32 A 4 3C47 A 4 5202 A6 U22 A1
2301 E1 2L01 A 8 3C48 A 4 5207 A6 U24 F7
2302 F1 2L02 B7 3C49 A4 5208 A6 U26 E2
10-17
Page 49
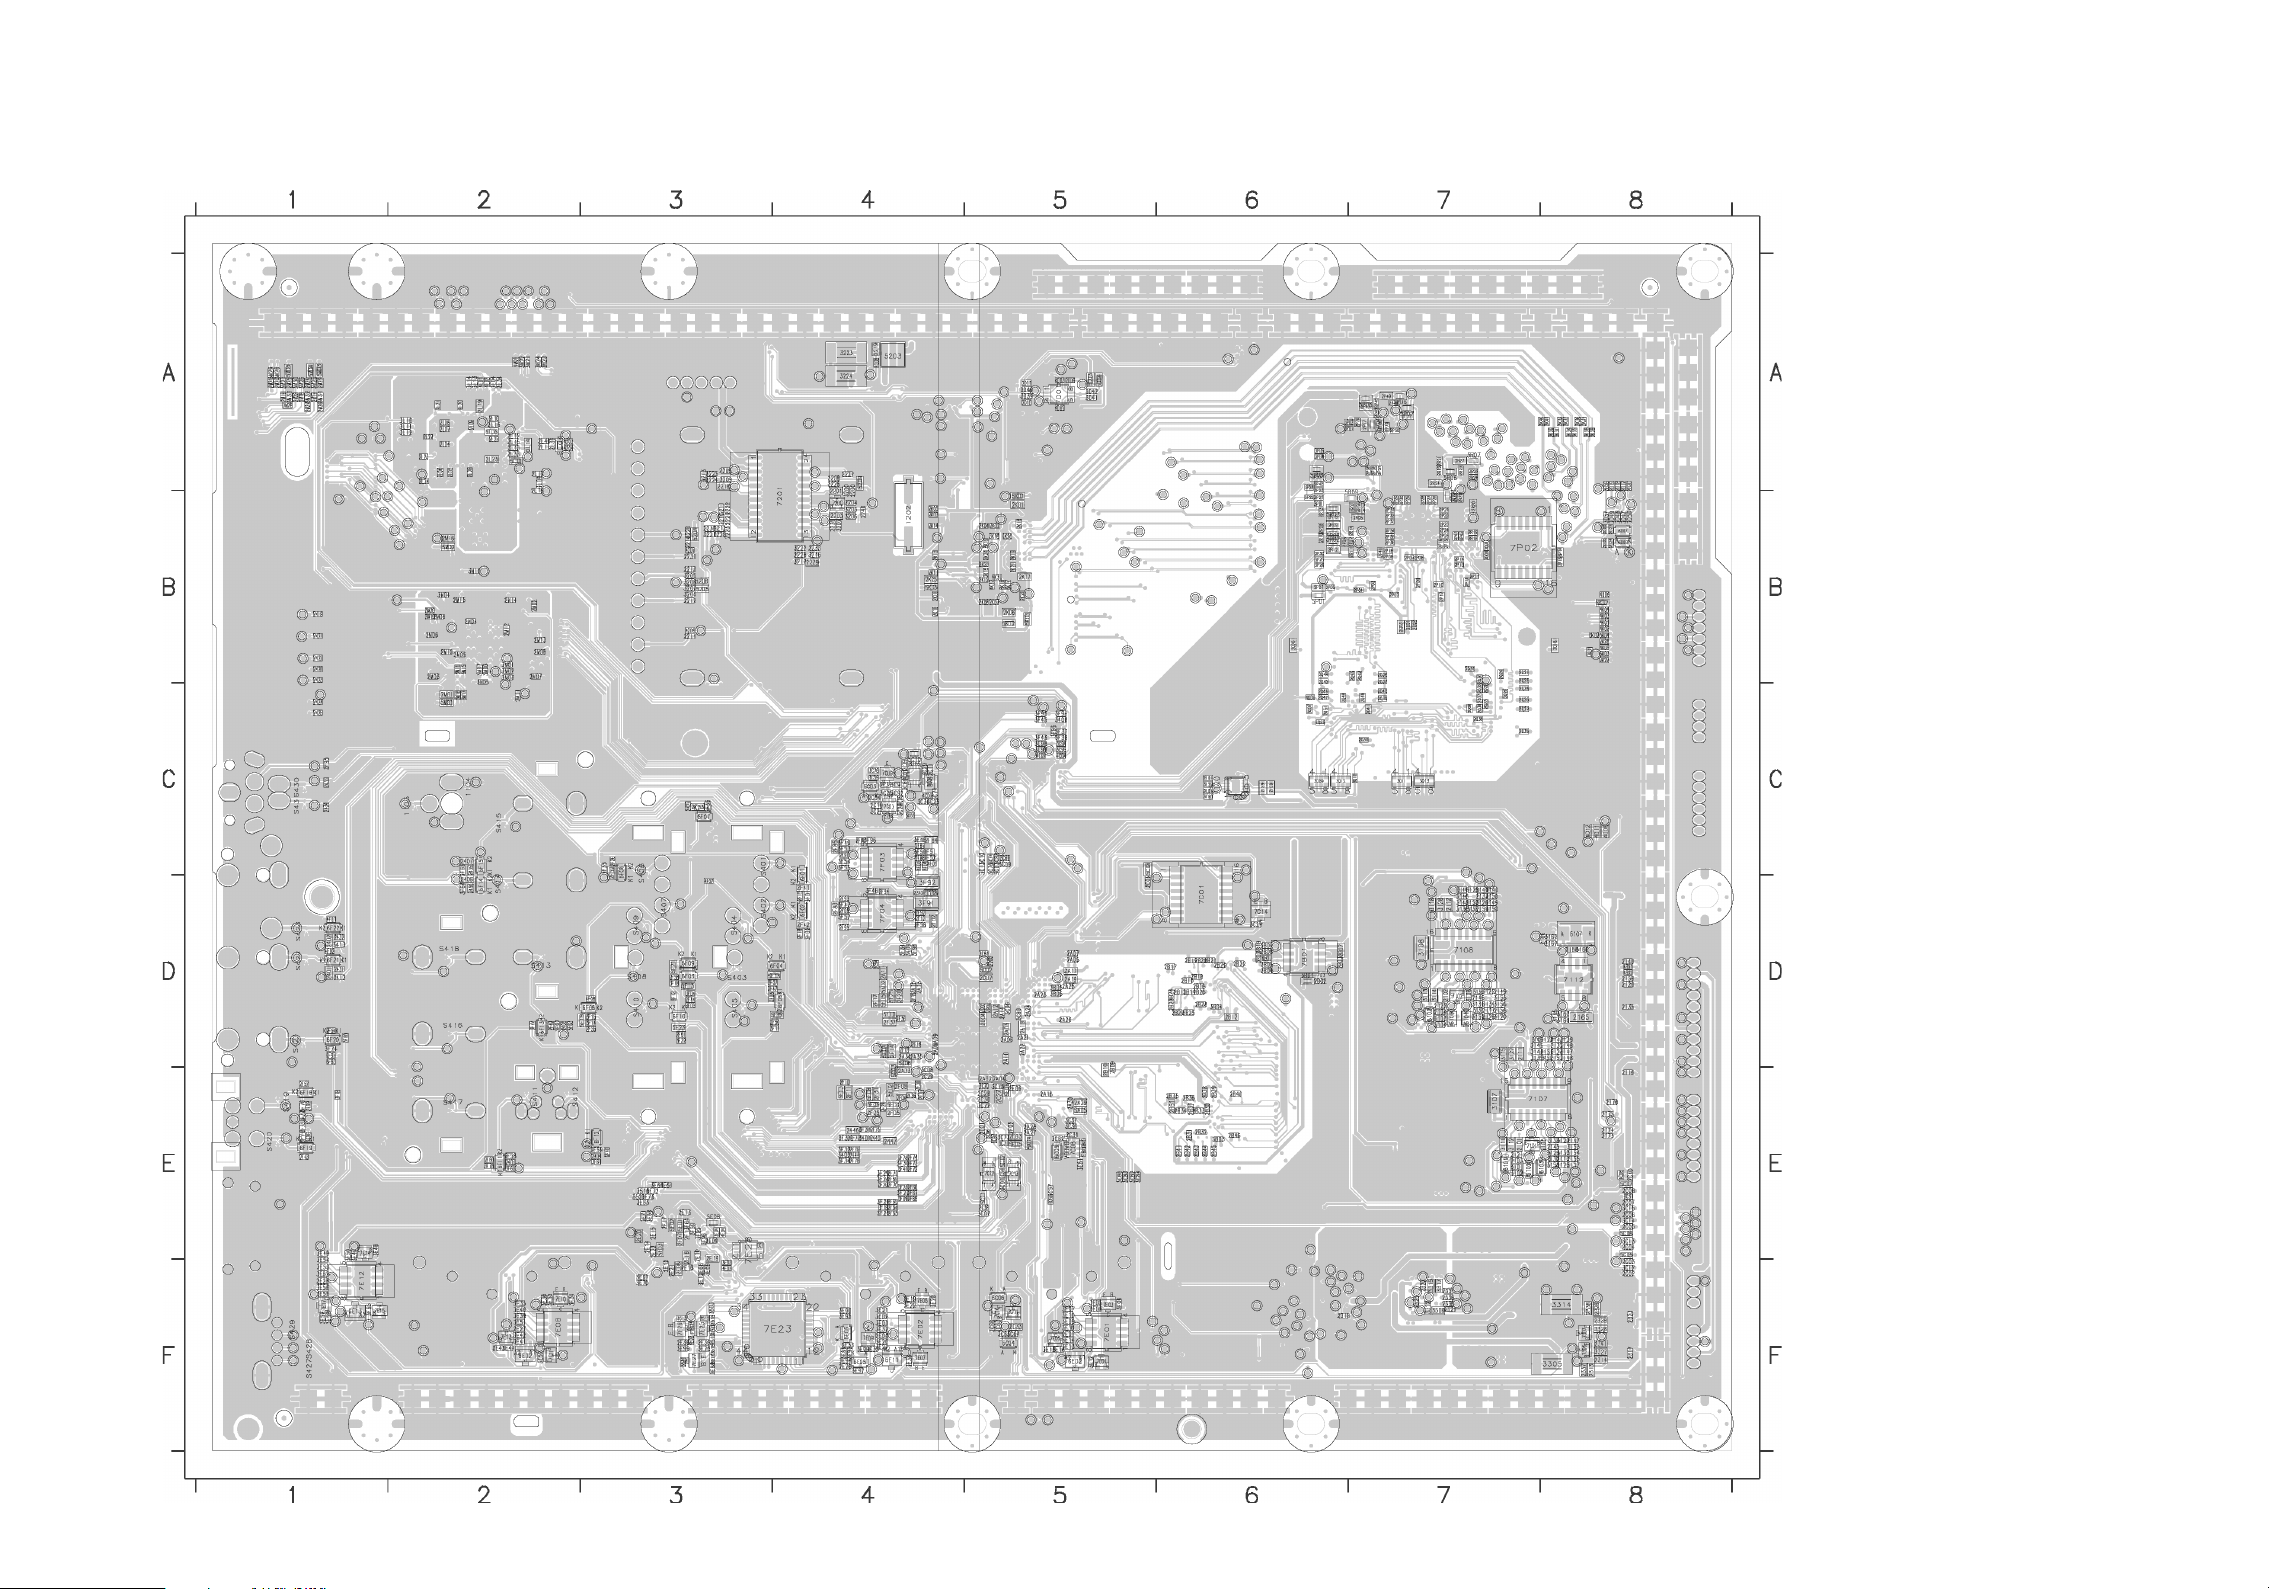
SSB CBA Bottom View
10-18
Page 50
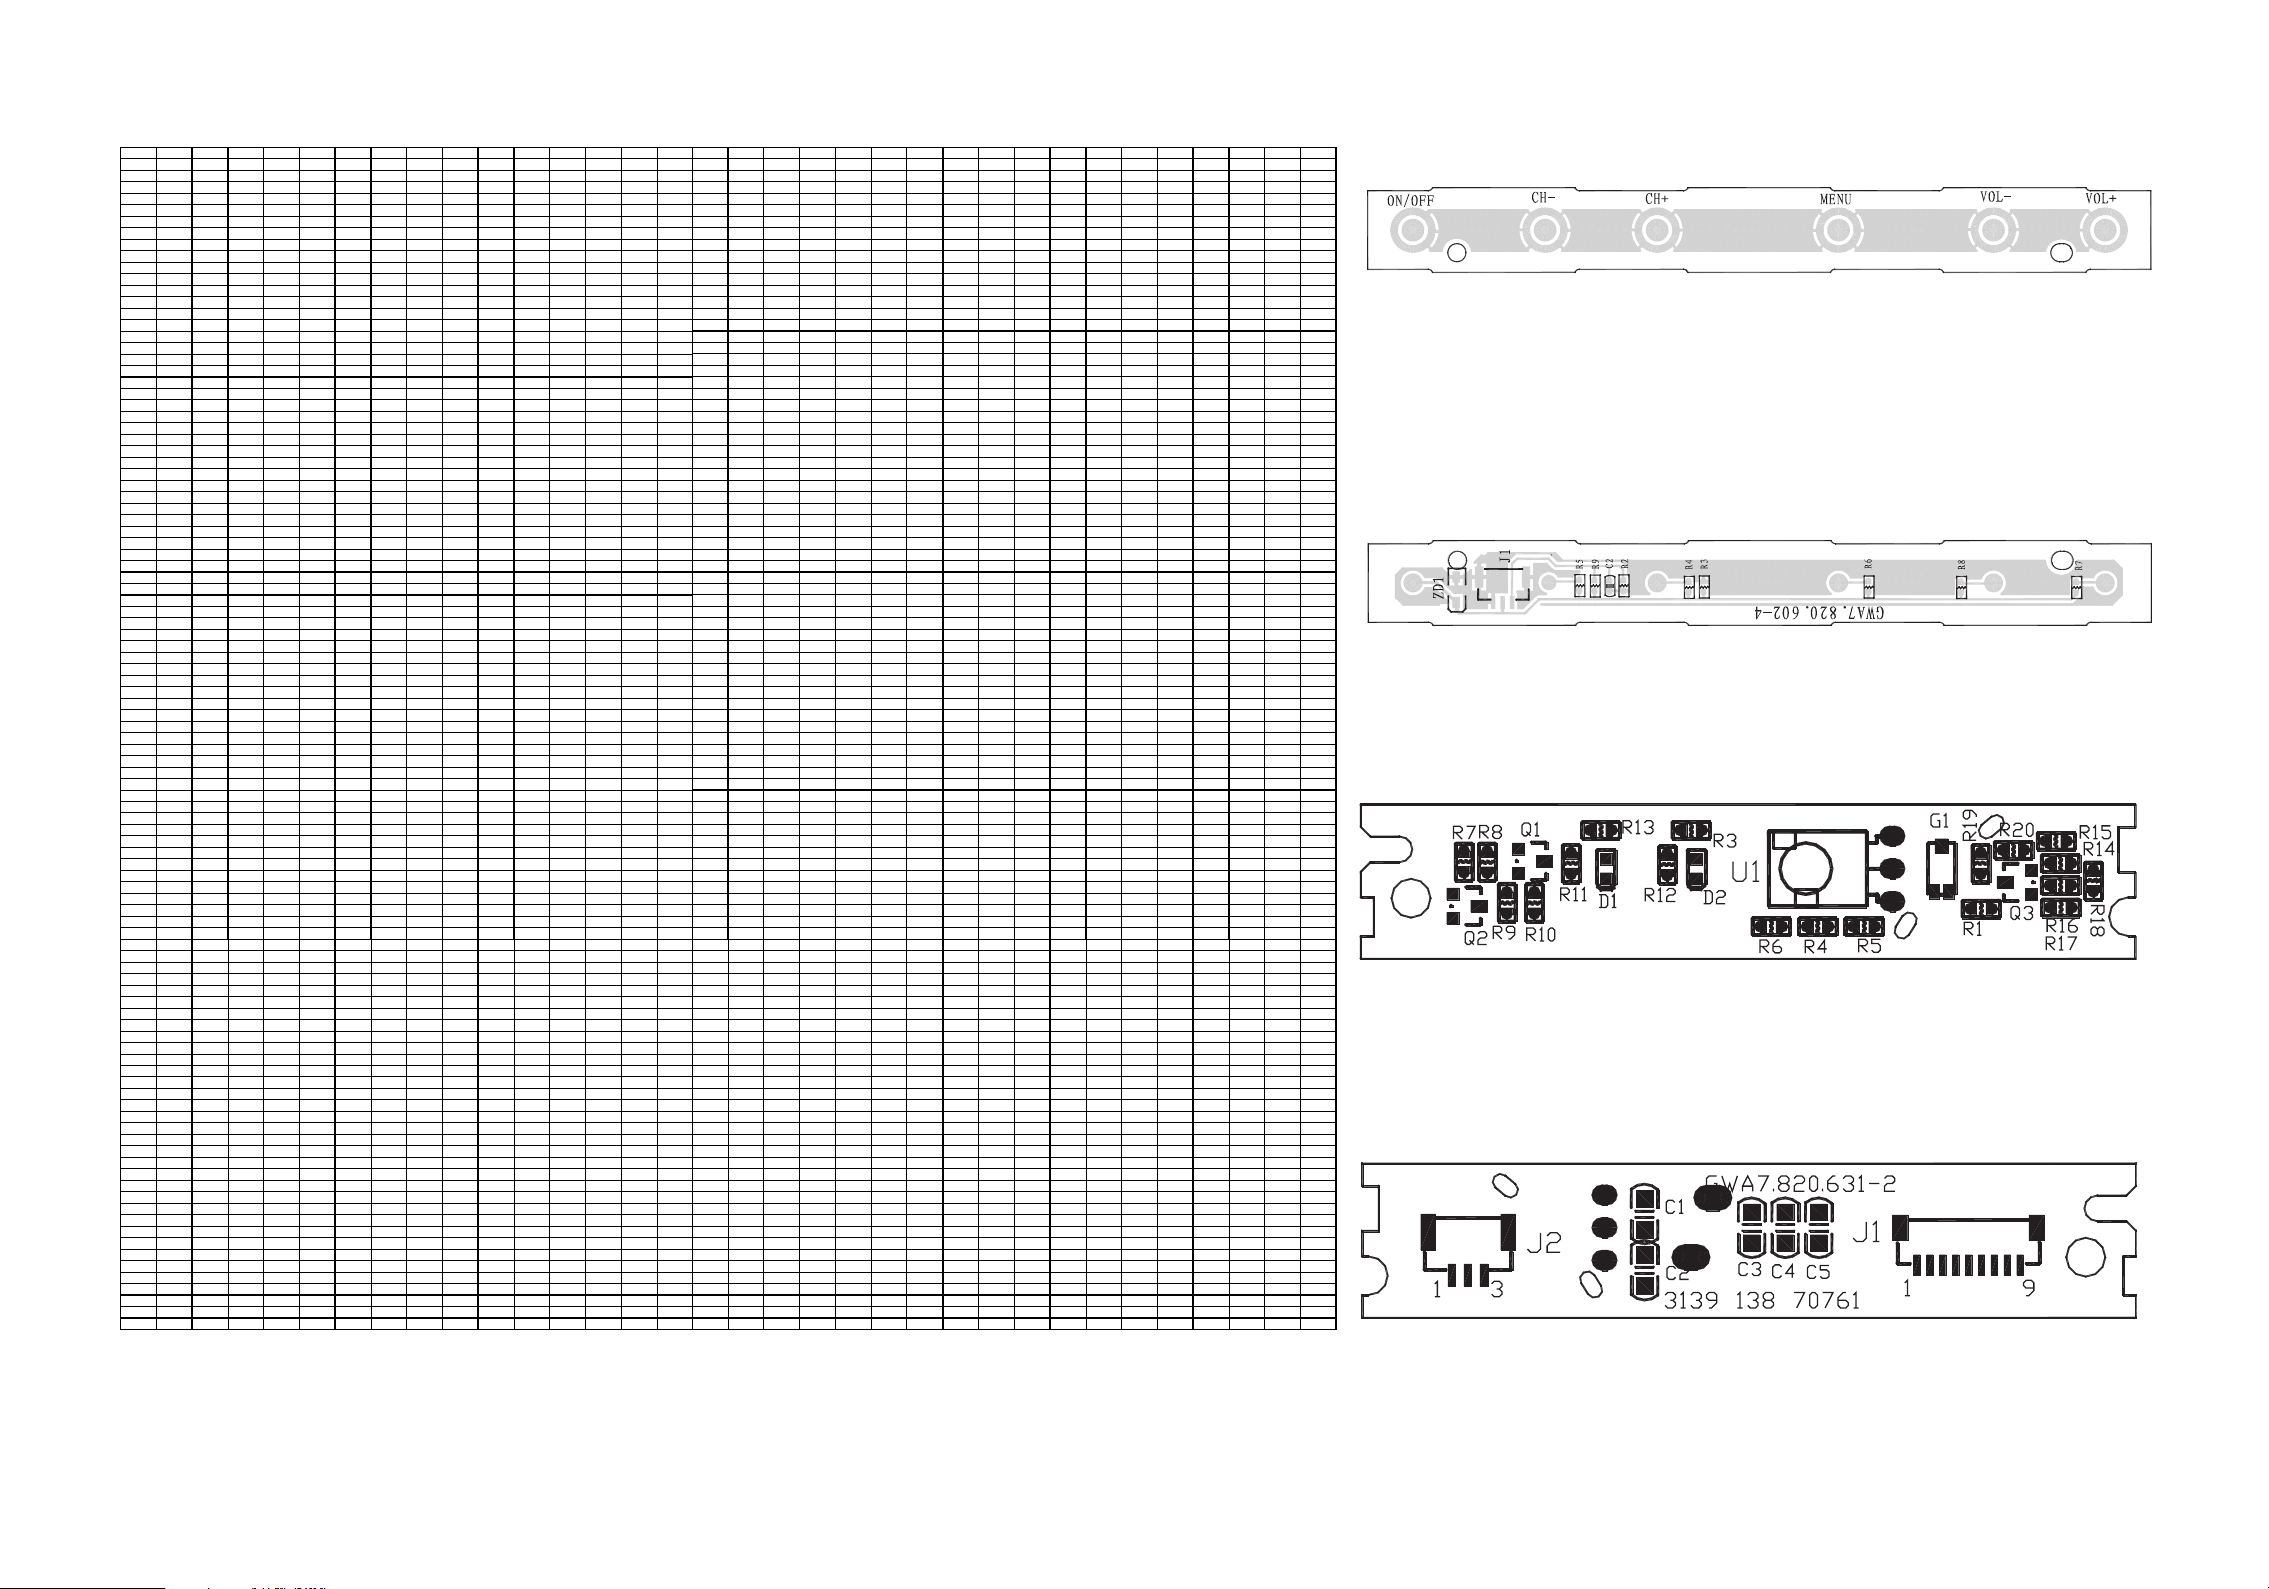
SSB CBA Bottom View Parts Location Guide
3M01 B2 5A06 D4 7108 D7 F317 C4 FD25 A6 FE56 F1 FM23 A 2 I 175 D8 I M03 B 2
3M02 B2 5B01 D6 7110 C6 F318 E5 F D26 A 6 FE57 F 3 F M24 A2 I 176 D8 I M04 C2
3M03 B2 5C03 E4 7112 D8 F332 F8 FD27 A6 FE58 F 3 F M25 A2 I 177 D8 I M05 B 2
3M04 B2 5C05 E8 7200 B4 F333 F7 F D28 A 6 FE59 F3 FM26 F 2 I 178 D7 S401 C3
3M05 B2 5C06 E8 7201 B4 F334 F7 F D30 B 6 FF02 E 4 FM27 A2 I179 D8 S402 D3
3M06 B2 5C07 E8 7306 F8 F335 F6 FD31 B 6 FF03 E 4 FM28 A2 I201 B4 S403 D3
3M07 B2 5C08 C5 7307 F8 F336 F7 F D32 B 6 FF05 D4 FM29 A2 I 202 A3 S404 D3
3M10 B2 5C10 C4 7B01 D6 F424 E1 FD33 B6 FF07 D4 FM30 A 2 I 203 A4 S 405 D3
3M15 B2 5C11 E5 7C01 D6 F442 E1 FD34 B6 FF09 E 4 FM31 A2 I204 A3 S406 C3
3M16 B2 5C12 E5 7C03 C4 F443 D1 FD35 C7 FF11 E4 FM32 A2 I205 A3 S407 D3
3M17 C2 5D02 D5 7C04 C4 F 444 D1 FD36 D8 FF 12 E4 FM33 B2 I 206 A3 S408 D3
3M18 C2 5D03 A5 7C05 C4 F445 D1 FD41 B8 FF13 D4 FM34 B2 I 207 A4 S409 D3
3M19 B2 5D04 A5 7C08 E5 F446 C1 FD42 B8 FF14 D3 F P01 B6 I208 A4 S410 D3
3M20 B2 5E01 E3 7C09 C4 F447 C1 FD43 C7 FF15 D3 FP02 B7 I209 B4 S411 E 2
3M21 A2 5E02 E3 7C10 F5 F448 C1 FD44 C5 FF16 E2 FP03 A6 I210 B4 S412 E 2
3M22 A2 5E03 E3 7C11 F5 F A01 D4 FD45 A 8 FF17 D2 FP04 A7 I211 B4 S413 D2
3M23 A2 5E05 E5 7C12 E 5 FA02 D4 FD55 A 7 FF18 E 3 FP05 A7 I301 F6 S 414 D2
3M24 A2 5E06 E5 7C13 E 5 FA03 E5 FD56 A7 FF19 D2 FP 06 A7 I302 F6 S415 C2
3M25 A1 5E08 E3 7C14 D6 F A04 D4 FD57 A7 F F20 C2 FP07 A7 I303 F7 S 416 D2
3M26 A1 5F01 E4 7D01 A5 FA05 D5 FD58 A 7 FF21 D2 FP 14 B7 I304 F8 S417 E 2
3M27 A1 5F02 E4 7E01 F5 FA 06 E4 FD59 A 7 FF22 E2 FP15 B8 I305 F6 S 418 D2
3M28 A1 5F03 E4 7E02 F4 FA 07 D4 F D60 A 7 FF23 D2 FP 16 B7 I306 F6 S419 E1
3M29 A1 5F04 D4 7E03 F5 F A08 D4 FD61 A7 FF25 C4 FP17 B8 I307 F7 S420 E1
3M30 A1 5F05 D4 7E04 F5 F A09 D4 FD62 A7 FF26 D4 FP18 A7 I309 F7 S421 D1
3M31 A1 5F06 E4 7E05 F5 FB 01 D6 F D63 A 7 FF27 D4 FP 19 A6 I310 E6 S422 D1
3M32 A1 5F08 E4 7E06 F4 FB 02 D6 F D64 A 7 FF28 D3 FP 20 A7 I311 F6 S423 D1
3M33 A1 5F10 D4 7E07 F4 F B03 D6 FD65 A7 FF29 D3 FP21 A7 I312 F6 S430 C1
3P01 B6 5F13 D3 7E08 F2 F B04 D6 FD66 A7 F F30 D3 FP22 A7 I313 F6 S 431 C1
3P02 A7 5F15 D4 7E09 F4 F B05 D6 FD67 B8 F F31 C3 FP23 A6 I314 F7 U2 B3
3P04 A6 5F17 D4 7E10 F2 F C01 C2 FD68 B8 FF32 D3 F P24 B7 I315 F7 U15 B 4
3P05 A6 5F19 D3 7E11 F2 F C02 C2 FD69 B8 FF33 D3 FQ01 B7 I316 F7 U19 A1
3P07 A7 5F21 D3 7E12 F1 F C03 C2 FD70 B8 FF34 D3 FQ02 B6 I317 F8 U21 F6
3P14 B8 5F23 D3 7E13 F2 F C04 C4 FD71 A8 FF35 D3 F R01 B 7 I 318 F7 U23 A8
3P15 B8 5F25 D4 7E14 E 1 FC05 C5 F D72 A 8 FF36 D2 FR02 B7 I319 F7 U25 F2
Ref No. Position Ref No. P osition Ref No. Position Ref No. Position Ref No. Position Ref No. Position Ref No. Position Ref No. P osition Ref No. Position
3F45 C5 3P21 B6 5K01 B 5 7E15 F1 F C06 E 8 FD73 B8 FF37 F1 FR03 B7 I321 F6
3F46 D4 3P22 B6 5K02 B 5 7E17 F1 F C08 A 5 FD74 B8 FF38 F1 FR04 B7 I322 F6
3F47 D4 3P23 A6 5K03 B 5 7E23 F4 F C09 A 5 FD75 A8 FF39 F1 FR05 B7 I329 F8
3F48 C4 3P24 A6 5K05 B 4 7E25 F3 F C10 C5 FD76 A8 FF40 F2 FR06 A7 I 330 F6
3F49 C4 3P25 B6 5K07 B 8 7E26 F3 F C11 C5 FD77 A8 FF41 F5 FR07 A7 I 333 F7
3F50 C4 3P29 B6 5L04 A2 7E27 F3 FC12 C5 FD78 A 8 FF42 B1 F R08 A 7 I335 F7
3F51 C4 3P30 B6 5L05 A2 7E28 E3 F C13 C5 FD79 A7 FF43 E 1 I101 E8 I 336 F 7
3F52 C4 3P31 A7 5L10 A2 7F03 C4 F C14 C5 FD80 A7 FF44 B 1 I102 E7 I 337 F 8
3F53 C4 3Q01 B7 5M01 C2 7F04 D4 FC15 C5 FD81 A 7 FF45 B1 I 103 E7 I338 F7
3F54 C4 3Q06 C7 5M02 B 2 7P02 B 7 FC16 C4 F D82 A 7 FF46 B 1 I 105 E7 I339 F7
3F55 C4 3Q07 C6 5M03 A 1 CXXX D8 FC17 C4 FD83 A7 FF47 C1 I 106 E8 I340 F6
3F56 D4 3Q08 B7 5M04 A1 F 101 E7 FC18 C4 FD84 A 7 FF49 E 2 I 107 E8 I342 C4
3F57 D4 3Q09 C6 5M05 A 1 F102 D7 FC19 C4 FD85 A7 FF50 C2 I108 E8 I343 F6
3F58 E2 3Q10 C7 5P 01 B6 F103 E 7 FC20 F5 FD86 A7 FF51 E 1 I 109 D8 I344 F6
3F59 E3 3Q11 C7 5P 03 A6 F104 E 8 FC21 F5 FD87 A7 FG18 B 7 I 110 D7 IA01 B 3
3F60 E2 3Q12 C6 5P 04 A7 F105 D7 FC22 C5 FD88 A 7 FK01 B5 I111 E7 IB01 D6
3F61 E3 3Q13 C7 5P 05 A7 F106 D7 FC23 E5 FD89 A7 FK02 B4 I113 E7 IC01 C4
3F62 D2 4203 A2 5P 06 A7 F107 D7 FC25 C5 FD90 A 7 FK03 B5 I114 E7 IC02 C4
3F63 D2 4204 A2 5P 07 A7 F108 D7 FC26 C4 FD91 B 5 FK04 B4 I115 D7 IC06 F5
3F64 D2 4207 B3 5R02 B6 F109 C7 F C27 C5 F D92 A 6 FK05 B5 I116 E7 IC07 F5
3F65 C2 4208 A4 5R03 B6 F110 D7 F C28 C5 F D93 B 6 FK06 B8 I117 E8 IC08 F5
3F70 E1 4209 B3 5R04 B7 F111 E 8 FC29 C5 FE01 E5 FK07 B8 I118 E8 IC10 E3
3F71 E1 4301 D8 5R06 A7 F112 D8 F C30 C5 F E02 F5 FK 08 B8 I119 E8 IC11 E5
3F72 E1 4302 D8 5R07 A7 F113 D8 F C31 C5 F E03 F5 FK 09 B8 I120 D8 I C14 F8
3F73 E1 4B01 D6 5R08 B6 F114 D8 FC32 A5 FE 04 F5 FK 10 B 8 I121 D7 IC15 E8
3F74 D1 4C01 C4 5R09 B 7 F115 D8 FC33 A5 F E05 F5 F K11 B8 I122 E8 IC16 E8
3F75 E4 4C02 C5 6101 E7 F116 D8 FC34 E8 FE06 D1 FK12 A5 I123 D8 I C17 E 8
3F76 E2 4C03 C4 6102 D7 F117 E8 FC35 E8 FE07 F4 F K13 A5 I124 D8 IC18 D6
3F77 D2 4C04 C5 6103 E 8 F118 E8 FC36 E8 FE08 F4 F K14 A4 I125 D7 I C19 C4
3F78 E1 4C05 C4 6104 D7 F119 E8 FC37 E8 FE09 F4 F K15 A4 I126 D7 IC21 E8
3F83 D1 4C06 E8 6105 E7 F120 E8 F C38 E 8 FE10 F 4 FK16 A5 I127 D7 IC23 E5
3F84 D4 4D02 A5 6106 D7 F121 E8 FC39 E8 FE11 F2 F K17 A4 I128 D7 IC24 C4
3F85 C5 4D03 A5 6107 D8 F122 E8 FC40 E8 FE12 F2 F K18 A5 I130 D7 IC25 A5
3F86 D1 4D08 C8 6C03 C4 F123 A 7 FC41 D6 FE13 F2 FK19 B5 I131 D7 ID01 C8
3F91 D4 4D11 C8 6C04 F5 F124 E4 FC42 C6 FE14 F2 F K20 A4 I132 D7 I D02 C8
3F92 D4 4D12 C8 6C05 E 5 F125 E8 FC43 D6 F E15 F2 F K21 A4 I133 D7 I D03 A 5
3F93 C5 4E01 F 3 6C06 F5 F126 D7 F C44 D6 FE 16 E1 FK22 A5 I134 D7 ID04 A5
3F94 C5 4E02 F 3 6D07 B8 F201 B3 F C46 D6 FE 17 E1 FK23 B5 I135 D7 ID05 C8
3F95 C1 4E03 F 3 6D08 B8 F203 A4 F C47 D5 FE 18 F1 FK 24 B5 I136 D7 I D06 C8
3F96 C4 4E04 E3 6E02 F5 F204 B3 F C48 E 5 FE19 F 1 FK25 A4 I137 D7 IE06 F3
3F98 D4 4F01 D1 6E05 F4 F205 B3 F C49 E 5 FE20 E1 FK 26 A4 I138 D7 I F24 D3
3K01 B8 4F02 D1 6E06 F4 F206 B4 FC50 D6 FE26 F3 FK 27 B5 I139 D7 I F27 D2
3K02 B8 4F03 C4 6E11 F4 F207 B3 FC51 D4 FE27 E3 FK28 B5 I140 D7 IF28 D2
3K03 B8 4F04 C4 6E12 F2 F208 B3 FC52 C4 FE28 E3 F L01 A2 I141 D7 IF29 E2
3K04 B8 4F05 C4 6E13 F1 F209 A3 FC53 C4 FE31 E5 F L02 A2 I142 D7 IF30 D2
3K16 B5 4F07 D3 6F01 C4 F210 A3 FD01 C4 FE32 F5 FL03 A 2 I143 D7 IF31 C2
3K17 B5 4F08 D3 6F02 D4 F211 B3 FD02 D5 FE33 F4 FL04 B 2 I144 D7 IF32 D2
3K18 B5 4K01 B 8 6F 03 D3 F 212 B3 FD03 A6 FE34 F 2 FM01 B2 I145 D7 IF33 E 2
3K19 B5 4K02 B 8 6F 04 D4 F 213 A3 FD04 B8 FE35 F 1 FM02 B2 I146 D7 IF34 E 3
3K30 A8 4K03 B 8 6F 05 D4 F 214 A2 FD05 B8 FE36 F 6 FM03 B1 I147 D7 IF38 D1
3K31 A8 4K04 B 8 6F 06 C3 F 215 A2 FD06 B8 FE37 F 4 FM04 A1 I148 D7 IF39 D1
3K32 A8 4K05 B 8 6F 07 C3 F 216 A4 FD07 A8 FE38 F 4 FM05 B1 I149 D7 IF40 C4
3K33 A8 4K06 B 8 6F 08 D3 F 217 A3 FD08 A5 FE39 F 6 FM06 B2 I150 D7 IF41 C4
3K34 A8 4K31 B 5 6F 09 D3 F 301 F 8 FD09 A 5 FE40 F6 FM07 B1 I156 E8 IF42 C4
3K35 A8 4K32 B 5 6F 10 D3 F 302 F 8 FD10 A 5 FE41 F6 FM08 B2 I157 E7 IF43 D4
3K36 A8 4L01 A 2 6F11 E2 F304 F7 FD11 B 6 FE42 F4 FM09 A 2 I 158 D7 IF44 C4
3K37 A8 4L02 A 2 6F12 E3 F305 F6 FD12 B 6 FE43 F4 FM10 A 1 I 160 D7 IF45 D4
3K38 A8 4M01 A 2 6F 13 D2 F306 F6 FD13 B5 F E44 F4 FM11 B2 I 161 C6 IF46 D4
3K39 A8 4Q01 C6 6F14 D2 F307 F7 FD14 B 6 FE45 F 5 FM13 A1 I162 E7 IK01 A 5
3K40 A8 5203 A 4 6F15 C2 F308 F8 FD15 B5 FE 47 F3 FM14 A1 I163 E8 IK02 B5
3K41 A8 5204 B 3 6F18 E1 F309 F6 FD16 B 5 FE48 F4 FM15 B 1 I 164 E8 IL01 A2
3L04 A2 5205 B3 6F 19 E1 F310 F8 FD17 B 5 FE 49 F2 FM16 A1 I166 E7 IL02 A2
3L09 A2 5206 B3 6F 20 D1 F 311 F8 FD18 B5 FE50 F1 FM17 A2 I 167 E7 IL03 A2
3L10 A2 5209 A4 6F 21 D1 F 312 F6 FD19 B5 FE51 F3 FM18 A2 I 168 E7 IL04 A2
3L11 A2 5308 D4 6F22 D1 F313 E5 FD20 B6 FE52 F1 FM19 E8 I 169 E8 IL05 B2
3L12 A2 5A 02 D4 7101 E7 F314 F6 FD22 B6 FE53 F 5 FM20 A2 I170 D7 IL06 A2
3L13 A2 5A 04 E5 7102 D7 F315 E5 F D23 A 6 FE54 F 4 FM21 A2 I172 D7 IM 01 C2
3L14 A2 5A 05 E5 7107 E7 F 316 C4 FD24 A 6 FE55 F 3 F M22 A2 I 174 D8 I M02 B 2
Ref No. Position Ref No. Pos ition Ref No. Position Ref No. Position Ref No. Position Ref No. P osition Ref No. Position Ref No. Position
1103 C2 2421 B1 2C11 C4 2F72 E4 2M27 A1 2R12 B6 3327 F8 3E06 F5
1104 C2 2422 B1 2C27 E5 2F73 E 4 2M28 A 1 2R13 B6 3328 F8 3E07 F5
1202 B4 2423 B1 2C28 E5 2F74 E4 2P 01 B6 2R14 B 7 3401 E4 3E08 F 5
2101 E7 2424 C1 2C29 E4 2F75 E 4 2P02 B 7 2R15 B6 3402 E4 3E09 F5
2102 D7 2425 C1 2C30 E5 2F76 E4 2P03 B7 2R18 B 7 3408 C5 3E10 F5
2103 E7 2427 C3 2C31 E5 2F77 E 4 2P04 B 7 2R19 B7 3409 D4 3E 11 F5
2104 D7 2430 D2 2C32 C4 2F78 E4 2P 05 B6 2R20 B 7 3412 D1 3E12 F5
2111 D7 2431 D1 2C33 F5 2F82 D4 2P06 B7 2R21 A 7 3413 D1 3E13 F5
2112 D7 2432 D1 2C34 C4 2F83 D4 2P07 B 7 2R22 A7 3503 F3 3E14 F5
2113 E8 2433 C1 2C35 C4 2F84 C4 2P08 B 7 2R23 A7 3509 E3 3E15 F5
2116 E8 2434 C1 2C36 E5 2F85 C4 2P 09 B7 2R24 A7 3510 E3 3E16 F5
2117 D7 2435 C2 2C37 E5 2F86 C4 2P 10 B7 2R25 A 7 3511 F3 3E17 F3
2120 D8 2436 E4 2C40 E8 2F87 C4 2P 11 B7 2R26 A7 3512 F3 3E 19 F4
2121 E7 2443 E4 2D02 D5 2F88 C4 2P 12 B7 2R27 A7 3513 F3 3E 20 F4
2122 D7 2444 E4 2D03 D5 2F91 C4 2P13 B 7 2R28 B7 3514 F3 3E21 F4
2125 E8 2446 E4 2D04 D5 2F92 D4 2P 14 B7 2R29 B7 3515 F3 3E 22 F4
2126 D7 2447 E4 2D06 D5 2F93 D4 2P15 B 7 3101 E7 3516 F3 3E25 F 3
2132 D8 2A02 E5 2D07 D5 2F94 D4 2P 16 B7 3102 E7 3517 F3 3E27 F4
2135 D8 2A03 D5 2D09 A5 2F95 D4 2P 17 B7 3103 D7 3518 F3 3E28 F4
2137 D7 2A04 E5 2D10 A 5 2F96 E1 2P18 B7 3104 D7 3B01 D6 3E29 F4
2140 D8 2A05 D5 2D11 A5 2F97 D1 2P 20 B7 3105 E8 3B02 D6 3E30 F4
2143 D8 2A06 D5 2D17 A8 2F99 E 1 2P21 B 7 3106 D7 3B 03 E6 3E33 F2
2144 D7 2A07 D5 2D18 A8 2K 01 B5 2P 22 B7 3107 E7 3B04 D6 3E34 F2
2145 E8 2A 08 D4 2D19 A8 2K02 B 5 2P23 B7 3108 D7 3B05 D5 3E35 F2
2146 D7 2A09 D4 2D20 A8 2K 03 B4 2P 24 B7 3111 E7 3B06 D5 3E36 F2
2147 E8 2A 10 D5 2D23 B8 2K04 B 5 2P25 B7 3112 E7 3B19 D6 3E 37 F4
2148 D8 2A11 D4 2D24 B8 2K 05 B4 2P 26 B7 3113 D7 3C01 E 5 3E38 F4
2149 D7 2A12 D5 2E01 F5 2K 06 B5 2P 27 B7 3114 D7 3C02 E5 3E39 F2
2150 D7 2A13 D4 2E02 E 5 2K07 B 5 2P28 B7 3115 D7 3C06 D5 3E40 F 2
2151 D8 2A14 D5 2E03 E 5 2K08 B 5 2P29 B7 3117 E8 3C07 C5 3E41 F2
2152 D7 2A15 D4 2E04 F4 2K 09 B4 2P 30 B7 3118 D7 3C08 E4 3E42 F2
2153 D8 2A16 E5 2E 06 E5 2K 10 B4 2P 31 B7 3120 D7 3C09 C5 3E 43 F2
2154 D7 2A17 D5 2E07 E 3 2K11 B 4 2P32 B7 3121 E8 3C10 C5 3E44 F2
2155 E8 2A 18 D5 2E08 F3 2K12 B 5 2P33 B 7 3122 D7 3C11 C5 3E47 E 1
2156 D7 2A19 D5 2E09 E 3 2K13 B 4 2P34 B7 3123 D8 3C12 F8 3E 48 E1
2158 D8 2A20 D5 2E10 E 3 2K14 B 4 2P35 B7 3124 D8 3C13 E8 3E49 E 1
2159 C6 2A21 D5 2E11 E 3 2K15 B 5 2P36 B7 3125 D7 3C14 E8 3E50 E 1
2160 C6 2A22 D5 2E12 F3 2K 17 B5 2P 37 A6 3126 D7 3C15 E8 3E51 F2
2161 C6 2A23 D5 2E13 E 3 2K18 B 5 2P38 A7 3127 D7 3C24 D6 3E52 F 2
2165 D8 2A24 D5 2E14 E 3 2K19 B 5 2P39 A7 3128 D7 3C25 C4 3E53 F 1
2166 D8 2A25 D5 2E15 E 3 2K20 B 5 2P40 B7 3129 E8 3C26 C4 3E54 F1
2167 D8 2A27 E5 2E 16 E3 2K 21 B5 2P 41 B7 3130 E8 3C27 C4 3E55 F1
2168 D8 2A28 E5 2E 17 E3 2K 23 B5 2P 42 B7 3131 D7 3C28 C4 3E 56 F1
2173 E8 2A 29 E5 2E18 F3 2K24 B5 2P43 A 6 3132 D7 3C29 C4 3E57 F1
2174 E8 2A 30 E5 2E19 E 3 2K25 B 4 2P45 A 7 3133 E8 3C30 C4 3E 58 F1
2175 E8 2A 33 E4 2E20 E 3 2K26 B 5 2P46 A 7 3134 D7 3C31 E8 3E 59 E3
2176 E8 2A 34 D4 2E21 F3 2K27 B 8 2P47 A 7 3135 D7 3C36 E5 3E 60 E3
2200 B4 2A 35 D4 2E22 E3 2K 28 B8 2P 48 A7 3136 D7 3C37 E 5 3E61 E 3
2201 B4 2B 02 D6 2E26 F4 2L04 A2 2P 49 A7 3137 E8 3C54 D4 3E62 F1
2202 B4 2B 03 D6 2E27 F2 2L05 A2 2P 50 A7 3138 D7 3C55 C4 3E 63 E3
2203 B4 2B 04 D6 2E28 F1 2L06 A2 2P 51 A7 3139 D8 3C57 E5 3E64 E3
2204 B4 2B 05 D6 2E33 F4 2L07 A2 2P 77 A7 3140 D7 3C59 C4 3E 65 F1
2205 A3 2B 07 D6 2E35 F3 2L08 A2 2P 78 A7 3141 D7 3C60 C5 3E 66 F3
2208 A4 2B 08 D6 2E36 F3 2L09 A2 2P 79 A7 3142 D7 3C61 E5 3E67 F3
2209 A3 2B 09 E5 2F04 E 4 2L10 A2 2P80 A7 3143 D7 3C62 E 5 3E68 E 3
2211 B3 2B 10 E5 2F05 E4 2L11 A2 2Q01 B7 3144 D7 3C63 F5 3E69 F3
2212 B3 2B 12 D6 2F07 E 4 2L12 A2 2Q02 B7 3145 D7 3C64 F5 3E 70 F3
2213 B3 2B 13 D6 2F08 E 4 2L13 A2 2Q03 B7 3146 D7 3C65 F5 3E 71 E3
2214 B3 2B 14 D6 2F09 D4 2L14 A2 2Q18 B8 3147 D8 3C66 F5 3E72 E 3
2218 A3 2B 15 D6 2F10 E 4 2L15 A2 2Q20 B6 3148 D8 3C69 E 5 3E73 E 3
2219 A4 2B 16 D6 2F11 E 4 2L16 A2 2Q21 B7 3149 D7 3C70 E 5 3E88 F3
2220 B3 2B 17 D6 2F12 D4 2L17 A2 2Q22 B7 3150 D7 3C71 E5 3E 89 F4
2221 B3 2B 18 D6 2F13 D4 2L18 A2 2Q23 C7 3151 D8 3C72 E 5 3E90 F4
2222 B3 2B 19 D6 2F14 D4 2L19 A2 2Q24 B7 3152 D7 3C73 E5 3E 92 F4
2223 B3 2B 20 D6 2F15 D4 2L20 A2 2Q25 C7 3153 E 8 3C74 C5 3E93 F4
2224 A3 2B 21 D6 2F16 D4 2L21 A2 2Q26 C7 3154 E 8 3C75 C5 3E94 F4
2225 A3 2B 22 D6 2F17 D4 2L22 A2 2Q27 C7 3155 D7 3C76 C4 3E 95 E3
2226 A4 2B 23 D6 2F18 D4 2L23 A2 2Q28 C7 3156 D7 3C77 C4 3E 96 E3
2227 A4 2B 24 D6 2F19 D4 2L24 A2 2Q29 C7 3157 D7 3C78 E 5 3E97 F4
2228 B4 2B 25 D6 2F20 D4 2L25 A2 2Q30 B7 3158 E8 3C80 D5 3E 99 F3
2229 B4 2B 26 D6 2F24 E 4 2L26 A2 2Q31 B7 3159 C6 3C81 D5 3F01 D4
2230 B3 2B 27 D6 2F25 E 4 2L27 A2 2Q32 C7 3160 C6 3C82 E5 3F02 D4
2231 B3 2B 28 D6 2F26 C3 2L33 A2 2Q33 C7 3161 C6 3C83 E 5 3F 03 D3
2233 B4 2B 29 D6 2F30 E 4 2L34 A2 2Q34 C7 3162 D8 3C84 E5 3F04 D3
2235 B4 2B 30 E6 2F31 E 4 2L39 A2 2Q35 C7 3163 D8 3C85 E5 3F07 D4
2240 B4 2B 31 E6 2F36 D4 2L40 A2 2Q36 C7 3164 D8 3C88 C5 3F08 D3
2313 F8 2B32 E 6 2F 37 D4 2M 01 C2 2Q37 B7 3165 D8 3C89 C4 3F09 E 4
2314 F8 2B33 E 6 2F 41 D4 2M 02 B 2 2Q38 B7 3166 D8 3C91 C4 3F11 D4
2317 F8 2B34 E 6 2F 42 D4 2M 03 B 2 2Q39 C7 3200 B4 3C92 C4 3F12 D3
2318 F6 2B35 E 6 2F 43 E1 2M04 B 2 2Q40 C7 3203 B 4 3C94 C5 3F14 D3
2321 F7 2B36 E 6 2F 44 D3 2M 05 B 2 2Q41 C7 3204 B3 3C95 C5 3F15 D3
2323 F8 2B37 E 6 2F 46 E3 2M06 B 2 2Q42 B7 3205 B3 3C96 E 5 3F18 D3
2325 F7 2B38 E 6 2F 47 D4 2M 07 B 2 2Q43 B7 3206 B4 3C97 E5 3F19 E 4
2326 F8 2B39 E 6 2F 49 D2 2M 08 B 2 2Q44 B6 3207 B3 3C98 C5 3F20 E4
2327 F7 2B40 E 6 2F 50 D4 2M 09 B 2 2Q45 B6 3208 B3 3C99 C5 3F22 D3
2328 F8 2B41 E 6 2F 52 C3 2M 10 B 2 2Q46 C6 3210 B3 3D05 B8 3F23 E 4
2331 F7 2B42 E 6 2F 53 C3 2M 11 C2 2Q47 C6 3211 B3 3D06 B 8 3F25 E4
2335 F7 2B43 E 6 2F 54 D1 2M 12 B 2 2Q48 C7 3212 B3 3D39 A5 3F26 E 4
2336 F7 2B44 E 6 2F 55 D3 2M 13 B 2 2Q49 C6 3213 A3 3D40 A5 3F27 E 4
2337 F8 2B45 E 6 2F 57 E1 2M14 B 2 2Q50 C7 3216 B 4 3D41 A5 3F28 E 4
2338 F8 2B46 E 6 2F 58 D3 2M 15 B 2 2Q51 C6 3217 B4 3D42 A5 3F29 E 4
2341 F8 2B61 E 6 2F 60 E2 2M16 B 2 2Q52 C6 3220 B 3 3D47 B8 3F30 E 4
2342 D4 2C01 E5 2F61 D3 2M17 A 1 2R02 B7 3221 B3 3D48 B8 3F31 E4
2401 D1 2C02 F8 2F63 E4 2M 18 A 1 2R03 B7 3222 B4 3D49 B8 3F32 E4
2402 D1 2C03 F8 2F64 E4 2M 19 A 1 2R04 B7 3223 A4 3D50 B8 3F33 E4
2403 E2 2C04 E8 2F65 E4 2M 20 A 1 2R05 B7 3224 A4 3D57 B8 3F34 E4
2404 E3 2C05 E8 2F66 E4 2M 21 A 1 2R06 B6 3305 F8 3D59 A8 3F35 C3
2405 D2 2C06 E8 2F67 E4 2M22 A1 2R07 B7 3309 F7 3E01 F4 3F36 C3
2406 D2 2C07 E8 2F68 E4 2M23 A1 2R08 B6 3312 F7 3E02 F4 3F37 C5
2407 C2 2C08 E8 2F69 E4 2M24 A1 2R09 B6 3314 F8 3E03 F3 3F38 C5
2419 B1 2C09 D5 2F70 E4 2M25 A1 2R10 B6 3315 F7 3E04 E 3 3F41 E4
2420 B1 2C10 C4 2F71 E4 2M26 A1 2R11 B7 3317 F7 3E05 F5 3F43 C5
ASSY Tact SW Top View
ASSY Tact SW Bottom View
Module IR Top View
Module IR Bottom View
10-19
Page 51
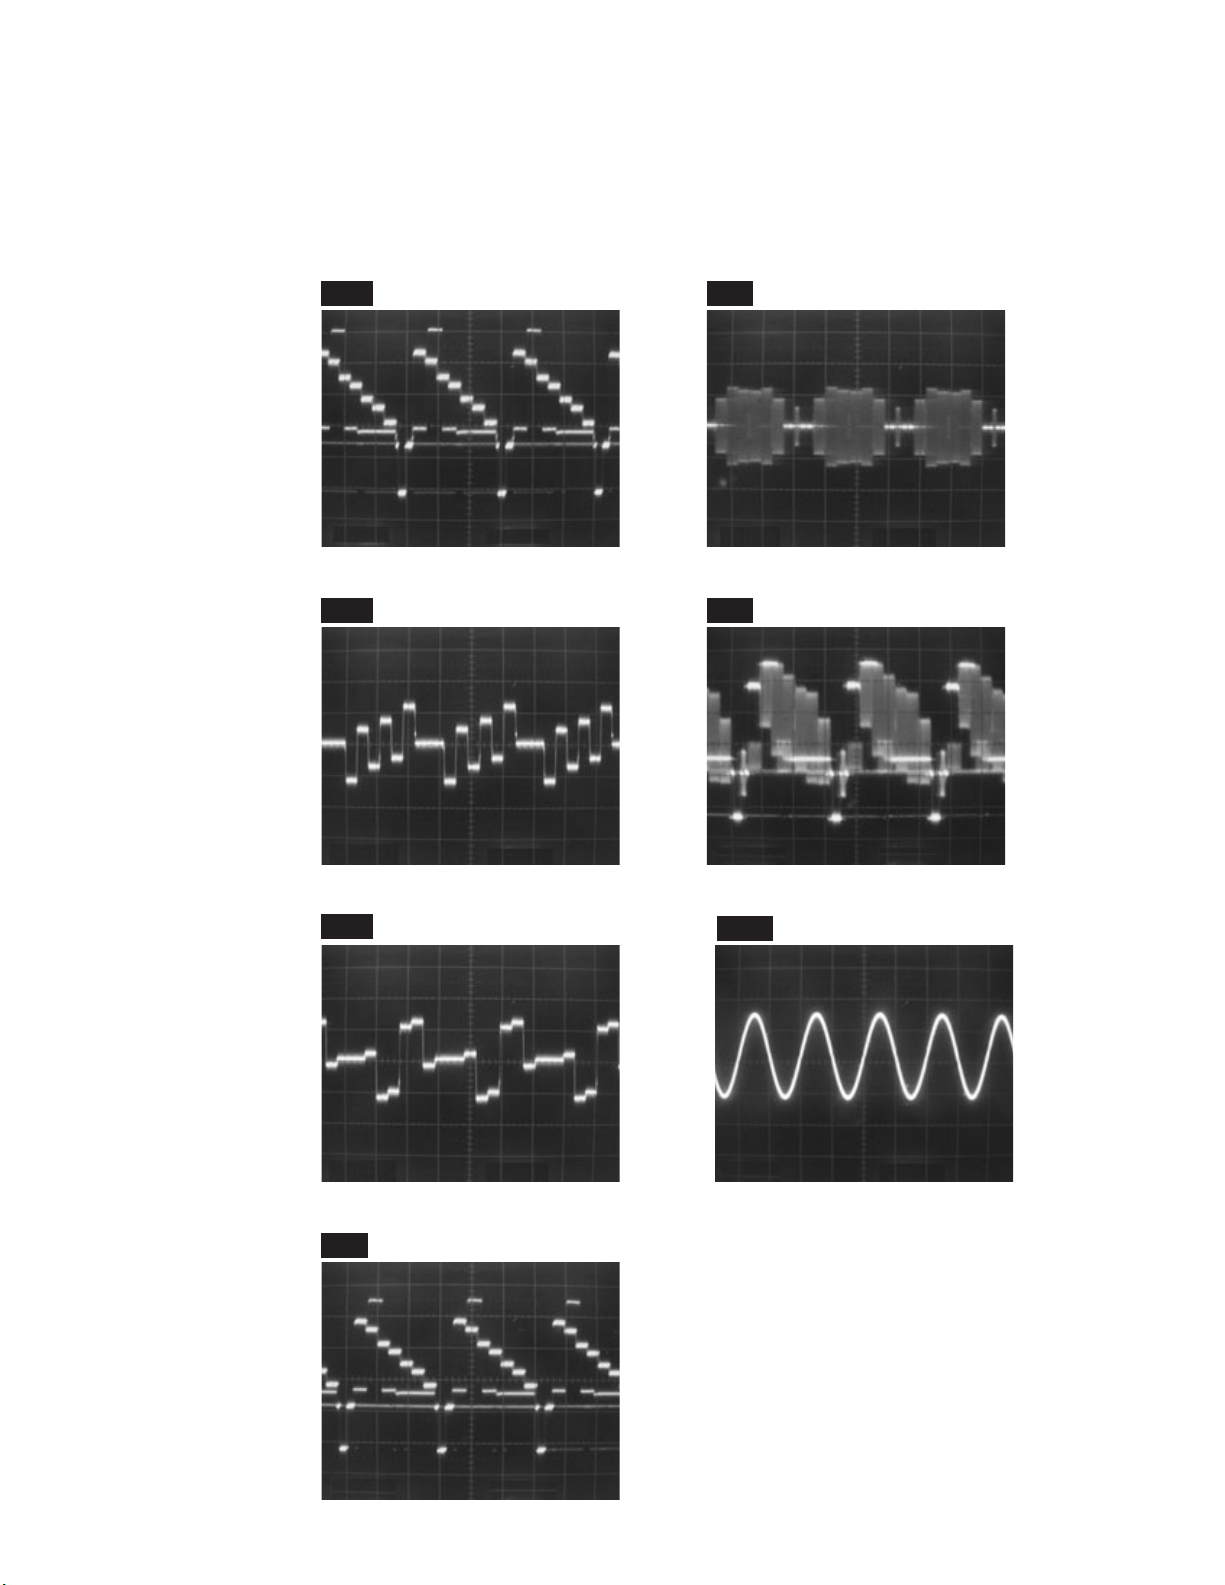
WAVEFORMS
Y-IN
0.2V
Pb-IN
0.2V
Pr-IN
0.2V
AUDIO-L/R-IN1V1V
0.5m
CVBS-IN
0.2V
SC-IN
0.2V
SY-IN
0.2V
WF1 ~ WF7 = Waveforms to be observed at
Waveform check points.
(Shown in Schematic Diagram.)
Input: NTSC Color Bar Signal (with 1kHz Audio Signal)
WF1
Y-IN
WF2
Pb-IN
5F13, 5F19
0.2V
5F15, 5F21
0.2V
2020µ
2020µ
WF5
s
s
WF6
SC-IN
CVBS-IN
3F59, 3F71
0.2V
3F62, 3F74
0.2V
2020µ
2020µ
s
s
WF3
Pr-IN
WF4
5F17, 5F23
0.2V
3F58, 3F70
2020µ
s
3F01, 3F02, 3F35,3F36,
WF7
3F64, 3F65, 3412, 3413
AUDIO-L/R-IN
0.5m
s
SY-IN
0.2V
2020µ
s
11-1
PL9_1WF
Page 52
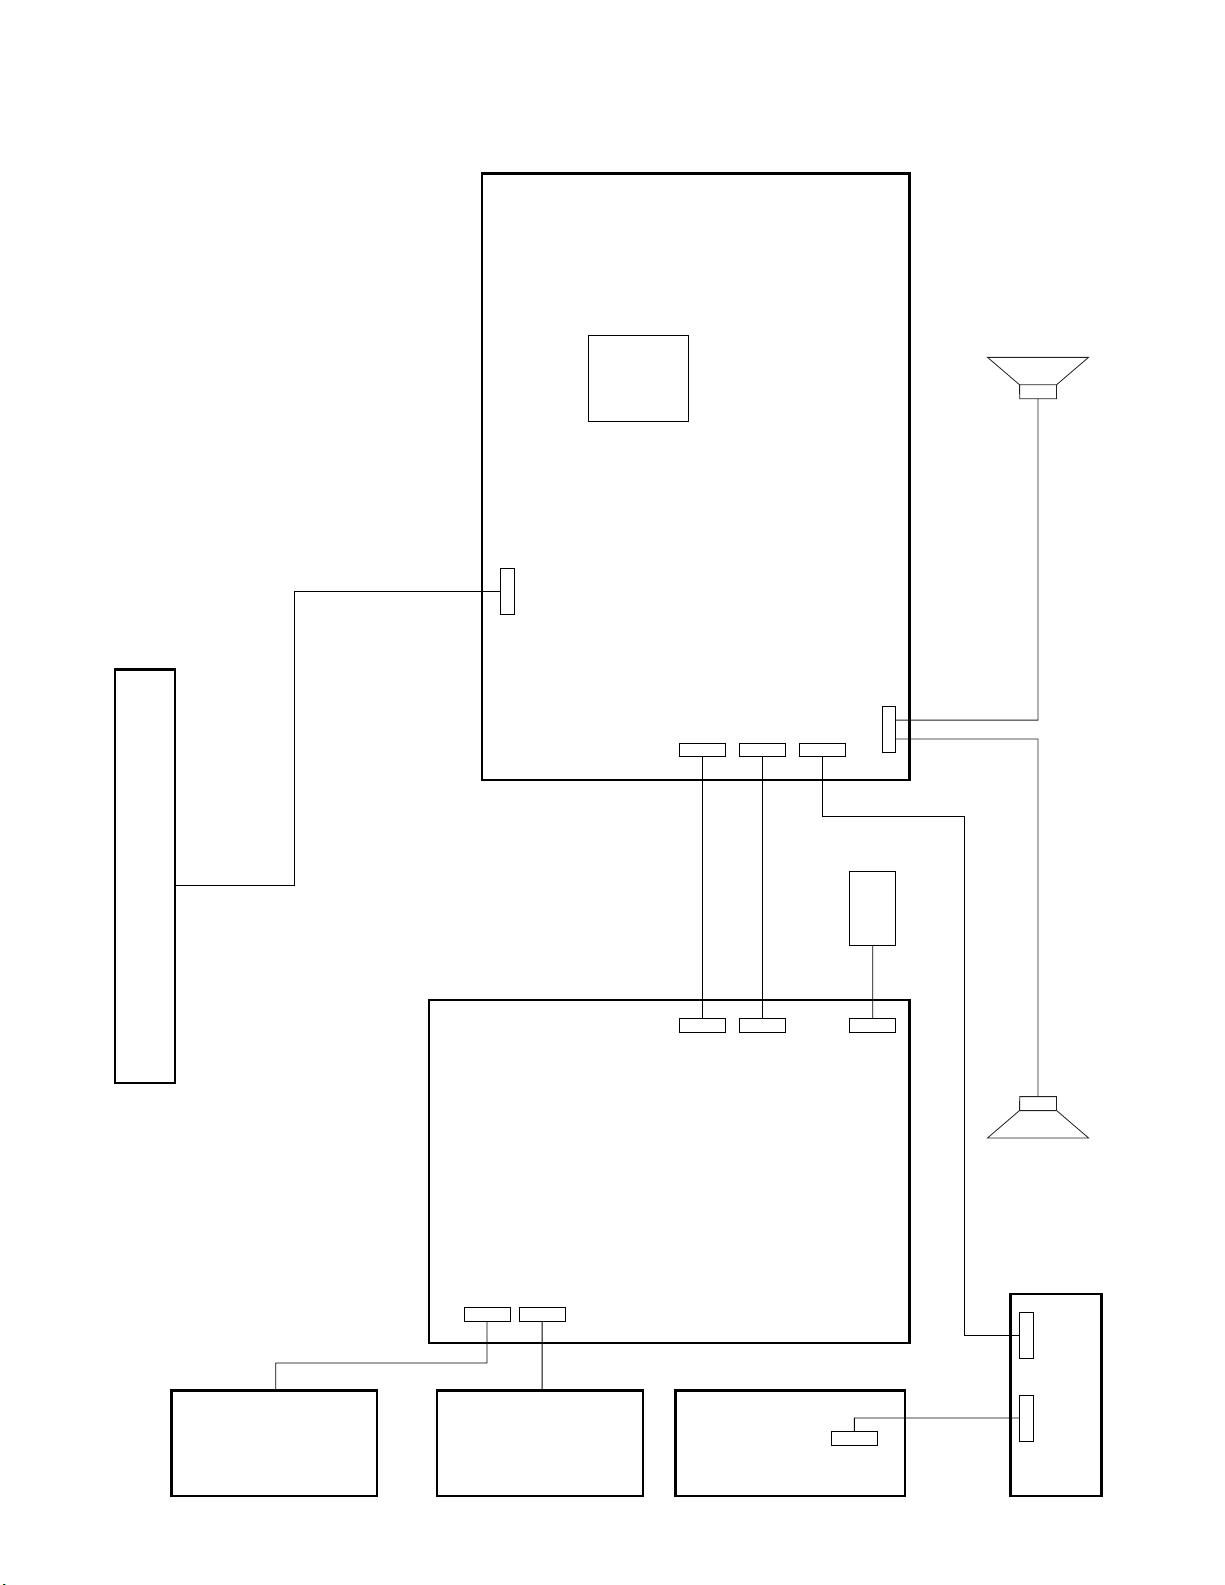
WIRING DIAGRAM
TUNER
SSB
1D01
(41Pin)
LEFT
LOUDSPEAKER
PANEL LVDS
CN2
(14Pin)
CN3
(12Pin)
1101
(11Pin)
CN6
(11Pin)
POWER SUPPLY MODULE
1102
CN7
(8Pin)
(8Pin)
1C02
(8Pin)
1301
(4Pin)
IN
AC MAINS
CN1
(2Pin)
RIGHT
LOUDSPEAKER
PANEL
PANEL
12-1
ASSY TACT
SW
J1
(3Pin)
J1
(8Pin)
J2
(3Pin)
MODULE IR
A9PH1WI
Page 53
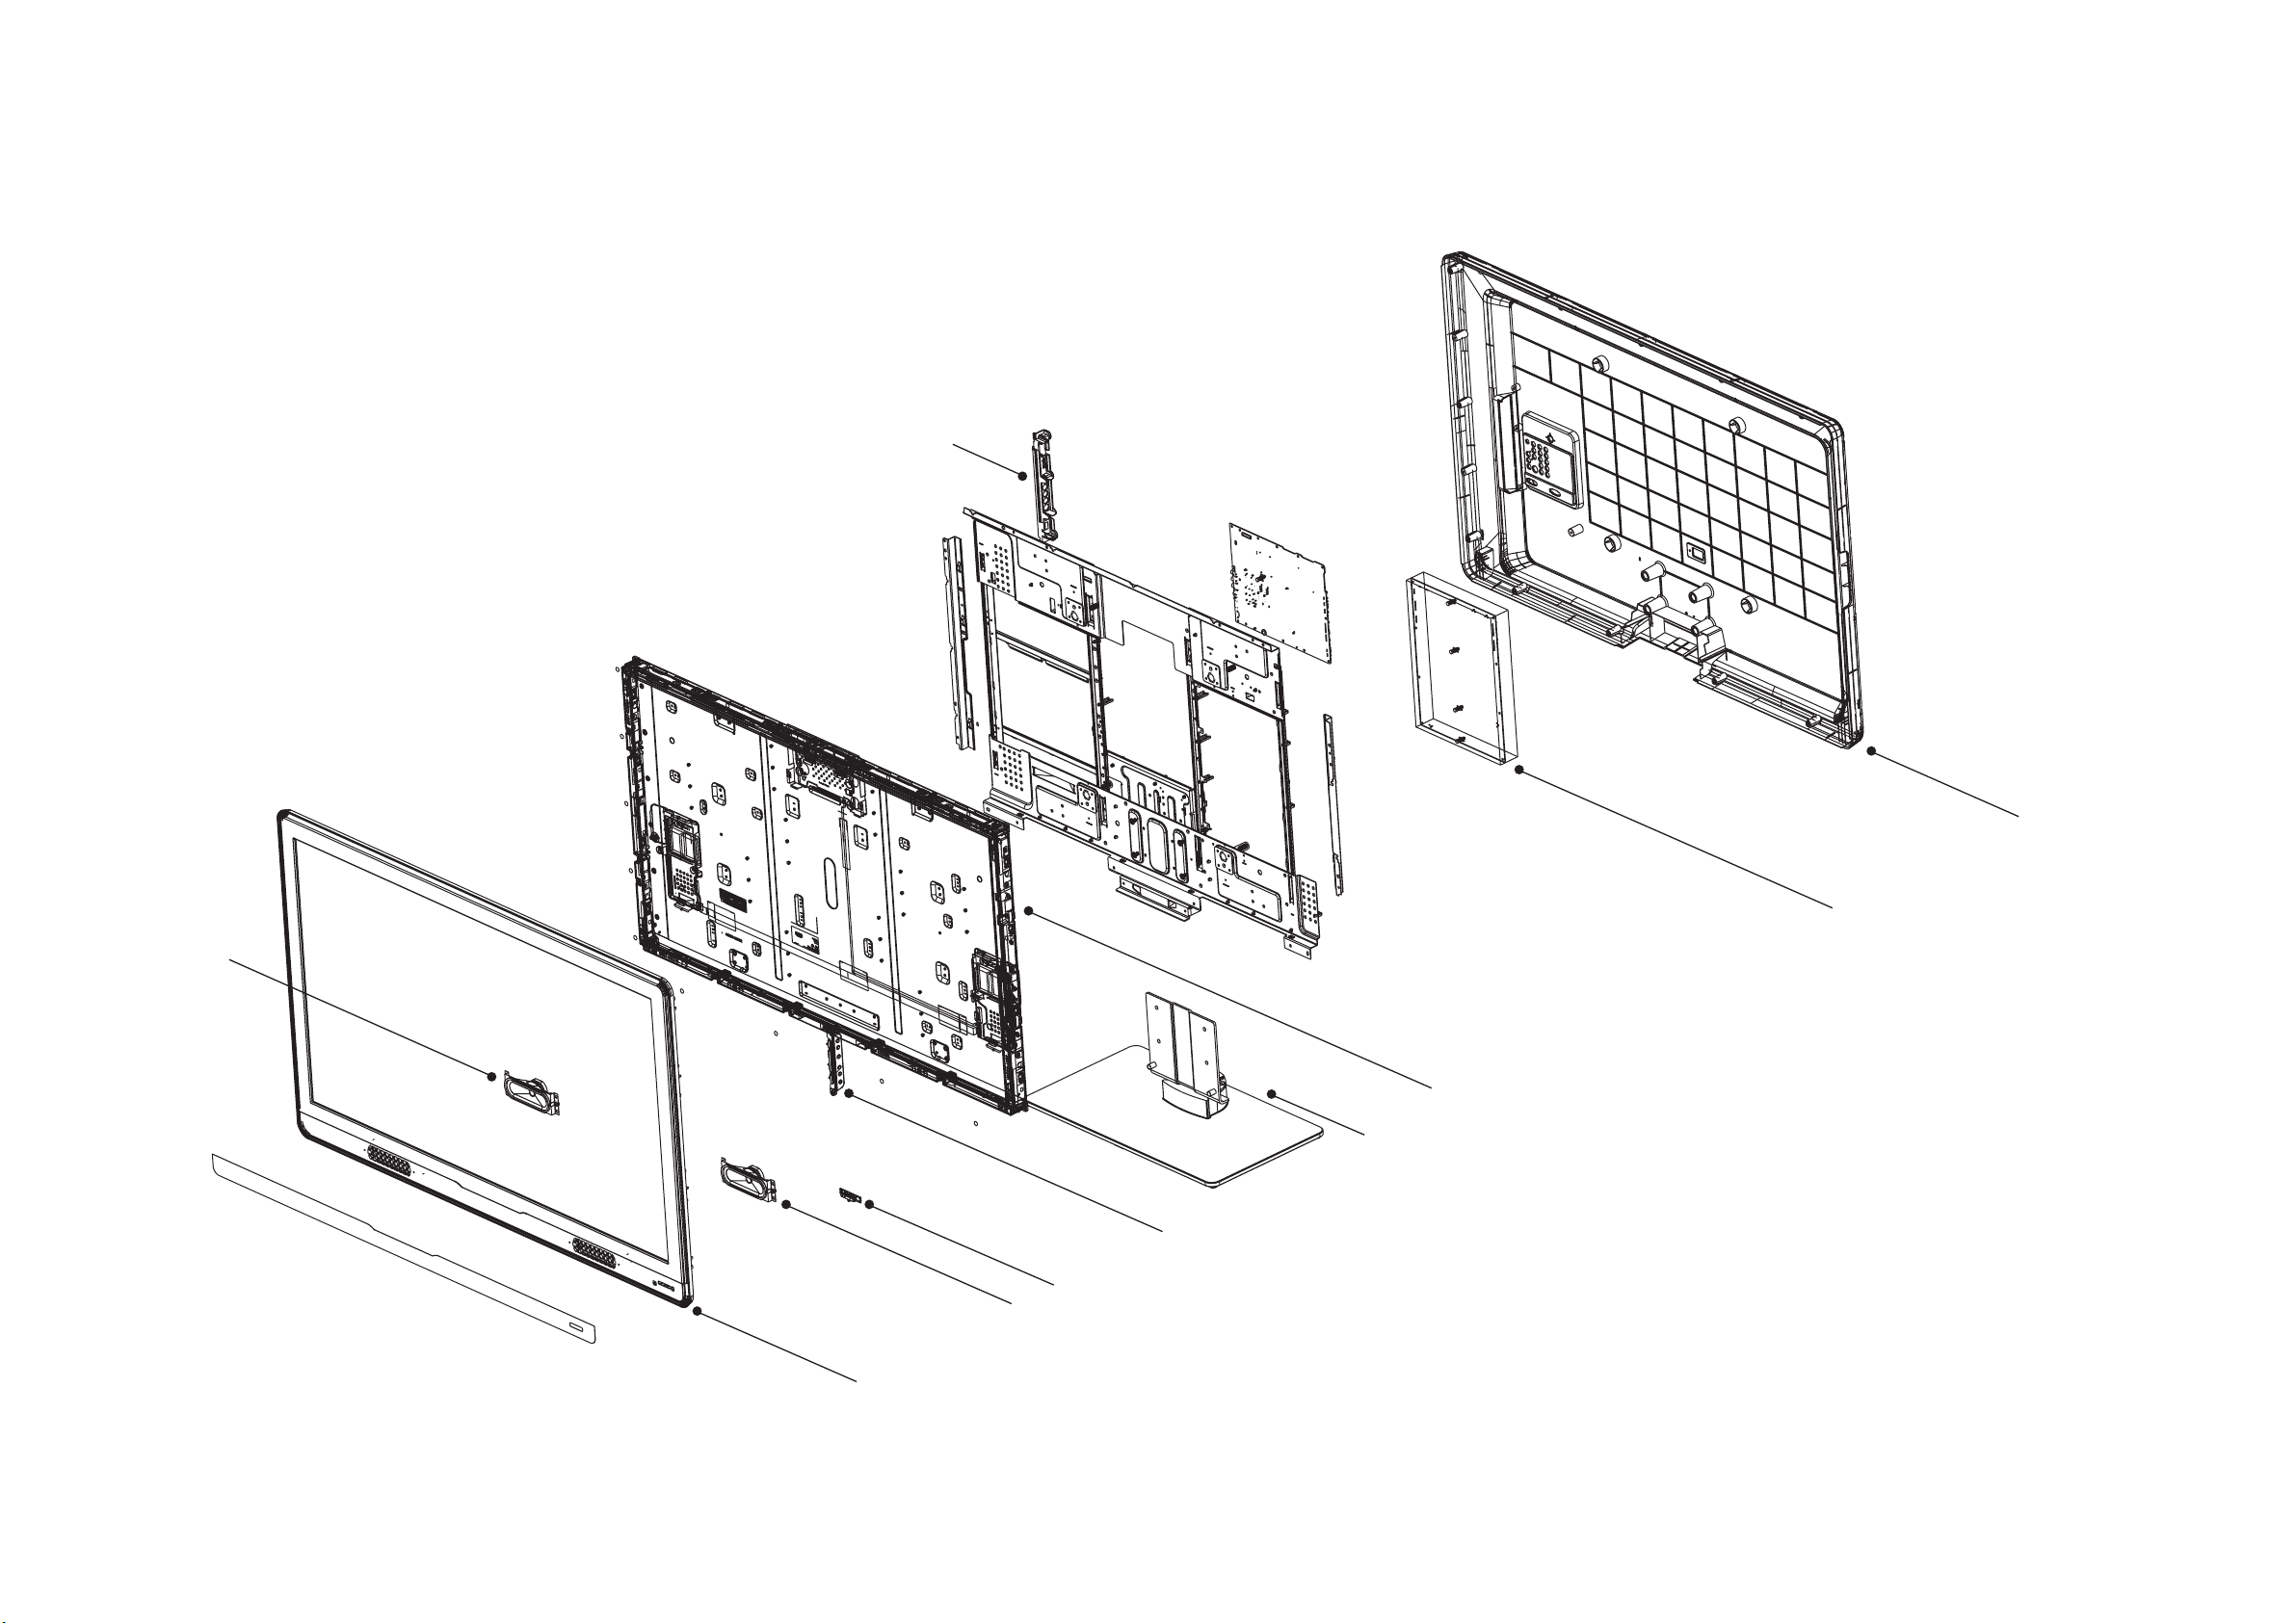
Note: The number in parentheses are the Item No.
EXPLODED VIEWS
3 (0021)
10 (5211)
1 (0011)
2 (1005)
4 (1004)
5 (0260)
6 (0025)
7 (1113)
8 (5211)
9 (0006)
13-1 PL9.0CEX
Page 54
PARTS LIST
[47MF439B/F7 (Serial No. : YA1A**********)]
PRODUCT SAFETY NOTE: Products marked with a
# have special characteristics important to safety.
Before replacing any of these components, read
carefully the product safety notice in this service
manual. Don't degrade the safety of the product
through improper servicing.
Item Philips 12NC Description
Mechanical Parts
0006 313926881091 FO AS FCAB MG8 47 NA 438
0011 313918763241 AS BC MG8 47 NA
0021 313912472941 SIDE AV BKT NA
0259 313912879931 SCREW BAG STAND MG8 42
0260 313918763141 AS STAND MAG8 47 BLACK
5211 242226400654 LSP 4R 20W OPN FULR O46X154 B
5211 242226400689 LSP 4R 20W OPN FULR O46X154 B
Packing Parts
0101 313912540551 ADDENDUM ME8 MV
0124 312212422789 BAG
0124 313501300261 PE-BAG
0125 313912540891 DFU NAFTA 2k9 MAG
0127 313912540563 FCC Addendum
0136 313912567391 ME8 Child Safety Guide
0561 242201500827 CABLE MGNT TIE NY66 235X14MM
0687 312123349281 White Label w/o Ribbon
Accessory
1082 908210090001 R03-B500/01S - Battery
1085 313923816951 RC2033603/01
8195 242207000106 MAINSCORD UL 7A 1M5 DET 2P B
Miscellanea
8101 313917100641 CBLE HL 11P/560/11P HL 24ST BK
8102 313917100631 CBLE HL 8P/560/8P HL 24ST BK
8301 313917101211 CBLE HL 04P/560+820/2X2FT FER
8408 310431106951 CBLE VH 2P3/180/INLET INS UL
8C02 313917101011 CBLE SR 9P/820/9P SR 30ST INS
8D01 313917103041 CBLE FX15 41P/480/51P FI-R FER
8N10 313917102961 CBLE CML 3P/400/3P CML 28ST IN
LCD Panel
1004 932225837682 TFT-LCD LC470WUE-SAA1 (LGPH) B
PCB Assembly
0025 313913870661 ASSY TACT SW MG8 47 BK 2k9 NA
1005 272217100571 POW SUPP MOD IPB PLHL-T722A B
1113 313913870761 MODULE IR MG8 2k9 NA
1150 313926863871 AS SSB MG8 NA2K9M
PCB Assembly
1150 313926863871 AS SSB MG8 NA2K9M
1101 242202520686 CON V 11P M 2.00 1735446 B
1102 242202520683 CON V 8P M 2.00 1735446 B
1203 242254290148 TUN V+U PLL F B
1204 242254944518 FIL SAW 45MHZ75 OFWM1971M L
1301 242202520678 CON V 4P M 2.00 1735446 B
Item Philips 12NC Description
1C01 242202605905 SOC PHONE V 1P F 3.5 ST MSJ Y
1C02 242202517766 CON V 9P M 1.00 SM SR R
1C04 242254301631 RES XTL SM 60MHZ 20P U4B R
1D01 242202520715 CON H 41P F 0.50 SM FX15S R
1D04 242254945325 FIL CM SM 50V 100MHZ 67R R
1D05 242254945325 FIL CM SM 50V 100MHZ 67R R
1D06 242254945325 FIL CM SM 50V 100MHZ 67R R
1D07 242254945325 FIL CM SM 50V 100MHZ 67R R
1D08 242254945325 FIL CM SM 50V 100MHZ 67R R
1D09 242254945325 FIL CM SM 50V 100MHZ 67R R
1D10 242254945325 FIL CM SM 50V 100MHZ 67R R
1D11 242254945325 FIL CM SM 50V 100MHZ 67R R
1D12 242254945325 FIL CM SM 50V 100MHZ 67R R
1D13 242254945325 FIL CM SM 50V 100MHZ 67R R
1D38 242254945325 FIL CM SM 50V 100MHZ 67R R
1D39 242254945325 FIL CM SM 50V 100MHZ 67R R
1E01 242203300698 SOC HDMI V 19P F SM DC1 R
1E02 242203300698 SOC HDMI V 19P F SM DC1 R
1E03 242203300698 SOC HDMI V 19P F SM DC1 R
1E04 242203300617 SOC HDMI H 19P F SM DC1 R
1E06 242202518779 CON V 4P M 2.00 SM PH R
1E07 242254301638 RES XTL SM 12MHZ 20P XS R
1F01 242202605996 SOC CINCH V 5P F 1L5 B
1F02 242202605996 SOC CINCH V 5P F 1L5 B
1F03 242202605702 SOC MDIN V 4P F MDC-066H-A Y
1F04 242202605751 SOC CINCH V 3P F 1L3 YEWHRD B
1F05 242202604811 SOC CINCH V 3P F BKWHRD B
1F06 242202605703 SOC PHONE H 1P F 3.5 ST MSJ Y
1F07 242202605959 SOC MDIN H 4P F MDC-013V1 Y
1F08 242202605952 SOC CINCH H 3P F 1L3 YEWHRD Y
1F10 242203300486 SOC USB H 4P F 2/2.5 292303 B
1F13 242254945325 FIL CM SM 50V 100MHZ 67R R
2101 319802771080 CER2 0603 X5R 25V 1U COL R
2102 319802771080 CER2 0603 X5R 25V 1U COL R
2103 319803521040 CER2 0402 X7R 16V 100N COL
2104 319803521040 CER2 0402 X7R 16V 100N COL
2105 202055200483 CER2 1206 X5R 16V 22U PM20 R
2106 202055200483 CER2 1206 X5R 16V 22U PM20 R
2108 202055200483 CER2 1206 X5R 16V 22U PM20 R
2109 202055200483 CER2 1206 X5R 16V 22U PM20 R
2111 319802771080 CER2 0603 X5R 25V 1U COL R
2112 319802771080 CER2 0603 X5R 25V 1U COL R
2113 319803503320 CER2 0402 X7R 50V 3N3 COL
2114 202055200483 CER2 1206 X5R 16V 22U PM20 R
2115 319803041010 ELCAP SM 16V 100U PM20 COL R
2116 319803512230 CER2 0402 X7R 25V 22N COL
2117 319803503320 CER2 0402 X7R 50V 3N3 COL
2118 202055200483 CER2 1206 X5R 16V 22U PM20 R
2119 319803041010 ELCAP SM 16V 100U PM20 COL R
2120 319803512230 CER2 0402 X7R 25V 22N COL
2121 319803503320 CER2 0402 X7R 50V 3N3 COL
2122 319803503320 CER2 0402 X7R 50V 3N3 COL
2123 319803501020 CER2 0402 X7R 50V 1N COL
2124 319803501020 CER2 0402 X7R 50V 1N COL
2125 319803521040 CER2 0402 X7R 16V 100N COL
2126 319803521040 CER2 0402 X7R 16V 100N COL
2127 319803501020 CER2 0402 X7R 50V 1N COL
2128 319803501020 CER2 0402 X7R 50V 1N COL
20090302 14-1 A9PJ3PL
Page 55
Item Philips 12NC Description
2129 319803503320 CER2 0402 X7R 50V 3N3 COL
2130 319803503320 CER2 0402 X7R 50V 3N3 COL
2131 319803501020 CER2 0402 X7R 50V 1N COL
2132 319803503320 CER2 0402 X7R 50V 3N3 COL
2133 202055200483 CER2 1206 X5R 16V 22U PM20 R
2134 319803041010 ELCAP SM 16V 100U PM20 COL R
2135 319803512230 CER2 0402 X7R 25V 22N COL
2136 319803501020 CER2 0402 X7R 50V 1N COL
2137 319803503320 CER2 0402 X7R 50V 3N3 COL
2138 202055200483 CER2 1206 X5R 16V 22U PM20 R
2139 319803041010 ELCAP SM 16V 100U PM20 COL R
2140 319803512230 CER2 0402 X7R 25V 22N COL
2141 319803501020 CER2 0402 X7R 50V 1N COL
2142 319803501020 CER2 0402 X7R 50V 1N COL
2143 319803521040 CER2 0402 X7R 16V 100N COL
2144 319803521040 CER2 0402 X7R 16V 100N COL
2145 319803521040 CER2 0402 X7R 16V 100N COL
2146 319803521040 CER2 0402 X7R 16V 100N COL
2147 319803521040 CER2 0402 X7R 16V 100N COL
2148 319803521040 CER2 0402 X7R 16V 100N COL
2149 319803521040 CER2 0402 X7R 16V 100N COL
2150 319803521040 CER2 0402 X7R 16V 100N COL
2151 319803521040 CER2 0402 X7R 16V 100N COL
2152 319803521040 CER2 0402 X7R 16V 100N COL
2153 319803401010 CER1 0402 NP0 50V 100P COL
2154 319803401010 CER1 0402 NP0 50V 100P COL
2155 319803401010 CER1 0402 NP0 50V 100P COL
2156 319803401010 CER1 0402 NP0 50V 100P COL
2157 319803512230 CER2 0402 X7R 25V 22N COL
2158 319803521040 CER2 0402 X7R 16V 100N COL
2159 319802771080 CER2 0603 X5R 25V 1U COL R
2160 319802771080 CER2 0603 X5R 25V 1U COL R
2161 319803501020 CER2 0402 X7R 50V 1N COL
2162 319803022290 ELCAP SM 6V3 22U PM20 COL R
2163 319803521040 CER2 0402 X7R 16V 100N COL
2164 319803022290 ELCAP SM 6V3 22U PM20 COL R
2172 202055200259 CER2 0603 X7R 25V 220N PM10 R
2173 319803502220 CER2 0402 X7R 50V 2N2 COL
2174 319803502220 CER2 0402 X7R 50V 2N2 COL
2175 319803502220 CER2 0402 X7R 50V 2N2 COL
2176 319803502220 CER2 0402 X7R 50V 2N2 COL
2177 202055200483 CER2 1206 X5R 16V 22U PM20 R
2200 319803501520 CER2 0402 X7R 50V 1N5 COL
2201 202055200259 CER2 0603 X7R 25V 220N PM10 R
2203 202055200124 CER2 0603 X5R 10V 470N PM10 R
2204 319803521040 CER2 0402 X7R 16V 100N COL
2205 319803501020 CER2 0402 X7R 50V 1N COL
2208 319803501020 CER2 0402 X7R 50V 1N COL
2209 319803521030 CER2 0402 X7R 16V 10N COL
2214 319803521030 CER2 0402 X7R 16V 10N COL
2215 319803521030 CER2 0402 X7R 16V 10N COL
2216 319802771080 CER2 0603 X5R 25V 1U COL R
2217 319803521040 CER2 0402 X7R 16V 100N COL
2218 202055200124 CER2 0603 X5R 10V 470N PM10 R
2219 319802741090 CER2 0603 X5R 6V3 10U COL R
2220 319803521040 CER2 0402 X7R 16V 100N COL
2223 319803521040 CER2 0402 X7R 16V 100N COL
2224 319803521030 CER2 0402 X7R 16V 10N COL
2225 319803403910 CER1 0402 NP0 50V 390P COL
2226 319803521030 CER2 0402 X7R 16V 10N COL
2227 319803521030 CER2 0402 X7R 16V 10N COL
2230 319803404790 CER1 0402 NP0 50V 47P COL
2233 319803512230 CER2 0402 X7R 25V 22N COL
Item Philips 12NC Description
2235 319803401010 CER1 0402 NP0 50V 100P COL
2236 319803403390 CER1 0402 NP0 50V 33P COL
2237 319803403390 CER1 0402 NP0 50V 33P COL
2238 319803501020 CER2 0402 X7R 50V 1N COL
2239 319803501020 CER2 0402 X7R 50V 1N COL
2240 319803404790 CER1 0402 NP0 50V 47P COL
2301 319803521040 CER2 0402 X7R 16V 100N COL
2302 319803521040 CER2 0402 X7R 16V 100N COL
2304 202002100215 ELCAP SM SKV 25V 220U PM20 R
2304 202002100477 ELCAP SM SKV 25V 220U PM20 R
2304 202203100521 ELCAP SM VES 25V 220U PM20 R
2308 202002100215 ELCAP SM SKV 25V 220U PM20 R
2308 202002100477 ELCAP SM SKV 25V 220U PM20 R
2308 202203100521 ELCAP SM VES 25V 220U PM20 R
2309 319803521040 CER2 0402 X7R 16V 100N COL
2310 319803521040 CER2 0402 X7R 16V 100N COL
2311 319802771080 CER2 0603 X5R 25V 1U COL R
2312 319803502210 CER2 0402 X7R 50V 220P COL
2314 202055200247 CER2 0603 X5R 25V 470N PM10 R
2315 319802771080 CER2 0603 X5R 25V 1U COL R
2316 319802771080 CER2 0603 X5R 25V 1U COL R
2317 319803501020 CER2 0402 X7R 50V 1N COL
2318 319803501020 CER2 0402 X7R 50V 1N COL
2319 319803502210 CER2 0402 X7R 50V 220P COL
2320 319802771080 CER2 0603 X5R 25V 1U COL R
2321 319803501020 CER2 0402 X7R 50V 1N COL
2322 319803521040 CER2 0402 X7R 16V 100N COL
2323 319803501020 CER2 0402 X7R 50V 1N COL
2324 319803521040 CER2 0402 X7R 16V 100N COL
2325 319803501530 CER2 0402 X7R 50V 15N COL
2327 319803501530 CER2 0402 X7R 50V 15N COL
2328 202055200247 CER2 0603 X5R 25V 470N PM10 R
2329 319803521040 CER2 0402 X7R 16V 100N COL
2330 319803521040 CER2 0402 X7R 16V 100N COL
2331 319803501020 CER2 0402 X7R 50V 1N COL
2332 319803501020 CER2 0402 X7R 50V 1N COL
2333 319803521040 CER2 0402 X7R 16V 100N COL
2334 319803521040 CER2 0402 X7R 16V 100N COL
2335 319803501020 CER2 0402 X7R 50V 1N COL
2336 319803501020 CER2 0402 X7R 50V 1N COL
2339 319802771080 CER2 0603 X5R 25V 1U COL R
2340 202055200124 CER2 0603 X5R 10V 470N PM10 R
2341 319802771080 CER2 0603 X5R 25V 1U COL R
2345 319803501020 CER2 0402 X7R 50V 1N COL
2346 202055200464 CER2 1206 X5R 6V3 100U PM20 R
2347 202055200464 CER2 1206 X5R 6V3 100U PM20 R
2401 319802741090 CER2 0603 X5R 6V3 10U COL R
2402 319802741090 CER2 0603 X5R 6V3 10U COL R
2403 319803404790 CER1 0402 NP0 50V 47P COL
2404 319803404790 CER1 0402 NP0 50V 47P COL
2405 319803404790 CER1 0402 NP0 50V 47P COL
2406 319802741090 CER2 0603 X5R 6V3 10U COL R
2407 319802741090 CER2 0603 X5R 6V3 10U COL R
2408 319802741090 CER2 0603 X5R 6V3 10U COL R
2409 319802741090 CER2 0603 X5R 6V3 10U COL R
2410 319803521040 CER2 0402 X7R 16V 100N COL
2411 319803403390 CER1 0402 NP0 50V 33P COL
2419 319803401010 CER1 0402 NP0 50V 100P COL
2420 319803401010 CER1 0402 NP0 50V 100P COL
2421 319803401010 CER1 0402 NP0 50V 100P COL
2422 319803401010 CER1 0402 NP0 50V 100P COL
2423 319803401010 CER1 0402 NP0 50V 100P COL
2424 319803401010 CER1 0402 NP0 50V 100P COL
20090302 14-2 A9PJ3PL
Page 56
Item Philips 12NC Description
2425 319803401010 CER1 0402 NP0 50V 100P COL
2426 319803501020 CER2 0402 X7R 50V 1N COL
2427 319803501020 CER2 0402 X7R 50V 1N COL
2429 319803501020 CER2 0402 X7R 50V 1N COL
2430 319803501020 CER2 0402 X7R 50V 1N COL
2431 319803501020 CER2 0402 X7R 50V 1N COL
2432 319803501020 CER2 0402 X7R 50V 1N COL
2433 319803501020 CER2 0402 X7R 50V 1N COL
2434 319803501020 CER2 0402 X7R 50V 1N COL
2435 319803501020 CER2 0402 X7R 50V 1N COL
2436 319803521040 CER2 0402 X7R 16V 100N COL
2437 319803524730 CER2 0402 X7R 16V 47N COL
2438 319803521030 CER2 0402 X7R 16V 10N COL
2439 319803521030 CER2 0402 X7R 16V 10N COL
2440 319803402290 CER1 0402 NP0 50V 22P COL
2441 319803022290 ELCAP SM 6V3 22U PM20 COL R
2442 319803521040 CER2 0402 X7R 16V 100N COL
2443 319803524730 CER2 0402 X7R 16V 47N COL
2444 319803524730 CER2 0402 X7R 16V 47N COL
2445 319802771080 CER2 0603 X5R 25V 1U COL R
2446 319802771080 CER2 0603 X5R 25V 1U COL R
2447 319802771080 CER2 0603 X5R 25V 1U COL R
2A01 319802754780 CER2 0603 X5R 10V 4U7 COL R
2A02 319802771080 CER2 0603 X5R 25V 1U COL R
2A03 319802771080 CER2 0603 X5R 25V 1U COL R
2A04 319802771080 CER2 0603 X5R 25V 1U COL R
2A05 319803521040 CER2 0402 X7R 16V 100N COL
2A06 319803521040 CER2 0402 X7R 16V 100N COL
2A07 319803521040 CER2 0402 X7R 16V 100N COL
2A08 319803521040 CER2 0402 X7R 16V 100N COL
2A09 319803521040 CER2 0402 X7R 16V 100N COL
2A10 319803521040 CER2 0402 X7R 16V 100N COL
2A11 319802754780 CER2 0603 X5R 10V 4U7 COL R
2A12 319802771080 CER2 0603 X5R 25V 1U COL R
2A13 319803521040 CER2 0402 X7R 16V 100N COL
2A14 319803521040 CER2 0402 X7R 16V 100N COL
2A15 319803521040 CER2 0402 X7R 16V 100N COL
2A16 319803521040 CER2 0402 X7R 16V 100N COL
2A17 319802754780 CER2 0603 X5R 10V 4U7 COL R
2A18 319802754780 CER2 0603 X5R 10V 4U7 COL R
2A19 319802771080 CER2 0603 X5R 25V 1U COL R
2A20 319803521040 CER2 0402 X7R 16V 100N COL
2A21 319803521040 CER2 0402 X7R 16V 100N COL
2A22 319803521040 CER2 0402 X7R 16V 100N COL
2A23 319803521040 CER2 0402 X7R 16V 100N COL
2A24 319803521040 CER2 0402 X7R 16V 100N COL
2A25 319803521040 CER2 0402 X7R 16V 100N COL
2A27 319802781080 CER2 0402 X5R 6V3 1U COL
2A28 319803521040 CER2 0402 X7R 16V 100N COL
2A29 319802754780 CER2 0603 X5R 10V 4U7 COL R
2A30 319803521040 CER2 0402 X7R 16V 100N COL
2A31 319803521030 CER2 0402 X7R 16V 10N COL
2A32 319803521030 CER2 0402 X7R 16V 10N COL
2A33 319802754780 CER2 0603 X5R 10V 4U7 COL R
2A34 319803521040 CER2 0402 X7R 16V 100N COL
2A35 319803521030 CER2 0402 X7R 16V 10N COL
2A38 319802754780 CER2 0603 X5R 10V 4U7 COL R
2A39 319803521040 CER2 0402 X7R 16V 100N COL
2A40 319803524730 CER2 0402 X7R 16V 47N COL
2B01 319803041010 ELCAP SM 16V 100U PM20 COL R
2B02 319803521040 CER2 0402 X7R 16V 100N COL
2B03 319803521040 CER2 0402 X7R 16V 100N COL
2B05 319803521040 CER2 0402 X7R 16V 100N COL
Item Philips 12NC Description
2B06 319803041010 ELCAP SM 16V 100U PM20 COL R
2B07 319802754780 CER2 0603 X5R 10V 4U7 COL R
2B08 319803521040 CER2 0402 X7R 16V 100N COL
2B09 319803521040 CER2 0402 X7R 16V 100N COL
2B11 319803041010 ELCAP SM 16V 100U PM20 COL R
2B12 319802754780 CER2 0603 X5R 10V 4U7 COL R
2B13 319803521040 CER2 0402 X7R 16V 100N COL
2B14 319803521040 CER2 0402 X7R 16V 100N COL
2B15 319803521040 CER2 0402 X7R 16V 100N COL
2B16 319803521040 CER2 0402 X7R 16V 100N COL
2B17 319803521040 CER2 0402 X7R 16V 100N COL
2B18 319803521040 CER2 0402 X7R 16V 100N COL
2B19 319803521040 CER2 0402 X7R 16V 100N COL
2B20 319803521040 CER2 0402 X7R 16V 100N COL
2B21 319803521040 CER2 0402 X7R 16V 100N COL
2B22 319803521040 CER2 0402 X7R 16V 100N COL
2B23 319803521040 CER2 0402 X7R 16V 100N COL
2B24 319803521040 CER2 0402 X7R 16V 100N COL
2B25 319803521040 CER2 0402 X7R 16V 100N COL
2B26 319803521040 CER2 0402 X7R 16V 100N COL
2B27 319803521040 CER2 0402 X7R 16V 100N COL
2B28 319803521040 CER2 0402 X7R 16V 100N COL
2B29 319803521040 CER2 0402 X7R 16V 100N COL
2B30 319803521040 CER2 0402 X7R 16V 100N COL
2B31 319803521040 CER2 0402 X7R 16V 100N COL
2B32 319803521040 CER2 0402 X7R 16V 100N COL
2B33 319803521040 CER2 0402 X7R 16V 100N COL
2B34 319803521040 CER2 0402 X7R 16V 100N COL
2B35 319803521040 CER2 0402 X7R 16V 100N COL
2B36 319803521040 CER2 0402 X7R 16V 100N COL
2B37 319803521040 CER2 0402 X7R 16V 100N COL
2B38 319803521040 CER2 0402 X7R 16V 100N COL
2B39 319803521040 CER2 0402 X7R 16V 100N COL
2B40 319803521040 CER2 0402 X7R 16V 100N COL
2B41 319803521040 CER2 0402 X7R 16V 100N COL
2B42 319803521040 CER2 0402 X7R 16V 100N COL
2B43 319803521040 CER2 0402 X7R 16V 100N COL
2B44 319803521040 CER2 0402 X7R 16V 100N COL
2B45 319803521040 CER2 0402 X7R 16V 100N COL
2B46 319803521040 CER2 0402 X7R 16V 100N COL
2B47 319802754780 CER2 0603 X5R 10V 4U7 COL R
2B48 319803521040 CER2 0402 X7R 16V 100N COL
2B49 319803521040 CER2 0402 X7R 16V 100N COL
2B50 319803521040 CER2 0402 X7R 16V 100N COL
2B51 319803521040 CER2 0402 X7R 16V 100N COL
2B52 319803521040 CER2 0402 X7R 16V 100N COL
2B53 319803521040 CER2 0402 X7R 16V 100N COL
2B54 319803521040 CER2 0402 X7R 16V 100N COL
2B55 319803521040 CER2 0402 X7R 16V 100N COL
2B56 319803521040 CER2 0402 X7R 16V 100N COL
2B57 319803521040 CER2 0402 X7R 16V 100N COL
2B58 319803521040 CER2 0402 X7R 16V 100N COL
2B59 319803521040 CER2 0402 X7R 16V 100N COL
2B60 319803041010 ELCAP SM 16V 100U PM20 COL R
2B61 319802754780 CER2 0603 X5R 10V 4U7 COL R
2C02 319803501020 CER2 0402 X7R 50V 1N COL
2C03 319803501020 CER2 0402 X7R 50V 1N COL
2C04 319803501020 CER2 0402 X7R 50V 1N COL
2C05 319803501020 CER2 0402 X7R 50V 1N COL
2C06 319803501020 CER2 0402 X7R 50V 1N COL
2C07 319803501020 CER2 0402 X7R 50V 1N COL
2C08 319803501020 CER2 0402 X7R 50V 1N COL
2C09 319803521040 CER2 0402 X7R 16V 100N COL
20090302 14-3 A9PJ3PL
Page 57
Item Philips 12NC Description
2C11 319802781080 CER2 0402 X5R 6V3 1U COL
2C17 319803501020 CER2 0402 X7R 50V 1N COL
2C18 319801634780 CER1 0603 NP0 50V 4P7 COL
2C19 319801634780 CER1 0603 NP0 50V 4P7 COL
2C20 319802781080 CER2 0402 X5R 6V3 1U COL
2C21 319803521040 CER2 0402 X7R 16V 100N COL
2C22 319802781080 CER2 0402 X5R 6V3 1U COL
2C23 319803521040 CER2 0402 X7R 16V 100N COL
2C24 319803401090 CER1 0402 NP0 50V 10P COL
2C25 319803401090 CER1 0402 NP0 50V 10P COL
2C26 319803521040 CER2 0402 X7R 16V 100N COL
2C27 319802754780 CER2 0603 X5R 10V 4U7 COL R
2C28 319802781080 CER2 0402 X5R 6V3 1U COL
2C29 319803521040 CER2 0402 X7R 16V 100N COL
2C30 319803521040 CER2 0402 X7R 16V 100N COL
2C31 319803521040 CER2 0402 X7R 16V 100N COL
2C32 202055200457 CER2 0402 X5R 6V3 2U2 PM20 R
2C33 202055200259 CER2 0603 X7R 25V 220N PM10 R
2C35 319803521040 CER2 0402 X7R 16V 100N COL
2C36 319803521040 CER2 0402 X7R 16V 100N COL
2C37 319803521040 CER2 0402 X7R 16V 100N COL
2D02 319803521040 CER2 0402 X7R 16V 100N COL
2D03 319803521040 CER2 0402 X7R 16V 100N COL
2D04 319802754780 CER2 0603 X5R 10V 4U7 COL R
2D05 319803041010 ELCAP SM 16V 100U PM20 COL R
2D06 319803521040 CER2 0402 X7R 16V 100N COL
2D07 319802754780 CER2 0603 X5R 10V 4U7 COL R
2D09 319803521040 CER2 0402 X7R 16V 100N COL
2D10 319803401090 CER1 0402 NP0 50V 10P COL
2D11 319803401090 CER1 0402 NP0 50V 10P COL
2D14 319802771080 CER2 0603 X5R 25V 1U COL R
2D15 319803041010 ELCAP SM 16V 100U PM20 COL R
2D16 319803521040 CER2 0402 X7R 16V 100N COL
2E01 319803521040 CER2 0402 X7R 16V 100N COL
2E02 319803521040 CER2 0402 X7R 16V 100N COL
2E03 319802741090 CER2 0603 X5R 6V3 10U COL R
2E04 319803521040 CER2 0402 X7R 16V 100N COL
2E06 319803521040 CER2 0402 X7R 16V 100N COL
2E07 319802741090 CER2 0603 X5R 6V3 10U COL R
2E08 319802741090 CER2 0603 X5R 6V3 10U COL R
2E09 319803521040 CER2 0402 X7R 16V 100N COL
2E10 319803521040 CER2 0402 X7R 16V 100N COL
2E11 319803521040 CER2 0402 X7R 16V 100N COL
2E12 319803521040 CER2 0402 X7R 16V 100N COL
2E13 319803521040 CER2 0402 X7R 16V 100N COL
2E14 319803521040 CER2 0402 X7R 16V 100N COL
2E15 319803521040 CER2 0402 X7R 16V 100N COL
2E16 319802741090 CER2 0603 X5R 6V3 10U COL R
2E17 319803521040 CER2 0402 X7R 16V 100N COL
2E18 319803521040 CER2 0402 X7R 16V 100N COL
2E19 319802741090 CER2 0603 X5R 6V3 10U COL R
2E20 319802741090 CER2 0603 X5R 6V3 10U COL R
2E21 319803521040 CER2 0402 X7R 16V 100N COL
2E22 319803521040 CER2 0402 X7R 16V 100N COL
2E23 319803022290 ELCAP SM 6V3 22U PM20 COL R
2E24 319803521030 CER2 0402 X7R 16V 10N COL
2E25 319803402290 CER1 0402 NP0 50V 22P COL
2E26 319803521030 CER2 0402 X7R 16V 10N COL
2E27 319803521040 CER2 0402 X7R 16V 100N COL
2E28 319803521040 CER2 0402 X7R 16V 100N COL
2E29 319803402290 CER1 0402 NP0 50V 22P COL
2E32 319803521040 CER2 0402 X7R 16V 100N COL
2E33 319803401010 CER1 0402 NP0 50V 100P COL
Item Philips 12NC Description
2E35 319803521040 CER2 0402 X7R 16V 100N COL
2E36 319803521040 CER2 0402 X7R 16V 100N COL
2F04 319803521040 CER2 0402 X7R 16V 100N COL
2F05 319802754780 CER2 0603 X5R 10V 4U7 COL R
2F07 319803521040 CER2 0402 X7R 16V 100N COL
2F08 319802754780 CER2 0603 X5R 10V 4U7 COL R
2F09 319803404790 CER1 0402 NP0 50V 47P COL
2F10 319803521040 CER2 0402 X7R 16V 100N COL
2F11 319802754780 CER2 0603 X5R 10V 4U7 COL R
2F12 319803404790 CER1 0402 NP0 50V 47P COL
2F13 319803521040 CER2 0402 X7R 16V 100N COL
2F14 319802754780 CER2 0603 X5R 10V 4U7 COL R
2F15 319803501020 CER2 0402 X7R 50V 1N COL
2F16 319803521040 CER2 0402 X7R 16V 100N COL
2F17 319802754780 CER2 0603 X5R 10V 4U7 COL R
2F18 319803501020 CER2 0402 X7R 50V 1N COL
2F19 319803521040 CER2 0402 X7R 16V 100N COL
2F20 319802754780 CER2 0603 X5R 10V 4U7 COL R
2F21 319803521040 CER2 0402 X7R 16V 100N COL
2F22 319803041010 ELCAP SM 16V 100U PM20 COL R
2F24 319803521040 CER2 0402 X7R 16V 100N COL
2F25 319802754780 CER2 0603 X5R 10V 4U7 COL R
2F26 319803501020 CER2 0402 X7R 50V 1N COL
2F27 319803521040 CER2 0402 X7R 16V 100N COL
2F28 319802754780 CER2 0603 X5R 10V 4U7 COL R
2F30 319803521040 CER2 0402 X7R 16V 100N COL
2F31 319802754780 CER2 0603 X5R 10V 4U7 COL R
2F33 319803521040 CER2 0402 X7R 16V 100N COL
2F34 319802754780 CER2 0603 X5R 10V 4U7 COL R
2F36 319803521040 CER2 0402 X7R 16V 100N COL
2F37 319802754780 CER2 0603 X5R 10V 4U7 COL R
2F38 319803521040 CER2 0402 X7R 16V 100N COL
2F39 319803521040 CER2 0402 X7R 16V 100N COL
2F41 319802741090 CER2 0603 X5R 6V3 10U COL R
2F42 319802741090 CER2 0603 X5R 6V3 10U COL R
2F44 319803402290 CER1 0402 NP0 50V 22P COL
2F47 319803402290 CER1 0402 NP0 50V 22P COL
2F50 319803402290 CER1 0402 NP0 50V 22P COL
2F52 319802741090 CER2 0603 X5R 6V3 10U COL R
2F53 319802741090 CER2 0603 X5R 6V3 10U COL R
2F55 319803402290 CER1 0402 NP0 50V 22P COL
2F58 319803402290 CER1 0402 NP0 50V 22P COL
2F61 319803402290 CER1 0402 NP0 50V 22P COL
2F63 319803514720 CER2 0402 X7R 25V 4N7 COL
2F64 319803521030 CER2 0402 X7R 16V 10N COL
2F65 319803521030 CER2 0402 X7R 16V 10N COL
2F66 319803521030 CER2 0402 X7R 16V 10N COL
2F67 319803521030 CER2 0402 X7R 16V 10N COL
2F68 319803521030 CER2 0402 X7R 16V 10N COL
2F69 319803514720 CER2 0402 X7R 25V 4N7 COL
2F70 319803521030 CER2 0402 X7R 16V 10N COL
2F71 319803521030 CER2 0402 X7R 16V 10N COL
2F72 319803521030 CER2 0402 X7R 16V 10N COL
2F73 319803521030 CER2 0402 X7R 16V 10N COL
2F74 319803521030 CER2 0402 X7R 16V 10N COL
2F75 319803524730 CER2 0402 X7R 16V 47N COL
2F76 319803524730 CER2 0402 X7R 16V 47N COL
2F77 319803524730 CER2 0402 X7R 16V 47N COL
2F78 319803524730 CER2 0402 X7R 16V 47N COL
2F79 319803521040 CER2 0402 X7R 16V 100N COL
2F80 319803521040 CER2 0402 X7R 16V 100N COL
2F81 319802754780 CER2 0603 X5R 10V 4U7 COL R
2F82 202055200124 CER2 0603 X5R 10V 470N PM10 R
20090302 14-4 A9PJ3PL
Page 58
Item Philips 12NC Description
2F83 202055200124 CER2 0603 X5R 10V 470N PM10 R
2F84 202055200124 CER2 0603 X5R 10V 470N PM10 R
2F85 202055200124 CER2 0603 X5R 10V 470N PM10 R
2F86 319803403390 CER1 0402 NP0 50V 33P COL
2F87 319803401010 CER1 0402 NP0 50V 100P COL
2F88 319803401010 CER1 0402 NP0 50V 100P COL
2F91 319803403390 CER1 0402 NP0 50V 33P COL
2F92 319803401010 CER1 0402 NP0 50V 100P COL
2F93 319803401010 CER1 0402 NP0 50V 100P COL
2F94 319803521040 CER2 0402 X7R 16V 100N COL
2F95 319803521040 CER2 0402 X7R 16V 100N COL
2F96 319803404790 CER1 0402 NP0 50V 47P COL
2F97 319803404790 CER1 0402 NP0 50V 47P COL
2F98 319802741090 CER2 0603 X5R 6V3 10U COL R
2F99 319803404790 CER1 0402 NP0 50V 47P COL
3101 319803106890 RST SM 0402 68R PM5 COL
3102 319803106890 RST SM 0402 68R PM5 COL
3103 319803106890 RST SM 0402 68R PM5 COL
3104 319803106890 RST SM 0402 68R PM5 COL
3105 319803102210 RST SM 0402 220R PM5 COL
3106 319803102210 RST SM 0402 220R PM5 COL
3107# 212010894133 RST SM FUSE 1206 10R PM5 R
3108# 212010894133 RST SM FUSE 1206 10R PM5 R
3109 319802131090 RST SM 0603 10R PM5 COL
3110 319802131090 RST SM 0603 10R PM5 COL
3111 319802131090 RST SM 0603 10R PM5 COL
3112 319802132280 RST SM 0603 2R2 PM5 COL
3113 319802131090 RST SM 0603 10R PM5 COL
3114 319802132280 RST SM 0603 2R2 PM5 COL
3115 319802131090 RST SM 0603 10R PM5 COL
3116 319802131090 RST SM 0603 10R PM5 COL
3117 319803101020 RST SM 0402 1K PM5 COL
3118 319802131090 RST SM 0603 10R PM5 COL
3119 319802131090 RST SM 0603 10R PM5 COL
3120 319803101020 RST SM 0402 1K PM5 COL
3121 232270671002 RST SM 0402 RC32 1K PM1 R
3122 232270676801 RST SM 0402 RC32 680R PM1 R
3123 319803106820 RST SM 0402 6K8 PM5 COL
3124 232270671002 RST SM 0402 RC32 1K PM1 R
3125 319803106820 RST SM 0402 6K8 PM5 COL
3126 232270672701 RST SM 0402 RC32 270R PM1 R
3127 319802132280 RST SM 0603 2R2 PM5 COL
3128 319802132280 RST SM 0603 2R2 PM5 COL
3129 319803103320 RST SM 0402 3K3 PM5 COL
3130 319803106820 RST SM 0402 6K8 PM5 COL
3131 319803103320 RST SM 0402 3K3 PM5 COL
3132 319803106820 RST SM 0402 6K8 PM5 COL
3133 319803103320 RST SM 0402 3K3 PM5 COL
3134 319803103320 RST SM 0402 3K3 PM5 COL
3135 319803103930 RST SM 0402 39K PM5 COL
3136 319803103930 RST SM 0402 39K PM5 COL
3137 319803106820 RST SM 0402 6K8 PM5 COL
3138 319803106820 RST SM 0402 6K8 PM5 COL
3139 319803101020 RST SM 0402 1K PM5 COL
3140 319803101020 RST SM 0402 1K PM5 COL
3141 319803103320 RST SM 0402 3K3 PM5 COL
3142 319803106820 RST SM 0402 6K8 PM5 COL
3143 319803103320 RST SM 0402 3K3 PM5 COL
3144 319803106820 RST SM 0402 6K8 PM5 COL
3145 319803103320 RST SM 0402 3K3 PM5 COL
3146 319803103320 RST SM 0402 3K3 PM5 COL
3147 319803105620 RST SM 0402 5K6 PM5 COL
3148 232270674701 RST SM 0402 RC32 470R PM1 R
Item Philips 12NC Description
3149 319803101530 RST SM 0402 15K PM5 COL
3150 232270673302 RST SM 0402 RC32 3K3 PM1 R
3151 319803106820 RST SM 0402 6K8 PM5 COL
3152 319803106820 RST SM 0402 6K8 PM5 COL
3153 232270672701 RST SM 0402 RC32 270R PM1 R
3154 319803103320 RST SM 0402 3K3 PM5 COL
3155 232270671002 RST SM 0402 RC32 1K PM1 R
3156 319803105620 RST SM 0402 5K6 PM5 COL
3157 319803106820 RST SM 0402 6K8 PM5 COL
3158 319803106820 RST SM 0402 6K8 PM5 COL
3159 232270672201 RST SM 0402 RC32 220R PM1 R
3160 232270671001 RST SM 0402 RC32 100R PM1 R
3161 319803102220 RST SM 0402 2K2 PM5 COL
3167 319803101020 RST SM 0402 1K PM5 COL
3168 319803101020 RST SM 0402 1K PM5 COL
3169 319803101530 RST SM 0402 15K PM5 COL
3170 319803101020 RST SM 0402 1K PM5 COL
3171 319803104710 RST SM 0402 470R PM5 COL
3200 319803103310 RST SM 0402 330R PM5 COL
3203 319803102210 RST SM 0402 220R PM5 COL
3204 319803101010 RST SM 0402 100R PM5 COL
3205 319803101010 RST SM 0402 100R PM5 COL
3206 319803102210 RST SM 0402 220R PM5 COL
3207 319803104720 RST SM 0402 4K7 PM5 COL
3208 319803104720 RST SM 0402 4K7 PM5 COL
3209 319803104720 RST SM 0402 4K7 PM5 COL
3210 319803101010 RST SM 0402 100R PM5 COL
3211 319803101010 RST SM 0402 100R PM5 COL
3212 319803104790 RST SM 0402 47R PM5 COL
3213 319803105620 RST SM 0402 5K6 PM5 COL
3220 319803190010 RST SM 0402 JUMP. 0R05 COL
3221 319803190010 RST SM 0402 JUMP. 0R05 COL
3223 232276260479 RST SM 2512 PRC221 47R PM5 R
3224 232276260479 RST SM 2512 PRC221 47R PM5 R
3226 319803102210 RST SM 0402 220R PM5 COL
3227 319803102210 RST SM 0402 220R PM5 COL
3301# 212010894133 RST SM FUSE 1206 10R PM5 R
3302# 212010894133 RST SM FUSE 1206 10R PM5 R
3303 319803101030 RST SM 0402 10K PM5 COL
3304 319803101230 RST SM 0402 12K PM5 COL
3306 319803101030 RST SM 0402 10K PM5 COL
3307 319803101030 RST SM 0402 10K PM5 COL
3308 319803101230 RST SM 0402 12K PM5 COL
3309 319802131090 RST SM 0603 10R PM5 COL
3311 319803101030 RST SM 0402 10K PM5 COL
3313 319802133930 RST SM 0603 39K PM5 COL
3317 319802131090 RST SM 0603 10R PM5 COL
3319 319803101030 RST SM 0402 10K PM5 COL
3326 319803190010 RST SM 0402 JUMP. 0R05 COL
3327 319802132240 RST SM 0603 220K PM5 COL
3328 319802132240 RST SM 0603 220K PM5 COL
3332 319803101020 RST SM 0402 1K PM5 COL
3333 319803101030 RST SM 0402 10K PM5 COL
3334 319803101020 RST SM 0402 1K PM5 COL
3335 319803101030 RST SM 0402 10K PM5 COL
3337 319803104720 RST SM 0402 4K7 PM5 COL
3338 319803104720 RST SM 0402 4K7 PM5 COL
3342 319803101030 RST SM 0402 10K PM5 COL
3343 319803102230 RST SM 0402 22K PM5 COL
3344 319803101030 RST SM 0402 10K PM5 COL
3345 319803101030 RST SM 0402 10K PM5 COL
3346 319803101030 RST SM 0402 10K PM5 COL
3347 319803101030 RST SM 0402 10K PM5 COL
20090302 14-5 A9PJ3PL
Page 59
Item Philips 12NC Description
3348 319803101030 RST SM 0402 10K PM5 COL
3401 319803101010 RST SM 0402 100R PM5 COL
3402 319803101010 RST SM 0402 100R PM5 COL
3408 319803101030 RST SM 0402 10K PM5 COL
3409 319803101010 RST SM 0402 100R PM5 COL
3412 319803102230 RST SM 0402 22K PM5 COL
3413 319803102230 RST SM 0402 22K PM5 COL
3503 319803101010 RST SM 0402 100R PM5 COL
3504 319803101010 RST SM 0402 100R PM5 COL
3505 319803101010 RST SM 0402 100R PM5 COL
3509 319803101030 RST SM 0402 10K PM5 COL
3510 319803101030 RST SM 0402 10K PM5 COL
3511 319803104720 RST SM 0402 4K7 PM5 COL
3512 319803101010 RST SM 0402 100R PM5 COL
3513 319803101030 RST SM 0402 10K PM5 COL
3514 319803101030 RST SM 0402 10K PM5 COL
3515 319803101030 RST SM 0402 10K PM5 COL
3516 319803101030 RST SM 0402 10K PM5 COL
3517 319803101030 RST SM 0402 10K PM5 COL
3518 319803101030 RST SM 0402 10K PM5 COL
3A01 232270675102 RST SM 0402 RC32 5K1 PM1 R
3A02 319803101030 RST SM 0402 10K PM5 COL
3B01 319803104720 RST SM 0402 4K7 PM5 COL
3B03 319803102210 RST SM 0402 220R PM5 COL
3B04 319803102210 RST SM 0402 220R PM5 COL
3B05 319803103390 RST SM 0402 33R PM5 COL
3B06 319803103390 RST SM 0402 33R PM5 COL
3B07 319803114790 RST NETW 1206 4X 47R PM5 COL R
3B08 319803114790 RST NETW 1206 4X 47R PM5 COL R
3B09 319803114790 RST NETW 1206 4X 47R PM5 COL R
3B10 319803104790 RST SM 0402 47R PM5 COL
3B11 319803104790 RST SM 0402 47R PM5 COL
3B12 319803104790 RST SM 0402 47R PM5 COL
3B13 319803104790 RST SM 0402 47R PM5 COL
3B14 319803104790 RST SM 0402 47R PM5 COL
3B15 319803104790 RST SM 0402 47R PM5 COL
3B16 319803104790 RST SM 0402 47R PM5 COL
3B17 319803104790 RST SM 0402 47R PM5 COL
3B18 319803104790 RST SM 0402 47R PM5 COL
3C01 319803104720 RST SM 0402 4K7 PM5 COL
3C02 319803104720 RST SM 0402 4K7 PM5 COL
3C03 319803103390 RST SM 0402 33R PM5 COL
3C04 319803103390 RST SM 0402 33R PM5 COL
3C05 319803101010 RST SM 0402 100R PM5 COL
3C06 319803101010 RST SM 0402 100R PM5 COL
3C07 319803104720 RST SM 0402 4K7 PM5 COL
3C08 319803101010 RST SM 0402 100R PM5 COL
3C09 319803101010 RST SM 0402 100R PM5 COL
3C10 319803101010 RST SM 0402 100R PM5 COL
3C11 319803104720 RST SM 0402 4K7 PM5 COL
3C12 319803101010 RST SM 0402 100R PM5 COL
3C13 319803101010 RST SM 0402 100R PM5 COL
3C14 319803101010 RST SM 0402 100R PM5 COL
3C15 319803101010 RST SM 0402 100R PM5 COL
3C16 319803103390 RST SM 0402 33R PM5 COL
3C17 319803103390 RST SM 0402 33R PM5 COL
3C18 319803101030 RST SM 0402 10K PM5 COL
3C19 319803111030 RST NETW 1206 4X 10K PM5 COL R
3C20 319803101030 RST SM 0402 10K PM5 COL
3C21 319803101030 RST SM 0402 10K PM5 COL
3C22 319803101030 RST SM 0402 10K PM5 COL
3C23 319803101030 RST SM 0402 10K PM5 COL
3C24 319803101030 RST SM 0402 10K PM5 COL
Item Philips 12NC Description
3C25 319803101030 RST SM 0402 10K PM5 COL
3C29 319803101020 RST SM 0402 1K PM5 COL
3C30 319803101020 RST SM 0402 1K PM5 COL
3C31 232270676801 RST SM 0402 RC32 680R PM1 R
3C32 319803101030 RST SM 0402 10K PM5 COL
3C33 319803101030 RST SM 0402 10K PM5 COL
3C34 319803101030 RST SM 0402 10K PM5 COL
3C35 232270678204 RST SM 0402 RC32 820K PM1 R
3C36 319803101010 RST SM 0402 100R PM5 COL
3C37 319803101010 RST SM 0402 100R PM5 COL
3C38 319803101010 RST SM 0402 100R PM5 COL
3C39 319803101010 RST SM 0402 100R PM5 COL
3C40 319803101030 RST SM 0402 10K PM5 COL
3C42 319803104720 RST SM 0402 4K7 PM5 COL
3C44 319803102290 RST SM 0402 22R PM5 COL
3C45 319803102290 RST SM 0402 22R PM5 COL
3C46 319803101020 RST SM 0402 1K PM5 COL
3C47 319803101020 RST SM 0402 1K PM5 COL
3C48 319803101030 RST SM 0402 10K PM5 COL
3C50 319803101030 RST SM 0402 10K PM5 COL
3C51 319803103390 RST SM 0402 33R PM5 COL
3C52 319803102290 RST SM 0402 22R PM5 COL
3C53 319803102290 RST SM 0402 22R PM5 COL
3C54 319803101030 RST SM 0402 10K PM5 COL
3C55 319803101030 RST SM 0402 10K PM5 COL
3C57 319803101010 RST SM 0402 100R PM5 COL
3C60 319803102220 RST SM 0402 2K2 PM5 COL
3C61 319803101030 RST SM 0402 10K PM5 COL
3C62 319803101030 RST SM 0402 10K PM5 COL
3C63 319803101530 RST SM 0402 15K PM5 COL
3C64 319803101020 RST SM 0402 1K PM5 COL
3C65 319803101020 RST SM 0402 1K PM5 COL
3C66 319803101020 RST SM 0402 1K PM5 COL
3C69 319803101030 RST SM 0402 10K PM5 COL
3C70 319803101030 RST SM 0402 10K PM5 COL
3C71 319803101030 RST SM 0402 10K PM5 COL
3C72 319803101010 RST SM 0402 100R PM5 COL
3C73 319803101010 RST SM 0402 100R PM5 COL
3C74 319803101030 RST SM 0402 10K PM5 COL
3C75 319803101010 RST SM 0402 100R PM5 COL
3C76 232270676801 RST SM 0402 RC32 680R PM1 R
3C77 319803101030 RST SM 0402 10K PM5 COL
3C78 319803101080 RST SM 0402 1R PM5 COL
3C80 319803104720 RST SM 0402 4K7 PM5 COL
3C81 319803104720 RST SM 0402 4K7 PM5 COL
3C82 319803101010 RST SM 0402 100R PM5 COL
3C83 319803101010 RST SM 0402 100R PM5 COL
3C84 319803101030 RST SM 0402 10K PM5 COL
3C85 319803101030 RST SM 0402 10K PM5 COL
3C86 319803101010 RST SM 0402 100R PM5 COL
3C87 319803101010 RST SM 0402 100R PM5 COL
3C88 319803101010 RST SM 0402 100R PM5 COL
3C89 319803101010 RST SM 0402 100R PM5 COL
3C91 319803104720 RST SM 0402 4K7 PM5 COL
3C94 319803101030 RST SM 0402 10K PM5 COL
3C95 319803101030 RST SM 0402 10K PM5 COL
3C96 319803101010 RST SM 0402 100R PM5 COL
3C97 319803101010 RST SM 0402 100R PM5 COL
3C98 319803101010 RST SM 0402 100R PM5 COL
3C99 319803101010 RST SM 0402 100R PM5 COL
3D45 319803104730 RST SM 0402 47K PM5 COL
3D46 319803104790 RST SM 0402 47R PM5 COL
3D55 319803104730 RST SM 0402 47K PM5 COL
20090302 14-6 A9PJ3PL
Page 60
Item Philips 12NC Description
3D56 319803101020 RST SM 0402 1K PM5 COL
3D58 319803190010 RST SM 0402 JUMP. 0R05 COL
3D59 319803190010 RST SM 0402 JUMP. 0R05 COL
3D60 319803101030 RST SM 0402 10K PM5 COL
3E01 319803104730 RST SM 0402 47K PM5 COL
3E02 319803104730 RST SM 0402 47K PM5 COL
3E05 319803101010 RST SM 0402 100R PM5 COL
3E06 319803102220 RST SM 0402 2K2 PM5 COL
3E07 319803101010 RST SM 0402 100R PM5 COL
3E08 319803101010 RST SM 0402 100R PM5 COL
3E09 319803104730 RST SM 0402 47K PM5 COL
3E10 319803104730 RST SM 0402 47K PM5 COL
3E11 319803101030 RST SM 0402 10K PM5 COL
3E12 319803104730 RST SM 0402 47K PM5 COL
3E13 319803101020 RST SM 0402 1K PM5 COL
3E14 319803101040 RST SM 0402 100K PM5 COL
3E15 319803101020 RST SM 0402 1K PM5 COL
3E17 319803101030 RST SM 0402 10K PM5 COL
3E19 319803101010 RST SM 0402 100R PM5 COL
3E20 319803102220 RST SM 0402 2K2 PM5 COL
3E21 319803101010 RST SM 0402 100R PM5 COL
3E22 319803101010 RST SM 0402 100R PM5 COL
3E23 319803101030 RST SM 0402 10K PM5 COL
3E24 319803101030 RST SM 0402 10K PM5 COL
3E25 319803101030 RST SM 0402 10K PM5 COL
3E27 319803101020 RST SM 0402 1K PM5 COL
3E28 319803101040 RST SM 0402 100K PM5 COL
3E29 319803101020 RST SM 0402 1K PM5 COL
3E33 319803101010 RST SM 0402 100R PM5 COL
3E34 319803102220 RST SM 0402 2K2 PM5 COL
3E35 319803101010 RST SM 0402 100R PM5 COL
3E36 319803101010 RST SM 0402 100R PM5 COL
3E37 319803101030 RST SM 0402 10K PM5 COL
3E38 319803104730 RST SM 0402 47K PM5 COL
3E39 319803104730 RST SM 0402 47K PM5 COL
3E40 319803104730 RST SM 0402 47K PM5 COL
3E41 319803101020 RST SM 0402 1K PM5 COL
3E42 319803101040 RST SM 0402 100K PM5 COL
3E43 319803101020 RST SM 0402 1K PM5 COL
3E47 319803101010 RST SM 0402 100R PM5 COL
3E48 319803102220 RST SM 0402 2K2 PM5 COL
3E49 319803101010 RST SM 0402 100R PM5 COL
3E50 319803101010 RST SM 0402 100R PM5 COL
3E51 319803101030 RST SM 0402 10K PM5 COL
3E52 319803104730 RST SM 0402 47K PM5 COL
3E53 319803104730 RST SM 0402 47K PM5 COL
3E54 319803104730 RST SM 0402 47K PM5 COL
3E55 319803101020 RST SM 0402 1K PM5 COL
3E56 319803101040 RST SM 0402 100K PM5 COL
3E57 319803101020 RST SM 0402 1K PM5 COL
3E59 319803101010 RST SM 0402 100R PM5 COL
3E61 319803101030 RST SM 0402 10K PM5 COL
3E62 319803101030 RST SM 0402 10K PM5 COL
3E63 319803104720 RST SM 0402 4K7 PM5 COL
3E64 319803104710 RST SM 0402 470R PM5 COL
3E65 319803104730 RST SM 0402 47K PM5 COL
3E66 319803101010 RST SM 0402 100R PM5 COL
3E67 319803101010 RST SM 0402 100R PM5 COL
3E68 319803101010 RST SM 0402 100R PM5 COL
3E69 319803101010 RST SM 0402 100R PM5 COL
3E70 319803101010 RST SM 0402 100R PM5 COL
3E71 319803101010 RST SM 0402 100R PM5 COL
3E72 319803101010 RST SM 0402 100R PM5 COL
Item Philips 12NC Description
3E73 319803101010 RST SM 0402 100R PM5 COL
3E89 319803101010 RST SM 0402 100R PM5 COL
3E90 319803102290 RST SM 0402 22R PM5 COL
3E92 319803102730 RST SM 0402 27K PM5 COL
3E93 319803102290 RST SM 0402 22R PM5 COL
3E94 319803102290 RST SM 0402 22R PM5 COL
3E95 319803102290 RST SM 0402 22R PM5 COL
3E96 319803102290 RST SM 0402 22R PM5 COL
3E99 319803101030 RST SM 0402 10K PM5 COL
3F01 319803102230 RST SM 0402 22K PM5 COL
3F02 319803102230 RST SM 0402 22K PM5 COL
3F03 232270677509 RST SM 0402 RC32 75R PM1 R
3F04 319803190010 RST SM 0402 JUMP. 0R05 COL
3F07 232270677509 RST SM 0402 RC32 75R PM1 R
3F08 319803190010 RST SM 0402 JUMP. 0R05 COL
3F09 319803106890 RST SM 0402 68R PM5 COL
3F11 232270677509 RST SM 0402 RC32 75R PM1 R
3F12 319803190010 RST SM 0402 JUMP. 0R05 COL
3F14 232270677509 RST SM 0402 RC32 75R PM1 R
3F15 319803190010 RST SM 0402 JUMP. 0R05 COL
3F18 232270677509 RST SM 0402 RC32 75R PM1 R
3F19 319803106890 RST SM 0402 68R PM5 COL
3F20 319803106890 RST SM 0402 68R PM5 COL
3F22 232270677509 RST SM 0402 RC32 75R PM1 R
3F23 319803106890 RST SM 0402 68R PM5 COL
3F25 319803190010 RST SM 0402 JUMP. 0R05 COL
3F26 319803101010 RST SM 0402 100R PM5 COL
3F27 319803101010 RST SM 0402 100R PM5 COL
3F28 319803190010 RST SM 0402 JUMP. 0R05 COL
3F29 319803101010 RST SM 0402 100R PM5 COL
3F30 319803101010 RST SM 0402 100R PM5 COL
3F31 319803101010 RST SM 0402 100R PM5 COL
3F32 319803101010 RST SM 0402 100R PM5 COL
3F33 319803101010 RST SM 0402 100R PM5 COL
3F34 319803101010 RST SM 0402 100R PM5 COL
3F35 319803102230 RST SM 0402 22K PM5 COL
3F36 319803102230 RST SM 0402 22K PM5 COL
3F37 319803101030 RST SM 0402 10K PM5 COL
3F38 319803101030 RST SM 0402 10K PM5 COL
3F39 319803101030 RST SM 0402 10K PM5 COL
3F41 319803106890 RST SM 0402 68R PM5 COL
3F43 319803101010 RST SM 0402 100R PM5 COL
3F44 319803101010 RST SM 0402 100R PM5 COL
3F45 319803101010 RST SM 0402 100R PM5 COL
3F46 319803102230 RST SM 0402 22K PM5 COL
3F47 319803102230 RST SM 0402 22K PM5 COL
3F48 319803102230 RST SM 0402 22K PM5 COL
3F49 319803102230 RST SM 0402 22K PM5 COL
3F50 232270570124 RST SM 0402 RC31 120K PM5 R
3F51 319803103390 RST SM 0402 33R PM5 COL
3F52 319803103390 RST SM 0402 33R PM5 COL
3F53 232270570124 RST SM 0402 RC31 120K PM5 R
3F54 319803103390 RST SM 0402 33R PM5 COL
3F55 319803103390 RST SM 0402 33R PM5 COL
3F56 319803102230 RST SM 0402 22K PM5 COL
3F57 319803102230 RST SM 0402 22K PM5 COL
3F58 232270570279 RST SM 0402 RC31 27R PM5 R
3F59 232270570279 RST SM 0402 RC31 27R PM5 R
3F60 232270674709 RST SM 0402 RC32 47R PM1 R
3F61 232270674709 RST SM 0402 RC32 47R PM1 R
3F62 232270570279 RST SM 0402 RC31 27R PM5 R
3F63 232270674709 RST SM 0402 RC32 47R PM1 R
3F64 319803102230 RST SM 0402 22K PM5 COL
20090302 14-7 A9PJ3PL
Page 61
Item Philips 12NC Description
3F65 319803102230 RST SM 0402 22K PM5 COL
3F66 319803102230 RST SM 0402 22K PM5 COL
3F67 319803102230 RST SM 0402 22K PM5 COL
3F68 319803101010 RST SM 0402 100R PM5 COL
3F69 319803101010 RST SM 0402 100R PM5 COL
3F70 232270570279 RST SM 0402 RC31 27R PM5 R
3F71 232270570279 RST SM 0402 RC31 27R PM5 R
3F72 232270674709 RST SM 0402 RC32 47R PM1 R
3F73 232270674709 RST SM 0402 RC32 47R PM1 R
3F74 232270570279 RST SM 0402 RC31 27R PM5 R
3F75 319803106890 RST SM 0402 68R PM5 COL
3F76 319803190010 RST SM 0402 JUMP. 0R05 COL
3F77 319803190010 RST SM 0402 JUMP. 0R05 COL
3F78 319803190010 RST SM 0402 JUMP. 0R05 COL
3F79 319803190010 RST SM 0402 JUMP. 0R05 COL
3F80 319803190010 RST SM 0402 JUMP. 0R05 COL
3F83 232270674709 RST SM 0402 RC32 47R PM1 R
3F84 319803101030 RST SM 0402 10K PM5 COL
3F86 319803190010 RST SM 0402 JUMP. 0R05 COL
3F91# 212010894133 RST SM FUSE 1206 10R PM5 R
3F92# 212010894133 RST SM FUSE 1206 10R PM5 R
3F93 319803101030 RST SM 0402 10K PM5 COL
3F94 319803101030 RST SM 0402 10K PM5 COL
3F95 319803101010 RST SM 0402 100R PM5 COL
4201 319803190010 RST SM 0402 JUMP. 0R05 COL
4205 319803190010 RST SM 0402 JUMP. 0R05 COL
4206 319803190010 RST SM 0402 JUMP. 0R05 COL
4207 319803190010 RST SM 0402 JUMP. 0R05 COL
4301 319803190010 RST SM 0402 JUMP. 0R05 COL
4302 319803190010 RST SM 0402 JUMP. 0R05 COL
4A01 319803190010 RST SM 0402 JUMP. 0R05 COL
4A02 319803190010 RST SM 0402 JUMP. 0R05 COL
4C02 319803190010 RST SM 0402 JUMP. 0R05 COL
4C04 319803190010 RST SM 0402 JUMP. 0R05 COL
4C07 319803190010 RST SM 0402 JUMP. 0R05 COL
4D01 319803190010 RST SM 0402 JUMP. 0R05 COL
4D05 319802190030 RST SM 0603 JUMP. 0R05 COL
4D06 319802190030 RST SM 0603 JUMP. 0R05 COL
4D07 319802190030 RST SM 0603 JUMP. 0R05 COL
4E03 319803190010 RST SM 0402 JUMP. 0R05 COL
4E04 319803190010 RST SM 0402 JUMP. 0R05 COL
4F01 319803190010 RST SM 0402 JUMP. 0R05 COL
4F02 319803190010 RST SM 0402 JUMP. 0R05 COL
4F03 319803190010 RST SM 0402 JUMP. 0R05 COL
5101 242253601634 IND FXD SM NR6045 10U PM20 R
5102 242253601567 IND FXD SM NR8040 10U PM20 R
5103 242253601634 IND FXD SM NR6045 10U PM20 R
5104 242253601567 IND FXD SM NR8040 10U PM20 R
5105 242253601567 IND FXD SM NR8040 10U PM20 R
5106 242253601567 IND FXD SM NR8040 10U PM20 R
5201 242254943276 IND FXD 0603 EMI 100MHZ 30R R
5202 242253601514 IND FXD SM 0603 0U56 PM5 R
5203 242253601386 IND FXD SM NR4018 10U PM20 R
5204 242254943276 IND FXD 0603 EMI 100MHZ 30R R
5205 242254943276 IND FXD 0603 EMI 100MHZ 30R R
5206 242254943276 IND FXD 0603 EMI 100MHZ 30R R
5207 242253601057 IND FXD SM 0603 0U39 PM5 R
5208 242253601057 IND FXD SM 0603 0U39 PM5 R
5209 242254943276 IND FXD 0603 EMI 100MHZ 30R R
5301 242253601564 IND FXD SM NR8040 22U PM20 R
5302 242253601564 IND FXD SM NR8040 22U PM20 R
5303 242253601564 IND FXD SM NR8040 22U PM20 R
5304 242253601564 IND FXD SM NR8040 22U PM20 R
Item Philips 12NC Description
5305 242254943276 IND FXD 0603 EMI 100MHZ 30R R
5306 242254943276 IND FXD 0603 EMI 100MHZ 30R R
5307 242254943276 IND FXD 0603 EMI 100MHZ 30R R
5308 242254943276 IND FXD 0603 EMI 100MHZ 30R R
5A01 242254943276 IND FXD 0603 EMI 100MHZ 30R R
5A02 242254943276 IND FXD 0603 EMI 100MHZ 30R R
5A04 242254943276 IND FXD 0603 EMI 100MHZ 30R R
5A05 242254943276 IND FXD 0603 EMI 100MHZ 30R R
5A06 242254943276 IND FXD 0603 EMI 100MHZ 30R R
5A07 242254943276 IND FXD 0603 EMI 100MHZ 30R R
5A08 242254943276 IND FXD 0603 EMI 100MHZ 30R R
5A09 242254943276 IND FXD 0603 EMI 100MHZ 30R R
5B01 242254943276 IND FXD 0603 EMI 100MHZ 30R R
5C01 242254943276 IND FXD 0603 EMI 100MHZ 30R R
5C02 242254943276 IND FXD 0603 EMI 100MHZ 30R R
5C03 242254943276 IND FXD 0603 EMI 100MHZ 30R R
5C04 319801838270 FXDIND SM 0805 0U82 PM10 COL R
5C05 319802190030 RST SM 0603 JUMP. 0R05 COL
5C06 242254943276 IND FXD 0603 EMI 100MHZ 30R R
5C07 242254943276 IND FXD 0603 EMI 100MHZ 30R R
5C08 242254943276 IND FXD 0603 EMI 100MHZ 30R R
5C09 242254943276 IND FXD 0603 EMI 100MHZ 30R R
5C10 242254943276 IND FXD 0603 EMI 100MHZ 30R R
5C11 242254943276 IND FXD 0603 EMI 100MHZ 30R R
5C12 242254943276 IND FXD 0603 EMI 100MHZ 30R R
5D01 242254943276 IND FXD 0603 EMI 100MHZ 30R R
5D02 242254943276 IND FXD 0603 EMI 100MHZ 30R R
5D04 242254943276 IND FXD 0603 EMI 100MHZ 30R R
5D05 242254943276 IND FXD 0603 EMI 100MHZ 30R R
5D06 242254943276 IND FXD 0603 EMI 100MHZ 30R R
5D07 242254943276 IND FXD 0603 EMI 100MHZ 30R R
5E01 242254943276 IND FXD 0603 EMI 100MHZ 30R R
5E02 242254943276 IND FXD 0603 EMI 100MHZ 30R R
5E03 242254943276 IND FXD 0603 EMI 100MHZ 30R R
5E04 242254943276 IND FXD 0603 EMI 100MHZ 30R R
5E05 242254943276 IND FXD 0603 EMI 100MHZ 30R R
5E06 242254943276 IND FXD 0603 EMI 100MHZ 30R R
5F01 242254943276 IND FXD 0603 EMI 100MHZ 30R R
5F02 242254943276 IND FXD 0603 EMI 100MHZ 30R R
5F03 242254943276 IND FXD 0603 EMI 100MHZ 30R R
5F04 242254943276 IND FXD 0603 EMI 100MHZ 30R R
5F05 242254943276 IND FXD 0603 EMI 100MHZ 30R R
5F06 242254943276 IND FXD 0603 EMI 100MHZ 30R R
5F07 242254943276 IND FXD 0603 EMI 100MHZ 30R R
5F08 242254943276 IND FXD 0603 EMI 100MHZ 30R R
5F09 242254943276 IND FXD 0603 EMI 100MHZ 30R R
5F10 242254943276 IND FXD 0603 EMI 100MHZ 30R R
5F13 242254942979 IND FXD 0603 EMI 100MHZ 60R R
5F15 242254942979 IND FXD 0603 EMI 100MHZ 60R R
5F17 242254942979 IND FXD 0603 EMI 100MHZ 60R R
5F19 242254942979 IND FXD 0603 EMI 100MHZ 60R R
5F21 242254942979 IND FXD 0603 EMI 100MHZ 60R R
5F23 242254942979 IND FXD 0603 EMI 100MHZ 60R R
5F24 242254943276 IND FXD 0603 EMI 100MHZ 30R R
5F25 242254943276 IND FXD 0603 EMI 100MHZ 30R R
5F31 242253601524 IND FXD SM 0603 0U27 PM5 R
6101 319801010630 DIO SIG SM BAS316 (COL) R
6102 319801010630 DIO SIG SM BAS316 (COL) R
6103 319802051890 DIO REG SM BZX384-C18 COL R
6104 319802051890 DIO REG SM BZX384-C18 COL R
6105 319801010630 DIO SIG SM BAS316 (COL) R
6106 319801010630 DIO SIG SM BAS316 (COL) R
6108 319802058280 DIO REG SM BZX384-C8V2 COL R
20090302 14-8 A9PJ3PL
Page 62
Item Philips 12NC Description
6109 319802053380 DIO REG SM BZX384-C3V3 COL R
6110 932213446685 LED VS SM SML-310MT (RHM0) R
6302 319801010630 DIO SIG SM BAS316 (COL) R
6303 319801010630 DIO SIG SM BAS316 (COL) R
6304 319801010630 DIO SIG SM BAS316 (COL) R
6305 319801010630 DIO SIG SM BAS316 (COL) R
6C01 319802056880 DIO REG SM BZX384-C6V8 COL R
6C02 319802056880 DIO REG SM BZX384-C6V8 COL R
6C03 319801010630 DIO SIG SM BAS316 (COL) R
6C04 319802058280 DIO REG SM BZX384-C8V2 COL R
6C05 319801010630 DIO SIG SM BAS316 (COL) R
6C06 319802053380 DIO REG SM BZX384-C3V3 COL R
6D04 932213446685 LED VS SM SML-310MT (RHM0) R
6E02 933976370215 DIO SIG SM BAT54C (PHSE) R
6E05 319801010630 DIO SIG SM BAS316 (COL) R
6E06 319802056880 DIO REG SM BZX384-C6V8 COL R
6E11 933976370215 DIO SIG SM BAT54C (PHSE) R
6E12 933976370215 DIO SIG SM BAT54C (PHSE) R
6E13 933976370215 DIO SIG SM BAT54C (PHSE) R
6E14 319801010630 DIO SIG SM BAS316 (COL) R
6F01 932226081685 DIO SUP SM CDS4C12GTA (EPCO) R
6F01 934058004115 DIO SUP SM PESD5V0S1BA(PHSE) R
6F02 932226081685 DIO SUP SM CDS4C12GTA (EPCO) R
6F02 934058004115 DIO SUP SM PESD5V0S1BA(PHSE) R
6F03 932226081685 DIO SUP SM CDS4C12GTA (EPCO) R
6F03 934058004115 DIO SUP SM PESD5V0S1BA(PHSE) R
6F04 932226081685 DIO SUP SM CDS4C12GTA (EPCO) R
6F04 934058004115 DIO SUP SM PESD5V0S1BA(PHSE) R
6F05 932226081685 DIO SUP SM CDS4C12GTA (EPCO) R
6F05 934058004115 DIO SUP SM PESD5V0S1BA(PHSE) R
6F06 932226081685 DIO SUP SM CDS4C12GTA (EPCO) R
6F06 934058004115 DIO SUP SM PESD5V0S1BA(PHSE) R
6F07 932226081685 DIO SUP SM CDS4C12GTA (EPCO) R
6F07 934058004115 DIO SUP SM PESD5V0S1BA(PHSE) R
6F08 932226081685 DIO SUP SM CDS4C12GTA (EPCO) R
6F08 934058004115 DIO SUP SM PESD5V0S1BA(PHSE) R
6F09 932226081685 DIO SUP SM CDS4C12GTA (EPCO) R
6F09 934058004115 DIO SUP SM PESD5V0S1BA(PHSE) R
6F10 932226081685 DIO SUP SM CDS4C12GTA (EPCO) R
6F10 934058004115 DIO SUP SM PESD5V0S1BA(PHSE) R
6F11 932226081685 DIO SUP SM CDS4C12GTA (EPCO) R
6F11 934058004115 DIO SUP SM PESD5V0S1BA(PHSE) R
6F12 932226081685 DIO SUP SM CDS4C12GTA (EPCO) R
6F12 934058004115 DIO SUP SM PESD5V0S1BA(PHSE) R
6F13 932226081685 DIO SUP SM CDS4C12GTA (EPCO) R
6F13 934058004115 DIO SUP SM PESD5V0S1BA(PHSE) R
6F14 932226081685 DIO SUP SM CDS4C12GTA (EPCO) R
6F14 934058004115 DIO SUP SM PESD5V0S1BA(PHSE) R
6F15 932226081685 DIO SUP SM CDS4C12GTA (EPCO) R
6F15 934058004115 DIO SUP SM PESD5V0S1BA(PHSE) R
6F16 932226081685 DIO SUP SM CDS4C12GTA (EPCO) R
6F16 934058004115 DIO SUP SM PESD5V0S1BA(PHSE) R
6F17 932226081685 DIO SUP SM CDS4C12GTA (EPCO) R
6F17 934058004115 DIO SUP SM PESD5V0S1BA(PHSE) R
6F18 932226081685 DIO SUP SM CDS4C12GTA (EPCO) R
6F18 934058004115 DIO SUP SM PESD5V0S1BA(PHSE) R
6F19 932226081685 DIO SUP SM CDS4C12GTA (EPCO) R
6F19 934058004115 DIO SUP SM PESD5V0S1BA(PHSE) R
6F20 932226081685 DIO SUP SM CDS4C12GTA (EPCO) R
6F20 934058004115 DIO SUP SM PESD5V0S1BA(PHSE) R
6F21 932226081685 DIO SUP SM CDS4C12GTA (EPCO) R
6F21 934058004115 DIO SUP SM PESD5V0S1BA(PHSE) R
6F22 932226081685 DIO SUP SM CDS4C12GTA (EPCO) R
Item Philips 12NC Description
6F22 934058004115 DIO SUP SM PESD5V0S1BA(PHSE) R
6F25 319802056880 DIO REG SM BZX384-C6V8 COL R
6F26 932222113685 DIO SUP SM NUP1301ML3 (ONSE) R
6F27 932222113685 DIO SUP SM NUP1301ML3 (ONSE) R
7101 319801044340 TRA SIG SM BC817-25W (COL) R
7102 319801044340 TRA SIG SM BC817-25W (COL) R
7103 932225619668 FET POW SM SI4936BDY-E3(VISH)R
7104 932225619668 FET POW SM SI4936BDY-E3(VISH)R
7105 932225619668 FET POW SM SI4936BDY-E3(VISH)R
7106 932225619668 FET POW SM SI4936BDY-E3(VISH)R
7107 932220746668 IC SM NCP5422ADG (ONSE) R
7108 932220746668 IC SM NCP5422ADG (ONSE) R
7109 932225480668 IC SM BD25KA5FP (RHM0) R
7110 932225470668 IC SM TPS74801DRC (TI00) R
7111 319801042310 TRA SIG SM BC847BW (COL) R
7113 319801042310 TRA SIG SM BC847BW (COL) R
20090302 14-9 A9PJ3PL
Page 63

PARTS LIST
[47MF439B/F7 (Serial No. : YA1B**********)]
Difference parts from the original model [47MF439B/F7 (Serial No. : YA1A**********)]
Item Philips 12NC Description
PCB Assembly
1150 A9PJ2D1G-001 AS SSB MG8 NA2k9M
20090608 14-10 A9PJ3BPL
Page 64

REVISION HISTORY
Chassis PL9.0
• 2009-06-08 A revision of “How To Set Option Code” on page 5-9.
• 2009-06-08 47MF439B/F7 (Serial No. : YA1B**********) added
15-1 PL9.0FREV
 Loading...