

Page 1
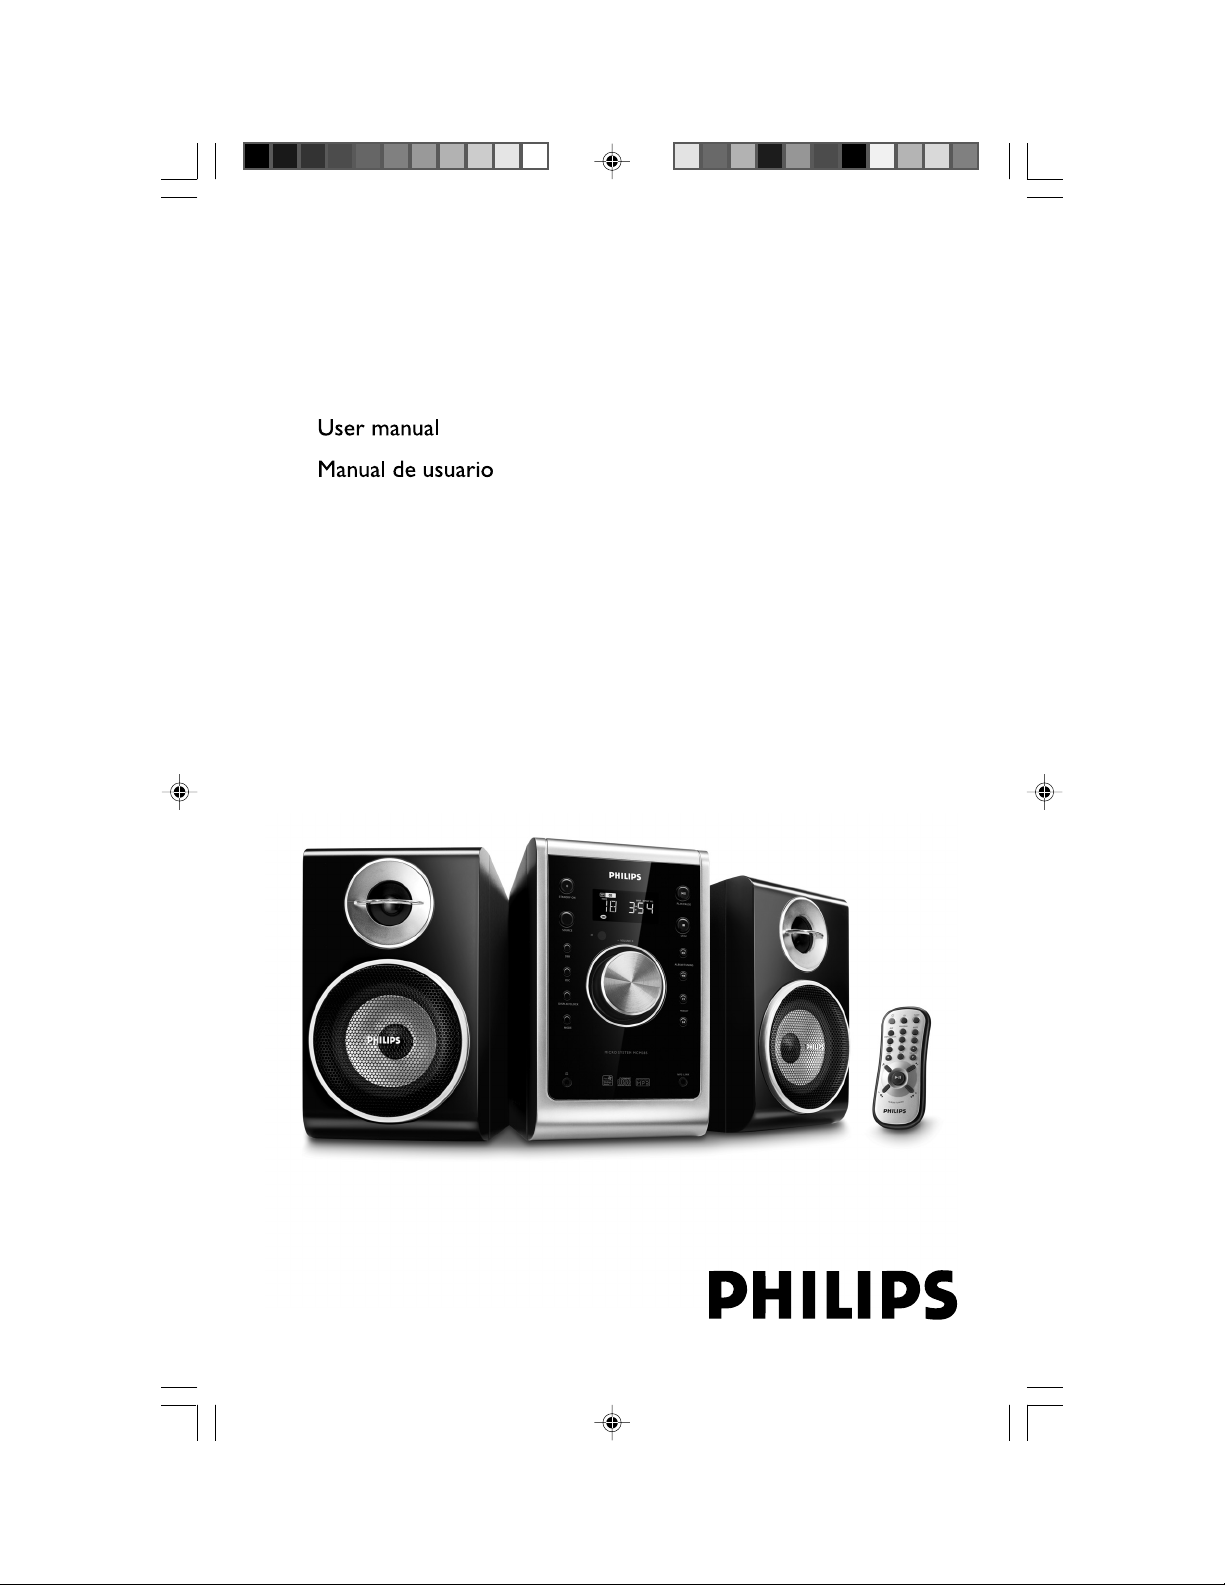
Micro Hi-Fi System
Register your product and get support at
www.philips.com/welcome
MCM285
pg 001-018_MCM285-77_Eng 2008.5.7, 16:551
Page 2

2
pg 001-018_MCM285-77_Eng 2008.5.7, 16:552
Page 3
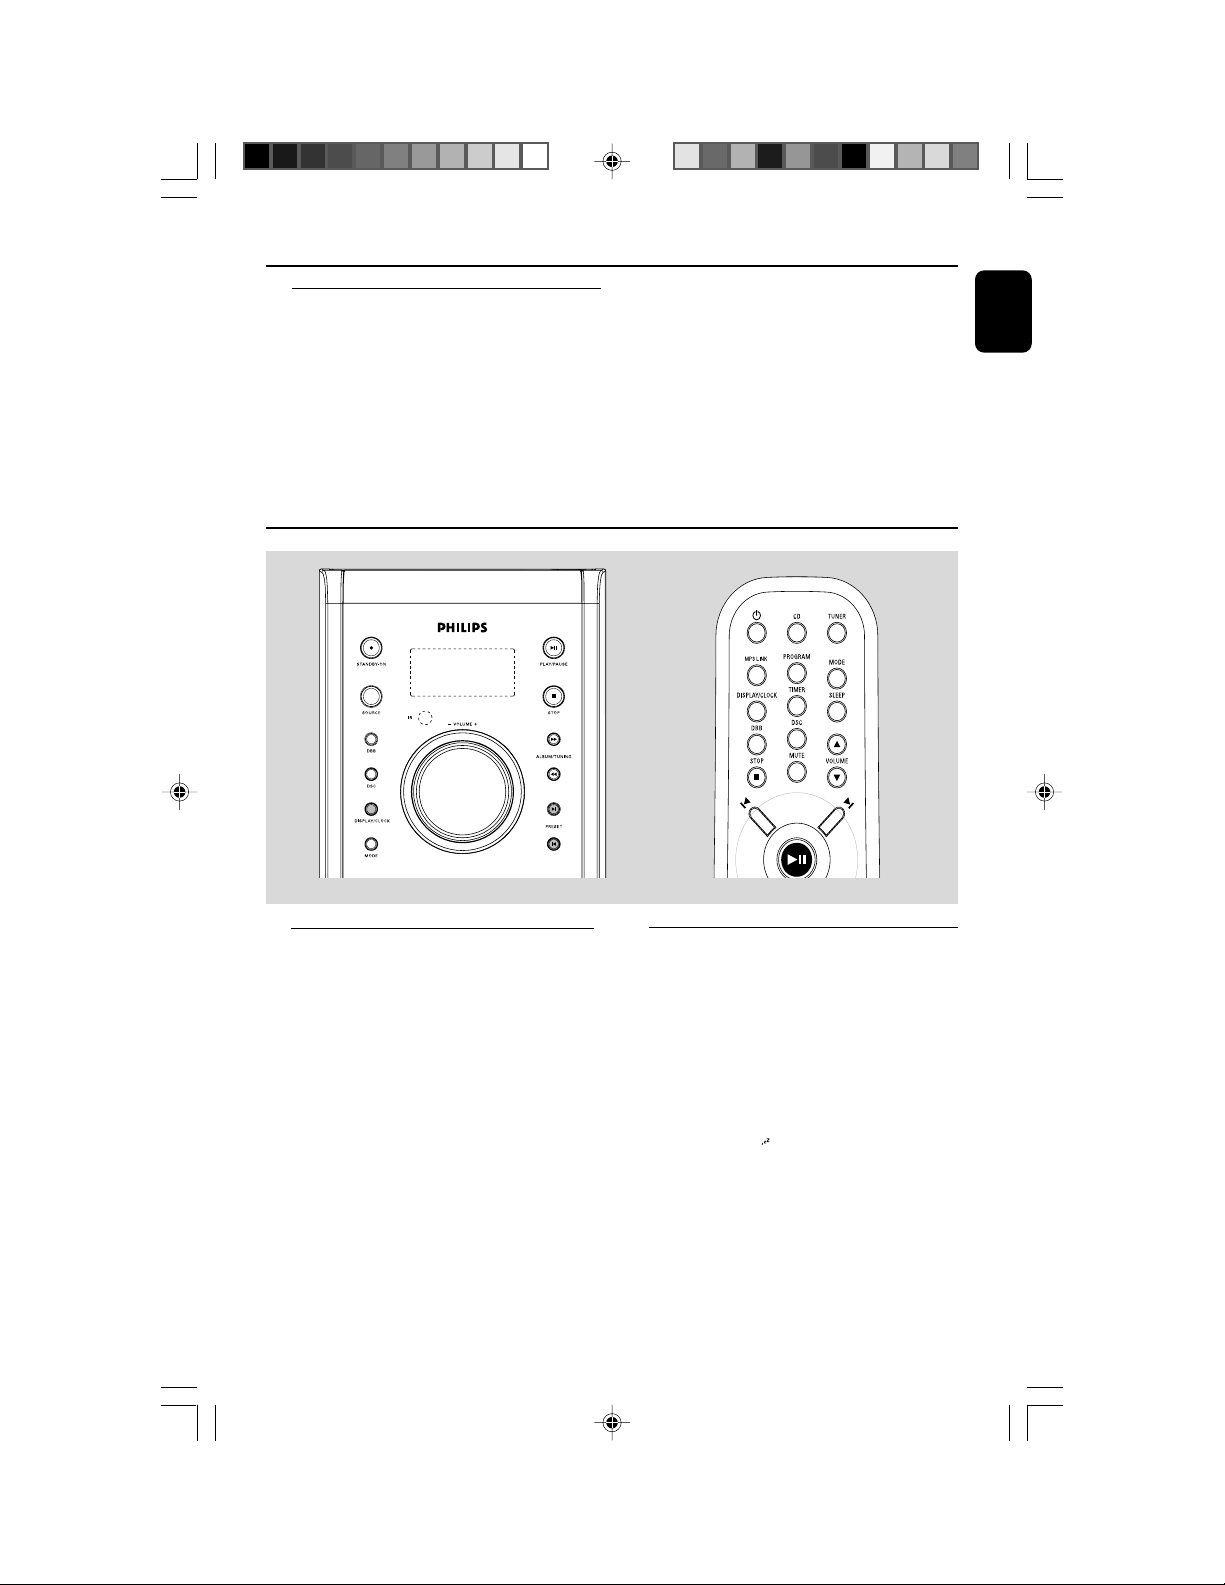
&
*
3
7
6
5
$
8
)
(
@
)
!
!
%
#
#
Top view
1
2
3
4
5
6
7
8
9
MP3 LINK
%
$
#
@
!
0
^
pg 001-018_MCM285-77_Eng 2008.5.7, 16:553
3
Page 4

4
pg 001-018_MCM285-77_Eng 2008.5.7, 16:554
Page 5
English ------------------------------------------------ 6
Español --------------------------------------------- 19
English
Español
pg 001-018_MCM285-77_Eng 2008.5.7, 16:555
CAUTION
Use of controls or adjustments or
performance of procedures other
than herein may result in hazardous
radiation exposure or other unsafe
operation.
5
Page 6
Contents
English
General Information
Supplied accessories ............................................ 7
Environmental information ................................ 7
Safety information ................................................ 7
Preparation
Rear connections ................................................. 8
Optional connection ........................................... 9
Inserting batteries into the remote control... 9
External Sources
Connecting external equipment ..................... 15
Clock/Timer
Setting the clock ................................................. 15
Setting the sleep timer ...................................... 15
Setting the timer ................................................. 16
Specifications ........................................... 17
Controls
Controls on the system and remote
control .................................................................. 10
Basic Functions
Switching the system on ................................... 11
Power-saving automatic standby ..................... 11
Adjusting volume and sound............................ 11
CD/MP3/WMA Operation
Playing a disc ........................................................ 12
Selecting a different track ................................. 12
Finding a passage within a track ...................... 12
Playing an MP3/WMA disc ............................... 12
Discs for playback .............................................. 13
Different play modes: Shuffle and Repeat ..... 13
Programming track numbers ........................... 13
Erasing the programme ..................................... 13
Radio Reception
Tuning to radio stations .................................... 14
Programming radio stations ............................. 14
Automatic programming
Manual programming
Tuning to preset radio stations ....................... 14
Maintenance.............................................. 17
Tr oubleshooting .................................... 18
6
pg 001-018_MCM285-77_Eng 2008.5.7, 16:556
Page 7
General Information
Congratulations on your purchase and
welcome to Philips!
To fully benefit from the support that
Philips offers, register your product at
www.philips.com/welcome.
Supplied accessories
–2 speaker boxes
– remote control
– MP3 Link cable
Environmental information
All unnecessary packaging has been omitted. We
have tried to make the packaging easy to
separate into three materials: cardboard (box),
polystyrene foam (buffer) and polyethylene (bags,
protective foam sheet).
Your system consists of materials which can be
recycled and reused if disassembled by a
specialized company. Please observe the local
regulations regarding the disposal of packaging
materials, exhausted batteries and old
equipment.
The making of unauthorized copies of copyprotected material, including computer
programmes, files, broadcasts and sound
recordings, may be an infringement of
copyrights and constitute a criminal offence.
This equipment should not be used for such
purposes.
Safety information
● Before operating the system, check that the
operating voltage indicated on the typeplate (or
the voltage indication beside the voltage
selector) of your system is identical with the
voltage of your local power supply. If not, please
consult your dealer.
● Place the system on a flat, hard and stable
surface.
● Place the system in a location with adequate
ventilation to prevent internal heat build-up in
your system. Allow at least 10 cm (4 inches)
clearance from the rear and the top of the unit
and 5 cm (2 inches) from each side.
● The ventilation should not be impeded by
covering the ventilation openings with items,
such as newspapers, table-cloths, curtains, etc.
● Do not expose the system, batteries or discs to
excessive moisture, rain, sand or heat sources
caused by heating equipment or direct sunlight.
● No naked flame sources, such as lighted candles,
should be placed on the apparatus.
● No objects filled with liquids, such as vases, shall
be placed on the apparatus.
● The apparatus shall not be exposed to dripping
or splashing.
● Install this unit near the AC outlet and where the
AC power plug can be reached easily.
● If the system is brought directly from a cold to a
warm location, or is placed in a very damp room,
moisture may condense on the lens of the disc
unit inside the system. Should this occur, the CD
player would not operate normally. Leave the
power on for about one hour with no disc in the
system until normal playback is possible.
● The mechanical par ts of the set contain self-
lubricating bearings and must not be oiled or
lubricated.
● When the system is switched to Standby
mode, it is still consuming some power.
To disconnect the system from the
power supply completely, remove the AC
power plug from the wall socket.
English
pg 001-018_MCM285-77_Eng 2008.5.7, 16:557
7
Page 8
Preparations
English
SPEAKERS
IMPEDANCE:
L
R
~
8 OHM( )
+
–
–
+
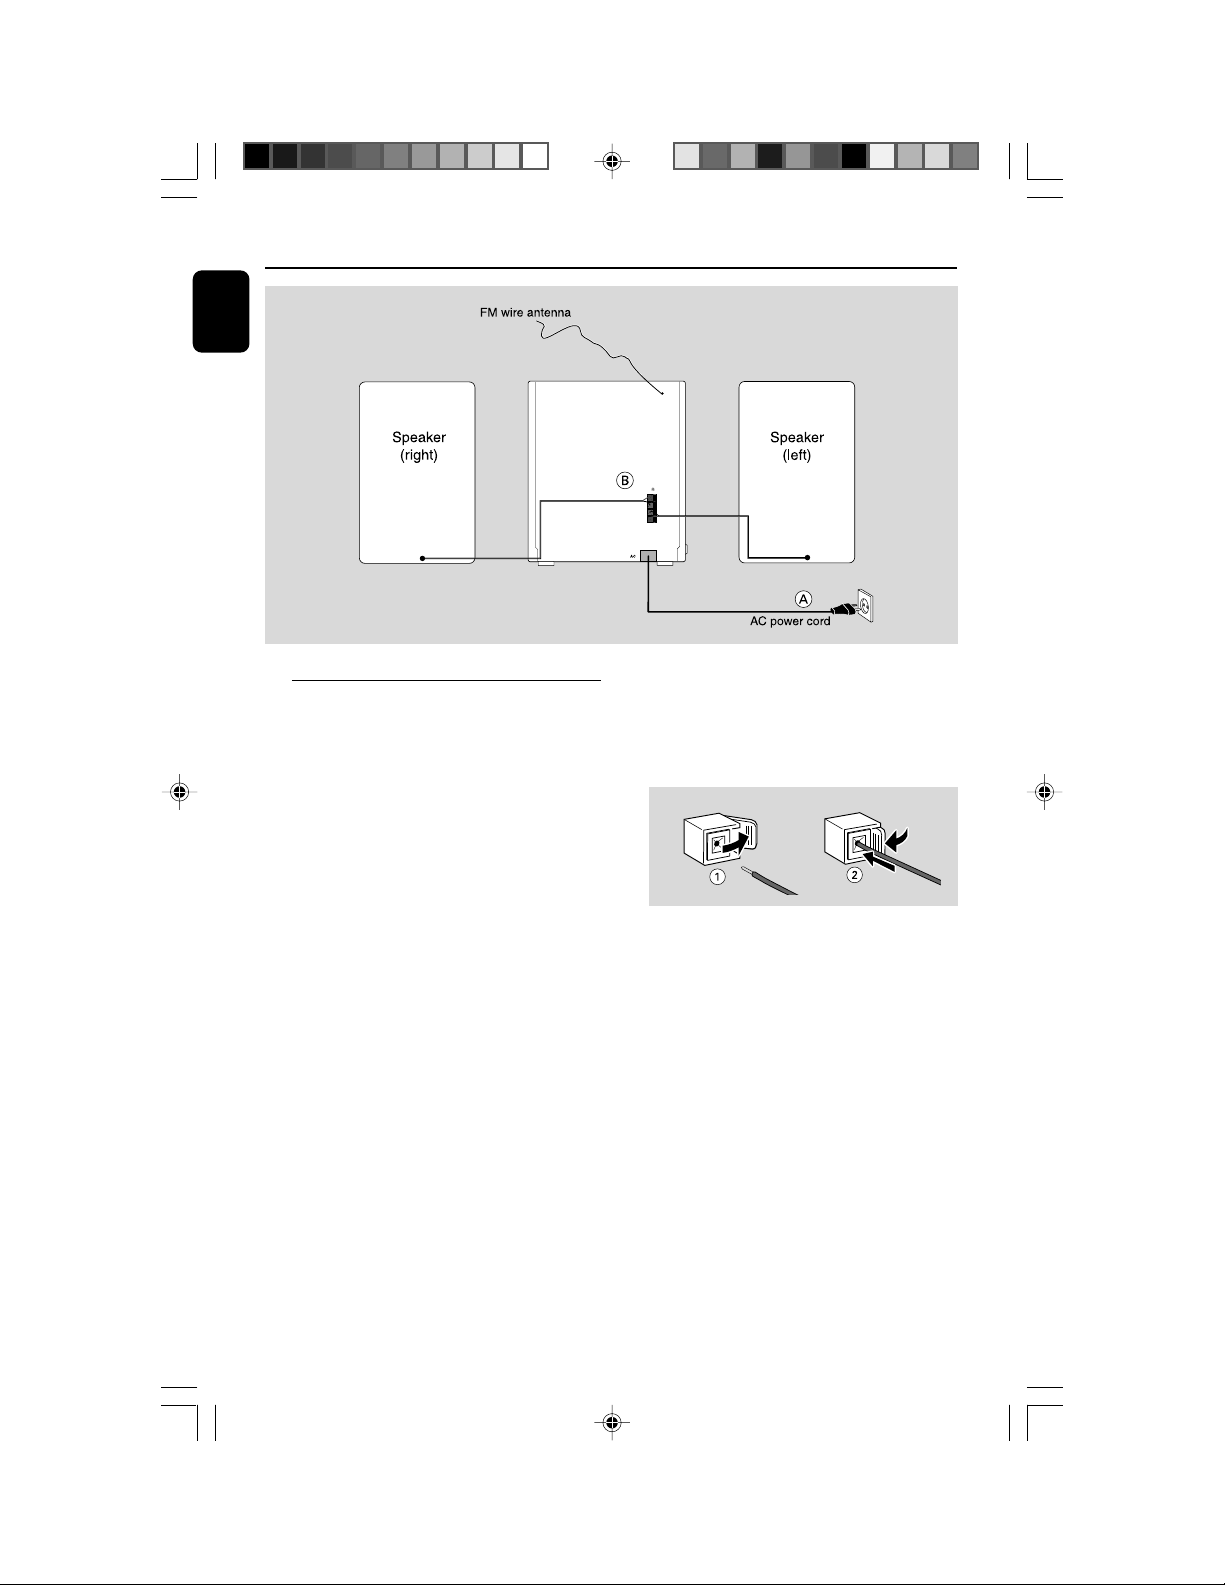
Rear connections
The type plate is located at the rear of the
system.
A Pow er
– Before connecting the AC power cord to the
wall outlet, ensure that all other connections
have been made.
WARNING!
–For optimal performance, use only the
original power cable.
–Never make or change any connections
with the power switched on.
To avoid overheating of the system, a safety
circuit has been built in. Therefore, your
system may switch to Standby mode
automatically under extreme conditions. If
this happens, let the system cool down
before reusing it (not available for all versions).
B Speakers Connection
Front Speakers
Connect the speaker wires to the SPEAKERS
terminals, right speaker to "R" and left speaker to
"L", red wires to "+" and black wires to "-".
● Fully insert the stripped portion of the speaker
wire into the terminal as shown.
Notes:
–For optimal sound performance, use the
supplied speakers.
– Do not connect more than one speaker to any
one pair of +/- speaker terminals.
– Do not connect speakers with an impedance
lower than the speakers supplied. Please refer to
the SPECIFICATIONS section of this manual.
8
pg 001-018_MCM285-77_Eng 2008.5.7, 16:558
Page 9
Optional connection
The optional equipment and connecting cords
are not supplied. Refer to the operating
instructions of the connected equipment for
details.
Connecting a non-USB device
Use a cinch cable to connect MP3 LINK to the
audio out terminals of an external equipment
(TV, VCR, Laser Disc player, DVD player or CD
Recorder).
Inserting batteries into the
remote control
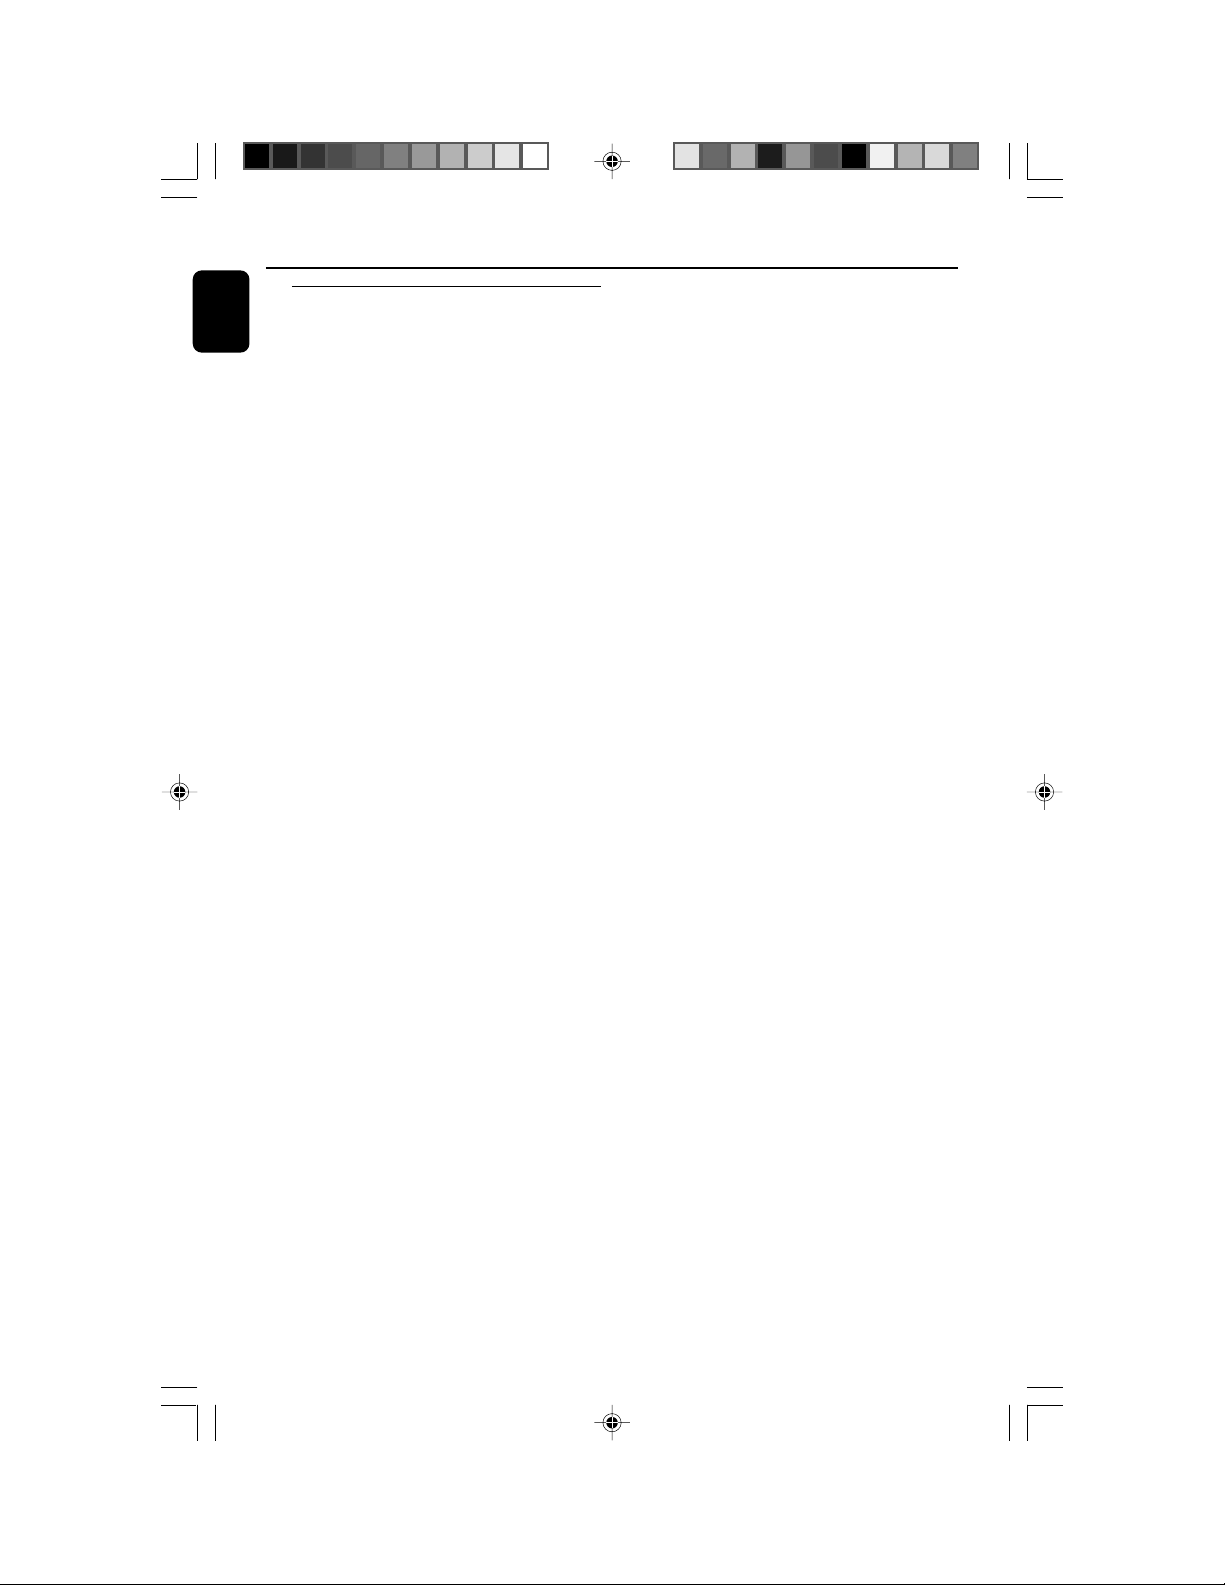
Insert two batteries type AAA into the remote
control with the correct polarity as indicated by
the “+”and“-” symbols inside the battery
compartment.
Preparations
English
CAUTION!
– Remove batteries if they are exhausted
or will not be used for a long time.
– Do not use old and new or different
types of batteries in combination.
– Batteries contain chemical substances,
so they should be disposed of properly.
pg 001-018_MCM285-77_Eng 2008.5.7, 16:559
9
Page 10
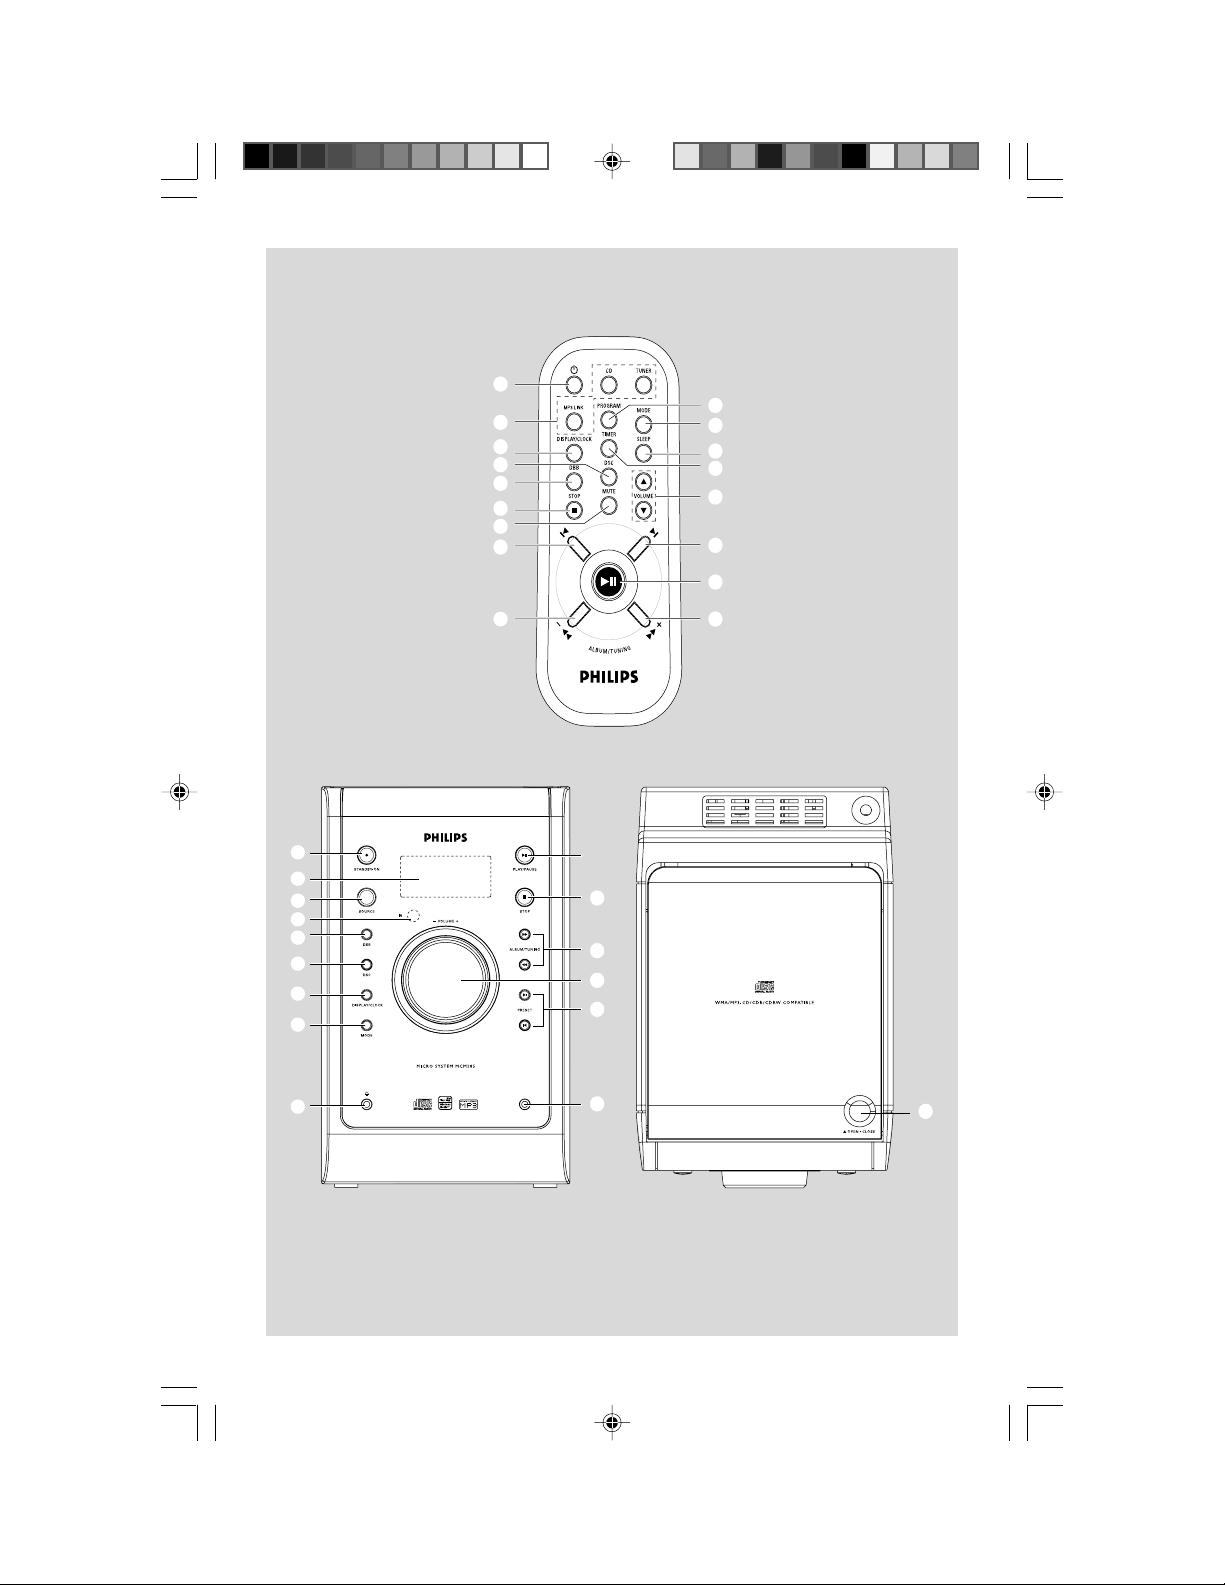
Controls (illustrations on page 3)
English
Controls on the system and
remote control
1 STANDBY ON
– switches the system on or to standby mode.
2 LCD Display
– shows the status of the system.
3 Source (CD/ TUNER/MP3 LINK)
– selects the respective sound source for CD/
TUNER/MP3 LINK.
4 iR SENSOR
– infrared sensor for remote control.
5 DBB (Dynamic Bass Boost)
– enhances the bass.
6 DSC (Digital Sound Control)
– selects sound characteristics: CLASSIC, JAZZ,
POP or ROCK.
7 DISPLAY/CLOCK
– to set or view the clock.
8 MODE
– selects different play modes: e.g. REPEAT or
SHUFFLE (random order)
9 ;
– Plugs in a headphone.
0 MP3 LINK
– 3.5mm audio input jack.
! PRESET +/- í/ë
– skips to the beginning of a current track/
previous/next track.
– sets the hours and minutes for the clock and
timer.
–selects a preset radio station.
@ VOLUME +/-
– adjusts the volume level.
# ALBUM/TUNING 5 / 6
– selects an album.
– tunes to a radio station.
– (press and hold) fast searches back and forward
within a track/disc.
$ STOP 9
– stops CD playback or erases a CD program.
% 2;
– starts or pauses CD playback.
^ OPEN/CLOSE
– open/close the CD door.
& y
– switches the system to standby mode.
* PROGRAM
– (for CD) programs CD tracks and reviews the
program.
– (for TUNER) programs preset radio stations.
( TIMER
– activates/deactivates the timer.
) SLEEP
– activates/deactivates or selects the sleep time.
– views the remaining sleep time.
¡ MUTE
– switches playback sound off and on.
10
pg 001-018_MCM285-77_Eng 2008.5.7, 16:5510
Page 11
IMPORTANT:
Before you operate the system, complete
the preparation procedures.
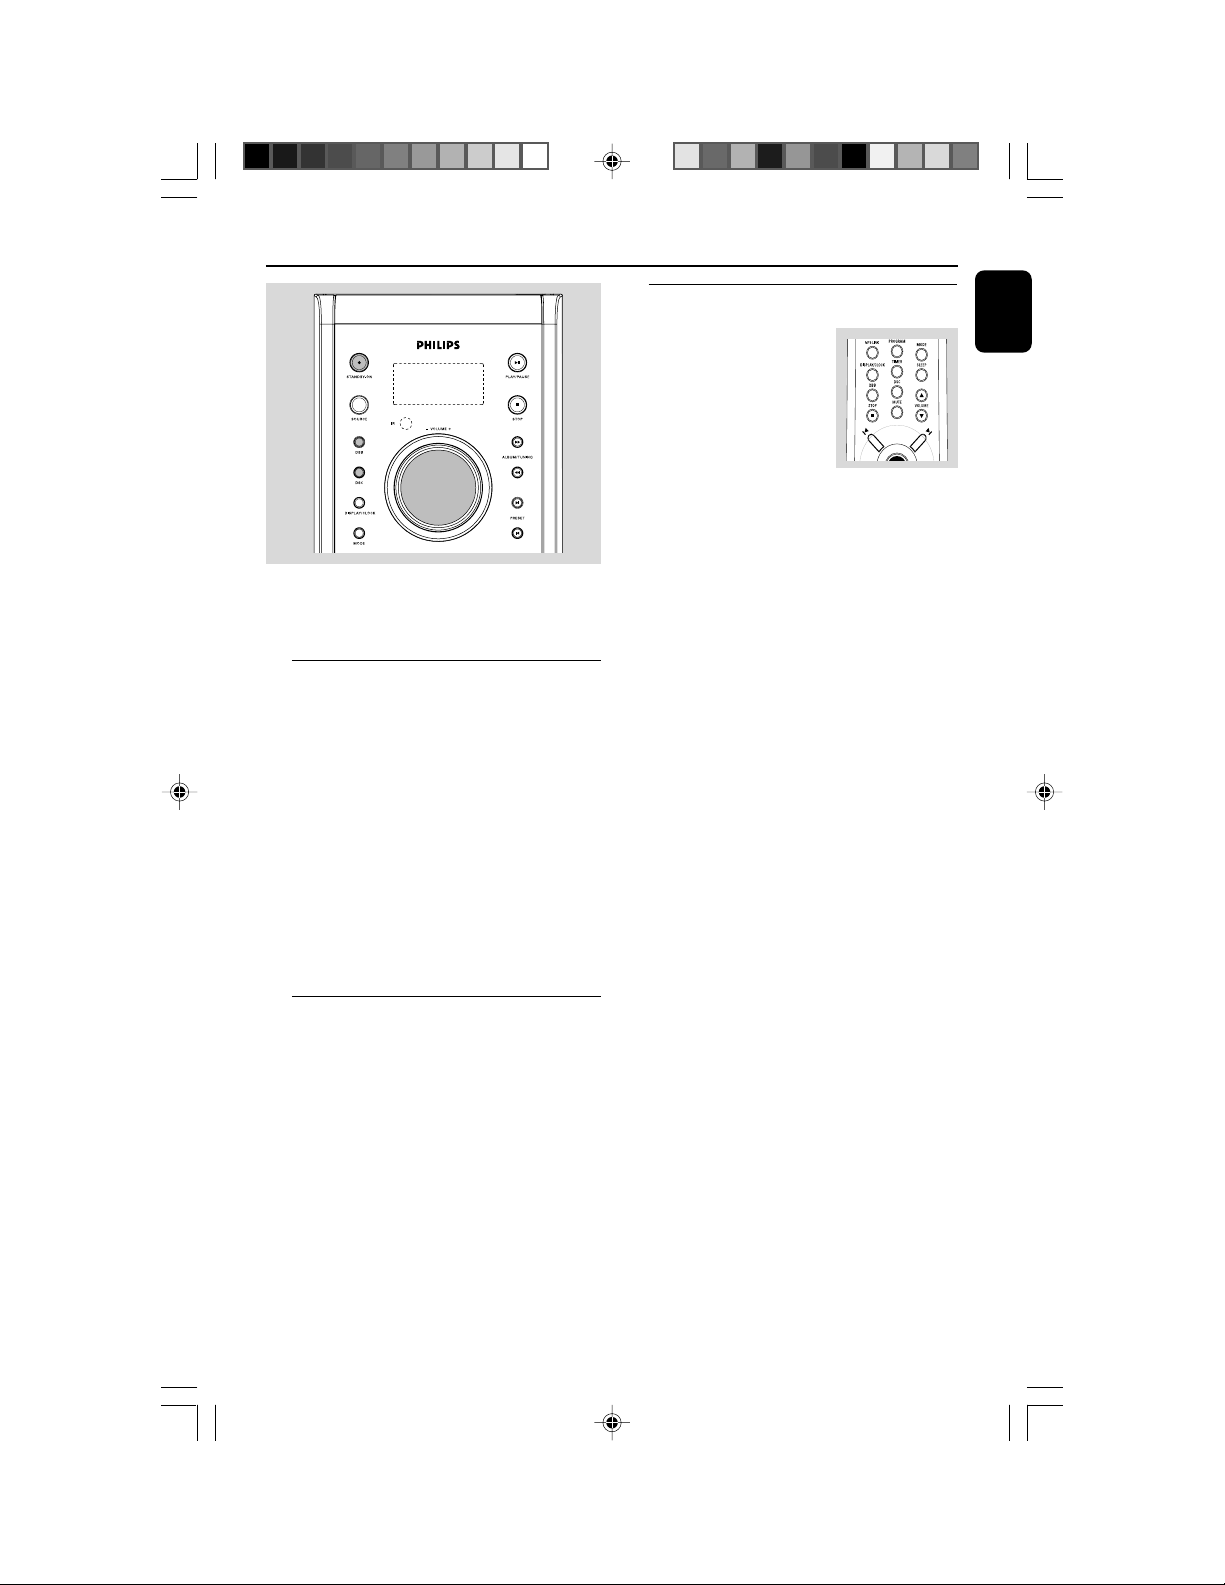
Switching the system on
● Press STANDBY-ON on the main set.
➜ The system will switch to the last selected
source.
● Press CD, TUNER, or MP3 LINK on the
remote control.
➜ The system will switch to the selected source.
Basic Functions
Adjusting volume and sound
1 Adjust the VOLUME control
knob or press VOLUME
3/4 on the remote
control to increase or
decrease volume.
➜ Display shows the
volume level UOL and a
number from 0-40.
2 Press DBB to switch bass enhancement on or
off.
➜ Display shows: DBB if the DBB is activated.
3 Press DSC on the remote control repeatedly to
select the desired sound effect: CLASSIC, JAZZ,
POP, or ROCK.
➜ The selected DSC is shown.
4 Press MUTE on the remote control to stop
sound playback instantly.
➜ Playback will continue without sound and the
display shows MUTE.
● To start sound playback you can:
– press MUTE again;
– adjust the volume controls.
English
To switch the system to standby mode
● Press STANDBY-ON (y on the remote
control).
➜ The volume level (up to a maximum volume
level of 15), interactive sound settings, last
selected source and tuner presets will be
retained in the player's memory.
Power-saving automatic standby
The power-saving feature automatically switches
to standby 30 minutes after CD playback has
ended and no control is operated.
pg 001-018_MCM285-77_Eng 2008.5.7, 16:5511
11
Page 12
CD/MP3/WMA Operation
English
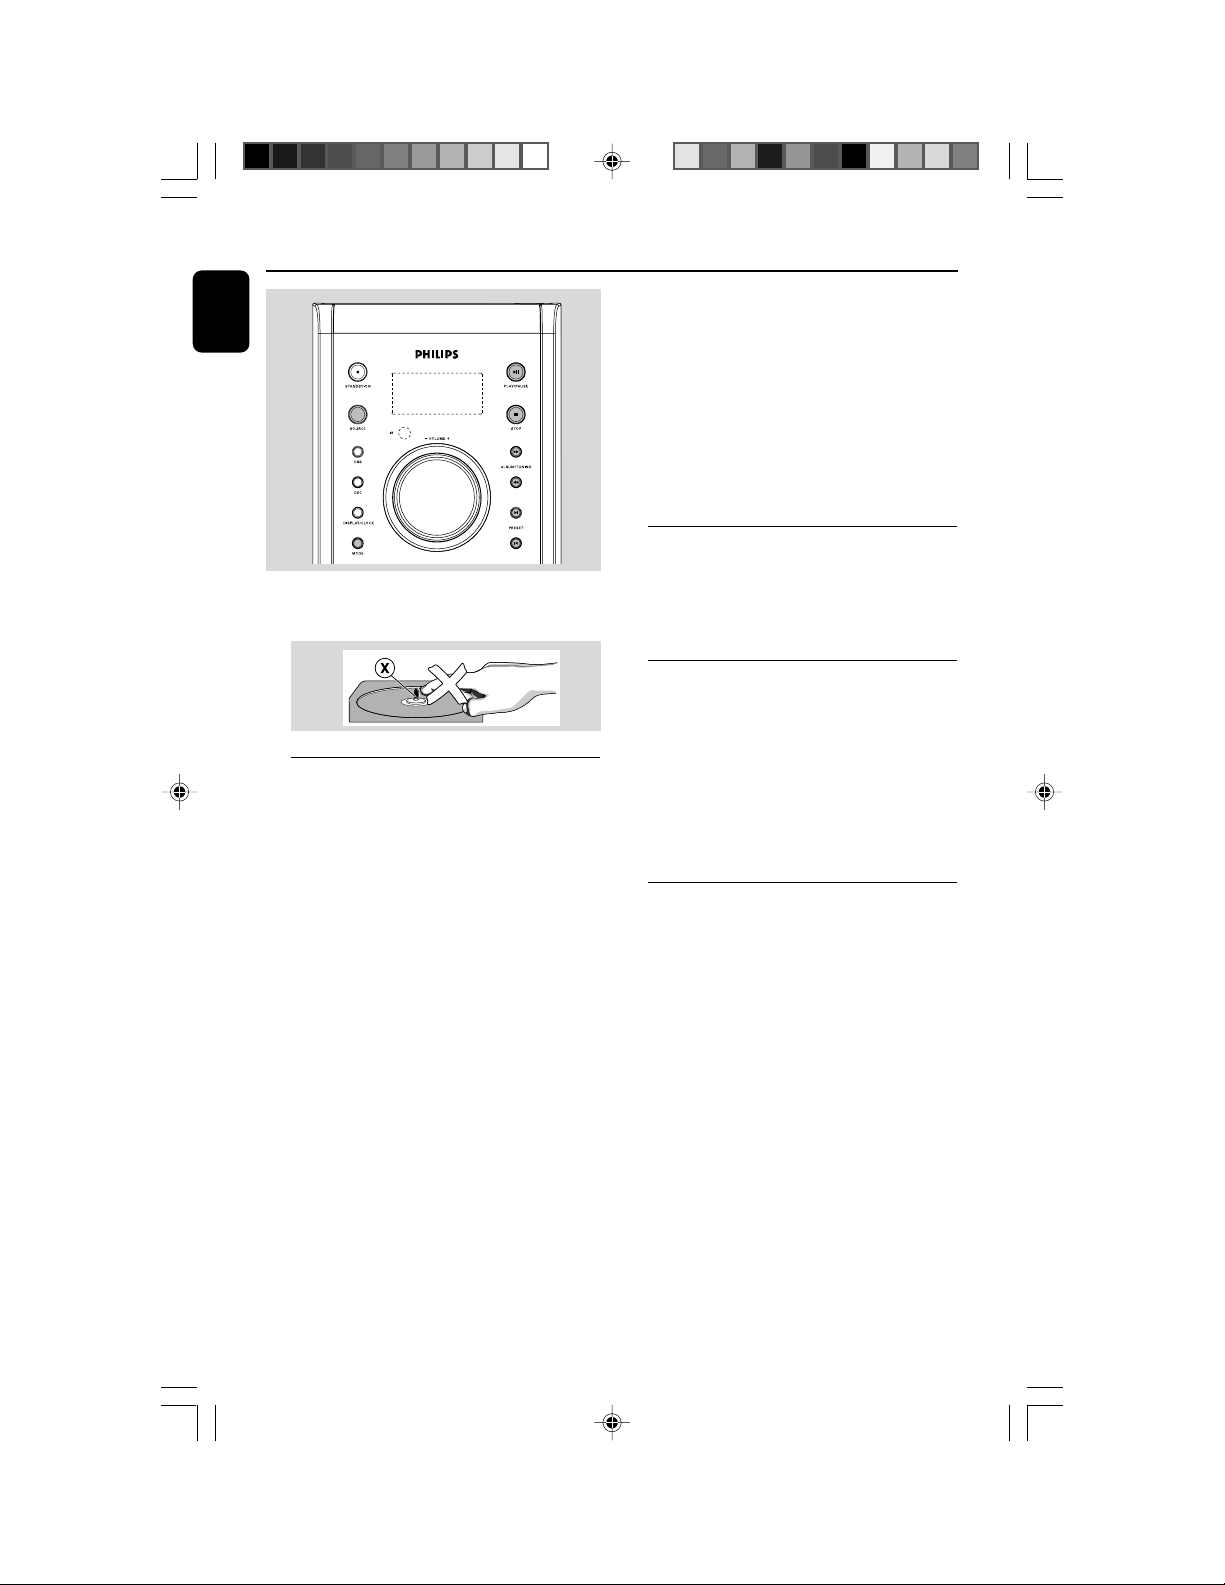
IMPORTANT:
The lens of the CD player should never be
touched.
Playing a disc
This CD player plays Audio Discs including CDRecordables, CD-Rewritables and MP3 CD.
¶ CD-ROM, CD-I, CDV, VCD, DVD or computer
CDs, however, are not possible.
5 To pause playback press 2;. Press 2; again to
resume play.
➜ The display freezes and the elapsed playing
time flashes when playback is interrupted.
6 To stop disc playback, press STOP 9.
Note: CD playback will also stop when;
– the CD door is opened.
– the disc has reached the end.
– you select another source: TUNER or MP3 LINK.
– you select standby.
Selecting a different track
● Press PRESET +/- í/ë (í/ë on the
remote) once or repeatedly until the desired
track number appears in the display.
● Press 2; to start playback.
Finding a passage within a track
1 Press and hold down ALBUM/TUNING 5 /
6 (5/6 on the remote).
➜ The disc is played at high speed and low
volume.
2 When you find the passage you want, release
ALBUM/TUNING 5 / 6 (5/6 on the
remote).
➜ Normal playback continues.
1 Press SOURCE once or more or CD on the
remote control to select CD.
2 Press OPEN/CLOSE on the system to open
the CD compartment.
➜ OPEN is displayed when you open the CD
compartment.
3 Insert a disc with the printed side facing up and
press OPEN/CLOSE to close the CD door.
➜ rEAd is displayed as the CD player scans
the contents of a disc, and then the total number
of tracks and playing time (or the total number
of albums and tracks for MP3 disc) are shown.
4 Press 2; to star t playback.
➜ The current track number and elapsed
playing time of the track are displayed during disc
playback.
12
pg 001-018_MCM285-77_Eng 2008.5.7, 16:5512
Playing an MP3/WMA disc
1 Load an MP3/WMA disc.
➜ The disc reading time may exceed 10
seconds due to the large number of songs
compiled into one disc.
➜ "XX YYY" is displayed. XX is the current
album number and YYY is the current track
number.
2 Press ALBUM/TUNING 5 / 6to select a
desired album.
3 Press PRESET +/- í/ë (í/ë on the
remote) to select a desired track.
➜ The album number will change accordingly as
you reach the first track of an album by pressing
í (í on the remote) or the last track of an
album by pressing ë (ë on the remote).
4 Press 2; to star t playback.
Page 13
CD/MP3/WMA Operation
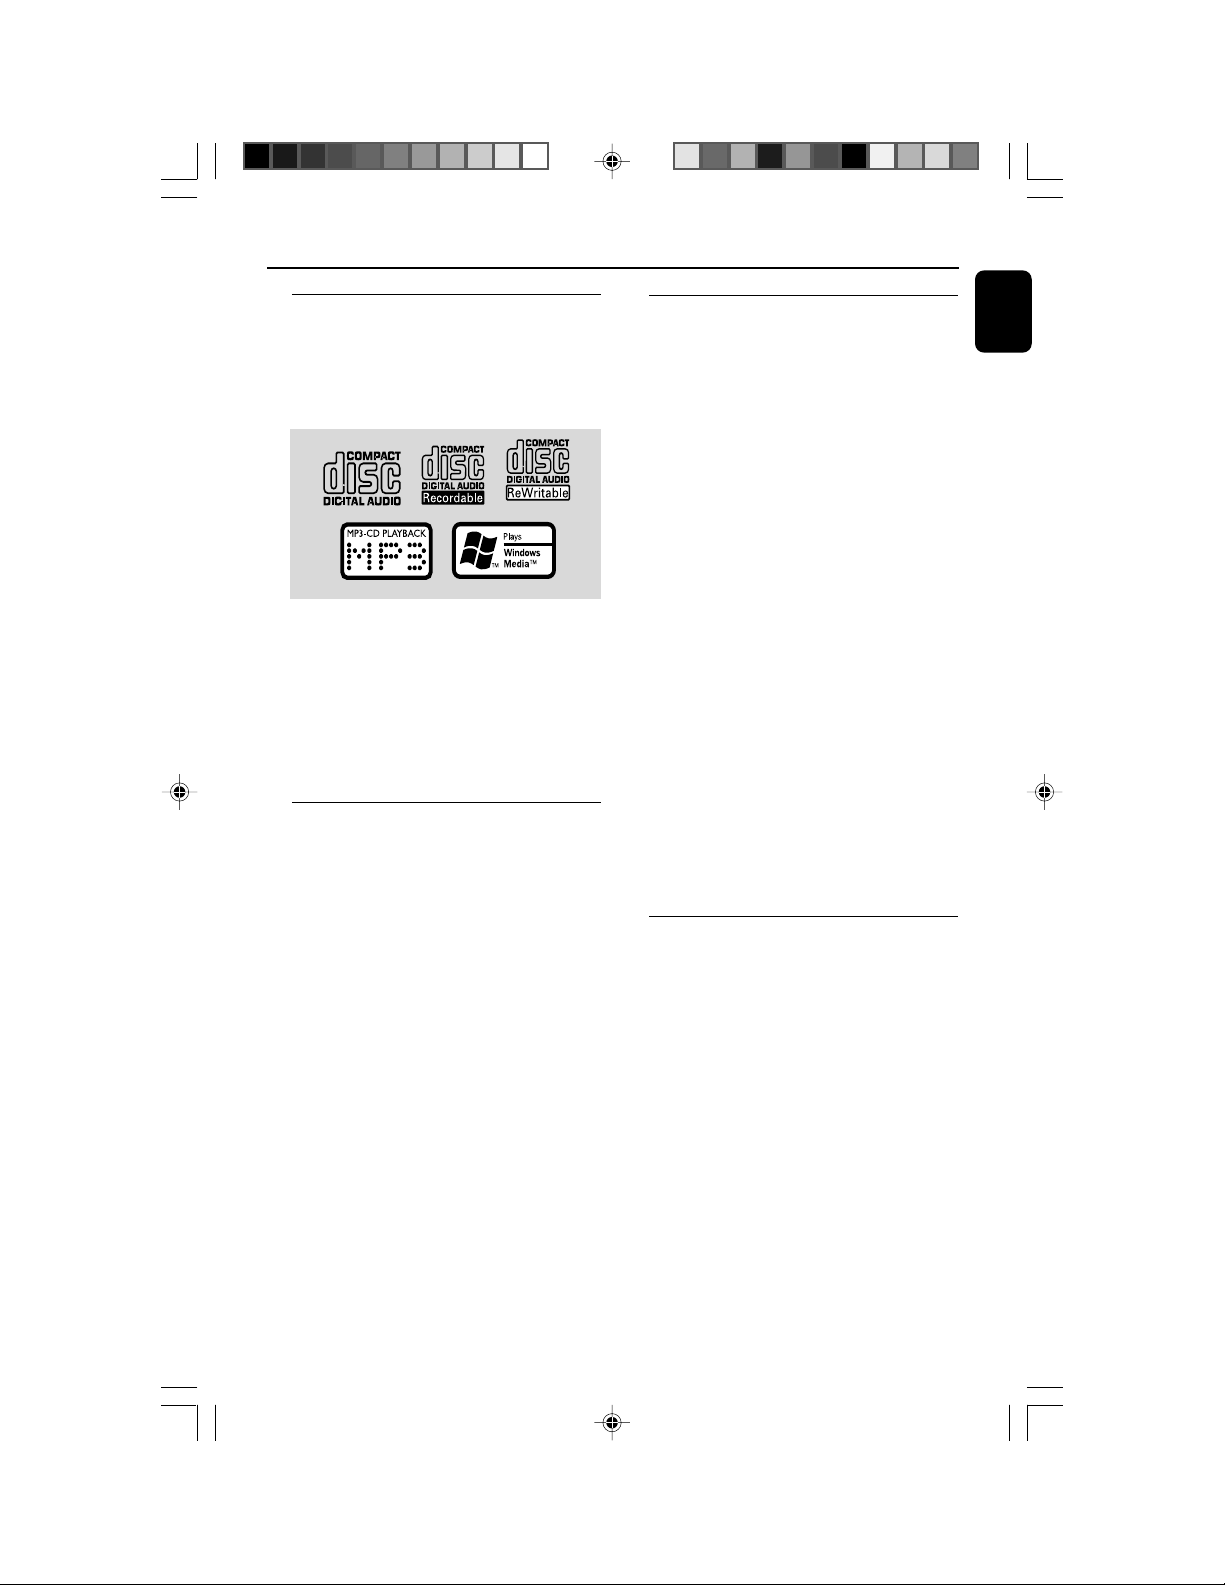
Discs for playback
This system can playback all digital audio CD,
finalised digital audio CD-Recordable (CDR)
discs and finalised digital audio CD-Rewritable
(CDRW)discs.
MP3-CDs (CD-ROMs with MP3 tracks)
Supported MP3 disc formats:
– ISO9660, Joliet, UDF 1.5
– Maximum title number: 511 (depending on
filename length)
– Maximum album number: 99
– Supported sampling frequencies: 32 kHz, 44.1
kHz, 48 kHz
– Supported Bit-rates: 32~256 (kbps), variable
bitrates
Different play modes: SHUFFLE
and REPEAT
You can select and change the various play
modes before or during playback.
REPEAT ............plays the current track
continuously
REPEAT ALL ... repeats the entire disc/
programme
SHUF ................ tracks of the entire disc are
played in random order
SHUF REPEAT ALL
................................. repeats the disc/program
continuously in random order
Programming track numbers
Programme in the STOP position to select and
store your disc tracks in the desired sequence. If
you like, store any track more than once. Up to
20 tracks can be stored in the memory.
1 In the STOP position, press PROGRAM on the
remote control to enter the programming
mode.
2 Use PRESET +/- í/ë (í/ë on the
remote) to select your desired track number.
● For MP3/WMA disc, press ALBUM/TUNING
5 / 6 (5 / 6 on the remote) to select
the desired album and title for programming.
➜ The selected track number and PROG flash on
the display panel.
3 Press PROGRAM on the remote control to
confirm the track number to be stored.
4 Repeat steps 2-3 to select and store all desired
tracks.
5 To start playback of your disc programme, press
2;.
Note:
– If you wish, you can add fur ther tracks to your
current program. Make sure you are in the STOP
position, and that you have not exceeded 20
tracks.
Erasing the programme
You can erase the programme by:
● pressing STOP 9 once in the STOP mode;
● pressing STOP 9 twice during playback;
● opening the CD compartment;
● selecting another sound source
➜PROG disappears from the display.
English
1 To select your play mode, press MODE before
or during playback until the display shows the
desired function.
2 Press 2; to star t playback if in the STOP
position.
3 To return to normal playback, press MODE until
the various SHUFFLE/ REPEAT modes are no
longer displayed.
● You can also press STOP 9 to cancel your play
mode.
pg 001-018_MCM285-77_Eng 2008.5.7, 16:5513
13
Page 14
Radio Reception
English
Programming radio stations
You can store up to 40 radio stations (FM:20,
MW (AM): 20) in the memor y.
Automatic programming
1 Press PRESET +/- í/ë to select the desired
preset number.
2 Press and hold PROGRAM until "AUTO" is
displayed.
➜ All available radio stations with sufficient signal
strength will be stored automatically, starting
from FM and followed by MW (AM) band.
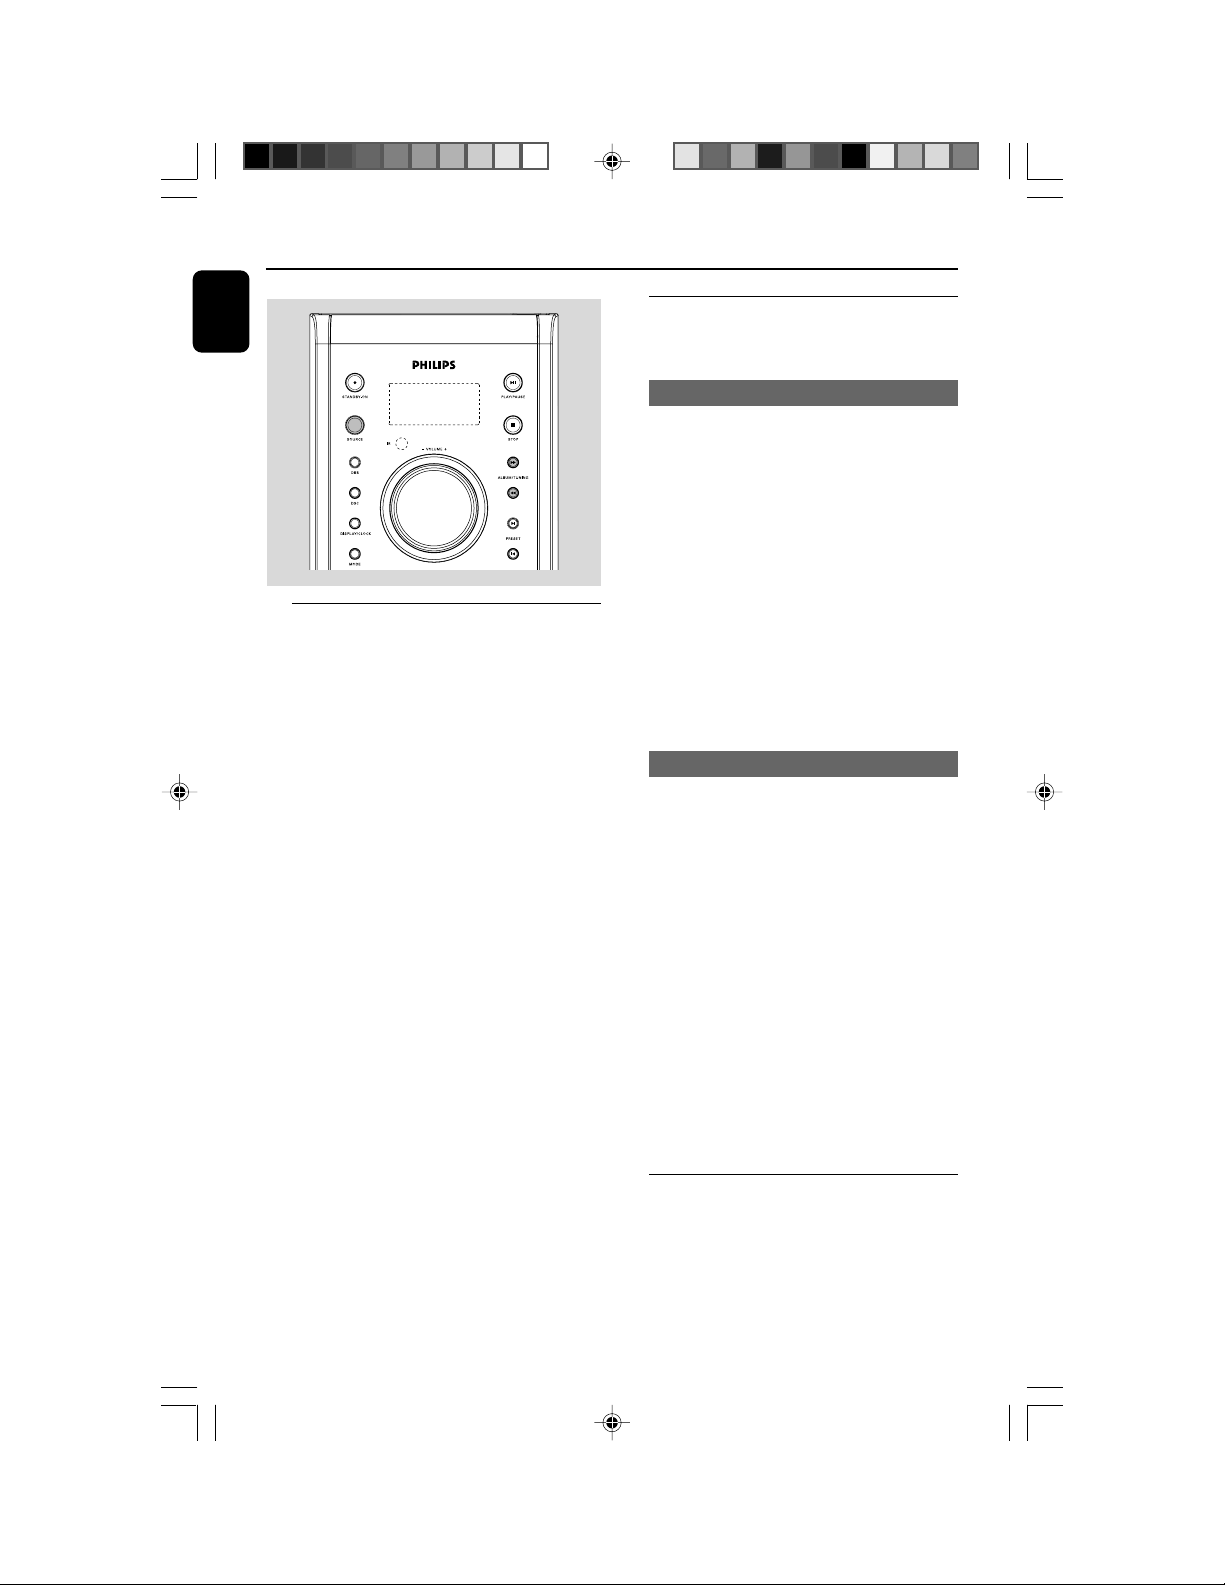
Tuning to radio stations
1 Press SOURCE or TUNER once or more to
select the desired waveband : FM or MW (AM).
2 Press and hold ALBUM/TUNING 5 6
until the frequency indication starts to change,
then release.
➜ The display will show "SEARCH" until a radio
station with sufficient signal strength is found.
➜ If the FM station is received in stereo, = is
shown..
3 Repeat step 2 if necessary until you find the
desired radio station.
● To tune to a weak station, press ALBUM/
TUNING 5 6 briefly and repeatedly until
optimal reception found.
Note:
– The system is equipped with a fixed FM antenna
and a built-in MW (AM) antenna. For optimal FM
reception, fully extend and adjust the position of
the FM antenna until the strongest signal is found.
To stop automatic programming
● Press STOP9 .
Note:
– If no preset number is selected, automatic preset
will begin from preset (1) and all your former
presets will be overridden.
Manual programming
1 Tune to your desired radio station (refer to
“Tuning to radio stations”).
2 Press PROGRAM.
➜ PROG starts flashing.
To store the radio station to another
preset number
● Press PRESET +/- í/ë to to select the
desired preset number.
3 Press PROGRAM again to store the radio
station.
➜ PROG disappears
4 Repeat steps 1–3 to store other radio stations.
To exit manual programming
● Press STOP 9.
14
pg 001-018_MCM285-77_Eng 2008.5.7, 16:5514
Tuning to preset radio stations
● Press PRESET +/- í/ë until the desired
preset station is displayed.
Page 15
External Sources
Connecting external equipment
1 Connect the audio out terminal of the por table
device (i.e. iPod or MP3 player) to the MP3
LINK terminal of your system.
2 Press SOURCE once or more to select MP3
LINK.
➜ "MP3 in" is displayed.
Note:
– All the sound control features (DSC or DBB, for
example) are available for selection.
– Refer to the operating instructions for the
connected equipment for details.
Clock/Timer
English
Setting the clock
1 In standby mode, press and hold DISPLAY/
CLOCK.
➜ The clock digits for the hours flash.
2 Press PRESET +/- í/ë (í/ë on the
remote) to set the hours.
3 Press DISPLAY/CLOCK.
➜ The clock digits for the minutes flash.
4 Press PRESET +/- í/ë (í/ë on the
remote) to set the minutes.
5 Press DISPLAY/CLOCK to confirm the time.
Note:
– If the clock has not been set, - - : - - will be
displayed.
pg 001-018_MCM285-77_Eng 2008.5.7, 16:5515
Setting the sleep timer
The sleep timer enables the system to switch off
by itself after a set period of time.
1 In active mode, press SLEEP on the remote
control repeatedly until the desired timer option
appears.
➜ Selections are as follows (time in minutes):
SLPOFF=SLP120=SLP90=SLP60
=SLP45=SLP30=SLP15=SLPOFF
➜ Display shows if activated, and disappears if
deactivated.
2 To cancel the sleep function, either press
SLEEP on the remote control once or more
until “SLPOFF” appears, or press STANDBYON (y on the remote) to switch to standby
mode.
15
Page 16
Clock/Timer
English
To check the remaining length of time
after sleep timer is activated
● Press SLEEP once.
Setting the timer
● The system can switch on to CD, TUNER, or
MP3 LINK mode automatically at a preset time,
serving as an alarm to wake you up.
IMPORTANT!
– Before setting the timer, ensure that the
clock is set correctly.
– The timer will always be switched on
after it has been set.
– The timer will not start if a recording is in
progress.
– The volume of the timer will increase
gradually from the minimum level to the
last tuned volume level (If the last tuned
volume level is less than 15, it will increase
gradually from the minimum level to 15).
1 In active or standby mode, press TIMER on the
remote control.
➜ The last timer setting is shown.
2 Press TIMER again for more than two seconds.
➜ The clock digits for the hours flash.
3 Press PRESET +/- í/ë (í/ë on the
remote) to set the hours.
4 Press TIMER again.
➜ The clock digits for the minutes flash.
5 Press PRESET +/-í/ë (í/ë on the
remote) to set the minutes.
6 Press TIMER to confirm the time.
➜ The timer is now activated and display shows
.
Notes:
– When the preset time is reached, the last
selected source will be played automatically.
– During timer setting, if no button is pressed
within 10 seconds, the system will exit timer setting
mode automatically.
– In active mode, if remote control is used, timer
setting is available only in CD and TUNER modes.
To deactivate the timer,
● Press TIMER in active or standby mode.
➜ disappear s if the timer is deactivated.
16
pg 001-018_MCM285-77_Eng 2008.5.7, 16:5516
Page 17
Specifications
AMPLIFIER
Total output power
........................................... 25 W (12.5 W per channel)
Signal-to-noise ratio .......................... ≥ 62 dBA (IEC)
Frequency response ......... 63 – 16000 Hz, ± 3 dB
CD PLAYER
Frequency range .................................. 63 – 16000 Hz
Signal-to-noise ratio ............................................65 dBA
TUNER
FM wave range ................................... 87.5 – 108 MHz
MW (AM) wave range .................. 530 – 1700 kHz
Cleaning the Cabinet
● Use a soft cloth slightly moistened with a mild
detergent solution. Do not use a solution
containing alcohol, spirits, ammonia or abrasives.
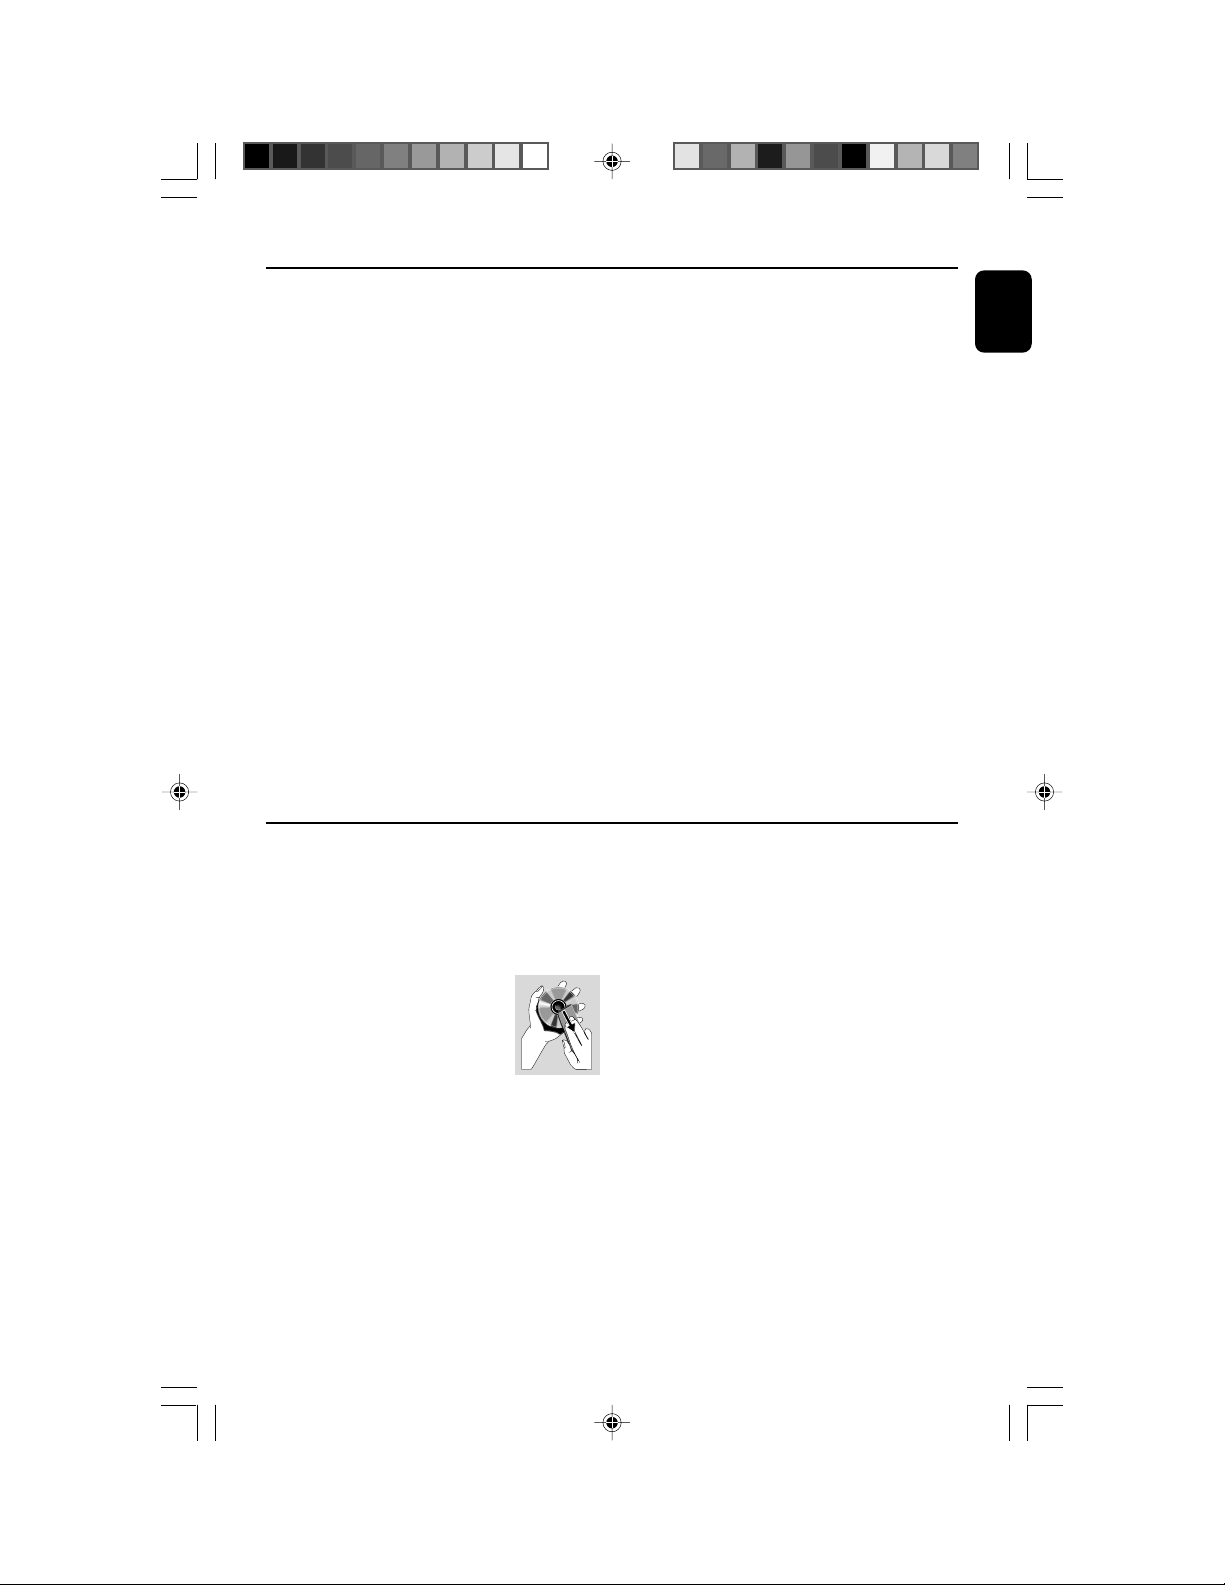
Cleaning Discs
● When a disc becomes dir ty,
clean it with a cleaning cloth. Wipe
the disc from the centre out.
● Do not use solvents such as
benzene, thinner, commercially
available cleaners, or antistatic
spray intended for analogue records.
SPEAKERS
1-way Bass Reflex System
Impedance ........................................................................ 8 Ω
Speaker diameter ............................................................. 4”
Dimensions (w x h x d)..........14.6x23.6x18.5 (cm)
GENERAL
AC Power ........................... 110 – 127 / 220 – 240 V;
....................................................... 50/60 Hz Switchable
Dimensions (w x h x d) ....... 14.6x23.6x23.9 (cm)
Weight (with/without speakers) ..................................
................................................................................. 5.9 / 2.5 kg
Specifications and external appearance are
subject to change without notice.
Maintenance
Cleaning the disc lens
● After prolonged use, dirt or dust may
accumulate at the disc lens. To ensure good
playback quality, clean the disc lens with Philips
CD Lens Cleaner or any commercially available
cleaner. Follow the instructions supplied with
cleaner.
English
pg 001-018_MCM285-77_Eng 2008.5.7, 16:5517
17
Page 18
Troubleshooting
English
WARNING
Under no circumstances should you try to repair the system yourself, as this will invalidate the
warranty. Do not open the system as there is a risk of electric shock.
If a fault occurs, first check the points listed below before taking the system for repair. If you
are unable to remedy a problem by following these hints, consult your dealer or service centre.
Problem Solution
CD OPERATION
“No disc” is displayed. – Insert a disc.
RADIO RECEPTION
Radio reception is poor. – Increase the distance between the Micro HiFi
GENERAL
The system does not react when buttons – Remove and reconnect the AC power plug and
are pressed. switch on the system again.
Sound cannot be heard or is of poor – Adjust the volume.
quality. – Check that the speakers are connected correctly.
The left and right sound outputs are – Check the speaker connections and location.
reversed.
– Check if the disc is inserted upside down.
–Wait until the moisture condensation at the lens
has cleared.
– Replace or clean the disc, see “Maintenance”.
– Use a finalised CD-RW, CD-R or MP3 CD.
System and your TV or VCR.
– Check if the stripped speaker wire is clamped.
The remote control does not function – Reduce the distance between the remote control
and the system.
– Insert the batteries with their polarities
(+/– signs) aligned as indicated.
–Replace the batteries.
–Point the remote control directly toward
IR sensor on the front of the system.
The timer is not working. – Set the clock correctly.
The Clock/Timer setting is erased. –Power has been interrupted or the power cord
18
pg 001-018_MCM285-77_Eng 2008.5.7, 16:5518
– Press TIMER in standby mode to switch on the
timer.
– If a recording is in progress, stop the recording.
has been disconnected. Reset the clock/timer.
 Loading...