

Page 1

MCM 276R
Quick Start Guide
What’s in the Box?
You should find these items upon opening the box.
Stand
140mm (5.51")
Mounting kit
(1x template, 2 x screws)
FM antenna
Quick Start Guide
Quick start guide User manual
AM antenna
User Manual
Step A
Step
Step
Remote control with
1 x CR2025 battery
B
C
/
Install
Prepare
Enjoy
Page 2
Install
AM
ANTENNA
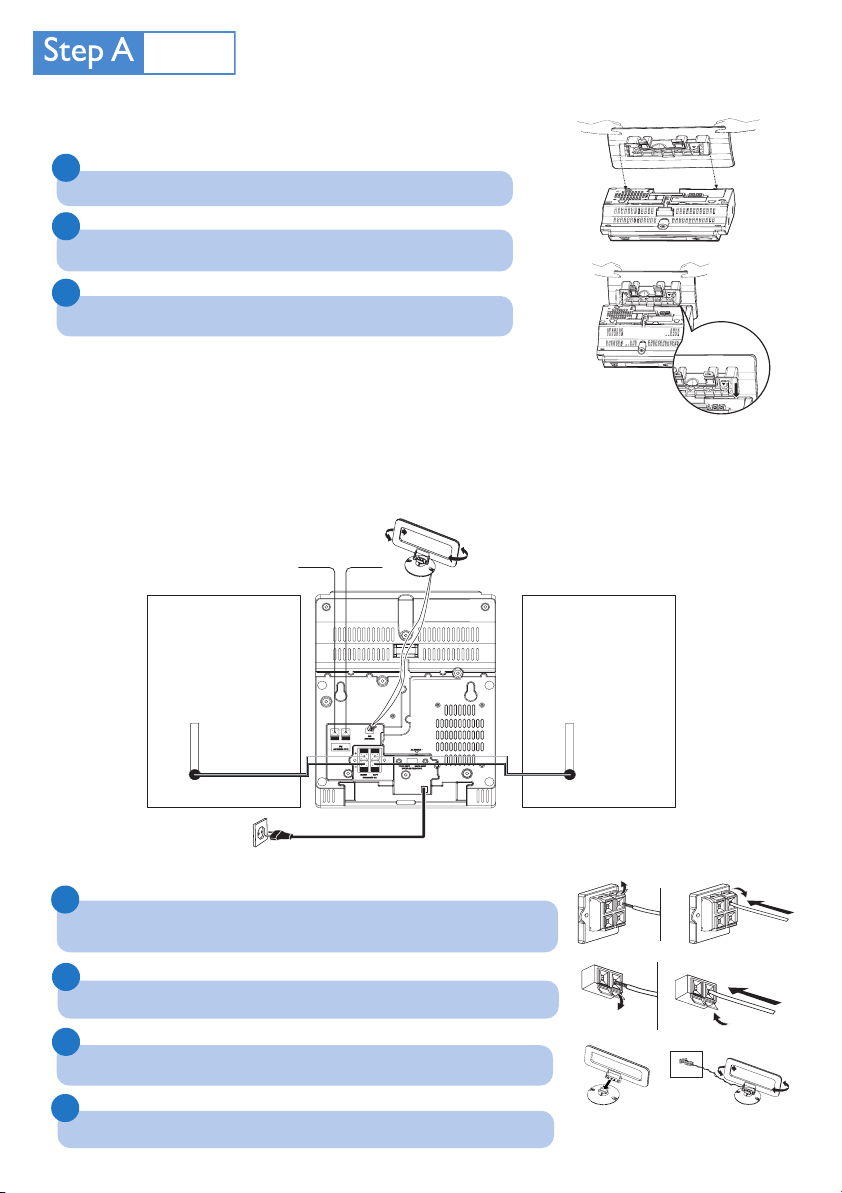
Mounting stand onto the set
1
Put MCM276R on a flat and firm surface, rear side facing up
2
As shown, align the stand to the slots at set’s bottom, 4 FRONT facing
down
3
Push the stand down into the slots
Helpful hints:
- For wall mounting, please refer to the User Manual, Appendix: How to mount
your MCM276R onto Walls. You may need assistance from the qualified service
personnel.
Rear connections
FM wire
antenna
Speaker
(right)
AM loop
antenna
Speaker
(left)
P
RE
SS
P
R
ES
S
F
R
O
N
T
F
R
O
N
T
AC power cord
1
Connect the cable of the left speaker to LEFT (red and black) and the cable
of the right speaker to RIGHT (red and black)
2
Extend the wire antenna and fit it to FM ANTENNA
3
a. Assemble the loop antenna
b. Fit the plug of the loop antenna to AM ANTENNA
4
Connect the AC power cord to the wall socket
ANTENNA
AM
Page 3
Prepare
Setting the clock
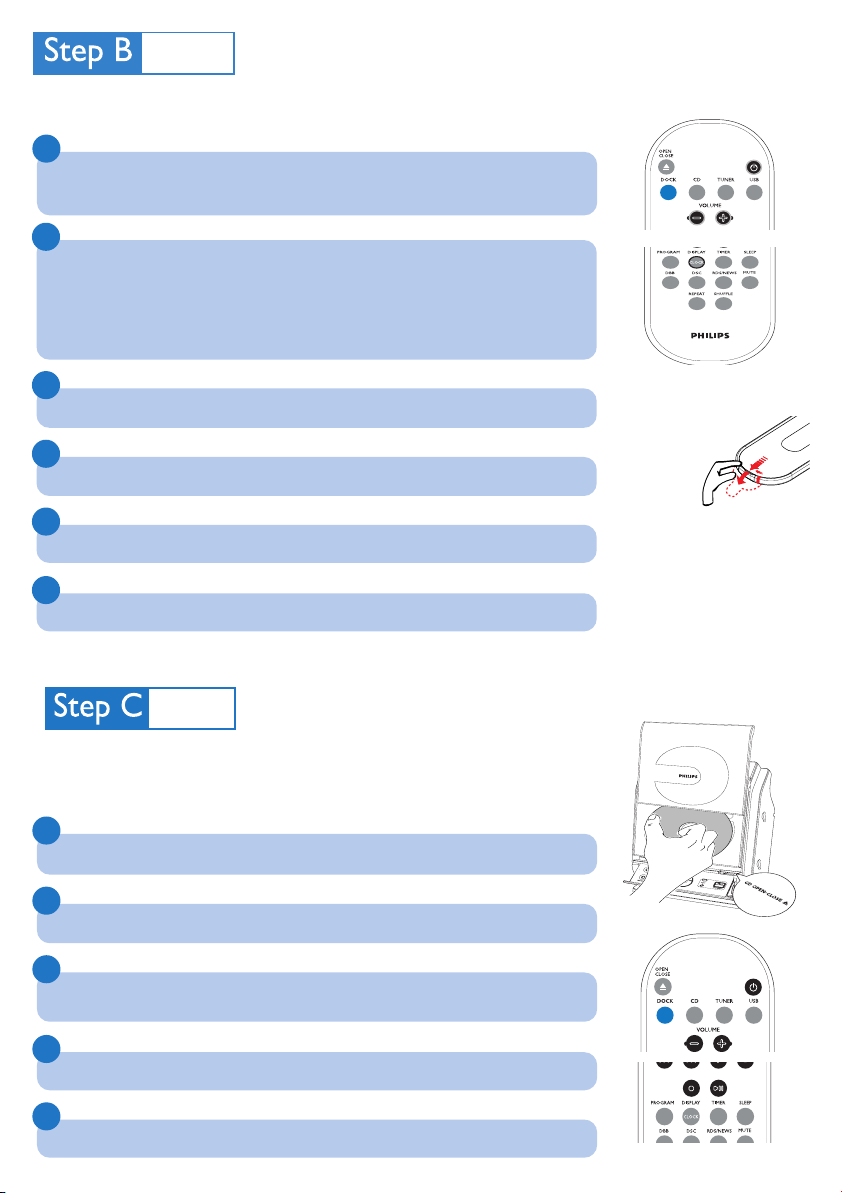
1
Press and hold STANDBY-ON y to switch the set to Standby mode
➜ The display shows the set time
➜ -- --:-- -- flashes by default if you have not set the clock
2
In the standby mode, press and hold DISPLAY/CLOCK on the remote control
or 24 HR appears for the initial clock setting. To select 24-hour clock or
➜ 12 HR
12-hour clock,
a.
Press VOLUME +/- once or more
DISPLAY/CLOCK to confirm
b. Press
➜ The hours digits start flashing
3
Hold down or press
4
Press DISPLAY/CLOCK to confirm
VOLUME +/- repeatedly to set the hours
5
Hold down or press
6
Press DISPLAY/CLOCK to confirm
VOLUME +/- repeatedly to set the minutes
/
IMPORTANT!
– Remove the
protective
plastic tab
before using
the remote
control
Notes for remote control:
– First, select the source you wish to
control by pressing one of the source
select keys on the remote control (DISC
or TUNER, for example).
– Then select the desired function
í, ë
( 2;,
for example).
Enjoy
Playing discs
With this system, you can play all pre-recorded audio CDs (CDDA), all finalized audio CD-Rs
and CD-RWs, MP3/WMA-CDs (CD-Rs/CD-RWs with MP3/WMA files)
1
Press SOURCE once or more to select CD (or CD on the remote control)
2
Press CD OPEN•CLOSEç to open the CD compartment
3
Insert a disc with the printed side facing up. Press CD OPEN•CLOSEç again
to close the compartment
4
Press ÉÅ to start playback
5
To stop playback, press STOPÇ
/
Page 4
/
Enjoy
Tuning to radio stations
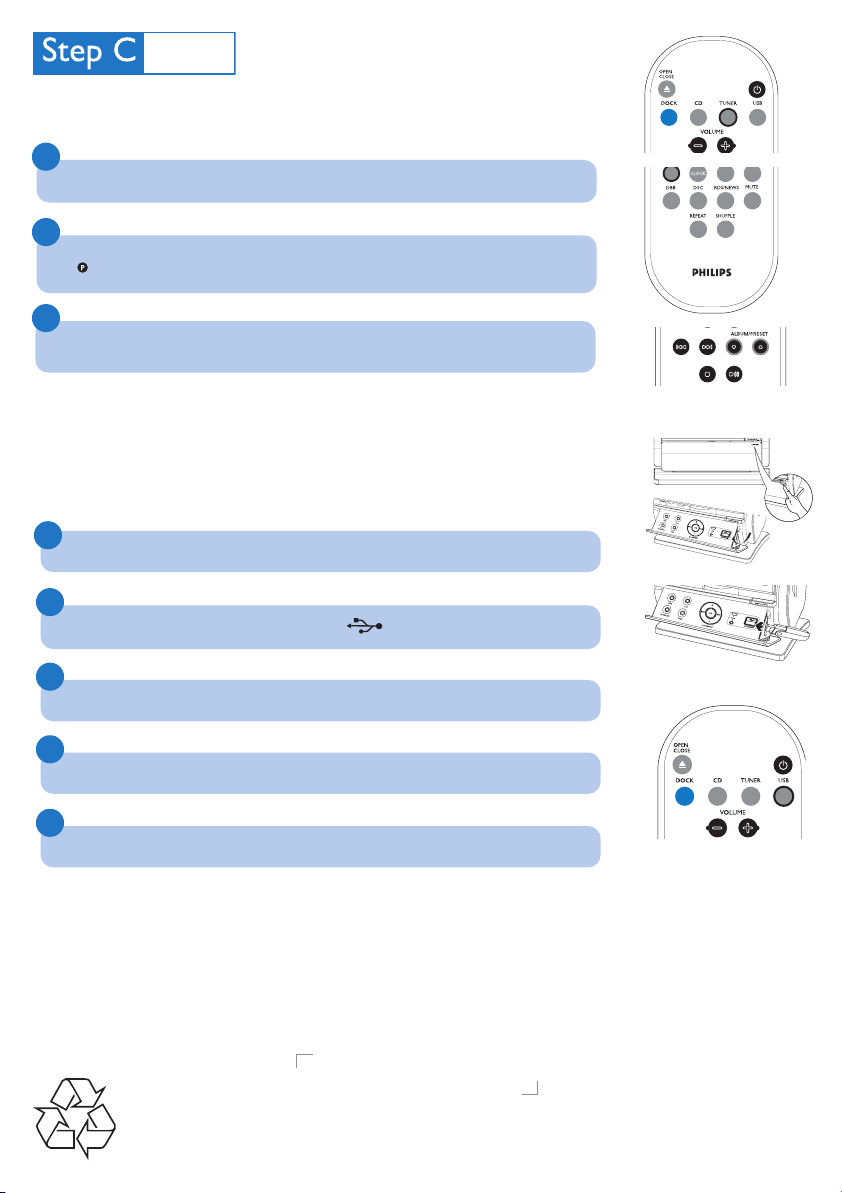
1
Press SOURCE once or more to select TUNER (or TUNER on the remote control)
2
Press and hold PROGRAM until AUTO appears
➜ flashes. Available stations are programmed: FM stations followed by AM stations
3
Press the ALBUM/ PRESET buttons once or more until the desired preset station is
displayed
Playing a USB mass storage device
With the Hi-Fi system, you can use USB flash memory (USB 2.0 or USB1.1),
USB flash players
work with this Hi-Fi system).
1
Check you have unfolded the control panel
(USB 2.0 or USB1.1), memory cards (requires an additional card reader to
/
2
Insert the USB device’s USB plug into the socket
on the set ‘s foldable control panel
3
Press SOURCE once or more to select USB (or USB on the remote control)
4
Play the USB’s audio files as you do with the albums/tracks on a CD
5
Press STANDBY-ON y to switch off the set
Tips
– Detailed playback features and additional functions are described in the accompanied
owner's manual.
– Refer to the user manual for how to use the DOCK functions.
Printed in China
PDCC-JS_JW-0630
 Loading...