

Page 1
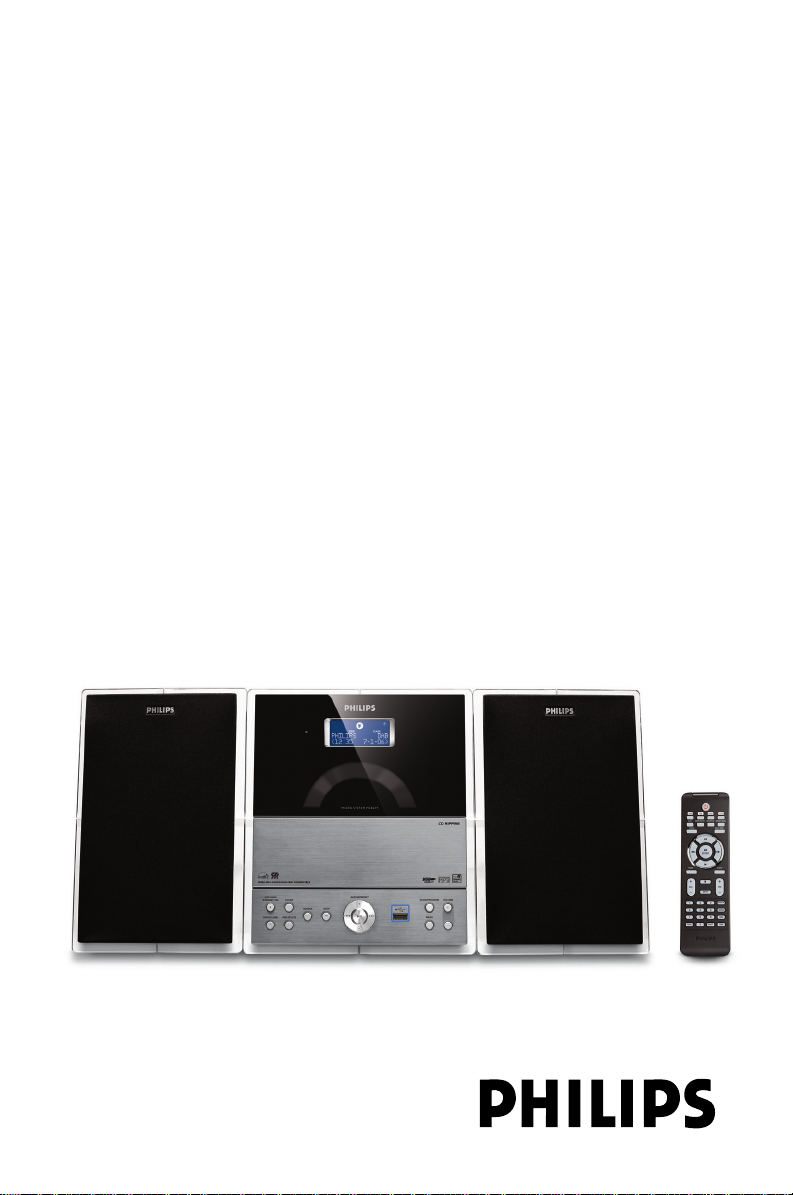
Micro Hi-Fi System
Register your product and get support at
www.philips.com/welcome
User manual
Benutzerhandbuch
Manuale dell'utente
Brukerhåndbok
Brugervejledning
MCB279
Page 2

Important notes for users in the
U.K.
Mains plug
This apparatus is fitted with an approved 13
Amp plug. To change a fuse in this type of plug
proceed as follows:
1 Remove fuse cover and fuse.
2 Fix new fuse which should be a BS1362 3 Amp,
A.S.T.A. or BSI approved type.
3 Refit the fuse cover.
If the fitted plug is not suitable for your socket
outlets, it should be cut off and an appropriate
plug fitted in its place.
If the mains plug contains a fuse, this should
have a value of 3 Amp. If a plug without a fuse
is used, the fuse at the distribution board
should not be greater than 3 Amp.
Note: The severed plug must be disposed of to
avoid a possible shock hazard should it be
inserted into a 13 Amp socket elsewhere.
How to connect a plug
The wires in the mains lead are coloured with
the following code: blue = neutral (N),
brown = live (L).
¶ As these colours may not correspond with the
colour markings identifying the terminals in
your plug, proceed as follows:
– Connect the blue wire to the terminal
marked N or coloured black.
– Connect the brown wire to the terminal
marked L or coloured red.
– Do not connect either wire to the earth
terminal in the plug, marked E (or e) or
coloured green (or green and yellow).
Before replacing the plug cover, make certain
that the cord grip is clamped over the sheath
of the lead - not simply over the two wires.
CAUTION
Use of controls or adjustments or
performance of procedures other than
herein may result in hazardous
radiation exposure or other unsafe
operation.
Copyright in the U.K.
Recording and playback of material may
require consent. See Copyright Act 1956 and
The Performer’s Protection Acts 1958 to 1972.
2
Page 3
6
1
7
8
9
0
!
@
2
3
4
5
3
Page 4

Italia
DICHIARAZIONE DI CONFORMITA’
Si dichiara che l’apparecchio MCD289 Philips
risponde alle prescrizioni dell’ar t. 2 comma 1
del D.M. 28 Agosto 1995 n. 548.
Fatto a Eindhoven
Philips Consumer Electronics
Philips, Glaslaan 2
5616 JB Eindhoven, The Netherlands
Norge
Typeskilt finnes på apparatens underside.
Observer: Nettbryteren er sekundert
innkoplet. Den innebygde netdelen er
derfor ikke frakoplet nettet så lenge
apparatet er tilsluttet nettkontakten.
For å redusere faren for brann eller elektrisk
støt, skal apparatet ikke utsettes for regn eller
fuktighet.
DK
Advarsel: Usynlig laserstråling ved åbning når sikkerhedsafbrydere er ude af funktion. Undgå
utsættelse for stråling.
Bemærk: Netafbryderen er sekundært indkoblet og ofbryder ikke strømmen fra nettet. Den
indbyggede netdel er derfor tilsluttet til lysnettet så længe netstikket sidder i stikkontakten.
4
Page 5

Index
English ------------------------------------------------ 6
Deutsch --------------------------------------------- 30
Italiano ---------------------------------------------- 56
Bokmål --------------------------------------------- 80
Dansk --------------------------------------------- 104
English
Deutsch
ItalianoBokmål
Dansk
5
Page 6

Contents
English
General Information
Supplied accessories ............................................ 7
Safety information ................................................ 7
About Digital Audio Broadcassting (DAB) ..... 8
Environmental Information ................................ 8
Hearing safety ....................................................... 8
Controls
Controls on the set ............................................. 9
Remote control ............................................ 10-11
Installation
Placing the set ..................................................... 11
Mounting stand onto the set
Rear connection ........................................... 12-13
Speaker connection
Antenna connection
Connecting an additional appliance................ 13
Connecting a USB device
Connecting a non-USB device
Using AC power ................................................. 13
Preparations
Using the remote control ................................ 14
Setting the clock ................................................. 14
Basic Functions
Switching on/off the set and
selecting functions .............................................. 15
Switching between Standby and
ECO POWER mode.......................................... 15
Auto-standby ....................................................... 15
Volume control ................................................... 15
Volume adjustment
MUTE
Sound control ..................................................... 15
DSC
DBB
Displaying the clock ........................................... 15
Different play modes: REPEAT, SHUFFLE...... 18
Display track information
(MP3/WMA only) ............................................... 18
Tuner
Tuning to radio stations .................................... 19
Programming radio stations ............................. 19
Autostore: Automatic programming
Manual programming
To listen to a preset station
RDS (Radio Data System) .......................... 19-20
Switching through RDS information
Tuning to a program type (PTY)
Automatic clock setting via RDS
Tuning to DAB for the first time .................... 20
Re-tuning .............................................................. 20
Manual tuning ...................................................... 20
DAB information display ................................... 21
Menu operation .................................................. 21
Programming DAB stations ............................. 21
Tuning to preset DAB stations ........................ 21
USB
Using a USB mass storage device ............. 22-24
Playing a USB mass storage device
CD Ripping - Recording disc files to a USB device
Deleting audio files on a USB device
Using a non-USB device .................................... 24
Clock/Timer/Sleep
Setting clock ........................................................ 25
Setting the timer ................................................. 25
Activating and deactivating TIMER ................. 25
Sleep ...................................................................... 26
Specifications ........................................... 27
Maintenance .............................................. 27
Tr oubleshooting .............................. 28-29
CD
Discs for playback .............................................. 16
Playing discs ......................................................... 16
Selecting and searching ..................................... 17
Selecting a different track
Finding a passage within a track during playback
Programming tracks ........................................... 17
Reviewing the program
Erasing the program
6
Page 7

General Information
Congratulations on your purchase and welcome
to Philips!
To fully benefit from the support that Philips
offers, register your product at www.philips.com/
welcome.
This product complies with the radio
interference requirements of the European
Community.
Supplied accessories
–1 X certified power adapter
(Brand name: PHILIPS,
Model No.: AS-650-190-AB340
Input: 100-240V ~50/60Hz 1.6A,
Output: 19.0V 3.4A)
–2 speaker boxes including 2 speaker cables
– remote control (with 1 x CR2025 battery)
– stand
Safety Information
● Before operating the system, check that the
operating voltage indicated on the typeplate (or
the voltage indication beside the voltage
selector) of your system is identical with the
voltage of your local power supply. If not, please
consult your dealer.
● Where the MAINS plug or an appliance coupler
is used as the disconnet device, the disconnet
device shall remain readily operable.
● The apparatus shall not be exposed to dripping
or splashing.
● Place the system on a flat, hard and stable
surface.
● Place the system in a location with adequate
ventilation to prevent internal heat build-up in
your system. Allow at least 10 cm (4 inches)
clearance from the rear and the top of the unit
and 5 cm (2 inches) from each side.
● The ventilation should not be impeded by
covering the ventilation openings with items,
such as newspapers, table-cloths, cur tains, etc.
● Do not expose the system, batteries or discs to
excessive moisture, rain, sand or heat sources
caused by heating equipment or direct sunlight.
● No naked flame sources, such as lighted candles,
should be placed on the apparatus.
● No objects filled with liquids, such as vases, shall
be placed on the apparatus.
● Install this unit near the AC outlet and where the
AC power plug can be reached easily.
● If the system is brought directly from a cold to a
warm location, or is placed in a very damp room,
moisture may condense on the lens of the disc
unit inside the system. Should this occur, the CD
player would not operate normally. Leave the
power on for about one hour with no disc in the
system until normal playback is possible.
● The mechanical par ts of the set contain self-
lubricating bearings and must not be oiled or
lubricated.
● When the system is switched to Standby
mode, it is still consuming some power.
To disconnect the system from the
power supply completely, remove the AC
power plug from the wall socket.
Disposal of your old product
Your product is designed and manufactured with
high quality materials and components, which
can be recycled and reused.
When this crossed-out wheeled bin symbol is
attached to a product it means the product is
covered by the European Directive 2002/96/EC
Please inform yourself about the local separate
collection system for electrical
and electronic products.
Please act according to your
local rules and do not dispose of
your old products with your
normal household waste. The correct disposal of
your old product will help prevent potential
negative consequences for the environment and
human health.
English
7
Page 8

General Information
English
About Digital Audio
Broadcasting (DAB)
DAB digital radio is a new way of broadcasting
radio via a network of terrestrial transmitters. It
provides listeners with more choice and
information delivered in crystal clear, crackle-free
sound quality.
– The technology allows the receiver to lock on
to the strongest signal it can find.
–With DAB digital stations there are no
frequencies to remember, and sets are tuned by
station name, so there's no retuning on the
move.
What is a multiplex?
Digital radio operation is made up of a single
block of frequencies called a multiplex. Each
multiplex works within a frequency spectrum,
such as Band III for DAB broadcasts.
Note:
–You will receive only those stations within your
transmission area.
DAB Broadcasters and DLS
Each DAB broadcaster (or multiplex operator)
also provides text and audio data services. Some
programmes are supported by Dynamic Label
Segments (DLS). This is data which you can read
as scrolling text on your DAB radio display. Some
stations transmit the latest news, travel, and
weather, what's on now and next, website
addresses and phone numbers.
For more information on digital radio coverage
and services, please visit: www.drdb.org.
Environmental Information
All unnecessary packaging has been omitted. We
have tried to make the packaging easy to
separate into three materials: cardboard (box),
polystyrene foam (buffer) and polyethylene (bags,
protective foam sheet).
Your system consists of materials which can be
recycled and reused if disassembled by a
specialised company. Please observe the local
regulations regarding the disposal of packaging
materials, exhausted batteries and old
equipment.
Hearing Safety
Listen at a moderate volume.
● Using headphones at a high volume can impair
your hearing. This product can produce sounds
in decibel ranges that may cause hearing loss for
a normal person, even for exposure less than a
minute. The higher decibel ranges are offered
for those that may have already experienced
some hearing loss.
● Sound can be deceiving. Over time your hearing
"comfort level" adapts to higher volumes of
sound. So after prolonged listening, what sounds
"normal" can actually be loud and harmful to
your hearing. To guard against this, set your
volume to a safe level before your hearing
adapts and leave it there.
To establish a safe volume level:
● Set your volume control at a low setting.
● Slowly increase the sound until you can hear it
comfortably and clearly, without distortion.
Listen for reasonable periods of time:
● Prolonged exposure to sound, even at normally
"safe" levels, can also cause hearing loss.
● Be sure to use your equipment reasonably and
take appropriate breaks.
Be sure to observe the following
guidelines when using your headphones.
● Listen at reasonable volumes for reasonable
periods of time.
● Be careful not to adjust the volume as your
hearing adapts.
● Do not turn up the volume so high that you
can't hear what's around you.
● You should use caution or temporarily
discontinue use in potentially hazardous
situations.
● Do not use headphones while operating a
motorized vehicle, cycling, skateboarding, etc.; it
may create a traffic hazard and is illegal in many
areas.
8
Page 9

Controls
Controls on the set
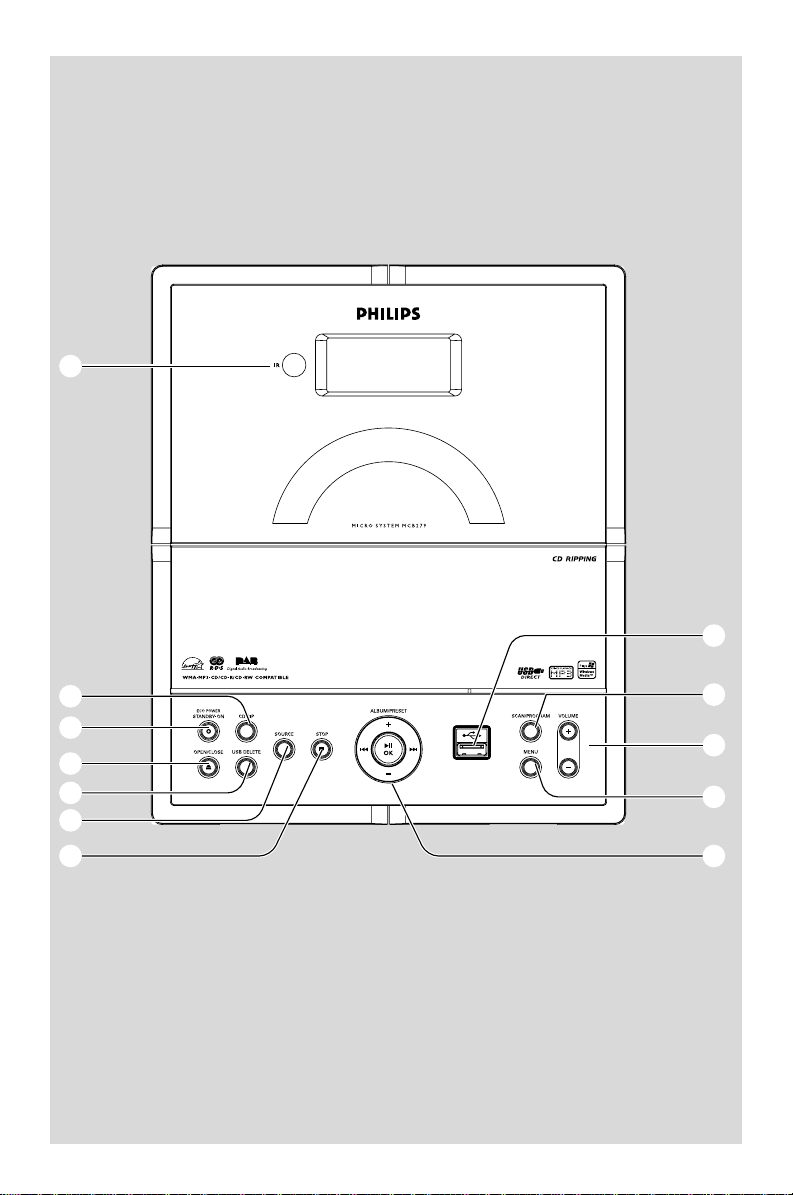
1
– jack for the external USB mass storage device
2 SCAN/PROGRAM
– CD/USB: programs tracks
– FM: programs preset radio stations.
– DAB : starts DAB service scanning.
3 VOLUME
– adjusts the volume level
4 MENU
– selects DAB full scan, quick scan, manual tuning,
language and DRC value.
5 ALBUM/ PRESET + /-
– CD/USB: selects albums (for MP3/WMA only)
– FM: selects a preset radio station
– Clock/Timer: adjusts the hours and minutes
4 / ¢
– CD/USB: (press and hold) fast searches CD
tracks/files backwards/forwards
– DAB : selects a preset radio station.
– CD/MP3-CD/USB: skips to the beginning of a
current/previous/subsequent track.
ÉÅ
– CD/USB: starts or pauses playback
– DAB : press to select an option.
– DAB : press and hold to start manual tuning.
6 IR
– sensor for the infrared remote control
Helpful hints: Always point the remote control
towards this sensor.
7 CD RIP
– records tracks in a CD or files in an MP3/WMA-
CD into a USB disk
8 STANDBY-ON/ ECO POWER
In standby mode:
– press and hold to switch the set to Eco power
mode
– press to switch the set on
In Eco power mode:
– press and hold to switch the set on
– press to switch the set to standby mode
In ON mode:
– press to switch to standby mode
– press and hold to switch to Eco power mode
9 OPEN/CLOSE 0
– opens/closes the CD door.
0 USB DELETE
– deletes a single MP3/WMA file or all tracks in a
USB disk
! SOURCE
– selects sound source CD, USB, FM, DAB or AUX
– In standby mode: switches the set on and selects
sound source CD, USB, FM, DAB, or AUX
@ STOP
– CD/USB: stops playback; erase a program
English
9
Page 10

Controls
English
Remote control
MODE
#
MENU
$
%
CD RIP
^
&
ALBUM/
PRESET
*
(
)
¡
™
Notes for remote control:
– First select the source you wish to
control by pressing one of the source select
keys on the remote control (for example
CD, TUNER).
– Then select the desired function (for
example ÉÅ,í , ë).
BB
1
B
BB
In standby mode:
– press and hold to switch the set to Eco power
mode
– press to switch the set on
In Eco power mode:
– press and hold to switch the set on
– press to switch the set to standby mode
In ON mode:
– press to switch to standby mode
– press and hold to switch to Eco power mode
2 Source buttons
USB
– selects USB source
– In standby mode: switches the set on and selects
USB source.
DISC
– selects CD source
– In standby mode: switches the set on and selects
CD source.
10
USB DEL
SLEEP
DAB/FM
– selects tuner source and toggles between: FM
and DAB
1
2
3
4
@
5
– In standby mode: switches the set on and selects
tuner source
AUX
– selects the audio input from an additional
connected appliance
– In standby mode: switches the set on and selects
the audio input from an additional connected
6
7
8
9
0
!
appliance
3 SCAN
– starts auto-scanning for DAB frequencies.
4 INFO./RDS
–for FM, displays RDS information.
5 à / á
for CD/MP3-CD/USB
fast searches back and forward
within a track/disc (press and
hold).
¡ / ™
for CD/MP3-CD/USB
................................. skips to the beginning of a
current/previous/subsequent
track.
for clock/timer
................................. adjusts the hours and minutes in
DAB mode.
for DAB
................................. tunes to preset DAB station.
ENTER/ÉÅ
– starts or interrupts playback.
–press to select an option (DAB only).
6 USB DEL
– deletes a single MP3/WMA file or an album in a
USB disk
7 VOL +/-
– adjusts the volume level
8 DISPLAY
–for CD/MP3/USB displays track information
during playback.
9 SLEEP
– set the sleep timer
0 DSC (Digital Sound Control)
– selects sound characteristics: CLASSIC/POP/
JAZZ/ROCK./OFF
! DBB (Dynamic Bass Boost)
– turns the bass enhancement on/off
Page 11

Controls Preparations
@ TIMER
– sets the timer function
# MODE
– selects playback modes between: REP, REP ALL,
SHUFFLE REP ALL, SHUFFLE, INTRO and OFF.
$ MENU
– selects DAB full scan, quick scan, manual tuning,
language and DRC value.
% CLOCK
Clock:
– press once to display time
– press twice to enter the clock setting
mode
FM/DAB/Audio CD/USB/AUX:
– switches between clock display and playback
display
^ CD RIP
– records tracks in a CD or files in an MP3/WMA-
CD into a USB disk
& 9
– CD/USB: stops playback; erase a program
* ALBUM/PRESET +/-
for MP3-CD/USB skips to the beginning of a
current/previous/subsequent
album.
for Tuner
................................. tunes to preset FM station.
for clock/timer
................................. adjusts the hours and minutes in
CD/USB/TUNER mode.
( MUTE
– switches the sound off temporarily
) Numeric keypad (0-9)
– selects track or station number
¡ PROG
–for CD/MP3/USB programs tracks.
for FM/DAB ...... programs radio stations.
™ SHIFT
– inputs your desired track number (used together
with the Numerical Keypad).
Placing the set
The set is supplied with a stand, you may attach
or detach the stand to/from the main set.
Mounting the stand onto the set
1 Locate the bottom of the main unit and find the
slot, then slide the stand in the slot until it stops,
as indicated in the figure below.
English
11
Page 12

Preparations
English
DAB/FM T-type antenna
Rear connection
Warning:
– Never make or change connections with
the mains supply switched on.
– Install your set near the AC outlet and
where the AC power plug can be reached
easily.
A Speaker connection
Use the supplied speakers only. Using other
speakers can damage the set or the sound
quality will be negatively affected.
● Connect the cable of the left speaker to LEFT
(red and black) and the cable of the right
speaker to RIGHT (red and black) as follows:
a. Press the clip of the red terminal and fully
insert the stripped portion of the colored (or
marked) speaker cable into the socket, then
release the clip
b. Press the clip of the black terminal and fully
insert the stripped portion of the black (or
unmarked) speaker cable into the socket, then
release the clip
12
B FM/DAB antenna connection
Hang up one end of the T-shape DAB/FM
antenna and keep the other end at horizontal
angle to it to ensure sound DAB reception.
Note:
– This system does not support MW reception.
Helpful hints:
–To receive optimal radio reception, put the main
unit and the antennas as far away as possible from
the power adaptor.
Page 13

Preparations
Connecting an additional
appliance
Connecting a USB device or memory
card
By connecting a USB mass storage device
(including USB flash memory, USB flash players
or memory cards) to the Hi-Fi system, you can
enjoy the music stored on the external device
through the powerful speakers of Hi-Fi system.
1 Insert the USB device’s USB plug into the socket
on the front panel of the main set.
Or,
for the devices with USB cable:
a. Insert one plug of the USB cable (not
supplied) to the socket on the front
panel of the main set.
b. Insert the other plug of the USB cable to the
USB output terminal of the USB device.
Or,
for the memory card:
a. Insert the memory card into a card reader
(not supplied).
b. Use a USB cable (not supplied) to connect
the card reader to the socket .
on the front panel of the main set.
Connecting a non-USB device
Use a cinch cable to connect AUX-IN to the
analogue audio out terminals of an external
equipment (TV, VCR, Laser Disc player, DVD
player or CD Recorder).
Using AC power
1 Make sure all the connections have been made
before switching on the power supply
2 Connect the supplied AC/DC power adaptor to
the DC jack (located on the rear panel of the
main set) and to the wall socket. This switches on
the power supply.
To avoid damage to the set, use only the
adaptor supplied.
When the set is switched to standby mode, it is
still consuming some power. To disconnect the
system from the power supply completely,
remove the power plug from the wall
socket.
The type plate is located on the rear of the
set.
For users in the U.K.: please follow the
instructions on page 2.
Warning!
To avoid overheating of the system, a safety
circuit has been built in. Therefore, your
system may switch to Standby mode
automatically under extreme conditions. If
this happens, let the system cool down
before reusing it (not available for all versions).
This product complies with the radio
interference requirements of the European
Community.
English
CAUTION
Visible and invisible laser radiation. If the
cover is open, do not look at the beam.
High voltage! Do not open. You run the risk
of getting an electric shock.
The machine does not contain any userserviceable parts.
Modification of the product could result in
hazardous radiation of EMC or other
unsafe operation.
13
Page 14

Preparations
English
Before using the remote control
1 Pull out the plastic protective sheet.
2 Select the source you wish to control by pressing
one of the source select keys on the remote
control (for example CD, TUNER).
3 Then select the desired function (for example
ÉÅ , à , á).
Remove the plastic protective sheet
Replacing battery (lithium
CR2025) into the remote control
1 Press the slot on the battery compartment.
2 Pull out the battery compartment.
3 Replace a new battery and fully insert the
battery compar tment back to the original
position.
Setting the clock
After connecting the set to the power supply, set
the clock first.
Important!
To set clock in the Eco Power mode,
press and hold STANDBY-ON/ ECO
POWER B on the set for 3 seconds or
more to switch to normal standby mode
first before proceeding with the
procedures below.
1 Press CLOCK on the remote control to view
clock time.
➜ The display shows the set time.
➜ 00:00 displays by default if you have not set
the clock.
2 Press
CLOCK once again.
➜ The hours digits star t flashing.
3 Hold down or press ALBUM/PRESET +/- on
the set repeatedly to set the hours.
4 Press CLOCK to confirm.
➜ The minutes digits star t flashing
5 Hold down or press ALBUM/PRESET +/-on
the set repeatedly to set the minutes.
6 Press CLOCK to confirm.
– To exit without storing the clock setting press
9.
1
CR2025
2
3
CAUTION!
Batteries contain chemical substances, so
they should be disposed of properly.
14
Helpful hints:
– The clock setting will be erased when the system
is disconnected from the power supply.
Page 15

Basic Functions
Important!
Before you operate the system, complete
the preparation procedures.
Switching on/off the set and
selecting functions
To switch on, press STANDBY-ON/ ECO
1
POWER or SOURCE on the set (or y on
the remote control)
➜ The set switches to the last source selected
OR
On the remote control, press the source button
(e.g. USB, DISC, DAB/FM, AUX).
2 When the set is on, press STANDBY-ON/
ECO POWER to switch off (or y on the
remote control).
3 To select your function, press SOURCE once
or more on the set (or USB, DISC, DAB/FM,
AUX on the remote control).
Switching between Standby and
ECO POWER mode
1 When the set is switched off, press and hold
STANDBY-ON/ ECO POWER to switch to
ECO POWER mode (or y on the remote
control) and press once to switch from ECO
POWER mode to standby mode.
In ECO POWER mode (power-saving mode):
➜ ECO POWER is displayed.
➜ The display is switched off.
➜ The red indicator lights up.
In Standby mode: ➜ The clock is displayed.
Helpful hints:
– In the standby/Eco power mode, the tone, sound
settings, tuner presets and the volume level (up to
a maximum volume level of 12) will be retained in
the set’s memory.
Volume control
Volume adjustment
● Adjust the volume by pressing or holding
VOLUME +/- (or VOL +/- on the remote
control).
➜ VOL and the actual value (between 1 and 31)
are displayed.
➜ VOL MIN is the minimum volume level.
➜ VOL MAX is the maximum volume level.
MUTE
You can temporarily switch off the sound
without switching off the set.
1 Press MUTE to switch off the sound.
➜ MUTE appears. Playback continues without
sound.
2 To switch on the sound, you can:
– press MUTE again;
– adjust the volume controls;
– change source.
Sound control
DSC
DSC and DBB effects cannot be used together.
Digital Sound Control enables you to select
predefined sound settings.
● Press DSC repeatedly to select the desired
sound setting: ROCK, JAZZ, POP, CLASSIC,
OFF.
DBB
● Press DBB (Dynamic Bass Boost) once or
more to switch bass enhancement on or off.
➜ DBB appears if DBB is activated
Displaying the clock
● During playback, press CLOCK on the remote
control to display the clock.
English
Auto-standby
When the set has reached the end of CD
playback and remains in the stop position for
more than 15 minutes, the set will switch off
automatically to save power.
15
Page 16

English
CD
Discs for playback
With this system, you can play
– all pre-recorded audio CDs (CDDA)
– all finalized audio CD-Rs and CD-RWs
– MP3/WMA-CDs (CD-Rs/CD-RWs with
MP3/WMA files)
IMPORTANT!
– This system is designed for regular
discs. Therefore, do not use any
accessories such as disc stabilizer rings or
disc treatment sheets, etc.
About MP3/ WMA
The music compression technology MP3
(MPEG1 Audio Layer 3) and WMA (Windows
Media Audio) significantly reduces the digital data
of an audio CD while maintaining CD quality
sound.
Windows Media Audio® is a registered
trademark of Microsoft Corporation.
Supported formats:
– Disc format ISO9660, Joliet, UDF (created on
Adaptec Direct CD) and multi-session CDs
– MP3 bit rate (data rate): 32-320 Kbps and
variable bit rate
– Directory nesting up to a maximum of 8
levels
– Max. track number plus album: 999
– WMA v9 or earlier
The system will not play or support the
following:
•Empty albums: an empty album is an album
that does not contain MP3/WMA files, and will
not be shown in the display.
• Non-supported file formats are skipped. This
means that e.g.: Word documents .doc or MP3
files with extension .dlf are ignored and will not
be played.
• DRM protected WMA files
• WMA files in Lossless or VBR format
IMPORTANT!
– Make sure that the file names of MP3
files end with .mp3.
–For DRM protected WMA files, use
Windows Media Player 10 (or later) for
CD burning/conversion. Visit www.
microsoft.com for details about Windows
Media Player and WM DRM (Windows
Media Digital Rights Management).
Playing discs
1
Press SOURCE once or more to select CD (or
CD on the remote control)
➜ The CD icon appears
2 Press OPEN/CLOSE0 to open the CD door.
➜ OPEN is displayed.
3 Insert a disc with the printed side facing outward.
Then press OPEN/CLOSE0 again to close
the CD door.
➜ READING is displayed as the CD player scans
the contents of a disc
➜ Audio CD: the total number of tracks and
playing time are shown
MP3/WMA: Display shows total album
number and total track number.
Helpful hints:
– If you have not organized MP3/WMA files into
any albums on your disc, an album “A000” will be
automatically assigned for all those files.
4 Press ÉÅ to start playback.
➜ Display shows current track.
number and elapsed playing time.
5 To pause playback, pressÉÅ. To resume
playback, press the button again.
6 To stop playback, press STOPÇ
Helpful hints:
CD play will also stop when
– the CD door is opened.
– the disc has reached the end.
– you select another source: DAB, FM, USB or AUX.
16
Page 17

CD
Selecting and searching
Selecting a different track
● Press 4 / ¢ on the set (or í/
remote control ) once or repeatedly until the
desired track number appears in the display.
MP3/WMA: ➜ Tr ack information scrolls briefly.
MP3/WMA:
● Press ALBUM/ PRESET +/- on the set or
remote control once or more to select the next
or previous album.
➜ Album information scrolls briefly.
or
● In the stop position, press ALBUM/ PRESET
+/- on the set or remote control and then 4
/ ¢ ( or í/
select the desired album and track.
➜ MP3/WMA: Display shows current album/
track number.
Finding a passage within a track
during playback
ë on the remote control ) to
ë on the
1 During playback, press and hold 4 / ¢ on
the set (or à / á on the remote control ).
➜ The CD plays at a high speed.
2 When you recognize the passage you want,
release 4 or ¢ or à / á.
➜ Normal playback resumes.
Programming tracks
You may store up to 32 tracks in the desired
sequence. If you like, store any track more than
once.
1 In stop position, press PROGRAM to start
programming.
➜ PROG flashes.
2 Press 4 / ¢ on the set (or í/
remote control) once or repeatedly until the
desired track number appears in the display.
● MP3/WMA: press ALBUM/ PRESET +/- on
the set (or 3 / 4 on the remote control ) and
4 / ¢ on the set (or í/ ë on the
remote control ) to select the desired album and
track.
ë on the
3 Press PROGRAM to confirm.
➜ Display shows briefly the number of tracks
programmed.
➜ Then, the display shows the track number
you just stored.
4 Repeat steps 2-3 to select and store all desired
tracks.
➜ PROG FULL is displayed if you attempt to
program more than 32 tracks.
5 Press ÉÅ play the program.
Helpful hints:
– The set will return to the stop position if no
button is pressed within 20 seconds. To resume
programming, press PROGRAM.
– MP3/WMA: When playing a program, use of
ALBUM/ PRESET are void.
English
Erasing the program
To erase the contents of the memory, you can:
● Press STOP 9
– once if in the stop position;
– twice during playback;
● Press STANDBY-ON/ ECO POWER.
● Select another sound source.
● Open the CD door.
➜ PROG disappears.
17
Page 18

CD
English
Different play modes: REPEAT,
SHUFFLE
REP
– plays the current track continuously.
REP ALL
– plays the entire disc/program
continuously.
SHUFFLE
– plays all the tracks in random order.
SHUFFLE REP ALL
– repeatedly plays all the tracks in random order.
INTRO
– plays the first 10 seconds in each track
OFF– plays tracks normally
1 During playback, press once or more REPEAT
or SHUFFLE to select play modes.
2 To return to normal playback, press REPEAT or
SHUFFLE repeatedly until the various modes
are no longer displayed.
Helpful hints:
– In the shuffle mode, press ¢ to select tracks.
Display track information
(MP3/WMA only)
The ID3 tag is part of an MP3/WMA file and
contains various track information such as the
track´s title or the artist´s name .
● During playback, press DISPLAY repeatedly on
the remote control.
➜ Display show title name, album name and ID3
tag information.
Helpful hints:
– Complete the ID3 tag information with your
MP3/WMA encoder software before burning the
MP3/WMA-CD.
18
Page 19

Tuner
Tuning to radio stations
Press SOURCE (or DAB/FM on the remote
1
control) once or more to select FM .
2 Press and hold 4 / ¢ on the set (or à /
á on the remote control ) until SEARCH
appears.
➜ The radio automatically tunes to a station
with sufficient reception. Display shows SEARCH
during automatic tuning.
3 Repeat step 2 if necessary until you find the
desired station.
● To tune to a weak station, press à / á on the
remote control briefly and repeatedly until you
have found optimal reception.
Programming radio stations
You can store up to a total of 40 radio stations
(FM and DAB) in the memory, manually or
automatically.
Automatic programming
Automatic programming will start from preset 1
or a chosen preset number. From this preset
number upwards, former programmed tuner
stations will be erased. The set will only program
stations which are not in the memory already.
1 Press ALBUM/ PRESET +/- on the set once
or more to select the preset number where
programming should start.
Note:
– If no tuner preset number is selected, default is
preset 1 and all your presets will be erased.
2 Press and hold PROG until AUTO PROGRAM
appears.
➜ Available FM stations are programmed.
➜ After all stations are stored, the first preset
station will then be played.
Manual programming
4 Press PROG to confirm.
➜ Display shows the preset number, waveband
and the frequency of the preset station.
5 Repeat steps 1-4 to store other stations.
● You can erase a preset station by
storing another frequency in its place.
To listen to a preset station
● Press ALBUM/ PRESET +/- on the set once
or more until the desired preset station is
displayed.
RDS
The feature RDS (Radio Data System) is a
service that allows FM stations to send
additional information along with the regular FM
radio signal. When you are receiving an RDS
station, and the station name are
displayed.
Switching through RDS information
1 Tune to the desired RDS radio station on the
FM waveband (see Tuning to radio stations).
2 Press INFO./RDS on the remote control
repeatedly to switch through the following
information (if available):
– Station name
– Program type (for example: News, Spor t, etc.)
– Radio text messages
– Frequency
Note:
– NO PS, NO PTY or NO TEXT is displayed if
you press INFO./RDS and no RDS signal is
available.
Automatic clock setting via RDS
When the set is on, the clock can be
automatically set by a time signal broadcast
together with the RDS signal. This only works if
the RDS station is sending this time signal.
English
1 Tune to your desired station (see Tuning to
radio stations).
2 Press PROG to activate programming.
➜ PROG flashes.
3 Press ALBUM/ PRESET +/- on the set to
allocate a number from 1 to 20 to this station.
Note:
– The time signal broadcast from certain RDS
stations may not always be accurate.
19
Page 20

DAB Reception
English
Tuning to a program type (PTY)
PTY enables you to tune to a desired program
type.
1 Program RDS stations (See Programming
radio stations).
2 When tuning to an RDS station, press RDS/
NEWS on the remote control repeatedly until
the program type is displayed.
3 Press ALBUM/ PRESET +/- on the set (or 3
/ 4 on the remote control ) repeatedly to
select the desired program type.
4 Press and hold 4 / ¢ on the set (or à /
á on the remote control ) until SEARCH
appears.
➜ The radio tunes to a radio station
broadcasting of the program type.
➜ TYPE NOT FOUND is displayed if the
program type is not available.
Tuning to DAB for the first time
1 Press SOURCE on the top of the system to
select DAB (or press DAB/FM on the remote
control).
➜ The system will star t full scan to search for all
available Band III channels automatically.
➜ If no DAB service is available, “station not
available" will appear on the display panel.
➜ If there are available DAB services, the system
will store all detected stations.
Re-tuning
By re-tuning, you can update your DAB multiplex
(ensemble) list all over again. At the completion
of scanning, the system will tune to the first
service of the first multiplex (ensemble) in the
updated multiplex (ensemble) list.
During scanning, the system will initially display
the following the following, where "CH" is the
DAB channel and "N" is the number of the
current multiplex (ensemble).
CH N
● Press SCAN briefly.
➜ The display panel shows "FULL SCAN" and
the system will start full scan to search for all
available Band III channels again automatically.
● Press and hold SCAN for more than 2 seconds.
➜ The display panel shows "QUICK SCAN" and
the system will start a quick scan process to
search for Band III channels again automatically.
● If you press 9 during scanning, the scanning
process will stop and the system will return to
the DAB frequency before scanning starts.
➜ The other DAB operation buttons will be
locked.
Note:
– If no DAB service is detected during the above
processes, the display panel will show "NO
SIGNAL".
Manual tuning
1 Press and hold OK/ÉÅ (or ENTER/ÉÅ
on the remote control) for more than 2 seconds
to start manual tuning.
➜ The current DAB channel and frequency will
be displayed.
2 Press ¡ / ™ on the remote control to select
your desired DAB channels backward/forward.
3 Press OK/ÉÅ (or ENTER/ÉÅ on the
remote control) to confirm and tune to your
selected channel.
20
Page 21

DAB Reception
DAB information display
You can view the DAB service information in the
following 3 information modes. Depending on
the DAB radio station you are tuning to, some
information modes may be unavailable.
● Press INFO./RDS repeatedly to view the
following information.
Channel & Frequency
Displays the channel and central frequency of
the current multiplex (ensemble).
12B 225 648
Date and Time
Shows the date & time of the current multiplex
(ensemble) in the format of MM-DD HH:MM
(MM: month; DD: day; HH: hour; MM: minute).
MM•DD HH:MM
Bit Rate and Audio Status
Displays the transmission rate of broadcasting in
bits per second (kbps) and the audio status of
the current service in stereo or mono.
Menu operation
You can also select DAB full scan, quick scan,
manual tuning, language and DRC value through
the DAB menu.
1 Press MENU on the set.
➜ A DAB menu appears on the display panel.
2 Press 4 / ¢ (or 5 /6 on the remote
control) to select an item you want.
3 Press OK/ÉÅ (or ENTER/ÉÅ on the
remote control) to confirm.
Programming DAB stations
You can save up to 20 DAB stations in the
system memory.
1 Press PROG on the remote control.
➜ The display shows "PN", where N stands for
the preset n–umber.
2 Press ALBUM/PRESET +/- (or ¡ / ™ on the
remote control) to select your desired preset
number. Then, press PROG on the remote
control again.
● You can also use the Numerical Keypad
(0~9) to input a number directly and tune to
the service associated with this number.
● To input a number larger than 10, press SHIFT
once or more to select the first digit you want
and then use the Numerical Keypad (0~9)
to input the second digit.
➜ The display shows "PN SAVED" briefly,
indicating the preset is saved.
Note:
– If no service is associated with the number you
input, the display will show "PN EMPTY" briefly,
where "N" stands for the input preset number.
Tuning to preset DAB stations
● Press ALBUM/PRESET +/- (or ¡ / ™ on the
remote control) until the desired preset station
is displayed.
English
21
Page 22

USB
English
Using a non-USB device
1 Connect the audio out terminals of the external
equipment (TV, VCR, Laser Disc player, DVD
player or CD Recorder) to the LINE-IN
terminal of your system.
2 Press SOURCE repeatedly (or AUX on the
remote control) to select external equipment.
Notes:
– All the sound control features (DSC or DBB, for
example) are available for selection.
– Refer to the operating instructions for the
connected equipment for details.
Using a USB mass storage device
By connecting a USB mass storage device to the
Hi-Fi system, you can enjoy the device's stored
music through the powerful speakers of Hi-Fi
system.
Playing a USB mass storage device
Compatible USB mass storage devices
With the Hi-Fi system, you can use:
– USB flash memory (USB 2.0 or USB1.1)
– USB flash players (USB 2.0 or USB1.1)
–memory cards (requires an additional card
reader to work with this Hi-Fi system)
– Supported Music type:
a) This device only supports unprotected music
with the following file extension:
.mp3
.wma
b) Music bought from on-line music stores are not
supported because they are secured by Digital
Rights Management protection (DRM).
c) File name extensions that end with the
following are not supported:
.wav; .m4a; .m4p; mp4; .aac and etc.
– No Direct connection can be made from
Computer USB port to the micro system even you
have either or both mp3 or wma files in your
computer.
Supported formats:
– USB or memory file format FAT12, FAT16,
FAT32 (sector size: 512 bytes)
– MP3 bit rate (data rate): 32-320 Kbps and
variable bit rate
– WMA v9 or earlier
– Directory nesting up to a maximum of 8
levels
– Number of albums/ folders: maximum 99
– Number of tracks/titles: maximum 500
– ID3 tag v2.0 or later
– File name in Unicode UTF8 (maximum length:
128 bytes)
Notes:
– In some USB flash players (or memory devices),
the stored contents are recorded using copyright
protection technology. Such protected contents will
be unplayable on any other devices (such as this
Hi-Fi system).
– Compatibility of the USB connection on this
micro system:
a) This micro system supports most USB Mass
storage devices (MSD) that are compliant to the
USB MSD standards.
i) Most common Mass storage class devices are
flash drives, memory sticks, jump drives and etc.
ii) If you see a "Disc Drive" show up on your
computer after you plugged the mass storage
device into your computer, most likely it is MSD
compliant and it will work with this micro
system.
b) If your Mass storage device required a battery/
power source. Please make sure you have a fresh
battery in it or charge the USB device first and
then plug it into the micro system again.
22
The system will not play or support the
following:
– Empty albums: an empty album is an album
that does not contain MP3/WMA files, and
will not be shown in the display.
– Non-supported file formats are skipped. This
means that e.g.: Word documents .doc or
MP3 files with extension .dlf are ignored and
will not be played.
–AAC, WAV, PCM audio files
– DRM protected WMA files
– WMA files in Lossless format
How to transfer music files from PC to a
USB mass storage device
By dragging and dropping music files, you can
easily transfer your favorite music from PC to a
USB mass storage device.
For the flash player, you can also use its music
management software for the music transfer.
However, those WMA files may be
unplayable for compatibility reasons.
Page 23

USB
How to organize your MP3/WMA files on
the USB mass storage device
This Hi-Fi system will browse the MP3/WMA
files in the folders/sub-folders/titles order.
Example:
Root
Title 001
Title 002
Title 003
Album 01
Title 001
Title 002
Title 003
Album 02
Title 001
Title 002
Title 003
Album 03
Title 001
Title 002
Title 003
Organize your MP3/WMA files in different
folders or subfolders as required.
Note:
– If you have not organized MP3/WMA files into
any albums on your disc, an album “A000” will be
automatically assigned for all those files.
– Make sure that the file names of MP3 files end
with .mp3. and the file names of WMA files end
with .wma.
– For DRM protected WMA files, use Windows
Media Player 10 (or later) for conversion. Visit
www. microsoft.com for details about Windows
Media Player and WM DRM (Windows Media
Digital Rights Management).
1 Check the USB device has been properly
connected.
2 Press SOURCE once or more to select USB
(or USB on the remote control).
– NO AUDIO appears if no audio file is found in
the USB device.
3 Play the USB’s audio files as you do with the
albums/tracks on a CD (See CD).
Note:
– For compatibility reasons, the album/track
information may differ from what it is displayed
through flash players’ music management software.
– File names or ID3 tags will be displayed as --- if
they are not in English.
CD Ripping - Recording disc files to a
USB device
The set allows you to copy the music files or
spoken contents of a disc to the external USB
device. You can record one track, the whole disc
or even selected tracks through the Program
function.
1 Check the USB device has been properly
connected.
2 Insert a disc (audio CD or MP3 or WMA). If
desired, program the disc.
3 Press SOURCE once or more to select CD
(or CD on the remote control).
4 To record one file
a. Select the track you want to record
b. Press once or repeatedly USB REC until “RIP
ONE” appears, flashing.
➜ Disc playback will start automactially from the
beginning of the selected track.
4 To record all files
a. Press repeatedly USB REC until “RIP ALL”
appears, flashing.
➜ Disc playback will start automactially from the
beginning.
5 To stop recording, first press 9, then unplug the
USB device.
● In the rip-one mode, the playback will auto go to
the stop position after one track/file comes to an
end.
● During MP3 and WMA recording, make sure the
playback of the file you want to record is wholly
completed before manually stop recording. Or
any part of the file will not be recorded.
● During recording, if the memory of the USB
device runs out, playback will not continue.
English
23
Page 24

USB USB /AUX
English
Helpful hints:
– In recording mode (even the USB device is
unplugged from the set), selections of track/album,
play modes (repeat and shuffle modes) are not
available.
– All the recorded audio files will be stored in the
folder named _PHILIPS which is automatically
created for recording.
– The recorded audio file will be stored in either
.mp3 format (for the disc of audio or MP3), or
.wma format (for WMA disc).
– Copyright-protected CD will not be recorded.
– DRM-protected WMA is not supported.
– Do not directly unplug the USB device to stop
recording for a possible loss of some of the
recorded contents.
–For MP3 and WMA recording, if the name of a
file to be recorded is the same as the one of a file
stored in the USB device, the file will not be
recorded. In this case, the set’s display will show
flashing “Err” and “duP” interchangeably 3 seconds.
–For some USB device of low speed, the playback
may go with muted sound for some seconds which
will depend on the capability of the low-speed USB
device.
Deleting audio files on a USB device
1 Check the USB device has been properly
connected.s
2 Press SOURCE once or more to select USB
(or USB on the remote control).
3 To delete one file
a. Select the track you want to delete before or
during playback.
b. Press USB DEL on the remote control.
➜ “DELETE ?” is displayed.
4 To delete all files
a. Press and hold USB DEL on the remote
control for 2 seconds.
➜ “DELETE ALL” is displayed.
5 To delete, press USB DEL again.
6 To not to delete, wait until “DEL” disappears
after 4 seconds of flashing, or just press 9.
Helpful hints:
–For some MP3 players, the set will read it as
only one folder which will wrap up all the audio
files on the player regardless of more than one
folder on that player.
– The set may not be able to delete a file /albume
stored on some MP3 players.
The making of unauthorized copies of
copy-protected material, including
computer programmes, files, broadcasts
and sound recordings, may be an
infringement of copyrights and constitute
a criminal offence. This equipment should
not be used for such purposes.
Using a non-USB device
1 Connect the audio out terminals of the external
equipment (TV, VCR, Laser Disc player, DVD
player or CD Recorder) to the AUX-IN
terminal of your system.
2 Press SOURCE repeatedly (or AUX on the
remote control) to select external equipment.
Notes:
– All the sound control features (DSC or DBB, for
example) are available for selection.
– Refer to the operating instructions for the
connected equipment for details.
24
Page 25

Clock/Timer
Setting clock
There are two possible methods for setting the
clock: manually or automatically by using RDS.
Automatic clock setting
Refer to “Setting the RDS clock”.
Manual clock setting
1 In standby mode, press CLOCK on the remote
control.
➜ The hour digits star t flashing.
2 Hold down or press ALBUM/PRESET +/-
on the set repeatedly to set the hours.
3 Press CLOCK again.
➜ The minute digits star t flashing.
4 Hold down or press ALBUM/PRESET +/-
on the set repeatedly to set the minute.
5 Press CLOCK to confirm the time.
Setting the timer
The set can be used as an alarm clock, whereby
the selected source (DAB, FM, DISC or USB)
starts playback at a preset time. Make sure the
clock is set before using the timer.
1 Press and hold TIMER on the remote control.
➜ TIMER ON and the hour digits star t flashing.
2 Hold down or press ALBUM/PRESET +/- on
the set repeatedly to set the hour.
3 Press TIMER to confirm.
➜ The minute digits star t flashing.
4 Hold down or press ALBUM/PRESET +/- on
the set repeatedly to set the minute.
5 Press TIMER to confirm .
➜ TIMER OFF and the hour digits star t
flashing.
6 Hold down or press ALBUM/PRESET +/- on
the set repeatedly to set the hour.
7 Press TIMER to confirm.
➜ The minute digits star t flashing.
8 Hold down or press ALBUM/PRESET +/- on
the set repeatedly to set the minute.
9 Press TIMER again.
➜ The source mode now is available for
selection.
0 Hold down or press ALBUM/PRESET +/- on
the set repeatedly to select the wake-up source
(DAB, FM, DISC or USB).
Note:
– if you choose FM as the wake-up source, Hold
down or press ALBUM/PRESET +/- on the set
repeatedly to select a preset station.
! Hold down or press ALBUM/PRESET +/- on
the set repeatedly to set the wake-up volume.
" Press TIMER to confirm.
➜ The timer is now set and activated.
Note:
– The set will exit from the timer setting mode if
no button is pressed within 10 seconds.
Activating and deactivating
TIMER
● Press TIMER on the remote repeatedly to
activate or deactivate the timer.
➜ If deactivated, “TIMER OFF” appears.
Helpful hints:
The timer will not work at the set time if
– the timer is deactivated.
The set will switch to Tuner source automatically if :
– no CD is inserted when the selected source is
CD;
– no USB device is connected when the selected
source is USB.
English
25
Page 26

SLEEP
English
SLEEP
You can set a cer tain period of time after which
the set will switch off.
● On the remote control, press SLEEP
repeatedly to select the desired time period
options (in minutes):
➜ Display shows in sequence: SLEEP OFF,
120, 90, 60, 45, 30, 15, 5, SLEEP OFF...
➜ Display shows the selected option briefly and
returns to its previous status. The icon
appears.
● To review the remaining sleep time, press
SLEEP.
Notes:
– If you press SLEEP again, this will change your
sleep time period to the next shorter preset option.
To deactivate the sleep timer, press
SLEEP repeatedly to SLEEP OFF..
➜ The icon
or
Press STANDBY-ON/ ECO POWER to
switch off the set (or y on the remote control).
disappears.
Helpful hints:
– The SLEEP function does not affect your alarm
time setting.
26
Page 27

Specifications
AMPLIFIER
Output power ....................................... 2 x 30 W RMS
Signal-to-noise ratio .......................... ≥ 62 dBA (IEC)
Frequency response ......... 63 – 16000 Hz, ± 3 dB
Impedance loudspeakers ......................................... 6 Ω
Impedance headphones ....................32 Ω -1000 Ω
CD/MP3-CD PLAYER
Number of programmable tracks ......................... 32
Frequency range .................................. 20 – 20000 Hz
Signal-to-noise ratio ............................................ 75 dBA
Channel separation ......................≥ 50 dBA (1 kHz)
Total harmonic distortion .................................. ≤ 0.5%
MPEG 1 Layer 3 (MP3-CD) .......... MPEG AUDIO
MP3-CD bit rate ....................................... 32-256 kbps
(192 kbps advised)
Sampling frequencies16/22.05/24/32/44.1/48 kHz
USB PLAYER
USB ..................................................................................... V1.1
Number of albums/folders .............. maximum 999
Number of tracks/titles ...................... maximum 999
TUNER
FM wave range ...................................87.5 – 108 MHz
Sensitivity at 75 Ω
– mono, 26 dB signal-to-noise r atio ............ 2.8 µV
– stereo, 46 dB signal-to-noise ratio ........ 61.4 µV
Total harmonic distortion ..................................... ≤ 5%
Frequency response ..... 63 – 12500 Hz (± 3 dB)
Signal-to-noise-ratio ...................................... ≥ 50 dBA
DAB wave range .................................... 174-240 MHz
SPEAKERS
2-way Bass reflex system
GENERAL INFORMATION
AC Power ................................. 110 – 240 V, 50/60 Hz
Standby Power Consumption ...........................≤ 6 W
ECO Standby Power Consumption .............≤ 1 W
Dimensions (w x h x d)
– Main unit (w x h x d) ...... 210 x 249 x 116 mm
– Speaker box (w x h x d) 157 x 249 x 190 mm
Weight
– With Packing ........................................................ 5.85 kg
– Main Unit ............................................................... 1.43 kg
– Speaker box ......................................................... 1.19 kg
Specifications and external appearance are
subject to change without notice.
English
Cleaning the Cabinet
● Use a soft cloth slightly moistened with a mild
detergent solution. Do not use a solution
containing alcohol, spirits, ammonia or abrasives.
Cleaning Discs
● When a disc becomes dir ty,
clean it with a cleaning cloth.
Wipe the disc from the centre
out.
● Do not use solvents such as
benzene, thinner, commercially
available cleaners, or antistatic spray intended for
analogue records.
Maintenance
Cleaning the disc lens
● After prolonged use, dirt or dust may
accumulate at the disc lens. To ensure good
playback quality, clean the disc lens with Philips
CD Lens Cleaner or any commercially available
cleaner. Follow the instructions supplied with
cleaner.
27
Page 28

Tr oubleshooting
English
WARNING
Under no circumstances should you try to repair the system yourself, as this will invalidate the
warranty. Do not open the system as there is a risk of electric shock.
If a fault occurs, first check the points listed below before taking the system for repair. If you
are unable to remedy a problem by following these hints, consult your dealer or Philips for
help.
Problem
“NO DISC” is displayed.
Some files on the USB device are not
displayed.
Radio reception is poor.
The system does not react when buttons
are pressed.
Sound cannot be heard or is of poor
quality.
Solution
✔ Insert a disc.
✔ Wait until the moisture condensation at the lens
has cleared.
✔ Replace or clean the disc, see “Maintenance”.
✔ Use a finalised CD-RW or a correct MP3/WMA
-CD format disc.
✔ Check if the number of folders exceeds 999 or
the number of titles exceeds 999
✔ If the signal is too weak, adjust the antenna or
connect an external antenna for better
reception.
✔ Increase the distance between the Micro HiFi
System and your TV or VCR.
✔ Remove and reconnect the AC power plug and
switch on the system again.
✔ Adjust the volume.
✔ Disconnect the headphones.
✔ Check that the speakers are connected correctly.
✔ Check if the stripped speaker wire is clamped.
✔ Make sure the MP3-CD was recorded within
32~256 kbps bit rate with sampling frequencies
at 48 kHz, 44.1 kHz or 32 kHz.
The left and right sound outputs are
reversed.
The indication “Station not available” is
displayed.
28
✔ Check the speaker connections and location.
✔ DAB coverage is currently unavailable in your
area.
-Wait until the coverage resumes.
✔ DAB signal is weak.
- Relocate the set.
Page 29

Tr oubleshooting
The remote control does not function
properly.
The timer is not working.
The Clock/Timer setting is erased.
The USB device doesn’t play on my set.
The disc file cannot be recorded to the
USB device
✔ Select the source (CD or TUNER, for example)
before pressing the function button (ÉÅ,í,
ë).
✔ Reduce the distance between the remote
control and the system.
✔ Insert the batter y with its polarities
(+/– signs) aligned as indicated.
✔ Replace the battery.
✔ Point the remote control directly toward
IR sensor on the front of the system.
✔ Check the set is switched off
✔ Set the clock correctly.
✔ Press TIMER to switch on the timer.
✔ Power has been interrupted or the power cord
has been disconnected. Reset the clock/timer.
✔ It is not set in the USB mode. Select USB mode.
✔ The device is not securely connected to the set’s
USB port. Re-connect the device.
✔ The device is not supported by the set, or the
audio file format stored on the device is not
supported by the set. Use a compatible device/
playable audio file format.
✔ You stop recording when the MP3 or WMA file
you want to record is still playing. Select recordone mode to record, or stop recording only
when the playback of MP3 or WMA file is wholly
completed.
✔ The memory of the USB device runs out. Delete
some unwanted files on the USB device to free
some memory, or use another USB device of
sufficient free memory to record.
✔ The name of a MP3 or WMA file on the disc is
identical to the one of a file on the USB device.
Change to a different name for the file on the
USB device.
English
29
Page 30

Meet Philips at the Internet
http://www.philips.com
PageBack_MCB279 2008.5.8, 17:0576
MCB279
CLASS 1
LASER PRODUCT
Printed in China
PDCC-JW-0819
 Loading...