

Page 1
Also Used by
™
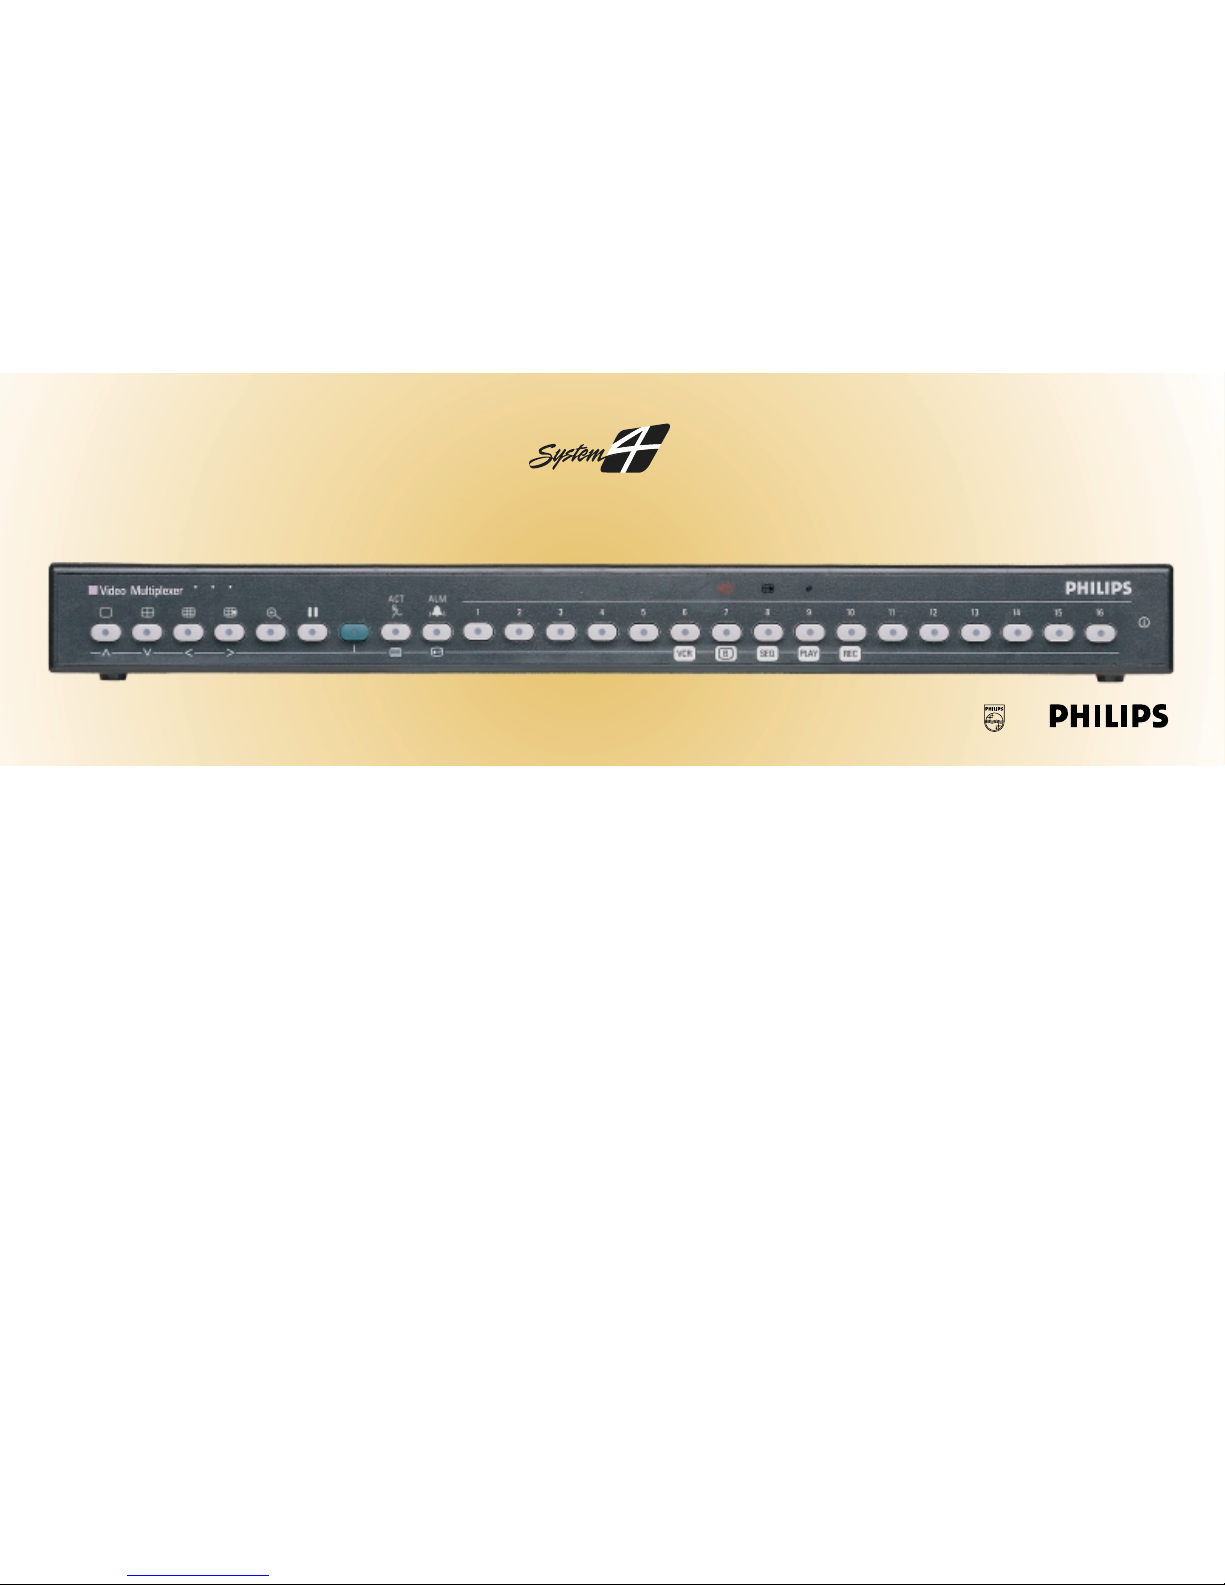
Video Controller
Philips
Communication,
Security & Imaging
LTC 2600 Series Multiplexer Quick Reference Guide
Page 2
Installation Instructions
These features are available on System4 Series only.
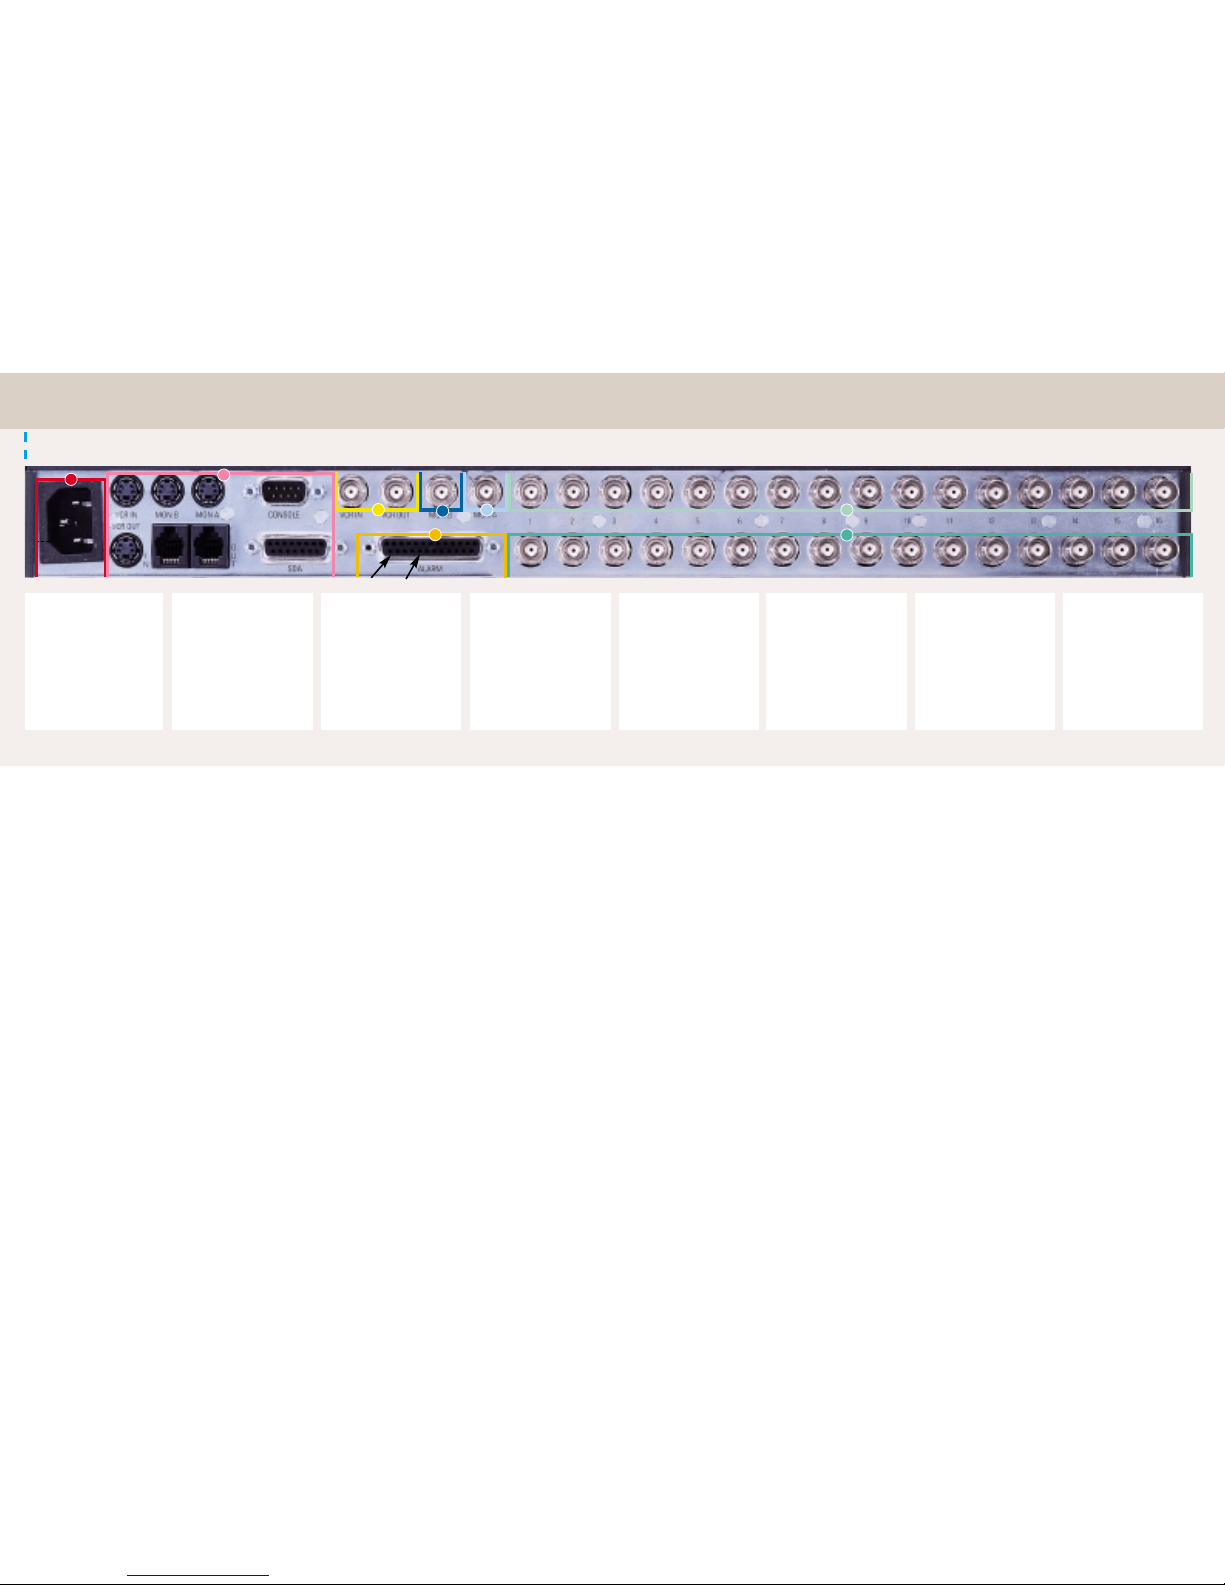
Keyboard: (LTC 2601/00 and LTC 2602/00 models only) Connect a remote keyboard with Pan/Tilt/Zoom for control and programming.
Console: Connect a host computer for CCL command inputs or a Philips LTC 2650 Graphical User Interface or a printer.
SDA: Five individual Bi-Phase outputs for a Philips’ AutoDome
®
or Receiver/Driver.
Connect cameras (up to 16)
to camera BNC inputs.
Follow steps 1-8 for quick installation
If looping is required,
connect camera out to
second source (second BNC).
Connect a monitor to
MON A output for
multiscreen display
and tape playback.
Connect a monitor to
MON B output if needed.
NOTE: For System4 Triplex Series
only, MON B can display a quad
or a multiscreen picture when
operating in live or playback mode.
(For playback) Connect the
Output of the VCR to the VCR
IN on the multiplexer.
(For recording) Connect the
Input of the VCR to the
VCR OUT on the multiplexer.
Synchronize the Mux with the VCR by
connecting pin 21 (VEXT INPUT 1)
to VCR Clock Out on your recorder.
Connect pin 25 to VCR ground.
Apply power to the unit.
The Console, SDA, KB, and
SVHS are available with System4
Series only. Please refer to
Instruction manual for full details.
. . . . . . . . . . . . . . . . . . . . . . . . . . . . . . . . . . . . . . . . . . . . . . . . . . . . . .
61 2 3 4 5 87
Pin 25
Pin 21
7
5
4
3 1
2
8
6
Page 3
Operating Instructions
Display Modes Available For LTC 2600 Series Multiplexers
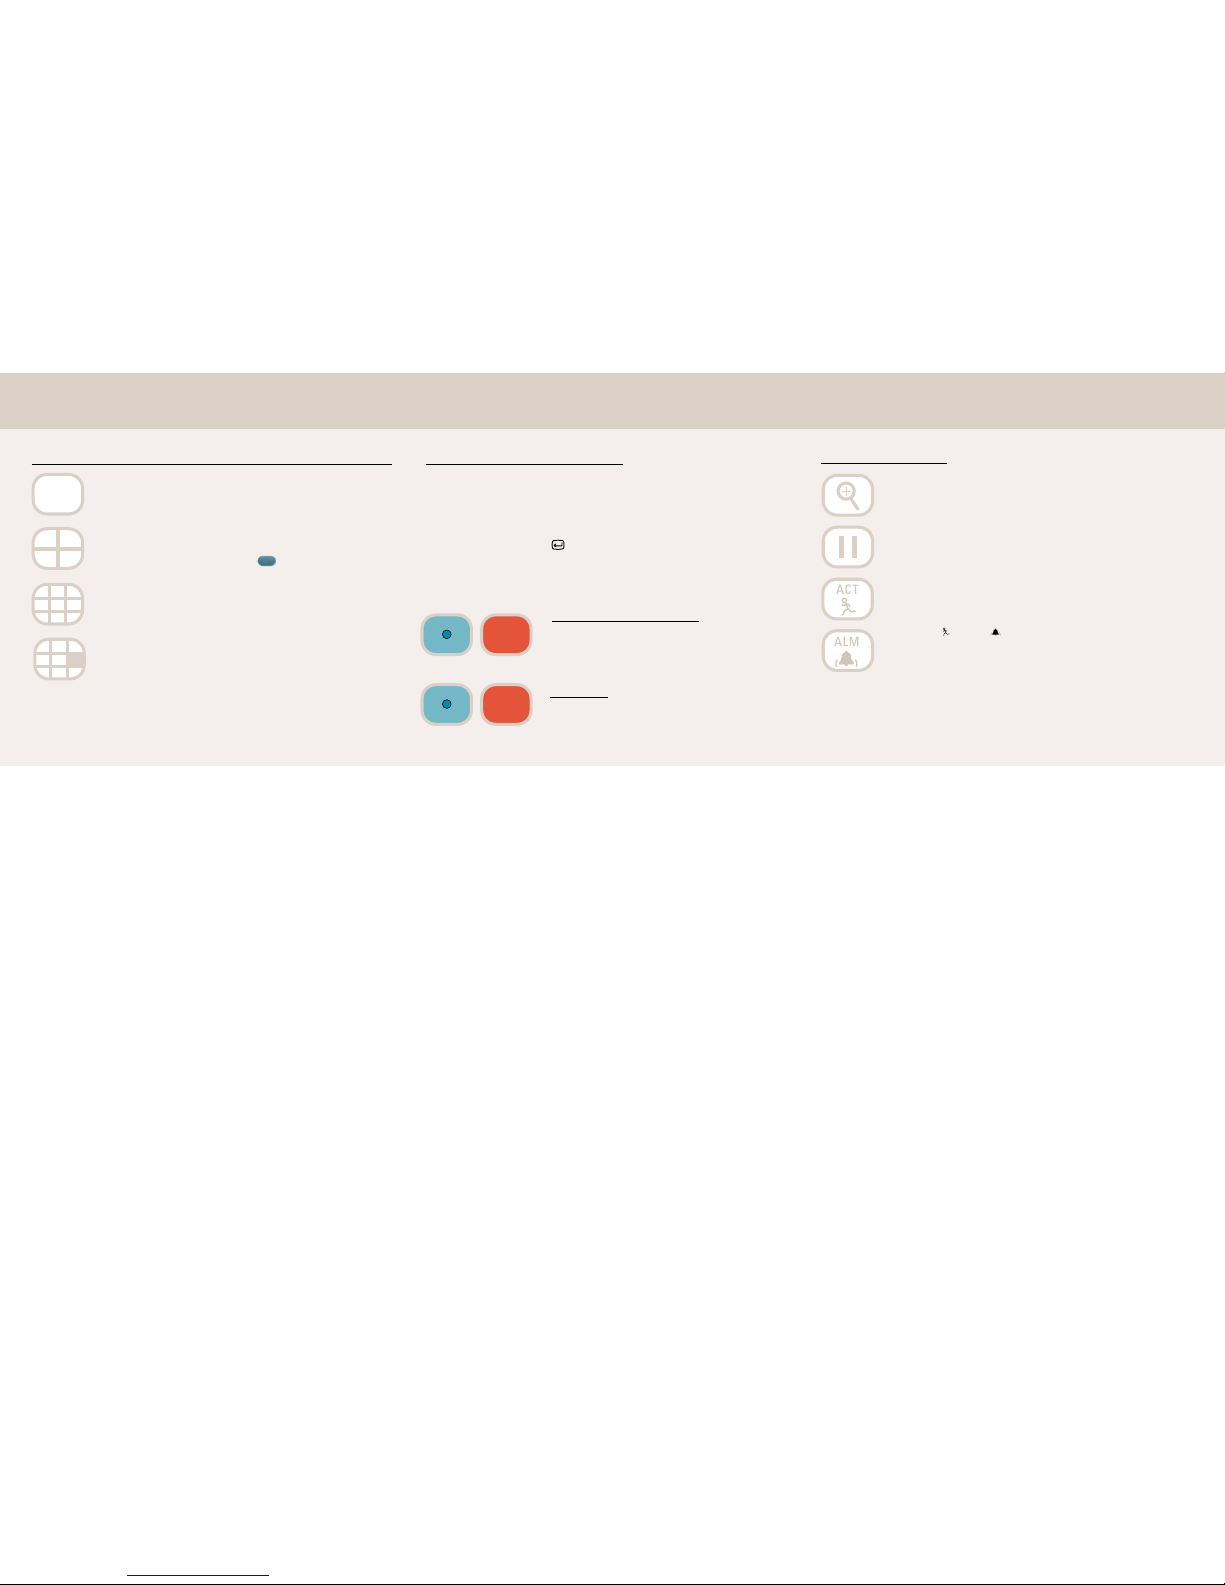
Full Screen Display: Shows one camera, full screen on one monitor.
Press the FULL SCREEN key on the front panel and then press the
appropriate camera number.
Quad Screen Display: Divides the screen into four separate viewing
areas. Press the QUAD key once to enable the feature. Press the key
repeatedly to toggle through the different viewing configurations
(three for the 9-channel model; four for the 16-channel model; eight
for System4 models). Pressing ALT , then SEQ will sequence
through all quad screens.
Multiscreen Display: Enabling this feature shows one of five
different multiscreen configurations: 4x4 (16 cameos), 12+1, 8+2,
3x3, and 4+3. Press the MULTI key repeatedly to toggle through the
different selections.
Cameo Mode: When in MULTI or QUAD modes, the screen area
where a camera is displayed is called a cameo. Note that the
numbered front panel keys can refer to either cameras or cameos.
Press the CAMEO key to toggle the operation of these keys to the
cameo function the cameo LED is illuminated when the multiplexer
is in the cameo mode). Press the CAMEO key again to revert to the
camera function.
Assign a Camera to the Cameo
1) In multi or quad display mode, press desired camera key; press CAMEO key;
cameo selected will display flashing camera title. Select desired camera, cameo will
display the selected camera.
Press the CAMEO key to store and/or exit.
2) Press ALT then SELECT keys (ALT LED will flash). Cameo #1 will be
selected and will show a flashing camera title. Press desired camera key. Cameo #1
will display selected camera, and cameo #2 is automatically selected. Repeat
procedure for remaining cameras.
Press the ALT key to exit at anytime.
Recording Live Pictures
Press the green ALT key and then press RECORD. This
key combination toggles the record mode on and off.
For System4 LTC 2672 or LTC 2682 Series:To activate
both VCR outputs,press ALT, then 2, then RECORD.
Playback
To playback the recorded pictures, press the green ALT
key and then press PLAY.
For the Simplex models, Record mode must be turned OFF.
Advanced Functions
Zoom: Enables the active camera display (a cameo in multi or
quad display) to be digitally enlarged by a factor of 2:1. “Zoom”
will be displayed on the monitor screen. Use the arrow keys for
closer inspection of any part of the selected image.
Freeze: Holds the selected camera picture on either full screen
or cameo. Press the FREEZE key again to release the image
from this function. Changing the display screen mode releases
the freeze mode from all cameos.
Alarms and Actions Acknowledge:
When an alarm or action condition occurs, the action alarm
camera picture displays in full screen on Monitor B and the
ALM or ACT LED Flashes. “ALARM”/“ACTION” will also
flash on Monitor A. Clearing an Alarm/Action by pressing
ACT or ALM will stop any recording associated with that
function. The method of clearing alarms or action conditions
depends on your multiplexer model.
Please refer to Section 3 in the instruction manual for advanced
operation features.
REC
PLAY
Page 4
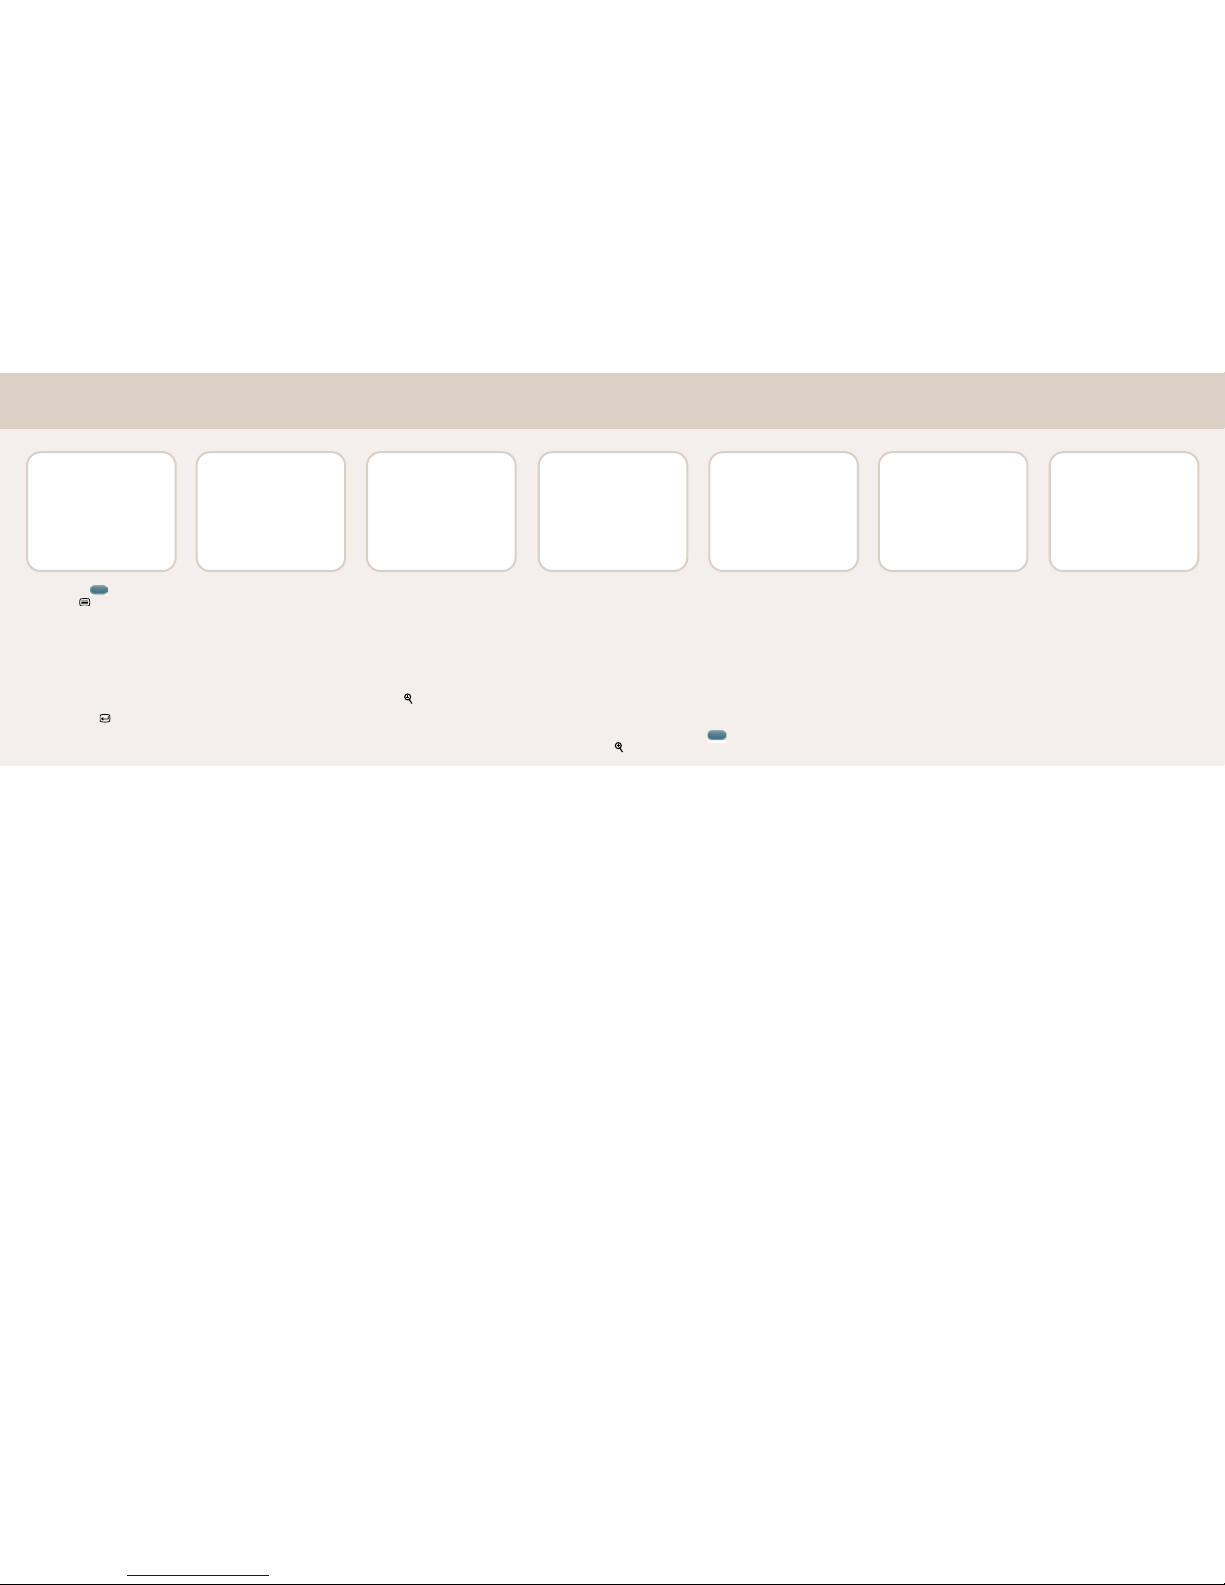
Access the menu screens by pressing
the ALT G reen key followed by
the MENU key. The menus (as
shown above) will be displayed on
Monitor A in the system.
The Main Menu (as shown above)
displays two setup options: Quick
Setup and Advanced Setup. In most
cases, performing the Quick Setup
will provide all the programming
necessary for system operation.
Use the SELECT key to choose
the option.
NOTE: The Quick Setup program
includes Time/Date, AutoS et, and
VCR setup. This programming procedure guides you through all of these
steps. If for any reason you need further
information,consult the built-in HELP
feature by pressing the AL T key.
Select Time/Date. Enter the time
format (12 or 24 hours), time, date
format (dd/mm/yyyy;yyyy/mm/dd),
and date information as requested. Use
the direction (arrow) keys to move the
cursor and to scroll through menu
settings. Use the SELECT key to
choose the settings you want to
program and to save your selections.
When you have finished programming all time/date settings, use the
ZOOM to return to the Quick
Setup menu.
Select Autoset and choose
AUTOSET ALLBELOW to
automatically set the record list,
sequence, and video loss list (according
to the number of camera inputs
detected by the multiplexer). Selecting
any of the other menu options, will set
only the selected option.
When Autoset is completed, a message
will be displayed for three seconds.
The camera inputs detected in the
setup process are also displayed as
shown in the above sample screen.
Press ZOOM to return to the Quick
Setup menu.
NOTE: The LTC 2600 Series
multiplexers are configured to record
and playback from a wide range of
VCRs.
You will need to decide how to
synchronize the multiplexer and the
VCR. The options are (a) Connect
and enable the VEXToutput from the
VCR (no further VCR programming
is required) or (b) if VEXTis not
available, specify the VCRmodel and
the time-lapse mode.
T o program the multiplexer for the V CR
in use, select the RECORD SETUP
menu. Move to the SELECT VCR
menu and press the SELECT key.
Scroll to the appropriate VCR model;
then press the SELECT key.
Press the ZOOM key to exit. Choose
the TIMELAPSE menu and select
recording speed. Press ZOOM five
times to exit the programming menu.
The unit is now ready for operation.
Programming Instructions
MAIN MENU
SETUP 1
>QUICK SETUP
ADVANCEDSETUP
Choose:SELECT More:V
Exit:ZOOM
QUICK SETUP
SETUP 1
>TIME/DATE
AUTOSET
VCR SETUP
Choose:SELECT More:V
Exit:ZOOM
TIME/DATE
>TIME FORMAT 12
TIME 12:00:00
DATEFORMATMM/DD/YYYY
DATE 01/01/1998
Choose:SELECT More:V
Exit:ZOOM
AUTOSET
SETUP 1
>AUTOSET ALL BELOW
RECORD LIST
SEQUENCES
VIDEO LOSS LIST
Choose:SELECT More:V
Exit:ZOOM
AUTOSET
SETUP 1
01 02 03 04 05 06 -- --
-- -- -- -- -- -- -- -- -- -The above cameras were
included in selected input lists
HIT ANY KEY TO COMPLETE
VCR SETUP
SETUP 1
>RECORD SETUP *VCR OUT*
PLAYBACK FORMAT
RECORD LOCK
Choose:SELECT More:V
Exit:ZOOM
RECORD SETUP
*VCR OUT* SETUP 1
VEXT INPUT OFF
SELECT VCR PHILIPS 3991HD
TIME LAPSE 6HD
Choose:SELECT More:V
Exit:ZOOM
NOTE: If you wish to perform an Advanced Setup for customized system configurations, please refer to the instruction manual.
If you need further information within the menu,
consult the built-in HELP feature by pressing the ALT key.
To exit from any menu, press the ZOOM key to return to the previous screen.
Page 5

Philips
Communication,
Security & Imaging
Philips Communication,Security & Imaging,Inc.
1004 New Holland Avenue, Lancaster, PA 17601-5606 U.S.A.
Tel: 1-717-295-6123 Fax: 1-717-295-6097
Philips Communication,Security & Imaging B.V.
P.O. Box 80002,
5600 JB Eindhoven,The Netherlands
Tel: 31 40 27 812222 Fax: 31 40 27 88284
Philips Singapore Pte.Ltd.
620A,Lorong 1 Toa Payoh,Singapore 319762, Republic of Singapore
Tel: 65 3501859 Fax: 65 3569202
3935 890 09513 00-12
© 2000 Philips Electronics N.V.
© 2000 Philips Communication, Security & Imaging, Inc.
All Rights Reserved.Philips ® is a registered trademark of Philips Electronics N.V.
Data subject to change without notice.
For product news,
technical information,and literature
update service, visit us at
www.philipscsi.com
 Loading...