

Page 1
3
Enjoy
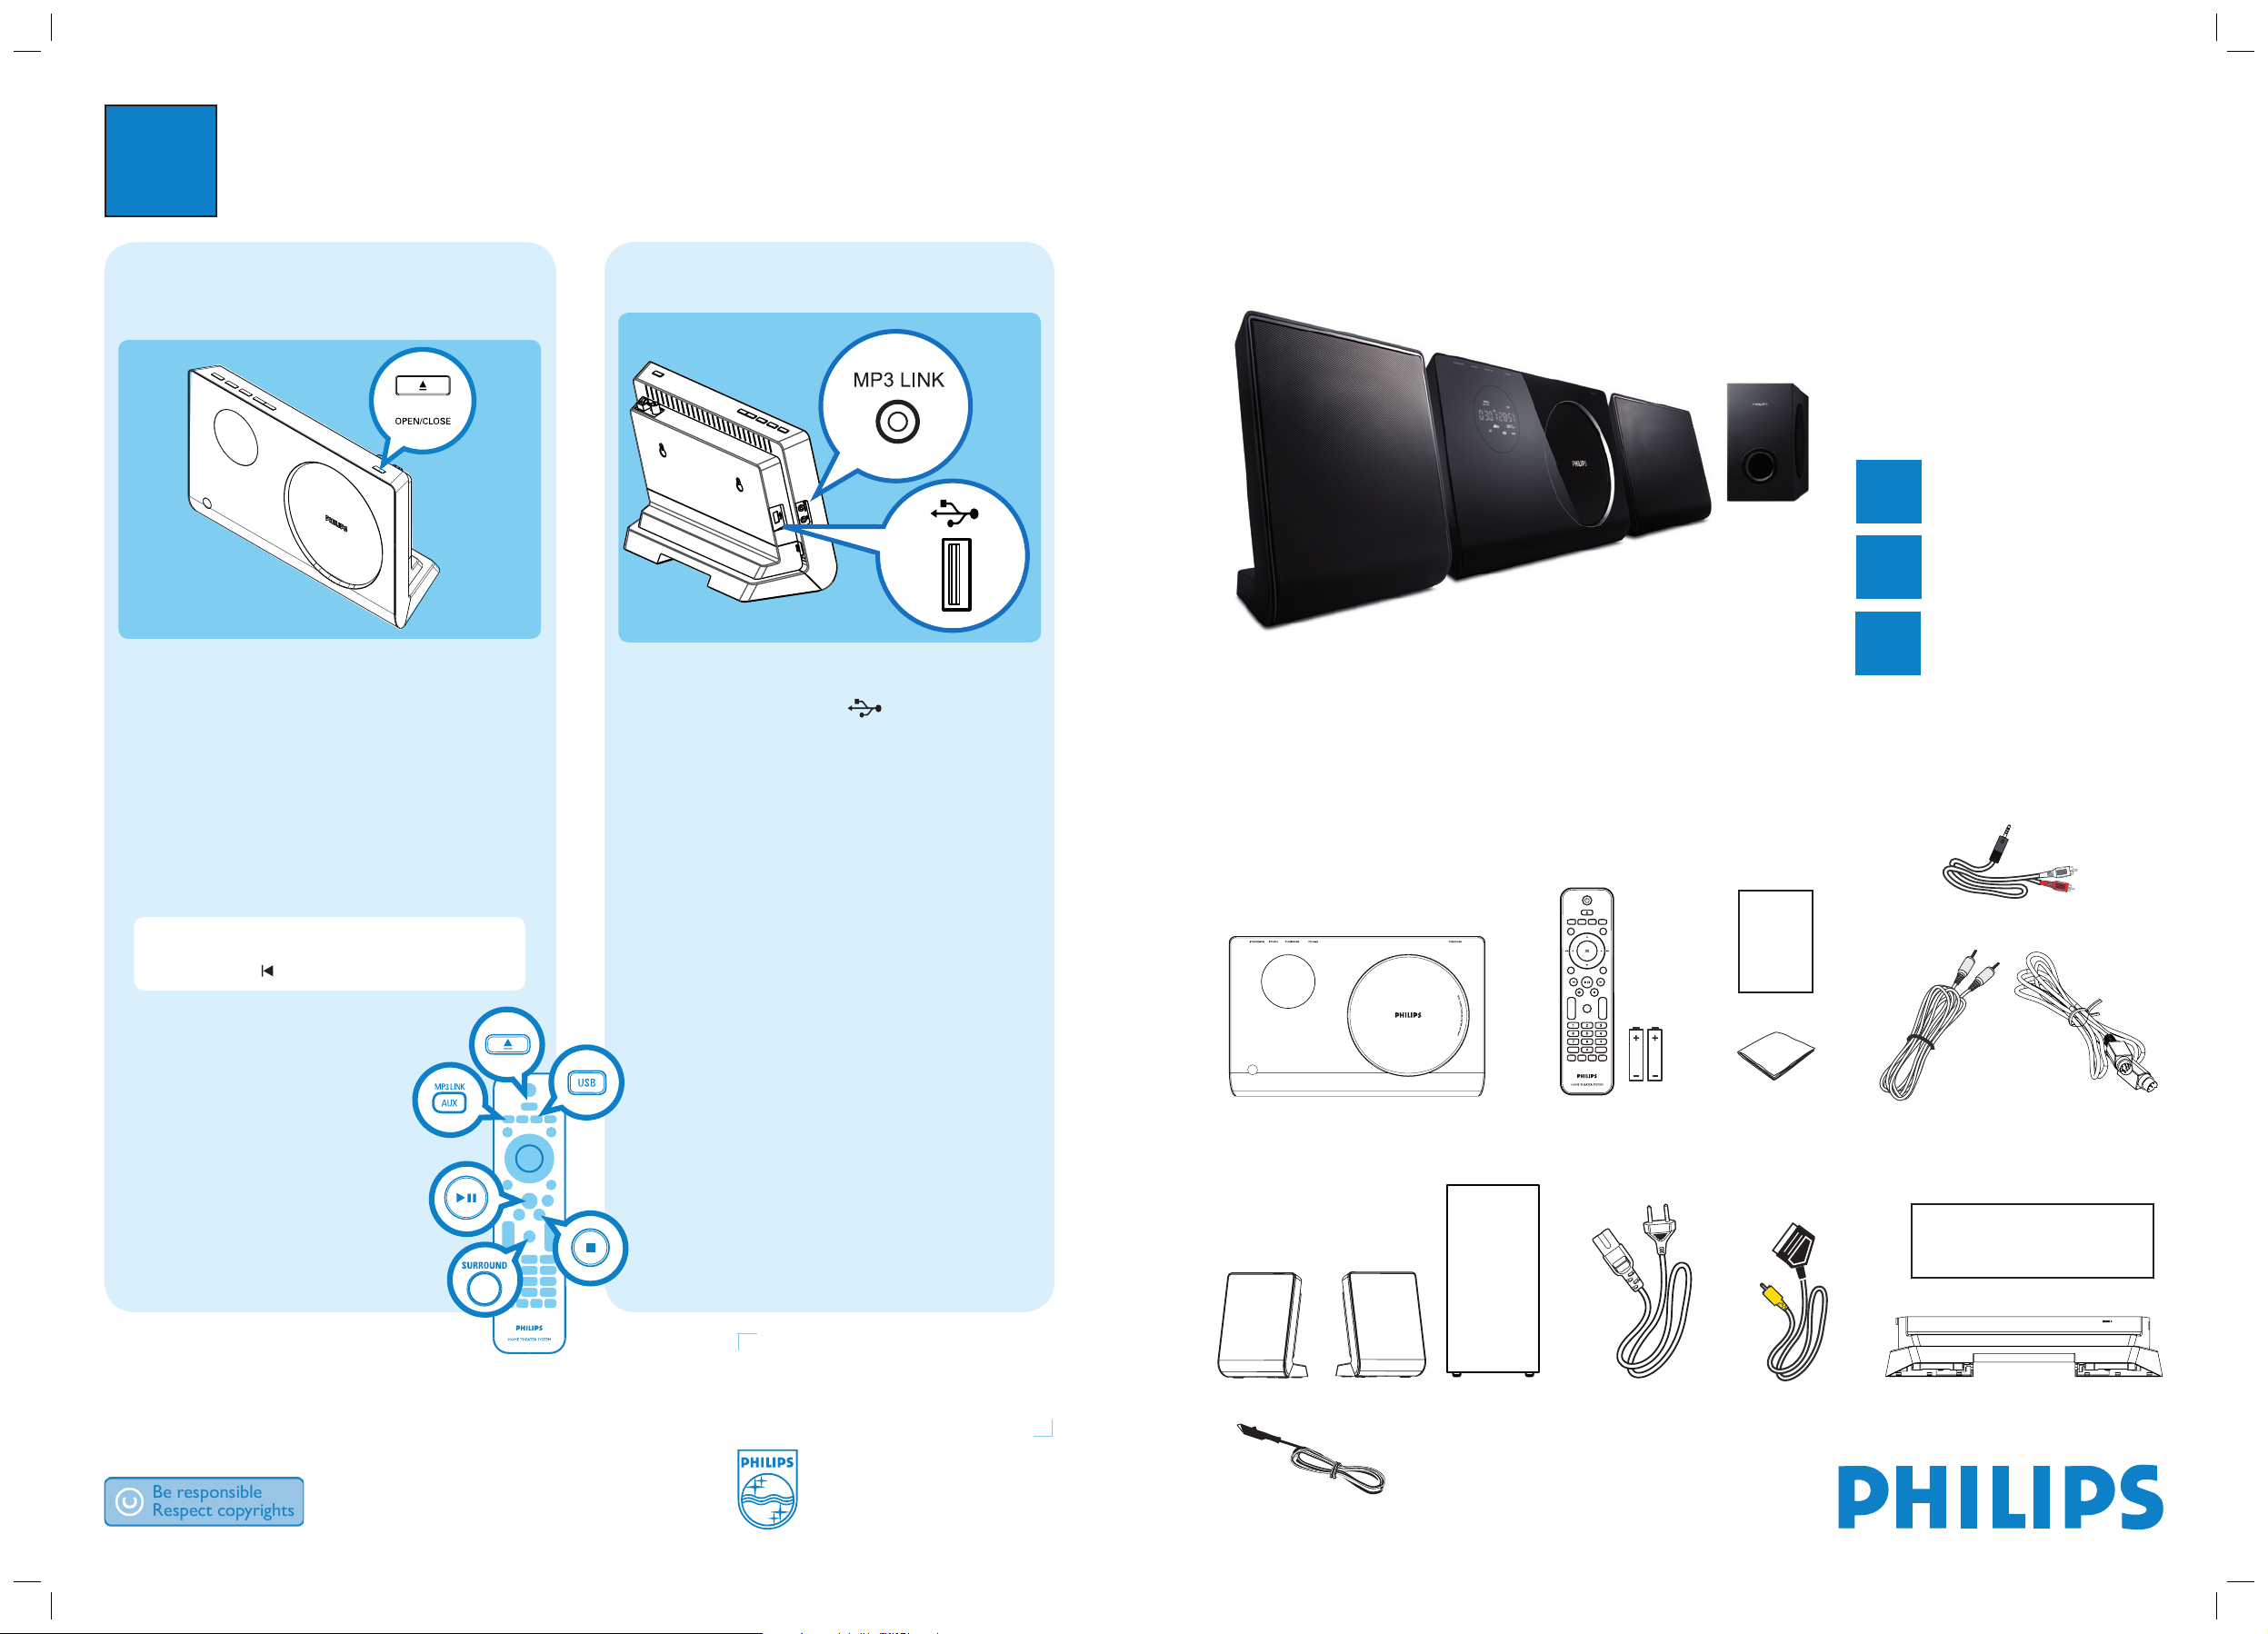
Start disc play
A Press Z to open the disc compartment.
B Place a disc with the disc label facing out.
C Press Z to close the disc compartment and start
disc play.
z
If the disc menu is displayed on the TV, use cursor
buttons to select an option in the menu, then press
OK.
z
To enjoy powerful surround sound, press
SURROUND to turn on the multi-channel
surround mode.
D Press x to stop play.
Note When you press u, playback resumes from
where it was last stopped. To start playback from the
beginning, press while the message is displayed.
Play other supported devices
USB device
A Insert your USB device to (USB) socket.
B Press USB to switch to ‘USB’ mode.
C Select a file to play, then press u.
D To stop play, press x or remove the USB device.
Other portable media player
A Connect a 3.5mm stereo audio cable (supplied)
from the MP3 LINK socket to the headphone
output socket on your portable media player.
B Press AUX/MP3 LINK repeatedly until ‘MP3
LINK’ is displayed.
C Press PLAY on your portable media player.
Need help?
User Manual
See the user manual that came with your Philips DVD Home Theatre System.
2008 C Koninklijke Philips N.V.
All rights reserved.
www.philips.com
sgpjp-816/12-eng1
Register your product and get support at
www.philips.com/welcome
Quick Start Guide
Connect
Set up
Enjoy
1
2
3
HTS4600
What’s in the box?
Remote Control
and 2 batteries
2 speakers and subwoofer
Scart converter
cable
Power cable
DVD Home Theatre (main unit)
FM wire antenna
3.5mm stereo
audio cable
(for MP3 LINK)
Table stand
(for main unit)
Interconnect
cable
User
Manual
Mounting guide
Micro bre
cleaning cloth
Audio cables
Page 2
1
Connect
A
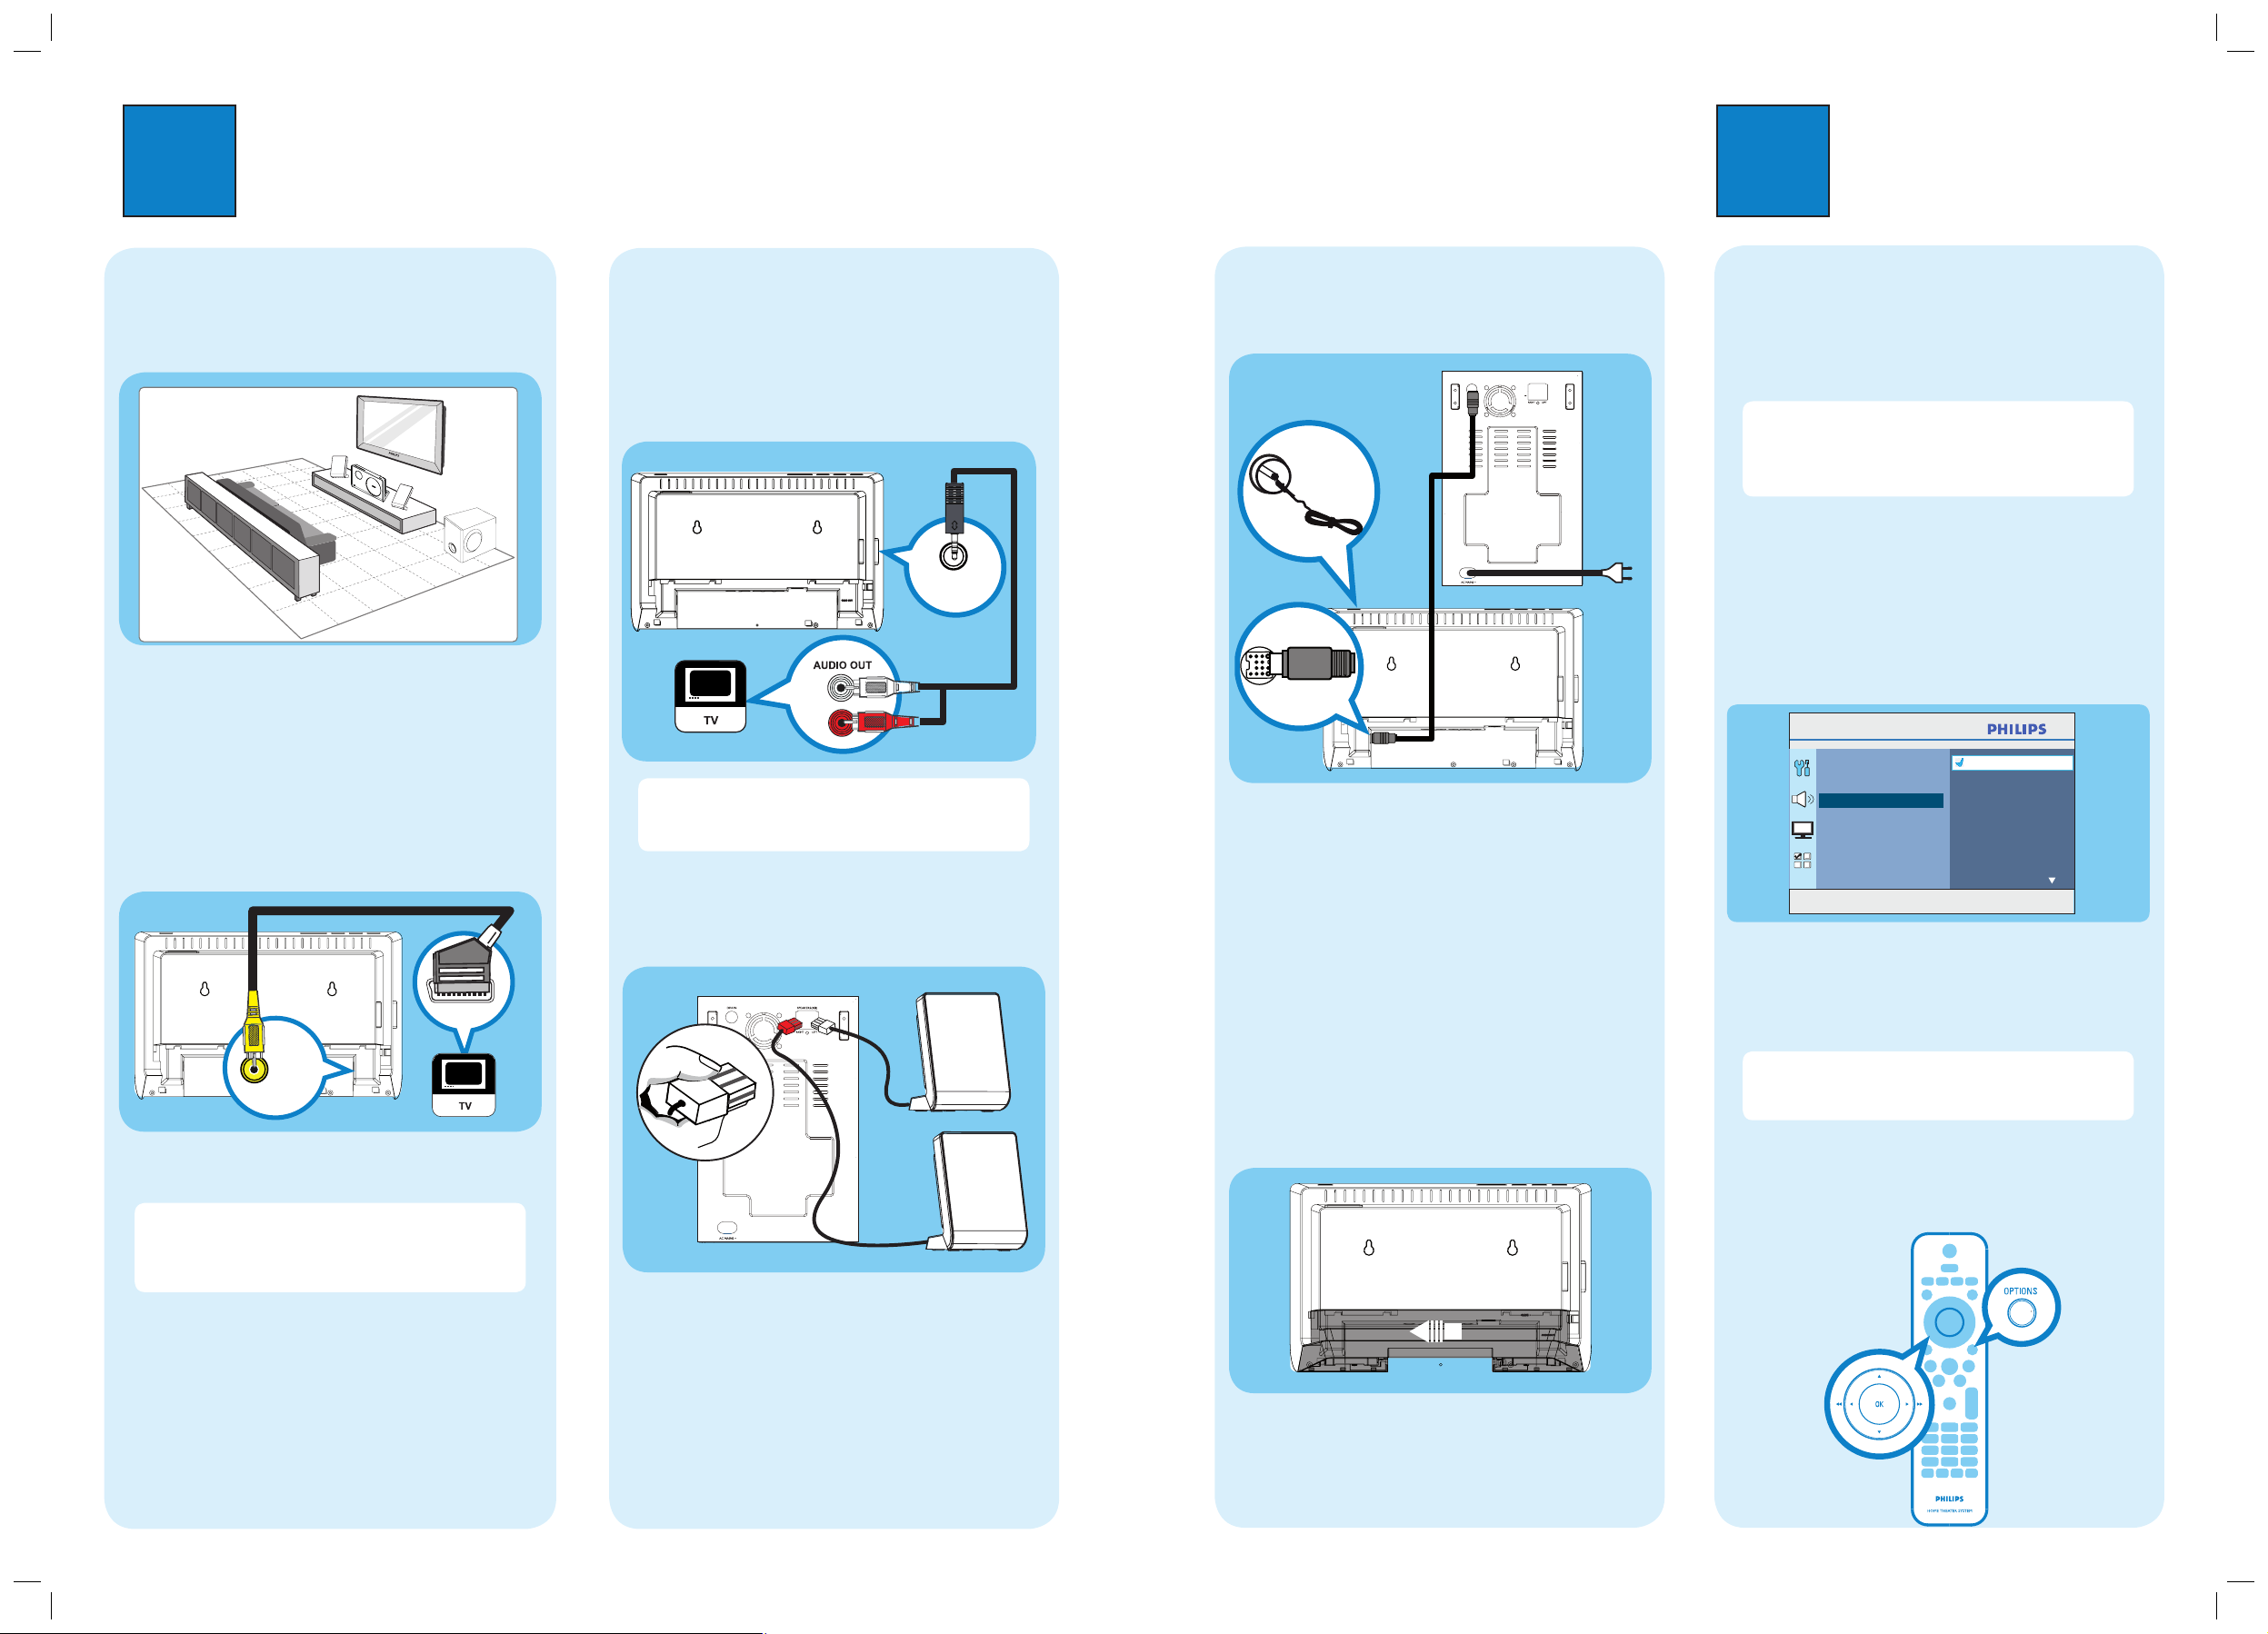
Placement
Proper speakers system placement is important to
ensure optimum sound performance.
A Place the speakers at the normal listening ear level,
equal distance from the TV and face it straight ahead
towards the listening area.
B Place the subwoofer on the floor, at least one metre
away from the TV.
B
Connect to TV
z
Connect the scart converter cable from the CVBS
OUT socket to the SCART socket on your TV.
Note If your TV supports HDMI, connect this unit
to your TV using HDMI connection for better picture
quality. See the accompanying user manual for more
information.
2
Set up
C
Connect audio output from TV (for
EasyLink control)
To hear the TV audio through this DVD Home Theatre
unit, connect an audio cable (supplied) from the
AUX IN sockets to the AUDIO OUT sockets on your
TV.
Note To listen to the audio output from this
connection, press AUX/ MP3 LINK repeatedly until
‘AUX’ is displayed on the display panel.
D
Connect speakers
A Connect the left and right speakers to the matching
sockets on the subwoofer.
A
Find the viewing channel
A Press 2 to turn on this DVD Home Theatre unit.
B Turn on the TV. Use the TVs remote control to
select the correct viewing channel.
Note To search for the correct viewing channel,
press the Channel Down button on the TVs remote
control repeatedly (or AV, SELECT,
° button) until
you see the Video In channel.
B
Select on-screen display language
A Press OPTIONS.
[ General Setup ] menu is displayed.
B Press B.
C Press V to select [ OSD Language ], then press B.
D Press vV
to select a language option, then press
OK.
E Press OPTIONS to exit.
Note The language set here is only for the menus
that are shown on the TV while operating this DVD
Home Theatre unit, not for the DVD disc menu.
There are various setup options (Audio Setup, Video
Setup, Preferences) available on this DVD Home
Theatre unit. Refer to the user manual for more
information.
E
Connect subwoofer and power
cable
C
A
B
A
Connect the interconnect cable between TO MAIN
UNIT socket on the subwoofer and TO
SUBWOOFER socket on this DVD Home Theatre
unit.
B Connect the FM antenna to the inner pin of the FM
75 socket (for some models, it has been
connected in the factory). Extend the wire for
optimum reception.
C Connect the power cable from subwoofer to the AC
power outlet.
F
Attach table stand to DVD Home
Theatre unit
A Attach the table stand to the rear of this unit and
slide it to the left to lock into position.
FM antenna
Main Unit (rear)
Subwoofer (rear)
Main Unit (rear)
LEFT
RIGHT
SCART
CVBS OUT
AUX IN
LEFT
RIGHT
General Setup
Disc Lock
Display Dim
OSD Language
Screen Saver
Sleep
DivX(R) VOD Code
Press OPTIONS to exit menu
Auto
English
Dansk
Nederlands
Suomi
Français
Deutsch
Italiano
 Loading...