

Philips HTS-3539 Service Manual
Home Theater DVD Player
GB
Service
HTS3539/12/51
TABLE OF CONTENTS
Location of PCB Boards & version variation & repair scenario matrix.....................
Production Specifications ...............................................................................................1-3
Safety Instruction, Warning & Notes................................................................................1-
D Instruction................................................................................................................2-1
FU
Mechanical and Dismantling Instructions ........................................................................3-1
Software Upgrades........................................................................................................... -1
Trouble Shooting Chart .................................................................................................... -1
Wiring Diagrams ................................................................................................6-1
Electrical Diagrams and Print-layouts .................................................................7-1
Set Mechanical Exploded view ....................................................................................... -1
Revision List ...................................................................................................................
©
Copyright 2010 Philips Consumer Electronics B.V. Eindhoven, The Netherlands
All rights reserved. No part of this publication may be reproduced, stored in a retrieval system or
transmitted, in any form or by any means, electronic, mechanical, photocopying, or otherwise without
the prior permission of Philips.
Published by Helen-RY 1202 Service Audio Printed in The Netherlands Subject to modification
Page
1-2
7
4
5
8
9
-1
CLASS 1
LASER PRODUCT
GB
313978536040
©
Version 1.2
Version 1.0
Version 0.0
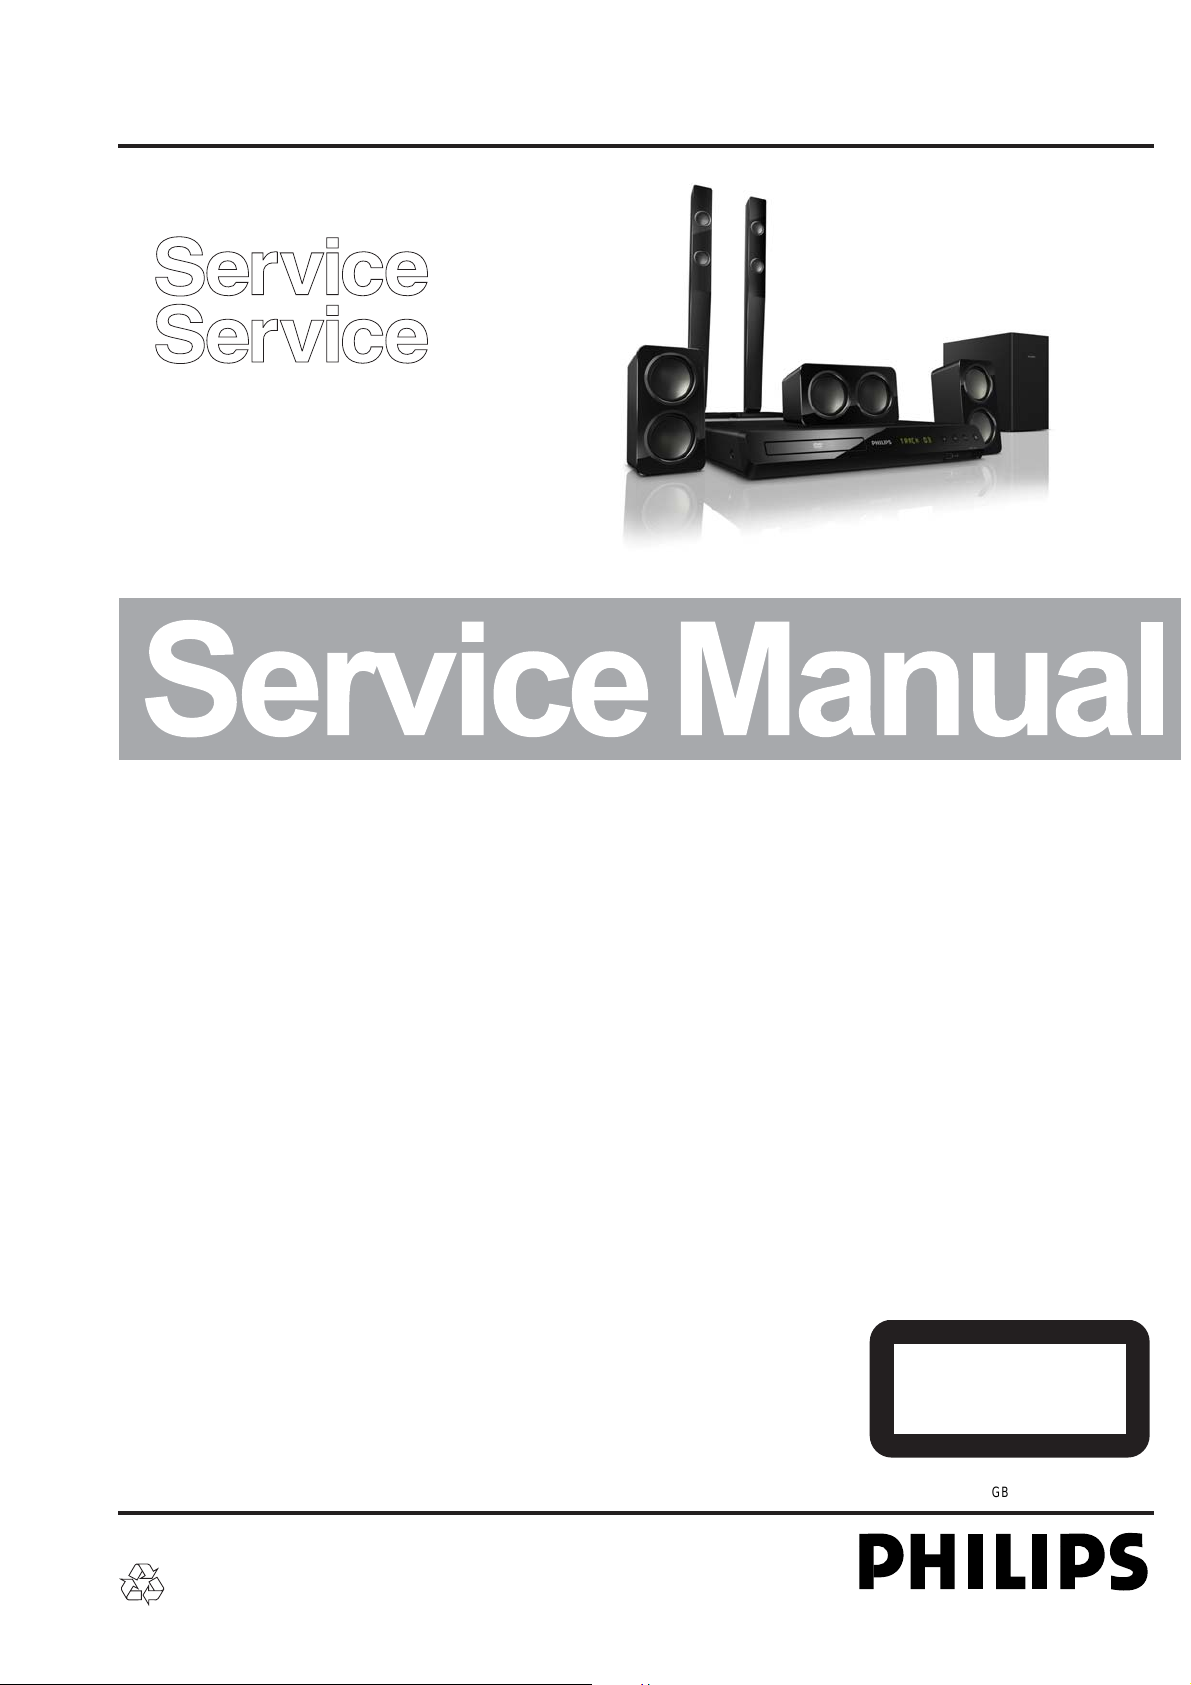
PCB BOARD LOCATION:
MAIN BOARD
AMPLIFIER BOARD
LOADER
POWER BOARD
1-2
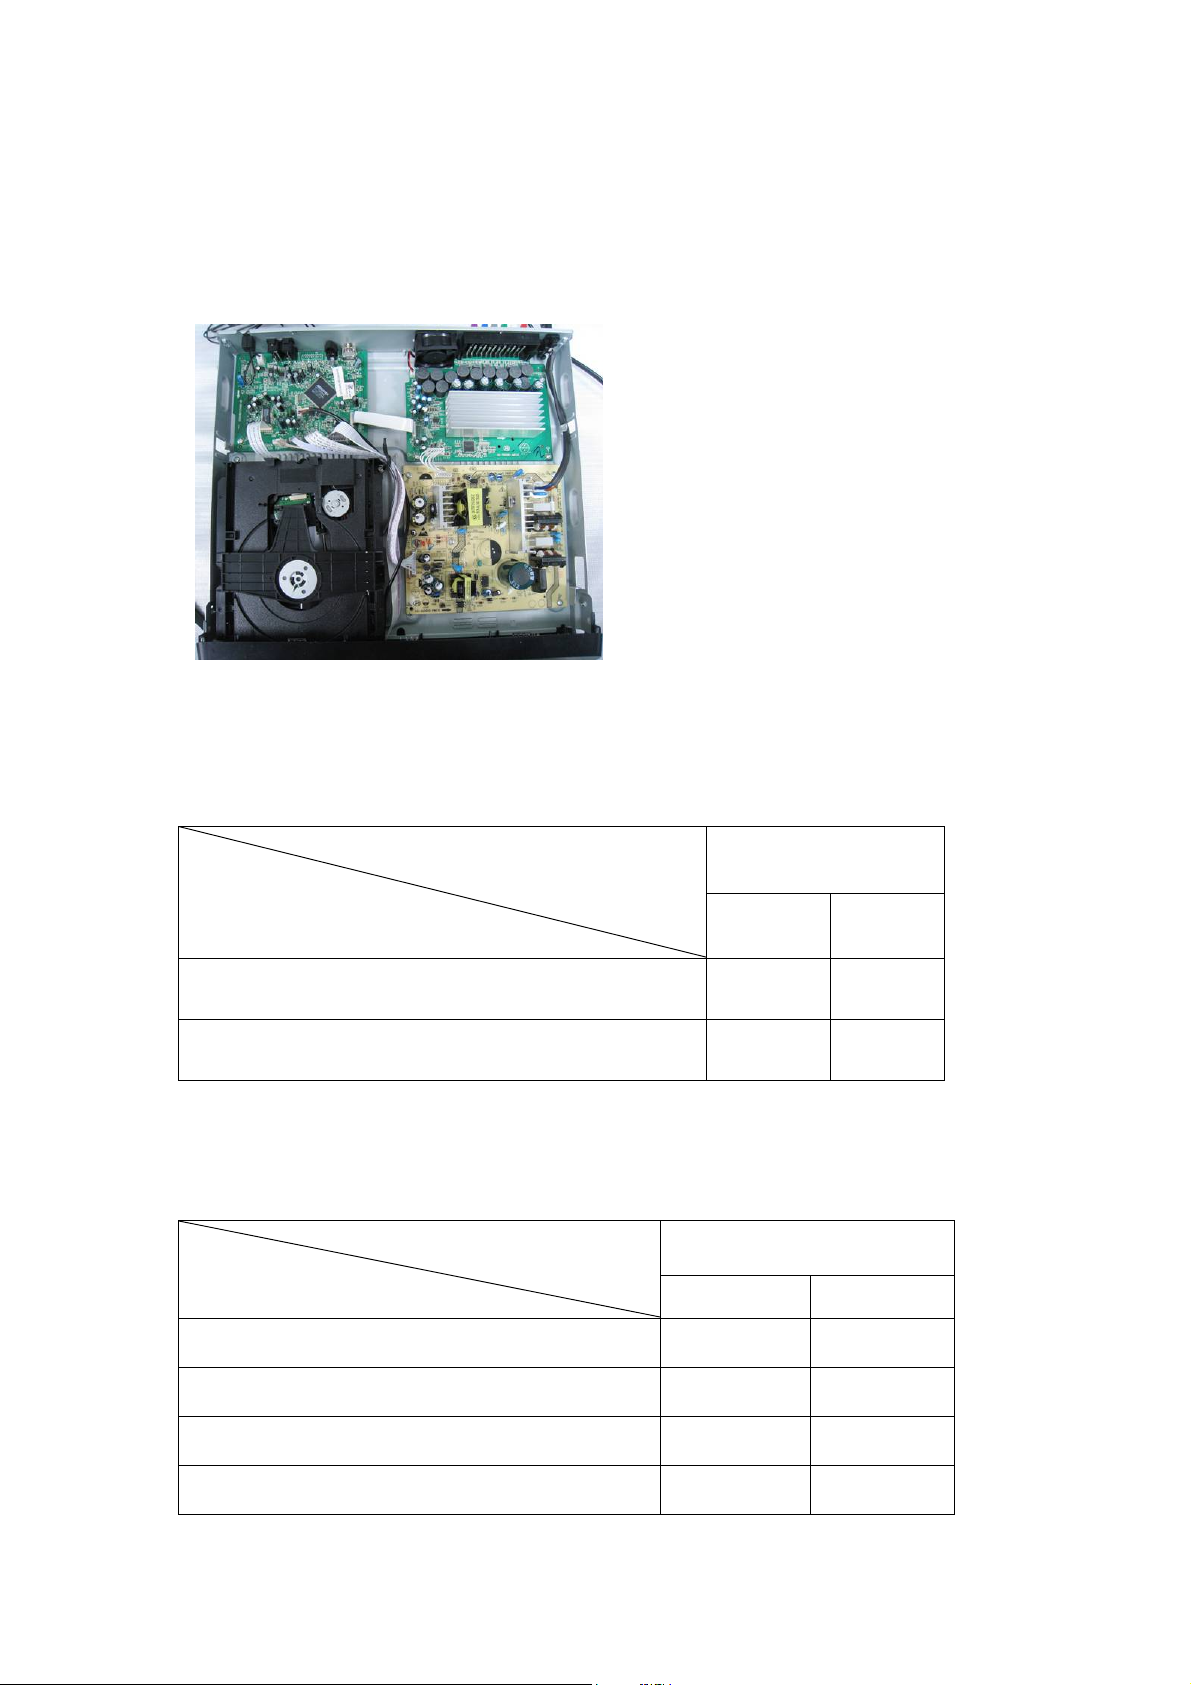
Version Variation
Type/Versions
Features
Power supply rating:220-240V ,50Hz X X
Power consumption:110W X X
HTS3539
/12 /51
Repair Scenario Matrix
Type/Versions
Board in used
Main Board C C
HTS3539
/12 /51
Front Control Board Bd Bd
Amplifier Board C C
Power Board C C
*Bd:Board Level Replacement
*C:Component Level Repair
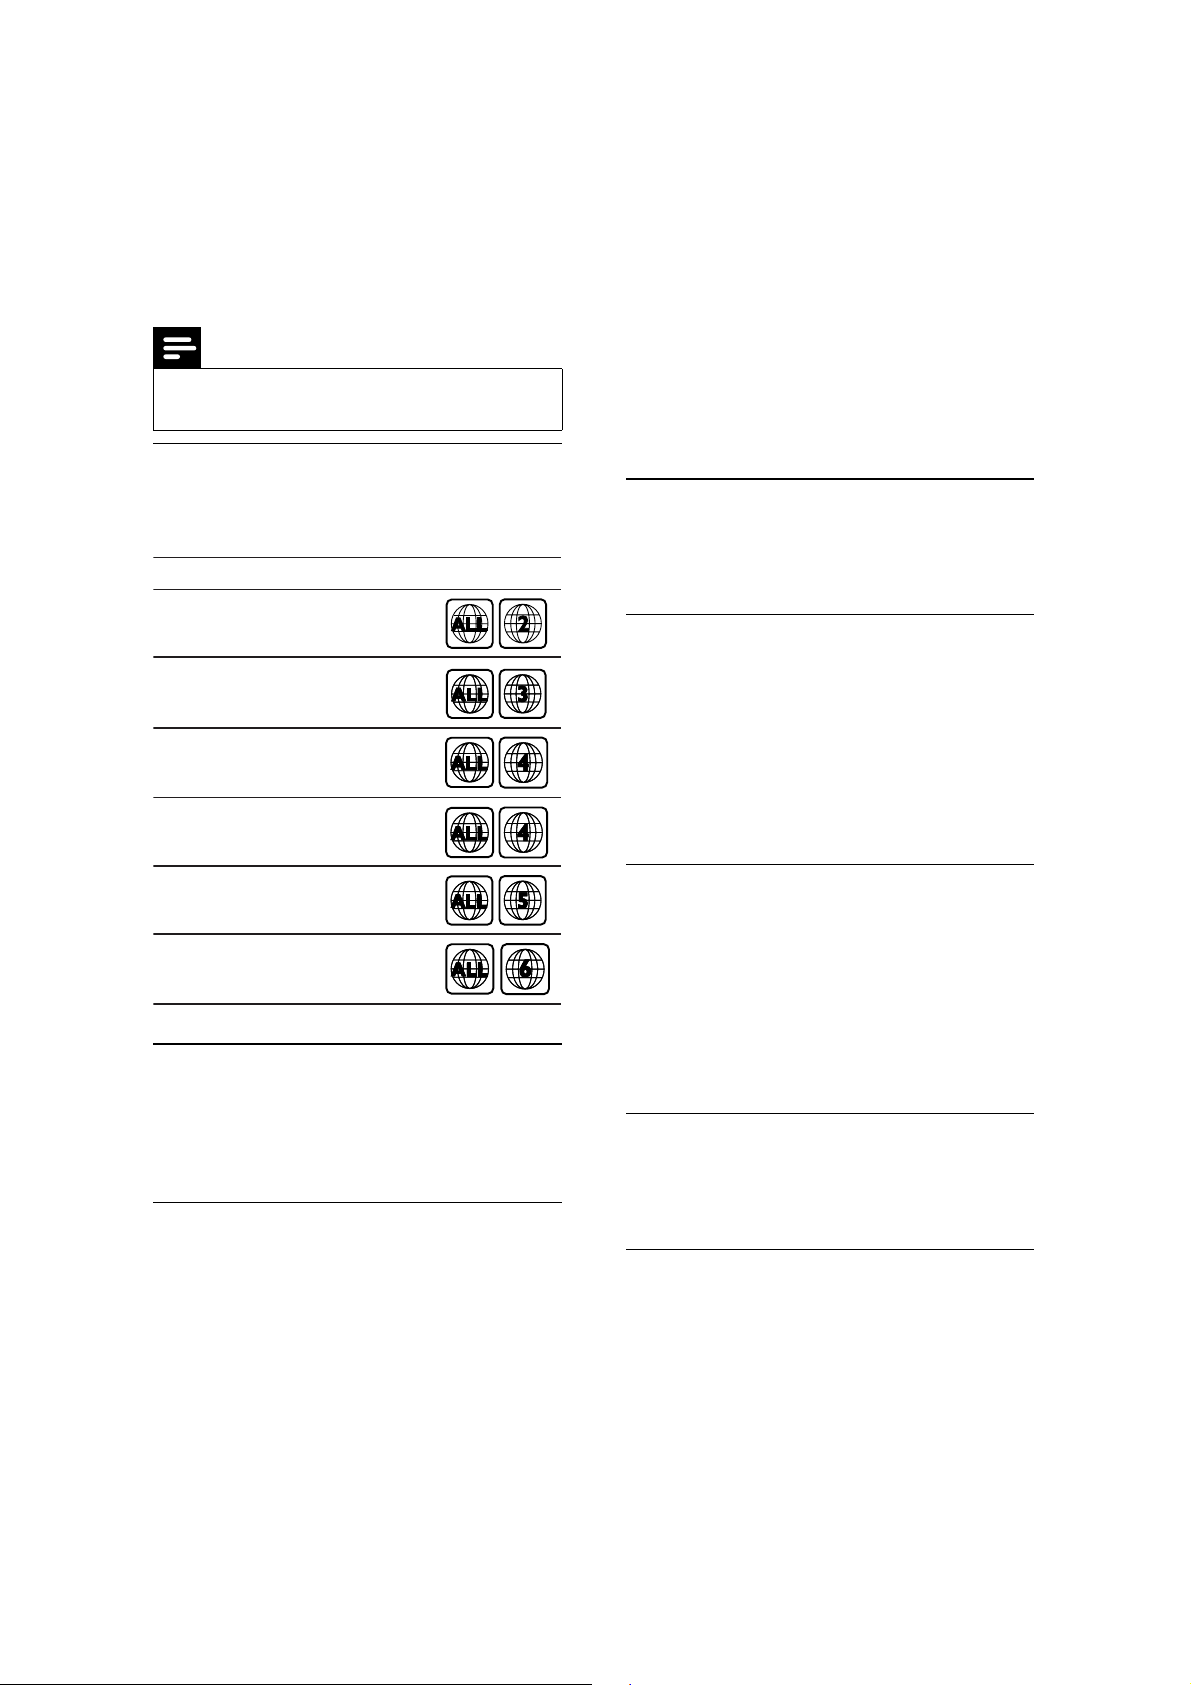
HTS3539/12:
Product Specifications:
1-3
Note
Specifi cations and design are subject to change
•
without notice.
Region codes
The type plate on the back or bottom of the
home theater shows which regions it supports.
Country
Europe, United Kingdom
Asia Pacific, Taiwan, Korea
Latin America
Australia, New Zealand
Russia, India
China
DVD
Media formats
•
DVD-Video, DVD+R/+RW, DVD-R/-RW,
DVD+R/-R DL, CD-R/CD-RW, Audio CD,
Video CD/SVCD, Picture fi les, MP3 media,
WMA media, DivX media, USB storage device
Amplifi er
•
Total output power: 600W RMS (30% THD)
Frequency response: 20 Hz-20 kHz / ±3 dB
•
•
Signal-to-noise ratio: > 65 dB (CCIR) /
(A-weighted)
•
Input sensitivity:
•
AUX: 2 V
Music iLink: 1 V
•
File formats
•
Audio: .mp3, .wma
Video: .avi, .divx, .mpg, .mpeg,
•
Picture: .jpg, .jpeg
•
Video
Signal system: PAL / NTSC
•
HDMI output: 480i/576i, 480p/576p, 720p,
•
1080i, 1080p
Audio
S/PDIF Digital audio input:
•
•
Optical: TOSLINK
Sampling frequency:
•
•
MP3: 32 kHz, 44.1 kHz, 48 kHz
•
WMA: 44.1 kHz, 48 kHz
•
Constant bit rate:
• MP3: 32 kbps - 320 kbps
WMA: 64 kbps - 192 kbps
•
Radio
Tuning range:
•
Europe/Russia/China: FM 87.5-108 MHz
•
(50 kHz)
Asia Pacifi c/Latin America: FM 87.5-108
•
MHz (50/100 kHz)
•
Signal-to-noise ratio: FM >45 dB
Frequency response: FM 200 Hz-12.5 kHz /
•
±6 dB
USB
Compatibility: Hi-Speed USB (2.0)
•
Class support: USB Mass Storage Class (MSC)
•
File system: FAT16, FAT32
•
Main unit
•
Power supply:
Europe/China/Russia/India: 220-240V~,
•
50 Hz
•
Latin America/Asia Pacifi c: 110-240V~,
50-60 Hz
•
Power consumption: 110 W
Standby power consumption: 0.9 W
•
• Dimensions (WxHxD): 360 x 58 x 325 mm
Weight: 2.52 kg
•

Subwoofer
Output power: 100 W RMS (30% THD)
•
Impedance: 4 ohm
•
Speaker drivers: 133 mm (5.25") woofer
•
Dimensions (WxHxD): 160 x 267.5 x 265 mm
•
•
Weight: 2.55 kg
Speakers
Center speaker:
•
Output power: 100 W RMS (30% THD)
•
Speaker impedance: 4 ohm
•
Speaker drivers: 1 x 63.5 mm (2.5") woofer
• Dimensions (WxHxD): 160 x 85 x 95 mm
Weight: 0.37 kg
•
Front/Rear speaker:
Output power: 4 x 100 W RMS (30% THD)
•
•
Speaker impedance: 4 ohm
Speaker drivers: 1 x 76.2 mm (3") twin driver
•
•
Dimensions (WxHxD):
Speakers: 85 x 160 x 95mm
•
•
Tall speakers: 240 x 1007 x 240 mm
•
Weight:
Speakers: 0.35 kg/each
•
• Tall speakers: 1.57 kg/each
1-4
Remote control batteries
2 x AAA-R03-1.5 V
•
Laser
Type: Semiconductor laser GaAIAs (CD)
•
Wave length: 645 - 665 nm (DVD), 770 - 800
•
nm (CD)
Output power: 6 mW (DVD), 7 mW (VCD/CD)
•
•
Beam divergence: 60 degrees.
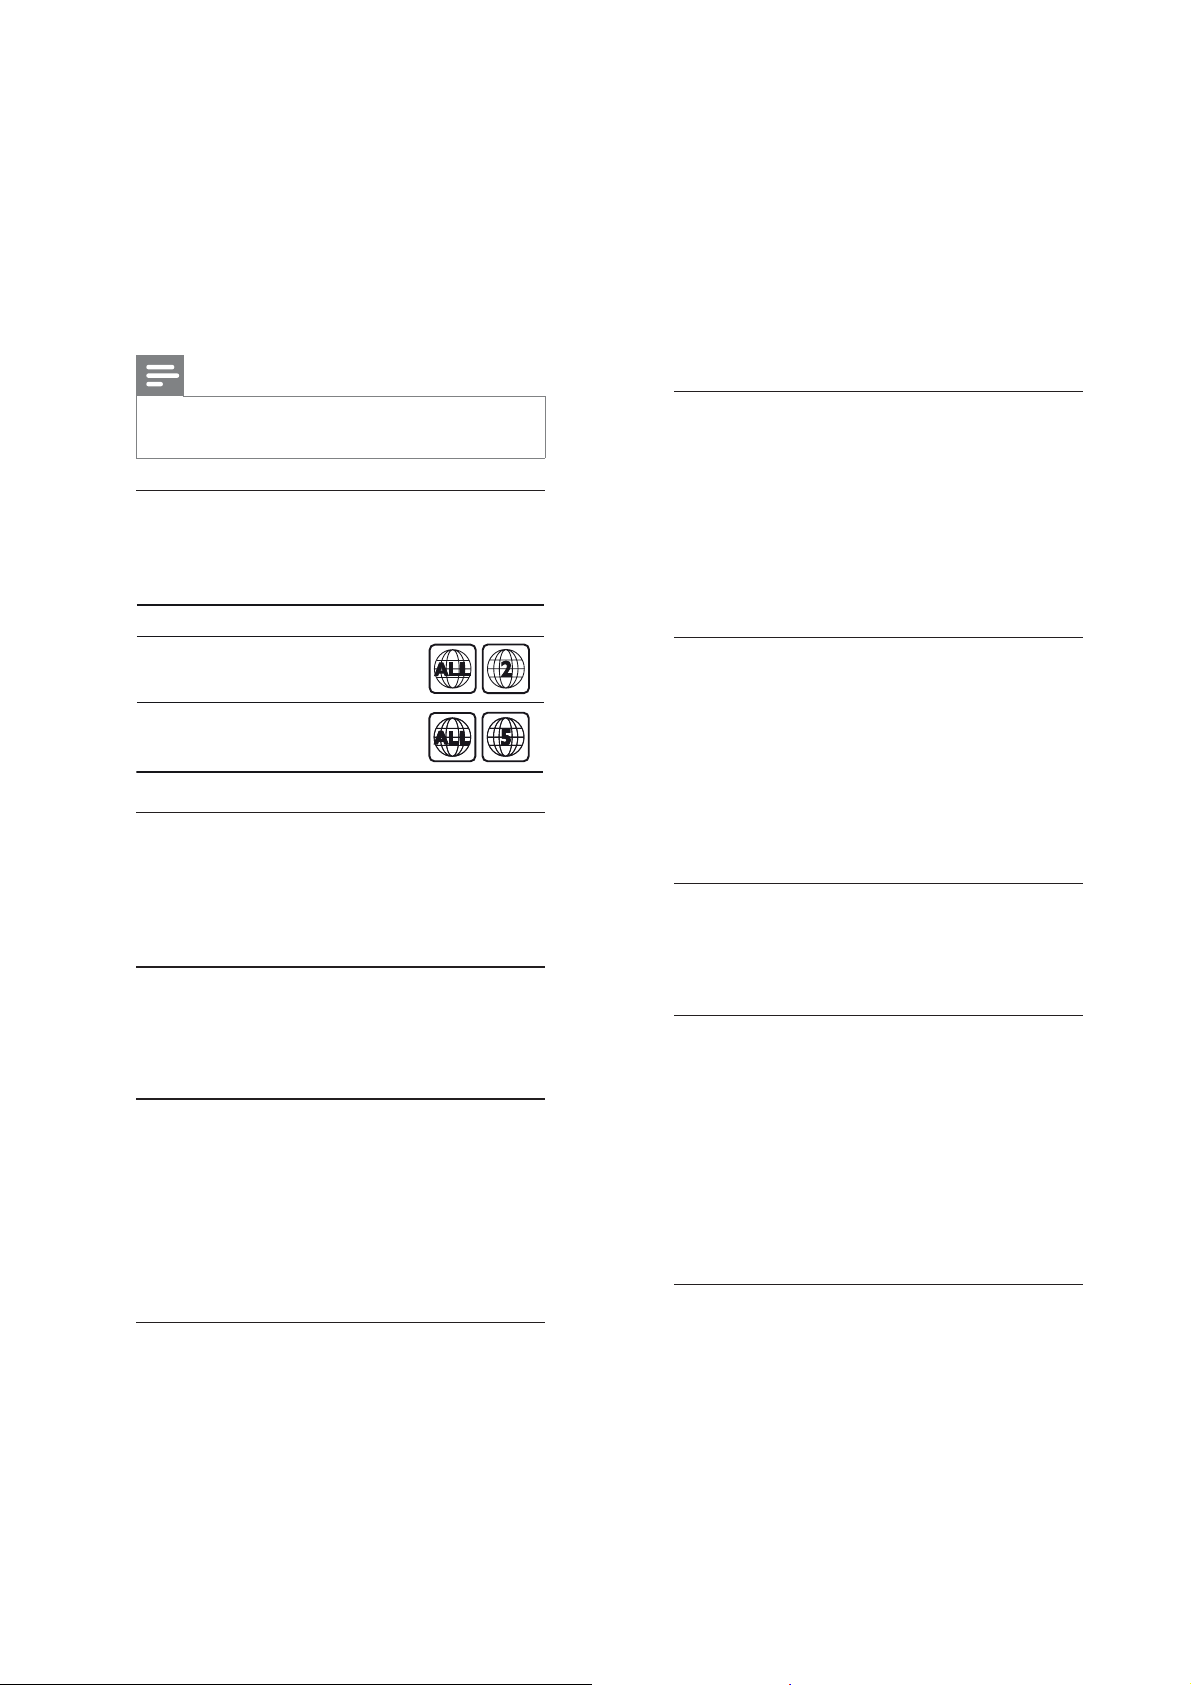
HTS3539/51:
Product Specifications:
Note
1-5
Specifi cations and design are subject to change
•
without notice.
Region codes
The type plate on the back or bottom of the
home theater shows which regions it supports.
Country
Europe, United Kingdom
Russia, India
DVD
Media formats
DVD-Video, DVD+R/+RW, DVD-R/-RW,
•
DVD+R/-R DL, CD-R/CD-RW, Audio CD,
Video CD/SVCD, Picture fi les, MP3 media,
WMA media, DivX media, USB storage device
File formats
Audio
•
S/PDIF Digital audio input:
•
Optical: TOSLINK
Sampling frequency:
•
MP3: 32 kHz, 44.1 kHz, 48 kHz
•
WMA: 44.1 kHz, 48 kHz
•
Constant bit rate:
•
MP3: 32 kbps - 320 kbps
•
•
WMA: 64 kbps - 192 kbps
Radio
•
Tuning range:
•
Europe/Russia/China: FM 87.5-108 MHz
(50 kHz)
Asia Pacifi c/Latin America: FM 87.5-108
•
MHz (50/100 kHz)
Signal-to-noise ratio: FM >45 dB
•
Frequency response: FM 200 Hz-12.5 kHz /
•
±6 dB
USB
•
Compatibility: Hi-Speed USB (2.0)
•
Class support: USB Mass Storage Class (MSC)
• File system: FAT16, FAT32
Audio: .mp3, .wma
•
Video: .avi, .divx, .mpg, .mpeg,
•
Picture: .jpg, .jpeg
•
Amplifi er
Total output power: 600W RMS (30% THD)
•
•
Frequency response: 20 Hz-20 kHz / ±3 dB
•
Signal-to-noise ratio: > 65 dB (CCIR) /
(A-weighted)
• Input sensitivity:
•
AUX: 2 V
Music iLink: 1 V
•
Video
Signal system: PAL / NTSC
•
•
HDMI output: 480i/576i, 480p/576p, 720p,
1080i, 1080p
Main unit
Power supply:
•
•
Europe/China/Russia/India: 220-240V~,
50 Hz
Latin America/Asia Pacifi c: 110-240V~,
•
50-60 Hz
•
Power consumption: 110 W
•
Standby power consumption: 0.9 W
• Dimensions (WxHxD): 360 x 58 x 325 mm
Weight: 2.52 kg
•
Subwoofer
•
Output power: 100 W RMS (30% THD)
Impedance: 4 ohm
•
•
Speaker drivers: 133 mm (5.25") woofer
•
Dimensions (WxHxD): 160 x 267.5 x 265 mm
•
Weight: 2.55 kg

Speakers
Center speaker:
•
Output power: 100 W RMS (30% THD)
•
Speaker impedance: 4 ohm
• Speaker drivers: 1 x 63.5 mm (2.5") woofer
Dimensions (WxHxD): 160 x 85 x 95 mm
•
Weight: 0.37 kg
•
Front/Rear speaker:
•
Output power: 4 x 100 W RMS (30% THD)
Speaker impedance: 4 ohm
•
Speaker drivers: 1 x 76.2 mm (3") twin driver
•
•
Dimensions (WxHxD):
Speakers: 85 x 160 x 95mm
•
•
Tall speakers: 240 x 1007 x 240 mm
•
Weight:
• Speakers: 0.35 kg/each
Tall speakers: 1.57 kg/each
•
1-6
Remote control batteries
2 x AAA-R03-1.5 V
•
Laser
Type: Semiconductor laser GaAIAs (CD)
•
•
Wave length: 645 - 665 nm (DVD), 770 - 800
nm (CD)
Output power: 6 mW (DVD), 7 mW (VCD/CD)
•
Beam divergence: 60 degrees.
•

1-7
Safety instruction, Warning & Notes
Safety instruction
1. General safety
Safety regulations require that during a repair:
. Connect the unit to the mains via an isolation transformer.
. Replace safety components indicated by the symbol
only by components identical to the original ones. Any
other component substitution (other than original type)
may increase risk of fire or electrical shock hazard.
Safety regulations require that after a repair, you must
return the unit in its original condition. Pay, in particular,
attention to the following points:
. Route the wires/cables correctly, and fix them with the
mounted cable clamps.
. Check the insulation of the mains lead for external
damage.
. Check the electrical DC resistance between the mains
plug and the secondary side:
1) Unplug the mains cord, and connect a wire between
the two pins of the mains plug.
2) Set the mains switch the “on” position (keep the
mains cord unplug).
3) Measure the resistance value between the mains
plug and the front panel, controls, and chassis
bottom.
4) Repair or correct unit when the resistance
measurement is less than 1M
5) Verify this, before you return the unit to the
customer/user (ref. UL-standard no. 1492).
6) Switch the unit “off”, and remove the wire between
the two pins of the mains plug.
¡
.
2.Laser safety
This unit employs a laser. Only qualified service personnel
,
may remove the cover, or attempt to service this device
(due to possible eye injury).
Laser device unit
Type : Semiconductor laser GaAlAs
Wavelength : 650nm (DVD)
: 780nm (VCD/CD)
Output power : 7mW (DVD)
: 10mW (DVD /CD)
Beam divergence: 60 degree
Note: Use of controls or adjustments or performance of
procedure other than those specified herein, may result in
hazardous radiation exposure. Avoid direct exposure to
beam.

Warning
1-8
1.General
. All ICs and many other semiconductors are susceptible to
electrostatic discharges (ESD). Careless handing during
repair can reduce life drastically. Make sure that, during
repair, you are at the same potential as the mass of the
set by a wristband with resistance. Keep components and
tools at this same potential. Available ESD protection
equipment:
1) Complete kit ESD3 (small tablemat, wristband,
connection box, extension cable and earth cable)
4822 310 10671.
2) Wristband tester 4822 344 13999.
. Be careful during measurements in the live voltage
section. The primary side of the power supply , including
the heat sink, carries live mains voltage when you
connect the player to the mains (even when the player is
“off”!). It is possible to touch copper tracks and/or
components in this unshielded primary area, when you
service the player. Service personnel must take
precautions to prevent touching this area or components
in this area. A “lighting stroke” and a stripe-marked
printing on the printed wiring board, indicate the primary
side of the power supply.
. Never replace modules, or components, while the unit is
“on”.
2. Laser
. The use of optical instruments with this product, will
increase eye hazard.
. Only qualified service personnel may remove the cover
or attempt to service this device, due to possible eye
injury.
. Repair handing should take place as much as possible
with a disc loaded inside the player.
. Text below is placed inside the unit, on the laser cover
shield:
CAUTION: VISIBLE AND INVISIBLE LASER
RADIATION WHEN OPEN, AVOID EXPOSURE
TO BEAM.
Notes: Manufactured under licence from Dolby
Laboratories. The double-D symbol is trademarks of Dolby
Laboratories, Inc. All rights reserved.

1-9
6HUYLFH+LQWV
&$87,21
&+$5*('&$3$&,7256217+(6(592%2$5'0$<'$0$*(7+('5,9(
(/(&7521,&6:+(1&211(&7,1*$1(:'5,9(7+$7¶6:+<%(6,'(67+(6$)(7<
0($685(6/,.(
6:,7&+2))32:(56833/<
(6'3527(&7,21
$'',7,21$/$&7,2160867%(7$.(1%<7+(5(3$,57(&+1,&,$1
7KHIROORZLQJVWHSVKDYHWREHGRQHZKHQUHSODFLQJWKHGHIHFWLYHORDGHU
'LVPDQWOLQJRIWKHORDGHUWRDFFHVVWKH(6'SURWHFWLRQSRLQWLIQHFHVVDU\
6ROGHUWKH(6'SURWHFWLRQSRLQW
'LVFRQQHFWÀH[IRLOFDEOHIURPWKHGHIHFWLYHORDGHU
3XWDSDSHUFOLSRQWKHÀH[IRLOWRVKRUWFLUFXLWWKHFRQWDFWV¿J
5HSODFHWKHGHIHFWLYHORDGHUZLWKDQHZORDGHU
5HPRYHSDSHUFOLSIURPWKHÀH[IRLODQGFRQQHFWLWWRWKHQHZORDGHU
5HPRYHVROGHUMRLQWRQWKH(6'SURWHFWLRQSRLQW
$77(17,217KHODVHUGLRGHRIWKLVORDGHULVSURWHFWHGDJDLQVW(6'E\DVROGHUMRLQWZKLFKVKRUWFLUFXLWVWKHODVHUGLRGHWRJURXQG
)RUSURSHUIXQFWLRQDOLW\RIWKHORDGHUWKLVVROGHUMRLQWPXVWEHUHPRYHDIWHUFRQQHFWLRQORDGHUWRWKHVHW
Solder Joint
2QO\DSSOLFDEOHIRUGHIHFWLYHORDGHUQHHGHGWREHVHQWEDFNWRVXSSOLHUIRUIDLOXUHDQDO\VLVDQGWRVXSSRUWEDFNFKDUJLQJ
HYLGHQFH
7KLVLVDOVRDSSOLFDEOHIRUDOOSDUWQHUVKLSZRUNVKRSV
(6'SURWHFWLRQSRLQWLVDFFHVVLEOHIURPWRSRIORDGHU

Notes
Lead-Free requirement for service
1-10
INDENTIFICATION:
Regardless of special logo (not always indicated)
One must treat all sets from 1.1.2005 onwards, according
next rules.
Important note: In fact also products a little older can also
be treated in this way as long as you avoid mixing
solder-alloys (leaded/ lead-free). So best to always use
SAC305 and the higher temperatures belong to this.
Due to lead-free technology some rules have to be
respected by the workshop during a repair:
x Use only lead-free solder alloy Philips SAC305 with
order code 0622 149 00106. If lead-free solder-paste is
required, please contact the manufacturer of your
solder-equipment. In general use of solder-paste within
workshops should be avoided because paste is not easy
to store and to handle.
x Use only adequate solder tools applicable for lead-free
solder alloy. The solder tool must be able
o To reach at least a solder-temperature of 400°C,
o To stabilize the adjusted temperature at the
solder-tip
o To exchange solder-tips for different applications.
x Adjust your solder tool so that a temperature around
360°C
– 380°C is reached and stabilized at the solder
joint. Heating-time of the solder-joint should not exceed
~ 4 sec. Avoid temperatures above 400°C otherwise
wear-out of tips will rise drastically and flux-fluid will be
destroyed. To avoid wear-out of tips switch off un-used
equipment, or reduce heat.
x Mix of lead-free solder alloy / parts with leaded solder
alloy / parts is possible but PHILIPS recommends
strongly to avoid mixed
solder alloy types (leaded and lead-free). If one cannot
avoid, clean carefully the
solder-joint from old solder alloy and re-solder with new
solder alloy (SAC305).
x Use only original spare-parts listed in the
Service-Manuals. Not listed standard-material
(commodities) has to be purchased at external
companies.
x Special information for BGA-ICs:
- always use the 12nc-recognizable soldering
temperature profile of the specific BGA (for
de-soldering always use highest lead-free
temperature profile, in case of doubt)
- lead free BGA-ICs will be delivered in so-called
‘dry-packaging’ (sealed pack including a silica gel
pack) to protect the IC against moisture. After
opening, dependent of MSL-level seen on
indicator-label in the bag, the BGA-IC possibly
still has to be baked dry. This will be
communicated via AYS-website.
Do not re-use BGAs at all.
x For sets produced before 1.1.2005, containing
leaded soldering-tin and components, all needed
spare-parts will be available till the end of the
service-period. For repair of such sets nothing
changes.
x On our website:
www.atyourservice.ce.Philips.com
You find more information to:
BGA-de-/soldering (+ baking instructions)
Heating-profiles of BGAs and other ICs used in
Philips-sets
You will find this and more technical information
within the “magazine”, chapter “workshop news”.
For additional questions please contact your local
repair-helpdesk.

2-1
EN Before using your product, read all accompanying safety
information
CS Pŏed použitím produktu si pŏeĈtĖte doprovodné
bezpeĈnostní informace
DA Læs alle medfølgende sikkerhedsoplysninger, inden du
tager produktet i brug
DE Lesen Sie vor Verwendung dieses Produkts alle
begleitenden Sicherheitsinformationen
EL ƑƱƩƭ ƷƱƧƳƩƬƯưƯƩƞƳƥƴƥ ƴƯ ưƱƯƺƼƭ, ƤƩơƢƜƳƴƥ ƼƫƥƲ ƴƩƲ
ươƱƥƷƼƬƥƭƥƲ ưƫƧƱƯƶƯƱƟƥƲ ơƳƶƜƫƥƩơƲ
ES Antes de usar el producto, lea toda la información de
seguridad adjunta
FI Lue kaikki turvallisuustiedot ennen tuotteen käyttöä
FR Avant d’utiliser votre produit, lisez l’intégralité des con-
signes de sécurité jointes
HU A termék használata elʼntt alaposan olvassa el a mellékelt
biztonsági tudnivalókat
IT Prima di utilizzare il prodotto, leggere tutte le relative
informazioni sulla sicurezza
NL Lees voordat u het product gaat gebruiken eerst alle
bijbehorende veiligheidsinformatie
NO Lees voordat u het product gaat gebruiken eerst alle
bijbehorende veiligheidsinformatie
PL Przed rozpoczĔciem korzystania z produktu naleůy
zapoznaĂ siĔ z informacjami dotyczĀcymi bezpieczeļstwa
PT Antes de utilizar o produto, leia todas as informações de
segurança que o acompanham
RO Înainte de a utiliza acest produs, citiŗi toate informaŗiile de
siguranŗþ care îl însoŗesc
SK Pred použitím produktu si preĈítajte všetky sprievodné
bezpeĈnostné informácie maklumat keselamatan yang
disertakan
SV Innan du använder produkten ska du läsa all tillhörande
säkerhetsinformation
TR Ürününüzü kullanmadan önce ilgili tüm güvenlik bilgilerini
okuyun
User manual
2x
2x
4x
2x
2x
1
2-2
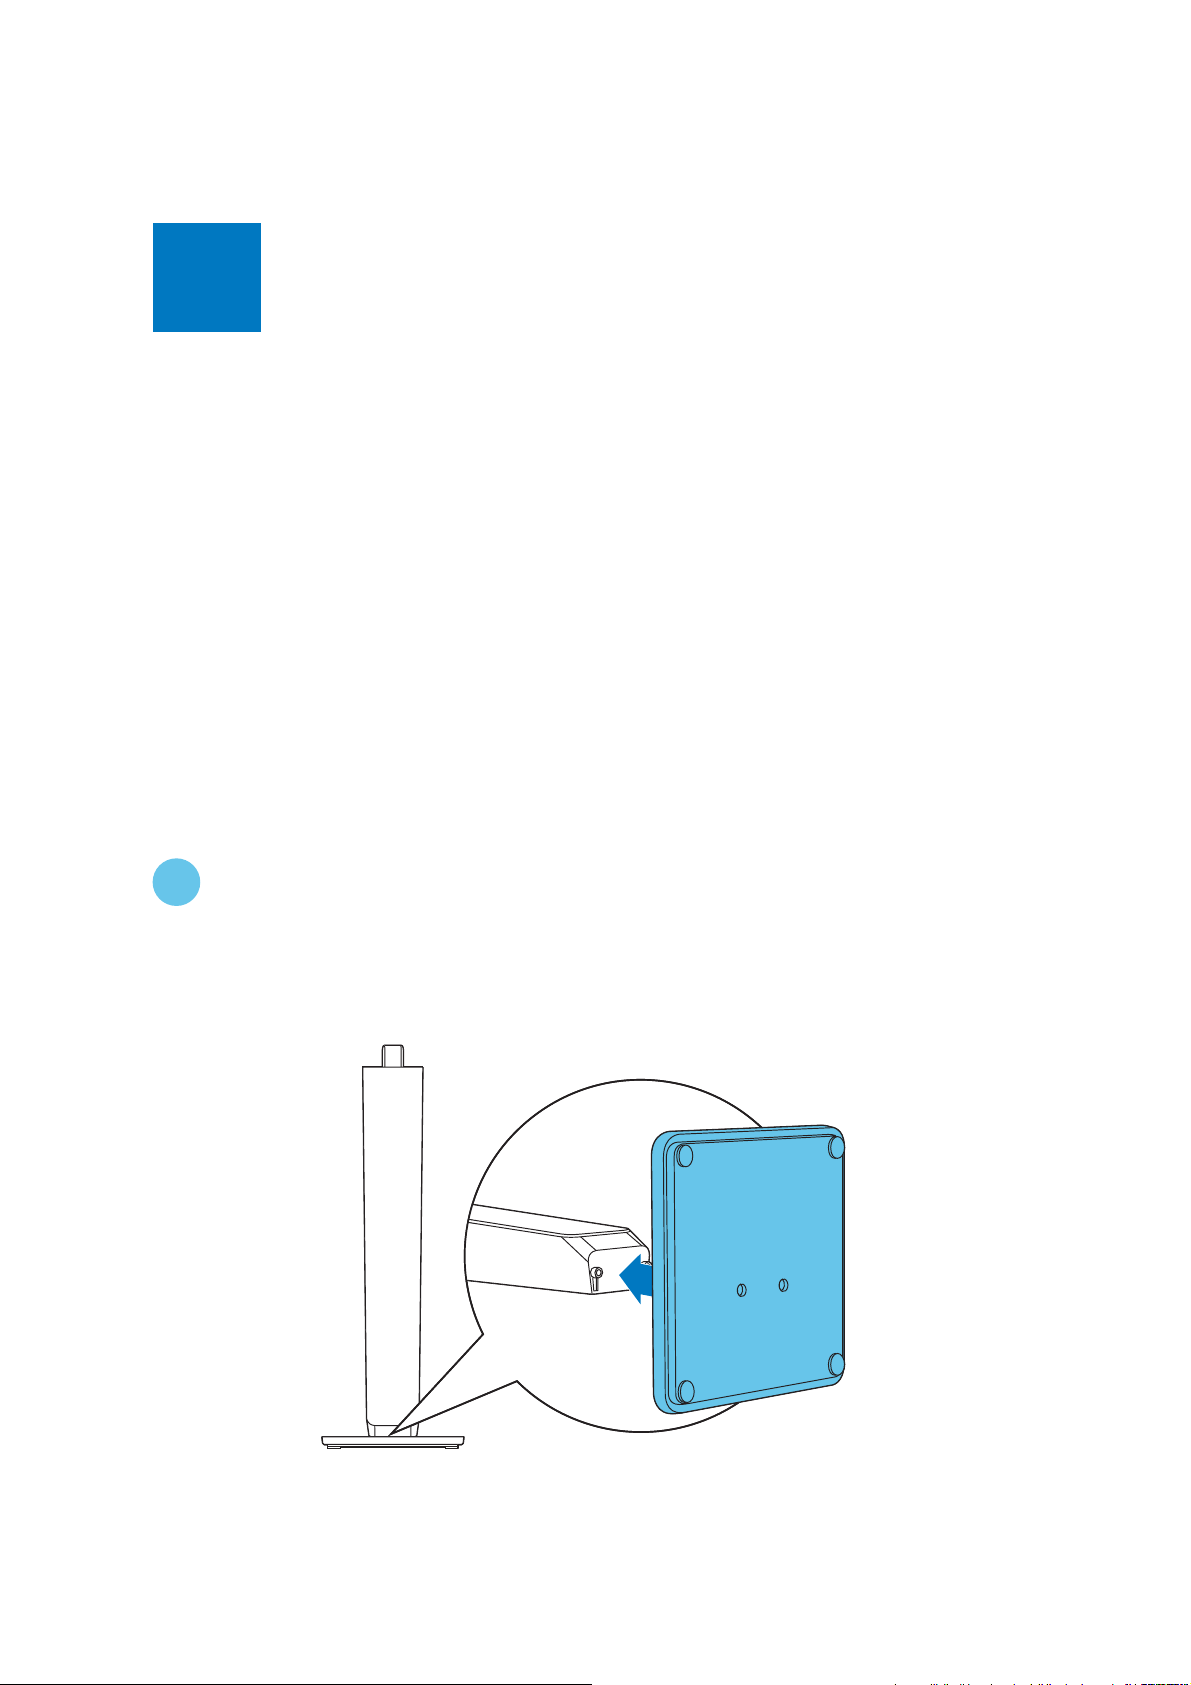
EN Stand mount the speakers
CS Nainstalujte reproduktory
DA Monter højttalerne på fod
DE Montage der Lautsprecher auf den Standfüßen
EL ƓƴƞƳƴƥ ƴơ ƧƷƥƟơ ưƜƭƹ ƳƴƩƲ ƢƜƳƥƩƲ
ES Monta los altavoces en la pared
FI Kaiuttimien kiinnitys jalustaan
FR Monter le pied des enceintes
HU A hangsugárzók állványra szerelése
1
IT Montaggio degli altoparlanti su supporto
NL Monteer de luidsprekers op de standaarden
NO Montere høyttalerne på stativ
PL Montaů gãoőników na podstawie
PT Colocar os altifalantes no suporte
RO Montaŗi pe suport boxele
SK Montáž reproduktorov na stojan
SV Montera högtalarna på stativ
TR Hoparlörleri kaideye monte edin
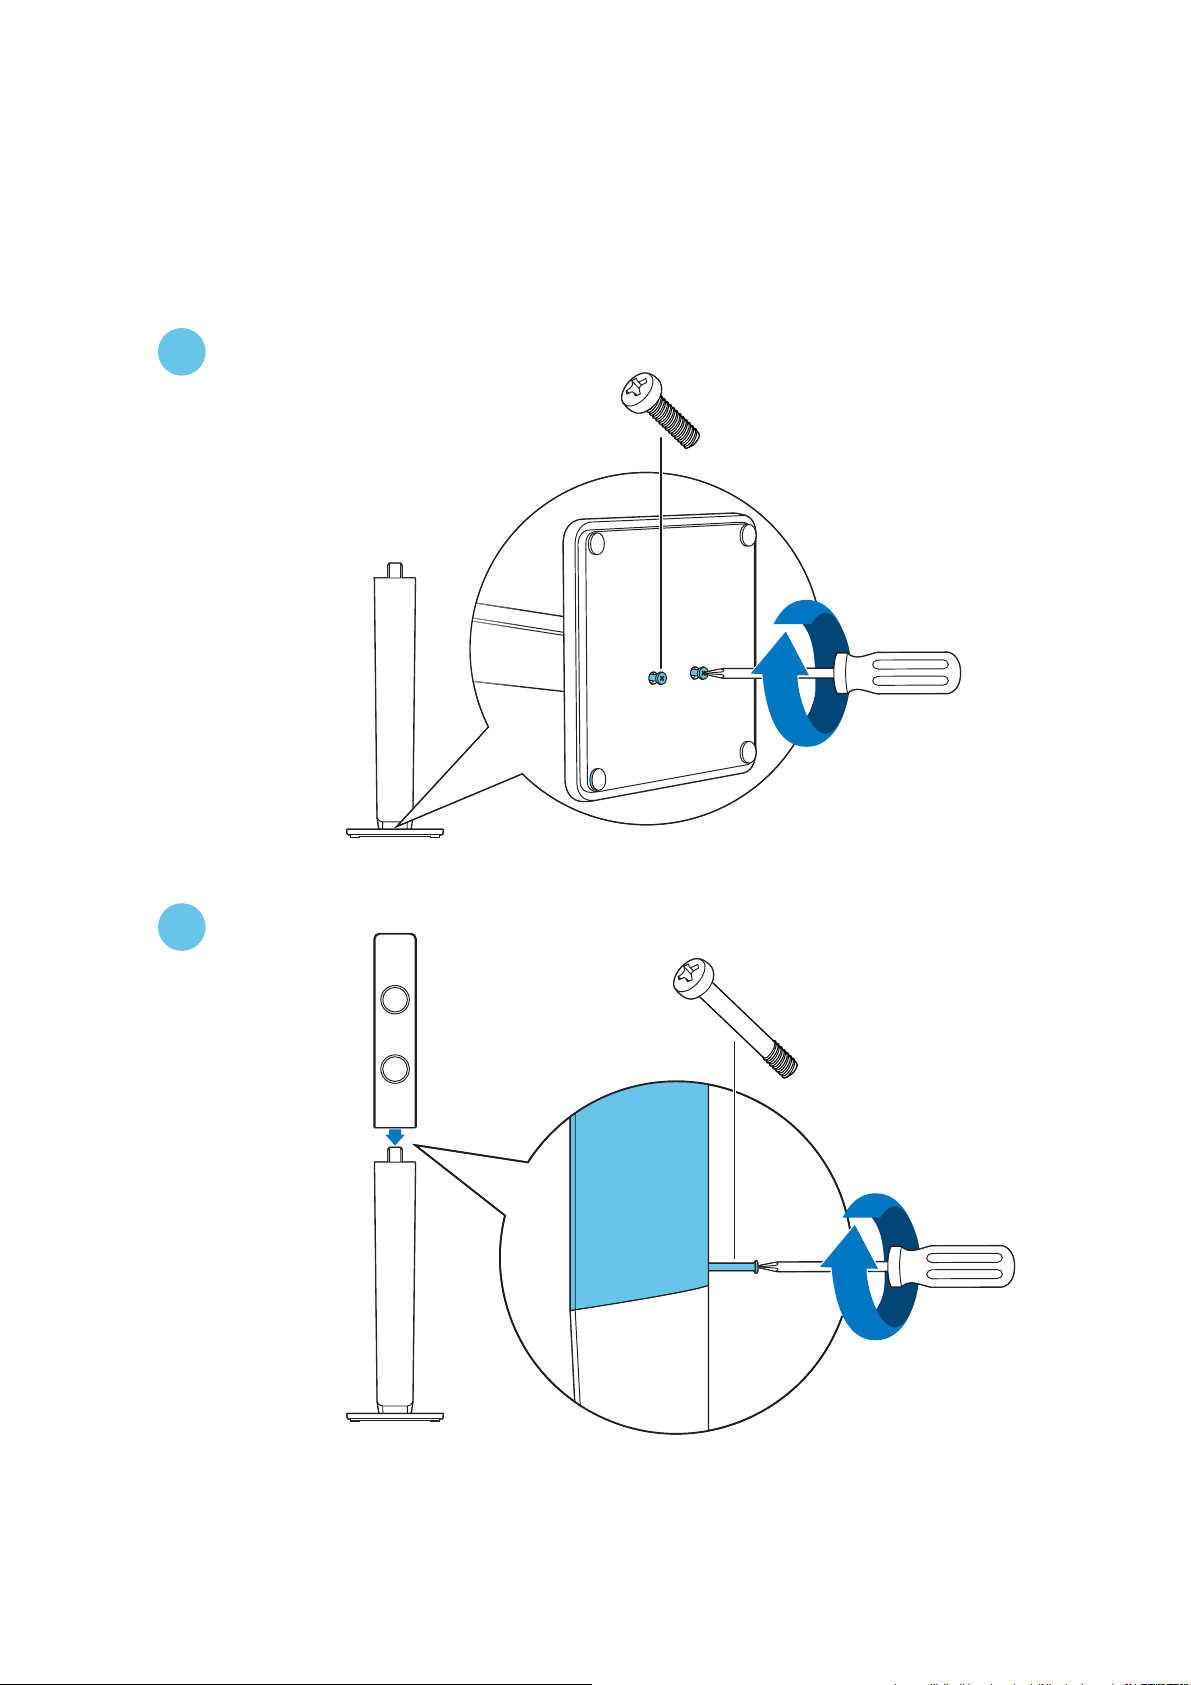
2
2-3
2x
3
1x
2
2-4
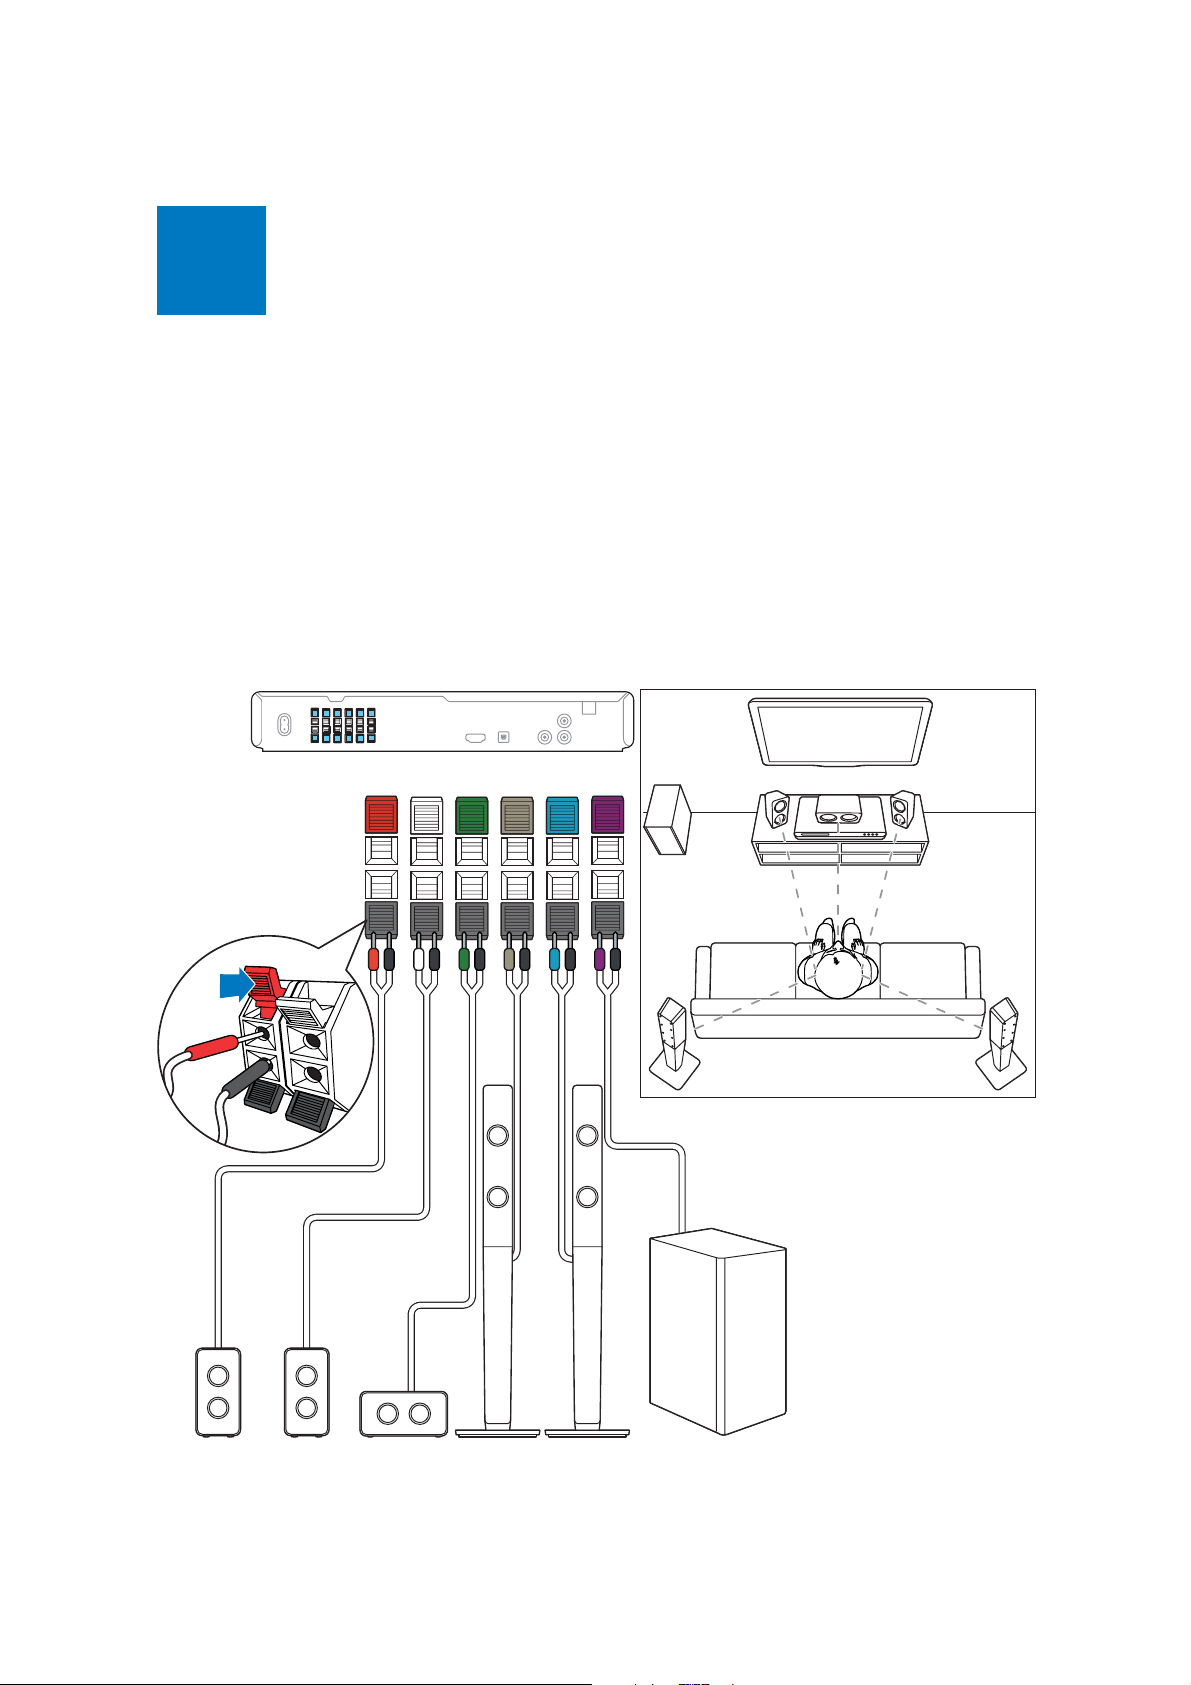
EN Connect the home theater
CS Pŏipojte domácí kino
DA Tilslut hjemmebiografen
DE Anschließen des Home
Entertainment-Systems
EL ƓƵƭƤƝƳƴƥ ƴƯ home cinema
ES Conecta el sistema de cine en casa
FI Kotiteatterin liitännät
FR Connecter les enceintes au Home Cinéma
HU A házimozi csatlakoztatása
IT Collegamento del sistema Home Theater
FRONT
FRONT
RIGHT
LEFT
CENTER
FRONT
REAR
RIGHT
REAR
LEFT
NL Sluit de home cinema aan
NO Koble til hjemmekinoanlegget
PL PodãĀczanie zestawu kina domowego
PT Efectuar as ligações ao sistema de cinema em casa
RO Conectaŗi sistemul home theater
SK Pripojenie k domácemu kinu
SV Anslut hemmabiosystemet
TR Ev sinemasını baĚlayın
SUB-
WOOFER
SUB
WOOFER
FRONT
LEFT
FRONT
CENTER
FRONT
RIGHT
FRONT
RIGHT
FRONT
LEFT
FRONT
CENTER
REAR
RIGHT
REAR
LEFT
REAR
LEFT
SUB
WOOFER
REAR
RIGHT
3
2-5
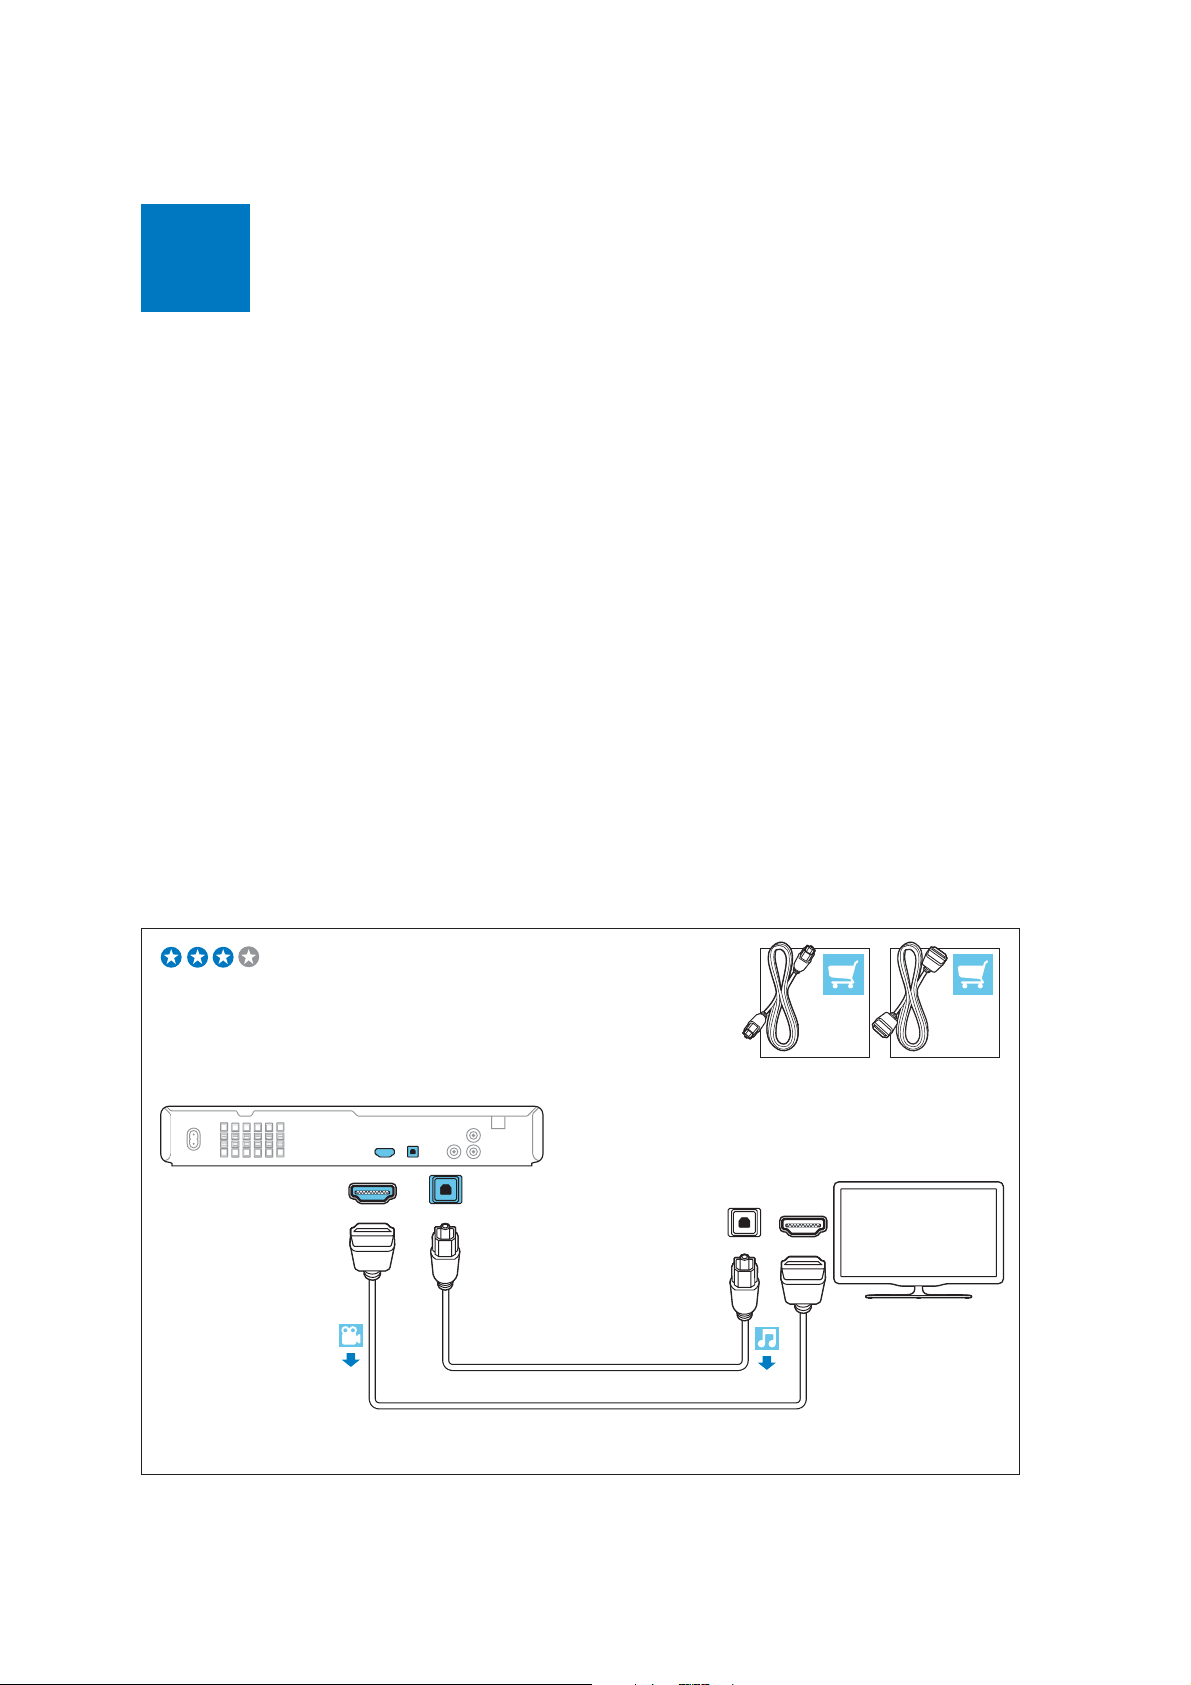
EN Connect to TV in one of these ways
CS Pŏipojení k televizoru proveĊte jedním z následujících
zpţsobţ
DA Tilslut til TV på en af følgende måder
DE Herstellen einer Verbindung mit dem Fernseher über
einer dieser Möglichkeiten
EL ƓƵƭƤƥƨƥƟƴƥ ƳƴƧƭ ƴƧƫƥƼƱơƳƧ Ƭƥ Ɲƭơƭ ơưƼ ƴƯƵƲ
ươƱơƪƜƴƹ ƴƱƼưƯƵƲ
ES Conexión al televisor de una de estas maneras
FI Liitä televisioon jommallakummalla tavalla
FR Connectez-vous au téléviseur via l’une de ces méthodes
HU Csatlakoztassa a tv-készülékhez az alábbi módok egyike
szerint
IT Esegui il collegamento al TV in uno dei modi indicati di
seguito
NL Maak op een van de volgende manieren verbinding met
de TV
NO Koble til TVen på en av følgende måter
PL PodãĀcz do telewizora przy uůyciu jednej z tych metod
PT Ligar ao televisor de uma destas formas
RO Conectaŗi-vþ la televizor într-unul din aceste moduri
SK Pripojte zariadenie k televízoru jedným z týchto
spôsobov
SV Anslut till TV:n på något av följande sätt
TR AŕaĚıdaki yöntemlerden biriyle TV’ye baĚlanın
HDMI + OPTICAL
HDMI OUT
OPTICAL IN
OPTICAL OUT
OPTICAL
HDMI IN
HDMI
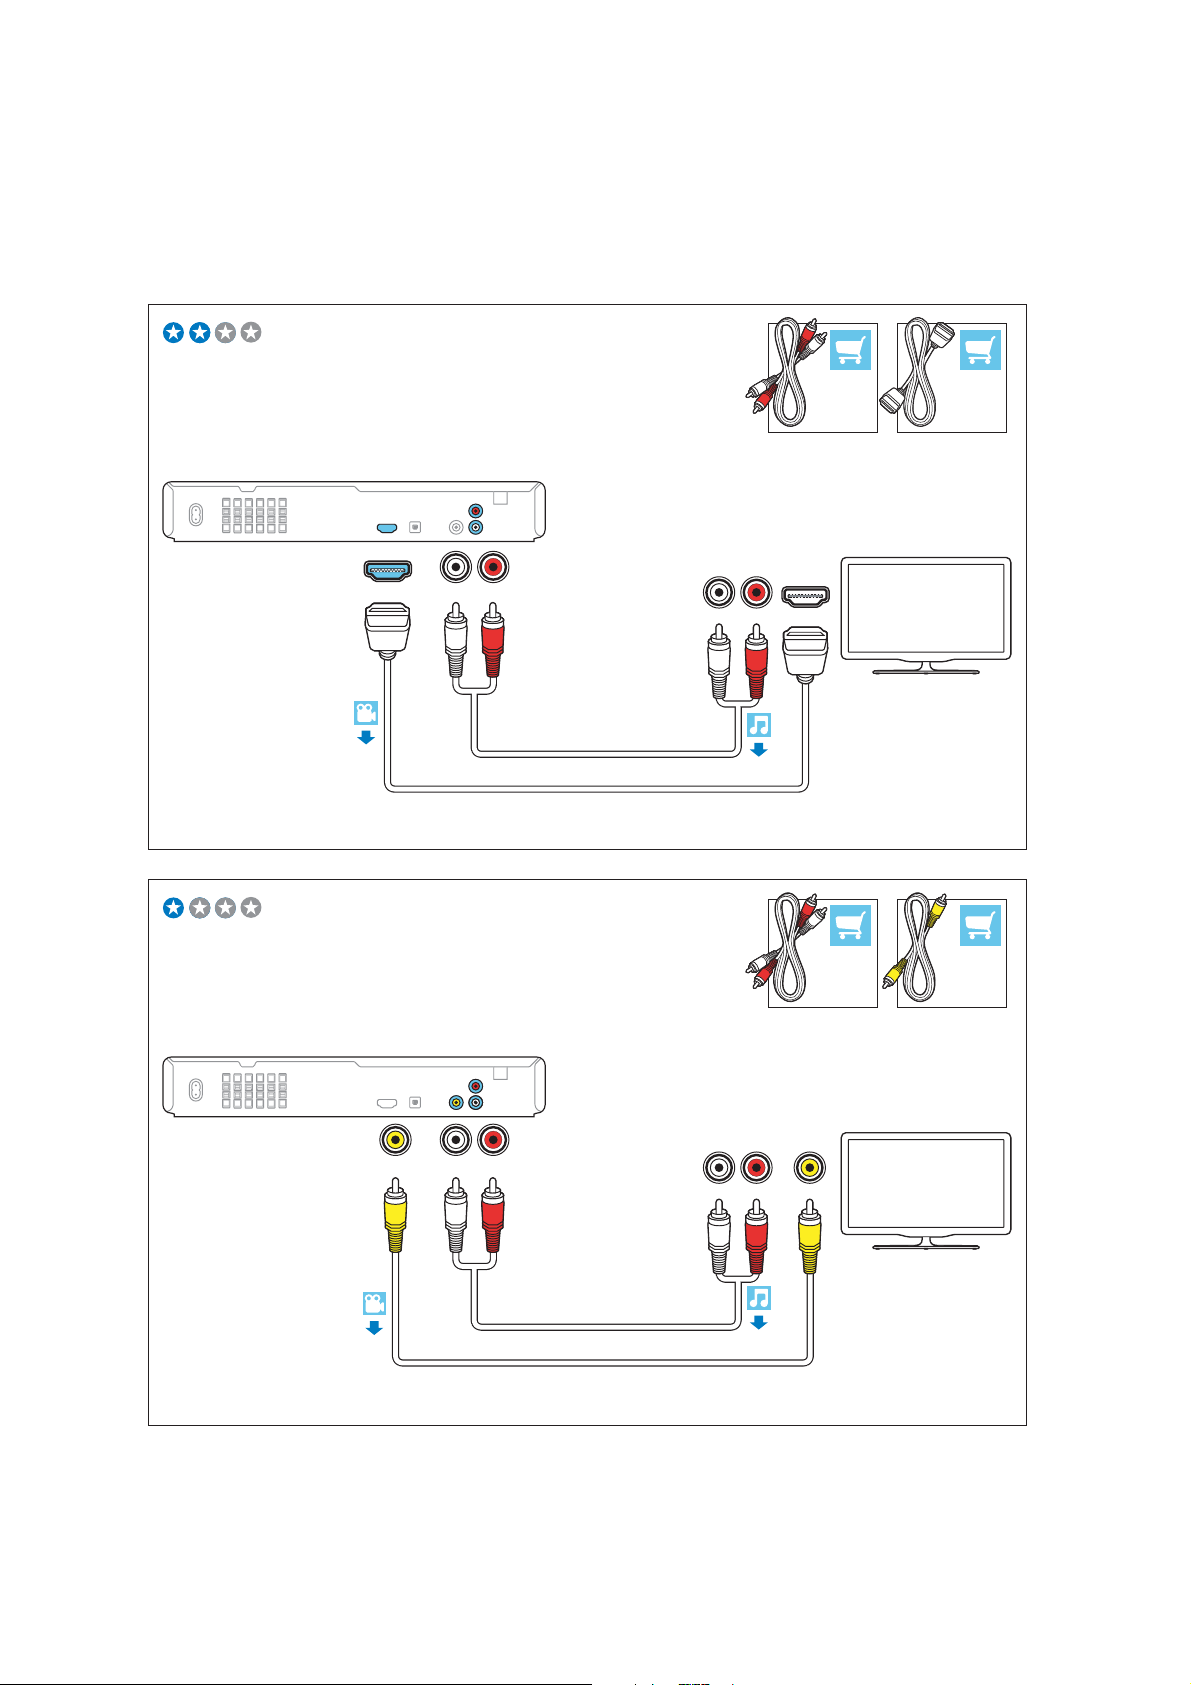
HDMI + AUDIO L/R
HDMI OUT
AUDIO IN
2-6
AUDIO L/R HDMI
RL
LR
AUDIO OUT
HDMI IN
VIDEO + AUDIO L/R
VIDEO OUT
AUDIO IN
AUDIO L/R VIDEO
RL
LR
AUDIO OUT
VIDEO IN
4
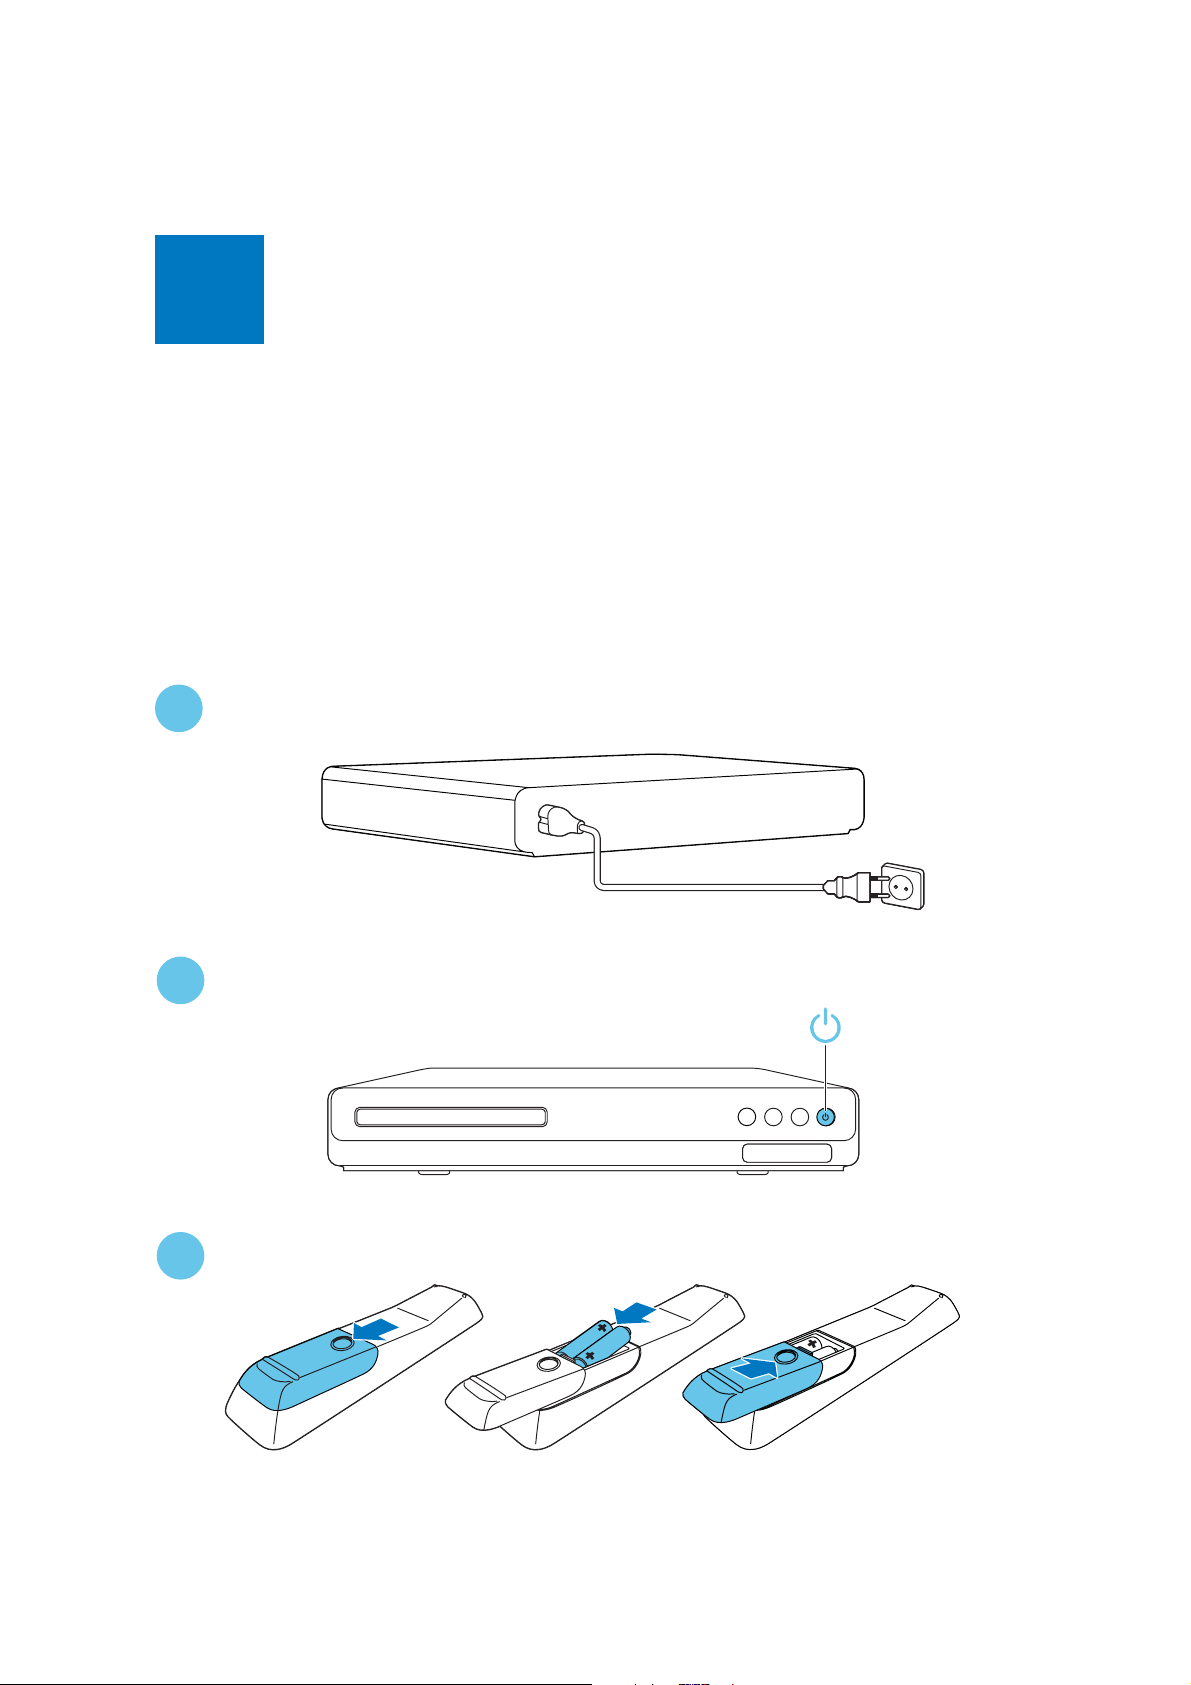
2-7
EN Switch on the home theater
CS ZapnĖte domácí kino
DA Tænd for hjemmebiografen
DE Einschalten des Home
Entertainment-Systems
EL ƆƭƥƱƣƯưƯƩƞƳƴƥ ƴƯ home cinema
ES Enciende el sistema de cine en casa
FI Virran kytkeminen kotiteatteriin
FR Mettre sous tension le Home Cinéma
HU A házimozi bekapcsolása
IT Accensione del sistema Home Theater
1
NL Schakel de home cinema in
NO Slå på hjemmekinoanlegget
PL WãĀczanie zestawu kina domowego
PT Ligar o sistema de cinema em casa
RO Porniŗi sistemul home theater
SK Zapnutie domáceho kina
SV Sätt på hemmabiosystemet
TR Ev sinemasını açın
2
3
 Loading...