

Philips HP6527 User Manual

Always here to help you
Register your product and get support at
www.philips.com/welcome
HP6527
User manual

1

ENGLISH 4
DANSK 14
DEUTSCH 24
ΕΛΛΗΝΙΚΑ 34
ESPAÑOL 45
SUOMI 55
FRANÇAIS 65
ITALIANO 75
NEDERLANDS 85
NORSK 95
PORTUGUÊS 105
PORTUGUÊS DO BRASIL 115
SVENSKA 125
TÜRKÇE 135
繁體中文 145
HP6527

4
ENGLISH
Introduction
Congratulations on your purchase and welcome to Philips! To fully benet
from the support that Philips offers, register your product at
www.philips.com/welcome.
General description (Fig. 1)
1 Trimming comb
2 Shaving head
3 Double wavy massage attachment
4 Sensitive area cap
5 Epilating discs
6 Epilating head
7 On/off button
- press once for speed II
- press twice for speed I
- press three times to switch off
8 Charging light (white) with battery-low indication (red)
9 Socket for small plug
10 Adapter
11 Storage pouch
12 Cleaning brush
Important
Read this user manual carefully before you use the appliance and save it for
future reference.
Danger
- Keep the adapter dry.
Warning
- Only use the adapter supplied.
- If the adapter is damaged, always have it replaced with one of the
original type in order to avoid a hazard.
- This appliance can be used by children aged from 8 years and above
and persons with reduced physical, sensory or mental capabilities or
lack of experience and knowledge if they have been given supervision
or instruction concerning use of the appliance in a safe way and
understand the hazards involved.
- Children shall not play with the appliance.
- Cleaning and user maintenance shall not be made by children without
supervision.
- The adapter contains a transformer. Do not cut off the adapter to
replace it with another plug, as this causes a hazardous situation.
- Do not insert metal-containing material into the socket for the
appliance plug to avoid short circuiting.
Caution
- This appliance is only intended for removing women’s body hair on
areas below the neck: underarms, bikini line and legs. Do not use it for
any other purpose.
- Fully charge the appliance every 3 to 4 months, even if you do not use
the appliance for a longer time.

ENGLISH 5
- To prevent damage and injuries, keep the operating appliance (with
or without attachment) away from scalp hair, eyebrows, eyelashes,
clothes, threads, cords, brushes etc.
- Do not use the appliance on irritated skin or skin with varicose veins,
rashes, spots, moles (with hairs) or wounds without consulting your
doctor rst. People with a reduced immune response or people who
suffer from diabetes mellitus, haemophilia or immunodeciency should
also consult their doctor rst.
- For hygienic reasons, the appliance should only be used by one person.
- Your skin may become a little red and irritated the rst few times you
use the epilator. This phenomenon is absolutely normal and quickly
disappears. As you use the appliance more often, your skin gets used to
epilation, skin irritation decreases and regrowth becomes thinner and
softer. If the irritation has not disappeared within three days, we advise
you to consult a doctor.
- Do not use the epilating head, the shaving head, the attachments and
the trimming comb if they are damaged or broken, as this may cause
injury.
- Do not clean the appliance with water that is hotter than shower
temperature (max. 40°C).
- Charge, use and store the appliance at a temperature between 10°C
and 30°C.
- Make sure the socket is live when you charge the appliance. The
electricity supply to sockets in mirror cabinets over washbasins or
shaver sockets in bathrooms may be cut off when the light is turned off.
- Always charge the appliance fully every 3 to 4 months. Also do this if
you have not used the appliance during these months.
- Do not use bath or shower oils when you epilate wet skin, as this may
cause serious skin irritation.
Is it safe to use the epilator in the shower or bath?
All cordless products in the Philips wet & dry epilator range are 100%
waterproof and can be safely used in the shower and bath. The product
has an automatic shut-off function to ensure that it only works if the cord
is removed.
Electromagnetic elds (EMF)
This Philips appliance complies with all applicable standards and regulations
regarding exposure to electromagnetic elds.
General
5
- This symbol means that this appliance is suitable for use in a bath or
shower and for cleaning under a running tap.
- For safety reasons, this appliance can only be operated cordlessly.
- The adapter is equipped with an automatic voltage selector and is
suitable for mains voltages ranging from 100 to 240 volts.

6
ENGLISH6
Preparing for use
Charging
Charging the epilator takes approximately 1 hour. When the epilator is fully
charged, it has a cordless operating time of up to 30 minutes.
1 Switch off the appliance before you charge it. Then connect it to a
wall socket.
, The charging light ashes white to indicate that the appliance is
charging.
, When the battery is fully charged, the charging light lights up white
continuously for 20 minutes and then goes out.
Battery low or empty
- When the battery is almost empty, the charging light starts to ash
red. When this happens, the battery still contains enough energy for a
few minutes of epilating.
- When the battery is completely empty, the charging light lights up red
continuously. To charge the epilator, see section ‘Charging’ above.
Using the appliance
Clean the epilating head and charge the appliance fully before you use the
appliance for the rst time.
Note: You cannot use the appliance while it is connected to the mains.
Epilating tips
- Wet: If you are new to epilation, we advise you to start epilating on
wet skin, as water relaxes the skin and makes epilation less painful and
more gentle. The appliance is waterproof and can be safely used in the
shower or bathtub.

ENGLISH 7
Tip: If you want, you can use your regular shower gel or foam.
- Dry: If you epilate dry, epilation is easier just after taking a bath or
shower. Make sure your skin is completely dry when you start epilating.
- General: Make sure your skin is clean and free from grease. Do not
apply any cream to your skin before you start epilating.
- General: We advise you to epilate before you go to bed at night, as
skin irritation usually disappears overnight.
- General: Epilation is easier and more comfortable when the hairs
have a length of 3-4 mm. If the hairs are longer, we recommend that
you shave rst and epilate the shorter regrowing hairs after 1 week.
Epilating
Note: If you are new to epilation, start epilating with the double wavy massage
attachment to minimise the pulling sensation of epilation. This attachment is
only intended for epilating the legs.
Note: To epilate the underarms or bikini line, use the sensitive area cap that
reduces the number of active epilating discs.
1 Put the double wavy massage attachment or the sensitive area cap
on the epilating head.
2 Press the on/off button once to switch on the appliance.
, The appliance starts to operate at speed II, which is the most
efcient speed for epilating.
Note: If you want to use speed I, press the on/off button a second time. Speed
I is suitable for areas with little hair growth, for hard-to-reach areas and for
areas where bones are located directly beneath the skin, such as knees and
ankles.
3 Stretch the skin with your free hand to make the hairs stand upright.
Place the epilating head at an angle of 90° onto the skin with the on/
off button pointing in the direction in which you are going to move
the appliance.
- Epilate your bikini line as shown in the gure.
7
- Epilate your underarms as shown in the gure.
4 Move the appliance slowly over the skin against the direction of the
hair growth while pressing it lightly.
5 Press the on/off button a third time to switch off the appliance.

8
ENGLISH8
6 Remove the double wavy massage attachment or the sensitive area
cap by pulling it off the appliance.
Tip: When you epilate your underarms in the shower, use a small amount of
your regular shower gel for better gliding.
Tip: To relax the skin, we advise you to apply a moisturising cream immediately
or a few hours after epilation. For the underarms, use a gentle deodorant
without alcohol.
Pretrimming with the shaving head and trimming comb
before epilation
Use the shaving head and trimming comb to trim the hair in your bikini line
to a hair length of 4mm. You can also use the trimming comb to pretrim
long hairs (longer than 10mm).
Note: Only use the trimming comb on dry skin to achieve the best results.
1 To attach the shaving head, follow steps 1 and 2 in section ‘Shaving
the underarms and bikini line’.
2 Put the trimming comb on the shaving head.
3 Follow steps 3 to 7 in section ‘Shaving the underarms and bikini line’.
To obtain an even result, make sure that the trimming comb stays
fully in contact with the skin.
Note: Do not place the appliance on the skin too steeply.
Shaving the underarms and bikini line
Note: Use the shaving head on dry skin to achieve the best results.
Use the shaving head to shave sensitive areas.
1 Push the epilating head in the direction of the arrows on the back of
the appliance (1) and remove it from the appliance (2).
2 Put the shaving head on the appliance (1) and push it against the
direction of the arrows on the back of the appliance (2) to x it.
3 Switch on the appliance.
4 Stretch the skin with your free hand. When shaving the underarms,
raise your arm to stretch the skin.
5 Place the appliance onto your skin, with the on/off button pointing in
the direction in which you are going to move the appliance.
6 Move the appliance against the direction of hair growth.
Note: Make sure that the shaving foil with integrated trimmer is always fully in
contact with the skin.

ENGLISH 9
- Shave your bikini line as shown in the gure. Move the appliance in
different directions.
- Shave your underarms as shown in the gure. Move the appliance in
different directions.
7 When you have nished shaving, switch off the appliance and clean
the shaving head (see chapter ‘Cleaning and maintenance’).
Overheat protection
This function helps to prevent overheating of the appliance.
Note: To avoid overheating of the epilator, do not press the appliance too
hard onto your skin. The epilator works best when you move it over your skin
without exerting any pressure.
If the overheat protection is activated, the appliance switches off
automatically and the charging light ashes red for 30 seconds.
To reset the overheat protection, let the appliance cool down and then
switch it on again.
Note: If the charging light starts to ash red again, the appliance has not yet
cooled down completely.
Overload protection
If you press the epilating head too hard onto your skin or when the
epilating discs of the epilating head get blocked (e.g. by clothes etc.), the
appliance switches off and the charging light ashes red for 5 seconds.
Turn the epilating discs with your thumb until you can remove whatever is
blocking the epilating discs.
9
Cleaning and maintenance
Never use scouring pads, abrasive cleaning agents or aggressive liquids
such as petrol or acetone to clean the appliance.
Always keep the adapter dry. Never rinse it under the tap or immerse it
in water.
Note: Make sure the appliance is switched off and unplugged before you start
to clean it.
- If necessary, clean the adapter with the cleaning brush or a dry cloth.
- After each wet use, clean the appliance thoroughly with water to
ensure optimum performance.

10
ENGLISH10
Cleaning the epilating head and attachments
1 Switch off the appliance.
2 Remove the attachment from the epilating head.
3 Push the epilating head to the right (1) and remove it from the
appliance (2).
Note: Never try to detach the epilating discs from the epilating head.
4 Remove loose hairs with the cleaning brush.
5 Rinse all parts under the tap and shake off excess water.
Note: Make sure all parts are completely dry before you reassemble the
appliance.
Cleaning the shaving head and the trimming comb
1 Push the shaving head in the direction of the arrows on the back of
the appliance (1) and remove it (2).
2 Remove the shaving foil from the shaving head.
3 Rinse the shaving foil and the inside of the shaving head under the
tap for 5-10 seconds while turning them.

ENGLISH 11
4 Shake the shaving foil and shaving head rmly.
Note: Do not exert any pressure on the shaving foil to avoid damage.
Note: Make sure the shaving foil and shaving head are completely dry before
you reassemble them.
5 Clean the trimming comb with the cleaning brush or under the tap.
Tip: Rub a drop of sewing machine oil onto the shaving foil twice a year.
Ordering accessories
To buy accessories or spare parts, visit www.shop.philips.com/service or
go to your Philips dealer. You can also contact the Philips Consumer Care
Centre in your country (see the worldwide guarantee leaet for contact
details).
Shaving head
If you use the shaving head two or more times a week, replace the shaving
unit after around two years or if it is damaged.
Environment
- Do not throw away the appliance with the normal household waste
at the end of its life, but hand it in at an ofcial collection point for
recycling. By doing this, you help to preserve the environment.
11
- The built-in rechargeable battery contains substances that may pollute
the environment. Always remove the battery before you discard and
hand in the appliance at an ofcial collection point. Dispose of the
battery at an ofcial collection point for batteries. If you have trouble
removing the battery, you can also take the appliance to a Philips
service centre. The staff of this centre will remove the battery for you
and will dispose of them in an environmentally safe way.

12
ENGLISH12
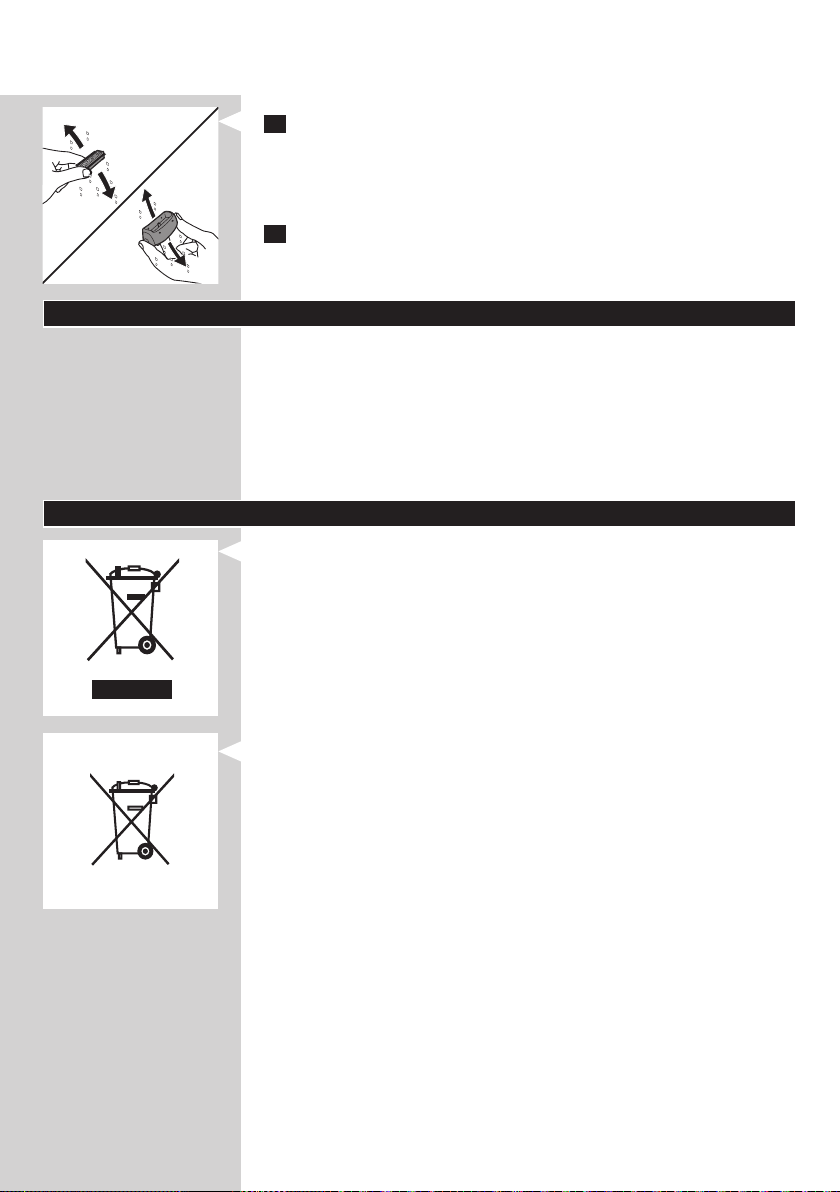
Removing the rechargeable battery
1 Disconnect the appliance from the adapter. Let the appliance operate
until the battery is completely empty.
2 Remove the epilating head and open the appliance with a
screwdriver.
3 Insert the screwdriver into the small slot in the printed circuit board
(1). Turn around the screwdriver until the connection between the
printed board and battery breaks off (2).
4 Pry the battery out of the appliance with the screwdriver.
Caution: Be careful, the battery strips are sharp.
Do not attempt to replace the rechargeable battery.
Do not connect the appliance to the mains again after you have removed
the rechargeable battery.
Guarantee and support
If you need information or support, please visit www.philips.com/support
or read the separate worldwide guarantee leaet.
Troubleshooting
This chapter summarises the most common problems you could
encounter with the appliance. If you are unable to solve the problem with
the information below, visit www.philips.com/support for a list of
frequently asked questions or contact the Consumer Care Centre in your
country.

Problem Cause Solution
ENGLISH 13
13
My skin is irritated
after shaving or
trimming.
You move the shaver (with
trimming comb) in the wrong
direction and/or you use it with
too much pressure.
You use the shaver (with
trimming comb) with too much
pressure.
The shaving head or trimming
comb is broken.
Slight skin irritation like red skin may occur.
This is normal. To avoid irritated skin, make sure
that the shaving head (with trimming comb) is
always in full contact with the skin and that you
gently move the appliance against the direction
of hair growth.
Do not apply too much pressure during
shaving (and trimming), as this may cause skin
irritation.
Replace the shaving head or trimming comb.

14
DANSK
Introduktion
Tillykke med dit køb og velkommen til Philips! For at få fuldt udbytte
af den support, Philips tilbyder, skal du registrere dit produkt på
www.philips.com/welcome.
Generel beskrivelse (g. 1)
1 Trimmekam
2 Skærhoved
3 Dobbeltbølget massagetilbehør
4 Præcisionskappe til sensitive områder
5 Pincetskiver
6 Epilatorhoved
7 On/off-knap
- tryk en gang for hastighed II
- tryk to gange for hastighed I
- tryk tre gange for at slukke
8 Opladeindikator (hvid) med indikator for lavt batteriniveau (rød)
9 Lille strømstik
10 Adapter
11 Opbevaringsetui
12 Rensebørste
Vigtigt
Læs denne brugsvejledning omhyggeligt igennem, inden apparatet tages i
brug, og gem den til eventuelt senere brug.
Fare
- Hold adapteren tør.
Advarsel
- Brug kun den medfølgende adapter.
- Hvis adapteren beskadiges, skal den altid udskiftes med en original
adapter af samme type for at undgå en farlig situation.
- Dette apparat kan bruges af børn fra 8 år og opefter og personer med
reducerede fysiske, sensoriske eller mentale evner eller manglende
erfaring og viden, hvis de er blevet instrueret i sikker brug af apparatet
og forstår de medfølgende risici.
- Lad ikke børn lege med apparatet.
- Rengøring og vedligeholdelse må ikke foretages af børn uden opsyn.
- Adapteren indeholder en transformer. Adapteren må ikke klippes af og
udskiftes med et andet stik, da dette vil forårsage en farlig situation.
- Sæt ikke metalholdige materialer i stikkontakten til apparatstikket for at
undgå kortslutning.
Forsigtig
- Dette apparat er kun beregnet til fjernelse af kvinders kropsbehåring
fra halsen og nedefter: Armhuler, bikinilinje og ben. Anvend det ikke til
andre formål.
- Oplad apparatet helt hver 3. - 4. måned, selvom du ikke anvender
apparatet i længere tid.
- For at undgå skader og uheld skal apparatet (med og uden tilbehør)
altid holdes i sikker afstand fra hovedhår, øjenbryn, øjenvipper, tøj, snore,
ledninger, børster o.l., når det er tændt.

DANSK 15
- Brug ikke apparatet på irriteret hud eller hud med åreknuder, udslæt,
knopper, modermærker (med hår) eller sår uden at konsultere din
læge. Personer med svækket immunforsvar eller personer, der lider af
diabetes, hæmoli eller nedsat immunforsvar, skal altid først konsultere
lægen.
- Af hygiejniske grunde bør apparatet kun anvendes af en og samme
person.
- Huden bliver måske lidt rød og irriteret de første par gange epilatoren
anvendes. Dette er helt normalt og vil hurtigt forsvinde. Efterhånden
som huden vænner sig til behandlingen, bliver den mindre irriteret, og
de hår, der gror ud igen, vil være blødere og tyndere. Hvis en eventuel
hudirritation ikke er forsvundet efter 3 dage, bør du kontakte lægen.
- Brug ikke epilatorhovedet, shaverhovedet, tilbehøret, og
trimmekammen, hvis de er beskadigede eller i stykker, da det kan
forårsage personskade.
- Apparatet må ikke rengøres med vand, der er varmere end almindelig
brusebadstemperatur (maks. 40°C).
- Brug, oplad og opbevar altid apparatet ved en temperatur mellem
10°C og 30°C.
- Sørg for, at stikkontakten, der anvendes til opladningen, er tændt.
Vær opmærksom på, at stikkontakter i toiletskabe og lign. samt
specielle stik til barbermaskiner kan være afbrudt, når lyset på
badeværelset er slukket.
- Oplad altid apparatet helt hver 3.-4. måned. Gør også dette, hvis du
ikke har brugt apparatet i løbet af disse. måneder.
- Brug ikke badeolier, når du epilerer våd hud, da dette kan forårsage
alvorlig hudirritation.
Er det sikkert at bruge epilatoren i badet?
Alle ledningsfri produkter i Philips Wet-and-Dry epilatorserien er 100 %
vandtætte og kan uden risiko bruges i badet. Produktet har en funktion
til automatisk slukning for at sikre, at den kun fungerer, hvis ledningen er
blevet fjernet.
Elektromagnetiske felter (EMF)
Dette Philips-apparat overholder alle branchens gældende standarder og
regler angående eksponering for elektromagnetiske felter.
Generelt
- Dette symbol betyder, at apparatet kan bruges i badet eller rengøres
under vandhanen.
- Af sikkerhedsmæssige årsager kan apparatet kun betjenes trådløst.
- Adapteren er udstyret med automatisk spændingstilpasning til
netspændinger mellem 100 og 240 volt.

DANSK16
Klargøring
Opladning
Opladning af epilatoren tager ca. 1 time. Når epilatoren er fuldt opladet, har
den en trådløs brugstid på op til 30 minutter.
1 Sluk apparatet, før du oplader det. Tilslut det derefter til
stikkontakten.
, Opladeindikatoren blinker hvidt for at vise, at apparatet oplades.
, Når batteriet er fuldt opladet, lyser indikatoren i 20 minutter,
hvorefter den går ud.
Batteri tomt eller næsten tomt
- Når batteriet er næsten tomt, begynder opladeindikatoren at blinke
rødt. Når det sker, indeholder batteriet stadig nok strøm til et par
minutters epilering.
- Når batteriet er helt tomt, lyser opladeindikatoren konstant rødt. Se
afsnittet “Opladning” for at oplade epilatoren.
Sådan bruges apparatet
Rengør epilatorhovedet, og oplad apparatet helt, før du bruger apparatet
for første gang.
Bemærk: Du kan ikke bruge apparatet, mens det er tilsluttet en stikkontakt.
Tip til epilering
- Vådt: Hvis du ikke tidligere har prøvet epilering, anbefaler vi, at
du starter epileringen på våd hud, da vand afslapper huden og gør
epileringen mindre smertefuld og mere skånsom. Dette apparat er
vandtæt og er sikkert at bruge i brusebadet eller badekarret.
Tip: Hvis du ønsker det, kan du bruge almindelig ydende sæbe eller skum.

DANSK 17
- Tørt: Hvis du epilerer under tørre forhold, er det nemmest at bruge
epilatoren lige efter et kar- eller brusebad, men huden skal være helt
tør, inden du starter.
- Generelt: Sørg for, at huden er ren og fri for fedt. Påfør ikke nogen
creme på huden før epileringen.
- Generelt: Sørg for, at huden er ren, helt tør og fri for fedt. Påfør ikke
creme på huden før epileringen.
- Generelt: Epilering er nemmere og mere behagelig, når hårene har
en længde på 3 - 4 mm. Hvis hårene er længere, anbefaler vi, at du
barberer benene først og venter 1 uge, før du epilerer de kortere hår,
som gror frem.
Epilering
Bemærk: Hvis du ikke har prøvet at epilere før, skal du starte epileringen med
det dobbeltbølgede massagetilbehør for at minimere smertefornemmelsen ved
epilering. Dette tilbehør må kun anvendes til at epilere ben.
Bemærk: Hvis du vil epilere under armene eller ved bikinilinjen, skal du bruge
præcisionskappen til følsomme områder, der reducerer antallet af aktive
epilatorskiver.
1 Sæt det dobbeltbølgende massagetilbehør eller præcisionskappen til
følsomme områder på epilatorhovedet.
2 Tryk en gang på on/off-knappen for at tænde for apparatet.
, Apparatet starter med hastighed II, som er den mest effektive
hastighed til epilering.
Bemærk: Hvis du vil bruge hastighed I, skal du trykke på on/off-knappen igen.
Hastighed I er velegnet til områder med mindre hårvækst, til svært tilgængelige
områder og til områder, hvor der er knogler lige under huden, f.eks. knæ og
ankler.
3 Stræk huden ud med den frie hånd, så hårene rejser sig. Placer
epilatorhovedet i en vinkel på 90° på huden med on/off-knappen i
den retning, som apparatet skal bevæges i.
- Epiler bikinilinjen som vist på tegningen.
- Epilér armhulerne som vist på illustrationen.
4 Bevæg apparatet langsomt hen over huden med ganske let tryk, imod
hårenes vækstretning.
5 Tryk en gang til på on/off-knappen for at slukke for apparatet.

DANSK18
6 Tag det dobbeltbølgende massagetilbehør eller præcisionskappen til
følsomme områder af ved at trække det af apparatet.
Tip: Når du epilerer armhuler i badet, skal du bruge en smule almindelig
ydende sæbe, så apparatet glider bedre.
Tip: Vi anbefaler, at du med det samme eller inden for et par timer efter
epileringen smører huden med fugtighedscreme. Det hjælper huden til at
slappe af. Brug en skånsom deodorant uden alkohol under armene.
Trimning med shaverhovedet og trimmekammen før epilering
Brug shaverhovedet og trimmekammen til at trimme din bikinilinje til en
hårlængde på 4 mm. Du kan også bruge trimmekammen til at trimme lange
hår (mere end 10 mm).
Bemærk: Brug kun trimmekammen på tør hud for at opnå de bedste
resultater.
1 Sæt shaverhovedet på ved at følge trin 1 og 2 i afsnittet “Barbering af
armhuler og bikinilinje”.
2 Sæt trimmekammen på skærhovedet.
3 Følg trin 3 til 7 i afsnittet “Barbering af armhuler og bikinilinje”. Du
får et endnu bedre resultat ved at sørge for, at trimmekammen hele
tiden er i fuld kontakt med huden.
Bemærk: Placer ikke apparatet for stejlt mod huden.
Barbering af armhuler og bikinilinje
Bemærk: Brug shaverhovedet på tør hud for at opnå de bedste resultater.
Brug shaverhovedet til at barbere følsomme områder.
1 Skub epilatorhovedet i den retning, pilene bag på apparatet viser (1),
og tag det af apparatet (2).
2 Sæt shaverhovedet på apparatet (1), og skub det imod den retning,
pilene bag på apparatet viser (2) for at sætte det fast.
3 Tænd for apparatet.
4 Stræk huden ud med din frie hånd. Løft armen for at strække huden
ud, når du barberer området under armene.
5 Placer apparatet på huden, mens on/off-knappen peger i den retning,
du vil bevæge apparatet.
6 Bevæg altid apparatet imod hårenes vækstretning.
Bemærk: Sørg for, at skærfolien med den integrerede trimmer altid er i fuld
kontakt med huden.

DANSK 19
- Bikinilinjen barberes som vist på illustrationen. Bevæg apparatet i
forskellige retninger.
- Armhulerne barberes som vist på illustrationen. Bevæg apparatet i
forskellige retninger.
7 Sluk apparatet, og rengør shaverhovedet, når du er færdig med
barberingen (se kapitlet “Rengøring og vedligeholdelse”).
Beskyttelse mod overophedning
Denne funktion forhindrer overophedning af apparatet.
Bemærk: Pres ikke apparatet for hårdt mod huden, da det kan medføre
overophedning. Epilatoren fungerer bedst, når du bevæger den over huden
uden at presse.
Hvis overophedningssikringen er aktiveret, slukker apparatet automatisk, og
opladeindikatoren blinker rødt i 30 sekunder.
For at nulstille overophedningssikringen skal du lade apparatet køle ned og
derefter tænde det igen.
Bemærk: Hvis indikatorerne begynder at blinke rødt igen, er apparatet ikke
kølet helt ned.
Overbelastningssikring
Hvis du presser epilatorhovedet for hårdt mod huden, eller hvis
pincetskiverne på epilatorhovedet blokeres (f.eks. af tøj), slukker apparatet,
og opladeindikatoren blinker rødt i 5 sekunder.
Drej pincetskiverne med tommelngeren, indtil du kan fjerne det, der
eventuelt måtte blokere dem.
Rengøring og vedligeholdelse
Brug aldrig skuresvampe eller skrappe rengøringsmidler så som benzin,
acetone eller lignende til rengøring af apparatet.
Hold altid adapteren tør. Skyl den aldrig under vandhanen, og læg den
ikke i vand.
Bemærk: Kontrollér, at apparatet er slukket, og at stikket er trukket ud, før
opladningen påbegyndes.
- Rengør om nødvendigt adapteren med rensebørsten eller en tør klud.
- Efter hver våd brug skal du rengøre apparatet grundigt med vand for at
sikre optimal ydeevne.

DANSK20
Rengøring af epilatorhoved og tilbehør
1 Sluk for apparatet.
2 Fjern tilbehøret fra epilatorhovedet.
3 Skub epilatorhovedet til højre (1), og fjern det fra apparatet (2).
Bemærk: Prøv aldrig at fjerne pincetskiverne fra epilatorhovedet.
4 Fjern løse hår med rensebørsten.
5 Skyl alle dele under vandhanen, og ryst overskydende vand af.
Bemærk: Sørg for, at alle delene er helt tørre, før du samler apparatet igen.
Rengøring af shaverhoved og trimmekam
1 Skub shaverhovedet i den retning, pilene bag på apparatet viser (1),
og tag det af apparatet (2).
2 Fjern skærfolien fra skærhovedet.
3 Skyl skærfolien og det indvendige af shaverhovedet under vandhanen
i 5-10 sekunder, mens du drejer dem.
DANSK 21
4 Ryst skærfolien og shaverhovedet grundigt.
Bemærk: Tryk ikke på skærfolien, da den ellers kan blive beskadiget.
Bemærk: Sørg for, at skærfolien og shaverhovedet begge er helt tørre, inden du
samler dem.
5 Rengør trimmekammen med rensebørsten eller under vandhanen.
Tip: Smør skærfolien med en dråbe symaskineolie to gange om året.
Bestilling af tilbehør
For at købe tilbehør eller reservedele kan du besøge www.shop.philips.com/
service eller gå til din Philips-forhandler. Du kan også kontakte det lokale
Philips Kundecenter i dit land (se folderen “World-Wide Guarantee” for
at få kontaktoplysninger).
Skærhoved
Hvis du bruger skærhovedet to gange eller mere om ugen, skal du udskifte
skærenheden efter ca. to år, eller hvis det er beskadiget.
Miljøhensyn
- Apparatet må ikke smides ud sammen med det almindelige
husholdningsaffald, når det til sin tid kasseres. Aever det i stedet på
en kommunal genbrugsstation. På den måde er du med til at beskytte
miljøet.
- Det indbyggede genopladelige batteri indeholder stoffer, der kan
forurene miljøet. Fjern altid batteriet, før du kasserer apparatet og
aeverer det på en genbrugsstation. Aevér batteriet på et ofcielt
indsamlingssted for brugte batterier. Kan du ikke få batteriet ud,
kan du aevere apparatet til Philips, som vil sørge for udtagning og
bortskaffelse på en miljømæssig forsvarlig måde.

DANSK22
Udtagning af det genopladelige batteri
1 Frakobl apparatet fra adapteren. Lad apparatet køre, indtil batteriet
er løbet helt tør.
2 Fjern epilatorhovedet, og åbn apparatet med en skruetrækker.
3 Sæt skruetrækkeren ind i den lille åbning i printpladen (1). Drej
skruetrækkeren, indtil forbindelsen mellem printpladen og batteriet
knækkes over (2).
4 Lirk batteriet ud af apparatet med skruetrækkeren.
Forsigtig: Pas på: Strimlerne på batteriet er skarpe.
Forsøg ikke at udskifte det genopladelige batteri.
Apparatet må ikke tilsluttes lysnettet igen, efter at det genopladelige
batteri er fjernet.
Sikkerhed og support
Hvis du brug for hjælp eller support, bedes du besøge www.philips.com/
support eller læse i den separate folder “World-Wide Guarantee”.
Fejlnding
Dette kapitel opsummerer de mest almindelige problemer, der kan
forekomme ved brug af apparatet. Har du brug for yderligere hjælp og
vejledning, så besøg www.philips.com/support for en liste af ofte
stillede spørgsmål eller kontakt dit lokale Philips Kundecenter.

Problem Årsag Løsning
DANSK 23
Min hud er
irriteret efter
barbering eller
trimning.
Du bevæger shaveren
(med trimmekammen) i den
forkerte retning, og/eller du
trykker for hårdt mod huden.
Du trykker shaveren
(med trimmekammen)
for hårdt mod huden.
Shaverhovedet eller
trimmekammen er gået i stykker.
Der kan forekomme let hudirritation i form af
rødme. Dette er normalt. For at undgå irriteret
hud skal du sikre dig, at shaverhovedet (med
trimmekammen) altid er i fuld kontakt med
huden, og at du bevæger apparatet nænsomt
mod hårenes vækstretning.
Tryk ikke for hårdt under barbering og
trimning, da det kan give hudirritation.
Udskift shaverhovedet eller trimmekammen.

24
DEUTSCH
Einführung
Herzlichen Glückwunsch zu Ihrem Kauf und willkommen bei Philips!
Um das Kundendienstangebot von Philips vollständig nutzen zu können,
sollten Sie Ihr Produkt unter www.philips.com/welcome registrieren.
Allgemeine Beschreibung (Abb. 1)
1 Kammaufsatz
2 Scherkopf
3 Doppelt wellenförmiger Massageaufsatz
4 Aufsatz für empndliche Körperzonen
5 Epilierpinzetten
6 Epilierkopf
7 Ein-/Ausschalter
- Einmal drücken für Geschwindigkeit II
- Zweimal drücken für Geschwindigkeit I
- Dreimal drücken zum Ausschalten
8 Ladeanzeige (weiß) mit Warnanzeige bei geringem Ladestand (rot)
9 Buchse für Gerätestecker
10 Adapter
11 Aufbewahrungstasche
12 Reinigungsbürste
Wichtig
Lesen Sie diese Bedienungsanleitung vor dem Gebrauch des Geräts
aufmerksam durch, und bewahren Sie sie für eine spätere Verwendung auf.
Gefahr
- Halten Sie den Adapter trocken.
Warnhinweis
- Verwenden Sie ausschließlich den mitgelieferten Adapter.
- Wenn der Adapter defekt oder beschädigt ist, darf er nur durch
ein Original-Ersatzteil ausgetauscht werden, um Gefährdungen zu
vermeiden.
- Dieses Gerät kann von Kindern ab 8 Jahren und Personen mit
verringerten physischen, sensorischen oder psychischen Fähigkeiten
oder Mangel an Erfahrung und Kenntnis verwendet werden, wenn
sie bei der Verwendung beaufsichtigt wurden oder Anweisung zum
sicheren Gebrauch des Geräts erhalten und die Gefahren verstanden
haben.
- Kinder dürfen nicht mit dem Gerät spielen.
- Die Reinigung und Wartung darf nicht von Kindern ohne Aufsicht
durchgeführt werden.
- Der Adapter enthält einen Transformator. Ersetzen Sie den
Adapter keinesfalls durch einen anderen Stecker, da dies eine
Gefährdungssituation darstellt.
- Zur Vermeidung eines Kurzschlusses stecken Sie kein metallhaltiges
Material in die Buchse für den Gerätestecker.

DEUTSCH 25
Achtung
- Dieses Gerät ist nur für die Entfernung von weiblichem Körperhaar an
Hautpartien unterhalb des Halses vorgesehen: Achselhöhlen, Bikinizone
und Beine. Verwenden Sie es nicht für andere Zwecke.
- Laden Sie das Gerät alle 3 bis 4 Monate vollständig auf, auch wenn Sie
es längere Zeit nicht verwenden.
- Halten Sie das eingeschaltete Gerät (mit oder ohne Aufsatz)
fern von Kopfhaar, Wimpern und Augenbrauen sowie von Kleidung,
Fäden, Kabeln, Bürsten usw., um Verletzungen und Beschädigungen zu
vermeiden.
- Benutzen Sie das Gerät nicht bei Hautreizungen, Krampfadern,
Ausschlag, Pickeln, (behaarten) Muttermalen oder Wunden, ohne
vorher einen Arzt zu konsultieren. Gleiches gilt für Patienten
mit geschwächter Immunabwehr, Diabetes, Hämophilie und
Immuninsufzienz.
- Aus hygienischen Gründen sollte das Gerät nur von einer Person
verwendet werden.
- Nach den ersten Anwendungen kann Ihre Haut möglicherweise
mit Rötungen oder Reizungen reagieren. Dies ist völlig normal und
sollte sich bald legen, sobald Sie sich an das Epilieren gewöhnt haben
und die nachwachsenden Haare feiner und weicher werden. Sollte
die Hautirritation nicht innerhalb von 3 Tagen wieder abklingen,
konsultieren Sie Ihren Arzt.
- Um Verletzungen zu vermeiden, sollten Sie keinen beschädigten
Epilierkopf, Scherkopf, Kammaufsatz und keine beschädigten Aufsätze
verwenden.
- Bei der Reinigung des Geräts darf das Wasser nicht wärmer als
normales Duschwasser (max. 40 °C) sein.
- Laden, benutzen und verwahren Sie das Gerät bei Temperaturen
zwischen 10 °C und 30 °C.
- Prüfen Sie vor dem Auaden des Geräts, ob die Steckdose
kontinuierlich Strom führt. Steckdosen in Badezimmerschränken über
Waschbecken sowie Rasierer-Steckdosen werden häug zusammen mit
der Raumbeleuchtung ausgeschaltet.
- Laden Sie das Gerät alle 3 bis 4 Monate vollständig auf. Tun Sie dies
auch, wenn Sie das Gerät während dieser Monate nicht verwendet
haben.
- Verwenden Sie keine Bade- oder Duschöle, wenn Sie nass epilieren,
da dies zu starken Hautreizungen führen kann.
Ist es sicher, den Epilierer in der Dusche und der Badewanne zu
verwenden?
Alle kabellosen Produkte der Philips Epiliererserie mit Nass- und
Trockenfunktion sind 100 % wasserdicht und können sicher in der
Dusche und in der Badewanne verwendet werden. Das Produkt hat eine
automatische Abschaltfunktion, die sicherstellt, dass es nur funktioniert,
wenn das Kabel entfernt wurde.
Elektromagnetische Felder
Dieses Philips Gerät erfüllt sämtliche Normen und Regelungen bezüglich
der Exposition in elektromagnetischen Feldern.

DEUTSCH26
Allgemeines
- Dieses Symbol bedeutet, dass dieses Gerät für den Gebrauch in einer
Badewanne oder Dusche und für die Reinigung unter ießendem
Wasser geeignet ist.
- Aus Sicherheitsgründen kann dieses Gerät nur kabellos bedient werden.
- Der Adapter hat eine automatische Spannungsanpassung und eignet
sich für Netzspannungen von 100 bis 240 Volt.
Für den Gebrauch vorbereiten
Laden
Das Auaden des Epilierers dauert ca. 1 Stunde. Wenn der Epilierer
vollständig aufgeladen ist, kann er bis zu 30 Minuten kabellos betrieben
werden.
1 Schalten Sie das Gerät aus, bevor Sie es auaden. Verbinden Sie es
dann mit einer Steckdose.
, Die Ladeanzeige blinkt weiß und zeigt an, dass das Gerät aufgeladen
wird.
, Wenn die Akkus vollständig aufgeladen sind, leuchtet die Ladeanzeige
konstant weiß und erlischt nach 20 Minuten.
Akku fast leer oder leer
- Wenn der Akku fast leer ist, beginnt die Ladeanzeige rot zu blinken.
In diesem Fall steht noch genügend Energie für ein paar Minuten
Akkubetrieb zur Verfügung.
- Wenn der Akku vollständig leer ist, leuchtet die Ladeanzeige konstant
rot. Um den Epilierer aufzuladen, lesen Sie den Abschnitt “Auaden”
weiter oben.

DEUTSCH 27
Das Gerät benutzen
Reinigen Sie den Epilierkopf, und laden Sie das Gerät vollständig auf, bevor
Sie das Gerät zum ersten Mal verwenden.
Hinweis: Solange das Gerät an das Stromnetz angeschlossen ist, kann es nicht
verwendet werden.
Tipps zum Epilieren
- Nass: Wenn Sie noch nie epiliert haben, empfehlen wir Ihnen, mit dem
Epilieren auf nasser Haut zu beginnen, da Wasser die Haut entspannt
und für eine sanftere und weniger schmerzhafte Epilation sorgt. Das
Gerät ist wasserdicht und kann sicher in der Dusche oder Badewanne
verwendet werden.
Tipp: Wenn Sie möchten, können Sie Ihr übliches Duschgel oder Ihren üblichen
Rasierschaum verwenden.
- Trocken: Wenn Sie trocken epilieren, ist das Epilieren nach einem
Dusch- oder Vollbad am leichtesten. Achten Sie darauf, dass Ihre Haut
vor der Anwendung vollständig trocken ist.
- Allgemein: Ihre Haut sollte sauber und fettfrei sein, wenn Sie das
Gerät benutzen. Tragen Sie vor dem Epilieren keine Creme auf.
- Allgemein: Wir empfehlen das Epilieren vor dem Schlafengehen, da
Hautreizungen in der Regel über Nacht abklingen.
- Allgemein: Am angenehmsten und gründlichsten wird die Epilation,
wenn die Haare 3 – 4 mm lang sind. Wenn die Haare länger sind,
empfehlen wir, dass Sie zunächst rasieren und anschließend nach
1 Woche die nachgewachsenen kürzeren Haare epilieren.
Epilieren
Hinweis: Wenn Sie noch nie epiliert haben, beginnen Sie die Epilation mit dem
doppelt wellenförmigen Massageaufsatz, um das Zupfgefühl zu minimieren.
Dieser Aufsatz ist nur für das Epilieren der Beine vorgesehen.
Hinweis: Um die Achseln oder die Bikinizone zu epilieren, verwenden Sie
die Kappe für empndliche Stellen, die die Anzahl der wirksamen Pinzetten
reduziert.
1 Setzen Sie den doppelt wellenförmigen Massageaufsatz oder den
Aufsatz für empndliche Stellen auf den Epilierkopf.
2 Drücken Sie den Ein-/Ausschalter einmal, um das Gerät
einzuschalten.
, Das Gerät fängt an, mit Geschwindigkeitsstufe II zu arbeiten, die am
effektivsten für die Epilation ist.
Hinweis: Wenn Sie die Geschwindigkeitsstufe I verwenden möchten, drücken Sie
den Ein-/Ausschalter ein zweites Mal. Die Geschwindigkeitsstufe I eignet sich
für Hautpartien mit geringer Behaarung, für schwer erreichbare Zonen und für
Hautpartien direkt über Knochen, z. B. Knie und Knöchel.

DEUTSCH28
3 Straffen Sie die Haut mit der freien Hand, damit sich die Haare
aufrichten. Setzen Sie den Epilierkopf im 90° Winkel auf die Haut auf,
sodass der Ein-/Ausschalter in die Richtung zeigt, in der Sie das Gerät
bewegen.
- Epilieren Sie die Bikinizone wie in der Abbildung dargestellt.
- Epilieren Sie die Achselhöhlen wie in der Abbildung dargestellt.
4 Führen Sie das Gerät langsam und mit leichtem Druck gegen die
Haarwuchsrichtung über die Haut.
5 Drücken Sie den Ein-/Ausschalter ein drittes Mal, um das Gerät
auszuschalten.
6 Nehmen Sie den doppelt wellenförmigen Massageaufsatz oder den
Aufsatz für empndliche Stellen ab, indem Sie ihn vom Gerät ziehen.
Tipp: Wenn Sie Ihre Achseln unter der Dusche epilieren, verwenden Sie etwas
Duschgel für bessere Gleitfähigkeit.
Tipp: Damit sich die Haut beruhigt, sollten Sie sofort oder ein paar Stunden
nach dem Epilieren eine Feuchtigkeitscreme auftragen. Verwenden Sie für die
Achselhöhlen ein mildes alkoholfreies Deodorant.
Vor der Epilation mit dem Scherkopf und Kammaufsatz
vorschneiden
Verwenden Sie den Scherkopf und Kammaufsatz, um die Haare in Ihrer
Bikinizone auf eine Länge von 4 mm zu trimmen. Sie können mit dem
Kammaufsatz auch längere Haare (länger als 10 mm) vorschneiden.
Hinweis: Verwenden Sie den Kammaufsatz für optimale Ergebnisse nur auf
trockener Haut.
1 Um den Scherkopf anzubringen, befolgen Sie die Schritte 1 und 2 im
Abschnitt “Achselhöhlen und Bikinizone rasieren”.

DEUTSCH 29
2 Setzen Sie den Kammaufsatz auf den Scherkopf.
3 Befolgen Sie die Schritte 3 bis 7 im Abschnitt “Achselhöhlen und
Bikinizone rasieren”. Um einen gleichmäßigen Schnitt zu erzielen,
sollten Sie darauf achten, dass der Kammaufsatz auf der Haut auiegt.
Hinweis: Setzen Sie das Gerät nicht zu steil auf die Haut.
Achselhöhlen und Bikinizone rasieren
Hinweis: Verwenden Sie den Scherkopf für die Trockenrasur, um die besten
Ergebnisse zu erzielen.
Verwenden Sie den Scherkopf, um empndliche Stellen zu rasieren.
1 Schieben Sie den Epilierkopf in Richtung der Pfeile auf der
Geräterückseite (1), und nehmen Sie ihn vom Gerät ab (2).
2 Setzen Sie den Scherkopf auf das Gerät (1), und schieben Sie ihn zur
Befestigung gegen die Richtung der Pfeile auf der Geräterückseite (2).
3 Schalten Sie das Gerät ein.
4 Straffen Sie Ihre Haut mit der freien Hand. Heben Sie beim Rasieren
der Achselhöhlen den Arm, um so die Haut zu spannen.
5 Setzen Sie das Gerät auf die Haut, wobei der Ein-/Ausschalter in die
Richtung zeigt, in die Sie das Gerät bewegen.
6 Führen Sie das Gerät immer gegen die Haarwuchsrichtung.
Hinweis: Achten Sie darauf, dass die Scherfolie mit dem integrierten Trimmer
stets Kontakt zur Haut hat.
- Rasieren Sie die Bikinizone, wie in der Abbildung dargestellt. Bewegen
Sie dabei das Gerät in verschiedene Richtungen.
- Rasieren Sie die Achselhöhlen, wie in der Abbildung dargestellt.
Bewegen Sie dabei das Gerät in verschiedene Richtungen.
7 Schalten Sie das Gerät aus, und reinigen Sie den Scherkopf (siehe
“Reinigung und Wartung”), wenn Sie mit dem Rasieren fertig sind.

DEUTSCH30
Überhitzungsschutz
Diese Funktion hilft dabei, eine Überhitzung des Geräts zu vermeiden.
Hinweis: Um eine Überhitzung des Epilierers zu vermeiden, drücken Sie das
Gerät nicht zu stark auf die Haut. Der Epilierer funktioniert am besten, wenn
Sie ihn ohne Ausübung von Druck über Ihre Haut gleiten lassen.
Bei aktiviertem Überhitzungsschutz schaltet sich das Gerät automatisch ab,
und die Ladeanzeige blinkt 30 Sekunden lang rot.
Um den Überhitzungsschutz zurückzusetzen, lassen Sie das Gerät abkühlen,
und schalten Sie es dann wieder ein.
Hinweis: Wenn die Ladeanzeige erneut rot blinkt, ist das Gerät noch nicht
vollständig abgekühlt.
Überlastungsschutz
Wenn Sie den Epilierkopf zu fest auf Ihre Haut drücken oder die
Epilierpinzetten des Epilierkopfs blockiert werden (z. B. durch Kleidung
usw.), schaltet sich das Gerät aus, und die Ladeanzeige blinkt 5 Sekunden
lang rot.
Drehen Sie die Epilierpinzetten mit Ihrem Daumen, bis Sie die Ursache für
die Blockierung entfernen können.
Reinigung und Wartung
Benutzen Sie zum Reinigen des Geräts keine Scheuerschwämme und
-mittel oder aggressive Flüssigkeiten wie Benzin oder Azeton.
Achten Sie darauf, dass der Adapter immer trocken ist. Spülen Sie ihn
niemals unter ießendem Wasser ab, und tauchen Sie ihn auch nicht in
Wasser.
Hinweis: Vor Beginn der Reinigung muss das Gerät ausgeschaltet und der
Netzstecker von der Steckdose getrennt sein.
- Bei Bedarf reinigen Sie den Adapter mit der Reinigungsbürste oder
einem trockenen Tuch.
- Reinigen Sie nach jedem Nassgebrauch das Gerät gründlich mit Wasser,
um eine optimale Funktion zu gewährleisten.
Den Epilierkopf und die Aufsätze reinigen
1 Schalten Sie das Gerät aus.
2 Nehmen Sie den Aufsatz vom Epilierkopf ab.
3 Drücken Sie den Epilierkopf nach rechts (1), und entfernen Sie ihn
vom Gerät (2).
Hinweis: Versuchen Sie nicht, die Epilierpinzetten vom Epilierkopf abzunehmen.
 Loading...