

Page 1
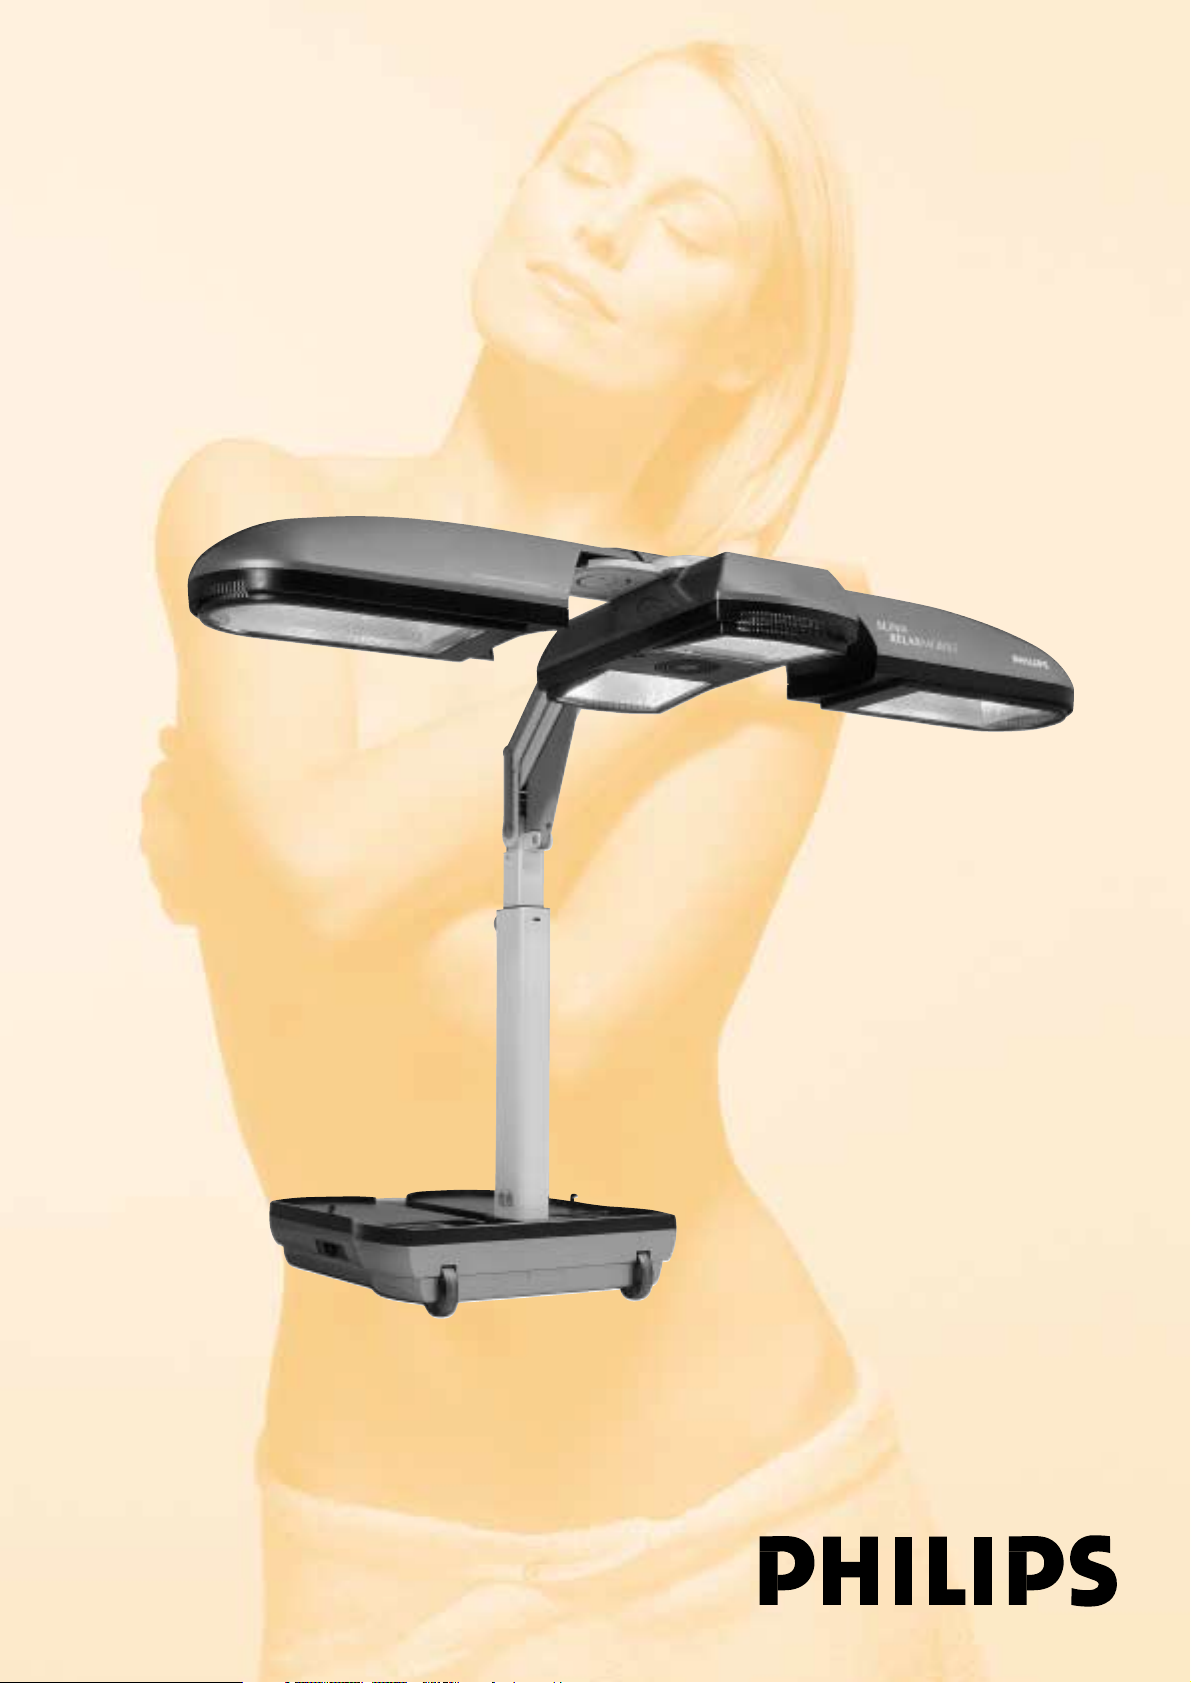
Sun & Relax
HB975
Sunmobile
HB971
Page 2
2
F
E
H
I
C
D
A
G
2
3 4 5
6
1
FACIAL
Page 3
ENGLISH 4
ESPAÑOL 10
ITALIANO 16
PORTUGUÊS 22
HB975,HB971
3
Page 4

Introduction
Full-body tanner
With this tanning appliance you can suntan comfortably at home.The tanning lamps emit visible light, heat and ultraviolet light, giving you the
impression you are sunbathing in real sunlight.The special UV filter only passes the light that is required to get a tan.
The tanning lamps emit sufficient infrared light to provide a comfortable warmth.
Type HB975 only: besides a tanning session, you can take a relax session by just switching on the special infrared lamps.
A timer ensures that each session does not last longer than 30 minutes. Just as with natural sunlight, overexposure must be avoided (see section
'Tanning and your health' and 'Relaxation and your health').
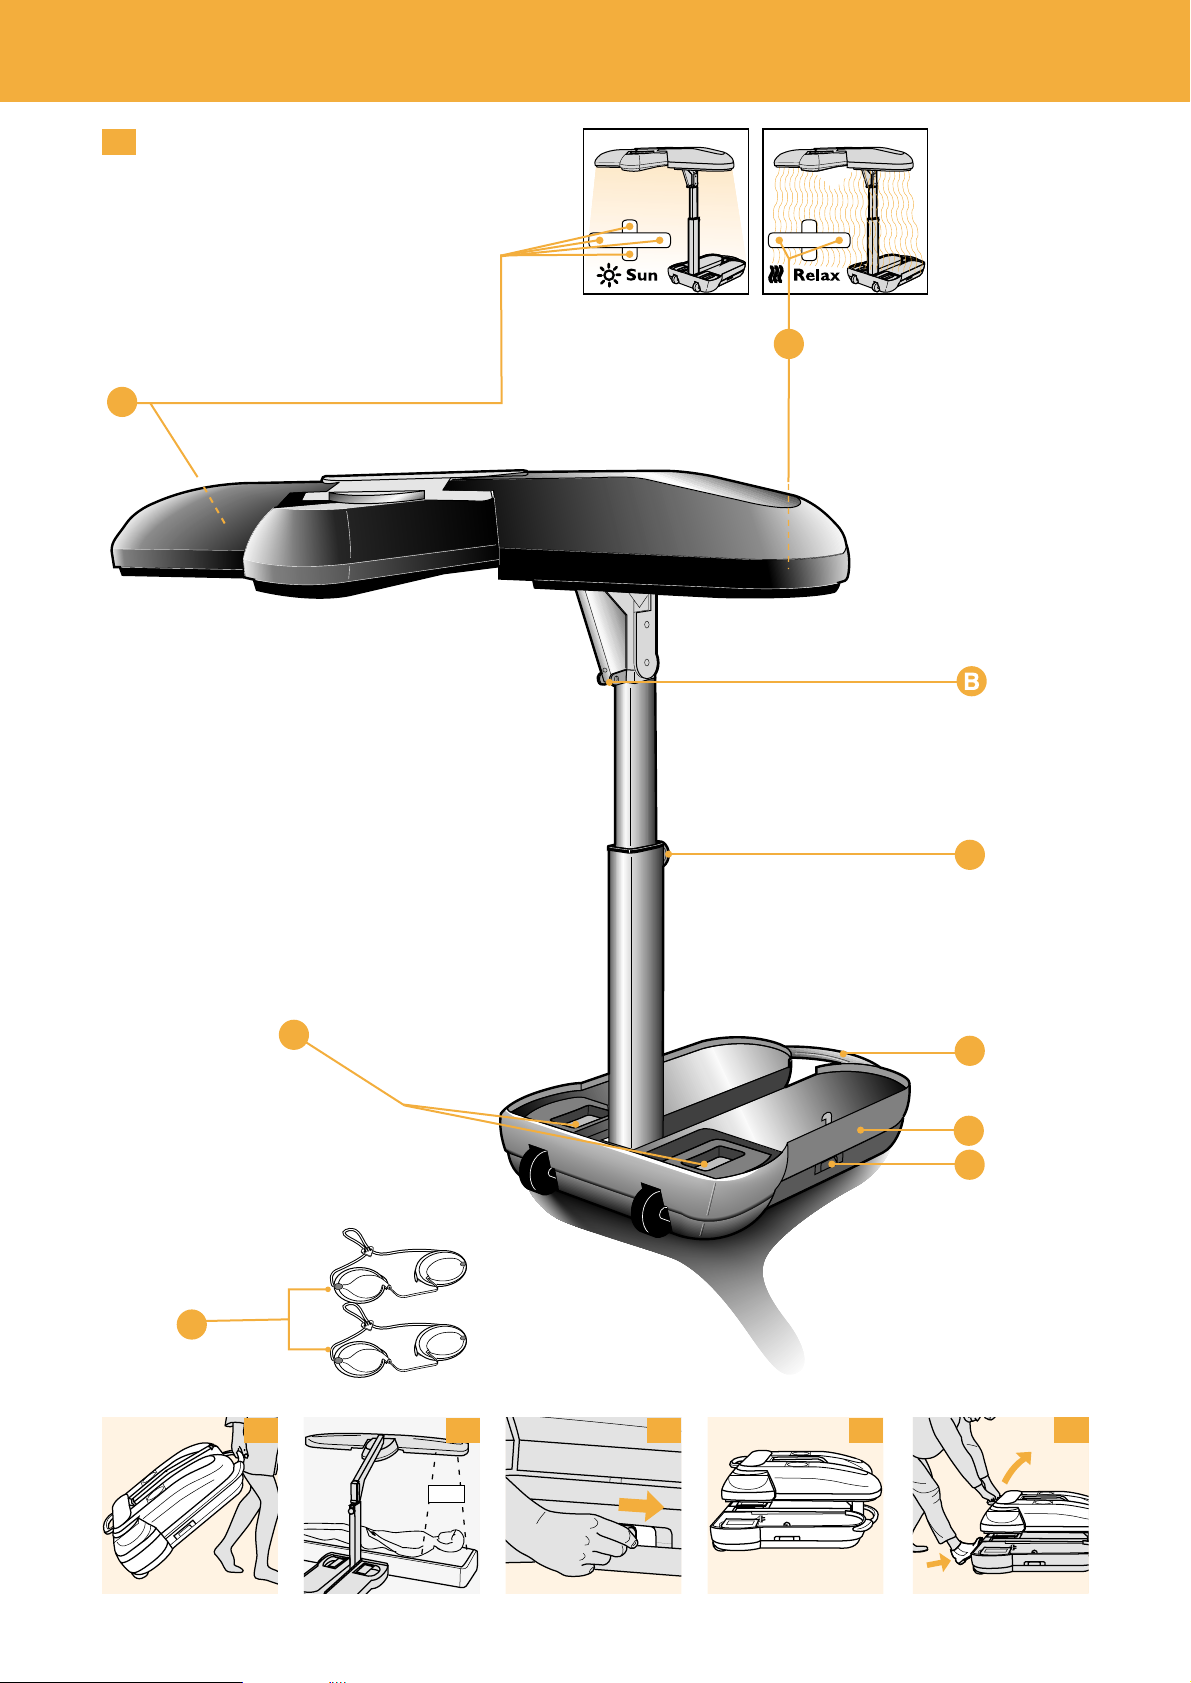
General description (fig. 1)
A Height adjustment knob
B Unlocking button
C 4 Tanning lamps Philips HPA flexpower 400-600
D 2 Infrared lamps type IRK 15020 R (1500W) or 4222 062 95600 (1100W) (HB975 only)
E Stand
F Protective goggles (2 pairs)
- (type no. HB072/service no. 4822 690 80147)
G Lock slide
H Handgrip
I Storage compartments for the cord and remote control.
Important
Read these instructions for use carefully before using the appliance and save them for future reference.
◗ Check if the voltage indicated on the appliance corresponds to the mains voltage in your home before you connect the appliance.
◗ If the plug has not been inserted properly into the wall socket, it may become hot. Make sure you insert the plug properly into the wall
socket.
◗ The appliance must be connected to a circuit that is protected with a 16A (10A for Switzerland and Scandinavian countries) standard fuse
or an automatic fuse.
◗ Always unplug the appliance after use.
◗ If the mains cord of this appliance is damaged, it must always be replaced by Philips or a service centre authorised by Philips in order to
avoid hazardous situations.
◗ Water and electricity are a dangerous combination! Do not use this appliance in wet surroundings (e.g. in the bathroom or near a shower or
swimming pool).
◗ If you have just been swimming or have just taken a shower, dry yourself thoroughly before using the appliance.
◗ Let the appliance cool down after use for approx. 15 minutes before folding it back into transport position and storing it.
◗ Make sure the vents in the centre and side lamp units and in the base remain open during use.
◗ The appliance has been fitted with an automatic protection against overheating. If the appliance is insufficiently cooled (e.g. because the vents
are covered), the appliance will switch off automatically. Once the cause of overheating has been removed and the appliance has cooled
down, the appliance can be switched on again.
◗ The UV filters become very hot when you use the appliance. Do not touch them.
◗ The appliance contains hinging parts, so be careful not to get your fingers stuck between the parts.
◗ The rubber parts fitted onto the appliance may give off a slight smell the first times you use the appliance.This is not an assembly fault.This
smell will disappear after a few sessions.
◗ Never use the appliance when a UV filter is damaged, broken or missing.
◗ Never use the appliance when the remote control is defective.
◗ Make sure children do not play with the appliance.
◗ Do not exceed the recommended session time or the maximum number of tanning hours (see 'Tanning sessions: how often and how long?').
◗ Do not take a tanning and/or relax session if you have a disease and/or if you use a medication or cosmetics that increase the sensitivity of
your skin. Be extra careful if you are hypersensitive to UV light or IR light. Consult your doctor in case of doubt.
◗ Do not tan a particular part of your body more than once a day. Avoid excessive exposure to natural sunlight on the same day.
◗ Consult your doctor if ulcers, moles or persistent lumps develop on the skin.
◗ The appliance is not to be used by people who get sunburnt without tanning when exposed to the sun, by persons suffering from sunburn,
by children, or by persons who suffer (or have previously suffered) from skin cancer or who are predisposed to skin cancer.
◗ Always wear the protective goggles provided with the appliance while tanning to protect your eyes from excessive doses of visible light, UV
light and IR light (also see section 'Tanning and your health').
◗ Remove creams, lipstick and other cosmetics well in advance of a tanning session.
◗ Do not use any sunscreens or suntan accelerators.
◗ If your skin should feel taut after the tanning session, you may apply a moisturising cream.
◗ To acquire an even tan you should lie directly below the lamp units.
◗ Do not choose a tanning distance of less than 65 cm.
◗ Only move the appliance when it is in transport position. Make sure that the two parts of the appliance have been properly fastened before
you move it. Do not attempt to lift the appliance on your own.
◗ Colours may fade under the influence of the sun.The same effect may occur when you use this appliance.
◗ Do not expect the appliance to yield better results than the natural sun.
Tanning and your health
The sun, UV and tanning
The sun
The sun supplies various types of energy.Visible light enables us to see, ultraviolet (UV) light gives us a tan and the infrared (IR) light in sunlight
provides the heat in which we like to bask.
ENGLISH4
Page 5

UV and your health
Just as with natural sunlight, the tanning process will take some time.The first effect will only become visible after a few sessions (see 'Tanning
sessions: how often and how long?').
Overexposure to ultraviolet light (natural sunlight or artificial light from your tanning appliance) can cause sunburn.
Besides many other factors, such as overexposure to natural sunlight, incorrect and excessive use of a tanning appliance may increase the risk of
skin and eye problems.The degree to which these effects occur is determined by the nature, intensity and duration of the exposure on the one
hand and the sensitivity of the person involved on the other hand.
The more the skin and the eyes are exposed to UV light, the higher the risk of keratitis, conjunctivitis, damage to the retina, cataracts, premature
skin ageing and the development of skin tumours will be. Some medications and cosmetics increase the sensitivity of the skin.
◗ Therefore it is highly important:
- that you follow the instructions in chapters 'Important' and 'Tanning sessions: how often and how long?';
- that the tanning distance (distance between the UV filters and the body) is 65 cm.
- that you do not exceed the maximum number of tanning hours per year (i.e. 19 hours or 1140 minutes);
- that you always wear the goggles provided while tanning.
Tanning sessions: how often and how long?
◗ Take one tanning session a day for five to ten days. Wait at least 48 hours after the first session before taking the second session. After this 5-
to 10-day course, we advise you to give your skin a rest for a while.
B
Approximately one month after a course, your skin will have lost much of its tan.You can then start a new course.
B
If you want to keep your tan, do not stop tanning after the course, but continue taking one or two tanning sessions a week.
Whether you choose to stop tanning for a while or whether you continue tanning on a lower frequency, always keep in mind that you must not
exceed the maximum number of tanning hours. For this appliance the maximum is 19 tanning hours (= 1140 minutes) a year.
This maximum also holds if you use the appliance for tanning of parts of your body (function º and ªº).
Example
Suppose you are taking a 10-day course, consisting of a 7-minute tanning session on the first day and a 20-minute tanning session on the
following nine days.
◗ The entire course will then last (1 x 7 minutes) + (9 x 20 minutes) = 187 minutes.
B
This means you can take 6 of these courses a year, as 6 x 187 minutes = 1122 minutes.
Of course, the maximum number of tanning hours applies to each separate part or side of the body that is tanned (e.g. the back and front of
the body).
Ta b l e
As is shown in the table, the first session of a tanning course should always last 7 minutes, irrespective of the sensitivity of the skin.
B
If you think that the sessions are too long for you (e.g. because your skin feels taut and tender after the session), we advise you to reduce the length
of the sessions by e.g. 5 minutes.
B
For a beautiful all-over tan, turn your body slightly during the session so that the sides of your body are better exposed to the tanning light.
B
If your skin feels slightly taut after tanning, you can apply a moisturising cream.
B
If you tan just a part of your body, you can also use the table above together with the information in 'Tanning sessions: how often and how long?'.
B
If you use function º or function ªº, we advise you to extend the tanning sessions by approximately 5 minutes. This does not apply to the first
tanning session, which must not last longer than 7 minutes.
ENGLISH 5
For persons with less sensitive
skin
7 minutes
30 minutes*
30 minutes*
30 minutes*
30 minutes*
30 minutes*
30 minutes*
30 minutes*
30 minutes*
30 minutes*
For persons with normal
sensitive skin
7 minutes
20-25 minutes
20-25 minutes
20-25 minutes
20-25 minutes
20-25 minutes
20-25 minutes
20-25 minutes
20-25 minutes
20-25 minutes
For persons with very sensitive
skin
7 minutes
10 minutes
10 minutes
10 minutes
10 minutes
10 minutes
10 minutes
10 minutes
10 minutes
10 minutes
Duration of the tanning session
for each separate part of the
body
1st session
rest of at least 48 hours
2nd session
3rd session
4th session
5th session
6th session
7th session
8th session
9th session
10th session
*) or longer, depending on your skin
sensitivity.
Page 6

Relaxation and your health (HB975 only)
Warmth has a relaxing effect.Think of what a hot bath or lazing in the sunshine does to you.You can enjoy the same relaxing effect by switching
on the infrared lamps.
Bear in mind the following when you have a relax session:
- Avoid getting too hot. Increase the distance between yourself and the lamps, if necessary.
- If your head gets too hot, cover it or move your body so that less heat is emitted towards your head.
- Close your eyes during a relax session.
- Do not let the relax session last too long (see section 'Relax sessions: how often and how long?').
Relax sessions: how often and how long?
Type HB975 only
◗ If you do not want to get up right away after the tanning session, you can switch on the infrared lamps for a relax session, during which the
infrared lamps keep you warm.
◗ You can also take a relax session without a tanning session.You can do this several times a day (e.g. 30 minutes in the morning and in the
evening).
Preparing for use
◗ The appliance can be easily moved and stored in transport position (fig. 2).
◗ If you want to give your face an extra tan (HB971 only) or if you only want to tan a part of your body (i.e. just the legs or the upper half of
your body), make sure you place the appliance at the correct side of the bed (fig. 3).
1 To open the appliance, move the lock slides in the direction of the arrow (fig. 4).
The upper part of the appliance is now unlocked.
2 The upper part comes slightly up (by itself or with a little help) (fig. 5).
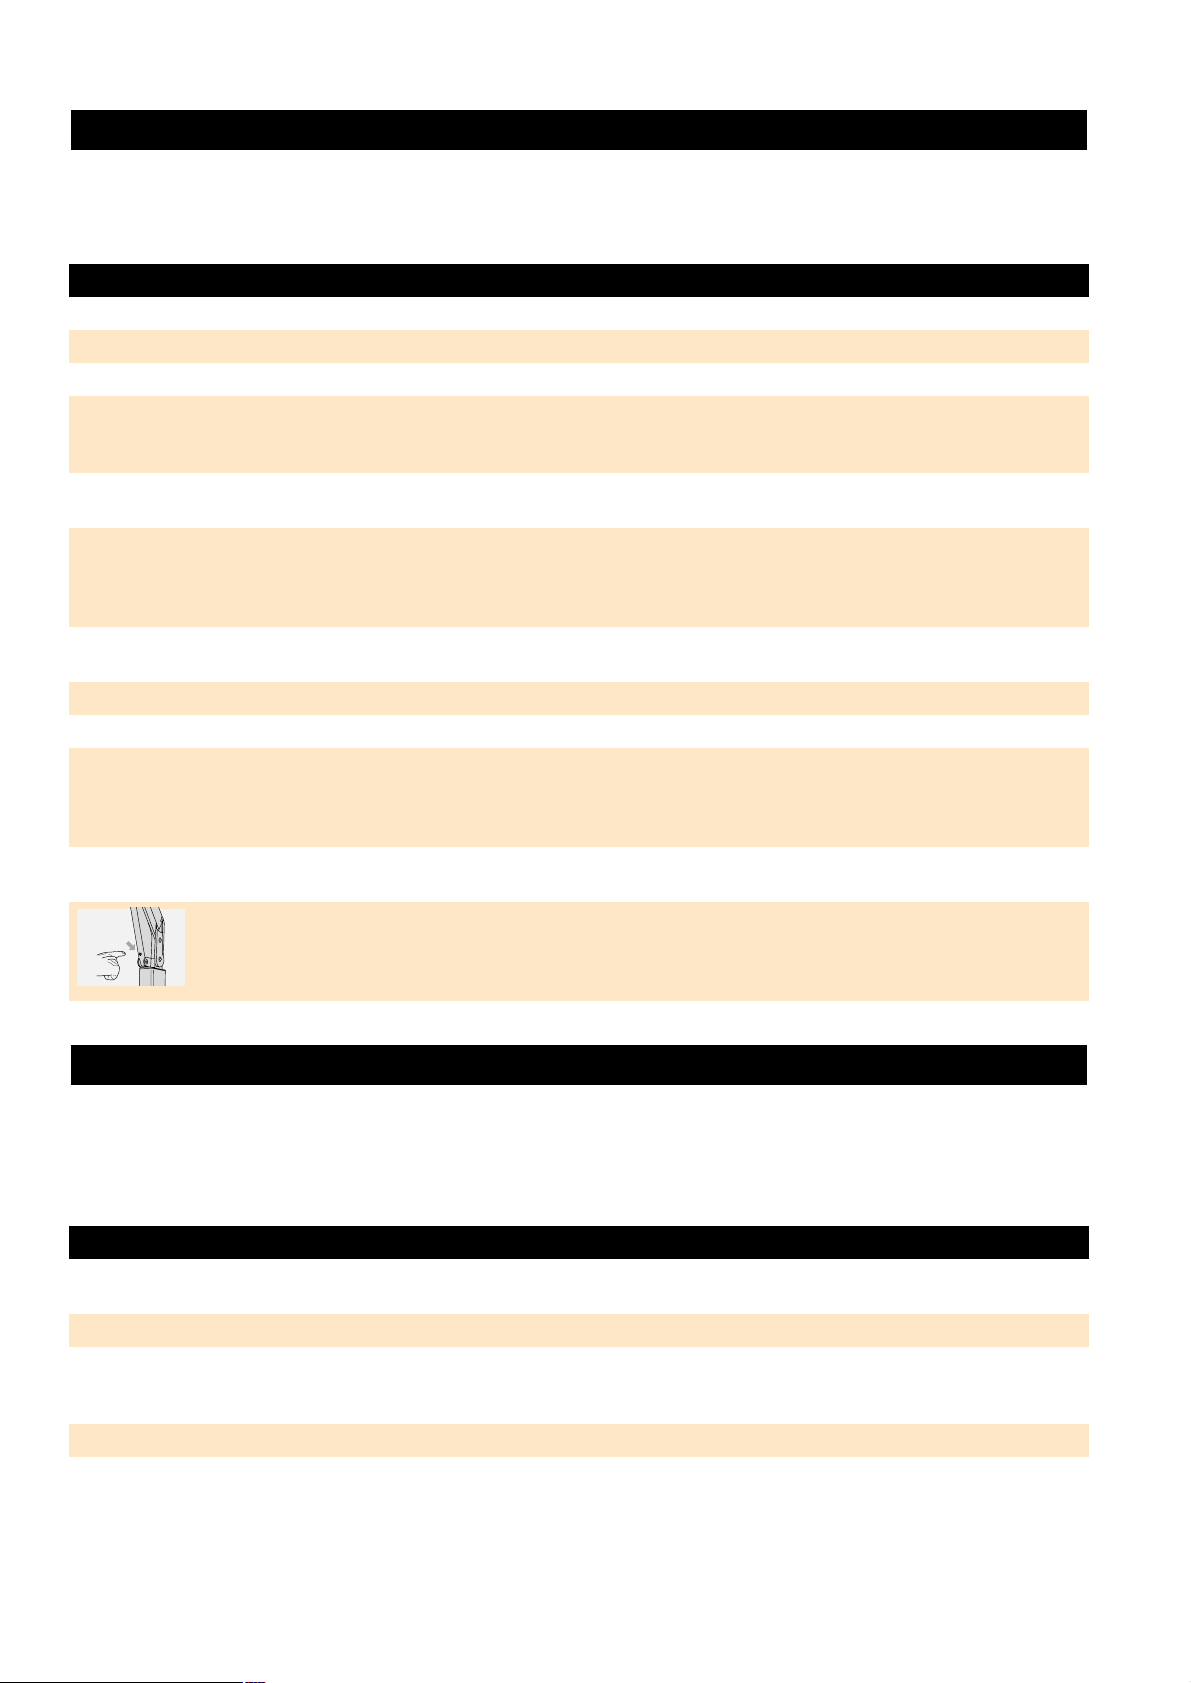
3 Grab the handle with both hands and put one foot against the appliance to prevent it from sliding away.Tilt the upper part by pulling the
handle and tracing an arc with it (fig. 6).
Do not tilt the upper part too far.
4 Pull the upper part up and towards you at the same time (fig. 7).
This requires some effort.
5 Move both lamp units sideways as far as possible, until they are in line with each other (fig. 8).
6 The distance between the UV filters and your body must be 65 cm.The distance between the UV filters and the surface on which you
are lying down (e.g. a bed) must be 85 cm (fig. 9).
7 Support the upper part of the stand when you set or adjust the height of the appliance (fig. 10).
Loosen the height adjustment knob (A) by turning it anticlockwise (two or three turns).
8 Put your hand under the horizontal part of the stand and extend the stand to the required height (fig. 11).
9 Firmly fasten the height adjustment knob (A) by turning it clockwise and release the stand (fig. 12).
◗ You can determine whether the appliance has been set to the required height by pulling out the measuring tape (fig. 13).
◗ The measuring tape will automatically rewind if you move the red tab sideways (fig.14).
10 Turn the centre lamp unit 90c until you hear a click (fig. 15).
Note: the centre lamp unit can only be turned in the direction of the arrow!
The appliance can only be switched on if both the side lamp units and the centre lamp unit have been fully extended and have been put in
the right position.This applies to tanning sessions as well as to relax sessions.
◗ Right position (fig. 16).
The appliance is now ready for use.
Using the appliance
1 Fully unwind the mains cord.
2 Put the plug in the wall socket.
◗ The remote control will show all the functions that need to be adjusted by the user.The tanning or relax session time is shown as 00 (fig. 17).
B
Only HB975 shows symbol l (relax session).
B
Only HB971 shows symbol ª (extra face tan).
Adjusting functions:
1 Use the ¡™buttons to switch from function to function (fig. 18).
The underlined symbol shows the function you are programming.
2 Selecting tanning, extra tanning or relaxing
Choose symbol • if you want to tan your whole body.
Choose symbol • and ª if you want to tan your whole body and give your face an extra tan (HB971only).
Choose º if you want to tan just a part of your body.
Choose symbols ª and º if you want to tan just a part of your body and give your face an extra tan (HB971 only).
Choose – if you prefer a relax session (warmth) for the whole body (HB975 only).
Note: In these directions for use, functions ;ªare used in the pictures as examples of what may be shown on the display.
ENGLISH6
Page 7
ENGLISH 7
Setting the time for a tanning or relax session
1 Set the time of the tanning or relax session by pushing the + button to put the time forward or by pushing the - button to put the time
backward (fig. 19).
Keep the button pressed to adjust the time more quickly.
2 Lie down directly under the lamp units of the appliance to ensure that the sides of your body are also tanned properly.
3 Put on the protective goggles provided.
4 Switch on the tanning lamps or the infrared lamps by pressing the start button ∞ (fig. 20).
B
Note: during start-up the tanning lamps may produce a humming sound. This sound will stop as soon as the lamps are burning properly.
B
Note: the tanning lamps will start to emit a visibly stronger light after approx. 60 seconds, which means they are now burning at full power. From this
moment onwards you can switch the facial tanner on or off.
B
Note: if the lamps fail to go on after about 20 seconds, switch the appliance off (∞), let the lamps cool down for 3 minutes, set the tanning time and
switch the appliance back on again (∞).
◗ A blinking signal will appear; the set time is shown on the display (25 minutes in this case) (fig.21).
The countdown of the set tanning or relax session time will now start.
◗ You can switch the facial tanner (•, ª) on or off during the session without having to switch off the whole appliance. (This also holds for the
extra face tan in combination with º) (fig. 22).
The chosen symbols stay visible in the display, but the other symbols do not.
◗ During the last minute of the session you will hear a beeping sound (fig. 23).
◗ During this minute, you can press the pause/repeat button § to repeat the set time (fig. 24).
◗ The display shows the set time and starts to count down.The beeping stops.
◗ It is also possible to set a new time.
By doing this, you can avoid the 3-minute waiting time which is necessary to allow the tanning lamps to cool down after they have been
switched off.
This waiting time does not apply to the infrared lamps (type HB975 only).
5 Set a new time by pushing the ¢ and £ buttons.Then push the start button ∞ (fig. 25).
The beeping stops and the time that has just been set starts counting down.
◗ When you do not repeat the time or set a new time during the last minute of the session, the countdown continues and the appliance will
automatically switch off as soon as the set time has passed.
Interrupting the tanning or relax session
1 You can interrupt the tanning session by pushing the pause/repeat § button (fig. 26).
The lamps will be switched off, ¶ appears on the display together with the remaining time.The remaining time will blink for 3 minutes. During
this time the lamps cool down.When the blinking has stopped, you can switch the appliance back on again by pushing the ∞ button.The
remaining time will now be counted down.
2 You can interrupt the relax session by pushing the pause/repeat § button.
The lamps will be switched off, ¶ appears on the display together with the remaining time (not blinking).You can switch the appliance
immediately back on again by pushing the ∞ button.The waiting time does not apply in the case of the infrared lamps.The remaining time will be
counted down.
Changing the tanning or relax time during a session.
1 When you are tanning, you can change the set time by pushing the ∞ button.The lamps will be switched off.Then set a new time by
pushing the ¢ and £ buttons.Wait until the set time has stopped blinking (this will take 3 minutes because the lamps have to cool down
first) and push the ∞ button again.
◗ When relaxing (l), you can change the set time by pushing the ∞ button.The lamps will be switched off.You can set a new time and switch
the appliance back on immediately by pushing the ∞ button.The waiting time does not apply in case of the infrared lamps (the newly set
time does not blink on the display).
Make sure the right lamps are switched on:
◗ (HB975, HB971) Tanning: 4 lamps (one in every lamp unit) or 1 lamp (in the side lamp unit).The lamps emit a bluish light (fig. 27).
◗ (HB975 only) Relaxing: 2 lamps (one in every side lamp unit).The lamps emit red light (fig. 28).
Cooling
The appliance is cooled by means of fans to prevent materials and parts from becoming too hot.The tanning lamps won't go on if they are too
hot (see for instance 'Interrupting the tanning or relax session').
◗ After you have switched off the tanning lamps or infrared lamps, the fans will continue to work for three more minutes.
This is convenient, because it enables you to use the tanning lamps again only 3 minutes after switching them off (the infrared lamps do not
require a cooling-down period before they can be switched on again!)
B
If you have switched the tanning appliance off by removing the plug from the wall socket, the fans won't provide cooling for three more minutes, of
course.Therefore, if another person wishes to use the appliance for a tanning session right away, this person must first allow the tanning appliance to
cool down.
B
HB975 only: If you want to use the appliance for a tanning session immediately after having used it for a relax session (l), you should also let the
appliance cool down for three minutes. As a result of the relax session, the tanning lamps will have become hot and will need to cool down before
they can be switched on.
Cleaning
1 Always unplug the appliance and let it cool down before you start cleaning it.
2 Clean the outside of the appliance with a damp cloth.
Page 8
Do not let any water run into the appliance.
3 Do not use scouring pads.
Never use abrasive liquids like scouring agents, petrol or acetone to clean the appliance.
◗ You can clean the outside of the UV filters with a soft cloth sprinkled with some methylated spirits.
Storage
1 Let the appliance cool down for 15 minutes before you put it in transport position and store it.
◗ In the meantime, you can wind up the cord and put it in the base of the appliance together with the remote control.
2 Make sure the cord and remote control are stored properly,as they might otherwise get stuck between parts of the appliance when
you put the appliance in transport position (fig. 29).
3 Turn the centre lamp unit 90c to put it in a line with the side lamp units (fig. 30).
4 Firmly hold the upper part of the stand with one hand and loosen the height adjustment knob (A) by turning it anticlockwise (fig. 31).
5 Slide in the stand (fig. 32).
6 Firmly fasten the height adjustment knob (A) by turning it clockwise (fig. 33).
7 Turn the two side lamp units towards each other (fig. 34).
8 Grab the handle with both hands, put one foot against the appliance to prevent it from sliding away and tilt the upper part with the
stand backward (fig. 35).
The automatic unlocking system will only work if you tilt the upper part with the stand backward far enough. However, you should be
careful not to tilt it backward too far because you might lose your balance if you do.
9 Push the upper part down (fig. 36).
10 Lower it slowly onto the base (fig. 37).
11 Fasten the lamp units to the base by pushing both lock slides in the direction of the arrow (fig. 38).
Replacement
The light emitted by the tanning lamps will become less bright in time (i.e. after a few years in case of normal use).When this happens, you will
notice a decrease in the tanning capacity of the appliance.You can solve this problem by setting a slightly longer tanning time or by having the
tanning lamps replaced.
◗ The remote control of the appliance includes a counter that registers the number of operating hours.
1 Choose function •. Set the time to 00 and hold down the pause/repeat § button to display the number of operating hours (fig. 39).
The maximum number of hours the counter can display is 999.After it has reached this number, it will continue to count up from 000.
2 When you release the pause/repeat button, the number of operating hours disappears from the display.
◗ After 750 burning hours, an L will appear on the left-hand side of the display.This means that the tanning power of the appliance has
decreased so much that replacement of the tanning lamps is advisable (fig. 40).
Of course, you can choose to postpone replacement for a while by setting a longer tanning time.
3 To remove the L from the display, press the pause/repeat § button, with time indication 00 and function symbol• on the display.Hold
down the pause/repeat button and press first the ¢ button and then the £ button and the L will disappear from the display (fig.41).
For type HB975 only: Have the infrared lamps replaced when they stop functioning.
The UV filters protect against undesired exposure. It is therefore important to have a damaged or broken filter replaced right away.
Have the tanning lamps (Philips HPA flexpower 400-600), infrared lamps (IRK 15020R or 4222 062 95600) and UV filters replaced by an
authorised Philips service centre. Only they have the knowledge and skills required for this job and the original spare parts for the
appliance.
Environment
The lamps of the appliance contain substances that can be harmful to the environment.When you discard the lamps, make sure they are not
thrown away with the normal household waste but are handed in at an official collection point.
Guarantee & service
If you need service or information or if you have a problem, please visit the Philips Web site at www.philips.com or contact the Philips Customer
Care Centre in your country (you will find its phone number in the worldwide guarantee leaflet). If there is no Customer Care Centre in your
country, turn to your local Philips dealer or contact the Service Department of Philips Domestic Appliances and Personal Care BV.
Guarantee restrictions
The tanning lamps are not covered by the terms of the international guarantee.
ENGLISH8
Page 9
ENGLISH 9
Possible cause
The plug has not been (properly) inserted into the wall socket.
There is a power failure. Check by means of another appliance.
The lamps are still too hot to go on. Let them cool down for 3 minutes first.
The appliance was not sufficiently cooled and the overheating protection switched the
appliance off automatically. Remove the cause of overheating (e.g. remove a towel that is
blocking one or more vents).Wait for 10 minutes and switch the appliance back on.
The two side lamp units and the centre lamp unit have not been put in the right position (see
'Preparing for use').
Check the fuse of the circuit to which the tanning appliance is connected.The correct fuse type
is a 16A (or 10A for Switzerland and Scandinavian countries) standard fuse or an automatic
fuse.The fuse may also blow because you have connected too many appliances to the same
circuit.
You are using an extension cord that is too long or does not have the correct rating. Consult
your dealer. Our general advice is not to use an extension cord.
You are not following the tanning schedule suitable for your skin type.
The distance between the UV filters and the surface you lie on is larger than prescribed.
When the lamps have been used for a long time, the UV light emitted will decrease.This effect
only becomes noticeable after several years.You can solve this problem by selecting a longer
tanning time or by having the lamps replaced.After 750 operating hours an L will appear on the
display telling you that it is advisable to have the lamps replaced.
You have not pushed the upper part of the appliance backward far enough. Make sure you first
push the upper part backward before pushing it down (see 'Storage').
The appliance fails to unlock automatically. In that case you first have to press unlocking button
(B), after which you can fold the appliance back into transpor t position in the manner indicated
in chapter 'Storage'. If the appliance fails to unlock several times, contact your dealer or a Philips
service centre.
Problem
The appliance does not start
The fuse cuts off the power when you switch on the tanning
appliance or during use.
Poor tanning result
The appliance cannot be put back into transport position.
Troubleshooting
If the appliance does not work properly, this may be due to a defect. In that case we advise you to contact your dealer or a Philips service centre.
The appliance may also fail to work properly because it has not been installed or is not used in accordance with the instructions. In that case you are able to
solve the problem yourself by following the troubleshooting tips below.
Solution
Check whether the two side lamps units and the centre lamp unit are in the right position (see
'The appliance does not start' in 'Troubleshooting')
Check whether the vents are open (see 'The appliance does not start' in 'Troubleshooting').
Check the UV filters (the special glass panes that cover the lamps). If these filters are broken,
damaged or missing, stop using the appliance and contact your dealer or a Philips service
centre.
Contact your local dealer or a Philips service centre.
Error code
E01
E02 and codes with a higher number
Error codes
The display of the remote control may show error codes. Below we will explain what you should do if an error code appears on the display.
Note: E01 appears in the display for 5 seconds and at the same time you hear a beeping sound.
Note: E02 and codes with a higher number remain visible on the display.If these codes appear,the appliance has a serious problem and must not be used any
longer.
Page 10

Introducción
Solarium de cuerpo entero
Con este aparato puede broncearse en su casa con toda comodidad. Los tubos bronceadores emiten luz visible, ultravioleta y calor, dando la
impresión de estar bronceándose bajo la luz solar. El filtro especial UV sólo deja pasar la radiación necesaria para ponerse moreno.
Las lámparas emiten suficiente luz infrarroja como para dar un calor agradable.
Sólo modelo HB975: además de una sesión de bronceado, puede recibir una sesión de relajación si enciende las lámparas infrarrojos especiales.
Existe un temporizador que garantiza que las sesiones no duran más de 30 minutos.Al igual que con la luz solar natural, se debe evitar la
exposición prolongada (véase el capítulo 'El bronceado y la salud' y "La relajación y la salud").
Descripción general (fig. 1)
A Botón de ajuste de la altura
B Botón de apertura
C 4 lámparas Philips HPA flexpower 400-600
D 2 lámparas infrarrojos modelo IRK 15020 R (1.500 W) o 4222 062 95600 (1.100 W) (sólo modelo HB975)
E Pie
F Gafas protectoras (2 pares)
- (modelo nº. HB072/nº de servicio 4822 690 80147)
G Corredera de cierre
H Asa
I Compartimentos para guardar el cable y el mando a distancia.
Importante
Antes de utilizar el aparato, lea atentamente estas instrucciones y consérvelas por si necesitara consultarlas en el futuro.
◗ Antes de conectarlo, compruebe si el voltaje indicado en el aparato se corresponde con el voltaje de su hogar.
◗ Si no se introduce correctamente la clavija en el enchufe, ésta podría calentarse. Asegúrese de que enchufa el aparato correctamente.
◗ El aparato debe estar conectado a un circuito protegido con un fusible estándar 16A (10A para Suiza y los países escandinavos) o un fusible
automático.
◗ Después de usarlo, desenchufe siempre el aparato de la red.
◗ Si el cable de red estuviera dañado, debe sustituirlo siempre Philips o un centro de servicio autorizado por Philips para evitar situaciones
peligrosas.
◗ El agua y la electricidad son una combinación peligrosa. No utilice el aparato en ambientes húmedos (por ejemplo, en el cuarto de baño o
cerca de una ducha o de una piscina).
◗ Si ha estado nadando o acaba de darse una ducha, séquese completamente antes de usar el aparato.
◗ Después de usarlo, deje enfriar el aparato durante aproximadamente 15 minutos, antes de plegarlo en la posición de transporte y guardarlo.
◗ Asegúrese de que los conductos de ventilación de las unidades de lámparas centrales y laterales, y de la base permanecen abiertos mientras
se usa el aparato.
◗ El aparato está equipado con un dispositivo automático de protección contra sobrecalentamientos. Si el aparato no se enfría lo suficiente
(por ejemplo, porque los conductos de ventilación están tapados), se apagará automáticamente. Una vez que se haya eliminado la causa del
sobrecalentamiento y el aparato se haya enfriado, se podrá volver a conectar.
◗ Al estar en funcionamiento, los filtros UV se calientan mucho. No los toque.
◗ El aparato contiene piezas giratorias, tenga cuidado de no pillarse los dedos entre las piezas.
◗ Es posible que las piezas de plástico desprendan un ligero olor las primeras veces que use el aparato. No es un fallo de montaje. El olor
desaparecerá después de unas cuantas sesiones.
◗ No utilice el aparato si falta algún filtro UV o si está estropeado o roto.
◗ No utilice el mando a distancia si está defectuoso.
◗ Mantenga el aparato fuera del alcance de los niños.
◗ No supere el tiempo de exposición recomendado ni el número máximo de horas de bronceado (véase el capítulo 'Sesiones de bronceado:
frecuencia y duración').
◗ No tome una sesión de bronceado o relajación si tiene alguna enfermedad y/o si toma medicación o utiliza cosméticos que puedan aumentar
la sensibilidad de la piel.Tenga cuidado especialmente si es hipersensible a los rayos UV o infrarrojos. En caso de duda,consulte a su médico.
◗ No broncee una misma parte del cuerpo más de una vez al día. Evite la exposición excesiva a la luz solar natural durante el mismo día.
◗ Consulte a su médico si aparecen úlceras, lunares o bultos persistentes en la piel.
◗ No deben utilizar el aparato las personas que al tomar el sol se queman pero no se broncean, las que sufren quemaduras, los niños o
aquellas personas que padecen (o han padecido) cáncer de piel o están predispuestas a padecerlo.
◗ Durante la sesión de bronceado, utilice siempre las gafas protectoras que se proporcionan junto con el aparato para proteger los ojos de
una sobre exposición a la luz visible, los rayos UV o infrarrojos (véase también el capítulo 'El bronceado y la salud').
◗ Antes de una sesión de bronceado, quítese las cremas, el lápiz de labios y otros cosméticos.
◗ No utilice filtros solares ni aceleradores del bronceado.
◗ Si siente la piel tirante después de una sesión de bronceado, puede aplicarse una crema hidratante.
◗ Para conseguir un bronceado uniforme, sitúese directamente bajo las lámparas.
◗ La distancia de bronceado no debe ser inferior a 65 cm.
◗ Mueva el aparato únicamente cuando se encuentre en posición de transporte. Asegúrese de que las dos par tes del aparato están bien
sujetas antes de moverlo. No intente levantar el aparato usted mismo.
◗ Los colores pueden perder intensidad con la luz del sol. Puede ocurrir lo mismo al utilizar este aparato.
◗ No espere que el solarium produzca mejores resultados que el sol natural.
El bronceado y la salud
El sol, los rayos UV y el bronceado
El sol
El sol proporciona varios tipos de energía. La luz visible nos permite ver, la luz ultravioleta (UV) nos broncea,y la luz infrarroja (IR) de los rayos
solares nos proporciona calor.
ESPAÑOL10
Page 11

Los rayos UV y la salud
Al igual que ocurre con la luz solar natural, el proceso de bronceado lleva su tiempo. Los primeros efectos sólo serán visibles tras unas pocas
sesiones (véase el capítulo: 'Sesiones de bronceado: frecuencia y duración')
La exposición excesiva a los rayos ultravioleta (ya sean de luz solar natural o de luz artificial del solarium) puede provocar quemaduras.
Además de otros factores, como la exposición prolongada a la luz solar, el uso excesivo e incorrecto de este aparato puede aumentar el riesgo
de padecer enfermedades cutáneas y oculares. La medida en que esto pueda ocurrir viene determinada, por un lado, por la naturaleza,
intensidad y duración de la radiación y, por otro, por la sensibilidad de la persona.
Cuanto más tiempo estén los ojos y la piel expuestos a los rayos UV, mayor será el riesgo de padecer queratitis, conjuntivitis, cataratas,
envejecimiento prematuro de la piel, de dañar la retina o de desarrollar tumores cutáneos.Algunos medicamentos y cosméticos aumentan la
sensibilidad de la piel.
◗ Por lo tanto es muy importante:
- que siga las instrucciones de los capítulos 'Importante' y 'Sesiones de bronceado: frecuencia y duración';
- que la distancia de bronceado (distancia entre los filtros UV y el cuerpo) sea de 65 cm.
- que no supere el número máximo de horas de bronceado anuales (es decir, 19 horas o 1.140 minutos);
- que utilice siempre las gafas de protección mientras se broncea.
Sesiones de bronceado: frecuencia y duración
◗ Tome una sesión de bronceado una vez al día durante un periodo de cinco a diez días. Espere al menos 48 horas tras la primera sesión
antes de seguir con la segunda sesión. Después de esta serie de 5 a 10 días, le recomendamos que deje descansar la piel durante un tiempo.
B
Aproximadamente un mes después de realizar un tratamiento, la piel perderá gran parte de su bronceado. Entonces podrá comenzar otra serie.
B
Si quiere mantener el moreno, no deje de broncearse después de una serie, tome una o dos sesiones por semana.
Tanto si elige dejar de broncearse durante un tiempo, como si continúa haciéndolo con menor frecuencia, recuerde que no debe superar el
número máximo de horas de bronceado. Para este aparato el número máximo de horas de bronceado al año es 19 (=1.140 minutos).
Este máximo también se mantiene si utiliza el aparato para broncear partes del cuerpo (función º y ªº).
Ejemplo
Supongamos que realiza un tratamiento de bronceado de diez días, con una sesión de 7 minutos el primer día y de 20 los nueve días restantes.
◗ El tratamiento completo durará (1 x 7 minutos) + (9 x 20 minutos) = 187 minutos.
B
Esto significa que puede realizar 6 de estos tratamientos al año, ya que 6 x 187 minutos = 1.122 minutos.
Lógicamente esta cantidad máxima de horas de bronceado es válida para cada parte o lado del cuerpo tratado por separado (por ejemplo, la
parte frontal o la parte delantera del cuerpo).
Ta b l a
En la tabla puede verse que la primera sesión de un tratamiento debe tener siempre una duración de 7 minutos, independientemente de la
sensibilidad de la piel.
B
Si piensa que las sesiones son demasiado largas para usted (si siente la piel tirante y sensible después de una sesión), le recomendamos que
reduzca la duración de las sesiones 5 minutos, por ejemplo.
B
Para obtener un bronceado bonito y uniforme, gire ligeramente el cuerpo durante la sesión para que las partes laterales del cuerpo reciban mejor la
luz bronceadora.
B
Si siente la piel ligeramente tirante después de broncearse, puede aplicarse crema hidratante.
B
Si sólo broncea una parte de su cuerpo, puede guiarse también por la tabla que aparece a continuación en 'Sesiones de bronceado: frecuencia y
duración'.
B
Si utiliza la función º o la función ªº, le recomendamos que aumente las sesiones aproximadamente 5 minutos. Esto no se aplica a la primera
sesión, que no debe durar más de 7 minutos.
ESPAÑOL 11
Para personas con piel poco
sensible
7 minutos
30 minutos*
30 minutos*
30 minutos*
30 minutos*
30 minutos*
30 minutos*
30 minutos*
30 minutos*
30 minutos*
Para personas con piel de
sensibilidad normal
7 minutos
20-25 minutos
20-25 minutos
20-25 minutos
20-25 minutos
20-25 minutos
20-25 minutos
20-25 minutos
20-25 minutos
20-25 minutos
Para personas con piel muy
sensible
7 minutos
10 minutos
10 minutos
10 minutos
10 minutos
10 minutos
10 minutos
10 minutos
10 minutos
10 minutos
Duración de la sesión de
bronceado para cada parte del
cuerpo por separado.
1ª sesión
descanso de al menos 48 horas
2ª sesión
3ª sesión
4ª sesión
5ª sesión
6ª sesión
7ª sesión
8ª sesión
9ª sesión
10ª sesión
*) o más, dependiendo de la
sensibilidad de la piel.
Page 12

La relajación y la salud (sólo modelo HB975)
El calor tiene un efecto relajante. Piense en cómo se siente después de un baño caliente o tomar el sol.Puede disfrutar del mismo efecto
relajante conectando las lámparas infrarrojos.
Cuando tome una sesión relajante, tenga en cuenta los siguientes aspectos:
- Evite el calor excesivo.Aumente la distancia entre su cuerpo y las lámparas, si fuera necesario.
- Si le da demasiado calor en la cabeza, cúbrala o mueva el cuerpo de manera que le dé menos calor en la cabeza.
- Cierre los ojos durante una sesión relajante.
- No prolongue demasiado la sesión de relajación (véase el capítulo 'Sesiones de relajación: frecuencia y duración').
Sesiones relajantes: frecuencia y duración
Sólo modelo HB975
◗ Si no quiere levantarse inmediatamente después de una sesión de bronceado, puede conectar las lámparas infrarrojos, que mantendrán el
calor, para darse una sesión de relajación.
◗ También se puede dar una sesión relajante sin haber tomado previamente una sesión de bronceado. Puede hacerlo varias veces al día (por
ejemplo, 30 minutos por la mañana y por la noche).
Cómo preparar el aparato
◗ El aparato se puede trasladar y guardar fácilmente en la posición de transporte (fig. 2).
◗ Si quiere broncearse más el rostro (sólo modelo HB971) o si sólo quiere broncearse una parte del cuerpo (es decir, sólo las piernas o el
tronco), asegúrese de colocar el aparato en el lado correcto de la cama (fig. 3).
1 Para abrir el aparato, mueva las correderas de cierre en la dirección de la flecha (fig. 4).
Ya puede abrir la parte superior del aparato.
2 La parte superior irá abriéndose poco a poco (por sí sola o con un poco de ayuda) (fig.5).
3 Agarre el asa con las dos manos y sujete el aparato con el pie para que no se resbale. Incline la parte superior tirando del asa y
dibujando un arco con ella (fig. 6).
No incline demasiado la parte superior.
4 Tire de la parte superior hacia arriba y hacia usted al mismo tiempo (fig. 7).
Tendrá que hacer un poco de fuerza.
5 Gire las unidades de lámparas lateralmente todo lo que pueda, hasta que estén completamente alineadas (fig. 8).
6 La distancia entre los filtros UV y el cuerpo debe ser de 65 cm. La distancia entre los filtros UV y la superficie en la que se va a tumbar
(por ejemplo, la cama) debe ser de 85 cm (fig. 9).
7 Sujete la parte superior de la base cuando coloque o ajuste la altura del aparato (fig. 10).
Afloje el botón de ajuste de la altura (A) girándolo en sentido contrario a las agujas del reloj (dos o tres vueltas).
8 Ponga la mano bajo la parte horizontal de la base y extiéndala hasta la altura deseada (fig. 11).
9 Apriete bien el botón de ajuste de la altura (A) girándolo en el sentido de las agujas del reloj y suelte el pie (fig. 12).
◗ Puede comprobar si el aparato se ha colocado a la altura adecuada desplegando la cinta de medir (fig. 13).
◗ La cinta de medir se recogerá de manera automática si mueve la lengüeta roja a los lados (fig. 14).
10 Gire la unidad central de lámparas 90c hasta que oiga un clic (fig. 15).
Nota: la unidad central de lámparas sólo se puede girar en la dirección de la flecha.
El aparato sólo se puede conectar si las unidades de lámparas laterales y la unidad central se han extendido completamente y se han
colocado en la posición adecuada. Esto se aplica tanto a las sesiones de bronceado como a las de relajación.
◗ Posición correcta (fig. 16).
Ahora ya puede utilizar el aparato.
Cómo usar el aparato
1 Desenrolle completamente el cable.
2 Enchufe el aparato a la red.
◗ El mando a distancia mostrará todas las funciones que debe ajustar el usuario. El tiempo de bronceado o de relajación está en 00 (fig. 17).
B
Sólo el modelo HB975 muestra el símbolo l (sesión de relajación).
B
Sólo el modelo HB971 muestra el símbolo ª (bronceado facial extra).
Funciones de ajuste:
1 Utilice los botones ¡ y ™ para pasar de una función a otra (fig. 18).
El símbolo subrayado muestra la función que está programando.
2 Seleccione bronceado, bronceado extra o relajación.
Elija el símbolo • si quiere broncearse el cuerpo entero.
Elija el símbolo • y ª si quiere broncearse el cuerpo entero y dar un bronceado extra al rostro (sólo modelo HB971).
Elija º si sólo quiere broncearse una parte del cuerpo.
Elija los símbolos ª y º si sólo quiere broncearse una parte del cuerpo y dar un bronceado extra a su rostro (sólo modelo HB971).
Elija – si prefiere recibir una sesión relajante (de calor) en todo el cuerpo (sólo modelo HB975).
Nota: en estas instrucciones, las funciones ;ªse utilizan en los dibujos como ejemplo de lo que debe mostrar la pantalla.
ESPAÑOL12
Page 13

ESPAÑOL 13
Cómo programar el tiempo para una sesión de bronceado o de relajación.
1 Programe el tiempo de la sesión de bronceado o de relajación pulsando el botón + para adelantar el tiempo o el botón - para retrasarlo
(fig. 19).
Mantenga el botón pulsado para ajustar el tiempo con mayor rapidez.
2 Colóquese directamente debajo de las lámparas del aparato para asegurarse de que los lados del cuerpo también se broncean
correctamente.
3 Póngase las gafas de protección que vienen con el aparato.
4 Conecte las lámparas bronceadoras o las lámparas infrarrojos pulsando el botón de marcha ∞ (fig. 20).
B
Nota: durante la puesta en marcha, puede que las lámparas produzcan un zumbido. El sonido cesará en cuando las lámparas se calienten del todo.
B
Nota: las lámparas comenzarán a emitir una luz visiblemente más fuerte una vez transcurridos unos 60 segundos, lo que significa que están a toda
potencia. A partir de ese momento, puede conectar o desconectar el solarium facial.
B
Nota: si las lámparas no se ponen en funcionamiento transcurridos 20 segundos, desconecte el aparato (∞), deje que las lámparas se enfríen
durante 3 minutos, establezca el tiempo de bronceado y vuelva a conectar el aparato (∞).
◗ Aparecerá una señal intermitente; el tiempo de bronceado se muestra en la pantalla (25 minutos en este caso) (fig.21).
Comenzará la cuenta atrás del tiempo programado para la sesión de bronceado o de relajación.
◗ Durante la sesión, puede conectar o desconectar el solarium facial (•, ª) sin tener que desconectar todo el aparato. (Esto también se aplica
al bronceado extra del rostro combinado con º) (fig. 22).
Los símbolos elegidos permanecen en la pantalla, pero el resto no.
◗ Durante el último minuto de la sesión oirá un bip (fig. 23).
◗ Durante este minuto puede pulsar el botón pausa/repetición § para repetir el tiempo (fig. 24).
◗ La pantalla muestra el tiempo y comienza la cuenta atrás. Se deja de oír el bip.
◗ También se puede programar un tiempo distinto.
Para hacerlo, no tiene que esperar los 3 minutos necesarios para que las lámparas se enfríen después de haber desconectado el aparato.
Ese tiempo de espera no se aplica a las lámparas infrarrojos (sólo modelo HB975).
5 Establezca un tiempo nuevo pulsando los botones ¢ y £. Luego pulse el botón de inicio ∞ (fig. 25).
Deja de oírse el bip y empezará la cuenta atrás del tiempo que se ha seleccionado.
◗ Si no repite el tiempo o si no establece un tiempo nuevo durante el último minuto de la sesión, la cuenta atrás continuará y el aparato se
desconectará automáticamente en cuanto se consuma el tiempo.
Cómo interrumpir la sesión de bronceado o de relajación
1 Puede interrumpir la sesión de bronceado pulsando el botón de pausa/repetición § (fig. 26).
Las lámparas se desconectarán y en la pantalla aparecerá ¶ junto con el tiempo restante. El tiempo restante parpadeará durante 3 minutos.
Durante este tiempo se enfrían las lámparas. Cuando cese el parpadeo, puede volver a conectar de nuevo el aparato, pulsando el botón ∞.
Ahora se empezará a descontar el tiempo restante.
2 Puede interrumpir la sesión de relajación pulsando el botón de pausa/repetición §.
Las lámparas se desconectarán y en la pantalla aparecerá ¶ junto con el tiempo restante (sin parpadear). Puede volver a conectar
inmediatamente el aparato pulsando el botón ∞. El tiempo de espera no se aplica a las lámparas infrarrojos. Se empezará a descontar el tiempo
restante.
Cómo cambiar el tiempo de bronceado o de relajación durante la sesión
1 Cuando se está bronceando, puede cambiar el tiempo programado pulsando el botón ∞. Las lámparas se desconectarán. Establezca a
continuación un tiempo nuevo pulsando los botones ¢ y £. Espere hasta que el tiempo programado deje de parpadear (esto tardará 3
minutos porque primero deben enfriarse las lámparas) y pulse de nuevo el botón ∞.
◗ Cuando esté tomando una sesión relajante (l), puede cambiar el tiempo pulsando el botón ∞. Las lámparas se desconectarán. Puede volver
a conectar inmediatamente el aparato pulsando el botón ∞. El tiempo de espera no se aplica para las lámparas infrarrojos (el nuevo tiempo
establecido no parpadea en la pantalla).
Asegúrese de que están conectados los tubos correctos:
◗ (Modelos HB975, HB971) Bronceado: 4 lámparas (una en cada unidad de lámparas) o 1 lámpara (en la unidad de lámparas lateral). Las
lámparas emiten una luz azulada (fig. 27).
◗ (Sólo modelo HB975) Relajación: 2 lámparas (una en cada unidad de lámparas lateral). Las lámparas emiten una luz roja (fig. 28).
Cómo enfriar el aparato
El aparato se enfría mediante unos ventiladores para evitar que los materiales y las piezas se calienten demasiado. Las lámparas no funcionarán si
están demasiado calientes (véase por ejemplo, 'Cómo interrumpir la sesión de bronceado o de relajación')
◗ Después de desconectar las lámparas bronceadoras o las lámparas infrarrojos, los ventiladores seguirán funcionando durante otros tres
minutos.
Es muy práctico, porque le permite poder volver a utilizar los tubos sólo 3 minutos después de desconectarlos (las lámparas infrarrojos no
necesitan enfriarse antes de volver a conectarlos).
B
Por supuesto, si desconecta el aparato desenchufándolo de la pared, los ventiladores no podrán enfriar durante otros 3 minutos. Por lo tanto, si
inmediatamente después otra persona quiere usar el aparato para darse una sesión de bronceado, debe dejar que primero se enfríe el aparato.
B
Sólo modelo HB975: si desea disfrutar de una sesión de bronceado inmediatamente después de haber recibido una sesión de relajación (l), debe
dejar que el aparato se enfríe durante 3 minutos. Como resultado de la sesión de relajación, las lámparas se calentarán y necesitarán enfriarse
antes de que se puedan conectar.
Page 14

Cómo limpiar el aparato
1 Desenchufe siempre el aparato y déjelo enfriar antes de empezar a limpiarlo.
2 Limpie la parte exterior del aparato con un paño húmedo.
No deje que entre agua en el aparato.
3 No utilice estropajos.
No utilice nunca líquidos abrasivos como detergentes, gasolina o acetona para limpiar el aparato.
◗ Puede limpiar el exterior de los filtros UV con un paño suave humedecido con un poco de alcohol de quemar.
Cómo guardar el aparato
1 Deje enfriar el aparato durante 15 minutos antes de ponerlo en la posición de transporte y guardarlo.
◗ Mientras tanto, puede recoger el cable y ponerlo en la base del aparato junto con el mando a distancia.
2 Asegúrese de que el cable y el mando a distancia están guardados correctamente, ya que, si no, podrían quedarse atrapados entre las
piezas del aparato al ponerlo en posición de transporte (fig. 29).
3 Gire la unidad central de tubos 90c para alinearla con las unidades de lámparas laterales (fig. 30).
4 Sostenga firmemente la parte superior del pie con una mano y afloje el botón de ajuste de la temperatura (A) girándolo en sentido
contrario a las agujas del reloj (fig. 31).
5 Deslice el pie hacia dentro (fig. 32).
6 Apriete bien el botón de ajuste de altura (A) girándolo en el sentido de las agujas del reloj (fig. 33).
7 Gire las dos unidades de lámparas laterales, la una hacia la otra (fig. 34).
8 Agarre el asa con las dos manos y apoye un pie contra el aparato para que no se resbale. Incline la parte superior hacia atrás, hacia la
base (fig. 35).
El sistema automático de apertura sólo funcionará si inclina lo suficiente la parte superior hacia atrás para juntarla con la base. Sin embargo,
debe tener cuidado de no inclinarla demasiado porque podría perder el equilibrio.
9 Empuje la parte superior hacia abajo (fig. 36).
10 Bájela despacio hasta la base (fig. 37).
11 Sujete las unidades de lámparas a la base empujando las dos correderas de cierre en la dirección que indica la flecha (fig. 38).
Sustitución
La luz de las lámparas perderá intensidad con el tiempo (es decir,tras unos años de uso normal). Cuando esto ocurra, notará que la capacidad
de bronceado del aparato disminuye. Puede resolver este problema programando un tiempo de bronceado ligeramente superior o sustituyendo
las lámparas.
◗ El mando a distancia del aparato incluye un contador que registra el número de horas de funcionamiento.
1 Elija la función •. Ponga el tiempo a 00 y mantenga apretado el botón de pausa/repetición § para mostrar el número de horas de
funcionamiento (fig. 39).
El número máximo de horas que puede mostrar el contador es 999. Una vez alcanzado este número,seguirá contando desde 000.
2 Cuando suelte el botón pausa/repetición, el número de horas de funcionamiento desaparece de la pantalla.
◗ Tras 750 horas de alumbrado, aparecerá una L en el lado izquierdo de la pantalla. Esto significa que la potencia de bronceado del aparato ha
disminuido tanto que es aconsejable cambiar las lámparas (fig. 40).
Por supuesto,puede dejar el cambio para más adelante, seleccionando un tiempo de bronceado mayor.
3 Para quitar la L de la pantalla, pulse el botón pausa/repetición § con el tiempo en 00 y el símbolo de función • en la pantalla. Mantenga
presionado el botón pausa/repetición, primero pulse el botón ¢ y luego el botón £. Entonces la L desaparecerá de la pantalla (fig.41).
Sólo para el modelo HB975: Sustituya los tubos infrarrojos cuando dejen de funcionar.
Los filtros UV protegen de las radiaciones no deseadas. Por lo tanto es importante que sustituya inmediatamente un filtro roto o dañado.
Póngase en contacto con un centro autorizado de Philips para cambiar las lámparas bronceadoras (Philips HPA flexpower 400-600), las
lámparas infrarrojos (IRK 15020R ó 4222 062 95600) y los filtros UV. Sólo allí encontrará los conocimientos y las habilidades necesarios, así
como las piezas de repuesto originales para el aparato.
Medio ambiente
Las lámparas del aparato contienen sustancias que pueden ser nocivas para el medio ambiente. Cuando deseche las lámparas, no las tire junto
con el resto de desperdicios domésticos sino en un lugar especialmente destinado a este fin.
Garantía y servicio
Si necesita servicio o información, o si tiene algún problema, visite la página web de Philips en www.philips.com, o póngase en contacto con el
Servicio Philips de Información al Consumidor de su país (encontrará el número de teléfono en el folleto de Garantía Mundial). Si en su país no
hay Servicio Philips de Información al Consumidor, consulte a su distribuidor local Philips o póngase en contacto con el Service Department of
Philips Domestic Appliances and Personal Care BV.
Restricciones de la garantía
Las lámparas no se incluyen en las condiciones de la garantía internacional.
ESPAÑOL14
Page 15

ESPAÑOL 15
Solución
Compruebe si las dos unidades de lámparas laterales y la central están en la posición correcta
(véase 'El aparato no se enciende' en 'Guía de problemas y soluciones').
Compruebe si los conductos de ventilación están abiertos (véase 'El aparato no se enciende'
en 'Guía de problemas y soluciones').
Compruebe los filtros UV (los paneles de vidrio especiales que cubren las lámparas). Si faltaran
estos filtros o si estuvieran dañados o rotos, deje de utilizar el aparato y póngase en contacto
con su distribuidor o con un centro de servicio de Philips.
Póngase en contacto con su distribuidor local o con un centro de servicio de Philips.
Código de error
E01
E02 y códigos con un número superior
Códigos de error
La pantalla del mando a distancia puede mostrar códigos de error.A continuación, explicamos lo que debe hacer si aparece un código de error en la pantalla.
Nota: en la pantalla aparece E01 durante 5 segundos y al mismo tiempo se oye un bip.
Nota: en la pantalla se mantiene visible E02 y códigos con un número superior. Si aparecen dichos códigos, es que el aparato tiene un problema grave y no se
debe utilizar más.
Posible causa
La clavija no se ha insertado (correctamente) en el enchufe.
Hay un fallo de alimentación. Compruebe la red con otro aparato.
Las lámparas están demasiado calientes para continuar. Déjelas enfriar primero durante tres
minutos.
El aparato no estaba suficientemente frío y la protección contra el sobrecalentamiento lo ha
desconectado automáticamente. Elimine la causa del sobrecalentamiento (por ejemplo,una
toalla que está bloqueando uno o más ventiladores). Espere 10 minutos y vuelva a conectar el
aparato.
Las dos unidades de lámparas laterales y la central no se han colocado correctamente (véase
'Cómo preparar el aparato').
Compruebe el fusible del circuito al que está conectado el solarium. El fusible adecuado es uno
estándar 16A (o 10A para Suiza y los países escandinavos) o un fusible automático.También es
posible que salte el fusible porque ha conectado demasiados aparatos diferentes al mismo
circuito.
Está utilizando un cable alargador demasiado largo o que no tiene la corriente adecuada.
Consulte a su distribuidor.Nuestro consejo general es que no utilice cables alargadores.
No está siguiendo la tabla de bronceado adecuada para su tipo de piel.
La distancia entre los filtros UV y la superficie en la que está tumbado es mayor a la aconsejada.
Después de utilizar durante mucho tiempo las lámparas, la emisión de rayos UV disminuye. Este
efecto sólo es evidente pasados algunos años. Puede solucionar este problema seleccionando
un tiempo de bronceado mayor o sustituyendo las lámparas.Tras 750 horas de funcionamiento,
aparecerá una L en la pantalla indicándole que es recomendable que sustituya las lámparas.
No ha empujado lo suficiente la parte superior del aparato hacia atrás.Asegúrese de que
primero echa la parte superior hacia atrás antes de empujarla hacia abajo (consulte 'Cómo
guardar el aparato').
El aparato no se abre automáticamente. En ese caso, debe pulsar primero el botón de apertura
(B) y después ya podrá volver a plegar el aparato en posición de transporte, según se indica en
el capítulo 'Cómo guardar el aparato'. Si no consigue abrir el aparato después de varios
intentos, póngase en contacto con su distribuidor o con un centro de servicio de Philips.
Problema
El aparato no se enciende.
El fusible corta la corriente al conectar el solarium o mientras
se está usando.
Pobres resultados de bronceado
El aparato no se puede poner en la posición de transporte.
Guía de problemas y soluciones
Si el aparato no funciona correctamente, puede que tenga algún defecto. En ese caso le recomendamos que se ponga en contacto con su distribuidor o con un
centro de servicio Philips.
Puede que el aparato no funcione porque no se ha instalado o no se ha utilizado de acuerdo con las instrucciones. En ese caso puede resolver el problema
usted mismo, consultando la siguiente guía de problemas y soluciones.
Page 16

Introduzione
Solarium per l'intero corpo
Con questo apparecchio potrete ottenere una splendida abbronzatura fra le pareti di casa. Le lampade abbronzanti emettono luce, calore e
raggi ultravioletti, dandovi l'impressione di essere sdraiati al sole. Lo speciale filtro UV lascia passare soltanto i raggi necessari per l'abbronzatura.
Le lampade abbronzanti emettono una quantità di raggi infrarossi sufficienti per procurare un piacevole calore.
Solo modello HB975: oltre alle sedute abbronzanti potete sottoporvi anche a sedute rilassanti, accendendo semplicemente le speciali lampade a
raggi infrarossi.
Il timer fa in modo che ciascuna seduta non possa durare più di 30 minuti. Ad ogni modo, come nel caso del sole, è sempre meglio non esporsi
troppo (vedere il capitolo: "L'abbronzatura e la vostra salute" e "Il relax e la vostra salute").
Descrizione generale (fig. 1).
A Manopola regolazione altezza
B Pulsante sblocco
C 4 lampade abbronzanti Philips HPA flexpower 400-600
D 2 lampade a raggi infrarossi mod. IRK 15020 R (1500W) o 4222 062 95600 (1100W) (solo mod. HB975).
E Supporto
F Occhiali di protezione
- (mod. HB702/numero di codice 4822 690 80147)
G Cursore di bloccaggio
H Maniglia
I Scomparto per il cavo e il telecomando
Importante
Prima di usare l'apparecchio, leggete attentamente le istruzioni per l'uso e conservatele per eventuali riferimenti futuri.
◗ Prima di collegare l'apparecchio alla presa di corrente, controllate che la tensione indicata sull'apparecchio corrisponda a quella della rete
locale.
◗ Se la spina non è inserita in modo corretto nella presa, si può surriscaldare. Accer tatevi che la spina sia inserita nel modo corretto.
◗ L'apparecchio deve essere collegato a un circuito protetto con un fusibile standard da 16A (10A per Svizzera e paesi scandinavi) o un
fusibile automatico.
◗ Dopo l'uso togliete sempre la spina dalla presa di corrente.
◗ Nel caso il cavo di alimentazione fosse danneggiato,dovrà essere sostitutio esclusivamente presso un centro autorizzato Philips per evitare
situazioni a rischio.
◗ L'acqua e l'elettricità rappresentano una combinazione pericolosa! Non usate l'apparecchio in ambienti umidi (ad esempio nel bagno,vicino
alla doccia o alla piscina).
◗ Al termine di una nuotata o dopo aver fatto la doccia, asciugatevi con cura prima di usare l'apparecchio.
◗ Lasciate raffreddare l'apparecchio per circa 15 minuti prima di metterlo nella posizione per il trasporto o prima di riporlo.
◗ Assicuratevi che le aperture poste nel gruppo lampade centrali e laterali e nella base rimangano aperte durante l'uso.
◗ L'apparecchio è provvisto di un dispositivo automatico di protezione contro il surriscaldamento. Nel caso l'appparecchio non venga
sufficientemente raffreddato (ad esempio perchè le prese di ventilazione sono coperte), il solarium si spegnerà automaticamente. Dopo aver
eliminato le cause che hanno provocato il surriscaldamento, l'apparecchio potrà essere riacceso.
◗ I filtri UV diventano bollenti durante l'uso. Non toccateli!
◗ L'apparecchio contiene parti incernierate: fate attenzione a non schiacciarvi le dita!
◗ Le parti in gomma montate sull'apparecchio possono emettere un odore sgradevole le prime volte che userete l'apparecchio. Non si tratta
di un difetto di fabbricazione: l'odore svanirà dopo le prime sedute.
◗ Non usate mai l'apparecchio nel caso in cui un filtro UV sia danneggiato, rotto o mancante.
◗ Non usate l'apparecchio nel caso in cui il telecomando sia difettoso.
◗ Fate in modo che i bambini non giochino con l'apparecchio.
◗ Non superate il numero di sedute o le ore di abbronzatura consigliate (vedere "Sedute abbronzanti: quante volte? Per quanto tempo?").
◗ Evitate di esporvi alle sedute abbronzanti e/o rilassanti se siete malati e/o se state assumendo farmaci o usando cosmetici che potrebbero
aumentare la sensibilità della pelle. Prestata particolare attenzione nel caso di ipersensibilità ai raggi UV o IR. In caso di dubbi, consultate il
medico.
◗ Non esponete ciascuna parte del corpo più di una volta al giorno. Evitate di esporvi in modo eccessivo ai raggi diretti del sole dopo una
seduta abbronzante.
◗ Rivolgetevi al medico nel caso appaiano ulcerazioni, nei o noduli persistenti sulla pelle.
◗ L'apparecchio non deve essere usato da persone che si scottano senza abbronzarsi, da persone già scottate, dai bambini o da persone
affette (o che sono state affette in passato) da tumori alla pelle o comunque predisposte ad essi.
◗ Durante le sedute indossate sempre gli speciali occhiali di protezione forniti con l'apparecchio per evitare dosi eccessive di luce e raggi UV e
IR (vedere anche la sezione "L'abbronzatura e la vostra salute").
◗ Prima di iniziare una seduta abbronzante, togliete qualsiasi traccia di creme, rossetti o altri cosmetici.
◗ Non usate creme solari o prodotti per accelerare l'abbronzatura.
◗ Se la pelle appare secca dopo la seduta, potete applicare una crema idratante.
◗ Per ottenere un'abbronzatura uniforme, sdraiatevi direttamente sotto le lampade.
◗ Mantenetevi ad una distanza di almeno 65 cm dal solarium.
◗ Prima di spostare il solarium, assicuratevi che sia nella posizione prevista per il trasporto. Controllate che le due parti del solarium siano state
correttamente fissate prima di spostare l'apparecchio. Non cercate di sollevare il solarium da soli.
◗ Alcuni colori possono sbiadire per effetto del sole: è possibile che si verifichi lo stesso utilizzando il solarium.
◗ Non aspettatevi di ottenere risultati migliori con il solarium rispetto a quelli ottenibili con i raggi del sole.
ITALIANO16
Page 17

L'abbronzatura e la vostra salute
Il sole, i raggi UV e l'abbronzatura
Il sole
Il sole fornisce diversi tipi di energia. I raggi visibili ci permettono di vedere, quelli ultravioletti (UV) permettono alla pelle di abbronzarsi mentre
quelli infrarossi (IR) ci riscaldano piacevolmente.
I raggi UV e la vostra salute
Il processo di abbronzatura richiede un certo periodo di tempo, sia esso legato al sole o al solarium. I primi risultati si notano infatti solo dopo
alcune sedute (vedere il capitolo "Sedute abbronzanti: Quante volte? Per quanto tempo?").
Dopo un'eccessiva esposizione ai raggi ultravioletti (luce naturale o artificiale, proveniente dal solarium) la pelle può scottarsi.
Insieme a numerosi altri fattori, fra cui un'esposizione eccessiva ai raggi del sole, l'uso improprio o eccessivo del solarium può aumentare il
rischio di problemi alla pelle o agli occhi. Da una parte la natura, l'intensità e la durata delle radiazioni e dall'altra la sensibilità individuale sono
fattori decisivi per stabilire il grado con cui questi problemi si possono verificare.
Più gli occhi e la pelle sono esposti ai raggi UV e maggiore sarà il rischio di disturbi quali l'infiammazione della cornea, congiuntivite, lesione della
retina, cataratta, invecchiamento precoce e tumori della pelle.Alcuni farmaci e cosmetici possono inoltre aumentare la sensibilità della pelle.
◗ È pertanto della massima importanza:
- attenersi alle istruzioni riportate nelle sezioni "Impor tante" e "Sedute abbronzanti: quante volte? Per quanto tempo?";
- rispettare le distanza consigliata di 65 cm (fra i filtri UV e il corpo)
- non superare il numero annuo consigliato di ore di abbronzatura (ad es. 19 ore o 1140 minuti);
- indossare sempre gli speciali occhiali di protezione durante le sedute.
Sedute abbronzanti: quante volte e per quanto tempo?
◗ Sottoponetevi ad una seduta al giorno, per un periodo di 5-10 giorni. Lasciate trascorrere almeno 48 ore fra la prima e la seconda seduta.
Dopo il primo ciclo di 5-10 sedute, vi consigliamo di lasciar riposare la pelle per un po'.
B
Circa un mese dopo il ciclo di sedute, la pelle avrà perso gran parte dell'abbronzatura.A questo punto potete iniziare un nuovo ciclo.
B
Per mantenere l'abbronzatura non dovete sospendere il trattamento, ma potete anche sottoporvi a una o due sedute settimanali.
Sia che decidiate di interrompere le sedute per un po' o che continuiate con le sedute anche se con frequenza minore, ricordate di non superare il
limite massimo di ore consigliate. Per questo apparecchio, vi consigliamo al massimo 19 ore di sedute abbronzanti (= 1140 minuti) all'anno.
Esempio
Immaginiamo che vi sottoponiate a un ciclo di 10 giorni, con una seduta di 7 minuti il primo giorno e di 20 minuti nei nove giorni successivi.
◗ L'intero ciclo sarà così composto da (1 x 7 minuti) + (9 x 20 minuti) = 187 minuti.
B
Questo significa che nel corso dell'anno potrete sottoporvi a 6 di questi cicli (6 x 187 = 1122 minuti).
Evidentemente, o número máximo de horas de bronzeamento é válido para cada parte do corpo que for tratada separadamente.
Tabella
Dalla tabella allegata risulta che la prima seduta di ciascun cicolo dovrebbe durare al massimo 7 minuti, indipendentemente dalla sensibilità della
pelle.
B
Se pensate che le sedute siano troppo lunghe per la vostra pelle (ad es. nel caso in cui la pelle risulti tirata o eccessivamente sensibile al termine
della seduta), vi consigliamo di ridurre la durata della sessione, magari di 5 minuti.
B
Per un'abbronzatura dorata e uniforme, ruotate leggermente il corpo durante la seduta per esporre meglio le varie parti del corpo ai raggi UV.
B
Se la vostra pelle risulta leggermente tirata dopo la seduta, potete applicare della crema idratante.
B
Se abbronzate solo una parte del corpo, usate comunque la tabella riportata sopra, insieme alle informazioni contenute in "Sedute abbronzanti:
quante volte? Per quanto tempo?"
B
Se usate la funzione º o la funzione ªº vi consigliamo di prolungare le sedute abbronzanti di circa 5 minuti. Questo prolungamento non si applica
alla prima seduta abbronzante, che non deve comunque superare i 7 minuti.
ITALIANO 17
Per persone con pelle poco
sensibile
7 minuti
30 minuti*
30 minuti*
30 minuti*
30 minuti*
30 minuti*
30 minuti*
30 minuti*
30 minuti*
30 minuti*
Per persone con pelle normale
7 minuti
20-25 minuti
20-25 minuti
20-25 minuti
20-25 minuti
20-25 minuti
20-25 minuti
20-25 minuti
20-25 minuti
20-25 minuti
Per persone con pelle molto
sensibile
7 minuti
10 minuti
10 minuti
10 minuti
10 minuti
10 minuti
10 minuti
10 minuti
10 minuti
10 minuti
Durata della seduta abbronzante
per ciascuna parte del corpo.
1° seduta
intervallo di almeno 48 ore
2° seduta
3° seduta
4° seduta
5° seduta
6° seduta
7° seduta
8° seduta
9° seduta
10° seduta
*) o per più tempo, in relazione alla
vostra sensibilità.
Page 18

Il relax e la vostra salute (solo mod.HB975)
Il calore ha un effetto rilassante. Pensate ai vantaggi legati ad un bel bagno caldo o a qualche ora distesi sotto i caldi raggi del sole. Potete
ottenere gli stessi benefici accendendo le lampade a raggi infrarossi.
Prima di sottoporvi ad una seduta rilassante, ricordate quanto segue:
- Evitate di riscaldarvi troppo. Se necessario, aumentate la distanza fra voi e le lampade.
- Se la testa diventa troppo calda, copritela o spostate il corpo in modo da evitare un eccessivo surriscaldamento.
- Durante la seduta rilassante, tenete gli occhi chiusi.
- Non prolungate troppo una seduta rilassante (vedere la sezione: "Sedute rilassanti: quante volte? Per quanto tempo'")
Sedute rilassanti: quante volte? per quanto tempo?
Solo mod. HB975
◗ Se non volete alzarsi subito dopo una seduta abbronzante, potete accendere le lampade a raggi infrarossi e sottoporvi ad una seduta
rilassante, in modo da rimanere al caldo.
◗ Potete anche sottoporvi solo ad una seduta rilassante, senza abbronzarvi, ripetendola anche più volte al giorno (ad es. 30 minuti al mattino e
alla sera).
Come preparare il solarium
◗ L'apparecchio è facile da spostare e da riporre (nella posizione di trasporto) (fig. 2).
◗ Se volete abbronzare in particolar modo il viso (solo mod. HB971) o soltanto una parte del corpo (ad esempio le gambe o la parte
superiore del corpo), ricordate di posizionare l'apparecchio dalla parte giusta del letto (fig.3).
1 Per aprire l'apparecchio, spostate i cursori di bloccaggio nella direzione della freccia (fig. 4).
A questo punto la parte superiore dell'apparecchio è sbloccata.
2 La parte superiore si solleverà leggermente (da sola o con un piccolo aiuto) (fig. 5).
3 Afferrate la maniglia con entrambe le mani e appoggiate un piede sul solarium per evitare che scivoli. Sollevate la parte superiore
compiendo un movimento ad arco (fig. 6).
Non sollevate eccessivamente la parte superiore.
4 Tirate la parte superiore contemporaneamente verso l'alto e verso di voi (fig. 7).
Questo movimento richiederà una certa forza.
5 Muovete lateralmente entrambe le lampade laterali fino a quando risultano in linea l'una con l'altra (fig. 8).
6 La distanza consigliata fra i filtri UV e il corpo e di 65 cm. La distanza fra i filtri UV e la superficie su cui vi sdraiare (ed.es. un letto) deve
invece essere di 85 cm (fig. 9).
7 Tenete ferma la parte superiore del supporto mentre impostate o regolate l'altezza (fig. 10).
Allentate la manopola per la regolazione dell'altezza (A) ruotandola in senso antiorario (due o tre giri).
8 Mettete la mano sotto la parte orizzontale del supporto e regolatelo in base all'altezza desiderata (fig. 11).
9 Fissate saldamente la manopola per la regolazione dell'altezza (A) ruotandola in senso orario e lasciate andare il supporto (fig. 12).
◗ Per stabilire se avete impostato l'altezza giusta, potete usare l'apposito metro fornito con l'apparecchio (fig. 13).
◗ Il metro verrà riavvolto automaticamente spostando lateralmente la linguetta rossa (fig. 14).
10 Ruotate il gruppo di lampade centrali 90c fino a quando sentirete un click (fig. 15).
Nota: il gruppo di lampade centrali può essere ruotato solo nella direzione della freccia.
L'apparecchio può essere acceso solo se entrambi i gruppi di lampade laterali e il gruppo di lampade centrali sono state estratte
completamente e posizionate in modo corretto. Questo vale sia per le sedute abbronzanti che per quelle rilassanti.
◗ Posizione corretta (fig. 16).
A questo punto l'apparecchio è pronto per l'uso.
Come usare l'apparecchio
1 Srotolate completamente il cavo.
2 Inserite la spina nella presa di corrente.
◗ Il telecomando indicherà tutte le funzioni che devono essere regolate dall'utente. La durata della seduta abbronzante o rilassante è indicata
con 00 (fig. 17).
B
Solo il modello HB975 mostra il simbolo l (seduta rilassante)
B
Solo il modello HB971 mostra il simbolo ª (abbronzatura extra per il viso)
Funzioni di regolazione
1 Usate i pulsanti ¡™per passare da una funzione all'altra (fig. 18).
I simboli sottolineati indicano la funzione che state programmando.
2 Selezionate abbronzatura, abbronzatura extra o relax.
Scegliete il simbolo • se volete abbronzare tutto il corpo.
Scegliete il simbolo • e ª se volete abbronzare tutto il corpo e aggiungere un'abbronzatura extra per il viso (solo HB971).
Scegliete º se volete abbronzare solo una parte del corpo.
Scegliete i simboli ª e º se volete abbronzare solo una parte del corpo e aggiungere un'abbronzatura extra per il viso (solo HB971).
Scegliete – se preferite una seduta rilassante (calore) per tutto il corpo (solo HB975).
Nota: in queste istruzioni per l'uso, le funzioni ;ªvengono utilizzate nelle figure come esempi di quello che potrebbe visualizzare il display.
ITALIANO18
Page 19

ITALIANO 19
Come impostare la durata di una seduta abbronzante o rilassante.
1 Impostate la durata della seduta abbronzante o rilassante premendo il pulsante + per aumentare il tempo o il pulsante - per ridurlo (fig. 19).
Tenete premuto il pulsante per regolare più rapidamente il tempo.
2 Sdraiatevi direttamente sotto le lampade dell'apparecchio per abbronzare anche i lati del corpo.
3 Indossate gli occhiali di protezione forniti con l'apparecchio.
4 Accendete le lampade abbronzanti o quelle a raggi infrarossi premendo il pulsante di start ∞ (fig. 20).
B
Nota: durante il periodo di start-up le lampade abbronzanti potrebbero produrre un suono sommesso, destinato a scomparire non appena le
lampade saranno perfettamente in funzione.
B
Nota: le lampade abbronzanti inizieranno ad emettere una luce decisamente più forte dopo circa 60 secondi, quando inizieranno a funzionare a
piena potenza. Da questo momento in poi, potete accendere o spegnere la lampada facciale.
B
Nota: se le lampade non si accendono dopo circa 20 secondi, spegnete l'apparecchio (∞), lasciate raffreddare le lampade per 3 minuti, impostate il
tempo di abbronzatura e riaccendete le lampade (∞).
◗ Apparirà un segnale lampeggiante, mentre sul display viene visualizzato il tempo impostato (in questo caso 25 minuti) (fig.21).
A questo punto inizierà il conto alla rovescia della durata della seduta abbronzante o rilassante.
◗ Durante la seduta potete accendere o spegnere la lampada facciale (•, ª) senza dover spegnere l'intero apparecchio. (Questo vale anche
per l'abbronzatura extra del viso con º) (fig. 22).
I simboli scelti rimarrano visualizzati sul display, mentre gli altri si spegneranno.
◗ Durante l'ultimo minuto della seduta sentirete un bip prolungato (fig. 23).
◗ Durante questo minuto, potete premere il pulsante pausa/ripetizione § per ripetere il tempo impostato (fig. 24).
◗ Il display indicherà il tempo impostato e avrà inizio il conto alla rovescia. Il segnale acustico verrà interrotto.
◗ È anche possibile impostare un nuovo tempo.
In questo modo, eviterete di dover aspettare i tre minuti necessari per raffreddare le lampade dopo averle spente.
Questo tempo di attesa non viene applicato nel caso delle lampade a raggi infrarossi (solo mod. HB975).
5 Impostate un nuovo tempo premendo i pulsanti ¢ e £. Poi premete il pulsante di start ∞ (fig. 25).
Il segnale acustico si interrompe e inizia il conto alla rovescia del tempo appena impostato.
◗ Se non ripetete la seduta abbronzante o impostate un nuovo tempo durante l'ultimo minuto della seduta, il conto alla rovescia continuerà e
l'apparecchio si spegnerà non appena sarà trascorso il tempo impostato.
Come interrompere la seduta abbronzante o rilassante
1 Potete interrompere la seduta abbronzante premendo il pulsante pause/repeat § (fig. 26).
Le lampade si spegneranno, ¶ apparirà sul display insieme al tempo rimanente, che lampeggerà per circa 3 minuti. Durante questo periodo, le
lampade si raffredderanno. Quando il tempo smetterà di lampeggiare, potrete riaccendere l'apparecchio premendo il pulsante ∞. Inizierà così il
conto alla rovescia del tempo rimanente.
2 Per interrompere la seduta rilassante, premete il pulsante pause/repeat §.
Le lampade si spegneranno, ¶ apparirà sul display insieme al tempo rimanente (non lampeggiante). Potete riaccendere subito l'apparecchio
premendo il pulsante ∞. Il tempo di attesa non si applica nel caso di lampade a raggi infrarossi. Inizierà quindi il conto alla rovescia del tempo
rimanente.
Come modificare la durata di una seduta abbronzante o rilassante durante la seduta stessa
1 Mentre vi state abbronzando potete modificare il tempo impostato premendo il pulsante ∞. Le lampade si spegneranno.A questo punto
impostate un nuovo tempo premendo i pulsanti ¢ e £.Aspettate fino a quando il tempo indicato smette di lampeggiare (ci vorranno
circa 3 minuti perché le lampade devono prima raffreddarsi), poi premete nuovamente il pulsante ∞.
◗ Mentre vi state rilassando (l) potete modificare il tempo impostato premendo il pulsante ∞. Le lampade si spegneranno. A questo punto
impostate un nuovo tempo e riaccendere subito l'apparecchio premendo il pulsante ∞. Il tempo di attesa non si applica nel caso di lampade
a raggi infrarossi (il nuovo tempo impostato non lampeggia sul display).
Controllate di aver acceso le lampade giuste:
◗ (HB975, HB971) Abbronzatura: 4 lampade (una in ciascuna unità) o 1 lampada (nell'unità laterale). Le lampade emettono una luce bluastra
(fig. 27).
◗ (Solo HB975) Relax: 2 lampade (una in ciascuna unità laterale). Le lampade emettono una luce rossa (fig. 28).
Raffreddamento
L'apparecchio viene raffreddato mediante due ventole che impediscono il surriscaldamento dei materiali e dei vari pezzi. Le lampade
abbronzanti non si accendono se sono troppo calde (vedere ad esempio "Come interrompere una seduta abbronzante o rilassante").
◗ Dopo aver spento le lampade abbronzanti o a raggi infrarossi, le ventole continueranno a funzionare per altri 3 minuti.
Si tratta di un accorgimento molto utile, perchè vi permette di usare nuovamente le lampade tre minuti soltanto dopo averle spente (le
lampade a raggi infrarossi non richiedono un periodo di raffreddamento per poter essere riaccese).
B
Se avete spento il solarium togliendo la spina dalla presa, le ventole non potranno ovviamente raffreddare l'apparecchio per altri tre minuti. Nel caso
un'altra persona desideri usare il solarium subito dopo di voi, ricordate pertanto di lasciar raffreddare l'apparecchio.
B
Solo HB975: se volete usare l'apaprecchio per una seduta abbronzante subito dopo una seduta rilassante (l) dovrete lasciar raffreddare
comunque l'apparecchio per tre minuti. Dopo una seduta rilassante, infatti, le lampade abbronzanti diventano bollenti e devono raffreddarsi prima di
poter essere riaccese.
Pulizia
1 Togliete sempre la spina dalla presa e lasciate raffreddare l'apparecchio prima di procedere alla pulizia.
2 Usate un panno umido per pulire la parte esterna dell'apparecchio.
Page 20

Fate in modo che non entri acqua all'interno dell'apparecchio.
3 Non usate spugnette abrasive.
Non usate sostanze abrasive, acetone o benzina per pulire l'apparecchio.
◗ Per pulire la parte esterna dei filtri UV, utilizzate un panno morbido imbevuto di alcool denaturato.
Come riporre il solarium
1 Lasciate raffreddare l'apparecchio per 15 minuti prima di metterlo in posizione di trasporto e di riporlo.
◗ Nel frattempo, potete riavvolgere il cavo e riporlo nella base dell'apparecchio, insieme al telecomando.
2 Prestate la massima attenzione nell'eseguire questa operazione per evitare che il cavo o il telecomando rimangano incastrati quando
metterete l'appareccho in posizione di trasporto (fig. 29).
3 Ruotate l'unità centrale 90c per metterla in linea con le unità laterali (fig. 30).
4 Tenete ferma la parte superiore del supporto con una mano e allentate la manopola per la regolazione dell'altezza (A) ruotandola in
senso antiorario (fig. 31).
5 Fate scorrere il supporto (fig. 32).
6 Fissate la manopola per la regolazione dell'altezza (A) ruotando in senso orario (fig. 33).
7 Girate le due unità laterali l'una verso l'altra (fig. 34).
8 Afferrate la maniglia con entrambe le mani, appoggiate un piede sull'apparecchio per evitare che scivoli e sollevate la parte superiore
tenendo il supporto all'indietro (fig. 35).
Il sistema di sblocco automatico funziona soltanto se solleverete a sufficienza la parte superiore con il supporto rivolto all'indietro. Fate
però attenzione a non spingerla troppo all'indietro, per evitare di perdere l'equilibrio.
9 Premete la parte superiore verso il basso (fig. 36).
10 Abbassatela lentamente sulla base (fig. 37).
11 Fissate le unità di lampade alla base spingendo i cursori di bloccaggio nella direzione della freccia (fig. 38).
Sostituzione
Dopo un certo periodo di utilizzo dell'apparecchio (con un uso normale in genere dopo alcuni anni), l'efficienza delle lampade inizierà a
diminuire gradualmente. In questo caso, vi accorgerete che la capacità abbronzante delle lampade risulta diminuita. Sarà quindi necessario
aumentare leggermente la durata delle sedute oppure sostituire le lampade abbronzanti.
◗ Il telecomando dell'apparecchio include un dispositivo per registrare il numero delle ore di funzionamento.
1 Scegliete la funzione • Impostate il tempo 00 e tenete premuto il pulsante pausa/ripetizione § per visualizzare il numero delle ore di
funzionamento (fig. 39).
Il numero massimo delle ore di funzionamento che il display è in grado di visualizzare è 999. Dopo aver raggiunto questo numero, il display
riprenderà a contare da 000.
2 Lasciando andare il pulsante pausa/ripetizione, il numero di ore di funzionamento scomparirà dal display.
◗ Dopo 750 ore di funzionamento, una L apparirà sul lato sinistro del display. Questo significa che il potere abbronzante delle lampade è
diminuito e che è quindi consigliabile procedere alla sostituzione delle lampade abbronzanti (fig. 40).
Naturalmente, potete anche decidere di rimandare per un po' la sostituzione delle lampade, impostando un tempo di seduta leggermente più
lungo.
3 Per togliere la L dal display, premete il pulsante pausa/ripetizione § mentre sul display è visualizzata l'indicazione del tempo 00 e il
simbolo della funzione •.Tenendo premuto il pulsante pausa/ripetizione, premete prima il pulsante ¢ e poi il pulsante £ In questo modo
la L scomparirà dal display (fig. 41).
Solo per il mod. HB975: fate sostituire le lampade a raggi infrarossi quando smettono di funzionare.
I filtri UV proteggono contro le radiazioni indesiderate: ecco perchè è importante sostituire immediatamente un filtro rotto o danneggiato.
Le lampade abbronzanti (Philips HPA flexpower 400-600), le lampade a raggi infrarossi (IRK 15020R o 4222 062 95600) e i filtri UV devono
essere sostituiti presso i Centri Assistenza Philips autorizzati, che possiedono la necessaria esperienza e i pezzi di ricambio originali per
eseguire il lavoro.
Ambiente
Le lampade del solarium contengono sostanze che possono inquinare l'ambiente. Quando dovrete gettare le vecchie lampade, assicuratevi che
vengano separate dai normali rifiuti domestici e depositate presso un centro di raccolta differenziata.
Garanzia & assistenza
Se avete bisogno di assistenza o di ulteriori informazioni, vi preghiamo di visitare il nostro sito web:www.Philips.com oppure di contattare il
Centro Assistenza Clienti Philips del vostro paese (per conoscere il numero di telefono, vedere l'opuscolo della garanzia). Qualora nel vostro
paese non ci fosse un Centro Assistenza Clienti,rivolgetevi al rivenditore autorizzato Philips oppure contattate il Service Departmente of Philips
Domestic Appliances and Personal Care BV.
Limiti della garanzia
Le lampade abbronzanti non sono coperte dai termini previsti dalla garanzia internazionale.
ITALIANO20
Page 21

ITALIANO 21
Soluzione
Controllate che le due lampade laterali e quella centrale siano in posizione corretta (vedere
"L'apparecchio non si accende" nella "Localizzazione Guasti").
Controllate che le aperture non siano ostruite (Vedere "L'apparecchio non si accende nella
"Localizzazione Guasti").
Controllate i filtri UV (gli speciali pannelli di vetro che coprono le lampade). Nel caso siano rotti,
mancanti o danneggiati, non usate l'apparecchio e rivolgetevi subito al vostro rivenditore o un
Centro Assistenza Philips.
Rivolgetevi al vostro rivenditore localo o a un Centro Assistenza Philips.
Codice errore
E01
E02 e codici con un numero superiore
Codice di errore
Il display del telecomando può visualizzare codici di errore. Qui di seguito vi spieghiamo che cosa fare nel caso il display mostri un codice di errore.
Nota: E01 appare sul display per 5 secondi e contemporaneamente si sente un bip.
Nota: sul display rimangono visibili il codice E02 e altri codici con un numero superiore. Se vengono visualizzati questi codici,significa che l'apparecchio ha un
problema serio e non deve più essere utilizzato.
Possibile causa
Non avete inserito (correttamente) la spina nella presa di corrente.
Può trattarsi di un problema di corrente. Controllate con un altro apparecchio.
Le lampade sono ancora troppo calde. Lasciatele raffreddare per almeno 3 minuti.
L'apparecchio non si è raffreddato a sufficienza e il dispositivo di protezione contro il
surriscaldamento l'ha spento automaticamente. Eliminate la causa del surriscaldamento (ad
esempio togliete l'asciugamano che ostruisce una o più aperture).Aspettate 10 minuti e
riaccendete l'apparecchio.
Le due lampade laterali e il gruppo centrale non sono state collocate in posizione corretta
(vedere "Come preparare l'apparecchio per l'uso").
Controllate il fusibile del circuito a cui è collegato l'apparecchio. Il fusibile corretto è un fusibile
standard a 16A (o 10A per la Svizzera e i paesi scandinavi) oppure un fusibile automatico. Il
fusibile può essere saltato anche perché sono stati collegati troppi apparecchi allo stesso
circuito.
State usando una prolunga troppo lunga oppure di tipo sbagliato. Rivolgetevi al vostro
rivenditore. In linea di massima, non è consigliato l'uso di una prolunga.
Il ciclo prescelto non è il più adatto per il vostro tipo di pelle.
La distanza fra i filtri UV e la superficie su cui poggiate è maggiore rispetto a quella consigliata.
Dopo un certo periodo di utilizzo,i raggi UV emessi inizieranno a diminuire. Questo effetto si
potrà notare solo dopo parecchi anni. Per risolvere il problema, potrete prolungare leggermente
le sedute abbronzanti oppure sostituire le lampade. Dopo 750 ore di funzionamento, sul display
apparirà una L per indicare che sarebbe meglio procedere alla sostituzione delle lampade.
Non avete spinto abbastanza indietro la parte superiore dell'apparecchio. Controllate di
spingere all'indietro la parte superiore prima di premerla verso il basso (vedere "Come riporre
l'apparecchio").
L'apparecchio non si sblocca automaticamente. In questo caso dovete premere per prima cosa
il pulsante di sblocco (B), poi piegare l'apparecchio nella posizione di traspor to secondo quando
indicato nel capitolo "Come riporre l'apparecchio". Se l'apparecchio non si sblocca per più volte,
rivolgetevi al vostro rivenditore o a un Centro Assistenza Philips.
Problema
L'apparecchio non si accende
Il fusibile interrompe l'erogazione di corrente quando
accendete l'apparecchio o durante l'uso.
Scarso risultato abbronzante
Non riuscite a mettere l'apparecchio in posizione di trasporto.
Localizzazione guasti
Se l'apparecchio non funziona correttamente, potrebbe trattarsi di un difetto. In questo caso, vi consigliamo di rivolgervi al vostro rivenditore o a Centro
Autorizzato Philips.
L'apparecchio potrebbe non funzionare correttamente perchè non è stato installato o usato conformemente alle istruzioni. In questo caso, potete cercare di
risolvere il problema aiutandovi con i consigli riportati qui sotto.
Page 22

Introdução
Solário de corpo inteiro
Com este solário pode bronzear-se confortavelmente em casa.As lâmpadas bronzeadoras emitem luz visível, calor e luz ultravioleta, dando a
impressão de estar a bronzear-se ao sol. O filtro UV especial deixa passar apenas a luz necessária para bronzear.
As lâmpadas bronzeadoras emitem luz infravermelha suficiente para proporcionar uma agradável sensação de calor.
Apenas mod. HB975: além de se bronzear, também pode fazer uma sessão de relaxamento se ligar as lâmpadas infravermelhas especiais.
Um temporizador assegura que cada sessão não durará mais do que 30 minutos.Tal como acontece com a luz natural do sol, uma
sobreexposição deve ser sempre evitada (vidé secção 'Bronzeamento e a sua saúde' e 'Relaxamento e a sua saúde').
Descrição geral (fig. 1)
A Regulação da altura
B Botão de destravagem
C 4 Lâmpadas de bronzeamento Philips HPA flexpower 400-600
D 2 Lâmpadas infravermelhas tipo IRK 15020 R (1500W) ou 4222 062 95600 (1100W) (apenas mod. HB975)
E Suporte
F Óculos de protecção (2 pares)
- (mod. HB072/código de service 4822 690 80147)
G Fecho
H Pega
I Compartimentos para o fio e para o controlo remoto
Importante
Antes de usar o aparelho, leia atentamente estas instruções e guarde-as para uma eventual consulta futura.
◗ Antes de ligar à corrente, verifique se a voltagem indicada no aparelho corresponde à tensão utilizada em sua casa.
◗ Se a ficha não for introduzida correctamente na tomada eléctrica, poderá aquecer. Cer tifique-se que a ficha fica bem introduzida na tomada.
◗ Este aparelho tem que ser ligado a um circuito que esteja protegido com um fusível de 16A (10A para a Suiça e países Escandinavos) ou
com um disjuntor automático.
◗ Sempre que acabar uma sessão, desligue a ficha da corrente.
◗ Se o cabo de alimentação estiver estragado, só deverá ser substituído pela Philips ou por um concessionário autorizado pela Philips por
forma a serem evitadas situações gravosas.
◗ A água e a electricidade formam uma combinação perigosa! Não use este aparelho em ambientes molhados (por ex.: na casa de banho,
perto do chuveiro ou de piscinas).
◗ Se acabou de sair da piscina ou de tomar um duche, seque-se muito bem antes de utilizar o aparelho.
◗ Depois de o usar, deixe o aparelho arrefecer durante cerca de 15 minutos antes de o dobrar em posição de transporte e de o arrumar.
◗ Certifique-se que os orifícios de ventilação do centro e da parte lateral das lâmpadas e da base permanecem abertos durante a utilização.
◗ O aparelho está equipado com um sistema automático de protecção contra sobreaquecimentos. Se o aparelho não for suficientemente
arrefecido (por ex. devido à obstrução das ventilações), desligar-se-á automaticamente. Uma vez retirada a causa do sobreaquecimento e
depois de se deixar arrefecer, o aparelho poderá voltar a ser ligado.
◗ Os filtros UV ficam muito quentes quando se utiliza o solário. Não deverá tocar-lhes.
◗ O aparelho contém partes articuladas. Por isso, tenha muito cuidado para não entalar os dedos.
◗ As partes em borracha do aparelho poderão libertar um ligeiro odor durante as primeiras utilizações. Não se trata de um defeito de
origem. Este cheiro desaparecerá após algumas sessões.
◗ Nunca se sirva do aparelho no caso de haver algum filtro UV danificado, partido ou em falta.
◗ Nunca se sirva do aparelho se o controlo remoto estiver com defeito.
◗ Nunca deixe as crianças brincarem com o aparelho.
◗ Não exceda os tempos de sessão ou o número máximo de horas de bronzeamento recomendados (vidé 'Sessões de bronzeamento:
frequência e duração?').
◗ Não faça uma sessão de bronzeamento e/ou de relaxamento se tiver alguma doença e/ou se estiver com medicação ou cosméticos que
aumentem a sensibilidade da pele.Tenha especial cuidado se tiver hipersensibilidade à luz UV ou à luz IV. Em caso de dúvida, consulte o seu
médico.
◗ Não bronzeie uma determinada parte do corpo mais do que uma vez por dia. No dia da sessão, evite uma exposição excessiva à luz natural
do sol.
◗ Consulte o seu médico no caso de lhe aparecerem úlceras, verrugas ou edemas persistentes.
◗ O aparelho não deve ser usado por pessoas que se queimam em vez de se bronzearem quando expostas ao sol, por pessoas que sofram
de queimaduras solares, por crianças ou por pessoas que sofram (ou já tenham sofrido) de cancro da pele ou que tenham predisposição
para o cancro da pele.
◗ Quando estiver a bronzear-se, use sempre os óculos de protecção fornecidos com o aparelho para proteger os olhos de doses excessivas
de luz visível, luz UV e luz IV (vidé secção 'Bronzeamento e a sua saúde').
◗ Bastante tempo antes de se submeter a uma sessão, deverá limpar todos os vestígios de cremes, batôn e outros cosméticos.
◗ Não aplique protectores solares nem bronzeadores.
◗ Se a sua pele ficar tensa e seca depois da sessão de bronzeamento, poderá aplicar um creme hidratante.
◗ Para adquirir um bronzeado uniforme, deverá deitar-se directamente sob as campânulas.
◗ Não se coloque a uma distância inferior a 65 cm.
◗ O aparelho só deve ser deslocado quando estiver dobrado em posição de transporte. Certifique-se que as duas partes do aparelho estão
bem apertadas antes de o deslocar. Não tente levantar o aparelho sem ajuda.
◗ As cores podem desvanecer sob a influência do sol. O mesmo pode acontecer quando se utiliza este aparelho.
◗ Não espere obter melhores resultados do que os obtidos com o sol natural.
PORTUGUÊS22
Page 23

O bronzeamento e a sua saúde
O sol, os raios UV e o bronzeamento
O sol
O sol fornece vários tipos de energia. A luz visível permite-nos ver, a luz ultravioleta (UV) bronzeia-nos e a luz infravermelha (IV) dá-nos o calor
sob o qual gostamos de nos espreguiçar.
Os raios UV e a sua saúde
À semelhança do que acontece com a luz natural do sol, o processo de bronzeamento demora algum tempo.Os primeiros efeitos só se
tornarão visíveis após algumas sessões (vidé 'Sessões de bronzeamento: frequência e duração?').
Uma exposição exagerada à luz ultravioleta (luz natural do sol ou luz artificial do solário) poderá provocar queimaduras.
Para além de muitos outros factores, como a sobreexposição à luz natural do sol, o uso incorrecto ou o abuso do solário, podem aumentar o
risco de problemas na pele e nos olhos. O grau de gravidade desses efeitos é determinado, por um lado, pela natureza,pela intensidade e pela
duração da exposição e, por outro lado, pela sensibilidade da pessoa em questão.
Quanto maior for a exposição da pele e dos olhos à luz UV, maior será o risco de inflamações da córnea, conjuntivites, danos na retina,
cataratas, envelhecimento prematuro da pele e desenvolvimento de tumores. Alguns medicamentos e cosméticos potenciam a sensibilidade da
pele.
◗ Por conseguinte, é muitíssimo importante:
- que siga as instruções dadas nos capítulos 'Importante' e 'Sessões de bronzeamento: frequência e duração?';
- que a distância de bronzeamento (distância entre os filtros UV e o corpo) seja de 65 cm;
- que não se exceda o número máximo de horas por ano (isto é, 19 horas ou 1140 minutos);
- que use sempre os óculos de protecção fornecidos durante as sessões.
Sessões de bronzeamento: frequência e duração?
◗ Faça uma sessão de bronzeamento um dia durante cinco a dez dias. Espere 48 horas depois da primeira sessão antes de fazer a segunda.
Terminado um curso de 5 a 10 dias, é aconselhável dar algum descanso à pele durante algum tempo.
B
Aproximadamente um mês depois de um período de sessões, a pele já terá perdido a maior parte do bronzeado. Poderá, então, recomeçar um
novo período de tratamento.
B
Se pretender conservar sempre o bronzeado, não interrompa as sessões depois de cada período de tratamento. Pode continuar, fazendo uma ou
duas sessões por semana.
Quer opte por parar o bronzeamento durante algum tempo, quer opte por continuar a bronzear-se com menos frequência, tenha sempre em
mente que não deve exceder o número máximo de horas de bronzeamento. Para este aparelho o máximo é de 19 horas (=1140 minutos) por
ano.
Este máximo refere-se também à utilização do solário para bronzear partes do corpo (função º e ªº).
Exemplo
Suponha que fez um curso de 10 dias, consistindo numa sessão de 7 minutos no primeiro dia e em sessões de 20 minutos nos nove dias seguintes.
◗ O curso total demorará, então, (1 x 7 minutos) + (9 x 20 minutos) = 187 minutos.
B
Isto significa que poderá fazer 6 cursos destes por ano, porque 6 x 187 minutos = 1122 minutos.
Evidentemente, o número máximo de horas de bronzeamento é válido para cada parte do corpo que for tratada separadamente.
Tabela
Na tabela podemos observar que a primeira sessão de um período de tratamento deve ter uma duração de 7 minutos.
B
Se achar que as sessões são demasiado longas para si (por ex. por sentir que a pele fica tensa e mole depois da sessão), aconselha-se a redução
das sessões para, por exemplo, 5 minutos.
B
Para obter um bronzeado bonito e uniforme, vire o corpo ligeiramente durante a sessão para que ambos os lados fiquem igualmente expostos à luz.
B
Se a pele ficar ligeiramente tensa e seca depois do bronzeamento, poderá aplicar um creme hidratante.
B
Se bronzear apenas uma parte do corpo, também poderá servir-se da tabela juntamente com as informações dadas em 'Sessões de
bronzeamento: frequência e duração?'.
B
Se usar a função º ou a função ªº, é aconselhável prolongar as sessões de bronzeamento por cerca de 5 minutos. Isto não se aplica à primeira
sessão de bronzeamento, que não deverá durar mais do que 7 minutos.
PORTUGUÊS 23
Page 24

Relaxamento e a sua saúde (apenas mod. HB975)
O calor tem um efeito relaxante. Pense no que um banho quente ou estar deitado ao sol podem fazer por si. Poderá usufruir do mesmo efeito
relaxante se ligar as lâmpadas por infravermelhos.
Quando fizer uma sessão de relaxamento, tenha em atenção o seguinte:
- Evite demasiado calor. Se for necessário, aumente a distância entre o seu corpo e as lâmpadas.
- Se sentir a cabeça muito quente, tape-a ou desloque o corpo de modo que a cabeça fique a receber menos calor.
- Feche os olhos durante a sessão de relaxamento.
- Não deve prolongar a sessão de relaxamento por muito tempo (vidé secção 'Sessões de relaxamento: frequência e duração?').
Sessões de relaxamento: frequência e duração?
Apenas mod. HB975
◗ Se não quiser levantar-se logo que a sessão de bronzeamento termine, pode ligar as lâmpadas por infravermelhos para fazer uma sessão de
relaxamento, durante a qual as lâmpadas por infravermelhos o manterão aquecido.
◗ Também pode fazer uma sessão de relaxamento sem fazer uma sessão de bronzeamento.Pode fazê-lo várias vezes ao dia (por ex. 30
minutos de manhã e à tarde).
Preparação do aparelho
◗ O aparelho desloca-se facilmente e arruma-se bem se estiver em posição de transporte (fig. 2).
◗ Se quiser dar um bronzeado extra ao rosto (apenas mod. HB971) ou se quiser bronzear apenas uma parte do corpo (por ex. as pernas ou
o tronco), certifique-se que coloca o solário no lado correcto da cama (fig. 3).
1 Para abrir o aparelho, desloque os fechos na direcção da seta (fig. 4).
A parte de cima do aparelho fica desbloqueada.
2 A parte de cima sobe ligeiramente (por si mesma ou com uma pequena ajuda) (fig. 5).
3 Segure na pega com ambas as mãos e encoste um pé contra o aparelho para evitar que ele deslize. Incline a parte de cima, puxando a
pega e traçando um arco com ela (fig. 6).
Não incline demasiado a parte de cima.
4 Empurre a parte superior para cima e na sua direcção (fig. 7).
Isto requer algum esforço.
5 Desloque as duas lâmpadas para os lados, o mais possível, até ficarem totalmente alinhadas uma com a outra (fig. 8).
6 A distância entre os filtros UV e o corpo deve ser de 65 cm.A distância entre os filtros UV e a superfície onde estiver deitado (a cama,
por ex.) deve ser de 85 cm (fig. 9).
7 Segure a parte de cima do suporte quando regular ou ajustar a altura do aparelho (fig. 10).
Solte o botão para regulação da altura (A) rodando-o para a esquerda (duas ou três voltas).
8 Coloque a mão debaixo da parte horizontal do suporte e puxe o suporte até atingir a altura pretendida (fig. 11).
9 Aperte com firmeza o botão para regulação da altura (A) rodando-o para a direita e solte o suporte (fig. 12).
◗ Para verificar se o aparelho está regulado na altura correcta, poderá servir-se da fita métrica fornecida com o solário (fig. 13).
◗ A fita métrica rebobina-se automaticamente quando se desloca a pestana encarnada para o lado (fig. 14).
10 Volte a lâmpada do centro 90c até ouvir um clique (fig. 15).
Nota: a lâmpada do centro só pode ser virada na direcção da seta!
Para pessoas com pele menos
sensível
7 minutos
30 minutos*
30 minutos*
30 minutos*
30 minutos*
30 minutos*
30 minutos*
30 minutos*
30 minutos*
30 minutos*
Para pessoas com pele normal
7 minutos
20-25 minutos
20-25 minutos
20-25 minutos
20-25 minutos
20-25 minutos
20-25 minutos
20-25 minutos
20-25 minutos
20-25 minutos
Para pessoas com pele muito
sensível
7 minutos
10 minutos
10 minutos
10 minutos
10 minutos
10 minutos
10 minutos
10 minutos
10 minutos
10 minutos
Duração das sessões de
bronzeamento para cada parte
separada do corpo
1ª sessão
descansar pelo menos 48 horas
2ª sessão
3ª sessão
4ª sessão
5ª sessão
6ª sessão
7ª sessão
8ª sessão
9ª sessão
10ª sessão
*) ou mais, dependendo da
sensibilidade da pele.
PORTUGUÊS24
Page 25

O solário só pode ser ligado se ambas as lâmpadas laterais e a lâmpada do centro estiverem totalmente abertas (estendidas) e colocadas na
posição certa. Isto aplica-se às sessões de bronzeamento e também às sessões de relaxamento.
◗ Posição certa (fig. 16).
O solário está pronto a ser usado.
Utilização do aparelho
1 Desenrole completamente o fio.
2 Ligue a ficha à tomada eléctrica.
◗ O controlo remoto mostrará todas as funções que precisam de ser ajustadas pelo utilizador.O tempo da sessão de bronzeamento ou da
sessão de relaxamento é indicado em 00 (fig. 17).
B
Apenas o mod. HB975 mostra o símbolo l (sessão de relaxamento).
B
Apenas o mod. HB971 mostra o símbolo ª (bronzeado extra do rosto).
Funções de ajuste:
1 Use os botões ¡™para passar de uma função para outra (fig. 18).
O símbolo sublinhado mostra a função que está a ser programada.
2 Seleccionar bronzeamento, bronzeamento extra ou relaxamento
Escolha o símbolo • se pretender bronzear todo o corpo.
Escolha os símbolos • e ª se quiser bronzear todo o corpo e dar um bronzeado extra ao rosto (apenas HB971).
Escolha o símbolo º se quiser bronzear apenas uma parte do corpo.
Escolha os símbolos ª e º se quiser bronzear apenas uma parte do corpo e dar um bronzeado extra ao rosto (apenas HB971).
Escolha – se preferir uma sessão de relaxamento (calor) para todo o corpo (apenas HB975).
Nota: No modo de emprego, as funções ;ªsão usadas nas imagens como exemplos do que o mostrador poderá apresentar.
Programação do tempo para bronzear ou relaxar
1 Programe o tempo da sessão de bronzeamento ou de relaxamento pressionando o botão + para avançar ou o botão - para recuar (fig. 19).
Mantenha o botão premido para programar o tempo mais depressa.
2 Deite-se directamente sob as campânulas do solário para que os lados do corpo também fiquem bronzeados.
3 Coloque os óculos de protecção fornecidos.
4 Ligue as lâmpadas de bronzeamento ou as lâmpadas infravermelhas pressionando o botão de arranque ∞ (fig. 20).
B
Nota: durante o arranque as lâmpadas de bronzeamento produzem um ligeiro murmurar. Este som pára logo que as lâmpadas começam a
funcionar em pleno.
B
Nota: as lâmpadas de bronzeamento começam por emitir uma luz visivelmente mais forte após cerca de 60 segundos, o que significa que estão a
funcionar em plena potência. A partir desse momento, poderá ligar ou desligar o bronzeador facial.
B
Nota: se as lâmpadas falharem (não acendendo) ao fim de 20 segundos, desligue o solário (∞), deixe as lâmpadas arrefecerem durante 3 minutos,
regule o tempo de bronzeamento e volte a ligar o solário (∞).
◗ Aparece um sinal a piscar e o tempo é indicado no visor (neste caso, 25 minutos) (fig. 21).
A contagem decrescente do tempo programado para a sessão de bronzeamento ou de relaxamento começará.
◗ Pode ligar ou desligar (•, ª) o bronzeador facial durante a sessão sem precisar de desligar todo o solário. (Isto também se aplica ao
bronzeado facial extra em combinação com º) (fig. 22).
Os símbolos escolhidos permanecem visíveis, mas os outros símbolos não.
◗ No decorrer do último minuto da sessão ouve-se um 'beep' (fig. 23).
◗ Durante esse minuto, poderá premir o botão § pausa/repetição para repetir o tempo programado (fig. 24).
◗ O visor indica o tempo programado e começa a contagem decrescente. O sinal sonoro pára.
◗ Também é possível programar outro tempo.
Ao fazê-lo, evitará os 3 minutos de espera necessários para permitir que as lâmpadas de bronzeamento arrefeçam depois de serem desligadas.
Este tempo de espera não se aplica às lâmpadas infravermelhas (apenas mod. HB975).
5 Programe um novo tempo empurrando os botões ¢ e £. Em seguida, o botão de arranque ∞ (fig. 25).
Os sinais sonoros ('beeps') páram e o tempo que se programou começa a ser contado.
◗ Se não repetir o tempo ou se não programar um novo tempo no decurso do último minuto da sessão, a contagem decrescente continua e
o solário desligar-se-á automaticamente logo que o tempo programado chegue ao fim.
Interromper a sessão de bronzeamento ou de relaxamento
1 A sessão de bronzeamento pode ser interrompida, empurrando o botão pausa/repetição § (fig. 26).
As lâmpadas desligam-se e aparece a indicação ¶ no visor, juntamente com o tempo que falta. O tempo restante fica a piscar durante 3
minutos. Durante esse período as lâmpadas arrefecem. Quando parar de piscar, pode voltar a ligar o aparelho, empurrando o botão ∞. Inicia-se
a contagem decrescente do tempo que falta.
2 A sessão de relaxamento pode ser interrompida empurrando o botão pausa/repetição §.
As lâmpadas desligam-se e aparece a indicação ¶ no visor, juntamente com o tempo que falta (sem piscar). Pode voltar a ligar o aparelho logo a
seguir, empurrando o botão ∞. O tempo de espera não se aplica no caso das lâmpadas por infravermelhos. Inicia-se a contagem decrescente do
tempo que falta.
PORTUGUÊS 25
Page 26

Alteração do tempo de bronzeamento ou de relaxamento durante a sessão
1 Quando se estiver a bronzear, pode alterar o tempo programado pressionando o botão ∞. As lâmpadas desligam-se. Programe o novo
tempo através dos botões ¢ e £. Aguarde até que o tempo programado páre de piscar (o que levará 3 minutos porque as lâmpadas têm
que arrefecer) e depois pressione novamente o botão ∞.
◗ Quando estiver a relaxar (l), pode alterar o tempo programado pressionando o botão ∞. As lâmpadas desligam-se. Pode programar um
novo tempo e voltar a ligar o solário logo a seguir, carregando no botão ∞. O tempo de espera não se aplica no caso das lâmpadas por
infravermelhos (o novo tempo programado não fica a piscar no visor).
Certifique-se que as lâmpadas certas estão ligadas:
◗ (HB975, HB971) Bronzeamento: 4 lâmpadas (uma em cada unidade) ou 1 lâmpada (na unidade lateral).As lâmpadas emitem uma luz
azulada (fig. 27).
◗ (Apenas HB975) Relaxamento: 2 lâmpadas (uma em cada unidade lateral). As lâmpadas emitem uma luz encarnada (fig. 28).
Arrefecimento
O aparelho é arrefecido por meio de ventoinhas para evitar que os materiais e as peças fiquem demasiado quentes. As lâmpadas de
bronzeamento não acendem se estiverem muito quentes (vidé, p.ex. 'Interromper a sessão de bronzeamento ou de relaxamento').
◗ Depois de desligar as lâmpadas de bronzeamento ou as lâmpadas por infravermelhos, as ventoinhas continuam a funcionar durante mais
três minutos.
Isto é conveniente, porque permite usar novamente as lâmpadas de bronzeamento apenas 3 minutos depois de se terem desligado (as
lâmpadas por infravermelhos não precisam deste período de arrefecimento para voltarem a ser ligadas!)
B
Se tiver desligado o solário, retirando a ficha da tomada eléctrica, é óbvio que as ventoinhas não fornecerão o arrefecimento de três minutos. Por
conseguinte, se outra pessoa pretender servir-se do solário para fazer uma sessão de bronzeamento logo a seguir, terá primeiro que deixar o
aparelho arrefecer.
B
Apenas HB975: Se quiser servir-se do solário para uma sessão de bronzeamento imediatamente após tê-lo utilizado para uma sessão de
relaxamento (l), também deve deixar arrefecer o aparelho durante três minutos. Em resultado duma sessão de relaxamento, as lâmpadas de
bronzeamento ficarão quentes e precisam de arrefecer antes de voltarem a ser ligadas.
Limpeza
1 Antes de começar a limpar o aparelho, desligue-o da corrente e deixe-o arrefecer.
2 Limpe a parte exterior com um pano húmido.
Não deixe entrar água para dentro do aparelho.
3 Não use esfregões.
Nunca use líquidos abrasivos, como petróleo ou acetona, para limpar o aparelho.
◗ A parte exterior dos filtros UV pode ser limpa com um pano macio humedecido com umas gotas de álcool metílico.
Arrumação
1 Deixe o aparelho arrefecer durante 15 minutos antes de o colocar em posição de transporte e de o guardar.
◗ Entretanto, pode enrolar o fio e guardá-lo na base do aparelho juntamente com o controlo remoto.
2 Certifque-se que o fio e o controlo remoto ficam bem arrumados porque, caso contrário, poderão ficar presos nas peças do aparelho
quando este é colocado em posição de transporte (fig. 29).
3 Volte a lâmpada central 90c para a alinhar com as lâmpadas laterais (fig. 30).
4 Com uma mão, aperte firmemente a parte de cima do suporte e solte o botão de ajuste da altura (A) rodando-o para a esquerda (fig. 31).
5 Faça deslizar o suporte (fig. 32).
6 Aperte bem o botão (A) de regulação da altura, rodando-o para a direita (fig. 33).
7 Vire as duas lâmpadas laterais uma para a outra (fig. 34).
8 Segure a pega com ambas as mãos, encoste um pé contra o solário para evitar que ele deslize e incline a parte de cima com o suporte
para trás (fig. 35).
O sistema automático de desbloqueio só funcionará se inclinar a parte de cima com o suporte suficientemente para trás. Contudo, deverá
ter cuidado e não inclinar demasiado para trás porque pode desequilibrar-se com o peso e cair.
9 Empurre a parte de cima para baixo (fig. 36).
10 Baixe-a lentamente até à base (fig. 37).
11 Aperte as lâmpadas na base, empurrando ambos os fechos na direcção da seta (fig. 38).
PORTUGUÊS26
Page 27

Substituição
A luz emitida pelas lâmpadas de bronzeamento vai perdendo o brilho com o tempo (isto é, após alguns anos numa utilização normal). Quando
isso acontecer, notará uma diminuição na capacidade de bronzeamento do solário. Este problema pode ser resolvido aumentando ligeiramente
o tempo das sessões ou, então, procedendo à substituição das lâmpadas.
◗ O controlo remoto do solário inclui um contador que regista o número de horas de funcionamento.
1 Escolha a função •. Regule o tempo para 00 e mantenha premido o botão § de pausa/repetição para visualizar o número de horas de
funcionamento (fig. 39).
O número máximo de horas que o contador pode visualizar é 999. Depois de atingir esse número, recomeçará a contagem a partir de 000.
2 Quando se liberta o botão de pausa/repetição, o número de horas de funcionamento desaparece do visor.
◗ Após 750 horas de funcionamento, aparece um L no lado esquerdo do visor. Isto significa que a capacidade de bronzear do aparelho
diminuiu de tal modo que a substituição das lâmpadas se torna aconselhável (fig. 40).
Evidentemente, poderá optar por adiar a substituição durante algum tempo e passar a fazer sessões mais longas.
3 Para remover o L do visor, prima o botão § de pausa/repetição, com a indicação de tempo em 00 e o símbolo da função • no visor.
Mantenha o botão pausa/repetição premido e carregue primeiro no botão ¢. Em seguida, prima o botão £ e o L desaparecerá do ecrã
(fig. 41).
Apenas mod. HB975: Deve substituir as lâmpadas por infravermelhos quando deixarem de funcionar.
Os filtros UV protegem contra uma exposição indesejada. Por conseguinte, é impor tante que substitua imediatamente um filtro que esteja
estragado ou partido.
As lâmpadas de bronzeamento (Philips HPA flexpower 400-600), as lâmpadas por infravermelhos (IRK 15020R ou 4222 062 95600) e os
filtros UV só devem ser substituídos por um concessionário autorizado pela Philips.Apenas eles têm os conhecimentos e a capacidade
necessários para esse serviço, bem como as peças de origem próprias para este aparelho.
Meio ambiente
As lâmpadas deste aparelho contêm substâncias que podem ser prejudiciais ao meio ambiente. Quando se desfizer das lâmpadas, não as misture
com o seu lixo doméstico normal. Coloque-as nos locais próprios - ecopontos.
Garantia e assistência
Se necessitar de assistência ou de informações ou se tiver qualquer problema, por favor visite o endereço da Philips em www.philips.pt ou
contacte o Centro de Informação ao Consumidor Philips do seu país (os números de telefone encontram-se no folheto da garantia mundial). Se
não existir um desses Centros no seu País, dirija-se a um agente Philips ou contacte o Departamento de Service da Philips Domestic Appliances
and Personal Care BV.
Restrições à garantia
As lâmpadas não estão cobertas pelas condições da garantia mundial.
PORTUGUÊS 27
Page 28

Causa provável
A ficha não está (não está bem) introduzida na tomada eléctrica.
Há uma falha de energia.Verifique, ligando outro aparelho eléctrico.
As lâmpadas ainda estão muito quentes. Deixe-as arrefecer primeiro durante 3 minutos.
O aparelho não arrefeceu o suficiente e o dispositivo de protecção contra sobreaquecimentos
desligou o aparelho automaticamente. Retire a causa do sobreaquecimento (alguma toalha que
esteja a obstruir uma ou mais ventilações). Aguarde 10 minutos e volte a ligar o aparelho.
As duas lâmpadas laterais e a lâmpada central não estão posicionadas correctamente (vidé
'Preparação').
Verifique o fusível do circuito ao qual o solário está ligado.O fusível correcto deve ser do tipo
16A (ou 10A para a Suiça e países Escandinavos) ou um disjuntor de disparo automático. O
fusível também poderá ter rebentado por estarem demasiados aparelhos eléctricos ligados ao
mesmo tempo no mesmo circuito.
Está a servir-se duma extensão demasiado comprida ou que não tem a voltagem correcta.
Consulte o seu agente. Regra geral, não aconselhamos o uso de extensões.
Não está a seguir um calendário de bronzeamento adequado ao seu tipo de pele.
A distância entre os filtros UV e a superfície onde está deitado é maior do que a aconselhada.
Quando as lâmpadas são usadas por um longo período de tempo, a luz UV emitida diminuirá.
Este efeito só se torna perceptível passados alguns anos. Este problema pode ser resolvido
seleccionando um tempo de bronzeamento maior ou mandando substituir as lâmpadas.Ao fim
de 750 horas de funcionamento, aparece um L no visor para avisar que é aconselhável
proceder à substituição das lâmpadas.
Não empurrou a parte de cima do aparelho suficientemente para trás. Certifique-se que
empurra primeiro a par te de cima para trás antes de a empurrar para baixo (vidé
'Arrumação').
O solário não se destrava automaticamente. Nesse caso, deve primeiro premir o botão de
desbloqueio (B). Em seguida pode dobrar o solário para a posição de transporte, tal como se
ilustra no capítulo 'Arrumação'. Se não conseguir destravar o aparelho várias vezes, contacte o
seu agente ou um concessionário autorizado pela Philips.
Problema
O aparelho não arranca
O fusível corta a energia quando se liga o aparelho ou durante
a sua utilização.
Resultados pouco satisfatórios
O aparelho não fica em posição de transporte.
Resolução de problemas
Se o solário não funcionar correctamente, talvez tenha algum defeito. Nesse caso, aconselha-se o contacto com o seu agente ou com um concessionário
autorizado pela Philips.
O aparelho também poderá não estar a trabalhar correctamente por ter sido mal instalado ou por não estar a ser usado de acordo com as instruções. Nesse
caso, você mesmo poderá resolver o problema se seguir as sugestões que lhe damos.
PORTUGUÊS28
Solução
Verifique se as duas lâmpadas laterais e a lâmpada central estão posicionadas correctamente
(vidé 'O solário não arranca' no capítulo 'Resolução de problemas').
Verifique se os orifícios de ventilação estão abertos (vidé 'O solário não arranca' em
'Resolução de problemas').
Verifique os filtros UV (os painéis de vidro especial que cobrem as lâmpadas). Se estes filtros
estiverem partidos, estragados ou em falta, páre de usar o aparelho e contacte o seu agente ou
um concessionário autorizado pela Philips.
Contacte o seu agente local ou um concessionário autorizado pela Philips.
Código de erro
E01
E02 e códigos com numeração superior
Códigos de erro
O visor do controlo remoto pode mostrar códigos de erro. Explicamos em seguida o que deverá fazer se lhe aparecer um código de erro no ecrã.
Nota: aparece E01 no visor durante 5 segundos e, simultaneamente, ouve-se um 'beep'.
Nota: E02 e códigos com numeração superior permanecem visíveis no mostrador.Se estes códigos aparecerem, o aparelho apresenta um problema sério e não
deve continuar a ser usado.
Page 29

293031
Page 30

Page 31

7 8
9
10 11
12 13
14 15 16
17
18 19 20 21
22 23 24 25
26
27 28 29
30 31
32 33
34 35 36
37
38 39 40 41
85
65
20
FACIAL
Page 32

www.philips.com
4222 000 26143
u
 Loading...