

Philips HB875A Service Manual
Service
Information
!
Domestic Appliances and Personal Care
TECHNICAL DATA
Service
Information
!
Service
Information
!
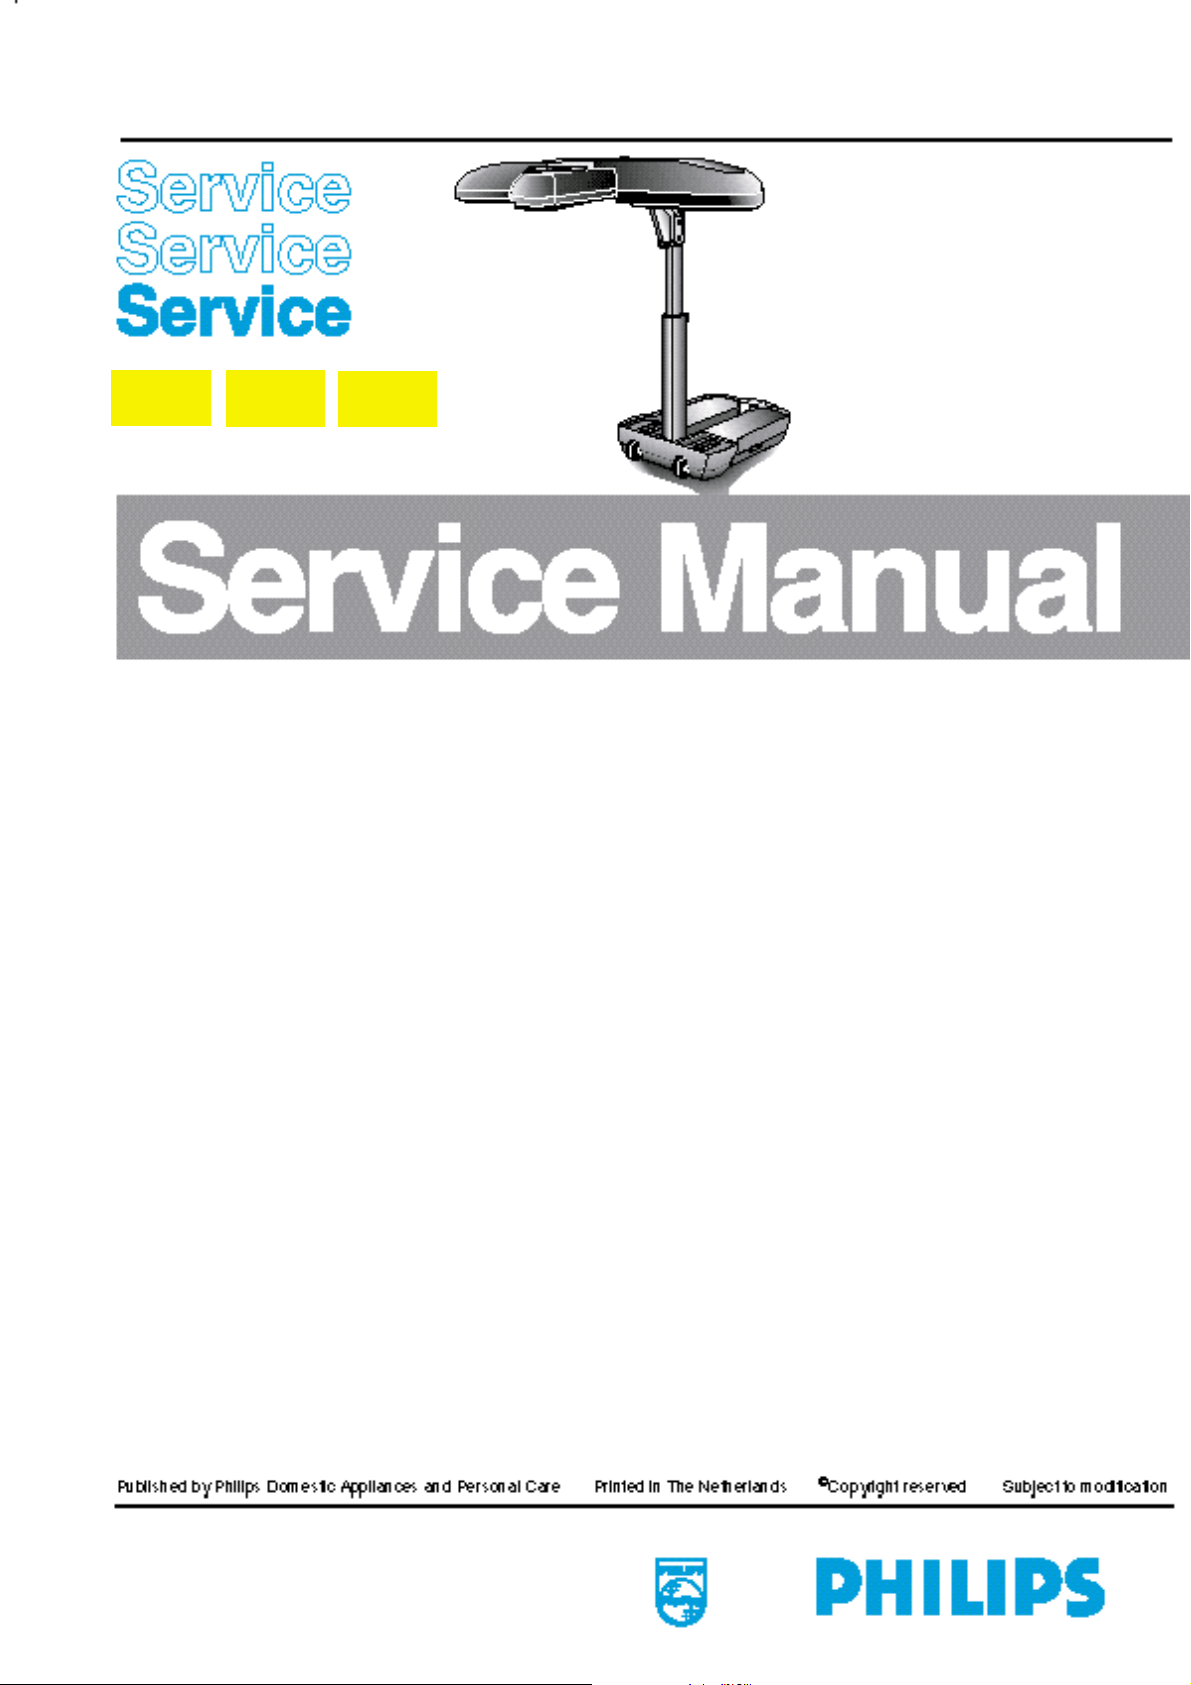
HPA Solarium
HB 875/A
Sun &
Relaxmobile
Input voltage : 220-230V 50Hz
Input consumption : approx. 2530W
Fuse : min. 16A slow
IR source : 2X IRK 15020R
UVA source : 4X HPA400/118mm
Ballast : 2X 400W
2X 500W
Starter : 4X SN58-spec.
Timer : digital 30 mins
Cooling : 1X fan floor part
: 3X fan tanning part
Radiation area : 190 X 70 cm
Output (min) at 65 cm : 5.6 mW/cm2 LMV
: 2.4 mW/cm2 HEBRU
Protecting goggles : 2X HB072
Safety : CENELEC
: insulation class 2
: UV type 3
Weight : approx. 42 kg
SAP Coding : HB875
AS THE APPLIANCE IS HIGHLY SUSCEPTIBLE TO SCRATCHING, YOU SHOULD BE
EXTRA CAREFUL DURING DISASSEMBLY.
TO PREVENT THE MULTI-CORE CABLES FROM GETTING DAMAGED AT THE HINGES,
THEY MUST BE ASSEMBLED AND CLAMPED AT THE ORIGINAL PLACES.
4322 277 00060
99/07

DISASSEMBLY
AS THE APPLIANCE IS HIGHLY SUSCEPTIBLE TO SCRATCHING, YOU SHOULD BE
EXTRA CAREFUL DURING DISASSEMBLY.
BY INTERCHANGING IT CAN BE FOUND OUT WHETHER A LAMP, BALLAST OR STARTER
IS DEFECTIVE.
1. FLOOR PART (item 32)
- Remove the cord holders (item 26) and detach the cord clamps
at the back.
- Remove the covers (item 27 and 34).
The cover on the flex side can only be removed last.
2. REMOTE CONTROL (item 36)
- Remove the cord holder and pull the connector loose.
3. WHEEL (item 46)
- Remove the covers (item 27,34).
- Remove the locking plate and the nearest frame screw.
- Push the shaft out of its clamping.
4. GAS SPRING (item 12)
- Remove the covers (item 27,34).
- Put the appliance in its highest operating position (to ensure
that no pressure is excerted on the gas spring) and tighten the
ornamental screw (item 24).
- Loosen the 10-core cable so that the cable can easely slide through
the cable duct.
- Remove a retaining ring from the hinge shaft at A.
- Tilt the appliance carefully so that the radiation part rests
on the floor.
- Support the floor part to remove the pressure from the hinge shaft.
- Remove the hinge shaft and lower the floor part onto the floor.
- Remove the 2 bearing bushes.
- Loosen the ornamental screw (item 24), slide the top part of the
stand approx. 20 cm inwards and tighten the screw again.
- Remove the 2 screws from the upper part of the stand at B and
pull this part loose from the hinge.
- After the shafts have been removed, the gas spring can be slid out
of the stand.
5. HIGHT ADJUSTMENT (item 25)
- Loosen the lower attachment of the gas spring in the manner
described under 4.
- Remove the cord with its clamping by pressing the snap clamping
on the inside.
- Remove the outer tube.
- Remove the 2 guide blocks and slide the clamping block from the
inner tube.
6. HINGE WITH GAS SPRING (item 11)
- Remove the stand part in the manner described under 4 and 5.
- Remove the upper ornamental strips from the hinge part.
- Remove the cover (item 15) from the radiation part.
- Remove the cover from the connector compartment.
- Detach the 10-core cable.
- Remove the retaining ring from the locking shaft at C and push
the shaft out of the stand.
- Remove the hinge part.

7. HPA LAMP (item 21) or IR LAMP (item 21A)
- Remove the glass filter from the lamp unit in question.
The lamp unit will continue to cling to the upper part.
- Remove the reflector clamps.
- Remove the reflector and take the lamp from the holder.
NB: When checking or replacing HPA lamps, pay attention to the
following:
a. HPA lamps only start burning when they have cooled down
sufficiently.
b. Never touch a lamp with your fingers. Clean the lamp with a
cloth moistened with alcohol, if necessary.
c. After assembly the glass filter should be free from finger prints
and dust. Clean the glass filter with a cloth moistened with
alcohol, if necessary.
8. COVER OUTER SECTION (item 17)
- Remove the cover (item 15) and the cover of the connector compartment.
- Detach the wires of the outer section.
- Support this section and remove the 3 fixing screws at D.
9. COVER INNER SECTION (item 1)
- Disassembly of the cover is not advisable, since the non-visible
parts of the pivot can only be fitted with special tools.
For this reason, the cover is supplied as a whole with grip plate
and wiring.
- Remove the centre glass filter and assemble it onto the new cover.
- Remove the outer sections (see under 8) and attach them to the
inner section.
- Detach the wiring that runs through the tube of the stand.
- Remove the upper ornamental strips.
- Remove the retaining ring from the locking shaft at C and push the
shaft out of the stand.
- Pull the inner section out of the stand.
ASSEMBLY
TO PREVENT THE MULTI-CORE CABLES FROM GETTING DAMAGED AT THE HINGES,
THEY MUST BE ASSEMBLED AND CLAMPED ATTHE ORIGINAL PLACES.
PCS 101 544
 Loading...