

Page 1

GC8700 series
Page 2

Page 3

21 3
6 75
9 8
11 1012
4
Page 4

Page 5

English 6
Қазақша 17
Русский 29
Türkçe 41
Page 6
6
English
Introduction
Congratulations on your purchase and welcome to Philips! To fully benefit
from the support that Philips offers, register your product at
www.philips.com/welcome.
Read this user manual, the important information leaflet, and the quick start
guide carefully before you use the appliance. Save them for future
reference.
Exclusive technology from Philips
OptimalTemp technology
The OptimalTemp technology enables you to iron all types of ironable
fabrics, in any order, without adjusting the iron temperature and without
sorting your garments.
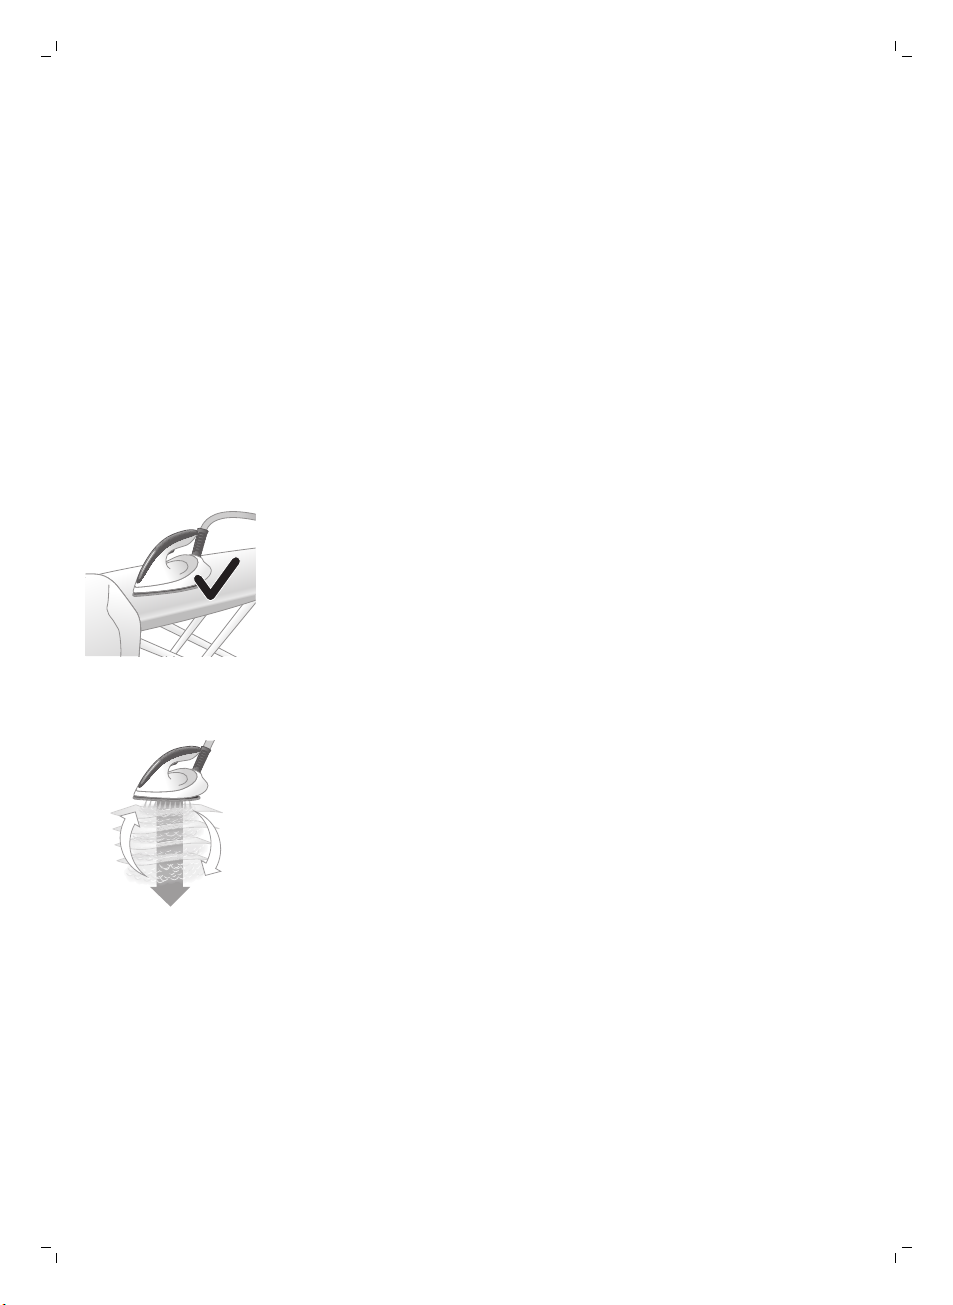
It is safe to just rest the hot soleplate directly on the ironing board without
putting back to the iron platform. This will help reduce the stress on your
wrist.
This iron has been approved by The Woolmark Company Pty Ltd for the
ironing of wool-only products, provided that the garments are ironed
according to the instructions on the garment label and those issued by the
manufacturer of this iron. R1701. In the United Kingdom, Eire, Hong Kong and
India, the Woolmark trademark is a certification trademark.
Compact ProVelocity Technology
This technology delivers continuous steam that penetrates deeply to
remove creases easily. At the same time, it keeps the appliance more
compact and lighter than traditional steam generators, for easier storage.
Product overview (Fig. 1)
1 Steam hose
2 Steam trigger/Steam boost
3 'Iron ready' light
4 Soleplate
5 Iron platform
6 Carry lock release button
7 Detachable water tank
8 Supply hose storage compartment
9 Mains cord with plug
10 CALC-CLEAN button with light
English
Page 7

11 On/off button with power-on light and auto-off light
12 ECO button with light
Preparing for use
Type of water to use
This appliance has been designed to be used with tap water. However, if
you live in an area with hard water, fast scale build-up may occur.
Therefore, it is recommended to use distilled or demineralized water to
prolong the lifetime of the appliance.
Warning: Do not use perfumed water, water from the tumble
dryer, vinegar, starch, descaling agents, ironing aids, chemically
descaled water or other chemicals, as they may cause water
spitting, brown staining or damage to your appliance.
Filling the water tank
1 Fill the water tank before every use or when the water level in the water
tank drops below the minimum level. You can refill the water tank at any
time during use.
2 Remove the water tank from the base.
English
7
3 Fill the water tank up to the MAX indication.
4 Put the water tank back into the appliance by fitting the bottom part into
the appliance first.
5 Push in the top part of the water tank until it locks into place ('click').
Page 8
8
English
Using the appliance
Ironable fabrics
Warning:Do not iron non-ironable fabrics.
-
Fabrics with these symbols are ironable, for example linen, cotton,
polyester, silk, wool, viscose and rayon.
-
Fabrics with this symbol are not ironable. These fabrics include synthetic
fabrics such as Spandex or elastane, Spandex-mixed fabrics and
polyolefins (e.g. polypropylene). Prints on garments are not ironable
either.
Ironing
1 Place the steam generator on a stable and even surface.
Note: In order to ensure safe ironing we recommend to always place the
base on a stable ironing board.
2 Make sure that there is enough water in the water tank.
3 Put the mains plug in an earthed wall socket and press the on/off button
to switch on the steam generator. Wait until the 'iron ready' light lights up
continuously. This takes approx. 2 minutes.
4 Remove the supply hose from the hose storage compartment.
5 Press the carry lock release button to unlock the iron from the iron
platform.
Page 9

6 Press and hold the steam trigger to start ironing.
2x
Warning: Never direct steam at people.
7 For best ironing results, after ironing with steam, perform the last strokes
without steam.
Note: When you use the appliance for the first time, it may take 30 seconds
for steam to come out of the appliance.
Note: The pump is activated each time you press the steam trigger. It
produces subtle rattling sound, which is normal. When there is no water in
the water tank, the pump sound is louder. Fill up the water tank with water
when the water level drops below the minimum level.
For more powerful steam, you can use the TURBO steam mode, which is
safe on all ironable fabrics.
For fabrics such as cotton, jeans and linen, you are recommended to use the
TURBO steam mode.
1 Press and hold the on/off button for 2 seconds until the light turns white.
2 To deactivate the TURBO mode, press and hold the on/off button for 2
seconds again until the light turns blue.
Steam boost function
Use the steam boost function to remove stubborn creases.
1 Press the steam trigger twice quickly.
English
9
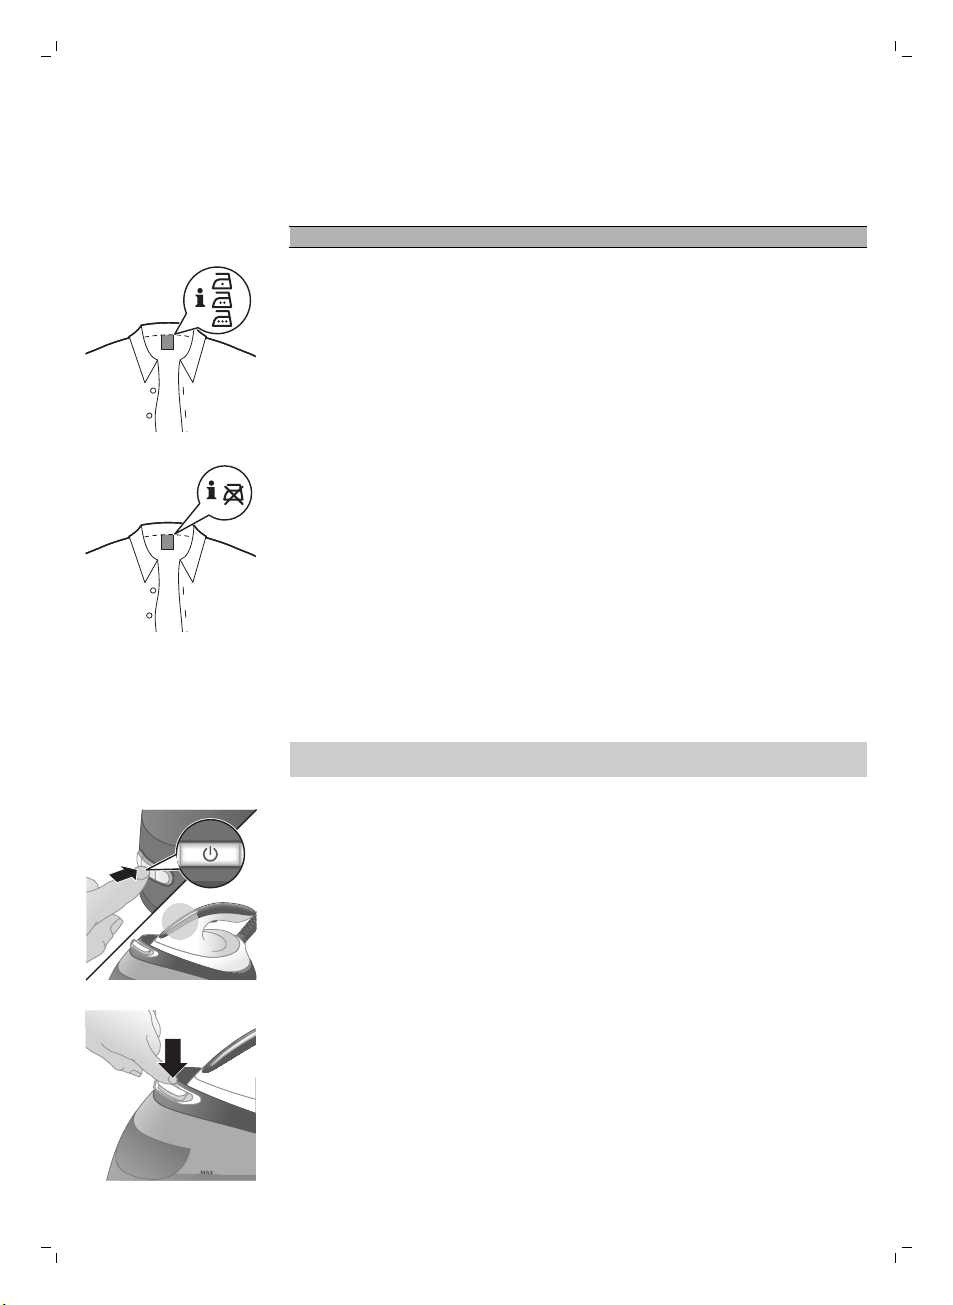
Vertical ironing
Warning: Hot steam is emitted from the iron. Never attempt to
remove wrinkles from a garment while someone is wearing it. Do
not apply steam near your or someone else's hand.
You can use the steam iron in vertical position to remove wrinkles from
hanging fabrics.
Page 10

10
English
Safe rest
Energy saving
1 Hold the iron in vertical position, press the steam trigger and touch the
garment lightly with the soleplate and move the iron up and down.
Resting the iron while rearranging your garment
While rearranging your garment, you can rest the iron either on the iron
platform or horizontally on the ironing board. The OptimalTemp technology
ensures the soleplate will not damage the ironing board cover.
Eco mode
By using the ECO mode (reduced amount of steam), you can save energy
without compromising on the ironing result.
1 To activate the ECO mode, press the ECO button. The green ECO light
goes on.
2 To deactivate the ECO mode, press the ECO button again. The green
ECO light goes out.
Safety auto-off mode (specific types only)
-
To save energy, the appliance switches off automatically when it has not
been used for 5 minutes. The auto-off light in the on/off button starts to
flash.
-
To activate the appliance again, press the on/off button. The appliance
then starts to heat up again.
Warning: Never leave the appliance unattended when it is
connected to the mains. Always unplug the appliance after use.
Page 11

Cleaning and maintenance
Smart Calc-Clean System
Your appliance has been designed with a Smart Calc-Clean system to
ensure that descaling and cleaning is done regularly. This helps to maintain
a strong steam performance and prevents dirt and stains coming out of the
soleplate over time. To ensure that the cleaning process is performed, the
steam generator gives regular reminders.
Sound and light Calc-Clean reminder
After 1 to 3 months of use, the Calc-Clean light starts flashing and the
appliance starts beeping to indicate that you have to perform the CalcClean process.
Besides that, a second defense step to protect the steam generator from
scale is integrated: the steam function gets disabled if descaling is not done.
After descaling is done, the steam function will be restored. This takes place
regardless of the type of water used.
Note: The Calc-Clean process can be performed at any time, even when the
sound and light reminder is not activated yet.
English
11
Performing the Calc-Clean process with the Calc-Clean container
Warning: Do not leave the appliance unattended during the CalcClean process.
Caution: Always perform the Calc-Clean process with the Calc-Clean
container. Do not interrupt the process by lifting the iron up from the
Calc-Clean container, as hot water and steam will come out of the
soleplate.
Page 12

2 sec.
2 min.
12
English
1 Fill up the water tank halfway.
Note: Make sure that the appliance is plugged in and switched ON during
the Calc-Clean process.
2 Place the Calc-Clean container on the ironing board or any other even,
stable surface.
3 Place the iron stably on the Calc-Clean container.
4 Press and hold the CALC-CLEAN button for 2 seconds until you hear
short beeps.
Note: The Calc-Clean container has been designed to collect scale
particles and hot water during the Calc-Clean process. It is perfectly safe
to rest the iron on this container during the entire process.
5 During the Calc-Clean process, you hear short beeps and a pumping
sound.
Page 13

English
6 Wait approximately 2 minutes for the appliance to complete the process.
When the Calc-Clean process is completed, the iron stops beeping and
the CALC-CLEAN light stops flashing.
7 Wipe the iron with a piece of cloth and put it back on the base station.
Caution: The iron is hot.
8 As the Calc-Clean container becomes hot during the Calc-Clean process,
wait approx. 5 minutes before you touch it. Then carry the Calc-Clean
container to the sink, empty it and store it for future use.
9 If necessary, you can repeat steps 1 to 8. Make sure that you empty the
Calc-Clean container before you start the Calc-Clean process.
Note: During the Calc-Clean process, clean water may come out of the
soleplate if no scale has accumulated inside the iron. This is normal.
For more information on how to carry out the Calc-Clean process, refer to
the videos in this link: http://www.philips.com/descaling-iron.
13
Cleaning the soleplate
To properly maintain your appliance, clean it regularly.
1 Clean the appliance with a moist cloth.
2 To easily and effectively remove stains, let the soleplate heat up and
move the iron over a moist cloth.
Tip: Clean the soleplate regularly to ensure smooth gliding.
Storage
1 Switch off the steam generator and unplug it.
Page 14

14
English
2 Pour the water out of the water tank into the sink.
3 Fold the supply hose. Wind the supply hose inside the supply hose
storage compartment and secure it inside the storage hook.
4 Fold the mains cord and fasten it with the Velcro strip.
5 Push the carry lock release button to lock the iron onto the iron platform.
6 You can carry the appliance with one hand by the handle of the iron
when the iron is locked on the iron platform.
Page 15
Troubleshooting
This chapter summarizes the most common problems you could encounter
with the appliance. If you are unable to solve the problem with the
information below, visit www.philips.com/support for a list of frequently
asked questions or contact the Consumer Care Center in your country.
Problem
The iron does not
produce any steam.
Possible cause Solution
There is not enough water in
the water tank.
English
Fill the water tank beyond the MIN
indication. Press and hold the steam trigger
until steam comes out. It may take up to 30
seconds until steam comes out.
15
The light of the CALCCLEAN button flashes
and the appliance beeps.
No steam comes out of
the soleplate, the light of
the CALC-CLEAN button
flashes and the appliance
beeps.
The appliance has
switched off.
The appliance produces
a loud pumping sound.
You did not press the steam
trigger.
The steam function has
been disabled until you
have performed the CalcClean process.
The water tank is not placed
in the appliance properly.
At the start of your ironing
session, the steam trigger
has not been pressed long
enough.
This is the Calc-Clean
reminder.
You have not done or have
not completed the CalcClean process.
The safety auto-off function
is activated automatically
when the appliance has not
been used for more than 5
minutes.
The water tank is empty. Fill the water tank with water and press the
Press and hold the steam trigger until steam
comes out.
Perform the Calc-Clean process to restore
the steam function. (see chapter ' Cleaning
and maintenance')
Fit the water tank back into the appliance
firmly ('click').
Press and hold the steam trigger until steam
comes out. It may take up to 30 seconds
until steam comes out.
Perform the Calc-Clean after the CalcClean reminder is given (see chapter
'Cleaning and maintenance').
Perform the Calc-Clean process to enable
the steam function again (see chapter
'Cleaning and maintenance').
To activate the appliance again, press the
on/off button. The appliance then starts to
heat up again.
steam trigger until the pumping sound
becomes softer and steam comes out of the
soleplate.
Water droplets come out
of the soleplate.
After the Calc-Clean process
remaining water may drip
out of the soleplate.
The Calc-Clean process has
not been completed.
Wipe the soleplate dry with a piece of cloth.
If the Calc-Clean light still flashes and the
appliance still beeps, perform the CalcClean process (see chapter 'Cleaning and
maintenance').
You have to perform the Calc-Clean
process again (see chapter 'Cleaning and
maintenance').
Page 16

16
English
Problem Possible cause Solution
Steam condenses into water
in the hose when you use
steam for the first time or
have not used it for a long
time.
This is normal. Hold the iron away from the
garment and press the steam trigger.Wait
until steam instead of water comes out of
the soleplate.
Dirty water and impurities
come out of the
soleplate.
Water flushes out of the
soleplate.
The Calc-Clean process
does not start.
The iron leaves a shine or
an imprint on the
garment.
The ironing board cover
becomes wet, or there
are water droplets on the
floor/garment.
Impurities or chemicals
present in the water have
deposited in the steam vents
and/or soleplate.
You have accidentally
started the Calc-Clean
process (see chapter
'Cleaning and
maintenance').
You have not pressed the
CALC-CLEAN button for 2
seconds until the appliance
started beeping.
The surface to be ironed was
uneven, for instance
because you were ironing
over a seam or a fold in the
garment.
There was not enough felt in
the ironing board cover.
Steam has condensed on
the ironing board cover after
a long ironing session.
You have an ironing board
that is not designed to cope
with the high steam rate of
the appliance.
Perform the Calc-Clean process regularly
(see chapter 'Cleaning and maintenance').
Switch off the appliance. Then switch it
back on again. Let the iron heat up until the
'iron ready' light lights up steadily.
See chapter 'Cleaning and maintenance'.
PerfectCare is safe on all garments. The
shine or imprint is not permanent and will
come off if you wash the garment.Avoid
ironing over seams or folds or you can place
a cotton cloth over the area to be ironed to
avoid imprints.
Put an extra layer of felt material under the
ironing board cover.
Replace the ironing board cover if the foam
or felt material has worn out. You can also
add an extra layer of felt material under the
ironing board cover to prevent
condensation on the ironing board.
Put an extra layer of felt material under the
ironing board cover to prevent
condensation on the ironing board.
Page 17

Қазақша
Кіріспе
Осы затты сатып алуыңызбен құттықтаймыз және Philips компаниясына қош
келдіңіз! Philips ұсынатын қолдауды толық пайдалану үшін өнімді
www.philips.com/welcome торабында тіркеңіз.
Құралды пайдаланбастан бұрын, осы пайдаланушы нұсқаулығын, маңызды
ақпарат парақшасын және жылдам бастау нұсқаулығын мұқият оқып
шығыңыз. Келешекте қарау үшін оларды сақтап қойыңыз.
Philips компаниясының ерекше технологиясы
OptimalTemp технологиясы
OptimalTemp технологиясы үтіктеуге болатын бүкіл мата түрлерін үтік
температурасын реттеусіз және киімдерді сұрыптаусыз кез келген ретте
үтіктеуге мүмкіндік береді.
Ыстық табаны кері үтік түпқоймасына қоймай тікелей үтіктеу тақтасына
қойған дұрыс. Бұл білектегі қысымды азайтуға көмектеседі.
The Woolmark Company Pty Ltd компаниясы бұл үтікті тек жүннен жасалған
өнімдерді үтіктеуге қолдануды бекіткен. Тек киімді киім жапсырмасындағы
және осы үтік өндірушісінің нұсқауларына сай үтіктеу керек. R1701.
Ұлыбританияда, Ирландияда, Гонконгта және Үндістанда «Woolmark»
сауда белгісі сертификатталған сауда белгісі болып табылады.
17
Compact ProVelocity технологиясы
Бұл технология бүктеліп қалған қыртыстарды жеңіл кетіру үшін терең енетін
үздіксіз буды жеткізеді. Дәл сол уақытта оңай сақтай алу үшін құралды
дәстүрлі бу генераторларына қарағанда барынша ықшам және жеңіл күйде
сақтайды.
Өнімге жалпы шолу (1-сурет)
1 Бу шлангісі
2 Бу шығарғыш/буды күшейту
3 «Үтік дайын» жарығы
4 Үтіктің табаны
5 Үтіктің түпқоймасы
6 Тасымалдау бекітпесін босату түймесі
7 Алынбалы су ыдысы
8 Бу жеткізу шлангісін сақтау орны
9 Штепсельдік ұшы бар қуат сымы
10 Шамы бар ҚАҚ ТАЗАЛАУ түймесі
Қазақша
Page 18

18
Қазақша
11 Қуат қосу және авто өшіру шамы бар қосу/өшіру түймесі
12 Жарығы бар ECO түймесі
Пайдалануға дайындау
Пайдаланылатын су түрі
Бұл құрылғы құбыр суымен пайдалануға арналған. Дегенмен, егер қатты су
аймағында тұрсаңыз, қақ жылдам пайда болуы мүмкін. Сондықтан,
құрылғының қызмет мерзімін ұзарту үшін дистильденген немесе
минералсызданған суды пайдалану ұсынылады.
Абайлаңыз: Хош иісті суды, кептіргіштен алынған суды, сірке суын,
крахмалды, қақ түсіру заттарын, үтіктеу заттарын, химиялық түрде
қағы түсірілген суды немесе басқа химикаттарды пайдаланбаңыз,
өйткені олар судың шашырауына, қоңыр дақтарға әкелуі немесе
құралды зақымдауы мүмкін.
Су ыдысын толтыру
1 Әр қолданар алдында немесе су ыдысындағы су деңгейі ең төменгі
көрсеткіштен төмен түскенде су ыдысын толтырыңыз. Қолдану
барысында су ыдысын толтыра аласыз.
2 Су ыдысын негізден шығарып алыңыз.
3 Су сыйымдылығын MAX (Макс) көрсеткішіне дейін сумен толтырыңыз.
Page 19

4 Алдымен астыңғы бөлігін құралға бекітумен су ыдысын кері құралға
салыңыз.
5 Орнына құлыпталғанша су ыдысының үстіңгі бөлігін басыңыз («сырт»
еткен дыбыс шығады).
Құрылғыны пайдалану
Үтіктеуге болатын маталар
Абайлаңыз!Үтіктеуге болмайтын маталарды үтіктемеңіз.
-
Мына белгілері бар маталарды, мысалы, зығыр, мақта-мата, полиэстер,
жібек, жүн, вискоза және жасанды жібекті үтіктеуге болады.
Қазақша
19
Үтіктеу
-
Мына белгісі бар маталарды үтіктеуге болмайды. Бұл маталардың
құрамында спандекс немесе эластан, спандекс аралас талшықтар және
полиолефиндер (мысалы, полипропилен) сияқты синтетикалық
талшықтар бар. Суреті бар маталарды да үтіктеуге болмайды.
1 Бу генераторын тұрақты тегіс жерге қойыңыз.
Ескерту: Қауіпсіз үтіктеу мақсатында негізін тұрақты үтіктеу тақтасына қою
ұсынылады.
2 Су ыдысында жеткілікті мөлшерде су барын тексеріңіз.
Page 20

20
Қазақша
3 Бу генераторын қосу үшін, штепсельдік ұшты жерге қосылған розеткаға
жалғап, қосу/өшіру түймесін басыңыз. «Үтік дайын» шамы тұрақты
жарықпен жанғанша күтіңіз. Бұл шамамен 2 минут алады.
4 Шланг сақтау бөлімінен көз шлангісін алыңыз.
5 Тасымалдау бекітпесін босату түймесін басып, үтікті түпқоймасынан
шығарып алыңыз.
6 Үтіктей бастау үшін бу шығарғышын басыңыз.
Абайлаңыз! Буды адамдарға бағыттаушы болмаңыз.
7 Жақсы үтіктеу нәтижелері үшін бумен үтіктегеннен кейін соңғы
соққыларды бусыз орындаңыз.
Ескерту: Құралды бірінші рет пайдаланып жатсаңыз, құралдан бу шығуы
үшін 30 секунд қажет болуы мүмкін.
Ескерту: Сорғы бу шығару түймесі әр басылған сайын іске қосылады. Ол
аздап дірілдеген дыбыс шығарады және бұл қалыпты нәрсе. Су ыдысында
су болмаған кезде сорғы дыбысы қаттырақ шығады. Су деңгейі ең төменгі
деңгейден азайған кезде су ыдысына су толтырыңыз.
Қуаттырақ бу үшін барлық үтіктелетін маталарда қауіпсіз ТУРБО бу режимін
пайдалануға болады.
Мақта, джинсы және кендір сияқты маталар ТУРБО бу режимін пайдалану
ұсынылады.
1 Шам ақ болып жанғанша қосу/өшіру түймесін 2 секунд бойы басып
тұрыңыз.
2 ТУРБО режимін өшіру үшін шам көк түспен жанғанда қосу/өшіру түймесін
қайтадан 2 секунд бойы басып тұрыңыз.
Буды күшейту функциясы
Қиын қатпарларды кетіру үшін, буды күшейту функциясын қолданыңыз.
Page 21

2x
Тігінен үтіктеу
Қазақша
1 Бу шығару түймесін екі рет жылдам басыңыз.
Абайлаңыз! Үтіктен ыстық бу шығады. Киімді біреу киіп тұрғанда
оның қыртысын кетіруге әрекет етпеңіз. Үтіктің жанында өзіңіздің
немесе басқа біреудің қолы тұрса, буды шығармаңыз.
Ілулі тұрған матаның қыртысын кетіру үшін булы үтікті тігінен пайдалануға
болады.
1 Үтікті тік позицияда ұстап, бу шығару түймесін басып, киімге үтіктің
табанын жайлап тигізіп, үтікті жоғары және төмен жылжытыңыз.
21
Қауіпсіз орын
Киімді қайта орналастыру кезінде үтікті қалдыру
Киімді қайта орналастыру кезінде үтікті түпқоймаға немесе көлденеңінен
үтіктеу тақтасына қоюға болады. OptimalTemp технологиясы үтіктің табаны
үтіктеу тақтасының жабынын бүлдірмейтінін қамтамасыз етеді.
Page 22

22
Қазақша
Қуатты үнемдеу
Эко режимі
ECO режимін пайдалану арқасында (будың шығуын азайтады) үтіктеу
нәтижесіне әсер етпестен энергияны үнемдеуге болады.
1 ECO режимін белсендіру үшін ECO түймесін басыңыз. Жасыл ECO шамы
қосылады.
2 ECO режимін тоқтату үшін ECO түймесін қайта басыңыз. Жасыл ECO
шамы өшеді.
Қауіпсіз автоматты өшіру режимі (тек белгілі бір түрлерде)
-
Энергияны үнемдеу үшін құрал 5 минут қолданылмай тұрса, автоматты
түрде өшіп қалады. Қосу/өшіру түймесіндегі автоматты өшетін шам
жыпылықтай бастайды.
-
Құралды қайта іске қосу үшін қосу/өшіру түймесін басыңыз. Содан соң,
құрал қайта қыза бастайды.
Абайлаңыз! Құрал розеткаға қосылып тұрса, оны бақылаусыз
қалдырмаңыз. Қолданып болған соң құрылғыны міндетті түрде
розеткадан ажыратыңыз.
Тазалау және техникалық қызмет көрсету
Смарт қақ тазалау жүйесі
Құралда жиі қақты кетіріп, тазалауды қамтамасыз ететін зерделі қақ тазалау
жүйесі бар. Бұл буды қаттырақ шығаруға және уақыт өте келе үтік табанынан
кір мен дақтардың ақпауына көмектеседі. Тазалау процесінің
орындалғанына сенімді болу үшін, бу генераторы әдетте еске салып
отырады.
Дыбыспен және шаммен қақ тазалау еске салғышы
1–3 ай пайдаланудан кейін қақ тазалау шамы жыпылықтай бастайды және
құрал қақ тазалау процесін орындау қажет екенін көрсету үшін дыбыстық
сигнал шығара бастайды.
Page 23

Қазақша
Бұдан басқа бу генераторында қақ жиналмауы үшін екінші қорғау әрекеті
біріктірілген: қақты кетіру орындалмаса, бу шығару функциясы
ажыратылады. Қақ тазарту орындалғаннан кейін бу шығару функциясы
қалпына келтіріледі. Бұл қолданылған су түріне қарамастан орындалады.
Ескерту: Қақ тазалау процесі кез келген уақытта орындалуы мүмкін, тіпті
дыбыс және шам еске салғышы белсендірілмеген кезде.
23
Қақ тазалау ыдысының көмегімен қақ тазалау процесін орындау
Абайлаңыз! Қақ тазалау процесі кезінде құралды қараусыз
қалдырмаңыз.
Абайлаңыз: Қақ тазалау ыдысының көмегімен қақ тазалау процесін үнемі
орындаңыз. Үтікті қақ тазалау ыдысынан көтеру арқылы процесті үзбеңіз,
өйткені табаннан ыстық су мен бу шығады.
1 Су ыдысын жартылай толтырыңыз.
Ескерту: Қақ тазалау процесі кезінде құрал тоққа қосылып тұрғанын және
ҚОСУ күйінде екенін тексеріңіз.
2 Қақ тазалау ыдысын үтіктеу тақтасына немесе кез келген басқа тегіс,
тұрақты жерге қойыңыз.
3 Үтікті қақ тазалау ыдысына қозғалмайтын етіп қойыңыз.
Page 24

2 sec.
2 min.
24
Қазақша
4 Қысқа дыбыстық сигналдарды естігенше ҚАҚ ТАЗАЛАУ түймесін 2 секунд
басып тұрыңыз.
Ескерту: Қақ тазалау ыдысы қақ тазалау процесінің барысында қақ
бөлшектерін және ыстық суды жинауға арналған. Бүкіл процесс
барысында үтікті осы ыдысқа қою мүлде қауіпсіз.
5 Қақ тазалау процесі кезінде қысқа дыбыстық сигналдарды және соратын
дыбысты естисіз.
6 Процесс аяқталғанша, шамамен 2 минуттай күтіңіз. Қақ тазалау процесі
аяқталған кезде үтік дыбыстық сигнал шығаруды тоқтатады және ҚАҚ
ТАЗАЛАУ шамы жыпылықтауды қояды.
7 Үтікті шүберекпен сүртіп алып, негізге қойыңыз.
Абайлаңыз: Үтік ыстық.
8 Қақ тазалау процесі кезінде қақ тазалау ыдысы ыстық болатындықтан
оны ұстамас бұрын шамамен 5 минуттай күте тұрыңыз. Одан кейін қақ
тазалау ыдысын шұңғылшаға апарып төгіңіз де, кейін тағы пайдалану
үшін сақтап қойыңыз.
9 Қажет болғанда 1–8 қадамдарын қайталауға болады. Қақ тазалау
процесін бастамай тұрып қақ тазалау ыдысын босатыңыз.
Ескерту: Қақ тазалау процесінің барысында үтік ішінде қақ жиналмаған
болса, табаннан таза су шығуы мүмкін. Бұл қалыпты жағдай.
Қақ тазалау процесін орындау әдісі туралы ақпарат үшін келесі сілтеме
бойынша бейнелерді қараңыз: http://www.philips.com/descaling-iron.
Page 25

Үтік табанын тазалау
Құралды дұрыс сақтау үшін оны әрдайым тазалап тұрыңыз.
1 Құралды дымқыл шүберекпен сүртіңіз.
2 Дақтарды оңай және тиімді түрде кетіру үшін, үтіктің табанын қыздырып,
ылғал шүберекке ысқылаңыз.
Кеңес: Тегіс сырғуды қамтамасыз ету үшін үтіктің табанын кезеңді түрді
тазалаңыз.
Сақтау
1 Бу генераторын өшіріп, ток көзінен ажыратыңыз.
2 Бу ыдысындағы суды шұңғылшаға төгіңіз.
Қазақша
25
3 Шлангты бүгіңіз. Бу жеткізу шлангісін бу жеткізу шлангісі сақталатын
бөлімнің ішіне орап, оны сақтау ілмегімен бекітіңіз.
4 Қуат сымын бүгіп, Velcro таспасымен бекітіңіз.
Page 26

26
Қазақша
5 Тасымалдау бекітпесін босату түймесін басып, үтікті түпқоймасына
құлыптаңыз.
6 Үтік түпқоймаға бекітілгенде үтіктің тұтқасынан ұстап бір қолмен алып
жүруге болады.
Ақаулықтарды жою
Бұл тарауда құрылғыда жиі кездесетін мәселелер аталып өтеді. Төмендегі
ақпараттың көмегімен мәселені шеше алмасаңыз, жиі қойылатын сұрақтар
тізімін көру үшін www.philips.com/support торабына кіріңіз немесе
еліңіздегі Тұтынушыларды қолдау орталығына хабарласыңыз.
Мәселе
Үтік бу шығармайды. Су ыдысындағы су
Ықтимал себеп Шешім
жеткіліксіз.
Су ыдысын МИН көрсеткішінен көбірек
толтырыңыз. Бу шыққанша бу қосқышын
басып тұрыңыз. Бу шыққанша 30 секундқа
дейін кетуі мүмкін.
ҚАҚ ТАЗАЛАУ түймесі
жыпылықтайды және
құрал дыбыстық сигнал
шығарады.
Бу шығару түймесін
баспағансыз.
Бу функциясы қақ тазалау
процесін орындағанша
өшірілді.
Су ыдысы құралға дұрыс
қойылмаған.
Үтіктеу сеансы басында бу
шығарғыш жеткілікті түрді
ұзақ басылмады.
Бұл — қақ тазалау еске
салғышы.
Бу шыққанша бу қосқышын басып тұрыңыз.
Бу функциясын қайта қосу үшін қақ тазалау
процесін орындаңыз. («Тазалау және
техникалық қызмет көрсету» тарауын
қараңыз)
Су ыдысын қайта құралға мықтап
орнатыңыз («сырт» ете түседі).
Бу шыққанша бу қосқышын басып тұрыңыз.
Бу шыққанша 30 секундқа дейін кетуі
мүмкін.
Қақ тазалау еске салғышы ескерткенде қақ
тазалау процесін орындаңыз («Тазалау
және техникалық қызмет көрсету» тарауын
қараңыз).
Page 27

Мәселе Ықтимал себеп Шешім
Табаннан бу шықпайды,
ҚАҚ ТАЗАЛАУ түймесі
жыпылықтайды және
құрал дыбыстық сигнал
шығарады.
Қақ тазалау процесін
орындамадыңыз немесе
аяқтамадыңыз.
Бу функциясын қайта қосу үшін қақ тазалау
процесін орындаңыз («Тазалау және
техникалық қызмет көрсету» тарауын
қараңыз).
Қазақша
27
Құрал өшті. Құрал 5 минут бойы іссіз
Құрал қатты сору
дыбысын шығарады.
Үтіктің табанынан су
тамшылап тұр.
Үтіктің табанынан кір су
мен қалдық қаттар
шығады.
Табаннан су ағады. Қақ тазалау процесін
тұрғанда, қауіпсіз автоматты
өшіру функциясы автоматты
түрде қосылады.
Су ыдысы бос. Су ыдысын сумен толтырыңыз және бу
Қақ тазалау процесінен кейін
қалған су табаннан тамуы
мүмкін.
Қақ тазалау процесі
аяқталмаған.
Буды бірінші рет
пайдаланған кезде немесе
оны ұзақ уақыт
пайдаланбаған кезде, бу
шлангісінде суға айналады.
Бу шығару тесіктерінде
және/немесе үтіктің
табанында су құрамындағы
қоспалар мен химикаттар
жиналған болуы мүмкін.
кездейсоқ іске қостыңыз
(«Тазалау және техникалық
қызмет көрсету» тарауын
қараңыз).
Құралды қайта іске қосу үшін қосу/өшіру
түймесін басыңыз. Содан соң, құрал қайта
қыза бастайды.
қосқышын сору дыбысы жайырақ болғанша
және табаннан бу шыққанша басыңыз.
Табанды шүберекпен құрғақ етіп сүртіңіз.
Егер қақ тазалау шамы әлі де жыпылықтап
тұрса және құрал әлі де дыбыстық сигнал
шығарып жатса, қақ тазалау процесін
орындаңыз («Тазалау және техникалық
қызмет көрсету» тарауын қараңыз).
Қақ тазалау процесін қайтадан орындау
керек («Тазалау және техникалық қызмет
көрсету» тарауын қараңыз).
Бұл қалыпты жағдай. Үтікті киімнен алыс
ұстап, бу шығарғышты басыңыз. Үтік
табанынан су орнына бу шыққанша күтіңіз.
Қақ тазалау процесін үнемі орындап
отырыңыз («Тазалау және техникалық
қызмет көрсету» тарауын қараңыз.).
Құралды өшіріңіз. Одан кейін оны қайта
қосыңыз. «Үтік дайын» шамы тұрақты
жанғанша, үтікті қыздырып алыңыз.
Қақ тазалау процесі
басталмайды.
Үтік киімде жылтыр із
немесе белгі қалдырады.
Құрал дыбыстық сигналды
шығаруды бастағанша ҚАҚ
ТАЗАЛАУ түймесін 2 секунд
бойы баспағансыз.
Үтіктелетін бет тегіс емес,
мысалы, қатты бумен үтіктеп
жатқандықтан немесе киімде
бүктелген жер болғандықтан.
Үтіктеу тақтасы қаптамасына
жеткілікті бекітілмеді.
«Тазалау және техникалық қызмет көрсету»
тарауын қараңыз.
PerfectCare үтігін кез келген киімге қауіпсіз
пайдалануға болады. Жылтыр із тұрақты
қалмайды. Ол киім жуылғанда кетеді. Қатты
бумен немесе бүктеп үтіктемеңіз, не
болмаса белгілердің алдын алу үшін
үтіктелетін аймаққа мақта мата қоюға
болады.
Үтіктеу тақтасы қаптамасының астына
киізден жасалған қосымша қабат қойыңыз.
Page 28

28
Қазақша
Мәселе Ықтимал себеп Шешім
Үтіктеу тақтасының
жапқышы ылғал болады
немесе еденде/киімде су
тамшылары бар.
Ұзақ үтіктеу сеансынан кейін
бу үтіктеу тақтасының
жапқышында суға айналған.
Губка немесе киізден жасалған материал
тозған болса, үтіктеу тақтасының жапқышын
ауыстырыңыз. Сонымен қатар, үтіктеу
тақтасында конденсаттың пайда болуын
болдырмау үшін үтіктеу тақтасы
қаптамасының астына киізден жасалған
қосымша қабат қосуға болады.
EAC
Үтіктеу тақтасы құралдың
буды тез шығару
жылдамдығына арналмаған.
Бумен үтіктеу жүйесі
Өндіруші: “Филипс Консьюмер Лайфстайл Б.В.”, Туссендиепен 4,9206 АД,
Драхтен, Нидерланды
Ресей және Кедендік Одақ территориясына импорттаушы: "Филипс" ЖШҚ,
Ресей Федерациясы, 123022 Мәскеу қаласы, Сергей Макеев көшесі, 13-үй,
тел. +7 495 961-1111
220-240 B, 50-60 Гц, 2350-2800 Вт
Тұрмыстық қажеттіліктерге арналған
Үтіктеу тақтасында конденсаттың пайда
болуын болдырмау үшін үтіктеу тақтасы
қаптамасының астына киізден жасалған
қосымша қабат қойыңыз.
Page 29

Введение
Поздравляем с покупкой продукции Philips! Чтобы воспользоваться всеми
преимуществами поддержки Philips, зарегистрируйте изделие на веб-сайте
www.philips.com/welcome.
Перед использованием прибора ознакомьтесь со сведениями,
содержащимися в данном руководстве пользователя, информационной
листовке и кратком руководстве. Сохраните эти документы для дальнейшего
использования в качестве справочного материала.
Эксклюзивная технология компании Philips
Технология OptimalTemp
Технология OptimalTemp позволяет гладить все типы тканей, допускающих
глажение, без необходимости регулирования температуры нагрева утюга
или сортировки одежды по типу ткани.
Оставлять горячую подошву утюга непосредственно на гладильной доске
безопасно. Утюг можно не устанавливать обратно на подставку. Это
позволяет снизить нагрузку на запястье рабочей руки.
Глажение изделий из натуральной шерсти с помощью данного утюга
одобрено компанией Woolmark Pty Ltd при условии, что глажение
осуществляется в соответствии с указаниями на этикетке изделия и
инструкциями производителя утюга. R1101. Торговая марка Woolmark
является сертификационным товарным знаком, зарегистрированным в
Великобритании, Ирландии, Гонконге и Индии.
Русский
29
Технология Compact ProVelocity
Эта технология обеспечивает непрерывную подачу пара, который глубоко
проникает в ткань и упрощает разглаживание складок. При этом прибор
имеет меньшие габариты и вес по сравнению с традиционными
парогенераторами, что упрощает его хранение.
Описание изделия (рис. 1)
1 Шланг подачи пара
2 Кнопка выпуска пара/парового удара
3 Индикатор готовности утюга
4 Подошва
5 Подставка утюга
6 Фиксатор блокировки
7 Съемный резервуар для воды
8 Отделение для хранения шланга подачи пара
9 Сетевой шнур с вилкой
Русский
Page 30

30
Русский
10 Кнопка CALC-CLEAN с индикатором
11 Кнопка включения/выключения с индикаторами питания и
автоматического отключения
12 Кнопка ECO с индикатором
Подготовка прибора к работе
Тип используемой воды
Этот прибор можно использовать с водопроводной водой. Однако, если
вода в вашем регионе жесткая, накипь может образовываться быстрее.
Поэтому для продления срока службы прибора рекомендуется использовать
дистиллированную или деминерализованную воду.
Предупреждение! Во избежание появления протечек, коричневых
пятен или повреждения прибора не используйте душистую воду,
воду из сушильной машины, уксус, крахмал, средства очистки от
накипи, добавки для глажения, химические вещества или воду,
подвергшуюся очистке от накипи с использованием химических
средств.
Заполнение резервуара для воды
1 Наполняйте резервуар для воды перед каждым использованием, а также
когда уровень воды в резервуаре опускается ниже минимальной отметки.
Резервуар для воды можно заполнять в любой момент в процессе
использования.
2 Извлеките резервуар для воды из основания.
3 Заполните резервуар водопроводной водой до отметки MAX.
Page 31

4 Установите резервуар для воды обратно в устройство, начиная с
установки его нижней части.
5 Нажмите на верхнюю часть резервуара для воды (должен прозвучать
щелчок).
Использование прибора
Ткани, которые можно гладить
Предупреждение!Не гладьте ткани, глажение которых не
допускается.
-
Ткани, на которых размещены эти символы, можно гладить (например,
лен, хлопок, полиэстер, шелк, шерсть, вискоза и искусственный шелк).
Русский
31
Глажение
-
Ткани, на которых размещен этот символ, гладить нельзя. Это
синтетические ткани, такие как спандекс или эластан; ткани с
добавлением спандекса и полиолефины (например, полипропилен).
Также это касается термонаклеек на ткани.
1 Установите парогенератор на ровную и устойчивую поверхность.
Примечание. В целях безопасности рекомендуется во время глажения
ставить базу на устойчивую гладильную доску.
2 Убедитесь, что резервуар для воды заполнен.
Page 32

32
Русский
3 Вставьте вилку питания в заземленную розетку электросети и нажмите
кнопку питания, чтобы включить парогенератор. Подождите, пока
индикатор готовности утюга загорится ровным светом. Это займет около
2 минут.
4 Извлеките шланг подачи пара из отделения для хранения шланга.
5 Чтобы снять утюг с подставки, нажмите кнопку фиксатора блокировки.
6 Чтобы начать глажение, нажмите кнопку подачи пара.
Предупреждение! Запрещается направлять струю пара на
людей.
7 Для улучшения результатов глажения после глажения с использованием
пара выполните последние движения без подачи пара.
Примечание. При первом использовании прибора может потребоваться
30 секунд для генерации пара.
Примечание. Активация насоса происходит при каждом нажатии кнопки
подачи пара. Работа насоса сопровождается характерным звуком. Это
нормально. Когда вода в резервуаре заканчивается, звук насоса становится
громче. Как только уровень воды достигнет минимальной отметки, снова
наполните резервуар водой.
Для более мощной подачи пара можно использовать режим TURBO,
который безопасен для всех тканей, глажение которых допускается.
Для таких тканей, как хлопок, джинсовая ткань и лен, рекомендуется
использовать режим подачи пара TURBO.
1 Нажмите и удерживайте кнопку включения/выключения в течение
2 секунд, пока индикатор не загорится белым светом.
2 Чтобы отключить режим TURBO, снова нажмите и удерживайте кнопку
включения/выключения в течение 2 секунд, пока индикатор не загорится
синим светом.
Функция "Паровой удар"
В процессе глажения с паром можно использовать функцию "Паровой удар"
для разглаживания глубоких складок.
Page 33

2x
1 Быстро дважды нажмите кнопку подачи пара.
Вертикальное глажение
Предупреждение! Из утюга выходит горячий пар. Никогда не
пытайтесь гладить одежду на себе и других. Берегите руки от
воздействия пара.
Для глажения одежды, висящей на плечиках, можно использовать функцию
вертикального отпаривания.
1 Удерживая утюг в вертикальном положении, нажмите кнопку подачи пара,
и слегка касаясь одежды подошвой утюга, перемещайте утюг вверх и
вниз.
Русский
33
Безопасная установка утюга в перерывах между глажением
Установка утюга при расправлении одежды.
Во время расправления одежды утюг можно поставить на подставку или
поместить подошвой вниз на гладильную доску. Благодаря технологии
OptimalTemp повреждение поверхности гладильной доски горячей
подошвой исключено.
Page 34

34
Русский
Энергосбережение
Режим ECO
Благодаря режиму ECO (сниженная мощность подачи пара) можно
экономить электроэнергию и при этом по-прежнему получать отличные
результаты.
1 Чтобы включить режим ECO, нажмите кнопку ECO. Загорится зеленый
индикатор режима ECO.
2 Чтобы отключить режим ECO, снова нажмите кнопку ECO. Загорится
зеленый индикатор режима ECO.
Режим автовыключения (только для некоторых моделей)
-
В целях экономии энергии прибор автоматически отключается, если он
не используется в течение 5 минут. На кнопке включения/выключения
начинает мигать индикатор автоотключения.
-
Чтобы включить прибор, нажмите кнопку включения/выключения. Прибор
снова начнет нагреваться.
Предупреждение. Не оставляйте включенный в сеть прибор без
присмотра. После завершения работы отключите прибор от розетки
электросети.
Очистка и уход
Интеллектуальная система очистки от накипи
Для обеспечения регулярной очистки от накипи в приборе используется
интеллектуальная система очистки Smart Calc-Clean. Она способствует
поддержанию оптимальной подачи пара, а также предотвращению
появления пятен и загрязнений на поверхности подошвы утюга в результате
длительной эксплуатации. На парогенераторе регулярно появляются
напоминания о необходимости выполнения очистки от накипи.
Page 35

Русский
35
Звуковые и световые напоминания о необходимости очистки от накипи
Спустя 1–3 месяца после начала эксплуатации начинает мигать индикатор
Calc-Clean, на приборе раздается звуковой сигнал, напоминающий о
необходимости очистки от накипи.
Кроме того, предусмотрена дополнительная защита парогенератора от
накипи: подача пара отключается, если очистка от накипи не была
произведена. После проведения очистки от накипи подача пара
восстанавливается. Это происходит независимо от типа используемой воды.
Примечание. Процедуру очистки от накипи можно выполнить в любое время,
даже если звуковое и световое напоминания не активированы.
Проведение очистки от накипи с использованием контейнера
Calc-Clean
Предупреждение! Не оставляйте прибор без присмотра во время
выполнения очистки от накипи.
Внимание! Очистка от накипи должна всегда производиться с
использованием контейнера Calc-Clean. Не снимайте прибор с контейнера
Calc-Clean, так как процесс будет прерван и из подошвы утюга начнет
поступать горячая вода и пар.
1 Наполните резервуар для воды наполовину.
Примечание. Во время выполнения очистки от накипи прибор должен
быть подключен к электросети и ВКЛЮЧЕН.
Page 36

2 sec.
2 min.
36
Русский
2 Поставьте контейнер Calc-Clean на гладильную доску или другую ровную
и устойчивую поверхность.
3 Установите утюг на контейнер Calc-Clean.
4 Нажмите и удерживайте кнопку CALC-CLEAN в течение 2 секунд,
дождитесь коротких звуковых сигналов.
Примечание. Во время очистки от накипи в контейнере Calc-Clean
скапливаются частицы накипи и горячая вода. Вы можете установить
утюг на контейнер во время проведения процедуры, это совершенно
безопасно.
5 Во время процесса очистки от накипи на приборе раздаются короткие
звуковые сигналы, слышен звук работающего насоса.
6 Подождите примерно 2 минуты, пока не закончится процесс очистки. По
окончании процесса очистки от накипи на приборе прекращается
воспроизведение звукового сигнала, а индикатор CALC-CLEAN
перестает мигать.
Page 37

Очистка подошвы
Русский
7 Протрите утюг тканью и поместите его обратно на базовую станцию.
Внимание! Утюг горячий.
8 Поскольку контейнер Calc-Clean нагревается во время процесса очистки
от накипи, подождите около 5 минут, прежде чем взять его в руки. Затем
поднесите контейнер Calc-Clean к раковине и опустошите его и
поместите на хранение до следующего использования.
9 При необходимости повторите шаги 1–8. Прежде чем начать процесс
очистки от накипи, убедитесь, что контейнер Calc-Clean пуст.
Примечание. Если накипь не успела скопиться внутри утюга, во время
очистки из подошвы утюга будет поступать чистая вода. Это нормально.
Дополнительную информацию о процессе очистки от накипи можно
получить, просмотрев видеоролики по ссылке:
http://www.philips.com/descaling-iron.
Для поддержания оптимальной работы прибора необходима регулярная
очистка.
1 Очищайте прибор влажной тканью.
2 Чтобы просто и быстро удалить пятна, после того как подошва утюга
нагреется, проведите ей по влажной ткани.
Совет. Для обеспечения гладкого скольжения регулярно очищайте подошву
утюга.
37
Хранение
1 Выключите парогенератор и отключите его от сети.
2 Вылейте воду из резервуара для воды в раковину.
Page 38

38
Русский
3 Сложите шланг подачи пара. Смотайте шланг подачи пара внутри
отделения для хранения и закрепите его в приспособлении для хранения
шланга.
4 Сложите сетевой шнур и закрепите его с помощью крепления Velcro.
5 Чтобы зафиксировать утюг на подставке, нажмите кнопку фиксатора
блокировки.
6 Одной рукой вы легко можете переносить утюг, зафиксированный на
подставке, за ручку.
Поиск и устранение неисправностей
Данный раздел посвящен наиболее распространенным проблемам, с
которыми вы можете столкнуться при использовании прибора. Если не
удается самостоятельно справиться с возникшими проблемами,
ознакомьтесь с ответами на часто задаваемые вопросы на веб-сайте
www.philips.com/support или обратитесь в центр поддержки потребителей
в вашей стране.
Page 39

Проблема Возможная причина Способы решения
Утюг не вырабатывает
пар.
В резервуаре недостаточно
воды.
Наполните резервуар для воды выше
отметки MIN. Нажмите и удерживайте
кнопку подачи пара до начала подачи пара.
Это может занять до 30 секунд.
Русский
39
Не нажата кнопка подачи
пара.
Функция подачи пара будет
отключена, пока вы не
выполните процесс очистки
от накипи.
Резервуар для воды
неправильно вставлен в
прибор.
В начале сеанса глажения
вы недостаточно долго
нажимали на кнопку подачи
пара.
Индикатор кнопки CALCCLEAN мигает, и прибор
подает звуковой сигнал.
Из подошвы не поступает
пар, мигает индикатор
кнопки CALC-CLEAN,
звучит сигнал.
Прибор выключился. Функция автовыключения
Прибор издает звук
работающего насоса.
Это напоминание о
необходимости проведения
очистки от накипи.
Процесс очистки от накипи
не был проведен или был
проведен не до конца.
активируется автоматически,
если прибор не
используется более 5 минут.
Резервуар для воды пуст. Наполните резервуар для воды и нажмите
Нажмите и удерживайте кнопку подачи пара
до начала подачи пара.
Чтобы снова активировать подачу пара,
выполните процедуру очистки от накипи (см.
главу "Очистка и уход").
Установите резервуар для воды обратно в
прибор (должен прозвучать щелчок).
Нажмите и удерживайте кнопку подачи пара
до начала подачи пара. Это может занять
до 30 секунд.
Выполните очистку от накипи после
появления напоминания (см. главу "Очистка
и уход").
Чтобы снова активировать подачу пара,
выполните процесс очистки от накипи (см.
главу "Очистка и уход").
Чтобы включить прибор, нажмите кнопку
включения/выключения. Прибор снова
начнет нагреваться.
кнопку подачи пара, пока звук работающего
насоса не станет тише и из подошвы
прибора не начнет поступать пар.
На подошве появляются
капли воды.
После проведения очистки
от накипи остатки воды
могут вытекать из подошвы
утюга.
Не завершен процесс
очистки от накипи.
При первом использовании
прибора или после долгого
перерыва в его
использовании пар внутри
шланга преобразуется в
воду.
Протрите подошву сухой тканью. Если
индикатор Calc-Clean по-прежнему мигает,
а на приборе раздается звуковой сигнал,
выполните очистку от накипи (см. главу
"Очистка и уход").
Необходимо снова провести процесс
очистки от накипи (см. главу "Очистка и
уход").
Это нормально. Отведите утюг в сторону от
одежды и нажмите кнопку подачи пара.
Подождите, пока из подошвы утюга вместо
воды не начнет выходить пар.
Page 40

40
Русский
Проблема Возможная причина Способы решения
Из отверстий подошвы
поступают хлопья накипи
и грязная вода.
Примеси или химические
вещества, растворенные в
воде, отложились на
подошве утюга и/или в
отверстиях для выхода пара.
Регулярно очищайте прибор от накипи (см.
главу "Очистка и уход").
Из подошвы вытекает
вода.
Процесс очистки от
накипи не запускается.
После использования
утюга на ткани остается
блеск или след от
глажения.
Во время глажения
гладильная доска
становится влажной или
на полу/одежде
появляются капли воды.
Был случайно запущен
процесс очистки от накипи
(см. главу "Очистка и уход").
Вы не удерживали кнопку
CALC-CLEAN в течение
2 секунд (пока на приборе не
начнет звучать сигнал).
Разглаживаемая
поверхность была неровной,
например глажение
выполнялось поверх шва
или складки на одежде.
В покрытии гладильной
доски недостаточно слоев
войлока.
Пар скапливается на
покрытии гладильной доски
при продолжительном
глажении.
Ваша гладильная доска не
предназначена для столь
сильного потока пара из
прибора.
Выключите прибор. Затем включите прибор
снова. Дождитесь, когда утюг нагреется и
загорится индикатор готовности.
См. главу "Очистка и уход".
Модель PerfectCare безопасна для всех
типов тканей. Блеск или следы от глажения
не являются постоянными и исчезают после
стирки. Не рекомендуется гладить поверх
швов или складок, чтобы предотвратить
появление следа от глажения в
соответствующих местах, либо постелите
поверх разглаживаемого участка хлопковую
ткань.
Поместите под покрытие гладильной доски
дополнительный слой войлока.
Если пористый материал покрытия
гладильной доски или войлок износился,
замените его. Можно также поместить под
покрытие гладильной доски
дополнительный слой войлока, чтобы
предотвратить появление конденсата.
Поместите под покрытие гладильной доски
дополнительный слой войлока, это
предотвратит появление конденсата.
EAC
Парогенератор
Изготовитель: “Филипс Консьюмер Лайфстайл Б.В.», Туссендиепен 4,9206
АД, Драхтен, Нидерланды
Импортер на территорию России и Таможенного Союза: ООО "Филипс",
Российская Федерация, 123022 г. Москва, ул. Сергея Макеева, д.13, тел. +7
495 961-1111
220-240 B, 50-60 Гц, 2350-2800 Вт
Для бытовых нужд
Page 41

Giriş
Ürünümüzü satın aldığınız için teşekkür ederiz; Philips'e hoş geldiniz!
Philips'in sunduğu destekten tam olarak yararlanmak için ürününüzü
www.philips.com/welcome adresinden kaydettirin.
Cihazı kullanmadan önce bu kullanım kılavuzunu, önemli bilgiler broşürünü
ve hızlı başlangıç kılavuzunu dikkatle okuyun. Bunları gelecekte başvurmak
üzere saklayın.
Philips'ten benzersiz teknoloji
Akıllı Çip teknolojisi
Akıllı Çip teknolojisi, ütü sıcaklığını ayarlamaya veya giysilerinizi ayırmaya
gerek kalmadan, ütülenebilir her tür kumaşı istediğiniz sırayla
ütüleyebilmenizi sağlar.
Ütü platformunu tekrar takmadan sıcak tabanı doğrudan ütü masası
üzerinde bırakmak güvenlidir. Bu, bileğinizdeki gerginliğin azalmasına
yardımcı olacaktır.
Giysilerin, etiketlerinde belirtilen ve bu ütünün üreticisi tarafından verilen
talimatlara uygun şekilde ütülenmesi şartıyla, bu ütünün tamamen yünlü
ürünlerde kullanılabileceği The Woolmark Company Pty Ltd tarafından
onaylanmıştır. R1701. Woolmark ticari markası İngiltere, İrlanda, Hong Kong
ve Hindistan'da bir sertifika markasıdır.
Türkçe
41
Kompakt ProVelocity Teknolojisi
Bu teknoloji kırışıklıkları ortadan kaldırmak için diplere işleyen sürekli buhar
üretir. Aynı zamanda, daha kolay depolama için cihazı, geleneksel buhar
üreticilerine kıyasla daha kompakt ve hafif tutar.
Ürüne genel bakış (Şekil 1)
1 Buhar hortumu
2 Buhar tetiği/Buhar püskürtücü
3 'Ütü hazır' ışığı
4 Taban
5 Ütü platformu
6 Taşıma kilidi açma düğmesi
7 Sökülebilir su deposu
8 Besleme hortumu saklama bölmesi
9 Fişli elektrik kablosu
10 Işıklı Kireç Temizleme düğmesi
Türkçe
Page 42

42
Türkçe
11 Güç açık ışığı ve otomatik kapanma ışığı ile açma/kapama düğmesi
12 Işıklı ECO düğmesi
Cihazın kullanıma hazırlanması
Kullanılabilir su türleri
Bu cihaz musluk suyu ile kullanılmak üzere tasarlanmıştır. Ancak, yaşadığınız
bölgedeki suyun sert olması halinde, kısa süre içinde kireç oluşumu
meydana gelebilir. Bu nedenle, cihazın kullanım ömrünü uzatmak için saf
veya demineralize su kullanmanız önerilir.
Uyarı: Suyun damlamasına ve kahverengi lekelere sebep
olabileceğinden ve cihazınıza zarar verebileceğinden parfümlü su,
kurutma makinesinde biriken su, sirke, kola, kireç çözücü
maddeler, ütülemeye yardımcı ürünler, kimyasal olarak kireçten
arındırılmış su veya başka kimyasallar kullanmayın.
Su haznesinin doldurulması
1 Su haznesini her kullanımdan sonra veya su seviyesi minimum seviyenin
altına düştüğünde doldurun. Su haznesini, kullanım sırasında herhangi bir
zamanda doldurabilirsiniz.
2 Su tankını tabandan çıkarın.
3 Hazneyi MAX seviyesine kadar doldurun.
Page 43

4 Su tankını cihaza, önce alt kısmı cihaza takarak yeniden cihaza yerleştirin.
5 Su haznesinin üst kısmını yerine tam oturana kadar itin ('klik' sesi gelir).
Cihazın kullanımı
Ütülenebilir kumaşlar
Uyarı:Ütülenmeyen kumaşları ütülemeyin.
-
Bu simgeleri taşıyan kumaşlar ütülenebilirler, örneğin keten, pamuk,
polyester, ipek, yün, viskoz ve suni ipek.
Türkçe
43
Ütüleme
-
Bu simgeyi taşıyan kumaşlar ütülenmez. Bu kumaşlara, spandeks veya
elastan, spandeks karışımlı kumaşlar ve poliolefinler (örneğin,
polipropilen) dahildir. Kumaşlardaki baskılar da ütülenmez.
1 Buhar kazanlı ütüyü sabit ve düz bir zemine yerleştirin.
Not: Güvenli bir ütüleme işlemi için ütü tabanını her zaman sabit bir ütü
masasına yerleştirmenizi öneririz.
2 Su haznesinde yeterince su olduğundan emin olun.
Page 44

44
Türkçe
3 Elektrik fişini topraklı bir prize takın ve buhar kazanlı ütüyü açmak için
açma/kapatma düğmesine basın. 'Ütü hazır' ışığı sürekli olarak yanmaya
başlayana kadar bekleyin. Bu yaklaşık 2 dakika sürer.
4 Besleme hortumunu hortum saklama bölmesinden çıkartın.
5 Ütüyü ütü platformundan almak için taşıma kilidini açın.
6 Ütülemeye başlamak için buhar tetiğini basılı tutun.
Uyarı: Buharı asla insanlara yöneltmeyin.
7 En iyi sonuçları elde etmek için buharla ütüledikten sonra son vuruşları
buhar kullanmadan yapın.
Not: Cihazı ilk kez kullandığınızda, cihazdan buhar çıkması 30 saniye alabilir.
Not: Buhar tetiğine her bastığınızda pompa devreye girer. Belli belirsiz bir
tıkırtı sesi çıkarır, bu gayet normaldir. Su haznesinde suyun olmadığı
durumlarda pompa sesi daha yüksektir. Su seviyesi minimum seviyenin
altına düşünce su tankını suyla doldurun.
Daha güçlü buhar için, turbo buhar modunu kullanabilirsiniz; ütülenebilir
bütün kumaşlar için güvenlidir.
Pamuk, kot ve keten gibi kumaşlar için TURBO buhar modunu kullanmanız
önerilir.
1 Işık beyaza dönene kadar açma/kapama düğmesine basın ve düğmeyi 2
saniye boyunca basılı tutun.
2 Turbo modunu devre dışı bırakmak için açma/kapama düğmesine tekrar
basın ve düğmeyi ışık mavi yanana kadar 2 saniye boyunca basılı tutun.
Buhar püskürtme fonksiyonu
İnatçı kırışıklıkları gidermek için buhar püskürtme fonksiyonunu kullanın.
Page 45

2x
Dikey ütüleme
Türkçe
1 Buhar tetiğine iki kez hızlıca basın.
Uyarı: Ütü sıcak buhar üretir. Kendi üzerinizdeki veya başka
birinin üzerindeki kıyafetlerin kırışığını ütüyle açmaya kesinlikle
çalışmayın. Elinizin veya başka birinin elinin yakınında buhar
uygulamayın.
Buharlı ütüyü, asılı giysilerinizden buruşuklukları gidermek için dikey
konumda kullanabilirsiniz.
1 Ütüyü dik tutun, buhar tetiğine basın ve ütünün tabanıyla giysiye hafifçe
dokunarak ütüyü yukarı aşağı doğru hareket ettirin.
45
Güvenli bekleme
Kıyafetinizi düzeltirken ütüyü bekletme
Kıyafetinizi düzeltirken ütüyü, ütü platformunda veya yatay biçimde ütü
masasında bırakabilirsiniz. Akıllı Çip teknolojisi, tabanın ütü masasına
örtüsüne zarar vermemesini sağlar.
Page 46

46
Türkçe
Enerji tasarrufu
Eco modu
ECO (Ekonomi) modunu kullanarak (daha az miktarda buhar çıkışı ile),
ütüleme sonucundan ödün vermeden enerji tasarrufu yapabilirsiniz.
1 ECO (Ekonomi) modunu etkinleştirmek için ECO düğmesine basın. Yeşil
ECO ışığı yanar.
2 ECO (Ekonomi) modunu devre dışı bırakmak için ECO düğmesine tekrar
basın. Yeşil ECO ışığı söner.
Güvenli otomatik kapanma modu (sadece belirli modellerde)
-
Cihaz 5 dakika boyunca kullanılmadığında, enerji tasarrufu yapmak için
otomatik olarak kapanır. Açma/kapama düğmesindeki otomatik kapanma
ışığı yanıp sönmeye başlar.
-
Cihazı tekrar etkinleştirmek için açma/kapama düğmesine basın. Cihaz
yeniden ısınmaya başlar.
Uyarı: Cihaz elektriğe bağlıyken asla gözetimsiz bırakmayın.
Kullanım sonrasında, cihazı her zaman prizden çekin.
Temizlik ve bakım
Akıllı Kireç Temizleme Sistemi
Kireç çözme ve temizliğin düzenli olarak yapılmasını garanti etmek için
cihazınız Akıllı Kireç Temizleme sistemiyle tasarlanmıştır. Bu sayede güçlü
buhar performansı korunur ve zamanla tabandan kir ve buhar lekesi gelmesi
önlenir. Temizlik işleminin yapılmasını garanti etmek için buhar üretici
düzenli şekilde anımsatıcı uyarılar verir.
Ses ve ışık Kireç Temizleme hatırlatıcı
1 - 3 aylık kullanımdan sonra Kireç Temizleme ışığı yanıp sönmeye ve cihaz
Kireç Temizleme işlemini uygulamanız gerektiğini hatırlatmak için sesli uyarı
vermeye başlar.
Page 47

Bununla birlikte, buhar üreticisini kireçten korumak için ikinci bir savunma
adımı entegre edilmiştir: eğer kireç çözme yapılmamışsa buhar fonksiyonu
devre dışı bırakılır. Kireç çözme işleminden sonra buhar fonksiyonu tekrar
etkinleştirilir. Bu durum, kullanılan su türünün önemi olmaksızın gerçekleşir.
Not: Kireç Temizleme işlemi ses ve lamba hatırlatıcılar devreye girmeden bile
herhangi bir zaman yapılabilir.
Kireç Temizleme işlemini Kireç Temizleme haznesiyle uygulayın
Uyarı: Kireç Temizleme işlemi sırasında cihazı gözetimsiz
bırakmayın.
Dikkat: Kireç Temizleme işlemini her zaman Kireç Temizleme haznesiyle
uygulayın. Ütü tabanından sıcak su ve buhar çıkacağından, ütüyü Kireç
Temizleme haznesinden kaldırarak işlemi bölmeyin.
1 Su haznesini yarısına kadar doldurun.
Not: Kireç Temizleme işlemi sırasında cihazın fişe takılı ve ON (Açık)
konumunda olduğundan emin olun.
Türkçe
47
2 Kireç Temizleme haznesini ütü masasının ya da başka bir düz ve sabit
yüzeyin üzerine yerleştirin.
3 Kireç Temizleme haznesini sağlam bir şekilde ütü masasına yerleştirin.
Page 48

2 sec.
2 min.
48
Türkçe
4 Kısa sesli uyarılar duyana kadar Kireç Temizleme düğmesini 2 saniye
boyunca basılı tutun.
Not: Kireç Temizleme haznesi, Kireç Temizleme işlemi sırasında kireç
parçalarını ve sıcak suyu toplamak için tasarlanmıştır. Bütün süreç
boyunca, ütüyü bu haznenin üzerinde tutmak tamamen güvenlidir.
5 Kireç Temizleme işlemi sırasında, bip sesleri ve bir pompa sesi duyarsınız.
6 Cihazın işlemi tamamlaması için yaklaşık 2 dakika kadar bekleyin. Kireç
Temizleme işlemi tamamlandığında, ütü biplemeyi bırakır ve Kireç
Temizleme lambası söner.
7 Ütüyü bir bez parçasıyla silin ve yeniden taban standına yerleştirin.
Dikkat: Ütü sıcaktır.
8 Kireç Temizleme haznesi Kireç Temizleme işlemi sırasında ısındığından
hazneye dokunmadan önce yaklaşık 5 dakika bekleyin. Sonra Kireç
Temizleme haznesini lavaboya boşaltın vedaha sonra kullanmak üzere
saklayın.
9 Gerekirse, 1'den 8'e kadar olan adımları tekrarlayın. Kireç Temizleme
işlemine başlamadan önce Kireç Temizleme haznesinin boşaltığınızdan
emin olun.
Not: Kireç Temizleme işlemi sırasında, ütünün içinde hiç kireç
birikmediyse tabandan temiz su gelebilir. Bu durum normaldir.
Kireç Temizleme işlemini nasıl gerçekleştireceğinize dair daha fazla bilgi için
şu bağlantıdaki videolara bakın: http://www.philips.com/descaling-iron.
Page 49

Tabanın temizlenmesi
Cihazınızın bakımını doğru şekilde yapmak için düzenli olarak temizleyin.
1 Cihazı nemli bir bezle silerek temizleyin.
2 Lekeleri kolay ve etkili bir şekilde çıkarmak için, tabanın ısınmasını
bekleyin ve ütüyü nemli bir bez üzerinde gezdirin.
İpucu: Kolay hareket etmesini sağlamak için tabanı düzenli olarak temizleyin.
Depolama
1 Buhar kazanlı ütüyü kapatın ve fişini prizden çekin.
2 Su haznesindeki suyu lavaboya boşaltın.
Türkçe
49
3 Besleme hortumunu katlayın. Besleme hortumunu, besleme hortumu
saklama bölmesinin içinde sarın ve saklama kancasının içine sabitleyin.
4 Elektrik kablosunu katlayın ve Velcro şeridiyle sabitleyin.
Page 50

50
Türkçe
5 Ütüyü, ütü platformuna kilitlemek için taşıma kilidi açma düğmesine
bastırın.
6 Ütü, ütü platformuna kilitliyken cihazı tek elle ütünün sapından tutarak
taşıyabilirsiniz.
Sorun giderme
Bu bölümde, cihazla ilgili en sık karşılaşabileceğiniz sorunları özetleyeceğiz.
Sorunu aşağıda verilen bilgilerle çözemezseniz, sıkça sorulan soruları içeren
liste için www.philips.com/support adresini ziyaret edin veya ülkenizdeki
Müşteri Hizmetleri Merkezi ile iletişime geçin.
Sorun
Ütü buhar üretmiyor. Su haznesinde yeterince su
Olası neden Çözüm
yok.
Su haznesini MIN göstergesini aşacak
şekilde doldurun. Lütfen buhar tetiğini
buhar çıkana dek basılı tutun. Buharın
gelmesi 30 saniyeyi bulabilir.
Kireç Temizleme
düğmesinin ışığı yanıp
sönüyor ve cihaz sesli
uyarı veriyor.
Buhar tetiğine basmayın. Lütfen buhar tetiğini buhar çıkana dek basılı
Buhar fonksiyonu, siz Kireç
Temizleme işlemini
uygulayana kadar devre dışı
bırakılmıştır.
Su haznesi cihaza düzgün
şekilde yerleştirilmemiştir.
Ütülemeye başladığınızda,
buhar tetiği yeterince basılı
tutulmamıştır.
Bu, Kireç Temizleme
hatırlatmasıdır.
tutun.
Buhar fonksiyonunu tekrar etkinleştirmek
için Kireç Temizleme işlemini uygulayın.
('Temizlik ve bakım' bölümüne bakın)
Su haznesinin cihaza tam olarak oturmasını
sağlayın ('klik' sesi duyulur).
Lütfen buhar tetiğini buhar çıkana dek basılı
tutun. Buharın gelmesi 30 saniyeyi bulabilir.
Kireç Temizleme işlemini Kireç Temizleme
hatırlatması verildikten sonra uygulayın
(bkz. 'Temizlik ve bakım' bölümü).
Page 51

Sorun Olası neden Çözüm
Ütü tabanından buhar
gelmiyor, Kireç
Temizleme düğmesi
yanıp sönüyor ve cihaz
ötüyor.
Kireç Temizleme işlemini
uygulamamış veya
tamamlamamış olabilirsiniz.
Buhar fonksiyonunu tekrar etkinleştirmek
için Kireç Temizleme işlemini uygulayın
(bkz. 'Temizlik ve bakım' bölümü).
Türkçe
51
Cihaz kapandı. Cihaz 5 dakikadan uzun bir
Cihazdan yüksek bir
pompalama sesi geliyor.
Ütü tabanından su
damlıyor.
Ütünün tabanından kirli
su ve kireç zerrecikleri
çıkıyor.
Ütü tabanından su akıyor. Yanlışlıkla Kireç Temizleme
süre kullanılmadığı takdirde,
güvenli otomatik kapanma
fonksiyonu otomatik olarak
devreye girer.
Su haznesi boşalmıştır. Su haznesini suyla doldurun ve pompalama
Kireç Temizleme işleminden
sonra, kalan su ütü
tabanından damlayabilir.
Kireç Temizleme işlemi
tamamlanmadı.
Buharı ilk kullanışınızda veya
uzun bir süreden sonra ilk
kez kullandığınızda buhar,
hortumun içinde yoğunlaşır.
Suda bulunan kireç
zerrecikleri veya kimyasal
maddeler buhar deliklerinde
ve/veya ütü tabanında
birikiyor.
işlemini başlatmış
olabilirsiniz (bkz. 'Temizlik ve
bakım' bölümü).
Cihazı tekrar etkinleştirmek için
açma/kapama düğmesine basın. Cihaz
yeniden ısınmaya başlar.
sesi azalana ve ütü tabanından buhar
gelene kadar buhar tetiğine basın.
Tabanı bir parça bezle kurulayın. Kireç
Temizleme lambası hala yanıp sönüyor ve
cihaz ötüyorsa, Kireç Temizleme işlemini
gerçekleştirin (bkz. 'Temizlik ve bakım'
bölümü).
Kireç Temizleme işlemini tekrar
uygulamanız gerekiyor (bkz. 'Temizlik ve
bakım' bölümü).
Bu durum normaldir. Ütüyü kumaştan
uzaklaştırın ve buhar tetiğine basın. Ütünün
tabanından su yerine buhar gelene kadar
bekleyin.
Kireç Temizleme işlemini düzenli olarak
uygulayın (bkz. 'Temizlik ve bakım' bölümü).
Cihazı kapatın. Ardından, cihazı tekrar
çalıştırın. 'Ütü hazır' sürekli olarak yanana
kadar ütünün ısınmasını bekleyin.
Kireç Temizleme işlemi
başlamıyor.
Ütü, kumaş üzerinde
parlaklık veya iz bırakıyor.
Cihaz sesli uyarı vermeye
başlayana kadar Kireç
Temizleme düğmesini 2
saniye boyunca basılı
tutmamış olabilirsiniz.
Örneğin dikişleri veya kumaş
katını ütülediğiniz için,
ütülenen yüzey düz değildir.
Ütü masası örtüsünde yeteri
kadar keçe astarı yoktu.
'Temizlik ve bakım' bölümüne bakın.
PerfectCare tüm kumaşlarda kullanılabilir.
Bu parlaklık veya iz kalıcı değildir, kumaşı
yıkadığınızda geçer. Dikişleri veya katları
ütülemeyin veya dikişlerde ve katlarda iz
oluşmasını önlemek için o kısma pamuklu
bir bez örtün.
Ütü masası örtüsünün altına fazladan bir kat
keçe astarı malzeme koyun.
Page 52

52
Türkçe
Sorun Olası neden Çözüm
Ütü masası örtüsü
ıslanıyor veya kumaş
üzerinde su damlacıkları
oluyor.
Uzun süre ütü yaptıktan
sonra ütü masası örtüsü
üzerinde buhar
yoğunlaşmıştır.
Köpük veya keçe astarı malzeme
yıpranmışsa, ütü masası örtüsünü değiştirin.
Ayrıca, ütü masası üzerindeki yoğunlaşmayı
önlemek için ütü masası örtüsünün altına
ekstra bir katman keçe ekleyebilirsiniz.
Ütü masası cihazın ürettiği
yüksek miktardaki buhara
dayanıklı olmayabilir.
Ütü masası üzerindeki yoğunlaşmayı
önlemek için ütü masası örtüsünün altına
ekstra bir katman keçe yerleştirin.
Page 53

Page 54

Page 55

Page 56

empty page before backcover
Page 57

© 2016 Koninklijke Philips N.V.
4239.001.0159.1 (6/2016)
>75% recycled paper
papier recyclé
>75%
 Loading...