How it Works
Log In / Sign Up
Buy Points
How it Works
FAQ
Contact Us
Questions and Suggestions
Users
Philips
Loading...
G
GC7842
GC7842/40
GC7842/46
GC7844/20
3
GC7846
GC7846/80
GC7846/86
3
GC7846/88
GC7920
GC7920/20
7
GC7920/26
3
GC7923-20
2
GC7923/20R1
2
GC7926
GC7926/20
2
GC7926/28
GC7929-20
2
GC7929/21
GC7930/30
GC7930/31
GC7933
2
GC7933-30
4
GC7933/36
GC800/80
GC800/88
2
GC801/10
7
GC8030/02
5
GC8030/08
5
GC8030/28
2
GC8080/02
7
GC8080/08
7
GC8080/28
2
GC810
GC810/20
3
GC810/26
2
GC811/10
GC8200
2
GC820/02
2
GC8210
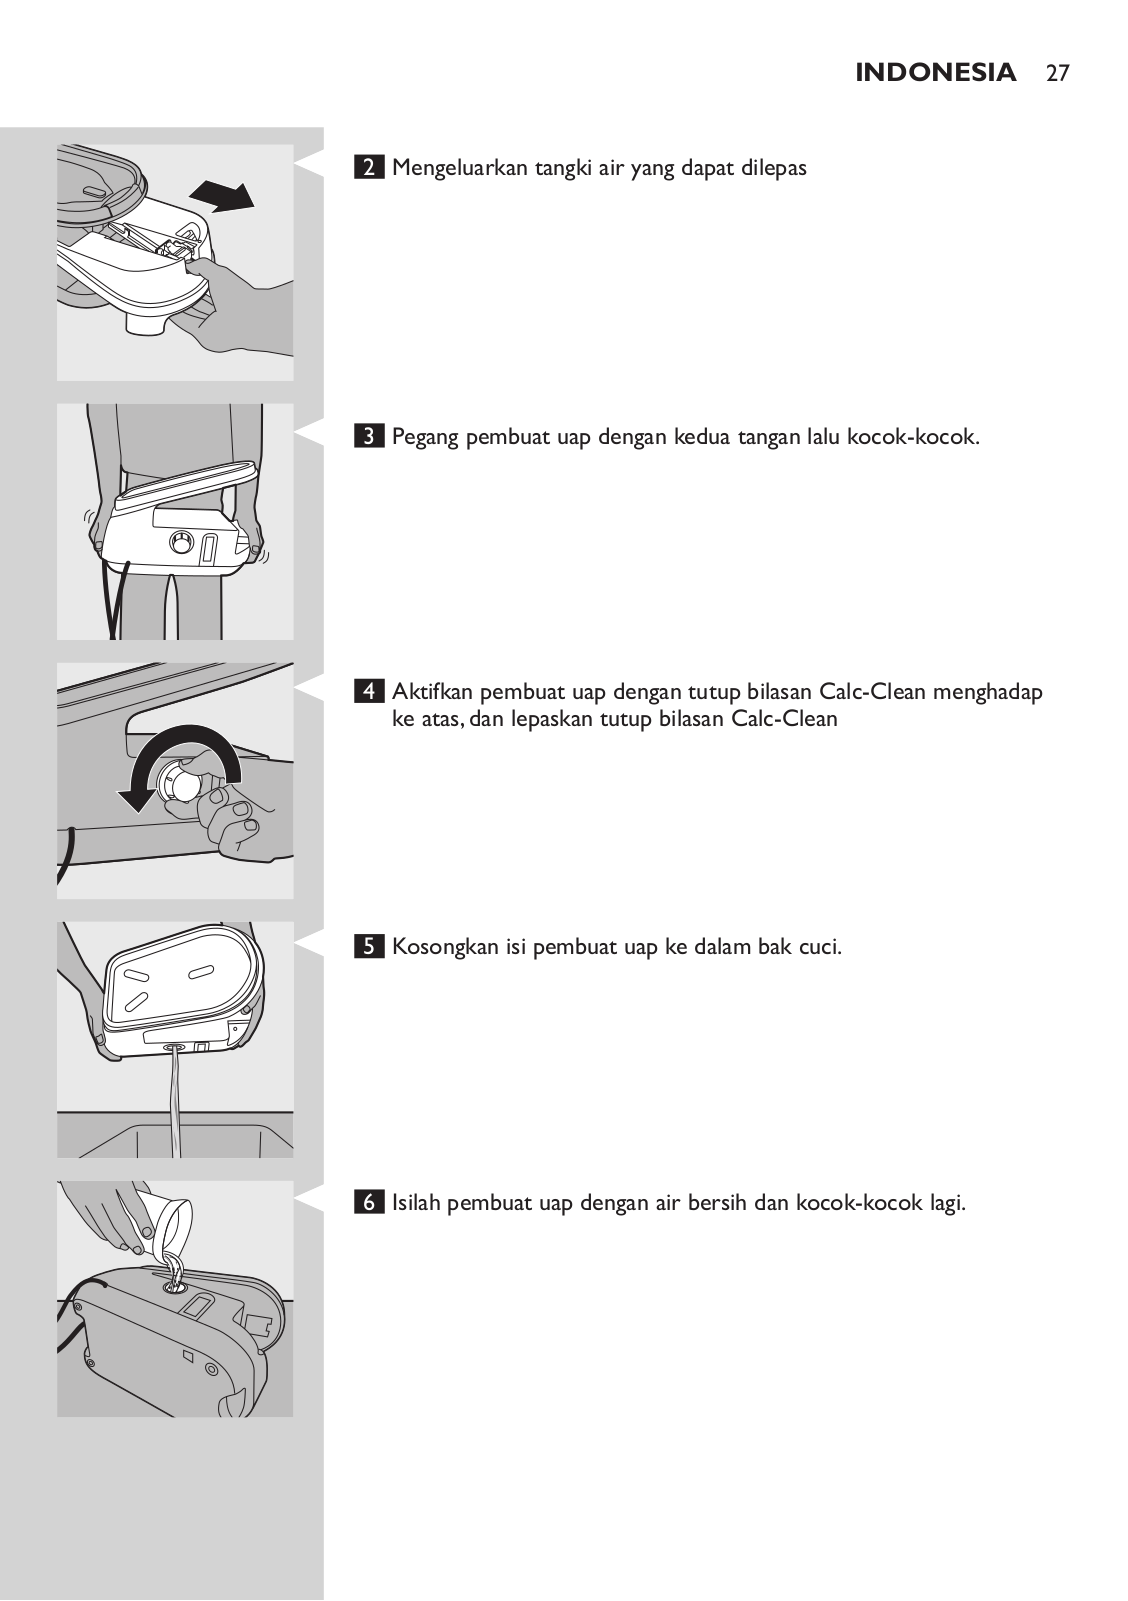
27
GC8210/03
2
GC8215
GC8215/01
4
GC8220/02
GC8220/07
GC8225
8
GC8225/02
GC8260
16
GC8260/02
GC8261
14
GC8261/02
GC8280
5
GC8280/02
GC8300
4
GC830/02
2
GC8300 series
3
GC8320/02
2
GC8320/07
2
GC8323/02
2
GC8325
4
GC8325/02
2
GC8325/22
2
GC8328
5
GC8328/02
2
GC8330
8
GC8330/02
GC8340/02
2
GC8340/07
GC8350
16
GC8351
2
GC8351/02
GC8370
GC8370/02
GC8371/02
GC8375
GC8375/02
GC8376/02
2
GC8380/02
GC8400
GC840/02
2
GC8400 SERIES
2
GC8410/02
GC8420/02
3
GC8420/07
GC8460-02
3
GC8500
GC850/02
2
GC8500 series
GC8510/02
GC8520-02
2
GC8520/07
2
GC8560
17
GC8560/02
GC8565
GC8565/02
GC8600 series
6
GC8615
GC8615/02
GC8615/07
GC8616/30
GC8616/30R1
Loading...
Loading...
Nothing found
GC8280
Service Manual
9 pgs
1.22 Mb
0
User Manual
2 pgs
353.88 Kb
0
User Manual
194 pgs
14.7 Mb
0
User Manual [fr]
186 pgs
15.01 Mb
0
User Manual [ko]
90 pgs
10.14 Mb
0
Table of contents
Loading...
Philips GC8280 User Manual [ko]
...
Philips User Manual [ko]
Download
Specifications and Main Features
Frequently Asked Questions
User Manual
Download
Loading...
+
hidden pages
Unhide
You need points to download manuals.
1 point = 1 manual.
You can buy points or you can get point for every manual you upload.
Buy points
Upload your manuals
 Loading...