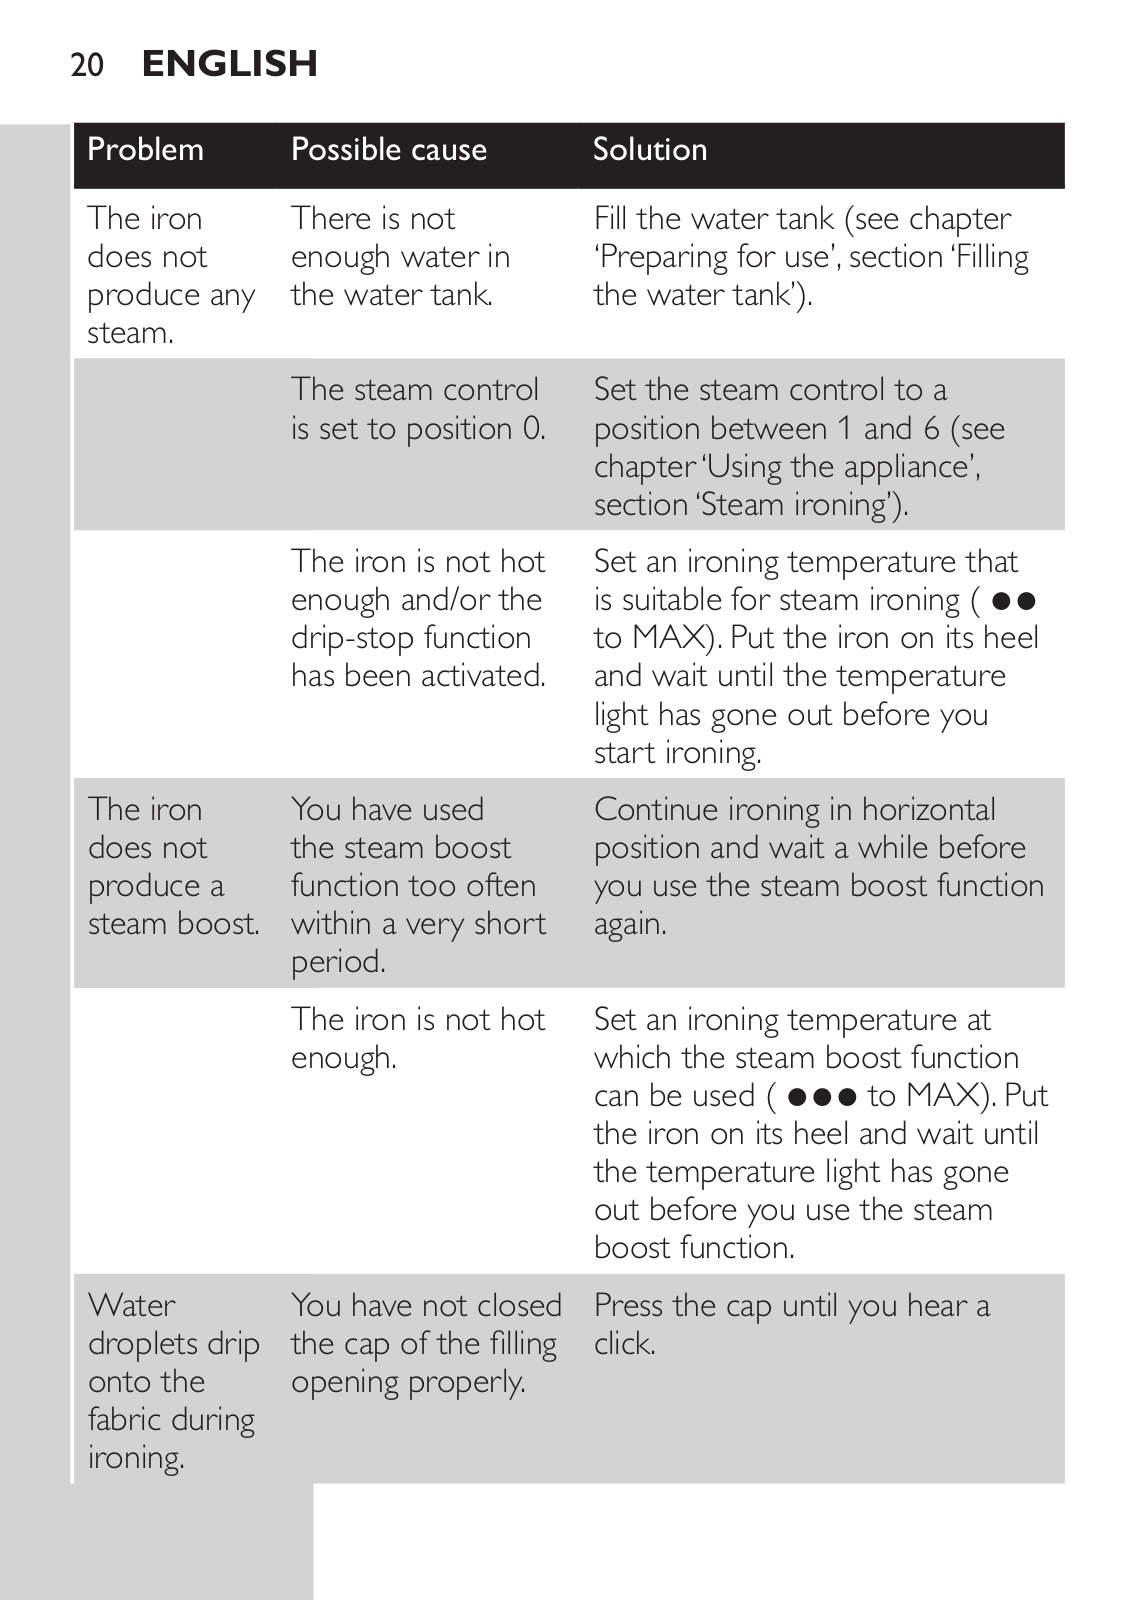
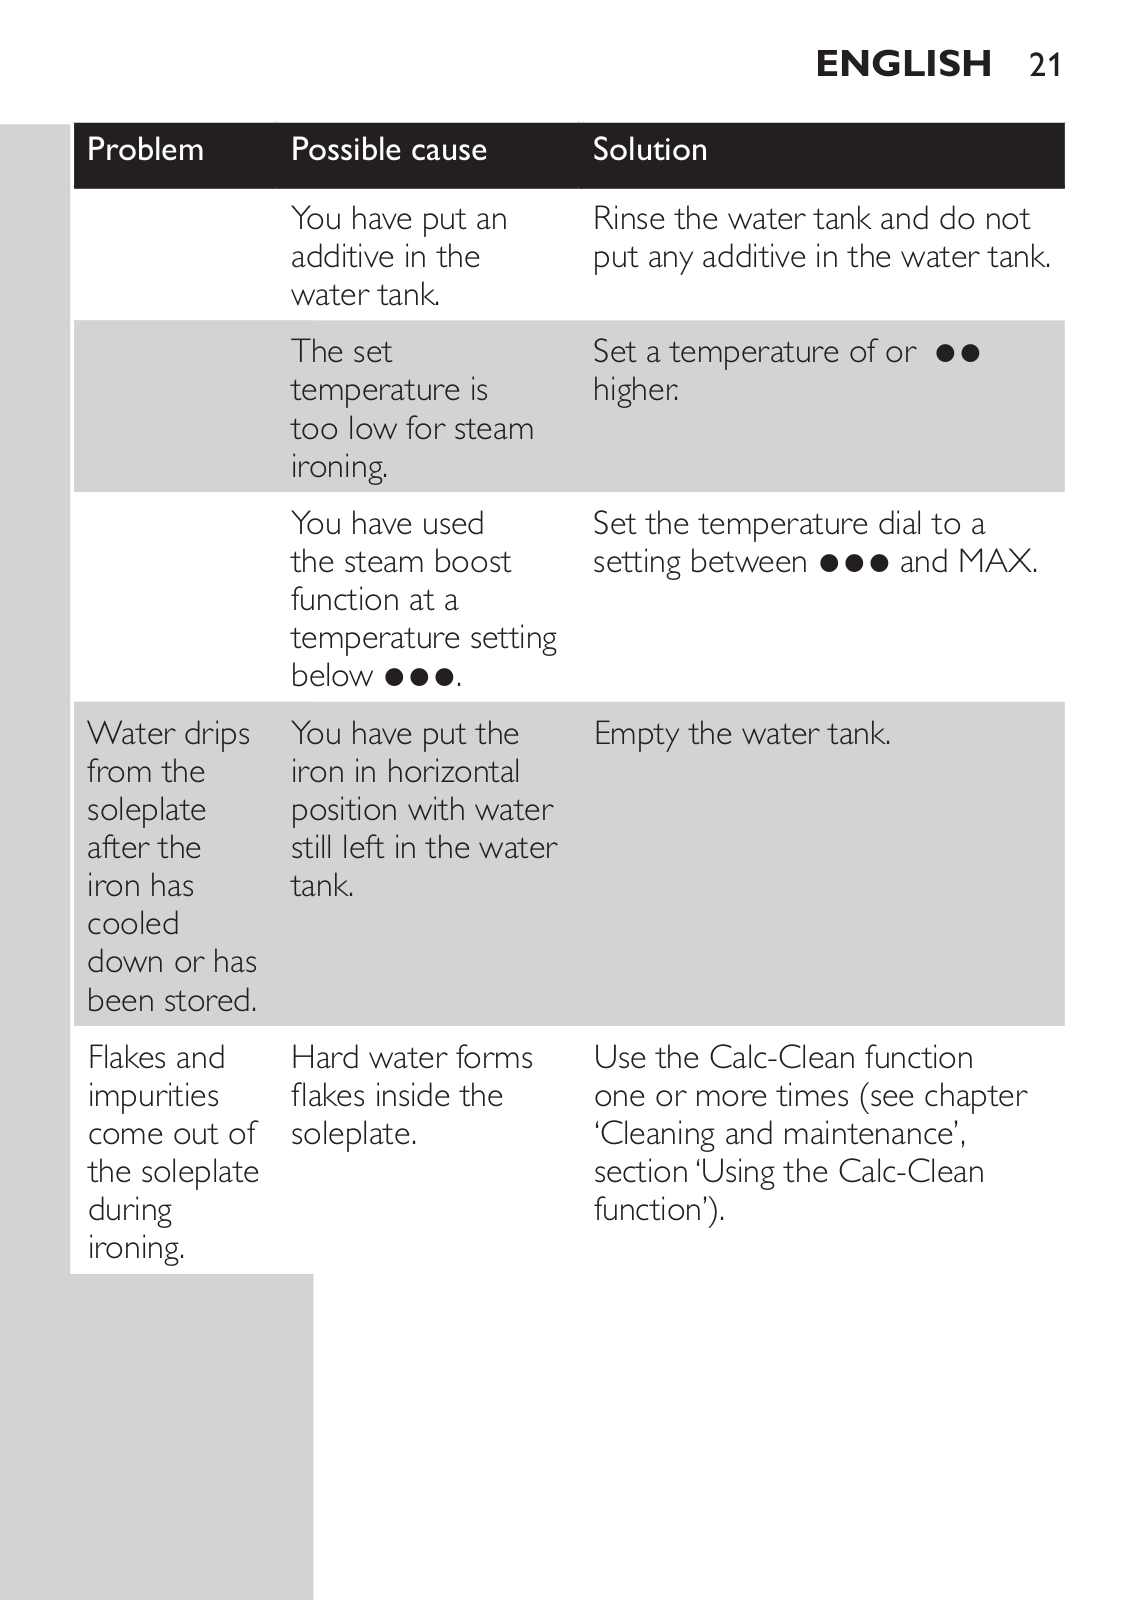
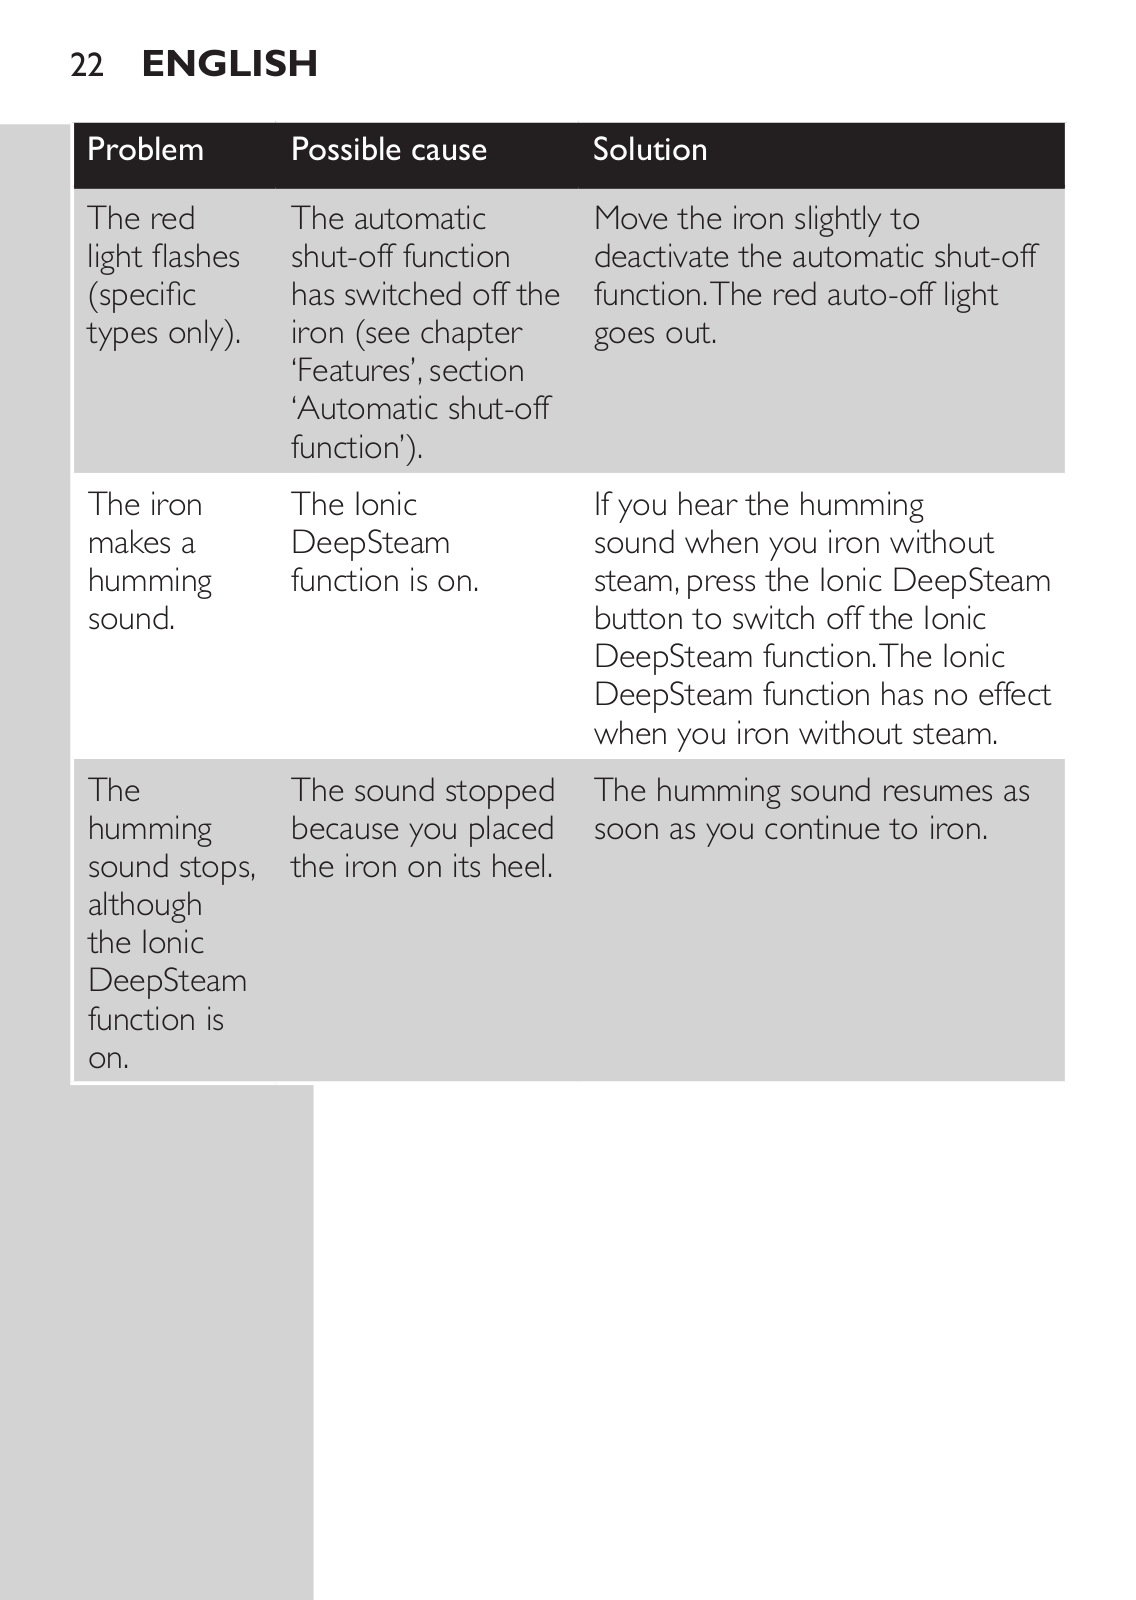
How it Works
Log In / Sign Up
Buy Points
How it Works
FAQ
Contact Us
Questions and Suggestions
Users
Philips
Loading...
G
GC4566/89
GC4567
GC4567/80
2
GC4567/80R1
GC4567/81
GC4567/86
GC4567/86R1
GC4590/70
GC4590 SERIES
2
GC4595
GC4595/40
6
GC4596/40
GC4600
GC4600 SERIES
6
GC4610
30
GC4610/02
GC4610/07
GC4610/27
GC4620
28
GC4620/02
2
GC4620/07
GC4620/38
GC4625
3
GC4625/02
GC4630/02
2
GC4630/07
GC4630/27
GC4630/38
GC4630i
4
GC4641/02
2
GC4641i
GC4700
2
GC4700 SERIES
2
GC4705/02
2
GC4705/07
2
GC4710
3
GC4710/02
4
GC4711
8
GC4711/02
2
GC4712-02
3
GC4720
22
GC4720-02
4
GC4721/02
3
GC4730/02
2
GC4730/12
GC4740
22
GC4740/02
3
GC4741
GC4741/02
2
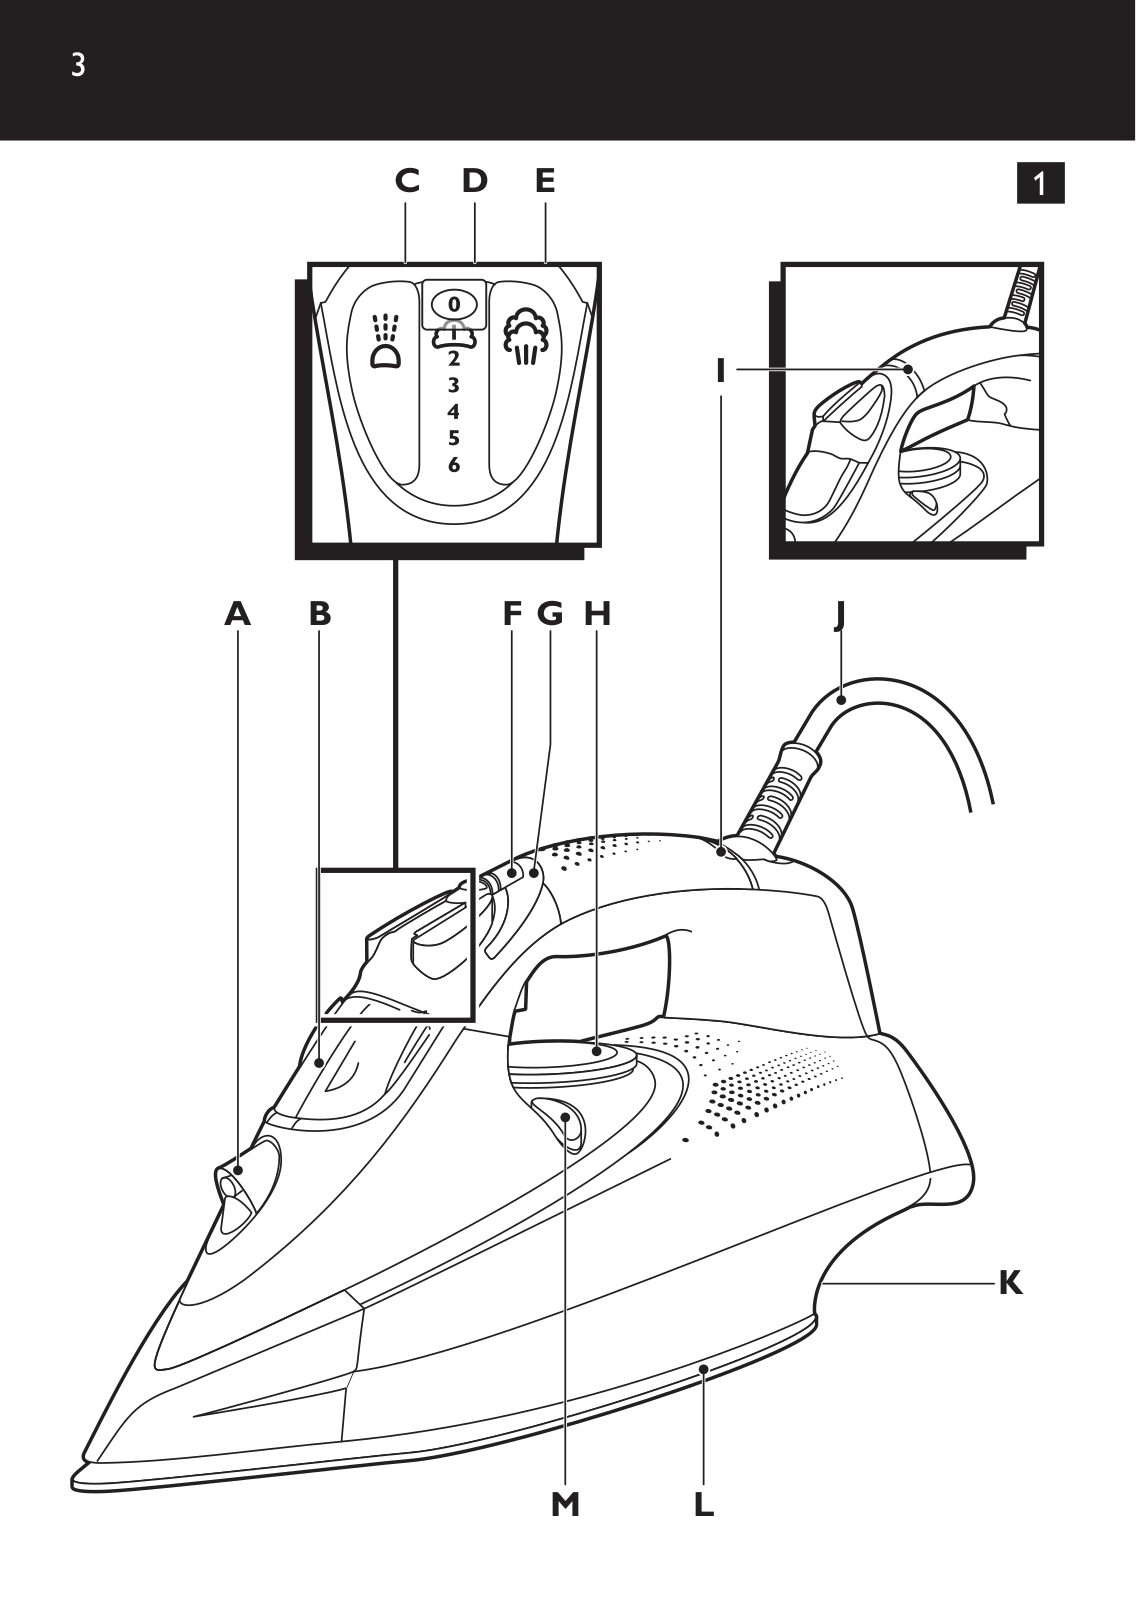
GC4800
3
GC4800 series
9
GC4810
4
GC4810/02
3
GC4810/27
GC481/76
GC481/78
GC482
GC4820
4
GC4820/02
GC482/20
3
GC482/25
2
GC482/26
2
GC482/27
GC482/28
2
GC482/29
2
GC483/30
GC483/38
3
GC484
GC484/40
GC484/46
GC484/48
GC484/49
GC4845/02
2
GC4845/15
2
GC4845/16
GC4845/22
2
GC4845/35
GC4846/02
3
GC4846/22
3
GC4846/32
GC4850/02
5
GC4850/22
4
GC4851
2
GC4851/02
GC4851/32
GC4852
2
GC4852/02
GC485/40
GC485/46
2
GC485/48
GC485/49
GC4855
2
GC4855/02
GC4855/07
GC4855/22
GC4856/02
GC4856/22
GC486/30
3
GC486/36
GC486/38
3
Loading...
Loading...
Nothing found
GC4800 series
User Manual
90 pgs
2.68 Mb
0
User Manual
102 pgs
5.4 Mb
0
User Manual
78 pgs
3.04 Mb
0
User Manual
194 pgs
7.44 Mb
0
User Manual
94 pgs
2.7 Mb
0
User Manual
94 pgs
2.69 Mb
0
User Manual
54 pgs
3.15 Mb
0
User Manual [bg]
78 pgs
2.04 Mb
0
User Manual [vi]
90 pgs
2.95 Mb
0
Table of contents
Loading...
Philips GC4800 series User Manual [vi]
...
Philips User Manual [vi]
Download
Specifications and Main Features
Frequently Asked Questions
User Manual
Download
Loading...
+
63
hidden pages
Unhide
You need points to download manuals.
1 point = 1 manual.
You can buy points or you can get point for every manual you upload.
Buy points
Upload your manuals
 Loading...