


GC4590 series
© 2018 Koninklijke Philips N.V.
All rights reserved.
4239 000 98062
EN User manual
RU
Руководство пользователя
UK Посібник користувача
TR Kullanım kılavuzu
KK Пайдаланушы нұсқаулығы

ENGLISH
j
i
h
a
b
c
d
e
1
2 3 4
7 86
a
b
c
10 11 12 13
5
9
g
n k
l
m
f
14
18
15 16 17

ENGLISH 6
РУССКИЙ 14
УКРАЇНСЬКА 23
TÜRKÇE 32
ҚАЗАҚ 40
Azur Freemotion_GC4590 series

6 ENGLISH
Important
Read the separate important information leaet and the user manual
carefully before you use the appliance. Save both documents for future
reference.
General description (Fig. 1)
1 Spray nozzle
2 Water lling door
3 Spray button
4 Steam slider
a. Dry setting
b. ECO setting
c. Auto steam setting
5 Steam boost trigger
6 Temperature dial with Auto steam control
7 Water tank
8 Typeplate
9 Calc clean button
10 Soleplate
11 Light ring
12 Base
13 Iron storage lock
14 Mains cord
Using the appliance
Filling the water tank
Note: Your appliance has been designed to be used with tap water. In case
you live in an area with hard water, fast scale build-up may occur. Therefore,
it is recommended to use distilled or de-mineralized water to prolong the
lifetime of your appliance.
Note: Do not add perfume, water from tumble dryer, vinegar, magnetically
treated water (e.g., Aqua+), starch, descaling agents, ironing aids, chemically
descaled water or other chemicals as they may cause water spitting, brown
staining, or damage to your appliance.

ENGLISH
1 Set the steam control to position . (Fig. 2)
2 Fill the water tank up to the MAX indication (Fig. 3).
3 Close the water lling door.
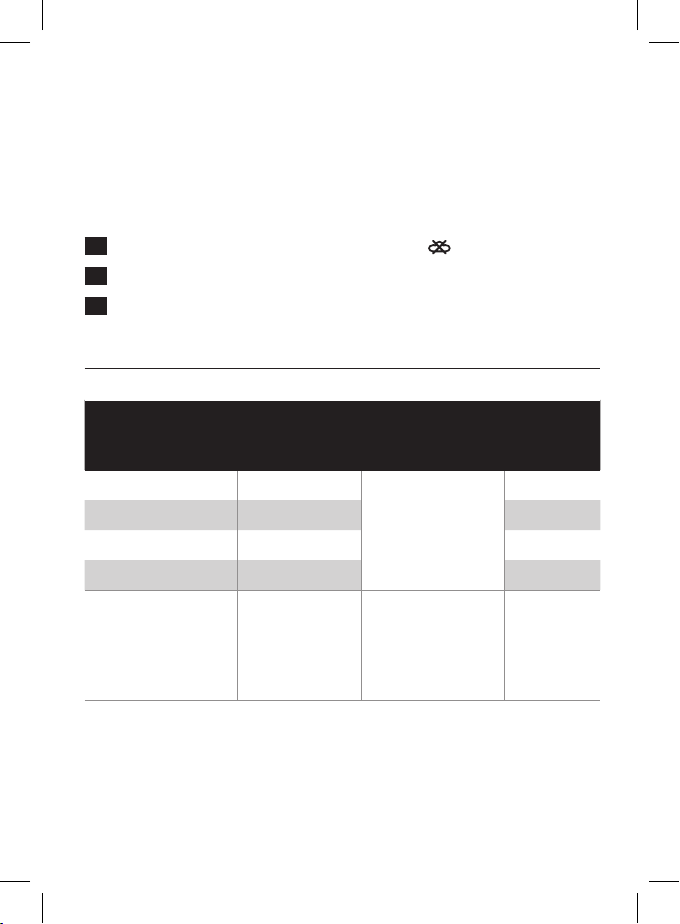
Selecting temperature and steam setting
Table 1
Fabric type Temperature
setting
Linen MAX Automatically
Cotton ●●● Ye s
Wool ●● No
Silk ●● No
Synthetic fabric
● No steam No
(e.g. acrylic, nylon,
polyamide, polyester)
Note: As indicated in the table above, do not use steam or steam boost at a
low temperature, otherwise hot water may leak from the iron.
1 Consult table 1 to set the temperature dial to the appropriate
setting for your garment. (Fig. 4)
2 Select Auto steam setting in the steam slider. (Fig. 5)
This iron is equipped with Auto steam control. According to the
temperature you select, the iron automatically provides the optimal
amount of steam for the best result.
Auto steam
control
adjusted to the
optimal amount
Steam
boost
Ye s
7
3 Place the iron on its base and connect the base to a power socket.
(Fig. 6)

8
ENGLISH
Note: Make sure that the base sits on a stable and level surface. It is
recommended to place the base on the soft part of the ironing board.
4 The light ring starts to ash blue light, indicating the iron is heating
up. (Fig. 7)
5 When the blue light turns steady, you can start ironing. (Fig. 8 )
Operation of Smart Charging base
The iron is equipped with Smart Charging base. The light will indicate
the status of the iron, and remind you to charge the iron after 20 to
25 seconds to ensure a good wrinkle removal performance. Please
refer to table 2 for the operation of the base.
Note: to ensure good wrinkle removal performance, always put the iron on
its base during the resting period. Do not place the iron on its heel. (Fig.9)
Table 2
Light status Iron status Instructions
Flashing blue Heating up Wait for iron to be ready.
Steady blue Ready for use You can start ironing.
Flashing orange The iron needs to
be charged now
Slow breathing
blue (specic
Safety auto-off has
been activated
types only)
Put the iron back to the
base to charge it.
Refer to Chapter
“Features”, section “safety
auto-off”.
Features
Spray function
- Press the spray button to moisten the garment to be ironed. This
helps remove stubborn creases (Fig. 10).

ENGLISH
Steam boost function
- Press and release the steam boost trigger for a powerful boost of
steam to remove stubborn creases (Fig. 11).
- For optimal steam boost performance, it is recommended to press
the steam boost trigger at a 5 seconds interval.
Vertical steam
- You can use the steam boost function when you hold the iron in
vertical position for removing creases from hanging clothes, curtains
etc. (Fig. 12)
Ironing with extra steam
- For extra steam during ironing, press and hold the steam boost
trigger.
Eco steam setting / Dry ironing
- In stead of Auto steam, you could choose ECO setting in the steam
slider to save energy, yet to achieve satisfactory ironing results
- To iron without steam, select dry setting in the steam slider.
Safety auto-off function
- The iron switches off automatically if the iron is not in use for
8 minutes. The light ring starts to slowly breath in blue to indicate
the safety auto-off mode is activated.
- To let the iron heat up again, remove the iron (if the iron is on the
base) and put it back to the base.
Cleaning and maintenance
Cleaning
9
1 Set the steam control to , unplug the base and let the iron cool
down. (Fig. 2)
2 Pour any remaining water out of the water tank.

10
ENGLISH
3 Wipe akes and any other deposits off the soleplate with a damp
cloth and a non-abrasive (liquid) cleaning agent.
Caution: To keep the soleplate smooth, avoid hard contact with metal
objects. Never use a scouring pad, vinegar or other chemicals to clean
the soleplate.
Note: Regularly rinse the water tank with tap water. Empty the water tank
after rinsing it.
Calc-Clean function
IMPORTANT: To prolong the lifetime of your appliance and
to maintain good steaming performance, use the Calc-Clean
function once every two weeks. If the water in your area is
veryhard(i.e.whenakescomeoutofthesoleplateduring
ironing), use the Calc-Clean function more frequently.
1 Make sure the steam control is set to . (Fig. 2)
2 Fill the water tank to the MAX indication. (Fig. 3)
Do not pour vinegar or other descaling agents into the water tank.
3 Set the temperature dial to MAX. (Fig. 13)
4 Plug in the base, put the iron on the base and let the iron heat up.
(Fig. 6)
5 Remove the iron when the light ring turns steady blue. (Fig. 8)
6 Hold the iron over the sink. Keep pushing the calc clean button
and gently shake the iron forth and back until all water in the
water tank has been used up.
Caution: While scale is ushed out, steam and boiling water also come
out of the soleplate.
7 Set the steam control back to . (Fig. 2)

11
ENGLISH
Note: Repeat the Calc-Clean process if the water that comes out of the iron
still contains scale particles.
After the Calc-Clean process
1 Put the iron on the base. Let the iron heat up to dry the soleplate.
2 Take the iron from the base when the light ring turns steady blue.
3 Move the iron gently over a piece of cloth to remove any water
stains on the soleplate.
Storage
1 Set the steam control back to . (Fig. 2)
2 Pour out any remaining water from the water tank.
3 Unplug the mains cord and wind the mains cord around the base.
(Fig. 16)
Remove iron from the base when you wind the cord, as the soleplate
could still be hot.
4 Put the iron on the base. Lock the iron to its base. (Fig. 17)
5 Let the iron cool down before you store it.
You can carry the iron and base by the iron handle. (Fig. 18)
Troubleshooting
This chapter summarises the most common problems you could
encounter with the appliance. If you are unable to solve the problem
with the information below, visit www.philips.com/support for a list of
frequently asked questions or contact the Consumer Care Centre in
your country (see the worldwide guarantee leaet for contact details).
Problem Possible cause Solution
The iron does
not produce
steam.
Cordless iron cools
down after a while. It
needs to be recharged.
Put the iron back to the
base until the light ring
turns steady blue light,
indicating that the iron is
ready for use again.

12
ENGLISH
Problem Possible cause Solution
The steam control is
set to .
The water tank is empty. Fill the water tank.
You are using a
temperature of below
2 dots.
The iron leaks. Cordless iron cools
down after a while. It
needs to be recharged.
You are using steam
boost at a low
temperature.
You have used the
steam boost function
too often within a very
short period.
The water tank is
overlled.
The water lling door
is not closed properly.
Set the steam control to
a steam setting (consult
Table 1 in Chapter “using
the appliance”).
Consult Table 1
in Chapter “using
the appliance” for
temperature and steam
setting.
Put the iron back to its
base to heat up and dry
the soleplate.
Put the iron back to its
base to heat up and dry
the soleplate.
Consult Table 1 for use
of steam boost.
Put the iron back to its
base to heat up and dry
the soleplate. Use the
steam boost function
less frequently.
Do not ll the water
tank beyond the MAX
indication.
Make sure that the
water lling door is
closed properly.

ENGLISH
Problem Possible cause Solution
Flakes and
impurities come
out of the soleplate
during ironing.
Only part of
the light ring is
lighted in safety
auto-off mode.
The base is not
lighted up when
I place the iron
on it.
You have not
performed Calc-Clean
function for some time.
The iron need to be
cleaned.
This is normal. This
is intended to save
energy in safety autooff mode.
The iron is not
connected to the base
properly.
Use the Calc-Clean
function (see chapter
‘Cleaning and
maintenance’, section
‘Calc-Clean function’).
Take out the iron and
put it back to the base
again.
13
N/A

14 РУССКИЙ
Важно
Перед использованием прибора внимательно ознакомьтесь
с буклетом с важной информацией и данным руководством
пользователя. Сохраните эти документы для дальнейшего
использования в качестве справочного материала.
Общееописание(рис.1)
1 Разбрызгиватель
2 Крышка наливного отверстия
3 Кнопка разбрызгивателя
4 Переключатель режимов подачи пара
a. Глажение без пара
b. Экорежим
c. Функция автоматической подачи пара
5 Кнопка парового удара
6 Дисковый регулятор нагрева с автоматической регулировкой
подачи пара
7 Резервуар для воды
8 Табличка с обозначениями
9 Кнопка очистки от накипи
10 Подошва
11 Световая индикация
12 Подставка
13 Фиксатор утюга
14 Сетевой шнур
Использованиеприбора
Заполнениерезервуарадляводы
Примечание. Прибор подходит для использования с водопроводной
водой. Если вода в вашем регионе жесткая, в приборе может
быстро образоваться накипь. Поэтому для продления срока службы
прибора рекомендуется использовать дистиллированную или
деминерализованную воду.
15
РУССКИЙ
Примечание. Во избежание протекания, появления коричневых пятен
или повреждения устройства не добавляйте в прибор душистую
воду, воду из сушильной машины, уксус, воду, обработанную магнитным
полем (например, Aqua+), крахмал, средства очистки от накипи,
добавки для глажения, химические вещества или воду, подвергшуюся
очистке с использованием химических средств.
1 Установите парорегулятор в положение . (Рис. 2)
2 Наполните резервуар до отметки MAX (рис. 3).
3 Закройте крышку наливного отверстия.
Выбортемпературыирежимаподачипара
Таблица1
Тип ткани Настройка
температуры
Лен MAX Автоматическая
Хлопок ●●● Да
Шерсть ●● нет
Шелк ●● нет
Синтетические
● Нет пара нет
ткани (например,
акрил, нейлон,
полиамид,
полиэстер)
Автоматическая
регулировка
подачи пара
настройка
оптимального
уровня
"Паровой
удар"
Да
Примечание. Как указано в таблице выше, не используйте кнопку
подачи пара или парового удара при низкой температуре.
В противном случае из утюга может вытекать горячая вода.

16
РУССКИЙ
1 Чтобы выбрать настройку, подходящую для конкретного типа
ткани, ознакомьтесь с таблицей 1. (Рис. 4)
2 С помощью переключателя режимов подачи пара выберите
режим автоматической подачи пара. (Рис. 5)
Этот утюг оснащен функцией автоматической регулировки
подачи пара. Количество пара настраивается автоматически
в зависимости от выбранного температурного режима.
3 Поставьте утюг на подставку и подключите подставку
к розетке электросети. (Рис. 6)
Примечание. Подставку необходимо установить на ровную
и устойчивую поверхность. Не рекомендуется устанавливать
подставку на мягкую часть гладильной доски.
4 Подсветка начнет мигать синим светом, что указывает на
нагрев утюга. (Рис. 7)
5 Когда индикатор загорится ровным синим светом, можно
начинать гладить. (Рис. 8)
Работасмарт-подставкидляподзарядки
В комплектацию утюга входит смарт-поставка для подзарядки.
Индикатор указывает на состояние утюг и напоминает
о необходимости подзарядки через 20-25 секунд, что помогает
обеспечить эффективное разглаживание складок. Для получения
дополнительной информации о работе подставки ознакомьтесь
с таблицей 2.
Примечание. Для эффективного разглаживания складок всегда
ставьте утюг на подставку во время перерывов. Не оставляйте
утюг вертикально без подставки. (рис. 9)
 Loading...