

Page 1
Always there to help you
2
GC4500 series
Specifications are subject to change without notice
© 2014 Koninklijke Philips N.V.
All rights reserved.
4239 000 90993
User manual
Page 2
3 4
1
f
e
a
g
h
i
c
b
d
c
b
a
j
k
l
m
n
o
Page 3

ENGLISH 6
РУССКИЙ 12
TÜRKÇE 19
УКРАЇНСЬКА 25
ҚАЗАҚША 32
GC4500 series
Page 4
6 ENGLISH
Introduction
Congratulations on your purchase and welcome to Philips!
To fully benefit from the support that Philips offers,
register your product at www.philips.com/welcome.
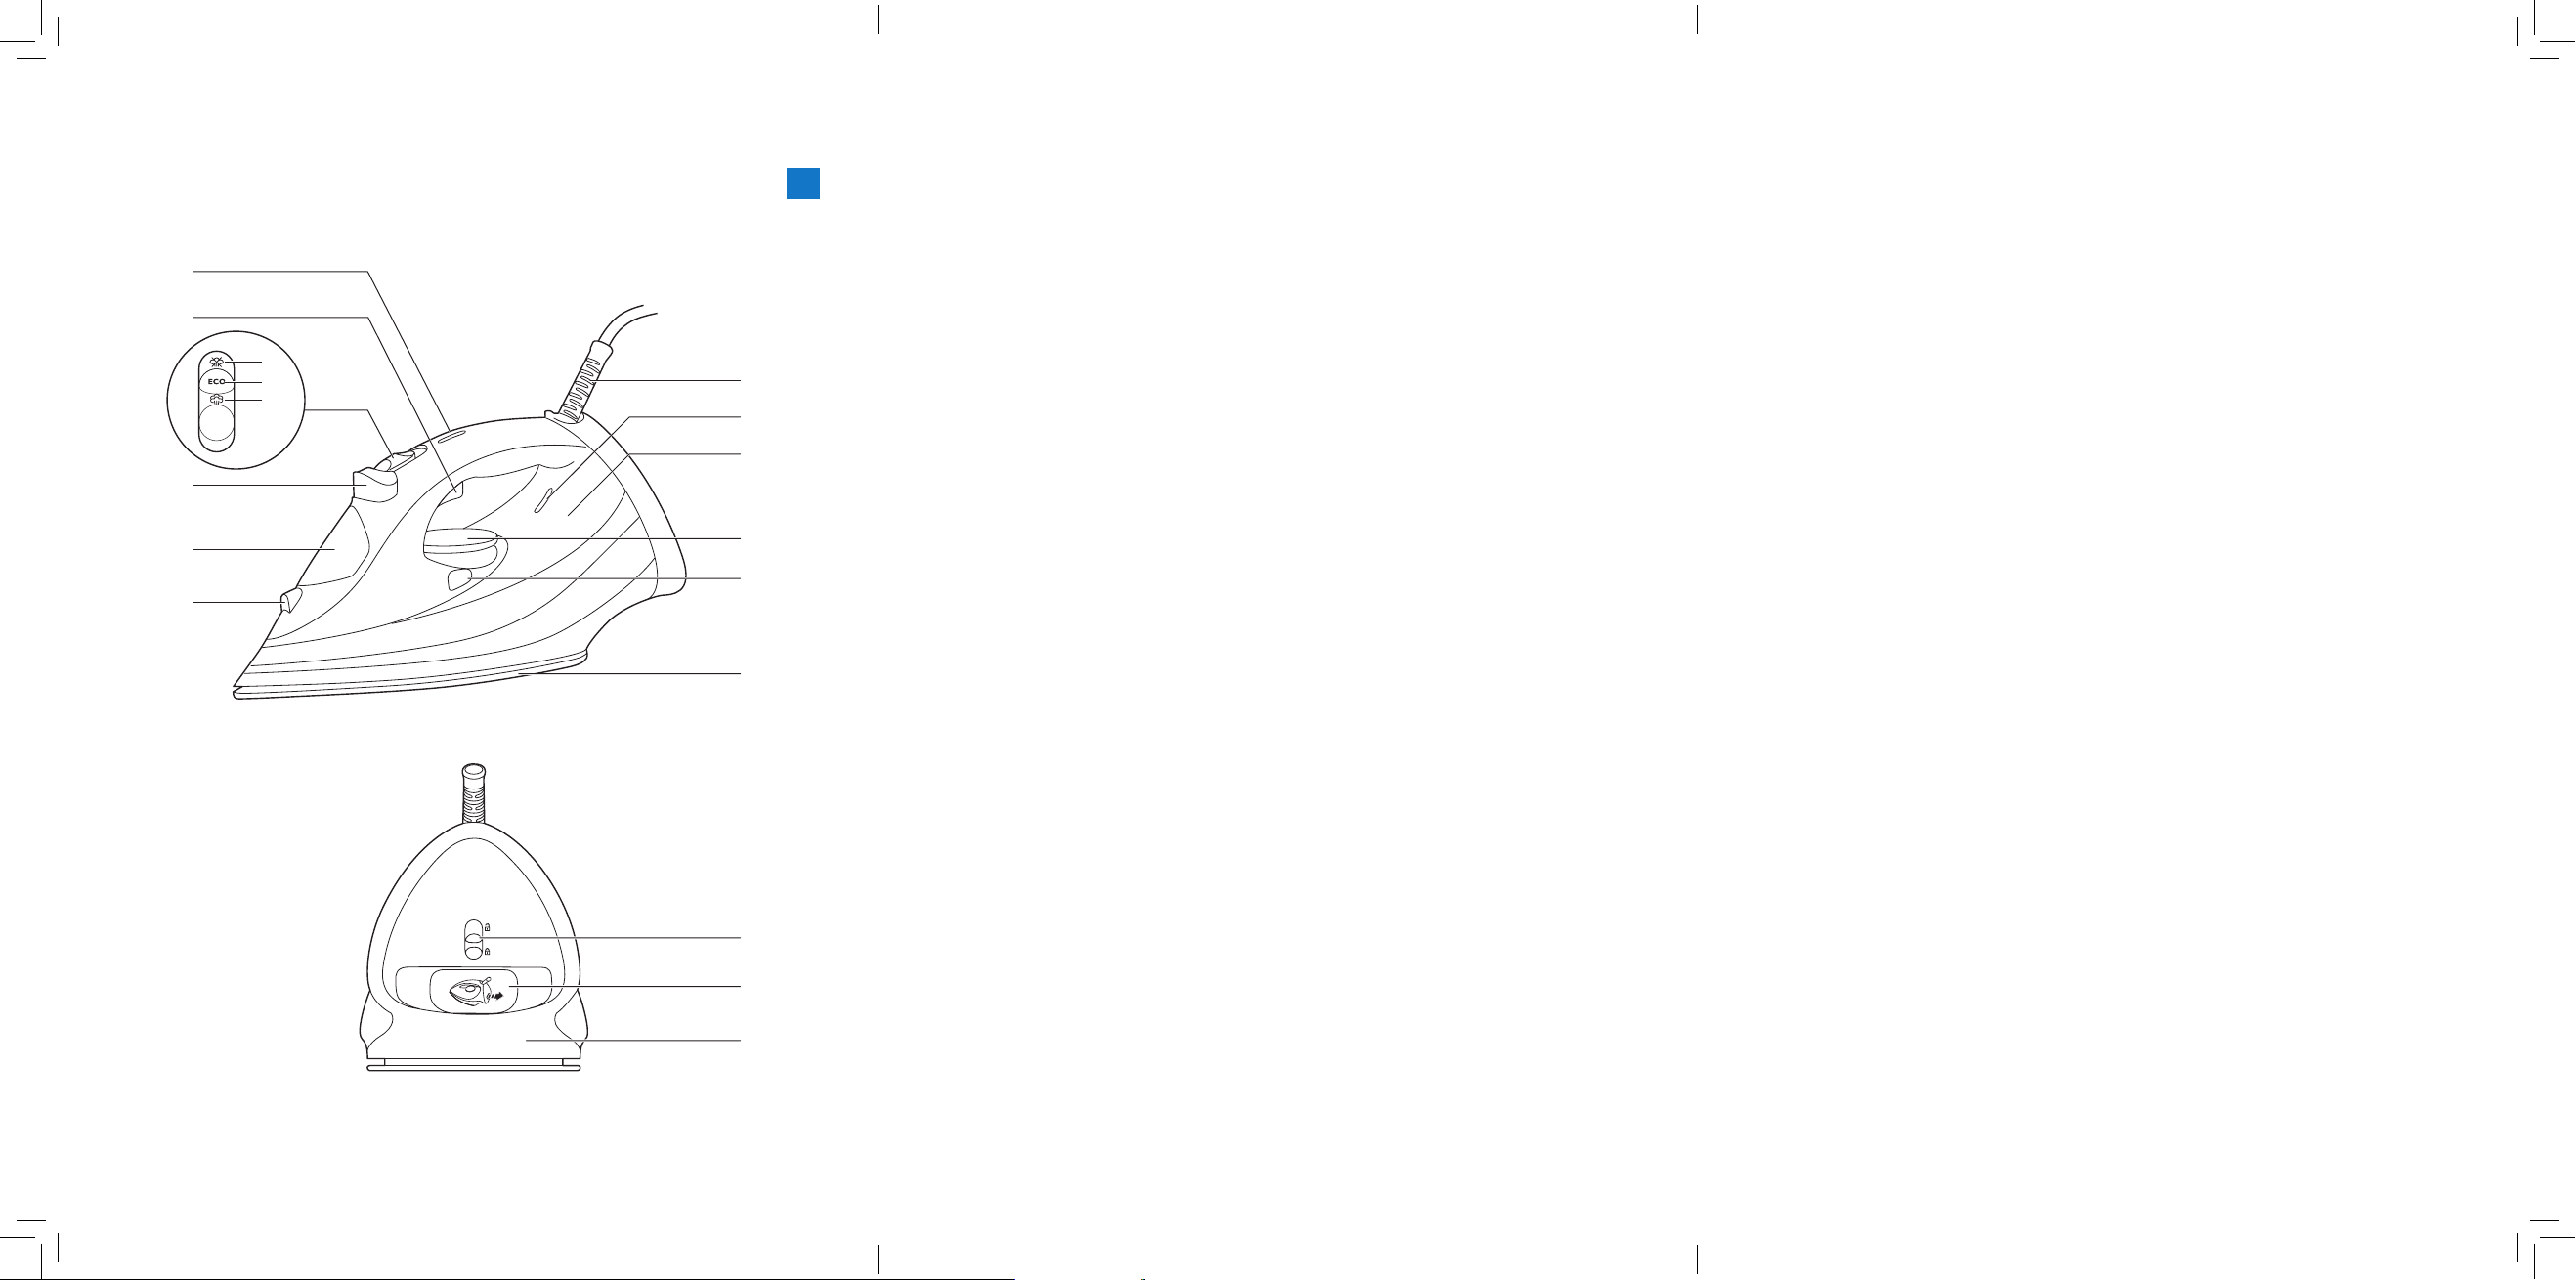
Product overview (Fig. 1)
1 Spray nozzle
2 Water filling door
3 Spray button
4 Steam slider
a. Dr y setting
b. ECO setting
c. Auto steam setting
5 Steam boost trigger
6 Safety auto-off light (specific types only)
7 Mains cord
8 Temperature indicator light
9 Water tank
10 Temperature dial with Auto steam control
11 Calc clean button
12 Soleplate
13 Quick Calc Release lock
14 Quick Calc Release tray
15 Typeplate
Important
Read the separate important information leaet and this user manual
carefully before you use the appliance. Keep both documents for future
reference.
Using the appliance
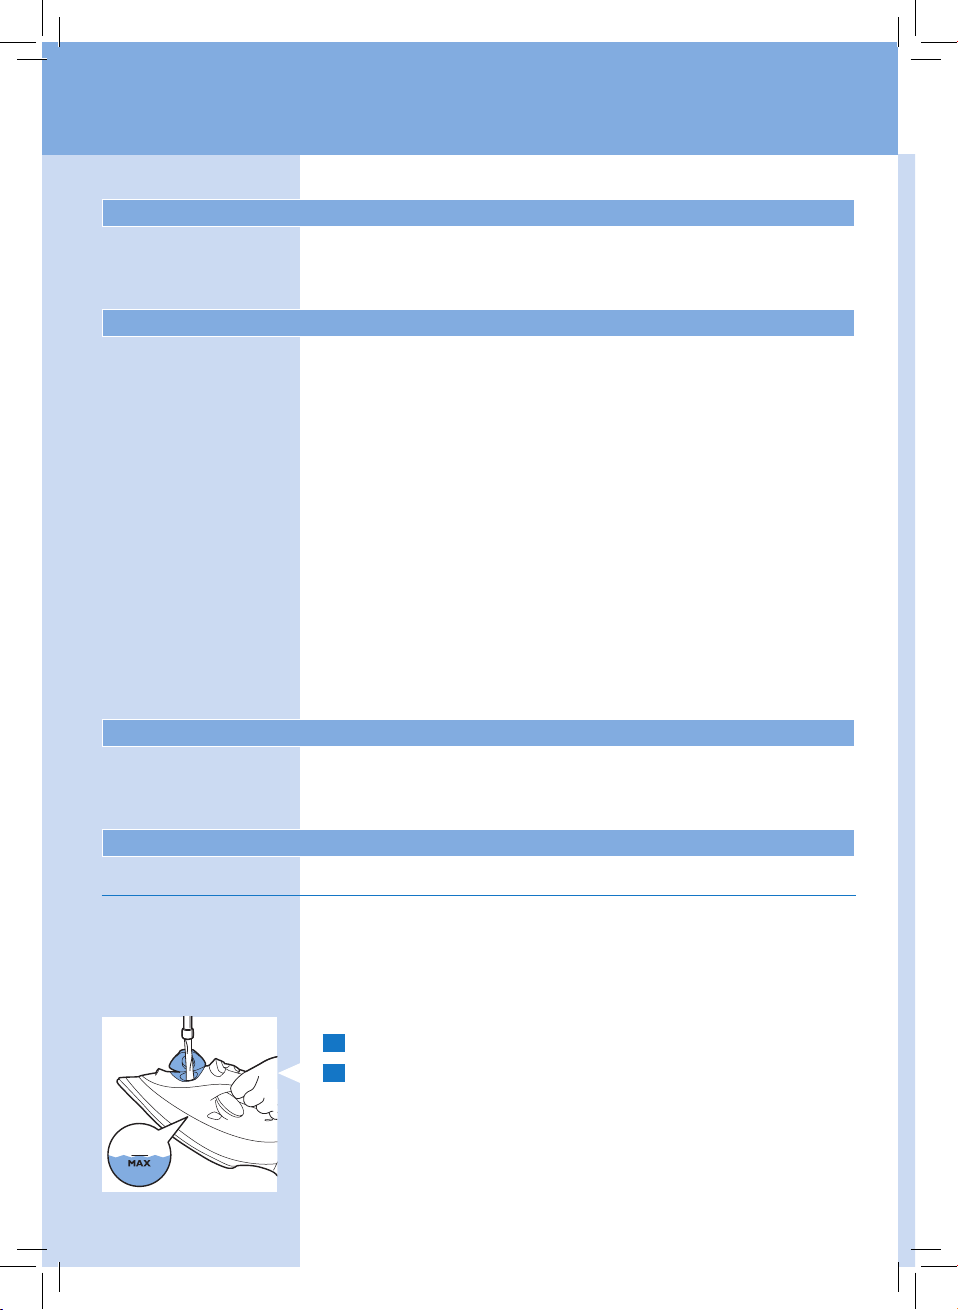
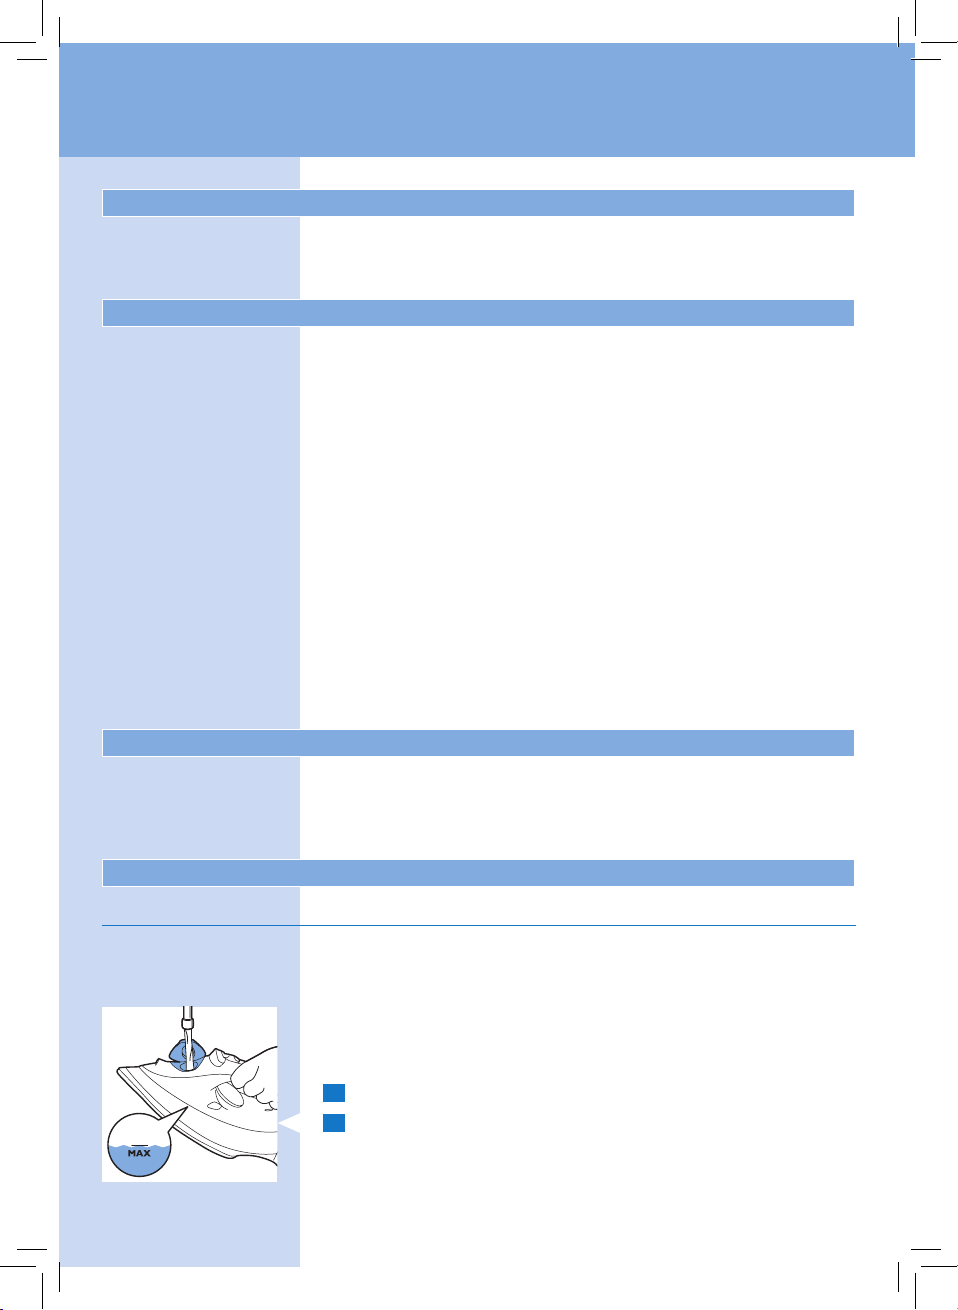
Filling the water tank
Note: Your appliance has been designed to be used with tap water. If you
live in an area with hard water, fast scale build-up may occur. Therefore, it is
recommended to use 100% distilled or demineralized water to prolong the
lifetime of your appliance.
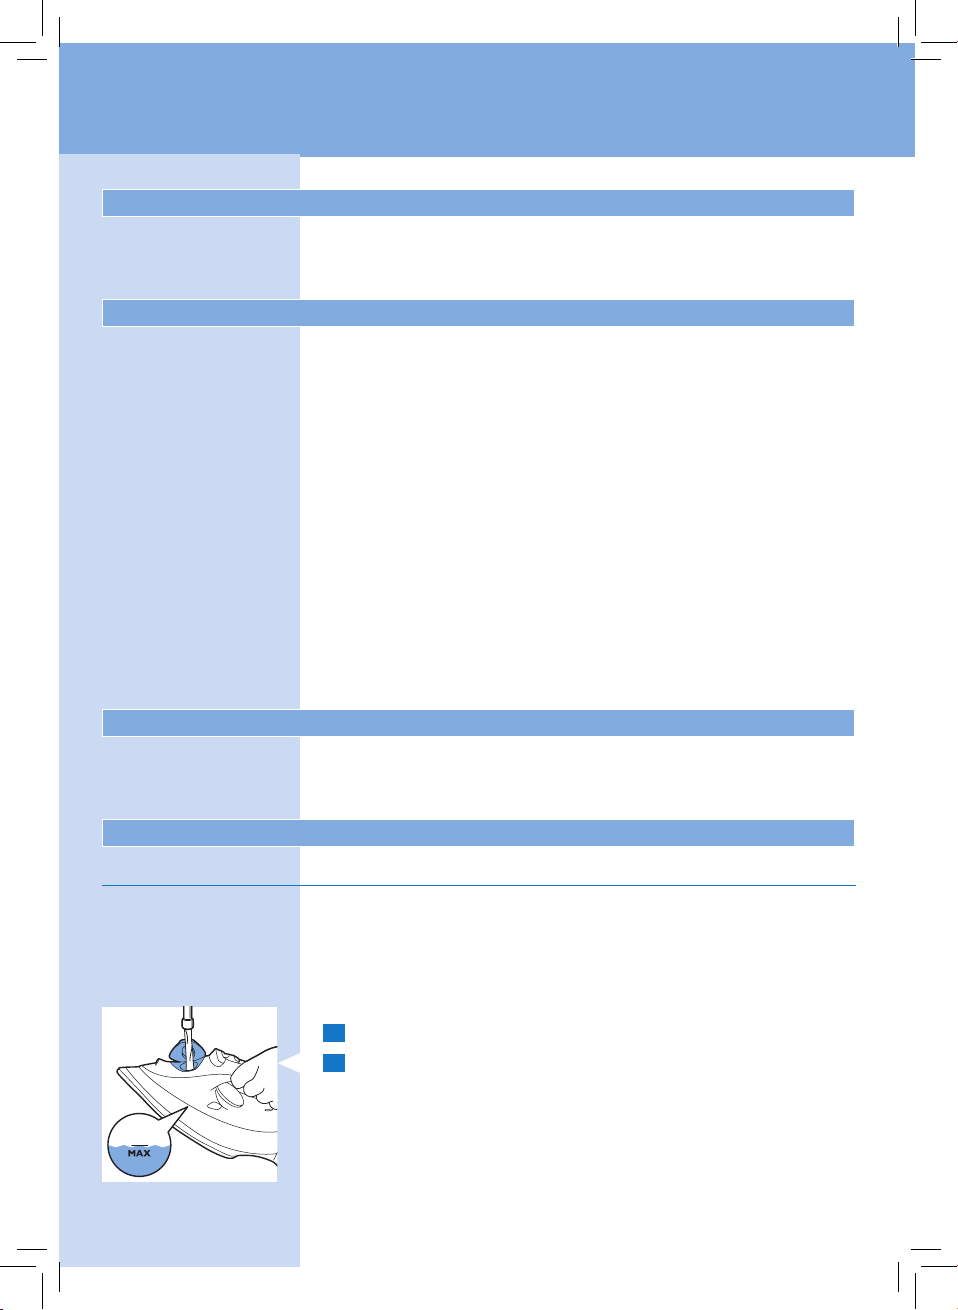
1 Open the water lling door.
2 Tilt the iron backwards and ll the water tank with tap water up to
the maximum level.
Note: Do not ll the water tank beyond the MAX indication.
Page 5
ENGLISH 7
Do not put perfume, vinegar, starch, descaling agents, ironing aids or
other chemicals in the water tank.
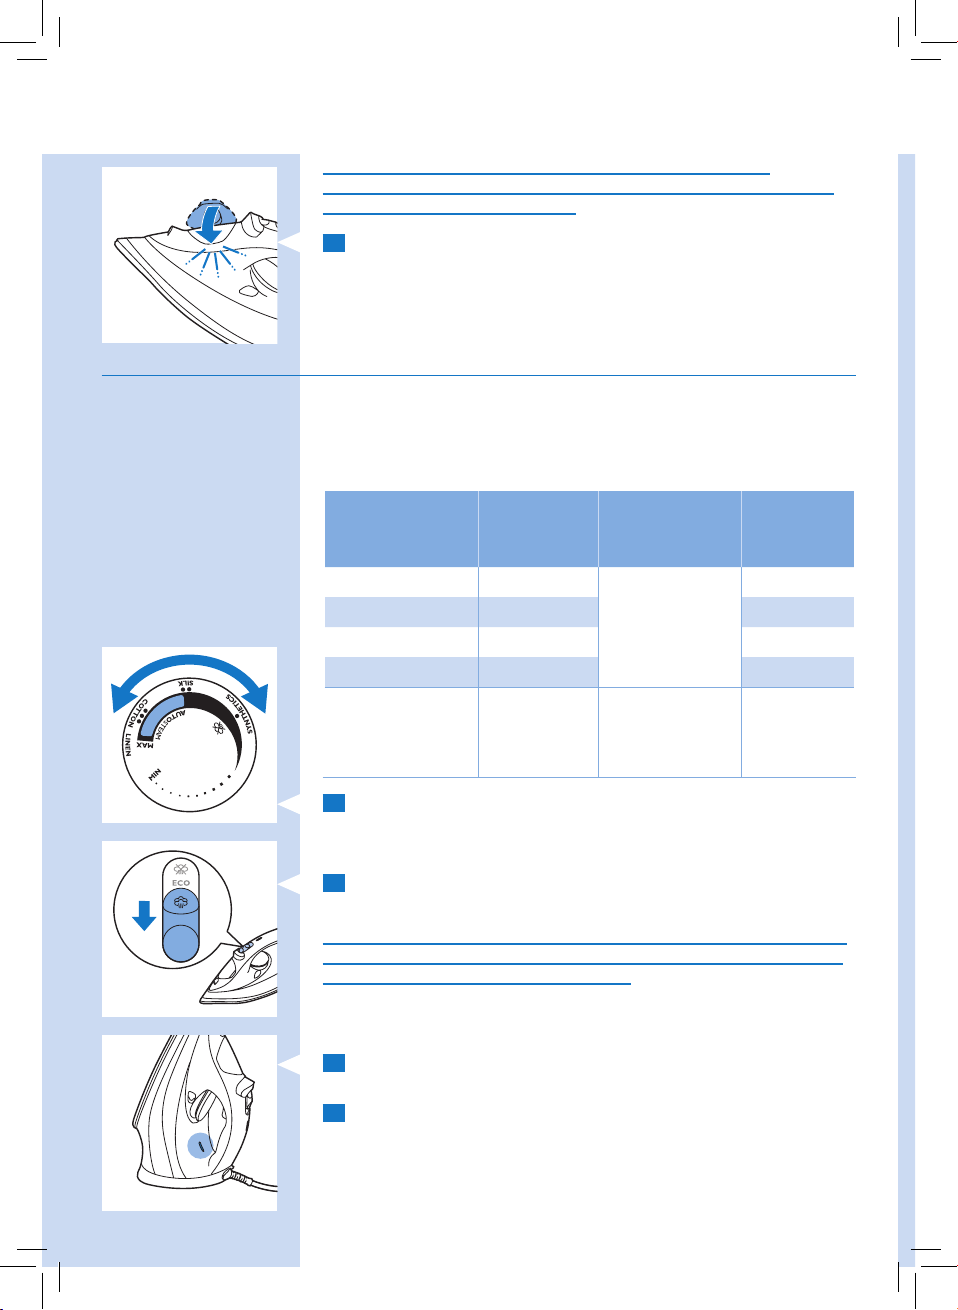
3 Close the water lling door ( ‘click’).
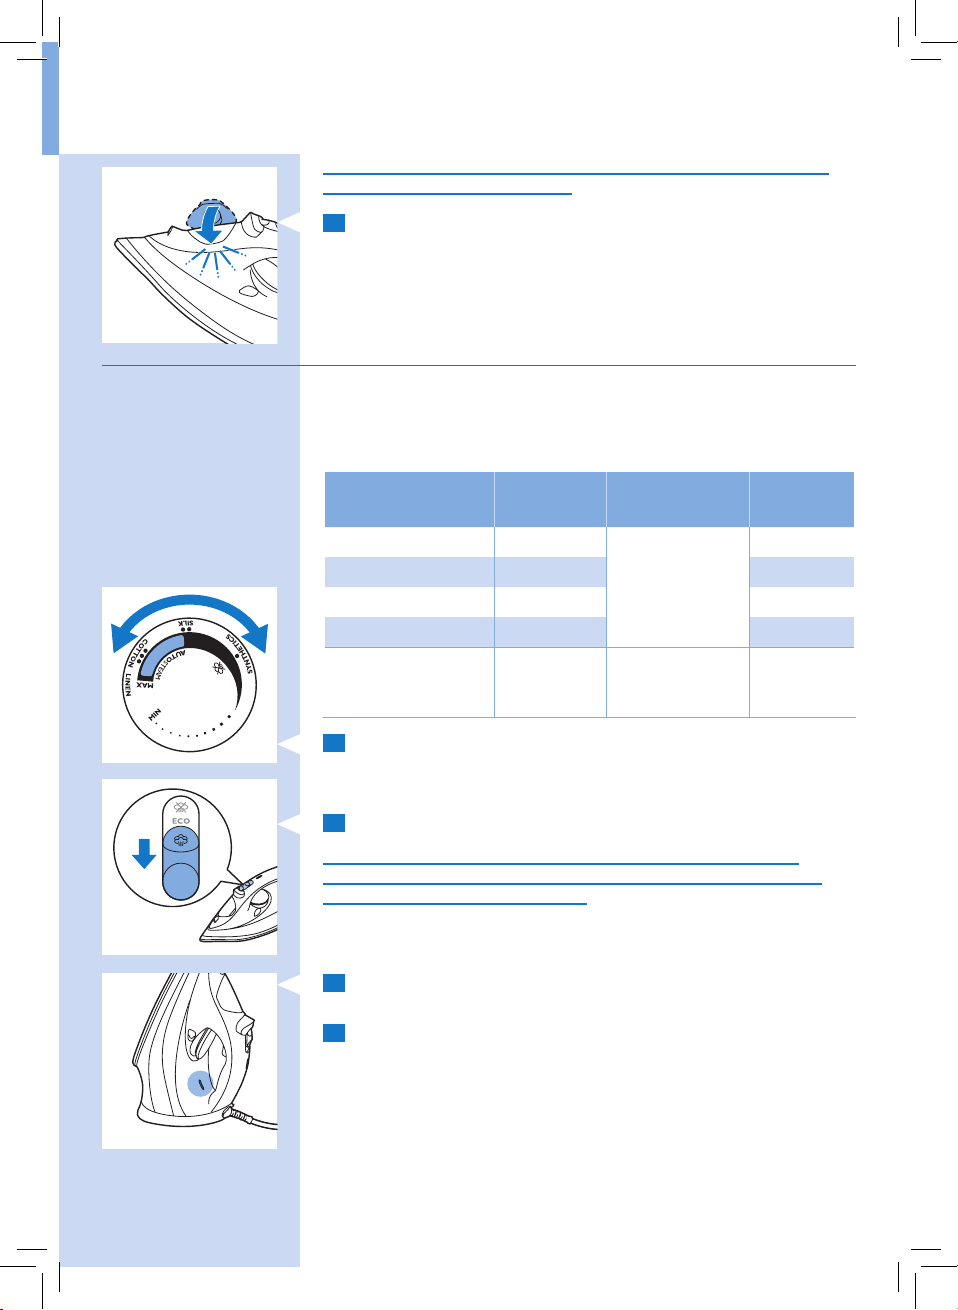
Temperature and steam setting
Table 1:
Warning: Do not use steam or steam boost at low temperature, as indicated
in the below table. Otherwise, hot water may leak from the iron.
Fabric type Temperature
setting
Linen MAX Automatically
Cotton ●●● Ye s
Wool ●● No
Silk ●● No
Synthetic fabric
(e.g. acrylic, nylon,
polyamide, polyester)
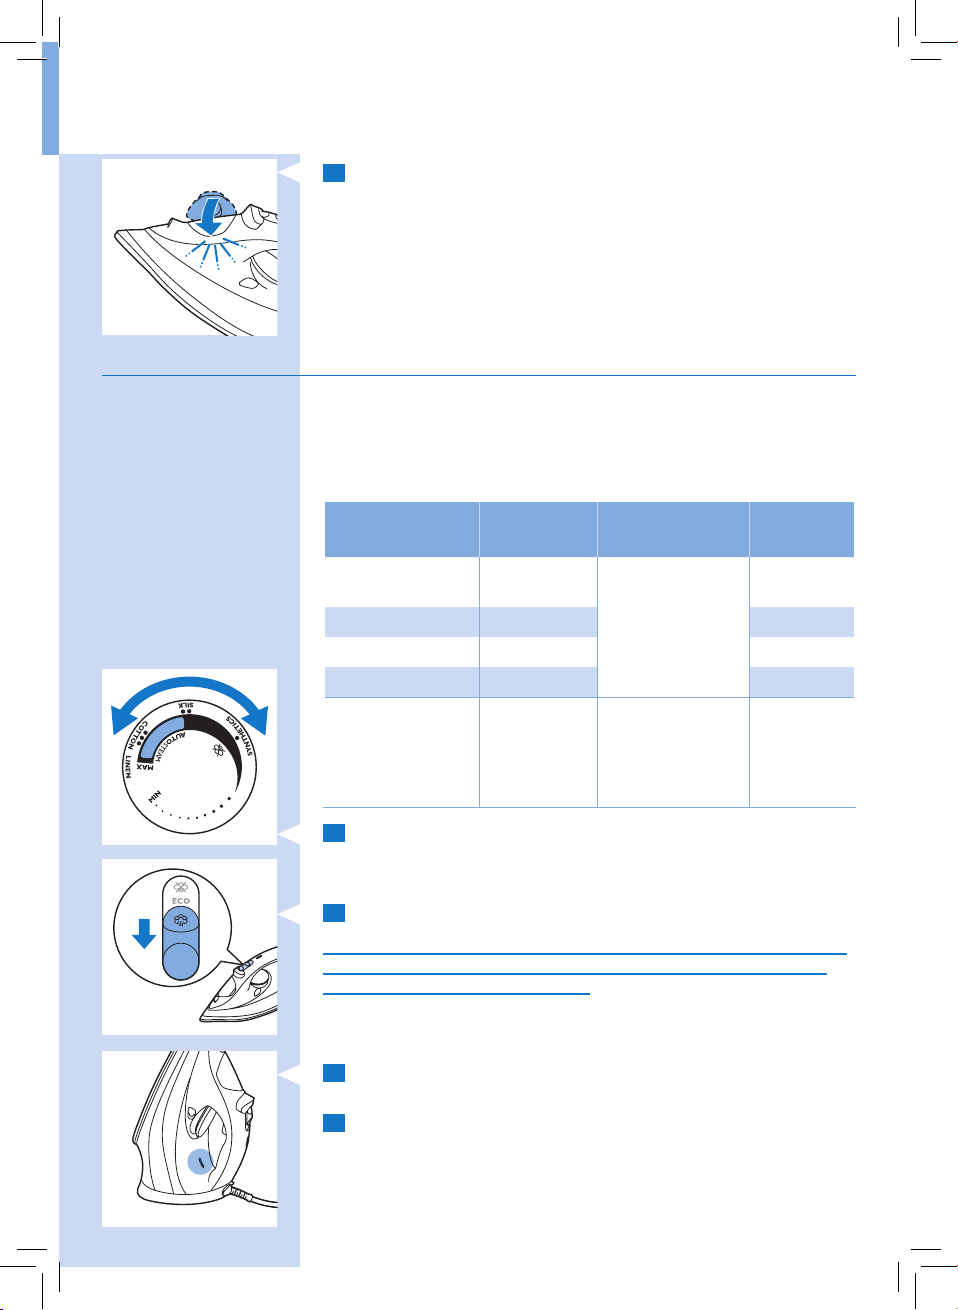
1 Consult table 1 to set the temperature dial to the appropriate
setting for your garment.
2 Select Auto steam setting in the steam slider.
This iron is equipped with Auto steam control. According to the
temperature you select, the iron automatically provides the optimal
amount of steam for the best result.
3 Put the iron on its heel and plug it in. The temperature light goes on
to indicate that the iron is heating up.
4 When the temperature light goes out, the iron has reached the
correct temperature and you could start ironing.
● No steam No
Auto steam
control
adjusted to the
optimal amount
Steam
boost
Ye s
Page 6
ENGLISH8
Features
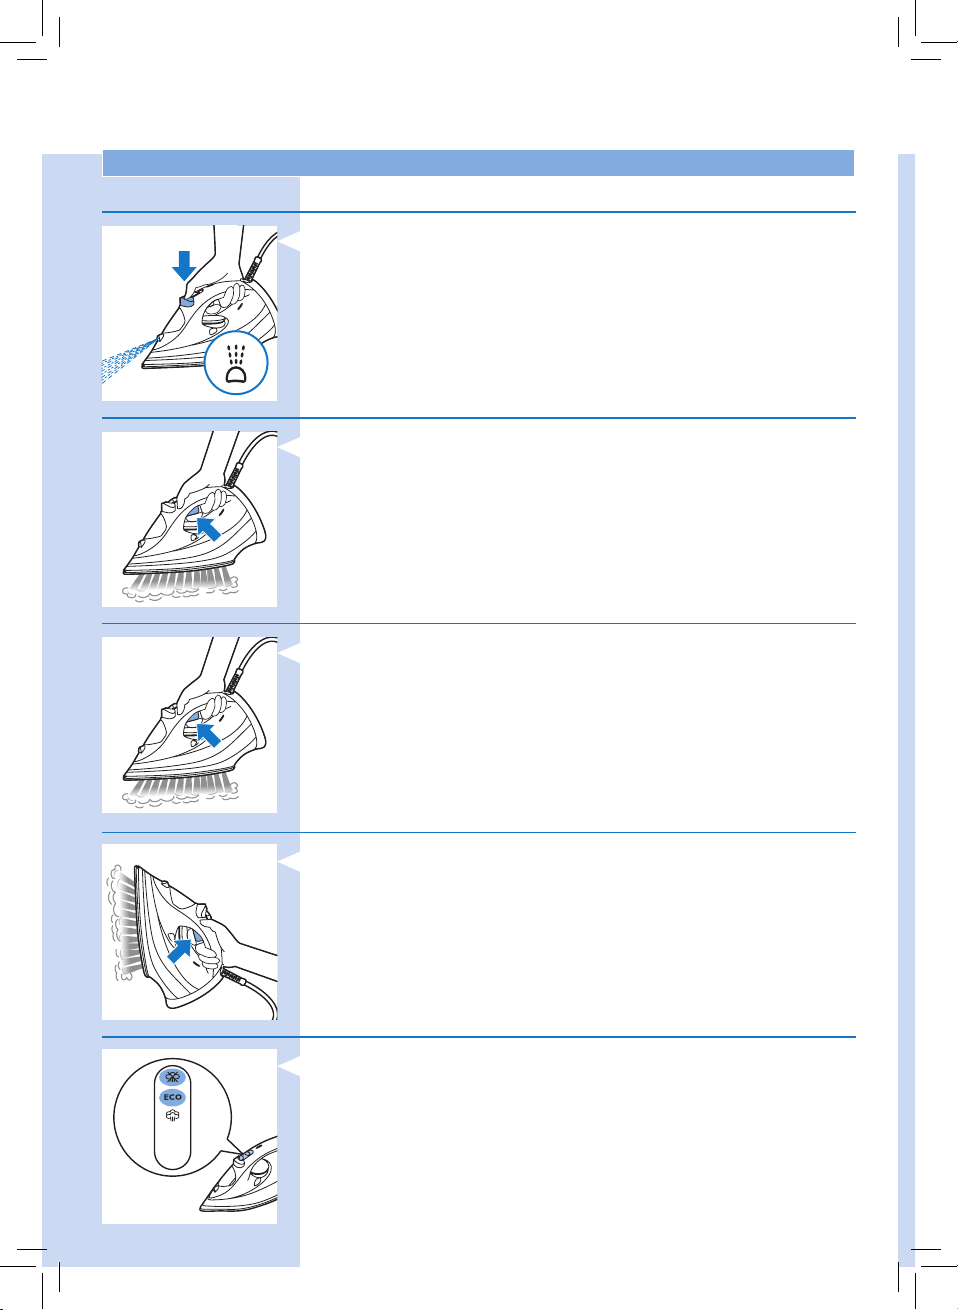
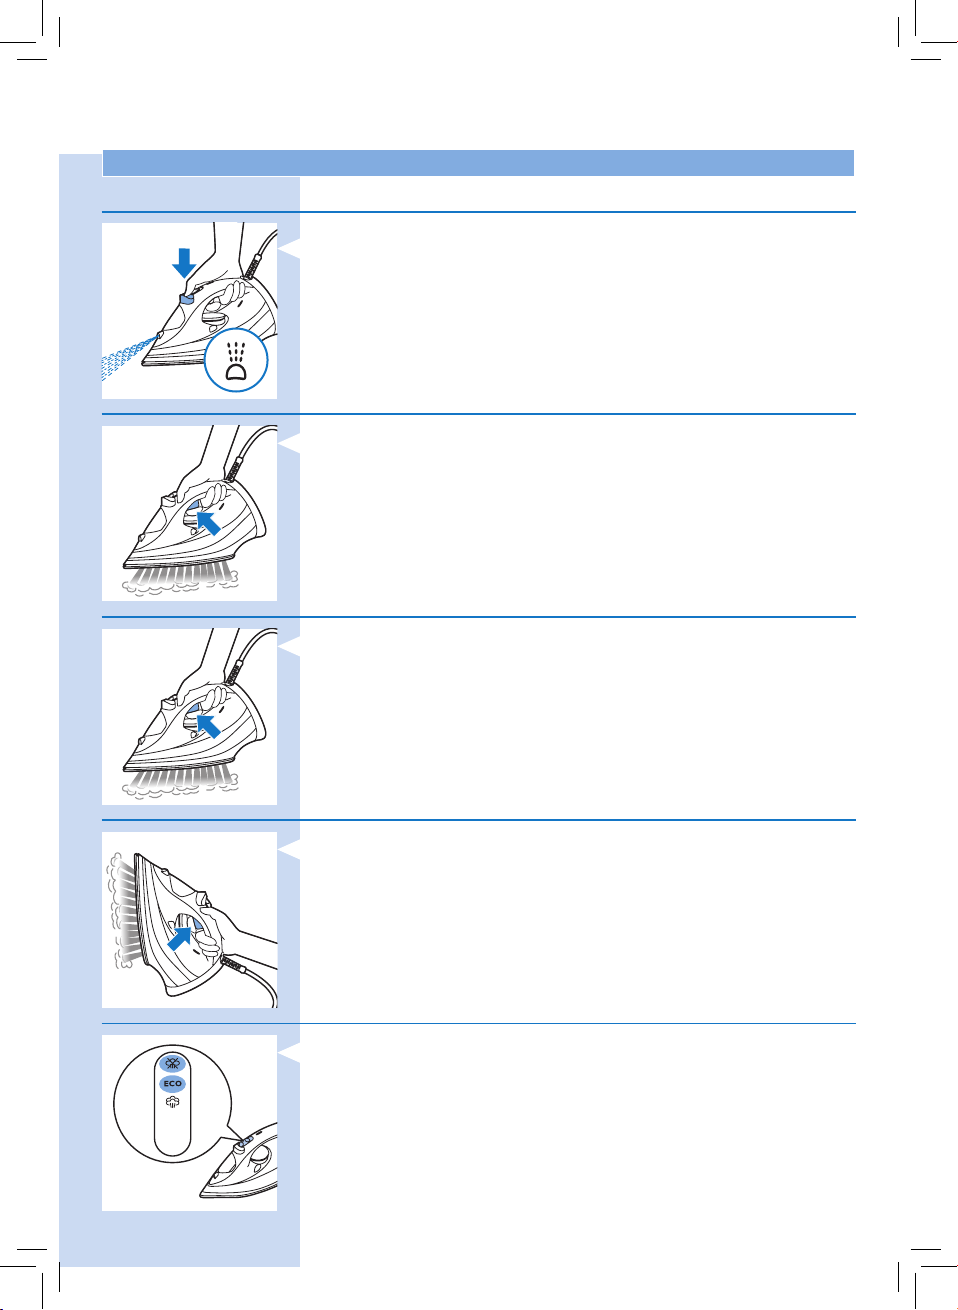
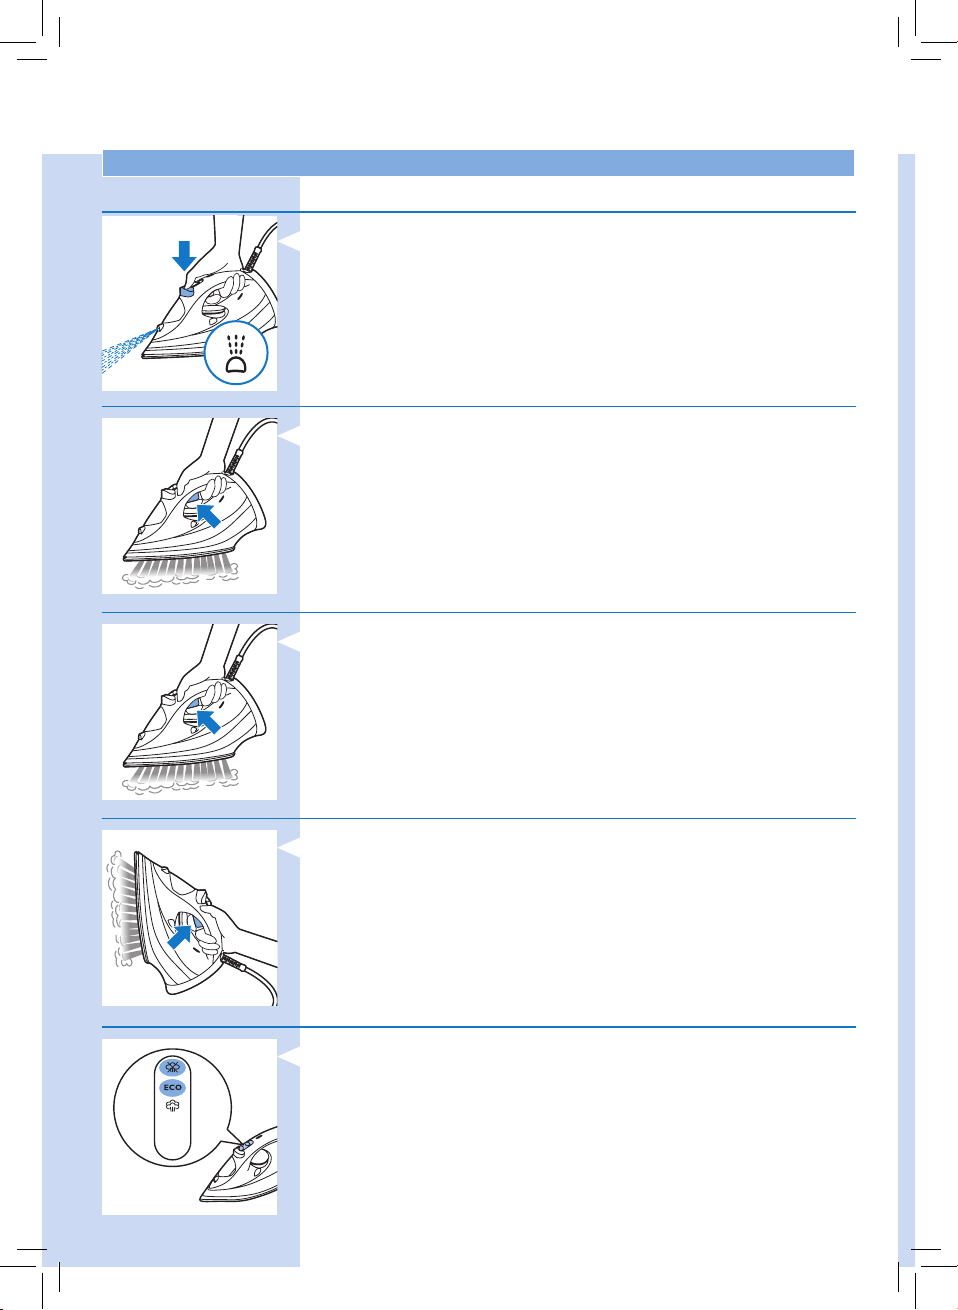
Spray funtion
- Press the spray button to moisten the article to be ironed. This helps
to remove stubborn creases.
Steam boost function
- Press and release the steam boost trigger for a powerful boost of
steam to remove stubborn creases.
Ironing with extra steam
- For extra steam during ironing, press and hold the steam boost trigger.
Vertical steam
- You can use the steam boost function when you hold the iron
in vertical position for removing creases form hanging clothes,
curtains etc.
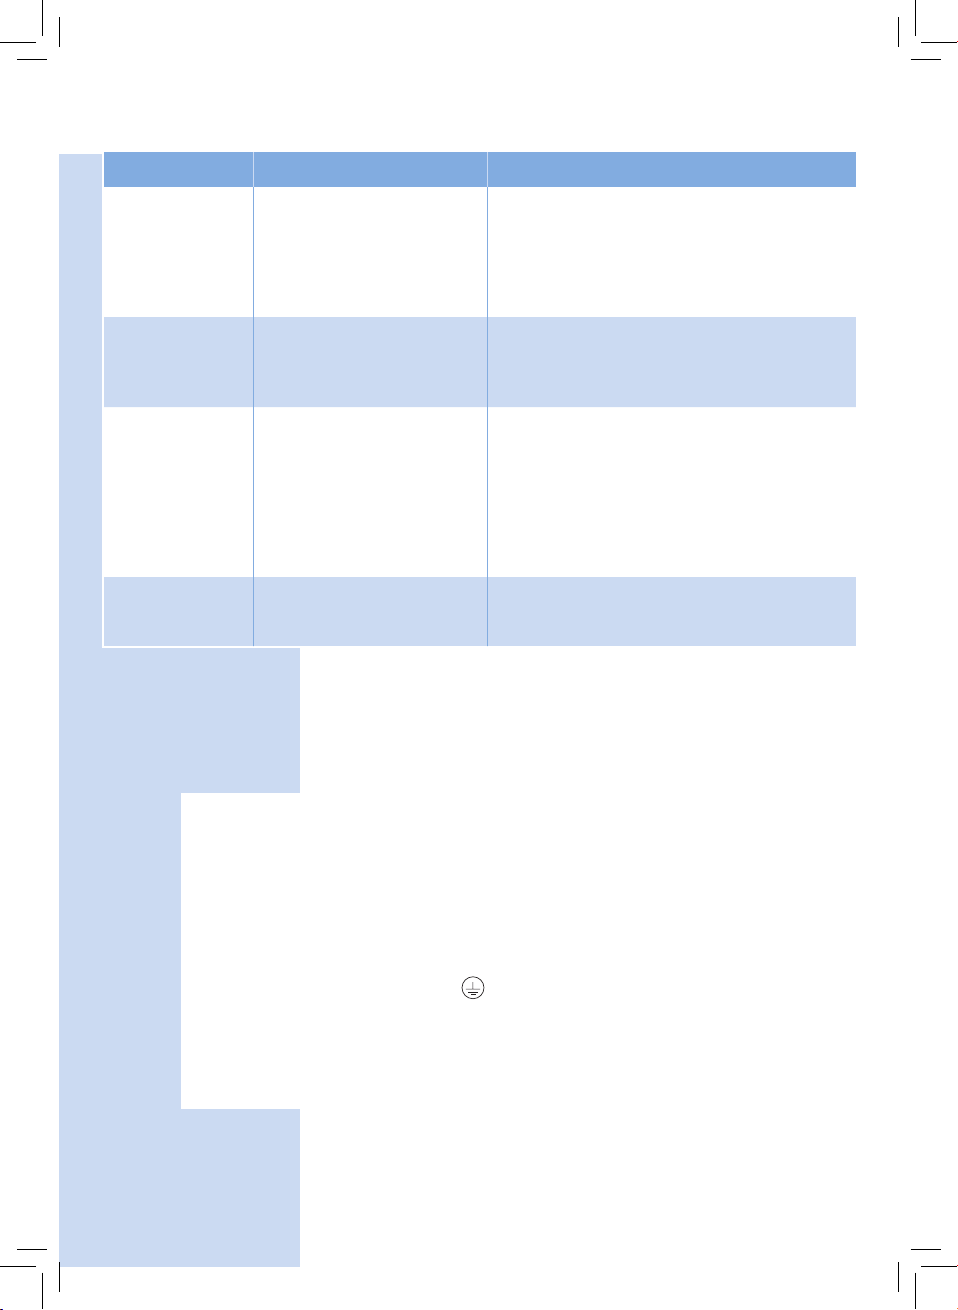
Eco steam setting / Dry ironing
- In stead of Auto steam, you could choose ECO setting in the steam
slider to save energy, yet to achieve satisfactory ironing results.
- To iron without steam, select dry setting in the steam slider.
Page 7
ENGLISH 9
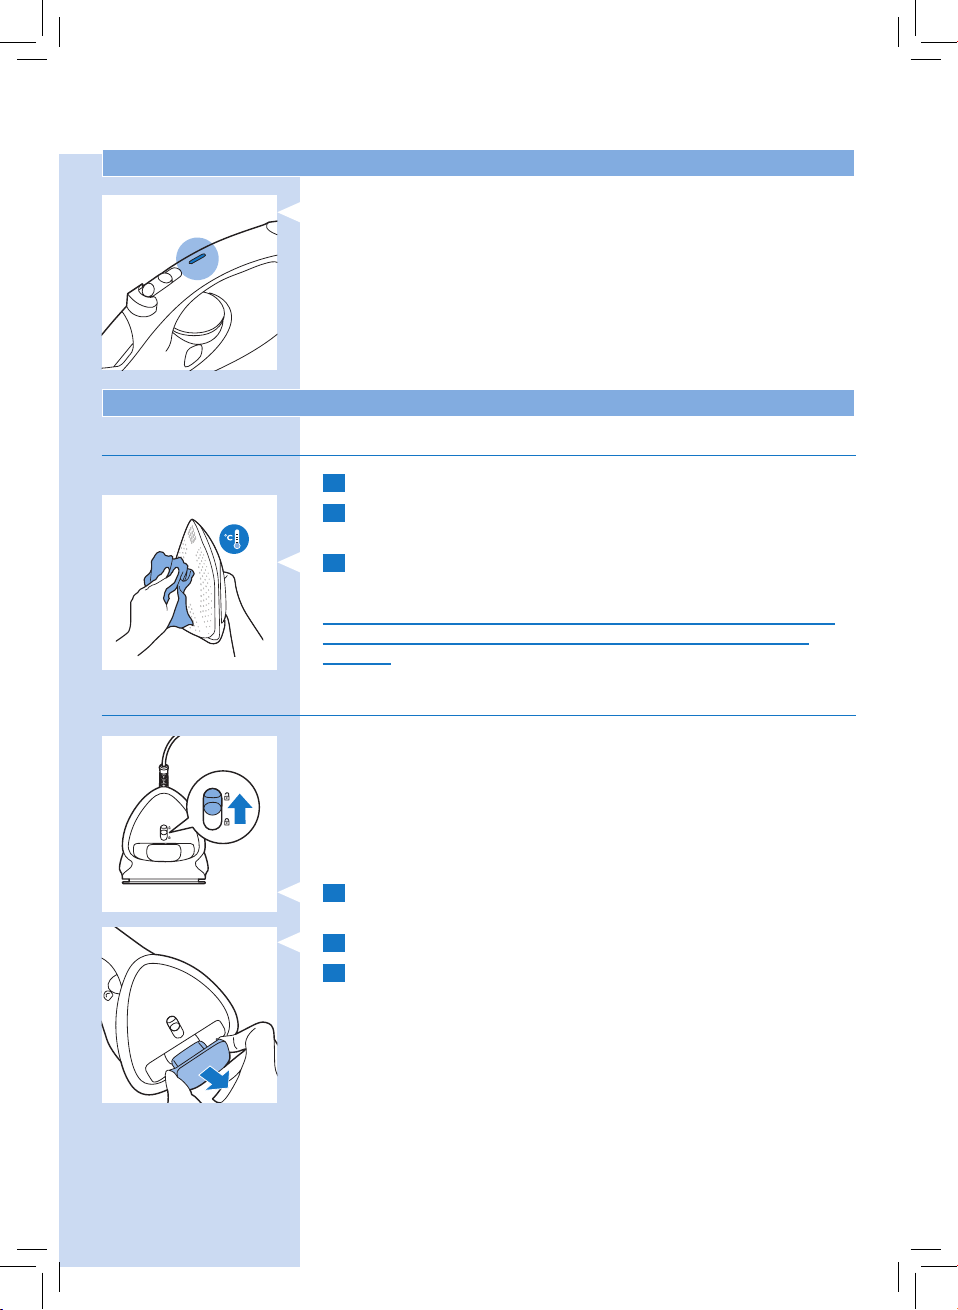
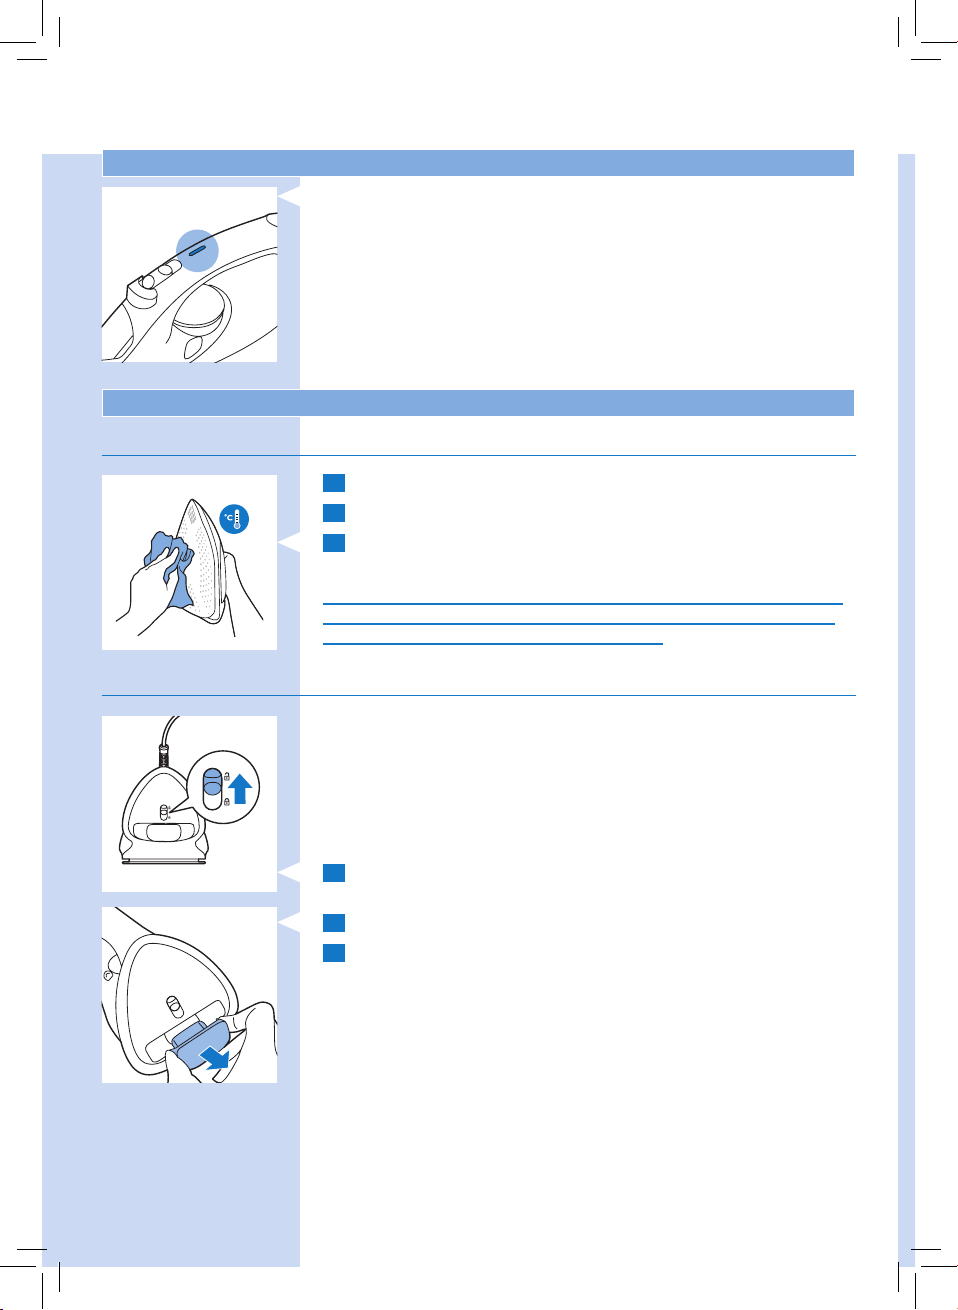
Safety auto-off (specic types only)
The safety auto-off function automatically switches off the iron if it has not
been used for 30 seconds resting on its soleplate or 8 minutes resting on
its backplate. The auto-off light will light up.
- To let the iron heat up again, pick up the iron or move it slightly.
The auto-off light goes out.
Cleaning and maintenance
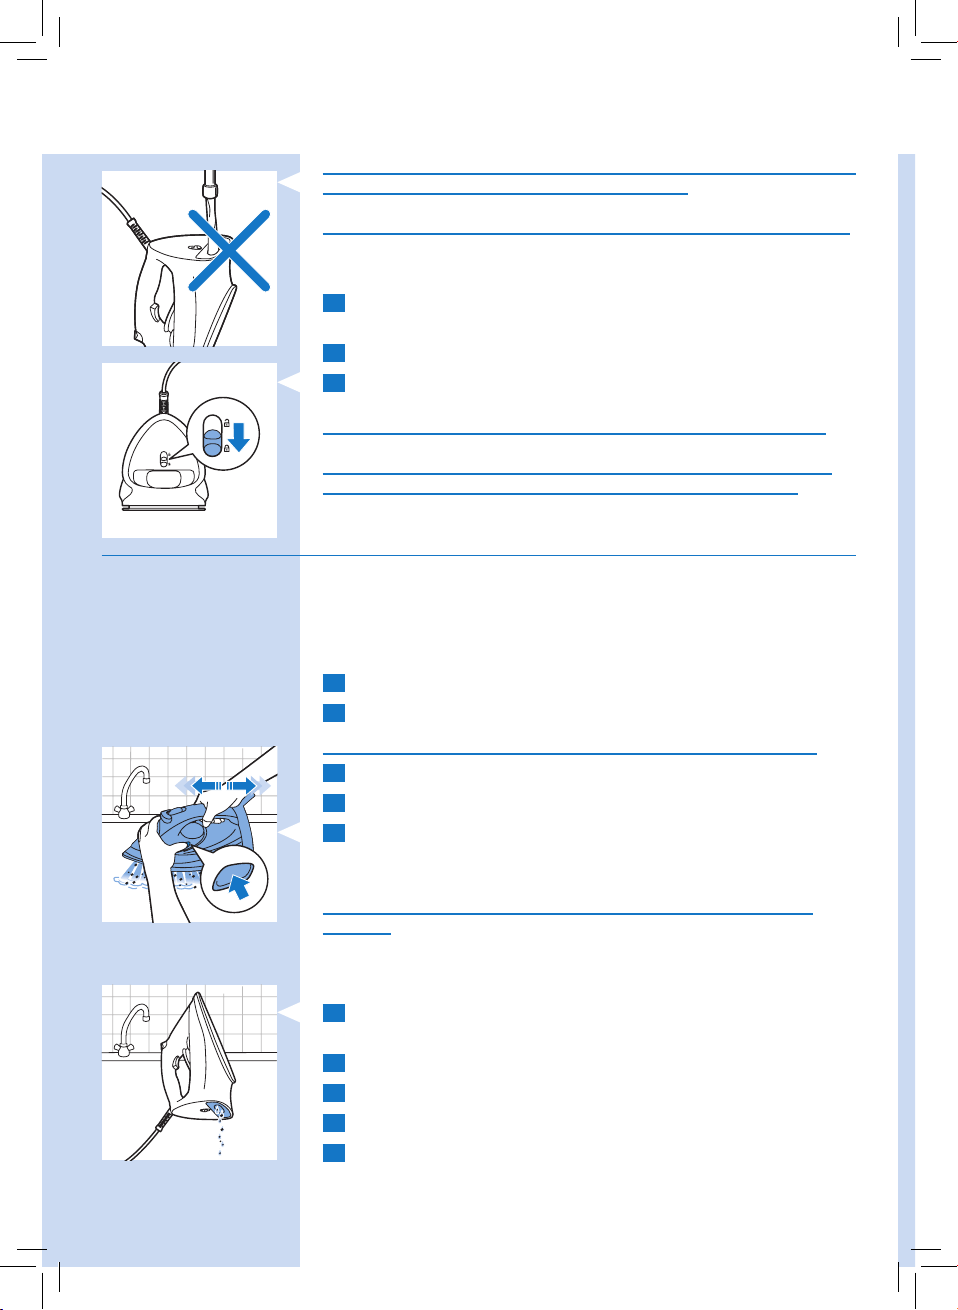
Cleaning
1 Unplug the iron and let it cool down.
2 Pour any remaining water out of the water tank from the water
lling door.
3 Wipe akes and any other deposit off the soleplate with a damp
cloth and a non-abrasive (liquid) cleaning agent.
To keep the soleplate smooth, avoid hard contact with metal objects.
Never use a scouring pad, vinegar or other chemicals to clean the
soleplate.
Quick Calc Release
IMPORTANT: To prolong the life time of your appliance and to maintain good
steaming performance, use Quick Calc Release function once every 1 month.
If water in your area is very hard, use this function more frequently.
Note: Make sure that the iron has been unplugged for at least 1 hour and has
completely cooled down, before you use Quick Calc Release.
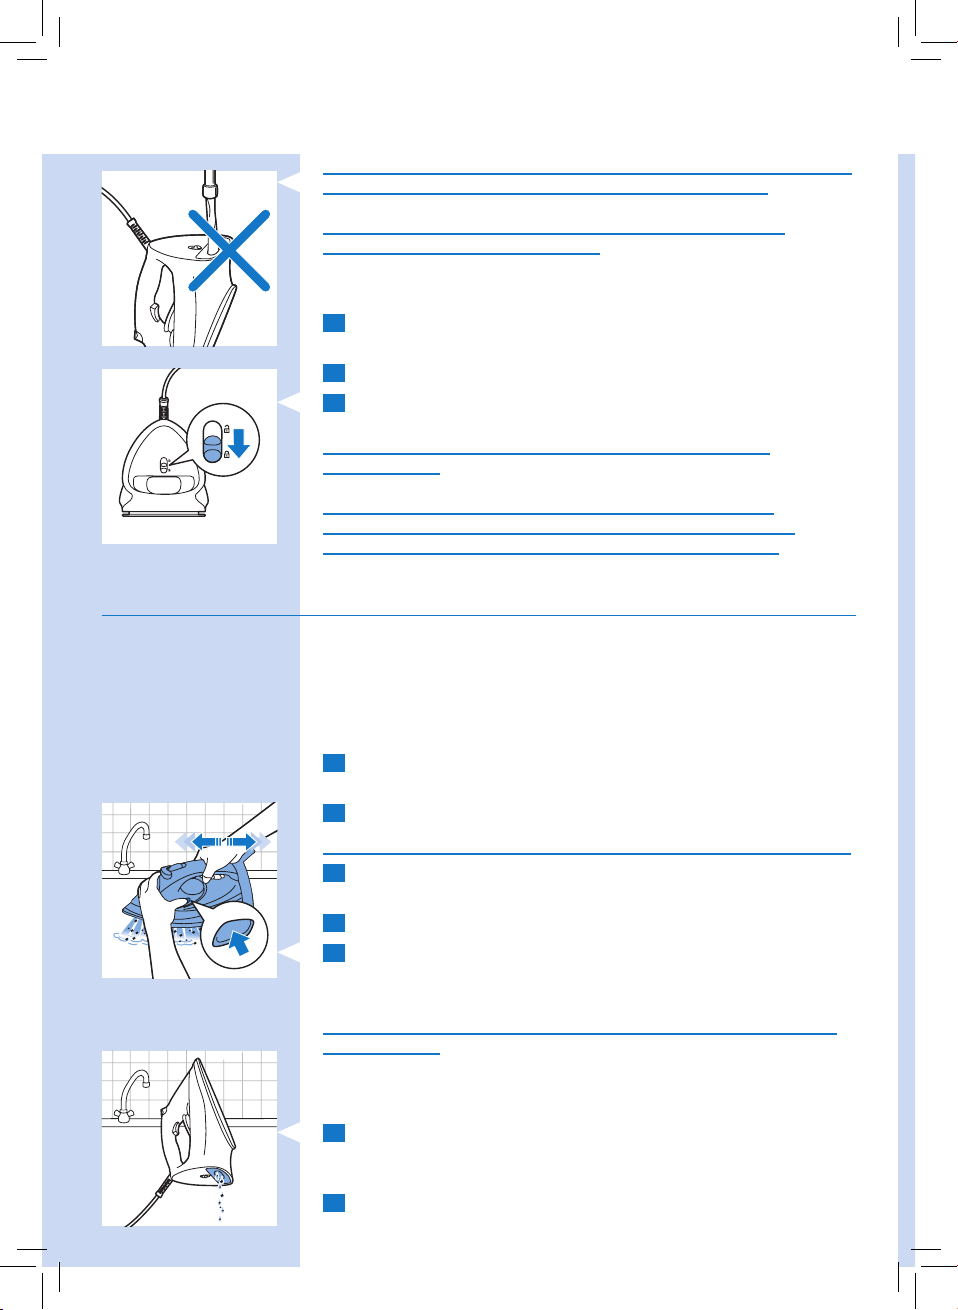
1 Put the iron on a levelled surface and push up the Quick Calc
Release lock at the back of the iron.
2 Take out the Quick Calc Release tray.
3 Pour out scales in the tray into a sink or dustbin. Clean the tray
using tap water. Remove any excess water from the tray.
Page 8
ENGLISH10
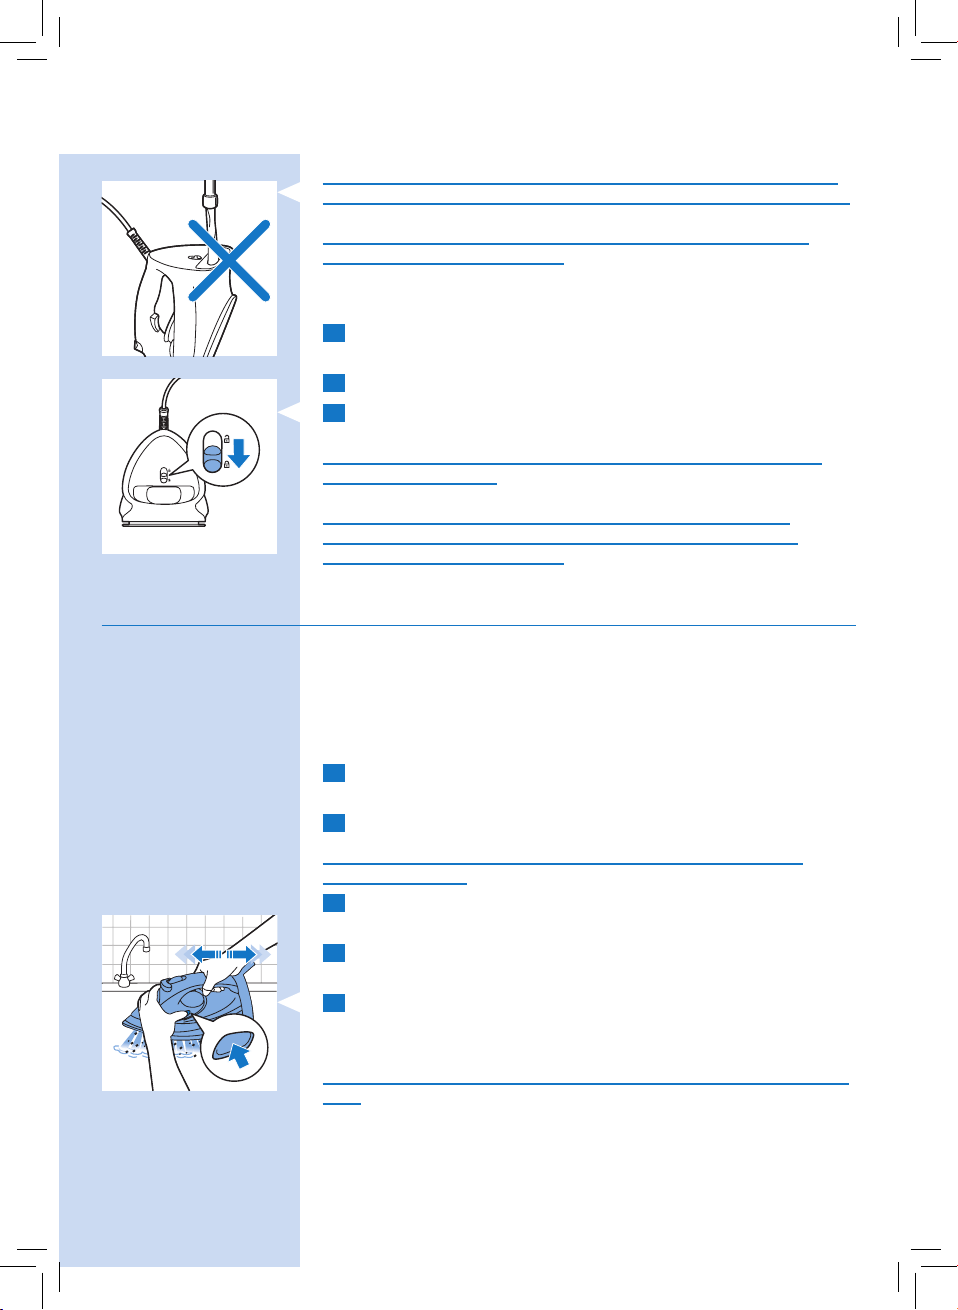
Do not pour water, vinegar, descaling agents or other chemicals into the
iron from the opening of the Quick Calc Release.
Do not use vinegar, descaling agents or other chemicals to wash the tray.
4 Wipe off the scales in the opening of the Quick Calc Release tray
with a damp cloth.
5 Insert the tray back into the iron.
6 Push down the Quick Calc Release lock.
Do not use the iron when the Quick Calc Release tray is not locked.
If you break or lose the tray, contact a consumer care center in your
country (see the worldwide guarantee leaet for contact details).
Calc-clean function
IMPORTANT: Besides Quick Calc Release function, you should also perform
calc-clean once every 1 month to prolong the life of your iron. If water in your
area is very hard, or you see scales coming out from the soleplate during
ironing, use this function more frequently.
1 Make sure the iron is unplugged and the steam slider is set to dry setting.
2 Fill the water tank to the MAX indication.
Do not pour vinegar or other descaling agents into the water tank.
3 Plug in the iron and set the temperature dial to MAX.
4 Unplug the iron when the temperature light goes out.
5 Hold the iron over the sink. Keep pushing the calc clean button and
gently shake the iron forth and back until all water in the water tank
has been used up.
Scales is ushed out, steam and boiling water also come out of the
soleplate.
Note: Repeat steps 2 to 5 if the water that comes out of the iron still contains
scale particles.
6 Take out the Quick Calc Release tray, empty the water in the tray.
Hold the iron vertically to allow small amount of water to ow out.
7 Insert the tray back to the iron and lock it.
8 Plug in the iron and let the iron heat up to dry the soleplate.
9 Unplug the iron when the temperature indicator light goes out.
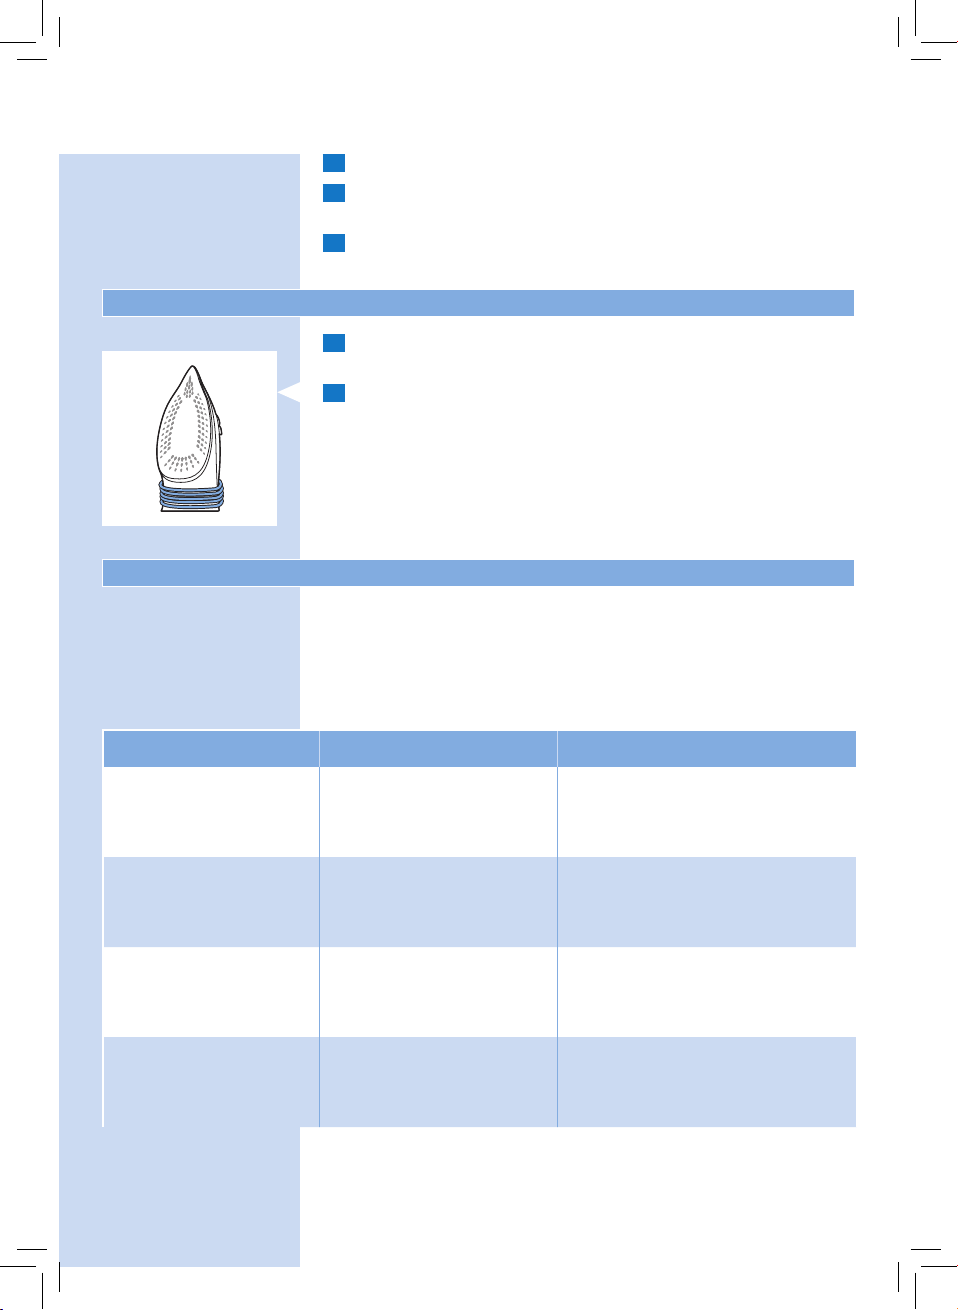
10 Move the iron gently over a piece of cloth to remove any water
stains on the soleplate.
Page 9
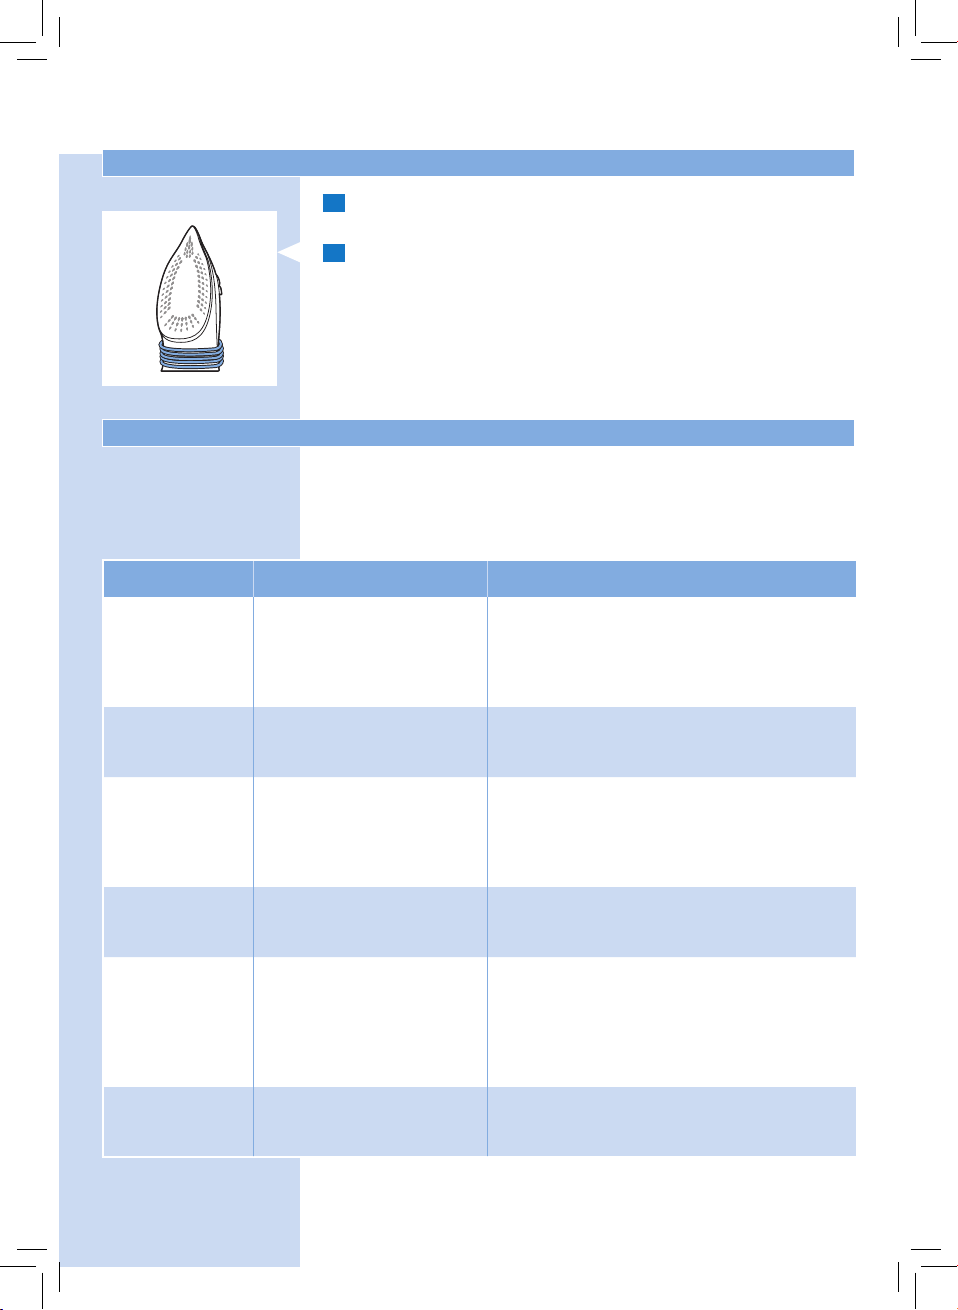
Storage
1 Unplug the iron and empty the water tank. Let it cool down in a safe
place.
2 Wind the mains cord around the backplate of the iron and store it
on its heel.
Troubleshooting
This chapter summarises the most common problems you could
encounter with the appliance. If you are unable to solve the problem with
the information below, visit www.philips.com/support for a list of
frequently asked questions or contact the Consumer Care Centre in your
country (see the worldwide guarantee leaet for contact details).
Problem Possible cause Solution
ENGLISH 11
The steam boost
function does not
work properly
(water leaks out of
the soleplate).
Flakes and
impurities come
out of the
soleplate during
ironing.
Water leaks from
the water filling
door.
Water or steam
leaks from the
back part of the
iron.
You have used the steam
boost function too often
within a very short period.
You have used the steam
boost function at a too low
temperature.
Scales are formed inside the
soleplate.
You have overfilled the water
tank.
You have not locked the Quick
Calc release tray properly.
The Quick Calc release tray is
damaged.
Wait for a few seconds before you use the steam
boost function again.
Set an ironing temperature at which the steam
boost function can be used (●●● to MAX).
Use the Calc-clean funtion (see chaper ‘Cleaning
and maintenance’, section ‘Calc-clean function’).
Do not fill the water tank beyond the MAX
indication. Pour excess water out of the water
tank.
Take out the Quick Calc Release tray and clean
it using tap water. Use a piece of cloth to wipe
off scales in the opening of the back part of the
iron. Put back the tray and lock it. (See chapter
“cleaning and maintenance, section ”Quick calc
release function).
Contact a consumer care center in your country
(see the world wide guarantee leaet for contact
details).
Page 10
РУССКИЙ 12
Введение
Поздравляем с покупкой и приветствуем в клубе Philips!
Чтобы воспользоваться всеми преимуществами поддержки Philips,
зарегистрируйте продукт на веб-сайте www.philips.com/welcome.
Описание изделия (рис. 1)
1 Разбрызгиватель
2 Дверца наливного отверстия
3 Кнопка разбрызгивателя
4 Переключатель режимов подачи пара
a. Глажение без пара
b. Экорежим
c. Функция автоматической подачи пара
5 Кнопка парового удара
6 Индикатор автовыключения (только некоторые модели)
7 Сетевой шнур
8 Индикатор нагрева
9 Резервуар для воды
10 Дисковый регулятор нагрева с автоматической регулировкой
подачи пара
11 Кнопка очистки от накипи
12 Подошва
13 Фиксатор системы быстрой очистки от накипи
14 Подставка системы быстрой очистки от накипи
15 Табличка
12
Важно
Перед использованием прибора внимательно ознакомьтесь
с буклетом с важной информацией и данным руководством
пользователя. Сохраните эти документы для дальнейшего
использования в качестве справочного материала.
Использование прибора
Заполнение резервуара для воды
Примечание. Прибор подходит для использования с водопроводной
водой. Если вода в вашем регионе очень жесткая, в приборе может
быстро образовываться накипь. Поэтому для продления срока
службы прибора рекомендуется использовать дистиллированную или
деминерализованную воду.
1 Откройте дверцу наливного отверстия.
2 Наклоните утюг назад и наполните резервуар водопроводной
водой до отметки максимального уровня.
Примечание. Не заполняйте резервуар для воды выше отметки
максимального уровня (MAX).
Page 11
13
РУССКИЙ13
Не добавляйте в резервуар для воды духи, уксус, крахмал,
химические средства для удаления накипи, добавки для глажения
или другие химические средства.
3 Закройте дверцу наливного отверстия (должен прозвучать
щелчок).
Выбор температурного режима и режима подачи пара
Таблица 1.
Предупреждение. Не используйте функцию парового удара или глажение
с паром при низкой температуре (см. таблицу ниже). В противном
случае из утюга может начать вытекать горячая вода.
Тип ткани Настройка
температуры
Лен MAX Автоматическая
Хлопок ●●● Да
Шерсть ●● нет
Шелк ●● нет
Синтетические ткани
(например, акрил,
нейлон, полиамид,
полиэстер)
1 Чтобы выбрать настройку, подходящую для конкретного типа
ткани, ознакомьтесь с таблицей 1.
2 С помощью переключателя режимов подачи пара выберите
режим автоматической подачи пара.
Этот утюг оснащен функцией автоматической регулировки подачи
пара. Количество пара настраивается автоматически в зависимости
от выбранного температурного режима.
3 Поставьте утюг вертикально и подключите к сети. Загорится
индикатор нагрева. Это значит, что утюг нагревается.
4 Если индикатор нагрева погас, значит, утюг нагрелся до заданной
температуры, можно начинать глажение.
● Нет пара нет
Автоматическая
регулировка
подачи пара
настройка
оптимального
уровня
"Паровой
удар"
Да
Page 12
РУССКИЙ 14
Особенности
Функция увлажнения ткани
- Несколько раз нажмите кнопку разбрызгивателя для увлажнения
ткани перед глажением. Это поможет разгладить глубокие
складки.
Функция "Паровой удар"
- Для удаления глубоких складок с помощью мощного выброса пара
нажмите и отпустите кнопку парового удара.
Глажение с усиленной подачей пара
- Чтобы усилить подачу пара во время глажения, нажмите и
удерживайте кнопку парового удара.
14
Вертикальное отпаривание
- Функцию "Паровой удар" можно также использовать для
вертикального отпаривания. Это особенно удобно при
разглаживании складок на висящей одежде, шторах и пр.
Режим подачи пара ECO/глажение без пара
- В целях экономии электроэнергии и обеспечения хороших
результатов глажения вместо автоматического режима можно
выбрать режим ECO.
- Для глажения без пара выберите соответствующую настройку с
помощью переключателя режимов подачи пара.
Page 13

15
РУССКИЙ15
Режим автовыключения (только для некоторых моделей)
Благодаря функции автовыключения утюг отключается автоматически,
если не используется более 30 секунд (в горизонтальном положении)
или более 8 минут (в вертикальном положении). Загорается индикатор
автовыключения.
- Чтобы возобновить нагрев утюга, приподнимите утюг или
переместите его. Индикатор автовыключения погаснет.
Очистка и обслуживание
Очистка
1 Отключите утюг от сети и дайте ему остыть.
2 Вылейте оставшуюся воду из резервуара через дверцу наливного
отверстия.
3 Удалите с подошвы следы накипи и другие загрязнения влажной
тканью с мягким (жидким) моющим средством.
Чтобы поверхность подошвы утюга оставалась гладкой, не
допускайте ее соприкосновения с металлическими предметами.
Для очистки подошвы запрещается использовать губки с
абразивным покрытием, уксус или другие химические средства.
Быстрая очистка от накипи
ВАЖНАЯ ИНФОРМАЦИЯ. Для продления срока службы прибора и
поддержания оптимальной подачи пара используйте функцию быстрой
очистки от накипи каждый месяц. Используйте функцию чаще, если
вода в вашем регионе очень жесткая.
Примечание. Перед использованием функции быстрой очистки от
накипи убедитесь, что утюг был отключен от сети более часа назад и
полностью остыл.
1 Установите утюг на ровную поверхность и сдвиньте вверх
фиксатор системы быстрой очистки от накипи на задней части
утюга.
2 Извлеките подставку системы быстрой очистки от накипи.
3 Вылейте частицы накипи в раковину или мусорное ведро.
Промойте подставку водопроводной водой. Вылейте
оставшуюся воду из подставки.
Page 14

РУССКИЙ 16
Не наливайте в утюг воду, уксус, средства для удаления накипи и
другие химические вещества через отверстие для быстрой очистки
от накипи.
Не используйте для очистки подставки уксус, средства для удаления
накипи и другие химические вещества.
4 Удалите частицы накипи в отверстии подставки быстрой
очистки от накипи с помощью влажной ткани.
5 Установите подставку на место.
6 Сдвиньте вниз фиксатор системы быстрой очистки от накипи.
Не используйте утюг, если подставка системы быстрой очистки от
накипи не зафиксирован.
В случае повреждения или утери подставки обратитесь в центр
поддержки потребителей в вашей стране (контактные данные
указаны в гарантийном талоне).
Функция очистки от накипи
ВАЖНАЯ ИНФОРМАЦИЯ. Для продления срока службы утюга кроме
быстрой очистки от накипи необходимо проводить полный цикл
очистки от накипи каждый месяц. Если в вашем регионе очень жесткая
вода или во время глажения из подошвы утюга поступают частицы
накипи, используйте функцию чаще.
16
1 Убедитесь, что утюг отключен от сети, а переключатель режимов
подачи пара установлен в положение без пара.
2 Заполните резервуар для воды до отметки MAX.
Не добавляйте в резервуар для воды уксус и другие средства для
удаления накипи.
3 Подключите утюг к электросети и установите дисковый
регулятор нагрева в положение MAX.
4 Когда индикатор нагрева погаснет, отключите утюг от
электросети.
5 Поднесите утюг к раковине. Нажимайте на кнопку очистки от
накипи и слегка перемещайте утюг вперед и назад до тех пор,
пока из резервуара не выльется вся вода.
При вымывании накипи пар и кипящая вода будут выходить из
подошвы утюга.
Примечание. Если вода, поступающая из утюга, по-прежнему содержит
частицы накипи, повторите шаги 2—5.
Page 15

17
РУССКИЙ17
6 Извлеките подставку системы быстрой очистки от накипи,
слейте воду из подставки. Удерживая утюг вертикально, слейте
оставшуюся воду.
7 Установите подставку на место и зафиксируйте ее.
8 Подключите утюг к сети и нагрейте его, чтобы дать подошве
высохнуть.
9 Когда индикатор нагрева погаснет, отключите утюг от
электросети.
10 Осторожно проведите утюгом по ткани, чтобы удалить с
подошвы излишки воды.
Хранение
1 Отключите утюг от сети и слейте воду из резервуара.
Установите утюг в безопасном месте и дайте ему остыть.
2 Обмотайте сетевой шнур вокруг задней части утюга. Храните
утюг в вертикальном положении.
Поиск и устранение неисправностей
Данная глава посвящена наиболее распространенным проблемам,
возникающим при использовании прибора. Если самостоятельно
справиться с возникшими проблемами не удается, см. список часто
задаваемых вопросов на веб-странице www.philips.com/support
или обратитесь в центр поддержки потребителей в вашей стране
(контактные данные указаны в гарантийном талоне).
Проблема Возможная причина Решение
Функция
"Паровой
удар" работает
неправильно
(из подошвы
вытекает вода).
Функция "Паровой удар"
использовалась слишком
часто в течение короткого
периода времени.
Функция "Паровой удар"
использовалась при слишком
низкой температуре.
Перед повторным использованием функции
"Паровой удар" подождите несколько секунд.
Установите температуру глажения, при
которой допускается использование функции
"Паровой удар" (от ●●● до MAX).
Page 16
Проблема Возможная причина Решение
Паровой утюг
Изготовлено под контролем “Philips Consumer Lifestyle B.V.”, Туссендиепен 4, 9206 АД
Драхтен, Нидерланды
Импортер: ООО «Филипс», Российская Федерация
123022 г. Москва, ул. Сергея Макеева, д.13, тел. +7
(495) 937 93 00
GC451X
GC452X
Для бытовых нужд
Класс защиты от электрического тока: Класс
Дату изготовления можно определить по серийному номеру (xxxxYYWWxxxxxx, где YY —год
W
можно определить, что дата производства — 25-ая неделя 2010 года. На некоторых моделя
дата изготовления может быть указана в следующих форматах: YYWW, YYWWx, YYWWxx ил
xYYWWxxxx. Если определить дату изготовления не удается, обратитесь в центр поддержки Philips.
РУССКИЙ 18
18
Во время
глажения из
отверстий
подошвы
поступают хлопья
накипи и грязь.
Вода подтекает
из дверцы
наливного
отверстия.
Вода или пар
выходит из
задней части
утюга.
Внутри подошвы скопилась
накипь.
Резервуар для воды
переполнен.
Подставка системы быстрой
очистки от накипи не
зафиксирована должным
образом.
Подставка системы
быстрой очистки от накипи
повреждена.
Используйте функцию очистки от накипи
(см. главу "Очистка и уход", раздел "Функция
очистки от накипи").
Не заполняйте резервуар для воды выше
отметки максимального уровня (MAX).
Вылейте лишнюю воду из резервуара.
Извлеките подставку системы быстрой
очистки от накипи и промойте ее
водопроводной водой. Удалите следы
накипи из отверстия на задней части утюга с
помощью салфетки. Установите подставку на
место и зафиксируйте ее. (См. главу "Очистка
и уход", раздел "Функция быстрой очистки от
накипи").
Обратитесь в центр поддержки потребителей
в вашей стране (контактные данные указаны в
гарантийном талоне).
,
-
> 2000-2400W, 220-240V, 50-60Hz
-
> 2200-2600W, 220-240V, 50-60Hz
W — номер недели, x — любой знак). Например, по серийному номеру AJ021025123456
1
,
,
х
и
Page 17
TÜRKÇE 19
Giriş
Ürünü satın aldığınız için teşekkür ederiz; Philips'e hoş geldiniz!
Philips'in sunduğu destekten tam olarak yararlanmak için ürününüzü
www.philips.com/welcome adresinde kaydettirin.
Ürüne genel bakış (Şek. 1)
1 Sprey başlığı
2 Su doldurma kapağı
3 Sprey düğmesi
4 Buhar düğmesi
a. Kuru ayarı
b. ECO ayarı
c. Otomatik buhar ayarı
5 Buhar püskürtme tetiği
6 Güvenli otomatik kapanma ışığı (sadece belirli modellerde)
7 Elektrik kablosu
8 Sıcaklık gösterge ışığı
9 Su haznesi
10 Otomatik buhar kontrollü sıcaklık kadranı
11 Kireç temizleme düğmesi
12 Taban
13 Hızlı Kireç Çözme kilidi
14 Hızlı Kireç Çözme tepsisi
15 Tanıtım levhası
19
Önemli
Cihazı kullanmadan önce ayrıca sunulan önemli bilgiler kitapçığını ve
bu kullanım kılavuzunu dikkatli bir şekilde okuyun. İki belgeyi de ileride
başvurmak üzere saklayın.
Cihazın kullanımı
Su haznesinin doldurulması
Not: Cihazınız musluk suyuyla kullanılmak üzere tasarlanmıştır. Yaşadığınız
bölgedeki suyun sert olması halinde kısa süre içinde kireç oluşumu meydana
gelecektir. Bu nedenle, cihazınızın kullanım ömrünü uzatmak için %100 saf
veya demineralize su kullanmanız önerilir.
1 Su doldurma kapağını açın.
2 Ütüyü arkaya doğru eğin ve su haznesini, maksimum seviyeye kadar
musluk suyu ile doldurun.
Not: Su haznesini MAX göstergesini aşacak şekilde doldurmayın.
Page 18

20
TÜRKÇE20
Su haznesine parfüm, sirke, kola, kireç çözücü ürünler, ütülemeye yardımcı
olacak ürünler ve diğer kimyasal maddeler koymayın.
3 Su doldurma kapağını kapatın (‘klik’ sesi duyulur).
Sıcaklık ve buhar ayarı
Tablo 1:
Uyarı: Aşağıdaki tabloda belirtildiği gibi, buhar veya buhar püskürtme özelliklerini
düşük sıcaklıklarda kullanmayın. Aksi takdirde, ütüden sıcak su sızabilir.
Kumaş türü Sıcaklık
ayarları
Keten MAX Otomatik olarak
Pamuklu ●●● Evet
Yünlü ●● Hayır
İpekli ●● Hayır
Sentetik kumaşlar
(örn. akrilik, naylon,
polyamid, polyester)
1 Sıcaklık kadranını kumaşınıza uygun ayara getirmek için Tablo 1'e
başvurun.
2 Buhar düğmesinde Otomatik buhar ayarını seçin.
Bu ütüde Otomatik buhar kontrolü bulunur. Seçtiğiniz sıcaklığa göre ütü
otomatik olarak optimum miktarda buhar verir ve en iyi sonucu almanızı
sağlar.
3 Ütüyü arka kısmı üzerine oturtun ve şini takın. Ütünün ısındığını
gösteren sıcaklık ışığı yanar.
4 Sıcaklık ışığı söndüğünde ütü doğru sıcaklığa ulaşmıştır. Ütüleme
işlemine başlayabilirsiniz.
● Buhar yok Hayır
Otomatik buhar
kontrolü
optimum miktara
ayarlanmış
Şok buhar
Evet
Page 19

TÜRKÇE 21
Özellikler
Sprey fonksiyonu
- Ütülenecek kumaşı nemlendirmek için sprey düğmesine basın. Bu özellik
inatçı kırışıklıkları gidermenize yardımcı olur.
Buhar püskürtme fonksiyonu
- İnatçı kırışıklıkları giderecek güçlü bir buhar püskürtmek için buhar
püskürtme tetiğine basın ve bırakın.
Ekstra buharlı ütüleme
- Ütü sırasında ekstra buhar püskürtmek için buhar püskürtme tetiğini
basılı tutun.
21
Dikey buhar
- Buhar püskürtme fonksiyonunu askıdaki elbiselerde, perdelerde vb.
bulunan kırışıklıkları yok etmek için ütüyü dik pozisyonda tutarak
kullanabilirsiniz.
Eco buhar ayarı / Kuru ütüleme
- Hem enerji tasarrufu yapıp hem de tatmin edici sonuçlar almak için
buhar düğmesinde Otomatik buhar yerine ECO ayarını seçebilirsiniz.
- Buharsız ütüleme için buhar düğmesinde kuru ayarını seçin.
Page 20
22
TÜRKÇE22
Güvenli otomatik kapanma (sadece belirli modellerde)
Ütü, tabanına yerleştirilmiş durumdayken 30 saniye veya arka kısmı üzerine
yerleştirilmiş durumdayken 8 dakika boyunca çalışmadığında güvenli
otomatik kapanma fonksiyonu ütüyü otomatik olarak kapatır. Otomatik
kapanma ışığı yanar.
- Ütüyü tekrar ısınması için kaldırın veya hafifçe yerinden oynatın.
Otomatik kapanma ışığı söner.
Temizlik ve bakım
Temizleme
1 Ütünün şini prizden çekin ve soğumasını bekleyin.
2 Su haznesinde kalan suyu su doldurma kapağından boşaltın.
3 Nemli bir bez ve aşındırıcı olmayan (sıvı) bir temizlik maddesi
kullanarak tabandaki tortuları ve diğer artıkları temizleyin.
Tabanın düzlüğünü koruması için metal cisimlerle sert bir şekilde temas
etmemesini sağlayın. Tabanı temizlemek için ovalama bezleri, sirke veya
diğer kimyasal maddeleri kesinlikle kullanmayın.
Hızlı Kireç Çözme
ÖNEMLİ: Cihazınızın kullanım ömrünü uzatmak ve buhar üretme
performansını korumak için Hızlı Kireç Çözme fonksiyonunu ayda bir kullanın.
Bulunduğunuz bölgedeki su çok sertse bu fonksiyonu daha sık kullanın.
Not: Hızlı Kireç Çözme fonksiyonunu kullanmadan önce ütünün şinin en az
1 saat önce çekildiğinden ve cihazın tamamen soğuduğundan emin olun.
1 Ütüyü düz bir yüzeye yerleştirin ve ütünün arka kısmındaki Hızlı
Kireç Çözme kilidini yukarı doğru itin.
2 Hızlı Kireç Çözme tepsisini çıkarın.
3 Tepsideki kireç artıklarını lavaboya veya çöpe dökün. Tepsiyi musluk
suyuyla temizleyin. Tepside kalan fazla suyu temizleyin.
Page 21

TÜRKÇE 23
Hızlı Kireç Çözme deliğinden ütüye su, sirke, kireç çözücü maddeler veya
başka kimyasal maddeler doldurmayın.
Tepsiyi temizlemek için sirke, kireç çözücü maddeler veya başka kimyasal
maddeler kullanmayın.
4 Hızlı Kireç Çözme tepsisi deliğinde biriken kireci nemli bir bezle
temizleyin.
5 Tepsiyi yeniden ütüye yerleştirin.
6 Hızlı Kireç Çözme kilidini aşağı doğru itin.
Hızlı Kireç Çözme tepsisi kilitli değilse ütüyü kullanmayın.
Tepsiyi kırarsanız veya kaybederseniz ülkenizdeki müşteri destek merkezi
ile iletişim kurun (iletişim bilgileri için dünya çapında garanti kitapçığına
başvurun).
Kireç temizleme fonksiyonu
ÖNEMLİ: Hızlı Kireç Çözme fonksiyonunun yanı sıra, ütünüzün ömrünü
uzatmak için her ayda bir kireç temizleme işlemini uygulamanız gerekir.
Bulunduğunuz bölgedeki su çok sertse veya ütüleme işlemi sırasında ütünün
tabanından kireç çıktığını fark ettiyseniz bu fonksiyonu daha sık kullanın.
23
1 Ütünün şinin çekili olduğundan ve buhar düğmesinin kuru ayarına
getirildiğinden emin olun.
2 Su haznesini MAX göstergesine kadar doldurun.
Su haznesine, sirke veya başka kireç çözücü maddeler doldurmayın.
3 Ütünün şini takın ve sıcaklık kadranını MAX ayarına getirin.
4 Sıcaklık ışığı söndüğünde ütünün şini prizden çekin.
5 Ütüyü lavabo üzerinde tutun.Su haznesindeki tüm su kullanılana
kadar kireç temizleme düğmesine basmaya devam edin ve ütüyü öne
ve arkaya doğru nazikçe sallayın.
Kireç atılır ve tabandan buhar ve kaynar su da çıkar.
Not: Ütüden çıkan suda hala kireç artıkları varsa 2 ile 5 arasındaki adımları
tekrarlayın.
6 Hızlı Kireç Çözme tepsisini çıkarın ve tepsideki suyu boşaltın.
Az miktardaki suyun akması için ütüyü dik konumda tutun.
7 Tepsiyi yeniden ütüye takın ve kilitleyin.
8 Ütünün şini prize takın ve tabanın kuruması için ütünün ısınmasını bekleyin.
9 Sıcaklık göstergesi ışığı söndüğünde ütünün şini prizden çekin.
10 Tabandaki su lekelerini gidermek için ütüyü bir bez parçası üzerinde
hafçe gezdirin.
Page 22

24
TÜRKÇE24
Saklama
1 Ütünün şini prizden çekin ve su haznesini boşaltın. Ütünün güvenli
bir yerde soğumasını bekleyin.
2 Elektrik kablosunu ütünün arka kısmına sarın ve ütüyü arka kısmı
üzerine oturtun.
Sorun giderme
Bu bölüm, cihazda en sık karşılaşabileceğiniz sorunları
özetlemektedir. Sorunu aşağıdaki bilgilerle çözemiyorsanız sık sorulan
sorular listesi için www.philips.com/support adresini ziyaret edin veya
ülkenizdeki Müşteri Destek Merkezi ile iletişim kurun (iletişim bilgileri için
dünya çapında garanti kitapçığına başvurun).
Sorun Nedeni Çözüm
Buhar püskürtme
fonksiyonu
doğru çalışmıyor
(tabandan su
sızıyor).
Ütünün tabanından
tortular ve kireç
zerrecikleri çıkıyor.
Su doldurma
kapağından su
sızıyor.
Ütünün arka
kısmından su veya
buhar çıkıyor.
Buhar püskürtme fonksiyonunu
kısa bir süre içinde çok sık
kullandınız.
Buhar püskürtme
fonksiyonunu çok düşük bir
sıcaklıkta kullanmış olabilirsiniz.
Tabanın içinde kireç oluşuyor. Kireç temizleme fonksiyonunu kullanın (bkz.
Su haznesini çok fazla
doldurmuş olabilirsiniz.
Hızlı Kireç Çözme
tepsisini düzgün bir şekilde
takmamışsınızdır.
Hızlı Kireç Çözme tepsisi zarar
görmüştür.
Buhar püskürtme fonksiyonunu yeniden
kullanmadan önce birkaç saniye bekleyin.
Buhar püskürtme fonksiyonunun kullanılabileceği
bir ütüleme sıcaklığı belirleyin (●●● - MAX).
‘Temizlik ve bakım’ bölümü, ‘Kireç temizleme
fonksiyonu’ kısmı).
Su haznesini MAX göstergesini aşacak şekilde
doldurmayın. Fazla suyu su haznesinden boşaltın.
Hızlı Kireç Çözme tepsisini çıkarın ve musluk suyu
kullanarak temizleyin. Ütünün arka kısmındaki
delikte biriken kireci temizlemek için bir bez
parçası kullanın. Tepsiyi yerine takın ve kilitleyin.
(Bkz. 'Temizlik ve bakım' bölümü, 'Hızlı kireç
çözme fonksiyonu' kısmı).
Ülkenizdeki müşteri destek merkezi ile iletişim
kurun (iletişim bilgileri için dünya çapında garanti
kitapçığına başvurun).
Page 23

УКРАЇНСЬКА 25
Вступ
Вітаємо Вас із покупкою та ласкаво просимо до клубу Philips!
Щоб у повній мірі користуватися підтримкою, яку пропонує компанія
Philips, зареєструйте свій виріб на веб-сайті www.philips.com/welcome.
Огляд виробу (мал. 1)
1 Носик розпилювача
2 Дверцята резервуара для води
3 Кнопка розпилювача
4 Перемикач налаштування пари
a. Налаштування "без пари"
b. Економний режим
c. Налаштування автоподачі пари
5 Кнопка подачі парового струменя
6 Індикатор безпечного автоматичного вимкнення (лише певні
моделі)
7 Шнур живлення
8 Індикатор температури
9 Резервуар для води
10 Регулятор температури з автоматичним регулятором пари
11 Кнопка Calc clean
12 Підошва
13 Фіксатор функції швидкого видалення накипу
14 Лоток для швидкого видалення накипу
15 Табличка
25
Важливо
Перед тим як користуватися пристроєм, уважно прочитайте окремий
буклет із важливою інформацією і цей посібник користувача. Збережіть
обидва документи для довідки в майбутньому.
Застосування пристрою
Наповнення резервуара для води
Примітка. Пристрій розраховано на використання води з-під
крана. Якщо Ви живете в регіоні з жорсткою водою, може швидко
накопичуватися накип. Тому для подовження терміну експлуатації
пристрою рекомендується використовувати 100% дистильовану або
демінералізовану воду.
1 Відкрийте дверцята резервуара для води.
2 Нахиліть праску назад і наповніть резервуар холодною водою до
максимального рівня.
Примітка. Не наповнюйте резервуар для води вище позначки MAX.
Page 24

26
УКРАЇНСЬКА26
Не заливайте у резервуар для води парфуми, оцет, крохмаль, засоби
проти накипу, засоби для прасування чи інші хімікати.
3 Закрийте дверцята резервуара для води (чути клацання).
Налаштування температури та пари
Таблиця 1
Попередження: не використовуйте функцію відпарювання чи подачі
парового струменя за низької температури, як вказано в таблиці
нижче. Інакше з праски може витікати гаряча вода.
Тип тканини Налаштування
температури
Льон MAX Автоматичне
Бавовна ●●● ТАК
Вовна ●● Ні
Шовк ●● Ні
Синтетична
тканина
(наприклад, акрил,
нейлон, поліамід,
поліестер)
1 Як встановити регулятор температури у відповідне для одягу
положення, дивіться у таблиці 1.
2 Виберіть налаштування автоподачі пари на перемикачі
налаштування пари.
Цю праску обладнано автоматичним регулятором пари. Відповідно
до вибраної температури праска автоматично подає оптимальну
кількість пари для забезпечення найкращого результату.
3 Поставте праску на п'яту та під'єднайте її до мережі. Засвітиться
індикатор температури, повідомляючи про нагрівання праски.
4 Коли праска нагріється, індикатор температури згасне, і можна
починати прасувати.
● Немає пари Ні
Автоматичний
регулятор пари
налаштування
оптимальної
кількості пари
Паровий
струмінь
ТАК
Page 25

УКРАЇНСЬКА 27
Характеристики
Функція розпилення
- Натисніть кнопку розпилення для зволоження тканини, яку
потрібно розпрасувати. Це допомагає розпрасувати важкі складки.
Функція подачі парового струменя
- Натисніть і відпустіть кнопку подачі парового струменя, щоб
отримати потужний паровий струмінь для прасування важких
складок.
Прасування з екстра-відпарюванням
- Для додаткового викиду пари під час прасування натисніть та
утримуйте кнопку подачі парового струменя.
27
Вертикальне відпарювання
- Функцію подачі парового струменя можна використовувати,
тримаючи праску у вертикальному положенні. Це підходить для
прасування складок на підвішеному одязі, шторах тощо.
Економний режим пари/прасування без відпарювання
- Для економії енергії замість функції автоподачі пари можна
вибрати налаштування ECO на перемикачі налаштування пари,
отримуючи при цьому задовільні результати прасування.
- Для прасування без пари виберіть налаштування висушування на
перемикачі налаштування пари.
Page 26

28
УКРАЇНСЬКА28
Безпечне автоматичне вимкнення (лише окремі моделі)
Функція безпечного автоматичного вимкнення автоматично вимикає
праску, якщо нею не користувалися протягом 30 секунд (коли вона
стоїть на підошві) або протягом 8 хвилин (коли вона стоїть на п'яті).
Засвітиться індикатор автоматичного вимкнення.
- Щоб праска знову нагрілася, підніміть її або трохи порухайте.
Індикатор автоматичного вимкнення згасає.
Чищення та догляд
Чищення
1 Від'єднайте праску від мережі та дайте їй охолонути.
2 Вилийте залишки води з резервуара для води через дверцята.
3 Витріть із підошви накип та інші відкладення вологою тканиною
з неабразивним (рідким) засобом для чищення.
Щоб підошва залишалася гладкою, уникайте жорсткого контакту
з металевими предметами. Ніколи не використовуйте шліфувальні
подушечки, оцет чи інші хімічні речовини для чищення підошви.
Швидке видалення накипу
ВАЖЛИВА ІНФОРМАЦІЯ. Щоб подовжити термін експлуатації
пристрою і забезпечити хорошу обробку парою, використовуйте
функцію швидкого видалення накипу кожного місяця. Якщо у Вашому
регіоні вода дуже жорстка, використовуйте цю функцію частіше.
Примітка. Перед використанням функції швидкого видалення накипу
праску має бути від'єднано від мережі щонайменше протягом 1 години і
вона має бути повністю холодна.
1 Поставте праску на рівну поверхню і посуньте вгору фіксатор
функції швидкого видалення накипу на задній панелі праски.
2 Вийміть лоток для швидкого видалення накипу.
3 Вилийте накип у лотку в раковину або смітник. Помийте лоток
водою з-під крана. Видаліть надлишок води з лотка.
Page 27
УКРАЇНСЬКА 29
Не наливайте у праску воду, оцет, речовини для видалення накипу
або інші хімічні речовини з отвору для швидкого видалення накипу.
Не мийте лоток оцтом, речовинами для видалення накипу або
іншими хімічними речовинами.
4 Витріть накип в отворі лотка для швидкого видалення накипу
вологою ганчіркою.
5 Вставте лоток назад у праску.
6 Посуньте донизу фіксатор функції швидкого видалення накипу.
Не використовуйте праску, коли лоток для швидкого видалення
накипу не зафіксовано.
Якщо Ви зламаєте або загубите лоток, зверніться до Центру
обслуговування клієнтів у своїй країні (контактну інформацію
шукайте в гарантійному талоні).
Функція Calc-Clean
ВАЖЛИВА ІНФОРМАЦІЯ. Щоб подовжити термін експлуатації праски,
крім використання функції швидкого видалення накипу, слід також
кожного місяця виконувати процедуру видалення накипу Calc-Clean.
Якщо у Вашому регіоні вода дуже жорстка або під час прасування із
підошви виходить накип, використовуйте цю функцію частіше.
29
1 Перевірте, чи праску від'єднано від мережі, а перемикач
налаштування пари встановлено в положення "без пари".
2 Наповніть резервуар для води до позначки MAX.
Не заливайте в резервуар для води оцет та інші речовини для
видалення накипу.
3 Під'єднайте праску до мережі та встановіть регулятор
температури в положення MAX.
4 Коли індикатор температури згасне, витягніть штепсель із
розетки.
5 Тримайте праску над раковиною. Утримуючи натисненою кнопку
Calc clean, легко трусіть праску вперед і назад, поки з резервуару
не виллється вся вода.
Під час видалення накипу з підошви також виходить пара та гаряча
вода.
Примітка. Якщо вода, що витікає із праски, все ще містить частинки
накипу, повторіть кроки 2–5.
Page 28

30 УКРАЇНСЬКА30
6 Вийміть лоток для швидкого видалення накипу, вилийте воду
з лотка. Тримайте праску вертикально, щоб змогла витекти
невелика кількість води.
7 Вставте лоток назад у праску та зафіксуйте його.
8 Під'єднайте праску до мережі та дайте їй нагрітися, щоб
висушити підошву.
9 Коли індикатор температури згасне, витягніть штепсель із
розетки.
10 Повільно ведіть праскою по шматку тканини, щоб видалити
плями від води на підошві.
Зберігання
1 Від'єднайте праску від мережі та спорожніть резервуар для води.
Дайте прасці охолонути в безпечному місці.
2 Намотайте шнур живлення на п'яту праски та зберігайте її на
п'яті.
Усунення несправностей
У цьому розділі зведено основні проблеми, які можуть виникнути під
час використання пристрою. Якщо Ви не в змозі вирішити проблему за
допомогою інформації, поданої нижче, відвідайте веб-сайт
www.philips.com/support для перегляду списку частих запитань або
зверніться до Центру обслуговування клієнтів у своїй країні (контактну
інформацію шукайте в гарантійному талоні).
Проблема Можлива причина Вирішення
Функція подачі
парового
струменя не
працює належним
чином (з підошви
витікає вода).
Ви використовували функцію
парового струменя надто
часто за дуже короткий
відрізок часу.
Ви використовували функцію
подачі парового струменя за
надто низької температури.
Перед тим як повторно використовувати
функцію подачі парового струменя, почекайте
кілька секунд.
Виберіть температуру прасування, за якої
можна використовувати функцію подачі
парового струменя (від ●●● до MAX).
Page 29

Проблема Можлива причина Вирішення
УКРАЇНСЬКА 31
31
Частки накипу та
інші забруднення
виходять із
підошви під час
прасування.
Із дверцят
резервуара для
води витікає вода.
Із задньої
частини праски
витікає вода або
виходить пара.
У підошві утворився накип. Скористайтеся функцією видалення накипу
(див. розділ "Чищення та догляд", підрозділ
"Функція Calc-Clean").
Переповнено резервуар для
води.
Неправильно зафіксовано
лоток для швидкого
видалення накипу.
Пошкоджено лоток для
швидкого видалення накипу.
Не наповнюйте резервуар для води вище
позначки MAX. Вилийте зайву воду з
резервуара для води.
Вийміть лоток для швидкого видалення накипу
та помийте його водою з-під крана. Шматком
тканини витріть накип в отворі задньої
частини праски. Встановіть лоток на місце
та зафіксуйте його. (Див. розділ "Чищення
та догляд", підрозділ "Функція швидкого
видалення накипу").
Зверніться до Центру обслуговування клієнтів
у своїй країні (контактну інформацію шукайте в
гарантійному талоні).
Page 30

32 ҚАЗАҚША
Кіріспе
Сатып алуыңызбен құттықтаймыз және Philips компаниясына қош
келдіңіз! Philips ұсынатын қолдауды толық пайдалану үшін өнімді келесі
торапта тіркеңіз: www.philips.com/welcome.
Өнімге шолу (1- сур.)
1 Бүрку қондырмасы
2 Су толтыру есігі
3 Бүрку түймесі
4 Бу слайдері
а. Dr y (Құрғату) параметр
b. ECO параметрі
c. Auto steam (Автоматты бу) параметрі
5 Буды күшейту триггері
6 Қауіпсіздік үшін автоматты өшіру жарығы (тек белгілі бір түрлер)
7 Қуат сымы
8 Температура индикаторының шамы
9 Су ыдысы
10 Автоматты бу басқару элементі бар температура дискі
11 Calc clean (Қақты тазалау) түймесі
12 Табан
13 Жылдам қақты тазалау құлпы
14 Жылдам қақты тазалау науасы
15 Зауыттық тақтайша
Маңызды
Құрылғыны пайдалану алдында бөлек маңызды ақпарат парақшасын
және осы пайдаланушы нұсқаулығын мұқият оқып шығыңыз.
Құжаттардың екеуін де болашақта анықтама алу үшін сақтаңыз.
Құрылғыны қолдану
Су ыдысын толтыру
Ескертпе: құрылғы шүмек суын пайдалануға арналған. Егер кермек су
аумағында тұрсаңыз, қақ тез жиналуы мүмкін. Сондықтан, құрылғының
қызмет көрсету мерзімін ұзарту үшін 100% дистильденген немесе
минералсыздандырылған суды пайдалану ұсынылады.
1 Су толтыру есігін ашыңыз.
2 Үтікті артқа еңкейтіп, су ыдысына ең жоғарғы көрсеткішіне дейін
шүмектен су толтырыңыз.
Ескертпе: су ыдысына MAX (ЕҢ ЖОҒ.) көрсеткішінен асырып су құюға
болмайды.
Су ыдысына әтір, сірке суын, крахмал, қақ түсіретін, үтіктеуді
жеңілдететін сұйықтықты немесе басқа химиялық заттарды құюға
болмайды.
Page 31
ҚАЗАҚША 33
3 Су толтыру есігін жабыңыз («шырт» еткен дыбыс шығады).
Температура және бу параметрі
1-кесте:
Ескерту: Төмендегі кестеде көрсетілгендей төмен температурада
булауды немесе буды күшейтуді пайдаланбаңыз. Болмаса, ыстық су
үтіктен ағуы мүмкін.
Мата түрі Температура
параметрі
Зығыр MAX (ЕҢ
ЖОҒ.)
Мақта ●●● Иә
Жүн ●● Жоқ
Жібек ●● Жоқ
Синтетикалық
мата мысалы
акрил, нейлон,
полиамид,
полиэстр)
1 Температураны реттеу дискін киім үшін тиісті параметрге орнату
үшін 1-кестені қараңыз.
2 Бу слайдерінде Auto steam (Автоматты бу) параметрін таңдаңыз.
Бұл үтік автоматты бу басқару элементімен жабдықталған. Таңдаған
температураға сай үтік ең жақсы нәтиже үшін оңтайлы мөлшерді
автоматты түрде қамтамасыз етеді.
3 Үтікті қойғышқа қойып, розеткаға қосыңыз. Температура
шамының жанғаны үтіктің қызып жатқандығын білдіреді.
4 Температура шамы өшсе, үтік дұрыс температураға жеткені және
үтіктеуді бастауға болады.
● Бу жоқ Жоқ
Автоматты бу
басқару элементі
Оңтайлы
мөлшерге дейін
автоматты түрде
реттеледі
Буды
күшейту
Иә
Page 32
ҚАЗАҚША34
Мүмкіндіктер
Бүрку функциясы
- Үтіктегелі жатқан затты сулау үшін бүрку түймесін басыңыз. Бұл
қатты қыртыстарды кетіруге көмектеседі.
Буды күшейту функциясы
- Қатты қыртыстарды кетіру үшін буды күшейтуге арналған буды
күшейту триггерін басып, жібере салыңыз.
Қосымша бумен үтіктеу
- Үтіктеу барысында қосымша бу беру үшін, буды күшейту түймесін
басып тұрыңыз.
Тігінен бу шығару
- Ілулі тұрған киімдердегі, перделердегі, т.б. қыртыстарды кетіру үшін
үтікті тігінен ұстап тұрып буды күшейту функциясын пайдалануға
болады.
Eco steam (Үнемді бу) параметрі / құрғақ үтіктеу
- Қуатты үнемдеп, сонда да қанағаттанарлық үтіктеу нәтижелерін
алу үшін бу слайдерінде Auto steam (Автоматты бу) орнына ECO
параметрін таңдауға болады.
- Бусыз үтіктеу үшін бу слайдерінде құрғақ параметрді таңдаңыз.
Page 33

ҚАЗАҚША 35
Қауіпсіздік үшін автоматты түрде өшіру режимі
(тек белгілі бір түрлерде)
Қауіпсіздік үшін автоматты түрде өшіру табанында тұрып 30
секунд бойы пайдаланылмаса немесе артқы тақтасында тұрып
8 минут бойы пайдаланылмаса үтікті автоматты түрде өшіреді.
Автоматты өшіру шамы жанады.
- Үтікті қайтадан қыздыру үшін көтеріңіз немесе кішкене
қозғаңыз. Автоматты өшіру шамы өшеді.
Тазалау және күту
Тазалау
1 Үтікті розеткадан ажыратыңыз және салқындатыңыз.
2 Қалған суды су ыдысынан су толтыру есігі арқылы төгіңіз.
3 Үтіктің табанындағы қоқымдарды немесе басқа қалдықтарды
дымқыл шүберекпен және жұмсақ (сұйық) тазалағышпен сүртіп
алыңыз.
Үтіктің астыңғы табанын тегіс етіп сақтау үшін, оны металды заттарға
қатты соғудан сақ болу керек. Үтіктің астыңғы табанын тазалау үшін
қыратын шүберек, сірке суын немесе басқа химиялық заттарды
қолдануға болмайды.
Жылдам қақты тазалау
МАҢЫЗДЫ: құрылғының қызмет көрсету мерзімін ұзарту және жақсы
булау өнімділігін сақтау үшін жылдам қақты тазалау функциясын әр 1
ай бір рет пайдаланыңыз. Егер сіздің аймақтағы су өте кермекті болса,
осы функцияны жиірек пайдаланыңыз.
Ескертпе: жылдам қақты тазалау функциясын пайдаланбай тұрып
үтікті кемінде 1 сағатқа розеткадан ажырату және толығымен
салқындату керек.
1 үтікті тегіс бетке қойыңыз және үтіктің артындағы жылдам
қақтан тазалау құлпын жоғары итеріңіз.
2 Жылдам қақты тазалау науасын шығарыңыз.
3 Науадағы қақты шұңғылшаға немесе қоқыс шелегіне төгіңіз.
Науаны шүмек суын пайдаланып тазалаңыз. Науадан бүкіл артық
суды кетіріңіз.
Page 34
ҚАЗАҚША36
Жылдам қақты тазалау саңылауы арқылы үтікке суды, сірке суын, қақ
түсіргіштерді немесе басқа химиялық заттарды құймаңыз.
Науаны жуу үшін сірке суын, қақ түсіргіштерді немесе басқа
химиялық заттарды пайдаланбаңыз.
4 Жылдам қақты тазалау науасының саңылауындағы қақты ылғалды
шүберекпен сүртіп алыңыз.
5 Науаны қайтадан үтікке кіргізіңіз.
6 Жылдам қақты тазалау құлпын төмен итеріңіз.
Жылдам қақты тазалау науасы құлыпталмаған болса, үтікті
пайдаланбаңыз.
Науаны сындырып немесе жоғалтып алсаңыз, сіздің елдегі
тұтынушыларды қолдау орталығына хабарласыңыз (байланыс
мәліметтерін дүниежүзілік кепілдік парақшасында қараңыз).
Қақты тазалау функциясын
МАҢЫЗДЫ: жылдам қақты тазалау функциясына қоса, сондай-ақ,
үтіктің қызмет көрсету мерзімін ұзарту үшін қақты тазалауды әр 1
ай орындау керек. Егер сіздің аймақтағы су өте кермекті болса немесе
үтіктеу кезінде табаннан қақ шығып жатқанын көрсеңіз, бұл
функцияны жиірек пайдаланыңыз.
1 Үтік розеткадан ажыратылғанын және бу слайдері құрғақ
параметрге орнатылғанын тексеріңіз.
2 Су ыдысын MAX (ЕҢ ЖОҒ.) көрсеткішіне дейін толтырыңыз.
Су ыдысына сірке суын немесе қақ кетіретін сұйықтықтарды құймаңыз.
3 Үтікті розеткаға қосып, температураны реттеу дискін MAX (ЕҢ
ЖОҒ.) мәніне орнатыңыз.
4 Температура шамы өшкеннен кейін үтікті розеткадан суырыңыз.
5 Үтікті шұңғылша үстінде ұстаңыз. Қақты тазалау түймесін басып
тұрып, үтікті су ыдысындағы бүкіл су пайдаланылып біткенше
алға-артқа жайлап шайқаңыз.
Қақ сумен шайылып кетеді, қайнаған су және бу үтіктің табанынан
шыға бастайды.
Ескертпе: үтіктен шыққан суда әлі де қақ бөлшектері бар болса,
2 - 5 қадамдарын қайталаңыз.
6 Жылдам қақты тазалау науасын шығарыңыз, науадағы суды
төгіңіз. Өте шағын су мөлшерінің ағып шығуына мүмкіндік беру
үшін үтікті тігінен ұстаңыз.
7 Науаны қайтадан үтікке салып, құлыптаңыз.
Page 35
ҚАЗАҚША 37
8 Үтікті розеткаға қосып, табан құрғауы үшін қыздырыңыз.
9 Температура көрсеткіш шамы өшкеннен кейін үтікті розеткадан
суырыңыз.
10 Табандағы су дақтарын кетіру үшін үтікті жайлап шүберектің
үстімен жүргізіңіз.
Сақтау
1 Үтікті розеткадан суырыңыз және су ыдысын босатыңыз. Үтікті
қауіпсіз орында суытып алыңыз.
2 Қуат сымын үтіктің артқы тақтасының айналасында орап,
ұстағышында сақтаңыз.
Ақаулықтарды шешу
Бұл тарауда құралда ең жиі кездесетін мәселелер жинақталған.
Төмендегі ақпараттың көмегімен мәселені шеше алмасаңыз, жиі
қойылатын сұрақтар тізімін көру үшін www.philips.com/support
торабына кіріңіз немесе еліңіздегі Тұтынушыларды қолдау орталығына
хабарласыңыз (байланыс мәліметтерін дүниежүзілік кепілдік
парақшасынан қараңыз).
Мәселе Мүмкін себеп Шешімі
Буды күшейту функциясы
дұрыс жұмыс істемейді
(үтіктің табанынан су
тамшылап тұр).
Үтіктеп жатқанда, үтіктің
табанынан қоқымдар мен
қалдықтар шығып жатыр.
Су толтыру есігінен су
ағады.
Мүмкін сіз қысқа уақыт
аралығында бу ағымы
функциясын тым жиі
қолданып жіберген боларсыз.
Буды күшейту функциясын
өте төмен температурада
пайдаланғансыз.
Табанның ішінде қақ
жиналған.
Су ыдысын шамадан тыс
толтырғансыз.
Буды күшейту функциясын
пайдаланбай тұрып бірнеше секунд
бойы күтіңіз.
Буды күшейту функциясын
пайдалануға болатын үтіктеу
температурасын (●●● - MAX
(ЕҢ ЖОҒ.)) орнатыңыз.
Қақты тазалау функциясын
пайдаланыңыз («Тазалау және күту»
тарауын, «Қақты тазалау функциясы»
бөлімін қараңыз).
Су ыдысына MAX (ЕҢ ЖОҒ.)
көрсеткішінен асырып су құюға
болмайды. Артық суды су ыдысынан
төгіңіз.
Page 36

ҚАЗАҚША38
Булы үтік
Бақылауда жасап шығарған: “Philips Consumer Lifestyle B.V.”, Туссендиепен 4, 9206 АД, Драхтен,
Нидерланды
Импортшы:
«ЖШҚ Филипс», Сергей Макеев көшесі, 13 үй жән
123022 Мәскеу қаласы, Ресей Құрамасы, тел. +7 (495) 937 93 00
GC451X
GC452X
Үйде пайдалануға арналған.
Ток соғудан қорғау класы: 1-класс
Өнімнің жасалған күнін сериялық нөмірін анықтауға болады (xxxxYYWWxxxxxx, мұнда YY – жыл,
W
Жасалған күні кейбір үлгілерде мынадай кодтар түрінде басылуы мүмкін: YYWW, YYWWx, YYWWx
немесе xYYWWxxxx. Өнімнің жасалған күнін анықтау қиын болған жағдайда қолдау алу үшін Philip
компаниясының қоңырау шалу орталығына хабарласыңыз
Мәселе Мүмкін себеп Шешімі
Үтіктің артқы бөлігінен су
немесе бу шығады.
Жылдам қақты тазалау
науасын дұрыстап
құлыптамағансыз.
Жылдам қақты тазалау
науасы зақымдалған.
е
Жылдам қақты тазалау науасын
шығарыңыз және шүмек суын
пайдаланып тазалаңыз. Шүберекпен
үтіктің артқы бөлігіндегі саңылаудағы
қақты сүртіп алыңыз. Науаны орнына
қойып, құлыптаңыз. («Тазалау және
күту» тарауын, «Жылдам қақты
тазалау функциясы» бөлімін қараңыз).
Еліңіздегі тұтынушыларды қолдау
орталығына хабарласыңыз (байланыс
мәліметтерін дүниежүзілік кепілдік
парақшасынан қараңыз).
-
> 2000-2400W, 220-240V, 50-60Hz
-
> 2200-2600W, 220-240V, 50-60Hz
W – апта нөмірі, x – кез келген таңба). Мысалы: AJ021025123456 – жасалған күні: 25 апта 2010 жыл.
.
x
s
Page 37

Page 38

 Loading...