How it Works
Log In / Sign Up
Buy Points
How it Works
FAQ
Contact Us
Questions and Suggestions
Users
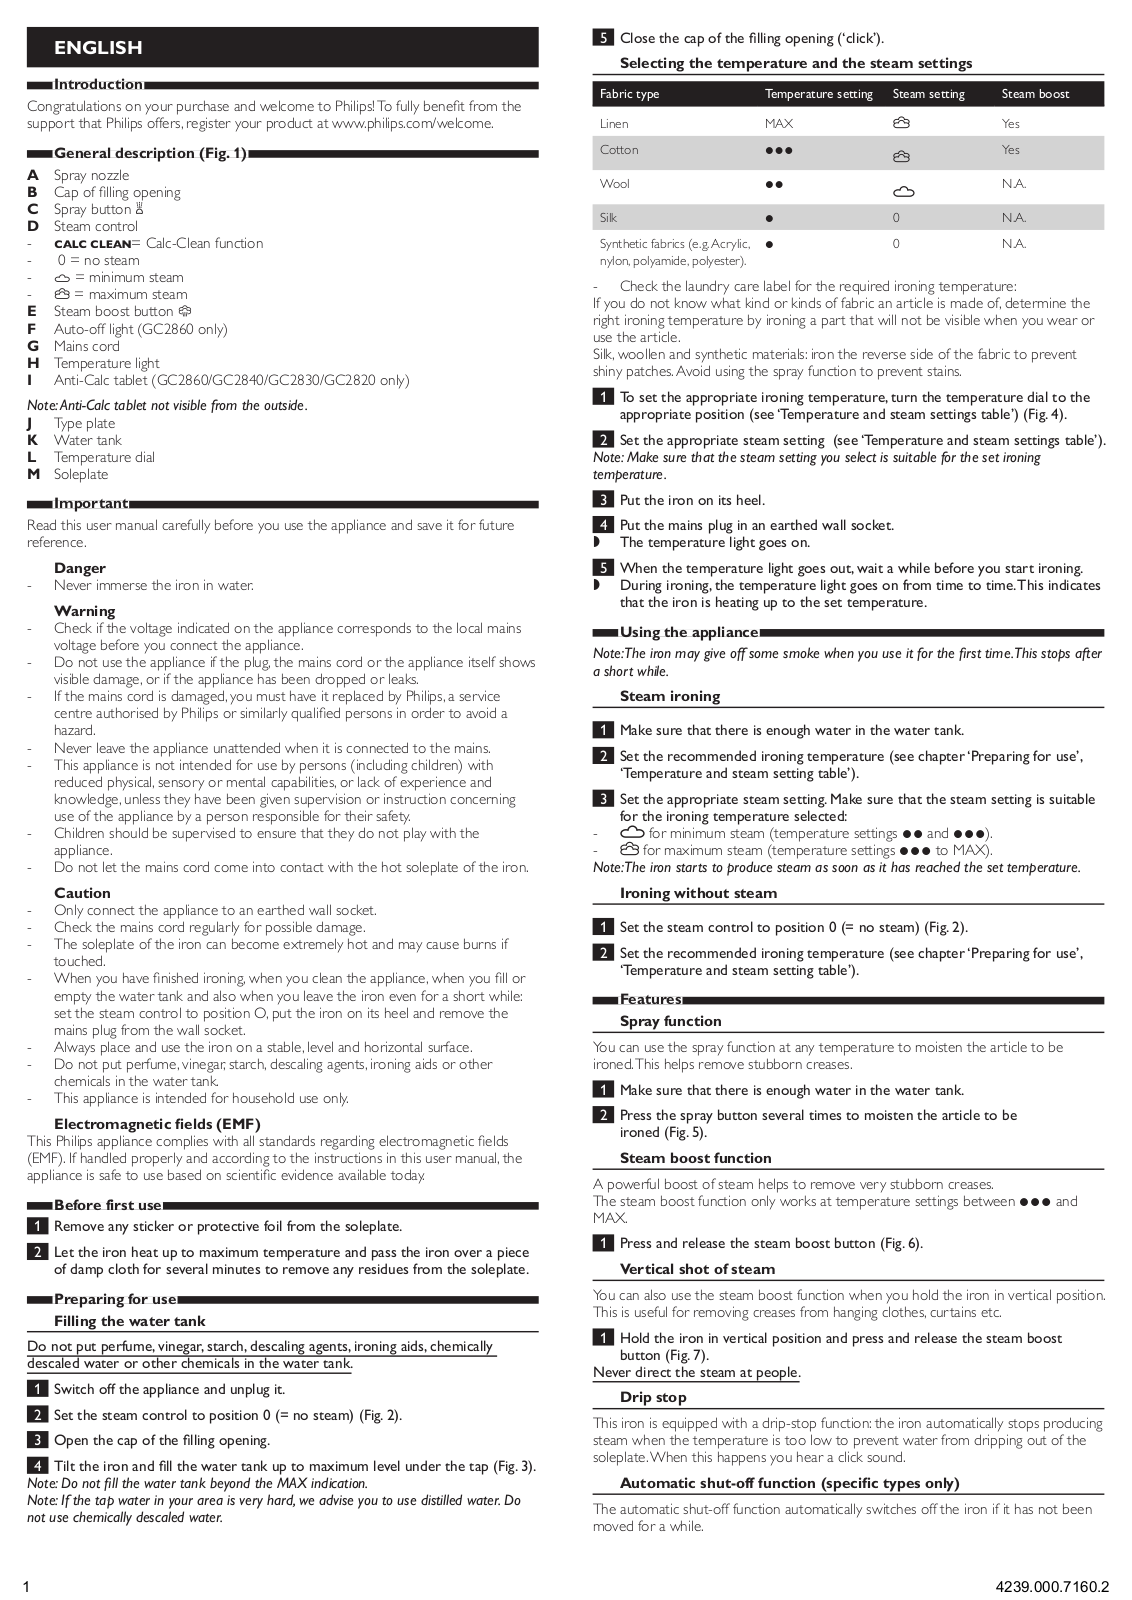
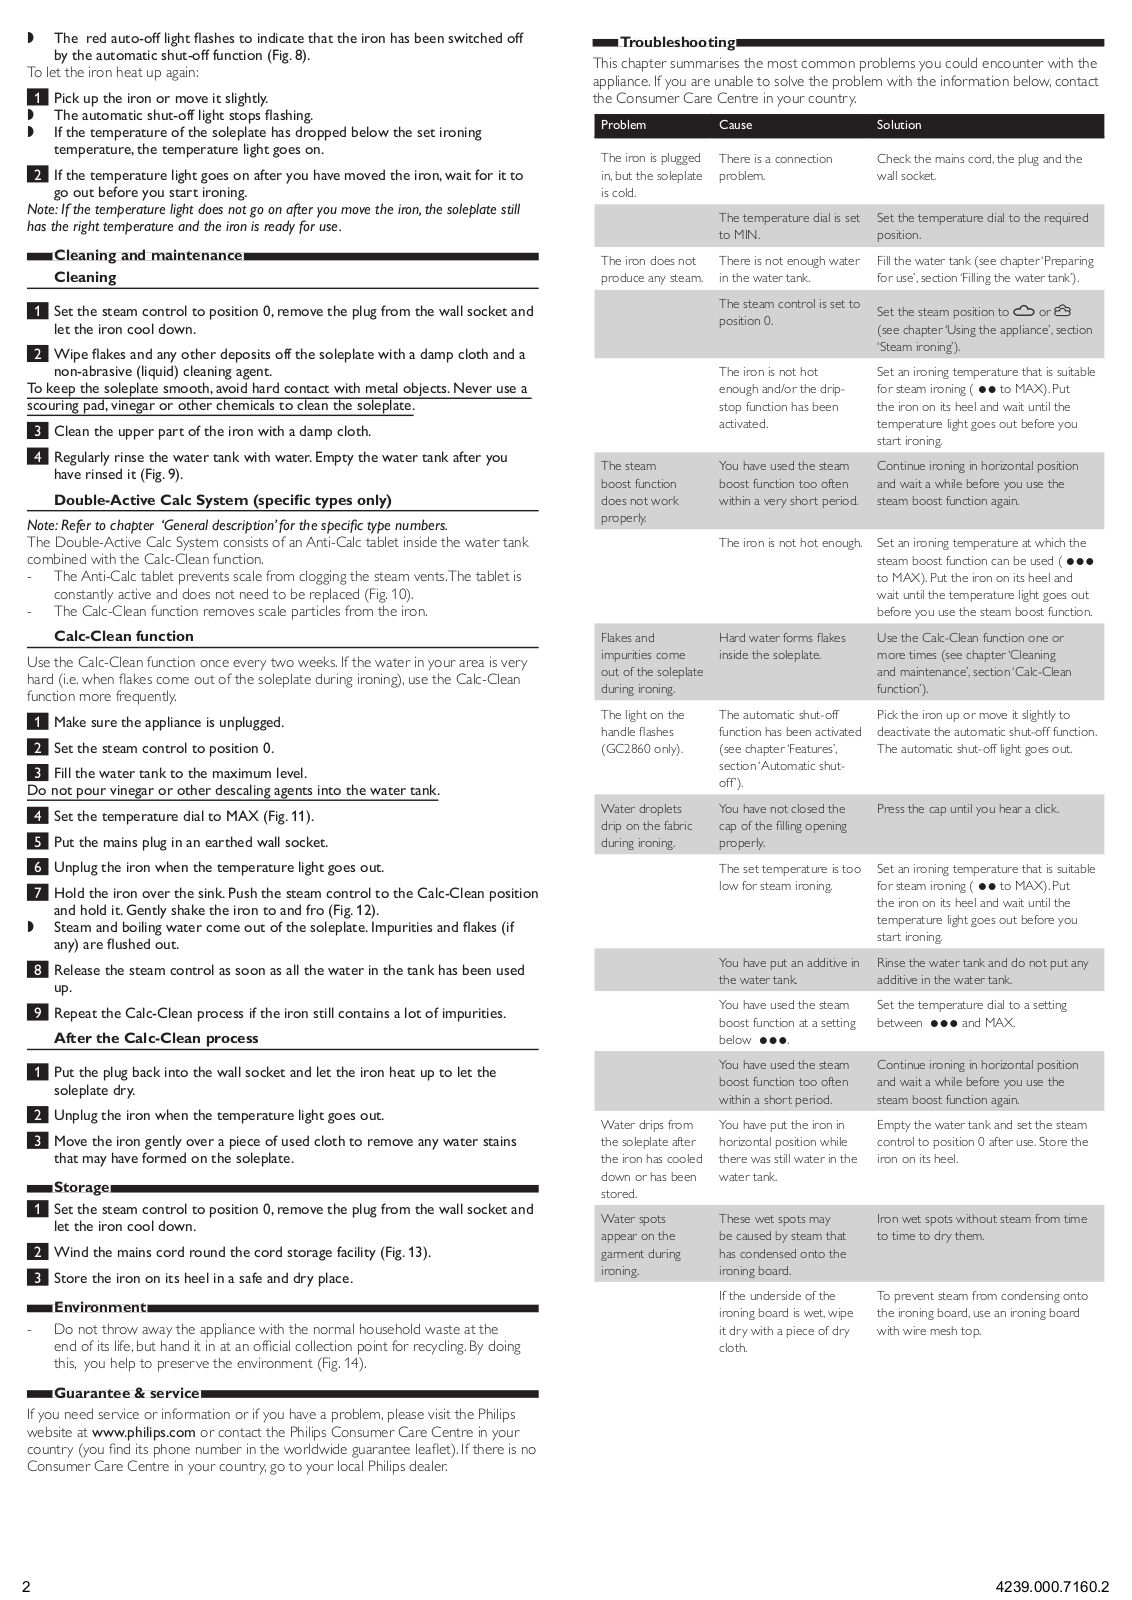
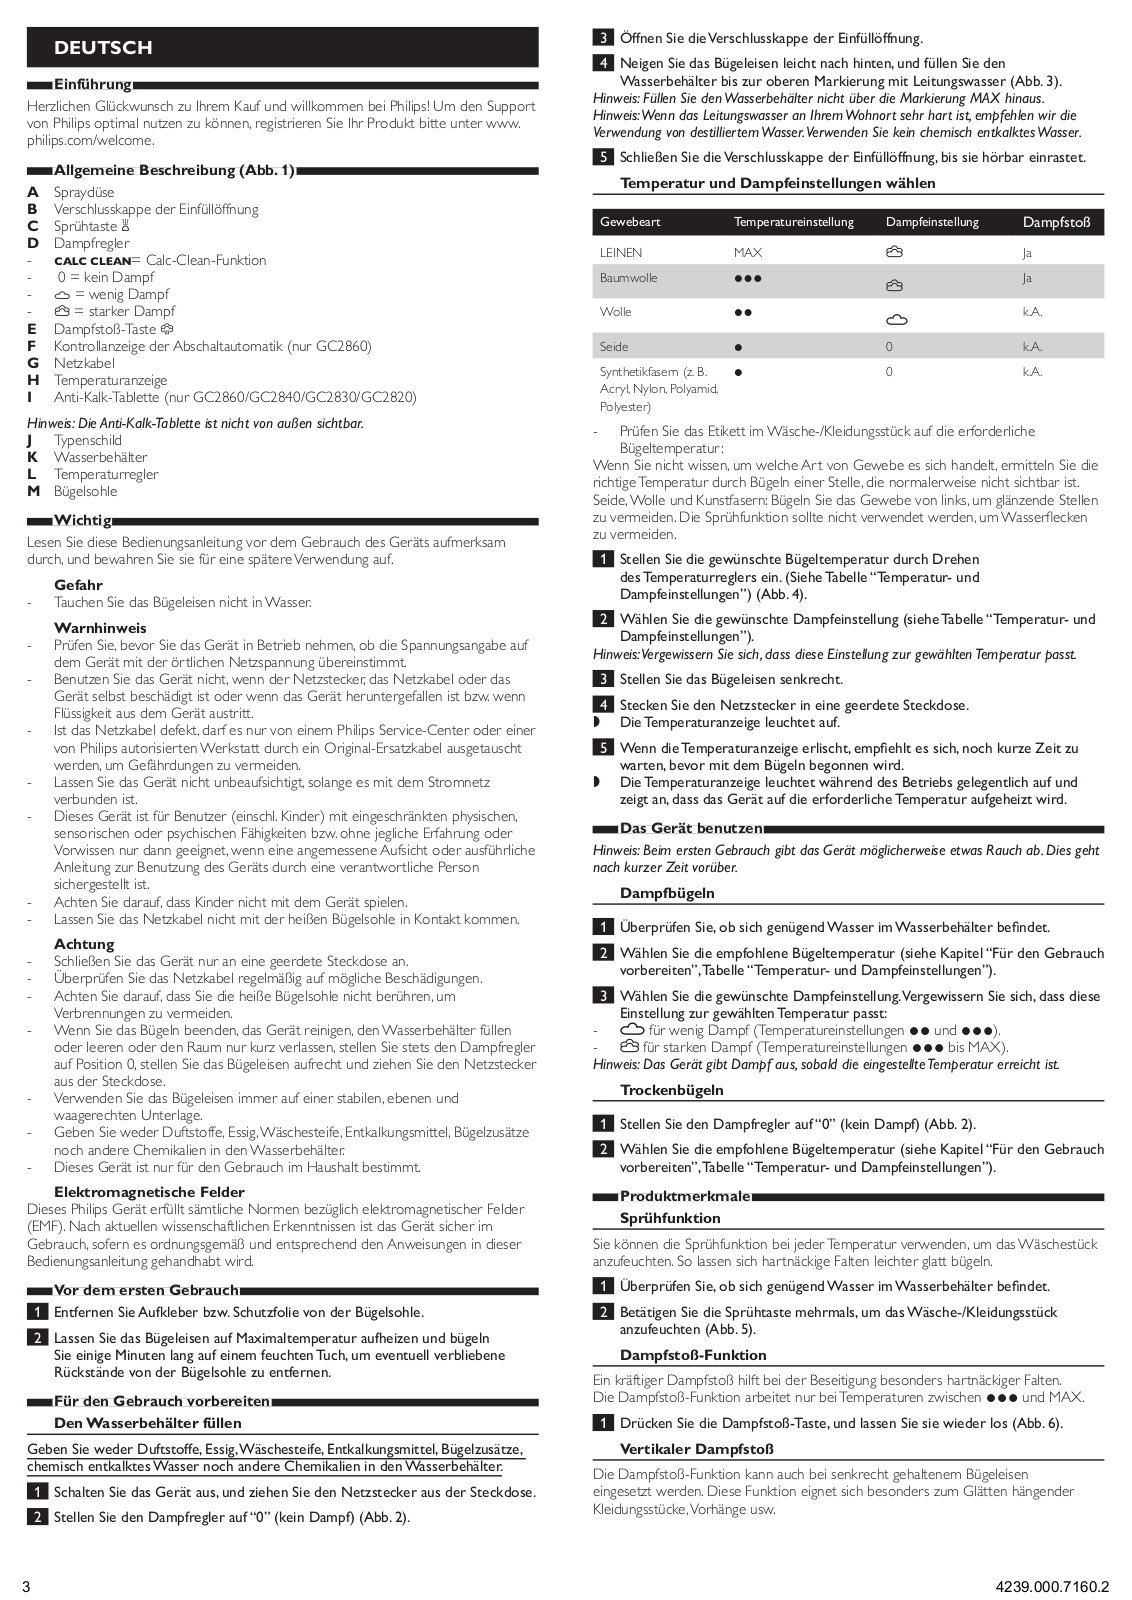
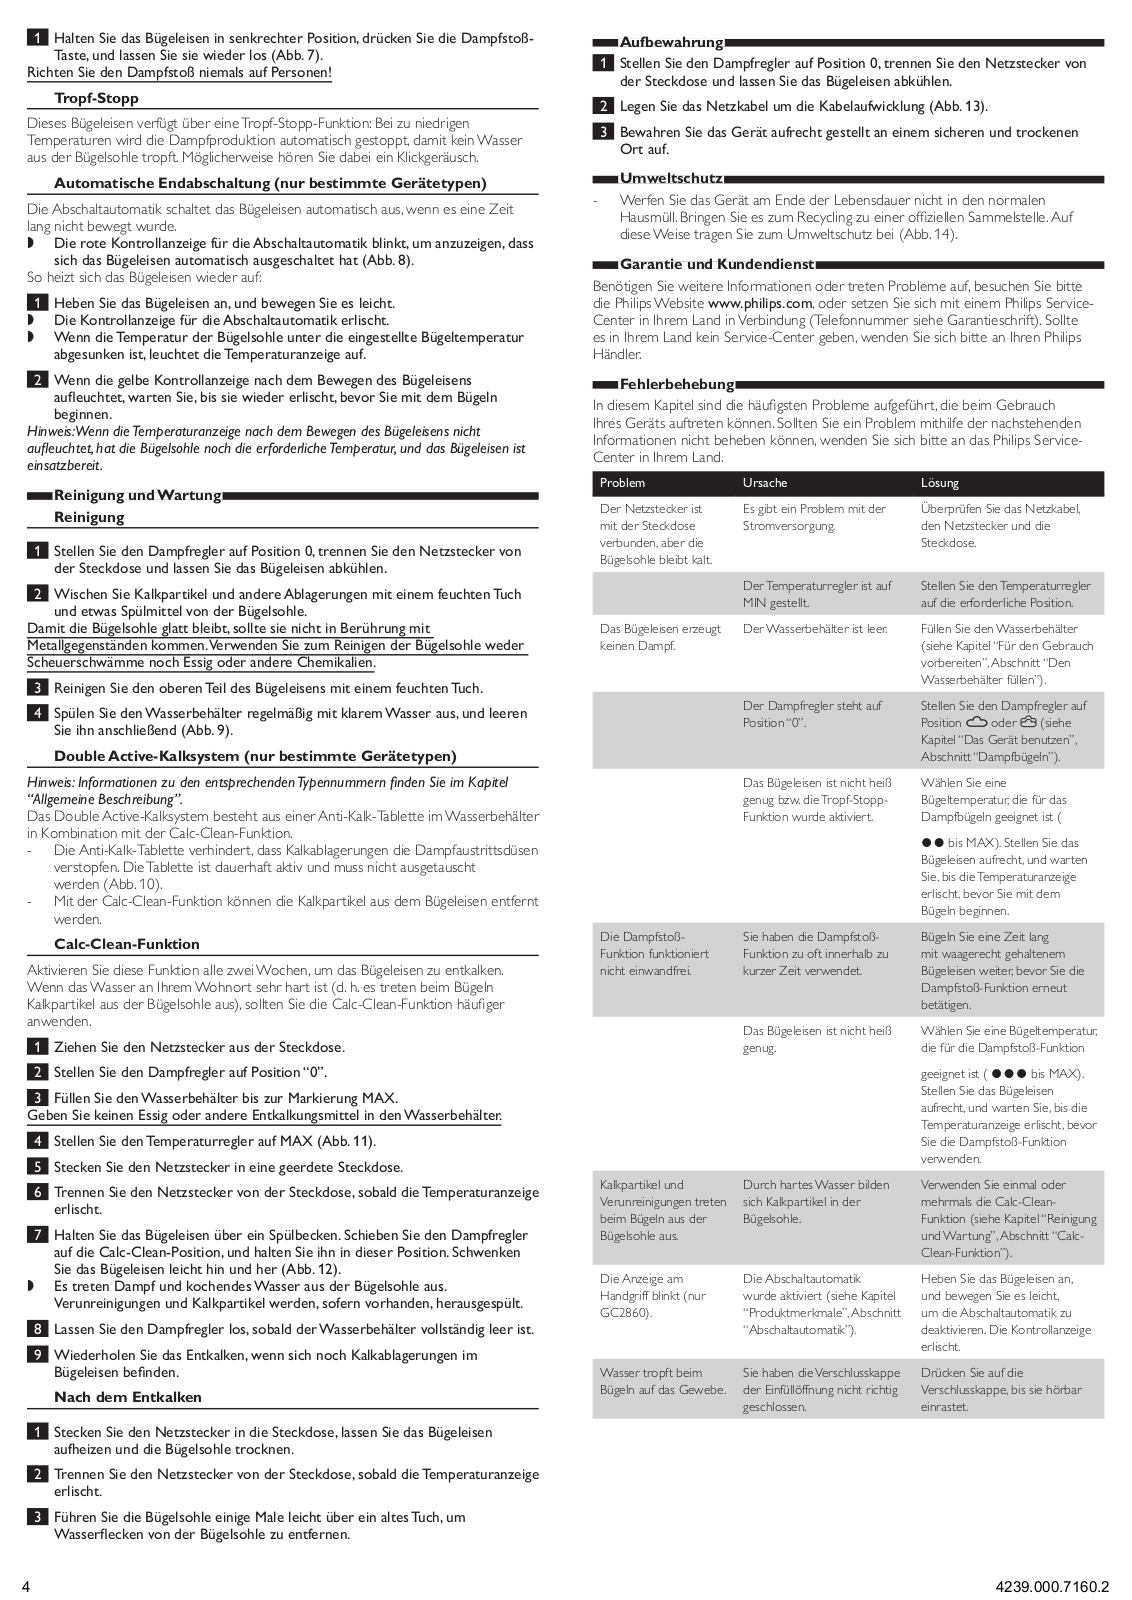
PHILIPS
Loading...
G
GC2650/07
GC2652/03
GC2670
GC2670-20
3
GC2670/26
GC2671
GC2672
GC2672/40
GC2672/40R1
GC2672/49
GC2673/80
GC2673/89
GC2675
GC2675/21
GC2675/25
GC2675/85R1
GC2675/87
GC2676
3
GC2676/20
3
GC2676/28
2
GC2676/29
2
GC2678/30
2
GC2678/30R1
GC2678/36
GC2678/38
GC2678/39
GC2700 Series
GC2710
2
GC2710/02
2
GC2710/07
GC2710/27
GC2720/02
GC2730
2
GC2730/02
GC2730/07
GC2800
3
GC2800 Series
4
GC2805
GC2805/02
GC2806
2
GC2806/02
GC2807
GC2807/02
GC2810/02
GC2810/12
GC2820
3
GC2820/02
2
GC2821/02
4
GC2830/02
GC2830/12
GC2840-02
2
GC2860
2
GC2860/02
GC2860/12
GC2900
GC2900 series
3
GC2905/02
GC2905/50
2
GC2906/02
GC2906/70
GC2907/02
GC2907/20
GC2910/02
GC2910/20
GC2910/23
GC2910/26
GC2910/27
GC2910/28
GC2910/29
GC2920-02
2
GC2920/07
GC2920/27
GC2920/70
3
GC2920/71
GC2920/76
GC2930-02
2
GC2930/07
GC2930/12
GC2930/27
GC2930/30
GC2930/35
2
GC2930/36
GC2930/38
GC2930/39
GC293-30
GC2960
2
GC2960/07
GC2960/12
2
GC2960/22
GC2960/27
GC2960/42
GC2960/50
2
GC2960/51
GC2960/55
GC2960/56
GC2960/58
GC2960/59
GC2965
2
GC2965/02
GC2965/15
Loading...
Loading...
Nothing found
GC2840-02
leaflet
2 pgs
1 Mb
0
User Manual
15 pgs
952.54 Kb
0
Table of contents
Loading...
PHILIPS GC2840-02 User Manual
...
PHILIPS User Manual
Download
Specifications and Main Features
Frequently Asked Questions
User Manual
Download
Page 1
Page 2
Page 3
Page 4
Page 5
Page 6
Page 7
Page 8
Page 9
Page 10
Page 11
Page 12
Page 13
Page 14
Page 15
Loading...
+
hidden pages
Unhide
You need points to download manuals.
1 point = 1 manual.
You can buy points or you can get point for every manual you upload.
Buy points
Upload your manuals
 Loading...