

Page 1
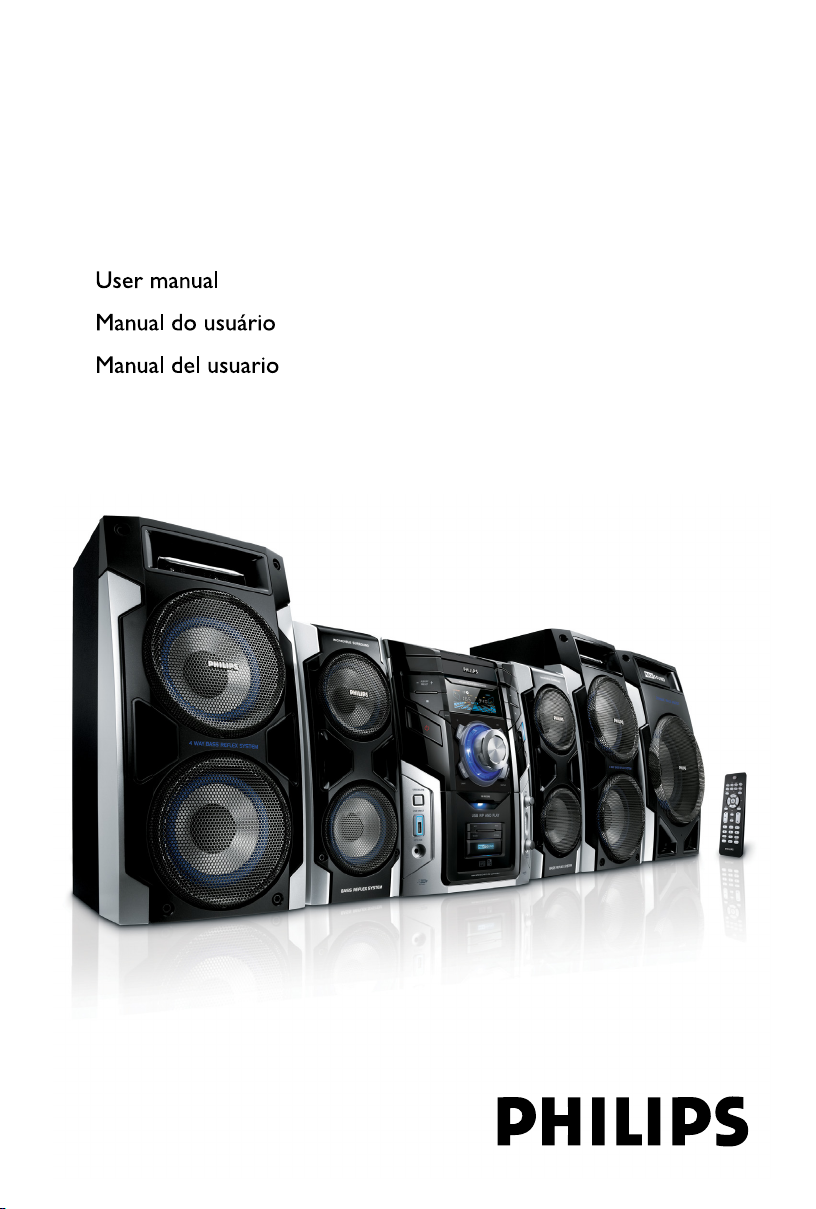
MP3-CD Mini Hi-Fi System
Register your product and get support at
www.philips.com/welcome
FWM996
Page 2
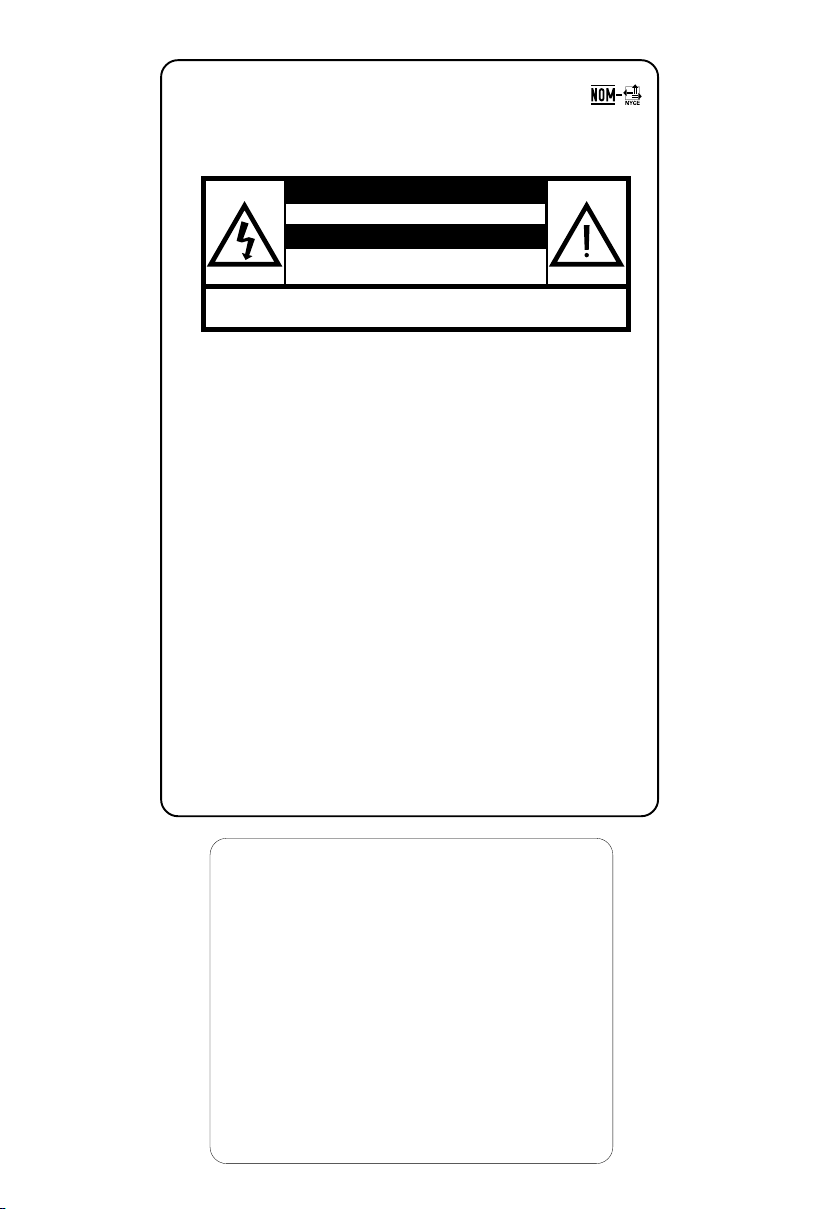
México
Es necesario que lea cuidadosamente su instructivo de
manejo.
PRECAUCIÓN - ADVERTENCIA
No abrir, riesgo de choque eléctrico
Verifique que el voltaje de alimentación
sea el requerido para su aparato
Para evitar el riesgo de choque eléctrico, no quite la tapa.
En caso de requerir servicio, dirijase al personal calificado.
Descripción: Minisistema de Audio
Modelo: FWM996/55
Alimentación: 110–127 / 220–240V~ ; 50/60 Hz
subwoofer each)
Consumo: 90W (for the main unit )
Importador: Philips Mexicana, S.A. de C.V.
Domicilio: Av. La Palma No.6
Localidad y Tel: Edo. de México C.P. 52784
Exportador: Philips Electronics HK, Ltd.
País de Origen: China
Nº de Serie: ______________________________
LEA CUIDADOSAMENTE ESTE INSTRUCTIVO
ANTES DE USAR SU APARATO.
ATENCIÓN
(for the main unit and the
100W (for the subwoofer)
Col. San Fernando La Herradura
Huixquilucan
Tel.52 69 90 00
AVISO IMPORTANTE
Philips Mexicana, S.A. de C.V.no se hace
responsable por daños o desperfectos causados por:
– Maltrato, descuido o mal uso, presencia de
insectos o roedores (cucarachas, ratones etc.).
– Cuando el aparato no haya sido operarado
de acuerdo con el instructivo del uso, fuera
de los valores nominales y tolerancias de las
tensiones (voltaje), frecuencia (ciclaje) de
alimentación eléctrica y las características
que deben reunir las instalaciones auxiliares.
– Por fenómenos naturales tales como:
temblores, in
eléctricas, rayos etc. o delitos causados por
terceros (choques asaltos, riñas
2
undaciones, incendios,descargas
, etc.).
Page 3

1
2
3
§
∞
≤
£
3
4
5
6
7
8
9
0
!
@
#
™
¡
)
(
*
&
^
%
$
3
Page 4

CAUTION
Use of controls or adjustments or
performance of procedures other
than herein may result in hazardous
radiation exposure or other unsafe
operation.
ATENCIÓN
El uso de mando o ajustes o la
ejecucción de métodos que no sean
los aquí descritos puede ocasionar
peligro de exposición a radiación.
CUIDADO
A utilização de comandos ou ajustes
ou a execução de procedimentos
diferentes dos descritos neste manual
podem provocar uma exposição a
radiações perigosas ou outras
operações inseguras.
(for tuner installation)
4
Page 5

Index
English ------------------------------------------------ 6
Español --------------------------------------------- 32
Português ------------------------------------------ 52
English
Español
Por tuguês
55
Page 6

Contents
English
General Information
Supplied accessories ............................................ 7
Environmental information ................................ 7
Safety information ................................................ 7
Preparations
Rear connections ............................................. 8~9
Optional connection .................................... 9~10
Inserting batteries into the remote
control .................................................................. 10
Power
Antenna connection
Speakers connection
Connecting a USB device or memory card
Connecting other equipment to your system
Radio Reception
Tuning to radio stations .................................... 19
Programming radio stations ...................... 19~20
Automatic programming
Manual programming
Tuning to preset radio stations ....................... 20
Changing tuning grid .......................................... 20
USB
Using a USB mass storage device ............ 21~22
Ripping function .................................................. 23
Tuner record timer setting .............................. 24
To deactivate the TIMER
To activate the TIMER
Controls
Controls on the system .................................... 11
Controls on remote control ........................... 12
Basic Functions
Plug and Play ........................................................ 13
Switching the system on ................................... 13
Switching the system to standby mode ........ 14
Power-saving automatic standby ..................... 14
Dim mode ............................................................ 14
Volume control ................................................... 14
Sound control .............................................. 14~15
MAC sound
DSC (Digital Sound Control)
DBB (Dynamic Bass Boost)
Incredible Surround
Karaoke ................................................................ 15
CD/MP3-CD/WMA Operations
Discs for playback .............................................. 16
About MP3 disc .................................................. 16
Loading discs ................................................ 16~17
Playing discs ......................................................... 17
Replacing discs during playback ...................... 17
Selecting a desired track/passage.................... 17
Selecting a desired Album/Title (MP3/WMA
disc only) .............................................................. 17
Different play modes: SHUFFLE and REPEAT ...
................................................................................ 18
Programming the disc tracks ........................... 18
Erasing the programme ..................................... 18
External Sources
Listening to external sources .......................... 25
Clock/Timer
Clock setting ....................................................... 26
Timer setting ................................................ 26~27
To deactivate the TIMER
To activate the TIMER
Sleep timer setting ............................................. 27
Maintenance.............................................. 28
Specifications ........................................... 29
Tr oubleshooting ............................ 30~31
6
Page 7

General Information
Congratulations on your purchase and welcome
to Philips!
To fully benefit from the support that Philips
offers, register your product at www.philips.com/
welcome.
IMPORTANT!
PLEASE NOTE THAT THE VOLTAGE
SELECTOR LOCATED AT THE REAR OF
THIS SYSTEM IS PRESET AT 220V FROM
THE FACTORY. FOR COUNTRIES THAT
OPERATE AT 110V-127V, PLEASE ADJUST
TO 110V-127V BEFORE YOU SWITCH ON
THE SYSTEM.
Supplied accessories
–2 AC power cords for the main unit and the
subwoofer each
–2 front speakers
–2 rear speakers
–1 subwoofer
– remote control with 2 AAA batteries
– AM loop antenna
– FM wire antenna
– DIN cable
– MP3 link cable
Environmental information
All unnecessary packaging has been omitted. We
have tried to make the packaging easy to
separate into three materials: cardboard (box),
polystyrene foam (buffer) and polyethylene (bags,
protective foam sheet).
Your system consists of materials which can be
recycled and reused if disassembled by a
specialised company. Please observe the local
regulations regarding the disposal of packaging
materials, exhausted batteries and old
equipment.
Safety information
● Before operating the system, check that the
operating voltage indicated on the typeplate (or
the voltage indication beside the voltage
selector) of your system is identical with the
voltage of your local power supply. If not, please
consult your dealer.
● Place the system on a flat, hard and stable
surface.
● Where the MAINS plug or an appliance coupler
is used as the disconnet device, the disconnet
device shall remain readily operable.
● Place the system in a location with adequate
ventilation to prevent internal heat build-up in
your system. Allow at least 10 cm (4 inches)
clearance from the rear and the top of the unit
and 5 cm (2 inches) from each side.
● The ventilation should not be impeded by
covering the ventilation openings with items,
such as newspapers, table-cloths, cur tains, etc.
● Do not expose the system, batteries or discs to
excessive moisture, rain, sand or heat sources
caused by heating equipment or direct sunlight.
● No naked flame sources, such as lighted candles,
should be placed on the apparatus.
● No objects filled with liquids, such as vases, shall
be placed on the apparatus.
● Don’t expose the system to dripping or
splashing.
● Install this unit near the AC outlet and where the
AC power plug can be reached easily.
● The lens may cloud over when the system is
suddenly moved from cold to warm
surroundings, making it impossible to play a disc.
Leave the system in the warm environment until
the moisture evaporates.
● The mechanical par ts of the set contain self-
lubricating bearings and must not be oiled or
lubricated.
● Batteries (batter y pack or batteries installed)
shall not be exposed to excessive heat such as
sunshine, fire or the like.
● When the system is switched to Standby
mode, it is still consuming some power.
To disconnect the system from the
power supply completely, remove the AC
power plug from the wall socket.
English
7
Page 8

Preparations
Fix the claw
to the slot
1
2
3
AM
English
FM antenna
B
AM antenna
Front
speaker
(right)
AC power cord
Rear speaker
(right)
Rear connections
The type plate is located at the rear of the
system.
A Pow er
● If your system is equipped with a Voltage
Selector, set the VOLTAGE SELECTOR to the
local power line voltage.
● Before connecting the AC power cords of the
main unit and the subwoofer to the wall outlet,
ensure that all other connections have been
made.
● To turn on or off the subwoofer, press POWER
switch located on the back of the subwoofer.
WARNING!
–For optimal performance, use only the
original power cable.
–Never make or change any connections
with the power switched on.
– High voltage! Do not open.You run the
risk of getting an electric shock.
– The machine does not contain any userserviceable parts.
– Modification of the product could result
in hazardous radiation of EMC or other
unsafe operation.
8
Front
speaker
(left)
C
CC
A
C
A
Subwoofer
To avoid overheating of the system, a safety
circuit has been built in. Therefore, your
system may switch to Standby mode
automatically under extreme conditions. If
this happens, let the system cool down
before reusing it (not available for all versions).
B Antennas Connection
Connect the supplied AM loop antenna to the
AM ANTENNA terminal. Adjust the position of
the antenna for optimal reception.
AM Antenna
C
A
AC power cord
Rear speaker
(left)
Page 9

Preparations
● Position the antenna as far as possible from a TV,
VCR or other radiation source.
FM Antenna
● For better FM stereo reception, connect an
outdoor FM antenna to the FM ANTENNA
terminal.
C Speakers Connection
Front Speakers
● Connect the speaker wires to the SPEAKERS
terminals on the main unit, right speaker to "R"
and left speaker to "L", white wires to "+" and
black wires to "-" of the woofer connection
terminals, blue wires to "+" and black wires to
"-" of the tweeter connection terminals.
Subwoofer
● Connect the supplied DIN cable to
SUBWOOFER jack on the main unit and to
FROM MAIN jack on the subwoofer.
Rear Speakers
● Connect the speaker wires to the SPEAKERS
terminals on the subwoofer, right speaker to “R”
and left speaker to “L”, purple wires to "+" and
black wires to "-" .
1
● Fully inser t the stripped por tion of the speaker
wire into the terminal as shown.
Notes:
–For optimal sound performance, use the
supplied speakers.
– Do not connect more than one speaker to any
one pair of +/- speaker terminals.
– Do not connect speakers with an impedance
lower than the speakers supplied. Please refer to
the SPECIFICATIONS section of this manual.
2
Optional connection
The optional equipment and connecting cords
are not supplied. Refer to the operating
instructions of the connected equipment for
details.
Connecting a USB device or memory
card
By connecting a USB mass storage device
(including USB flash memory, USB flash players
or memory cards) to the Hi-Fi system, you can
enjoy the device's stored music through the
powerful speakers of Hi-Fi system.
● Insert the USB device's USB plug into the
socket on the set.
OR
for the devices with USB cables:
1 Insert one plug of the USB cable (not supplied)
to the socket on the set.
2 Insert the other plug of the USB cable to the
USB output terminal of the USB device.
OR
for the memory card:
1 Insert the memory card into a card reader (not
supplied).
2 Use a USB cable (not supplied) to connect the
card reader into the socket on the set.
Connecting a non-USB device
Using AUX IN (white/red jacks)
● Use the audio cables (white/red, not supplied) to
connect AUX IN (L/R) jacks of the main unit
(located on the back panel ) to the
corresponding AUDIO OUT jacks on an
external device (such as TV or VCR).
Note:
– If you are connecting equipment with a mono
output (a single audio out terminal), connect it to
the AUX left terminal. Alternatively, you can use a
“single to double” cinch cable (the output sound
still remain mono).
English
9
Page 10

Preparations
English
Using MP3 LINK (3.5 mm jack )
● Use a MP3 link cable (supplied) to connect
MP3 LINK jack of the main unit (3.5 mm,
located on the front panel) to an AUDIO OUT
or headphone jack on an external equipment
(such as CD player, or VCR).
Inserting batteries into the
remote control
Insert two batteries (Type R03 or AAA,
supplied) into the remote control with the
correct polarity as indicated by the "+" and
"-" symbols inside the battery compar tment.
3
1
2
CAUTION!
– Remove batteries if they are exhausted
or will not be used for a long time.
– Do not use old and new or different
types of batteries in combination.
– Batteries contain chemical substances, so
they should be disposed of properly.
10
Page 11

Controls (illustrations on page 3)
Controls on the system
1 Disc tray
2 Display screen
– to view the current status of the system.
3 Mode Selection
ALBUM/PRESET -/+
for MP3-CD .............
for Tuner .....................
for Clock/Timer ..... to set the hour.
for Clock .................... to switch between 12 hour
Ç
for CD/ MP3-CD .. to stop playback or to clear a
for Clock .................... to exit clock setting.
ÉÅ
for CD/ MP3-CD .. to star t or interrupt playback.
S / T
for MP3-CD ............ to select previous/next title.
for CD ........................to skip to the beginning of
for CD/MP3-CD/USB/WMA
......................................... (press and hold) to search
for Tuner .....................to tune to a lower or higher
for Clock/Timer .... to set the minute.
to select previous/next album.
to select a preset radio station
and 24 hour display.
programme.
the current, previous, or next
track.
backward/forward.
radio frequency.
4 MODE
–to select various repeat modes or the shuffle
play mode for a disc.
5 IS (Incrediable Surround)
– to activate or deactivate the surround sound
effect.
6 B
– to switch the system on or to standby mode.
7 Source selection – to select the following:
DISC
– to select disc tray 1, 2 or 3.
TUNER
– to select waveband: FM or AM.
USB
– to select USB source.
AUX/MP3 LINK
– to select the input for an additional appliance:
AUX.
– to select the input for an additional appliance:
MP3 LINK.
8 LIGHT
– to select different lighting effects for some
buttons on the main unit (Light 1/2/3/4/Off).
9 USB RECORD
– to copy music to an external portable USB
storage device.
0 USB DELETE
–
to delete music stored on the external USB device.
! USB DIRECT
– jack for the external USB mass storage device.
@ MP3 LINK jack
– to connect an external device.
# MAX SOUND
– to activate or deactivate the optimal mix of
various sound features.
$ KARAOKE ECHO VOL
– to adjust the echo level.
% MIC 1/2
– to connect microphone
^ DSC
– to selectdifferent types of preset sound equaliser
settings (OPTIMAL, TECHNO, ROCK or JAZZ).
& MCI VOL
– to adjust the mixing level for Karaoke
* DISPLAY
– to select disc information display mode.
( VOLUME
– to increase or decrease the volume.
) iR
– infrared sensor for remote control.
¡ DBB
– to select the desired bass boost level. (DBB 1,
DBB 2, DBB 3 or DBB OFF).
™ PROG/CLOCK
for CD/ MP3-CD .. to programme disc tracks.
for Tuner ..................... to programme preset radio
for Clock .................... to view or set the clock.
stations.
£ VAC
– to select different type of ambience-based
equaliser settings (HALL, CONCERT or CINEMA).
≤ DISC 1/2/3
– to select a disc tray for playback.
∞ OPEN•CLOSE
– to open or close the disc tray.
§ DISC CHANGE
– to change disc (s).
English
11
Page 12

Controls
English
Controls on remote control
1 B
– to switch the system on or to standby mode.
2 Source selection – to select the following:
CD 1/2/3
– to select disc tray 1, 2 or 3.
TUNER
– to select waveband: FM or AM.
AUX
– to select the input for an additional appliance:
AUX or MP3 LINK.
USB
– to select USB source.
3 CLOCK
– to view or set the clock.
4 MODE
– to select different play modes: e.g. REPEAT or
SHUFFLE (random order).
5 USB DELETE
– to delete music stored on the external USB
device.
6 Mode Selection
ALBUM -/ + (à / á)
for MP3-CD/USB/WMA
......................................... to select previous/next
album.
for CD/MP3-CD/USB/WMA
......................................... (press and hold) to search
backward/forward.
for Tuner .....................to tune to a lower or higher
radio frequency.
for Clock/Timer ..... to set the hour.
for Clock .................... to switch between 12 hour
and 24 hour display.
TITLE -/ + (í/ë)
for MP3-CD/WMA
........................................ to select previous/next title.
for CD ........................to skip to the beginning of
the current, previous, or next
track.
for Tuner .................... to select a preset radio
station.
for Clock ................... to set the minute.
7 DSC
– to select different types of preset sound
equaliser settings (OPTIMAL, TECHNO, ROCK
or JAZZ).
12
8 MAX
– to activate or deactivate the optimal mix of
various sound features.
9 VOL +/-
– to increase or decrease the volume.
0 DBB/IS (Incrediable Surround)
– to select the desired bass boost level. (DBB 1,
DBB 2, DBB 3 or DBB OFF).
– to activate or deactivate the surround sound
effect.
! Numeric Keypad (0-9)
– to input a track number of the disc.
@ PROGRAM
for CD/ MP3-CD .. to programme disc tracks.
for Tuner ..................... to programme preset radio
stations.
# DISPLAY
– to select disc information display mode.
$ Ç
for CD/ MP3-CD/WMA
to stop playback or to clear a
for Tuner ..................... to stop programming.
for Clock .................... to exit clock setting.
for Plug&Play ............ to exit plug&play mode.
ÉÅ
for CD/ MP3-CD/WMA
......................................... to start or interrupt playback.
programme.
% VAC
– to select different type of ambience-based
equaliser settings (HALL, CONCERT or CINEMA).
^ USB RECORD
– to copy music to an external portable USB
storage device.
& MUTE
– to mute or restore the volume.
* SLEEP (TIMER)
– to activate/deactivate or set the sleep/ wake-up
timer.
( DIM
– to select different levels of display brightness
(DIM 1/2/3/OFF).
Notes for remote control:
– First, select the source you wish to
control by pressing one of the source select
keys on the remote control (CD 1/2/3 or
TUNER, for example).
– Then select the desired function (ÉÅ,
í
,
ë
, for example).
Page 13

Basic Functions
English
IMPORTANT!
Before you operate the system, complete
the preparation procedures.
Plug and Play (for tuner installlation)
Plug and Play allows you to store all available
radio stations automatically.
First time setup/power up
1 When you turn on the main supply, "AUTO
INSTALL - PRESS PLAY" is displayed.
2 PressÉÅ to star t installation.
➜ "PLUG AND PLAY" .... "INSTALL" is
displayed, followed by "AUTO".
➜ All available radio stations with sufficient signal
strength will be stored automatically, starting
from FM and followed by AM band.
➜ When all the available radio stations are
stored or the memory for 40 presets are used,
the first preset radio station will be played.
To reinstall Plug and Play
1 In standby mode, press and holdÉÅ until
"AUTO INSTALL - PRESS PLAY" is displayed.
2 PressÉÅ again to star t installation.
➜ All previously stored radio stations will be
replaced.
To exit without storing the Plug and Play
● Press Ç.
➜ If you do not complete the Plug and Play
installation, the function will be restarted when
you next turn on the main supply again.
Notes:
– When the power is turned on, the disc tray may
open and close to initialise the system.
– If no stereo frequency is detected during Plug
and Play, "CHECK ANTENNA" will be displayed.
– During Plug and Play, if no button is pressed
within 15 seconds, the system will exit Plug and
Play mode.
Switching the system on
● Press 2.
➜ The system will switch to the last selected
source.
●
Press DISC (or DISC 1/2/3, CD 1/2/3),
TUNER, AUX/MP3 LINK (or AUX) or USB.
➜ The system will switch to the selected source.
● Press OPEN•CLOSE or DISC CHANGE.
➜ The system will switch to the disc source and
the disc tray will open.
13
Page 14

Basic Functions
English
Switching the system to standby
mode
In any other source mode
● Press 2.
➜ The clock will appear on the display when the
system is in standby mode.
Power-saving automatic standby
As a power-saving feature, the system will
automatically switch to Standby mode if you do
not press any buttons within 15 minutes after a
disc/USB has stopped playing.
Dim mode
You may select three levels of display brightness.
● Press DIM on the remote control to select :
DIM 1, DIM 2, DIM 3 or DIM OFF.
Volume control
Adjust VOLUME to increase (turn knob
clockwise or press VOL + on the remote
control) or decrease (turn knob anti-clockwise
or press VOL - on the remote control) the
sound level.
Karaoke
Connect a microphone (not supplied) to the
system allowing you to sing along with the music
source.
1 Connect a microphone to the MIC 1/2 jack.
● Before connecting the microphone, set the
microphone MIC VOL to the minimum level to
prevent howling sound.
2 Press DISC (or DISC 1/2/3, CD 1/2/3),
TUNER, AUX/MP3 LINK (or AUX) or
USB to select the source to be mixed and start
playback.
3 Adjust the volume level of the source with
VOLUME control.
4 Adjust the microphone volume with the
microphone MIC VOL control.
5 Adjust the echo level with the
KARAOKE ECHO VOL control.
Note:
–Keep the microphone away from the speakers to
prevent howling.
To switch off the volume temporarily
● Press MUTE on the remote control.
➜ Playback will continue without sound and the
MUTE is displayed.
● To restore the volume, press MUTE again or
increase/decrease the volume level.
LED definition
Normal Mode
Standby mode On
POWER ON On Half lighted On
DBB ON On
MAX ON On
VOLUME setting Flashes
USB Mode On
USB Ripping/deletion Flashes
14
SATNDBY
Indicator
DBB
Indicator
Light control
There are 6 button’s LEDs on the front panel of
the set. Different LEDs will turn on or flash in
different styles when the set is in different
situations.
Lighting in normal modes
As shown in the table below, by pressing (or
rotating) the corresponding buttons, the
respective LEDs light up or flash.
VOLUME
Indicator
USB
Indicator
USB
Ripping
Indicator
MAX
Indicator
Page 15

Basic Functions
Light mode demonstration
● Press once or repeatedly LIGHT on the set to
demonstrate different lighting styles.
● First press -> It flashes alternatively between the
three LEDs (STANDBY, DBB and USB) and
another three LEDs (VOLUME, USB Ripping and
MAX). (Three LEDs are used as a group with
simultaneous on and off.)
● Second press -> It flashes one LED by another
LED in the sequence of STANDBY, DBB, USB,
VOLUME, USB Ripping and MAX.
● Third press -> It flashes one LED by another
LED in a random order among all the LEDs.
● Four th press -> All the LEDs turn off.
● Fifth press -> It returns to the normal mode as
stated in the aforementioned table.
Sound control
For optimal sound listening, select only one
of the following navigation sound controls
at a time: MAX or DSC.
MAX Sound
MAX sound provides the best mixture of various
sound features (DSC, DBB, for example).
● Press MAX SOUND (or MAX on the remote
control) repeatedly.
➜ If activated, MAX ON is shown and MAX
SOUND button lights up.
➜ If deactivated, MAX OFF is displayed.
DSC (Digital Sound Control)
The DSC feature enables you to enjoy special
sound effects that have preset equaliser settings,
providing the best music reproduction.
● Press DSC to select : OPTIMAL, TECHNO,
ROCK or JAZZ.
➜ The selected DSC is shown.
DBB (Dynamic Bass Boost)
There are three DBB settings to enhance the
bass response.
● Press DBB (DBB/IS on the remote control) to
select : DBB 1, DBB 2, DBB 3 or DBB OFF.
➜ The selected DBB is shown and DBB button
lights up, except for DBB OFF mode.
Note:
– Some discs might be recorded in high
modulation, which causes a distortion at high
volume. If this occurs, switch off DBB or reduce the
volume.
Automatic DSC-DBB selection
The best DBB setting is generated automatically
for each DSC selection. You can manually select
the DBB setting that best suits your listening
environment.
English
Note:
– When MAX sound is selected, DBB 3 will switch
on.
Incredible Surround
The Incredible Surround magnifies the virtual
distance between the front speakers for an
incredibly wide, enveloping, stereo effect.
● Press IS on the set.
Or, press and hold DBB/IS on the remote
control.
➜ If activated, “INC SURR” is displayed.
➜ If deactivated, “IS OFF” is displayed.
15
Page 16

CD/MP3-CD/WMA Operations
2
2
1
1
English
IMPORTANT!
– This system is designed for regular discs.
Therefore, do not use any accessories such
as disc stabiliser rings or disc treatment
sheets, etc., as offered on the market,
because they may jam the changer
mechanism.
– Do not load more than one disc into each
tray.
Discs for playback
This system can playback all digital audio CD,
finalised digital audio CD-Recordable (CDR) discs
and finalised digital audio CD-Rewritable
(CDRW)discs.
MP3-CDs/WMA (CD-ROMs with MP3/WMA
tracks)
* DRM-protected WMA is not supported.
About MP3 disc
Supported formats
– ISO9660, Joliet, Multisession
– Number of albums/ folders: maximum 99
– Number of tracks/titles: maximum 999
– The max. MP3 program track number is 40
– Suppor ted VBR bit-rate
– Supported sampling frequencies for MP3 disc
are: 32 kHz, 44.1 kHz, 48 kHz
– Supported Bit-r ates of MP3 disc are: 32, 64,
96, 128, 192, 256 (kbps)
Loading discs
1 Press OPEN•CLOSE to open the disc tray.
2 Load up to two discs on the individual disc trays.
To load the third disc, press DISC CHANGE.
➜ The disc tray will rotate until the empty tray
is ready for loading.
16
Page 17

CD/MP3-CD/WMA Operations
3 Press OPEN•CLOSE to close the disc tray.
➜ READING is displayed as the CD player scans
the contents of a disc, and then the total number
of tracks and playing time (or the total number
of albums and tracks for MP3/WMA disc) are
shown.
Notes:
– Load the discs with the label side facing up.
–To ensure good system performance, wait until
the disc tray completely reads the disc(s) before
proceeding.
–For MP3/WMA disc , the disc reading time may
exceed 10 seconds due to the large number of
songs compiled into one disc.
Playing discs
To play current disc on the disc tray
● Press ÉÅ.
➜ All loaded discs will play once, then stop.
➜ During playback, the selected disc tray, track
number and elapsed playing time of the current
track are displayed.
➜ For mixed mode discs, only one mode will be
selected for playback depending on the
recording format.
Note:
– When playing a mixed mode disc, you may find a
very short mute track inserted into the total
number of tracks available in your disc.
To play the selected disc only
● In CD mode, press DISC 1/2/3 (or CD 1/2/3
on the remote control).
➜The current disc will play once, then stop.
To interrupt playback
● Press ÉÅ.
➜ The display freezes and the elapsed playing
time flashes when playback is interrupted.
● To resume playback, press ÉÅ again.
To stop playback
● Press Ç.
Te xt display during playback
In CD mode
● Press DISPLAY to show the current track
number and remaining playback time.
In MP3-CD/WMA mode
● Press DISPLAY repeatedly to show the current
album and track numbers followed by ID3
information (if available).
Replacing discs during playback
1 Press DISC CHANGE.
➜ The disc tray will open without interrupting
current playback.
2 To change the inner disc, press DISC
CHANGE again.
➜ "OPEN" is displayed and the disc will stop
playing.
➜ The disc tray will close to retrieve the inner
disc, then reopen with the inner disc accessible.
Selecting a desired track/passage
To search for a particular passage during
playback
● Press and hold S / T (or ALBUM +/-
(à / á) on the remote control) and release it
when the desired passage is located.
➜ During searching, the volume will be muted.
To select a desired track
● Press S / T (or TITLE +/- (í/ë) on
the remote control) repeatedly until the desired
track is displayed.
● If playback is stopped, press ÉÅ to start
playback.
Selecting a desired Album/Title
(MP3/WMA disc only)
To select a desired album
● Press ALBUM/PRESET +/- (or ALBUM +/-
(à / á) on the remote control ) repeatedly.
To select a desired title
● Press S / T (or TITLE +/- (í/ë) on
the remote control) repeatedly.
English
17
Page 18

CD/MP3-CD/WMA Operations
English
Different play modes: SHUFFLE
and REPEAT
You can select and change the various play
modes before or during playback. The REPEAT
modes can also be combined with PROGRAM.
..................plays the current track
continuously
ALL ........repeats the entire disc/
programme
ALL
................................. repeats the entire disc
continuously in random order
................... tracks of the entire disc are
played in random order
1 To select your play mode, press the MODE
button before or during playback until the display
shows the desired function.
2 Press 2; to start playback if in the STOP
position.
➜ If you have selected SHUFFLE, playback starts
automatically.
3 To return to normal playback, press the MODE
button until or is no longer displayed.
● You can also press 9 to cancel your play mode.
5 Press PROG/CLOCK (or PROGRAM on
the remote control) to store the track.
6 To end programming, press 9 once.
➜ PROG stays and the programme mode
remains active.
7 To start programme play, press 2;.
Notes:
– It is not possible to create a programme with
MP3 tracks from multiple CDs, or combined with
normal audio tracks.
– If you attempt to programme more than 40
tracks, "PROGRAM FULL" is displayed.
– During programming, if no button is pressed
within 90 seconds, the system will exit the
programme mode automatically.
To review the programme
● Stop playback and press S / T (or TITLE
+/- (í/ë) on the remote control) repeatedly.
● To exit review mode, press 9.
Erasing the programme
● Press 9 once when playback is stopped or
twice during playback.
➜ PROG disappears and "PROGRAMME CLEAR"
is displayed.
Programming the disc tracks
Programming tracks is possible when playback is
stopped. Up to 40 tracks can be stored in the
memory in any order.
1 Load the desired discs on the disc tray (refer to
“Loading discs”).
2 Press DISC 1/2/3 (or CD 1/2/3 on the remote
control) to select a disc.
3 In stop mode, press PROG/CLOCK (or
PROGRAM on the remote control) to start
programming.
➜ PROG star ts flashing.
4 Press S / T (or TITLE +/- (í/ë) on
the remote control) repeatedly to select the
desired track.
● For MP3/WMA disc, press ALBUM/PRESTE -
/+ (or ALBUM +/- (à / á) on the remote
control) and S / T (or TITLE +/- (í/
ë) on the remote control) to select the
desired album and title for programming.
18
Note:
– The programme will be erased when the system
is disconnected from the power supply or when the
disc tray is opened.
Page 19

Radio Reception
English
Tuning to radio stations
1
Press TUNER.
➜ "FM" or “AM” is displayed. A few seconds later,
the current radio frequency will appear on the
display.
2 Press TUNER again to select the desired
waveband : FM or AM.
3 Hold S / T (or ALBUM +/- (à / á)
on the remote control) and then release the
button.
➜ The system will star t searching for a radio
station with sufficient signal strength.
4 Repeat step 3 if necessary until you find the
desired station.
● To tune to a weak station, press S / T (or
ALBUM +/- (à / á) on the remote control)
briefly and repeatedly until you have found
optimal reception.
Programming radio stations
You can store up to a total of 40 radio stations
in the memory.
Automatic programming
1 Press TUNER to select TUNER mode.
2 Press and hold PROG/CLOCK (or
PROGRAM on the remote control) until
"AUTO" is displayed.
➜ PROG star ts flashing.
➜ AUTO is displayed and available stations are
programmed in order of waveband reception
strength.
➜ When all the available radio stations are
stored or the memory for 40 presets are used,
the first preset radio station will be played.
To stop storing the automatic preset
● Press Ç.
19
Page 20

Radio Reception
English
Manual programming
1 Tune to your desired radio station (refer to
“Tuning to radio stations”).
2 Press PROG/CLOCK (or PROGRAM on
the remote control).
➜ PROG star ts flashing.
➜ The next available preset number is displayed
for selection.
To store the radio station to another
preset number
● Press ALBUM/PRESET +/- (or TITLE +/-
(í/ë) on the remote control) to select the
desired preset number.
3 Press PROG/CLOCK (or PROGRAM on
the remote control) again to store the radio
station.
➜ PROG disappears.
● Repeat steps 1–3 to store other radio stations.
To exit manual preset mode
● Press Ç.
Notes:
– If you attempt to store more than 40 preset
radio stations, "PROGRAM FULL " is displayed.
– During programming, if no key is pressed within
90 seconds, the system will exit the programme
mode automatically.
Changing tuning grid
In some countries, the frequency step between
adjacent channels is 9 kHz (10 kHz in some
areas). The preset frequency step in the factory is
10 kHz.
1 Select tuner mode.
2 Press and hold 9 on the set for more than 2
seconds .
Note:
– All preset stations will be lost and need to be
reprogrammed.
Tuning to preset radio stations
● Press ALBUM/PRESET +/- (or TITLE +/-
(í / ë) on the remote control) until the
desired preset station is displayed.
20
Page 21

USB
Using a USB mass storage device
By connecting a USB mass storage device or SD/
MMC memory card to the Hi-Fi system, you can
enjoy the device's or card’s stored music through
the powerful speakers of Hi-Fi system.
Playing a USB mass storage device
Compatible mass storage devices/cards
With the Hi-Fi system, you can use:
– USB flash memory (USB 2.0 or USB1.1)
– USB flash players (USB 2.0 or USB1.1)
– memory cards (requires an additional card
reader to work with this Hi-Fi system)
Notes:
– In some USB flash players (or memory devices),
the stored contents are recorded using copyright
protection technology. Such protected contents will
be unplayable on any other devices (such as this
Hi-Fi system).
– Compatibility of the USB connection on this
product:
a) This product supports most USB Mass storage
devices (MSD) that are compliant to the USB
MSD standards.
i) Most common Mass storage class devices are
flash drives, memory sticks, jump drives and etc.
ii) If you see a "Disc Drive" show up on your
computer after you plugged the mass storage
device into your computer, most likely it is MSD
compliant and it will work with this product.
b) If your Mass storage device required a battery/
power source. Please make sure you have a fresh
battery in it or charge the USB device first and
then plug it into the product again.
– Supported Music type:
a) This device only supports unprotected music
with the following file extension:
.mp3
.wma
b) Music bought from on-line music stores are not
supported because they are secured by Digital
Rights Management protection (DRM).
c) File name extensions that end with the
following are not supported:
.wav; .m4a; .m4p; mp4; .aac and etc.
– No Direct connection can be made from
Computer USB port to the product even you have
either or both mp3 or wma files in your computer.
Supported formats:
– USB or memory file format FAT12, FAT16,
FAT32 (sector size: 512 bytes)
– MP3 bit rate (data rate): 32-320 Kbps and
variable bit rate
– WMA v9 or earlier
– Directory nesting up to a maximum of 8
levels
– Number of albums/ folders: maximum 99
– Number of tracks/titles: maximum 999
– ID3 tag v2.0 or later
– File name in Unicode UTF8 (maximum length:
128 bytes)
The system will not play or support the
following:
– Empty albums: an empty album is an album
that does not contain MP3/WMA files, and
will not be shown in the display.
– Non-supported file formats are skipped. This
means that e.g.: Word documents .doc or
MP3 files with extension .dlf are ignored and
will not be played.
–AAC, WAV, PCM audio files
– DRM protected WMA files
– WMA files in Lossless format
English
21
Page 22

USB
English
How to transfer music files from PC to a
USB mass storage device
By dragging and dropping music files, you can
easily transfer your favorite music from PC to a
USB mass storage device/SD/MMC memory
card.
For a flash player, you can also use its music
management software for the music transfer.
However, those WMA files may be
unplayable for compatibility reasons.
How to organize your MP3/WMA files on
the USB mass storage device/SD/MMC
memory card
This Hi-Fi system will browse the MP3/WMA
files in the folders/sub-folders/titles order.
Example:
Root
Title 001
Title 002
Title 003
Album 01
Title 001
Title 002
Title 003
Album 02
Notes:
– If you have not organized MP3/WMA files into
any albums on your disc, an album "01" will be
automatically assigned for all those files.
– Make sure that the file names of MP3 files end
with .mp3. and the file names of WMA files end
with .wma.
–For DRM protected WMA files, use Windows
Media Player 10 (or later) for conversion. Visit
www.microsoft.com for details about Windows
Media Player and WM DRM (Windows Media
Digital Rights Management).
1 Check the USB device has been properly
connected. (See Installation: Connecting an
additional appliance).
2 Press USB to select USB.
– NO SONG appears if no audio file is found in
the USB device.
3 Play the USB's audio files as you do with the
albums/tracks on a CD (See CD/MP3
Operations).
Notes:
–For compatibility reasons, the album/track
information may differ from what it is displayed
through flash players' music management software.
– File names or ID3 tags will be displayed as --- if
they are not in English.
Title 001
Title 002
Title 003
Album 03
Title 001
Title 002
Title 003
Organize your MP3/WMA files in different
folders or subfolders as required.
22
Page 23

USB
Ripping function
This function enables you to record music to a
connected USB mass storage device from any
other source (i.e., DISC, TUNER or AUX)
without interrupting your enjoyment of the
music.
1 Insert a USB mass device with sufficient free
space to the USB DIRECT socket on
the set. (See "Installation: Connecting an
additional appliance".).
2 Prepare the source to record from.
DISC - load the disc(s). Select the disc to
record from. Then, select a track where ripping
will start (See "CD/MP3-CD Operations":
"Selecting a desired track/passage" and "Selecting
a desired Album/Title (MP3/WMA disc only)").
TUNER - tune to the desired radio station
(See "Radio Reception": "Tuning to radio stations"
and "Tuning to preset radio stations").
AUX - connect external equipment.
3 Press USB RECORD to start ripping.
➜ "USB REC" will star t flashing on the display.
➜ In the DISC mode, "RIPPING ONE" will scroll
once.
● In the DISC mode, to record all tracks starting
from the one you selected, press USB RECORD
again.
➜ "RIPPING ALL" will scroll once. "ALL" and
"USB REC" will start flashing on the display.
4 At any moment, simply press 9 to stop ripping.
Notes:
– This function can also be combined with the
programme function. In this case, selection of
"RIPPING ALL" in DISC mode will record all
programmed tracks from the starting point to the
USB mass storage device.
– It is impossible to rip from "MIC IN".
–Never unplug the USB mass storage device
before pressing 9 to stop ripping.
– In the DISC mode, when you stop ripping or the
free space is insufficient, the current track being
ripped will not be recorded to your USB mass storage
device and the playback will stop at the same time.
– During ripping, it is impossible to select any
other source or track (radio station) or even switch
the set to standby mode.
To delete a track/album from your USB
mass storage device
1 Plug in the USB mass storage device.
2 Select the track to be deleted during playback.
3 Press USB DELETE.
➜ "DELETE TRACK-- PRESS AGAIN TO
DELETE " appears.
4 Press USB DELETE again before "DELETE
TRACK-- PRESS AGAIN TO DELETE" disappears
to confirm the deletion.
English
23
Page 24

USB
English
Tuner record timer setting
This function enables you to set a timer for
starting and stopping ripping from the tuner
source automatically.
IMPORTANT!
– Before setting the timer, ensure that
the clock is set correctly.
1 Tune to the station you desire to record from.
(See "Radio Reception": "Tuning to radio stations"
and "Tuning to preset radio stations".).
2 Go to the standby mode. Then, press and hold
SLEEP/TIMER on the remote control for
more than two seconds to select timer mode.
➜ The last timer setting star ts flashing.
➜ The selected source will be lighted.
3 Press TUNER to select TUNER mode.
4 Press USB RECORD to enable USB recording.
➜ "ST" appears. “USB REC” and the hour and
minute digits for the start timer star t flashing.
● To cancel USB record setting, press USB
RECORD again until “ST” and "USB REC"
disappear.
➜ In this case, you can only continue to set the
system switch-on timer. (See "Clock/Timer":
"Timer setting".)
5 Press ALBUM/PRESET -/+ (or ALBUM -/+
(à / á) on the remote control) repeatedly to
set the hour for the timer to start.
6 Press S / T (or TITLE -/+ (í /ë)on
the remote control) repeatedly to set the minute
for the timer to start.
7 Press SLEEP/TIMER on the remote control to
confirm.
➜ “ET” appears. and the hour and minute
digits for the sleep timer (12 hours later than the
start timer by default) star t flashing.
8 Press ALBUM/PRESET -/+ (or ALBUM -/+
(à / á) on the remote control) repeatedly to
set the hour for the timer to stop.
9 Press S / T (or TITLE -/+ (í /ë)on
the remote control) repeatedly to set the minute
for the timer to stop.
0 Press SLEEP/TIMER on the remote control to
store the set tuner record timer.
➜ The ripping will star t at the set star t time and
end at the set stop time.
Notes:
– It is impossible to set a sleep timer more than
12 hours later than the start timer.
– During timer setting, if no button is pressed
within 60 seconds, the system will exit timer setting
mode automatically.
To deactivate the TIMER
● In standby mode, press SLEEP / TIMER on the
remote control.
➜ disappear s from the display.
To activate the TIMER
● In standby mode, press SLEEP / TIMER on the
remote control.
➜ appear s on the display.
24
Page 25

Listening to external sources
Using AUX IN (white/red jacks)
1 Use the audio cables (white/red, not supplied) to
connect AUX IN (L/R) jacks of the main unit
(located on the back panel ) to the
corresponding AUDIO OUT jacks on an
external device (such as TV or VCR).
2 Press AUX/MP3 LINK (or AUX on the
remote control) repeatedly until “AUX “ is
displayed.
Using MP3 LINK (3.5 mm jack )
1 Use a MP3 link cable (supplied) to connect
MP3 LINK jack of the main unit (3.5 mm,
located on the front panel) to an AUDIO OUT
or headphone jack on an external equipment
(such as CD player, or VCR).
2 Press AUX/MP3 LINK (or AUX on the
remote control) repeatedly until “MP3 LINK” is
displayed.
Note:
– All the sound control features (DSC or DBB, for
example) are available for selection.
– Refer to the operating instructions for the
connected equipment for details.
External Sources
English
25
Page 26

Clock/Timer
English
Clock setting
The clock can be set in either 12-hour or
24-hour mode ("AM 12:00" or "00:00" for
example).
1 In standby or view clock mode, press PROG/
CLOCK (or CLOCK on the remote control).
2 Press ALBUM/PRESET -/+ (or ALBUM -/+
(à / á) on the remote control) to select
clock mode.
3 Press PROG/ CLOCK (or CLOCK on the
remote control)
to activate to adjust clock time.
4 Press ALBUM/PRESET +/- (or ALBUM +/-
(à / á) on the remote control) repeatedly to
set the hour.
5 Press S / T (or TITLE +/- (í / ë) on
the remote control ) repeatedly to set the minute.
6 Press PROG/ CLOCK (or CLOCK on the
remote control) again to store the setting.
➜ The clock star ts working.
To exit without storing the setting
● Press Ç.
Notes:
– The clock setting will be cancelled when the power
cord is disconnected or if a power failure occurs.
– During clock setting, if no button is pressed
within 30 seconds, the system will exit clock setting
mode automatically.
26
Timer setting
The system can switch on to DISC, TUNER or
USB mode automatically at a preset time, serving
as an alarm to wake you up.
IMPORTANT!
– Before setting the timer, ensure that the
clock is set correctly.
1 In standby or view clock mode, press and hold
SLEEP/TIMER on the remote control for
more than two seconds to select timer mode.
➜ The last timer setting star ts flashing.
➜ The selected source will be lighted.
2 Press DISC (or DISC 1/2/3, CD 1/2/3),
TUNER or USB to select the desired source.
● Before setting timer, make sure the music source
has been prepared.
CD – Load the disc(s).
TUNER – tune to the desired radio station.
3 Press SLEEP/TIMER on the remote control
to activate to adjust time.
4 Press ALBUM/PRESET +/- (or ALBUM +/-
(à / á) on the remote control) repeatedly to
set the hour for the timer to start.
Page 27

Clock/Timer
5 Press S / T (or TITLE +/- (í / ë) on
the remote control ) repeatedly to set the
minute for the timer to start.
6 Press SLEEP/TIMER on the remote control to
store the start time.
● At the preset time, the selected source will play.
To exit without storing the setting
● Press Çon the system.
Notes:
– When the preset time is reached and the
selected disc tray is empty, the next available disc
will be selected. If all the disc trays are not
available, Tuner will be selected automatically.
– During timer setting, if no button is pressed
within 60 seconds, the system will exit timer setting
mode automatically.
To deactivate the TIMER
● In standby or view clock mode, press SLEEP/
TIMER on the remote control.
➜ disappears from the display.
To activate the TIMER
● In standby or view clock mode, press SLEEP/
TIMER on the remote control.
➜ appears on the display.
Sleep timer setting
The sleep timer enables the system to switch to
standby mode automatically at a preset time.
1 In active mode, press SLEEP/TIMER on the
remote control repeatedly to select a preset
time.
➜ The selections are as follows (time in
minutes):
90 ™ 75 ™ 60 ™ 45 ™ 30 ™ 15 ™ OFF ™
90…
2 When you reach the desired length of time, stop
pressing the SLEEP/TIMER button.
➜ is shown, except for "OFF" mode.
➜ The sleep timer is now set.
To check the remaining length of time
after sleep timer is activated
● Press SLEEP/TIMER once.
To change the preset sleep timer
● Press SLEEP/TIMER again while the remaining
sleep timer is shown.
➜ The display will show the next sleep timer
options.
To deactivate the sleep timer
● Press SLEEP/TIMER repeatedly until "OFF" is
displayed, or press B.
Note:
– will start flashing when the remaining
length of time after activation of the sleep timer is
less than 1 minute.
English
27
Page 28

Maintenance
English
Cleaning the Cabinet
● Use a soft cloth slightly moistened with a mild
detergent solution. Do not use a solution
containing alcohol, spirits, ammonia or abrasives.
Cleaning Discs
● When a disc becomes dirty,
clean it with a cleaning cloth.
Wipe the disc from the centre
out.
● Do not use solvents such as
benzene, thinner, commercially
available cleaners, or antistatic
spray intended for analogue
records.
Cleaning the disc lens
● After prolonged use, dirt or dust may
accumulate at the disc lens. To ensure good
playback quality, clean the disc lens with Philips
CD Lens Cleaner or any commercially available
cleaner. Follow the instructions supplied with
cleaner.
28
Page 29

Specifications
AMPLIFIER
RMS output power
Total output power ............................... 800 W RMS
Signal-to-noise ratio .......................... 67 dB A (IEC)
Frequency response .......................... 60 – 16000 Hz
Input sensitivity
AUX ................................................. 1500mV/2000mV
Output
Speakers .................................................................... 3 Ω
(1) (3 Ω, 1 kHz, 10% THD)
CD/MP3-CD PLAYER
Number of programmable tracks ......................... 40
Frequency response ............. 60 – 16000 Hz -3dB
Signal-to-noise ratio ....................................... 75 dB A
Channel separation .......................... 50 dB (1 kHz)
Total harmonic distor tion ................................. < 1.5%
MPEG 1 Layer 3 (MP3-CD) .......... MPEG AUDIO
MP3-CD bit rate ....................................... 32-256 kbps
Sampling frequencies ....................... 32, 44.1, 48 kHz
TUNER
FM wave range ...................................87.5 – 108 MHz
AM wave range (9 kHz) ............... 531 – 1602 kHz
AM wave range (10 kHz) ............. 530 – 1700 kHz
Tuning grid ............................................................ 9/10 kHz
Number of presets ........................................................ 40
Antenna
FM ....................................................................... 75 Ω wire
AM .............................................................. Loop antenna
USB PLAYER
USB ................................................................... 12Mb/s, V1.1
......................................... support MP3 and WMA files
Number of albums/folders ................. maximum 99
Number of tracks/titles ...................... maximum 999
(128 kbps advised)
FRONT SPEAKERS
System 4-way; double port bass reflex
Impedance ............................................................... 2 x 6 Ω
Woofer ...................................................................2 x 5.25”
Tw eeter................................................................... 2 x 1.75”
Output power ........................ 2 x (100 W+ 100 W)
Dimensions (w x h x d) . 225 x 430 x 275 (mm)
Weight.......................................................... 4.928 kg each
REAR SPEAKERS
System full range satellite
Impedance ....................................................................... 3 Ω
Speaker driver ........................................... 4” + 4” (fake)
Frequency response ............................ 150Hz-16KHz
Output power ................................................ 2 x 100 W
Dimensions (w x h x d) ....... 142.5 x 345 x 171.3
Weight.............................................................. 2.1 kg each
SUBWOOFER
AC Power ........................... 110 – 127 / 220 – 240 V;
....................................................... 50/60 Hz, Switchable
Power Consumption
Active ........................................................................ 100 W
Impedance ........................................................................ 6 Ω
Subwoofer driver ............................................................. 8”
Output power ......................................................... 200 W
Dimensions (w x h x d)..... 274 x 430 x 342.3 (mm)
Weight......................................................................... 11.2 kg
GENERAL
Material/finish ................................... Polystyrene/Metal
AC Power (for the main unit) .......................................
.............................................. 110 – 127 / 220 – 240 V;
....................................................... 50/60 Hz, Switchable
Power Consumption
Active .......................................................................... 90 W
Standby .................................................................. ≤ 20 W
Dimensions (w x h x d) .. 265 x 345 x 382 (mm)
Weight (without speakers) ........................... 8.671 kg
English
Specifications and external appearance are
subject to change without notice.
29
Page 30

Tr oubleshooting
English
WARNING
Under no circumstances should you try to repair the system yourself, as this will invalidate the
warranty. Do not open the system as there is a risk of electric shock.
If a fault occurs, first check the points listed below before taking the system for repair. If you
are unable to remedy a problem by following these hints, consult your dealer or Philips for
help.
Problem
“NO DISC” is displayed.
“DISC NOT FINALIZED” is displayed.
Radio reception is poor.
The system does not react when buttons
are pressed.
Sound cannot be heard or is of poor
quality.
Solution
✔ Insert a disc.
✔ Check if the disc is inserted upside down.
✔ Wait until the moisture condensation at the lens
has cleared.
✔ Replace or clean the disc, see “Maintenance”.
✔ Use a finalized CD-RW or a correct MP3-CD
format disc.
✔ Use a finalised CD-RW or CD-R.
✔ If the signal is too weak, adjust the antenna or
connect an external antenna for better
reception.
✔ Increase the distance between the Mini HiFi
System and your TV or VCR.
✔ Remove and reconnect the AC power plug and
switch on the system again.
✔ Adjust the volume.
✔ Check that the speakers are connec ted
correctly.
✔ Check if the stripped speaker wire is clamped.
✔ Make sure the MP3-CD was recorded within
32-256 kbps bit rate with sampling frequencies
at 48 kHz, 44.1 kHz or 32 kHz.
The left and right sound outputs are
reversed.
30
✔ Check the speaker connections and location.
Page 31

Tr oubleshooting
Problem
The remote control does not function
properly.
The time is not working.
The Clock/Timer setting is erased.
Some files on the USB device are not
displayed.
“DEVICE NOT SUPPORTED” scrolls on the
display.
Solution
English
✔ Select the source (DISC or TUNER, for example)
before pressing the function button (ÉÅ,í,ë).
✔ Reduce the distance between the remote
control and the system.
✔ Insert the batteries with their polarities
(+/– signs) aligned as indicated.
✔ Replace the batteries.
✔ Point the remote control directly towards the IR
sensor.
✔ Set the clock correctly.
✔ In standby mode, press SLEEP/TIMER on the
remote control to switch on the timer.
✔ Power has been interrupted or the power cord
has been disconnected. Reset the clock/timer.
✔ Check if the number of folders exceeds 99 or
the number of titles exceeds 999.
✔ Remove the USB mass storage device or select
another source.
31
Page 32

606162
Page 33

Page 34

Page 35

L
ISTA DE
S
ERVIÇOAUTORIZADO - BRASIL
ACR E
CRUZEIRO DO SUL 68-33224432 CASTELO 28-35420482 BELO HORIZONTE 31-32254066 SANTAREM 93-35235322
RIO BRANCO 68-32217642 COLATINA 27-37222288 BELOHORIZONTE 31-34420944
RIO BRANCO 68-32249116 GUARAPARI 27-33614355 BELO HORIZONTE 31-34181919
ALAGO AS
ARAPIRACA 82-5222367 SAO MATEUS 27-37633806 BELO HORIZONTE 31-21027373 GUARABIRA 83-2711159
MACEIO 82-32417237 VILA VELHA 27-32891233 BETIM 31-35322088 JOAO PESSOA 83-32469689
PALMEIRA DOS INDIOS 82-4213452 VITORIA 27-32233899 BOM DESPACHO 37-35212906 JOAO PESSOA 83-32446044
UNIAO DOS PALMARES 82-32811305 BOM DESPACHO 37-35222511 JOAO PESSOA 83-32210460
AM APÁ
MACAPA 96-2175934 CACU 64-6561811 CONGONHAS 31-37311638 SOLANEA 83-3631241
SANTANA 96-2811080 CALDAS NOVAS 64-4532878 CONSLAFAIETE 31-37637784
AM AZO N AS
MANAUS 92-36333035 GOIANIA 62-32919095 CORONEL FABRICIANO 31-38411804 ANTONINA 41-34321782
MANAUS 92-36633366 GOIANIA 62-32292908 CURVELO 38-37213009 APUCARANA 43-34225306
MANAUS 92-32324252 GOIATUBA 94-34952272 DIVINOPOLIS 37-32212353 ARAPONGAS 43-2753723
BAHIA
ALAGOINHAS 75-4211128 ITAPURANGA 62-3551484 GOV.VALADARES 33-32716650 CAMPO MOURAO 44-35238970
BARREIRAS 77-36117592 ITUMBIARA 64-34310837 GUAXUPE 35-35513891 CASCAVEL 45-32254005
BOM JESUS DA LAPA 77-4814335 JUSSARA 62-3731806 GUAXUPE 35-35514124 CIANORTE 44-6292842
BRUMADO 77-4412381 LUZIANIA 61-6228519 IPATINGA 31-38222332 CURITIBA 41-33334764
CAETITE 77-34541183 MINEIROS 64-6618259 ITABIRA 31-38316218 CURITIBA 41-32648791
CAMACARI 71-36218288 PIRES DO RIO 64-4611133 ITAJUBA 35-36211315 CURITIBA 41-32534391
CICERO DANTAS 75-32782767 RIALMA 62-3971320 ITAPECERICA 37-33411326 FOZ DO IGUACU 45-35233029
CRUZ DAS ALMAS 75-6212839 RIO VERDE 64-36210173 ITAPECERICA 37-33411326 FOZ DO IGUACU 45-35234115
ESPLANADA 75-4271454 TRINDADE 62-5051505 ITAUNA37-32412468 FRANCISCO BELTRAO 46-35233230
EUNAPOLIS 73-2815181 URUACU 62-3571285 ITUIUTABA 34-32682131 GUARAPUAVA 42-36235325
FEIRA DE SANTANA 75-32232882 JOAOMONLEVADE 31-38512909 IBAITI 43-5461162
FEIRA DE SANTANA 75-2213427
GANDU 73-32541664 ACAILANDIA 99-35381889 JOAO PINHEIRO 38-35611327 IRATI 42-34221337
ILHEUS 73-2315995 BACABAL 99-36212794 JUIZ DE FORA 32-30842584 LAPA 41-36222410
IRECE 74-36410202 BALSAS 99-5410113 JUIZ DE FORA 32-32151514 LOANDA 44-4252053
ITABERABA 75-32512358 CAROLINA 98-7311335 LAGOA DA PRATA 37-32613493 LONDRINA 43-33241002
ITABUNA 73-36137777 CAXIAS 99-35212377 LAVRAS 35-38219188 MANDAGUARI 44-2331335
ITAPETINGA 77-2613003 CHAPADINHA 98-4711364MANHUACU 33-33314735 MARINGA 44-32264620
JACOBINA 74-36211323 CODO 99-36611277 MONTE CARMELO 34-38422082 MEDIANEIRA 45-32642580
JEQUIE 73-35254141 CODO 99-36612942 MONTE SANTO DE MINAS 35-35911888 PALMEIRA 42-2523006
JUAZEIRO 74-36116456 COELHO NETO 98-34731351 MONTES CLAROS 38-32218925 PARANAGUA 41-34225804
JUAZEIRO 74-36111002 IMPERATRIZ 99-35244969 MURIAE 32-37224334 PATO BRANCO 46-32242786
LAURO DE FREITAS 71-3784021 PEDREIRAS 99-36423142 MUZAMBINHO 35-5712419 PONTAGROSSA 42-32226590
MURITIBA 75-4241908 PRESIDENTE DUTRA 99-36631815 NANUQUE 33-36212165 RIO NEGRO 47-36450251
PAULO AFONSO 75-32811349 SANTA INES 98-36537553 NOVA LIMA 31-35412026 ROLANDIA 43-2561947
POCOES 77-4311890 SAO JOSE DE RIBAMAR 98-2241581 OLIVEIRA 37-33314444 S J DOS PINHAIS 41-32822522
RIBEIRA DO POMBAL 75-2761853 SAO LUIS 98-32323236 PARA DE MINAS 37-32316369 S MIGUEL DO IGUACU 45-5651429
SALVADOR 71-32473659 SAO LUIS 98-32315276 PARA DE MINAS 37-32321975 SANTA FE 44-2471147
SALVADOR 71-2675000 PARACATU 38-36711250 SAO JORGE D' OESTE 46-5341305
SALVADOR 71-32072070
SALVADOR 71-33356233 ALTA FLORESTA 66-35212460 PATOS DE MINAS 34-38222588 TELEMACO BORBA 42-32726044
SANTO AMARO 75-32413171 ALTO ARAGUAIA 66-4811726 PATROCINIO 34-38311531 TOLEDO 45-32522471
SENHOR DO BONFIM 74-5413143 BARRA DO GARGAS 66-4011394 PITANGUI 37-32716232 UMUARAMA 44-36231233
SERRINHA 75-32611794 CUIABA 65-36230421 PIUMHI 37-33714632
STO ANTONIO JESUS 75-36314470 LUCAS DO RIO VERDE 65-5491333 POCOS DE CALDAS 35-37121866
TEIXEIRA DE FREITAS 73-30111600 PONTES E LACERDA 65-2662326 POCOSDE CALDAS 35-37224448 BELO JARDIM 81-37261918
VALENCA 75-6413710 PRIMAVERA DO LESTE 66-4981682 PONTE NOVA 31-38172486 CABO STO AGOSTINHO 81-35211823
VITORIA DA CONQUISTA 77-34241183 RONDONOPOLIS 66-4233888 POUSO ALEGRE 35-34212120 CAMARAGIBE 81-34581246
CEARÁ
BREJO SANTO 88-5310133 VARZEAGRANDE 65-6826502 SANTOS DUMONT 32-32516369 GARANHUNS 87-37611090
CRATEUS 88-6910019 SAO JOAO DEL REI 32-33718306 GARANHUNS 87-37610085
CRATO 88-5212501
FORTALEZA 85-32875506 AMAMBAI 67-4811543 TEOFILO OTONI 33-35225831 RECIFE 81-32313399
FORTALEZA 85-40088555 CAMPO GRANDE 67-33242804 TIMOTEO 31-38482728 RECIFE 81-21262111
IBIAPINA 88-36531223 CAMPO GRANDE 67-3831540 UBA 32-35323626 RECIFE 81-34656042
IGUATU 88-35810512 CAMPOGRANDE 67-3213898 UBERABA 34-33332520 RECIFE 81-34629090
ITAPIPOCA 88-6312030 DOURADOS 67-4217117 UBERLANDIA 34-32123636 SALGUEIRO 87-38716309
JUAZEIRO DO NORTE 88-35112667 IVINHEMA 67-4421244 UBERLANDIA 34-32360764 SERRA TALHADA 87-38311401
LIMOEIRO DO NORTE 88-4231938 NAVIRAI 67-4612486 VARGINHA 35-32227889
OROS 88-5841271 NOVA ANDRADINA 67-4413851 VARZEADA PALMA 38-37311548
SOBRAL 88-36110605 PONTAPORA 67-4314313 VAZANTE 34-38131420 CAMPO MAIOR 86-32521376
TIANGUA 88-36713336 RIO BRILHANTE 67-4527950 VICOSA 31-38918000 FLORIANO 89-5221154
UBAJARA 88-6341233 TRES LAGOAS 67-5212007 OEIRAS 89-4621066
DISTRITO FEDERAL MINAS GERAIS
BRASILIA 61-32269898 ALFENAS 35-32927104 BELEM 91-32690400 PICOS 89-34155135
BRASILIA 61-33016666 ALMENARA 33-7211234 BELEM 91-32421090 TERESINA 86-32213535
GAMA 61-5564840 ANDRADAS 35-37312970 CAPANEMA 91-34621100 TERESINA 86-32230825
ESPÍRITO SANTO
ALEGRE 28-35526349 ARCOS 37-33513455 MARABA 94-3211891
ARACRUZ 27-32561251 BAMBUI 37-34311473 OBIDOS 93-5472116 B JESUS ITABAPOANA 22-38312216
BAIXO GUANDU 27-37321142 BARBACENA 32-33310283 PARAGOMINAS 91-30110778 BELFORD ROXO 21-27616060
BARRA S FRANCISCO 27-37562245 BELO HORIZONTE 31-32257262 PORTO TROMBETAS 93-35491606
LINHARES 27-33710148 BELO HORIZONTE 31-32957700 CAMPINA GRANDE 83-3212128
SGABRIELDAPALHA 27-37271153 BELO HORIZONTE 31-34491000 ESPERANCA 83-3612273
GOÍAS
ANAPOLIS 62-3243562 CASSIA 35-35412293 SAPE 83-2832479
CATALAO 64-4412786 CONTAGEM 31-33912994
FORMOSA 61-6318166 CONTAGEM 31-33953461 AMPERE 46-5471605
INHUMAS 62-5111840 FORMIGA 37-33214177 ASSIS CHATEAUBRIAND 44-5285181
IPAMERI 62-4511184 FRUTAL 34-34235279 BANDEIRANTES 43-5421711
MARANHÃ O
MATO GROSSO
SINOP 66-5314592 S SEBASTIAO PARAISO 35-35313094 CARUARU 81-37220235
TANGARA DA SERRA 65-3261431 S SEBASTIAO PARAISO 35-35312054 FLORESTA 81-8771274
MATO GROSSO DO SUL
ARAXA 34-36611132 CASTANHAL 91-37215052 TERESINA 86-32214618
ARAXA 34-36691869 ITAITUBA 93-5181545
CARANGOLA 32-37412017 NOVA FLORESTA 83-3741014
JOAO MONLEVADE 31-38521112 IBIPORA 43-2581863
PASSOS 35-35214342 STO ANTONIO PLATINA 43-35341809
STO ANTONIO MONTE 37-32811258 PAULISTA 81-34331142
PARÁ
ABAETETUBA 91-37512272 PICOS 89-4221444
PARAÍBA
PARANÁ
PERNAMBUCO
PIAUÍ
PARNAIBA 86-3222877
RIO DE JANEIRO
63
Page 36

646566
Page 37

Page 38

Page 39

67
Page 40

English
Español
Português
Meet Philips at the Internet
http://www.philips.com
FWM996
CLASS 1
LASER PRODUCT
Printed in China
PDCC-ZYL-0823
 Loading...