

Page 1
DIGITAL VIDEO DISC PLAYER &
VIDEO CASSETTE RECORDER
DVP3345VB/F7
User Manual
Page 2
English
CAUTION:
TO REDUCE THE RISK OF
ELECTRIC SHOCK, DO NOT REMOVE COVER (OR
BACK). NO USER-SERVICEABLE PARTS INSIDE.
REFER SERVICING TO QUALIFIED SERVICE
PERSONNEL.
CAUTION
RISK OF ELECTRIC SHOCK
DO NOT OPEN
Return your Product Registration Card or register online at
www.philips.com/welcome today to get the very most from your purchase.
Registering your model with PHILIPS makes you eligible for all of the valuable benefits listed below,so
don't miss out.Complete and return your Product Registration Card at once,or register online at
www.philips.com/welcome to ensure:
*Proof of
Purchase
Returning the enclosed card
guarantees that your date of purchase will be on file,so no additional paperwork will be required
from you to obtain warranty service.
*Product Safety
Notification
By registering your product,you'll
receive notification - directly
from the manufacturer - in the
rare case of a product recall or
safety defect.
Congratulations on your purchase,
and welcome to the “family!”
Dear PHILIPS product owner:
Thank you for your confidence in PHILIPS.
You’ve selected one of the best-built,bestbacked products available today.We’ll do
everything in our power to keep you happy
with your purchase for many years to come.
As a member of the PHILIPS “family,” you’re
entitled to protection by one of the most
comprehensive warranties and outstanding
service networks in the industry.What’s
more,your purchase guarantees you’ll
receive all the information and special offers
for which you qualify,plus easy access to
accessories from our convenient home
shopping network.
Most importantly,you can count on our
uncompromising commitment to your total
satisfaction.
All of this is our way of saying welcome and thanks for investing in a PHILIPS
product.
*Additional
Benefits
Registering your product guarantees that you'll receive all of the
privileges to which you're entitled,including special money-saving offers.
Know these
safety symbols
This “bolt of lightning” indicates uninsulated material
within your unit may cause an electrical shock.For
the safety of everyone in your household,please do
not remove product covering.
The “exclamation point” calls attention to features
for which you should read the enclosed literature
closely to prevent operating and maintenance
problems.
WARNING: To reduce the risk of fire or electric
shock,this apparatus should not be exposed to rain or
moisture,and objects filled with liquids,such as vases,
should not be placed on this apparatus.
P.S. To get the most from your
PHILIPS purchase,be sure to
complete and return your Product
Registration Card at once,or
register online at:
www.philips.com/welcome
Visit our World Wide Web Site at http://www.philips.com/welcome
For Customer Use
Enter below the Model and Serial numbers which are
located on the rear of the cabinet.Retain this information
for future reference.
Model No. ______________________________________
Serial No. ______________________________________
Page 3

Safety Information 3
IMPORTANT SAFETY INSTRUCTIONS
Read before operating equipment
AC Polarized
Plug
English
1. Read these instructions.
2. Keep these instructions.
3. Heed all warnings.
4. Follow all instructions.
5. Do not use this apparatus near water.
6. Clean only with a dry cloth.
7. Do not block any of the ventilation openings. Install in accordance with
the manufacturers instructions.
8. Do not install near any heat sources such as radiators, heat registers,
stoves, or other apparatus (including amplifiers) that produce heat.
9. Do not defeat the safety purpose of the polarized or groundingtype
plug. Apolarized plug has two blades with one
wider than the other. A grounding type plug has
two blades and third grounding prong. The wide
blade or third prong are provided for your safety.
When the provided plug does not fit into your
outlet, consult an electrician for replacement of the obsolete outlet.
10. Protect the power cord from being walked on or pinched particularly at
plugs, convenience receptacles, and the point where they exit from the
apparatus.
11. Only use attachments/accessories specified by the manufacturer.
12. Use only with a cart, stand, tripod, bracket, or table specified
13. Unplug this apparatus during lightning storms or when unused for long
14. Refer all servicing to qualified service personnel. Servicing is required
15. This product may contain lead and mercury. Disposal of these materials
16. Damage Requiring Service - The appliance should be serviced by
17. Tilt/Stability - All televisions must comply with recommended interna-
by the manufacturer, or sold with the apparatus. When a cart
is used, use caution when moving the cart/apparatus combination to avoid injury from tip-over.
periods of time.
when the apparatus has been damaged in any way, such as power-supply cord or plug is damaged, liquid has been spilled or objects have fallen into apparatus, the apparatus has been exposed to rain or moisture,
does not operate normally, or has been dropped.
may be regulated due to environmental considerations. For disposal or
recycling information, please contact your local authorities or the
Electronic Industries Alliance: www.eiae.org
qualified service personnel when:
A. The power supply cord or the plug has been damaged; or
B. Objects have fallen, or liquid has been spilled into the appliance; or
C. The appliance has been exposed to rain; or
D. The appliance does not appear to operate normally or exhibits a
marked change in performance; or
E. The appliance has been dropped, or the enclosure damaged.
tional global safety standards for tilt and stability properties of its cabinet design.
●
Do not compromise these design standards by applying excessive pull
force to the front, or top, of the cabinet which could ultimately overturn
the product.
●
Also, do not endanger yourself, or children, by placing electronic
equipment/toys on the top of the cabinet. Such items could unsuspectingly fall from the top of the set and cause product damage and/or personal injury.
18. Wall or Ceiling Mounting - The appliance should be mounted to a
wall or ceiling only as recommended by the manufacturer.
19. Power Lines - An outdoor antenna should be located away from power
lines.
20. OutdoorAntenna Grounding - If an outside antenna is connected to
the receiver, be sure the antenna system is grounded so as to provide
some protection against voltage surges and built up static charges.
Section 810 of the National Electric Code, ANSI/NFPA No. 70- 1984,
provides information with respect to proper grounding of the mast and
supporting structure, grounding of the lead-in wire to an antenna discharge unit, size of grounding connectors, location of antenna-discharge
unit, connection to grounding electrodes, and requirements for the
grounding electrode. See Figure below.
21. Object and Liquid Entry - Care should be taken so that objects do not
fall and liquids are not spilled into the enclosure through openings.
a) Warning: To reduce the risk of fire or electric shock, this apparatus
should not be exposed to rain or moisture and objects filled with liquids, such as vases, should not be placed on this apparatus.
22. Battery Usage CAUTION - To prevent battery leakage that may result
in bodily injury, property damage, or damage to the unit:
●
Install all batteries correctly, with + and - aligned as marked on the
unit.
●
Do not mix batteries (old and new or carbon and alkaline, etc.).
●
Remove batteries when the unit is not used for a long time.
23. Overloading - Do not overload wall outlets, extension cords, or integral
convenience receptacles as this can result in a risk of fire or electric
shock.
24. Object and Liquid Entry - Never push objects of any kind into this
product through openings as they may touch dangerous voltage points
or short-out parts that could result in a fire or electric shock. Never spill
liquid of any kind on the product.
25. Replacement Parts - When replacement parts are required, be sure the
service technician has used replacement parts specified by the manufacturer or have the same characteristics as the original part. Unauthorized
substitutions may result in fire, electric shock, or other hazards.
26. Safety Check - Upon completion of any service or repairs to this prod-
uct, ask the service technician to perform safety checks to determine
that the product is in proper operating condition.
Note to the CATV system installer: This reminder is provided to call the CATV system installer’s attention to Article 820-40 of the NEC
that provides guidelines for proper grounding and, in particular, specifies that the cable ground shall be connected to the grounding system of the
building, as close to the point of cable entry as practical.
Example of Antenna Grounding
as per NEC - National Electric Code
GROUND CLAMP
ELECTRIC SERVICE EQUIPMENT
POWER SERVICE GROUNDING ELECTRODE SYSTEM (NEC ART 250, PART H)
ANTENNA LEAD IN WIRE
ANTENNA DISCHARGE UNIT
GROUNDING CONDUCTORS (NEC SECTION 810-21)
GROUND CLAMPS
(NEC SECTION 810-20)
Page 4

English
4 Safety Information (cont’d)
Safety Precautions
Warning: To prevent fire or shock hazard,do not expose this equipment to rain or moisture.
Federal Communications Commission (FCC) Warning: Any unauthorized changes or
modifications to this device void the user’s authority to operate it.
• Do not stand the unit up vertically. Install the unit in a horizontal and stable position.
• Be sure to remove the disc and unplug the AC power cord from the outlet before carrying the unit.
Department of Health and Human Services (DHHS) Certification: Complies with 21
Center for Radiation (CFR) chapter 1 subchapter J applicable at time of manufacture.
Laser Safety: This unit employs a laser. Only a qualified service person should remove the cover
or attempt to service this device,due to possible eye injury.
CAUTION:USE OF CONTROLS OR ADJUSTMENTS OR PERFORMANCE OF PROCEDURES OTHER
THAN THOSE SPECIFIED HEREIN MAY RESULT IN HAZARDOUS RADIATION EXPOSURE.
CAUTION: VISIBLE AND INVISIBLE LASER RADIATION WHEN OPEN AND INTERLOCK
DEFEATED.DO NOT STARE INTO BEAM. THE BEAM IS LOCATED INSIDE,NEAR THE DECK
MECHANISM.
Radio/TV Interference: This device has been tested and found to comply with the limits
for a Class B digital device,pursuant to Part 15 of the FCC Rules.These limits are designed to provide
reasonable protection against harmful interference in a residential installation.This device generates,uses,
and can radiate radio frequency energy and,if not installed and used in accordance with the instructions,
may cause harmful interference to radio communications.
However, there is no guarantee that interference will not occur in a particular installation.If this device
does cause harmful interference to radio or television reception,which can be determined by turning the
device off and on,the user is encouraged to try to correct the interference by one or more of the
following measures:
1) Reorient or relocate the receiving antenna.
2) Increase the separation between the device and the receiver.
3) Connect the device into an outlet on a circuit different from that to which the receiver is connected.
4) Consult the dealer or an experienced radio/TV technician for help.
Copyright Notice: T
computer programs,files,broadcasts and sound recordings,may be an infringement of copyrights and
constitute a criminal offence. This equipment should not be used for such purposes.
Copyright Protection: Unauthorized copying,broadcasting,public performance,and lending
of Discs are prohibited.
This product incorporates copyright protection technology that is protected by U.S.patents and
other intellectual property rights.Use of this copyright protection technology must be authorized by
Macrovision,and is intended for home and other limited viewing uses only unless otherwise
authorized by Macrovision.Reverse engineering or disassembly is prohibited.
Notice for Progressive Scan Use: Consumers should note that not all high definition
television sets are fully compatible with this product and may cause artifacts to be displayed in the
picture.In case of picture problems with 525 (480) progressive scan output, it is recommended that the
user switch the connection to the ‘standard definition’ output.If there are questions regarding your TV
set compatibility with this 525p (480p) DVD player,please contact our customer service center.
Declaration of Conformity
Model Number: DVP3345VB/F7
Trade Name: Philips
Responsible Party: P&F USA,Inc.
PO Box 430 Daleville,IN 47334-0430
1-866-309-0866
Manufactured under license from Dolby Laboratories."Dolby" and the double-D symbol are trademarks of Dolby
Laboratories.
Copyright 2010 Philips. All rights reserved.
he making of unauthorized copies of copy-protected material,including
Page 5

Table of Contents 5
General Information
Safety Information . . . . . . . . . . . . . . . . . . . . . . . . . . .3-4
Table of Contents . . . . . . . . . . . . . . . . . . . . . . . . . . . . .5
Introduction . . . . . . . . . . . . . . . . . . . . . . . . . . . . . . . . .6
Playable Discs and Video Cassettes . . . . . . . . . . . . . . .7
Initial DVD/VCR Setup
Hookups . . . . . . . . . . . . . . . . . . . . . . . . . . . . . . . . .8-12
Remote Control Setup . . . . . . . . . . . . . . . . . . . . . . .13
First-time DVD/VCR Setup . . . . . . . . . . . . . . . . . . . .14
Basic Playback
Video Cassette Playback . . . . . . . . . . . . . . . . . . . . . .15
Disc Playback . . . . . . . . . . . . . . . . . . . . . . . . . . . . . . .16
Basic DVD/VCR Controls
Display Panel . . . . . . . . . . . . . . . . . . . . . . . . . . . . . . .17
Front Panel,Rear Panel and Remote Control . . . . .18
Additional VCR Setup
Clock (VCR) . . . . . . . . . . . . . . . . . . . . . . . . . . . . . . . .19
Language (VCR) . . . . . . . . . . . . . . . . . . . . . . . . . . . . .20
VCR Status Displays . . . . . . . . . . . . . . . . . . . . . . . . . .20
VCR Recording Options
Videotape Recording . . . . . . . . . . . . . . . . . . . . . . . . .21
One-Touch Recording . . . . . . . . . . . . . . . . . . . . . . . .22
Rerecording (Tape Duplication) . . . . . . . . . . . . . . . .23
Timer Recording . . . . . . . . . . . . . . . . . . . . . . . . . .24-25
Satellite Link . . . . . . . . . . . . . . . . . . . . . . . . . . . . .26-27
DVD to Videotape Duplication . . . . . . . . . . . . . . . . .28
Video Cassette Playing Options
Repeat Playback . . . . . . . . . . . . . . . . . . . . . . . . . . . . .29
Tape Counter . . . . . . . . . . . . . . . . . . . . . . . . . . . . . . .29
Time Search,Index Search . . . . . . . . . . . . . . . . . . . . .30
Special Effects Playback . . . . . . . . . . . . . . . . . . . . . . . .31
Automatic Operation Features . . . . . . . . . . . . . . . . .31
Additional VCR Features
Hi-Fi Stereo . . . . . . . . . . . . . . . . . . . . . . . . . . . . . . . . .32
Disc Playback Features
Menus . . . . . . . . . . . . . . . . . . . . . . . . . . . . . . . . . . . . .32
Fast Forward/Fast Reverse . . . . . . . . . . . . . . . . . . . . .33
x1.3 and x0.8 Rapid Play with Voice . . . . . . . . . . . . .33
Title/Chapter/Time Search . . . . . . . . . . . . . . . . . . . . .34
Track Search . . . . . . . . . . . . . . . . . . . . . . . . . . . . . . . .35
Paused and Step-by-Step Playback,Resume On . . . .36
Repeat, A-B Repeat . . . . . . . . . . . . . . . . . . . . . . . . . .37
Markers . . . . . . . . . . . . . . . . . . . . . . . . . . . . . . . . . . .38
Subtitles,Camera Angles . . . . . . . . . . . . . . . . . . . . . . .39
Audio Language,Stereo Sound Mode . . . . . . . . . . . .40
Slow Motion,Zoom . . . . . . . . . . . . . . . . . . . . . . . . . .41
Program /Random Playback . . . . . . . . . . . . . . . . . . . .42
MP3/Windows MediaTMAudio/JPEG Playback . . .43-44
On-Screen Displays . . . . . . . . . . . . . . . . . . . . . . . .45-46
Black Level,Virtual Surround . . . . . . . . . . . . . . . . . . .47
Initializing . . . . . . . . . . . . . . . . . . . . . . . . . . . . . . . . . . .47
DVD Player Setup Options
Language . . . . . . . . . . . . . . . . . . . . . . . . . . . . . . . .48-49
Display . . . . . . . . . . . . . . . . . . . . . . . . . . . . . . . . . .50-51
Progressive Scan . . . . . . . . . . . . . . . . . . . . . . . . . . . . .51
Audio . . . . . . . . . . . . . . . . . . . . . . . . . . . . . . . . . . . . . .52
Parental Password . . . . . . . . . . . . . . . . . . . . . . . . . . .53
Parental Levels . . . . . . . . . . . . . . . . . . . . . . . . . . . . . .54
Others . . . . . . . . . . . . . . . . . . . . . . . . . . . . . . . . . .55-56
Information You May Need
Glossary . . . . . . . . . . . . . . . . . . . . . . . . . . . . . . . . . . .57
Helpful Hints . . . . . . . . . . . . . . . . . . . . . . . . . . . . .58-60
Care and Maintenance . . . . . . . . . . . . . . . . . . . . . . . .61
Specifications . . . . . . . . . . . . . . . . . . . . . . . . . . . . . . . .61
Limited Warranty . . . . . . . . . . . . . . . . . . . . . . . . . . . .62
Information Index . . . . . . . . . . . . . . . . . . . . . . . . . . . .63
English
Page 6

English
6 Introduction
Welcome!
This DVD/VCR combines a Digital Video Disc (DVD) player and a Hi-Fi Video Cassette
Recorder (VCR) into one unit,letting you play DVDs, Audio Compact Discs (Audio
CDs),and Video Cassettes on one piece of equipment.
Read this owner’s manual carefully to learn how to use the features listed below.
VCR Features
• Automatic Head Cleaner
• English, French and Spanish Menus and
Displays
• 19 Micron head
• Recording:One-Touch and Timer
• Repeat Playback
Disc Features
• Audio Language choices *
• Camera Angles *
• DVD menus in a desired
language *
• Markers
• MP3 Playback
• JPEG Playback
• Windows MediaTMAudio
Playback
• Dual Playback
• Parental Control *
• Paused/Fast/Slow/
Step-by-Step Playback
• Program Playback
• Progressive Scan
• Satellite Link
• Searching:Time,Index,Forward and
Reverse
• Slow Motion
• Still Picture
• Tape Counter
• Tracking Adjustment
• Random Playback
• Repeat, A-B Repeat
• Resume On
• Specific Time/Title/
Chapter/Track Search
• Subtitles *
• Zoom
* If available on the disc
Package Contents
The following items are provided with your new DVD/VCR.
• Remote Control and two AA (1.5 V) batteries
• One set of Audio (red and white tips) and Video (yellow tips) cables
• This Owner’s Manual and Quick Start Guide
DVD Disc Menus...
Some explanations in this manual describe DVD Disc Menus.DVD manufacturers set
the menus,which vary among DVDs.Not all DVDs have menus.If the DVD has a
menu,access it by pressing DVD,then DISC MENU on the remote control.
Details are on page 32.
DVD Player Setup Menu...
Some instructions explain how to use the DVD player’s Setup Menu to set up features
of the DVD player or a DVD. Access the DVD player menu by pressing SETUP on the
remote control when playback is stopped. Even if a feature is set in the DVD player’s
menu,it may not be available if the current DVD does not include that feature.
Available Disc Features...
All features described in this manual are not available on every disc. If the feature is
not available on the disc,you cannot use the DVD/VCR to make it
available. An “X” will appear in the top right corner of the TV screen if
you try to access a feature that is not currently available.
Page 7
Playable Discs and Video Cassettes 7
is a trademark of DVD Format/Logo Licensing Corporation.
Playable Discs
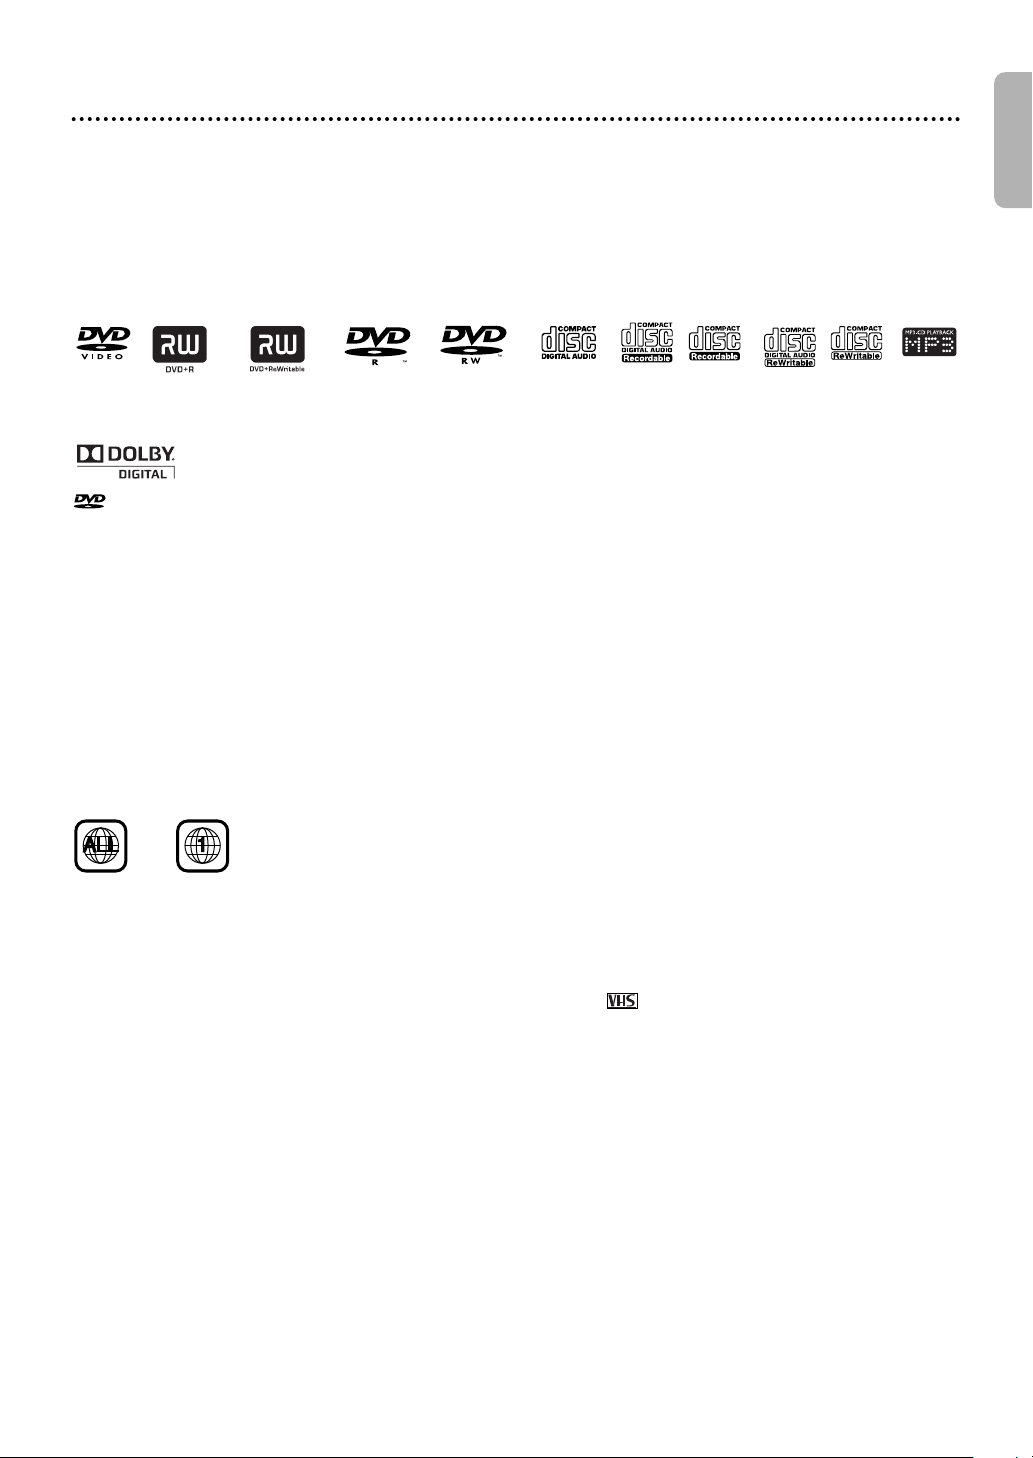
The DVD player will play Digital Video Discs (DVDs);finalized Digital Video Discs Recordable (DVD+R,DVD-R);
finalized Digital Video Discs Rewritable (DVD+RW,DVD-RW);Audio Compact Discs (CDs);finalized Compact
Discs Recordable (CD-R) and Compact Discs Rewritable (CD-RW).
To play a DVD, make sure it meets the requirements for Region Codes and Color Systems as described
below.Discs that have the following logos will play on the DVD player. Other disc types are not guaranteed
to play in the DVD/VCR.
• Do not stand the unit up vertically. Install the unit in a horizontal and stable position.
• Be sure to remove the disc and unplug the AC power cord from the outlet before carrying the unit.
English
DVD
Windows Media is a trademark of Microsoft Corporation.
This unit is not compatible with Multiple Bit Rate
(MBR:a file that contains the same content encoded at several different bit rates).
DVD+R DVD+RW DVD-RWDVD-R
Manufactured under license from Dolby Laboratories.“Dolby” and the double-D symbol are
trademarks of Dolby Laboratories.
Audio
CD
CD-R
CD-RW
MP3 files
Region Codes
DVDs must be labeled for ALL regions or for Region 1 in order to play on this DVD player. You cannot play
DVDs that are labeled for other regions.
Look for the symbols below on your DVDs. If these region symbols do not appear on your DVD,you
cannot play the DVD in this player.
The number inside the globe refers to a region of the world. Region 1 represents the United States,
Canada,upper regions of North America,Bermuda,the U.S.Virgin Islands,and small regions near Australia.
A disc encoded in a specific region format can only play on DVD players with the same region code.For
example,if a disc is labeled for Region 2, you cannot play the DVD on this player.
Color Systems
Different color systems are available throughout the world. The most common color
systems are NTSC,which is used primarily in the United States and North America,
PAL, and SECAM.
This DVD player will play both NTSC and PAL DVDs. You cannot play DVDs recorded in other formats.
The color system of the DVD may be listed on the DVD or on the disc case. Your TV must have the NTSC
and/or PAL color system as well.
Playable Video Cassettes
The VCR of this DVD/VCR has a High Quality (HQ) system and is compatible with existing Video Home
System (VHS) equipment.Use only video cassettes that have the mark. The use of other tapes may
result in poor picture quality and excessive deposits on the video heads,which may not be covered by the
warranty if damage occurs.
The VCR also has a 19 micron head,which provides a better picture when you view tapes recorded in slow
speed (SLP).
Unacceptable Discs
If you insert an unacceptable type of disc,a Disc Error message may appear on the TV screen. The following
discs will not play on this DVD player.
• CD-ROM • Compact Disc-Interactive (CD-I) • DVD-RAM
• Video Single Disc (VSD) • DVD-ROM • DVD-Audio
• Unfinalized disc • DVD contains MP3, Windows MediaTMAudio or JPEG files
• Non-compatible recording mode
On the following disc,the sound may not be heard.
• Super Audio CD - Only the sound on the CD layer can be heard. The sound on the high-density Super
Audio CD layer cannot be heard.
Page 8

English
8 Hookups
Determining the best possible connection...
Your hookup will be determined primarily by your existing equipment,especially your TV. These guidelines describe
which options have the best picture and sound quality. You will not use all the jacks on the DVD/VCR.
★★★★★★★★
★★★★★★
★★★★
★★★★★★★★
★★★★★★
If your TV has Component Video In jacks (which could be labeled Y CR CB, Y PR PB or YUV and may be
green,blue and red),use the Component Video jacks (Y C
only this video connection,only the DVD picture will be available. To see DVD features on the TV,set the TV
to its Component Video In channel.Component Video provides the best picture quality.See page 10.
Progressive Scan provides less flickering and higher image resolution than traditional (525i/480i or interlace)
TV signals.
If your TV has Progressive Scan (525p/480p or progressive),connect the TV to the DVD/VCR’s
COMPONENT VIDEO OUT (Y C
DVD/VCR’s DISPLAY Menu.See pages 50-5
Progressive Scan also
If your TV does not have Progressive Scan but has Component Video In jacks,connect
them to the DVD/VCR’s COMPONENT VIDEO OUT jacks (Y C
to OFF either in the DISPLAY Menu or by pressing and holding PLAY B (DVD) on the front of the
SCAN)
DVD/VCR for more than 5 seconds. See pages 50-51.
If your TV has an S-Video In jack (which also may be labeled Y/C or S-VHS),use the S-VIDEO OUT jack for
excellent picture quality.If you use only this video connection,only the DVD picture will be available. To see
DVD features on the TV,set the TV to its S-Video In channel. See page 10.
If your TV has a single yellow Video In jack (which also may be labeled CVBS,Composite or baseband),use
the yellow DVD/VCR VIDEO OUT jack for good picture quality.This connection provides a picture for both
the DVD player and the VCR. To see DVD or VCR features on the TV,set the TV to its Video In channel.See
page 9
If you have a Stereo with a Coaxial Digital Audio In jack,this provides the clearest sound for the DVD player.
Connect the DVD/VCR’s COAXIAL DIGITAL AUDIO OUT jack to your Stereo for the best sound quality.If
you use only this audio connection,only disc sound (no VCR) will be available.See page 12.
If digital audio connections are not possible,connect the DVD/VCR’s red and white DVD/VCR AUDIO OUT
jacks to the Audio In jacks of your Stereo or TV. This connection provides sound for both the DVD player
and the VCR.See pages 10-11.
.
B/PBCR/PR
) jacks.Set Progressive Scan (PROG.SCAN) to ON in the
1
. P.SCAN will appear on the DVD/VCR’s display panel.Set your TV to
B/PB CR/PR) for the best picture quality.If you use
B/PB CR/PR).Set
Progressive Scan (PROG.
Before you begin...
●●
Refer to the manuals of your TV,Cable Box,Stereo or other devices as necessary.Note the style of jacks and
connectors on the other equipment.Determine how to choose different Audio and Video In channels on your
other equipment so you can see and hear the DVD/VCR material playing on the TV,Stereo,etc.
●●
Disconnect all equipment from the power outlets.Connect the equipment to power only after you have finished
hooking up everything.Never make or change connections with equipment connected to power.
Remember...
●●
Set the TV to the correct Video In channel. Such channels may be called AUX or AUXILIARY IN, AUDIO/VIDEO or
A/V IN,EXT1 or External In,etc. These channels often are located near channel zero (0).Or, your TV’s remote may
have a button or switch that selects the Video Input channel.See your TV manual for details.If you do not see the
DVD or VCR playback on the TV,go to the lowest TV channel (01 or 02) and change channels downward until you
see the DVD or VCR picture on the TV.
To help you find the right Audio/Video In channel,turn on the DVD/VCR.Press DVD to put the DVD/VCR in DVD
mode. With no disc in the player,a large DVD Video logo will appear on the TV screen when you get the TV on the
correct Audio/Video In channel.
●●
Set the Stereo to the correct channel or “source” mode.
●●
Depending on your connection,you may need to purchase additional cables or adaptors.If your TV or monitor has
BNC-type connectors,you will need an adaptor.
Once you determine the best option, find your choice on pages 9-12. Follow the steps for the
hookup you choose. Then, go to page 14 to complete the first-time setup.
Page 9

Hookups (cont’d) 9
DIGITAL
AUDIO OUT
COAXIAL
AUDIO
OUT
DVD
L
R
LRL
R
S-VIDEO
OUT
COMPONENT
VIDEO OUT
Y
C
B
/
P
B
AUDIO OUT
DVD/VCR
VCR
VIDEO OUT
AUDIO IN
VIDEO IN
CR /
P
R
AUDIO IN
VIDEO IN
L
R
ANT. IN
AUDIO OUT
LR
VIDEO
OUT
OUTIN
Audio Cable
(not supplied)
RF coaxial cable
(not supplied)
RF coaxial cable
(not supplied)
External tuner
TV Signal
Audio Cable (supplied)
Video Cable
(not supplied)
Video Cable (supplied)
DVD/VCR
Back of TV
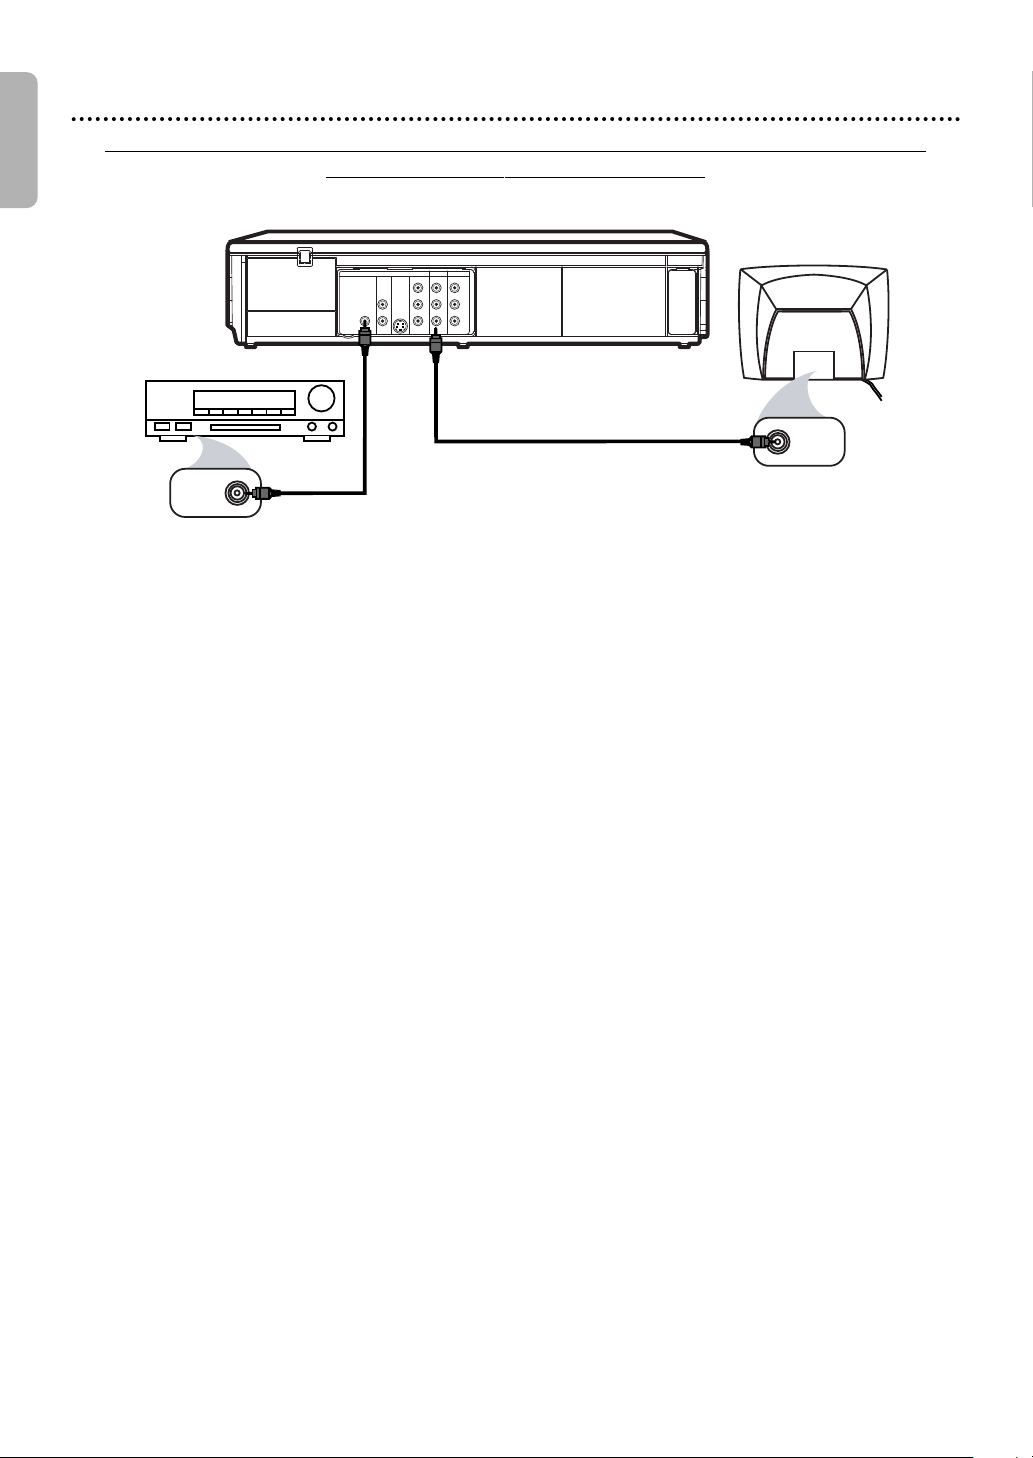
DVD/VCR to An External Tuner
This DVD/VCR does not have a tuner input jack.To record TV programs on your DVD/VCR,you need to
connect this DVD/VCR to an external tuner device (e.g.,set top box, cable box or satellite receiver) that
has audio/video output jacks.
e.g.)
English
1
2
6
4
3
Connections
Connect a TV signal to the IN jack on the
external tuner.
1
Use an RF coaxial cable (not supplied) to
connect the OUT jack on the external tuner to
2
the ANT. IN jack on the TV.
Connect the red and white audio cable
(supplied) to the red and white AUDIO OUT
3
jacks on the external tuner and to the red and
white VCR AUDIO IN jacks on the DVD/VCR.
Connect the yellow video cable (supplied) to the
yellow VIDEO OUT jack on the external tuner
4
and to the VCR VIDEO IN jack on the DVD/VCR.
Connect another red and white audio cable (not
5
6
7
supplied) to the red and white DVD/VCR
AUDIO OUT jacks on the DVD/VCR and to the
red and white AUDIO IN jacks on the TV.
Connect another yellow video cable (not supplied)
to the DVD/VCR VIDEO OUT jack on the
DVD/VCR and to the VIDEO IN jack on the TV.
Connect the power cords of the TV and the
DVD/VCR to a power outlet. Turn on the TV and
set it to the correct Video In channel.
You are ready to turn on the DVD/VCR. Go to
page 14 to complete the first-time setup.
8
●
You can record any unscrambled channel by selecting the channel
on the external tuner. Be sure that the external tuner is turned on.
●
Signal from the external tuner can be output only on CVBS output
even when the power of the DVD/VCR is off.
●
You cannot record one channel while watching
another channel.
5
Helpful Hints
• If your TV has antenna in jack
only, it is still possible to connect
this unit to your TV by using a
commercially available stereo
audio/video RF modulator.Refer
to the manual accompanying the
modulator for more information.
• Required cables and connecting
methods differ depending on the
external tuner.
For more information,please
contact your external tuner
provider.
• Line through output
When an external device,such as
cable/satellite box,is connected
to L1(Rear) jacks of this
DVD/VCR,the signal from the
external device can be output
even when the power of the
DVD/VCR is off.
• Instead of using video out jack of
this DVD/VCR,you can also use
S-video out jack or component
video output jack for connecting
to your TV.
• Refer to the manual
accompanying external devices
for more information.
Page 10

English
DIGITAL
AUDIO OUT
COAXIAL
AUDIO
OUT
DVD
L
R
LRL
R
S-VIDEO
OUT
COMPONENT
VIDEO OUT
Y
C
B /
PB
AUDIO OUT
DVD/VCR
VCR
VIDEO OUT
AUDIO IN
VIDEO IN
CR /
PR
AUDIO IN
S-VIDEO IN
L
R
Back of TV
Audio and
Video IN Jacks
on TV
Audio Cable
(supplied)
Video Cable
(supplied)
AUDIO
OUT
DVD
L
R
S-VIDEO
OUT
COMPONENT
VIDEO OUT
Y
C
B
/
P
B
CR /
P
R
AUDIO IN
Y
Cb/Pb
Cr/Pr
COMPONENT
VIDEO IN
L
R
Back of TV
AUDIO
OUT
DVD
L
R
S-VIDEO
OUT
COMPONENT
VIDEO OUT
Y
C
B
/
P
B
CR /
P
R
AUDIO IN
VIDEO IN
L
R
1
1
1
2
b
2
c
2
a
10 Hookups (cont’d)
DVD/VCR to a TV that has Audio/ Video, Component Video or S-Video In
jack
s
Connect the red and white audio cable (supplied) to
the red and white DVD or DVD/VCR AUDIO OUT
1
jacks on the DVD/VCR and to the red and white
AUDIO IN jacks on the TV.
● If you are using DVD/VCR AUDIO OUT jacks for your
audio connection,use 2a method for your video connection.
If you are using DVD AUDIO OUT jacks for your audio
connection,use 2b or 2c method for your video connection.
Connect the yellow video cable (supplied) to the
a
2
2
2
DVD/VCR VIDEO OUT jack on the DVD/VCR and
to the VIDEO IN jack on the TV. TheVIDEO IN jack on
the TV is usual
ly yellow and may be labeled CVBS,
Composite or Baseband video.
Connect component video cable (not supplied) to
b
the COMPONENT VIDEO OUT jacks on the
DVD/VCR and to the COMPONENT VIDEO IN
jacks on the TV. The Co
mponent Video In jacks on the
TV are usually red,blue and green.
Connect an S-Video cable (not supplied) to the
c
S-VIDEO OUT jack on the DVD/VCR and to the
S-VIDEO IN jack on the TV.
3
4
Connect the power cords of the TV and the
DVD/VCR to a power outlet. Turn on the TV and set
it to the correct Video In channel.
If you are using the yellow video cable for VCR playback,choose
the Video In channel at your TV. To find the correct Video In
channel,go to your lowest TV channel and change channels
downward until you see VCR playback on the TV screen. To help
you find the right Video In channel, turn on the DVD/VCR.Press
DVD to put the DVD/VCR in DVD mode. With no disc in the
player, a large DVD Video logo will appear on the TV screen when
you get the TV on the correct Video In channel.
You are ready to turn on the DVD/VCR. Go to page
14 to complete the first-time setup.
Helpful Hint
• Match the cable colors to the
jack colors.If the TV has a single
AUDIO IN jack,use the white
audio cable to connect the
DVD/VCR’s white AUDIO OUT
(left) jack to the TV’s AUDIO IN
jack.You will not use the red
cable.Or,purchase a “splitter”
audio cable to go from the
left/right AUDIO OUT jacks of
the DVD/VCR to the TV’s single
AUDIO IN jack.
Page 11

DIGITAL
AUDIO OUT
COAXIAL
AUDIO
OUT
DVD
L
R
LRL
R
S-VIDEO
OUT
COMPONENT
VIDEO OUT
Y
C
B
/
P
B
AUDIO OUT
DVD/VCR
VCR
VIDEO OUT
AUDIO IN
VIDEO IN
CR /
P
R
VIDEO IN
AUDIO (LEFT) IN
AUDIO (RIGHT) IN
Back of TV
(example only)
Hookups (cont’d) 11
DVD/VCR to a TV and a Stereo
English
Audio Cable
(supplied)
Video Cable
2
(supplied)
1
Connect the supplied red and white audio cable to the red and
white DVD/VCR AUDIO OUT jacks on the DVD/VCR and to
1
the red and white AUDIO IN jacks on the Stereo. Match the cable
colors to the jack colors.
Connect the supplied yellow video cable to the DVD/VCR
VIDEO OUT jack on the DVD/VCR and to the VIDEO IN jack
2
on the TV.
To use Component Video cable or S-Video cable instead for the DVD player,
see page 10. You will still need the yellow video cable for VCR features.
Connect the power cords of the DVD/VCR, TV and Stereo to a
power outlet. Turn on the TV and set it to the Video In
3
channel. Or,simply go to your TV’s lowest channel (01 or 02) and continue
changing channels downward at the TV until you see VCR or DVD playback on
the TV screen.
To help you find the right Video In channel at the TV,turn on the DVD/VCR.Press
DVD to put the DVD/VCR in DVD mode. With no disc in the player, a large DVD
Video logo will appear on the TV screen when you get the TV on the correct
Video In channel.
Turn on the Stereo and set it to the correct auxiliary or source
mode. Check your Stereo manual for details.
Stereo
You are ready to turn on the DVD/VCR. Go to page 14 before
turning on the DVD/VCR.
4
Page 12
English
DIGITAL
AUDIO OUT
COAXIAL
AUDIO
OUT
DVD
L
R
LRL
R
S-VIDEO
OUT
COMPONENT
VIDEO OUT
Y
C
B
/
P
B
AUDIO OUT
DVD/VCR
VCR
VIDEO OUT
AUDIO IN
VIDEO IN
CR /
P
R
VIDEO IN
COAXIAL
DIGITAL
AUDIO IN
12 Hookups (cont’d)
DVD/VCR to a TV and to a Stereo that is Dolby Digital-compatible
Using Digital A
Stereo
udio connections
Back of TV
(example only)
2
Video Cable
1
Coaxial Digital Audio
Cable (not supplied)
Connect a coaxial digital audio cable (not supplied) to the
DVD/VCR’s COAXIAL DIGITAL AUDIO OUT jack and to the
1
COAXIAL DIGITAL AUDIO IN jack on the Stereo.
This digital audio connection only provides sound for the DVD player of the DVD/VCR.
So,in order to use the VCR features,connect the supplied red/white audio cable. To
connect the red/white audio cable,see step 5 on page 9.
(supplied)
Connect the supplied yellow video cable to the yellow DVD/VCR
VIDEO OUT jack on the DVD/VCR and to the VIDEO IN jack on
2
the TV. To use component video cable or S-Video cable instead for the DVD
player, see page 10.You will still need the yellow video cable for VCR features.
Plug in the power cords of the Stereo, TV and DVD/VCR. Turn on
the Stereo and select its Auxiliary IN channel. Turn on the TV and
3
set it to the correct Video In channel. Go to your TV’s lowest channel (01
or 02) and change channels downward until you see DVD or VCR material on the
TV screen.
To help you find the right Video In channel on the TV,turn on the DVD/VCR.Press
DVD to put the DVD/VCR in DVD mode. With no disc in the player,a large DVD
Video logo will appear on the TV screen when you get the TV on the correct Video
In channel.
Make sure
the DVD/VCR’s display panel.Disable
Progressive Scan (PROG.SCAN)
Progressive Scan either in the DISPLAY
is OFF and P.SCAN does not appear on
Menu or by pressing and holding PLAY B (DVD) on the front of the
DVD/VCR for more than 5 seconds. Details are on pages 8 and 51.
You are ready to turn on the DVD/VCR. Go to page 14 before
turning on the DVD/VCR.
4
Remember...
Some DVDs are recorded in Dolby Digital Multi-channel Surround Sound. Select Dolby
Digital Multi-channel Surround Sound in the DVD Disc Menu. If Dolby Digital Surround
Sound is not recorded on the disc,you will not have surround sound available.
If you connect the DVD/VCR to a Dolby Digital Stereo,set DOLBY DIGITAL to
BITSTREAM in the DVD player’s Setup Menu. Details are on page 52. If the DVD/VCR is not
connected to a Dolby Digital-compatible Stereo,set DOLBY DIGITAL to PCM.
Incorrect settings may cause noise distortion and damage the speakers.
Page 13
Remote Control Setup 13
Putting Batteries in the Remote Control
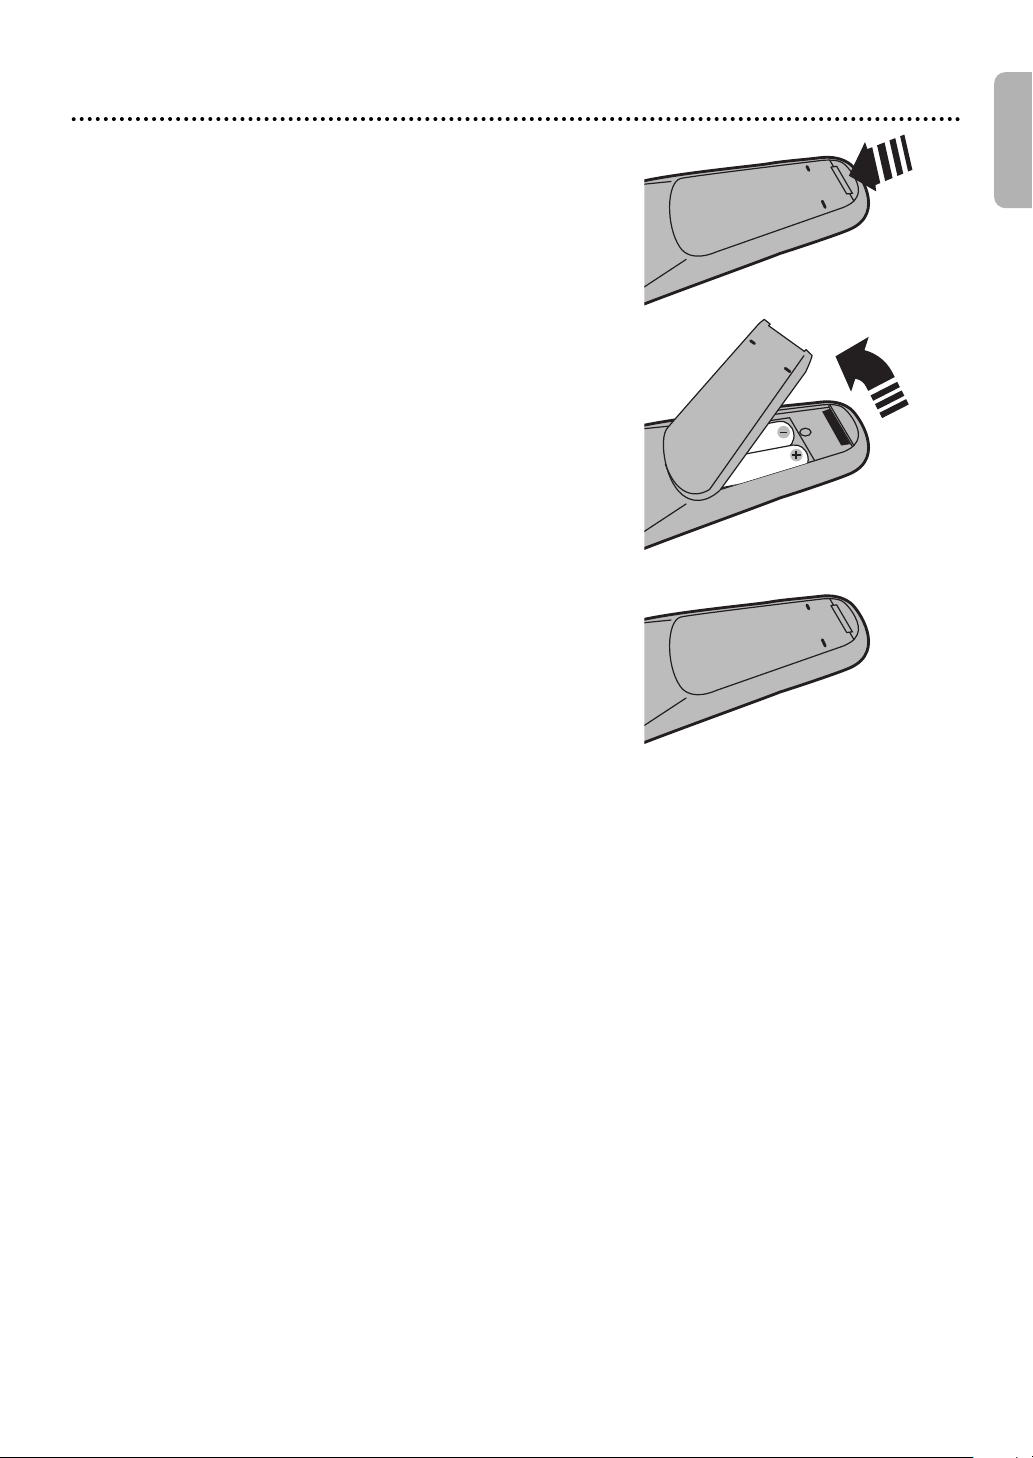
Remove the battery compartment lid on the
bottom of the remote control by pressing the tab, then
1
lifting the lid.
Place two AA (1.5 V) batteries inside the
battery compartment with their
2
as indicated.
Replace the battery compartment lid.
+ and –
ends aligned
3
Using the Remote Control
● Point the remote control at the DVD/VCR’s remote sensor (see
page 18) when using the remote to operate the DVD/VCR.Do
not point the remote at the TV.
● Do not put objects between the remote and the DVD/VCR.
Recycling Guidelines/Battery Safety
● Your new product and its packaging contain materials that can
be recycled and reused.Specialized companies can recycle your
product to increase the amount that needs to be properly
disposed. Your product uses batteries that should not be
thrown away when depleted but should be disposed of as small
chemical waste.Please find out about the local regulations on
disposal of your old product,batteries and packaging whenever
you replace existing equipment.
● Battery Usage CAUTION - To prevent battery leakage that may
result in bodily injury, property damage or damage to the unit:
• Install ALL batteries correctly,with the
the battery aligned as indicated on the unit.
• Do not mix batteries,for example, old with new or carbon
with alkaline.
• Remove batteries when the unit will not be used for a long
time.
+ and –
markings on
English
1
2
3
Page 14

English
DVDVCR SETUP
INPUT MENU
REC SPEED MODE
ANGLE SEARCH REPEAT
DISPLAY SUBTITLE ZOOM
TIMER SET
REPEAT
A-B
AUDIO
BACKPAUSESTOP
PLAYOKFFW
REW
CLEAR TITLE
DISC
TRACKING
OPEN/CLOSE
12
6
5
4
7
8
9
0
+10
3
14 First-time DVD/VCR Setup
Before turning on your DVD/VCR,make sure batteries are in the
remote control and the DVD/VCR and TV are connected correctly.
These menus may not appear if you have already
turned on the DVD/VCR.
Turn on the TV. Set it to the correct Video In
channel. (Check your TV owner’s manual for details.)
1
Pressy. VCR light will appear on the front of the
DVD/VCR.The display shown below will appear.
2
These menus may not appear if you have already turned on
the DVD/VCR.You may have turned on the DVD/VCR
before to find the Audio/Video In channel of the TV, for
example.If so,follow the steps on page 20 to select a
language for the VCR menus.
LANGUAGE SELECT
BENGLISH [ON]
FRANCAIS
ESPAÑOL
PUSH B
Press K or L to select ENGLISH, FRANCAIS
(French) or ESPAÑOL (Spanish) as the language for
3
VCR On-Screen Displays and menus. Then, press B.
● To put the DVD/VCR in VCR mode,press VCR so VCR
light appears.
Turn on the TV.
1
2
3
Helpful Hints
• To skip this feature and play a
tape immediately,insert a tape
with its record tab removed.
• Repeat this process if the power
fails.
Page 15
Video Cassette Playback 15
DVDVCR SETUP
INPUT MENU
REC SPEED MODE
ANGLE SEARCH REPEAT
DISPLAY SUBTITLE ZOOM
TIMER SET
REPEAT
A-B
AUDIO
BACKPAUSESTOP
PLAYOKFFW
REW
CLEAR TITLE
DISC
TRACKING
OPEN/CLOSE
12
6
5
4
7
8
9
0
+10
3
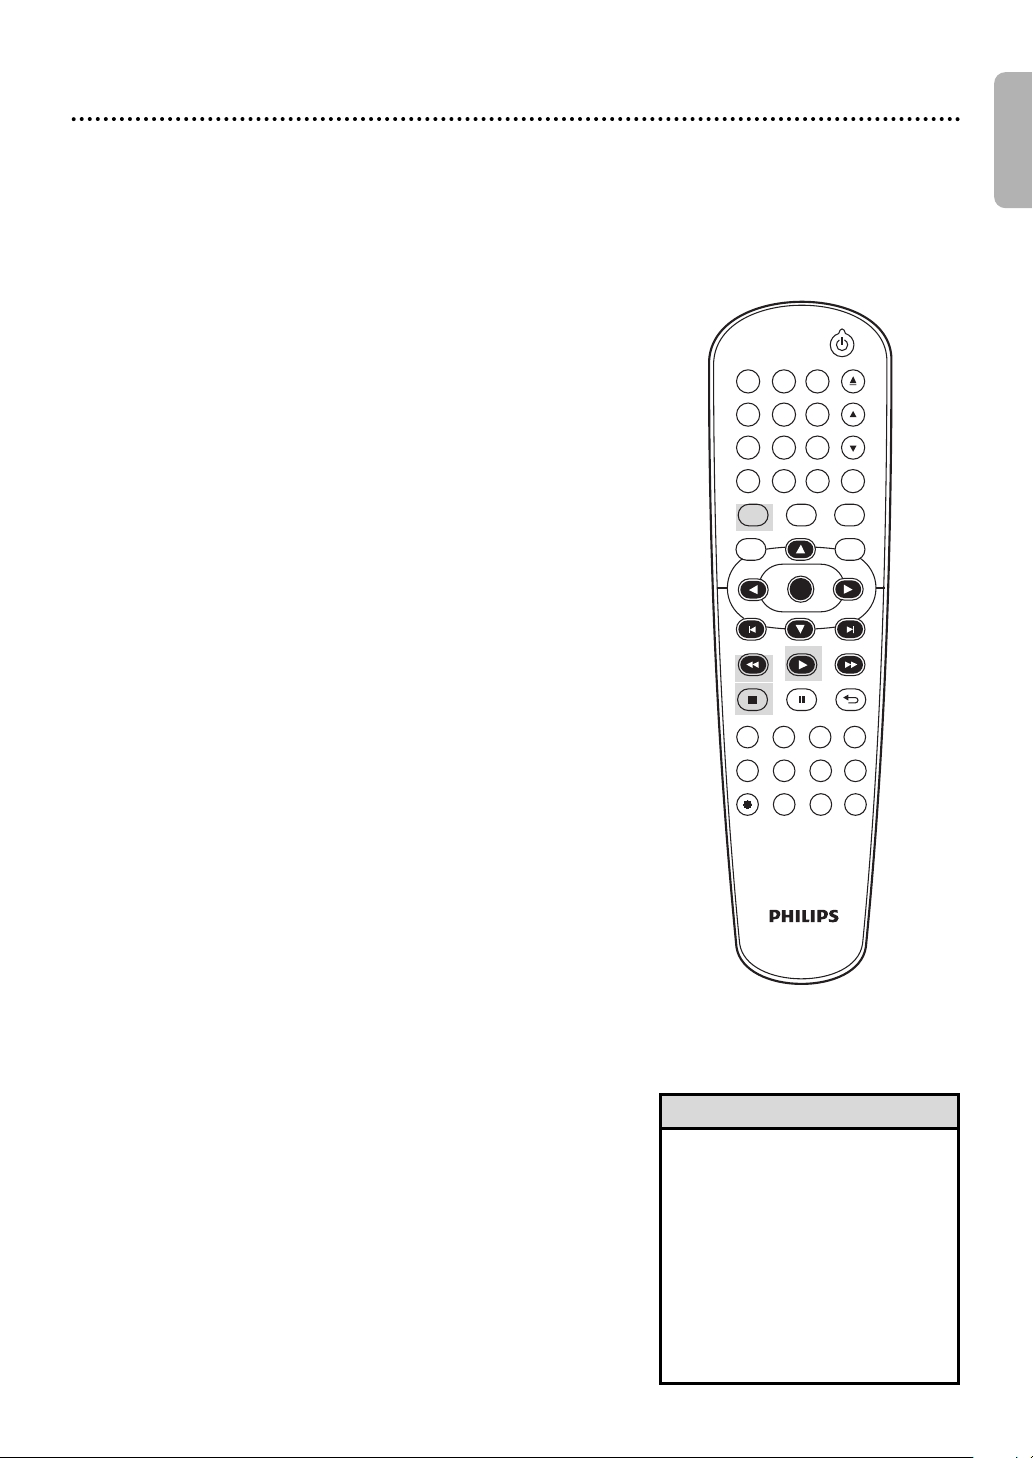
Read and follow the steps below to play a tape.
Turn on the TV. Set it to the correct Video In
channel. (Check your TV owner’s manual for details.)
1
Details are on page 8.
Insert a tape in the cassette compartment of
the DVD/VCR.VCR light will appear on the front of the
2
DVD/VCR.If the tape’s record tab has been removed,
playback will start automatically.
If the DVD/VCR power is already on, press VCR to put the
DVD/VCR in VCR mode if necessary.VCR light will appear
on the front of the DVD/VCR.
● If playback does not start automatically,press VCR,then
press PLAY B.
● Press STOP C to stop playback.
● Press REW h to rewind the tape.
● After the tape stops,press STOP/EJECT CA on the front
of the DVD/VCR to remove the tape.
Turn on the TV.
1
Insert a tape in the
DVD/VCR.
2
English
Helpful Hints
• Other tape playback features are
on pages 29-32.
• If AUTO REPEAT is ON,playback
will begin when you insert a tape,
even when the record tab is
intact.Details are on page 29.
• You must connect the DVD/VCR
to a TV using the audio/video
cables in order to use the VCR
features.These hookups are
explained on pages 9 and 11.
Page 16

English
DVDVCR SETUP
INPUT MENU
BACKPAUSESTOP
PLAYOKFFWREW
CLEAR TITLE
DISC
TRACKING
OPEN/CLOSE
12
6
5
4
7
8
9
0
+10
3
16 Disc Playback
Before you begin,turn on the TV,Stereo and other equipment
connected to the DVD/VCR.Make sure the TV and the Stereo
(if applicable) are set to the correct channel.
Details are on pages 8-12.
1
Pressy to turn on the DVD/VCR.
1
Press DVD so DVD light appears on the front of
the DVD/VCR.
2
Press OPEN/CLOSE A to open the disc tray.
3
Place a disc onto the tray. If the DVD is recorded on
only one side,place the disc on the tray with the label
4
facing up and the shiny side facing down.Some DVDs are
recorded on both sides.Make sure the label of the side you
want to play is facing up.
Press PLAY B to close the tray. The tray will close
and playback will begin.If playback does not start
5
automatically, press PLAY B again.
If a DVD Menu appears instead,see page 32.
To play MP3, Windows MediaTMAudio or JPEG files,see
pages 43-44.
You also can close the tray by pressing
OPEN/CLOSE A.
● Press STOP C to stop playback.
REMINDER: This DVD/VCR
will play only certain discs.
See page 7 for details.
3
2
5
Insert a disc.
4
Helpful Hints
• An “X” may appear at the top right
corner of the TV screen when you
try a feature.Either the feature is
not available on the disc,or the
DVD/VCR cannot access the
feature at this time. This does not
indicate a problem with the
DVD/VCR.
• If a disc is dirty or scratched, the
picture may appear distorted or
playback may stop.In such cases,
remove the disc and turn off the
DVD/VCR.Disconnect the power
cord,then reconnect it.Clean the
disc,then turn on the DVD/VCR
again and reinsert the disc for
playback.
• If a disc has multiple layers,the
picture may freeze occasionally. This
happens when the first layer
switches to the second layer. This is
not a malfunction.
• When the DVD or CD light
appears on the display panel,the
disc is loaded and ready for
playback.
• When you press OPEN/CLOSE A
or PLAY B (DVD) on the front of
the DVD/VCR when the power is
off,the DVD/VCR will turn on in
DVD mode.Otherwise,the
DVD/VCR will turn on in the mode
in which it was turned off.
If you use PLAY B to close the disc
•
tray, playback starts automatically.If
you use OPEN/CLOSE A to close
the disc tray, you have to press
PLAY B to start playback.
Page 17
Display Panel 17
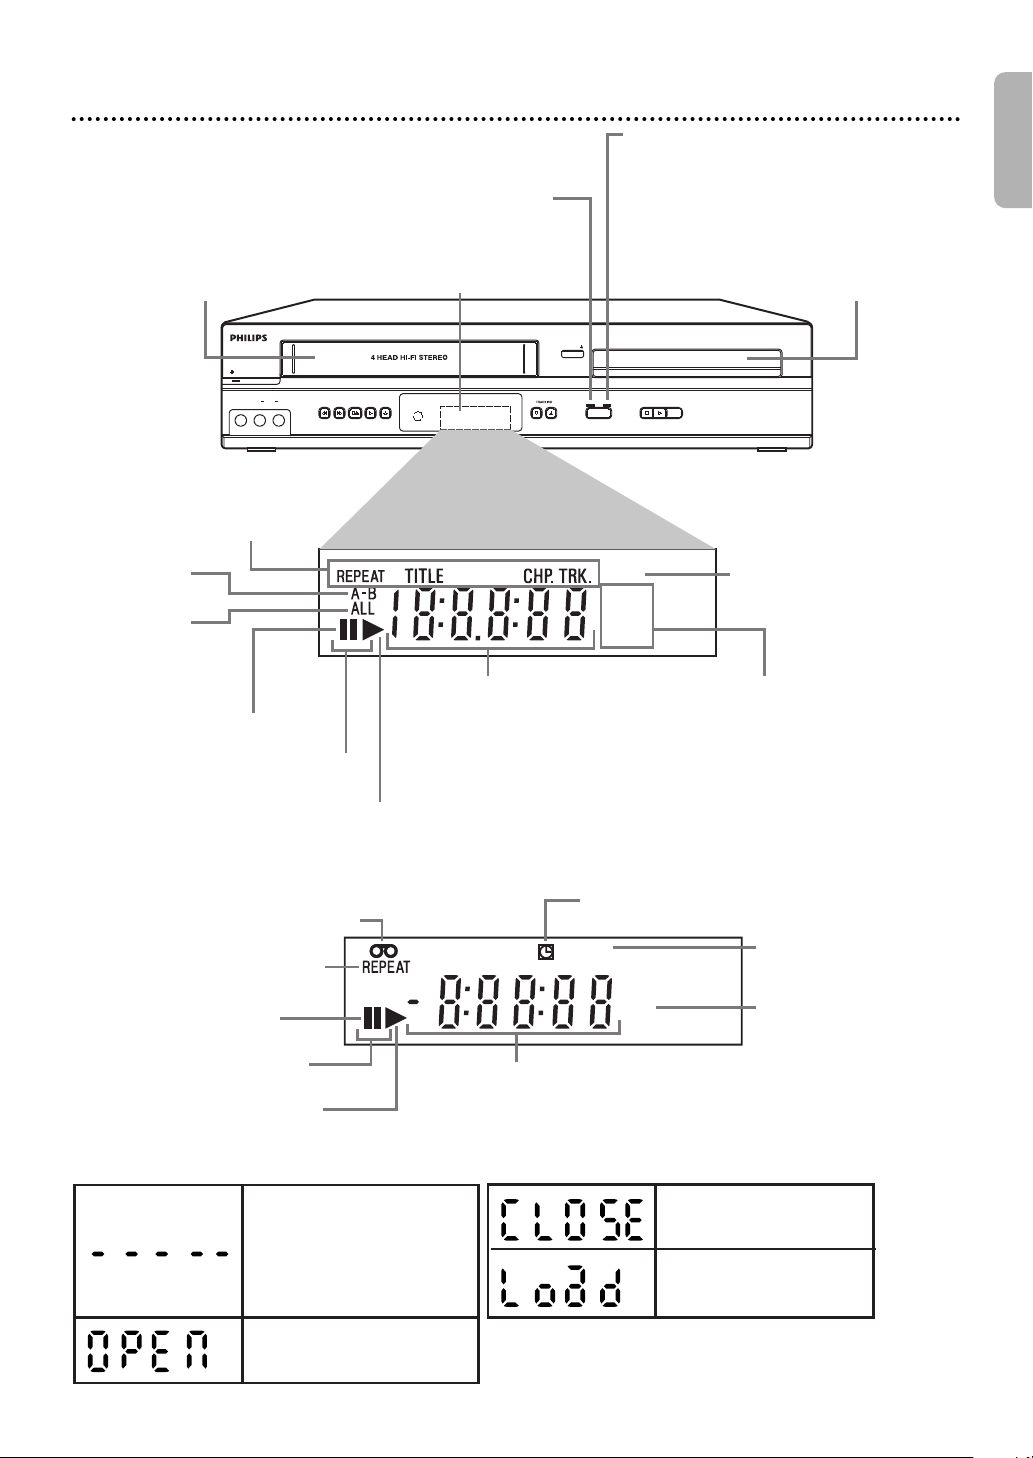
Appears after the disc tray
closes if the tray is empty,
if there is an error reading
the disc, or if an unacceptable
disc is installed.
Tray is opening or is open.
Tray is closing.
Disc is loading.
STOP PLAY
REW F.FWD PLAY
RECSTOP/EJECT
VIDEO AUDIOLR
ONE TOUCH RECORDING • LONG PLAY
SOURCE
STANDBY-ON
VCR DVD
DVD
OPEN/CLOSE
REC
PM
GROUP P.SCAN
DVD
CD
DVD VIDEO PLAYER
Disc tray
Insert a disc here.
DVD light
This light appears when the DVD/VCR is in
DVD mode. You can only watch DVDs when
DVD light is on. To make DVD light come
on, press SOURCE on the front of the
DVD/VCR or DVD on the remote control.
Display
Messages about current disc operations
appear here. See Display Messages below.
VCR light
This light appears when the DVD/VCR is in VCR mode. You can only
watch videotapes or access VCR features when VCR light is on.
To make VCR light come on, press VCR on the remote control or
SOURCE on the front of the DVD/VCR.
Cassette
Compartment
Insert a video
cassette here.
Appears when a repeat function
is active.
Appears when
A-B Repeat is on.
Appears when
ALL Repeat is on.
(C D, M P3 ,
Windows MediaTM Audio
and JPEG)
Appears when disc playback
is paused.
Appears during Slow Motion
Playback (DVD).
Appears during Slow Motion
Playback.
Appears during disc playback.
Displays the current disc type.
• DVD: DVD
• CD: Audio CD, MP3,
Windows Media
TM
Audio,
JPEG
Appears when Progressive
Scan is active.
Indicates a tape is in the DVD/VCR.
Appears during playback when
the Auto Repeat function is on.
Appears if tape playback
is paused.
Appears during tape playback.
Indicates the elapsed playing time of a tape; also displays a selected
external input channel, tape speed, remaining time for an
OTR or the current time.
Indicates current time is P.M.
There is no A.M. indication.
Appears during recording;
flashes when recording is
paused.
Appears when an OTR, Timer Recording,
or Satellite Link has been set.
Displays the elapsed time of the title
or track.
The number of a new title, chapter, or
track is displayed for 3 seconds when
a chapter or track is switched, or
DISPLAY is pressed during playback.
English
DVD Display Panel
VCR Display Panel
Display Messages
Page 18

English
STOP PLAY
REW F.FWD PLAY
TRACKINGSTOP/EJECT
VIDEO AUDIOLR
ONE TOUCH RECORDING • LONG PLAY
SOURCE
STANDBY-ON
VCR DVD
DVD
OPEN/CLOSE
DVD VIDEO PLAYER
REC
VCR AUDIO and
VIDEO IN jacks (L2)
ySTANDBY-ON Button
REW h Button (VCR)
F.F WD g Button (VCR)
STOP/EJECT C A Button (VCR) PLAY B Button (VCR)
REC I
Button (VCR)
SOURCE Button
STOP C Button (DVD)
PLAY B Button (DVD)
OPEN/CLOSE A Button (DVD)
TRACKING
K/L
ButtonsRemote Sensor
DIGITAL
AUDIO OUT
COAXIAL
AUDIO
OUT
DVD
L
R
LRL
R
S-VIDEO
OUT
COMPONENT
VIDEO OUT
Y
C
B /
PB
AUDIO OUT
DVD/VCR
VCR
VIDEO OUT
AUDIO IN
VIDEO IN
CR /
PR
DVD/VCR AUDIO and VIDEO OUT jacks
DVD COMPONENT
VIDEO OUT jacks
DVD AUDIO
OUT jacks
AC Power Cord
DVD COAXIAL
DIGITAL AUDIO
OUT jack
DVD S-VIDEO
OUT jack
VCR AUDIO and
VIDEO IN jacks (L1)
DVDVCR SETUP
INPUT MENU
REC SPEED MODE
ANGLE SEARCH REPEAT
DISPLAY SUBTITLE ZOOM
TIMER SET
REPEAT
A-B
AUDIO
BACKPAUSESTOP
PLAYOKFFW
REW
CLEAR TITLE
DISC
TRACKING
OPEN/CLOSE
12
6
5
4
7
8
9
0
+10
3
SEARCH Button
SUBTITLE Button
SETUP Button
VCR Button
INPUT Button
s B KL Buttons
REW h Button
STOP C Button
PLAY B Button
ANGLE Button
y (
STANDBY-ON
) Button
OPEN/CLOSE A Button
TITLE Button
CLEAR Button
DVD Button
DISC MENU Button
OK Button
PAU SE k Button
FFW g Button
REC I Button
(SKIP) Button
(SKIP) Button
DISPLAY Button
SPEED Button
Number Buttons
AUDIO Button
MODE Button
TRACKING KL Button
ZOOM Button
TIMER SET Button
REPEAT Button
A-B REPEAT Button
BACK Button
Front Panel
18
Front Panel, Rear Panel and Remote Control
Rear Panel
Remote Control
Helpful Hint
• The DVD S-VIDEO OUT,
DVD COMPONENT
VIDEO OUT, DVD
AUDIO OUT and DVD
COAXIAL DIGITAL
AUDIO OUT jacks are
only useful in DVD mode.
To have sound and picture
in VCR mode, you must
connect the audio/video
cables supplied.Details are
on pages 9-11.
Helpful Hints
• For DVD player features,
press DVD before
pressing other buttons.
To put the DVD/VCR in
DVD mode,press DVD
or SOURCE so DVD
light appears on the front
of the DVD/VCR.
• For VCR features, press
VCR before pressing
other buttons.To put the
DVD/VCR in VCR mode,
press VCR or SOURCE
so VCR light appears on
the front of the
DVD/VCR.
Page 19

DVDVCR SETUP
INPUT MENU
REC SPEED MODE
ANGLE SEARCH REPEAT
DISPLAY SUBTITLE ZOOM
TIMER SET
REPEAT
A-B
AUDIO
BACKPAUSESTOP
PLAYOKFFW
REW
CLEAR TITLE
DISC
TRACKING
OPEN/CLOSE
12
6
5
4
7
8
9
0
+10
3
MONTH DAY YEAR
0 3 / – – – – – –
HOUR MINUTE AM/PM
– – : – – – –
CLOCK SET
Follow these steps to set the VCR clock. Make sure:
Clock (VCR) 19
Press VCR, then press SETUP so MENU appears.If
the clock has never been set,the CLOCK SET Menu may
1
appear when you press SETUP.If so,follow the instructions
from step 3 on this page.
- M E N U -
BTIMER PROGRAMMING
SATELLITE LINK
AUTO REPEAT [OFF]
CLOCK SET
LANGUAGE SELECT
Press K or L to select CLOCK SET. Then, press
B.
2
While the MONTH space is flashing, press K or
L until the month appears. Then, press B.
3
1
2-9
English
9
While the DAY space is flashing, press K or L
until the day appears. Then, press B.
4
While the YEAR space is flashing, press K or L
until the year appears. Then, press B. The day of
5
the week will appear automatically.
While the HOUR space is flashing, press K or L
until the hour appears. Then, press B.
6
While the MINUTE space is flashing, press K or
L until the minute appears. Then, press B.
7
While the AM or PM space is flashing, press K or
L to point to AM or PM.
8
Your selection will flash on the screen in the AM/PM space.
Press CLEAR or B to start the clock.
9
Helpful Hints
• If the clock has never been set,
the CLOCK SET Menu may
appear when you press SETUP.
If so,follow the instructions
from step 3 above.
• Press DISPLAY repeatedly to
show the time on the TV
screen.
• Power failures of more than 30
seconds can erase the Clock
Setting.
• To reset the clock,follow steps
1-2.Select the information you
want to change using s or B.
When the information is
flashing,use K or L to enter
the correct information.Press
CLEAR to set the clock.
Page 20
DVDVCR SETUP
INPUT MENU
PLAYOKFFWREW
CLEAR TITLE
DISC
TRACKING
6
5
4
7
8
9
0
+10
English
DVDVCR SETUP
INPUT MENU
REC SPEED MODE
ANGLE SEARCH REPEAT
DISPLAY SUBTITLE ZOOM
TIMER SET
REPEAT
A-B
AUDIO
BACKPAUSESTOP
PLAYOKFFW
REW
DISC
20 Language (VCR)
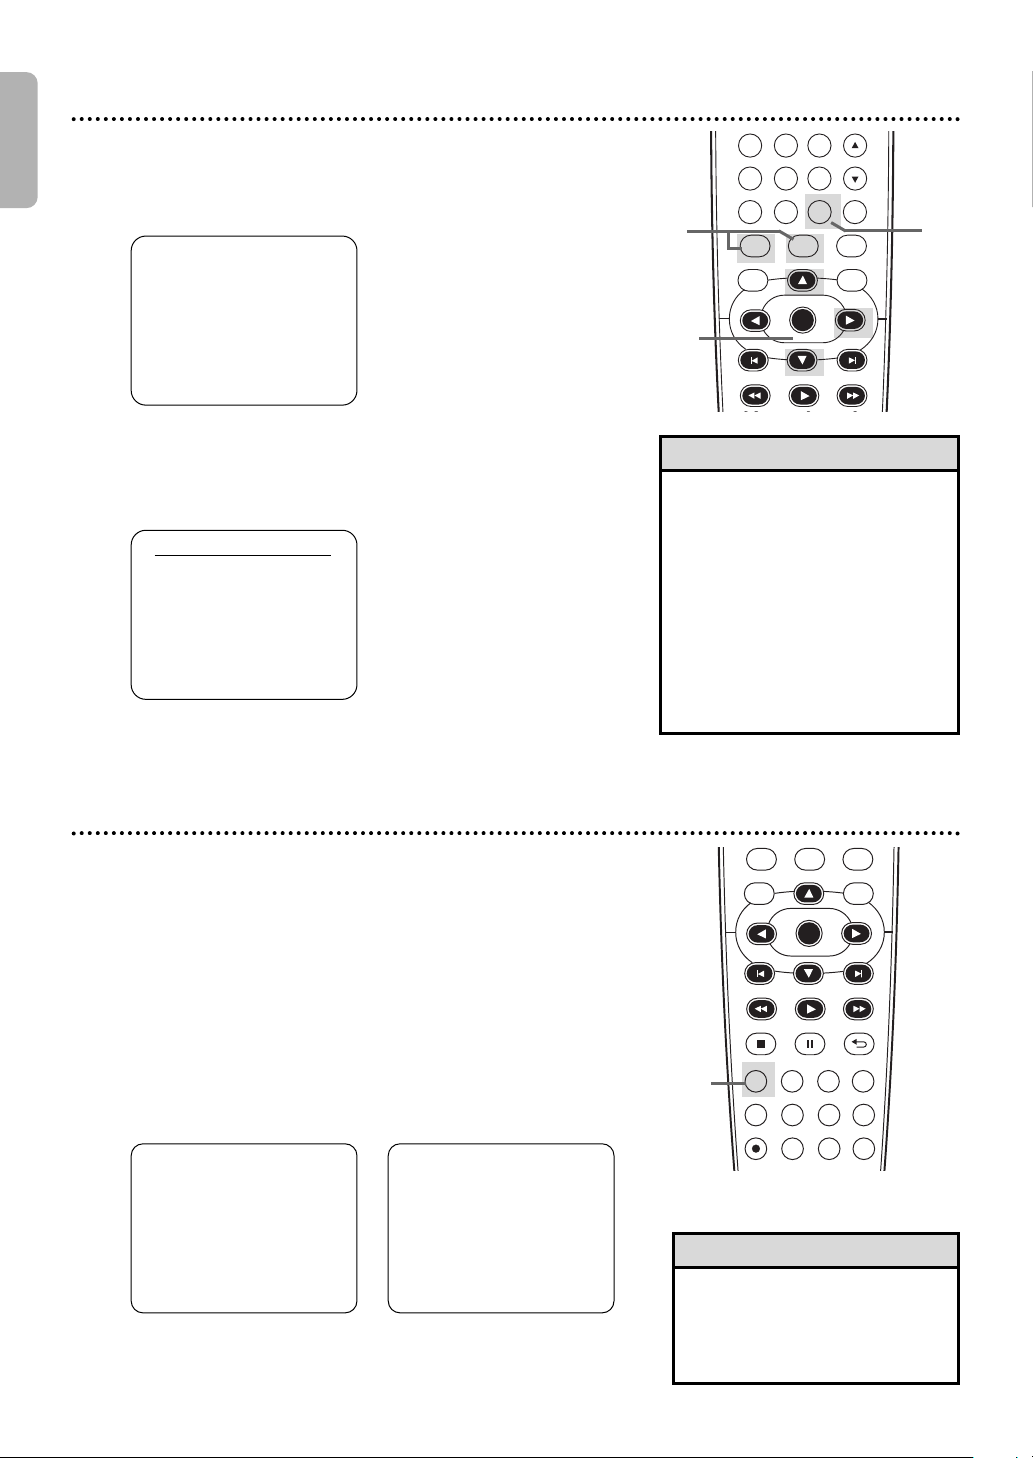
Follow the steps below to change the language of the VCR
On-Screen Displays and menus.
Press VCR, then press SETUP so MENU appears.
1
Press K or L to choose LANGUAGE SELECT,
then press B.
2
Press K or L to choose ENGLISH, FRANCAIS
(French) or ESPAÑOL (Spanish).
3
Press CLEAR to remove the menu.
- M E N U -
BTIMER PROGRAMMING
SATELLITE LINK
AUTO REPEAT [OFF]
CLOCK SET
LANGUAGE SELECT
LANGUAGE SELECT
BENGLISH [ON]
FRANCAIS
ESPAÑOL
1
2-3
• If you select FRANCAIS
1) Press SETUP so MENU
2) Press L to choose
3) Press K or L to select
4) Press CLEAR.
4
Helpful Hint
(French),or ESPAÑOL (Spanish)
and need English:
appears.
SELECTION LANGUE or
SELEC.IDIOMA, then press B.
ENGLISH.
4
VCR Status Displays
You may access Status Displays by pressing DISPLAY. The displays
may include the current time,external input channel and other
information.
Press DISPLAY. The COUNT Display will appear for 5
seconds. After 5 seconds,only the real-time tape counter
1
will appear. This counter shows you the elapsed playing
time of the tape (from the point at which the counter was
set to 0). The counter also will appear on the display panel
on the front of the DVD/VCR.
Press DISPLAY again. The CLOCK Display will
appear for 5 seconds. After 5 seconds, only the time will
2
appear.The time also will appear on the display panel on
the front of the DVD/VCR.
3
STOP
SLP 0:12:34
Press DISPLAY again to remove all the displays.
STOP 5:40 PM
SLP
L2
1-3
•
Helpful Hint
You cannot access a Status
Display when viewing a still
picture,during slow motion,or
during Forward and Reverse
Searching.
Page 21
Videotape Recording 21
DVDVCR SETUP
INPUT MENU
REC SPEED MODE
ANGLE SEARCH REPEAT
DISPLAY SUBTITLE ZOOM
TIMER SET
REPEAT
A-B
AUDIO
BACKPAUSESTOP
PLAYOKFFW
REW
CLEAR TITLE
DISC
TRACKING
OPEN/CLOSE
12
6
5
4
7
8
9
0
+10
3
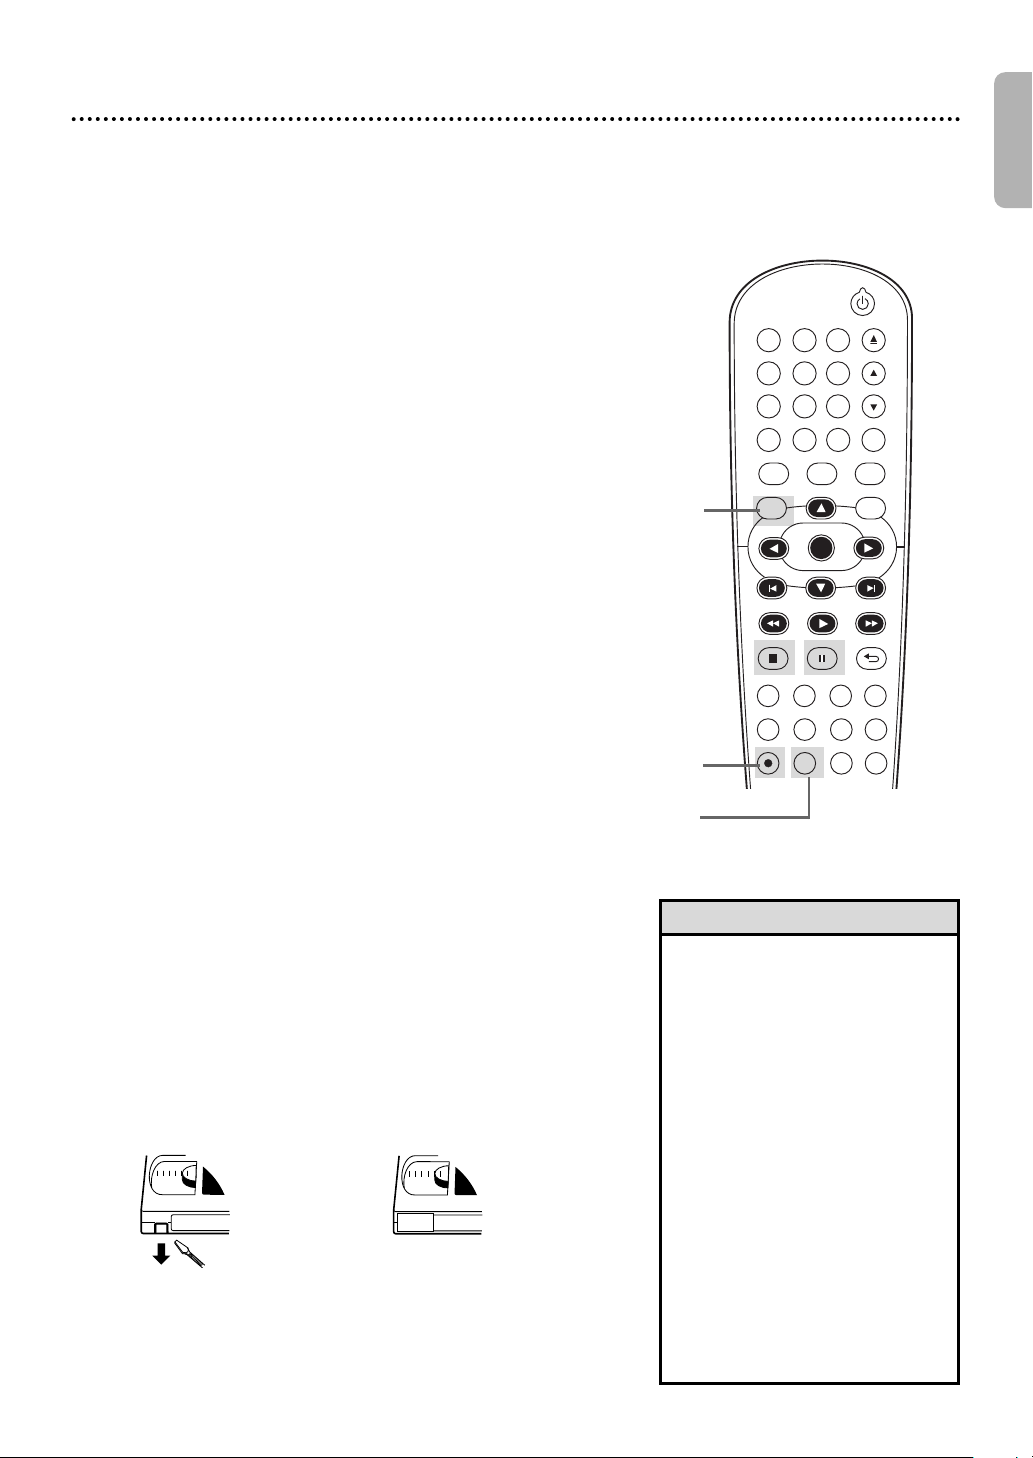
Read and follow the steps below to record a television program
onto a videotape.
Before you begin:
● This DVD/VCR does not have a tuner input jack.
To record TV programs on your DVD/VCR, you
need to connect this DVD/VCR to an external
tuner device (e.g., set top box, cable box or
satellite receiver) that has audio/video output
jacks. See page 9 on how to connect the DVD/VCR to the
external tuner.
● Make sure the DVD/VCR is in VCR mode.Press VCR so VCR
light appears on the front of the DVD/VCR.
Turn on your external tuner, and turn on the
TV and set it to the correct Video In channel.
1
(Check your TV owner’s manual for details.)
Insert a tape with its record tab intact into the
cassette compartment of the DVD/VCR. If tape
2
playback begins,press STOP C.
Press SPEED repeatedly until the desired tape
speed (SP or SLP) appears briefly on the
3
screen. Details about tape speed are on page 57.
Press INPUT to select the appropriate external
input channel (L1/L2) to which your external
4
tuner is connected. Then select the desired
channel to record on the external tuner.
Press REC I to start recording. “REC” will appear
on the DVD/VCR’s display panel.
5
● To pause the recording,press PAUSE k once.“REC” will
flash.To resume recording,press REC I or press
PAUSE k again.“REC” will reappear.
● To stop recording,press STOP C.
Recording Prevention
Video cassettes have record tabs to ensure that recordings are
not accidentally erased.
● To prevent recording,break off the tab with a screwdriver.
● To allow recording,cover the hole with clear tape.
Remove the
tab to prevent
recording.
Cover the
hole to allow
recording.
Turn on the TV.
1
Insert a tape in the
DVD/VCR.
2
4
5
3
Helpful Hints
• Other recording options are on
pages 22-28.
• The VCR will record in a preset
volume.
• Pause will switch to stop after 5
minutes to protect the VCR and
the tape from damage. When a
recording is paused,review the
pause time remaining with
the ■ marks on the screen.
Each ■ mark equals
1 minute remaining.During the
last minute of paused recording,
the ■ mark will flash.
• If any menu is on the TV screen,
REC
I on the remote does not
function.Press CLEAR to
remove the menu.Then, press
REC I.Or,use REC I on the
front of the DVD/VCR.
English
Page 22
English
DVDVCR SETUP
INPUT MENU
REC SPEED MODE
ANGLE SEARCH REPEAT
DISPLAY SUBTITLE ZOOM
TIMER SET
REPEAT
A-B
AUDIO
BACKPAUSESTOP
PLAYOKFFW
REW
CLEAR TITLE
DISC
TRACKING
OPEN/CLOSE
12
6
5
4
7
8
9
0
+10
3
22 One-Touch Recording
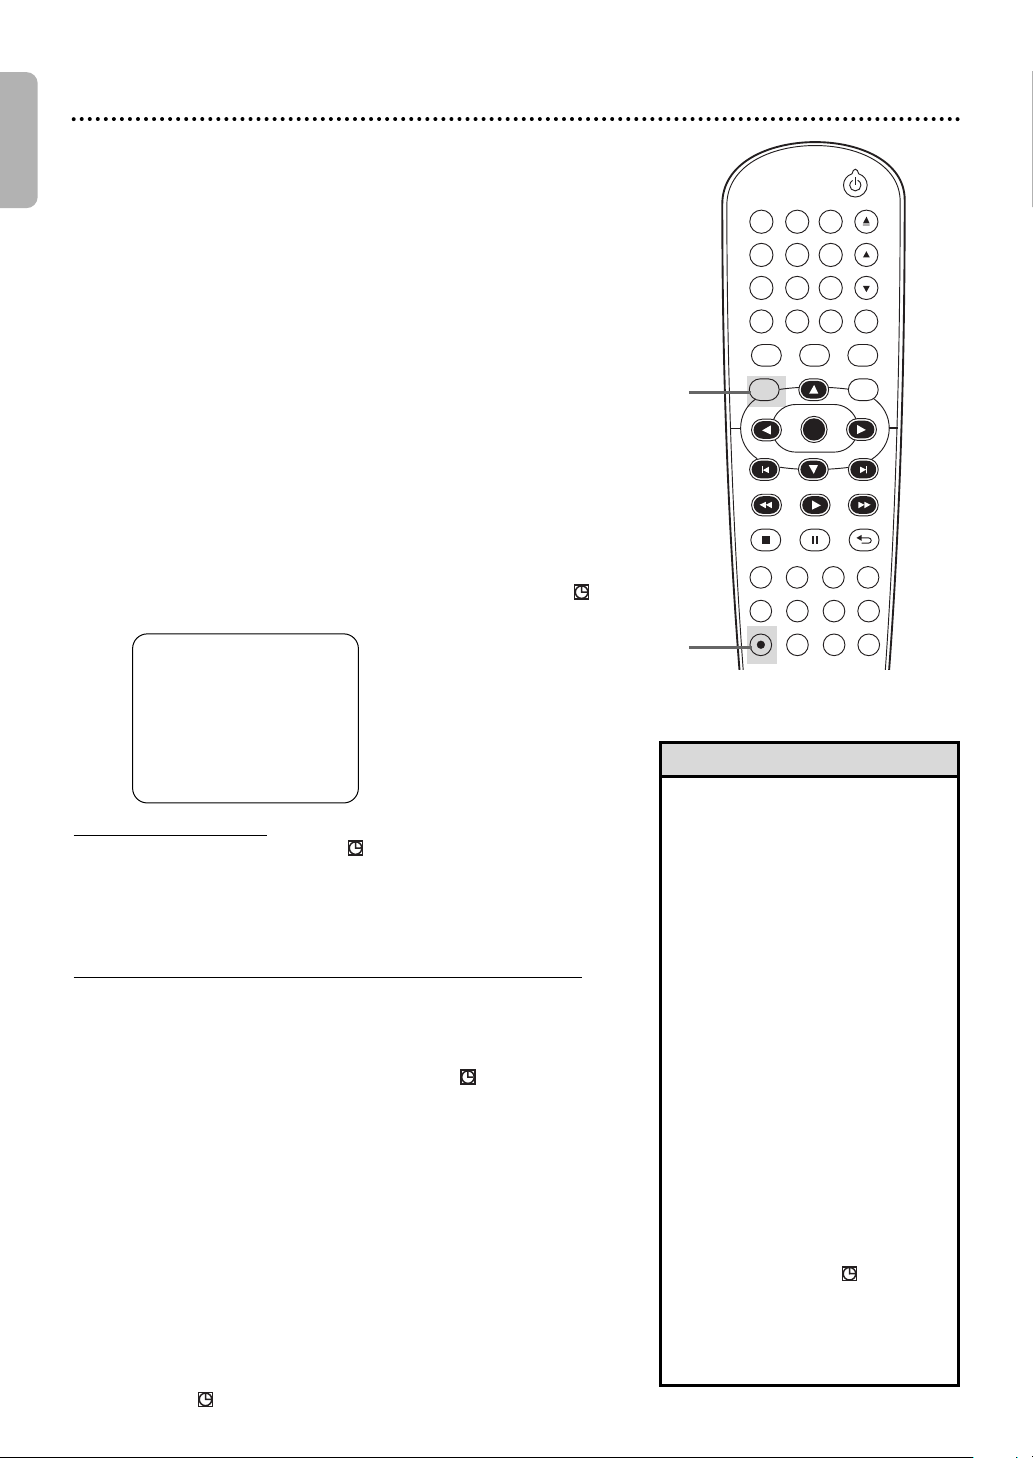
One-Touch Recording (OTR) lets you set a timed recording 30
minutes to 8 hours long.
Before you begin:
●
This DVD/VCR does not have a tuner input jack.
To record TV programs on your DVD/VCR, you
need to connect this DVD/VCR to an external tuner
device (e.g., set top box, cable box or satellite
receiver) that has audio/video output jacks. See page
9 on how to connect the DVD/VCR to the external tuner.
● Place the DVD/VCR in VCR mode.Press VCR so VCR light
appears on the front of the DVD/VCR.
● Select a recording speed (SP,SLP) by pressing SPEED.
● Put a videotape in the cassette compartment.Make sure the
tape’s record tab is intact and the tape is long enough to record
the program(s).
Press INPUT to select the appropriate external
input channel (L1/L2) to which your external
1
tuner is connected. Then select the desired
channel to record on the external tuner.
Press REC Irepeatedly until the desired
recording length (30 minutes to 8 hours) appears
2
on the TV screen. Recording will begin.“REC” and “ ”
will appear on the DVD/VCR’s display panel.
OTR (0:30)
1
2
SP
When an OTR ends
The DVD/VCR will turn off and “ ” on the DVD/VCR’s display
panel will flash indicating that the recording is complete,then goes
into the timer standby mode again.(It may switch to DVD mode
automatically.) At this point,you cannot use the VCR unless you
release the DVD/VCR from the timer standby mode.
To release the DVD/VCR from timer standby mode
are on standby,you can cancel the timer standby mode by
pressing TIMER SET or VCR on the remote control or by
pressing SOURCE or STOP/EJECT C A on the front panel.
● If the DVD component is not active, or the “ ” is not flashing
but lit indicating there are more Timer Recordings on standby,
● If the DVD component is active and no more Timer Recordings
you can cancel the timer standby mode only by pressing
TIMER SET on the remote control or by pressing
STOP/EJECT C A on the front panel.
● After releasing the DVD/VCR from timer standby mode,you
can use it as usual.
Stopping an OTR
● To stop an OTR before recording is finished, press STOP C on
the remote control or STOP/EJECT C A on the front of the
DVD/VCR.
● To cancel the OTR but continue recording, press REC I
repeatedly until REC appears in the upper left corner of the TV
screen,and “ ” disappears.
Helpful Hints
• The remaining recording time
will appear on the display panel
during an OTR.Press DISPLAY
to see it on the TV screen.
• To change the recording length
while an OTR is in progress,
press REC I repeatedly.
• You cannot pause an OTR.
• If the preset time for a Timer
Recording comes up during an
OTR,the OTR has priority. The
Timer Recording will not take
place.
• If the end of the tape is reached
during an OTR,the VCR will
stop recording,eject the tape,
and switch to DVD mode or
turn off.
• If one or more Timer
Recordings are on standby
when one OTR ends,the
DVD/VCR will turn off
automatically and “ ” will
appear on the DVD/VCR’s
display panel indicating that it is
now ready for another Timer
Recording.
Page 23
Rerecording (Tape Duplication) 23
DIGITAL
AUDIO OUT
COAXIAL
AUDIO
OUT
DVD
L
R
LRL
R
S-VIDEO
OUT
COMPONENT
VIDEO OUT
Y
C
B
/
P
B
AUDIO OUT
DVD/VCR
VCR
VIDEO OUT
AUDIO IN
VIDEO IN
CR /
P
R
DIGITAL
AUDIO OUT
COAXIAL
AUDIO
OUT
DVD
L
R
LRL
R
S-VIDEO
OUT
COMPONENT
VIDEO OUT
Y
C
B
/
P
B
AUDIO OUT
DVD/VCR
VCR
VIDEO OUT
AUDIO IN
VIDEO IN
CR /
P
R
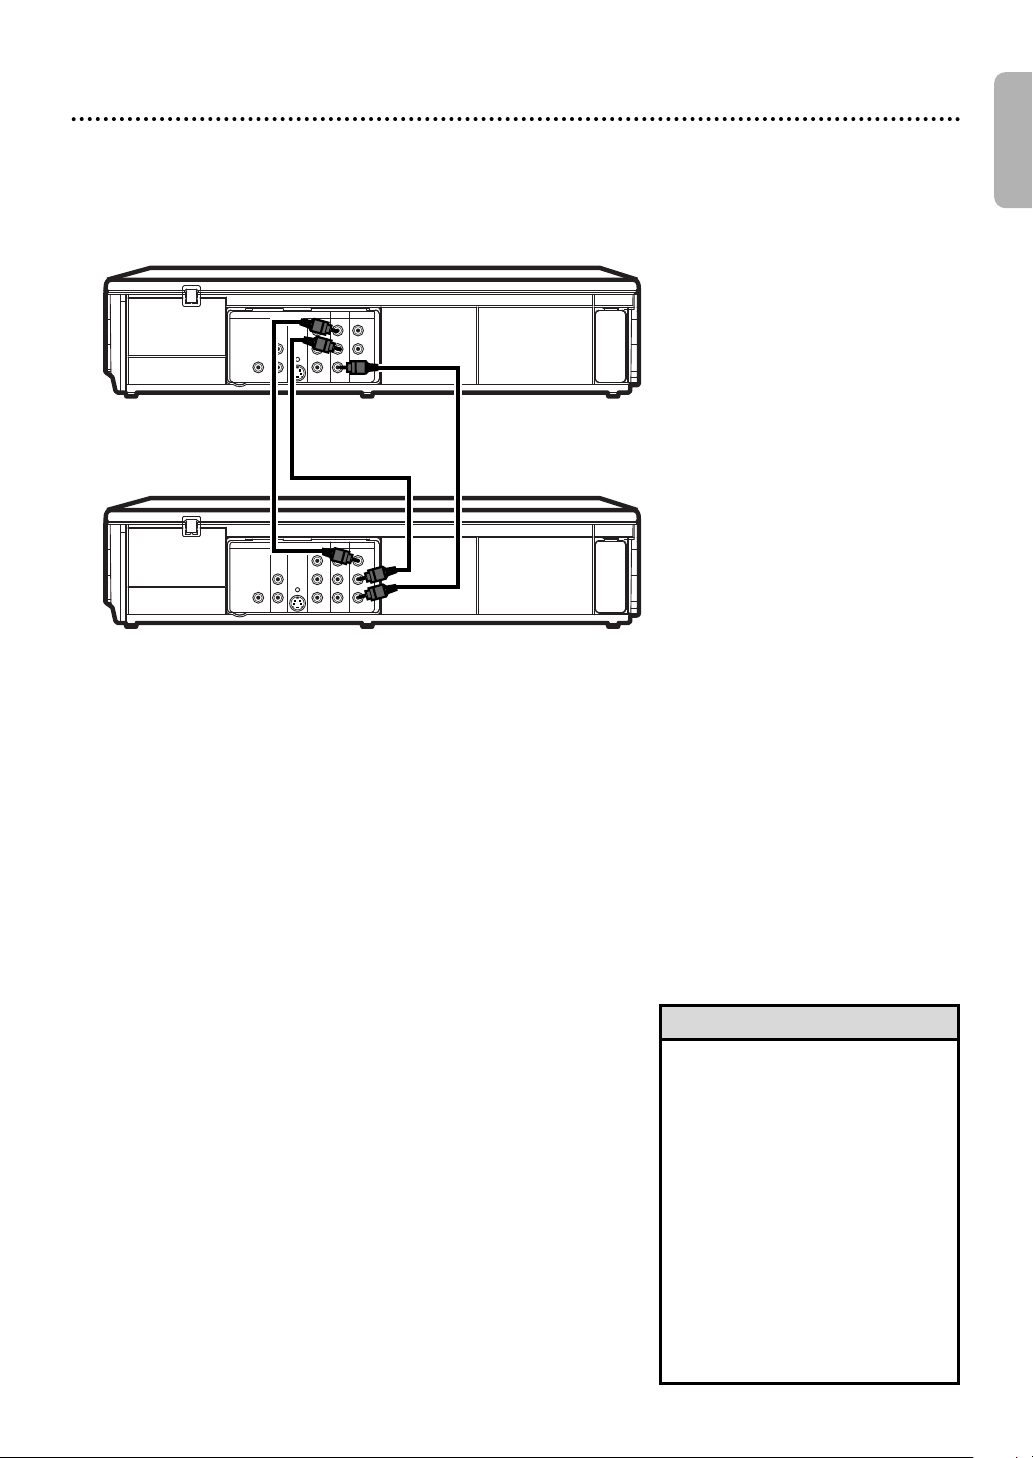
These instructions are made on the premise that the DVD/VCR 1 is already connected to the TV. The
instructions show you how to copy videotapes. The illustration uses two DVD/VCRs. Other VCRs or
Camcorders may operate differently.
1. Audio cable from AUDIO OUT jacks (red and white)
of DVD/VCR 1 to AUDIO IN jacks of DVD/VCR 2
English
DVD/VCR 1
Playing unit
2. Video cable from yellow VIDEO
DVD/VCR 2
Recording unit
Make the connections shown above.
1
DVD/VCR 1 will play your tape.Put a prerecorded
tape into the cassette compartment of
2
DVD/VCR 1. Press VCR to put the unit in VCR mode if
necessary.
DVD/VCR 2 will record your tape.Insert a blank tape
in the cassette compartment of DVD/VCR 2.
3
Press VCR to put the unit in VCR mode if necessary.
OUT jack of DVD/VCR 1 to
VIDEO IN jack of DVD/VCR 2
Turn on the TV and set it to the correct Video
In channel. (Check your TV owner’s manual for details.)
4
Point the remote control at DVD/VCR 2. Press
INPUT to select the appropriate external input
5
channel. (See Helpful Hints to the right.)
Press SPEED to select SP or SLP at DVD/VCR 2.
Details about tape speed are on page 57.
6
Press PLAY B (VCR) on the front of DVD/VCR
1 and REC
7
same time.
● To stop recording,press STOP/EJECT C A on DVD/VCR
2,then press STOP/EJECT C A on DVD/VCR 1.
I on the front of DVD/VCR 2 at the
Helpful Hints
• If you use the AUDIO and
VIDEO IN jacks on the back of
DVD/VCR 2,select L1 at step 5.
• If you use the AUDIO and
VIDEO IN jacks on the front of
DVD/VCR 2,select L2 at step 5.
• Unauthorized recording of
copyrighted television programs,
video tapes or other materials
may infringe on the rights of
copyright owners and violate
copyright laws.
• If a program has copyright
protection,it may not be
recorded clearly.
Page 24
English
DVDVCR SETUP
INPUT MENU
REC SPEED MODE
ANGLE SEARCH REPEAT
DISPLAY SUBTITLE ZOOM
TIMER SET
REPEAT
A-B
AUDIO
BACKPAUSESTOP
PLAYOKFFW
REW
CLEAR TITLE
DISC
TRACKING
OPEN/CLOSE
12
6
5
4
7
8
9
0
+10
3
PROG. 12345678
DATE
START TIME
END TIME
L1/L2
REC SPEED
TIMER PROGRAMMING
PROGRAM NUMBER 1
DATE – – / – –
START TIME – – : – – – –
END TIME – – : – – – –
L1/L2 – –
REC SPEED – –
24 Timer Recording
Follow the steps below to program the VCR of the DVD/VCR to
record TV programs while you’re away from home.Before you begin:
●
This DVD/VCR does not have a tuner input jack. To
record TV programs on your DVD/VCR, you need to
connect this DVD/VCR to an external tuner device
(e.g., set top box, cable box or satellite receiver)
that has audio/video output jacks. See page 9 on how to
connect the DVD/VCR to the external tuner.
● Set the clock.Details are on page 19.
● Put a tape in the cassette compartment of the DVD/VCR.Make
sure the tape’s record tab is intact and the tape is long enough
to record the program(s).
● Press VCR so VCR light appears on the front of the DVD/VCR.
● Turn on your external tuner.
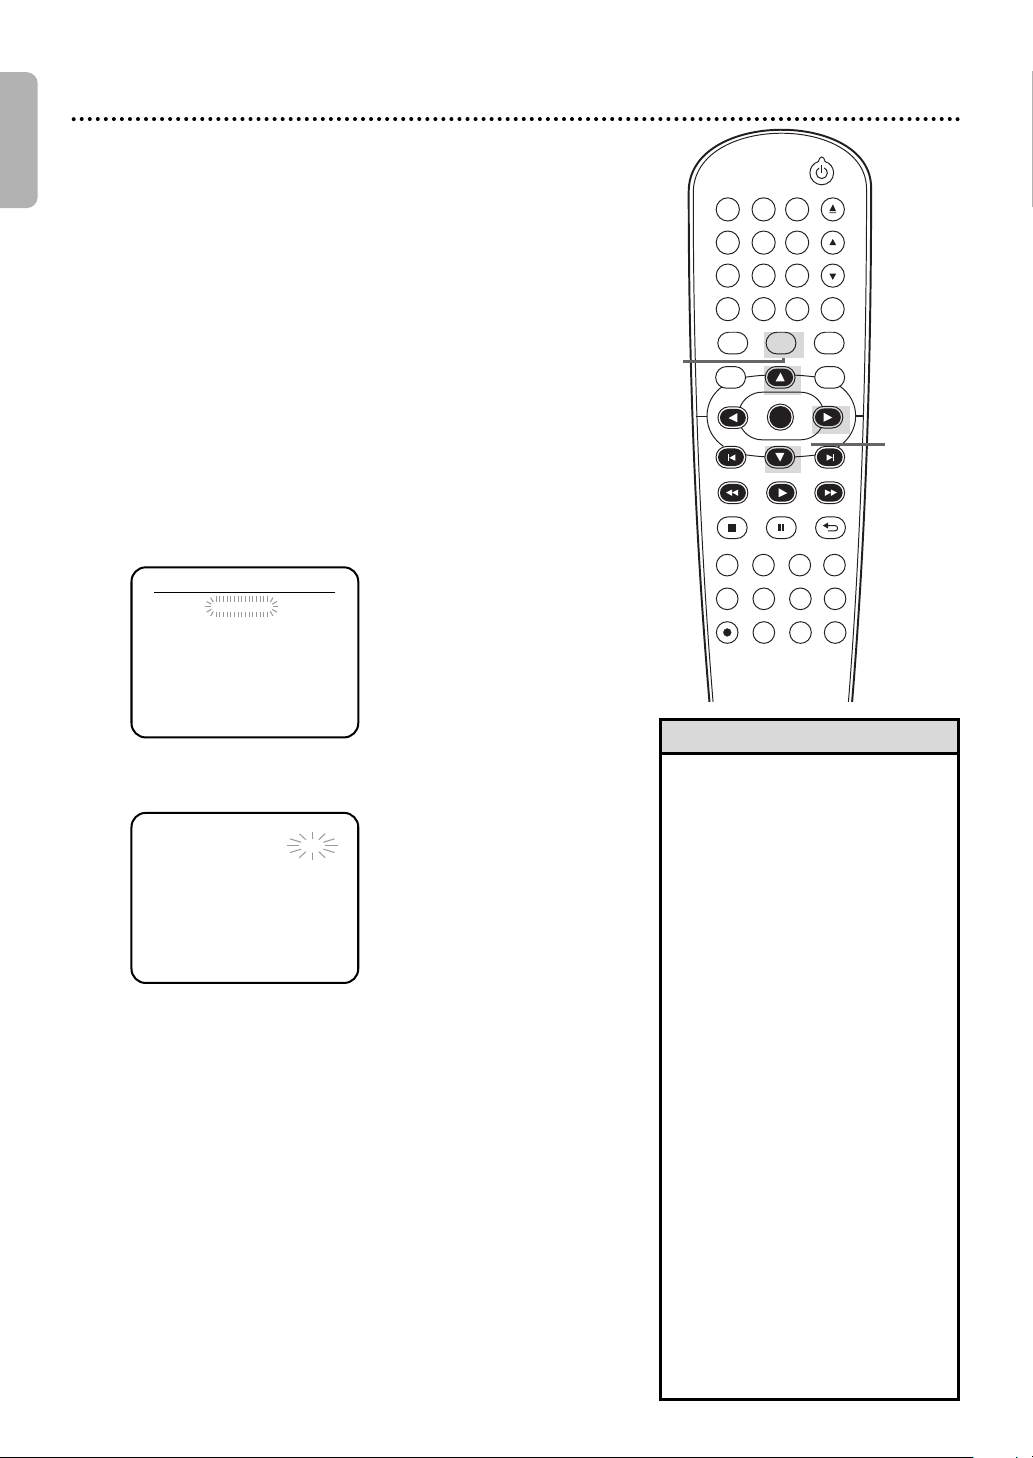
Press SETUP so MENU appears.
1
Press
K or L
Then, pressB. Program numbers that do not have a Timer
2
Recording stored will flash.
to select TIMER PROGRAMMING.
1
2-6
Press K or L to select an empty program.
Then, press B.
3
Press K or L to select ONCE, DAILY or WEEKLY.
Then, press B.
4
● ONCE - The VCR will record a TV program on any day you
5
6
choose,up to 12 months away.
● DAILY -
on the same channel every day,Monday through Friday.
●
WEEKLY - The VCR will record a TV program at the same time
on the same channel every week,for example,every Monday.
To set the recording date and time, press Kor
until the desired setting appears, then pressB.
Press K or L to select the appropriate external
input channel (L1/L2) to which your external
tuner is connected. Then select the desired
channel to record on the external tuner.
● Leave the external tuner on for the Timer Recording. Details
are on page 9.
The VCR will record a TV program at the same time
Helpful Hints
• You cannot access the TIMER
PROGRAMMING Menu at step
2 if the clock is not set.The
CLOCK SET Menu will appear.
Follow the steps on page 19 to
set the clock.
• Only programs that will air
Monday-Friday can be recorded
on a DAILY basis.If you select
DAILY at step 4,then enter a
Saturday or Sunday DATE at step
5,the correct program will not
be recorded.The VCR will alter
the recording date and record a
different program than the one
you intended.
• If you connected the external
tuner to the AUDIO and VIDEO
L
IN jacks on the front of the
DVD/VCR,choose L2.If you
connected the external tuner to
the AUDIO IN and VIDEO IN
jacks on the back of the
DVD/VCR,choose L1.
• Enter the information while the
space is flashing.
• You cannot program more than
one year in advance.
Page 25
Timer Recording (cont’d) 25
PROGRAM NUMBER 1
DATE 0 8 / 2 9 WED
START TIME 0 7 : 3 0 P M
END TIME 0 8 : 3 0 P M
L1/L2 L2
REC SPEED S P
B SP
SLP
ONE TIME PROGRAM
DVDVCR SETUP
INPUT MENU
REC SPEED MODE
ANGLE SEARCH REPEAT
DISPLAY SUBTITLE ZOOM
TIMER SET
REPEAT
A-B
AUDIO
BACKPAUSESTOP
PLAYOKFFW
REW
CLEAR TITLE
DISC
TRACKING
OPEN/CLOSE
12
6
5
4
7
8
9
0
+10
3
Press K or L to select a recording tape speed. The
arrow will appear beside your choice. The selected speed will
7
flash beside REC SPEED. Details about tape speed are on page 57.
You must select the recording speed to complete
the timer programming.
Press CLEAR to remove the menu.
English
8
8
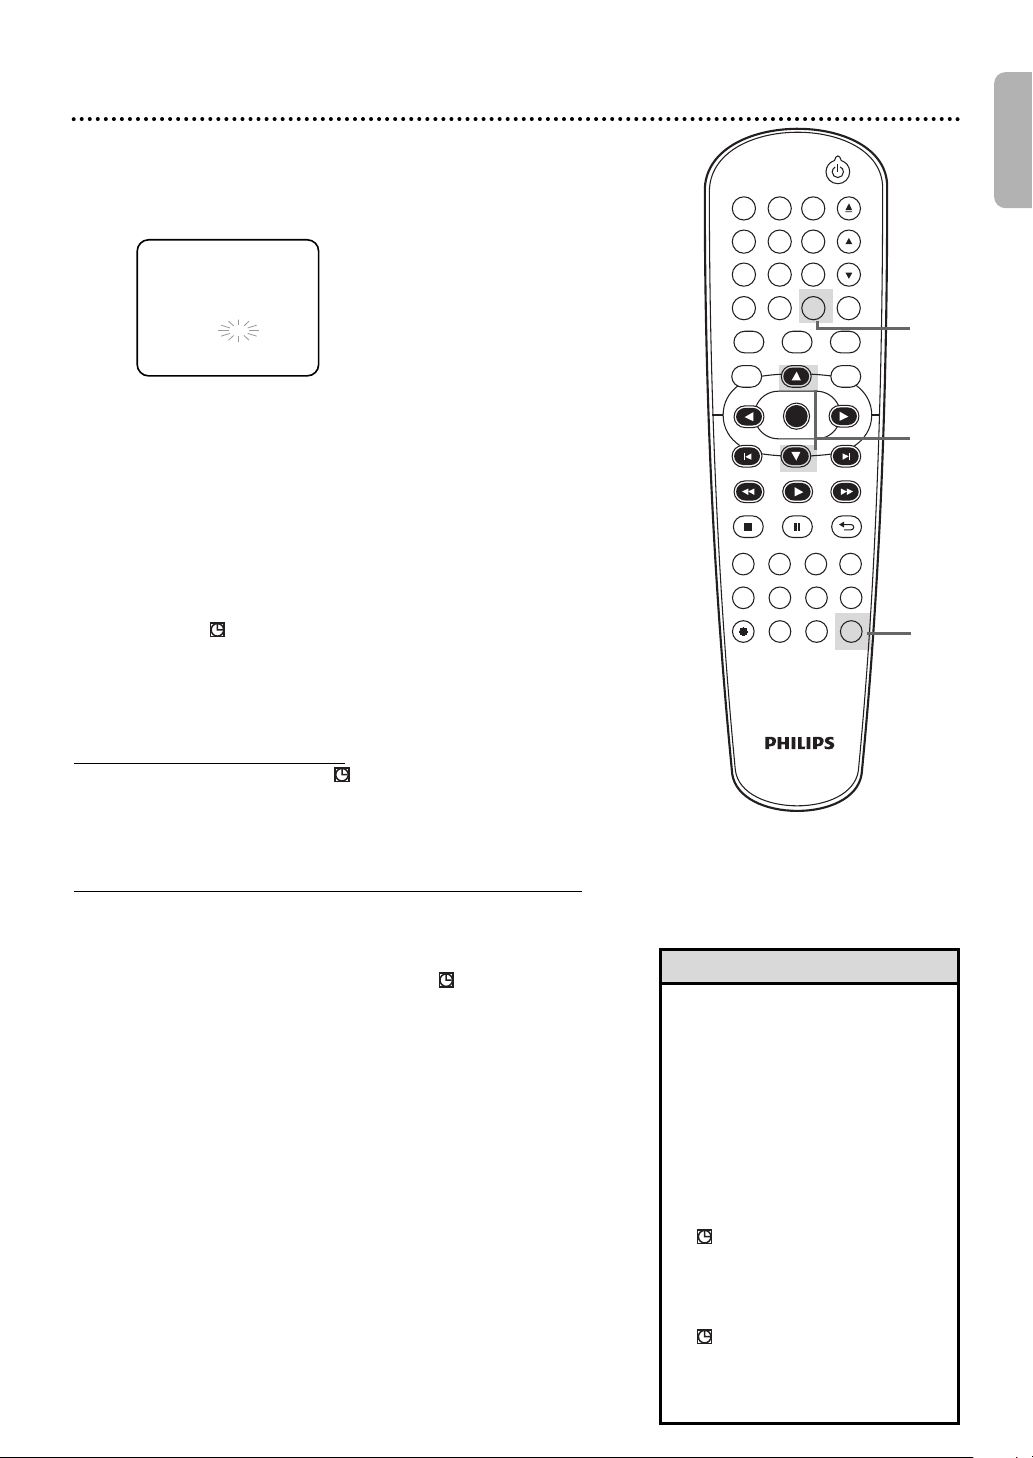
Press TIMER SET.
● In some cases,the DVD/VCR will switch to DVD mode
9
When a Timer Recording ends
The DVD/VCR will turn off and “ ” on the DVD/VCR’s display panel
will flash indicating that the recording is complete,then goes into the
timer standby mode again.(It may switch to DVD mode
automatically.) At this point,you cannot use the VCR unless you
release the DVD/VCR from the timer standby mode.
To release the DVD/VCR from timer standby mode
● If the DVD component is active and no more Timer Recordings are
● If the DVD component is not active,or the “ ” is not flashing but
● After releasing the DVD/VCR from timer standby mode,you can use
Canceling a Timer Recording Before the Recording
Starts
1
2
3
4
5
instead.
You may use the DVD player during a Timer Recording.
● If you want to use the VCR until time for the recording,
don’t press TIMER SET until a few minutes before the
recording should start.Or, press TIMER SET only when you
know you won’t be using the VCR anymore (until after the
recording).
● When “ ” is lit (not flashing),you cannot put the
DVD/VCR in VCR mode by pressing VCR or
You must first press TIMER SET on the remote control or
STOP/EJECT C A on the front panel to cancel the Timer
Recording temporarily. Then, you can use the VCR features
again.
on standby, you can cancel the timer standby mode by pressing
TIMER SET or VCR on the remote control or by pressing SOURCE
or STOP/EJECT C A on the front panel.
lit indicating there are more Timer Recordings on standby, you can
cancel the timer standby mode only by pressing TIMER SET on the
remote control or by pressing STOP/EJECT C A on the front panel.
it as usual.
Press VCR, then press SETUP so MENU appears.
Press K or L to select TIMER PROGRAMMING,
then press B.
Press K or L to find the program you want to
cancel.
While the program number is flashing, press s
to clear all the information for that program.
Press CLEAR to remove the menu.
SOURCE
7
.
Helpful Hints
•
To stop a started Timer Recording,
press STOP/EJECT C A on the
front of the DVD/VCR. (You cannot
stop a started Timer Recording with
STOP C on the remote.)
• To change incorrect information,
press s or B to choose the
item you want to change.Press
K or L to adjust the
information.
• If there is no tape in the VCR
when you press TIMER SET,
“ ” will flash.Insert a tape.
• If one or more Timer Recordings
are on standby when one Timer
Recording ends,the DVD/VCR
will turn off automatically and
“ ” will appear on the
DVD/VCR’s display panel
indicating that it is now ready for
another Timer Recording.
9
Page 26
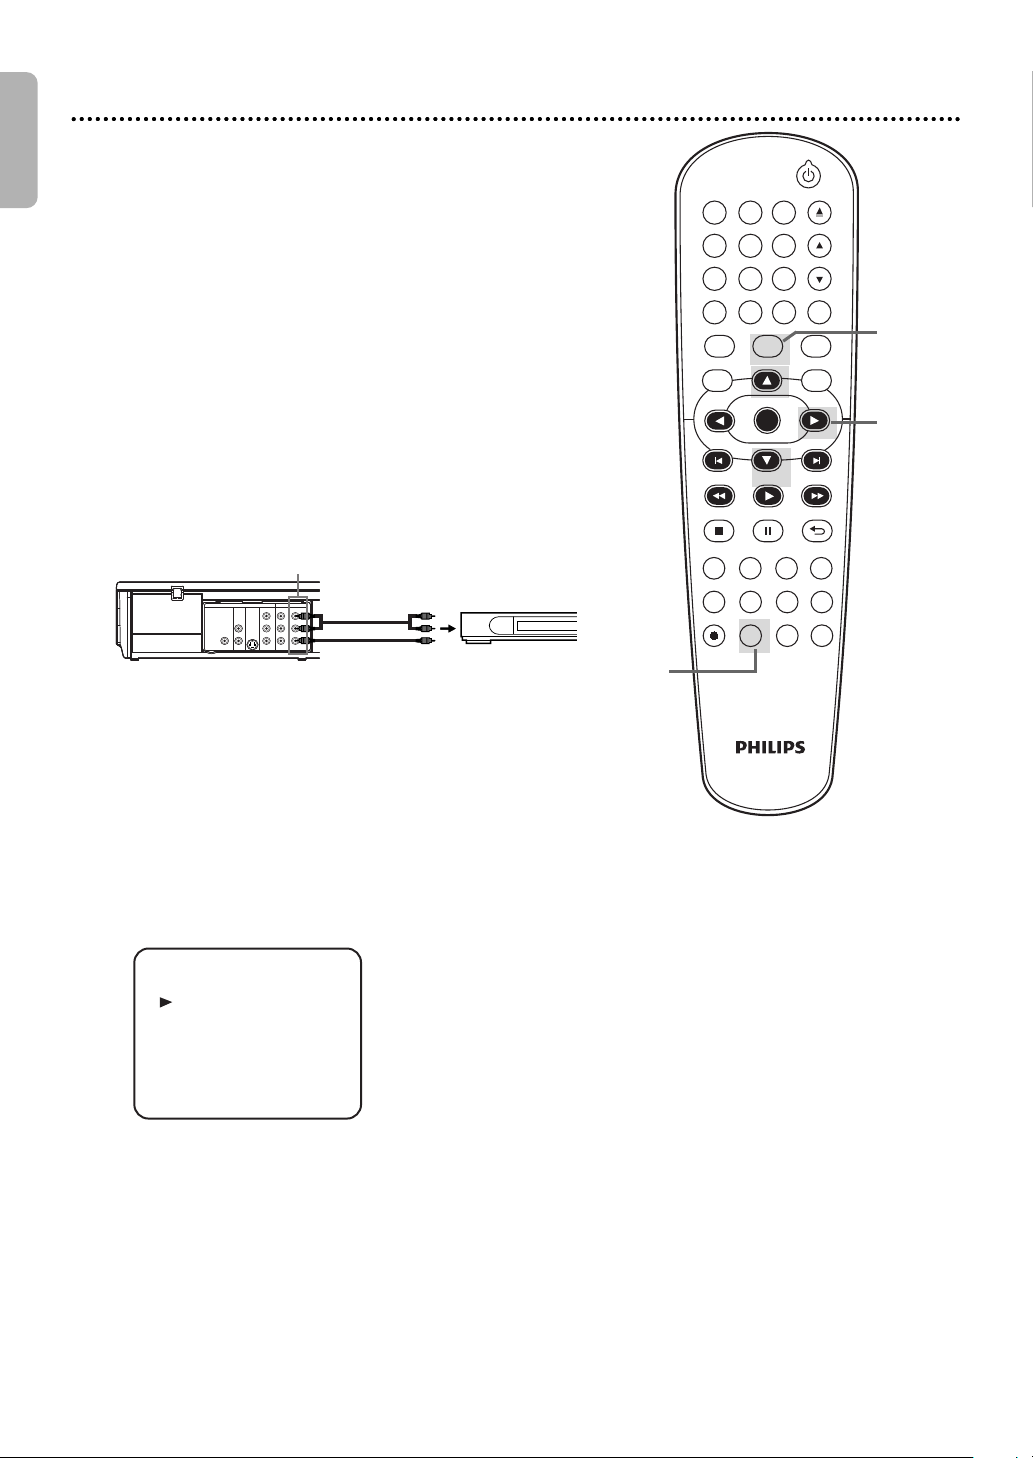
DVDVCR SETUP
INPUT MENU
REC SPEED MODE
ANGLE SEARCH REPEAT
DISPLAY SUBTITLE ZOOM
TIMER SET
REPEAT
A-B
AUDIO
BACKPAUSESTOP
PLAYOKFFW
REW
CLEAR TITLE
DISC
TRACKING
OPEN/CLOSE
12
6
5
4
7
8
9
0
+10
3
English
TIMER PROGRAMMING
SATELLITE LINK
AUTO REPEAT [OFF]
CLOCK SET
LANGUAGE SELECT
- M E N U -
DIGITAL
AUDIO OUT
COAXIAL
AUDIO
OUT
DVD
L
R
S-VIDEO
OUT
DIGITAL
AUDIO OUT
COAXIAL
AUDIO
OUT
DVD
L
R
S-VIDEO
OUT
LRL
R
Y
C
B
/
P
B
AUDIO OUT
DVD/VCR
VCR
VIDEO OUT
AUDIO IN
VIDEO IN
CR /
P
R
COMPONENT
VIDEO OUT
DIGITAL
AUDIO OUT
COAXIAL
AUDIO
OUT
DVD
L
R
S-VIDEO
OUT
L1
External tuner
To audio/video
input jacks
DVD/VCR
Audio/Video Cables
(supplied)
26 Satellite Link
You can set the DVD/VCR to start recording whenever it detects
a video signal from the external tuner.
Before you begin:
●●
Set the clock.Details are on page 19.
●●
Put a tape in the cassette compartment of the DVD/VCR.Make
sure the tape’s record tab is intact and the tape is long enough
to record the program(s).
●●
Press VCR so VCR light appears on the front of the DVD/VCR.
●●
Turn on the external tuner.
●●
Use the VCR AUDIO and VIDEO IN jacks on the rear (L1) to
connect the DVD/VCR to the external tuner. VCR AUDIO and
VIDEO jacks on the front (L2) cannot read any signal from the
external tuner.
●●
If the external tuner is equipped with some kind of timer
function,set it to output audio/video signals when it comes to
the time you want to start recording and stop when it comes to
the time you want to stop recording.Refer to the tuner’s
manual on how to set the timer.
●●
If the external tuner is not equipped with timer function,leave it
on for Satellite Link Recording.
2
4-6
1
2
3
Press SPEED repeatedly until the desired tape
speed (SP or SLP) appears briefly on the
screen. Details about tape speed are on page 57.
In stop mode, press SETUP.
Press K or L to
select SATELLITE LINK,
then press B.
1
Page 27
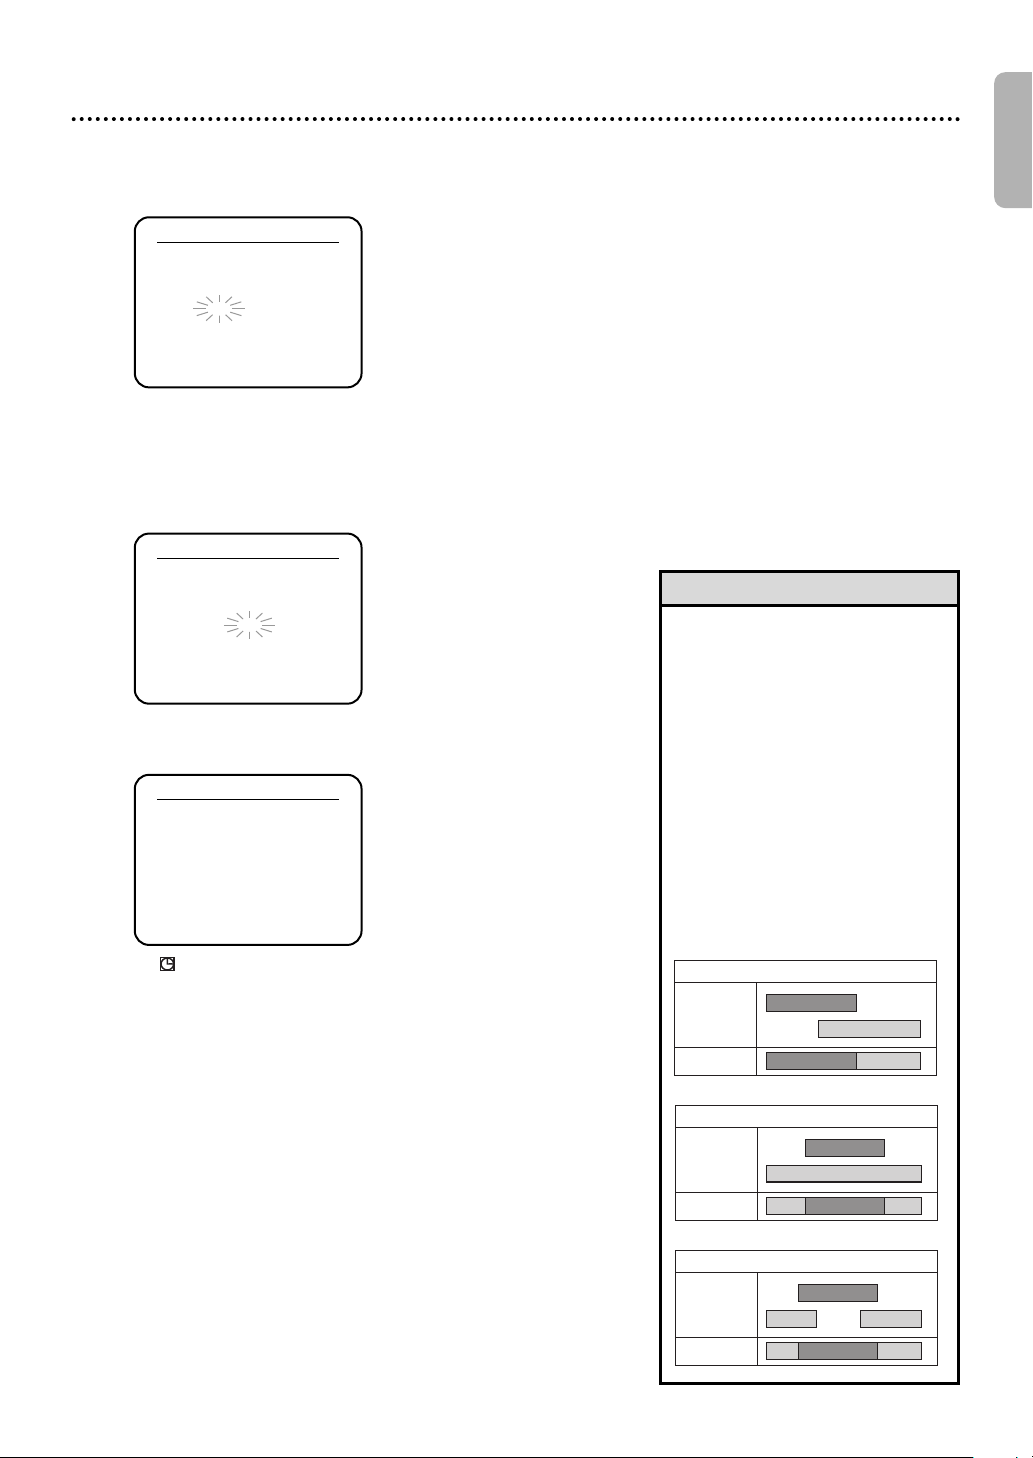
e.g.) In case of the Timer Recording is overlapped on the
existing Satellite Link Timer Recording.
Timer Recording
recording result
Satellite Link
e.g.) In case of the Timer Recording is programmed in the
middle of the Satellite Link Timer Recording.
Timer Recording
recording result
Satellite Link
e.g.) In case of the Satellite Link Timer Recording is
overlapped on the existing Timer Recording.
Timer Recording
recording result
Satellite Link
Satellite Link (cont’d) 27
SATELLITE LINK
0 1 : 3 0 PM
[ON]
SATELLITE LINK
0 1 : 0 0 PM
SATELLITE LINK
1 2 : 0 0 AM
Press K or L to
then press B.
4
●●
The hour can be selected from 1-12 with AM or PM.
●●
When the external tuner signal is stopped,recording will
be stopped also.
Press K or L to
If you wish to go back to the left,press s.
5
Press B to set Satellite Link standby mode.
set the desired start hour,
set the desired start minutes.
6
English
Helpful Hints
• If you have not set the clock,
CLOCK SET menu will appear at
step 3.Refer to “Clock (VCR)”
on page 19.
• You cannot set the ending time
for the Satellite Link Timer
Recording on this DVD/VCR.
• Recording picture will be
distorted if the copy protection
signal is being detected during
Satellite Link Timer Recording.
• When a regular Timer Recording
and the Satellite Link Timer
Recording are overlapped, those
recordings are recorded as
illustrated below.
●●
“”
on the DVD/VCR’s display panel lights up and the
DVD/VCR goes to the DVD mode. If you do not use
DVD function,turn off the DVD/VCR.
●●
If the external tuner is not equipped with timer function,
leave it on for Satellite Link Recording.
●●
To cancel the Satellite Link function in standby mode:
Press TIMER SET on the remote control or
STOP/EJECT
●●
To cancel the Satellite Link function while the Satellite
Link Recording is in progress:
Press STOP/EJECT
C A
on this DVD/VCR.
C A
on the DVD/VCR.
Page 28
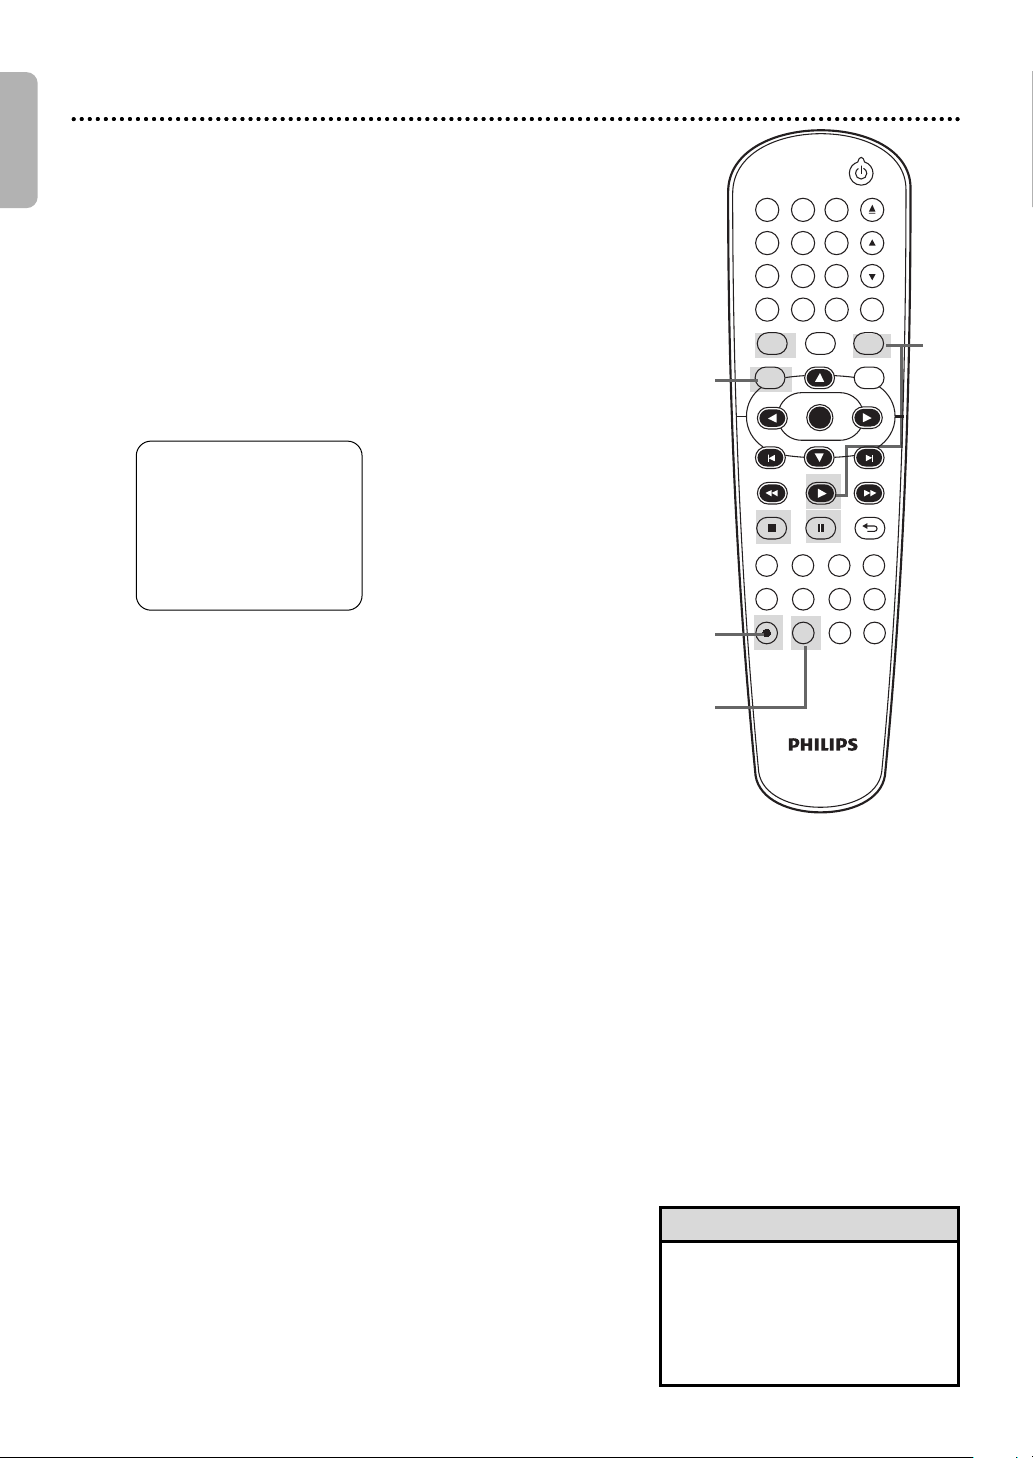
English
DVDVCR SETUP
INPUT MENU
REC SPEED MODE
ANGLE SEARCH REPEAT
DISPLAY SUBTITLE ZOOM
TIMER SET
REPEAT
A-B
AUDIO
BACKPAUSESTOP
PLAYOKFFW
REW
CLEAR TITLE
DISC
TRACKING
OPEN/CLOSE
12
6
5
4
7
8
9
0
+10
3
28 DVD to Videotape Duplication
Follow the steps below to copy a DVD to a videotape.This will
be possible only if the DVD is not copy protected.
Before you begin:
● Put a videotape in the cassette compartment.Make sure the
tape’s record tab is intact and the tape is long enough to record
the DVD.
● Put the DVD you want to copy in the disc tray.
● Press VCR so VCR light appears on the front of the DVD/VCR.
●
Turn on the TV and set it to the correct Video In channel.
(Check your TV owner’s manual for details.)
4
Press INPUT repeatedly until “DISC” appears on
the TV screen.
1
Press SPEED repeatedly until the desired tape
speed (SP or SLP) appears briefly on the screen.
2
Details about tape speed are on page 57.
Press REC I to start recording. “REC” will appear
on the display panel.
3
Press DVD. Press PLAY B to play the disc.
●
4
To pause the recording,press VCR,then press
PAUSE konce.“REC”will flash.
●
To resume recording,press REC Ior press PAUSE
again.“REC”will reappear.
●
To stop recording,press VCR,then press STOP C.
1
DISC
3
2
k
Helpful Hints
• A Timer Recording or Satellite
Link is not available during DVD
to videotape duplication.
• You cannot copy a DVD to a
videotape if you are using
Progressive Scan.
Page 29
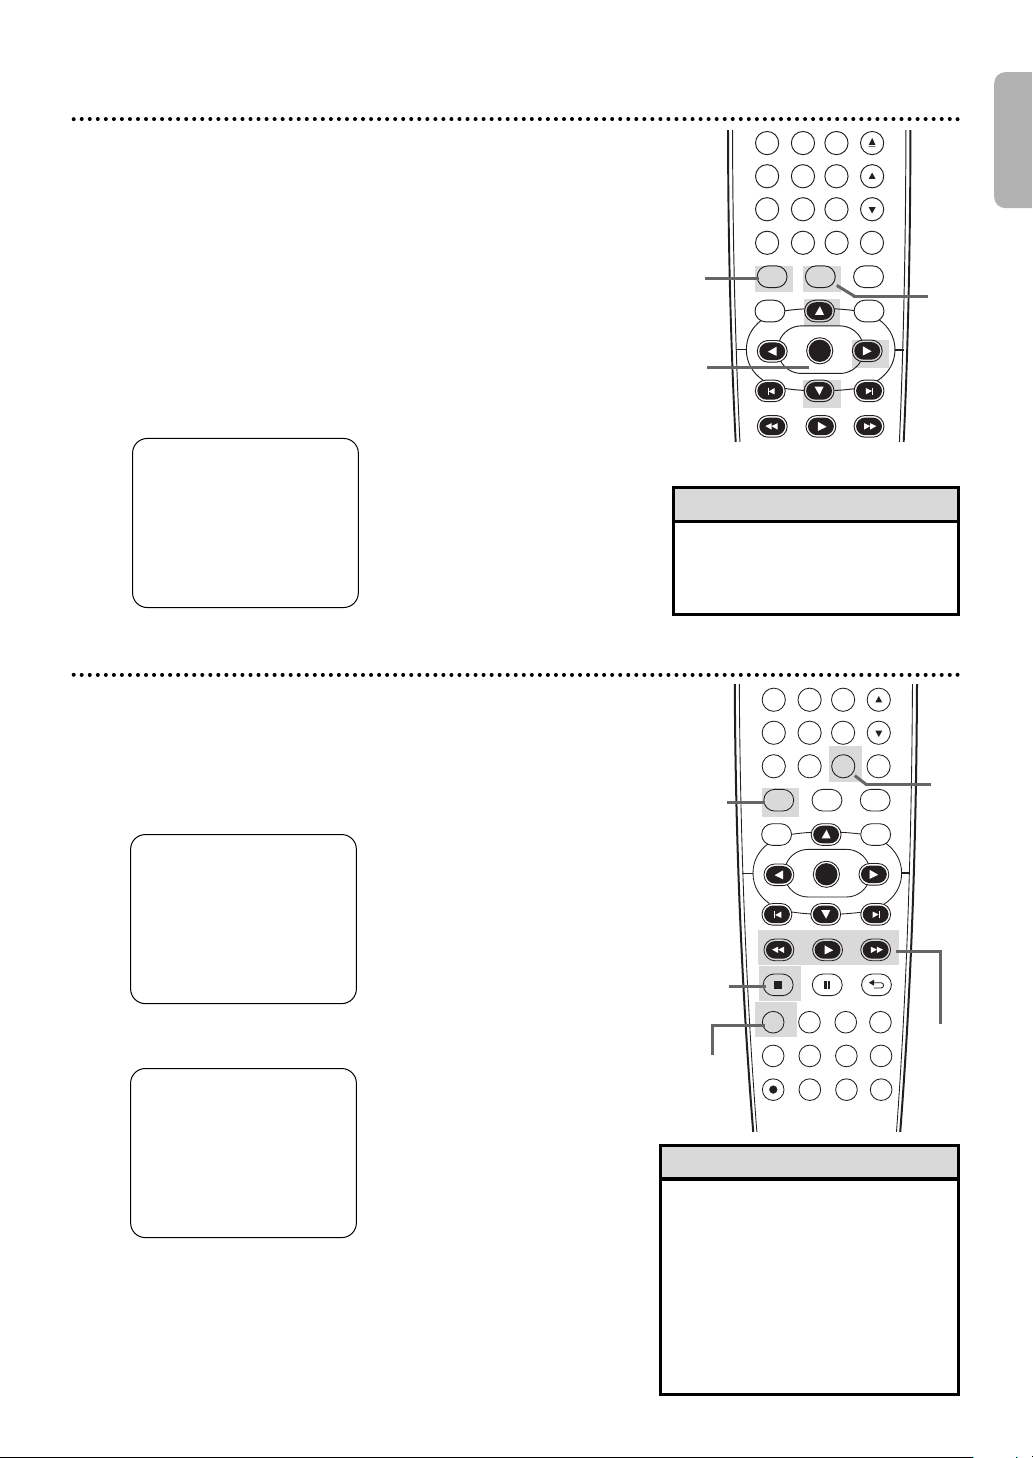
DVDVCR SETUP
INPUT MENU
REC SPEED MODE
ANGLE SEARCH REPEAT
DISPLAY SUBTITLE ZOOM
TIMER SET
REPEAT
A-B
AUDIO
BACKPAUSESTOP
PLAYOKFFW
REW
CLEAR TITLE
DISC
TRACKING
6
5
4
7
8
9
0
+10
Follow the steps below to play a videotape repeatedly.
DVDVCR SETUP
INPUT MENU
PLAYOKFFWREW
CLEAR TITLE
DISC
TRACKING
12
6
5
4
7
8
9
0
+10
3
Press VCR, then press SETUP so MENU appears.
1
Press K or L to select AUTO REPEAT.
Repeat Playback 29
English
2
Press B so ON appears next to AUTO REPEAT.
Tape playback will begin immediately. AUTO REPEAT will
3
appear on the TV screen briefly. (If you are fast forwarding
or rewinding the tape,press CLEAR to remove the menu,
then press PLAY B to begin tape playback.) The tape will
play to the end,rewind,then play again.
- M E N U -
TIMER PROGRAMMING
SATELLITE LINK
BAUTO REPEAT [ON]
CLOCK SET
LANGUAGE SELECT
Follow the steps below to reset the VCR’s real-time tape counter
to 0 at a tape location you want to refer to later.
Press VCR, then play, fast forward or rewind a
tape to the location that you would like to
1
refer to later. Press STOP C to stop the tape.
Press DISPLAY to see the Status Display.
2
STOP
1
1
2-3
Helpful Hint
• To cancel Auto Repeat, follow
steps 1-2. At step 3,press B
so OFF appears beside AUTO
REPEAT. Press CLEAR.
Tape Counter
3
1
3
4
SLP 1 :23 : 45
While the counter is on the screen, press
CLEAR to reset the counter to 0.
STOP
SLP 0 : 00 :00
When you later want to return to this point on
the tape, press DISPLAY so you can see the
counter (while tape playback is stopped). Press
REW h or FFW g.
As the tape rewinds or forwards,watch the counter.When
it reaches 0,press PLAY B to play the tape.
1
4
2,4
Helpful Hints
• You may only set the counter to
0 at one location at a time.
Setting the counter to zero at a
second location will erase the
previous 0 setting.
• If you remove the tape,the
counter will reset to 0 at the
point at which you last stopped
playback whenever you reinsert
the tape.
Page 30
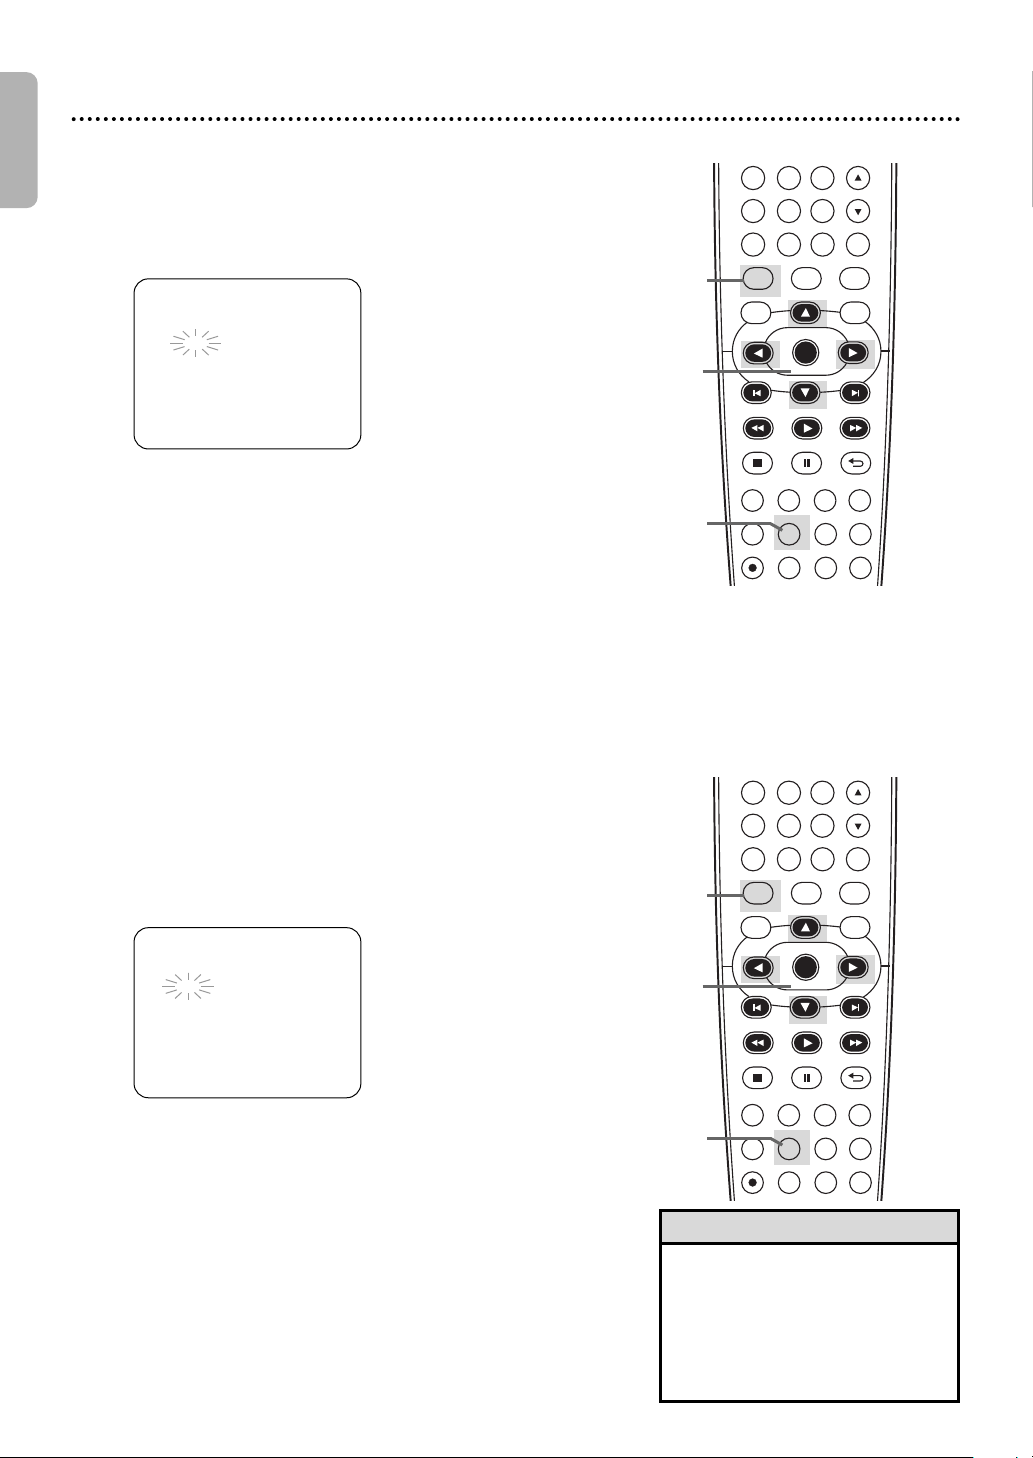
English
DVDVCR SETUP
INPUT MENU
REC SPEED MODE
ANGLE SEARCH REPEAT
DISPLAY SUBTITLE ZOOM
TIMER SET
REPEAT
A-B
AUDIO
BACKPAUSESTOP
PLAYOKFFW
REW
CLEAR TITLE
DISC
TRACKING
6
5
4
7
8
9
0
+10
TIME SEARCH
- : - -
INDEX SEARCH
– –
DVDVCR SETUP
INPUT MENU
REC SPEED MODE
ANGLE SEARCH REPEAT
DISPLAY SUBTITLE ZOOM
TIMER SET
REPEAT
A-B
AUDIO
BACKPAUSESTOP
PLAYOKFFW
REW
CLEAR TITLE
DISC
TRACKING
6
5
4
7
8
9
0
+10
30 Time Search, Index Search
Time Search
Follow the steps below to search forward or backward on a tape
a specific length of time. There must be a tape in the cassette
compartment.
Press VCR, then press SEARCH repeatedly
until the TIME SEARCH Screen appears.
1
2-3
Within 30 seconds, press K or L until your
desired length of time appears. Or, press and hold K
2
or L until you reach the desired length of time.
You can set a Time Search for up to 9 hours and 59 minutes
(9:59).
Within 30 seconds, press s (for a reverse search) or
B (for a forward search). The VCR begins rewinding or fast
3
forwarding the tape.When the tape finishes rewinding or fast
forwarding the time you specified,playback will begin.
The time will count down beneath TIME SEARCH during the
search.
If the end of the tape is reached during the search,the search
will stop and the tape may rewind.Details are on page 31.
1
1
Index Search
An Index Mark is made automatically at the beginning of each
recording.Essentially,an Index Mark is a “bookmark.” Find the start
of a recording by following these steps.
Press VCR, then press SEARCH repeatedly until
the INDEX SEARCH Screen appears.
1
Within 30 seconds, press K or L until the number of
programs you want to skip appears beneath INDEX
2
SEARCH.Include the current program in your number.
Within 30 seconds, press s (for a reverse search) or
B (for a forward search). When the tape finishes rewinding
3
or forwarding,playback will start. The program numbers will
count down beneath INDEX SEARCH during the search.
If the end of the tape is reached during the search,the search
will stop and the tape may rewind.Details are on page 31.
Recordings should be at least 1 minute long in SP speed and
3 minutes in SLP. Otherwise,the Index Mark will not be
available.Details on tape recording speeds are on page 57.
1
2-3
1
Helpful Hints
• Time Search and Index Search
are not available during
recording.
• To remove a Search Display,press
CLEAR.
• To cancel a search,press
STOP C.
Page 31
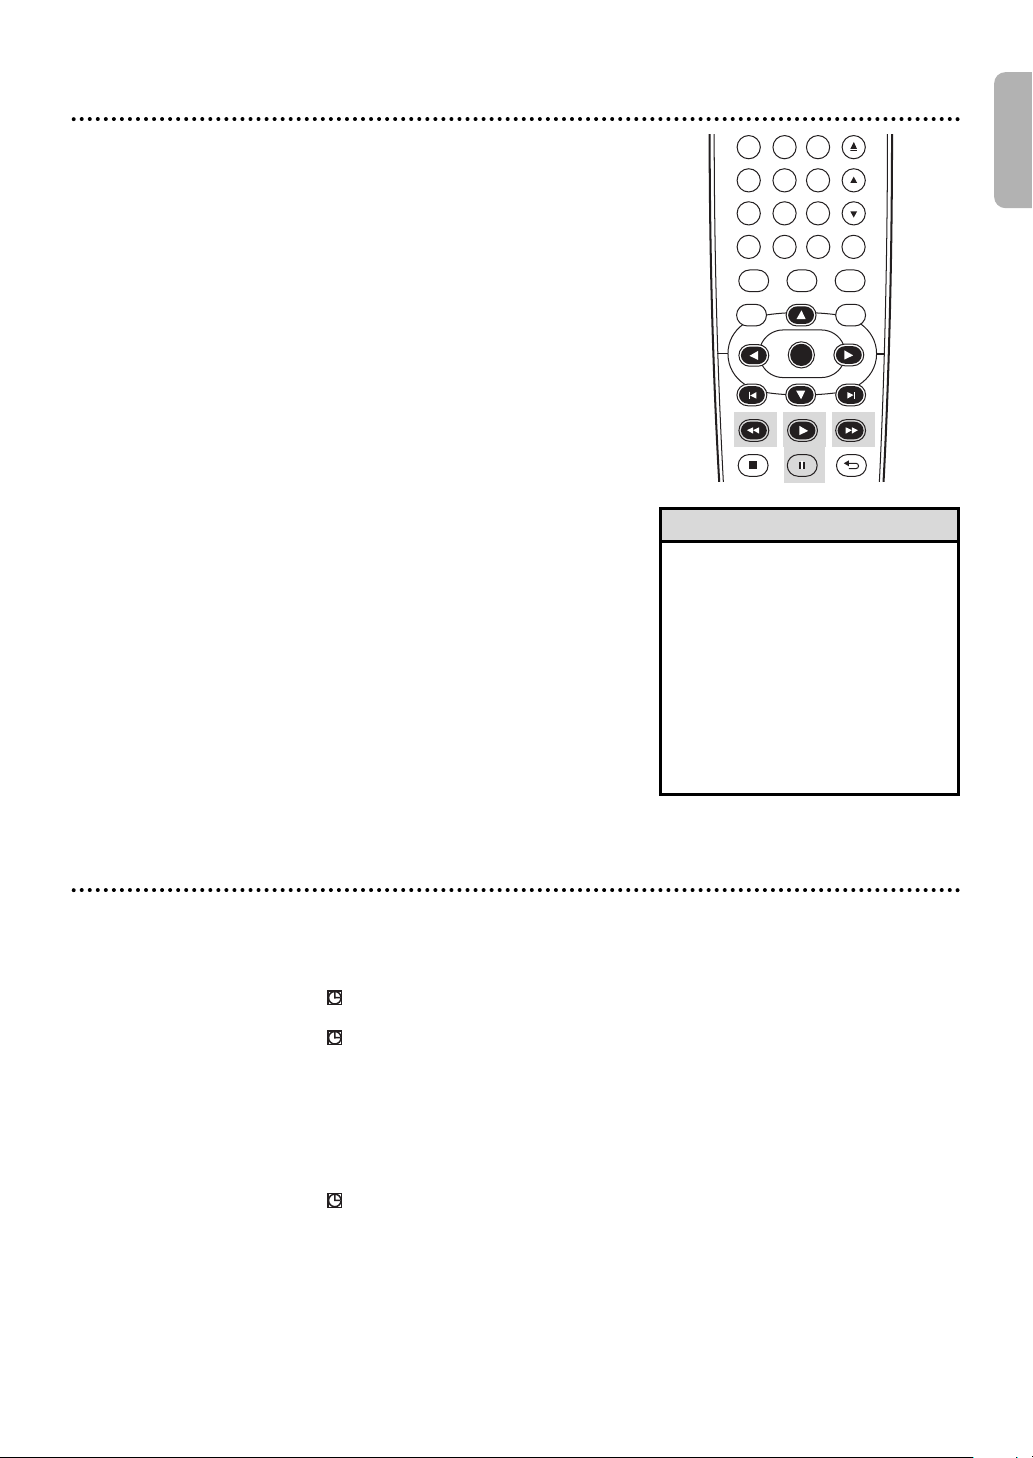
Special Effects Playback 31
DVDVCR SETUP
INPUT MENU
BACKPAUSESTOP
PLAYOKFFWREW
CLEAR TITLE
DISC
TRACKING
12
6
5
4
7
8
9
0
+10
3
●
Before you begin,press VCR so VCR light appears on the front of the
DVD/VCR.
Forward and Reverse Searching (SP/LP/SLP) /
Super High Speed Searching (LP/SLP)
During tape playback, press and release FFW
g or REW h. A fast forward or reverse picture
1
search will begin.
Press FFW g or REW h, then press again.
The search speed will increase.Repeatedly pressing FFW
g or REW h will switch between Regular and High
Speed Searching.
To return to normal playback, press PLAY B.
2
Viewing a Still Picture
During tape playback, press PAUSE k. A still pic-
ture will appear on the screen.
1
● To advance the still picture one frame at a time, press
PAUSE k repeatedly.
● To release the still picture and return to playback,press
PLAY B.
Viewing a Slow Motion Picture
During tape playback, press PAUSE k, then
press FFW g. The tape will play in slow motion.
1
● To change the playback speed,press FFW g or
REW h.
● To return to normal playback,press PLAY B.
Helpful Hints
• Slow and still modes will switch
to stop mode after 5 minutes
to protect the DVD/VCR and
the tape from damage.
•
SP/LP/SLP means this feature will
work with tapes recorded in
Standard Playback,Long Playback or
Super Long Playback.LP/SLP means
this feature will work with tapes
recorded in Long Playback or Super
Long Playback. Tape speed details
are on page 57.
English
Automatic Operation Features
The following tape features are available in VCR mode.Press VCR so VCR light appears on the front of the DVD/VCR, if
necessary.
Automatic Playback
When you put a tape in the DVD/VCR, the power will come on.If the tape’s record tab is missing,playback will begin.
If a Timer Recording is set and “ ” is flashing in the display panel,the power will not come on automatically
when you insert a tape with the record tab intact.
If a Timer Recording is set and “ ” is flashing in the display panel,the DVD/VCR will eject the tape if the record
tab is missing.
Automatic Rewind, Eject
When a tape is played,fast forwarded or recorded to its end,the tape will rewind to the beginning,stop and eject
itself. This feature does not operate if AUTO REPEAT is ON.Details are on page 29.
Tape Eject
A tape can be ejected with the DVD/VCR power on or off (but the DVD/VCR must be plugged in).
If a Timer Recording is set and “ ” is shown on the display panel,press TIMER SET on the remote control or
STOP/EJECT C A on the front panel to cancel the timer standby mode,and then press STOP/EJECT C A to
remove the tape.Remember to insert a tape and press TIMER SET to reset the Timer Recording.
Automatic Tracking Adjustment
The VCR adjusts tracking automatically to give you the best possible picture quality. With some recordings,however,
you may get a better picture using manual tracking.
Manual Tracking
To manually adjust the tracking during normal playback and Slow Motion Playback of a videotape,press
TRACKING K/L. Tracking will return to Automatic Tracking when you press STOP C or insert a tape. You
can also press TRACKING K/L to remove vertical jitter in a Still picture.
Page 32
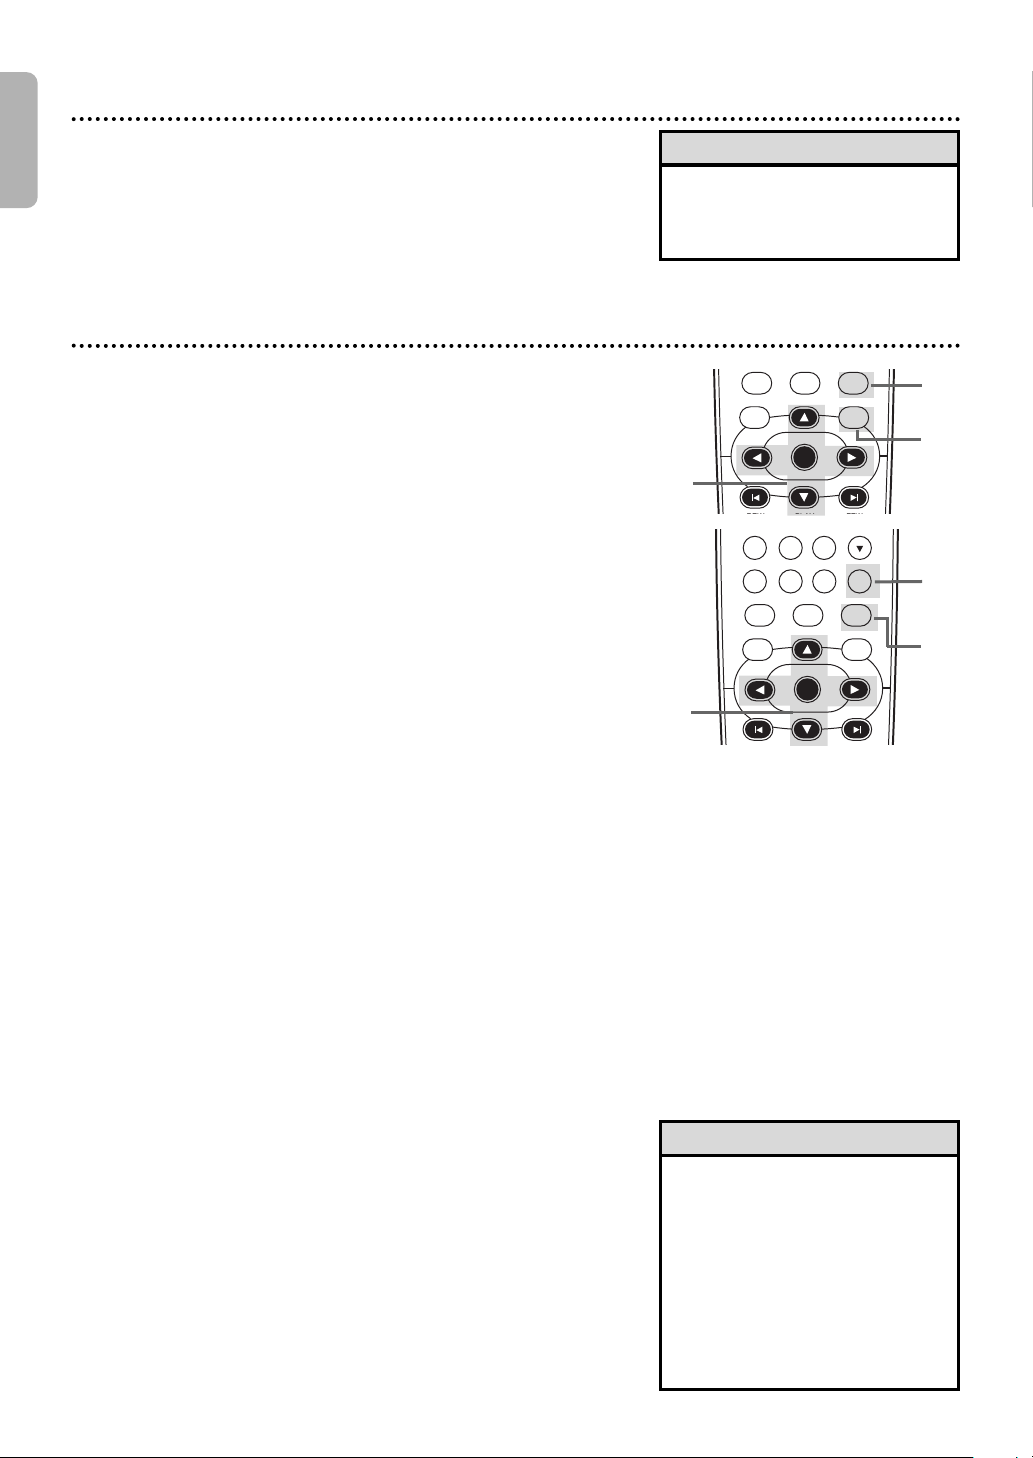
English
DVDVCR SETUP
INPUT MENU
OK
CLEAR TITLE
DISC
TRACKING
7
8
9
0
+10
DVDVCR SETUP
INPUT MENU
OK
DISC
32 Hi-Fi Stereo
Hi-Fi Stereo
To play in Hi-Fi stereo the tapes recorded in Hi-Fi stereo, press
AUDIO to switch Hi-Fi or MONO.
Menus
DVD Disc Menus
Some DVDs contain menus that describe the contents of the disc
or allow you to customize disc playback.For example, the menu
may offer choices for subtitle languages,director’s commentary or
Sound Track Playback. To use the DVD Menu and select playback
features,follow these steps.
Press DVD to put the DVD/VCR in DVD mode.
DVD light will appear on the front of the DVD/VCR.
1
Press DISC MENU. The DVD’s main Disc Menu will
appear.
2
Press
K, L, sorB
Continue this process to set up all the features you want.
3
Using the Title Menu
Some DVDs have a Title Menu, which lists the titles available on
the DVD.Use the Title Menu to play a specific title.
to select an item, then press OK.
Helpful Hint
• The audio level of a tape
recorded in Hi-Fi stereo will
differ from the audio level of a
tape not recorded in Hi-Fi stereo.
1
2
3
2
1
3
Press DVD to put the DVD/VCR in DVD mode.
DVD light will appear on the front of the DVD/VCR.
1
Press TITLE. The Title Menu will appear.
If a Title Menu is not available,the “X” may appear on the
2
TV screen.Or, if the DVD only has a main Disc Menu as
described above,it may appear when you press TITLE.
Press
Playback will begin at the title you selected.
3
K, L, sorB
to select a title, then press OK.
Helpful Hints
• Menus vary among discs.Follow
the literature accompanying the
disc for details.
• Not all DVDs have Disc or Title
Menus.
• Some DVDs may refer to
chapters as “scenes.” Some
DVDs may refer to the Title
Menu as the “scene index.”
• TITLE will not be active with all
DVDs.
Page 33
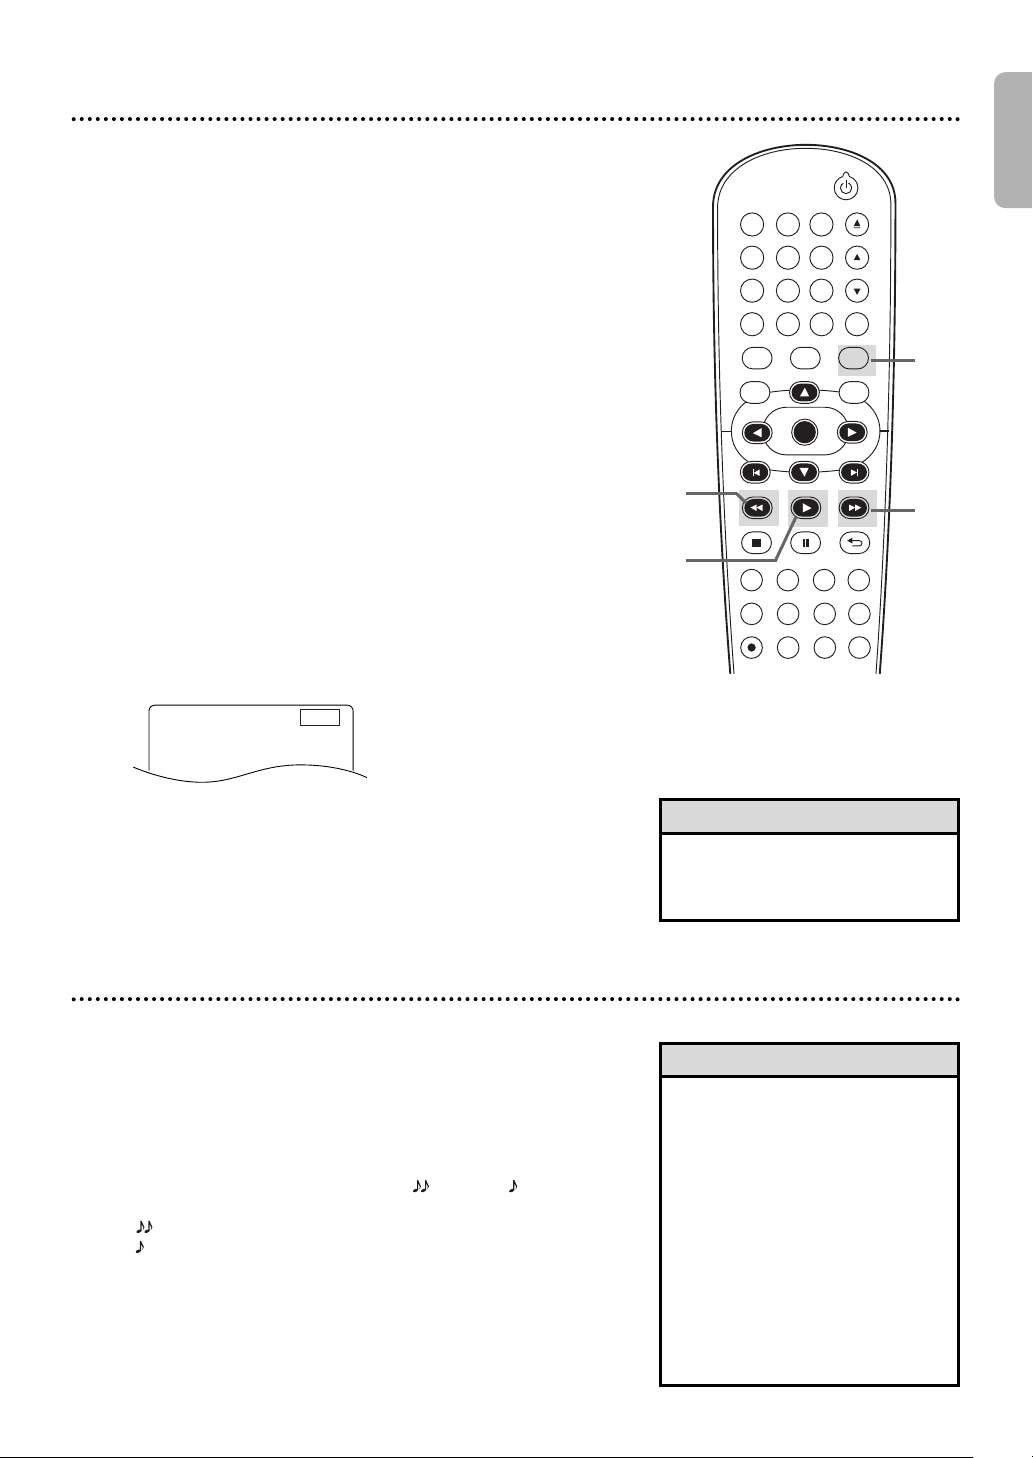
Fast Forward/Fast Reverse 33
DVDVCR SETUP
INPUT MENU
REC SPEED MODE
ANGLE SEARCH REPEAT
DISPLAY SUBTITLE ZOOM
TIMER SET
REPEAT
A-B
AUDIO
BACKPAUSESTOP
PLAYOKFFW
REW
CLEAR TITLE
DISC
TRACKING
OPEN/CLOSE
12
6
5
4
7
8
9
0
+10
3
E
1
Example: Playing a DVD in
reverse at twice the normal
playing speed.
Press DVD to put the DVD/VCR in DVD mode.
DVD light will appear on the front of the DVD/VCR.
1
During playback, press FFW g or REW h
on the remote control.
2
● During DVD playback,pressing FFW g or REW h will
forward or reverse the picture at approximately 2,8, 20,50
or 100 times the normal speed. The speed may vary
depending on the disc. g 1, g 2, g 3,g 4 or
g 5 will appear briefly on the TV screen to indicate
Forward Searching.Or,h 1,h 2, h 3,h 4 or
h 5 will indicate fast reverse.
For DVD playback, the sound will be mute during the
search.
● For Audio CDs, MP3 or Windows Media
playback,pressing FFW g or REW h will forward or
reverse the picture or sound at approximately 2,8 or 30
times the normal speed. The speed may vary depending
on the disc.
g 1,g 2 or g 3 will appear briefly on the TV
screen to indicate Forward Searching.Or,h 1, h 2
or h 3 will indicate fast reverse.
For Audio CD,MP3 or Windows MediaTMAudio playback,
the sound will be intermittent during the search.
TM
Audio
2
3
English
1
2
Press PLAY B to return to normal playback.
3
Rapid Play with Voice is available only during playback on the
discs recorded in the Dolby Digital format.Rapid Play with
Voice plays back in slightly faster/slower speed while keeping
the sound quality as in the normal playback.
During playback, press MODE.
The current setting appears.
1
Press OK to switch among (x1.3), (x0.8)
and OFF.
2
: Plays back approximately at 1.3 times of normal playback.
: Plays back approximately at 0.8 times of normal playback.
OFF : No effects.
● To resume normal playback,press PLAY B.
x1.3 and x0.8 Rapid Play with Voice
Helpful Hint
• If you use FFW g or
REW h during Dual Playback,
JPEG playback will be paused.
Helpful Hint
• During Rapid Play with Voice;
- Audio Language Setting,Black
Level Setting and Virtual
Surround Setting cannot be
changed.
- Virtual Surround does not
function.
- the PCM sound will be output
if using the digital audio
connection (COAXIAL).
- depending on the scenes you
are playing,Rapid Play with
Voice may be unavailable.
Page 34
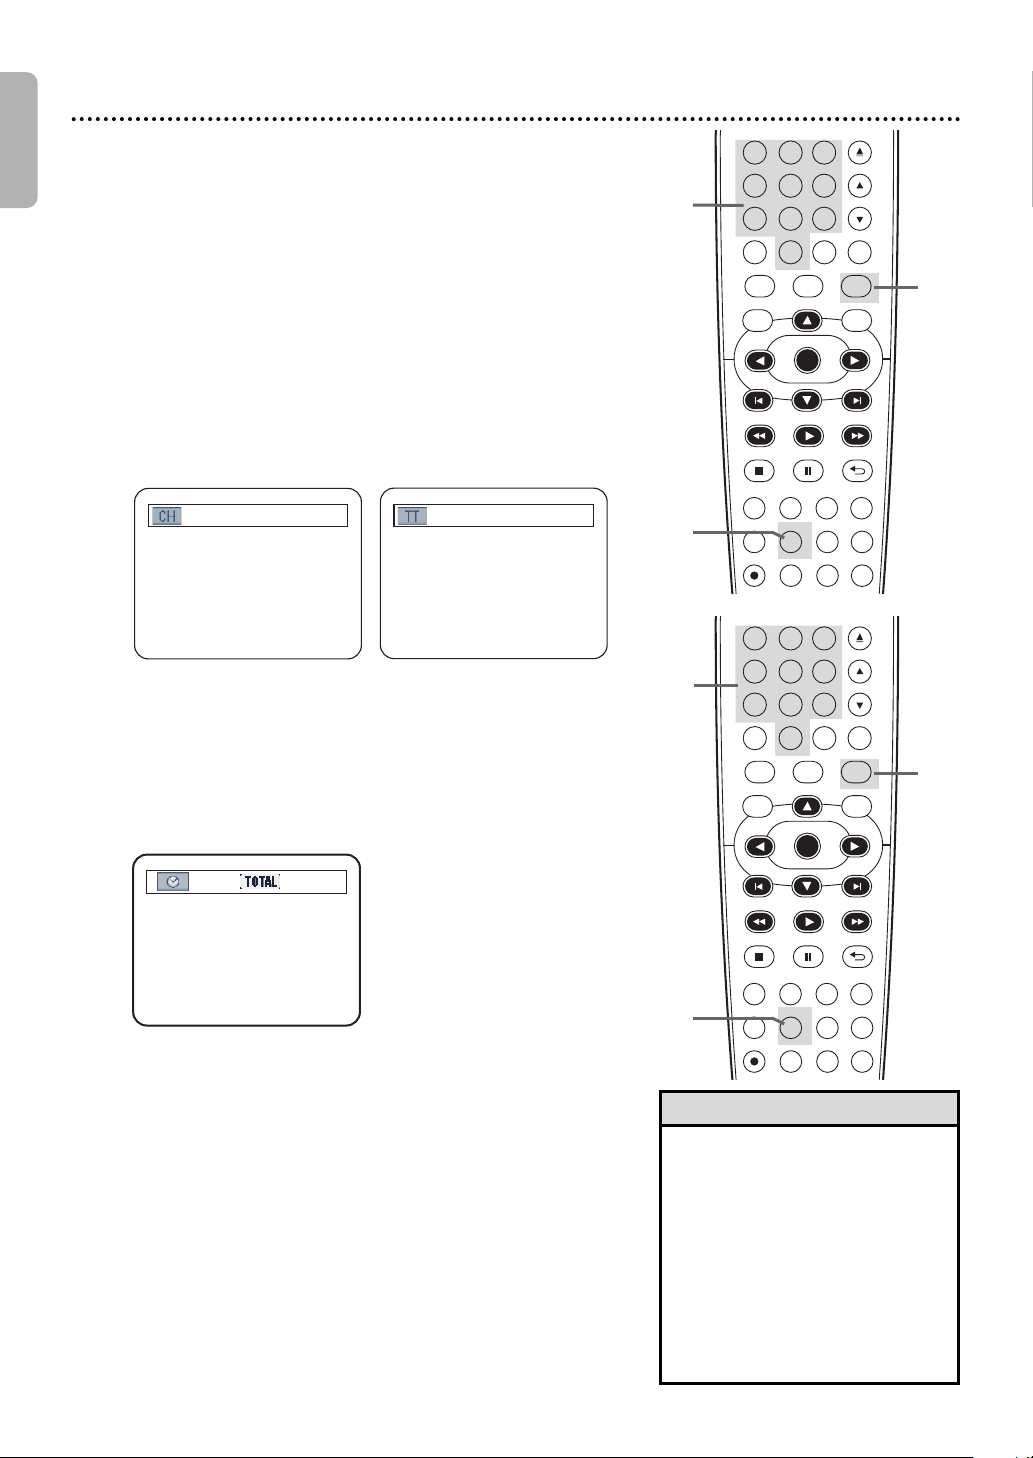
English
12/17 4 / 4
_:_ _:_ _
1:29:00
DVDVCR SETUP
INPUT MENU
REC SPEED MODE
ANGLE SEARCH REPEAT
DISPLAY SUBTITLE ZOOM
TIMER SET
REPEAT
A-B
AUDIO
BACKPAUSESTOP
PLAYOKFFW
REW
CLEAR TITLE
DISC
TRACKING
OPEN/CLOSE
12
6
5
4
7
8
9
0
+10
3
DVDVCR SETUP
INPUT MENU
REC SPEED MODE
ANGLE SEARCH REPEAT
DISPLAY SUBTITLE ZOOM
TIMER SET
REPEAT
A-B
AUDIO
BACKPAUSESTOP
PLAYOKFFW
REW
CLEAR TITLE
DISC
TRACKING
OPEN/CLOSE
12
6
5
4
7
8
9
0
+10
3
34 Title/Chapter/Time Search
Title/Chapter Search
Press DVD to put the DVD/VCR in DVD mode.
DVD light will appear on the front of the DVD/VCR.
1
During DVD playback, press SEARCH repeatedly until CH (for chapter) or TT (for title) appears on the
2
TV screen. The number of available titles or chapters will
appear at the right ( /4,for example).
Enter the title or chapter number using the
Number buttons. The title or chapter will play.
3
❹❹
To select a single-digit track number when there are
more than 10 tracks,press OK to play the track.
●●
If you enter a track number that is not available on the
Disc,playback will not begin (or the current track will
continue to play).
3
1
2
Time Search
Press DVD to put the DVD/VCR in DVD mode.
DVD light will appear on the front of the DVD/VCR.
1
During DVD or Audio CD playback, press SEARCH
repeatedly
2
3
Within 30 seconds, use the Number buttons to
enter the elapsed playing time (of the track or
title) at which you want playback to begin. Enter
the time in hours,minutes and seconds. Within a few seconds,playback will start at the specified time.
●●
Example:1 hour,23 minutes and 30 seconds
●●
Make sure the time you enter is within the total time of
the current title or track.If it is not,the time space will
clear and playback will continue at its current point. The
total time available in the current track or title will
appear in the Time Search Display.
●●
If you make a mistake entering the time,press CLEAR to
clear the time area.Enter the correct information.
until the Time Search Display appears.
1 → 2 → 3 → 3 → 0
3
1
2
Helpful Hints
• When playback is stopped,use
the Number buttons to select a
title for immediate playback.
During playback,use the
Number buttons to choose a
chapter for immediate playback.
• Title/Chapter Search is not
available with some DVDs.
• Time Search is not available for
MP3,Windows MediaTMAudio
and JPEG files.
Page 35
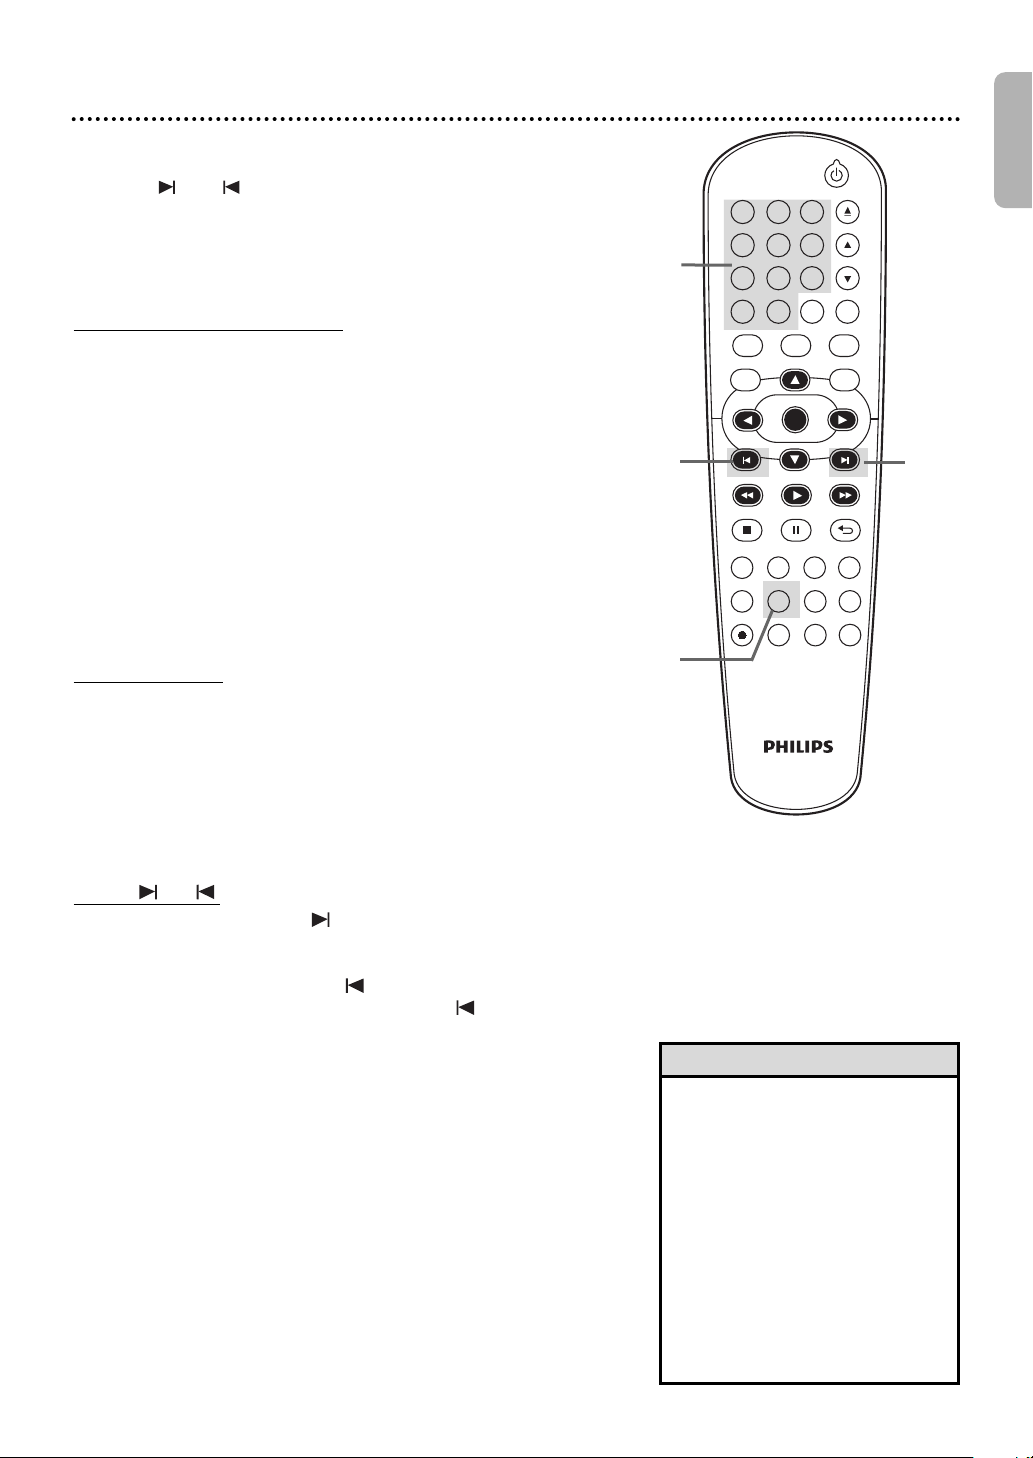
There are three ways to play a specific Audio CD, MP3, Windows
DVDVCR SETUP
INPUT MENU
REC SPEED MODE
ANGLE SEARCH REPEAT
DISPLAY SUBTITLE ZOOM
TIMER SET
REPEAT
A-B
AUDIO
BACKPAUSESTOP
PLAYOKFFW
REW
CLEAR TITLE
DISC
TRACKING
OPEN/CLOSE
12
6
5
4
7
8
9
0
+10
3
MediaTMAudio or JPEG track: Use the Number buttons,the SEARCH
button or and .
●●
Before you begin,press DVD so DVD light appears on the front of
the DVD/VCR.
Track Search 35
English
A
Using the Number Buttons
Press the Number buttons to enter a track number.
Playback will start at the selected track.
For tracks 10 and above,press the +10 button so the Search
Display (TR _ _ /12 - an example of total tracks) appears on the
TV screen.Press the Number button of the first digit,then press
the Number button of the second digit.For example,to play track
26,press +10,then Number 2, then Number 6 (Each number must
be pressed within 30 seconds of the previous number).
For single-digit tracks (1-9),press a single Number button.
If you enter a track number that is not available on the disc,play will
not begin (or the current track will continue to play).
B
Using SEARCH
Press SEARCH so the Track Search Display (TR) appears.
Within 30 seconds, press the Number buttons to select
the track number.
single-digit track (1-9),enter 0 first.For example, to play track 5,
press 0,5. You do not have to use the +10 button in search mode.
C
Using or
During playback, press to skip the current track
and move to the next track. The track number will appear
briefly on the DVD/VCR display panel.
Or, during playback, press to return to the
beginning of the current track. Press repeatedly
to go to previous tracks. The track number will appear
briefly on the DVD/VCR display panel.
Playback will begin at the selected track.For a
A,B
C
B
C
Helpful Hints
• 3 and does not function
when playback is stopped.
• You cannot use 3 to go from
the last track on the disc to the
first track.
• Using 3 or during Dual
Playback will only affect MP3
files.If you want to skip JPEG
files during Dual Playback,press
{ or B. Please note that
pressing 3 or will affect
both MP3 and JPEG files if
SLIDE SHOW is set to MUSIC.
3
3
3
Page 36
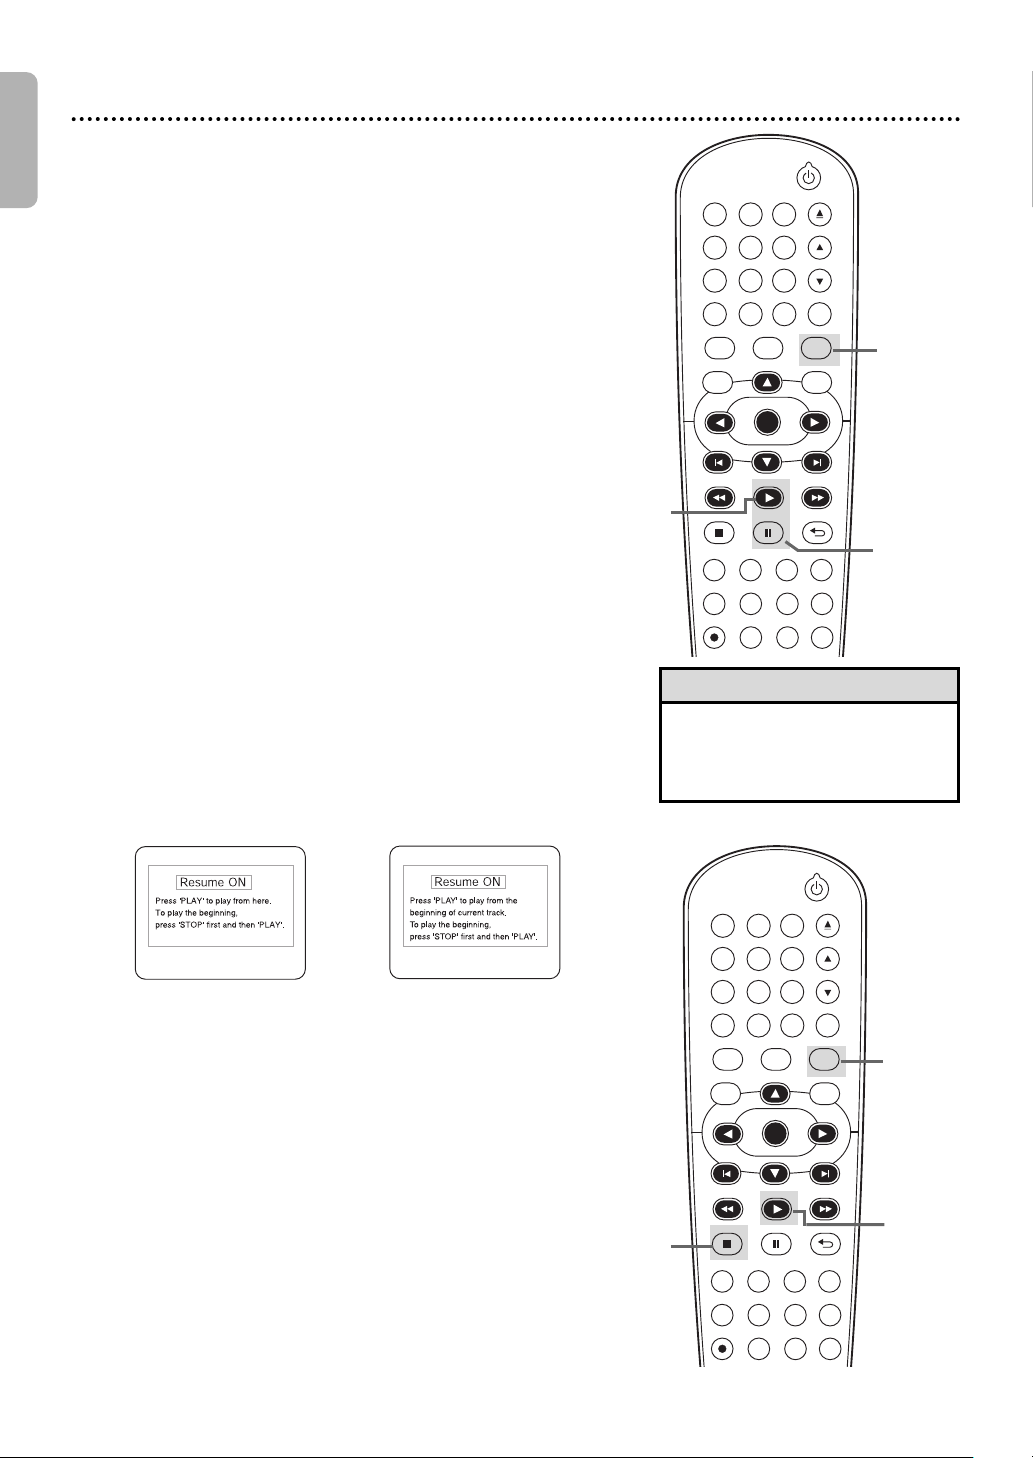
English
DVDVCR SETUP
INPUT MENU
REC SPEED MODE
ANGLE SEARCH REPEAT
DISPLAY SUBTITLE ZOOM
TIMER SET
REPEAT
A-B
AUDIO
BACKPAUSESTOP
PLAYOKFFW
REW
CLEAR TITLE
DISC
TRACKING
OPEN/CLOSE
12
6
5
4
7
8
9
0
+10
3
DVDVCR SETUP
INPUT MENU
REC SPEED MODE
ANGLE SEARCH REPEAT
DISPLAY SUBTITLE ZOOM
TIMER SET
REPEAT
A-B
AUDIO
BACKPAUSESTOP
PLAYOKFFW
REW
CLEAR TITLE
DISC
TRACKING
OPEN/CLOSE
12
6
5
4
7
8
9
0
+10
3
36
Paused and Step-by-Step Playback, Resume On
Paused and Step-by-Step Playback
Press DVD to put the DVD/VCR in DVD mode.
DVD light will appear on the front of the DVD/VCR.
1
During disc playback, press PAUSE k. Playback
will pause and the sound will be mute.
2
● Pressing PAUSE F once during Dual Playback will pause a
JPEG file only. Pressing PAUSE F one more time will
pause an MP3 playback.
When playing a DVD, press PAUSE k repeated-
ly to see the picture advance one frame (or
3
step) at a time. The sound will remain mute.
Pressing PAUSE k repeatedly during Audio CD,MP3,
Windows Media
effect.
Press PLAY B to resume playback.
TM
Audio or JPEG playback will have no
4
Resume On
1
4
2-3
Press DVD to put the DVD/VCR in DVD mode.
DVD light will appear on the front of the DVD/VCR.
1
Press STOP C during playback. In a few seconds,the
following Resume message will appear on the TV screen.
2
For DVD or AudioCD:
Press PLAY B. In a few seconds,playback will resume
from the point at which it stopped last.You can Resume
3
Playing at the same point even if you turn off the
DVD/VCR,then turn it on again later.However, opening the
disc tray will cancel the Resume feature.Playback will start
at the beginning the next time you insert the disc.
For MP3, Windows MediaTMAudio and JPEG playback will
resume from the beginning of the current track.
To cancel Resume and start playing the disc from the
beginning,press STOP C again while playback is in the resume
stop mode.As for MP3,Windows Media
playback,File List will appear when you cancel Resume.
Press PLAY B to start playing the disc from the beginning.
● The resume information will be cleared if you change the
For MP3,
Windows Media
or JPEG:
parental level when the resume information is on.
TM
Audio
TM
Audio and JPEG
Helpful Hint
• Set STILL MODE to FIELD in
the DISPLAY Menu if paused
images are blurry. Details are on
pages 50-51.
1
3
2
Page 37
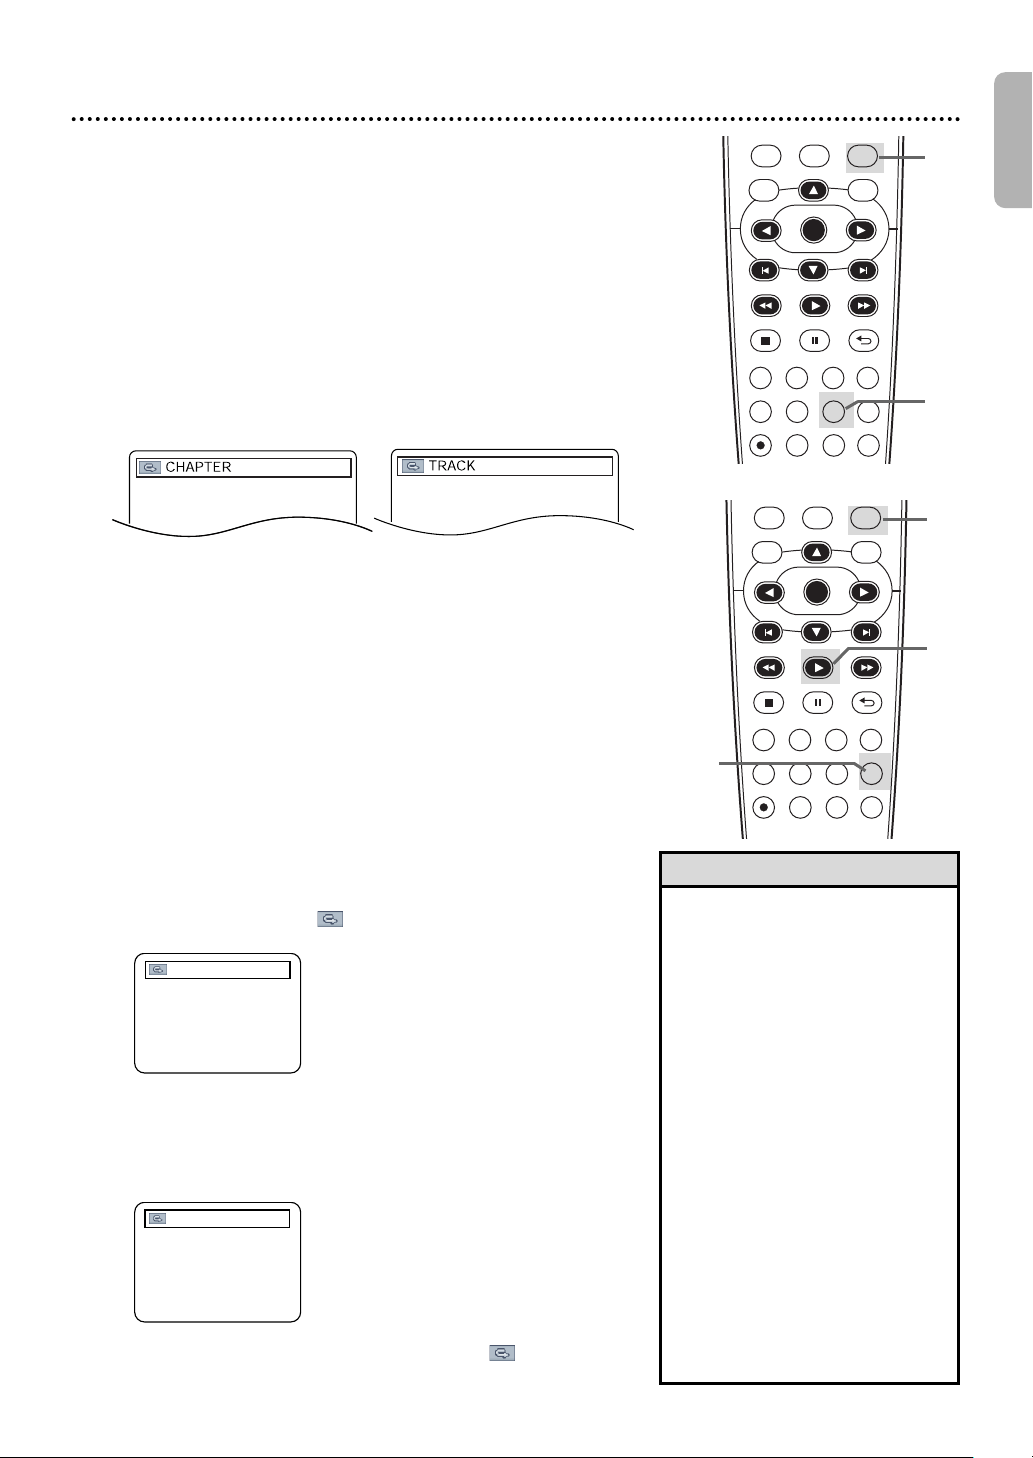
Repeat, A-B Repeat 37
DVDVCR SETUP
INPUT MENU
REC SPEED MODE
ANGLE SEARCH REPEAT
DISPLAY SUBTITLE ZOOM
TIMER SET
REPEAT
A-B
AUDIO
BACKPAUSESTOP
PLAYOKFFW
REW
DISC
DVDVCR SETUP
INPUT MENU
REC SPEED MODE
ANGLE SEARCH REPEAT
DISPLAY SUBTITLE ZOOM
TIMER SET
REPEAT
A-B
AUDIO
BACKPAUSESTOP
PLAYOKFFW
REW
DISC
A –
A – B
Repeat
Press DVD to put the DVD/VCR in DVD mode.
DVD light will appear on the front of the DVD/VCR.
1
During DVD, Audio CD, MP3, Windows MediaTMAudio
or JPEG playback, press REPEAT repeatedly until the
2
repeat mode you want appears on the TV screen.
On a DVD,select CHAPTER, TITLE or OFF.On an Audio CD,
select TRACK, ALL (all tracks on the disc) or OFF.
With MP3, Windows MediaTMAudio or JPEG tracks,select
TRACK,GROUP (all tracks in the current folder), ALL or OFF.
Selecting a new track,chapter or title will cancel Repeat Playback.
1
2
English
Example:Repeat a
DVD chapter
Example:Repeat an
Audio CD track
A-B Repeat
You can play a specified section of a DVD or Audio CD
repeatedly.Follow these steps to set up the section you want to
repeat.
Press DVD to put the DVD/VCR in DVD mode.
DVD light will appear on the front of the DVD/VCR.
1
Press PLAY B to play the disc to the point at
which you want repeated playback to begin.
2
Press A-B REPEAT to set the starting point (A).
If you make a mistake,press CLEAR. This will erase point A
3
and let you start over. OFF will appear briefly on the
TV screen.
Play the disc to the point at which you want
repeated playback to end, then press A-B
4
REPEAT again. Within a few seconds, the A-B section
will begin to play repeatedly.The segment will play over and
over until you cancel the A-B Repeat feature.
● To cancel A-B Repeat,press A-B REPEAT. OFF will
appear on the TV screen.Regular playback will resume.
3-4
Helpful Hints
• Repeat Playback and A-B Repeat
are not available with some discs.
• The entire A-B Repeat section
must be within a single title or
track.If you do not enter Point B
before the end of the track or
title is reached,the end of the
track or title will become Point B
automatically.
• Point B must be later on the
disc than Point A.
• A-B Repeat is not available with
MP3, Windows Media
and JPEG files.
• If you choose GROUP Repeat
during Dual Playback,all tracks
or files in each folder will play
repeatedly.For example if you
choose GROUP Repeat during
Dual Playback of MP3 folder A
and JPEG folder B,all MP3 files
in folder A and all JPEG files in
folder B will be repeated.
TM
1
2
Audio
Page 38
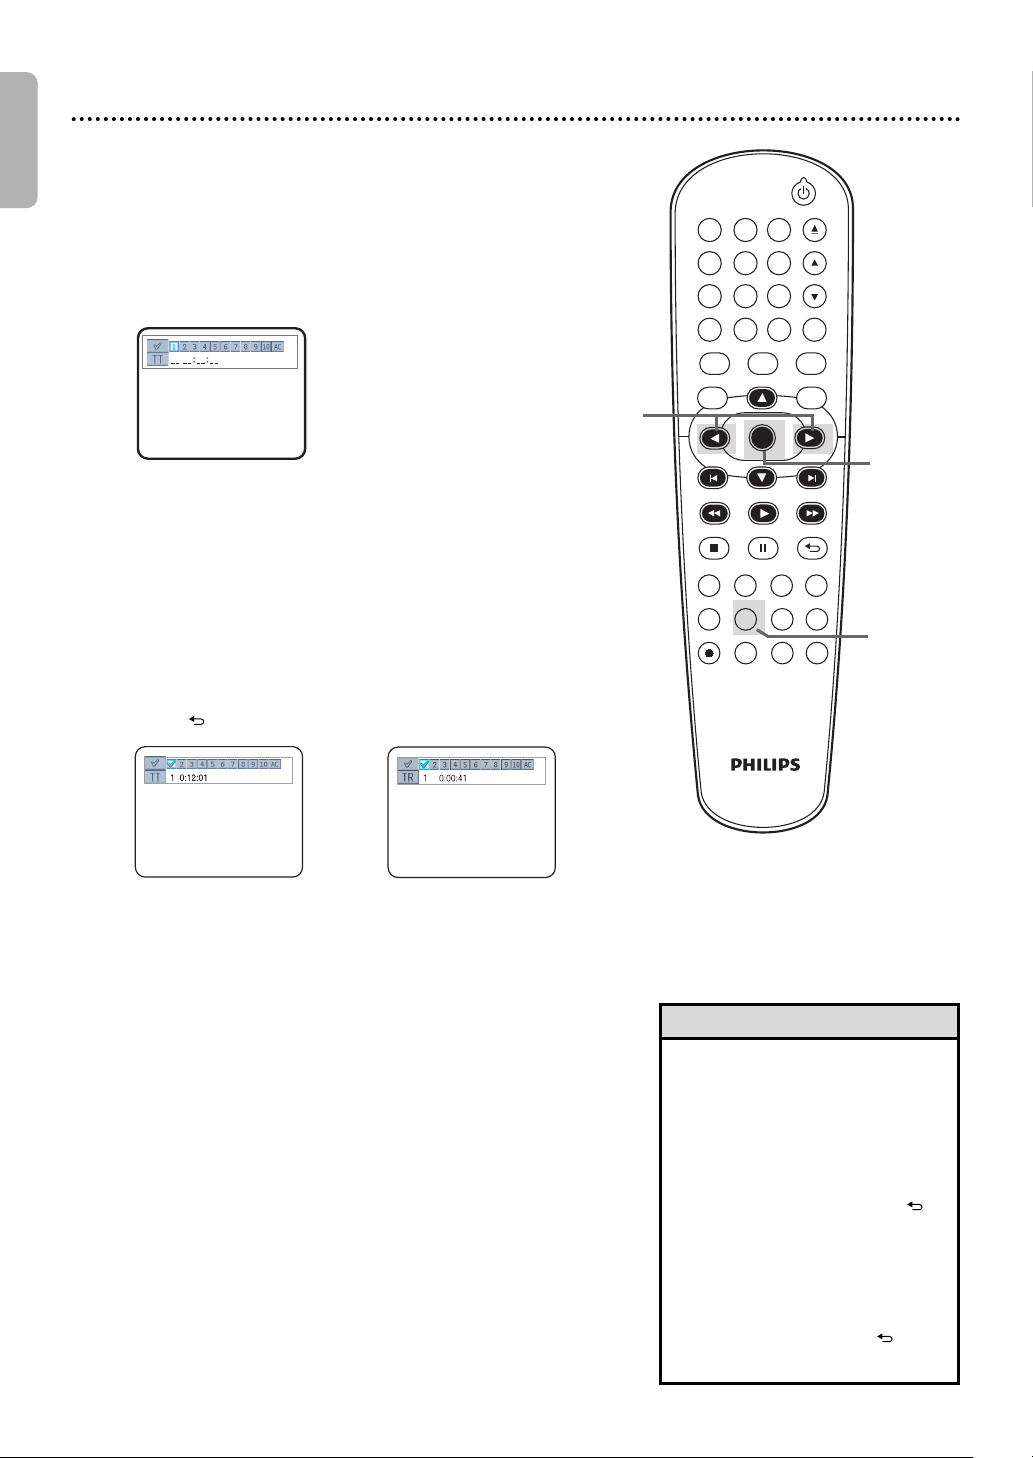
English
DVDVCR SETUP
INPUT MENU
REC SPEED MODE
ANGLE SEARCH REPEAT
DISPLAY SUBTITLE ZOOM
TIMER SET
REPEAT
A-B
AUDIO
BACKPAUSESTOP
PLAYOKFFW
REW
CLEAR TITLE
DISC
TRACKING
OPEN/CLOSE
12
6
5
4
7
8
9
0
+10
3
38 Markers
Use Markers to remember your favorite places on a DVD or
Audio CD.
●●
Before you begin,place the DVD/VCR in DVD mode.Press
DVD so DVD light appears on the front of the DVD/VCR.
Play the disc to within 30 seconds of the point at
which you want to set the Marker. Press SEARCH
1
repeatedly until Marker Display appears.
2,4
2
3
4
Example:DVD
Within 30 seconds, press s or B to select a Marker
(1-10).
When the playback reaches the point you want to
remember, press OK.
elapsed playing time will appear beneath the Markers.
A checkmark will replace the Marker number. The Marker
Display will disappear in about 30 seconds,or press
BACK to remove it.
To return to a Marker during playback, press
SEARCH repeatedly until Marker Display
appears.
Press s or B to choose the Marker you want,
then press OK. Disc playback will continue from the
marked point.
Make sure _ _ :_ _ :_ _ appears beneath the number.
The title or track number and its
Example:DVD
Example:Audio CD
3-4
1,4
Helpful Hints
• Opening the disc tray or turning
off the DVD/VCR will erase all
the Markers.
• To erase a single Marker,press
SEARCH repeatedly until
Marker Display appears.Press
s or B to select a Marker.
Press CLEAR.Press BACK
to remove the display.
• To erase all the Markers,press
SEARCH repeatedly until
Marker Display appears.
Press B to select AC,then
press OK.Press BACK to
remove the display.
Page 39
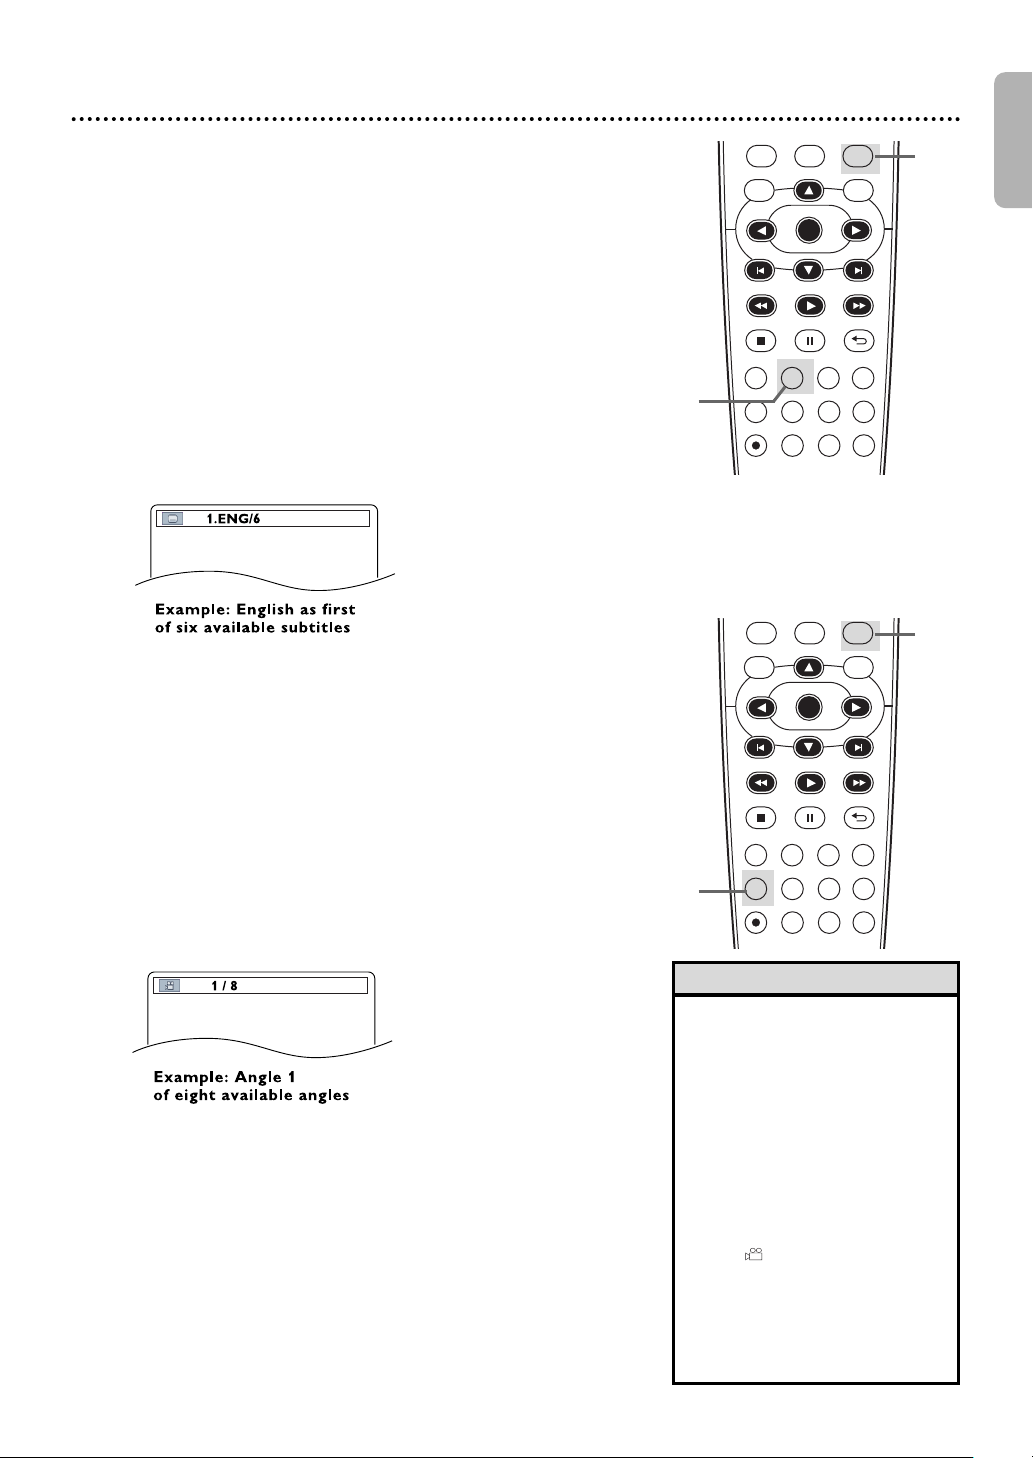
DVDVCR SETUP
INPUT MENU
REC SPEED MODE
ANGLE SEARCH REPEAT
DISPLAY SUBTITLE ZOOM
TIMER SET
REPEAT
A-B
AUDIO
BACKPAUSESTOP
PLAYOKFFW
REW
DISC
Subtitles, Camera Angles 39
DVDVCR SETUP
INPUT MENU
REC SPEED MODE
ANGLE SEARCH REPEAT
DISPLAY SUBTITLE ZOOM
TIMER SET
REPEAT
A-B
AUDIO
BACKPAUSESTOP
PLAYOKFFW
REW
DISC
Subtitles
The DVD/VCR allows you to select a language for subtitles during
playback.You may select only languages that are available on the
DVD.
Press DVD to put the DVD/VCR in DVD mode.
DVD light will appear on the front of the DVD/VCR.
1
During playback, press SUBTITLE repeatedly
to select a subtitle language. The number of
2
available languages appears at the right of the Subtitle
Display.In the example below,six languages are available (
/6).After a few seconds,the subtitles will appear.
Or, press SUBTITLE repeatedly to turn off subtitles.
When no subtitles are available,“NOT AVAILABLE”
appears at the right of the Subtitle Display.
2
1
1
English
Camera Angles
Some DVDs contain scenes recorded from different angles or
perspectives. The perspective will not change if the DVD does not
contain sequences recorded from different camera angles.
Press DVD to put the DVD/VCR in DVD mode.
DVD light will appear on the front of the DVD/VCR.
1
During playback, press ANGLE repeatedly to
select a different perspective. The number of avail-
2
able angles appears at the right of the Angle Display. In this
example,eight angles are available ( /8).
2
Helpful Hints
• With some DVDs,you must
select a subtitle language in
the Disc Menu.
• If the desired language does
not appear after pressing
SUBTITLE several times,the
disc does not have subtitles in
that language.
• Opening the disc tray will
cancel your Subtitle Setting.
• If the ANGLE ICON Setting is
ON, will appear on the TV
screen when the current
portion of the disc has
multiple camera angles. To set
the ANGLE ICON ON or
OFF,see page 55-56.
Page 40
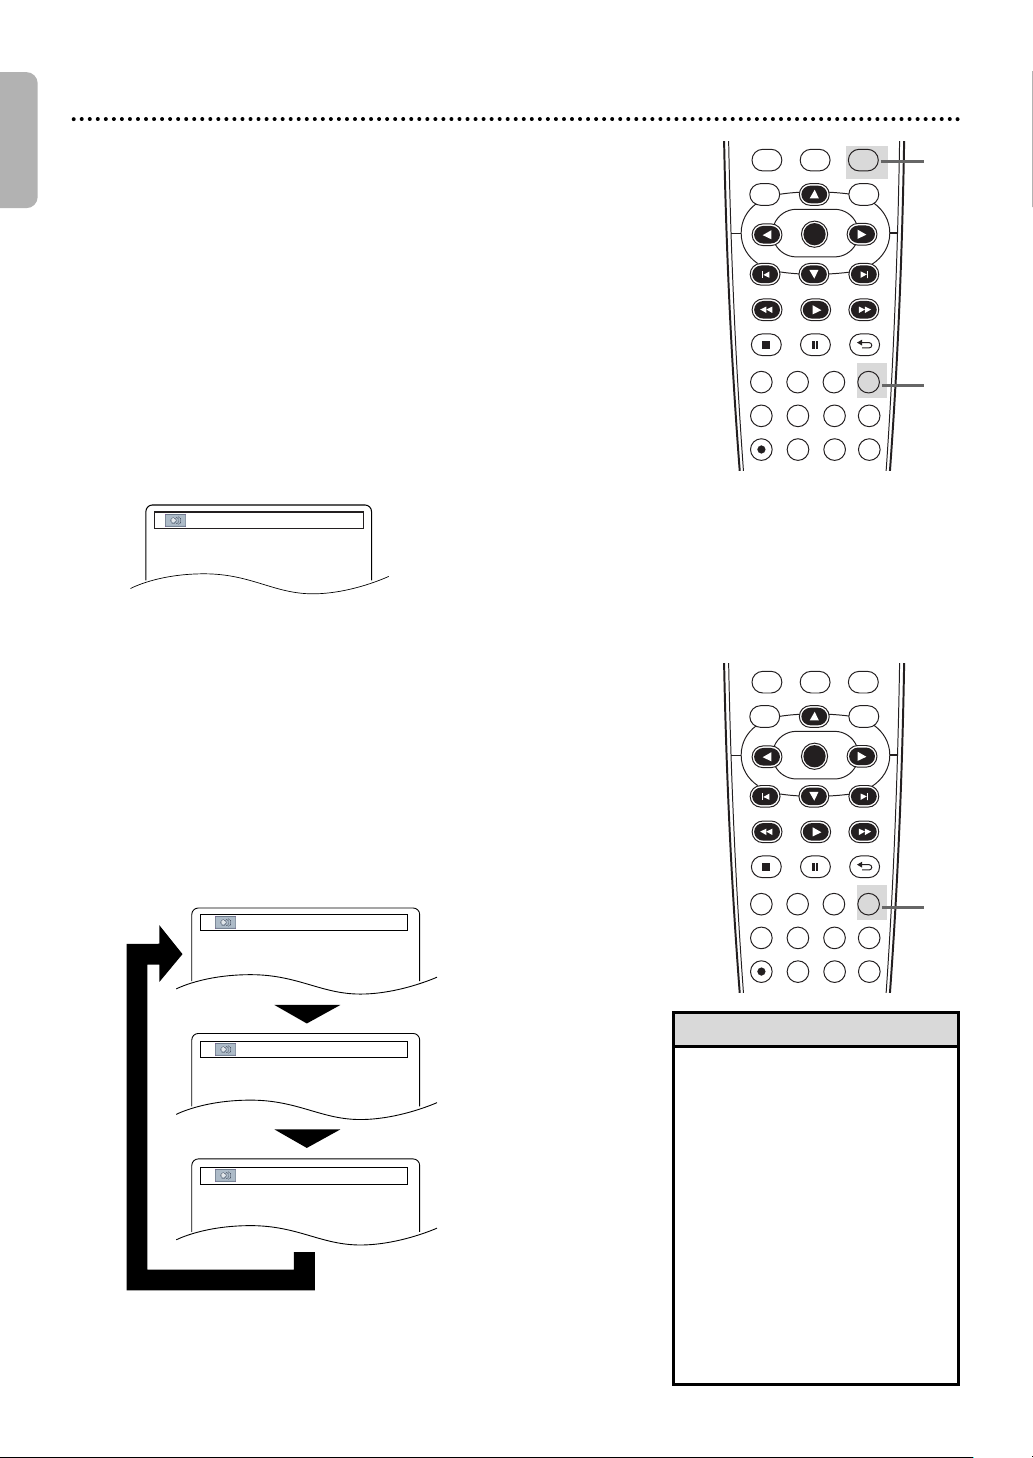
English
Both right and left channels
are heard (stereo).
STEREO
Only the left channel
is heard.
L-ch
Only the right channel
is heard.
R-ch
Example: English audio
1.ENG Dolby D 3/2.1ch 48k/3
DVDVCR SETUP
INPUT MENU
REC SPEED MODE
ANGLE SEARCH REPEAT
DISPLAY SUBTITLE ZOOM
TIMER SET
REPEAT
A-B
AUDIO
BACKPAUSESTOP
PLAYOKFFW
REW
DISC
DVDVCR SETUP
INPUT MENU
REC SPEED MODE
ANGLE SEARCH REPEAT
DISPLAY SUBTITLE ZOOM
TIMER SET
REPEAT
A-B
AUDIO
BACKPAUSESTOP
PLAYOKFFW
REW
DISC
Stereo Sound Mode
Adjust Stereo Sound to determine whether you will hear the left
channel,the right channel or both channels (stereo) during Audio
CD playback.
If you connected the DVD/VCR to a Stereo using the COAXIAL
DIGITAL AUDIO OUT jack as described on page 12, you cannot
adjust stereo sound mode.
40 Audio Language, Stereo Sound Mode
Audio Language
You can select a language for DVDs during playback if multiple
languages are available.
Press DVD to put the DVD/VCR in DVD mode.
DVD light will appear on the front of the DVD/VCR.
1
During DVD playback, press AUDIO repeatedly to
choose one of the available languages.
2
appears at the top of the TV screen,and the new audio will
be heard. The display will disappear after about 5 seconds.
The Audio Display may show the current settings for the
Dolby Digital or Multi-channel sound,if they are available on
the disc,and the sampling rate of the disc. The number of
available languages appears after the “ / ” at the right of the
display ( /3,for example).
Audio Display
1
2
Press AUDIO repeatedly during Audio CD
playback to choose STEREO, L-ch or R-ch.
1
1
Helpful Hints
• If a language is not available
after pressing AUDIO several
times,the DVD does not have
that language.
• Some DVDs only let you
change the language in the Disc
Menu.
• Audio languages may be
abbreviated (such as ENG for
English).Or, three dashes (- - -)
may appear instead of an
abbreviation.
• Audio language selection cannot
be made during Rapid Play with
Voice. (Refer to page 33.)
Page 41
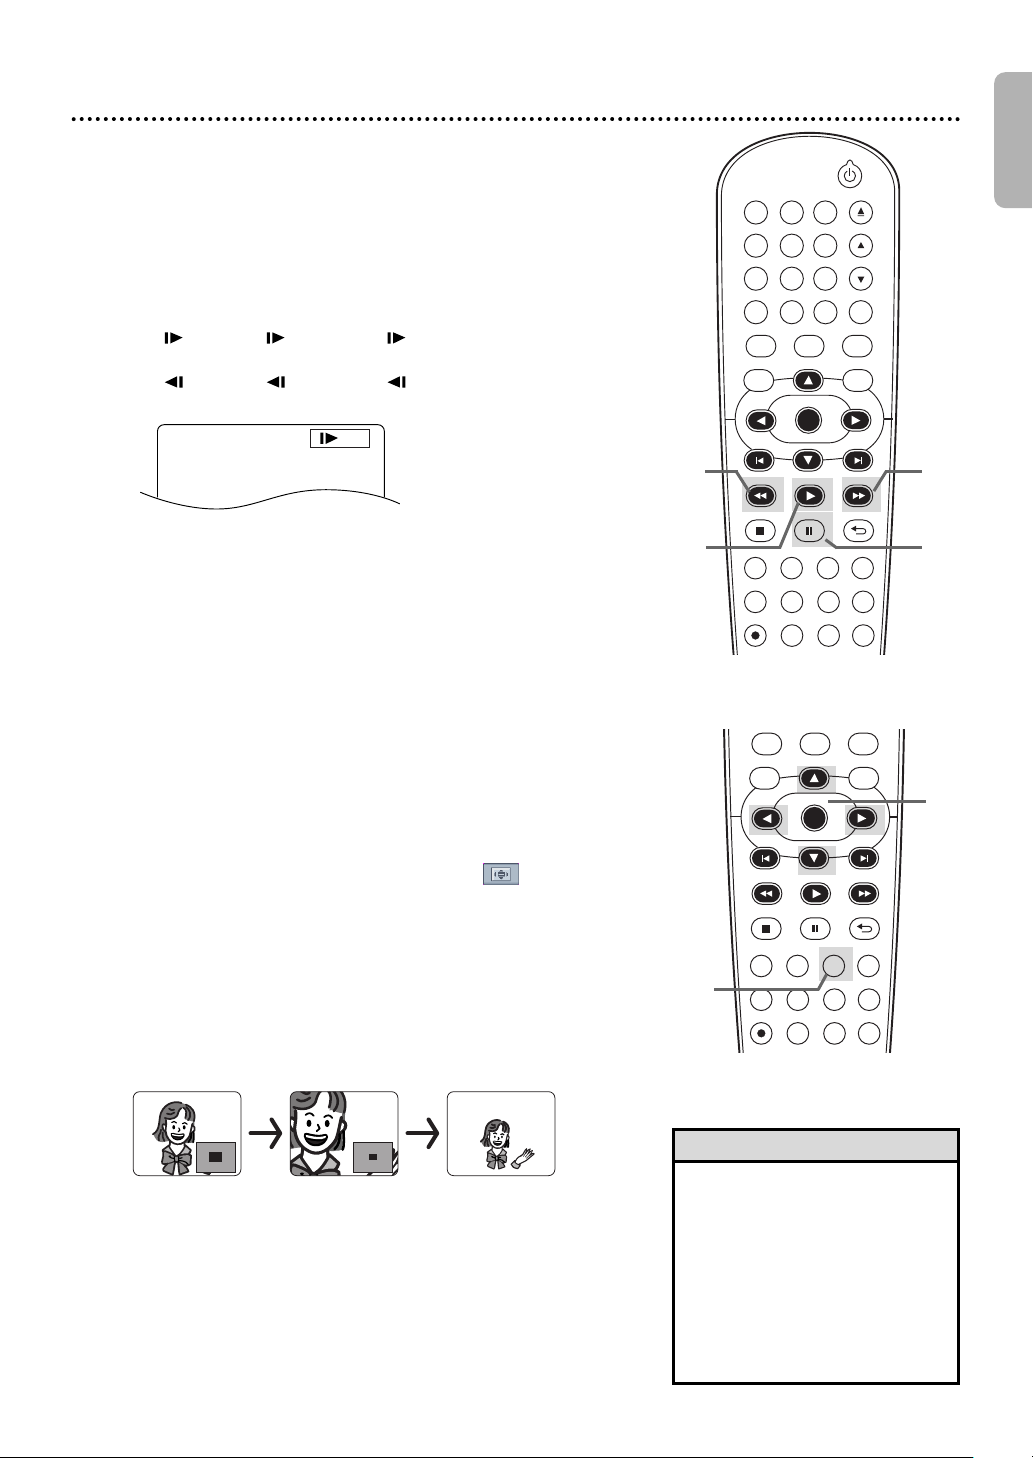
Slow Motion
Example: Playing a DVD forward
at half the normal speed.
3
DVDVCR SETUP
INPUT MENU
REC SPEED MODE
ANGLE SEARCH REPEAT
DISPLAY SUBTITLE ZOOM
TIMER SET
REPEAT
A-B
AUDIO
BACKPAUSESTOP
PLAYOKFFW
REW
CLEAR TITLE
DISC
TRACKING
OPEN/CLOSE
12
6
5
4
7
8
9
0
+10
3
DVDVCR SETUP
INPUT MENU
REC SPEED MODE
ANGLE SEARCH REPEAT
DISPLAY SUBTITLE ZOOM
TIMER SET
REPEAT
A-B
AUDIO
BACKPAUSESTOP
PLAYOKFFW
REW
DISC
Press PAUSE F during DVD playback.
1
Press FFW D or REW h. Slow Motion Playback
will begin.Press FFW D or REW h repeatedly during
2
Slow Motion Playback to play a DVD forward or backward
at approximately 1/16,1/8 or 1/2 the normal speed.
An 1 (1/16), 2 (1/8) or 3 (1/2) will appear
briefly on the TV screen to indicate Slow Forward Playback.
An 1 (1/16), 2 (1/8) or 3 (1/2) will indicate
Slow Reverse Playback.
Slow Motion, Zoom 41
English
22
Press PLAY B to return to normal playback.
3
Zoom
Zooming lets you enlarge the playback image of DVDs or JPEG
files,and lets you pan through the enlarged image.
Press ZOOM during playback or when playback
is paused. The picture will appear twice as large.Press
1
ZOOM again to make the picture four times larger than
normal.Either x2 or x4 will appear beside icon in the
upper left corner of the TV screen.
While the picture is enlarged, press K, L, s or B
to move the zoomed image up, down, left or right.
2
The gray box with an inner blue box that shows during
Zoomed Playback is the position guide. To remove it or
show it,press OK. The position of the blue box inside the
gray box indicates the position of the zoomed image within
the overall picture.
●●
To return the picture to normal,press ZOOM
repeatedly.
3
1
Helpful Hints
• The sound will be mute during
Paused or Slow Motion
Playback.
• You cannot zoom a Disc Menu.
• The x4 zooming is not active
with some discs.Only x2
zooming is available for JPEG
files.
• Position guide is not available
for JPEG playback.
1
2
Page 42
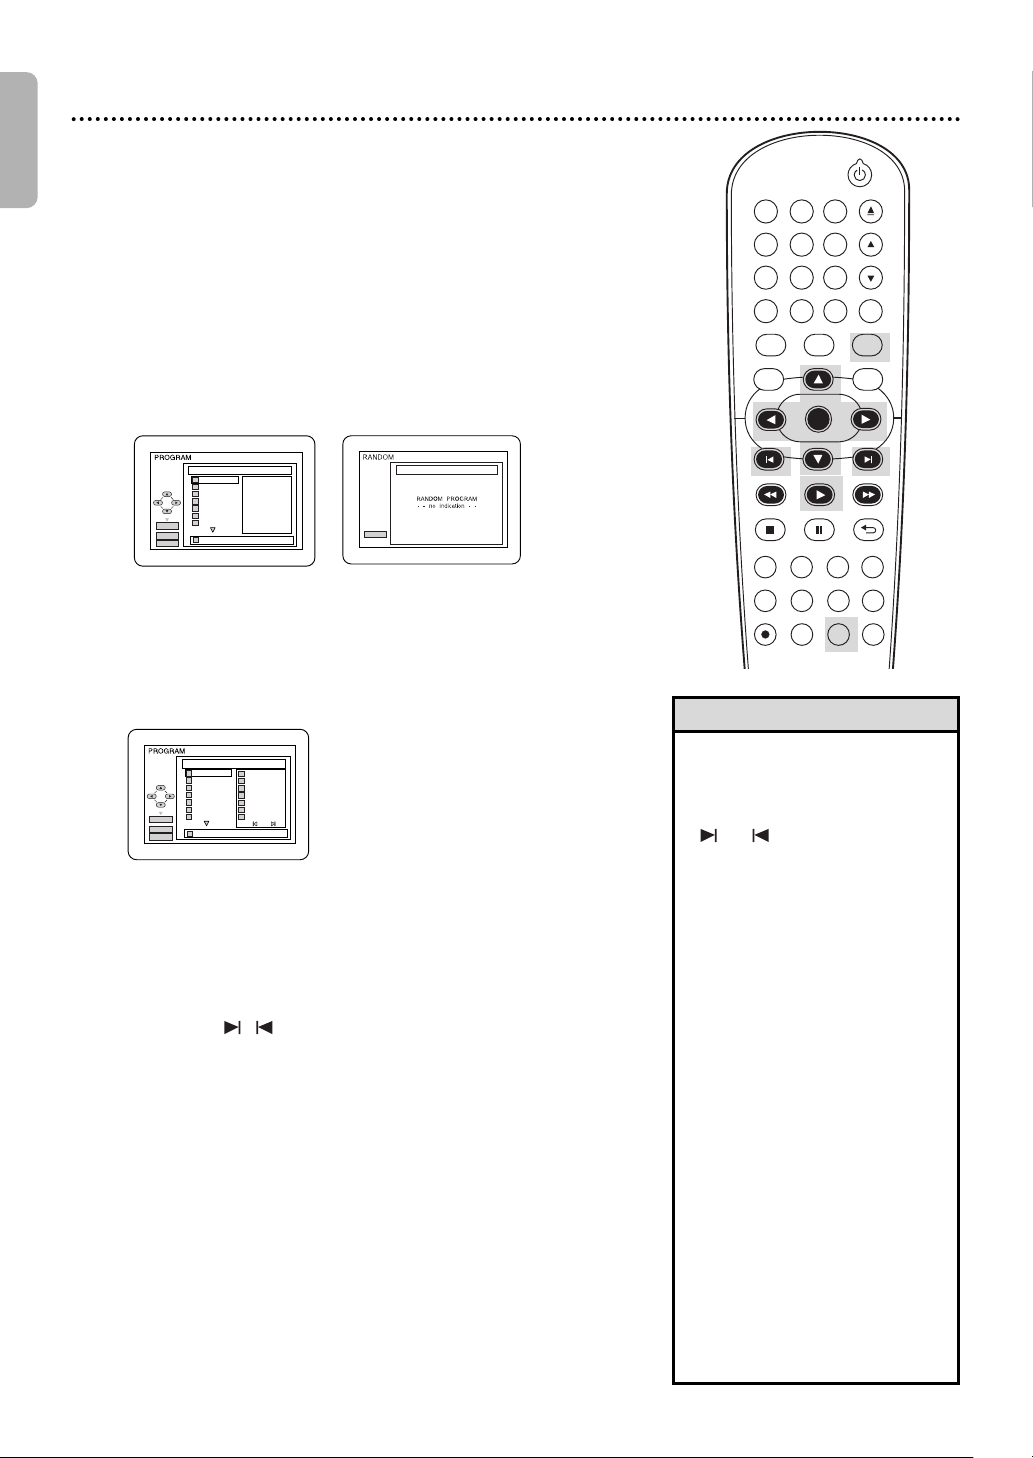
English
DVDVCR SETUP
INPUT MENU
REC SPEED MODE
ANGLE SEARCH REPEAT
DISPLAY SUBTITLE ZOOM
TIMER SET
REPEAT
A-B
AUDIO
BACKPAUSESTOP
PLAYOKFFW
REW
CLEAR TITLE
DISC
TRACKING
OPEN/CLOSE
12
6
5
4
7
8
9
0
+10
3
OK
PLAY
CLEAR
CD-DA TOTAL 1:03:30
1 3:303:30
2 4:304:30
3 5:005:00
4 3:103:10
5 5:105:10
6 1:301:30
7 2:302:30
1
3:303:30
5 5:105:10
10 4:204:20
11 3:003:00
12 3:203:20
17 4:104:10
22 2:502:50
1
3:303:30
1/4
2/3
T
T
T
T
T
T
T
T
T
T
T
T
T
T
T
PLAY
Disc name
CD-DA TOTAL 0:00:00
1 3:30
2 4:30
3 5:00
4 3:10
5 5:10
6 1:30
7 2:30
1
3:30
1/4
1/1
T
T
T
T
T
T
T
T
OK
PLAY
CLEAR
42 Program/Random Playback
Program Playback
You may determine the order in which Audio CD,MP3,
Windows Media
Random Playback
You may play the tracks of an Audio CD in Random order instead
of the order in which they are recorded (1,2,3...). You can also
use this feature for MP3, Windows Media
Press DVD to put the DVD/VCR in DVD mode.
DVD light will appear on the front of the DVD/VCR.
1
While playback is stopped, press MODE
repeatedly until the PROGRAM/RANDOM
2
Screen appears.
TM
Audio or JPEG tracks will play.
TM
Audio and JPEG tracks.
Example: Audio CD
Program Playback
Press K or L to select a track you want to play,
then press OK.
3
Example: Audio CD
Press CLEAR to erase the last track in the program if you
make an error. Additional tracks may be on other screens.
Press L to go on to the next page,and press K to go back
to the previous page.Repeat this step until you have
selected all the tracks you wish to play in the program.
To see tracks in a program when there are more than 8
tracks,use , to see all the tracks. For MP3, Windows
MediaTMAudio or JPEG folders,press s or B to go to the
previous or next level of folders.Press TITLE to return to
the first item in the highest level.
Press PLAY B. The tracks will play once in the order
you set. Turning off the player or opening the disc tray will
4
erase the program.
Random Playback
While the RANDOM Screen appears, press
PLAY B. The tracks will play in random order. After all
3
the tracks play once,playback will stop.
Example:MP3
(DUAL PLAYBACK - OFF)
Helpful Hints
• You cannot use the Number
buttons or SEARCH to select
another track during
Program/Random Playback.Use
or to select other tracks.
• You cannot combine Random
Playback with a program.
• You may play a program or a
track within a program
repeatedly.During Program
Playback,press REPEAT so ALL
(all tracks in the program) or
TRACK appears.The entire
program or the current track
will play over and over.
• You cannot alter a program
during playback.
• You can start Program Playback
only while in the PROGRAM
Screen.
• A program can have a maximum
of 99 tracks.
• To erase all tracks in the
program,select ALL CLEAR at
step 3.
• Program/Random Playback of
MP3, Windows MediaTMAudio
or JPEG tracks is not available
while DUAL PLAYBACK is ON.
Page 43
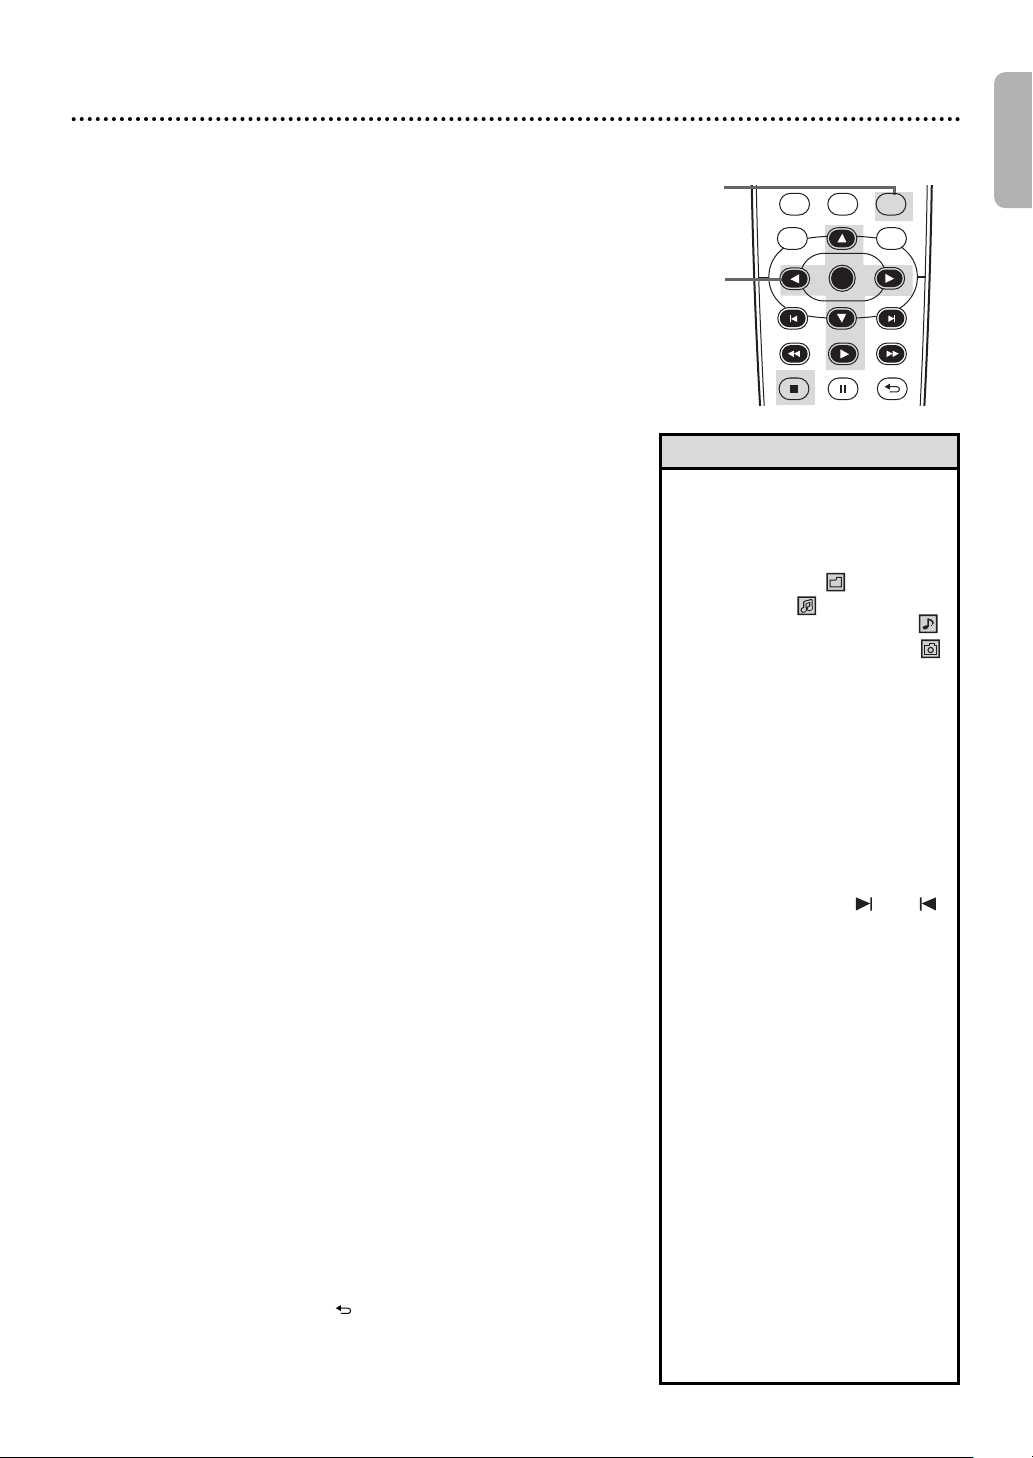
MP3/Windows MediaTMAudio/JPEG Playback
DVDVCR SETUP
INPUT MENU
BACKPAUSESTOP
PLAYOKFFWREW
DISC
The DVD/VCR will play MP3, Windows MediaTMAudio and JPEG files
that you record and finalize on a CD-R (Compact Disc-Recordable)
or CD-RW (Compact Disc-Rewritable).
These discs may contain pictures in a JPEG format or audio tracks in
an MP3 or Windows MediaTMAudio format.For example,you may have
photographic film developed by a retailer that places the pictures on a
CD-R for you.These pictures may be in JPEG format.Or,you may copy
or download MP3/Windows MediaTMAudio music files from certain
legal Internet sites,then copy those files onto a CD-R or CD-RW.
You cannot make or record such discs using this DVD/VCR.See your
computer manual for details on recording.
Keep these characteristics in mind when making discs you intend to
play on the DVD player of this DVD/VCR.
●●
Record MP3 files at a sampling frequency of 44.1 kHz or
48 kHz.Record in a constant bit rate between 32 kbps and 320
kbps.
●●
Record Windows MediaTMAudio tracks at a sampling frequency of
44.1kHz or 48kHz.Record in a constant bit rate between 48 kbps
and 192kbps.
●●
When recording JPEG files,the size of the picture should be
between 32 x 32 and 6300 x 5100 dots.
Press DVD to put the DVD/VCR in DVD mode.
DVD light will appear on the front of the DVD/VCR.
1
When you put a CD-R or CD-RW with MP3,
Windows MediaTMAudio or JPEG files in the DVD/VCR,a File
2
List will appear automatically.Or if the disc is already in the
DVD/VCR and you want to call up the File List,press DISC
MENU.(If you use PLAY B to close the disc tray,Playback
starts automatically.) Press K or L to select a folder,
MP3, Windows MediaTMAudio or JPEG file.
If you choose a track or file, press PLAY B or OK.
Starting with the track or file you selected,the tracks/files will
3
play in the order they were recorded, i.e.1,2,3.
If you select a folder an
files within that folder will appear. Press K or L to
select the track or file you want to play, then
press PLAY B or
●●
●●
●●
●●
●●
●●
OK.
Press TITLE to return to the first item in the highest level of
folders or files.You also can press
previous or next levels.
To change the Transition Mode for JPEG playback,press
MODE repeatedly until Transition Mode appears on top of
the TV screen during playback.Then press { ,B or OK to
switch CUT IN/OUT and FADE IN/OUT. If you choose
CUT IN/OUT,the images will cut in and out sharply as
playback progresses. If you choose FADE IN/OUT,the
images will fade in and out as playback progresses.
To change the size of the playback image,press MODE
repeatedly until SIZE MODE appears at the top of the TV
screen during playback. Then press { ,B or OK to switch
NORMAL(100%) and SMALL(95%).
Press MODE or BACK to remove the display.
During JPEG playback,press ANGLE to rotate a picture 90
degrees clockwise.
To stop playback,press STOP C.
d press OK, the tracks or
{ or B to return to
1
2-3
Helpful Hints
• MP3/Windows MediaTMAudio
tracks and JPEG images are
known as files.Groups of files
are called folders.
• Folders have the icon,MP3
files have the icon,Windows
MediaTMAudio files have the
icon,and JPEG files have the
icon.
• A maximum of 255 folders can
be recognized. A maximum of
999 files can be recognized.
• If you use PLAY B to close the
disc tray,playback starts
automatically. If you use
OPEN/CLOSE A to close the
disc tray,you have to press
PLAY B to start playback.
• During playback,use the
Number buttons or and
to change tracks. If a track is
not available,“X” will appear on
the TV screen,and playback may
resume at an incorrect track or
may continue with its current
track.
• To see the File List during
playback,press DISC MENU.
The current track will be
highlighted.
• Progressive JPEGs (JPEG files
saved in the progressive format)
will not play on this DVD/VCR.
• Copyright protected
Windows Media
will not play on this DVD/VCR.
• High resolution JPEG files takes
longer to be displayed.
• SIZE MODE may have no effect
on some files (e.g.files with a
small picture size).
TM
Audio files
43
English
Page 44
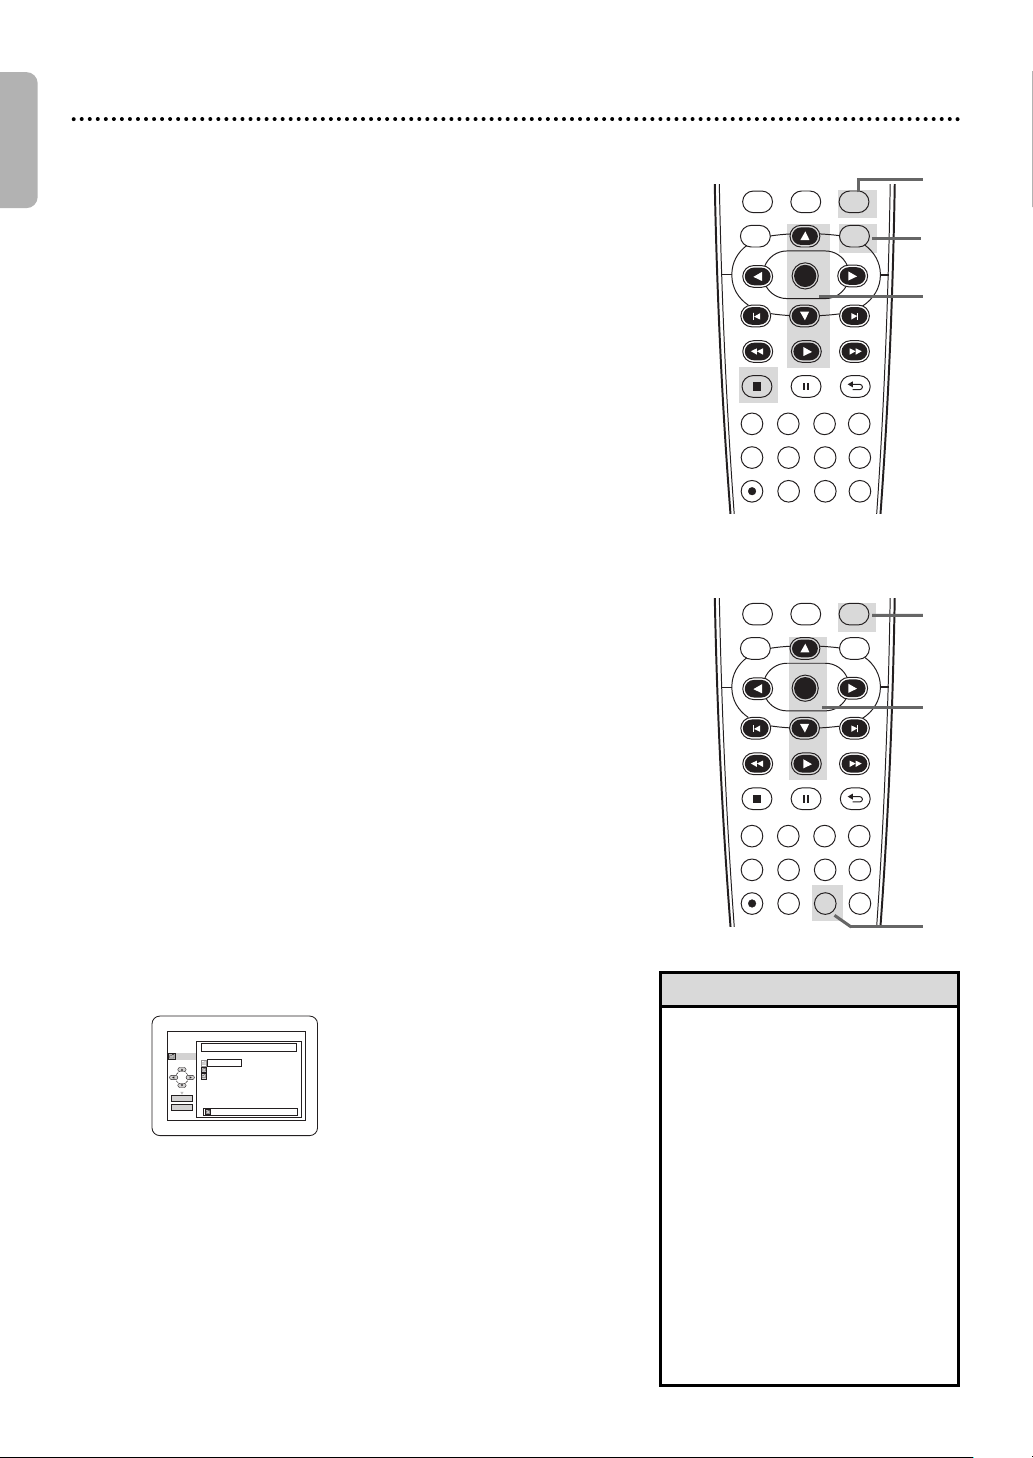
English
OK
PLAY
DISC NAME
FOLDER LIST
001
001
002
003
ALL
FOLDER
DVDVCR SETUP
INPUT MENU
REC SPEED MODE
ANGLE SEARCH REPEAT
DISPLAY SUBTITLE ZOOM
TIMER SET
REPEAT
A-B
AUDIO
BACKPAUSESTOP
PLAYOKFFW
REW
DISC
DVDVCR SETUP
INPUT MENU
REC SPEED MODE
ANGLE SEARCH REPEAT
DISPLAY SUBTITLE ZOOM
TIMER SET
REPEAT
A-B
AUDIO
BACKPAUSESTOP
PLAYOKFFW
REW
DISC
44
MP3/Windows Media
TM
Audio/JPEG Playback (cont’d)
Dual Playback
This feature lets you play MP3 and JPEG files simultaneously.
Available only when DUAL PLAYBACK is ON.
See pages 55-56 on how to set the DUAL PLAYBACK ON
or OFF.
Press DVD to put the DVD/VCR in DVD
mode.
1
DVD light will appear on the front of the DVD/VCR.
Press DISC MENU during MP3/JPEG playback.
A File List will appear.
2
Press KKor LLto select a desired MP3/JPEG
file from the list and press PLAY B or OK.
3
●●
To stop playback,press STOP C.
1
2
3
Folder Playback
You may select to play a folder containing MP3 and JPEG files.
Available only when DUAL PLAYBACK is ON.
See pages 55-56 on how to set the DUAL PLAYBACK ON
or OFF.
Press DVD to put the DVD/VCR in DVD mode.
DVD light will appear on the front of the DVD/VCR.
1
While playback is stopped, press MODE.
A Folder List will appear.
2
Press K or L to select a folder, then press
PLAY B or OK.
3
●●
MP3 and JPEG files in the selected folder will play
simultaneously.
●●
If Windows MediaTMAudio files are in the folder,
those files will be skipped during Folder Playback.
1
3
2
Helpful Hints
• If you press PLAY B directly
after you inserted a disc which
contains both MP3 and JPEG files
and if the DUAL PLAYBACK
Setting is ON,Dual Playback will
start automatically.
• You can not play Windows
MediaTMAudio and JPEG files
together at the same time. If you
choose a Windows MediaTMAudio
file during Dual Playback,only
Windows MediaTMAudio file will
play.
• Dual Playback may not function
properly if MP3 and JPEG files on
the disc interfere each other due
to the difference in their data size.
Page 45
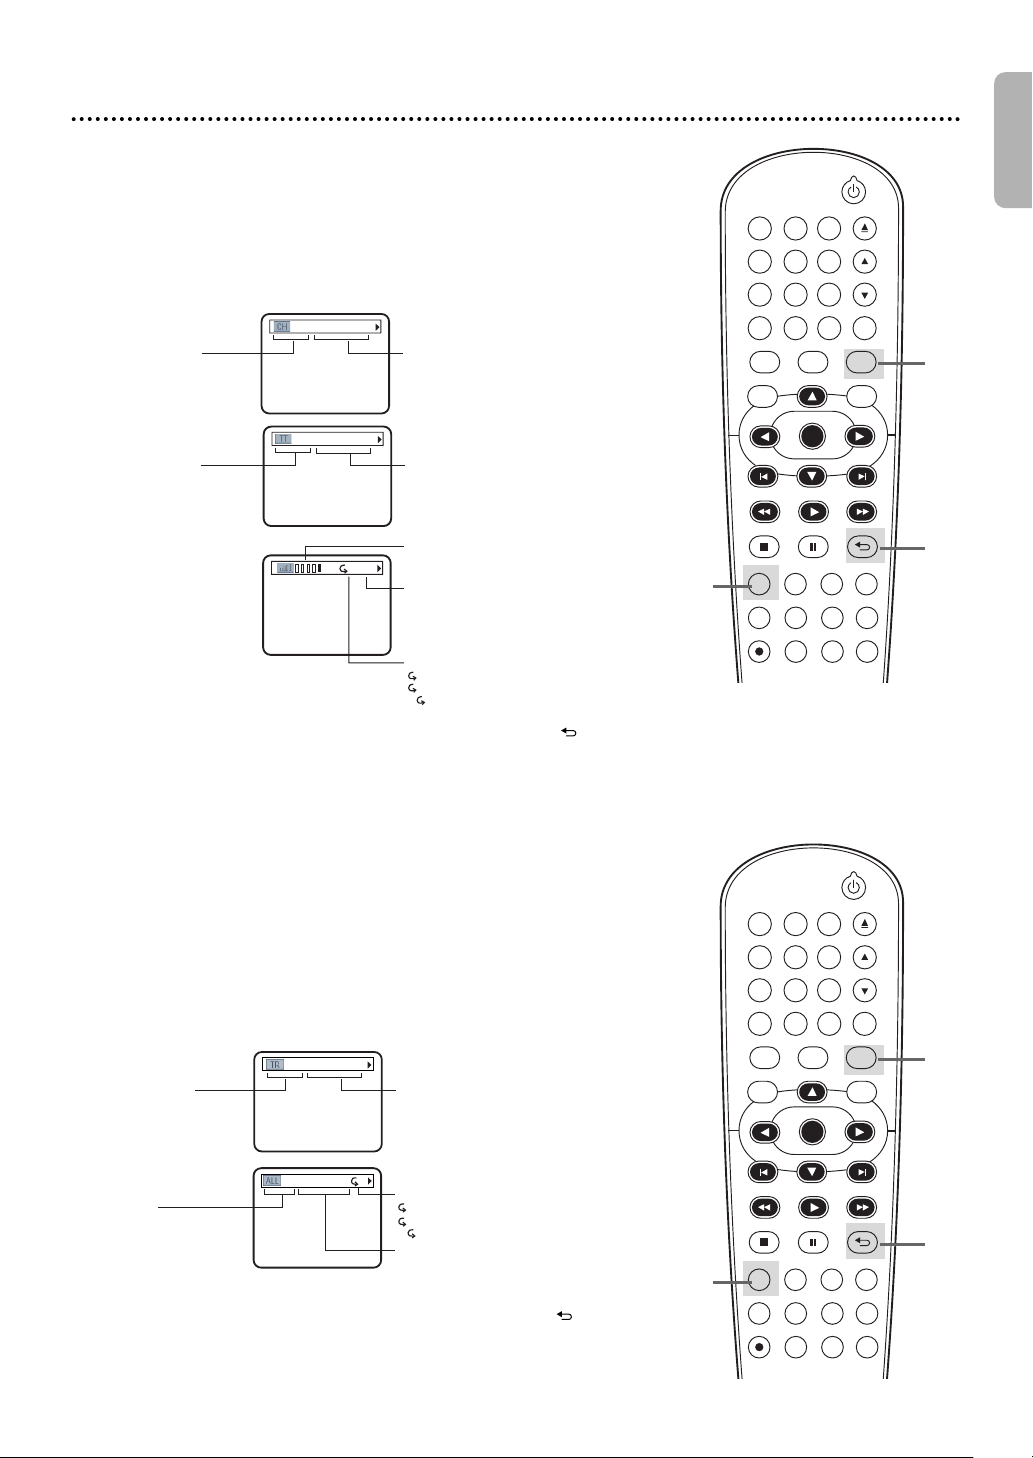
BIT RATE: The amount of audio
and video data currently being read.
Layer number, appears
only when playing a
two-layered disc.
L0: Layer 0 is playing
L1: Layer 1 is playing
Current Repeat Setting, if active
C: Chapter Repeat
T: Title Repeat
A B: A-B Repeat
C
L0
TR (track):
Current track number/
total tracks
Elapsed playing time
of the current track;
remaining playing time
of the current track
TR 4/12 0:03:21 - 0:02:15
ALL:
Current track number/
total tracks
Elapsed playing time
of the entire disc;
remaining playing time of
the entire disc
Current Repeat Setting, if active
T: Track Repeat
A: All Tracks Repeat
A B: A-B Repeat
ALL 4/12 0:13:45 - 0:45:40
T
CH (chapter):
Current chapter number/
total chapters
Elapsed playing time
of the current chapter;
remaining playing time
of the current chapter
CH 7/49 0:01:46 - 0:03:27
TT (title):
Current title number/
total titles
Elapsed playing time of the
current title; remaining playing
time of the current title
TT 1/2 0:00:00 - 1:23:45
DVD Displays
DVDVCR SETUP
INPUT MENU
REC SPEED MODE
ANGLE SEARCH REPEAT
DISPLAY SUBTITLE ZOOM
TIMER SET
REPEAT
A-B
AUDIO
BACKPAUSESTOP
PLAYOKFFW
REW
CLEAR TITLE
DISC
TRACKING
OPEN/CLOSE
12
6
5
4
7
8
9
0
+10
3
DVDVCR SETUP
INPUT MENU
REC SPEED MODE
ANGLE SEARCH REPEAT
DISPLAY SUBTITLE ZOOM
TIMER SET
REPEAT
A-B
AUDIO
BACKPAUSESTOP
PLAYOKFFW
REW
CLEAR TITLE
DISC
TRACKING
OPEN/CLOSE
12
6
5
4
7
8
9
0
+10
3
Press DVD to put the DVD/VCR in DVD mode.
DVD light will appear on the front of the DVD/VCR.
1
Press DISPLAY repeatedly to see the following
displays during DVD playback.
2
On-Screen Displays 45
English
1
3
2-3
3
Audio CD Displays
1
2
3
Press DISPLAY repeatedly or press BACK to
remove the display.
Press DVD to put the DVD/VCR in DVD mode.
DVD light will appear on the front of the DVD/VCR.
Press DISPLAY repeatedly to see the following
displays during Audio CD playback.
Press DISPLAY repeatedly
remove the display.
or press
BACK
1
3
2-3
to
Page 46
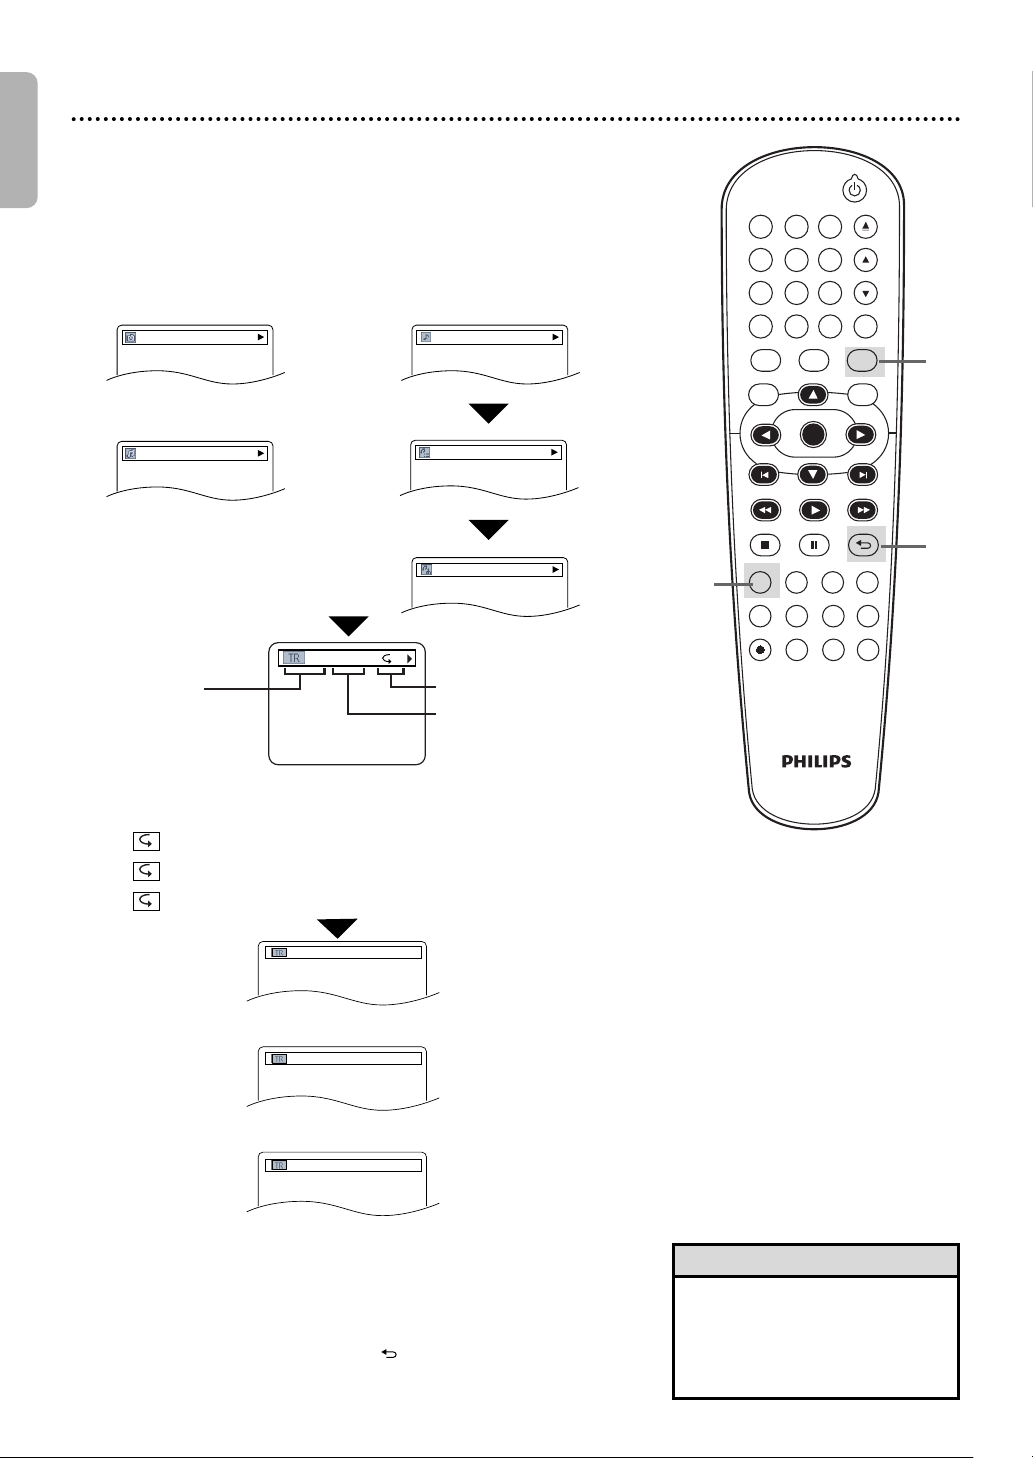
English
or
RANDOM
or
FOLDER PLAYBACK
PROGRAM
2/25 0:01:15
Elapsed playing time
of the current track
(for MP3/Windows Media
TM
Audio only)
TR (track):
Current track number/
total tracks
T
Current Repeat Setting
JPEG file name
MP3 file name
track name
title name
artist name
DVDVCR SETUP
INPUT MENU
REC SPEED MODE
ANGLE SEARCH REPEAT
DISPLAY SUBTITLE ZOOM
TIMER SET
REPEAT
A-B
AUDIO
BACKPAUSESTOP
PLAYOKFFW
REW
CLEAR TITLE
DISC
TRACKING
OPEN/CLOSE
12
6
5
4
7
8
9
0
+10
3
46 On-Screen Displays (cont’d)
MP3/Windows MediaTMAudio/JPEG Displays
Press DVD to put the DVD/VCR in DVD mode.
DVD light will appear on the front of the DVD/VCR.
1
Press
track or file information appears.
2
DISPLAY
repeatedly until the current
During JPEG playback
During MP3 playback
●●
If Dual Playback is on,MP3
file name will be displayed
after JPEG file name.
The following may appear to indicate Repeat Playback.
T: The current track will play repeatedly.
G: Tracks in the current folder (group) will play repeatedly.
A: All tracks will play repeatedly.
During
or
Example: MP3 playback
only during PROGRAM Playback
Windows MediaTMAudio
playback
1
3
2-3
3
●●
Program and Random Playback is available only when
only during RANDOM Playback
only during FOLDER Playback
DUAL PLAYBACK is OFF.
●●
Folder Playback is available only when DUAL PLAYBACK
is ON.
Press
display.
DISPLAY
or BACK to remove the
Helpful Hint
• For MP3 files recorded with
Variable Bit Rate (VBR),the
elapsed time displayed on the
screen may vary from the
actual elapsed time.
Page 47
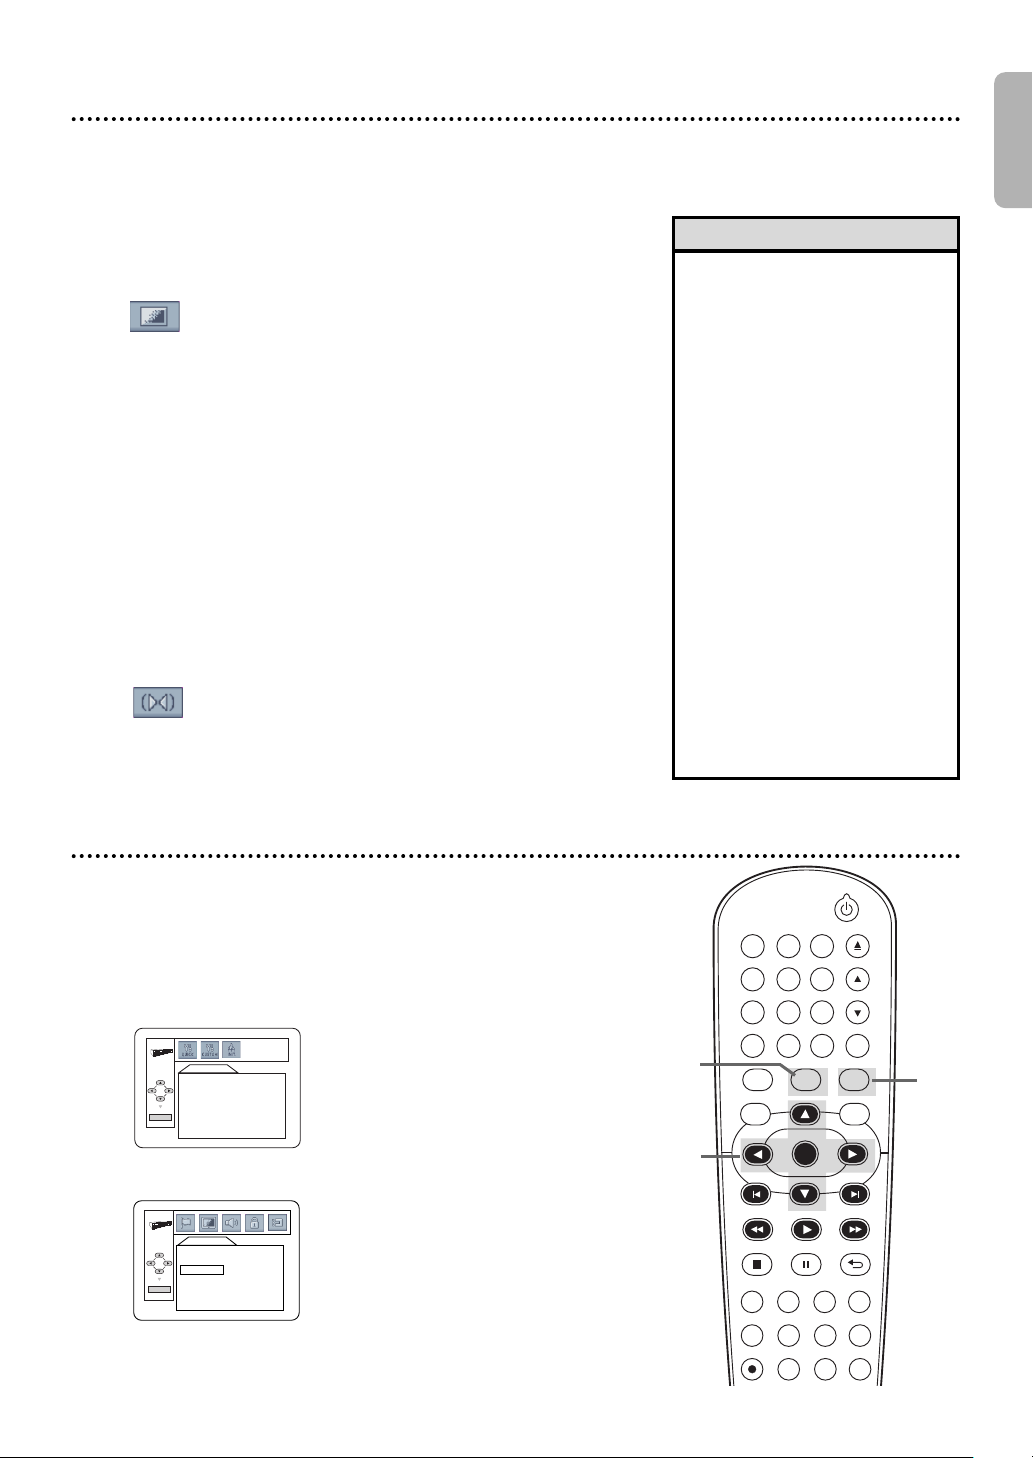
Black Level, Virtual Surround 47
ON
OFF
QUICK SETUP
OSD LANGUAGE ENGLISH
TV ASPECT
4:3 LETTER BOX
PROG. SCAN OFF
DOLBY DIGITAL BITSTREAM
OK
INITIALIZE
Initialize?
NO
YES
OK
DVDVCR SETUP
INPUT MENU
REC SPEED MODE
ANGLE SEARCH REPEAT
DISPLAY SUBTITLE ZOOM
TIMER SET
REPEAT
A-B
AUDIO
BACKPAUSESTOP
PLAYOKFFW
REW
CLEAR TITLE
DISC
TRACKING
OPEN/CLOSE
12
6
5
4
7
8
9
0
+10
3
Black Level
Adjust Black Level to brighten the DVD picture.
Press DVD to put the DVD/VCR in DVD mode.
DVD light will appear on the front of the DVD/VCR.
1
During DVD playback, press MODE so the
Black Level icon shows in the top left corner of the
2
TV screen.
While the Black Level icon is shown, press
s, B or OK repeatedly to choose ON or
3
OFF. ON brightens the dark parts of the picture.
OFF shows the original picture as recorded.The icon
will disappear after about 10 seconds.
Virtual Surround
You can enjoy improved stereo sound when you play DVDs,
Audio CDs,MP3 or Windows MediaTMAudio files recorded
in Dolby Digital or Pulse Code Modulation (PCM).Check
the disc case for details on availability.
Press DVD to put the DVD/VCR in DVD mode.
DVD light will appear on the front of the DVD/VCR.
1
During disc playback, press MODE repeatedly
until the Virtual Surround icon appears in the top left
2
corner of the TV screen.
While the Virtual Surround icon is shown, press
s , B or OK to choose 1
3
(Emphasized) or OFF.
about 10 seconds. The default setting is OFF.
(Natural)
The icon will disappear after
,2
English
Helpful Hints
• Black Level is not available for
a PAL DVD.
• If you want to enjoy Dolby
Digital in Virtual Surround
through coaxial cable
connection,set Dolby Digital
to PCM.
• For Audio CDs, you can adjust
Virtual Surround only if you
set Stereo Sound to STEREO.
Details are on page 40.
• The Black Level and the Virtual
Surround Settings will be saved
even if the player is turned off.
• When the Virtual Surround
function is active,96 kHz
sound source will be down
sampled at 48 kHz,and output
as 48 kHz sound.
• The Black Level and Virtual
Surround Settings cannot be
used during x1.3 and x0.8
Rapid Play with Voice (refer to
page 33).
Use INITIALIZE to return all your DVD player’s Setup Menu
items (except PARENTAL) to their default settings.
Press DVD to put the DVD/VCR in DVD mode.
DVD light will appear on the front of the DVD/VCR.
1
While playback is stopped, press SETUP.
The QUICK SETUP Screen appears.
2
Press s or B to select INIT. (INITIALIZE)
at the top of the menu, then press OK.
3
● Press
Press SETUP to remove the menu.
4
KK
cancel the process,select NO instead.
or LLto select YES.Then,press OK twice.To
Initializing
2,4
1
3
Page 48
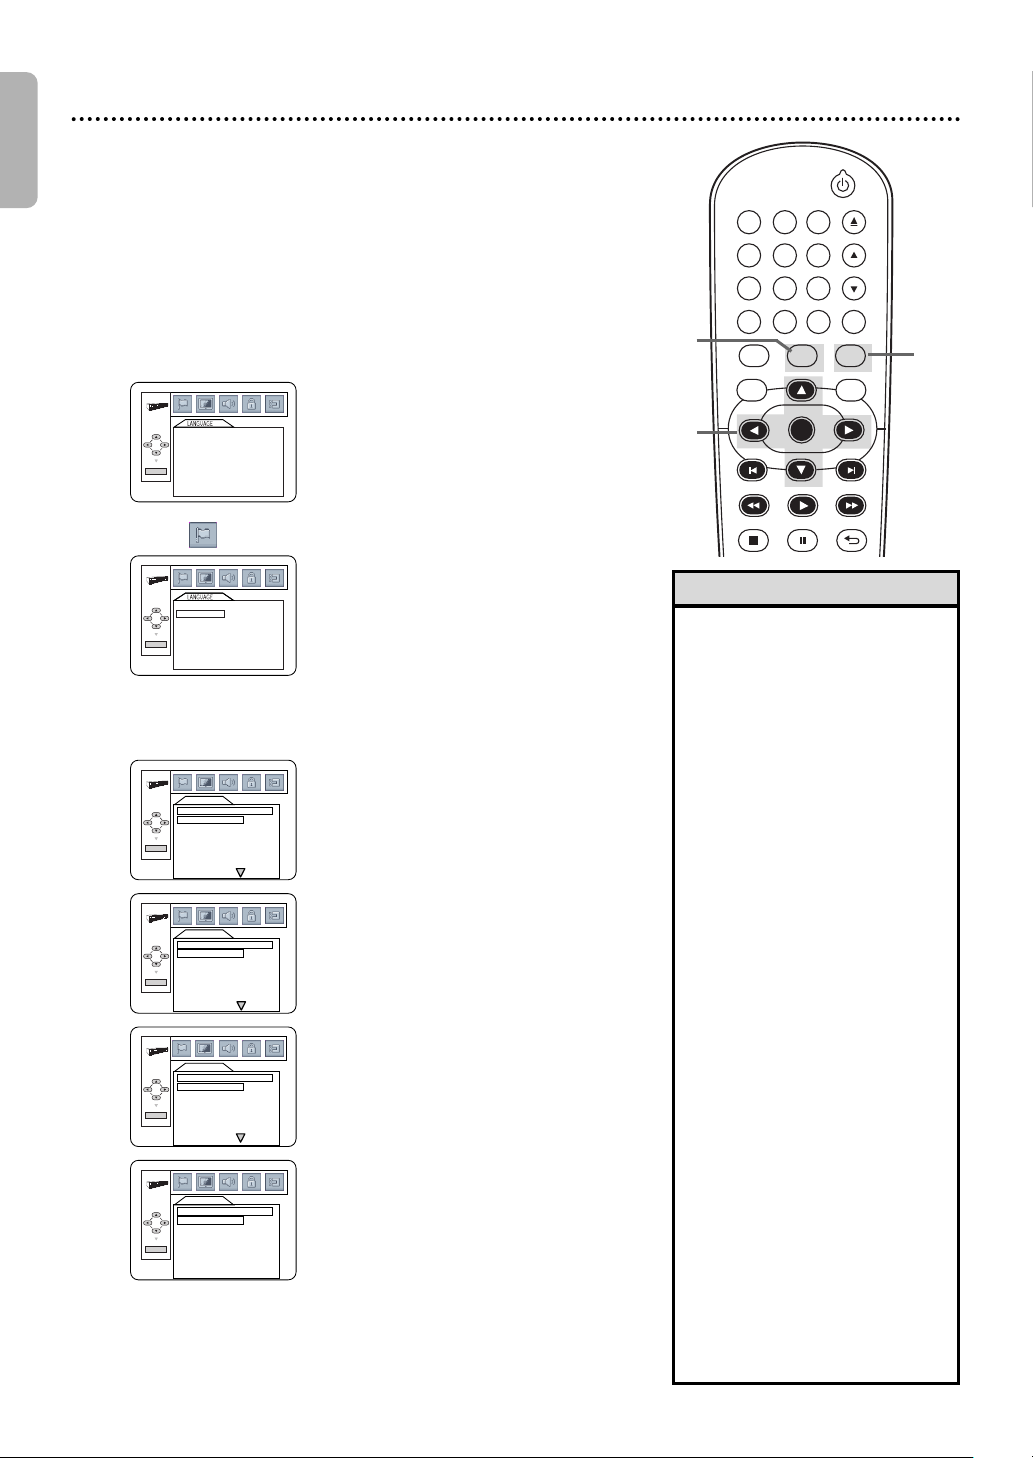
English
AUDIO
SUBTITLE
DISC MENU
OSD LANGUAGE
ORIGINAL
OFF
ENGLISH
ENGLISH
OK
LANGUAGE
AUDIO
ORIGINAL
ENGLISH
FRENCH
SPANISH
GERMAN
ITALIAN
SWEDISH
OK
LANGUAGE
SUBTITLE
OFF
ENGLISH
FRENCH
SPANISH
GERMAN
ITALIAN
SWEDISH
OK
LANGUAGE
DISC MENU
ENGLISH
FRENCH
SPANISH
GERMAN
ITALIAN
SWEDISH
DUTCH
OK
LANGUAGE
OSD LANGUAGE
ENGLISH
FRANÇAIS
ESPAÑOL
OK
AUDIO
SUBTITLE
DISC MENU
OSD LANGUAGE
ORIGINAL
OFF
ENGLISH
ENGLISH
OK
DVDVCR SETUP
INPUT MENU
BACKPAUSESTOP
PLAYOKFFWREW
CLEAR TITLE
DISC
TRACKING
OPEN/CLOSE
12
6
5
4
7
8
9
0
+10
3
48 Language
You can select different languages for the Audio or Subtitles
of DVDs,as well as languages for DVD Disc Menus and the
Setup Menus of the DVD player.
1
2
3
4
5
Press DVD to put the DVD/VCR in DVD mode.
DVD light will appear on the front of the DVD/VCR.
While playback is stopped, press SETUP.
The QUICK SETUP Screen appears.
Press s or B to select CUSTOM at the top
of the menu, then press OK.
With (LANGUAGE) selected, press OK.
Press KKor LLto select AUDIO, SUBTITLE,
DISC MENU or OSD LANGUAGE. Press OK.
The language options for the selected item will appear.
AUDIO: The DVD’s audio plays
in the selected language.
The default setting is
ORIGINAL.
SUBTITLE: Subtitles appear in
the selected language.
The default setting is OFF.
DISC MENU: A DVD’s Disc
Menu appears in the selected
language.
The default setting is ENGLISH.
OSD LANGUAGE: The DVD
player’s Setup Menu can be in
English,French or Spanish only.
The default setting is ENGLISH.
2
3-5
Helpful Hints
•
If the DVD’s default settings for
Audio and Subtitle are the same
language,the subtitles may not
show unless you turn them on.
•
Use the AUDIO and SUBTITLE
buttons to select Audio and
Subtitles available on the DVD.
Details are on pages 39-40.
•
If you set AUDIO to ORIGINAL,
the default setting of the DVD
Audio will play.
•
If you set OSD LANGUAGE to
FRANÇAIS (French) or
ESPAÑOL (Spanish) and need
English:Follow steps 1-2. At step
3,the IDIOMA or LANGUE
Menu will appear.Press OK.
Press L to select LANGUE OSD
or IDIOMA PANT.,then press
OK.Press K to select ENGLISH,
then press OK. The menus will
change to English.Press SETUP to
remove the menus.
•
You can change the OSD
LANGUAGE in the QUICK
SETUP Menu that appears when
you first press SETUP. With
QUICK selected,press OK.
OSD LANGUAGE will be
selected.Press OK.Press K or L
to choose a language,then press
OK.Press SETUP to remove the
menu.
•
The Language Settings may not
take effect until you restart disc
playback from the beginning.
1
Page 49
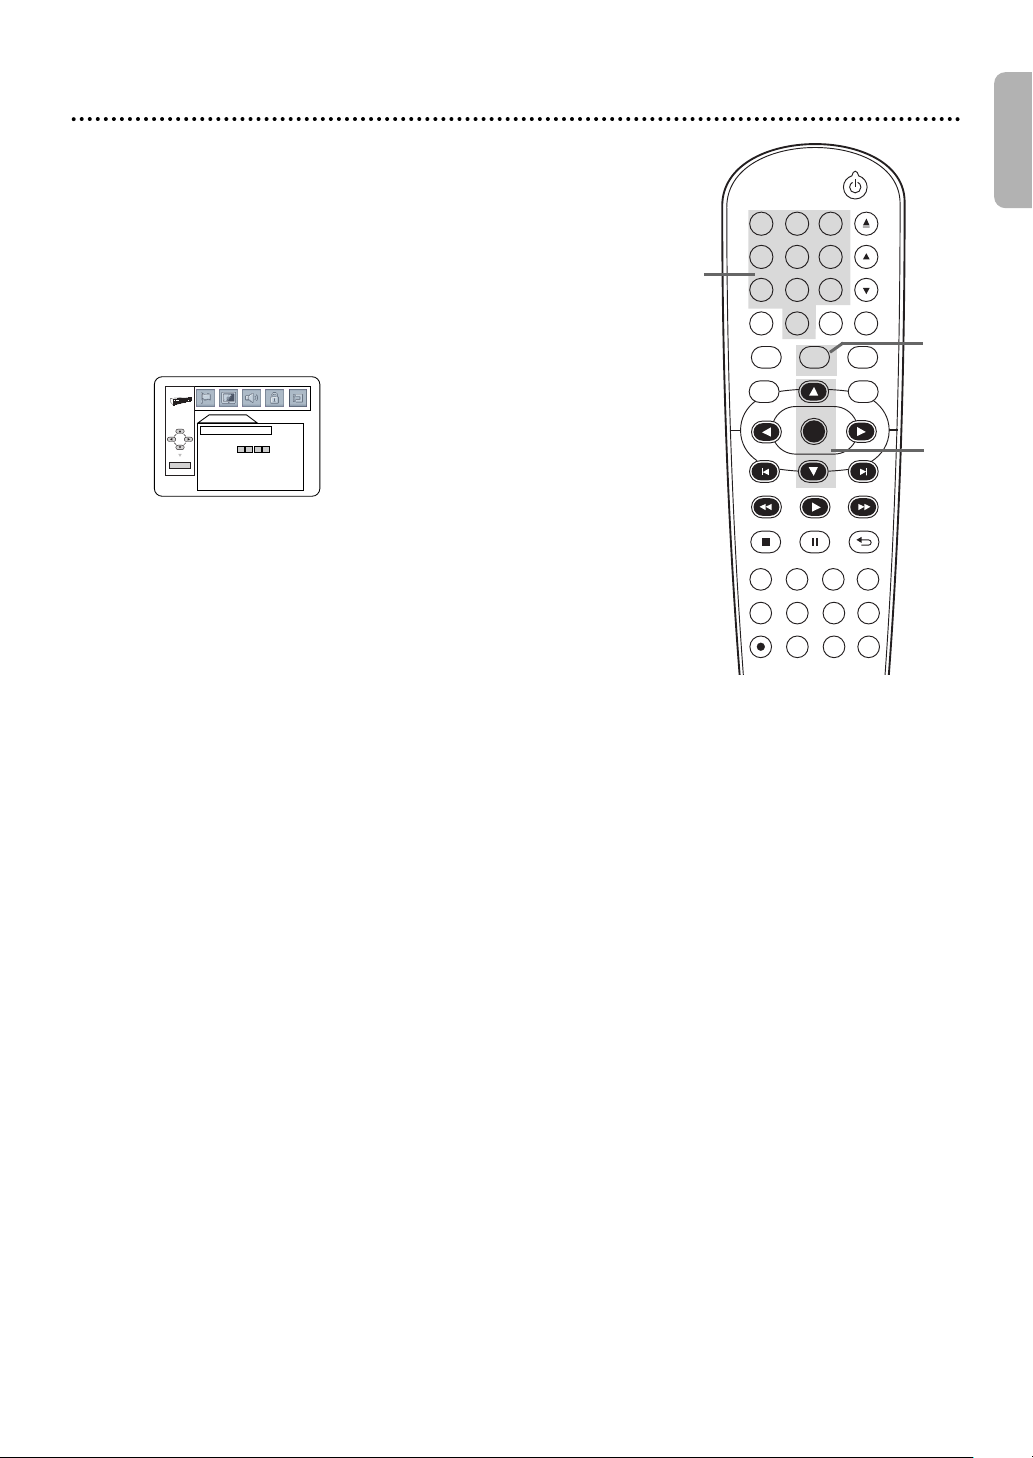
Language (cont’d) 49
LANGUAGE
LANGUAGE CODE
Please enter a 4-digit language code.
OK
DVDVCR SETUP
INPUT MENU
REC SPEED MODE
ANGLE SEARCH REPEAT
DISPLAY SUBTITLE ZOOM
TIMER SET
REPEAT
A-B
AUDIO
BACKPAUSESTOP
PLAYOKFFW
REW
CLEAR TITLE
DISC
TRACKING
OPEN/CLOSE
12
6
5
4
7
8
9
0
+10
3
Press K or L to select a language, then press OK.
The language lists may continue on multiple screens. Press
6
K or L to move to the other screens.
●●
If you select OTHER for AUDIO, SUBTITLE,
or DISC MENU, press four Number buttons
to enter the code for the language you desire.Use
one of the Language Codes listed below. The language or
language code you select will appear in the Language
Menu beside AUDIO,SUBTITLE, or DISC MENU.
●●
You can select other languages for AUDIO,SUBTITLE
and DISC MENU only if the language is available on the
disc.If the language you select is not recorded on the
DVD,changing these settings will have no effect.
Press SETUP to remove the menu.
7
Language Codes
A-B
Abkhazian 4748
Afar 4747
Afrikaans 4752
Albanian 6563
Amharic 4759
Arabic 4764
Armenian 5471
Assamese 4765
Aymara 4771
Azerbaijani 4772
Bangla 4860
Bashkir 4847
Basque 5167
Bengali 4860
Bhutani 5072
Bihari 4854
Bislama 4855
Breton 4864
Bulgarian 4853
Burmese 5971
Byelorussian 4851
C-E
Cambodian 5759
Catalan 4947
Chinese 7254
Corsican 4961
Croatian 5464
Czech 4965
Danish 5047
Dutch 6058
English 5160
Esperanto 5161
Estonian 5166
F-H
Faroese 5261
Fiji 5256
Finnish 5255
French 5264
Frisian 5271
Gaelic (Scots) 5350
Galician 5358
Georgian 5747
German 5051
Greek 5158
Greenlandic 5758
Guarani 5360
Gujarati 5367
Hausa 5447
Hebrew 5569
Hindi 5455
Hungarian 5467
I-K
Icelandic 5565
Indonesian 5560
Interlingua 5547
Interlingue 5551
Inupiak 5557
Irish 5347
Italian 5566
Japanese 5647
Javanese 5669
Kannada 5760
Kashmiri 5765
Kazakh 5757
Kinyarwanda 6469
Kirghiz 5771
Kirundi 6460
Korean 5761
Kurdish 5767
L-N
Laothian 5861
Latin 5847
Latvian 5868
Lettish 5868
Lingala 5860
Lithuanian 5866
Macedonian 5957
Malagasy 5953
Malay 5965
Malayalam 5958
Maltese 5966
Maori 5955
Marathi 5964
Moldavian 5961
Mongolian 5960
Nauru 6047
Nepali 6051
Norwegian 6061
O-R
Occitan 6149
Oriya 6164
Oromo (Afan)6159
6
Panjabi 6247
Pashto 6265
Persian 5247
Polish 6258
Portuguese 6266
Pushto 6265
Quechua 6367
Rhaeto-Romance 6459
Romanian 6461
Russian 6467
S
Samoan 6559
Sangho 6553
Sanskrit 6547
Serbian 6564
Serbo-Croatian
6554
Sesotho 6566
Setswana 6660
Shona 6560
Sindhi 6550
Singhalese 6555
Siswat 6565
Slovak 6557
Slovenian 6558
Somali 6561
Spanish 5165
Sundanese 6567
Swahili 6569
Swedish 6568
English
7
6
T
Tagalog 6658
Tajik 6653
Tamil 6647
Tatar 6666
Telugu 6651
Thai 6654
Tibetan 4861
Tigrinya 6655
Tonga 6661
Tsonga 6665
Turkish 6664
Turkmen 6657
Twi 6669
U-Z
Ukrainian 6757
Urdu 6764
Uzbek 6772
Vietnamese 6855
Volapuk 6861
Welsh 4971
Wolof 6961
Xhosa 7054
Yiddish 5655
Yoruba 7161
Zulu 7267
Page 50
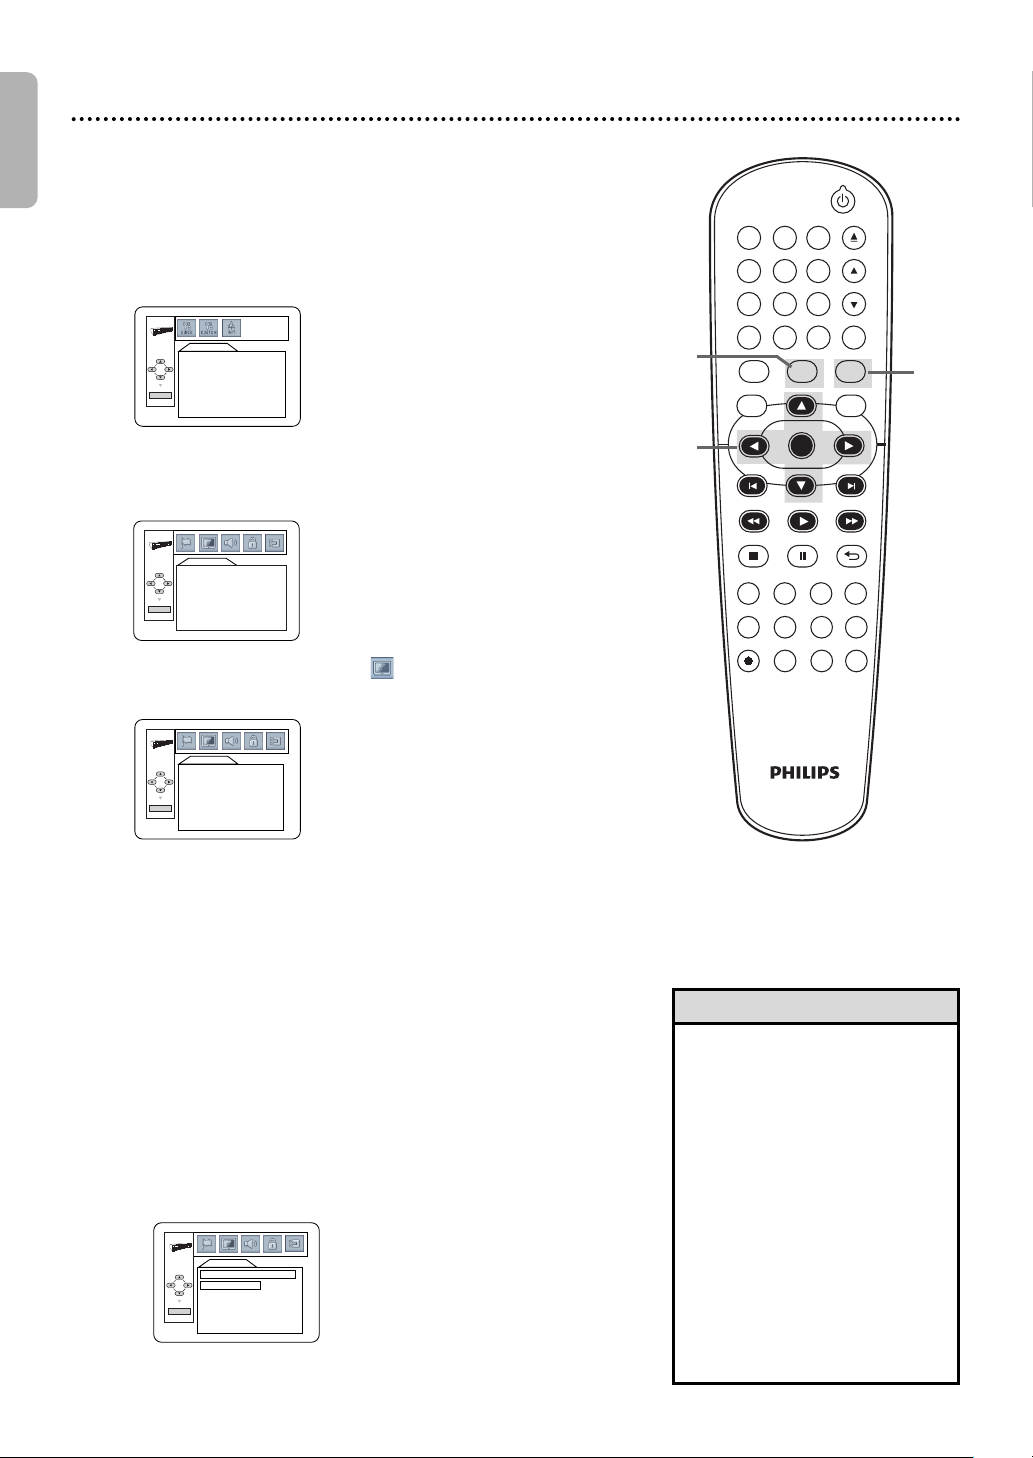
English
QUICK SETUP
OSD LANGUAGE ENGLISH
TV ASPECT
4:3 LETTER BOX
PROG. SCAN OFF
DOLBY DIGITAL BITSTREAM
OK
LANGUAGE
AUDIO ORIGINAL
SUBTITLE OFF
DISC MENU ENGLISH
OSD LANGUAGE ENGLISH
OK
DISPLAY
TV ASPECT 4:3 LETTER BOX
STILL MODE AUTO
PROG. SCAN OFF
OK
DISPLAY
TV ASPECT
4:3
LETTER BOX
4:3
PAN & SCAN
16:9
WIDE
OK
DVDVCR SETUP
INPUT MENU
REC SPEED MODE
ANGLE SEARCH REPEAT
DISPLAY SUBTITLE ZOOM
TIMER SET
REPEAT
A-B
AUDIO
BACKPAUSESTOP
PLAYOKFFW
REW
CLEAR TITLE
DISC
TRACKING
OPEN/CLOSE
12
6
5
4
7
8
9
0
+10
3
50 Display
You may adjust the TV Aspect ratio and still mode clarity,and
Progressive Scan compatibility.
Press DVD to put the DVD/VCR in DVD mode.
DVD light will appear on the front of the DVD/VCR.
1
When playback is stopped, press SETUP.
The QUICK SETUP Screen will appear.
2
3
4
5
Press s or B to select CUSTOM at the top
of the menu, then press OK.
Press s or B to select (DISPLAY), then
press OK.
Press K or L to select an item, then press OK.
●●
If you selected TV ASPECT, press K or L
to select a setting, then press OK.
Choose 4:3 LETTER BOX if you want to see the
entire,widened picture with black bars at the top and
bottom of the screen. This looks like the picture you
see when watching movies in a theater. This setting is
possible only if the DVD was recorded in the
letterbox or widescreen format.
Choose 4:3 PAN & SCAN for a full height picture,
with both sides trimmed.Some companies refer to
this as reformatting the picture to fit your TV screen
and may call it the regular or normal format.
Choose 16:9 WIDE if you connected a widescreen
TV to the DVD player.
The default setting is 4:3 LETTER BOX.
TV ASPECT
2
1
3-5
Helpful Hints
• Selecting a different TV
ASPECT Setting is only
effective if it is available on the
DVD.Check the DVD Disc
Menu or case for details.
• You also can adjust TV
ASPECT in the QUICK
SETUP Menu that appears
when you first press SETUP.
With QUICK selected,press
OK.Press L to select TV
ASPECT,then press OK.Press
K or L to choose a setting,
then press OK.Press SETUP
to remove the menu.
• This unit does not set the TV
aspect automatically.
Page 51
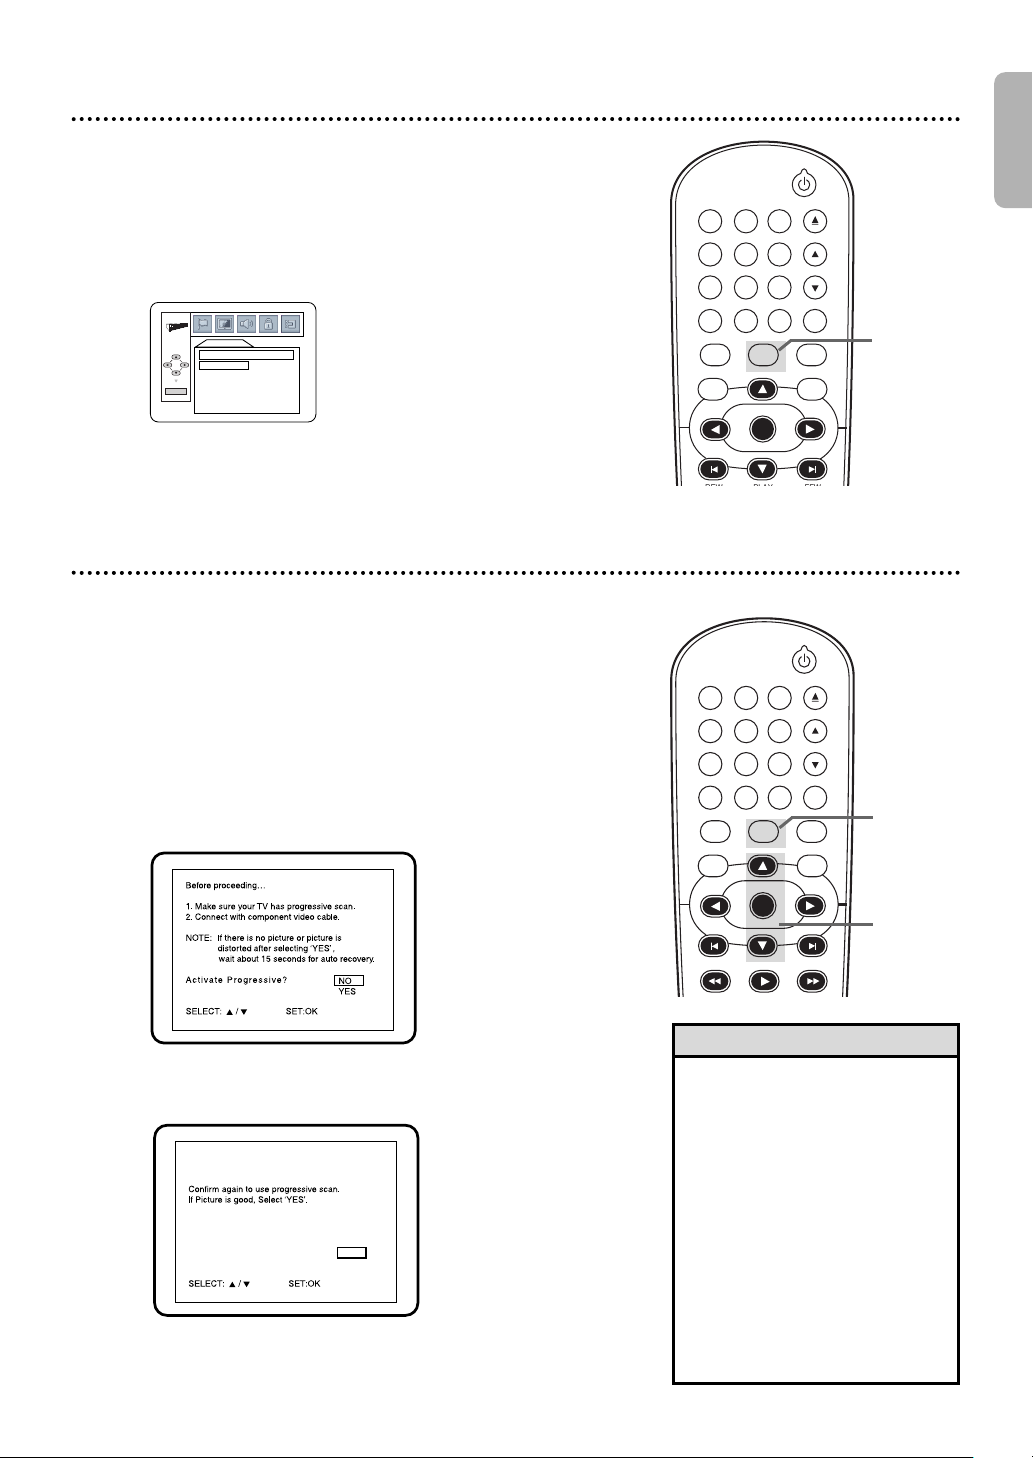
DVDVCR SETUP
INPUT MENU
PLAYOKFFWREW
CLEAR TITLE
DISC
TRACKING
OPEN/CLOSE
12
6
5
4
7
8
9
0
+10
3
●●
DISPLAY
AUTO
FIELD
FRAME
STILL MODE
OK
Confirm again to use progressive scan.
If Picture is good, Select “YES”.
SELECT: K / L SET:OK
NO
YESNOYES
DVDVCR SETUP
INPUT MENU
OK
CLEAR TITLE
DISC
TRACKING
OPEN/CLOSE
12
6
5
4
7
8
9
0
+10
3
If you selected STILL MODE, press K or L to
select a setting, then press OK.
This determines
the quality of an image in still mode.
If you select FIELD,still images will be stabilized but
coarse due to the small amount of data.
If you select FRAME,the images will be highly defined due
to the simultaneous output of two fields.
The default setting is AUTO.
STILL MODE
Press
SETUP
to remove the menu.
6
You may adjust the Progressive Scan compatibility.
Follow the steps 1-4 in the Display setup on
page 50.
1
Press K or L to select PROG. SCAN, then press
OK repeatedly to turn PROG. SCAN ON or OFF.
2
Choose ON if your TV has Progressive Scan and if the TV
is connected to the player’s COMPONENT VIDEO OUT
jacks.Choose OFF otherwise.
The default setting is OFF.
Press
3
SETUP
●●
If PROG. SCAN is ON, this message appears:
to remove the menu.
Display (cont’d) 51
English
6
Progressive Scan
3
Press K or L to make a selection, then press OK.
If you select NO, the menu disappears and
PROG.SCAN is OFF. If you select YES, this appears:
Confirm your setting, then press OK.The menu will
disappear and the Progressive Scan function will be activated.
If you do not press any buttons for 15 seconds,
Progressive Scan will switch to OFF.
2-3
Helpful Hints
• You can set PROG.SCAN to
OFF either in the DISPLAY
Menu or by pressing and
holding PLAY B (DVD) on
the front of the player for
more than 5 seconds.
• You can adjust Progressive
Scan Setting in the QUICK
SETUP Menu that appears
when you first press SETUP.
With QUICK selected,press
OK.Press L to select PROG.
SCAN.Press OK to choose
OFF or ON.Press SETUP to
remove the menu.
Page 52
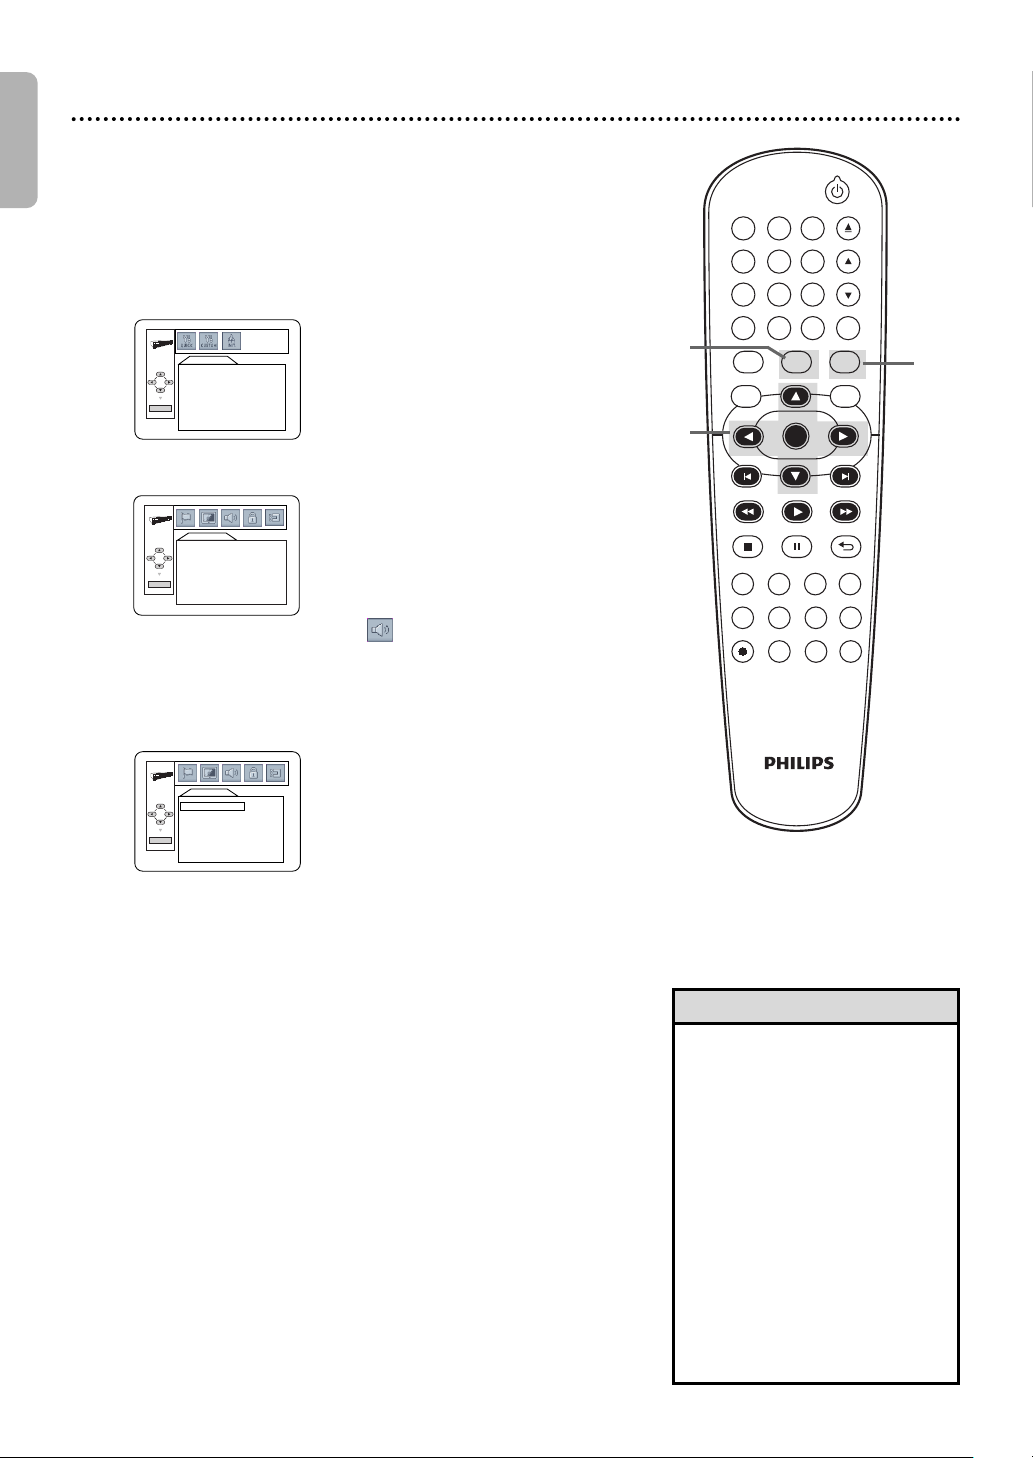
English
DVDVCR SETUP
INPUT MENU
REC SPEED MODE
ANGLE SEARCH REPEAT
DISPLAY SUBTITLE ZOOM
TIMER SET
REPEAT
A-B
AUDIO
BACKPAUSESTOP
PLAYOKFFW
REW
CLEAR TITLE
DISC
TRACKING
OPEN/CLOSE
12
6
5
4
7
8
9
0
+10
3
AUDIO
DRC
ON
DOWN SAMPLING
ON
DOLBY DIGITAL
BITSTREAM
OK
QUICK SETUP
OSD LANGUAGE ENGLISH
TV ASPECT
4:3 LETTER BOX
PROG. SCAN OFF
DOLBY DIGITAL BITSTREAM
OK
LANGUAGE
AUDIO ORIGINAL
SUBTITLE OFF
DISC MENU ENGLISH
OSD LANGUAGE ENGLISH
OK
52 Audio
Change Audio Settings based on other equipment you
connected to the DVD player or according to your disc
sound features. These setting only affect the Audio from the
DVD player of the DVD/VCR.
Press DVD to put the DVD/VCR in DVD mode.
DVD light will appear on the front of the DVD/VCR.
1
While playback is stopped, press SETUP.
The QUICK SETUP Screen will appear.
2
3
4
5
6
7
Press s or B to select CUSTOM at the top of
the menu, then press OK.
Press s or B to select (AUDIO) at the
top of the menu, then press OK.
Press KKor LLto select DRC, DOWN
SAMPLING, or DOLBY DIGITAL, then
follow step 6 accordingly.
●●
If you selected DRC, press OK repeatedly to
turn Dynamic Range Control (DRC) ON or
OFF.
Choosing ON compresses the range of volume
by suppressing loud sounds and raising low sounds.
DRC is available only on discs recorded in the
Dolby Digital format.
The default setting is ON.
●●
If you selected DOWN SAMPLING, press
OK repeatedly to choose ON or OFF.
Choose ON to down sample the 96 kHz sound
source to 48 kHz.Choose OFF to output the sound
source without any down sampling.
DOWN SAMPLING is available only when the player
is connected to a Stereo using the COAXIAL
DIGITAL AUDIO OUT jack as described on page 12.
The default setting is ON.
●●
If you selected DOLBY DIGITAL, press OK
repeatedly to select BITSTREAM or PCM.
Select BITSTREAM if you used the COAXIAL
DIGITAL AUDIO OUT jack to connect the DVD
player to a stereo that is Dolby Digital compatible.
Details are on page 12.Otherwise,choose PCM.
The default setting is BITSTREAM.
Press SETUP to remove the menu.
2,7
1
3-6
Helpful Hints
• Dolby Digital sound must be
available on the DVD.
• You can adjust DOLBY
DIGITAL in the QUICK
SETUP Menu that appears
when you first press SETUP.
With QUICK selected,press
OK.Press L to select DOLBY
DIGITAL. Press OK to choose
BITSTREAM or PCM.Press
SETUP to remove the menu.
• When you play a disc that has
copyright protection,
downsampling will be at 48
kHz,even if you set DOWN
SAMPLING to OFF.
Page 53
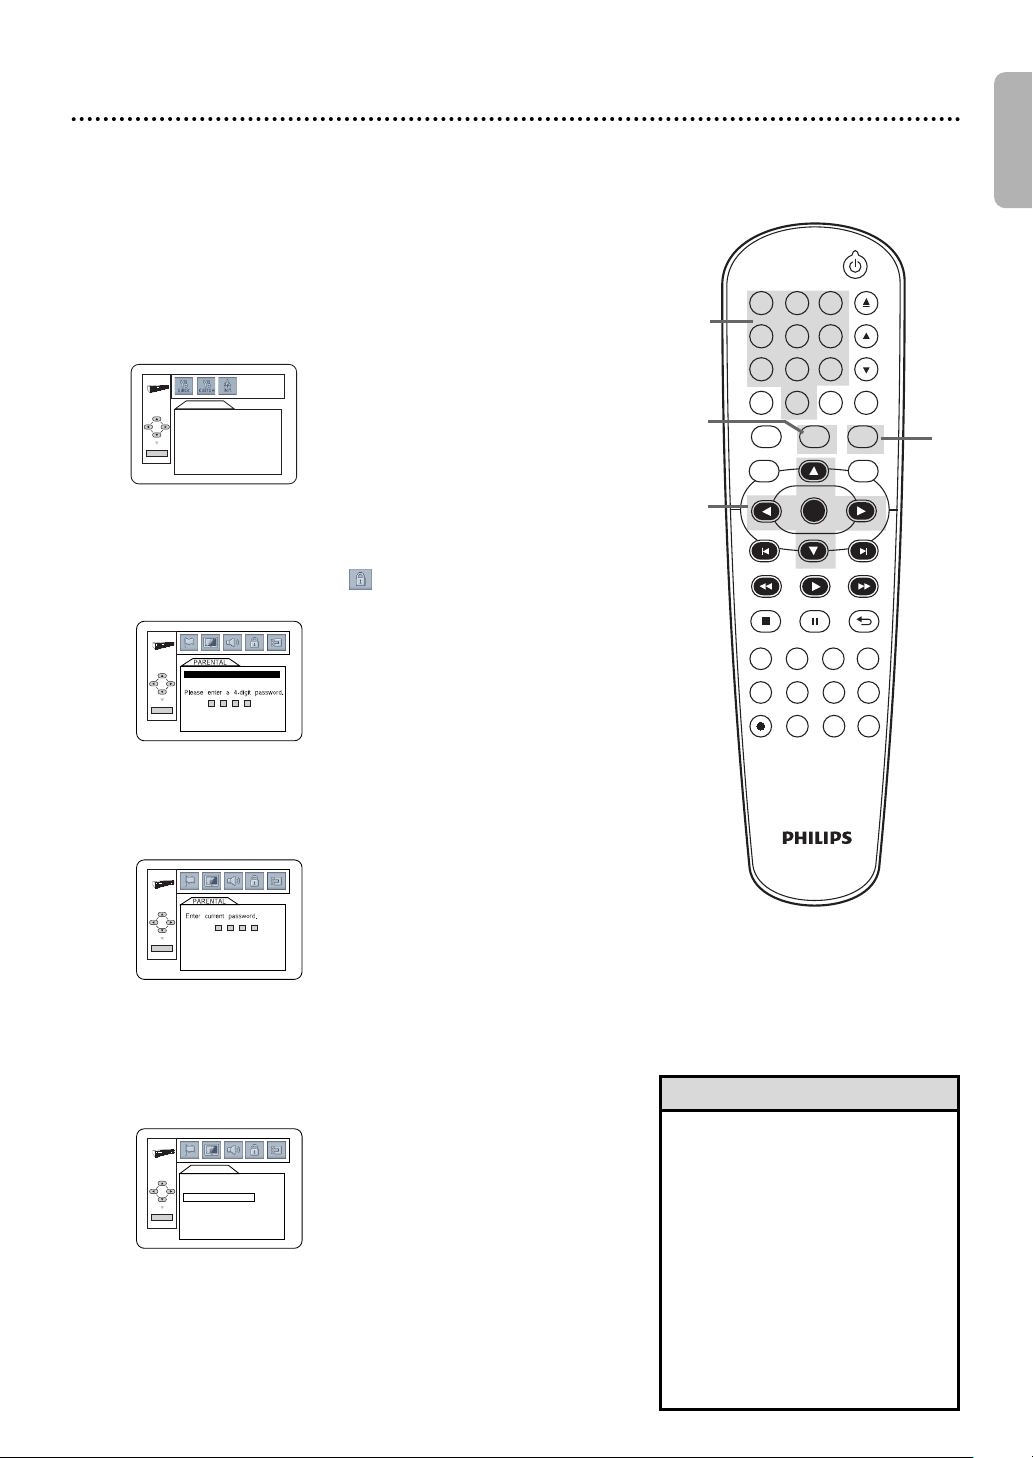
Parental Password 53
PASSWORD
OK
OK
PARENTAL
PARENTAL LEVEL ALL
PASSWORD CHANGE
OK
QUICK SETUP
OSD LANGUAGE ENGLISH
TV ASPECT
4:3 LETTER BOX
PROG. SCAN OFF
DOLBY DIGITAL BITSTREAM
OK
DVDVCR SETUP
INPUT MENU
REC SPEED MODE
ANGLE SEARCH REPEAT
DISPLAY SUBTITLE ZOOM
TIMER SET
REPEAT
A-B
AUDIO
BACKPAUSESTOP
PLAYOKFFW
REW
CLEAR TITLE
DISC
TRACKING
OPEN/CLOSE
12
6
5
4
7
8
9
0
+10
3
Parental Controls prevents viewing of DVDs that exceed your rating
limits. This feature will not limit viewing if the DVD is not rated or
coded.Check your DVDs and settings before letting children access
the DVD/VCR.You will need a password to change the Parental Settings
or to play a blocked disc.Follow these steps to change your password.
Press DVD to put the DVD/VCR in DVD mode.
DVD light will appear on the front of the DVD/VCR.
1
While playback is stopped, press SETUP.
The QUICK SETUP Screen appears.
2
English
4,6
3
4
5
6
7
2,7
Press s or B to select CUSTOM, then press OK.
Press ssor BBto select (PARENTAL), then press OK.
● If this is the first time you set a password,this menu will appear.
Press the Number buttons to enter a 4-digit password.
The password will appear on the screen. Write it down so you
will not forget it.
Press OK, and proceed to step 7.
● If you have set a password before, this menu will appear.
Press the Number buttons to enter your current
4-digit password. Asterisks (*) will appear instead of your
password.This protects its identity.Press OK, and proceed to
step 7.
If you like to change the password,press K or L to select
PASSWORD CHANGE, then press OK.
Press the Number buttons to enter a 4-digit
password. The password numbers will appear on the screen.
Write down the password so you will not forget it. Press OK.
The previous menu will reappear.
Press SETUP to remove the menu.
3-6
1
Helpful Hints
• The default password is 4737.If
you forget your password, press
Number buttons 4,7, 3,7 at
step 4. You will be prompted to
enter a new 4-digit password.
Use the Number buttons to
enter a new 4-digit password,
then press OK.PARENTAL
LEVEL will reset to ALL.See
page 54 to reset PARENTAL
LEVEL as you desire.
• A power failure will not erase
your password.
Page 54
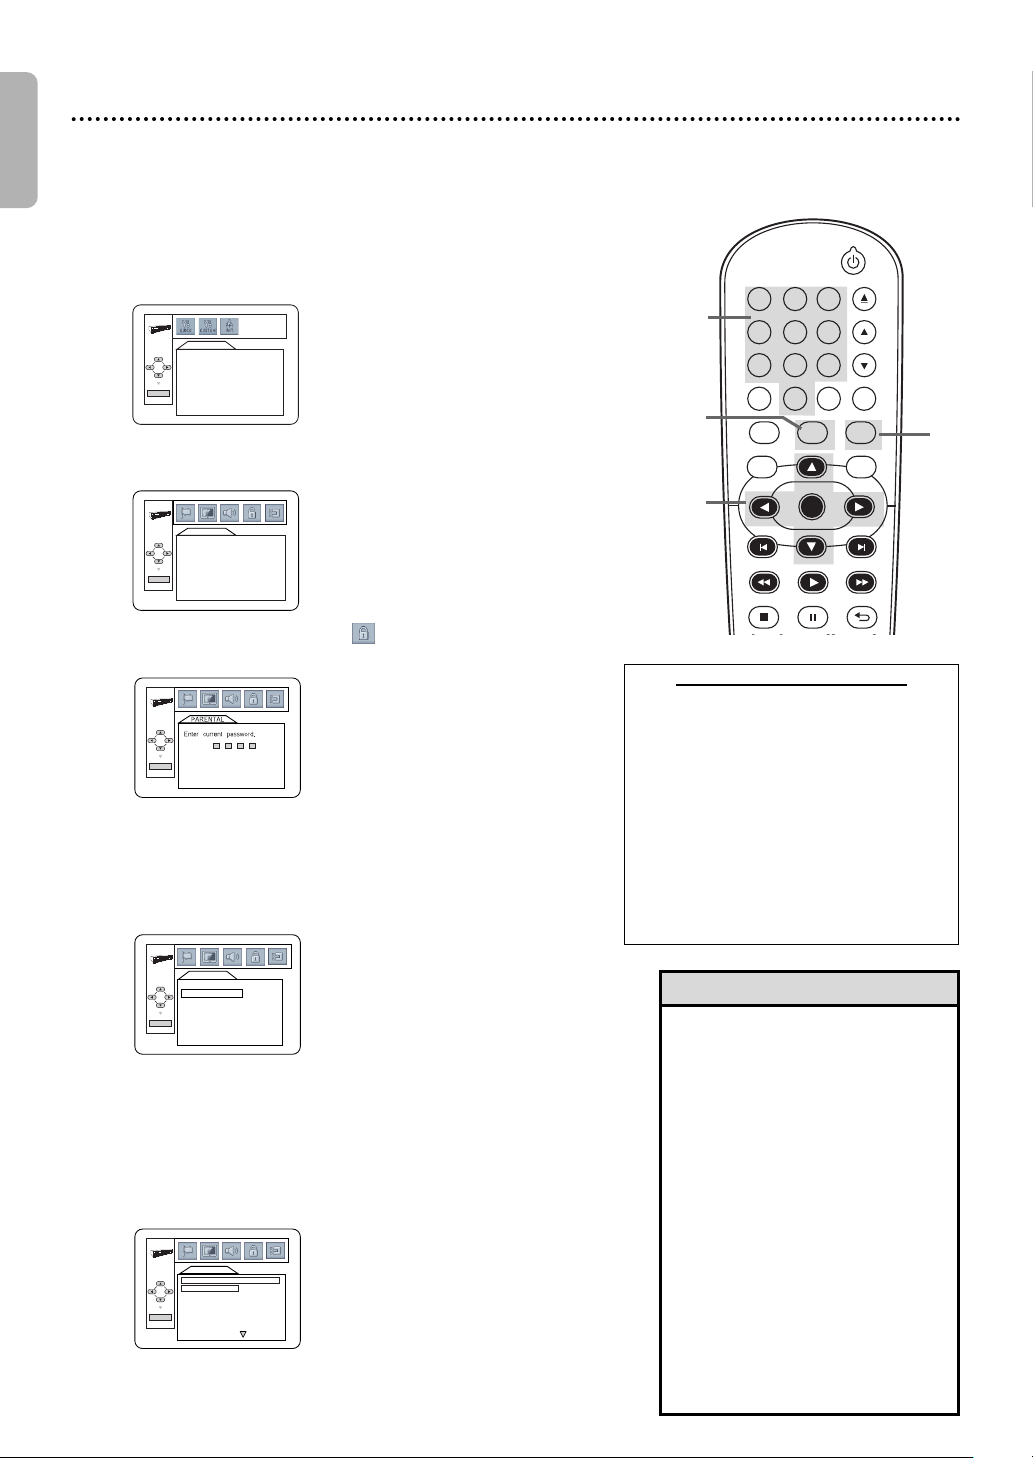
English
QUICK SETUP
OSD LANGUAGE ENGLISH
TV ASPECT
4:3 LETTER BOX
PROG. SCAN OFF
DOLBY DIGITAL BITSTREAM
OK
OK
PARENTAL
PARENTAL LEVEL ALL
PASSWORD CHANGE
OK
PARENTAL
PAR EN TA L LEVEL
ALL
8 [ADULT]
7 [NC-17]
6 [R]
5 [PGR]
4 [PG13]
3 [PG]
OK
LANGUAGE
AUDIO ORIGINAL
SUBTITLE OFF
DISC MENU ENGLISH
OSD LANGUAGE ENGLISH
OK
DVDVCR SETUP
INPUT MENU
BACKPAUSESTOP
PLAYOKFFWREW
CLEAR TITLE
DISC
TRACKING
OPEN/CLOSE
12
6
5
4
7
8
9
0
+10
3
54 Parental Levels
Follow these steps to set the rating level for your DVDs.
DVDs whose ratings exceed the level you set will not play.
Press DVD to put the DVD/VCR in DVD mode.
DVD light will appear on the front of the DVD/VCR.
1
While playback is stopped, press SETUP.
The QUICK SETUP Screen appears.
2
5
3
4
5
6
7
8
Press s or B to select CUSTOM at the top of the
menu,then press OK.
Press s or B to select
of the menu,
Press the Number buttons to enter your 4-digit
password.
Press K or L to select PARENTAL LEVEL, then
press OK.
Press K or L to select a level, then press OK.
The rating levels continue on two menu screens. Press
K or L repeatedly to move to the next or previous screen
to find the rating level you want.
After making your selection,the previous menu will appear.
The level you selected will appear beside PARENTAL
LEVEL.
Press SETUP to remove the menu.
then press OK.
(PARENTAL),at the top
2,8
3-4,
6-7
RATING EXPL
• ALL :Parental Control is inactive;all discs
can play.
•
8 [ADULT]: DVD softwares of any grades
(adult/general/children) can be played back.
•
7 [NC-17]:No one under 17 admitted
•
6 [R]:Restricted;under 17 requires
accompanying parent or adult guardian
•
5 [PGR]:Parental Guidance Recommended
•
4 [PG13]:Unsuitable for children under 13
•
3 [PG]:Parental Guidance suggested
•
2 [G]:General Audience
•
1 [KID SAFE]:Suitable for children
Helpful Hints
• When you try to play a DVD
whose rating exceeds the level
you set,an on-screen message
will indicate the DVD cannot
play.Remove the DVD,then set
PARENTAL LEVEL to ALL.
Reload the DVD and begin
playback.Some DVDs may let
you enter your 4-digit
password to begin playback.
Follow the on-screen messages
as prompted.
• You cannot use the default
password (4737) to play a DVD.
• The resume information will be
cleared if you change the
parental level when the resume
information is on.
ANATIO
1
NS
Page 55
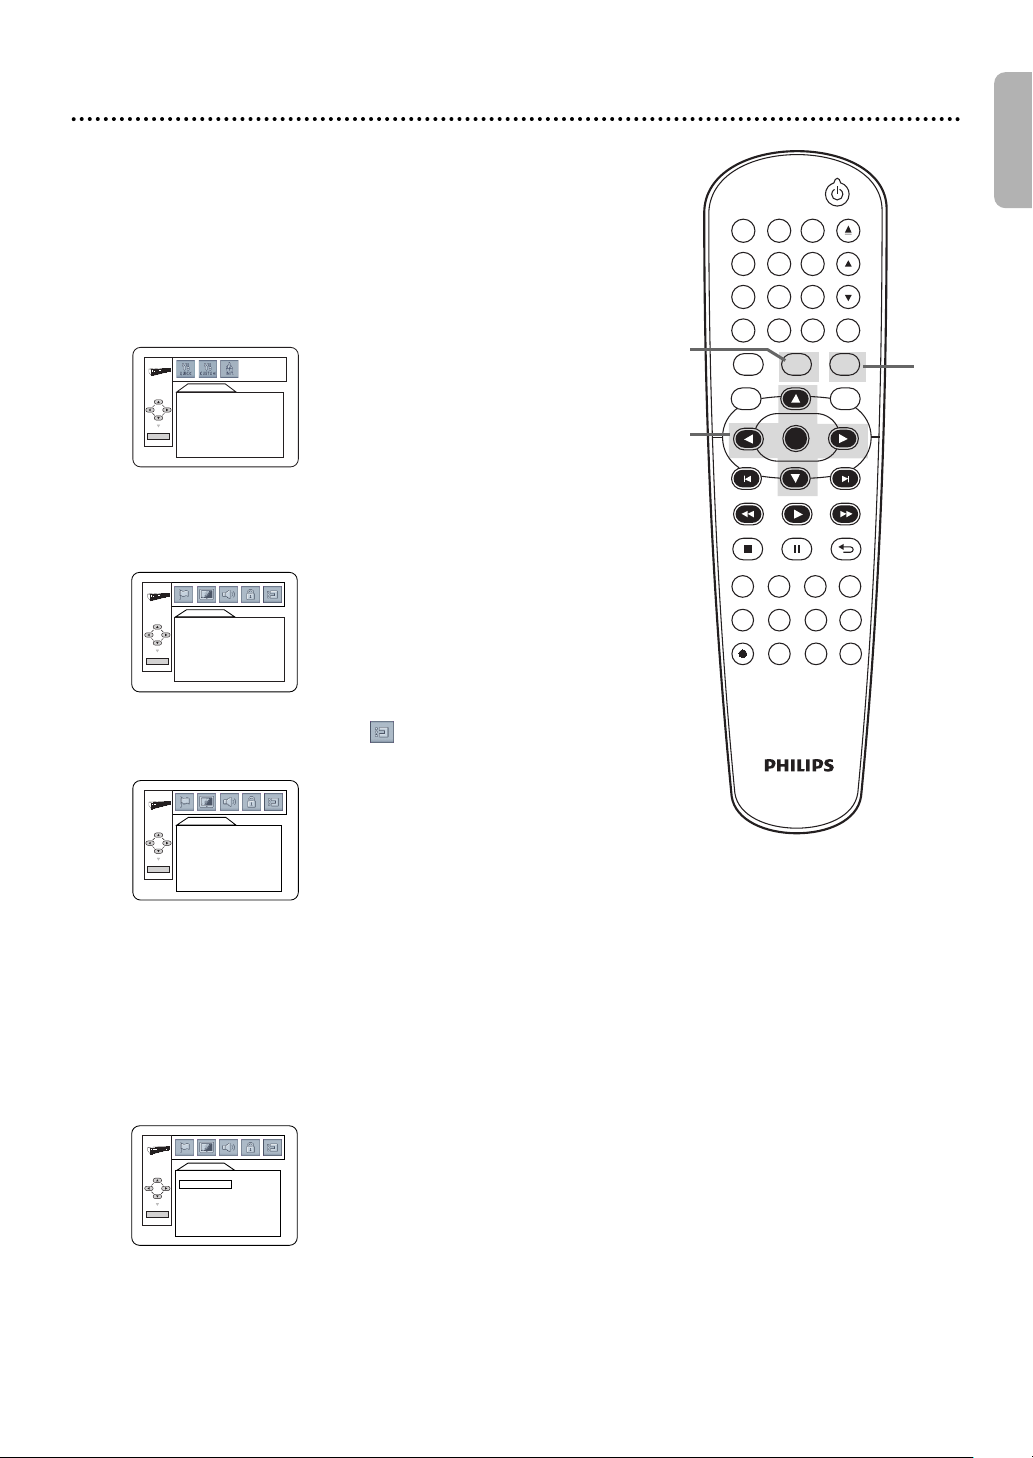
Others 55
QUICK SETUP
OSD LANGUAGE ENGLISH
TV ASPECT
4:3 LETTER BOX
PROG. SCAN OFF
DOLBY DIGITAL BITSTREAM
OK
LANGUAGE
AUDIO ORIGINAL
SUBTITLE OFF
DISC MENU ENGLISH
OSD LANGUAGE ENGLISH
OK
OTHERS
ANGLE ICON ON
AUTO POWER OFF ON
DUAL PLAYBACK OFF
SLIDE SHOW 5sec
OK
OTHERS
ANGLE ICON ON
AUTO POWER OFF
ON
DUAL PLAYBACK OFF
SLIDE SHOW 5sec
OK
DVDVCR SETUP
INPUT MENU
REC SPEED MODE
ANGLE SEARCH REPEAT
DISPLAY SUBTITLE ZOOM
TIMER SET
REPEAT
A-B
AUDIO
BACKPAUSESTOP
PLAYOKFFW
REW
CLEAR TITLE
DISC
TRACKING
OPEN/CLOSE
12
6
5
4
7
8
9
0
+10
3
You may adjust the Angle Icon,Automatic Power Off,
Dual Playback and Slide Show Settings.
Press DVD to put the DVD/VCR in DVD mode.
DVD light will appear on the front of the DVD/VCR.
1
While playback is stopped, press SETUP.
The QUICK SETUP Screen appears.
2
Press s or B to select CUSTOM at the top
of the menu, then press OK.
3
Press s or B to select (OTHERS), then
press OK.
4
Press K or L to select an item, then press OK.
5
●●
If you selected ANGLE ICON, press OK
repeatedly to select ON or OFF. Choose ON
to see the Angle icon when multiple camera angles are
available during DVD playback.Details are on page 39.
Choose OFF to disable the Angle icon.
English
2
1
3-5
The default setting is ON.
Instructions continue on the next page.
ANGLE ICON
Page 56
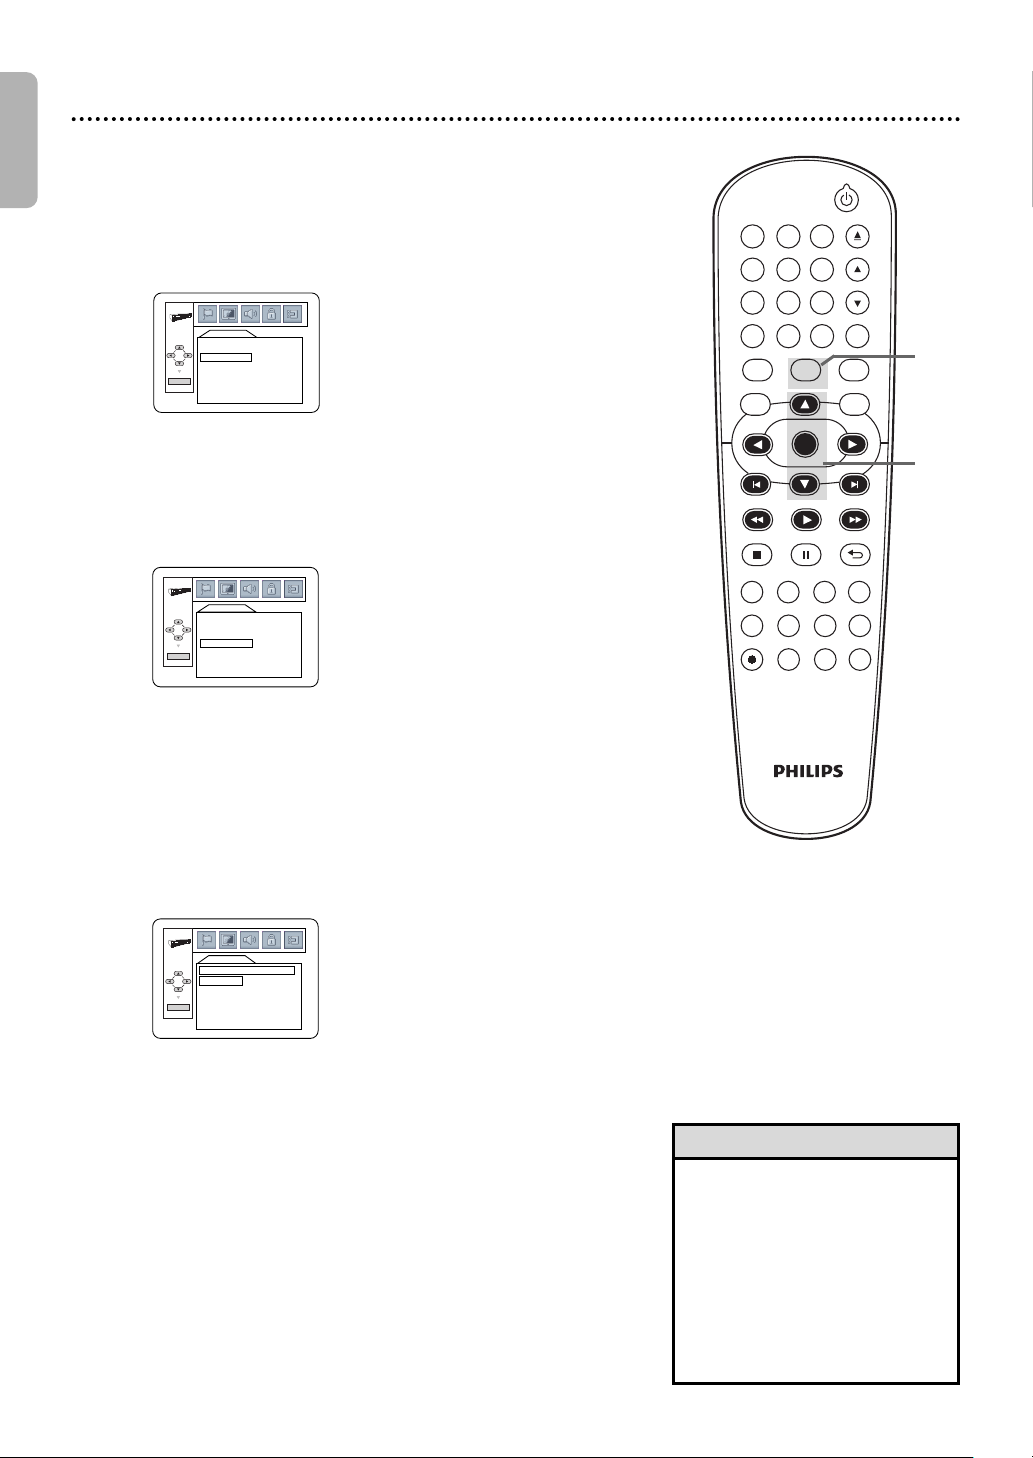
English
OTHERS
ANGLE ICON ON
AUTO POWER OFF
ON
DUAL PLAYBACK OFF
SLIDE SHOW 5sec
OK
OTHERS
SLIDE SHOW
5 sec
10 sec
MUSIC
OK
OTHERS
ANGLE ICON ON
AUTO POWER OFF
ON
DUAL PLAYBACK OFF
SLIDE SHOW 5sec
OK
DVDVCR SETUP
INPUT MENU
REC SPEED MODE
ANGLE SEARCH REPEAT
DISPLAY SUBTITLE ZOOM
TIMER SET
REPEAT
A-B
AUDIO
BACKPAUSESTOP
PLAYOKFFW
REW
CLEAR TITLE
DISC
TRACKING
OPEN/CLOSE
12
6
5
4
7
8
9
0
+10
3
56 Others (cont’d)
Instructions continued from the previous
●●
If you selected AUTO POWER OFF, press OK
repeatedly to choose ON or OFF. Choose ON if you
want the player to turn off when there is no activity at
the player or its remote for 30 minutes.
The default setting is ON.
AUTO POWER OFF
●●
If you selected DUAL PLAYBACK, press OK
to choose ON or OFF. This feature lets you play
MP3 and JPEG files simultaneously.
The default setting is OFF.
6
5
6
DUAL PLAYBACK
●●
If you selected SLIDE SHOW, press K or L to
choose 5sec, 10sec or MUSIC, then press OK.
This adjusts the playback speed of the SLIDE SHOW.
Choose 5 sec to display each image for 5 seconds.
Choose 10 sec to display each image for 10 seconds.
Choose MUSIC to display an image for each MP3 sound
file playback when DUAL PLAYBACK is ON.
The default setting is 5 sec.
SLIDE SHOW
Press SETUP to remove the menu.
Helpful Hint
• When MUSIC is selected,the
playback speed of the SLIDE
SHOW will be set to 5
seconds under the conditions
listed below:
- When DUAL PLAYBACK is
OFF.
- When DUAL PLAYBACK is
ON,but only the JPEG files
are playing.
Page 57
Glossary 57
AUDIO IN/OUT Jacks: jacks on the front and back of the DVD/VCR that receive audio from another
source (IN) or send audio to another system (OUT). These jacks are red (right) and white (left).
OAXIAL DIGITAL AUDIO OUT Jack: sends digital audio to a Stereo,allowing you to adjust the
C
volume at the Stereo. This connection provides the Multi-channel surround sound as heard in movie
theaters. This jack on the DVD/VCR is black.
COMPONENT VIDEO OUT (Y C
high-quality DVD video to a TV with Component Video In jacks.This connection provides the best picture
quality for the DVD player of the DVD/VCR.
y Digital: a surround sound system that provides Multi-channel sound as used in movie theaters.
Dolb
Dubbing:
HQ:
External Input Cha
external tuner. If you connected the external tuner to the AUDIO and VIDEO In jacks on the front of the
DVD/VCR,select L2. If you used the AUDIO and VIDEO IN jacks on the back of the DVD/VCR,select L1.
TR: One-Touch Recording;a timed recording on the VCR that starts immediately and records for 30
O
minutes to 8 hours.
S-V
S-Video only provides a picture for the DVD player of the DVD/VCR.
ape Speeds: how fast the video cassette travels during a recording or playback. The faster the tape
T
speed,the better the picture quality.Slower tape speeds affect picture quality,but you can record more
onto a videotape.
• SP (Standard Playback) – fastest tape speed (recording time for a T120 tape is approximately 2 hours);
best picture quality.
• LP (Long Playback) – average tape speed.You cannot record in LP with this VCR.If tapes were recorded
on a different VCR in LP speed,the tape will play in LP on the DVD/VCR.
• SLP (Super Long Playback) – slowest tape speed (recording time for a T120 tape is approximately 6
hours). This speed allows the maximum recording on a single videotape.
VIDEO IN/OUT J
source (IN) or send video to other video equipment or a TV (OUT). These jacks are yellow.
copying a video cassette using another VCR.
high quality;a feature in the VCR circuitry which provides enhanced picture detail.
nnel: the channel to which you set your DVD/VCR to receive the signal from the
ideo: produces a clearer DVD picture by sending separate signals for the luminance and the color.
acks: jacks on the front and back of the DVD/VCR that receive video from another
B/PBCR/PR
)
Jacks: jacks on the back of the DVD/VCR that send
English
Page 58

English
58 Helpful Hints
If you are having problems with your product,check this list of problems and possible solutions before requesting
service. You may be able to solve the problem yourself.
If you need to call a customer service representative,please know the model number and serial number of your
product before you call. This information is displayed on the back of the product. Also, please take a moment to identify
the problem you are having, and be prepared to explain this to the representative.If you believe the representative will
need to help you with operations,please stay near the product. Our representatives will be happy to assist you.
For online reference,please visit our web site at http://www.philips.com/welcome
The DVD/VCR has no power.
•
Make sure the power cord is connected completely to an AC (alternating current) outlet.
• Press y to turn on the DVD/VCR. The DVD/VCR usually turns on in the mode it was in when you
turned it off.If there has been a power failure,it will turn on in VCR mode. Press DVD to put the unit in
DVD mode.Press VCR to put the unit in VCR mode. Or, press SOURCE to switch between the two
modes.
The remote control will not operate the DVD/VCR.
•
Aim the remote control directly at the remote sensor on the front of the DVD/VCR,not toward the TV.Details are
on page 18.
•
Remove all obstacles between the remote control and the DVD/VCR.
•
Inspect and/or replace the batteries in the remote control.Details are on page 13.
•
Use the remote control within 23 feet (7m) of the DVD/VCR.
•
When using the DVD player,press DVD,then try the other DVD feature buttons.Press DVD so DVD light appears
on the front of the DVD/VCR. This means the DVD/VCR is in DVD mode.
•
To use the VCR, press VCR, then try the other VCR feature buttons.Press VCR so VCR light appears on the front of
the DVD/VCR.This means the DVD/VCR is in VCR mode.
There is no picture in DVD mode.
•
Make sure the video cable is connected correctly.You may connect either the yellow video cable (supplied),an
optional S-Video cable,or optional component video cables. Make sure the TV is set to the correct Video In channel
(usually the AUX IN, A/V IN, Auxiliary In,EXT or External In, Component Video In or S-Video In channel).Check
your TV owner’s manual for details.Details are on page 8.
•
Insert a DVD that is playable on this DVD/VCR.Details are on page 7.
•
Make sure the DVD/VCR is in DVD mode.Press DVD or SOURCE so DVD light appears on the front of the
DVD/VCR.
•
Check if Progressive Scan is set correctly according to your connection to a TV.Details are on page 8. Enable
Progressive Scan at the DVD player only if you used the Component Video connection to a TV that has Progressive
Scan.Details are on pages 8,10 and 51.
Disc cannot be played.
•
Insert a playable disc.Details are on page 7.
•
Place the disc correctly in the disc tray.If the disc is one-sided,place the disc in the tray with the label facing up.If the
disc is two-sided,make sure the label of the side you want to play is facing up.
•
Clean the disc.Make sure the disc is not scratched or warped.
•
Cancel the Parental Controls,enter the password or change the control level.Details are on pages 53-54.
•
Make sure the disc is labeled for use in Region 1 or ALL regions and is NTSC or PAL compatible. Details are on page 7
There is no sound.
•
Connect the audio cable firmly. Make sure the cables are connected to the AUDIO IN jacks on the TV or Stereo.
Details are on pages 9-12.
•
Check the Audio Settings of the DVD player.Details are on page 52.
•
Check the Audio Settings of the DVD.For example, you may have selected “soundtrack” playback or an unavailable
Sound Setting (such as Dolby Digital).Details are on pages 40 and 52.Try other sound options provided in the DVD
Disc Menu.
The picture is distorted.
•
Connect the DVD/VCR directly to the TV.Details are on pages 8-12. Do not connect the DVD/VCR to a VCR,then
connect the VCR to the TV.Copyright protection systems in the VCR could distort the picture playing on the
DVD/VCR.
•
There are some cases where a disc or videotape picture may be distorted slightly because of the quality in which it
was recorded. This is not a malfunction of the DVD/VCR.
•
Make sure the disc is compatible with the DVD player of the DVD/VCR.Details are on page 7.
• In case of picture problems with 525 (480) progressive scan output,it is recommended that the user switch the
connection to the ‘standard definition’ output.If there are questions regarding your TV set compatibility with this
525p (480p) DVD player,please contact our customer service center.
•
If your TV is not PAL compatible,DVDs recorded in the PAL color system may play only in black and white,the
picture may roll continuously,or the picture may appear distorted.
You cannot change the camera angle of a DVD.
•
The DVD might not contain segments recorded from different camera angles.See if multiple angles are available by
referring to the disc case or DVD Disc Menu. Details are on page 39.
.
Page 59

Helpful Hints (cont’d) 59
You cannot change the audio or subtitle language of a DVD.
•
The DVD does not contain audio or subtitles in the desired language.Not all DVDs contain audio or subtitles in
multiple languages.See if other languages are available by referring to the disc case or DVD Disc Menu.Details are on
pages 39-40.
An X appears in the top right corner of the TV screen when you try a DVD feature.
•
The operation is not available at the current time or the feature is not available on the disc.Some features are only
available during playback. Others can be accessed only if playback is stopped. Try stopping or playing the disc,then try
the feature again.
The DVD/VCR switches from DVD mode to VCR mode after 30 minutes of no activity.
•
When AUTO POWER OFF is set to ON, the DVD/VCR switches itself from DVD mode to VCR mode if disc
playback stops for more than 30 minutes and you press no buttons on the remote or the DVD/VCR.Details are on
pages 55-56.This prevents possible damage to your TV’s picture tube that can occur if a still image is left on too long.
A screen saver appears on the TV screen during DVD mode.
•
The screen saver appears when you leave the DVD/VCR in stop mode for about five minutes to protect the TV
screen from burn-in.
You want to use the DVD player during a VCR Timer Recording or while “ ” appears on the
display panel.
• Press y to turn on the DVD/VCR.Press DVD to choose DVD mode, then continue with other DVD
features as described in this manual.
A maximum of 999 MP3/Windows MediaTMAudio/JPEG files can be recognized.
Power Failure
•
Clock and language setting will be lost after 30 seconds of power failure.See pages 19-20 to set up the clock and
language again.
The VCR will not record a TV program.
•
This DVD/VCR does not have a tuner to receive TV broadcasting.
•
You must connect this DVD/VCR to an external tuner to record TV programs.
•
Check the connections between the DVD/VCR and the external tuner. Details are on page 9.
•
Put the DVD/VCR in VCR mode.Press VCR or SOURCE so VCR light appears on the front of the DVD/VCR.
•
Make sure the video cassette has a record tab.Details are on page 21.
The VCR will not perform a Timer Recording.
•
Make sure the recording start and stop times are set correctly.Details are on pages 24-25.
•
Make sure a tape is in the VCR and the tape has a record tab.Details are on page 21. If, after programming a Timer
Recording,you press TIMER SET without putting a tape in the DVD/VCR,“ ” will blink on the display panel.
•
If the record tab on a tape is missing,the DVD/VCR will eject the tape.“ ” will blink.
•
Press TIMER SET to put the DVD/VCR in standby mode for the Timer Recording.
•
Make sure the VCR clock is set.Details are on page 19.
•
The VCR may not perform or continue a Timer Recording if the power fails.
•
Finish programming a Timer Recording at least 5 minutes before it is set to begin.
•
12 p.m.is noon;12 a.m. is midnight.
There is no picture or the picture is noisy or has streaks during video cassette playback.
•
Put the DVD/VCR in VCR mode.Press VCR or SOURCE so VCR light appears on the front of the DVD/VCR.
•
Select the correct Video In channel at the TV. Details are on page 8.
•
Adjust the tracking.Details are on page 31.
•
TVs placed too close to the DVD/VCR can cause interference during tape playback.Move the DVD/VCR away from the TV
TV programs cannot be watched normally.
•
Check the connections between the DVD/VCR and the external tuner. Details are on page 9.
You cannot insert a video cassette.
•
Insert the tape,window side up,with the record tab facing you.
•
Make sure that there is no tape on the VCR by pressing STOP/EJECT CA on the front of the DVD/VCR.
•
Gently push on the center of the tape when putting it in the VCR. Never force the tape into the VCR.
•
If a Timer Recording is set,you cannot insert a tape without a record tab.
You cannot remove the tape.
•
Make sure the power plug is completely connected to a power outlet.
•
If a Timer Recording has been set,press TIMER SET on the remote control or STOP/EJECT CA on the front panel to
cancel the timer standby mode temporarily.“ ” will disappear from the display panel.Then,press STOP/EJECT CA
on the front of the DVD/VCR to eject the tape.Insert another tape and press TIMER SET to reset the Timer
Recording.
• Unplug the DVD/VCR power cord for 5 minutes. Then, plug in the power cord again and press y on the
DVD/VCR.Press STOP/EJECT C A on the DVD/VCR 3 to 5 times.If the tape still does not eject,you
may need to have an authorized servicer remove the tape.
.
English
Page 60

English
60 Helpful Hints (cont’d)
DVD/VCR ejects the tape when you press REC I or TIMER SET.
•
Make sure the tape has a record tab.Details are on page 21.
Hi-Fi Stereo Sound
•
During playback,Hi-Fi audio may normally revert to normal audio when you adjust tracking.
•
When connecting the DVD/VCR to a TV with the red and white audio cable, you will only get stereo sound if you
connect the DVD/VCR AUDIO OUT jacks on the DVD/VCR to the AUDIO IN jacks on your TV,and if the TV is on
its Audio/Video In channel. See your TV owner’s manual for details.
•
When you connect the DVD/VCR AUDIO OUT jacks on the DVD/VCR to the AUDIO IN jacks on your TV, the
stereo light on the TV might not glow.
•
Only tapes recorded in Hi-Fi audio will play in Hi-Fi audio. Tapes recorded in normal audio will play in monaural
(single-channel) audio.
Cleaning the video heads
•
Your DVD/VCR automatically cleans the video heads of the VCR each time you insert a tape.However,the heads
may become dirty. If so,have an authorized servicer clean the video heads.Eventually, the heads may need to be
replaced.
The playback picture is too dim, too bright or fluctuates in brightness.
•
Some programs may be broadcast with copyright protection technology in order to protect the rights of copyright
owners. This technology is used on programs that are recorded on video cassettes or DVDs, as well as some
programs broadcast by antenna/cable/satellite television channels. Programs broadcast with copyright protection may
not record clearly.Likewise,if you play a tape that is a recording of a copyright protected program,the picture may
not be clear. Tapes of copyright protected programs may have a picture that is dark or dim,or the brightness of the
picture may fluctuate. Therefore,avoid recording or playing copies of copyright protected programs.
Page 61

Care and Maintenance 61
Cleaning the DVD/VCR
• Wipe the front panel and other exterior surfaces of the DVD/VCR with a soft,slightly damp cloth.
• Never use a solvent,thinner,benzene or alcohol to clean the DVD/VCR.Do not spray insecticide liquid
near the DVD/VCR.Such chemicals may discolor the surface or damage the DVD/VCR.
Cleaning a Disc
• Use a soft,dry cloth to wipe the disc.
• Wipe the disc in a straight line from the center to the edge.Never wipe the disc in a circular motion.
• Do not use detergent or abrasive cleaning agents.
• Handle the discs so fingerprints and dust do not adhere to the discs.
• Always store the disc in its protective case when it is not in use.
Checking the Laser
• If the DVD/VCR does not operate as described in this manual,the DVD player’s laser may be dirty.
Consult an Authorized Service Center for inspection and cleaning of the laser.
Caring for Video Cassettes
• Use only cassettes with the mark.
• Remove any light adhesive stick-on notes from the video cassette before putting the cassette in the VCR.
Removable labels can jam the VCR.
Caring for the VCR’s Video Heads
• Periodic maintenance is required to maintain your DVD/VCR’s excellent performance. The VCR has an
Automatic Head Cleaner. However, the video heads will require replacement eventually. Only an
authorized service center should perform this service.
English
VCR Video Heads
4 heads - Hi-Fi
DVD Color System
NTSC
Frequency Response
DVD (linear sound):
20 Hz to 22 kHz (sample rate:48 kHz)
20 Hz to 44 kHz (sample rate:96 kHz)
Audio CD:20 Hz to 20 kHz
Signal-to-Noise Ratio
Audio CD:100 dB JEITIA
(Japan Electronics and Information Technology Industries
Association)
Dynamic Range
DVD (linear sound):90 dB
Audio CD:85 dB (JEITIA)
Total Distortion Factor
Audio CD:0.03% (JEITIA)
DVD:0.03%
Wow and Flutter
Below the measurement limitation
(±0.001% W PEAK) (JEITIA)
Power Requirement
120V AC +/- 10%,60 Hz +/- 0.5%
Specifications
Power Consumption
Power on:21 W
Power off:3.8 W
Operating Temperature
41°F (5°C) to 104°F (40°C)
Relative Humidity
30% to 80%
Dimensions
17.1” (W) x 3.7” (H) x 9.2” (D)
(435mm x 94mm x 233mm)
Weight
5.8 lbs.(2.6 kg.)
NOTE: Designs and specifications are subject to change
without notice.
Page 62

English
P&F USA, Inc.
PO Box 430 Daleville, IN 47334-0430
WARRANTY COVERAGE:
This warranty obligation is limited to the terms set forth
below.
WHO IS COVERED:
This product is warranted to the original purchaser or the person receiving the product as a gift against defects in materials and
workmanship as based on the date of original purchase
(“Warranty Period”) from an Authorized Dealer. The original
sales receipt showing the product name and the purchase date
from an authorized retailer is considered such proof.
WHAT IS COVERED:
This warranty covers new products if a defect in material
or workmanship occurs and a valid claim is received within
the Warranty Period. At its option, the company will either (1)
repair the product at no charge, using new or refurbished
replacement parts, or (2) exchange the product with a product
that is new or which has been manufactured from new, or serviceable used parts and is at least functionally equivalent or most
comparable to the original product in current inventory, or (3)
refund the original purchase price of the product.
The Company warrants replacement products or parts provided
under this warranty against defects in materials and workmanship
from the date of the replacement or repair for ninety (90) days
or for the remaining portion of the original product’s warranty,
whichever provides longer coverage for you. When a product or
part is exchanged, any replacement item becomes your property
and the replaced item becomes the company’s property. When a
refund is given, your product becomes the company’s property.
WHAT IS NOT COVERED - EXCLUSIONS AND LIMITATIONS:
This Limited Warranty applies only to the new products that
can be identified by the trademark, trade name, or logo affixed
to it. This Limited Warranty does not apply to any non-Philips
hardware product or any software, even if packaged or sold
with the product. Non-Philips manufacturers, suppliers, or
publishers may provide a separate warranty for their own
products packaged with the bundled product.
The Company is not liable for any damage to or loss of any
programs, data, or other information stored on any media
contained within the product, or any non-Philips product or part
not covered by this warranty. Recovery or reinstallation of
programs, data or other information is not covered under this
Limited Warranty.
This warranty does not apply (a) to damage caused by accident,
abuse, misuse, neglect, misapplication, or non-Philips product, (b)
to damage caused by service performed by anyone other than
an Authorized Service Location, (c) to a product or
a part that has been modified without written permission,
or (d) if any serial number has been removed or defaced,
or (e) product, accessories or consumables sold “AS IS”
without warranty of any kind by including refurbished Philips
product sold “AS IS” by some retailers.
•
Shipping charges to return defective product.
•
Labor charges for installation or setup of the product, adjustment of customer controls on the product, and installation or
repair of antenna/signal source systems outside of the product.
•
Product repair and/or part replacement because of improper
installation or maintenance, connections to improper voltage
supply, power line surge, lightning damage, retained images or
screen markings resulting from viewing fixed stationary content for extended periods, product cosmetic appearance items
due to normal wear and tear, unauthorized repair or other
cause not within the control of the company.
•
Damage or claims for products not being available for use, or
for lost data or lost software.
•
Damage from mishandled shipments or transit accidents when
returning product.
• A product that requires modification or adaptation to enable
it to operate in any country other than the country for which
it was designed, manufactured, approved and/or authorized, or
repair of products damaged by these modifications.
• A product used for commercial or institutional purposes
(including but not limited to rental purposes).
•
Product lost in shipment and no signature verification receipt
can be provided.
•
Failure to operate per Owner’s Manual.
REPAIR OR REPLACEMENT AS PROVIDED UNDER THIS
WARRANTY IS THE EXCLUSIVE REMEDY FOR THE CONSUMER. PHILIPS SHALL NOT BE LIABLE FOR ANY INCIDENTAL OR CONSEQUENTIAL DAMAGES FOR BREACH OF
ANY EXPRESS OR IMPLIED WARRANTY ON THIS PRODUCT. EXCEPT TO THE EXTENT PROHIBITED BY APPLICABLE
LAW, ANY IMPLIED WARRANTY OF MERCHANTABILITY OR
FITNESS FOR A PARTICULAR PURPOSE ON THIS PRODUCT
IS LIMITED IN DURATION TO THE DURATION OF THIS
WARRANTY.
Some states do not allow the exclusions or limitation of incidental or consequential damages, or allow limitations on how long an
implied warranty lasts, so the above limitations or exclusions may
not apply to you.
This warranty gives you specific legal rights. You may have other rights which vary from state/province to state/province.
TO OBTAIN ASSISTANCE IN THE U.S.A., PUERTO
RICO, OR U.S. VIRGIN ISLANDS…
Contact Customer Care Center at:
1-866-309-0866
NINETY (90) DAY LIMITED WARRANTY
Note: Any product sold and identified as refurbished
or renewed carries a ninety (90) day limited warranty.
This Limited Warranty does not cover:
Replacement product can only be sent if all warranty
requirements are met. Failure to follow all requirements
can result in delay.
62 Limited Warranty
Page 63

Information Index 63
ac power cord . . . . . . . . . . . . . . . . . .18
angle button . . . . . . . . . . . . . . . . .18,39
angle icon . . . . . . . . . . . . . . . .39, 55-56
arrow buttons . . . . . . . . . . . . . . . . . .18
audio button . . . . . . . . . . . . . . . . .18,40
audio in/out jacks . . . . . . . . .9-12,18,23
audio settings . . . . . . . . . . . . . . . . . . .52
auto power off . . . . . . . . . . . . . . .55-56
auto repeat . . . . . . . . . . . . . . . . . . . . .29
automatic
tape playback . . . . . . . . . . . . . . . . .31
tape rewind,eject . . . . . . . . . . . . . .31
a-b repeat . . . . . . . . . . . . . . . . . . . . . .37
a-b repeat button . . . . . . . . . . . . .18,37
back button . . . . . . . . . . . . . . . . . . . .18
batteries . . . . . . . . . . . . . . . . . . . . . . .13
bit-rate display . . . . . . . . . . . . . . . . . .45
black level . . . . . . . . . . . . . . . . . . . . . .47
camera angle . . . . . . . . . . . . . . . . . . .39
cassette compartment . . . . . . . . . . .17
chapters . . . . . . . . . . . . . . . . . . . . . . .34
clear button . . . . . . . . . . . . . . . . .18,19
clock . . . . . . . . . . . . . . . . . . . . . . . . . .22
coaxial digital audio out jack . . . .12,18
component video out jacks . . . .10,18
connections . . . . . . . . . . . . . . . . . .8-12
contents,table of . . . . . . . . . . . . . . . . .5
controls
dvd/vcr . . . . . . . . . . . . . . . . . . . . . .18
remote . . . . . . . . . . . . . . . . . . . . . .18
copyright protection . . . . . . . .4, 23, 60
counter . . . . . . . . . . . . . . . . . . . . .20,29
disc menu button . . . . . . . . . . . . .18,32
disc menus . . . . . . . . . . . . . . .32,48-49
disc tray . . . . . . . . . . . . . . . . . . . . . . .17
display button . . . . . . . . . .18,20, 45-46
display messages . . . . . . . . . . . . . . . .17
display panel . . . . . . . . . . . . . . . . . . . .17
displays . . . . . . . . . . . . . . . . . .20,45-46
dolby digital . . . . . . . . . . . . . . . . . . . .52
down sampling . . . . . . . . . . . . . . . . . .52
drc (dynamic range control) . . . . . . .52
dual playback . . . . . . . . . . . . . . . . . . .44
duplication (dvd to videotape) . . . . .28
duplication (tape) . . . . . . . . . . . . . . . .23
dvd button . . . . . . . . . . . . . . . . . . . . .18
dvd light . . . . . . . . . . . . . . . . . . . . . . .17
ejecting a tape . . . . . . . . . . . .15,31,60
fast forward . . . . . . . . . . . . . . . . .31,33
ffw D button . . . . . . . . . . . . . . . . . .18
folder playback . . . . . . . . . . . . . . . . . .44
front panel . . . . . . . . . . . . . . . . . . . . .17
glossary . . . . . . . . . . . . . . . . . . . . . . . .57
head cleaner . . . . . . . . . . . . . . . . . . . .60
helpful hints . . . . . . . . . . . . . . . . .58-60
hi-fi stereo sound . . . . . . . . . . . . . . . .32
hookups
cable box/satellite receiver . . . . . . .9
component video . . . . . . . . . . . . .10
S-video . . . . . . . . . . . . . . . . . . . . . .10
stereo . . . . . . . . . . . . . . . . . . . .11-12
tv . . . . . . . . . . . . . . . . . . . . . . . . .9-1
index search . . . . . . . . . . . . . . . . . . . .30
initializing . . . . . . . . . . . . . . . . . . . . . .47
input button . . . . . . . . . . . . . . . . .18,21
jpeg display . . . . . . . . . . . . . . . . . . . . .46
jpeg playback . . . . . . . . . . . . . . . . .43-44
language (dvd) . . . . . . . . . . . . . . . .48-49
language (vcr) . . . . . . . . . . . . . . . . . . .20
line input mode . . . . . . . . . . . . . . . . .24
long playback . . . . . . . . . . . . . . . . . . .57
lp . . . . . . . . . . . . . . . . . . . . . . . . . . . .57
markers . . . . . . . . . . . . . . . . . . . . . . .38
menus . . . . . . . . . . . . . . . . . . . . . . .6,32
mode button . . . . . . . . . . . . . . . .18,42
mp3 display . . . . . . . . . . . . . . . . . . . . .46
mp3 playback . . . . . . . . . . . . . . . .43-44
number buttons . . . . . . . . . . . . . . . . .18
ok button . . . . . . . . . . . . . . . . . . . . . .18
on-screen status displays (vcr) . . . . .20
one-touch recording . . . . . . . . . . . . .22
open/close A button . . . . . . . . . .16, 18
osd language . . . . . . . . . . . . . . . . .48-49
parental . . . . . . . . . . . . . . . . . . . . .53-54
parental password . . . . . . . . . . . . . . .53
pause button . . . . . . . . . . .18,31,36,41
play button . . . . . . . . . . . . . . .15-16,18
playing discs . . . . . . . . . . . . . . . . . . . .16
playing tapes . . . . . . . . . . . . . . . . . . . .15
power
cord . . . . . . . . . . . . . . . . . . . . . . . .18
on light . . . . . . . . . . . . . . . . . . . . . .18
program . . . . . . . . . . . . . . . . . . . . . . .42
progressive scan . . . . . . . . . . . . . . . . .51
quick setup . . . . . . . . . . . . . . . . . .48-52
random . . . . . . . . . . . . . . . . . . . . . . . .42
rapid play with voice . . . . . . . . . . . . .33
rear panel . . . . . . . . . . . . . . . . . . . . . .18
rec I button . . . . . . . . . . . . .18,21-22
recording
basic . . . . . . . . . . . . . . . . . . . . . . . .21
prevention . . . . . . . . . . . . . . . . . . .21
timer . . . . . . . . . . . . . . . . . . . . .24-25
remote control
batteries . . . . . . . . . . . . . . . . . . . . .13
buttons . . . . . . . . . . . . . . . . . . . . . .18
sensor . . . . . . . . . . . . . . . . . . . . . . .18
repeat button . . . . . . . . . . . . . . . .18,37
repeat (discs) . . . . . . . . . . . . . . . . . . .37
repeat (tape) . . . . . . . . . . . . . . . . . . .29
rerecording . . . . . . . . . . . . . . . . . . . . .23
resume on . . . . . . . . . . . . . . . . . . . . .36
reverse searching . . . . . . . . . . . . .31,33
rew E button . . . . . . . . . . .18,31,33
safety precautions . . . . . . . . . . . . . . . .4
satellite link . . . . . . . . . . . . . . . . . .26-27
search button . . . . . . . . . .18,30,34-35
searching . . . . . . . . . . . . . . . . . . . .31,33
sensor (remote) . . . . . . . . . . . . . . . . .18
setup button . . . . . . . . . . . . . . . . . . . .18
skip ,skip . . . . . . . . . . . . . .18,35
slow motion . . . . . . . . . . . . . . . . .31
2
slp . . . . . . . . . . . . . . . . . . . . . . . . . . . .57
source button . . . . . . . . . . . . . . . . . .18
sp . . . . . . . . . . . . . . . . . . . . . . . . . . . .57
specifications . . . . . . . . . . . . . . . . . . .61
speed button . . . . . . . . . . . . . . . .18,21
standard playback . . . . . . . . . . . . . . .57
standby-on y button . . . . . . . . . . . .18
status display (vcr) . . . . . . . . . . . . . . .20
step-by-step playback . . . . . . . . . . . .36
stereo sound . . . . . . . . . . . . . . . . . . .40
stereo TV hookups . . . . . . . . . . .11-12
still mode . . . . . . . . . . . . . . . . . . .50-51
still picture . . . . . . . . . . . . . . . . . .31,36
stop C button . . . . . . . . . . . . . . . . . .18
stop/eject C A (vcr) button . . . . . . .18
subtitle button . . . . . . . . . . . . . . .18,39
super high speed searching . . . . . . . .31
super long playback . . . . . . . . . . . . . .57
s-video out jack . . . . . . . . . . . . . .10,18
table of contents . . . . . . . . . . . . . . . . .5
tape
duplication . . . . . . . . . . . . . . . . . . .23
eject . . . . . . . . . . . . . . . . . .18,31,59
speed . . . . . . . . . . . . . . . . . . . . . . .57
time search . . . . . . . . . . . . . . . . . . . . .30
timer recording
canceling . . . . . . . . . . . . . . . . . . . . .25
setting . . . . . . . . . . . . . . . . . . . .24-25
timer set button . . . . . . . . . . . . .18,25
title button . . . . . . . . . . . . . . . . . .18,32
titles . . . . . . . . . . . . . . . . . . . . . . . . . .32
tracking . . . . . . . . . . . . . . . . . . . . . . . .31
tracks . . . . . . . . . . . . . . . . . . . . . . . . .35
tv aspect . . . . . . . . . . . . . . . . . . . .50-51
tv hookups . . . . . . . . . . . . . . . . . . .8-12
vcr
button . . . . . . . . . . . . . . . . . . . . . . .18
light . . . . . . . . . . . . . . . . . . . . . . . . .17
video in/out jacks . . . . . . . . . . . .9-12,18
virtual surround . . . . . . . . . . . . . . . . .47
warranty . . . . . . . . . . . . . . . . . . . . . . .62
Windows MediaTMAudio display
Windows MediaTMAudio playback
zoom . . . . . . . . . . . . . . . . . . . . . . . . . .41
zoom button . . . . . . . . . . . . . . . .18, 41
This owner’s manual is made of recyclable
materials.Remember to recycle!
,41
For Product recycling information,please visit
- www.recycle.philips.com
English
. . . . . .46
. . . . .43
Page 64
CLASS 1
LASER PRODUCT
DVP3345VB/F7
Meet Philips at the Internet
http://www.philips.com/support
P&F USA,Inc.
*1VMN29133B*
PO Box 430 Daleville,IN 47334-0430
Printed In China
JpnHF-1002/F7-2
1VMN29133B ★★★
E8E23UD/E8E23UH
 Loading...