

Philips DVP3040K/77, DVP3040K/55, DVP3040K/78, DVP3040K Quick Start Manual
1
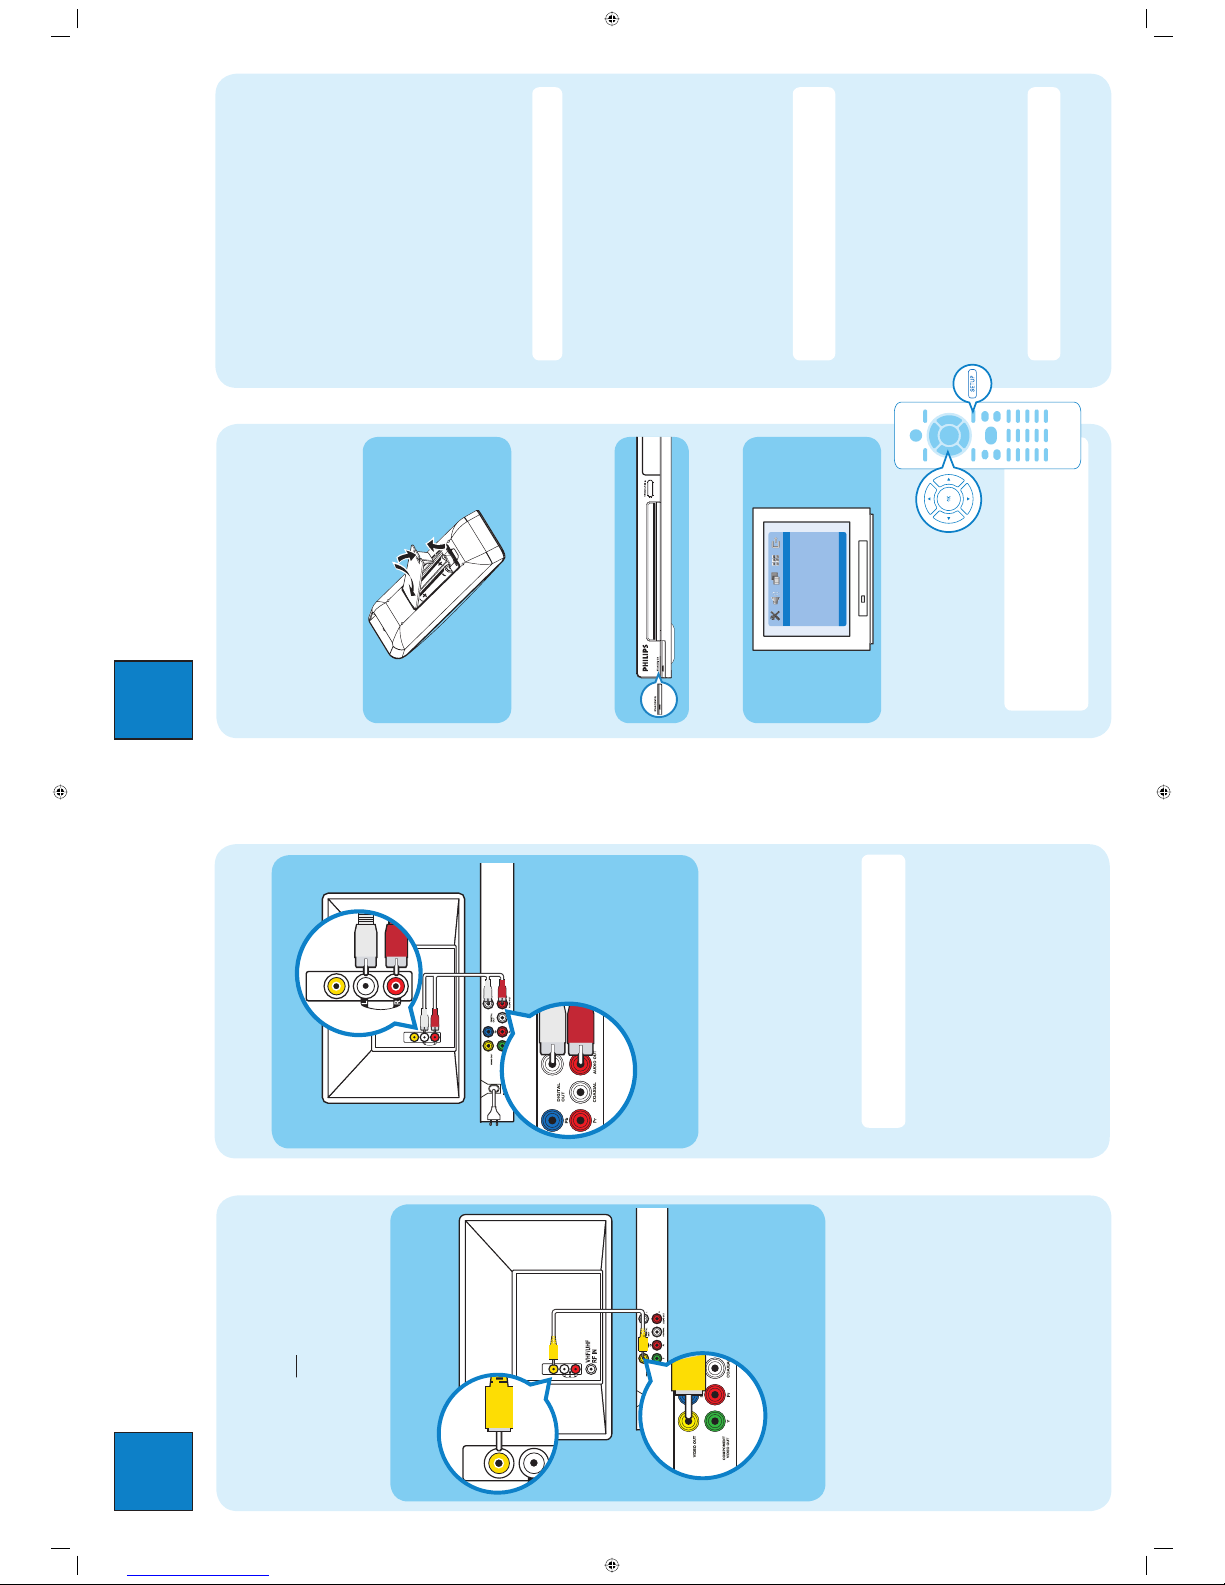
Connect
Basic Connection
A
Before Connecting
You only need to make one video and audio connection,
depending on the capabilities of your TV.
B
Video connection to TV
A Use the supplied composite video cable (yellow plug)
to connect the DVD player’s Video Out (CVBS)
socket to the Video In socket (or labeled as A/V In,
Video In, Composite or Baseband) on the
TV.
2
Set up
A
Insert batteries in Remote Control
A Remove batteries compartment cover.
B Insert the provided batteries in the remote control.
Take note of where the positive and negative ends
should go.
C Replace the batteries compartment cover.
B
Finding the viewing channel
A Press STANDBY-ON on the DVD player’s
remote control.
B Switch on the TV.
C Press SETUP
Go to General Setup Page
Disc Lock
Display Dim
Program
OSD Language
Sleep
DIVX(R) Vod Code
- - General Setup Page - -
D Press ‘0’ on the TV’s remote
control, then repeatedly press
the Channel Down button until
you see the DVD background
screen. This is the correct
viewing channel for the DVD
player.
Note For some TVs, to nd the correct
viewing channel, you can keep pressing the
AV or SELECT buttons, If still unable to
nd the correct viewing channel, check the
connections again or check your TV’s user
manual.
B To hear the sound of this DVD player from the TV,
use the supplied audio cables (red and white plugs)
to connect {AUDIO OUT L/R} sockets of the DVD
player to the corresponding Audio In sockets on the
TV.
C Plug in the power cable from the DVD player to an
AC power outlet.
Note See the accompanying user manual for other
possible connections (e.g. S-VIDEO, Component
Video).
C
Audio connection to TV
Television (rear)
Philips Recorder
(rear)
VIDEO OUT
(CVBS)
VIDEO OUT
(CVBS)
AUDIO OUT
AUDIO IN
VIDEO IN
(CVBS)
VIDEO IN
(CVBS)
To Video In
socket on the
TV
Television (rear)
C
TV settings basic setup
Use the DVD player’s remote control
to select the
settings
that matches
your country of residence and the
TV settings
.
Selecting TV Settings
A
Press
X
to select {Video Setup Page}.
B Press S
T
to highlight one of the options, then
press X to enter into the submenu.
In {TV Type}. options to select {PAL/NTSC/Multi}
In {TV Display}, options to select {4:3 Panscan/4:3
Letterbox/16:9}
C Press
S T
to highlight one of the options in the
submenu according to your country of residence and
the TV settings.
D Select an option and press OK.
Note Follow the instructions shown on the TV to
con rm the selection (if any).
D
Language preference setup
Use the DVD player’s remote control
to select the
desired On-screen language, Audio language, Subtitle
language and Menu language
you preferred.
Selecting On-screen language
A
Press
X
to select {General Setup Page}.
B Press S
T
to highlight {OSD Language}, then press
X.
C Press S
T
to select a language and press OK.
Note The On-screen language for the setup menu will
remain once you set it, regardless of various disc
languages.
Selecting disc languages
A
Press
X
to select {Preference Page}.
B Press S
T
to highlight one of the options, then
press X to enter into the submenu.
In {Audio} - select disc’s soundtracks languages
In {Subtitle} - select disc’s subtitles languages
In {Disc Menu} - select disc’s menu languages
C Press S
T
to select a language and press OK.
Note If the language selected is not available on the
disc, the disc’s default language will be used instead.
To Audio In
socket on the
TV
From Video Out
socket on the
DVD Player
DVD Player (rear)
From Audio Out
sockets on the
DVD player
DVD Player (rear)
Remote control
(rear)
DVD Player (front)
1_dvd3040K_qsg_eng_55.indd 11_dvd3040K_qsg_eng_55.indd 1 2005-10-28 3:28:51 PM2005-10-28 3:28:51 PM
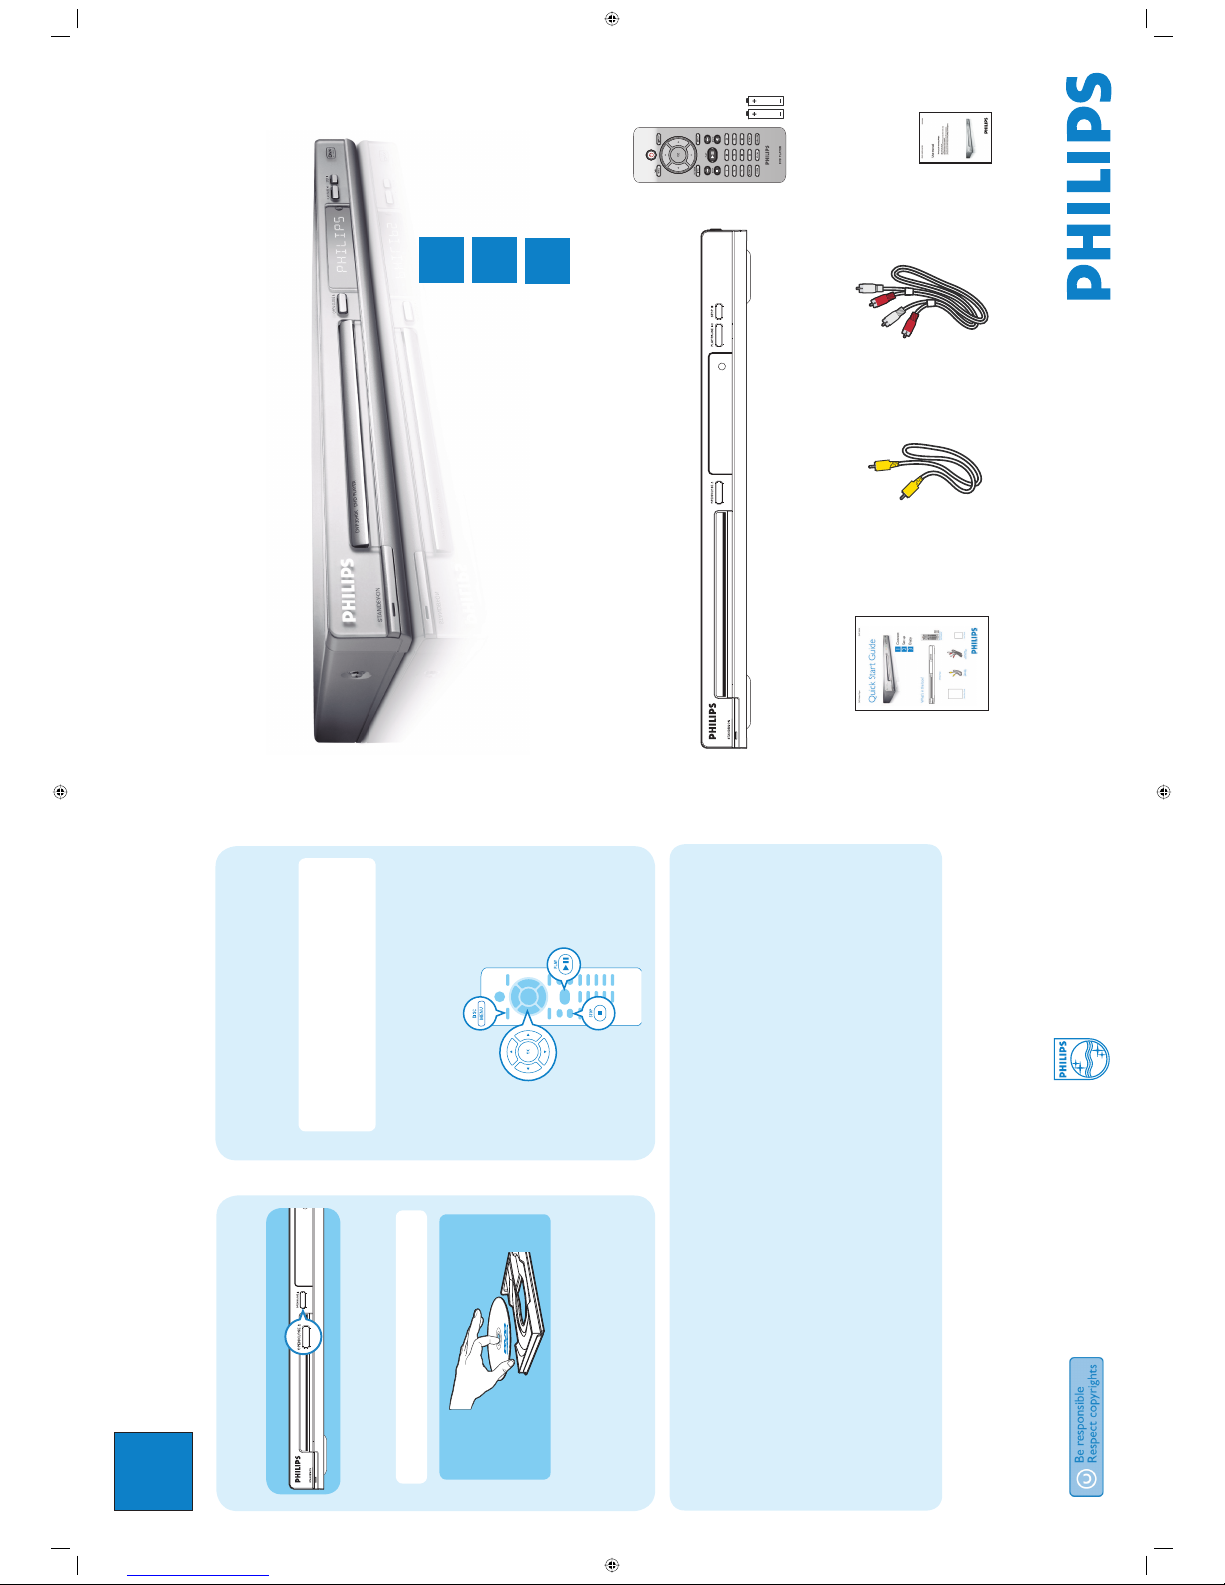
3
Enjoy
DVD Video Player DVP 3040K
Quick Start Guide
Connect
Set up
Enjoy
1
2
3
What’s in the box?
DVD Video Player
Video cable
(yellow plug)
Remote Control
and 2 batteries
User Manual
Audio cables
(red & white plugs)
Quick Start Guide
Need help?
User Manual
For more product information refer to the user manual of the DVD player
Online
Go to www.philips.com/support
2005 C Koninklijke Philips N.V.
All rights reserved.
www.philips.com
SL/0543/55_3
B
Start playback
A Playback may starts automatically when a disc has
been loaded in the disc tray.
Note If a disc menu appears on the TV:
1) Press S T W X to scroll through the options
available in the DVD menu.
2) Press
PLAY XÅ on the option you want to
start playback
B Press PLAY
XÅ
to start playback.
C To stop playback, press STOP Ç.
D Press DISC MENU to go back to the disc menu
anytime.
A
Inserting disc
A Press OPEN/CLOSE on the front of the DVD
player.
Note You can also hold down the STOP Ç button
on the remote control to open and close the disc tray.
B Place a disc into the disc tray with the label facing
up. For doubled-sided discs, load the side you want
to play facing up.
C Press OPEN/CLOSE on the front of the DVD
player again to close the disc tray.
DVD player (front)
Troubleshooting
For more troubleshooting tips, see the user manual.
Problem Tip
No power • Check if the AC power cord is properly connected.
• Press the STANDBY-ON on the front of the DVD player to turn on the power.
No picture • Check connection to TV and ensure the plugs are rmly in place.
No sound or distorted sound • Adjust the volume
• Check audio connections are in the correct input source.
Remote control does not work • Check the batteries are loaded correctly or replace the batteries with new ones.
• Reduce the distance between the remote control and the DVD player.
• Point the remote control directly toward the IR sensor.
1_dvd3040K_qsg_eng_55.indd 21_dvd3040K_qsg_eng_55.indd 2 2005-10-28 3:28:59 PM2005-10-28 3:28:59 PM
 Loading...