

Philips DVD750VR Quick start guide
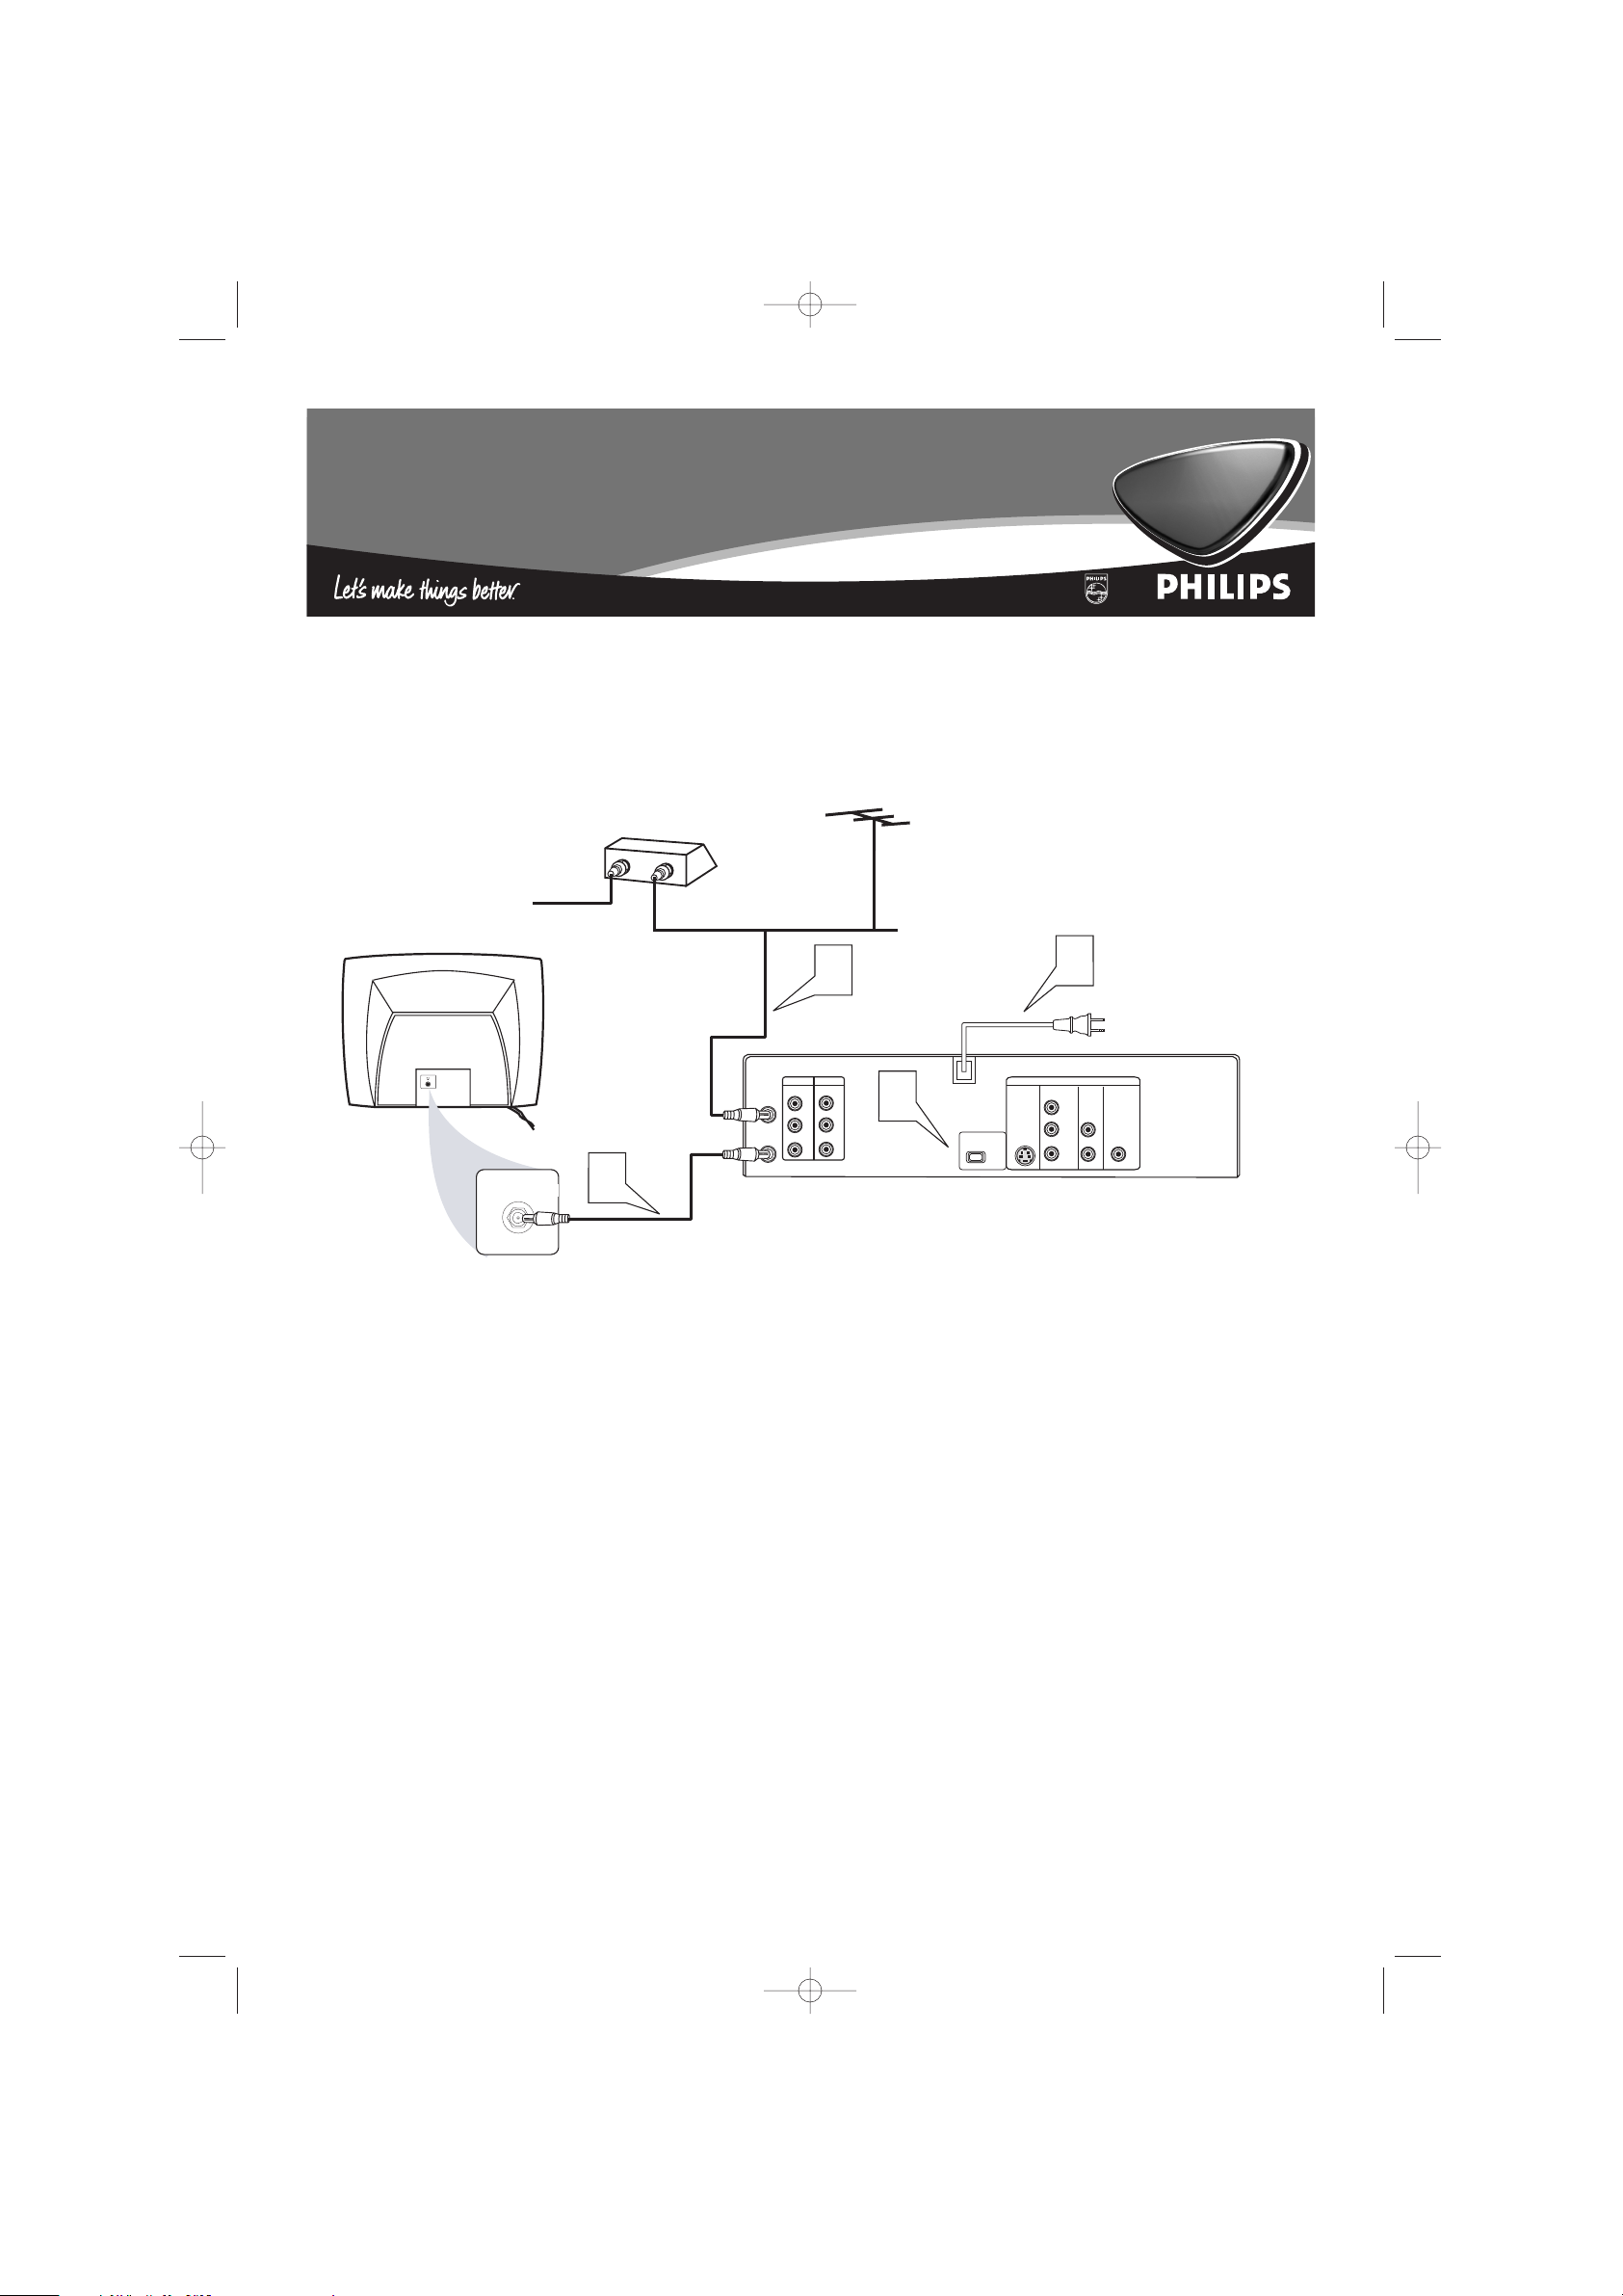
There are many ways to connect your new DVD/VCR to your Television and other equipment.This Quick-Use
Guide shows the easiest, most common connection.
Higher quality connections are explained in the accompanying owner’s manual and will provide better sound or
picture if your TV and/or audio system is compatible.
1
Disconnect all equipment from the power outlets. Connect the equipment to the power outlets only after you
have finished hooking up everything. Never make or change connections with equipment connected to the power outlet.
2
If you do not have a Cable Box, simply connect your Antenna or Cable TV signal directly to the ANT-IN jack
on the rear of the DVD/VCR.
If you do have a Cable Box (or Satellite Receiver), first connect the Cable TV (or Satellite) signal to the IN
jack on the Cable Box/Satellite Receiver. Then, use an RF coaxial cable (like the one supplied) to connect the
OUT jack of the Cable Box/Satellite Receiver to the ANT-IN jack on the DVD/VCR.
3
Connect the supplied black RF coaxial cable to the DVD/VCR’s ANT-OUT jack and to your TV’s ANTENNA
IN jack. The TV’s ANTENNA IN jack could be labelled 75-ohm, TV IN, or RF IN. Check your TV manual for details.
4
Set the INTERLACE/PROGRESSIVE SCAN SELECTOR to INTERLACE (I).
5
Connect the power cords of the DVD/VCR,TV, and Cable Box (if applicable) to a power outlet.
6
Turn on the TV power. Set the TV to channel 3. (If you cannot use channel 3 at your TV, you can use channel 4
instead. However, you must set the DVD/VCR’s output channel to 4. See the accompanying DVD/VCR owner’s manual for details.)
7
Press STANDBY-ON 2 on the DVD/VCR or its remote to turn on the DVD/VCR. The first time you
turn on the DVD/VCR, you should complete the VCR setup. See the other side of this Quick-Use Guide
for details.
DVD750VR
DVD750VR
Quick-Use Guide
Quick-Use Guide
750VR qug3 30/07/2003 4:57 PM Page 1
TV SIGNAL
REAR OF TV
(EXAMPLE ONLY)
CABLE BOX
IN
CABLE
RF COAXIAL CABLE
OR
OUT
ANTENNA or
CABLE TV SIGNAL
2
ANTENNA IN
3
ANT-IN
ANT-OUT
DVD/VCR VCR
AUDIO OUT AUDIO IN
VIDEO OUT VIDEO IN
S-VIDEO
COMPONENT
OUT
LL
4
RR
PROGRESSIVE
I P
VIDEO OUT
5
DVD
Y
Pb/
Cb
Pr/
Cr
AUDIO
OUT
DIGITAL
AUDIO OUT
L
COAXIAL
R
8239 300 26702
H9420UD/0VMN03701*****
Quick-Use Guide (cont’d)
Quick-Use Guide (cont’d)
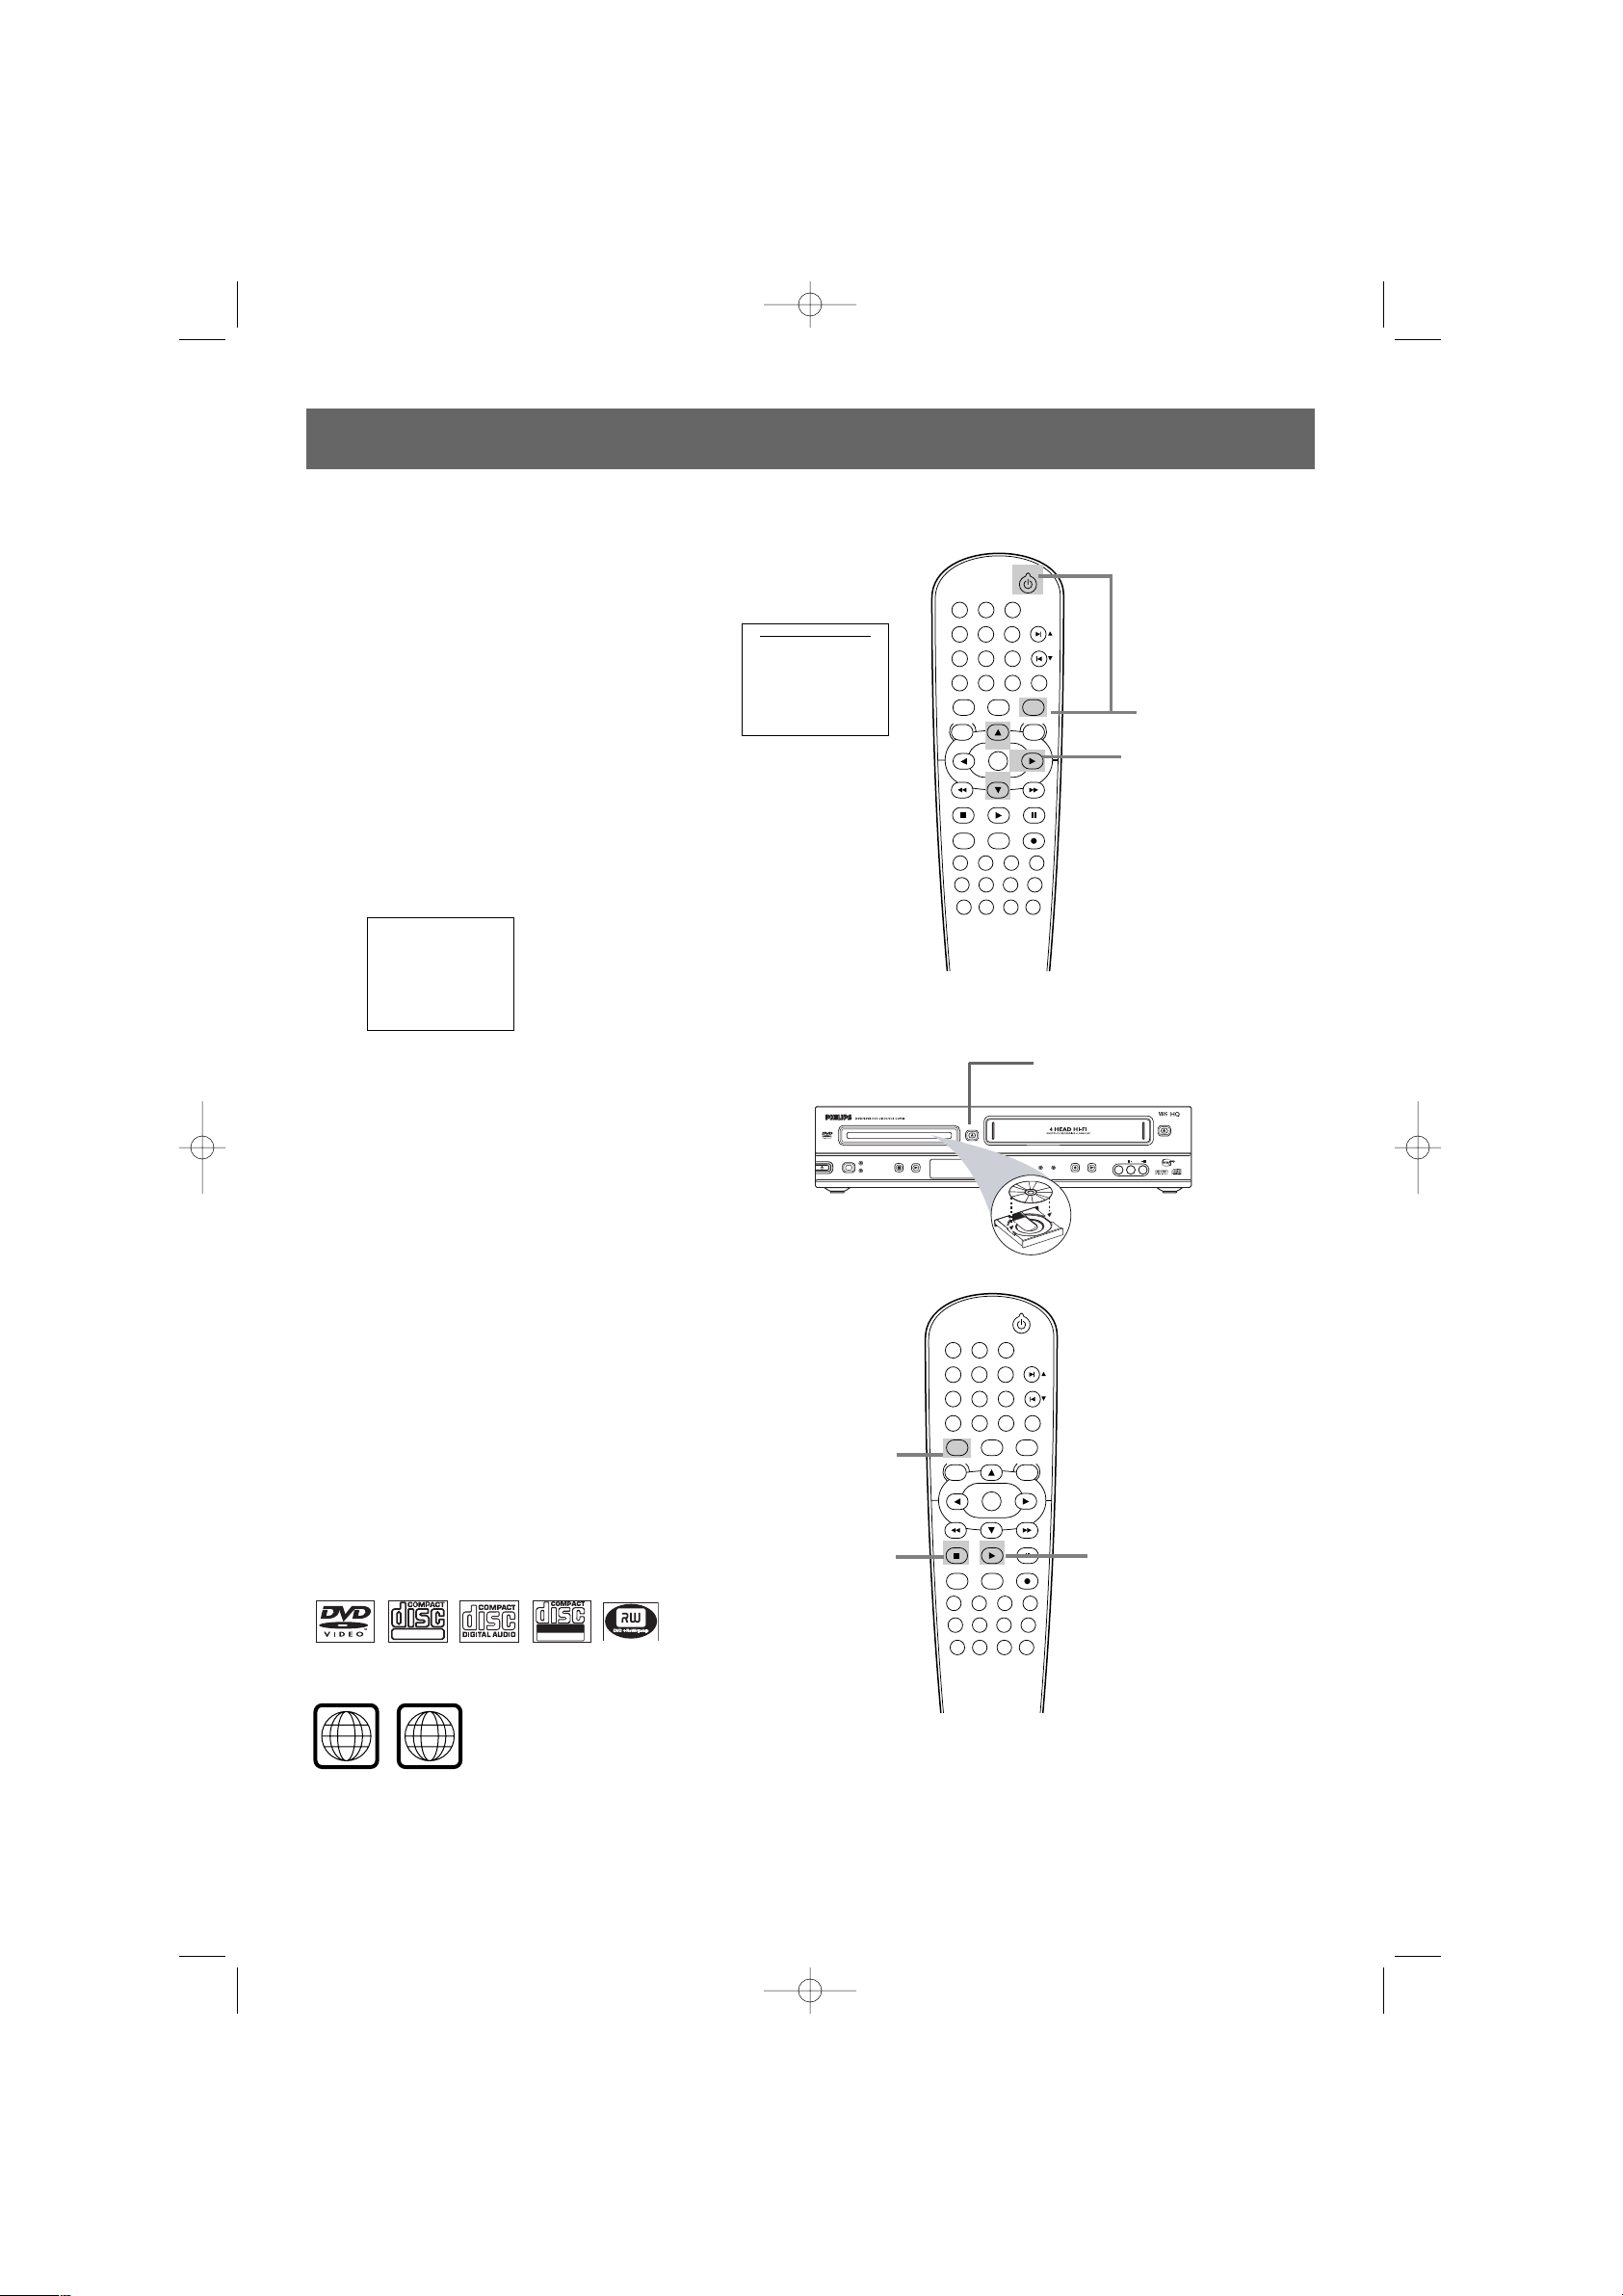
Playing a Disc
1
With the TV and DVD/VCR on, press the DVD
button to put the DVD/VCR in DVD mode.
2
Press OPEN/CLOSE / to open the disc tray. Put
a Disc in the tray with the label facing up and the
shiny side facing down.
Press OPEN/CLOSE / again to close the tray.
3
Playback may start automatically. If not, press
PLAY B. If a DVD Disc menu appears, use the 431
2, OK, or Number buttons to select features or start
playback. Follow the instructions in the menu.
4
To stop playing a Disc, press STOP 9.
Setting Up the VCR the First Time
1
Turn on the TV and set it to channel 3.
2
Press VCR, then press STANDBY-ON 2
to turn on the DVD/VCR. This display will
appear only the first time you turn on the
DVD/VCR. (If you have turned on the power
previously, you will not see this menu. See the
owner's manual to select a language and set up
channels.)
3
Press 3 or 4 to select English, French, or Spanish as the
language for VCR displays. Then, press 2.
4
The AUTO SET UP message will appear. Press 2 to set up TV
channels for the VCR. When set up is complete, the lowest
TV channel will appear on the TV.
AUTO SET UP
Playable Discs
The DVD Player of the DVD/VCR will play the following Discs.
DVDs must have a Region Code of ALL regions or Region 1.
DVDs must be recorded in the NTSC Color System.
Turn on
the TV to
channel 3.
3-4
2
STANDBY-ON
PLAY
VCR/TV
VCRDVD
OK
MENU MENU
SYSTEM
RETURN TITLE
A-B
CLEAR/RESET SLOW
SUBTITLE ZOOM
ANGLE
REPEAT REPEAT
AUDIO
SEARCH MODE
DISPLAY
SKIP / CH
DISC/VCR
PAUSESTOP
VCR Plus+ RECORDTIMER SET
SPEED
1 2 3
7
6
5
4
8
9
0
+10
4
1
2
1
3
LANGUAGE SELECT
2 ENGLISH [ON]
FRANCAIS
ESPAÑOL
750VR qug3 30/07/2003 4:57 PM Page 2
SEARCH MODE
DISPLAY
REPEAT REPEAT
AUDIO
A-B
SUBTITLE ZOOM
ANGLE
RETURN TITLE
CLEAR/RESET SLOW
VCR/TV
SYSTEM
MENU MENU
OK
PLAY
VCR Plus+ RECORDTIMER SET
SPEED
1 2 3
5
4
6
0
9
8
STANDBY-ON
VCRDVD
DISC/VCR
PAUSESTOP
+10
SKIP / CH
7
ALL
DIGITAL VIDEO
1
Recordable
ReWritable
STANDBY-ON
SOURCE
PROGRESSIVE SCAN DVD VIDEO/CD PLAYER
STOP PLAY
DVD
VCR
OPEN/CLOSE
STOP/EJECT
RECORD
PLAY
RECORD
TIMER RECORD
IR
VIDEO
LR
AUDIO
 Loading...