

Philips DVD727-17 User Manual
1
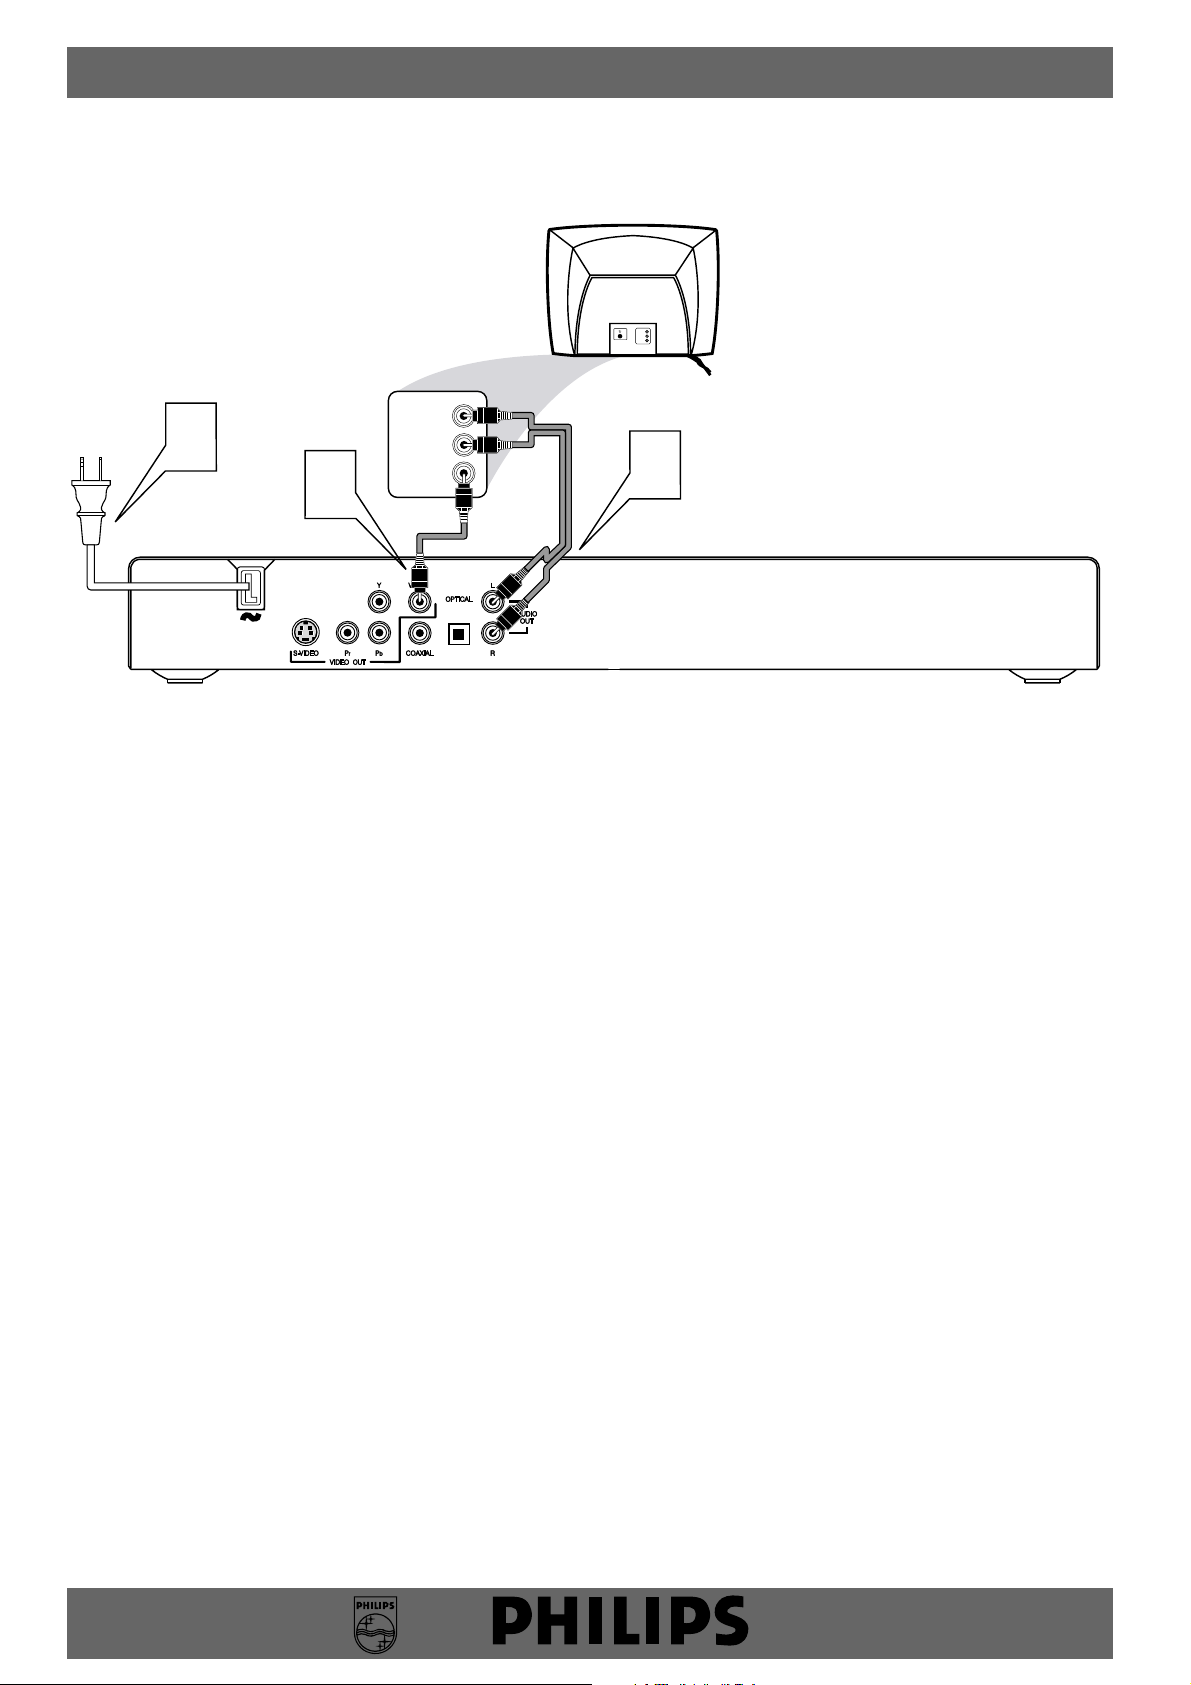
Disconnect all equipment from the power outlets. Connect the equipment to the
power outlets only after you have finished hooking up everything. Never make or change connections with equipment connected to the power outlet.
2
Connect the Player’s yellow VIDEO (VIDEO OUT) jack to the corresponding VIDEO
IN jack on your TV. Use the supplied video cable, which has yellow ends. On the TV, the
Video In jack is usually yellow and might be labeled video, CVBS, composite, or baseband.
3
Connect the supplied audio cable to the AUDIO OUT (left and right) jacks on the
DVD Player and to the left/right AUDIO IN jacks on the TV. The supplied audio cable
has red and white ends. Match the cable colors to the jack colors. On the TV, the Audio In jacks
are usually labeled Audio. The red jack is the right (stereo channel) and the white jack is the left
(stereo channel).
4
Plug the power cords of the DVD Player and the TV into an active power outlet.
Press STANDBY-ON yyon the front of the Player to turn it on.
5
Turn on the TV power and set it to the correct Video In channel. Such channels may
be called AUX or AUXILIARY IN,AUDIO/VIDEO or A/V IN, EXT1 or EXT2 or External In, etc.
These channels are often near channel 00, or your TV’s remote may have a button or switch
that selects a Video channel. See your TV manual for details. Or, go to your lowest TV channel
(01 or 02), then change TV channels downward until you see the blue DVD screen on the TV.
Remember...
● Connect the DVD Player directly to the TV. For example, do not connect the Player to a VCR, then
connect the VCR to a TV. This type of connection may distort the picture and sound or give you a
black and white picture. Also, your VCR might have the copy protection system, which could distort
the DVD image or prevent playback of some Discs.
● If your TV does not have red, white, and yellow Audio and Video In jacks, see the DVD
Player’s owner’s manual for other hookup options. If your TV only has a single Antenna
In or RF In jack, you will need an RF modulator. See the owner’s manual for details.
● If a DVD does not play properly, please contact Philips at 1-800-531-0039 for assistance. Due to the
inconsistency of Disc formats provided by various Disc manufacturers, your DVD Player may require
a playability enhancement. As DVD technology has advanced, these enhancements have become
both common and easy to complete.
QUICK-USE GUIDE
There are many ways to connect your new DVD Player to your Television and other equipment.This
Quick-Use Guide shows the easiest, most common connection between the DVD Player and a TV using
the supplied cables. Higher quality connections are explained in the accompanying owner’s manual and
will provide better sound or picture if your TV and/or audio system is compatible.
LEFT AUDIO IN
VIDEO IN
RIGHT AUDIO IN
3
2
4
Back of TV
(example only)
LEFT AUDIO IN
VIDEO IN
RIGHT AUDIO IN
Playable Discs
This DVD Player will play the following types of Discs:
Region Codes
DVDs must be labeled for ALL regions or for Region 1 in order to
play on this DVD Player. You cannot play Discs that are labeled for
other regions. If one of these logos appears on your DVD or its
case, it should play on this Player.
Color Systems
Recordings are made according to a color system.The most common color system in the United States is NTSC.
This Player is compatible with NTSC and PA L. Make sure the Discs
you play were recorded in NTSC or PAL and your TV is NTSC or
PAL compatible. Look for the color system of the DVD on the DVD
or on the Disc case. Set the Player's TV TYPE accordingly. See the
owner's manual for details.
QUICK-USE GUIDE
1
3,4
DVD727/EL6548E001
3141 015 23261
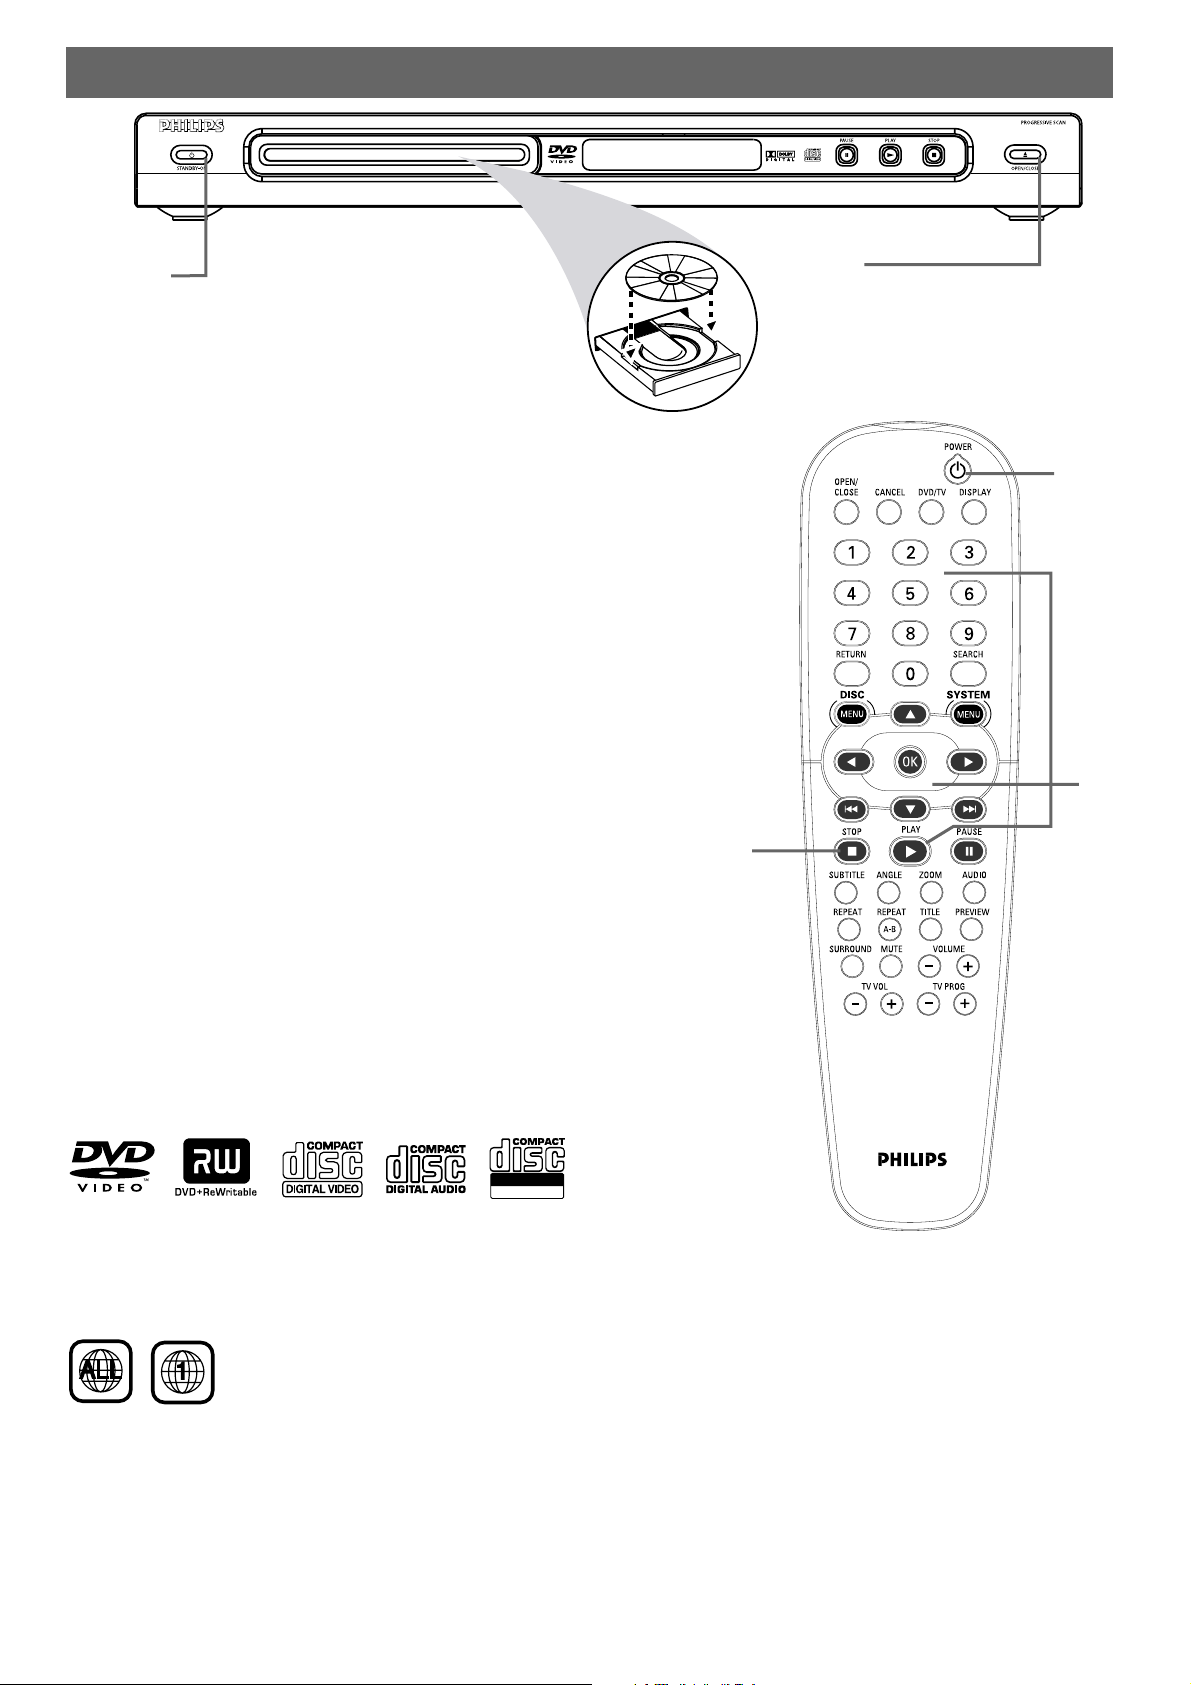
To simply play a Disc, follow these steps. Additional features are described in the accompanying owner’s manual.
1
Press STANDBY-ON
yy
on the front of the Player to turn
it on. Or, press POWER yyon the remote.
2
Turn on your TV. Set it to the correct Video In chan-
nel. You should see the blue DVD screen on the TV (if no
Disc is in the Player).
3
Press OPEN/CLOSE A (on either the Player or the
remote) to open the disc tray.
4
Load your Disc in the tray, with the label facing up, and
the shiny side facing down. If the Disc (DVD) is two-sided,
make sure the label of the side you want to play is facing up.
Press OPEN/CLOSE A again to close the tray.
5
Play may start automatically. If not, press PLAY B. If a
Disc menu appears, use the Bsop and OK buttons or the
Number buttons to select features or start playback from a
menu. Follow the instructions in the Disc menu.
6
To stop playing the Disc, press STOP C.
1
5
6
Recordable
ReWritable
 Loading...