

Page 1
Page 2
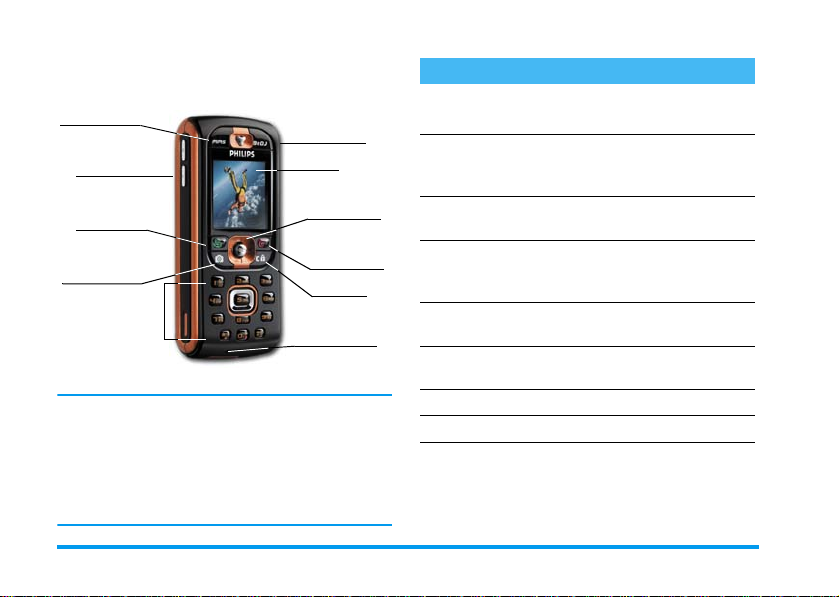
Discover your phone
m
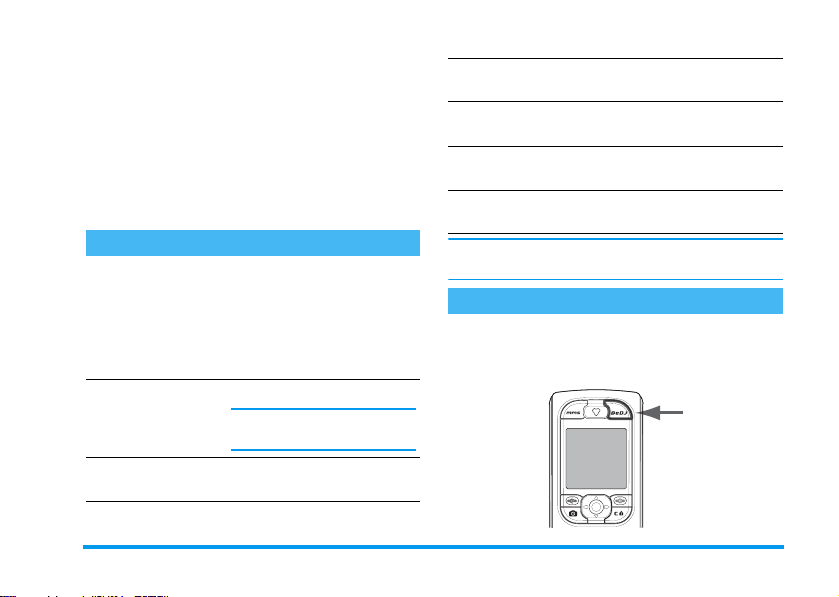
MMS key
Side keys
(volume)
Pick up and
Wap
(
key
C
camera key
Keypad
Philips continuously strives to improve its products.
Therefore, Philips reserves the rights to revise this user
guide or withdraw it at any time without prior notice.
Philips provides this user guide «as is» and does not accept, except as required by applicable law, liability for
any error, omission or discrepancy between this user
guide and the product described.
b
Screen
Navigation
,
and
Hang up and
)
on/off key
c
Microphone
key
key
key
How to...
Switch phone On/Off
Enter PIN code
Set the ringer volume
Make a cal l
Answer a call
Set conversation
volume
End a call
Access the main menu
Access the
Phonebook
Press and hold ).
Enter your PIN code using
the keypad and press
or
#
to confirm.
Press the side key up or
down when in idle mode.
Enter the phone number on
the keypad and press
to dial.
Press
(
phone rings.
Press the side key up or
down during the call.
Press ).
Press , in idle mode.
Press- in idle mode.
when your
,
(
Page 3
Use the
Phonebook
Access
BeDJ
Access the
Go to previous menu
Quickly return to idle
when browsing menus
Lock/unlock the keypad
View the last call made
Change the
language used
Access a function
in the menu
Call list
Browse the list by mov-
+or-
ing
(
to call the selected
name.
Press b in idle mode.
Press+ in idle mode.
Press c.
Press and hold c.
Press and hold c when
in idle mode.
Press ( in idle mode.
Press and hold 0, move
+
or - to select the
language and press
Press
>
to select a function,
then press
sub-menu. Repeat to reach
the desired function.
,
, move<or
,
and press
,
.
to enter the
Activate a programmed
Voice command
Launch
WA P
Press and hold the
key.
Press and hold (.
,
The carousel
A carousel is a circular loop of icons displayed on the
screen. Each icon represents a feature or operation of
your phone.
All icons don’t fit within the screen; the hidden ones appear when scrolling< or>.
,
You access the main carousel by pressing
idle mode. Move
wise) and press
choice is selected, or
ousel or list will then appear.
Pressing+ or - will alternate between two options, such as Activate/Deactivate, On/Off, Increase/
Decrease a value, etc.
<
(anti clockwise) or> (clock-
,
when the feature or option of your
c
to cancel. Another sub-car-
when in
1
Page 4

Browse carousels and lists until you reach the desired
feature or opt ion. When navigating in a list, a scroll bar
located on the right hand side of the screen shows your
actual position in the list. With the navigation key, you
can then select or adjust all the functions of your phone
as described in the relevant chapter of this user guide.
2
Events
Some events may modify the idle screen (missed call,
new message, etc.). Press
sponding menu or long press
idle screen.
,
to access the corre-
c
to go back to the
Page 5

Table of contents
1. Get started ......................................... 7
Insert the SIM card ...........................................7
Switch on the phone ........................................8
Set date and time ..............................................8
Copy the SIM phonebook ...............................8
Charge the battery ...........................................9
2. Main features ...................................10
Access and consult the phonebook ........... 10
Make a call ....................................................... 10
Answer and end a call ................................... 10
Call handsfree ................................................. 10
Change the ringer .......................................... 11
Lock / unlock the keypad ............................. 11
Activate the silence mode ........................... 11
Activate the vibra alert ................................. 11
Fotocall: see and hear who’s calling ........... 12
Foto Talk: add voice to pictures ................ 12
Read your mobile phone number .............. 12
Mute the microphone ................................... 13
Unmute the microphone .............................. 13
Record a conversation .................................. 13
Adjust the earpiece volume ......................... 13
Clear the call list ............................................ 13
Clear the SMS list .......................................... 13
Clear the phonebook ....................................14
Quickly scroll a list .........................................14
Other features during a call .........................14
3. Menu tree ........................................ 15
4. Text or number entry .................. 18
T9 ® text Input ................................................18
What is it? ..........................................18
How to use it? .....................................18
Basic text input ...............................................19
5. Taking pictures ............................... 20
How to... ..........................................................20
Pictures shots ..................................................20
Preview mode settings ..........................20
Take a picture .....................................21
Foto Talk: add voice to pictures ............22
Review the pictures ..............................23
Receive a call .......................................23
Make a call .........................................23
Settings ..............................................................23
Colour mode .......................................23
Camera mode ..................................... 24
Sound settings ..................................... 24
Picture resolution ............................... 24
Picture quality ................................... 24
Self-timer ........................................... 24
6. Music & Mix ..................................... 25
How to... ..........................................................25
Table of contents 3
Page 6

Get started ......................................................25
Activate tracks .....................................25
Change track melodies and instruments 26
Change the tempo ................................26
Start recording ....................................27
Manage the recording ..........................27
Record a mix ................................................... 27
Create your own style and mix .................. 27
From existing files ................................ 28
From scratch .......................................28
Save your own styles ..................................... 28
Receive a call ................................................... 28
7. Phonebook ....................................... 29
SIM card phonebook ..................................... 29
Phone’s phonebook ....................................... 30
Add names in the phonebook ..................... 30
In the SIM card ..................................30
In the phone ........................................30
Add a record in the phone’s phonebook .31
Own numbers .....................................31
Fotocall: see & hear who’s calling .............. 31
Edit and manage names ................................. 32
In the SIM card ..................................32
In the phone ........................................33
Make calls .........................................................34
Emergency number ..............................34
Other number .....................................34
8. Settings .............................................. 36
Sounds ............................................................... 36
Silent ................................................. 36
Ringer volume .................................... 36
Ringer ................................................ 36
Messages Ringer .................................. 36
Equaliser ............................................ 36
Key tones ............................................ 36
Sounds Alerts ...................................... 37
Vibra alert ......................................... 37
Display ............................................................... 37
Screen saver ........................................ 37
Animation ......................................... 38
Backlight ........................................... 38
Wallpaper .......................................... 38
Hotkeys ............................................................38
Voice command ..............................................40
Voice dial ..........................................................41
Security .............................................................42
Keypad lock ........................................ 42
Public names ...................................... 42
Call barring ....................................... 42
Change codes ...................................... 43
PIN protection ................................... 43
Network ........................................................... 43
GPRS attach ...................................... 44
Register again ..................................... 44
Preferred list ....................................... 44
4Table of contents
Page 7

Access settings ......................................44
Time and date ................................................. 46
Clock display ....................................... 46
Set date ..............................................46
Date format ........................................46
Time zone ..........................................46
Daylight saving ...................................46
Set time ..............................................46
Profiles .............................................................. 47
Language ........................................................... 47
9. Messages ...........................................49
SMS .................................................................... 49
Send a SMS ........................................ 49
Read SMS ..........................................50
SMS settings ....................................... 51
SMS Archive .......................................52
E-Mail ................................................................ 52
Settings ...............................................53
Write and send an e-mail ....................55
Receive and read e-mails ......................56
Broadcast Message ........................................ 60
Instant message .............................................. 60
MMS .................................................................. 61
Create an MMS ..................................61
Receive an MMS .................................63
Manage folders ....................................65
Settings ...............................................65
10. Infrared .......................................... 68
Position of devices .........................................68
Send data ..........................................................68
Select an item ......................................68
Send the selected item ...........................69
Receive data ..................................................... 69
Activate IrDA .....................................69
Save the data received ..........................69
Use the phone as a modem ...................70
11. Multimedia ..................................... 71
Picture album .................................................. 71
Sound album .................................................... 71
Demo mode .................................................... 72
Memory Status ................................................72
Sound recording .............................................73
BeDJ ................................................................... 73
Camera ............................................................. 73
12. Games & Appli. ............................ 74
Euro converter ............................................... 74
Calculator ......................................................... 74
Alarm clock ...................................................... 74
Organiser .........................................................75
Create a new event ..............................75
Modify an event ..................................75
Brick Game ...................................................... 77
Table of contents 5
Page 8

13. Call information ........................... 78
Call settings ..................................................... 78
Call forward .......................................78
Mailboxes ...........................................78
Auto redial .........................................79
Any key answer ...................................79
Call waiting ........................................ 79
Caller ID ............................................79
Call list .............................................................. 79
Call list ...............................................80
Reset ...................................................80
Call counters ................................................... 80
GSM counters .....................................80
GPRS counters .................................... 81
14. WAP ............................................... 82
Internet services ............................................. 82
Launch a WAP session .........................82
End a WAP session ..............................82
Homepage ...........................................82
Bookmarks ..........................................83
Enter address .......................................83
Settings ...............................................83
Push inbox .......................................... 85
Options ............................................................ 85
Homepage ...........................................85
Back ................................................... 85
Forward ............................................. 86
Refresh ............................................... 86
Save as homepage ................................ 86
Save as... ............................................ 86
Exit ................................................... 86
Receive a call ...................................... 86
15. Operator services ........................ 87
GSM strings ...................................................... 87
DTMF tones .....................................................87
Pause and wait characters ................... 87
For example: access your answering
machine ............................................. 88
Make a second call .........................................88
Answer a second call ..................................... 88
Answer a third call .........................................89
Conference call ............................................... 89
Explicit call transfer ........................................90
Precautions ...........................................91
Troubleshooting .................................. 95
Icons & symbols .................................. 98
Philips authentic accessories ............ 99
Declaration of conformity ..............100
6Table of contents
Page 9
1 • Get started
Read the safety instructions in the «Precautions» section before use.
To use your phone, you must insert a valid SIM card
supplied by your GSM operator or retailer. The SIM
card contains your subscription, your mobile number,
and memory in which you can store phone numbers
and messages (see “Phonebook” page 29).
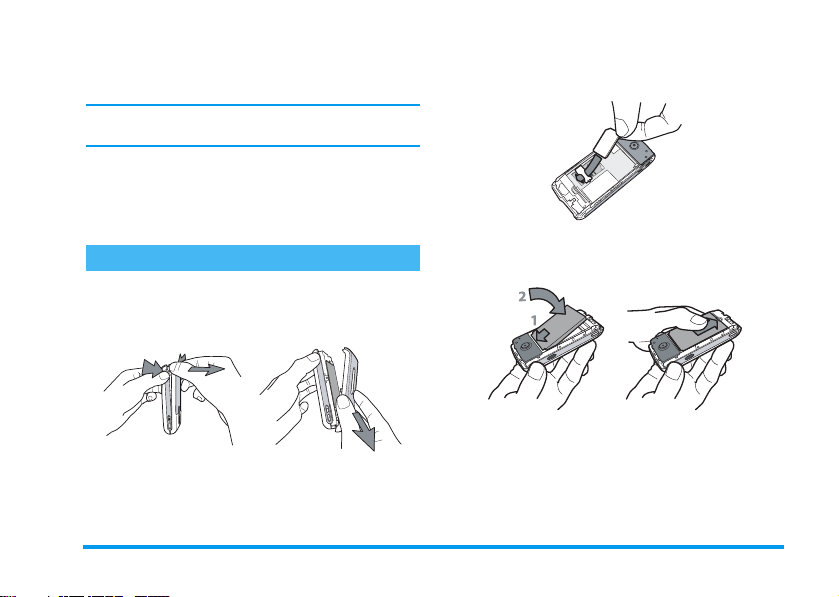
Insert the SIM card
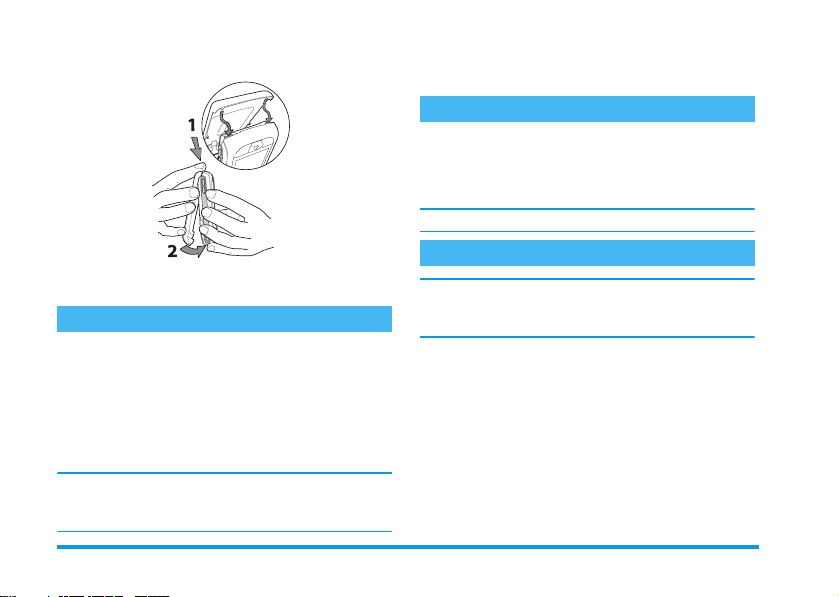
1.
Press on the two clips on each side of the back
cover of your phone as shown below and remove
it.
2.
Remove the SIM card from its holder and insert it
under the metal clip holder, until it stops. Be
careful that the clipped corner of the card is in the
correct corner.
3.
Slide the battery door into its slot, metallic connectors downwards, until it stops. Then lock it by
pushing it downwards.
4.
Replace the back cover of your phone: hook the
front housing onto the hinges on the top of the
phone, then press the bottom down until the
latch catches.
Get started 7
Page 10
3.
Enter your PIN code. If you make a mistake,
press
c
. Then press,or #.to confirm.
Set date and time
As prompted by the phone at first switch on, set the
date by pressing the appropriate numeric keys (press
c
to erase a number), then press,to validate.
Proceed in the same way to set the time.
For complete date and time options, see page 46.
Copy the SIM phonebook
5.
Remove the protective film covering the screen
before using the phone.
Switch on the phone
1.
To switch on the phone, press the ) key.
2.
When you switch on the phone, you may be
prompted to enter the PIN code, which is the 4
to 8-digit secret code of your SIM card to protect
it from unauthorised use. It is preconfigured and
communicated to you by your operator or
retailer. To personalise the PIN code, see page 43.
If you enter a wrong PIN code 3 times, your SIM card
is blocked. To unblock it, you must request the PUK
code from your operator.
8 Get started
If you do not copy the SIM phonebook at very first
switch, you will be able to do it directly from the phonebook menu (see page 29).
If you had a mobile phone before and are using the
same SIM card, the card might contain all or part of
your current phonebook. The mobile phone detects
this and a message asks you if you want to copy your
SIM phonebook onto the built-in phonebook. Press
c
to cancel or , to accept. Whether you accepted, aborted or cancelled the copy, the phonebook located on your phone is always automatically set as your
default phonebook. To switch back to the SIM phone-
Page 11
book, press , and select
settings
>
Phonebook select
Phonebook >Phonebook
>
In SIM card
.
Charge the battery
Your phone is powered by a rechargeable battery. A
new battery is partially charged and an alarm will warn
you when the battery reaches low.
We recommend that you do not
when the phone is switched on: you may lose all your
personal settings (see information on battery safety,
page 93).
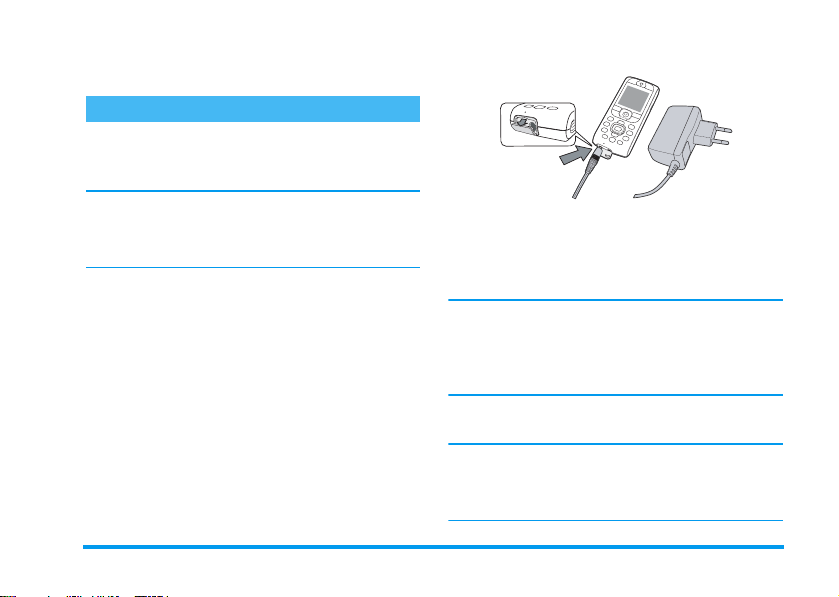
1.
Once the battery and battery cover are clipped on
the phone, plug the connector of the charger
(supplied with the phone, in the box) into the
LEFT
hand socket at the base of the phone on one
end, then plug it into a main AC power socket
with easy access on the other end.
2.
The battery symbol indicates the state of charge:
• During charging the 4 charge indicators change;
Each bar represents around 25% of charge and it
takes around 1.45 hours to fully recharge your
mobile phone.
Get started 9
remove
the battery
• When all 4 bars are steady the battery is fully
charged, you can disconnect the charger.
Depending on the network and condition of use,
talk time can be up to 6 hrs and stand-by time up
to 300 hrs.
Keeping the charger plugged to the mobile when the
battery is fully charged doesn’t damage the battery. The
only way to turn off the charger is to unplug it, so use
an easily accessible AC power socket. You can connect
the charger to an IT supply (Belgium only).
3.
If you don’t intend to use your phone for several
days, we recommend you disconnect the battery.
You can use the phone while it is on charge (note that
the vibra alert goes
the battery is completely flat, the battery icon will only
reappear after 2 or 3 minutes of charging.
Off
when plugging the charger). If
Page 12
2 • Main features
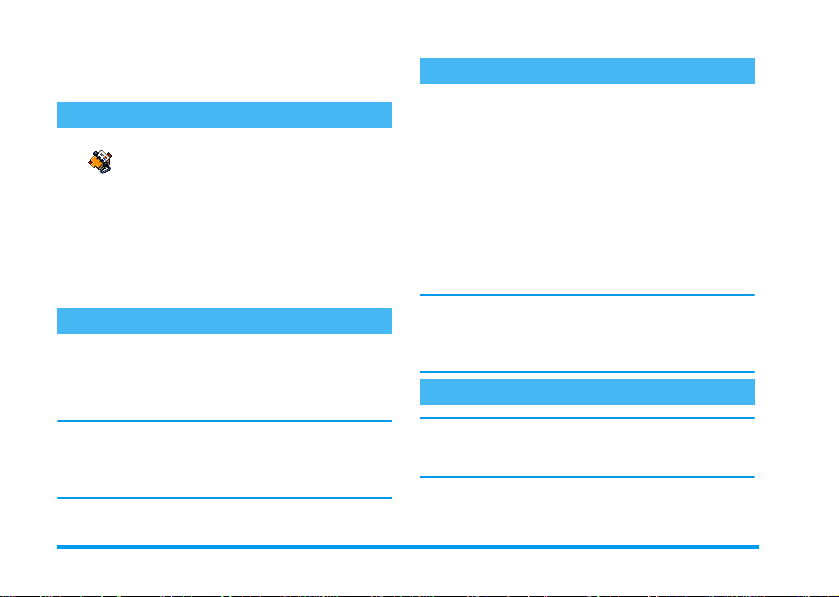
Access and consult the phonebook
In idle mode, press-. Depending on
Phonebook
screen may vary: see “Phonebook” page 29 for details
on this subject.
To consult the phonebook during a ca ll, press
View Names List
lect
entries by pressing
to return to the in-call screen.
Make a call
1.
In idle mode, enter the phone number using the
keypad. To correct an error, press
2.
Press ( to dial the number and press ) to
hang up.
For an international call, enter the «+» sign instead of
the usual international prefix by pressing and holding
*
see “Make calls” page 34.
the selected phonebook (in SIM or in
phone), the content that appears on the
,
, press , and scroll through the
-
or +. Then press
. To learn how to make a call from the phonebook,
c
c
.
twice
Answer and end a call
When receiving a call, depending on yo ur subscription
and if the caller has permitted this information to be
transmitted, his number may be displayed. If the
number is stored in the selected phonebook (see
page 29), the corresponding name is displayed instead
of the number.
1.
To answer the call, press (.
2.
, se-
To reject a call, press ). If you have activated
“Call forward” (see page 78), the call is diverted
to a number or voice mail.
3.
To hang up, press ).
The phone will not ring if in
page 11). If you have selected
page 79), you can accept a call by pressing any key (except )).
Any Key Answer
Call handsfree
For your own comfort and safety, ensure you move the
phone away from your ear when calling handsfree, especially when increasing the volume.
1.
If you selected the phonebook in your SIM card,
select a record, press
,
twice to access the next
Silence
mode (see
(see
10 Main features
Page 13
carousel, then select
press
,
2.
If you selected the phonebook in your phone,
proceed the same way to call the default number,
or press
the list, then press
If already on the phone, press,twice to switch to
handsfree mode and back.
to dial the number.
<
or >, select another number in
Change the ringer
1.
Press,, select
,
press
2.
Move+or-to select a ringer in the list,
then press
again.
,
to confirm your choice.
Lock / unlock the keypad
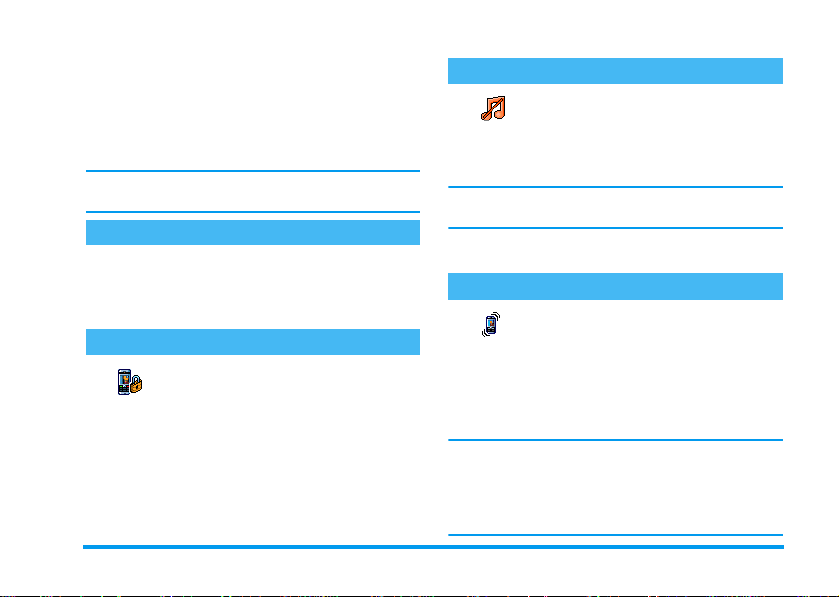
You can lock the keypad to protect the
Keypad lock
To lock the keypad, press and hold
screen. To unlock the keypad, press and hold
again.
keys from being pressed accidentally
(e.g., when the phone is in your pocket).
,
Settings
and select
Call handsfree
Call handsfree
>
Sounds
>
Ringer
c
when in idle
and
Activate the silence mode
If you don’t want your phone to ring
when you receive a call, you can deacti-
Silent
vate the ringer as follows:
,
Press
.
press
You can also press the side key while in idle screen until
the volume is set to silence.
You can also mute the ringer when receiving a call by
pressing the side key down.
and
and select
-
until the volume is set to On.
Settings >Sounds
Activate the vibra alert
If you want your phone to vibrate when
Vibra alert
1.
2.
c
Activating the vibra doesn’t mute the ringer. If you
want to mute it and keep the vibra function on, activate the
The vibra alert is automatically deactivated when you
plug the charger.
you receive a call, you can activate the vi-
bra alert as follows:
Press ,, select
and press ,.
Move + or - to select On or
,
to confirm.
Silent
mode as described above.
Settings >Sounds >Vibra alert
>
Silent
Off
and press
and
Main features 11
Page 14
1.
Foto Talk: add voice to pictures
This feature, which is available when using the camera
and also from the
send a message made of a picture and a sound.
1.
When in idle mode, press C to activate the
camera.
2.
Press C to take a picture, then press , to
access the option and select
3.
Press , again to access the Voice memo
recording window.
4.
Press ,, select the person you want to send it
to and validate the list. Press
your message.
This will send one message to one person, without text.
See “MMS” page 61 for details on this feature.
Picture album
, allows you to quickly
Send by MMS
,
.
twice to send
Fotocall: see and hear who’s calling
This feature is available only when selecting the phonebook in the phone (not the one in the SIM card).
This feature allows you to link one or several names to
a gr oup . W he n a n am e in th at g ro up cal ls , it wi ll a pp ear
along with the corresponding picture, and the melody
defined for that group will ring.
When in idle mode, press C to activate the
camera, and press
friend.
2.
Select
Multimedia
Record them saying something and save it in the
Sound album
3.
Select
Phonebook
tings
>
Groups
friend’s voice, then their picture.
4.
Press -, select a name in your phonebook and
,
press
it to the group that you renamed.
C
to take a picture of your
>
Sound recording
.
>
Phonebook set.
. Rename a group and select your
. Press , and choose
>
Group set-
Select group
>
New
to link
Read your mobile phone number
To read your own mobile phone number, press
when in idle mode and select
,
, select
Show
number is displayed if present on your SIM card. If
not, select
If your own number has been stored in the Phonebook,
you can read it during a call. See “Access and consult
the phonebook” page 10.
and press,again. Your phone
New
, then follow the instructions.
Own numbers
-
, then press
12 Main features
.
Page 15
Adjust the earpiece volume
During a call, move the side key up or down to increase/decrease the volume.
Mute the microphone
You can mute the microphone so that
your caller cannot hear you.
Mute
During a call, press
confirm by pressing
,
,
, select
.
Mute
Unmute the microphone
To unmute the microphone during a
Unmute
call, press
firm by pressing
is unmuted.
,
, select
Unmute
,
. The microphone
and con-
Record a conversation
In most countries, conversation record-
Record dialogue
to record the conversation you have with them and only
record if they agree. You should also keep any recording
ing is subject to law regulation. We advise you to notify the caller if you intend
private. 1 min. is the maximum recording time available (see “Sound recording” page 73).
To record a conversation during a call:
1.
and
While one or several simultaneous calls are in
progress, press
ousel.
If you select
voice is recorded.
2.
Select
c,,
3.
In all cases, and when hanging up, an edit window allows you to name the recording.
4.
Press,to save the recording, which is then
available in the menu
,
to access the call context car-
Mute
, then
Record dialogue
Record dial ogue
or hang up to end the recording.
and press,. Press
Multimedia> Sound album
Clear the call list
To clear your call list, press
Call Info
>
Reset
lect
,
twice to reset the call list.
Call list
Clear the SMS list
To clear the whole messages list at once, press
Messages
>
SMS
>
Read SMS
select
,
twice to reset the SMS list.
>
, only the caller’s
,
>
Reset
,
Delete all SMS
and se-
. Press
and
. Press
Main features 13
.
Page 16
You can also delete all the SMS messages from the
Archive
menu. Deleting your SMS list is useful to free
memory space in order to receive new messages.
Clear the phonebook
To clear the content of your phonebook at once, press
,
and select
all
. Press , to reset the phonebook content.
This option only applies to the phonebook in your
phone, NOT to the SIM phonebook.
Phonebook
>
Phonebook set.
>
SMS
Delete
Quickly scroll a list
When browsing a list (of ringers, events, etc.), press
0
to scroll page per page instead of item by item.
Other features during a call
- Change the equalizer settings (see page 36),
- Add a name to the phonebook (see page 30),
- Write and send a message (see page 49),
- Read a message (see page 50),
- Consult your Call list (see page 79),
- Consult your Organiser (see page 75),
- Make a second call (see page 88).
14 Main features
Page 17
3 • Menu tree
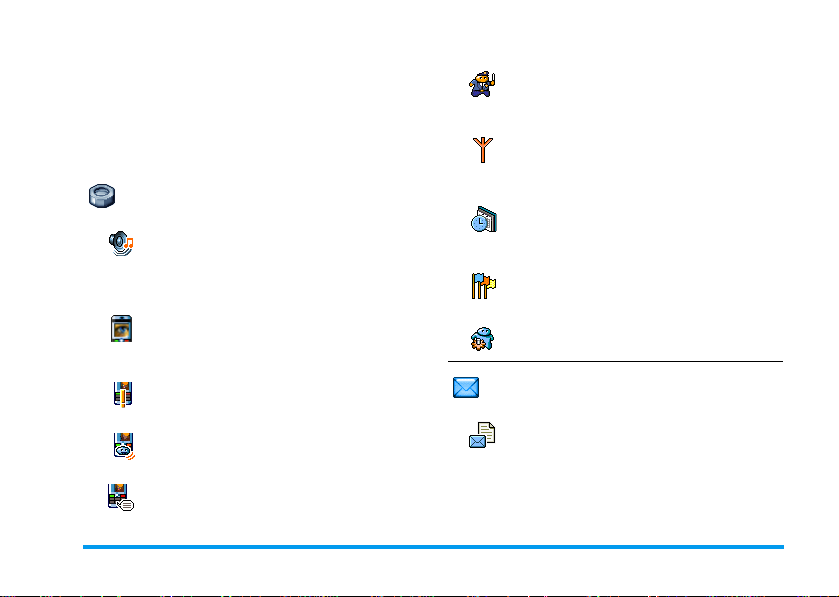
The table below describe the complete menu tree (first
to third levels) of your mobile phone, as well as the
page reference you should refer to for more information concerning each feature or setting.
Settings p36
Sounds p36
Silent / Ringer volume / Ringer / Messages
Ringer / Equaliser / Key tones / Sounds Alerts
/ Vibra alert
Display p37
Screen saver / Animation / Backlight / Wallpaper
Hotkeys p38
List of available hotkeys
Voice command p40
List of available voice commands
Voice dial p41
Security p42
Keypad lock / Public names / Call barring /
Change codes / PIN protection
Network p43
GPRS attach / Register again / Preferred list /
Access settings
Time and date p46
Clock display / Set date / Date format / Time
zone / Daylight saving / Set time
Language p47
List of available languages
Profiles p47
Mess ages p4 9
SMS p49
Send a SMS / Read SMS / SMS settings /
SMS Archive
Menu tree 15
Page 18
E-Mail p52
For each available mail box
Settings / Open mailbox / Send mail
Broadcast Message p60
Reception / Topics / District codes
Instant message p60
MMS p61
Create an MMS / Receive an MMS / Manage
folders / Settings
Demo mode p72
Memory Status p72
Sound recording p73
BeDJ p73
Games & Appli. p74
Multimedia p71
Camera p73
Picture album p71
List of available pictures
Sound album p71
List of available sounds
Euro converter p74
Calculator p74
Alarm clock p74
Organiser p75
16 Menu tree
Page 19
Brick Game p77
Operator serv ices p87
Infrared p68
Data / Receive
Call information p78
Call settings p78
Call forward / Mailboxes / Auto redial / Any
key answer / Call waiting / Caller ID
Call list p79
Call list / Reset
Call counters p80
GSM counters / GPRS counters
Phonebook p29
View names list
Phonebook settings
Delete all / Phonebook select. / Group settings / Copy to phone
Service numbers
The numbers available in this menu are
operator and subscription-dependent, please
check with your operator.
WAP p82
Services +
This menu is operator and subscription-dependent, please check with your operator.
Menu tree 17
Page 20

4 • Text or number entry
Text can be entered in editing screens in two different
ways: by using T9
input. Two other modes for numbers and punctuation
marks, are also available. Icons appearing on the screen
show the active text mode.
T9® text Input
What is it?
Tegic Euro. Pat.
App. 0842463
strokes input are analysed and the word suggested by
®
T9
is displayed in the edit screen. If several words are
available according to the keys used, the word you entered is highlighted: press
to choose from those proposed by the T9
tionary (see example below).
®
predictive Text Input, or basic text
T9® predictive Text Input is an intelligent editing mode for messages, including a comprehensive dictionary. It
allows you to quickly enter text. Press
only once on the key corresponding to
each letter needed to spell a word: key-
0
to browse the list and
®
built-in dic-
How to use it?
Alphabets and symbols represented by each key are as
follows:
2to9
0
1
c
#
*
Example: how to enter the word «home»:
1.
Press 4 6 6 3 The screen displays
the first word of a list:
2.
Press 0 to scroll and select
3.
You can press either 1 or , to confirm
selection of the word
confirms selection of the word and inserts a space,
ready for the next word of your message.
To key in letters.
Short press to browse the list of candidate words, long press to browse back.
To confirm entry.
Short press to clear one entry, long press
to clear all text.
Shift from standard, to lower, to upper
case.
Shift from basic mode, to numeric or to
punctuation typing mode.
Good
.
Home
.
Home
. Pressing>also
18 Text or number entry
Page 21

Basic text input
If you wish to access the basic text input, select «Abc»
basic text input using
multiple key presses to reach the desired character: the
letter «h» is the second letter on the
must press it twice to enter «h». Using this mode re-
quires you press a key as many times as is equal to the
order of the letter.
To enter the word «Home» in basic text input mode,
you should therefore key in
*
key. This method requires
4
4, 4
(GHI) 6,
key, so you
6, 6
Press
Letters, numbers and symbols are located on each key
as follows:
1
3
5
7
9
(MNO), 6 (MNO), 3, 3 (DEF).
,
when the message is completed.
space 1 @ _ # = <
> ( ) & £ $ ¥
d e f 3 é è D F
j k l 5 L
p q r s 7 b P Q S
w x y z 9 ø W X Y
a b c 2 à ä å æ ç
2
g h i 4 G ì
4
m n o 6 ñ ò ö
6
t u v 8 ü ù
8
. 0 , / : ; » ’ ! ¡ ? ¿ *
0
+ - %
Text or number entry 19
Page 22
5 • Taking pictures
Your mobile phone features a digital camera that
allows you to take pictures, store them in your phone,
use them as wallpaper or send them to your friends and
relatives.
How to...
Activate/deactivate
the camera
Zoom in/out Press the joystick key
Change the
Camera mode
Change the
Picture resolution
Access the
camera settings
Take a picture Press
Press the C key to activate,
and long press
deactivate.
c
to
+
(up) or -(down).
*
Press
Night
Press
VGA
128 x 128
Press
is active.
is active.
to toggle between
and
Normal
#
to switch from
to
QVGA
.
,
when the camera
C
when the camera
to
mode.
SQVGA
Save the picture Press C right after the
Delete the picture Press
Access the
shot options
Activate/deactivate
the self-timer
Within any menu related to the camera, a long press on
the
c
key will cancel any current action and bring
you back to idle mode.
shot.
shot.
Press
shot.
Press
c
,
0
.
Pictures shots
Preview mode settings
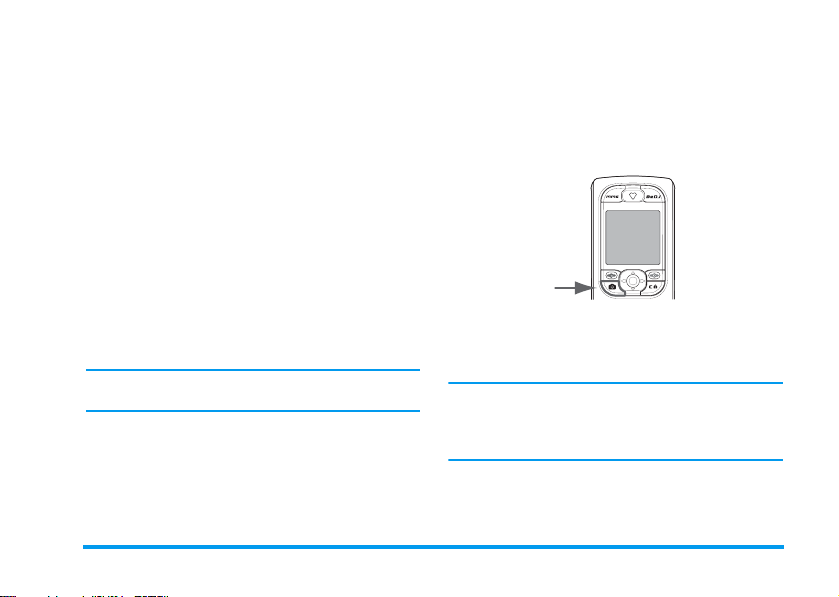
Press C to display the camera preview screen: the
lens of the camera is automatically focused. Icons
displayed on top and bottom of the screen allow you to
to
check the different
activation
.
All options and key presses described in the present section are applicable only when the camera mode is active, i.e. when the preview is displayed on the screen
Press , to access any of them.
Modes
, and also to set the
right after the
right after the
Self-timer
20 Taking pictures
Page 23
Camera mode
Two modes are available:
According to ambiant light level, press
between modes, which are reflected by the icons in the
bottom of the screen (sun & moon).
Picture res olution
The default picture size of the standard format is
128 x 128
. Press # to switch to
pixels), to
(160 x 120 pixels) or to
resolution
corner of the screen.
Zoom mode
This option is available in all modes: one-level zoom
(x2) in
x4) in all the other modes. In any mode, press the
navigation key
The zoom icon is highlighted when the zoom is activated. Zoom out is available only after a zoom in.
Self-timer
This option allows you to set the
or
QVGA
you select is displayed in the bottom right
128 x 128
mode, and two-levels zoom (x2 and
+
Off
(see next section for details).
Normal
and
Night mode
*
VGA
(320 x 240 pixels), to
128 x 128
or -to zoom in or out.
(640 x 480
. The
Self-timer
to toggle
SQ VGA
Picture
option
Take a picture
.
With the C key
1.
If the self-timer option is
era was activated, press the
ture, which is then automatically displayed on the
screen.
2.
The number in the upper black bar of the screen
shows its row. The pictures will be named in the
Own pictures
9999.
This does not mean you can take up to 9999 pictures
(see “Number of pictures” below), but that pictures, including the ones you delete, are numbered up to 9999.
On
Numbering will then restart from 1 on.
You can then choose to:
Press
c
Press
C
menu «img_1.jpg», etc., up to
To
Delete
To
Save
Off
, and once the cam-
C
the picture you have taken.
it.
key to take a pic-
Taking pictures 21
Page 24

Press
,
To access the list of available options,
which are:
-
Save
the picture in the
Album
,
-
Modify
it,
-
Send
it via
-
Take a new picture
you back to the preview window.
Press
c
orCTo go back to preview mode.
With the self-timer
1.
If the self-timer option is On, press C to activate it (or press
2.
The count-down starts at -10 seconds (this value
cannot be changed). A beep is played 2 seconds
before the picture is taken, then again when it’s
actually shot.
Beep alarms can be customized via the camera settings.
At any time, press
to preview mode or press 0 to just stop the timer.
3.
Once the picture is shot, follow the instructions
starting at point 2 of the previous section.
MMS, Infrared
, which will bring
0
if the option is
c
to stop the timer and go back
Off
or
Picture
E-mail
).
Number of pictures
The number of pictures you can save in the phone will
vary according to the settings you have configured: the
higher the resolution, the bigger the file size.
A message will warn you if there isn’t enough memory
,
to store the picture you have just taken. In this case, you
must delete data (sounds, images, etc.) before storing a
new picture. Select
the memory available in your phone.
Multimedia
>
Memory status
Foto Talk: add voice to pictures
This feature, which is available when using the camera
and also from the
send a message made of a picture and a sound.
The maximim size of an MMS is 50 KB.
1.
When in idle mode, press C to activate the
camera.
2.
Press C to take a picture, then press , to
access the option and select
3.
Press , again to access the Voice memo
recording window.
4.
Press ,, select the person you want to send it
to and validate the list. Press
your message.
Picture album
, allows you to quickly
Send by MMS
,
to check
.
twice to send
22 Taking pictures
Page 25

This will send one message to one person, without text.
See “MMS” page 61 for details on this feature.
Review the pictures
The pictures you save are automatically stored in the
Multimedia
a picture in the list and press
graphical display. Then press
next or previous picture, or
Rename
list.
As men tionned earlier, Foto Talk is also ava ilable f rom
the
>
Picture album
the picture. Press < to go back to the text
Picture album
menu.
>
Own pictures
+
or - to go to the
,
>
to access the
to
Send, Dele te
menu. Select
Receive a call
When receiving a call while using the camera:
1.
Answering the call will quit any action linked to
the camera: picture preview, picture shot, selftimer, options browsing, etc. Your phone will
return to idle when you hang up. If you had taken
a picture that was not yet saved, it will be lost.
2.
Rejecting the call will also quit any action linked
to the camera, and will bring you back to the preview screen.
Make a call
To make a call, you must first long press c to go
back to the idle screen. Then enter the number or select
a name of your phonebook, press
)
to hang up.
(
Settings
or
Further to the settings that are available directly within
the preview screen as described above, several menus
also allow you to set other options. Press
camera mode is active to access them.
In all cases, select an option, and press
next picture to be taken using this mode, or
cancel.
When quitting the camera application, settings you
have defined will be saved and available when reusing
the camera or until you change them again.
Colour mode
Allows you to choose a mode available from the
following:
effect will be applied to the picture according to the
mode you chose (e.g.,
picture, giving the impression of an old-times picture).
The default mode is
Colour, Black & white, Sepia
Sepia
will take a brown and beige
Colour
.
to dial and press
,
while the
,
for the
c
and
Blue
. The
Taking pictures 23
to
Page 26

Camera mode
Allows you to choose one of the two modes available:
Normal
and
Night
. The default mode is
Normal
.
Sound settings
Both
Alert
and
Shoot
menu. The first one occurs 2 seconds before the
picture is taken, the second one when it’s shot. In both
cases, select
available sounds. Select one of the sounds, or
create a new sound, then press
On
sounds can be set from this
, and press , to access the list of
,
<New>
to activate it.
Picture resolution
Allows you to choose a resolution available among the
following:
pixels),
default mode is
VGA
(640 x 480 pixels),
SQ VGA
(160 x 120 pixels) and
128 x 128
QVGA
.
Picture quality
Allows you to choose an image quality available among
to
the following:
Medium
Low, Medium, High
.
. The default mode is
Self-timer
See “Self-timer” page 21.
(320 x 240
128 x 128
. The
24 Taking pictures
Page 27
6 • Music & Mix
With BeDJ, you can create your own sound by using a
predefined BeDJ style (as explained below), or any SPMIDI or MIDI ring tones present in your phone, or
that you downloaded via WAP, Infrared, etc. (refer to
relevant chapters in the present user manual for complete information). You c an then send y our own mix t o
friends and relatives, use it as a ringer or an alarm, etc.
How to...
Switch
BeDJ
On/
Off
Activate/deactivate
a track
Record the mix
(start and stop)
Press b to switch on
Press , and select
>
BeDJ
0
.
.
dia
Press and hold
to switch off.
Press a key from
Press c to deactivate all
tracks at once.
Press
b
1
OR
Multime-
or
c
to 9.
Activate the
Te m p o
field
Open the track
selection list
Open the
Help
screen
Open the
Options
list
Within BeDJ, the colour orange always shows the information currently in use, or a selected item.
Get started
Activate tracks
1.
Launch BeDJ by pressing the b button, on
the top right corner of your mobile phone.
Press
#
.
Press and hold a key from
1
to 9.
*
,
.
.
Press
Press
Music & Mix 25
Page 28

2.
In the BeDJ screen that appears, the default
music style is selected (e.g., Groovy, Techno, etc.).
3.
In the upper left part of the screen, a small table
displays the current tempo value, the status of the
recording (
track.
4.
In the bottom part of the screen, 9 tracks are
available, linked to keys
you can mix: press the key corresponding to the
track you want to activate.
A total of 16 tracks are available: press and hold
keys
Key
5.
The activated track appears in orange, and the
above table displays the name of the relevant melody and instrument.
Off
by default) and the name of the
1
to 9 and which
1
to 9 to open the track selection list.
5
is always dedicated to the voice track.
Change track melodies and instruments
Press and hold keys 1 to 9 according to the
track you would like to change. In the list that appears,
you can change first the current melody used by the selected track, then the instruments used in the melody.
Melody
1.
The current melody used in the selected track is
the first one highlighted in the list. Move
-
to select another one (which is automati-
+
or
cally played when selected), then press
confirm your choice.
2.
The name of the selected melody is displayed in
the upper part of the screen. Press
the instruments list used in this melody.
Instrume nts
1.
The current instrument used in the selected melody is the first one highlighted in the list.
2.
Move - or + to select the next or previous
instrument, then press
,
to select it.
Change the tempo
1.
Press # to activate the
2.
The
Te m p o
minute») applies to all tracks. Press the highlighted
it.
You don’t have to save the
matically taken into account.
3.
Press c or , to go back one screen.
You cannot change a
during a mix recording.
(displayed in bmp or «beats per
<
or > keys to increase or decrease
Te m p o
Te m p o
Te m p o
while playing tracks or
,
>
to access
field.
, which is auto-
26 Music & Mix
to
Page 29

Record a mix
Start recording
1.
When ready to record your mix, press 0. The
timer starts and the
2.
While recording your mix, you can:
Press keys
1
to
9
Move
+
or
-
<
or
Move
3.
The recording will stop automatically when the mix
reaches 50 KB (approximately 2 min). Capacity depends on the memory available in your phone: select
Multimedia
>
Press 0 to stop recording.
>
Memory Status
Manage the recording
As soon as you stop recording your mix, a window automatically opens and displays the following options
On air
red icon is selected.
To activate the relevant track.
To increase/decrease the current
track volume.
To highlight the previous or next
track.
for memory information.
for you to choose from:
Remix
Re-play
Store
Send by MMS
Send by IrDA
Send by e-mail
The recording you save will appear under the name of
your choice in
Multimedia
in
er for incoming calls and new events.
Allows you to record a new mix by
using the same tracks.
Plays the mix you just recorded.
Opens the
name and save your mix.
Allows you to send your mix as part
of a multimedia message (MMS).
Activates IrDA so that you can send
your mix to another IrDA device.
Opens the E-Mail menu so that you
can send your mix via e-mail.
Settings
>
Sound album
Save
window, for you to
>
Sounds
>
Ringer
. You can select it as a ring-
list as well as
Create your own style and mix
Advanced options allow you to create and mix your
own styles of music, either directly from the BeDJ
styles available (e.g. Groove, Techno, Disco, etc.), or
from the ringers list (e.g., Bach, Cool, Dream, etc.).
Music & Mix 27
Page 30

The ringers list includes the MIDI files you might have
downloaded via e-mail, WAP, IrDA, etc.
From existing files
1.
When the BeDJ screen is active, press , to
access the options list.
2.
When selecting
choose one of the available melodies in the list
and press
3.
The phone automatically goes back to the BeDJ
screen, and the melody associated to the ringer
you have selected is divided into tracks.
4.
As described above, you can then activate and
deactivate tracks, record your mix, etc.
The number of active tracks depends on the melody you
have chosen.
Mix ringers
,
to confirm your choice.
or
BeDJ styles
, simply
From scratch
1.
When selecting
plete new set of empty tracks.
2.
Press and hold 1: the list of all the MIDI files
present in your phone appears on the screen.
Select one of them and press
3.
A new list appears, showing all tracks of the
selected MIDI file (max.16). Move
Advanced
, BeDJ opens a com-
,
.
+
or
-
to select one of them, then press , to apply it
to key
1
4.
Repeat these two steps to apply tracks of your
choice to keys
5.
When ready, record your mix (see page 27).
6.
Press , twice to go back to normal mode.
Have fun and mix: you can apply any of the 16 tracks
of any ringer of your choice to
phone! This makes thousands of possibilities that allow
you to completely personalise your own mix.
.
2
to 9 of the phone.
1
to 9 keys of your
Save your own styles
Style
You can save your own
and reuse it later to create another mix. This new style
will contain all the tracks you have mixed, but without
the effects applied to the mix.
in the BeDJ styles menu,
Receive a call
When receiving a call while BeDJ is activated, your
mobile phone will automatically mute the sound.
1.
Answering the call will quit BeDJ and your phone
will return to idle when you hang up.
2.
Rejecting or ignoring the call will allow you to
stay in the BeDJ screen.
28 Music & Mix
Page 31
7 • Phonebook
All operations described in this chapter require
the relevant Phonebook, whether in the SIM or
in the phone to be selected.
Your mobile phone has two phonebooks. The SIM
phonebook is located on the SIM card and the number
of entries depends on the card capacity.The second
phonebook is built into the mobile’s memory and can
hold up to 299 names.
The SIM card capacity depends on the type of card you
have. Please check with your local dealer for full information on this subject.
The phonebook located on your phone shares the mobile
capacity and memory with other features. As such, they
are inter-dependent: the more names you create, the less
events you can store and vice-versa. 299 is the maximum number of names and events cards, provided that
other features (memos, sounds, pictures, etc.) are not
using a significant amount of the phone’s memory.
Phonebook
The
two available phonebooks: the one on your SIM card
or the one in your phone. When entering new names
menu allows you to select one of the
in one of the
the one you have selected.
The
SIM phonebook.
Copy all to phone
into your phone. Selecting this option twice will duplicate all the names.
Phonebooks
Reset phonebook
SIM card phonebook
If you are using a SIM card for the first time, follow the
standard SIM card installation procedure as described
page 7, then go to the section titled “Add names in the
phonebook” below.
Phone book select.
located in your SIM card. Names added to this phonebook can then be copied into the phonebook located in
your phone.
If you cancelled or aborted the automatic copy of your
SIM phonebook at very first switch, you can do it manually : press
then
Press
book set.
+
,
Copy to phone
, they will only be added to
option does NOT apply to the
will copy the content of your SIM card
,
and select
,
Phonebook select
or - to select the phonebook
and select
.
Phone book, Phone-
. Then press
Phonebook, Phonebook set,
Phonebook 29
Page 32
When you copy the contents of your
In SIM card
card, even though it features less fields of information.
SIM phonebook into your phone, you
can still use the phonebook of your SIM
Phone’s phonebook
Your mobile phone only manages one phonebook at a
time and will ignore the information relative to the
other one: e.g., if «Smith» is present in both phonebooks
and if you delete it in the phone, it remains unchanged
in the SIM.
The default selected phonebook is the
one located in your phone. It can hold
In phone
using the
card capacity, names added to this phonebook can
then be copied into the SIM phonebook (see “Copy to
SIM” page 34).
up to 299 names and can be reset at once
Reset phonebook
option. Depending on SIM
Add names in the phonebook
In the SIM card
To add a name in the SIM phonebook:
1.
Press - to enter the phonebook, select
then press
,
.
2.
Enter the name, then the number of your choice
and press
,
.
A number can contain a maximum of 40 digits, depending on your SIM card.
Entering all numbers, including local ones with international prefix, country code and area code will allow
you to dial them from any location.
3.
Select the type of number allocated to the name:
Phone, Fax
store this name in your phonebook.
or
Data
and press , to confirm and
In the phone
The phonebook in your phone can holds more information fields t han the SIM card phonebook. Including
(in latin characters):
First and last names fields up to 20 characters
Numbers fields
(Mobile, Work, etc.)
Extra fields (e-mail and note) up to 50 characters
Group selection 20 groups available
You can create up to 299 records, holding up to a maximum of 7 information fields for each, with a maxi-
New
,
mum of 5 numeric fields. For example, you can save 2
mobile numbers, 3 work numbers, an e-mail address
and a text note, all for the same person.
up to 40 digits
and 1 «+»
30 Phonebook
Page 33

Add a record in the phone’s phonebook
Add a name field
1.
Press - to enter the
and then press
2.
Enter the last name of your contact and confirm
by pressing
confirm by pressing
One of the two name fields can be empty, but not both.
To go back to the previous field, press c.
Add a number/text field
1.
After entering the name of your contact, you will
be in the
from numerical fields (Mobile, Fax, Data, Pager,
Home, Work) or alphanumeric fields (Note, email). Make your selection and enter the relevant
number or text. Then press
record.
2.
The phone will then prompt you the
choose the group you want this name to belong
to and press
saved in your phone’s phonebook.
3.
You can associate a specific
each group, as well as
Phonebook > Phonebook set. > Group settings
then refer to “Fotocall: see & hear who’s calling”
,
Numbe r type
,
Phonebook
,
.
, then enter their first name and
,
menu. You can choose
to confirm. The record is then
.
,
Melody
Rename
, select
<New>
to save this new
and
Picture
groups. Select
Group:
to
,
,
page 31 for complete information). When receiving a call from a contact associated to a group, the
melody and/or picture defined for this group will
automatically ring and/or appear on the screen.
Own numbers
The
Own numbers
book should contain your own phone number. If not,
we advise that you enter your mobile number as well as
any other relevant information.
Although all its fields can be empty, the «Own numbers» item cannot be deleted.
option that appears in your phone-
Fotocall: see & hear who’s calling
This feature is only available when you select the
phonebook of your phone, NOT the SIM phonebook.
The Fotocall feature allows you to personalize the
groups available with their own name («Friends», «Office», etc.), a given picture (from the
a given melody (from the
You can link one or several contacts from your phonebook to a group. When a name in that group calls, the
contact’s name will appear along with the defined picture of that group. The melody defined for that group
will also ring.
Ringers
Picture album
list).
) and
Phonebook 31
Page 34

For that important person, why not set up a group just
for them. Use the camera to save their picture in the
ture album
ringer. When they call, you will truly be able to see and
hear them (for camera, see page 20 and for sound recording, see page 71).
1.
2.
3.
4.
and
Sound recording
To use Fotocall, you need to be using the phonebook in the phone; if you are not already doing
so, see “Copy the SIM phonebook” page 8.
Then select
the group of your choice.
Rename the group to be identified («Friends»,
«Kids», etc.) and select the
to be associated to this group.
Long press c to go back to idle, then - to
display the content of your Phonebook. Select a
contact you wish to link to this group and press
,
group of your choice.
When this contact calls you, the
ture
the screen.
Groups setting
. Then choose
associated to his group will ring/appear on
to save their voice as a
, press , and select
Melody
and the
Select group
and select the
Melo dy
Picture
and
Edit and manage names
Once you have stored names in your phonebook, press
-
when in idle mode to access the
Phonebook
. You
can search f or a name in the phonebook by pressing the
corresponding key for the letter that you want to go to
Pic-
in the list (e.g., press
«U»). The first record starting with this letter is selected
in the list. Depending on the phonebook menu you
have selected, you will have access to part or all of the
following options:
•Delete
•Show
•Copy to SIM
•Flash dial
•Change type
•Call
8
twice to access the letter
• Delete all
•Send an SMS
•Send an MMS
•Make default
•Copy to phone
• Call handsfree
In the SIM card
Select a name in the SIM card phonebook, then press
,
to access one of the following options:
Delete
to delete the selected name and number,
-
-
Change
to change the selected name and all related
information,
-
Pic-
Copy to phone
related information into the phonebook located in
your phone.
- If you cancelled the automatic copy of the SIM
phonebook at the very first switch of your phone,
you need to do it manually.
to copy the selected name and all
• Change name
•Include in a
group
•Associate a
voice dial
•Send via IrDA
32 Phonebook
Page 35
In the phone
Add a field
1.
To add a new field to an existing record, select the
name of your choice, select
2.
Select
<New>
field to be added and press
number or text, then press
3.
Repeat steps 1 and 2 to add up to 6 fields to the
same record. Make a short press on
back to the previous menu, or a long press to go
back to the idle mode.
Numbers or text will appear in order of creation date.
The first fax or phone number you enter becomes the
default number. As such, it appears in first position in
the list. To make another number default, see “Make
default” page 33. Alphanumeric fields (note and email) can only be changed or deleted.
Change a field content
1.
To change the content of a field in an existing
record, select the name of your choice, press
,
2.
Select the field to be changed in the list and press
,
and press ,. Choose the type of
, select
Show
and press , again.
.
Show
and press ,.
,
,
to save changes.
. Enter the
c
to go
In the carousel that appears, select
press
,
,
Change a field type
Chang e type
Change type
of number and press
If you copied your SIM phonebook into your phone,
some numbers might appear as being of «No type» and
don’t have any icon. «No type» numbers can be
changed: follow the procedure described previously to
define a type for these numbers.
Delete a field
Delete
in the carousel menu, and press , to confirm.
Make default
Make de fault
fields list and is automatically called when pressing the
pick-up key or when pressing
. Make the changes wanted and press
to save them.
To change a field type of an existing
record, repeat steps 1 to 3 of the “Change
a field content” paragraph. Then select
in the carousel menu, select the new type
,
to confirm your choice.
To delete a field of an existing record, repeat steps 1 to 3 of the “Change a field
content”paragraph. Then select
The first number you enter when
creating a new record becomes the
default numb er: it will appear fir st on the
,
Change
and
Delete
and selecting the
3.
Phonebook 33
Page 36
Call, Call handsfree
default number (e.g. make the «Work» number default
instead of the «Home» number), repeat steps 1 to 3 of
the “Change a field content” paragraph. Then select
Make default
confirm.
Copy to SIM
Copy to SIM
phone numbers into the SIM card, your phonebook is
always updated when switching phonebooks or when
using another phone.
To copy a number into the SIM card phonebook, repeat steps 1 to 3 of the “Change a field content”paragraph. Then select
Make calls
For your own comfort and safety, ensure you move the
phone away from your ear when calling handsfree, especially when increasing the volume.
Emergency number
SOS Call
or
Send SMS
option. To change the
in the carousel menu, and press , to
As mentioned earlier, entering names in
the SIM phonebook can be useful if you
change phones frequently. If you copy
Copy to SIM
The emergency number will call the
emergency services number in your
and press ,.
country. In most cases, you can call this number even
if your keypad is locked and if you haven’t yet entered
your PIN.
1.
Depending on the network operator, the emergency number can be dialled without the SIM
card being inserted. In Europe the standard emergency number is 112, in the UK it is 999. To c a l l
this number, enter it in idle mode by pressing the
corresponding keys, or press
Phonebook >View Names List
.
number
2.
Press ( to dial and press ) to hang up.
,
>
and select
Emergency
Other number
Enter a number
Pressing , will let you access a carousel allowing
you to call this number, store it or send a SMS.
Select a name
1.
2.
- once the record is selected, simply press
or
In idle mode, enter a number by pressing
the corresponding keys. Press
Call
dial and press
Press - and select the record of your choice.
If you selected the phonebook in your SIM card:
)
to hang up.
(
(
to call,
34 Phonebook
to
Page 37
- press , twice to access the next carousel, then
select
Call or Call handsfree
number.
3.
If you selected the phonebook in your phone:
•To call the
- once the record selected, simply press
or
- press
Call or Call handsfree
• To call any other number, choose
record is selected and choose a number type in
the list (Mobile, Home, etc.). Press
the next carousel and select
4.
In all cases, press ) to hang up.
default
,
to access the record carousel, then select
and press , to dial the
number:
.
Call or Call handsfree
(
Show
,
to dial,
once the
to access
You can also switch to handsfree while a standard call
is in progress: press
,
to confirm.
Use Flash dial
Flash dial
connection is established. Press
Use Voice dial
.
Voice Dial
ognizes the voice tag, it dials the number associated
with it. Press
,
, select
Activ.h/free
In idle mode, press and hold a key between
2
ated entry (see “Hotkeys” page 38):
In idle mode, press and hold ,, then
pronounce the saved voice tag (see
“Voice dial” page 41). If the phone rec-
)
and 9 to dial the associ-
)
to hang up.
to hang up.
and press
Phonebook 35
Page 38
8 • Settings
The
Settings
and change the settings related to each available option
(sounds, time and date, security, etc.). The
menu allows you to change several settings at once (see
page 47).
Sounds
Silent
The
Ringer volume
Ringer
BeDJ (see page 73), recorded sounds and melodies at-
menu allows you to customise your phone
Allows you to set the
Off
Silent
Silent
Ringer volume
Ringer
. When this setting is On, all alerts are
deactivated and the vibra alert is active.
mode also applies to key tones.
By default the ringer volume can be set
Medi um
to
volume of your ringer from
creasing
Allows you to select the ringer tone from
the choices available. The list also includes the music mix you create with
. Press+or-to set the
.
Silence
Profiles
mode On or
Silent
to
tached to messages you receive (from e-mail, SMS,
etc.).
Scroll through the list by pressing
to hear the selected melody being played. Press
select this melody as ringer,
the next melody.
You will not hear the melody if the volume ringer is set
to
Off
or if the
Silence
mode was activated (see page 11).
+or-
c
to cancel, or move to
Messages Ringer
Allows you to set an alert beep On or
Mess ages Ringer
select the alert of your choice from the ringers list.
for each time you receive a new message.
When
On
, this option also allows you to
Equaliser
This option allows you to choose from
Equaliser
press
In-
wait a few seconds to hear the difference. Press
confirm your choice.
different audio settings, also available
while a call is in progress. In this case,
,
, select
Equaliser
, scroll through the list and
Key tones
Allows you to set the key tones On or
Off
Key tones
. Even when set
played during calls (see page 87).
Off
and wait
,
Off
,
, DTMF are
36 Settings
to
,
to
Page 39
Sounds Alerts
Allows you to set alert beeps On or
Sounds Alerts
-when an
due,
- when you have missed a call,
-when the
- to manage the duration of your calls, first after 45
seconds, then every minute of an ongoing call (the
beep cannot be heard by the caller).
This menu only allows you to activate/deactivate the
alert sounds, NOT the alerts themselves. E.g. setting the
event alert
playing the
but the corresponding sound will not be played.
for the following items:
Event
you programmed in your organiser is
Battery
is low and requ ires charging,
Off
will not prevent your phone from dis-
Reminder
screen (if you programmed one),
Vibra alert
Allows you to set the vibra alert On or
Vibra alert
a message and when the alarm rings.
The vibra alert is always
charger or the Cigarette Ligh er Adapter.
when receiving a call, when an event set
in the organiser is due, when you receive
Off
when you connect the
Display
Off
Screen saver
Allows you to set the screen saver On or
Off
Screen saver
have stored in your phone and selected.
Setting the Screen saver
Economy mode
black background. This mode increases the autonomy
of your phone (increases your battery life).
1.
When setting the screen saver On, select a picture
in the list that appears by pressing
(you deselect it also by pressing these keys), then
press
selected the pictures of your choice, press
Off
activate the screen saver.
You must select several pictures (up to 10) in order to
display a slide show. When selecting only one picture to
be used as screen saver, only this picture will be displayed.
2.
Select
choose a value. When in idle mode, the screen
. When On, it will run a slide show in
idle mode, by using the jpeg file(s) you
Off
, i.e., the current time displayed on a
-
to move to the next picture. Once you
Start delay
automatically activates the
and press + or - to
<or>
,
Settings 37
to
Page 40

saver will start according to the time limit you
have set.
3.
Then select the
timing you have set will be applied between each
picture of the slideshow.
Display period
and press,. The
Animation
Allows you to set the animation of the
Animation
message selected in the
Deactivating this function increases the autonomy of
your phone.
carousel menus
this option will also scroll texts, such a
Read SMS
On
menu.
or
Off
. When On,
Backlight
The backlight is activated when receiving incoming calls or messages, browsing
Backlight
to set the backlight
available values and press
Deactivating this function increases the autonomy of
your phone.
lists and menus, etc. Press
Duration
by selecting one of the
,
+
to confirm.
or
Wallpaper
Allows you to set the Wallpaper On or
Off
Wallpaper
mode in idle mode, if you didn’t activate a slide show.
Only JPEG type pictures can be used as Wallpapers.
. When On, the picture(s) you select-
ed is (are) displayed in
Hotkeys
Instead of entering the various menus and browsing
the lists, you can set up direct access to a specific function by linking it to a
will then automatically activate the function or call the
associated number (Flash dial).
You can only program keys 2 to 9and #, as
0
keys
bags) are predefined and locked, preventing repro-
-
gramming. Depending on your service provider, other
hotkeys may be predefined and locked.
1.
2.
If the selected key is already set, you can reprogram it:
select
(select language) and 1 (call voice mail-
Select a key from 2 to 9 and press ,.
Browse the list to select the function you wish to
associate with this key (see list following). Press
,
to confirm your choice.
Settings
>
Hotkey
. A long press on the key
Hotkeys
> a hotkey in the list. Press
Normal
or
Fade
38 Settings
Page 41

,
twice, select
bring you to the list of available functions.
3.
To use the hotkeys, simply press and hold the key
corresponding to the function you want to launch
or to the number you want to dial while in idle
mode.
You can associate hotkeys
tions of the following table:
Flash Dial
Send SM S
Read SMS
Instant message
Keypad lock
Active. Silence
Change
and press ,. This will
2
to 9 to the func-
Dials the associated number of the
phonebook.
Opens the
Opens the
Activates the
to quickly
Send Messages
Read Messages
Instant message
Reply
to the sender of the
menu.
menu.
feature,
received message.
Immediately locks / unlocks the keypad.
Silence
Activates the
profile (vibra on,
ringer volume off).
Activate Car
Activ. Headset
Meeting
Activ.Outdoors
Activ. Personal
Activ. Autonomy
Calculator
Redial last no.
Reply last no.
SOS call
Activates the
Car
profile (ringer vol-
ume high, any key answer).
Headset
Activates the
profile (ringer
volume medium, any key answer on).
Activates the
Meeting
profile (vibra on,
ringer and all keys set to silent).
Outdoors
Activates the
profile (ringer
volume high).
Personal
Autonomy
profile.
profile, which
Activates the
Activates the
extends the battery autonomy (animation off, vibra off, backlight off, ringer
volume medium).
Direct access to the
Calculator
.
Redials the last number called.
Redials the number of the last call received.
Dials the emergency call number.
Settings 39
Page 42
Forwards ALL calls to the voice mailbox.
Direct access to the
Brick Game
.
Dials the number of your voice mailbox.
Opens the
Games
menu.
Subscription dependent
Direct access to the Euro converter
(from currency).
Direct access to the Euro converter (to
currency).
The Euro converter is available upon
subscription and only in countries using the Euro.
Instead of entering the various menus
and browsing the lists, you can also set a
voice tag that will activate a feature (e.g.,
E-mail
Show ba lance
Accum. cost
Add new event
Show events
Alarm Clock
Record
WAP
Screen saver
E-mail
Opens the
menu for access to
the mail boxes.
Displ ays the remaining credit balance.
Subscription dependent
Displays the
Accumulated cost
of out-
going calls.
Subscription dependent
Opens the
Add event
menu of the Or-
ganiser.
Events
Displays the
list of the Organ-
iser menu.
Alarm
Opens the
menu.
Allows to record a new sound.
Launches a
WA P
session.
Subscription dependent
Opens the
Screen saver On/Off
menu.
To voic e mail
Brick Game
Voice mail box
Games
-> Eu ro
Euro ->
Voice command
Voice Command
launch the Calculator).
40 Settings
Page 43

1.
Select
Settings
>
Voi c e di a l
>
<New>
Voi ce d i al
and press
,
when
and press
You can associate a Voice command to all the functions
supported by the
mail» and «Alarm clock».
1.
Select
press
tion to be set with a voice tag. Press
firm your choice.
2.
When
instructions displayed on the screen. When
prompted to record your voice tag, make sure you
are in a quiet environment, choose a short and
simple word and clearly pronounce it.
3.
Press c and repeat the steps described above to
add more voice commands.
To use the voice command, press and hold
in idle mode, then say the recorded voice tag. Words
recorded as voice tags can be played, changed or
deleted at any time.
Hotkeys
(see page 38), except for «Get
Settings
>
,
Voi c e Com m a n d
, then browse the list to select the func-
>
,
Press OK and speak
appears, follow the
<New>
to con-
,
and
when
Voic e d i al
Voice dial allows you to quickly call a
Voice Dial
corresponding name when pronounced.
name from your phonebook: set a voice
tag by recording a word that will call the
,
.
2.
Browse the list to select the call number to be set
with a voice tag. Depending on the selected
phonebook (see “Phonebook” page 29):
-SIM phonebook: select a name in the list and
press
,
-Phone’s phonebook: select a name in the list,
then the phone number of your choice if several numbers were stored for this name and
press
3.
When
low the instructions displayed on the screen.
When prompted to record your voice tag, make
sure you are in a quiet environment, choose a
short and simple word and clearly pronounce it.
To use the voice command, press and hold
in idle mode, then say the voice tag corresponding to
the number you want to dial.
To display the list of voice dials you have defined, select
Settings
,
. Words recorded as voice tags can be played,
changed or deleted at any time.
Up to 15 voice tags can be defined and shared between
voice dial and voice command.
,
,
.
Add voice tag?
>
Voice Commands
appears, press ,and fol-
or
Settings 41
Page 44
Security
Keypad lock
Allows you to lock/unlock your keypad
Keypad lock
matically unlocks when receiving a call.
You can also choose immediate or delayed lock by selecting
values by pressing
be permanently locked. If you unlock it by pressing the
c
your phone, and locked again after the time period you
selected.
Note that even when your keypad is locked, you can still
place an SOS call (see page 34).
by pressing and holding the
when in idle mode. The keypad auto-
Settings >Security
key, it will be temporarily unlocked while you use
>
Key pad loc k
+
or -. Your keypad wil l then
Public names
Allows you to manage a specific names
Public names
This feature is subscription dependent and requires a
PIN2 code (see page 43).
list, called
calls to this list via the
tion.
Public Names
c
, then one of the
list, and restrict
Call restriction
Call restriction
Call restriction
opposed to the
key
This function is subscription dependent and requires a
PIN2 code (see page 43). Please note that when activating this option, it might also apply to WAP and e-mail
connections over GPRS.
Public names
Public names
via PIN2 code. Use the
name and phone number, then select the number type:
Phone, Fax
or deleted.
Allows you restrict the calls to the
list. In this case, you can only ac-
Names
cess the names of the
Phonebook
Allows you to consult and modify your
Public Names
name, modify or delete a name in the list
or
Data
of the main menu.
list. You can enter a new
<New>
option to enter the
. Names in this list can be changed
Call barring
This menu allows you to limit the use of
op-
Call barring
calls. This function is network dependent and requires
a specific call barring password supplied by your service
provider.
your phone to specific calls by letting
you bar both outgoing and incoming
Public names
Public
list, as
42 Settings
Page 45
Outgoing calls
you to call your home country when you are abroad).
You can also
These menus then allow you to bar, within each available option,
Incoming calls
move bar on incoming calls.
These menus then allow you to bar, within each available option,
Status
The
Outgoing
menu allows you to select
All
calls,
between
Outgoing
Intl. Exc. Home
Deactivate
All calls, Voi ce c a l l s, Data calls
The
Incoming
All
Incoming
Status
calls or
vides access to the
All calls, Voi ce c a l l s, Data calls
In each sub-menu (All calls, When
roaming, etc.), the
you to know whether a type of call is
barred or not.
International
calls (the latter allowing
the bar on outgoing calls.
menu allows you to select
When roa ming
Cancel
Status
calls and
or
Fax calls
. It also pro-
menu to re-
or
Fax calls
option allows
Change codes
Change codes
Allows you to change your
PIN 2
codes, as well as the call
code
.
PIN
Barring
Depending on your SIM card, som e features or options
may require a PIN2 secret code. This is a second secret
4 to 8-digit code given to you by your operator.
If you enter a wrong PIN2 code 3 times, your SIM card
is blocked. To unblock it, request the PUK2 code from
your operator or retailer.
If you enter an incorrect PUK code 10 times in a row,
.
the SIM card will be blocked and unusable. If this happens, contact your operator or retailer.
PIN protection
This allows you to set the PIN protection
On
or
Off
PIN protection
.
switching your phone on.
You cannot change your PIN code if this option is
asked to enter your PIN code when
. When On, you will be
Network
This menu allows you to handle the connection between the phone and the network, register manually
the available networks and manage your preferred net-
and
works.
Off
Settings 43
.
Page 46

GPRS attach
Your mobile integrates features that sup-
GPRS attac h
data with high speed rates and to stay always on-line
(i.e. have a permanent connection to the Internet and
WAP).
Contact your phone operator to have full information
about GPRS availability over their network and for an
appropriate subscription. You might also need to configure your phone with the GPRS settings supplied by
your operator, by using the menus described in this section.
This menu allows you to define the attach mode of
your mobile phone to the GPRS service:
Always on
Your phone will always register to the GPRS service.
This option allows faster GPRS connection. However
it will increase energy consumption.
For data calls
Your phone will automatically register to the GPRS
service only when required. This option reduces energy
consumption, however it will increase the connection
delay.
port GPRS (Global Packet Radio Service), a service allowing you to exchange
In spite of these settings, you must still select the bearer
(GSM or GPRS) in the menus of each application to be
used (e.g., WAP, MMS, e-mail, etc.).
Register again
Provides you with a list of the networks
Register again
available in the area when the
mode is selected. Select the network you
want to register with and press
,
to confirm.
Manual
Preferred list
Allows you to build a network list in or-
Preferred list
der of preference. Once defined, the
phone will try to register on a network,
according to your preferences.
Access settings
This menu allows you to create several
Access settings
the selected profile will be used to connect to the GSM
or GPRS network.
All options described below are operator and/or subscription dependent.With some operators, you may receive a SMS which contains access parameters that will
data profiles: when using WAP or when
sending a multimedia message (MMS),
44 Settings
Page 47

be stored automatically. Please contact your network
operator for detailed information on this subject.
Change name
Allows you to enter or change the name
,
Chang e name
of the selected profile. Press
the name of your choice and press
, enter
to confirm.
Some pre-configured profiles might be locked, preventing re-programming and renaming.
Show
Allows you to visualise all parameters of
the selected profile (ISP number, APN,
Show
GSM settings
etc.), either
GSM
or
GPRS
.
Allows you to enter or change the GSM
GSM s ettings
Login
settings and gives you access to the following items:
and
Password
allow you to enter the login and
password needed. In both cases, enter the information
and press
,
Phone Number
needed to establish a connection. Select
to confirm.
allows you to enter the phone number
Phone numbers
and press ,, then press + or - to select:
ISDN No.
-
-
Analogic No.
to enter an ISDN ISP number, OR
to enter an analogic number.
In both cases, enter the «+» sign followed by the
number provided by your operator and press
Contact your operator to know what type of number
you should select.
Inactivity time
,
riod after which the phone automatically disconnects
allows you to enter an inactivity time pe-
(if a connection was in progress) and returns to idle
screen. Select
Inactivity time
a value (in seconds) of over 30 s.
GPRS settings
and press ,, then enter
This allows you to change the GPRS set-
Login, Password
GPRS s ettings
tings,
(the same fields and the same instructions as for GSM settings, please refer to the previous
section).
APN
allows you to enter the address of the external data
network you want to connect to, a text string (or IP address, e.g., wap.operatorname.fr) used to establish the
connection. Select
appropriate address
APN
and press ,, then enter the
and press ,.
Error messages during connections are mainly due to
incorrect parameters: you should contact your operator
before first use, in order to have the appropriate settings. With some operators, the access parameters can
be set remotely. Please check with your operator.
,
and press ,.
and
Inactivity time
.
Settings 45
Page 48
Time and date
This menu allows you to set the time and date, time
zone, daylight savings, and change the clock display
mode.
Clock display
Allows you to select
Tiny
Clock display
time formats when shown in idle
mode, by pressing
cases, press
Set date
Allows you to set the date by pressing the
appropriate numeric keys (you can also
Set date
set the date by moving
Press
,
to confirm.
Date format
Allows you to select one of the two avail-
Date format
able date formats, either
Press
,
to confirm.
Time zone
The time zone and daylight savings are to be set first.
You should then double-check date and time if previ-
,
Analogue, Digital
+or-
to confirm.
+or-
We s t e r n
. In all
).
or
ously set. To know which time zone you are in, we recommend you to check in an atlas or an encyclopedia.
or
Time zone
Move
+or-
your area.
Time zone
The
the time zone you belong to, according
to GMT (Greenwich Meridian Time).
to select the setting corresponding to
option allows you to set
Daylight saving
This setting only concerns countries in which time is set
according to summer/winter time (e.g. Greenwich Meridian Time / British Summer Time).
This option allows you to set the
Daylight saving
moving
and time opti on, it sho uld be set first. If daylight saving
is
Thai
On
.
automatically switch to 13:00 when turning the option
to
Off
daylight savings to
Off
(in winter time) by
or
+or-
and you set the time to 12:00, it will
.
. As this setting impacts the date
On
Set time
Allows you to set the time by pressing
the appropriate keys or
Set time
moving
+or-
decrease the time minute by minute.
(in summer time)
to increase or
46 Settings
Page 49
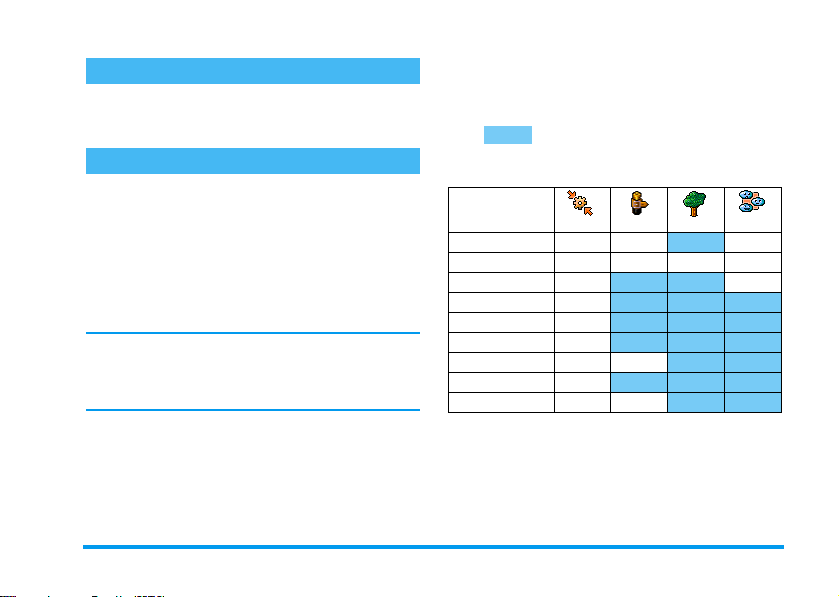
Personal
Language
This menu allows you to select a language for all menu
text. A long press on
tomatically displays this menu.
0
when in the idle screen au-
Profiles
This menu allows you to access a group of predefined
settings, which let you quickly adapt your phone to
your environment by changing several settings at once.
For example, selecting
ume to silent, activate vibra and deactivate the key
tones (the other items are set according to the settings
you configured). When your meeting is over, selecting
Personal
will reactivate all your usual settings.
When you associate a hotkey to a profile (e.g. long press
3
activates
key
also long press this key to deactivate it and go back to
the
Personal
settings.
Meeting
will set your ringer vol-
Meeting
, see “Hotkeys” page 38),
The settings listed in the column
lowing table, are default settings preset during production. As you can change them, the personal settings in
your phone may differ from the table.
Each box of the table refers to the settings as
stored in the
changed the settings or not).
Profiles
Vibra alert
Ringer volume
Key tones
Organiser alerts
Battery low alert
Mess age alert
Backlig ht
Any key answers
Animation
* personal setting
Personal
menu (whether you have
*
Personal
Autonomy Outdoors
On* Off On
Mediu m* Medium
On* Off
On*
On*
On*
10 sec* Off
Off*
On* Off
, in the fol-
Meeting
High Silent
Settings 47
Page 50
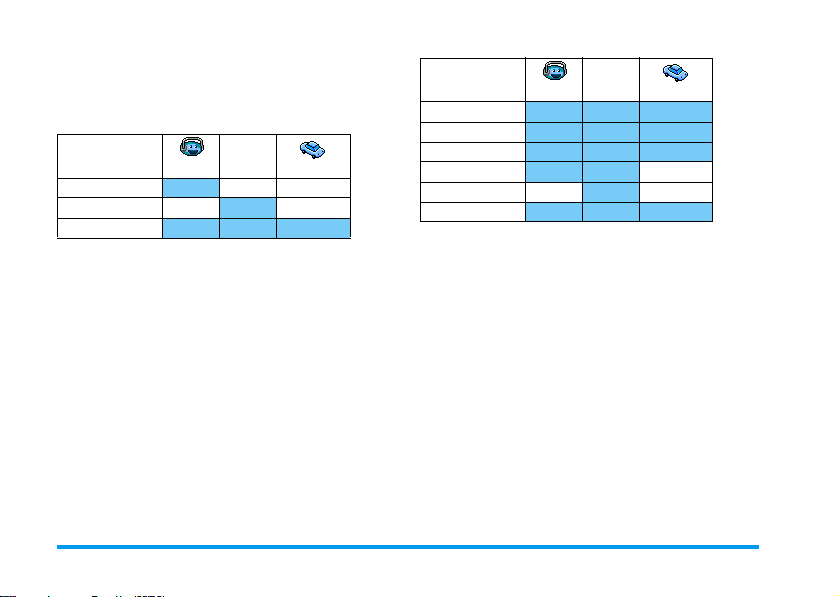
When connecting an accessory, the settings described
in the table below also become available. When disconnecting the accessory, the phone goes back to the
sonal
profile.
Accessories
Profiles
Vibra alert
Ringer volume
Headset
Medium High
CLA or
Activate Car
Charger
Off Off
Key tones
Per-
Accessories
Profiles
Organiser alerts
Battery low alert
Message alert
Backlig ht
Any key answers
Animation
CLA or
Charger
Activate Car
Headset
On On
On
48 Settings
Page 51

9 • Messages
SMS
The
Send SMS
Send SM S
• send a standard or customised short text message
• edit the last message sent and send it again,
• add an iMelody, pre-defined sounds, an anima-
The features above are not available from the idle mode
when the
this case, you can only access the
The Standard SMS messages are displayed in a list.
Press
me back at...
sage including your number, if this number is the first
one of the
allows you to:
to someone,
tion or a picture to your message.
Instant message
+
or - to browse: for example
allows you to select a pre-configured mes-
Own num.
item of the
feature is On (see page 60). In
option (see page 31).
Answer
Mess ages
option.
Please call
menu
Send a SMS
To a name in the list
To the default num ber i f s eve ral (p hon ebo ok in phone)
or to the unique phone number (phonebook in SIM)
1.
Press -, select the name of your choice and
,
press
2.
Select
type of message to be sent and press
your message, attach a graphic or a sound if you
wish, then select
.
Send SMS
and press ,, then select the
Send now
or
Save
(see below).
,
. Enter
To the number of your choice (phone name list only)
1.
Press - and select the record of your choice,
then press
2.
Select the number of your choice and press ,.
3.
Proceed as described in step 2 of the previous
paragraph.
To any other name
To send a short message to someone whose number
isn’t stored in the phonebook, press
Mess ages, SMS
phone number to which the message should be sent to
and press
above to send a message.
,
, select
Show
and press ,.
,
then
Send SMS
,
. Then follow the instructions detailed
and
New
and select
. Enter the
Messages 49
Page 52
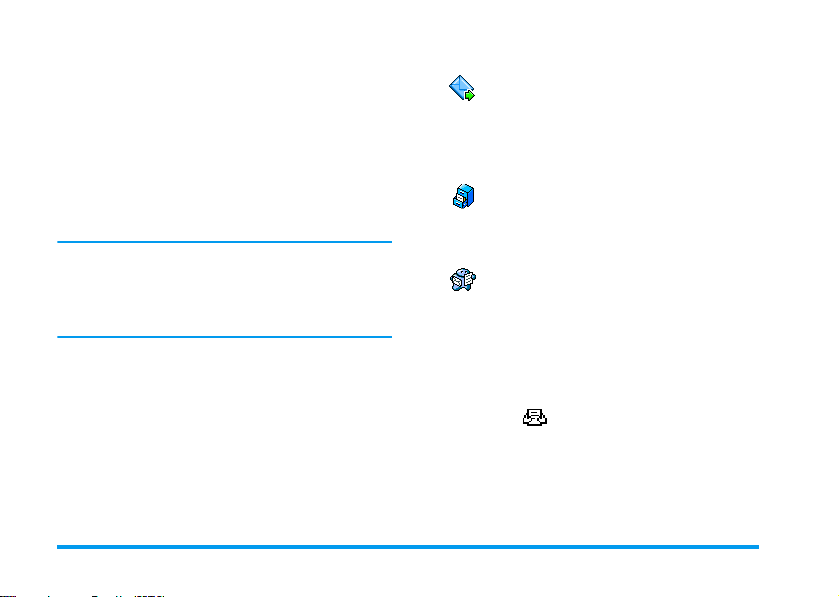
Together with an attachment
This option allows you to attach a sound, icon or animation to your message and press
attach it to your message. Depending on the type of file
you want to attach, select
map image or an animation, and/or
tach a melody. Select the sub-menu of your choice,
then one of the available items in the list that appears,
and press
sage.
You can send up to 2 attachments of 2 different types
together with your SMS. Animations and pictures are
exclusive: if you first select an animation, then a picture, only the picture will be taken into account and
vice-versa.
Some icons, animations and sounds are pre-defined
and supplied as standard with your mobile phone. Personal pictures and sounds, e.g., that you have received
via SMS or e-mail and then stored in the relevant menus, will automatically appear in the «Own» sub-menus
(Own melodies, Own animations, etc.). You cannot
send «Own» items via SMS when they are copyrightprotected.
,
to confirm and attach it to your mes-
,
Add graphic
to confirm and
to attach a bit-
Add sound
to at-
Send now
Send now
Save
This allows you to send the current message you have entered (to learn how to
enter text and numbers, see “Text or
number entry” page 18). Press
confirm.
Allows you to store the current message
and its associated icon and melody if
Save
any. Press
,
to confirm.
,
Read SMS
The
Read SMS
Read SMS
that are first stored on your SIM card. Several options
allow you to then manage them directly on your mobile phone.
Received Messages
- The messages you have received and already read are
labelled with . Messages received but not yet
read are labelled with a sealed envelope icon. Select a
message and press
press
-
Reply
-
Forward
in the phonebook or enter a phone number manually),
menu allows you to consult the list of
SMS you have saved and received, and
,
to access the following options:
to the sender,
the selected message (choose the recipient
option in the
,
to read it. When displayed,
Messages
50 Messages
to
Page 53
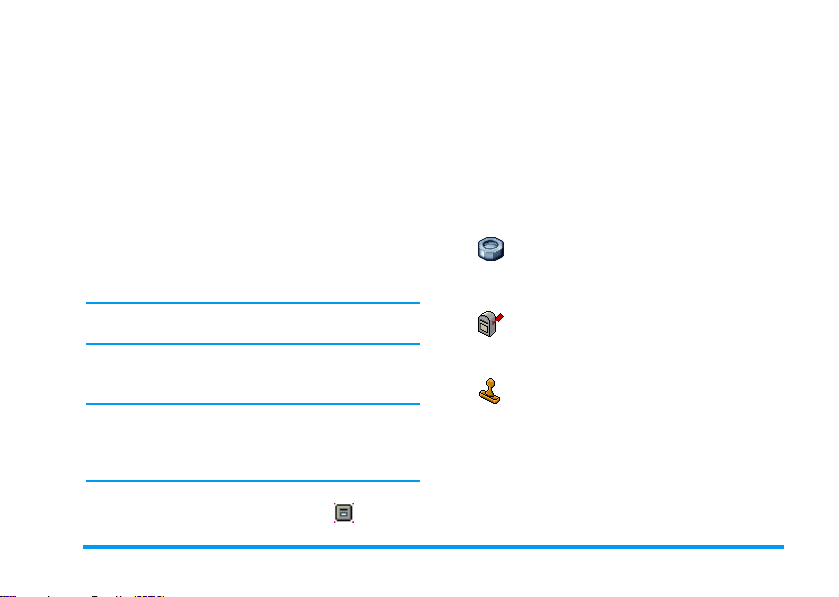
-
Delete
the selected message,
-
Store numbe r
message,
-
Store melody
SMS,
-
Store graphic(s)
mations were sent together with the message,
-
Extract
this number is included in double quotes (several
numbers can be included and extracted),
-
Call
-
Move to Archive
the phone memory. Saved messages can then be consulted by pressing
Archive
of the sender if it is attached to the
if a melody was sent together with the
if one or several graphics and/or ani-
a number included in the message itself, if
the sender of the message (operator-dependent),
allows you to store read messages in
,
,
and selecting
Messages, SMS
Moving a message to the archive list deletes it from the
read SMS list.
Edit
a message in the
it and resend it to someone (you can add a picture or
Read
or
Archive
folder, modifiy
a sound).
If a picture or a sound was attached to the message you
edit, you must first detach it and store it in the
album
or in the
Own melodies
menu of the ringers list.
Picture
Then re-attach it to your message (see page 50).
Saved Messages
(see page 52). Select the message you want and press
,
to read it. When displayed, press , to access
the same options, including storing the caller’s
number.
Delete all SMS
Allows you to delete all the messages of either the
(messages on SIM card) or
SMS
in phone) lists of the
Messages
SMS Archive
menu.
Read
(messages
SMS settings
This menu allows you to customise your
SMS setting s
SMS centre
SMS centre
Signature
length is consequently reduced). You can
nature,
SMS via the options described below.
Allows you to select your default SMS
If not available on your SIM card,
centre.
you must enter your SMS centre number
Allows you to sign your SMS. By default,
your signature is you phone number,
Signature
added at the end of your message (which
Change
and
Save
it.
Edit
the sig-
The messages you sent are labelled with in normal
mode or with a mail box icon in auto save SMS mode
Messages 51
.
Page 54
Validity period
This feature is subscription dependent.
Allows you to select the length of time
Validity period
your mess age is to be stored in your SMS
centre. This is useful when the recipient
is not connected to the network (and thus cannot receive your message immediately).
Reply path
This feature is subscription dependent.
Allows you to set the Reply path option
On
or
Off
Reply path
transmit the number of your SMS mes-
. When On, it allows you to
sage centre together with the message. Your correspondent can then reply using your own SMS centre
and not theirs. This speeds up the rate of transmission.
Delivery report
This feature is subscription dependent.
Informs you via an SMS whether your
Delivery repo rt
Auto save SMS
Auto save SMS
SMS was received or not. This option
On
or
Off
can be set
Allows you to set On or
.
Off
the option of
automatically saving messages sent in the
Archive
menu.
SMS Archive
Allows you to consult all read messages
SMS Archive
vating the
you saved and to
sages at once. You save a message by acti-
Auto save SMS
selecting a received message, pressing
selecting
Move to Archive
Reset
all archived mes-
option (see above), or by
,
twice and
.
If not included in your phone subscription, you must
subscribe to an e-mail account (over the phone or via
Internet from a computer) and have received the settings information from your provider. In this case, all
parameters are communicated to you by your provider
and/or operator as described below and must be entered
as given.
If included in your subscription, you simply have to enter the login, password and e-mail address of your
e-mail account. In some cases, your operator might also
be your e-mail service provider.
Your phone might have been pre-configured. In this case,
most parameters are already set and you don’t have to
change them
dress
count).
(except for
Login, Password
and
E-mail ad-
which are up to you when creating an e-mail ac-
52 Messages
Page 55
To enter text and numbers, including specific signs such
as @ or %, see the characters table described page 19.
Settings
Network access
This menu allows you to configure your phone and to
handle the connection to the network, whether GSM
or GPRS, in order to then connect to the appropriate
server that will let you send and receive e-mails.
All options described below are operator and/or subscription dependent.
1.
Press ,, select
Settings
2.
Select
Network Access
and press ,.
Messages
>
and press ,.
E-mail
>
E-mail 1
Bearer
This menu allows you to select the type
of network used when launching a con-
Bearer
GSM
the GPRS network for e-mail connections.
GPRS first
GPRS netwo rk, then to the GSM n etwork if the GPRS
network isn’t available when connecting.
nection.
or
GPRS
: your mobile will only use the GSM or
: your mobile will first try to connect to the
Selecting this option you need to have both GSM and
GPRS settings configured.
GPRS settings
This menu allows you to enter or change
the GPRS settings communicated to you
GPRS Settin gs
and
you by your operator.
Error messages during connections are mainly due to
incorrect parameters: you should contact your operator
before first use, in order to have the appropriate GPRS
>
parameters.
by your operator, which are:
Password
. All settings must be entered as given to
GSM settings
This menu allows you to enter or change
GSM S etti ngs
number
them as defined.
Phone Number
provided by your ISP and needed to establish a connection. Press
-
ISDN number
-
Analogi c No.
,
the GSM settings communicated to you
by your operator, which are:
,
Auto disconnection, Login
: allows you to enter the phone number
+
or - to select:
to enter an ISDN ISP number, OR
to enter an analogic number, then press
.
and
APN, Login
Password
Phone
. Enter
Messages 53
Page 56

Contact your ISP to know what type of number you
should select.
Auto disconnection
time period after which the phone automatically disconnects (if a connection was is progress) from the network. Press
10min. and press
The lack of exchanges with the network (connecting,
sending an e-mail, disconnecting) defines the inactivity
time period leading to auto disconnection.
Login
and
scribed to your account. Enter them also as defined.
E-mail ser ver access
The menus described in this section feature settings
needed to connect to the e-mail server of your Internet
Service Provider (ISP) via your mobile phone. Most
parameters are communicated to you by your service
provider and must be entered as given.
1.
Press ,, select
Settings
2.
Select
be completed are the following:
SMTP address, Login, Password
: allows you to select an inactivity
+
or - to select a value from 3 to
,
to validate.
Password
were up to you when you sub-
Messages
>
and press ,.
E-Mail server
and press ,. The fields to
E-mail
and
>
E-mail 1
POP3 address
E-Mail address
>
POP3 address
•
address of the POP3 server, which is used to
receive e-mails.
•
SMTP address
address of the SMTP server, which is used to send
e-mails.
WARNING ! Network-dependent! For an e-mail connection
via GPRS, if your phone operator is not
contact your operator to get the correct address of the SMTP
server and enter it in this field.
In some ca ses,
to you when you subscribe to your account. Enter
them as defined.
Account name
This menu allows you to renam e the available e-mail
accounts.
An e-mail account might be preconfigured with the
name of your operator. In this case, its name cannot be
changed.
1.
Press ,, select
Settings
,
2.
.
Enter the new name in the edition window that
appears and press
: allows you to enter the IP or DNS
: allows you to enter the IP or DNS
your e-mail provider,
Login, Password
>
Account name
and
Messages
and press ,.
,
.
E-mail address
>
E-mail
>
are up
E-mail 1
54 Messages
>
Page 57

Advanced
The menus described in this section feature advanced
settings that may have been pre-configured, so you
shouldn’t have to change any of them.
If the fields of these menus are empty, or if you encounter connection problems, contact your ISP.
Port POP3
which is used to receive e-mails.
Port SMTP
number, which is used to send e-mails.
DNS add ress
the external data network you want to connect to.
SMPT authenticat.
authentication process with the SMTP server.
In most European countries, this menu should be set to
Off
your provider for complete information.
: allows you to e nter the POP3 port num ber,
: allows you to enter the SMTP port
: allows you to enter the DNS address of
: allows you to activate/deactivate the
: yo ur e-mai ls will N OT be sen t if set to On. Contact
Write and send an e-mail
The
Send mail
Send mail
as a jpeg picture. Once received, your messages can be
e-mails to one or several recipients at a
time, including with an attachment such
menu allows you to send
forwarded and the attachments visualised with the appropriate software.
To one or several recipients
1.
Press ,, select
or
E-mail 2
Select
2.
If you select the phonebook «On SIM card», you will
not be able to access any e-mail address, but an edit
window will allow you to enter one. See “Phonebook”
page 29 for information on phonebook selection.
3.
4.
5.
6.
Send mail
Move-to select
to access the list.
Select a name in the list and press , to add it
to your mailing list or press
back to the previous sub-menu.
Back to the
the e-mail address or to
Add addressee
select
phonebook again and add new names to the mailing list.
Repeat steps 2 to 4 to add as many recipients as
required.
Select
Validate list
subject of your e-mail (you can leave this field
empty) and press
Mess ages
>
E-mail
, then
depending on the one you wish to use.
and press ,.
Add addressee
c
Addressees
list, press , to
Remove
, press , to access the
and press ,. Then enter the
,
it from the list, or
.
E-mail 1
and press
to cancel and go
,
Change
Messages 55
Page 58

7.
In the next window, enter the text of your e-mail
(you can also leave this field empty). Press
when you are ready to send your e-mail.
To learn how to enter text, see “Text or number entry”
page 18. If you exit the
your e-mail, its content is deleted without being stored.
8.
Select
Modify mail
change the content of your e-mail. This takes you
back to step 2: follow the instructions from there
to complete the list of recipients and send your
e-mail.
9.
Select
Send now
e-mail. Your mobile phone connects to the Internet server, sends your e-mail to the names present
in your mailing list, then disconnects.
You can cancel this operation by pressing and holding
the
c
key. Your mobile will then disconnect from
the server, exit the e-mail menu and go back to idle.
Disconnection also occurs each time you enter the
menu while a connection is in progress. In this
tings
case, your e-mail is lost.
Depending on the call settings you configured (see
“Call waiting” page 79), you can receive calls during an
Send e-mail
and press , if you want to
and press , to send your
menu before sending
e-mail connection. In this case, and if you accept the
,
incoming call, your phone switches to the call screen
context and the e-mail menu is closed; the phone goes
back to idle when you hang up.
With a sound or a picture
1.
Repeat steps 1 to 7 described above. Select
or
Add graphic
sound
2.
In both cases, a list appears, showing the available
JPEG, BMP, GIF or Midi files. Select the picture
and/or sound of your choice and press
You can only attach one JPEG file at a time. If you exit
the
Send e- mail
content (including attachment) is deleted without being stored.
3.
Select
Modify mail
confirm.
and press ,.
menu before sending your e-mail, its
or
Send now
Receive and read e-mails
Set-
Open mailbox
(some operators send you a SMS when you receive a
new e-mail). You must first download the headers from
the server before retrieving the corresponding e-mails.
E-mails are received on a server, which
you must connect to in order to retrieve
your e-mails on your mobile phone
Add
,
.
and press , to
56 Messages
Page 59
Connect to the server
Connection process
1.
Press , and select
mail 1
or
E-mail 2
to use. Select
Mailboxes 1 and 2 feature the same settings and options. Configuring them differently will allow you to
have two different e-mail addresses from your phone.
2.
Your mobile phone automatically connects to the
e-mail server and downloads the e-mail headers.
If you didn’t receive any e-mail,
played on the screen. Otherwise, the e-mail headers are displayed in the form of a list.
3.
The total number of mails received and pending
on the server is displayed on the top of the screen,
as well as the number of pages needed to display
all headers.
4.
Your mobile phone retrieves five e-mail headers at
a time. If
the end (respectively beginning) of the list, other
e-mail headers are pending: select one of the
available options and press
An e-mail without any attachment may be automatically displayed in the details screen.
Next
Messages
>
depending on the one you wish
Open mailbox
(respectively
E-mail
and press ,.
List empty
Previous
) appears at
,
to retrieve them.
, then
is dis-
Headers information
Select a header, press ,, select
,
E-
again to see the address it was sent from, the date
and time at which it was sent, its subject and the size of
the attachment if any. The following status icons may
appear in regards to each header:
[No icon] The e-mail can be downloaded.
The e-mail size is too large, it cannot be
downloaded.
The e-mail is marked to be deleted (see
page 59).
Download e-mails
e-mail. Repeat this operation to download each e-mail
corresponding to each selected header.
You can also press , to access the e-mail headers’
carousel and select
If the e-mail is too big (over 50 KB), it is rejected and
the download is cancelled.
Simply select one of the retrieved e-mail
headers and press
Get mail
and press , to download the
mail
Get mail
Details
,
. Then select
from the available options.
and press
Get
Messages 57
Page 60
Get and store attachments
If the e-mail you have received contains attachments
(JPEG picture, text file or another e-mail), they are
characterised by a specific icon:
Contains the details of the e-mail header (date
and time, sender’s e-mail address, etc.), press
,
to display these details.
The text of the e-mail itself can be viewed as an
attachment, press
any advanced options in this situation: it can be
read, but not stored nor forwarded.
A text file (text only, «.txt» format) is attached
to the e-mail, press
any advanced options in this situation either.
The application needed to manage this attachment isn’t available in your phone, or the e-mail
is too large to be uploaded.
Another e-mail is attached to the one you received (up to five e-mails can be attached one
after the other). There isn’t any advanced options for an attached e-mail: it can be read, but
not stored nor forwarded.
,
to read it. There isn’t
,
to read it. There isn’t
A picture in JPEG, BMP or GIF format is attached to this e-mail. Select the attached picture
in the list and press
your mobile phone (you can rename it if you
wish).
You must have stored a picture before being able to
view it via the
bum” page 71 for more details. If there isn’t enough
memory to store the new picture, you must delete other
items (name, event or picture) to release enough memory to be able to save the new picture.
A picture may not be accepted by your mobile phone
if it is too large, or if it doesn’t have the right file format. When receiving a picture via e-mail, proceed as
follows to obtain optimal results:
• The picture received must have been saved in
JPEG, BMP or GIF format.
• The size of the picture file should not exceed
50 KB.
• The optimal size is 128 x 128 pixels, in order to
be displayed correctly. We recommend you use a
standard picture editing software to create the size
of the picture you want.
• Use a file name, a maximum of 10 characters. You
can then add an extension such as «.jpg».
Picture album
,
twice to store it in
menu. See “Picture al-
58 Messages
Page 61

Add an e-mail address to the phonebook
You must have selected the phonebook in your phone to
be able to add an e-mail address; this menu item will
NOT appear if you selected the SIM phonebook.
You can add the sender’s e-mail address
Add to names
ing the header only is sufficient to access the e-mail
address).
1.
2.
Delete e-mails
1.
2.
to your phonebook, even when you haven’t yet downloaded his e-mail (retriev-
Select an e-mail header, then press , to access
the carousel options.
Select
Add to names
•<new> to create a new name, enter first and last
name then add the associated e-mail address,
or
•a name in the list and press , to add the
e-mail address to this name card. If it already
contains an e-mail address, you will be
prompted to press
Select the e-mail to be deleted and press , to
access the options.
Select
Delete
mark the e-mail to be deleted. A small icon allows
you to spot the header(s) of the list corresponding
to the e-mail(s) to be deleted.
and press ,. Then select:
,
to replace it.
, and press , to confirm and
To unmark the e-mail to be deleted, select this option
again.
3.
When you exit the
to confirm deletion of the selected item(s) from
the e-mail server. Press
to cancel (in this case, the marked e-mails remain
in the list and aren’t marked to be deleted any
more).
Reply to an e-mail
1.
Select the header of the e-mail you want to reply
,
to, press
select
2.
3.
4.
Forward an e-mail
In order to forward an e-mail to another recipient, you
must first have downloaded it (see “Download e- mails”
Reply
The address of the sender, which you can modify
(see “To one or several recipients” page 55), is
automatically added to the
Validate list
A new screen appears, that contains the subject of
the received e-mail preceded with
«Reply». Press
Enter the text of your mail, then press , to
send it: select
your reply.
E-mail
menu, you will be asked
,
to confirm or
to access the options menu, then
and press ,.
and press ,.
,
.
Send now
Addressees
and press , to send
list. Select
Re:
standing for
c
Messages 59
Page 62
page 57). From the
scribed above in “Reply to an e-mail”.
In both cases (reply to an e-mail or forward it), your
phone will disconnect from the server when reaching
the network inactivity time out set in the
nection
menu (see “Bearer” page 53). It will reconnect
to this server when sending the e-mail.
Broadcast Message
The Broadcast SMS feature is network-dependent.
Broadcast SMS
Reception
Reception
To p i c s
Topics
Forward to
option, proceed as de-
Auto discon-
Activate
or
You can
Deactivate
the reception of SMS broadcast regularly transmitted to all subscribers on the network.
Allows you to set the reception of cell
On
or
Off
broadcast messages
. When On,
you must define one or several topics as
described below.
Allows you to define the type of messages you want to receive. To define a new
type, select
<New>
, enter the code pro-
or delete it. You can enter up to 15 different types in
the list. To obtain the codes corresponding to the different types, contact your operator.
Distri ct codes
Allows you to select the type of messages
you would like to be permanently dis-
District Code
played on the idle screen. As a result, for
this special treatment of the message, you must enter
the type in both the
District code
and the
To p i c s
menu.
Instant message
Allows you to set the
On
When
, any short message (SMS) you receive is au-
Instant message
tomatically displayed in idle mode.
Scroll down to read it, and quickly reply by pressing
,
twice: first to enter the edition screen, then to
send your message. The phone will automatically go
back to the idle screen.
If you receive a second SMS while you are reading one,
c
press
to exit the first one or reply to it. The mobile
phone will then display the second message.
feature On or
Off
vided by the operator, and, if desired, associate a name.
If you select an existing type in the list, you can change
60 Messages
.
Page 63

4.
MMS
Your mobile phone allows you to send
and receive MMS (multimedia messag-
MMS
including music mixes you have created with BeDJ or
memos that you have recorded.
A multimedia message can be made of one slide (including text, sound and image), or of several: in this
case, the message is played in a slide show, whether you
send it to an e-mail address or to another mobile
phone.
Create an MMS
Select the addressees
1.
2.
3.
You must have selected the phonebook «In phone» to
access an e-mail address. See “Phonebook” page 29 for
information on phonebook selection.
es), featuring texts, pictures and sounds,
Press m while in idle mode.
Select
New MMS
Select a name in the list and press , to add it
to your mailing list,
Select
e-mail address you wish to send your message to.
Then press
and press ,.
<New>
OR
and enter the phone number or
,
.
If you wish to send your message to this person
only, select
If you want to send it to several people, select
Insert name
again and to add new names to the mailing list
(up to 20 names).
5.
Add as many recipients as required, then select
Validate list
You can select one of the items and press , to
the e-mail address or phone number, or to
from the list.
Design your message
1.
On the left hand side of the screen, 5 icons allow
you to add a
the message or access the
+
2.
Press , to access the
picture and press
The first window of your message is displayed,
showing the selected picture, which is resized if
needed, in order to fit the screen.
Although the picture preview when creating the MMS
is (W)105 x (H)55 pixels, the max. size of a picture you
can send is (W)640 x (H)640 pixels, and the max. size
of an MMS (sent or received) is 50 KB.
Validate list
, press , to access the phonebook
and press ,.
or - to go to the previous or next icon.
Picture
,
and press ,.
Remove
, add
Te x t
, add a
Options
Picture Album
to add it to your MMS.
Sound, Send
menu. Move
list, select a
Edit
Messages 61
it
Page 64

Warning! The bigger the picture size, the longer it will
take to send it. A copyright-protected picture cannot be
sent. Select
picture.
3.
4.
Sounds can be one of the files available in the Album,
or a sound memo that you record when creating the
MMS: in this case, select
follow the procedure that appears on the screen.You
cannot attach an existing voice memo.
The icon of the item you have added (picture or sound)
changes colour to indicate its insertion.
5.
If you quit the MMS menu and haven’t finished writing your message, it will be automatically saved in the
Draft
None
if you don’t want to insert any
The
Te x t
icon is automatically selected: press
,
to access the text editing screen, enter the
text of your message (see “Text or number entry”
page 18 for help).
The
Sound
access the
press
Press , to send your message, or move
to access the options.
menu (see below).
icon is then selected: press , to
Sound Album
,
to add it to your MMS.
list, select a sound and
<Records>
, then
<New>
Access the options
Move - to go to the
The following options are available:
Add slide
Delete slide
and
Next slide
Previous slide
Slide duration
-
Options
icon and press ,.
To create a new slide and add it to
your slide show.
You can also press > when the last
page of the message you are currently
designing is selected.
Once you have created several pages,
<
move
To delete the selected page.
This option is only available if there is
more than one slide in the message.
To move to the next or to the previous
slide.
To change the value of slide duration
that you have set in
tion settings
delay between each slide.
or > to browse slides.
Settings
>
(see page 67), and to set a
Applica-
62 Messages
Page 65

Save MMS
as draft
Save as
template
Preview MMS
Add subject
When browsing the lists, specific icons show the type of
the selected message (read MMS, delivery report, template, etc.). The information about the message (sender,
recipients, subject) scrolls horizontally automatically
when selected.
To save your message as a draft, that
you can edit, complete and send later
on. MMS saved as drafts are stored in
MMS
>
Drafts
page 65).
Messages saved as drafts must feature a
subject.
To save your message as a template,
that you can use as a basis for other
MMS (e.g., «Happy birthday» type of
message). MMS saved as templates are
listed in
age folders” below).
To preview the slide show you have
created from the first to the last slide,
including sounds & pictures.
To edit and change or enter the subject of your message.
(see “Manage folders”
MMS
>
Templates
(see “Man-
Send your Message
As described above, you can either:
• Send your message as soon as it is completed:
select
Send MMS
and press ,.
Draft
• Save it as a
to send, select the message in
and press ,. Once it has been sent, the
MMS
MMS
is removed from the drafts list.
If the sending of a draft message fails, the message will
be moved to the
sent.
• Select it from the
the message to be sent from this menu, select
send MMS
the MMS is identified as a sent message in the
list.
In the two last cases, select the message to be sent in the
relevant folder. In all cases, select
,
: a progress bar allows you to follow the sending
of your message. Press
your message.
to complete it and send it later:
Outbox
menu, and identified as Not
Outbox
and press ,. Once it has been sent,
c
Drafts
, select
Send
menu and send it: select
Send MMS
to cancel the sending of
and press
Receive an MMS
Download and play an MMS
When you receive an MMS, an alert message appears
on the screen to inform you.
Messages 63
Re-
Page 66

1.
If you activated the
page 66), the message is automatically downloaded and placed in the
Inbox
2.
A notification isn’t the MMS itself, but an information
window gathering the details about the sender’s identity, date and time of reception, subject, etc. DO NOT
DELETE NOTIFICATIONS BEFORE YOU HAVE
RETRIEVED THE MESSAGE, or you will never be
able to do so.
In both automatic and manual modes, a message will
inform you if the size of the MMS you wish to download is bigger than the memory available in your
phone. In this case, you must free memory by deleting
data (picture, sounds, etc.). See “Memory Status”
page 72.
list and press > to play it.
If the
Manual
•Press
c
the notification in the
•Press , to display the details of the notification, then select
download the message itself. As for sending, a
progress bar allows you to follow the download
of the message.
Automatic
mode is activated:
to go back to idle mode and to save
Download
retrieval mode (see
Inbox
. Select it in the
Inbox, OR
and press , to
• If the sender of the message has asked for a
report
, a prompt will ask you to press , to
send it or to press
the report.
3.
Once the MMS is downloaded, select it in the
Inbox
list and press > to play it.
Pressing < or > will switch the player mode from
automatic to manual. In manual mode, press
>
to display the previous or the next slide.
Get and store attachments
When playing an MMS as described in the previous
section, press
:
tions
Play message
Next (or
Previous) slide
c
to refuse the sending of
,
to access the following
To switch back to automatic mode:
the MMS is then played as a continuous slide show.
To move to the next or previous
slide. You can also press
>
when viewing the MMS in
manual mode.
This item is not available when you
have selected the last (or first) slide.
Read
<
Player op-
<
or
64 Messages
or
Page 67

Rewind
Detach picture
Detach sound
Manage folders
The MMS menu allows you to manage your messages
in 4 different folders. The default (active) folder is the
last one you selected. To change the active folder, press
c
to return to the main MMS menu and select the
folder of your choice:
Inbox
To rewind the MMS back to the first
slide.
To detach the picture of the current
slide and save it in the
To detach the sound of the current
slide and save it in the
Lists all the
Read reports, Read
-You can
and reports.
-You can
MMS, display its
Notifications are automatically deleted
once you have received the full MMS. Do
NOT delete notifications before you have
retrieved the MMS, or you will never be
able to do so.
Notifications, Deli very
Read
or
Play, Forward
and
Delete
Details
Picture album
Sound album
Unread MMS
notifications
or
Reply
or
Dele te
and
.
to an
it.
Outbox
.
.
Templates
Drafts
Messages you have saved can only be sent from the
or
(whether message, notification or report) that you have
deleted. Press c to cancel deletion.
Lists the messages you have
Not sent
but
celled the sending procedure by pressing
the
-You can
Details
- In addition, an MMS not yet sent can
also be
Forward
Lists all messages saved as templates after
their creation.
You can
Lists all messages saved as drafts after their
creation, or automatically saved if you
quit the MMS menu before saving or
sending your message.
You can
Outbox
folders. You can NOT recover an item
yet (e.g., if you have can-
c
key).
Open, Dele te
of all these messages.
Re-sent
to someone, and you can
an MMS already sent.
Play, Edit
and
Play, Edit, Send
Delete
and
Settings
Your phone may have been pre-configured to directly
access the services offered. If not, you must have received
Sent
or created
or view the
templates.
Delete
drafts.
Draft
Messages 65
Page 68

from your operator the information items described in
the present section and enter them as given.
With some operators, access parameters can be set « over
the air». Please check directly by your operator.
Network account
Allows you to choose a data profile from the ones you
have set (see “Access settings” page 44 for complete information on how to configure or modify a data profile). This profile and the parameters it features will
then be used for connection.
Bearer
This menu allows you to select the type of network
used when launching a connection.
GSM
Your mobile will only use the GSM
network for connections.
GPRS
Your mobile will only use the GPRS
network for connections.
GPRS fi rst
Your mobile will first try to connect
to the GPRS network, then to the
GSM network if the GPRS network
isn’t available when connecting.
If selecting
GPRS first
, you must have configured both
MMS Centre
Allows you to enter or change the MMS address of the
server your phone will connect to.
Gateway address
Allows you to enter or change the IP address of the
server’s gateway.
Gateway port
Allows you to enter or change the Port number of the
server’s gateway.
You must have the information relating to the three
points above, supplied by your operator, and must enter
them exactly as given.
Application settings
Retrieval mode
Automatic
(default
mode)
Any new MMS you receive is automatically downloaded from the server and placed
Inbox
in the
, without you having to launch
a connection. Select the message you have
received in the
Inbox
and press >.
This mode is deactivated when roaming.
the GSM and GPRS settings (see “Access settings”
page 44).
66 Messages
Page 69

Manual
Messages are stored on the MMS server,
and you must connect manually to retrieve them:
1.
Press , to access the
2.
Select the notification item corresponding to this message and press
,
3.
4.
5.
.
Select
Read
When the
displayed, press
connection and download it.
Once the message is in your phone,
press
press
and press ,.
Details
,
, select
,
.
Inbox
.
of the message are
,
to launch the
Play me ssage
and
Delivery report
This option can be set On or
an SMS) whether your MMS was received or rejected.
The delivery report will display the sender’s identity,
date and time of receipt, MMS subject and status of delivery.
Off
and informs you (via
Read report
This option can be set On or
an SMS) when the status the MMS you have sent has
changed, i.e., whether it was read or deleted without
being read.
Off
and informs you (via
Auto save
This option can be set On or
tomatically save of the messages sent from the
menu. Messages saved will then appear in the
folder.
Off
and allows you to au-
Outbox
Outbox
Validity period
Allows you to select the length of time your message is
to be stored on the server, from
imum). This is useful when the recipient is not connected to the network (and thus cannot receive your
message immediately).
1 hour
to
1 week
(max-
Slide duration
Allows you to select the duration between each slide included in your MMS, from
1sec.
to
60 secs
.
Messages 67
Page 70
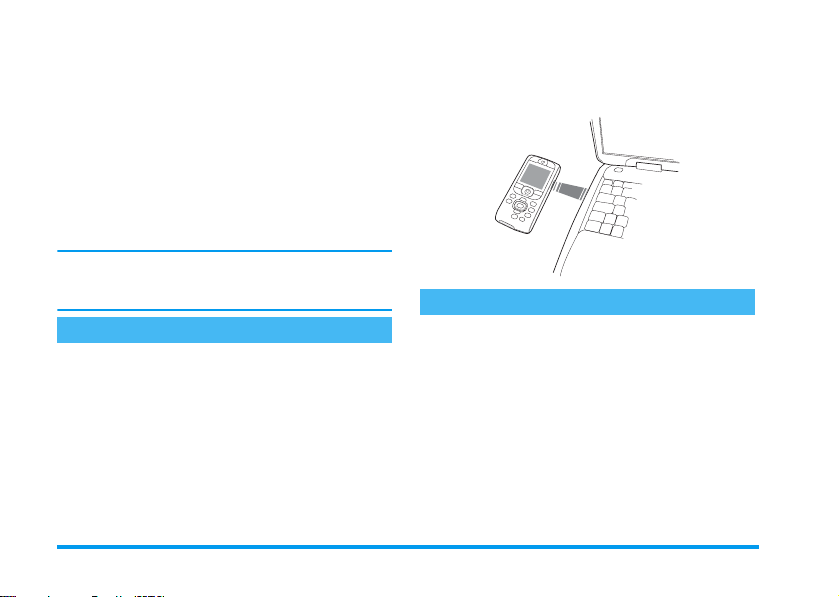
10 • Infrared
Your mobile phone integrates the infrared technology
(also called IrDA), that allows you to send or receive
data to and from other IrDA-compliant devices
through a wireless link (e.g., another mobile phone, a
PC or PDA, a printer etc.). Instead of sending a message, you can decide to use IrDA to quickly send a
sound you just mixed to a friend’s mobile phone, or to
receive pictures from their PDA.
Files that are copyright-protected cannot be sent. When
connecting with a PC, make sure you have activated its
infrared option.
Position of devices
Before sending or receiving data to and from another
device, they must be correctly positioned in relation to
your mobile phone. Make sure that the respective
IrDA ports are facing each other and are a maximum
of 50 cm away from each other (see diagram). Also
make sure that nothing obstructs the IrDA beam.
Send data
Select an item
To send data via IrDA from your mobile phone, you
must first select the item to be sent: for each category,
a sub-menu then gives you access to the
,
press
to send the selected data to the other device.
Send
option;
68 Infrared
Page 71
Data you
can send
Pictures (BMP,
GIF, JPEG)
Sounds (MIDI
files & ringers)
Names
Events
Where to find it
in the phone menus
Multimedia
Multimedia
(or live from BeDJ when mixing music,
see “Music & Mix” page 25).
Phonebook
(or press-when in idle mode).
Games & Appli
>
Picture album
>
Sound album
>
View names list
>
Organiser
>
Events
Send the selected item
As soon as your phone finds another IrDA-compliant
device to communicate with, the sending automatically takes place. Messages are displayed on the screen, for
you to follow the process.
If the phone finds several IrDA devices, a list is displayed on the screen, for you to choose from. Press
,
to confirm and to send the selected data.
Sending is cancelled in the following cases:
- the phone cannot find another device and the time out
is reached before any data is sent,
- the infrared link is broken,
- you press the c key to cancel the process.
Receive data
Activate IrDA
To receive data, press , and select
Infrared
>
Receive
Infrared
item and waits for the other IrDA device to send it. As
when sending, messages are displayed on the screen
and allow you to follow up the process.
Receiving is cancelled in the following cases:
- the phone isn’t contacted by another device and the
time out is reached before data is received,
- the infrared link is broken,
- the size of the file sent is too large for your phone to
manage it,
- you press the c key to cancel the process.
mobile phone is then ready to receive an
Save the data received
Several options are available when receiving data from
another IrDA device:
Press
c
Cancels the process: if you confirm your choice by
pressing
,
you have received isn’t saved.
, the phone goes back to idle and the data
and press ,. Your
Infrared 69
Page 72

Press
,
Gives you access to the options menu, from which the
following options are available:
Save
Show
Saves the data in the appropriate menu
(
Name
cards in the
cards in the
back to idle.
In the case of a
screen will be opened, for you to save
this new record.
The files default names are used, and
you can freely rename each of them via
the appropriate menu (i.e. in
>
Sounds
when you have saved a ringer
you would like to rename).
Displays the details of the data you have
received: press
screen.
You must save the data to modify it.
If you have received a
displayed in full screen.
If you have received a
played once. Press
playing it, or move the side keys up or
down to change the volume.
Organiser
Name
c
c
Phonebook, Event
, etc.), then goes
card, a
<New>
Multimedia
to go back one
Picture
, it will be
Sound
, it will be
or , to stop
Use the phone as a modem
You can also use your mobile phone together with a PC or a PDA, e.g. to surf
Data
To fully benefit from the services available via IrDA
(send and receive SMS, e-mail and fax, upload pictures
and MIDI sounds in your phone, phonebook synchronization, GPRS Wizard, etc.), you must install Mobile
Phone Tools on your PC. This software application is
available on the CD-Rom shipped with your phone.
The software supplied on the CD-Rom is not compatible with Apple
ports Windows® 98 SE, ME, 2000 and XP.
Specific software modules for Lotus Notes, Lotus Organizer and Microsoft Outlook are designed to allow
synchronisation from your Philips mobile phone to
these applications: refer to their respective user guides
for detailed information concerning installation and
configuration.
the Internet or send faxes.
®
Macintosh® computers. It only sup-
70 Infrared
Page 73
11 • Multimedia
Picture album
JPEG pictures must have the correct size and format
for your mobile phone to store and display them correctly. Please check “Get and store attachments”
page 58 for complete information on this subject.
This menu allows you to manage and
Picture Album
When entering one of the available sub-menus, the
pictures stored in your phone are displayed as a text
list. To access the graphical display, select a picture in
the list and press
to the next or previous picture, or
the text list. Press
Rename
Delete
Send by MMS
display the pictures stored in your mobile phone.
>
. Then press + or - to go
,
to access the following options:
To
Rename
name and press
To
Delete
To send the selected picture via MMS
(see “MMS” page 61 for details).
<
to go back to
it: press ,, enter a
,
again.
the selected picture.
Send by
Infrared
Send by Email
Set as
wallpaper
Pictures in the
ed. New pictures are stored in
isn’t enough space to store a new picture, you must delete some other pictures to release memory.
Sound album
Sound Album
ble sub-menus, the sounds are displayed as a text list.
+
Press
and wait for a few seconds for the sound to be played.
To send the selected picture via infrared to another IrDA device (see “Infrared” page 68 for details).
To send the selected picture via
E-mail (see “E-Mail” page 52 for details).
To set the selected picture as
Wallpaper
(this option must be set
in
Settings
>
Display
, see page 38).
Standard Pictures
This menu allows you to manage and listen to the sounds stored in your mobile
phone. When entering one of the availa-
or - to go to the next or previous sound
folder cannot be delet-
Own Pictures
On
. If there
Multimedia 71
Page 74
Select a sound and press , to access the following
options:
Rename
Delete
Send by MMS
Send by
Infrared
Send by Email
Set as ringer
Set as
SMS / MMS
ringer
You will not be able to send sounds that are protected
by a copyright. Sounds in the
cannot be deleted.
To
Rename
it: press ,, enter a
,
name and press
To
Delete
the selected sound.
To send the selected sound via MMS
(see “MMS” page 61 for details).
To send the selected sound via infrared to another IrDA device (see “Infrared” page 68 for details).
To send the selected sound via E-mail
(see “E-Mail” page 52 for details).
To set the selected sound as the current
Ringer
.
To set the selected sound as
(this option must be set On in
ringer
Settings
>
Sounds
again.
Messages
, see page 36).
Standard melodies
folder
Demo mode
,
Press
Demo mode
If you turned the phone on without having inserted a
SIM card, this menu is available in the first menu level.
to launch the
Demo
movie.
Memory Status
This menu allows you to display the per-
Memory status
capacity: pictures and sound album, recorded memos
and voice tags for voice commands, messages you have
stored in the phone, phonebook and organiser entries,
games, etc.
Your mobile phone is supplied with many sounds and
pictures. You can only delete sounds or pictures in the
Own Pictures
memory space for your own sounds and pictures.
Press
shows you the percentage of memory free and the
phone’s total memory in KB. Press
cess the detailed list of memory used by each feature.
centage of memory available in your
phone. Several features share the mobile
or
Own Melodies
,
to check the memory status. The display
folders, e.g., to free
,
again and ac-
72 Multimedia
Page 75
If «List full» appears when saving a new item or to free
memory space, you must delete an item to be able to create or add a new one.
Sound recording
This menu allows you to record a sound
Sound recording
Press
then press
sound. Follow the instructions on the screen and press
,
or
Rename
of 1 min. maximum, and up to 20 different sounds, depending on the Memory
status.
,
and select
,
once your sound is recorded. You can then
it.
Multimedia
again. Select
>
<New>
Sound recording
to record a new
Delete
Memos can then be used as alarm or incoming call
ringers, etc. Voice memos previously saved cannot be
sent by MMS.
BeDJ
This menu allows you to launch BeDJ:
,
(see “Music & Mix” page 25
,
(see “Taking pic-
,
BeDJ
Camera
Camera
press
for details).
This menu allows you to activate the
camera: press
tures” page 20 for details).
Multimedia 73
Page 76
12 • Games & Appli.
Euro converter
The
-> Euro
a sum into Euros by entering the amount
-> Euro
and pressing
The
a sum from Euro s by entering the
Euro ->
amount and pressing
The currency used for the conversion is determined by
the country where you have subscribed. The Euro converter is available upon subscription and only in countries using the Euro.
Calculator
This menu provides the following func-
Calculator
Addition By pressing the * key.
Subtraction By pressing the
Multiplication By pressing the
Division By pressing the
Equals By pressing the
tions:
menu enables you to convert
,
<- Euro
.
menu enables you to conver t
,
*
key twice.
*
key 3 times.
*
key 4 times.
#
.
key.
Enter the figures using the keypad. Calculator accuracy
is to 2 decimal places and is rounded up to the higher
decimal figure. Press
Press and hold
c
twice to return to idle mode.
c
0
to correct the numbers.
to get the dot. Press and hold
Alarm clock
This menu allows you to set the alarm
Alarm clock
-
select:
-
Once
-
Every day
of the week,
-
On weekdays
weekdays only.
Then select one of the alarm alerts: the buzzer, a melody or a sound recording (the latter being played only
once). Select an item in the list if required, and press
,
The alarm clock will ring even if you turned off your
phone, and even if the Ringer volume is set to
page 36). Press any key to stop the alarm ringing.
clock. Press
Appli
to activate it. Enter the time, then press , and
activates the alarm at a set hour on a set day,
activates the alarm at a set hour every day
activates the alarm at a set hour on
to confirm your choice.
>
Alarm clock
,
and select
, then press + or
Games &
Off
(see
74 Games & Appli.
Page 77
Organiser
Create a new event
The
Events
Organiser
When the organiser alert is On (see page 37), a beep
alerts you when an event is due.
1.
2.
3.
4.
This menu only applies to
Note that the reminder depends on the time set and displayed on the screen. As such, it will be updated when
changing time zones (see “Time and date” page 46).
and store them in your organiser. Events
can be
Select
Organiser
,
.
Select the type of event to create (
To D o
) and press ,.
Enter the starting and ending date & time of the
event and press
the event (e.g. «Meeting with Smith») and press
,
.
The
Set Reminder
alerts triggered at the chosen time. Move
>
, set the
,
.
menu allows to create events
Meetings, Holidays
>
Events
>
,
, enter the text concerning
menu reminds you of events via
Reminder
for this event and press
Meeting
or
<New>
and press
Holiday, Meeting
and
To D o
To D o s
<
events.
or
Move < or > to set the
option for this event and press ,.
6.
The events will be listed using start time and date.
From the events list,
-press and hold
.
,
-repeat steps 2 to 5 to create more events.
The organiser shares the mobile capacity and memory
with other features (phonebook, picture album, sound,
etc.). As a consequence, all features are inter-dependent: the more events you create, the less names, memos
or pictures you can store, and vice-versa. 299 is the
maximum total of events + names you can store.
If «List full» appears, delete an event (or name) to be
able to create a new one. To check the memory available in your phone, press
Memory status
c
to go back to the idle screen,
,
.
and select
Modify an event
Change an event
When creating an event, not all fields are
available, this is designed so make creat-
Change
an event, these further options become available.
1.
ing a new event quicker. When changing
To change an event, select the event of your
choice and press
,
.
Repeat Event
Multimedia >
5.
Games & Appli. 75
Page 78
2.
When your phone displays the details of the
selected event, press
,
again.
Changing a repeated event will also modify all instances of this event: in this case, press , to confirm.
3.
Change any information as needed and as
described above.
Deleting an event
,
, select
Change
and press
Deleting a single event
Select the event of your choice and press , twice.
Then select
Delete
and press , to confirm.
Deleting a repeated event
• By selecting a past occurrence: select a past occurrences of an event and press
event details appear, press
Dele te
and press , to confirm: only the past
occurrences of the selected event are deleted.
• By selecting a future occurrence: select a future
occurrence of an event and press
event details appear, press
Dele te
and press , to confirm: all occurrences
of the selected event are deleted.
,
,
, then select
,
,
, then select
. When the
. When the
Deleting past events
You can also delete past events by select-
Delete past
Delete past
starting date (past or future) from which all previous
events will be deleted and press
events preceding this date.
To delete all events set in your organiser, enter a starting date several years ahead (e.g., 3st of December,
2010). This way, you make sure all events preceding
this date are deleted at once.
View s of even ts
The
respective format all events stored in your organiser.
To display events in these views, proceed as follows:
1.
2.
3.
Time zone
Time zone
ing
ganiser menu. In this case, enter the
Day view, Week view
Select the view of your choice and press ,.
Once you entered the selected view, move
or > to display the previous or next day, week
or month.
Press , to display the list of corresponding
events or to create a new one.
Although changing time zones is necessary when travelling a lot, be aware that
it will impact all organiser reminders: the
at the first level of the Or-
,
twice to delete all
and
Month view
display in the
<
76 Games & Appli.
Page 79
event alarms will be updated depending on the time
displayed on the screen (see “Time and date” page 46).
Brick Game
This menu can be subscription dependent. As such its
icon and content may vary.
This menu gives you access to the brick
Brick Gam e
game. The object of the game is to destroy the bricks by hitting them with the
ball.
When you have destroyed the last brick, you access the
next level. Keys used are the following:
4
and 6To move the racket left or right.
*
and #To throw the ball left or righ t. Press ei-
0
ther of these keys to start the game.
To pause the game; pause time is limited to 2 min. after which the screen
returns to idle mode and the game is
lost.
Games & Appli. 77
Page 80
13 • Call information
Call settings
This menu allows you to set all the call
Call settings
Call forward
Call forward
applies to:
Before activating this option, you must enter your voice
mailboxes’ numbers (see “Mailboxes” page 78). This
feature is subscription dependent, and different from
the call transfer, which takes place when one/several
calls are in progress.
Unconditional
The unconditional option will divert all the incoming
calls.
Warning! When selecting this option, you will not receive any calls at all until you deactivate it.
options (call forward, waiting, etc.).
Allows you to divert incoming calls either to your mailbox or to a number
(whether in your
Data calls, Voi ce c a l l s
Phonebook
and
Fax calls
or not) and
.
Conditional
This option allows you to choose in which circumstance(s) you want to divert incoming calls. Three options are available:
If not reachable
call),
busy
(you are already on the phone and your subscription doesn’t include the call waiting option or you haven’t activated it). Each option can be set
independently.
Once you have selected either
, choose whether you want to divert calls to your
tional
voice mailbox or to another phone number, or cancel
the call forward.
Status
Status
If no reply
Allows you to display the status of all call
forwarding.
(you haven’t replied to the
(your network isn’t available) or
Conditional
or
Uncondi-
Mailboxes
This menu allows you to enter your
Mailboxes
In some cases, you might have to enter two numbers:
one to listen to your mailbox, the other one to forward
calls. Contact your operator for more information on
this subject.
voice mailbox numbers (if not available
on your SIM card).
78 Call information
If
Page 81
Auto redial
Allows you to set the auto redial On or
Off
Autoredial
. When On and if the person you are
calling is busy, your phone automatically
redials this number until a successful connection is
made, or until the maximum number of attempts is
reached (10). The phone emits one beep at the beginning of each attempt and one special beep if the connection is successful.
The time between redials increases with each attempt.
Any key answer
Allows you to accept a call by pressing
Any ke y answer
any key, except
)
, used to reject a call.
Call waiting
Call waiting is managed differently de-
Call waiting
With GSM call
With GSM call
pending on the type of network (GSM
or GPRS) you have selected.
Allows you to
call waiting and applies to:
calls
,
Fax calls
Activate
and
or
Data calls
Deactivate
All calls, Vo ic e
.
When this option is active, you hear a beep if someone
tries to call you while already on a call. Select the
option to find out whether the GSM call waiting is active or not.
This function is subscription-dependent. Contact your
operator.
With GPRS call
Allows you to
Activate
call waiting for voice incoming calls
With GP R S call
while a GPRS connection in ongoing.
Caller ID
Allows you to
to your correspondent. The
Caller ID
tion will inform you if this function is
activated or not.
Show
or
Call list
This menu provides you with the list of
outgoing and incoming calls, as well as
Call List
the
tails. The calls (made, missed and received) are displayed in chronological order with the most recent on
top of the list. When the
displays
attempts at auto redialling and call de-
Call list
List empty
.
is empty the screen
or
Deactivate
Hide
your identity
Status
Status
the
op-
Call information 79
Page 82
Call list
From the main carousel, press , then
select
Call Info
>
Call list
>
Call list
Call list
rows to scroll the list and press
the date, time, number, call status of any selected call
and to know if it was sent or received. Press
access to a carousel which allows you to
handsfree
lected call or
play the call list. Use
this correspondent,
Store
the associated number.
+
,
again to consult
Send a SMS, Delete
to dis-
and - ar-
,
Call
or
the se-
Reset
Press,, select
Reset
Reset
The phone stores the last 30 numbers in the
most recent number being displayed first. You can redial directly any of these numbers. In idle screen,
+
move
in your
Phonebook
played. Move
and press (. Press ) to hang up.
. Press,twice to reset.
to access the
, the corresponding name is dis-
+or-
Call Info
>
Call list
Call list
Call list
. If a number listed is also
to select the number to redial
, then
Call counters
This menu allows you to handle the cost
Call counte rs
GSM counters
for
Call
, the
GSM counters
The GSM Call Counters do not include WAP connections. Most options mentioned below are subscriptiondependent.
Total duration
Total duration
Last call information
This feature is subscription dependent.
Last call info
Info at call end
This feature is subscription dependent.
and duration of your calls.
This menu gives you access to the options described below.
Select this option and press , to
or
Reset
the time duration of
Incoming
calls.
This menu allows you to display the duration and/or cost of your last call.
Show
Outgoing
80 Call information
or
Page 83
Allows you to activate or deactivate the
Info at call end
To t a l c os t
systematic display of the length and/or
cost of each call when hanging up.
This feature is subscription dependent.
Allows you to display the accumulated
Total cost
cost and t o set the counter to zero. It may
be protected by PIN or PIN2 codes.
Shows how much has been spent, hav-
Show
ing established the charge rate.
Allows you to reset the current
cost
Reset
to 0; requires your PIN2 code.
Allows you to check the remaining
Show balance
credit (compared with previously set
limit).
Allows you to cancel the cost limit. It
Cancel cos t limit
may be protected by PIN or PIN2
codes (depending on your subscription).
Allows you to enter the cost limit used
in the
Cost limit
Show balance
menu.
Charge rate
GPRS counters
This feature is subscription and network dependent.
GPRS coun te rs
Last mobile session
Total
Mobile sess ion
Last PC session
PC session
The call counters managed by your mobile phone might
differ from the ones used by your operator. You should
therefore consider the call counters displayed on the
screen as informative items, but NOT as the actual
Allows you to set or change the rate
per unit. First enter the currency used
(three characters maximum) then enter the cost per unit.
This menu allows you to select either
one of the following options:
This option will display the last connection session or transfer volume of your
mobile phone (e.g., after a WAP connection over GPRS).
This option will display the last connection session or transfer volume of your
PC transmission.
charge rate basis.
Call information 81
Page 84
14 • WAP
Your mobile phone supports services
based on the Wireless Application Proto-
WAP
allows you to access services supplied with your network, such as news, sports, weather, etc.
Your mobile phone readily supports the WAP function
if it is included in your subscription; if your phone was
pre-configured, it shouldn’t be necessary for you to
change the settings described in this section.
With some operators, WAP parameters can be set remotely. Please check directly with your operator for detailed information.
Internet services
This main menu of the WAP browser allows you to
configure the settings related to WAP, connect to your
operator’s homepage, define bookmarks for direct and
faster connections, etc.
Launch a WAP session
1.
col (WAP). The built-in WAP browser
To launch a WAP session, press and hold the
key while in idle mode.
@
You can also select
Homepage
2.
3.
4.
5.
and press ,.
Your mobile phone will connect to the network
and according to the
defined in the menu
page 44).
The browser is launched and your phone connects to your operator’s homepage.
Move + or - to navigate the on-line
pages, and press
Press c to return to the previous page.
End a WAP session
To end a WAP session, press and hold @, OR select
Options
>
Exit
Homepage
The
Homepage
access when launching WAP from the idle screen. In
most cases, this menu item of the
is preconfigured and will connect directly to your
operator’s WAP homepage.
You can change this default homepage by specifying
the name and URL address of another homepage,
which will then replace the current one (see “Save as
homepage” page 86).
Operator Services.
Access settings
Settings
,
to select a highlighted item.
and press , to confirm.
is the link to the first WAP site you will
>
you have
>
Network
WAP s er v i c e s
WA P
(see
menu
82 WAP
>
Page 85

Bookmarks
This menu allows you to store your favourite WAP site
addresses, rename them if desired and access them
quickly from the list.
This can also be done while browsing: press @ to ac-
Options
cess the
Name and URL fields will be automatically filled in
with the information contained in the page you are
browsing.
Add bookmarks
1.
Select
press
2.
Start entering the new name: an edit screen automatically appears.
3.
Press , to save the name you entered.
4.
Press - to move to the address field and proceed the same way to enter the WAP address.
Manage bookmarks
This menu allows you to
or to
address. In both cases, press
Use bookmarks
To connect to a WAP site you have stored as a bookmark, simply select it in the list and press
launch the connection.
, then select
WA P
>
,
.
Edit
them in order to change their name and/or
Bookmarks
Bookmarks
Delete
. In this case, the
>
Add bookmark
the stored bookmarks,
,
to confirm.
,
Enter address
This menu allows you to enter a WAP site address, to
which you can connect directly when selecting it and
pressing
,
dresses without saving them as bookmarks.
1.
2.
All the addresses you enter in this menu and connect to
at least once, will appear in a list: select one of the items
and press
and
without having to enter the complete address again.
. This is a quick way to access WAP ad-
Press , and enter the URL address of the
desired homepage.
Press , to connect to this page.
,
to reconnect to the corresponding page,
Settings
Edit Homepage
Allows you to change the
1.
Press , and start entering the new name. An
edit screen automatically appears.
2.
Press , to save the name you entered.
3.
Back to the
move to the address field and proceed the same
way to change the address.
Select Profile
This menu allows you to select one of the available pro-
to
files, and to then define the connection settings for
each of them: scroll
Homepage
Edit Homepage
+
menu, press - to
or - to choose the profile
name and address:
WAP 83
Page 86

of your choice, then press < or > to select /
deselect it and press
All connection settings described below will apply to the
selected profile, which you can then rename for easier
identification.
Connection
,
to confirm.
Select connection
Allows you to select one of the data profiles you have
defined in
tailed information on this subject).
In the list that appears, select the connection setting of
your ch oice and press
Settings
>
Access settings
,
(se e page 44 for de-
to confirm.
Bearer
Allows you to select the type of network used by the selected profile when launching a connection.
GSM
or
GPRS
the GPRS network for WAP connections.
GPRS first
GPRS networ k, then to the GSM network if the GPRS
network isn’t available when connecting.
Selecting this option requires you to have configured
both GSM and GPRS settings. See page 44 for details.
: your mobile will only use the GSM or
: your mobile will first try to connect to the
Proxy address
Allows you to specify a proxy gateway address to be
used when launching a WAP connection using the selected profile. Press
choice, then press
Press and hold 0 to enter a dot «.»
,
and enter the address of your
,
to confirm.
Proxy port
Allows you to specify a proxy port number, in case the
proxy you are using requires a different port number.
Press
,
and enter the number of your choice, then
,
press
Security
to confirm.
Certificates
Select this menu and press , to display the list of installed security certificates. Select one of the items in
the list and press
,
to display its details or delete it.
Session info
Allows you to display information about the current
WAP session: security type, class, etc. Press
back one page.
c
to go
Current certificate
Allows you to display the currently used security certificate. Press
c
to go back one page.
84 WAP
Page 87
Rename Profile
This menu allows you to rename the currently selected
profile: enter the new name (an edit screen automatically appears), then press
entered.
Browser Options
This menu allows you to activate/deactivate the downloading of images attached to WAP pages. Select
or
Always
and press , to confirm your choice.
Selecting
Never
time of the pages browsed.
Cache
This menu allows you to empty an area of the phone’s
memory where the pages browsed during a WAP session are stored. Select
confirm your choice.
will speed up the global downloading
,
to save the name you
Clear cache
and press , to
Never
Push inbox
This menu allows you to read and manage messages
automatically sent to you by the network and / or by
your operator.
1.
If you have been informed that you received a
push message, press
2.
Otherwise, select
Internet services
access the list of messages.
,
to read it.
Operator Services.
>
Push Inbox
>
and press , to
WA P
Messages with high priority feature an exclamation
mark together with the read / unread icon.
3.
Press+ or - to browse the list and select
the message of your choice, press
4.
If the message contains a WAP address (or URL),
press
,
site.
5.
To delete one of the push messages, select
Inbox
6.
Select the message to be deleted and press , to
confirm.
to connect to the corresponding WAP
>
Manage
messages and press ,.
Options
While browsing Internet pages, press the
access the options described below.
The menus that are common to both
and
Options
menus are described in the above section.
Homepage
Gives you direct access to the Homepage of the WAP
site you are currently browsing.
Back
>
Brings you back to the previously browsed page.
,
to read it.
Push
@
key to
Internet services
WAP 85
Page 88

You must have browsed at least 2 pages for this option
to be available.
Forward
Takes you to the next browsed page (e.g., when you
have previously selected
Back
).
Refresh
Will reload the currently browsed page from its original server.
Save as homepage
This menu option allows you to save the currently
browsed WAP page as the default homepage.
1.
Select
Save as homepage
address of the page you are browsing automatically appears in the
2.
Enter a name for this homepage and press ,.
3.
Back on the
homepage name will be the first item on the list.
Press the
@
automatically to this page.
and press ,. The URL
Address
field.
Internet services
key while in idle mode to connect
menu, the
Save as...
When browsing WAP sites, this menu option allows
you to save images embedded in the pages that are displayed.
1.
While browsing, scroll + or - to select the
picture.
2.
Once the picture is highlighted, press @ to
access the
3.
Rename the picture if desired and press , to
save it in the
Options
. Select
Picture Album
Save as...
.
and press ,.
Exit
Allows you to end a WAP session: press , to confirm and to quit WAP.
Receive a call
When receiving a call whilst connected to WAP:
1.
Answering the call will quit the WAP application
and disconnect the current session. Your phone
will return to the last browsed page when you
hang up, but the connection itself will be lost.
2.
Rejecting the call will bring you back to the preview screen.
86 WAP
Page 89

15 • Operator services
Most items of the Operator Services menu (e.g. Service
numbers, Services +) are subscription-dependent and
specific to operators: your mobile phone readily supports them if they are included in your subscription.
Consequently, the menus shown following may or may
not be available. Contact your network operator for
detailed information on availability and rates.
The services provided may involve making a phone call
or sending a SMS for which you may be charged.
GSM strings
The phone supports standard GSM strings that can be
sent from the keypad to the network and used to activate services provided by the network.
•Example n° 1
Press
* 4 3 #
Call Waiting service.
•Example n° 2
* # 3 1 #
Press
if the mobile identification has been sent.
•Example n° 3
Press
* 6 1 #
feature call forward if no reply.
, then (, to activate the
, then (, to know
, then (, to activate the
•Example n° 4
* 6 2 #
Press
feature call forward if unreachable.
Contact your network operator for detailed information on GSM strings.
, then (, to activate the
DTMF tones
Some phone services (such as phone answering machines and pagers) require your phone to transmit
DTMF tones (Dual Tone Multi Frequency), also
known as “touch tones”. These are used to communicate passwords, callback numbers, caller choices, and
so on.
You can send DTMF tones at any time during a call by
pressing any of the keys
You can also attach a DTMF sequence to a phone
number before dialling it (or storing it in the
). The phone number and the DTMF part must
book
be separated by a wait character.
Pause and wait characters
To obtain a pause or wait character, press and hold
#
. The display shows w for a wait and p for a pause.
The phone always interprets the first pause character as
a wait character. When you dial a number containing
a wait character, your phone dials the first part (the
0
to 9, * and #.
Phone-
Operator services 87
Page 90

phone number) and then waits for the call to be connected before sending the rest of the digits as DTMF
tones. Any subsequent pause character is an ordinary
pause that generates a delay of 2.5 seconds.
For example: access your answering machine
To hear all messages (e.g. code 3) on your answering
machine (password 8421) at phone number
12345678, you could call:
The phone dials 12345678 and waits for the call to be
connected. When connected, the phone transmits
8421 (the password), pauses 2.5 seconds, and then
sends the last digit. If you find that 2.5 seconds is not
long enough for your needs, you can enter several
pause characters one after the other to increase the
pause time.
12345678w8421p3.
Make a second call
You can m ake a second ca ll during an acti ve call or during a call on hold. You can switch between the two calls
(the cost displayed on the screen depends on local
charge rate).
1.
While already on the phone, dial a number then
(
press
. The first call is put on hold and the
number is displayed at the bottom of the screen.
The second number is then dialled.
2.
To toggle between the two calls, press , then
select
Switch calls
one call to another, the active call is placed on
hold and the call which was on hold is activated.
3.
To hang up the active line, press ). The active
line is hung up and the call on hold remains as
such.
4.
To end the call on hold, use
it, then press
Notes:
The second number can be dialled either from the keypad or from:
- the phonebook, by pressing
name to be called,
- the Call list, by pressing
number to be called.
. Each time that you toggle from
)
.
Switch calls
-
, then selecting the
+
, then selecting the
to reach
Answer a second call
You are able to receive another call when already in
communication (if this feature is available with your
subscription). When you receive a second call the
phone emits an alert beep and the screen displays
waiting
.
Call
88 Operator services
Page 91
To receive a second call, you must have:
- subscribed to this feature,
- deactivated the Call forward option for voice calls (see
page 78),
- activated the Call waiting option (see page 79).
,
If you receive a second call, press
• accept the second call: the first one is put on hold,
the second one is active. If you want to toggle
between the two calls, press
calls
. Each time you toggle from one call to
another, the active call is put on hold and the call
which was on hold is then activated. To introduce
the new caller into a conference press
select
• reject the second call
• end the active call, then your incoming call is
Notes:
- If you also wish to answer the incoming call, press
(
Conference
ringing.
; to reject it, press
.
)
.
, then you can:
,
then select
Switch
,
- If you have activated call forwarding ‘If Busy’ (see
“Call forward” page 78), you will never receive second
calls since they are always forwarded when the line is
busy.
Answer a third call
Subscription dependent
While in communication and one call being on hold,
you may receive a third call. The phone emits an alert
beep. You can either end one of the calls before being
able to answer the third one or introduce the calling
party into a conference (see below). This service is limited to two current communications (one active and
one on hold).
Conference call
and
Subscription dependent
You can activate the conference call by
Conference
You may have up to five members at the same time and
end the conference with
disconnected.
In order to make consecutive o utgoing calls, first initiate a normal call with the first number of the conference. When the first member is on line, initiate a
second call as described in “Make a second call” above.
When the second call is engaged, press
making consecutive outgoing calls, or
create it from a multiparty call context.
)
. At this point all calls are
,
and select
Operator services 89
Page 92
Confere nce
bers are connected.
If there is an incoming call during the conference call
and there are less than five members, you can accept
this new call by pressing
then select
ference call. If there is an incoming call during a conference with five members already connected, you can
answer this new incoming call, but not add it to the
conference.
While a conference call is in progress, press
cess the
of the conference by selecting
. Repeat the above process until five mem-
,
Confere nce
. Press , again and
to add this member to the con-
,
Conf. members
options. Disconnect a member
Remove party
and press-
to ac-
,
to confirm, or select
ing
vate call with this member on ly (other members are put
on hold).
Private call
to have a pri-
Explicit call transfer
Subscription dependent
You can connect an active call and a call on hold. You
are disconnected when the transfer is completed. During a call press
This feature is different from the Call forward, which
takes place before you pick up the call (see page 78).
,
, select
Tr a n s f e r
and press ,.
90 Operator services
Page 93
Precautions
Radio waves
Your cellular mobile phone is a low power radio transmitter and receiver. When it is op-
erating, it sends and receives radio waves. The
radio waves carry your voice or data signal to
a base station that is connected to the telephone network. The network controls the power at which the
phone transmits.
• Your phone transmits/receives radio waves in the
GSM frequency (900 /1800MHz).
• The GSM network controls transmission power
(0.01 to 2 watts).
• Your phone complies with all relevant safety
standards.
• The CE mark on your phone shows compliancy
with European electromagnetic compatibility
(Ref. 89/336/EEC) and low voltage directives
(Ref. 73/23/EEC).
Your cellular mobile phone is your responsibility. To
avoid damage to yourself, to others or to the phone itself, read and follow all the safety instructions and
make them known to anyone borrowing your phone.
Furthermore to prevent unauthorised use of your
phone:
Keep your phone in a safe place and keep it
out of small children's reach.
Avoid writing down your PIN code. Try to
remember it instead.
Switch off the phone and remove the battery if you are
going to leave it unused for a long time.
Use the
Security
purchasing the phone and to activate call restriction
options.
should follow all local recommendations and regula-
tions when using your cellular phone both at home
and when away. Regulations on the use of cellular
phones in vehicles and aircraft are particularly stringent.
Public concern has been focused for some time on the
possible health risks for users of cellular phones. The
current research on radio wave technology, including
the GSM technology, has been reviewed and safety
standards have been drawn up to ensure protection
from exposure to radio wave energy. Your cellular tele-
menu to change the PIN code after
The design of your phone complies with all
applicable laws and regulations. However
your phone may cause interference with oth-
er electronic devices. Consequently you
Precautions 91
Page 94
phone complies with all applicable safety standards
and the Radio Equipment and Telecommunications
Terminal Equipment Directive 1999/5/EC.
Always switch off your phone
Inadequately protected or sensitive electronic equipment may be affected by radio energy. This interfer-
ence can lead to accidents.
Before boarding an aircraft and/or when
packing the phone in your luggage: the use of
mobile phones in an aircraft may be dangerous for the operation of the aircraft, disrupt the mobile
phones network and may be illegal.
In hospitals, clinics, other health care centres
and anywhere else where you may be in the
close vicinity of medic
In areas with a potentially explosive atmos-
phere (e.g. petrol stations and also areas
where the air contains dust particles, such as
metal powders).
In a vehicle transporting flammable products (even if
the vehicle is parked) or a vehicle powered by liquefied
petroleum gas (LPG), check first that the vehicle complies with the applicable safety rules.
al equ
ipment.
In areas where you are requested to turn off radio transmitting devices, such as quarries or other areas where
blasting operations are in progress.
Check with the vehicle manufacturer that
electronic equipment used in your vehicle
will not be affected by radio energy.
Users of pacemakers
If you are a user of a pacemaker:
• Always keep the phone more than 15 cm from
your pacemaker when the phone is switched on,
in order to avoid potential interference.
• Do not carry the phone in a breastpocket.
• Use the ear opposite to the pacemaker to minimise the potential interference.
• Switch off your phone if you suspect that interference is taking place.
Users of hearing aids
If you are a user of a hearing aid, consult your physician and hearing aid manufacturer to learn whether
your particular device is susceptible to cellular phone
interference.
92 Precautions
Page 95
Performance improvement
In order to improve the performance of your phone,
reduce radio energy emission, reduce battery con-
sumption and ensure safe operation adhere to the following guidelines:
For the optimal and satisfactory operation of
the phone you are recommended to use the
phone in the normal operating position
(when not using in hands-free mode or with
a hands-free accessory).
• Do not expose your phone to extreme temperatures.
• Treat the phone with care. Any misuse will void
the International Guarantee.
• Do not immerse the phone in any liquid; if your
phone is damp, switch it off, remove the battery
and let them dry for 24hrs before using them
again.
• To clean the phone, wipe it with a soft cloth.
• Placing and receiving calls consumes the same
amount of battery energy. However, the mobile
consumes less energy in idle screen when kept in
the same place. When in idle screen and while
you are moving, your phone consumes energy to
transmit updated location information to the net-
work. Setting the backlight for a shorter period of
time as well as avoiding unnecessary navigating in
the menus will also help to save the battery’s
energy for longer phoning and stand-by performances.
Information displayed on the battery
• Your phone is powered by a rechargeable battery.
• Use specified charger only.
• Do not incinerate.
• Do not deform or open the battery.
• Do not allow metal objects (such as keys in your
pocket) to short circuit the battery contacts.
• Avoid exposure to excessive heat (>60°C or
140°F), moisture or caustic environments.
You should only use Philips Authentic Accessories, as the use of any other accessories may
damage your phone and will make all guaran-
tees for your Philips phone null and void.
Make sure damaged parts are replaced immediately by
a qualified technician and that they are replaced with
genuine Philips replacement parts.
Precautions 93
Page 96
Do not use your phone while driving
It lowers concentration, which can be dangerous. Adhere to the following guidelines:
Give your full attention to driving. Pull off
the road and park before using the phone.
Respect the local regulations in countries where you
drive and use your GSM phone.
If you want to use your phone in a vehicle, install the
hands-free car kit which is designed for that purpose,
still ensuring you give full attention to driving.
Ensure that your phone and car kit do not block any
air bags or other security devices fitted in your car.
The use of an alarm system to operate a vehicle's light
or horn to indicate incoming phone calls is prohibited
on public roads in some countries. Check local regulations.
EN 60950 Norm
In case of hot weather or after a prolonged exposure to
the sun (e.g., behind a window or a windscreen), the
temperature of your phone's casing might increase, especially when featuring a metallic finish. Be very careful in this case when picking up your phone and also
avoid using it with an ambient temperature over 40°C.
Environmental care
Remember to observe the local regulations regarding the disposal of your packaging materials, exhausted batteries and old phone and
please promote their recycling.
Philips has marked the battery and packaging with
standard symbols designed to promote the recycling
and appropriate disposal of your eventual waste.
Battery: The crossed-out dustbin signifies that
the battery should not be disposed of
with general household waste.
Packaging: The mobius loop symbol signifies the la-
belled packaging material is recyclable.
The green point symbol signifies that a
financial contribution has been made to
the associated national packaging recovery and recycling system (e.g. EcoEm-
ballage in France).
The chasing arrows symbol on the plastic tray and plastic bag indicate that the
materials are recyclable and also identifies the plastic material.
94 Precautions
Page 97

Troubleshooting
The phone does not
switch on
The display shows
BLOCKED when
you switch on
The and
symbols are not displayed
Remove and reinstall the battery (see page 7). Then charge
the phone until the battery
icon has stopped flashing. Finally, unplug from the charger and try to switch the
mobile on.
Somebody tried to use your
phone but didn’t know the
PIN code nor the unblocking
code (PUK). Contact your
service provider.
The network connection is
lost. Either you are in a radio
shadow (in a tunnel or between tall buildings) or you
are outside the network coverage area. Try from another
place or contact your network
operator for assistance/information about the network.
The display doesn't
respond (or the display responds slowly) to key presses
Your phone doesn’t
return to the idle
screen
Your phone doesn’t
display the phone
numbers of incoming
calls
You can’t send text
messages
The display responds more
slowly at very low temperatures. This is normal and does
not affect the operation of the
phone. Take the phone to a
warmer place and try again.
In other cases please contact
your phone supplier.
Press and hold c, or
switch off the phone, check
that the SIM card and the battery are installed correctly,
and switch it on again.
This feature is network and
subscription dependent. If the
network doesn’t send the caller’s number, the phone will
display
Call 1
your operator for detailed information on this subject.
Some networks don’t allow
message exchanges with other
networks. Contact your operator for detailed information
on this subject.
instead. Contact
Troubleshooting 95
Page 98

The display shows
IMSI failure
You can’t receive
and/or store JPEG
pictures
When charging the
battery the battery
icon shows no bars
and the outline is
flashing
The display shows
SIM failure
This problem is related to
your subscription. Contact
your operator.
A picture may not be accepted
by your mobile phone if it is
too large, or if it doesn’t have
the correct file format. See
page 58 fo r complete information on this subject.
Only charge the battery in an
environment where the temperature does not go below
0°C (32°F) or above 50°C
(113°F).
In other cases please contact
your phone supplier.
Check that the SIM card has
been inserted in the right position (see page 7). If the
probl em remains, your SIM
card may be damaged. Contact your operator.
You are not sure that
you are receiving
calls properly
When attempting to
use a feature in the
menu, the mobile
displays not allowed
The display shows
Insert your SIM card
To receive all calls, make sure
that none of the features
«Conditional call forward» or
«unconditional call forward»
is activated (see page 78).
Some features are network dependent. They are only available, therefore, if the network
or your subscription supports
them. Contact your operator
for detailed information on
this subject.
Check that the SIM card has
been inserted in the right position (see page 7). If the
problem remains, your SIM
card might be damaged. Contact your operator.
96 Troubleshooting
Page 99

Your phone doesn’t
work well in your
car
A car contains many metallic
parts that absorb electromagnetic waves which can affect
the phone’s performances. A
car kit is available to provide
you with an external antenna
and enables you to make and
receive phone calls without
handling the handset.
You should check with local
authorities if you are allowed
to phone while driving.
Troubleshooting 97
Page 100
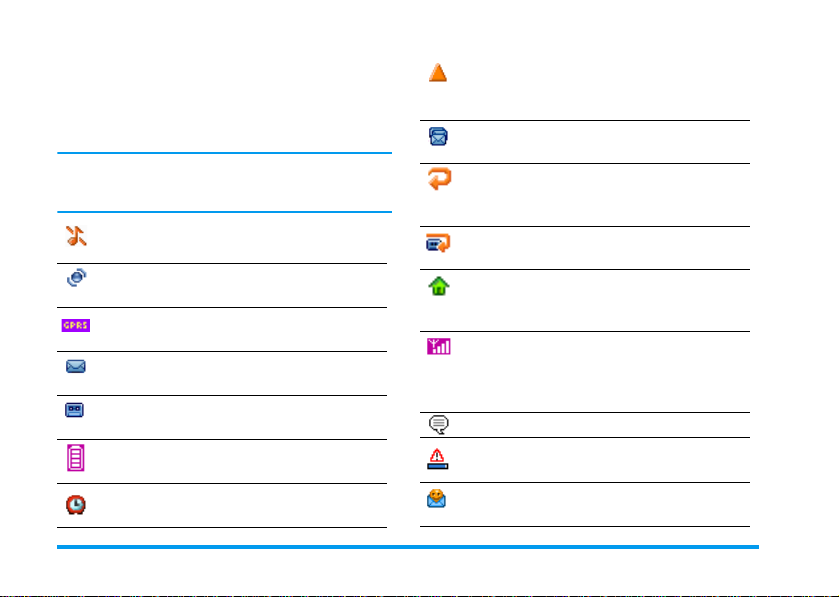
Roaming
Icons & symbols
In idle mode, several symbols can be displayed
simultaneously either on external screen or main
screen.
If the network symbol isn’t displayed, the network is
not currently available. You may be in a bad reception
area: move to a different location.
Silent
- Your phone will not ring when
receiving a call.
Vibra
- Your phone will vibrate when
receiving a call.
GPRS attach
connected to the GPRS network.
SMS message
message.
Voice mail
mail.
Battery
(4 bars = full, 1 bar = low).
Alarm clock
- Your mobile phone is
- You have received a new
- You have received a new voice
- The bars indicate the battery level
activated.
- Displayed when your phone is
registered to a network other than your own
(especially when you’re abroad).
SMS full
- Memory for messages is full. De-
lete old messages to receive new ones.
Call Forward Unconditional to number
All your incoming voice calls are being forwarded to a number other than voice mail.
Call Forward to voice mailbox
calls are being forwarded to voice mail.
Home zone
network operator. Subscription dependent,
contact your service provider for details.
GSM Network:
a GSM network
Reception qual ity:
the better the reception is.
Instant message
Memor y ful l
Delete items to store new ones.
MMS message
multimedia message.
- A zone designated by your
your phone is connected to
the more bars are shown
- option is set to On.
- The phone’s memory is full.
- You have received a new
- All your
98 Icons & symbols
-
 Loading...