

Page 1
Question?
Contact
Philips
Question?
Contact
Philips
Always there to help you
Register your product and get support at
www.philips.com/support
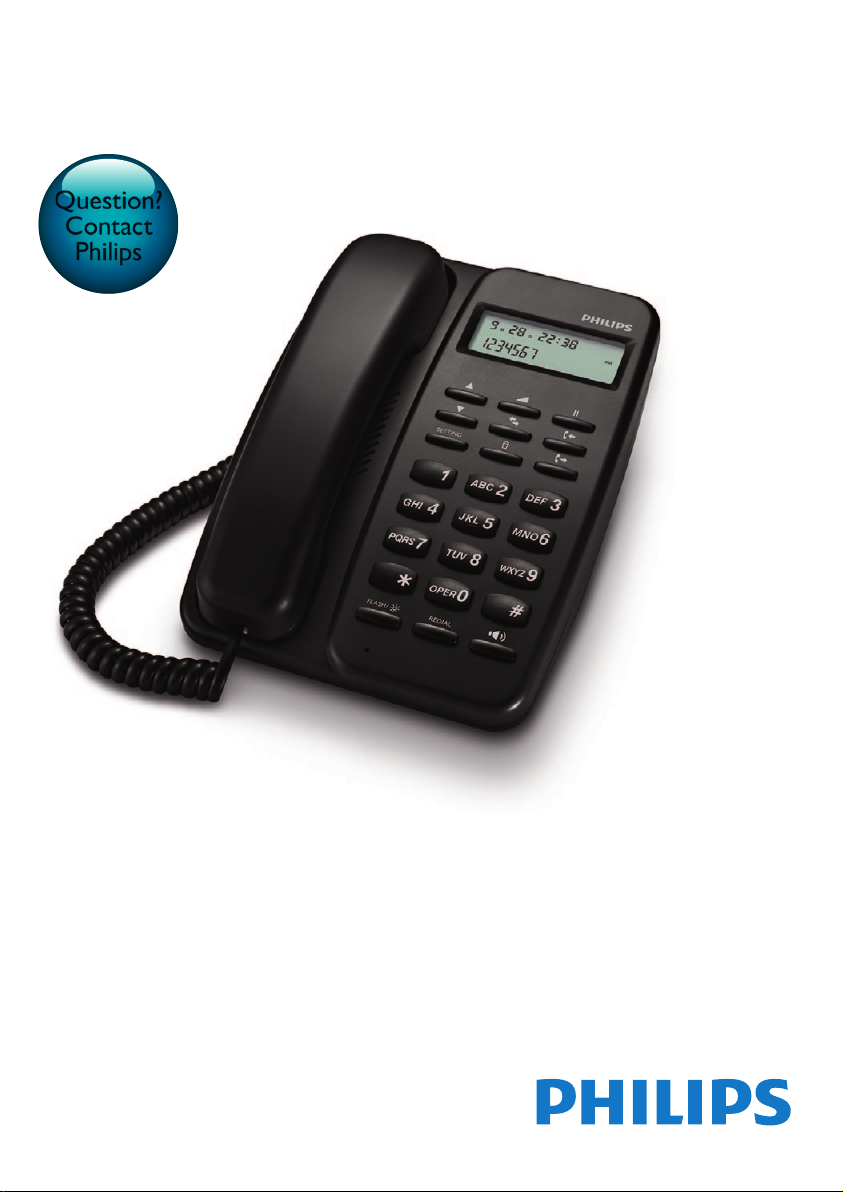
CRD150
Question?
Contact
Philips
User manual
Page 2

Page 3

Contents
1 Important safety instructions 2
2 Your phone 2
What is in the box 2
Overview of the phone 3
3 Get started 4
Connect the base station 4
Insert the supplied batteries 5
Set the date and time 5
What is standby mode? 5
4 Display icons 6
5 Calls 6
Make a call 6
Answer a call 7
Adjust the speaker volume 7
Turn the speaker on or off 7
Transfer a call 7
6 Settings 7
Set the contrast of the screen 7
Temporary time setting 7
English
7 Technical data 8
8 Notice 8
Disposal of your old product and
batteries 8
9 Frequently asked questions 9
EN 1
Page 4
1 Important safety
instructions
Warning
•
The voltage on the network is classied as TNV-3
(Telecommunication Network Voltages), as dened in
the standard EN 60950.
2 Your phone
Congratulations on your purchase and welcome
to Philips!
To fully benet from the support that
Philips offers, register your product at
www.philips.com/welcome.
To avoid damage or malfunction
Caution
Use only the batteries listed in the user instructions.
•
• Risk of explosion if battery is replaced by an incorrect
type.
• Dispose of used batteries according to the instructions.
• Do not dispose of batteries in re.
• Always use the cables provided with the product.
• Do not allow the charging contacts or the battery to
come into contact with metal objects.
• Do not let small metal objects come into contact with
the product. This can deteriorate audio quality and
damage the product.
• Metallic objects may be retained if placed near or on
the handset receiver.
• Do not use the product in places where there are
explosive hazards.
• Do not open the handset, base station or charger as
you could be exposed to high voltages.
• Do not allow the product to come into contact with
liquids.
• Do not use any cleaning agents containing alcohol,
ammonia, benzene, or abrasives as these may harm
the set.
• Do not expose the phone to excessive heat caused by
heating equipment or direct sunlight.
• Do not drop your phone or allow objects to fall on
your phone.
• Active mobile phones in the vicinity may cause
interference.
About operating and storage temperatures
• Operate in a place where temperature is
always between 0°C to +40°C (up to 90%
relative humidity).
• Store in a place where temperature is
always between -20°C and +45°C (up to
95% relative humidity).
• Battery life may be shorter in low
temperature conditions.
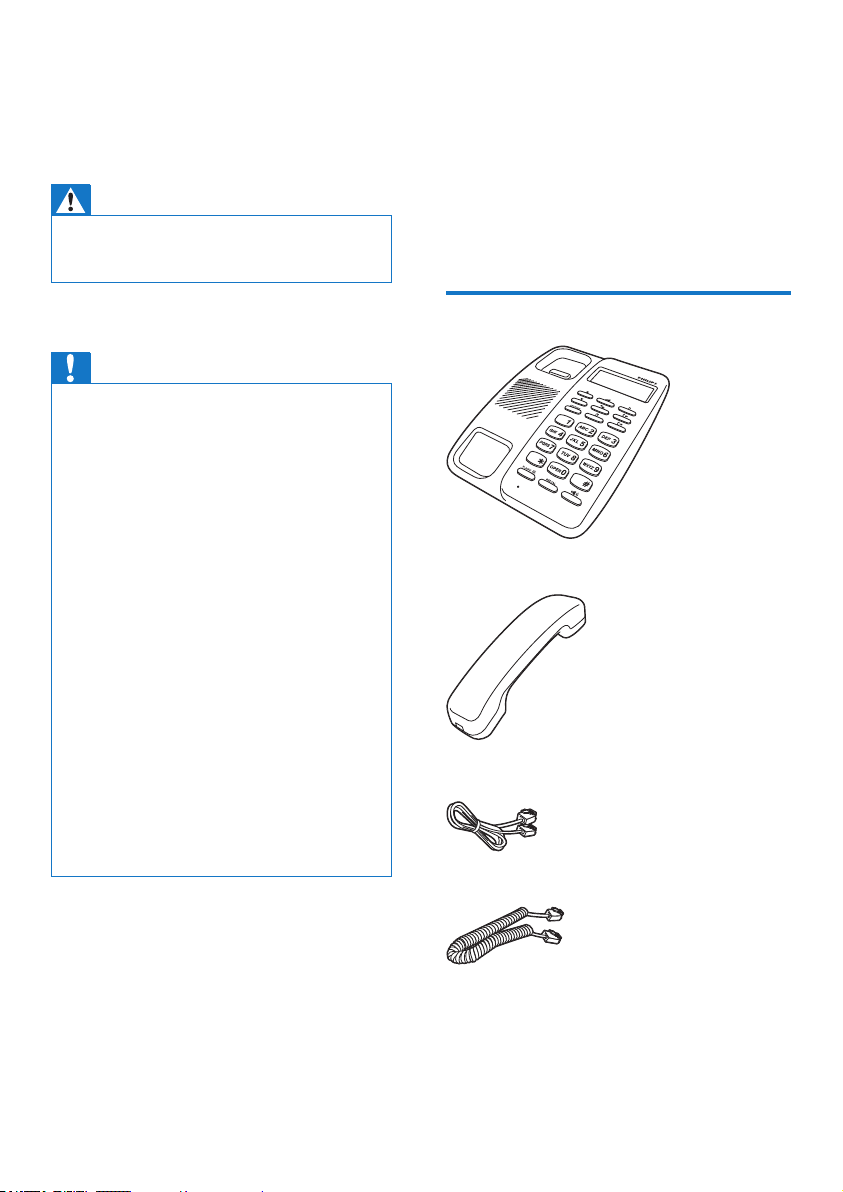
What is in the box
Base station
Handset
Line cord*
Coil cord
2 EN
Page 5
2 x AAA batteries
Guarantee
User manual
Note
* In some countries, you have to connect the line
•
adapter to the line cord, then plug the line cord to the
telephone socket.
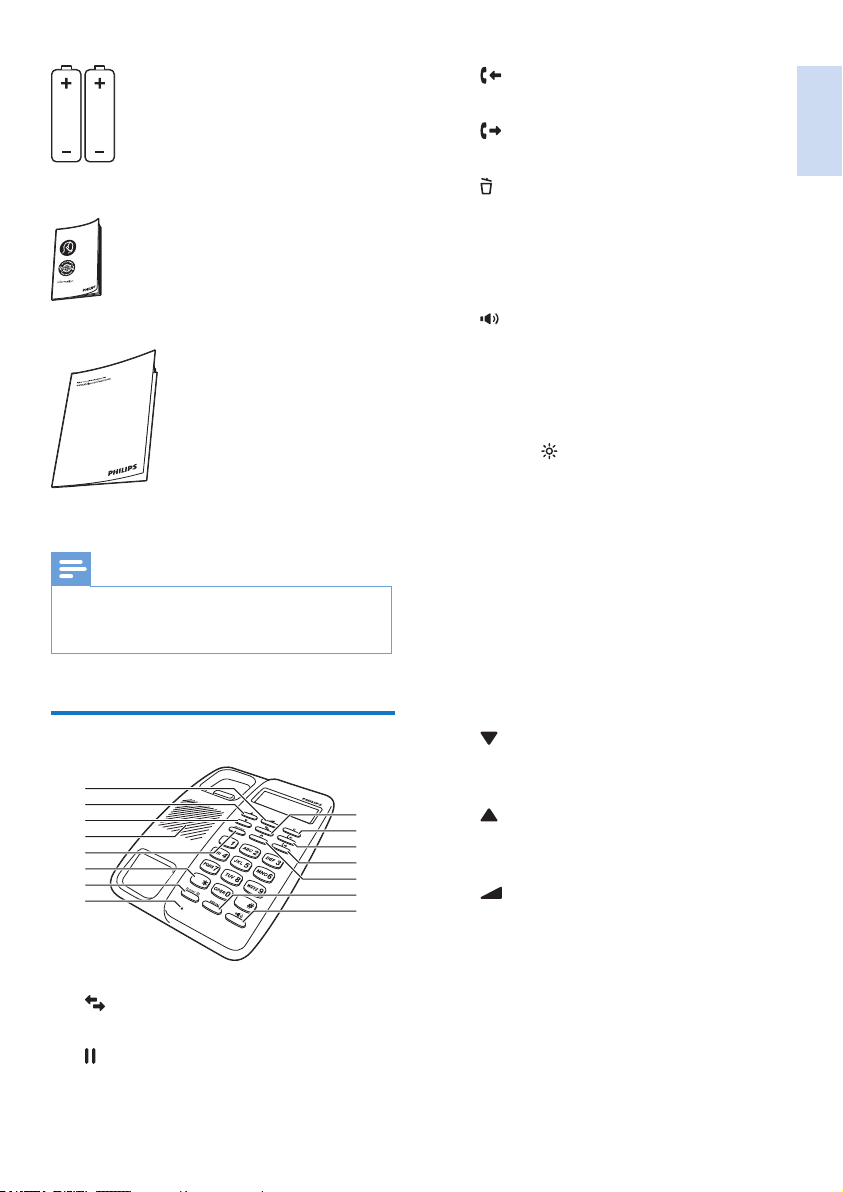
Overview of the phone
o
n
m
l
k
j
i
h
c
It shows the incoming call log.
d
It shows the outgoing call log.
e
• Delete the digit during editing.
• Exit the menu.
f REDIAL
Redial key
g
• Turn the speaker phone on/off.
• Make and receive calls through the
speaker.
h Microphone
i FLASH/
• Recall key (this feature is network
• Set the contrast level on the LCD
j *
Press and hold for 3 seconds to set the
temporary tone mode during pulse mode.
k SETTING
Access the setting menu.
l Loudspeaker
m
• Scroll down on the menu.
• Move to the right.
a
b
c
d
e
f
g
n
• Scroll up the menu.
• Move to the left.
o
Adjust the speaker volume during a call.
dependent).
screen in standby mode.
English
a
Call transfer
b
Enter a pause when making a predial call.
EN 3
Page 6
3 Get started
Caution
Make sure that you have read the safety instructions in
•
the 'Important safety instructions' section before you
connect and install your phone.
Connect the base station
Note
If you subscribe to the digital subscriber line (DSL) high
•
speed internet service through your telephone line,
ensure you install a DSL lter between the telephone
line cord and the power socket. The lter prevents
noise and caller ID problems caused by the DSL
interference. For more information on the DSL lters,
contact your DSL service provider.
• The type plate is located on the bottom of the base
station.
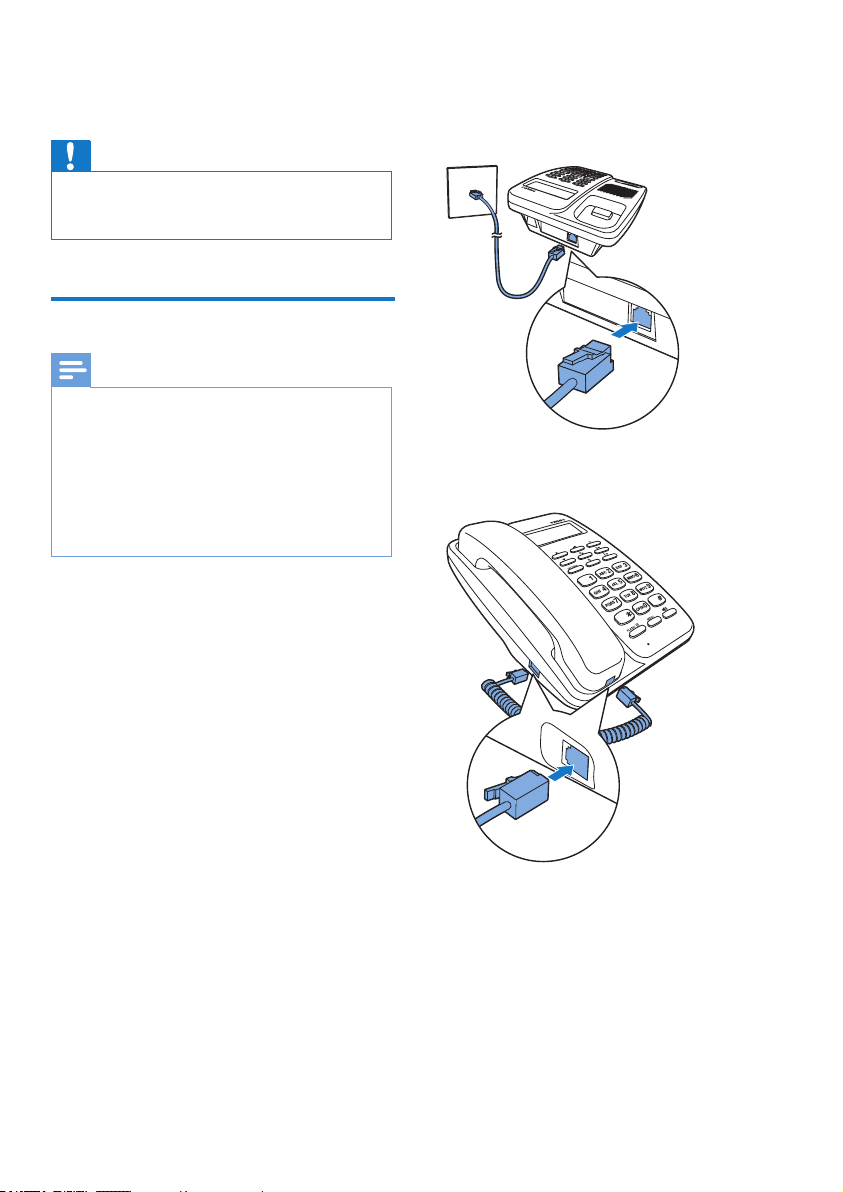
Connect each end of the line cord to:
1
• the telephone socket at the back of
the unit;
• the telephone socket on the wall.
Connect the coil cord to the base and
2
handset.
4 EN
Page 7
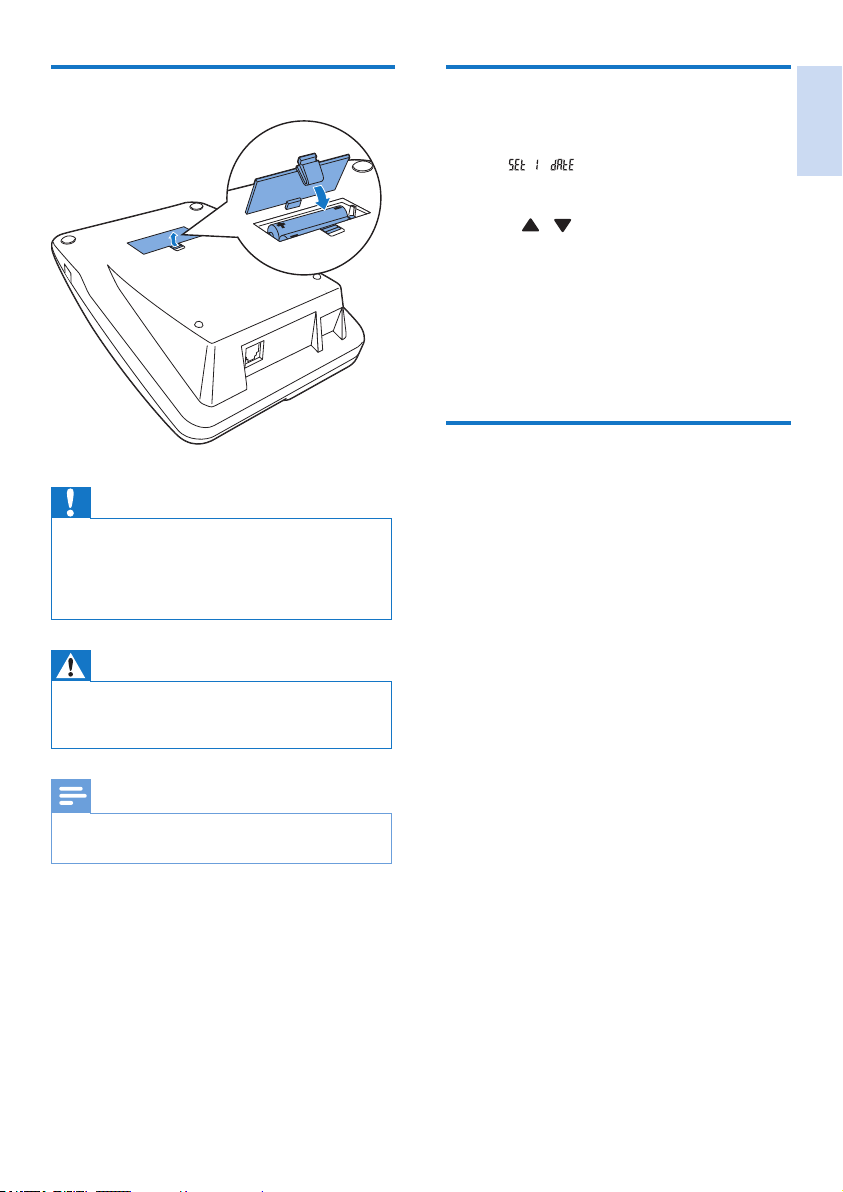
Insert the supplied batteries
Set the date and time
Caution
Risk of explosion! Keep batteries away from heat,
•
sunshine or re. Never discard batteries in re.
• Use only the supplied batteries.
• Risk of decreased battery life! Never mix different
brands or types of batteries.
Warning
•
Check the battery polarity when inser ting in the
battery compar tment. Incorrect polarity may damage
the product.
Press SETTING.
1
»
Press SETTING again to conrm.
2
Press / to set the year, press
3
SETTING to conrm.
Press SETTING again to date and time.
4
Pick up the handset to conrm the setting.
5
» The corresponding week of the day is
also displayed.
Your phone is now ready to use.
What is standby mode?
Your phone is in standby mode when it is idle.
The year, date, time and incoming counter are
displayed on the standby screen.
is displayed.
English
Note
When the line cord is disconnected and batteries are
•
removed, all settings are reset within 20 seconds.
EN 5
Page 8
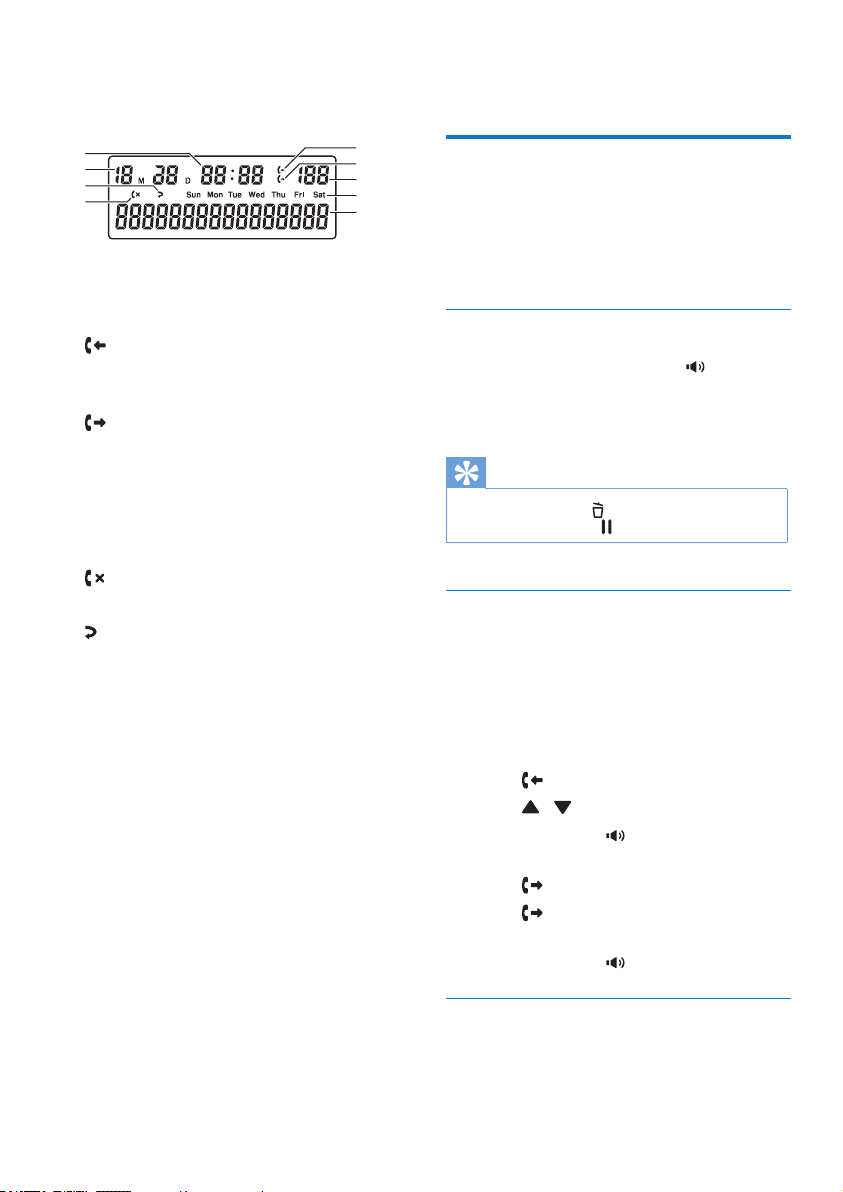
4 Display icons
5 Calls
i
h
g
f
a
b
c
d
e
In standby mode, the icons shown on the screen
tell you what features are available on your
phone.
a
It remains steadily on when browsing
answered incoming calls in the call log.
b
It indicates an outgoing call in the call list.
c Call counter
d Week of the day display
e Phone display
f
There is a missed call.
g
It indicates repeated missed calls from the
same number.
h Date display
i Time display
Make a call
You can make a call in these ways:
• Normal call
• Call from the call log
• Call from the redial list
Normal call
Pick up the handset or press .
1
Dial the phone number.
2
» The number is dialed out.
Tip
• To erase a digit, press .
• To enter a pause, press .
Call from the call log
The call log stores the call history of all incoming
or outgoing calls. The incoming call history
includes the number of the caller, call time and
date. This feature is available if you have registered
to the caller ID service with your service provider.
Incoming call
Press in standby mode.
1
Press / to select a record on the list.
2
Press REDIAL or to make the call.
3
Outgoing call
Press in standby mode.
1
Press again to view the number and
2
time of the most recent outgoing call.
Press REDIAL or to make the call.
3
6 EN
Redial a call
Pick up the handset.
1
Press REDIAL .
2
» The most recent outgoing call is dialed.
Page 9
Answer a call
6 Settings
When the phone rings, you can select from the
following options to answer the call:
• pick up the handset;
• press
If you have subscribed for a caller ID service with
•
the service provider, you will see the caller number
displayed on the screen.
.
Note
Adjust the speaker volume
Press in standby mode to select the low or
high volume.
Turn the speaker on or off
Press .
Transfer a call
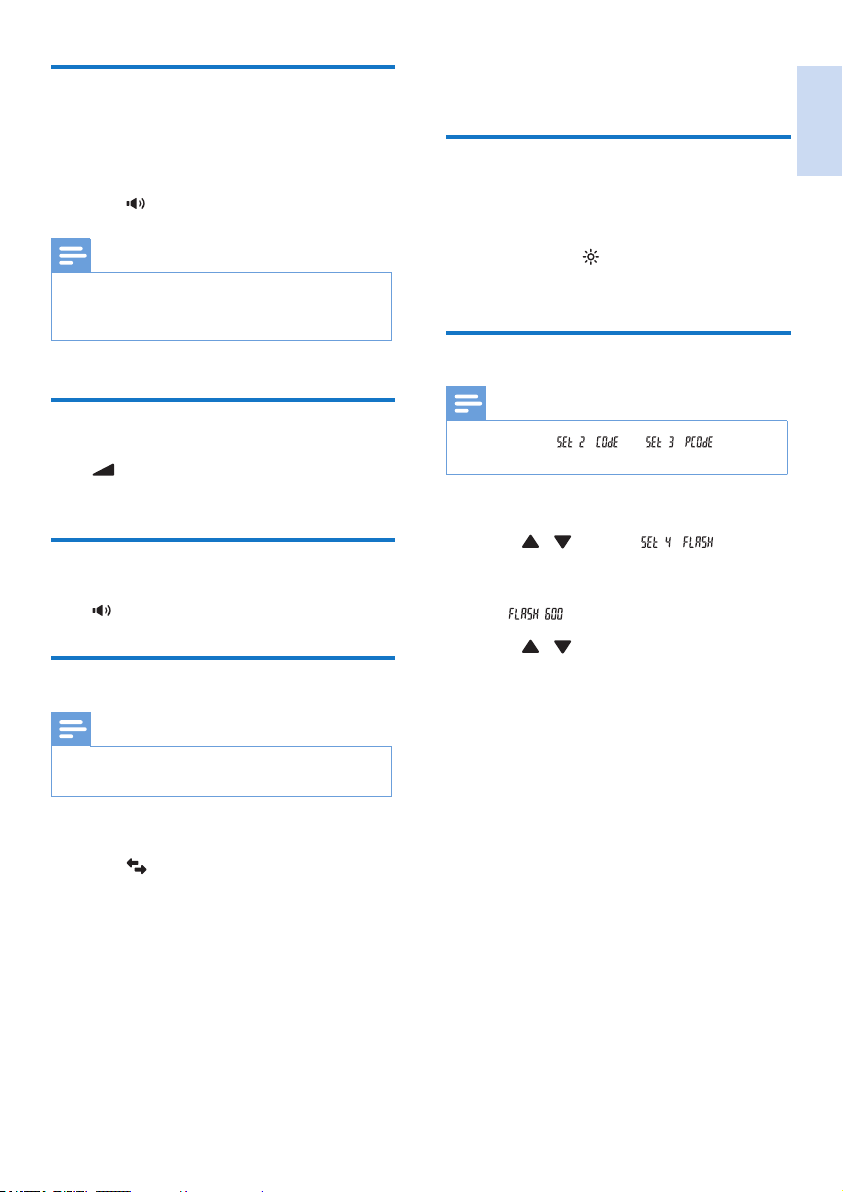
Set the contrast of the screen
You can set the contrast of the phone screen to
5 different levels.
Press FLASH/ in standby mode.
1
Pick up the handset to conrm the setting.
2
Temporary time setting
Note
•
You can ignore and which are
country dependent codes.
Press SETTING to enter the setting mode.
1
Press / to select .
2
Press SETTING again to enter the
3
temporary time setting menu.
»
Press / to set the time.
4
Pick up the handset to conrm the setting.
5
is displayed.
English
Note
This service is network dependent. Check with the
•
service provider for additional charges.
Make a rst call.
1
Press during a call.
2
Make a second call.
3
Hang up the handset when the other side
4
answers the call.
» The rst call is transferred to the
second call.
EN 7
Page 10
7 Technical data
8 Notice
General specication and features
• Speaker phone
• Redial
• Caller identication standard support: FSK,
DTMF
Battery
• LVLIANG: 2 x AAA batteries
Weight and dimensions
• Base station and handset: 465.0 grams
80.0 x 151.0 x 208.0 mm (H x W x D)
Disposal of your old product
and batteries
Your product is designed and manufactured with
high quality materials and components, which
can be recycled and reused.
This symbol on a product means that the product
is covered by European Directive 2012/19/EU.
This symbol means that the product contains
batteries covered by European Directive
2013/56/EU which cannot be disposed of with
normal household waste.
Inform yourself about the local separate collection
system for electrical and electronic products and
batteries. Follow local rules and never dispose of
the product and batteries with normal household
waste. Correct disposal of old products and
batteries helps prevent negative consequences for
the environment and human health.
8 EN
Removing the disposable batteries
To remove the disposable batteries, see section
‘Install the supplied batteries’.
When this logo is attached to a product, it means
a nancial contribution has been paid to the
associated national recovery and recycling system.
Page 11
Environmental information
All unnecessary packaging has been omitted.
We have tried to make the packaging easy to
separate into three materials: cardboard (box),
polystyrene foam (buffer) and polyethylene
(bags, protective foam sheet.)
Your system consists of materials which can
be recycled and reused if disassembled by
a specialized company. Please observe the
local regulations regarding the disposal of
packaging materials, exhausted batteries and old
equipment.
9 Frequently asked
questions
No dialing tone
Make sure your phone is properly connected to
the line cord.
The phone does not ring.
Make sure the phone is properly connected to
the line cord.
No display or unclear display
• Battery level is too low.
• Check the contrast level of the screen.
The caller ID does not display.
• The service is not activated. Check with
your service provider.
• The caller's information is withheld or
unavailable.
Note
If the above solutions do not help, disconnect the line
•
cord and remove the battery. Reinstall the line cord and
the battery after 1 minute and tr y again.
English
EN 9
Page 12

2015 © Gibson Innovations Limited. All rights reserved.
This product has been manufactured by, and is sold under
the responsibility of Gibson Innovations Ltd., and Gibson
Innovations Ltd. is the warrantor in relation to this product.
Philips and the Philips Shield Emblem are registered
trademarks of Koninklijke Philips N.V. and are used under
license from Koninklijke Philips N.V.
UM_CRD150_90_EN_V3.0
WK15384
 Loading...