

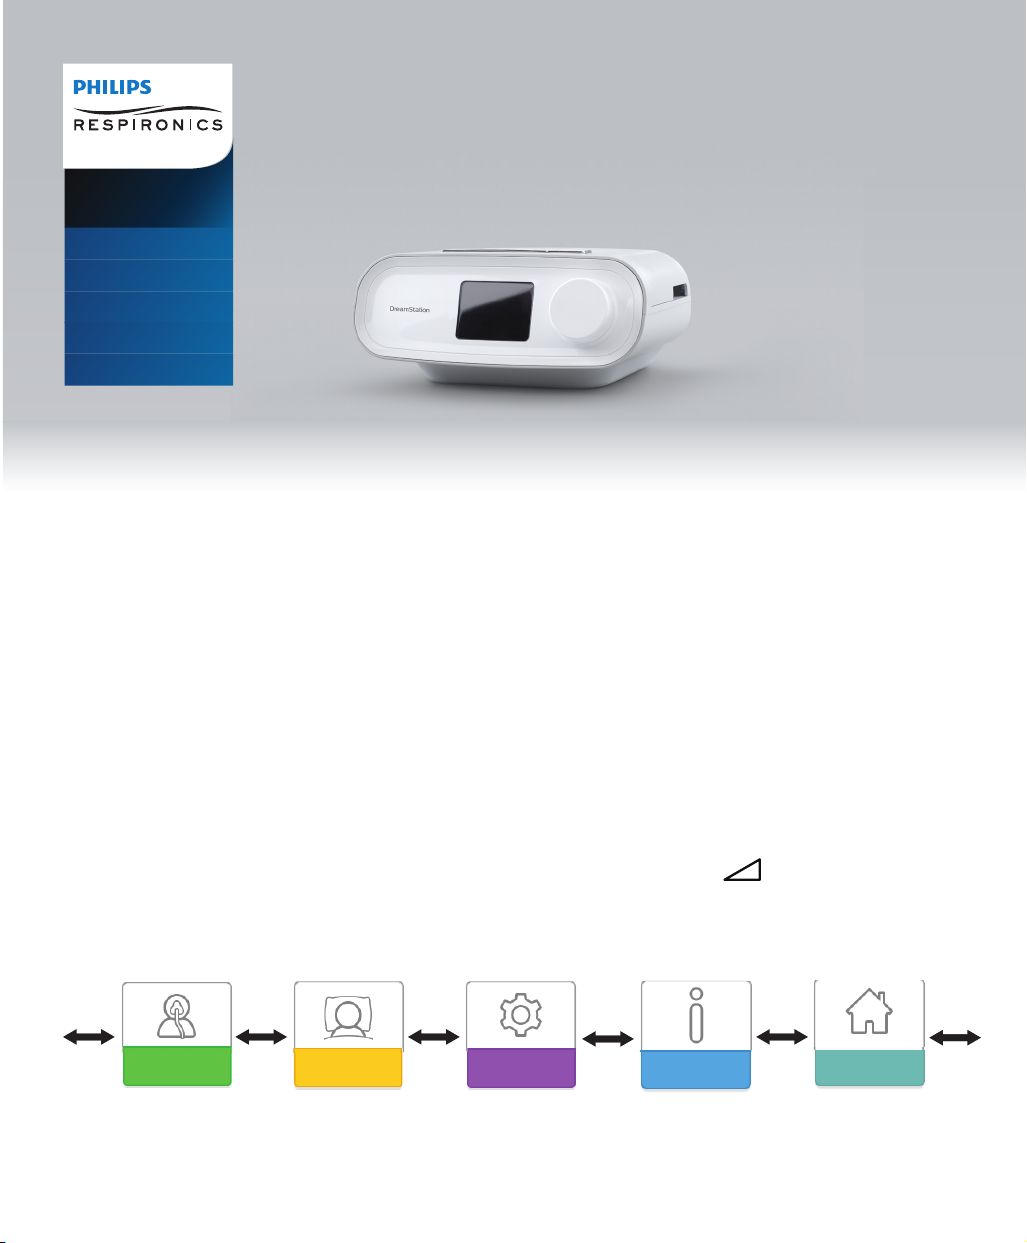
Provider guide
DreamStation
CPAP
CPAP Pro
Auto CPAP
BiPAP Pro
Auto BiPAP
IMPORTANT! Remove this guide before giving the device to the patient. Only medical professionals should adjust pressure settings.
This guide provides you with instructions on how to access and navigate the provider screens used to modify device settings.
Refer to the User Manual for more information on using the DreamStation therapy devices.
The device is to be used only on the instruction of a licensed physician. The home care provider will make the correct
pressure settings and device congurations including accessories, according to the health care professional’s prescription.
If you need to contact Philips Respironics directly, call the Philips Respironics Customer Service department at
1-800-345-6443 or 1-724-387-4000.
Accessing the Provider Mode Screens
Accessing Provider mode unlocks settings that cannot be modied by the user. To access Provider mode:
1. Supply power to the device. First, plug the socket end of the AC power cord into the power supply. Then plug the
pronged end of the AC power cord into an electrical outlet that is not controlled by a wall switch. Finally, plug the power
supply cord’s connector into the power inlet on the back of the device.
2. Once the device is powered, press and hold both the control dial and the Ramp button on the device for at least 5
seconds.
Note: You may also setup an optional 4 digit PIN to enter Provider mode for additional security. Once setup, if the wrong
PIN is entered too many times, you will have the option to reset the device or wait 15 minutes and try again.
3. You are now in Provider mode. You can choose between the following Provider mode screens.
Therapy Settings Comfort Settings Device Settings Info Patient Menu Return
- 1 -
Navigating the Provider Mode Screens
The User Interface (UI) on this device allows you to adjust the device settings and view information about your therapy. The
UI is comprised of the display screen and the control dial. Rotate the control dial in either direction to scroll through the
menu options on the display screen.
Note: The display is not a touch screen. You must use the control dial to navigate the device menu.
To adjust a setting:
1. Rotate the control dial to your desired menu option.
2. Press the control dial to select that setting.
3. Rotate the control dial to change the setting.
4. Press the control dial again to save the change.
Note: The rotate dial icon on any screen indicates to rotate the dial to perform an action. The click dial icon on any
screen indicates to press the dial to perform an action.
Note: Pressing the dial when the down arrow appears on any screen will take you to a sub-menu with more menu
options. Pressing the dial when the up arrow appears on any sub-menu will return you back to the main menu.
Note: The screens shown throughout this guide are examples for reference only. Actual screens may vary based upon
device model and provider settings.
Provider Mode Screen Descriptions
The following sections will describe the options available from the Provider screens:
Therapy Settings, Comfort Settings, Device Settings, Info, Return to Patient Mode
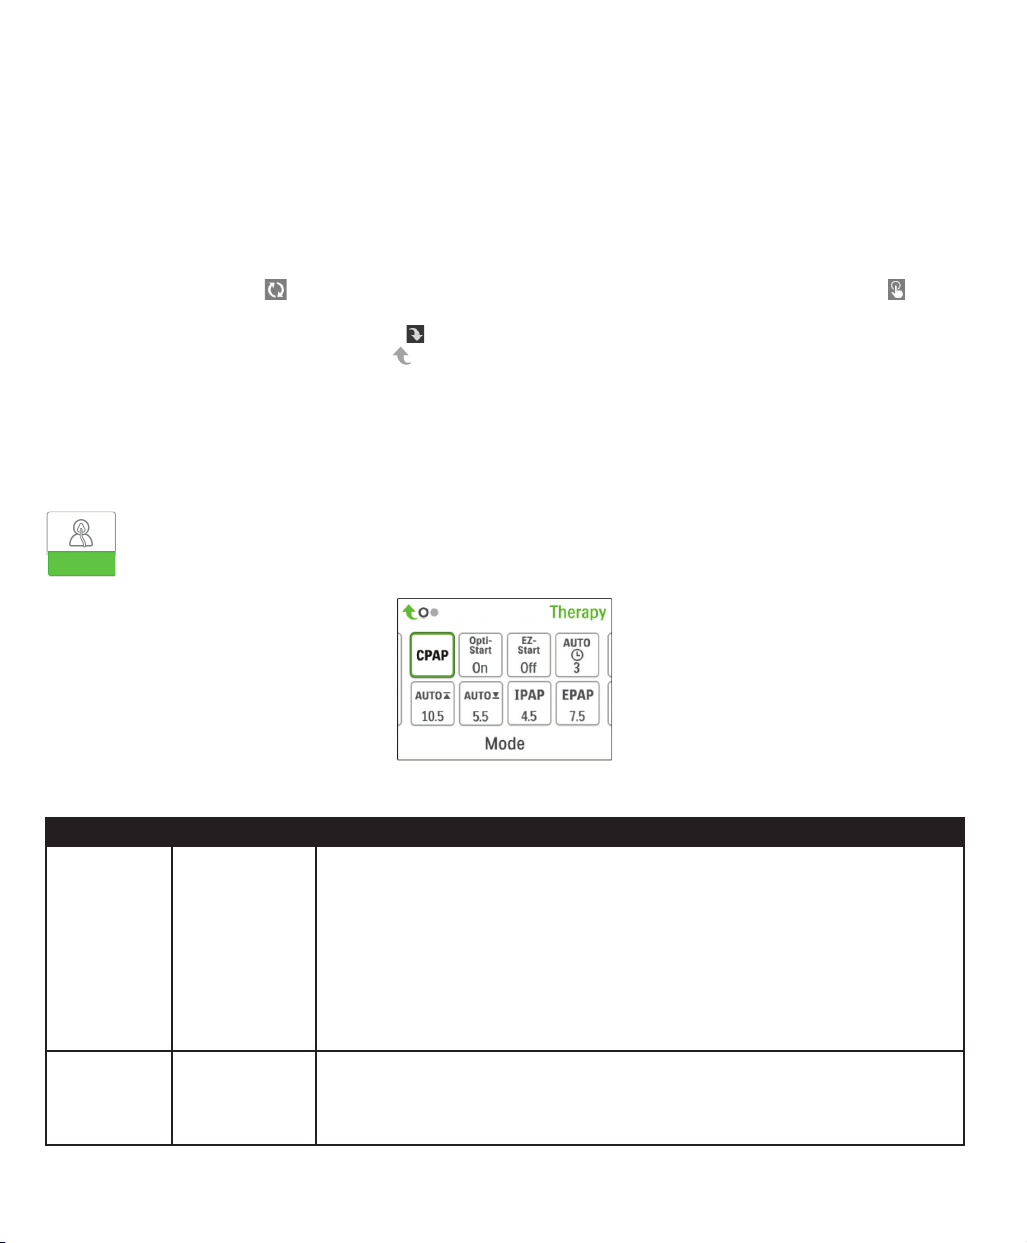
Therapy Settings
Choosing this screen will take you to a sub-menu where you can adjust the device therapy modes and pressure
settings. These settings are described here.
Sample Therapy Sub-Menu
Note: Not all settings shown here will display on the device. The display will vary based on therapy device model and device settings.
Icon Text Description
Mode This screen displays the therapy mode setting. Depending on the therapy device
model, you can select CPAP mode, CPAP-Check (C-Check) mode, Auto-CPAP
(Auto) mode, Bi-Level mode, or Auto Bi-Level (AutoB) mode.
Note: CPAP-Check mode (C-Check) delivers CPAP therapy while automatically
adjusting the pressure level to meet patient needs over the long term. Every 30
hours of therapy use, the therapy device evaluates patient obstructive respiratory
disturbance index (ORDI) and increments pressure ± 1 cm H2O if needed. The range
of adjustment that can be made over time is limited to ± 3 cm H2O of the CPAP-
Check pressure setting, in 1 cm H2O increments.
Opti-Start This feature starts an Auto-CPAP therapy session at a starting pressure that is closer
to the previous session’s 90% pressure, in order to reduce the likelihood of any
residual events at the beginning of a therapy session. You can enable or disable this
feature.
CPAP
C-Check
Auto
Bi-Level
AutoB
Opti-Start
- 2 -
Icon Text Description
EZ-Start
A-TRIAL
cmH2O
IPAP
EPAP
EZ-Start This feature reduces the therapy pressure setting for the first few days of operation
and gradually increases this setting until the prescription therapy pressure is reached.
For fixed CPAP mode, the initial pressure will be reduced to half of the prescription
CPAP pressure setting, but no lower than 5 cm H2O. For Auto CPAP mode, EZ-Start
reduces the maximum Auto pressure to 1cm H2O above the minimum Auto pressure
setting. For either mode, after each day of successful use (the therapy session was
greater than 4 hours), the therapy pressure will increase by 1 cm H2O until the
prescription pressure is reached. From that point forward, the therapy device would
operate in normal CPAP, CPAP-Check, or Auto CPAP mode. If the patient has
not reached their prescription pressure after 30 days of EZ-Start, then the therapy
pressure will increase by 1 cm H2O per day until the prescription pressure is reached.
You can enable or disable EZ-Start only if CPAP, CPAP-Check, or Auto CPAP mode
is enabled.
A-Trial This Auto-Trial feature will enable the device to deliver Auto-CPAP therapy for a
selectable number of days of patient use. You can enable or disable this feature.
A-Trial Days This screen allows you to adjust the duration of the Auto-Trial feature in number
of days. You can set this from 3 to 30 days. The default is 7 days. This setting only
displays if Auto-Trial mode is available and enabled. When you reach the last available
Auto-Trial period, the text for this selection will appear in red font.
Auto Min This screen allows you to modify the Auto minimum pressure setting. You can adjust
this setting from 4 cm H2O to the Auto maximum pressure setting. This setting only
displays if Auto-CPAP mode is enabled or if the Auto-Trial feature is available and
enabled.
Auto Max This screen allows you to modify the Auto maximum pressure setting. You can adjust
this setting from the Auto minimum pressure setting to 20 cm H2O. This screen only
displays if Auto-CPAP mode is enabled or if the Auto-Trial feature is available and
enabled.
Pressure This screen allows you to adjust the CPAP pressure, or the CPAP-Check mode
starting pressure. If Auto-Trial mode was used, you can choose the 90% pressure
setting determined from the Auto-Trial mode, or you can adjust this setting from 4
to 20 cm H2O. If the Auto-Trial mode was not used, this screen allows you to only
adjust the pressure setting from 4 to 20 cm H2O.
IPAP This screen allows you to modify the IPAP setting. The initial default setting is 20 cm
H2O. You can adjust the setting from the EPAP setting to 25 cm H2O. This screen
only displays if Bi-level mode is enabled.
EPAP This screen allows you to modify the EPAP setting. The initial default setting is 4 cm
H2O. You can adjust the setting from 4 cm H2O to the IPAP setting. This screen only
displays if Bi-level mode is enabled.
IPAP Max This screen allows you to modify the Maximum IPAP setting. The setting you specify
here will be the maximum level of pressure applied during the inspiratory breath
phase. You may adjust the setting from the Minimum EPAP setting to 25 cm H2O. This
screen only displays if Auto Bi-level mode is enabled.
EPAP Min This screen allows you to modify the Minimum EPAP setting. The setting specified
here will be the minimum level of pressure applied during the expiratory breath
phase. You may adjust the setting from 4 cm H2O to the Maximum IPAP setting. This
screen only displays if Auto Bi-level mode is enabled.
- 3 -
Icon Text Description
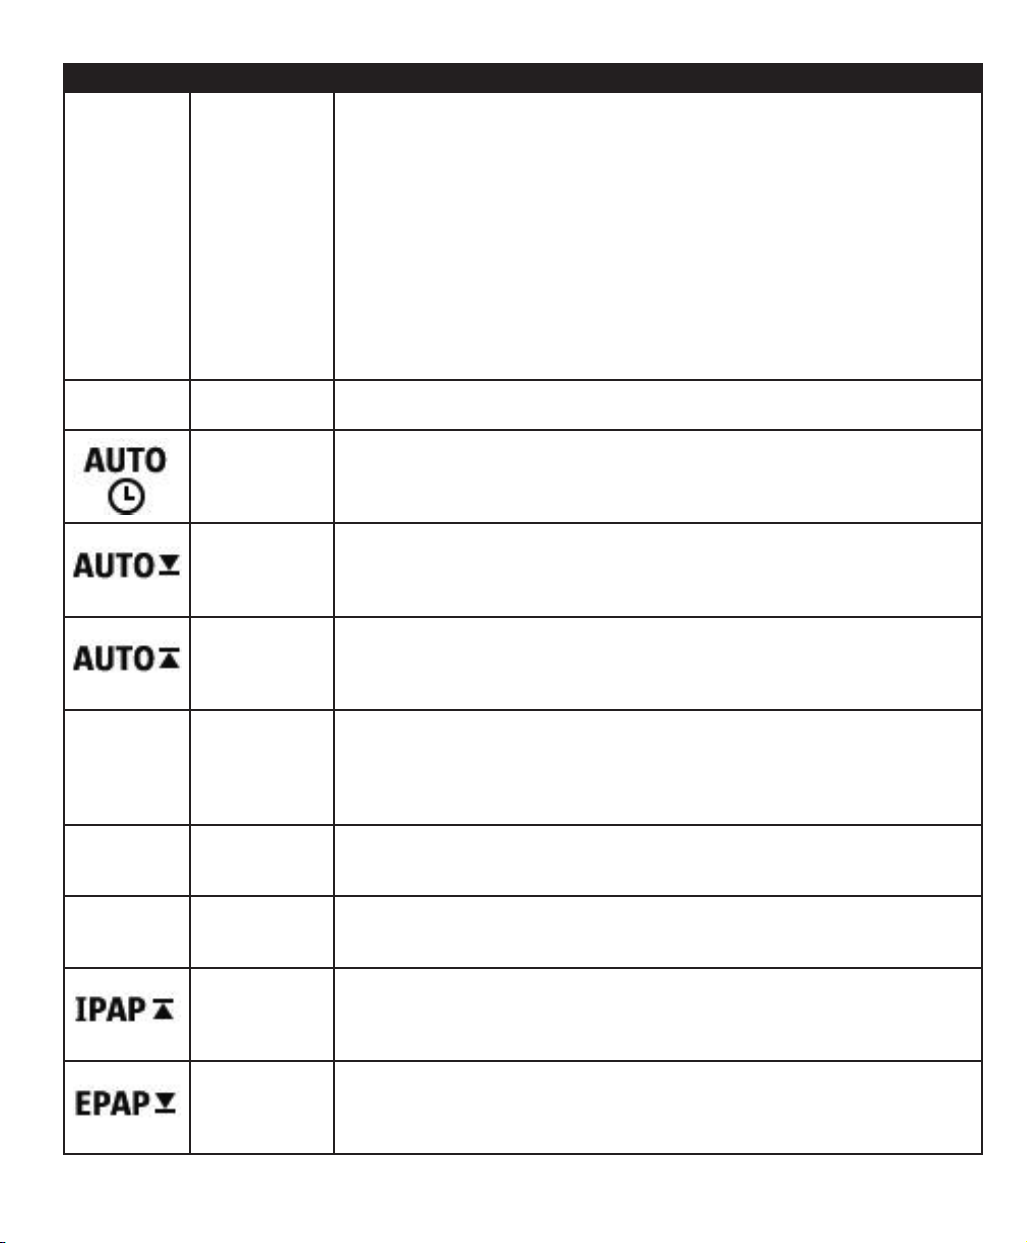
PS Min This screen allows you to modify the Minimum Pressure Support setting. This setting
is the minimum difference that is permitted between IPAP and EPAP while Auto
Bi-level therapy mode is active. You may adjust the setting from 0 cm H2O to the
Maximum Pressure Support setting. This screen only displays if Auto Bi-level mode is
enabled.
PS Max This screen allows you to modify the Maximum Pressure Support setting. This setting
is the maximum difference that is permitted between IPAP and EPAP while Auto
Bi-level therapy mode is active. You may adjust the setting from 0 cm H2O to the
minimum value of either 8 cm H2O, or the difference between Max IPAP and Min
EPAP. This screen only displays if Auto Bi-level mode is enabled.
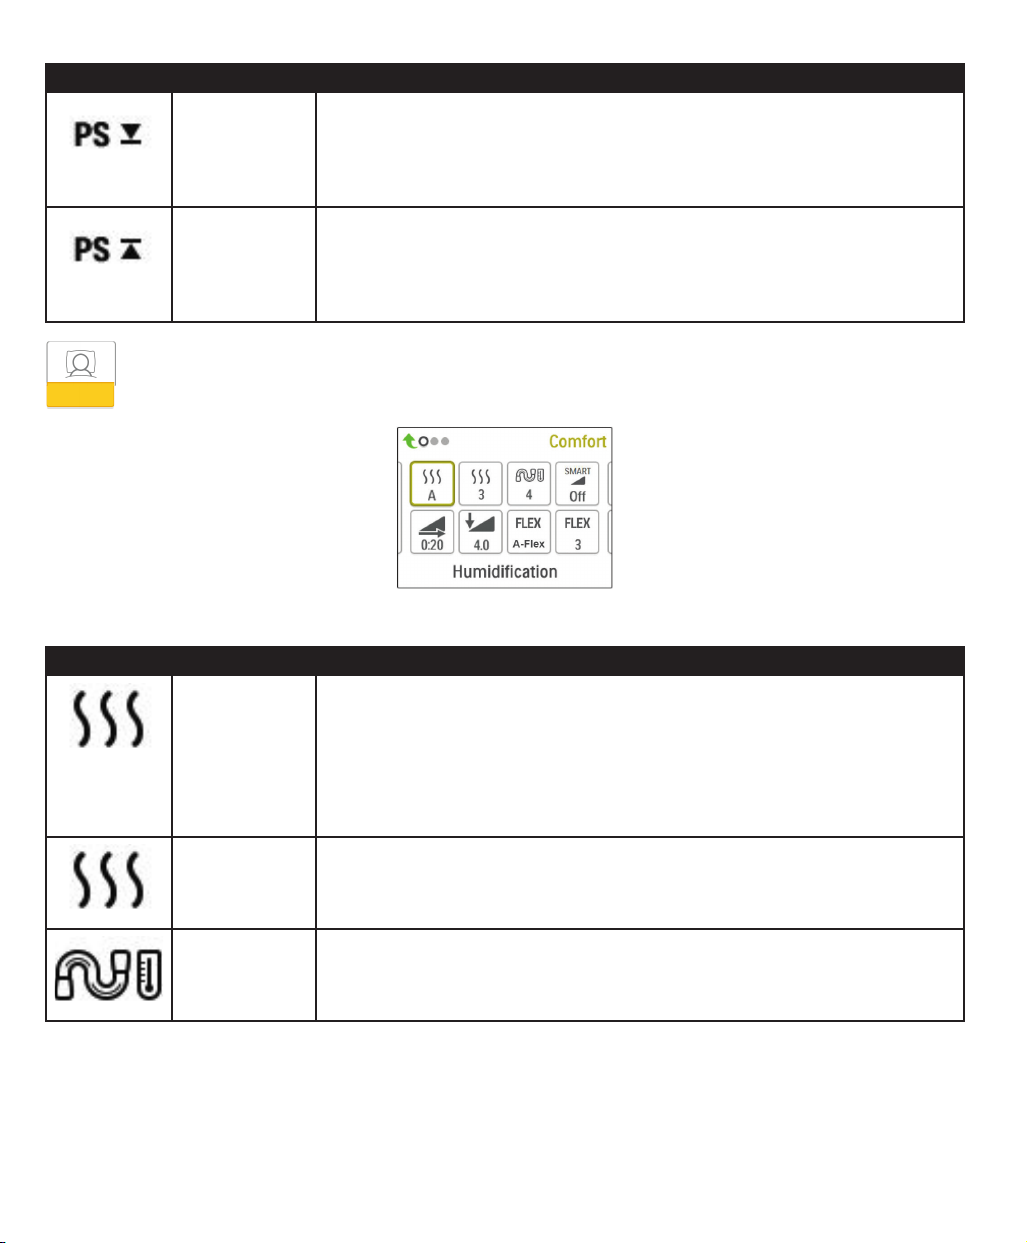
Comfort Settings
Choosing this screen will take you to a sub-menu where you can adjust the humidication and pressure comfort
settings. These settings are described here.
Sample Comfort Sub-Menu
Note: Not all settings shown here will display on the device. The display will vary based on therapy device model and device settings.
Icon Text Description
Humidification This setting allows you to select the Humidification Mode being used. You can choose
between Fixed or Adaptive (A) Humidification. If a heated tube is attached to the
device, then the device will automatically switch to Heated Tube Humidification Mode.
Fixed mode applies a constant heat on the humidifier heater plate. Under certain
conditions and settings, this mode can allow condensation to occur in the tube.
Adaptive mode adapts the heater plate temperature to the ambient conditions in the
room, and is designed to not allow condensation to occur in the tube.
Humidifier This setting allows you to choose the desired humidity setting for the humidifier: 0, 1,
2, 3, 4 or 5.
- 4 -
Tube
Temperature
This setting allows you to choose the desired temperature for the heated tube: 0, 1,
2, 3, 4 or 5.

Icon Text Description
SmartRamp When SmartRamp mode is enabled, the therapy device’s ramp function utilizes an
Auto titrating algorithm during the ramp period. It allows patients the ability to stay at
lower pressures during the ramp period, to improve their acclimation to therapy.
SmartRamp mode functions differently, depending on the therapy mode that the
device is using.
*In CPAP or CPAP-Check mode, the SmartRamp applies the Auto-CPAP algorithm
during the ramp period. The Ramp Start pressure becomes the Auto Minimum
pressure during the ramp period. The Auto Maximum pressure during ramp is the
CPAP or CPAP-Check pressure.
*In Auto mode, the SmartRamp applies the Auto-CPAP algorithm during the ramp
period. The Ramp Start pressure becomes the Auto Minimum pressure during the
ramp period. The Auto Maximum pressure during ramp is the Auto Minimum under
normal Auto mode.
*In BiPAP or Auto-BiPAP mode, the SmartRamp applies the a modified version of the
Auto-BiPAP algorithm during the ramp period. The Ramp Start pressure becomes the
EPAP Minimum pressure, and the Pressure Support Minimum pressured is applied.
The IPAP Maximum pressure during ramp is the EPAP or EPAP Minimum under
normal BiPAP or Auto-BiPAP mode.
The SmartRamp period will terminate in either of two ways:
1) If SmartRamp pressure reaches the minimum pressure of the therapy mode
selected, then SmartRamp ends, and the device continues to deliver therapy under the
selected therapy mode, or:
2) If SmartRamp pressure does not reach the minimum pressure of the therapy
mode selected by the end of the Ramp Time, then pressure is increased at a rate
of approximately 1 cm H2O per minute. Once the pressure reaches the minimum
pressure of the therapy mode selected, then the device will continue to deliver
therapy for that mode.
If SmartRamp mode is not enabled, then the standard, linear pressure ramp mode is
active.
Ramp Time When you set the Ramp time, the device increases the therapy pressure from the
value set on the Ramp start screen to the therapy pressure setting over the length of
time specified here. If the therapy pressure is set to 4 cm H2O (the minimum setting),
this screen will not display.
Note: Depending on the therapy mode, the therapy pressure setting could be CPAP
pressure, CPAP-Check pressure, Auto min pressure, EPAP pressure, or EPAP min
pressure.
Note: If the Ramp time is set to 0, Ramp start will not display.
Ramp Start This displays the Ramp starting pressure. You can increase or decrease the Ramp
starting pressure in 0.5 cm H2O increments. This is only available if Ramp time has
been set to >0 and therapy pressure >4 cm H2O.
Note: Depending on the therapy mode, the therapy pressure setting could be CPAP
pressure, CPAP-Check pressure, Auto min pressure, EPAP pressure, or EPAP min
pressure.
- 5 -

Icon Text Description
Flex This screen displays the comfort mode setting. You can select OFF, C-Flex, or
C-Flex+ (if in CPAP or CPAP-Check mode). You can select OFF, C-Flex, or A-Flex (if
in Auto-CPAP or Auto-Trial mode).
Flex Setting You can modify the Flex setting (1, 2 or 3) on this screen if you enabled Flex. The
setting of “1” provides a small amount of pressure relief, with higher numbers
providing additional relief.
Rise Time Rise time is the time it takes for the device to change from EPAP to IPAP. This screen
allows you to adjust the rise time so you can find the desired setting. This is only
available if Flex has been disabled and the device is in Bi-level or Auto Bi-level mode.
• 0 (off) reduces the Rise Time feature to the lowest setting (off = 150 msec).
• 1 sets Rise Time to 1 (200 msec).
• 2 sets Rise Time to 2 (300 msec).
• 3 sets Rise Time to 3 (400 msec).
This screen is only available if Advanced Menus is set to On.
Tube Type This setting allows you to select the correct size diameter tubing that you are using
with the device. You can choose either (22) for the Philips Respironics 22 mm
tubing, (15) for the Philips Respironics 15 mm tubing, or (12) for the optional Philips
Respironics 12 mm tubing. When using Heated Tubing, the device will automatically
change this setting to the appropriate tubing type (15H).
Tube Type Lock This enables you to lock the Tubing type setting for either the 12 mm, 15 mm, or the
22 mm tubing if you do not want the patient to change it.
- 6 -
Mask Type This setting allows you to select the appropriate Mask Type resistance setting (also
known as System One Resistance Control) for your Philips Respironics mask. This
feature allows the device to adjust the level of pressure compensation to match your
mask. Refer to the packaging of your mask to identify the resistance setting for your
mask.
Note: It is important to use the appropriate “Mask Type” resistance setting to ensure
proper pressure delivery to the patient.
Mask Type Lock This enables you to lock the Mask Type resistance setting if you do not want the
patient to change it.
This screen is only available if Advanced Menus is set to On.
Check Mask Fit You can enable or disable the check mask fit setting. This feature allows the patient
to check the fit of their mask prior to starting therapy. This is done by measuring the
amount of leak in the patient circuit.

Device Settings
Choosing this screen will take you to a sub-menu where you can adjust the way the device displays information.
These settings are described here.
Sample Device Sub-Menu
Note: Not all settings shown here will display on the device. The display will vary based on therapy device model and device settings.
Icon Text Description
Advanced Menus This feature enables you to turn on or off a set of advanced menu screens. When set
to Off, the below listed screens will not display. The device will still collect this data
and you can access it with our patient management software.
Patient menu screens
My Info menu: AHI, Mask Fit, Periodic Breathing, IPAP 90%, EPAP 90%, 90% Pressure,
Three Night Summary, Goal Progress, and DreamMapper screens
My Provider menu: Phone-In, Compliance, VCI90, and A-Trial
My Setup menu: Mask Type, Humidification Type, Flex, Rise Time, and Language
Preheat menu: Menu does not display
Provider menu screens
Info screens: Phone-In, Compliance, VIC90, Days>4, IPAP 90%, EPAP 90%, 90%
Pressure, Periodic Breathing, and A-Trial
Comfort settings screens: Mask Type Lock
cmH2O
Pressure Units If enabled on the device, you will have the option to choose the units of pressure that
are displayed. You can choose between “cm H2O” or “hPa”.
Automatic On You can enable or disable this feature if you want the device to automatically turn the
airflow on whenever the patient applies the interface (mask) to their airway.
Automatic Off You can enable or disable this feature if you want the device to automatically turn the
airflow off whenever the patient removes the interface (mask) from their airway.
Language This feature allows you to choose which language to display on the interface. You can
choose English (EN) or Spanish (ES).
Clear Default
Reminders
This setting turns off the default patient reminders that are enabled in the therapy
device from the factory.
Note: This does not turn off additional reminders that you may have activated in
Encore. Encore messages must be cleared or modified in Encore.
- 7 -

Icon Text Description
Reset Data Use the Reset Data function to clear patient data from the therapy device, as well as
an SD card and modem (if installed). After you click to execute Reset Data, the device
will display a message asking you to confirm the reset. Click again to reset data in the
device.
Note: Reset Data resets Blower Hours that are visible to the patient, but it does not
reset Machine Hours in the Provider Menu.
Info Screens
Choosing this screen will take you to a sub-menu where you can view information on patient usage. These info
screens are described here.
Note: Not all the screens shown here will display on the device. The display will vary based on therapy device model and device settings.
Icon Text Description
Phone In This screen displays the total therapy hours for the device, the total blower hours, and
the total number of days used when the sessions were greater than 4 hours since the
device was last reset. This screen also displays a compliance check number you can use to
validate that the data provided to you is the data taken from this screen. This screen is only
available if Advanced Menus is set to On.
Compliance This screen displays the start day and the total number of days used when the sessions
were greater than 4 hours. This screen also displays a check code number you can use to
validate that the data provided to you is the data taken from this screen. This screen is only
available if Advanced Menus is set to On.
VIC90
Days>4
VIC90 This Visual Inspection Check screen will display a check code number created from
information gathered over the most recent 90 day period. This 15 digit number will display
as: xxx.xxxx.xxxx.xxxx. This screen is only available if Advanced Menus is set to On.
Days Greater
Than 4
Therapy
Hours
Device Hours This screen displays the number of hours that the blower has been active over the life of
This screen displays the cumulative number of device therapy sessions that exceeded
4 hours over a 1 day, a 7 day, and a 30 day time frame. This screen is only available if
Advanced Menus is set to On.
The device is capable of recognizing the difference between the time the patient is actually
receiving therapy and the time when the blower is simply running. This screen displays the
amount of time the patient is actually receiving therapy on the device for the most recent 1
day time frame. It also displays the average amount of time the patient is actually receiving
therapy on the device over a 7 day and a 30 day time frame (provided the device has at
least 7 or 30 days of data respectively). If the device has only 5 days of data to use for the
calculation, the 5 day average value will be seen under the 7 day display.
the device.
- 8 -
AHI
Mask Fit Displays the value “100 - % Large Leak”. % Large Leak is the percentage of time that the
mask leak was so high that it is no longer possible for the device to identify respiratory
events with statistical accuracy. Displays the value for the most recent 1 day, as well as the
values over last 7 days and 30 days.
AHI The device accumulates individual Apnea/Hypopnea indices (AHI) for each session the
patient used the device. This screen displays the nightly AHI value for the most recent
1 day time frame. It also displays the average of these individual nightly AHI values over
a 7 day and a 30 day time frame (provided the device has at least 7 or 30 days of data
respectively). If the device has only 5 days of data to use for the calculation, the 5 day
average value will be seen under the 7 day display.

Icon Text Description
CSR
90%
IPAP
90%
EPAP
90%
A-Trial
Periodic
Breathing
90% Pressure During any given night, the device recognizes the 90% Pressure achieved by the Auto
IPAP: 90%
Pressure
EPAP: 90%
Pressure
A-Trial If Auto-Trial mode is available and enabled, this screen displays Days: xx/xx (where xx/xx
During any given night, the device recognizes the percentage of time the patient was
experiencing periodic breathing. This screen displays the nightly value of periodic breathing
for the most recent 1 day time frame. It also displays the average of these individual nightly
values of periodic breathing over a 7 day and a 30 day time frame (provided the device has
at least 7 or 30 days of data respectively). If the device has only 5 days of data to use for
the calculation, the 5 day average value will be seen under the 7 day display.
This screen is only available if Advanced Menus is set to On.
Algorithm. 90% Pressure is defined as the pressure at which the device spent 90% of the
session time at or below. For example, if the device recognized airflow for 10 hours,
and 9 hours were spent at or below 11 cm H2O, and 1 hour was spent above 11 cm H2O,
then the 90% Pressure would be 11 cm H2O. This screen displays the nightly value of
90% Pressure for the most recent 1 day time frame. It also displays the average of these
individual nightly values of 90% Pressure over a 7 day and a 30 day time frame (provided
the device has at least 7 or 30 days of data respectively). If the device has only 5 days
of data to use for the calculation, the 5 day average value will be seen under the 7 day
display. This screen only displays if the device is in Auto-CPAP or Auto-Trial therapy mode
and the Advanced Menus is set to On.
Displays the value of 90% inhalation pressure for the most recent 1 day, as well as the
average values over the last 7 days and 30 days. Available on the Auto BiPAP model. This
screen is only available if Advanced Menus is set to On.
Displays the value of 90% exhalation pressure for the most recent 1 day, as well as the
average values over the last 7 days and 30 days. Available on the Auto BiPAP model. This
screen is only available if Advanced Menus is set to On.
is the number of completed trial days / number of selected trial days). This screen is only
available if Advanced Menus is set to On.
Return to Patient Mode
Choosing this screen will exit Provider mode and the device will return to the Patient mode. Provider mode will
also time out after 5 minutes of inactivity and automatically return to the Patient mode.
Performance Check Device Screening Tool
Performance Check troubleshooting tool is a self-diagnostic utility built into the therapy device. It allows you to quickly
evaluate a therapy device remotely. If a patient calls indicating that their therapy does not seem to be operating properly, just
direct them to click on Performance Check in the patient’s My Provider menu. The check operates the blower and screens
the device for any operation errors. The screen then displays whether the device passed the check (displays a green check
mark) or should be returned for service (displays a red X). If a modem is installed, Performance Check will automatically
upload a troubleshooting dashboard to the Encore Anywhere patient management software. This dashboard gives you an
overview of key device settings and statistics to help make troubleshooting over the phone easier. If there is not a modem
installed in the therapy device, you can direct the patient to read you the ve codes off the Performance Check screen over
the phone. You can decode these codes in EncoreAnywhere, EncorePro or Encore Basic to populate the troubleshooting
dashboard.
Demonstration Mode
Demonstration mode allows you to demonstrate different device settings while the blower is on so that the patient can
feel the changes in pressure based on the changes to the device settings. To access Demonstration mode, navigate to the
Provider menu, then hold down the therapy button for 5 seconds. Then, the blower will start and the device will display the
- 9 -

Demonstration menu, which will allow you to choose from the following settings:
• Mode - Options will vary depending on the model of therapy device you are using. Note: A-Trial, Ez-Start, and Opti-Start
features are disabled during Demonstration mode.
• Pressure - Options will vary depending on the mode selected.
• Flex Type - Options will vary depending on the model of therapy device you are using.
• Flex Setting - Change the Flex Setting to demonstrate different amounts of pressure relief. Note: Turning Flex “OFF” on a
Bi-Level device will enable the rise-time adjustment setting.
Note: Entering the Demonstration menu will disable the 5 minute Provider mode timeout.
While in Demonstration mode, compliance data is not logged, pressing Ramp has no effect, the humidifer will operate with its
current settings, which cannot be adjusted during Demonstration mode, and setting adjustments have no effect on the exisitng
prescription settings in the Provider menu. To exit Demonstration mode, press the therapy button. Then, you will be returned
to the full Provider menu.
Event Denitions
The DreamStation monitors breathing and detects apneas and hypopneas.
Event Denition
Obstructed Airway
Apnea / Clear
Airway Apnea
Detection
RERA
Detection
Periodic Breathing A persistent waning and waxing breathing pattern which repeats itself between 30 and 100 seconds. The nadir of
Flow Limitation
Detection
Hypopnea
Detection
Snore
Detection
An apnea is detected when there is an 80% reduction in airow from baseline for at least 10 seconds or if there is no
airow detected for 10 seconds.
During the apnea, one or more pressure test pulses are delivered by the device. The device evaluates the response of
the patient to the test pulse(s) and assesses whether the apnea has occurred while the patient has a clear airway or
an obstructed airway. The airway is determined to be clear if the pressure test pulse generates a signicant amount of
ow; otherwise the airway is determined to be obstructed.
RERA (Respiratory effort-related arousal) is dened as an arousal from sleep that follows a 10 second or longer
sequence of breaths that are characterized by increasing respiratory effort, but which does not meet criteria for an
apnea or hypopnea. Snoring, though usually associated with this condition need not be present. The RERA algorithm
monitors for a sequence of breaths that exhibit both a subtle reduction in airow and progressive ow limitation. If
this breath sequence is terminated by a sudden increase in airow along with the absence of ow limitation, and the
event does not meet the conditions for an apnea or hypopnea, a RERA is indicated.
the breathing pattern is characterized by at least a 40% reduction in airow from an established baseline ow. The
pattern must be present for several minutes before it can be identied as periodic breathing.
No therapy adjustments are made in response to periodic breathing.
The device looks for relative changes in the peak, atness, roundness, or shape (skewness) of the inspiratory portion
of the airow waveform. These changes are observed both over a short period of time (groups of 4 breaths) and
over a long period of time (several minutes). Statistical measures are used to help minimize false event detection
while allowing the device to be sensitive to even small changes.
A hypopnea is detected when there is an approximately 40% reduction in airow from baseline for at least 10
seconds.
Vibratory snore is detected when a specic frequency is detected during the inspiratory portion of the patient’s
breath. Vibratory snore is disabled at pressures greater than 16 cm H2O.
Cleaning for Multiple Users
Warning: If you are using the device on multiple users, discard and replace the bacteria lter each time the device is used
on a different person.
Warning: Nebulization or humidication can increase the resistance of breathing system lters and the operator
must monitor the breathing system lter frequently for increased resistance and blockage to ensure the delivery of the
therapeutic pressure.
Note: When using the device on multiple users, it is recommended to use the “Reset Data” option before each new user.
Refer to Reset Data under Device Settings of this guide for additional information.
- 10 -

If you are using the device on multiple users, complete the following steps to clean the device before each new user.
1. Before cleaning, unplug the device. Also remove the blue pollen lter and light-blue disposable ultra-ne lter (if using).
2. Clean the outside of the device only. Use a cloth with one of the following cleaning agents to clean the exterior of the
device:
• Mild Detergent
• 70% Isopropyl Alcohol
• DisCide Towelettes
• 10% Chlorine Bleach solution
3. Allow the device to dry completely before plugging in the power cord and re-inserting the lter(s).
Note: Refer to the DreamStation Heated Humidier user manual for cleaning the humidier for multiple users.
Verifying the Pressure
WARNING: If the device fails to perform within the stated specications, have the system serviced by a qualied Philips
Respironics-approved service facility.
If part of your patient setup procedure is to verify actual pressure with a manometer, please use the following instructions to
ensure that the device is functioning properly. You will need the following equipment to verify the pressure:
• Philips Respironics Pressure Calibration Kit
Kit Includes:
• Philips Respironics Whisper Swivel II (1)
• Philips Respironics O2 Enrichment Final Assembly (2)
• Closed end cap (3)
• Philips Respironics exible tubing (4)
• Pressure tubing (5)
• Philips Respironics Digital Manometer (6) or equivalent
MinimumSpecications:
0 - 25 cm H2O (or better)
±0.3 cm H2O accuracy
±0.1 cm H2O resolution
• Blue pollen lter (not shown)
To verify the pressure, complete the following steps:
1. Install the blue pollen lter into the device.
2. With the device unplugged, connect the system as illustrated in the diagram.
3. Turn the manometer on. If it does not display a reading of zero, adjust the manometer to calibrate it. If the manometer
has variable settings for devices, set it to cm H2O.
4. Supply power to the device then place the device in Provider mode.
5. Set the therapy parameters according to the patient specic data.
6. Set the device to the specic pressure value for the patient.
7. Verify that the pressure setting matches the pressure displayed on the manometer. If the pressure setting does not match
the measured value for the device, contact Philips Respironics or an authorized service center to have the device serviced.
8. Set up the remaining parameters and exit Provider mode. The unit is ready for patient use.
- 11 -
Data Encryption
A small portion of the rmware that performs data encryption on the DreamStation device is being utilized under the
Apache 2.0 and Mozilla 2.0 licenses. These licenses are available at: www.apache.org/licenses/LICENSE-2.0 and
https://www.mozilla.org/en-US/MPL/2.0/
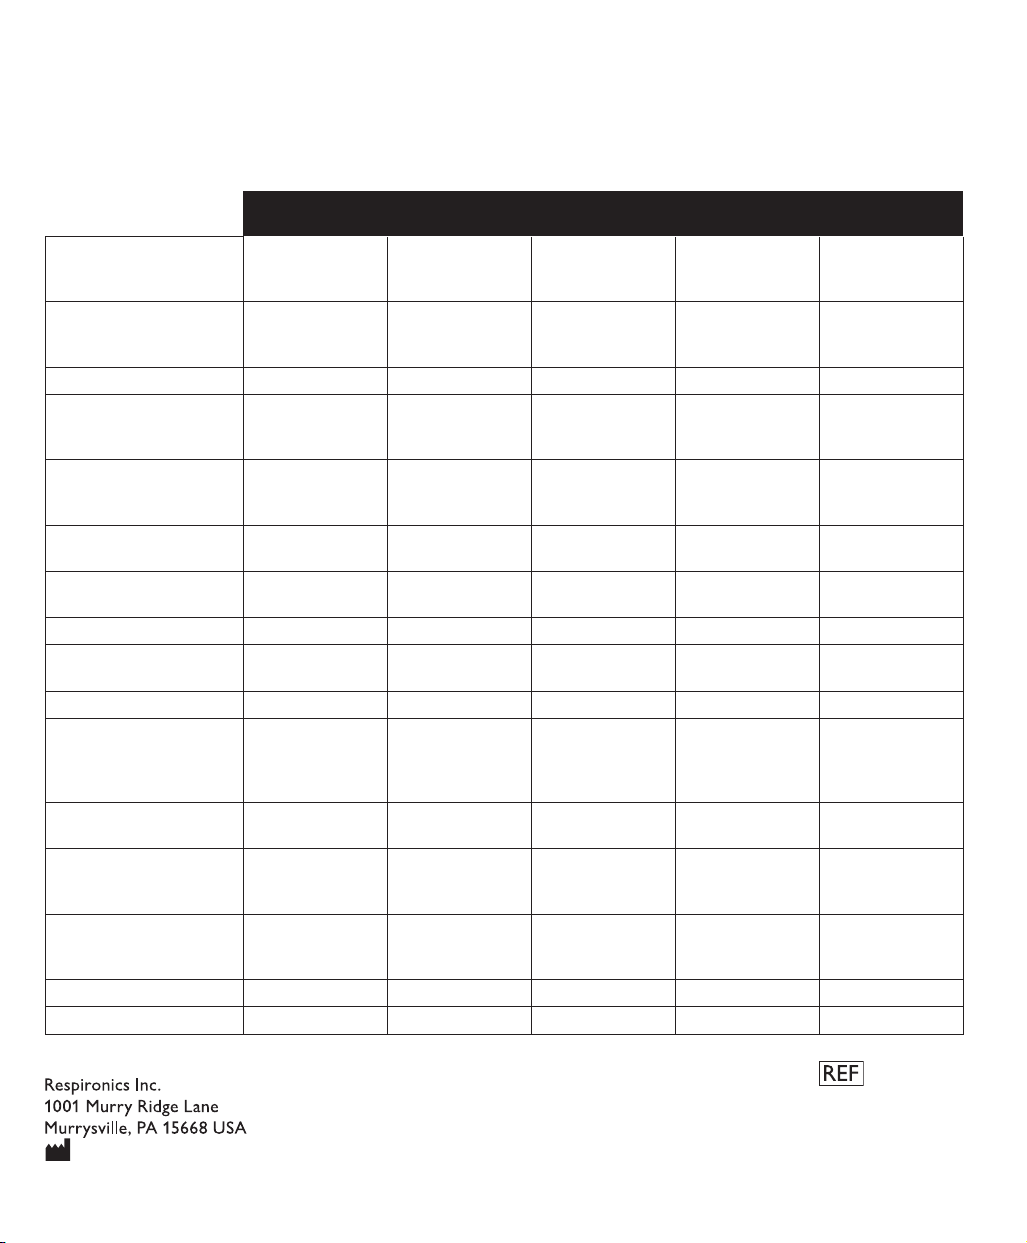
DreamStation Therapy Device Congurations
DreamStation
CPAP
Modes Fixed CPAP Fixed CPAP
Features n/a EZ-Start
Pressure Range 4 to 20 cm H2O 4 to 20 cm H2O 4 to 20 cm H2O 4 to 25 cm H2O 4 to 25 cm H2O
Flex Comfort C-Flex C-Flex
Humidication Modes (3) Fixed
Mask Type Resistance
Control
Ramp (5-45 minutes) Ramp
Altitude Compensation Automatic Automatic Automatic Automatic Automatic
Advanced Event
Detection
Flow Waveforms n/a Standard Standard Standard Standard
Modem Compatibility Standard
Built-in Bluetooth
Connectivity
DreamMapper
Compatibility
Oximetry Compatibility Standard
Check Mask Fit feature Standard Standard Standard Standard Standard
Performance Check Standard Standard Standard Standard Standard
Adaptive
Heated Tube
Standard Standard Standard Standard Standard
SmartRamp
n/a Standard Standard Standard Standard
(optional Cellular
Modem or Wi-Fi
Accessory)
Standard Standard Standard Standard Standard
Standard
(by mobile app or
web)
(optional oximetry
accessories)
DreamStation
CPAP Pro
CPAP-Check
Auto-Trial
C-Flex+
Fixed
Adaptive
Heated Tube
Ramp
SmartRamp
Standard
(optional Cellular
Modem or Wi-Fi
Accessory)
Standard
(by mobile app or
web)
Standard
(optional oximetry
accessories)
DreamStation
Auto CPAP
Fixed CPAP
CPAP-Check
Auto-CPAP
EZ-Start
Auto-Trial
Opti-Start
C-Flex
C-Flex+
A-Flex
Fixed
Adaptive
Heated Tube
Ramp
SmartRamp
Standard
(optional Cellular
Modem or Wi-Fi
Accessory)
Standard
(by mobile app or
web)
Standard
(optional oximetry
accessories)
DreamStation
BiPAP Pro
Fixed CPAP
Fixed BiPAP
EZ-Start EZ-Start
C-Flex
C-Flex+
Bi-Flex
Fixed
Adaptive
Heated Tube
Ramp
SmartRamp
Standard
(optional Cellular
Modem or Wi-Fi
Accessory)
Standard
(by mobile app or
web)
Standard
(optional oximetry
accessories)
DreamStation
Auto BiPAP
Fixed CPAP
Fixed BiPAP
Auto-BiPAP
C-Flex
C-Flex+
Bi-Flex
Fixed
Adaptive
Heated Tube
Ramp
SmartRamp
Standard
(optional Cellular
Modem or Wi-Fi
Accessory)
Standard
(by mobile app or
web)
Standard
(optional oximetry
accessories)
- 12 -
1120832
1120832 R07
HM 2/28/2018
EN-DOM
 Loading...