

Page 1

chapter
Technical Specification and Measurement setup................1-1, 1-2
Location of printed circuit boards............................................1-3
Warnings & Safety..................................................................2-1
Brief Operating Instructions..............................................3-1 to 3-15
Dismantling Instructions.....................................................4-1 to 4-5
Service hints......................................................................5-1 to 5-3
Service Test Program........................................................5-4 to 5-6
BLOCK DIAGRAMS ..........................................................6-1 to 6-5
WIRING DIAGRAM.................................................................6-6
POWER BOARD (for orientation only) ..............................7-1 to 7-4
FRONT BOARD.................................................................7-5 to 7-6
KEY BOARD left.....................................................................7-7
KEY BOARD right...................................................................7-8
chapter
HEADPHONE/MICROPHONE BOARD ...........................7-9 to 7-10
INTERFACE BOARD......................................................7-11 to 7-13
3CDC MODULE................................................................8-1 to 8-9
EXPLODED VIEWS
apparatus..........................................................................10-1
3CDC module...............................................................8-8 to 8-9
MECHANICAL PARTSLIST see Exploded views
ELECTRICAL PARTSLIST...................................................10-2 ff
CDR785/00/01C/17
Published by MS 0012 Service Audio Printed in The Netherlands Subject to modification
© 3103 785 25030
Compact Disc Recorder
C
D
T
E
X
T
E
D
I
T
IN
G
CD 1
CD 2
C
D 3
CDR
AUX
C
D
C
D
C
O
M
P
I
L
E
C
D
R
E
C
O
R
D
JOG CONTROL
NO
YES
R
E
C
T
Y
P
E
E
R
A
S
E
F
I
N
A
L
I
Z
E
R
E
C
L
E
V
E
L
B
A
L
A
N
C
E
T
E
X
T
P
R
O
G
T
R
A
C
K
E
D
I
T
O
P
E
N
/C
L
O
S
E
O
P
E
N
/
C
L
O
S
E
M
I
C
P
H
O
N
E
S
O
N
/
O
F
F
R
E
P
E
A
T
C
D
T
E
X
T
S
H
U
F
F
L
E
D
I
S
P
L
A
Y
C
D
C
H
A
N
G
E
A
U
D
I
O
C
D
R
E
C
O
R
D
E
R
C
D
R
7
8
5
CD R
EC
O
RD
ER
A
U
T
O
L
E
V
E
L
C
O
N
T
R
O
L
CD 1
C
D
2
CD
3
CDR
A
UX
C
D
C
D
C
O
M
P
I
L
E
C
D
R
E
C
O
R
D
JOG
CONTROL
NO
YES
R
E
C
T
Y
P
E
E
R
A
S
E
F
I
N
A
L
I
Z
E
R
E
C
L
E
V
E
L
B
A
L
A
N
C
E
T
E
X
T
P
R
O
G
T
R
A
C
K
E
D
I
T
O
P
E
N
/
C
L
O
S
E
O
P
E
N
/
C
L
O
S
E
M
I
C
P
H
O
N
E
S
O
N
/
O
F
F
R
E
P
E
A
T
C
D
T
E
X
T
S
H
U
F
F
L
E
D
I
S
P
L
A
Y
C
D
C
H
A
N
G
E
A
U
D
I
O
C
D
R
E
C
O
R
D
E
R
C
D
R
7
8
5
CD RE
COR
DER
A
U
T
O
L
E
V
E
L
C
O
N
T
R
O
L
T
EX
T
TOT
AL
T
R
ACK
TIME TO
TAL
R
EM
STEP
DIGITAL
C
D
RW
C
D
RW
C
O
M
P
I
L
E
D
I
S
C
A
L
L
P
R
O
G
R
A
M
R
E
C
O
R
D
I
N
P
R
O
G
R
E
S
S
S
H
U
F
F
L
E
R
E
P
E
A
T
T
R
A
C
K
E
D
I
T
R
EC TRAC
K
T
IM
E
1
2
345678
9
1
0
1
1
1
2
1
3
1
4
1
5
1
6
1
7
1
8
1
9
2
0
+
12
O
PTIC
AL
12
ANA
LOG
FI
NA
LI
ZE
ALC
T
EX
T
TOT
AL
T
R
ACK
TIME TO
TAL
R
EM
STEP
DIGITAL
C
D
RW
C
D
RW
C
O
M
P
I
L
E
D
I
S
C
A
L
L
P
R
O
G
R
A
M
R
E
C
O
R
D
I
N
P
R
O
G
R
E
S
S
S
H
U
F
F
L
E
R
E
P
E
A
T
T
R
A
C
K
E
D
I
T
R
EC TRAC
K
T
IM
E
1
2
345678
9
1
0
1
1
1
2
1
3
1
4
1
5
1
6
1
7
1
8
1
9
2
0
+
12
O
PTIC
AL
12
ANA
LOG
FI
NA
LI
ZE
ALC
TEXT T
OT
A
L
TRAC
K
TIME TO
TAL
REM
S
TEP
DIG
ITAL
C
D
RW
C
D
RW
C
O
M
P
I
L
E
D
I
S
C
A
L
L
P
R
O
G
R
A
M
R
E
C
O
R
D
I
N
P
R
O
G
R
E
S
S
S
H
U
F
F
L
E
R
E
P
E
A
T
T
R
A
C
K
E
D
I
T
REC T
RA
CK
TIM
E
1
2
3456
7
8
9
1
0
1
1
1
2
1
3
1
4
1
5
1
6
1
7
1
8
1
9
2
0
+
12
O
PT
IC
AL
12
A
NA
LO
G
FINAL
IZE
AL
C
123
456
7
89
0
S
P
A
C
E
U
V
W
M
N
D
E
F
T
R
A
C
K
I
N
C
R
.
P
R
O
G
R
A
M
X
Y
Z
O
P
Q
G
H
I
C
D
T
E
X
T
C
D
3
C
D
R
C
D
2
C
D
1
R
E
P
E
A
T
S
H
U
F
F
L
E
N
OYE
S
T
E
X
T
E
D
I
T
R
S
T
J
K
L
A
B
C
B
R
IG
H
T
N
E
S
S
123
456
78
9
0
S
P
A
C
E
U
V
W
M
N
D
E
F
T
R
A
C
K
IN
C
R
.
P
R
O
G
R
A
M
X
Y
Z
O
P
Q
G
H
I
C
D
T
E
X
T
C
D
3
C
D
R
C
D
2
C
D
1
R
E
P
E
A
T
S
H
U
F
F
L
E
N
OY
E
S
T
E
X
T
E
D
I
T
R
S
T
J
K
L
A
B
C
B
R
IG
H
T
N
E
S
S
S
T
O
P
S
T
O
P
P
L
A
Y
/P
A
U
S
E
P
L
A
Y
/P
A
U
S
E
CLASS 1
LASER PRODUCT
©
Copyright 2000 Philips Consumer Electronics B.V. Eindhoven, The Netherlands
All rights reserved. No part of this publication may be reproduced, stored in a retrieval
system or transmitted, in any form or by any means, electronic, mechanical, photocopying,
or otherwise without the prior permission of Philips.
CDR786/00
TABLE OF CONTENTS
SERVICING
For servicing CDR785/CDR786, the sets can be divided into two parts:
1. Except for the Power board (Switched Mode Power Supply) and the CD-R/W module the set has to
be repaired on component level.
2. The Power board and the CD-R/W module will be exchanged completely in case of a failure.
The defective CD-R/W module has to be returned for central repair.
Available circuit descriptions:
The Basics of Compact Disc Recordable/Rewritable
4822 725 25242
3rd generation Compact Disc Recording
3104 125 40100
Page 2

1-1
TECHNICAL SPECIFICATION
General:
Mains voltage : 220V-230V / 50-60Hz for /00
110V-240V /50-60Hz for /01C
120V / 60Hz for /17
Power consumption : ≤ 18W
≤ 1W in stand by
Input / Output:
Analog in:
input sensitivity : ≤500mVrms
max. input voltage : 2,8Vrms
input impedance : 47kΩ
Analog out:
output level : 2V
rms±2dB at no load
output impedance : 200Ω
Microphone in:
input sensitivity : ≤1mV
rms
max. input voltage : 50mVrms
input impedance : 2kΩ
Digital in (acc. IEC958):
input level : 0,5Vpp
input impedance : 75Ω
Digital out (acc. IEC958):
output level : 0,5V
pp
output impedance : 75Ω
Headphone:
output level : 4,4V
pp at no load
output impedance : 120Ω
frequency response: 20 - 20.000 Hz ±3dB
distortion : 0,01% at 1 kHz and -6dB output level at 120Ω
channel difference : ≤ 3dB at 1 kHz
channel crosstalk : -50dB at 1kHz
AUDIO PERFORMANCE
3CDC module:
To be measured on ANALOG OUT socket.
frequency response : 20 - 20.000 Hz ±0,6dB
signal/noise ratio : ≥ 115dB (120dB A-weighted)
distortion : -88dB at 1 kHz (-91dB typ.)
channel difference : ≤ 0,5dB at 1 kHz
channel crosstalk : -115dB at 1kHz(-120dB typ.)
de emphasis : 0 or 15/50µs switched automatically by subcode on the disc
laser
output power : 500µW
wave length : 780 ±20nm
CD-RW module:
To be measured on ANALOG OUT socket.
frequency response : 20 - 20.000 Hz ±0,3dB (±1dB recording)
signal/noise ratio : ≥ 95dB (98dB A-weighted)
distortion : -86dB at 1 kHz (-83dB recording)
channel difference : ≤ 0,5dB at 1 kHz
channel crosstalk : -86dB at 1kHz (-74dB recording)
de emphasis : 0 or 15/50µs switched automatically by subcode on the disc
laser (laser class 3B)
output power : 1mW max. during reading
20mW max. during writing
wave length : 780 ±20nm
Page 3
1-2
SYSTEM CODE
RC KEY
y
COMMAND CODE
CD
20 26 12
CDR
BRIGHTNESS
Standby
20 26 71
TRACK INCR.
- 26 114
CD TEXT
20 26 88
1
20 26 01
2
20 26 02
3
20 26 03
4
20 26 04
5
20 26 05
6
20 26 06
7
20 26 07
8
20 26 08
9
20 26 09
TEXT EDIT
20 26 82
0
20 26 00
PROGRAM
20 26 36
NO
20 26 49
YES
20 26 87
PLAY
20 26 53
¡
2
9
20 26 33
™
20 26 32
STOP
20 26 54
5
20 26 50
6
;
20 26 52
PAUSE
20 26 48
SHUFFLE
20 26 28
REPEAT
20 26 29
CD1
20 20 55
CD2
20 20 56
CD3
20 20 57
CDR
26 26 63
RC5 code RC283505, 130300
Remote Control:
RC5 commands
RC283505
TECHNICAL SPECIFICATION
L
R
LEVEL METER
e.g. Sennheiser UPM550
with FF-filter
S/N and distortion meter
e.g. Sound Technology ST1700B
DUT
CD
Use Audio Signal Disc SBC429 4822 397 30184
(replaces test disc 3)
MEASUREMENT SETUP
Page 4
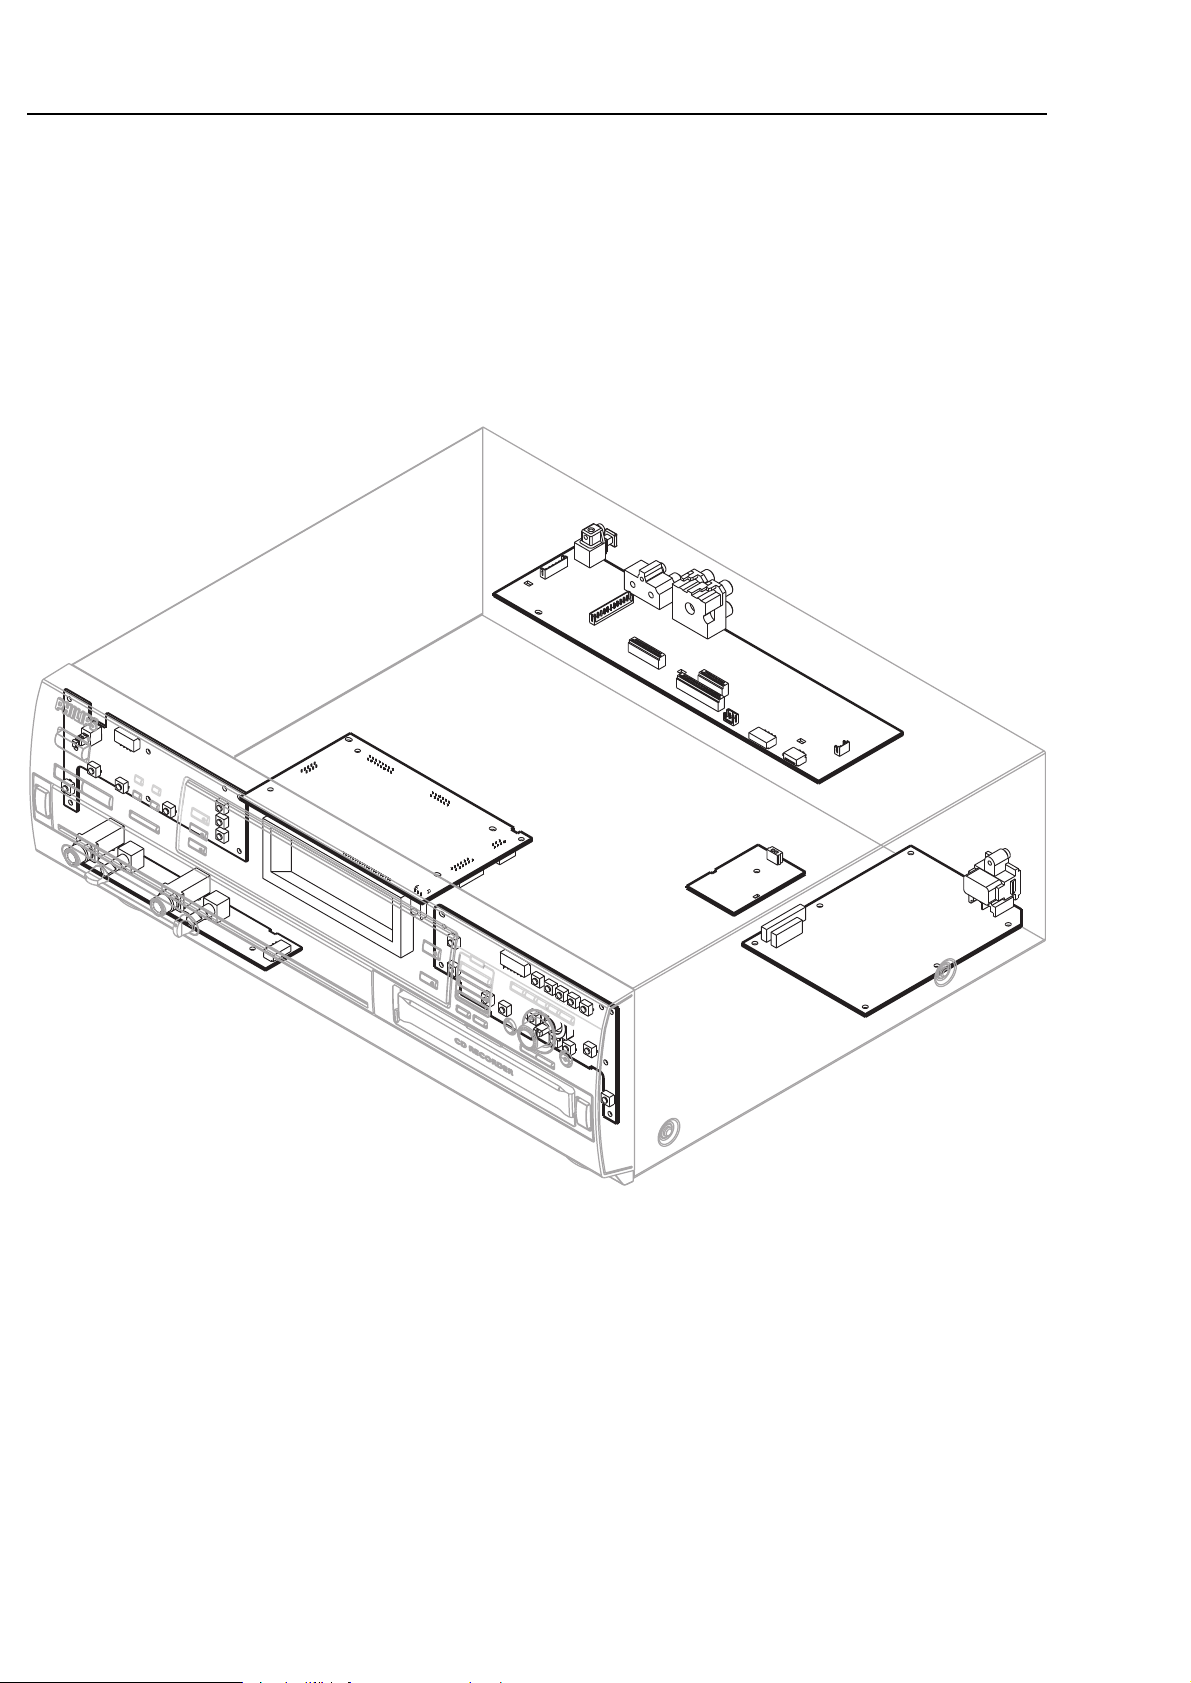
1-3
FRONT BOARD
INTERFACE BOARD
HEADPHONE/MIC BOARD
SWITCHED MODE
POWER SUPPLY
NTC
loccation of pcb´s, 240200
KEY BOARD RIGHT
KEY BOARD LEFT
LOCATION OF PRINTED BOARDS
picture 1
Page 5
2-1
© WARNING
All ICs and many other semiconductors are susceptible to
electrostatic discharges (ESD). Careless handling during
repair can reduce life drastically.
When repairing, make sure that you are connected with the
same potential as the mass of the set via a wristband with
resistance. Keep components and tools at this potential.
f ATTENTION
Tous les IC et beaucoup d´autres semi-conducteurs sont
sensibles aux décharges statiques (ESD). Leur longévite
pourrait être considérablement écourtée par le fait qu´aucune
précaution nést prise à leur manipulation.
Lors de réparations, s´assurer de bien être relié au même
potentiel que la masse de l´appareil et enfileer le bracelet
serti d´une résistance de sécurité.
Veiller à ce que les composants ainsi que les outils que l´on
utilise soient également à ce potentiel.
d WARNUNG
Alle ICs und viele andere Halbleiter sind empfindlich
gegenüber elektrostatischen Entladungen (ESD).
Unsorgfältige Behandlung im Reparaturfall kann die
Lebensdauer drastisch reduzieren.
Sorgen Sie dafür, daß Sie im Reparaturfall über ein Pulsarmband mit Widerstand mit dem Massepotential des
Gerätes verbunden sind.
Halten Sie Bauteile und Hilfsmittel ebenfalls auf diesem
Potential.
ñ WAARSCHUWING
Alle IC´s en vele andere halfgeleiders zijn gevoelig voor
electrostatische ontladingen (ESD).
Onzorgvuldig behandelen tijdens reparatie kan de levensduur
drastisch doen vermindern. Zorg ervoor dat u tijdens reparatie
via een polsband met weerstand verbonden bent met hetzelfde
potentiaal als de massa van het apparaat.
Houd componenten en hulpmiddelen ook op ditzelfde potentiaal.
i AVVERTIMENTO
Tutti IC e parecchi semi-conduttori sono sensibili alle scariche
statiche (ESD).
La loro longevità potrebbe essere fortemente ridatta in caso di
non osservazione della più grande cauzione alla loro
manipolazione. Durante le riparationi occorre quindi essere
collegato allo stesso potenziale che quello della massa
delápparecchio tramite un braccialetto a resistenza.
Assicurarsi che i componenti e anche gli utensili con quali si
lavora siano anche a questo potenziale.
©
Safety regulations require that the set be restored to its
original condition and that parts which are identical with
those specified be used.
Safety components are marked by the symbol
i
Le norme di sicurezza estigono che l´apparecchio venga
rimesso nelle condizioni originali e che siano utilizzati i
pezzi di ricambiago identici a quelli specificati.
Componenty di sicurezza sono marcati con
ñ
Veiligheidsbepalingen vereisen, dat het apparaat in zijn
oorspronkeliijke toestand wordt teruggebracht en dat
onderdelen, identiek aan de gespecificeerde, worden toegepast.
De Veiligheidsonderdelen zijn aangeduid met het symbool
s Varning !
Osynlig laserstrålning när apparaten är öppnad och
spärren är urkopplad. Betrakta ej strålen.
∂ Advarsel !
Usynlig laserstråling ved åbning når sikkerhedsafbrydere
er ude af funktion. Undgå udsaettelse for stråling.
ß Varoitus !
Avatussa laitteessa ja suojalukituksen ohitettaessa olet alttiina
näkymättömälle laserisäteilylle. Älä katso säteeseen !
f
"Pour votre sécurite, ces documents doivent être utilisés par
des spécialistes agréés, seuls habilités à réparer votre
appareil en panne".
ESD
SAFETY
d
Bei jeder Reparatur sind die geltenden Sicherheitsvorschriften zu beachten. Der Originalzustand des Gerätes
darf nicht verändert werden. Für Reparaturen sind Originalersatzteile zu verwenden.
Sicherheitsbauteile sind durch das Symbol markiert.
f
Les normes de sécurité exigent que l`appareil soit remis
à l`état d`origine et que soient utilisées les pièces de
rechange identiques à celles spécifiées.
Les composants de sécurité sont marqués
CLASS 1
LASER PRODUCT
©
DANGER: Invisible laser radiation when open.
©
After servicing and before returning the set to customer
perform a leakage current measurement test from all
exposed metal parts to earth ground, to assure no
shock hazard exists.
The leakage current must not exceed 0.5mA.
AVOID DIRECT EXPOSURE TO BEAM.
©
AVAILABLE ESD PROTECTION EQUIPMENT :
anti-static table mat large 1200x650x1.25mm 4822 466 10953
small 600x650x1.25mm 4822 466 10958
anti-static wristband 4822 395 10223
connection box (3 press stud connections, 1MΩ) 4822 320 11307
extendible cable (2m, 2MΩ, to connect wristband to connection box) 4822 320 11305
connecting cable (3m, 2MΩ, to connect table mat to connection box) 4822 320 11306
earth cable (1MΩ, to connect any product to mat or to connection box) 4822 320 11308
KIT ESD3 (combining all 6 prior products - small table mat) 4822 310 10671
wristband tester 4822 344 13999
WARNINGS & SAFETY
Page 6

3-1
TABLE OF CONTENTS
Welcome !
Thank you for buying this Philips Compact Disc Recorder / CD
Changer.
In the eighties Philips invented a new audio system - the CD.
The CD (compact disc) revealed to you the new dimensions of
digital sounds and added to the pleasures of audio.
Compact disc technology permits a high contrast in loud as
well as in quiet passages, with perfect channel separation.
Philips has now further developed compact disc technology
and the result is the CD recorder.
With your Philips CD Recorder/Changer, you can make your
own high-quality audio CDs (subject only to legal restrictions
on copying), either by recording at normal or high speed from
the Changer to the Recorder, or by recording from an external
source. And naturally, you can also play all pre-recorded audio
CDs, using one or both decks individually.
This manual gives instructions for operating this CD recorder
where:
– the figures (1) throughout the text indicate a sequence of
actions necessary to perform a certain operation;
– the arrows (➜) indicate the reaction from the recorder;
– the dots (•) indicate remarks, advice or special options
within a sequence of actions. The dot-marked instructions
are not necessary for the required operation.
All instructions in this manual are based on control via the
keys on the set. If there are corresponding keys available on
the remote control they can be used as well.
All redundant packing material has been omitted. We have
done our utmost to make the packaging easily separable into
three mono materials: cardboard (box), polystrene foam
(buffer) and polyethylene (bags, protective foam sheet).
Your set consists of materials which can be recycled if
disassembled by a specialized company. Please observe the
local regulations regarding the disposal of packing materials,
exhausted batteries and old equipment.
As an
ENERGY STAR® partner,
Philips has determined that this product
meets the ENERGY STAR® guidelines for
energy efficiency.
– 2 Analog audio cables (with red and white plugs)
– 1 Digital coaxial cable(with black plugs)
– Mains cable
– 2 batteries for the remote control, size AA
– Remote control
Subject to modification without notice.
General
Power consumption ..........................................................16 W
Power consumption in Standby........................................< 1 W
Operating temperature ..................................................5-35° C
Weight ..............................................................................6.0 kg
Dimensions ................................................435 x 360 x 140 mm
Audio
Frequency response ............................................2Hz-22.050 Hz
Playback S/N (A-weighted) CD (CDR)....................127 (100) dB
Playback S/N CD (CDR) .......................................... 121 (98) dB
Playback Dynamic Range CD (CDR)......................95 dB (94) dB
Playback Total Harmonic Distortion CD + CDR
........................................................................- 90 dB/0.003 %
Channel separation CD (CDR) ..................................120 (89) dB
Recording S/N (A-weighted) ............................................96 dB
Recording S/N digital without SRC ..................equal to source
Recording Dynamic Range ................................................92 dB
RecordingTotal Harmonic Distortion + noise
........................................................................- 86 dB / 0.005%
This set complies with the radio interference
requirements of the European Community.
Technical data
Supplied accessories
Environmental information
About this manual
GENERAL INFORMATION
5
English
BRIEF OPERATING INSTRUCTIONS
English
Table of contents
GENERAL INFORMATION
Welcome.....................................................................5
About this manual ......................................................5
Environmental information .........................................5
Supplied accessories..................................................5
Technical data.............................................................5
Discs for recording......................................................6
Discs for playback.......................................................6
Maintenance...............................................................6
CDR(W) handling .......................................................6
CONTROLS AND CONNECTIONS
Controls on the front...................................................7
Connections at the back.............................................8
DISPLAY
DISPLAY indications ...................................................9
DISPLAY messages...................................................10
INSTALLATION
Connections general.................................................12
Analog connections ..................................................12
Digital coaxial connections ......................................13
Digital optical connections.......................................13
Power supply/MAINS...............................................14
Setup recommendations...........................................14
Inserting batteries in the remote control.................14
REMOTE CONTROL
Remote control commands.......................................15
LOADING DISCS
CD recorder...............................................................15
CD changer ...............................................................16
PLAYING
Playing.......................................................................16
CD text ......................................................................17
Selecting a disc ........................................................17
Selecting a track.......................................................17
Search.......................................................................18
Shuffle (random order) play......................................18
Repeat CDs, track or program ..................................18
PROGRAMMING
Programming track numbers.....................................19
Erasing a track from the program.............................19
Clearing the program the program...........................19
Making a program for recording ..............................19
RECORDING GENERAL
Basic information......................................................20
Direct Line Recording (DLR)......................................20
Auto Level Control (ALC)...........................................20
BALANCE key............................................................20
REC LEVEL key ..........................................................21
Remarks on recording...............................................21
4
INTERNAL RECORDING
Recording modes ......................................................21
High speed recording and automatic finalizing .......22
High speed recording................................................23
Normal speed recording and listening.....................23
Microphone recording ..............................................24
EXTERNAL RECORDING
Analog or digital recording.......................................25
Recording modes ......................................................25
Automatic track increment .......................................25
Recording with automatic synchronized start..........26
Manual recording .....................................................27
(UN)FINALIZING, ERASING
Finalising CDR & CDRW discs..................................28
Unfinalising CDRW discs..........................................29
Erasing from a CDRW disc .......................................29
SPECIAL FEATURES
Text Edit (on CD recorder only).................................30
Track editing (on CD changer only)...........................32
TROUBLESHOOTING.................................................33
Page 7

3-2
BRIEF OPERATING INSTRUCTIONS
General
1 ON/OFF.......................turns the CD recorder/changer ON and
OFF
ON/OFF indicator.....lights up when the set is switched on
2 PLAY/PAUSE ; 2 .....starts play/interrupts play
3 SHUFFLE ....................plays discs in changer, program or
CD(RW) in recorder in random order
4 REPEAT.......................repeat play (All, program or track)
5 CD TEXT.....................makes CD text scroll over display once
6 DISPLAY.....................selects display information/text
7 IR sensor ...................receives signals from the remote con-
trol
8 Display.........................information screen
9 AUX.............................selects external input
0 CDR ............................selects CDR display/keys
& YES..............................- selects settings in Text Edit and Track
Edit mode
.....................................- stores Text settings
.....................................- plays selected tracks
.....................................- programs track numbers
( STOP 9.......................stops playback or recording
) MIC(rophone)..............microphone socket
Level ...........................microphone volume control
™ PHONES.....................socket for headphones
Level ...........................headphones volume control
£ CD 1, 2, 3 ...................select CD 1, 2 or 3/CD changer display
and keys
ª NO ..............................- deletes tracks from a program
.....................................- deletes complete program
.....................................- deletes text in Text Edit mode
º
5
................................- searches backward
.....................................- reviews the tracks in a program
.....................................- controls the cursor in different menus
(Text Edit and Track Edit)
6
................................- searches forward
.....................................- reviews the tracks in a program
.....................................- controls the cursor in different menus
(Text Edit and Track Edit)
⁄ ¡ JOG CONTROL ™.- previous/next disc/track (play and pro-
gram mode)
.....................................- recording level control (recording)
.....................................- balance control (recording)
.....................................- selects settings (menu on)
CD changer
% PROG(ram)..................opens/closes program (review) memory
^ TRACK EDIT ..............opens Track Edit mode to create your
own ‘tracks’
* OPEN/CLOSE /........opens/closes disc tray
¡ CD CHANGE..............selects disc in CD changer
≤ Disc tray
CD recorder
! Recording keys
CD ™ CD.....................selects high speed/auto finalise recor-
ding mode
COMPILE CD .............selects high speed recording
mode/opens program memory
REC(ord) TYPE ...........selects other recording modes
@ REC(ording) LEVEL.....enables the EASY JOG key to set the
recording level control
# BALANCE...................enables the EASY JOG key to set the
balance
$ TEXT............................opens Text Edit mode and and stores
entered text
∞ Disc tray
§ ERASE.........................erases recordings
≥ Recording Led..........- Blue in Stop and Play mode
.....................................- Red during recording
.....................................- Red blinking during erasing
• FINALIZE....................finalases/unfinalises disc
¤ OPEN/CLOSE /........opens/closes disc tray
Note: Unless stated otherwise, all controls are on the front of the
CD recorder/changer. When provided on the remote control,
you can also use the corresponding buttons, after selecting
the CD recorder or CD Changer by
pressing CD-R or CD 1,
CD 2,or CD 3.
Controls on the front
CONTROLS AND CONNECTIONS
7
English
C
D
1
C
D
2
C
D
3
C
D
R
A
U
X
C
D
C
D
C
O
M
P
I
L
E
C
D
R
E
C
O
R
D
J
O
G
C
O
N
T
R
O
L
N
O
Y
E
S
R
E
C
T
Y
P
E
E
R
A
S
E
F
I
N
A
L
I
Z
E
R
E
C
L
E
V
E
L
B
A
L
A
N
C
E
T
E
X
T
P
R
O
G
T
R
A
C
K
E
D
I
T
O
P
E
N
/
C
L
O
S
E
O
P
E
N
/
C
L
O
S
E
S
T
O
P
M
I
C
P
H
O
N
E
S
O
N
/
O
F
F
P
L
A
Y
/
P
A
U
S
E
R
E
P
E
A
T
C
D
T
E
X
T
S
H
U
F
F
L
E
D
I
S
P
L
A
Y
C
D
C
H
A
N
G
E
A
U
D
I
O
C
D
R
E
C
O
R
D
E
R
C
D
R
7
8
5
CD RECORDER
C
D
T
E
X
T
E
D
I
T
I
N
G
A
U
T
O
L
E
V
E
L
C
O
N
T
R
O
L
T
E
X
T
T
O
T
A
L
T
R
A
C
K
T
I
M
E
T
O
T
A
L
R
E
M
S
T
E
P
D
I
G
I
T
A
L
CD
RW
CD
RW
C
O
M
P
I
L
E
D
I
S
C
A
L
L
P
R
O
G
R
A
M
R
E
C
O
R
D
I
N
P
R
O
G
R
E
S
S
S
H
U
F
F
L
E
R
E
P
E
A
T
T
R
A
C
K
E
D
I
T
R
E
C
T
R
A
C
K
T
I
M
E
1234567
89
1
0
1
1
1
2
1
3
1
4
1
5
1
6
1
7
1
8
1
9
2
0
+
12
O
P
T
I
C
A
L
12
A
N
A
L
O
G
F
I
N
A
L
I
Z
E
A
L
C
T
E
X
T
T
O
T
A
L
T
R
A
C
K
T
I
M
E
T
O
T
A
L
R
E
M
S
T
E
P
D
I
G
I
T
A
L
CD
RW
CD
RW
C
O
M
P
I
L
E
D
I
S
C
A
L
L
P
R
O
G
R
A
M
R
E
C
O
R
D
I
N
P
R
O
G
R
E
S
S
S
H
U
F
F
L
E
R
E
P
E
A
T
T
R
A
C
K
E
D
I
T
R
E
C
T
R
A
C
K
T
I
M
E
123456789
1
0
1
1
1
2
1
3
1
4
1
5
1
6
1
7
1
8
1
9
2
0
+
12
O
P
T
I
C
A
L
12
A
N
A
L
O
G
F
I
N
A
L
I
Z
E
A
L
C
1
2 7 8 !903 4 65 ^%$#@ &
º
ª
∞
≥
≤* ⁄ ¤•§() ¡ ™ £
GENERAL INFORMATION
English
Discs for recording
For recording, make sure to use special audio discs only.
These discs are marked with “Digital Audio” and the logos
shown below.
There are two different types of audio discs for the use on
this CD recorder:
– CD-Audio Recordable (CDR) discs
These discs can be recorded on once and play
in all standard CD players and CD recorders,
when they are finalized.
– CD-Audio ReWritable (CDRW) discs
These discs can be recorded on, erased and
re-recorded many times and play in CDRW
compatible CD players and CD recorders,
when they are finalized.
– All Philips CD players and CD recorders with
the sticker shown here are CDRW compatible.
To ensure proper working of the set we recommend the use of
Philips audio CDR and audio CDRW discs only.
Note: Do not use a computer CDR or CDRW as recording will
not work properly!
In certain countries including the UK and certain
Commonwealth countries, use of the product (or CDRecorder) as shown or suggested in this user manual
may require the permission of copyright holders.
Discs for playback
For playback on this CD changer and CD recorder you can use
following audio discs:
– All pre-recorded audio CDs
– All audio CDR and audio CDRW discs
Notes:
– Do not try to play a CD-ROM, CD-I or CDV!
– CDR(W) discs, which are recorded on a computer can only
be used when they are correctly treated according the
audio standard (IEC958: Consumer part). Single session
only!
6
Maintenance
Clean the set with
a soft, slightly dampened lint-free
cloth. Do not use any cleaning agents
as they may have a corrosive effect.
Do not expose the set,
batteries or CDs to humidity, rain,
sand or excessive heat (caused by
Recordable
ReWritable
heating equipment or direct sunlight).
The lenses may cloud over when the set is suddenly moved
from cold to warm surroundings. Playing a CD(RW) is not
possible then. Leave the set in a warm environment until the
moisture evaporates.
CDR(W) handling
For recording it is very important to use dust and scratch free
discs.
To take a CD(RW) out of its box
easily, press the centre spindle while
lifting the CD(RW). Always pick up a
CD(RW) by the edge and put it back
after use. Never write on a CD or
attach a sticker to it. Write only on
the printed side of a CDR or CDRW,
and only with a soft felt-tipped pen.
To clean a CD(RW), wipe it in a straight
line from the centre toward the edge
using a soft, lint-free cloth.
A cleaning agent may damage the disc!
O
P
E
N
/
C
L
O
S
E
P
L
A
Y
/
P
A
U
S
E
S
T
O
P
A
U
D
I
O
C
D
R
E
C
O
R
D
A
B
L
E
/
R
E
W
R
I
T
A
B
L
E
2
,
ying
p
tria
s
o
c
1
.
ed
n Au
A
i
Y
s
,
A
2
ri
Y
.
,
H
I
o
E
de
R
E
h
3
a
.
t
W
S
E
A
M
Y
A
4
R
.
.
E
T
H
I
N
5
K
ed
.
t
A
N
B
O
O
T
H
bi
U
d. Unau
i
I
T
N
Y
'
e
N
O
E
v
U
W
oh
N
r
O
W
ser
e
1
r
k
ding p
r
wor
co
e
r
ed
s
d
r
o
thi
f
ec
r
al o
e
t
th
en
r
er of
n
E
P
C
4
6
hiring or
B
5
I
E
1
M
4
/
S
5
he ow
T
2
E
t
M
S
R
A
TE
f
ng,
i
REO
o
st
a
nd
C
O
a
M
P
A
C
T
D
I
G
I
T
A
L
A
U
producer
D
I
O
the
of
rformance, broadc
6
.
s
e
O
t
Y
E
7
p
M
.
I
D
C
c
O
A
N
N
righ
'
8
T
T
.
O
G
W
E
(
A
H
T
N
e
9
All
O
N
a
.
r
publi
A
N
Y
M
O
Y
L
y
O
O
U
S
R
U
1
V
0
E
R
o
L
.
i
Y
O
C
c
F
O
e
E
V
U
)
E
U
E
T
1
T
S
1
I
S
.
B
O
B
O
Y
E
T
E
D
1
H
2
M
F
W
.
O
I
S
A
C
R
I
Y
A
V
M
S
N
O
E
T
Y
O
A
(
S
P
p
E
a
R
n
D
i
s
E
h
R
V
T
E
e
r
s
i
o
n
)
Page 8
3-3
BRIEF OPERATING INSTRUCTIONS
CD changer section
1 STEP
....................
indicates the number of tracks in a
program
2 } .........................remote control active
3 TEXT......................CD TEXT active
4 TRACK TIME........remaining track time (CDC)
TOTAL TIME.........total time (CDC)
TRACK...................track number
5 + .............................disc or program contains more than 20
tracks
6 PROG.....................flashes during programming/ lights in
program mode
SHUFFLE...............plays tracks in random order
REPEAT TRACK...lights up when a track is repeated
ALL.........................lights up when all tracks on the discs in
the changer are repeated/when a
program is repeated
CD ..........................lights up when a complete disc in the
changer or recorder is repeated
7 ; ............................pause function active
8 B ..........................lights during play
9 CD ..........................CD selected (a pre-recorded CD or
finalised CD-R or CD-RW disc)
CD R .....................unfinalised CD R disc selected
CD RW .................unfinalised CD RW disc selected
0 ........CD changer selected and CD(s) inserted in
compartment 1, 2 and/or 3 (a prerecorded
CD or finalised CD-R or CD-RW disc)
!3..........................
disc in play or selected
@ Track bar ..............indicates:
................................
- number of tracks on a disc or in a
................................
program
................................
- number of track in play
CD recorder section
1 FE.............balance
2 STEP...................indicates the number of tracks in a
program
3 }.......................remote control active
4 TEXT....................CD TEXT active
5 TRACK TIME......remaining track time (CDR)
TOTAL TIME.......total time (CDR)
REM REC TIME .remaining recording time
REM TRACK TIME remaining track time
TRACK ................track number
TOTAL REM (TRACK) TIME
.............................total remaining (track) time (in dubbing
mode)
6
+ .............................disc or program contains more than 20
tracks
7 CD........................CD inserted (a pre-recorded CD or
finalised CD-R or CD-RW disc)
CD R...................unfinalised CD R disc inserted
CD RW...............unfinalised CD RW disc inserted
9 DIGITAL ..............digital input selected for external
recording
OPTICAL.............optical input selected for external
recording
ANALOG.............analog input selected for external
recording
.....................microphone input active
0 ALC......................Auto Level Control active
! FINALIZE............lights up during finalizing a recording
@ RECORD IN PROGRESS
.............................Lights during recording
# L/R ; ; .............indicates the audio signal level
$ .....internal recording activated
% COMPILE CD......lights up when Compile CD mode is
selected
^ Track bar
.............
indicates:
.............................- number of tracks on a disc or in a
program
.............................- number of track in play
TEXT TOTAL TRACK TIME TOTAL REM
STEP
DIGITAL
CD
RW
CD
RW
COMPILE CD TRACK PROG
RECORD IN PROGRESS
SHUFFLE REPEAT ALL EDIT
REC TRACK TIME
123456789
10 11 12 13 14 15 16 17 18 19 20 +
OPTICAL
ANALOG
FINALIZE ALC
1
234 5
^
6
%
$
#@!0
7
8
9
DISPLAY indications
DISPLAY
9
English
ANALOG
DIGITAL
IN OUT
IN OUT
O
P
T
I
C
A
L
I
N
A
C
M
A
I
N
S
L
R
1 2 3 4 5
6
CONTROLS AND CONNECTIONS
English
Connections at the back
1 Connection to mains
2 ANALOG IN.............connects to the line output of a tape
3 ANALOG OUT CDR & CD
..................................connects to the line input of an ampli-
4 DIGITAL IN ..............connects to the digital coaxial output
5 DIGITAL OUT CDR & CD
..................................connects to the digital coaxial input
6 OPTICAL IN.............connects to the digital optical output
8
deck, amplifier or other analogue
source
fier. (left and right)
of an external CD player
of e.g. amplifier or recording device
of an external CD player
123 4
STEP
TEXT TOTAL TRACK TIME TOTAL REM
@
123456789
!
0
9
10 11 12 13 14 15 16 17 18 19 20 +
COMPILE CD TRACK PROG
CD
RW
SHUFFLE REPEAT ALL EDIT
76
8
#
##
REC TRACK TIME
CD
RW
RECORD IN PROGRESS
DIGITAL
OPTICAL
ANALOG
FINALIZE ALC
5
Page 9

3-4
Others
AUTO FINAL............when activating/disactivating the auto
finalize function
NO AUDIO TR .........when the recorder enters a data track
during recording
FINALIZE CD.........laser power calibration performed 96
......................................times, please finalize disc
INITIALIZING ......during laser power calibration for
unfinalized discs
DISC RECOVER ......during disc recovering after power
failure
OPC ERROR ..............failure during OPC procedure (OPC =
Optimum Power Calibration)
RECORD ERROR ......recording error in menu mode
DISC ERROR............when trying to record on or finalize a
recovered disc
MEMORY FULL/ ......when no more text can be stored for a
FINALIZE CD.........certain disc. Another disc has to be
finalized to obtain memory space
NO TRACKS ..............when text input is given for an empty
disc
TEXT EDIT ..............when entering Text Edit mode
ALBUM ARTIST ......when editing or erasing an artist name
ALBUM TITLE.........when editing or erasing a title
TR N ARTIST .........when editing or erasing an artist name
per track
TR N TITLE ............when editing or erasing a title per
track
TEXT ERASE............when erasing text
ALL TEXT.................when erasing all text selected
ERASE.........................when confirmation for erasing has to
be given with YES key
ERASE ALL ..............when confirmation for erasing has to
be given with YES key
ERASE MEMORY ......when waiting for confirmation when
erasing a disc
TEXT MEMORY.........when selecting text review per
unfinalised disc in memory
MEMORY EMPTY ......when TEXT MEMORY is selected
while no text is in memory
AUTO TRACK............when selecting auto track increment
ON or OFF
ALBUM TITLE.........will be followed by album title
TRACK TITLE.........will be followed by track title
ALBUM ARTIST ......will be followed by artist name
TRACK ARTIST ......will be followed by track artist name
NO TEXT....................no text stored for disc/track
DISPLAY
11
English
DISPLAY
BRIEF OPERATING INSTRUCTIONS
English
DISPLAY messages
Messages, as listed and explained here, may appear on the
display for your guidance.
General
PHILIPS CD RECORDER
......................................when set is switched on
READING ...................reading disc information
OPEN CDC / CDR .during tray opening of
PROGRAM FULL .....program full
INSERT DISC.........insert disc or insert disc in correct
WRONG DISC............inserted disc is no audio CD
UNFINALIZED.........- lights up when unfinalized CDR(W)
......................................- flashes when CDR disc tray is
MEMORY _ ...... - lights up when 87 % of memory is
......................................- gives the amount of memory used,
Recording
WAIT ...........................when STOP 9 is pressed during
UPDATE......................updating disc contents
DISC-FULL...............no more recording possible
AUX DIGITAL ?....digital coaxial input 1 selected
AUX OPTICAL ?....digital optical input selected
AUX ANALOG ?.......analog input selected
COPY PROTECT ......no digital recording can be made of
NOT FINALIZED.... when opening the tray with an
CD FAST ? ..............high speed recording of a complete
TRACK FAST ?.......high speed recording of a single track
CD LISTEN ? .........normal speed recording of a complete
TRACK LISTEN ? normal speed synchronized recordingof
RECORD CD X ? ....recording of the entire disc selected
COMPILE CD ?.......High Speed recording of compilation
AUX CD ? .................Synchronised Start of recording of a
AUX TRACK ? .........Synchronised Start of recording of a
AUX MANUAL ?.......Manual Start of recording from
AUX MIX MIC ? ....Manual Start of mixed recording of
REC TR X ? ............select a track for recording
10
changer/recorder
way/when recording is activated while
no CD is inserted
disc or wrong disc is inserted in CD
changer
opened with unfinalised CDR(W) disc
inserted
used
when tray is opened
recording the first 4 seconds of a track
the external source
unfinalized disc inserted
disc from the CD Changer
from the CD Changer
CD from the CD Changer
a single a track
(program) selected
complete disc from external source
single track from external source
external source selected
microphone and external source input
MIC ONLY ? ............Manual Start of microphone recording
CLEAR A-B ?..........when clearing a passage
A-B FAST ?.............highspeed recording of a particular
A-B LISTEN ? .......normal speed recording of a particular
REC LEV - XX DBrecord level is being adjusted
NOT FITTING.........time left on CDR(W) disc is not enough
ANALOG REC............copy prohibited track found during
ERASE ?....................recorder asks for confirmation when
ERASE X + ? .........recorder asks for confirmation when
ERASE DISC ?.......recorder asks for confirmation when
FINALIZE ?............recorder asks for confirmation when
FINALIZED..............when trying to finalise an already
FINALIZED CD ......when trying to record on an already
UNFINAL XX............time countdown during unfinalizing
CHECK INPUT.........when RECORD is pressed while no
ERASE XX XX .........time countdown when erasing a track
FINAL XX XX .........time countdown when finalising a disc
PROF SOURCE.........when a professional source is
A - 0:00..................when point A of a passage to be
Play
PROGRAM ...................program mode selected
PLAY PROGRAM ......playback of program
CLEAR PROG ?.......when clearing a program
CD X ALL .................complete CD X selected for
passage
passage
for proposed recording
internal recording. Track will be copied
analog (Copy Protection Regulations).
erasing
erasing mote than one track
erasing a disc
finalising a disc
finalised disc
finalized disc
digital source is detected
or a disc
connected
repeated is stored
programming
Page 10

3-5
This connection is required if you want to make recordings
from an external CD player with a digital coaxial output.
1 For external recording, connect the cable 3 between the
DIGITAL IN-socket on the set and the DIGITAL OUT-socket
of an external CD player.
Note: Your set is equipped with a digital coaxial output (com-
mon output for CD recorder & CD changer deck). This
output can be used for digital playback. (e.g. Philips
receiver FR960 or FR970.)
This connection is required if you want to make recordings
from an external CD player with a digital optical output.
When connecting the Digital
Optical cable, make sure it
is fully inserted until
there is a click.
1 Remove the dust caps from the digital optical connection.
(We recommend you save the cap.)
2 For external recording, connect a fibre-optic cable 4 bet-
ween the digital optical input of the set and the digitaloptical output of an external CD player.
Note: For playback, the digital coaxial outputs or analog out-
puts of the CD Changer and CD recorder should be
connected to an amplifier.
DIGITAL
I
N
O
U
T
ANALOG
DIGITAL
IN
O
U
T
OPTICAL
IN
L
R
TAPE/CDR
I
N
O
U
T
IN
O
U
T
OPTICAL
OUT
1
4
RECEIVER/AMPLIFIER
CD RECORDER
CD PLAYER
2
Digital optical connections
Digital coaxial connections
INSTALLATION
13
English
A
N
A
L
O
G
D
IG
IT
A
L
IN
O
U
T
IN
O
U
T
O
P
T
IC
A
L
IN
L
R
T
A
P
E
/C
D
R
IN
O
U
T
L
R
L
R
RECEIVER/AMPLIFIER
CD RECORDER
1
2
INSTALLATION
BRIEF OPERATING INSTRUCTIONS
English
For playback on the CD recorder from the CD changer deck the
following outputs are present:
– Digital coaxial output (CD & CD-R)
– Analog output (CD & CD-R)
We advise you to connect these to the TAPE or CD-R input on
your amplifier.
For external recording the following inputs are present:
– Digital optical input
– Digital coaxial input
– Analog input (stereo)
The connections you make will depend upon the possibilities
your audio equipment offers. Please refer to the user manuals
for your other audio equipment first.
Digital recordings (optical or coaxial) give the best
performance in audio and usability (e.g. auto-track).
(The digital optical connection is less sensitive to external
disturbances).
If your equipment does not offer digital connections, the high
quality Analog-Digital-Convertor of your set will ensure very
good audio performance when recordings are made from the
analog input.
Playback via the digital coaxial output of the CD recorder
gives the best audio performance.
If your equipment does not offer digital connections, the high
quality Digital-Analog-Convertor of the set ensures a very
good sound quality via the analog output.
We advise you to always establish both digital and analog
connections. In this way you can always make analog recordings when digital recording is not possible.
We have described the most common ways of connecting the
CD recorder. If you still have difficulties with the connections
you can always contact the Philips Consumer Service desk in
your country.
Analog connectionsConnections general
This connection must be made for playback on the CD recorder deck as well as the CD changer deck (cable 2).
Cable 1is only required if you want to make recordings from
an external analog source.
Use the audio cables supplied. Connect the red plugs to the
R sockets, and the white plugs to the L sockets.
1 For external recording, connect cable 1 between the ANA-
LOG IN-sockets on the set and the CDR LINE- or TAPE OUTsockets of an amplifier.
Note: For recording directly from a CD player or tape deck, the
analog input of the set should be connected to the analog output of the CD player or tape deck.
2 For playback, connect cable 2 between the ANALOG OUT-
sockets on the set and the input sockets of an amplifier e.g.
TAPE IN, CD-R or AUX.
Note: Never use the PHONO input.
RECEIVER/AMPLIFIER
I
N
O
U
T
TAPE/CDR
L
R
I
N
O
U
T
I
N
ANALOG
DIGITAL
CD RECORDER
I
N
O
U
T
DIGITAL
CD PLAYER
1
2
OPTICAL
O
U
T
IN
3
OPTICAL
OUT
12
Page 11
3-6
STANDBY y .........................switches to Standby
BRIGHTNESS.......................sets the brightness of the display
TRACK INCR(ement) ............selects automatic or manual increase
of track numbers during recording
CD TEXT ................................activates CD text mode
Number/alphabet keys 0 - 9
..........................................- selects a track by number
- selects character for text input
TEXT EDIT.............................opens Text Edit mode and stores
entered text
SPACE....................................inserts space duting text input
PROGRAM ............................opens/closes program memory
NO ........................................- deletes tracks from a program
..........................................- deletes complete program
..........................................- deletes text in Text Edit mode
YES.........................................- selects settings in Text Edit and
Track Edit mode
..........................................- stores Text settings
..........................................- plays selected tracks
..........................................- programs track numbers
2 ..........................................starts CD(RW) play
O ..........................................previous track (Play and Program
mode)
P ..........................................next track (Play and Program mode)
9 ..........................................stops CD(RW)
5 ..........................................- searches backward
- cursor control in Prog. review mode
6 ..........................................- searches forward
- cursor control in Prog. review mode
; ..........................................interrupts CD(RW) play
SHUFFLE................................plays CDs, CD(RW) or program in
random order
REPEAT..................................repeat play
CD 1, 2, 3................................selects discs in CD changer
CDR ........................................selects CD recorder
Note:
Only Audio CDs will be accepted in the CD recorder deck If a nonaudio disc is inserted, the display shows
WRONG DISC.
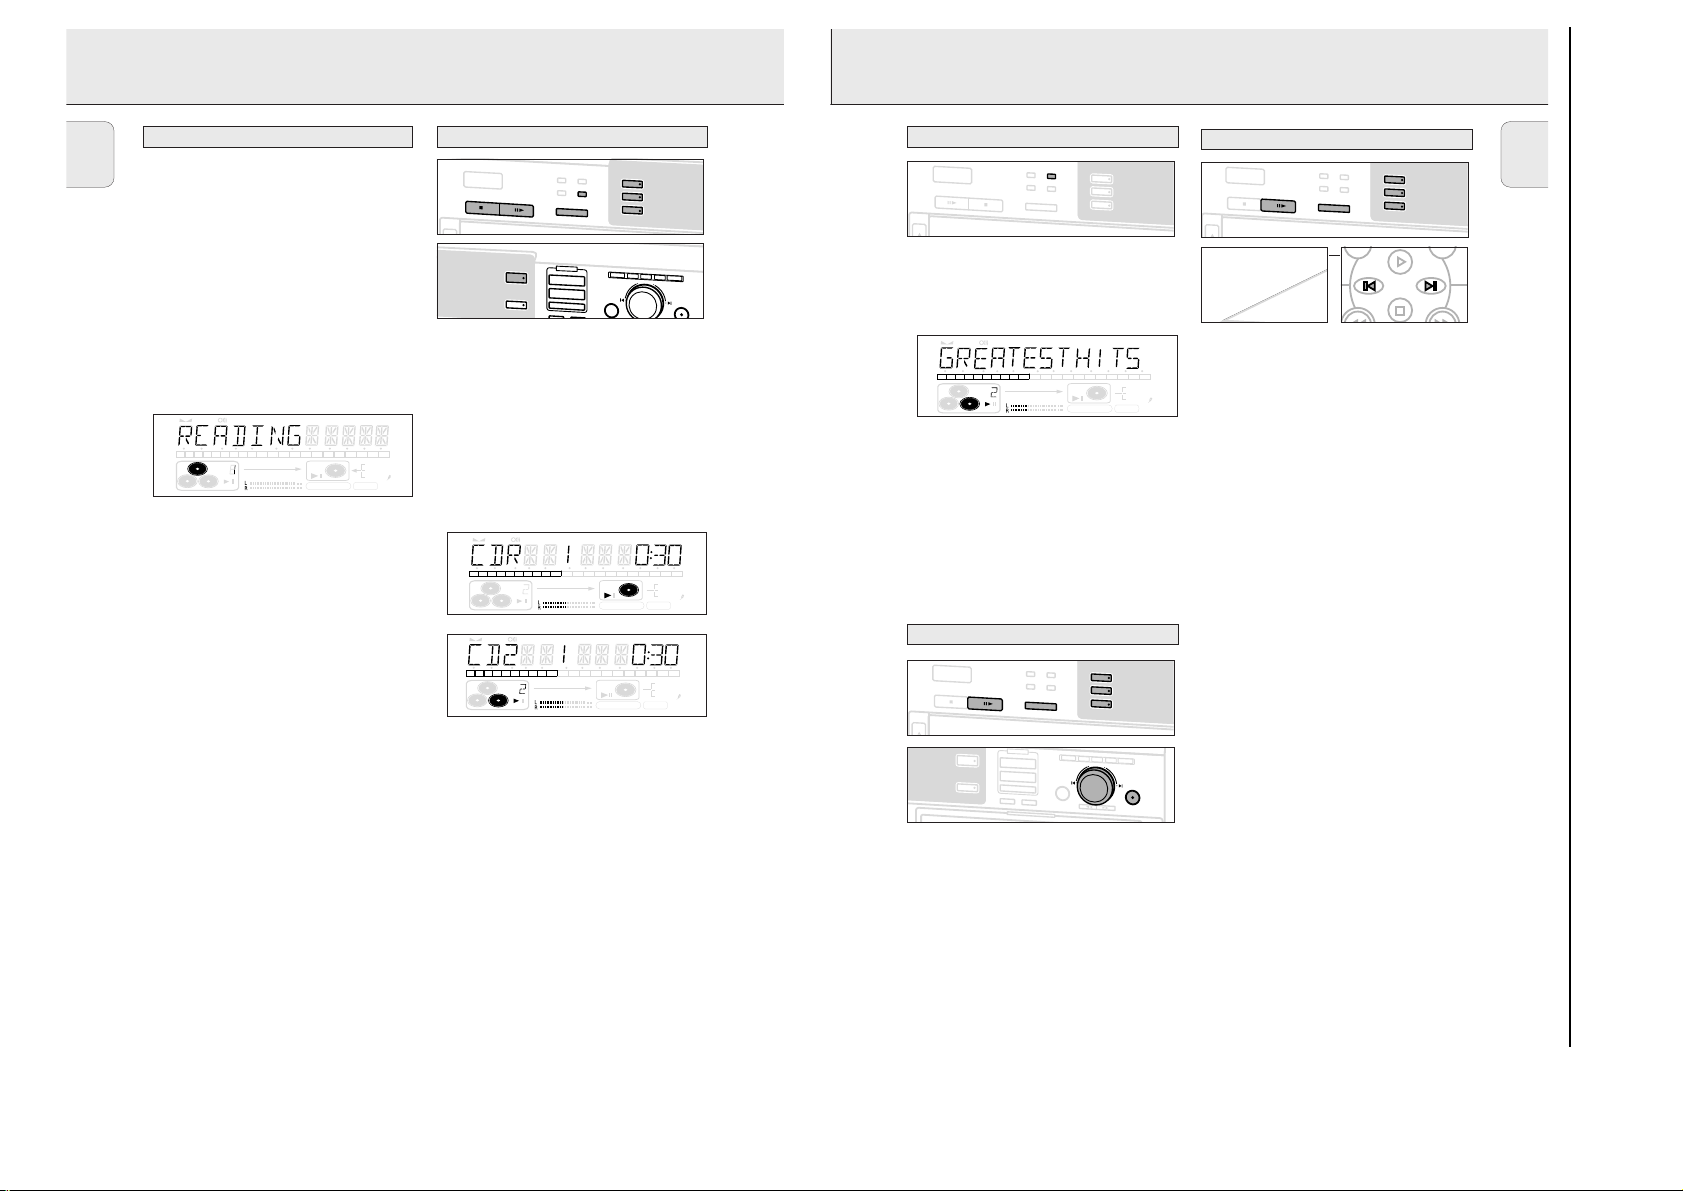
1 Press OPEN/CLOSE to open the disc tray.
➜ OPEN CDR lights up.
2 Insert a CD, CDR or CDRW in the appropriate recess in the tray,
label side up.
3 Press OPEN/CLOSE to close the tray (see also “Playing“).
➜ READING lights up and the display will show the type of
disc inserted.
• If a CDR(W) is finalised it will show CDon the display.
• If you insert a blank or partly-recorded CDR or unfinalised
CDRW, the CD recorder will calibrate the disc for optimum
recording. During this process the display will first show
READING; INITIALIZING and then the number of audio
tracks. Calibration can take up to 25 seconds.
• If CD-text is available the TITLE/ARTIST will scroll by.
IMPORTANT !
For recording it is important that the blank disc is completely
free from dust particles or scratches (see CD(RW) handling).
TEXT TOTAL TRACK TIME TOTAL REM
STEP
DIGITAL
CD
RW
CD
RW
RECORD IN PROGRESS
REC TRACK TIME
123456789
10 11 12 13 14 15 16 17 18 19 20 +
12
OPTICAL
12
ANALOG
FINALIZE ALC
COMPILE CD TRACK PROG
SHUFFLE REPEAT ALL EDIT
8
CD recorder
Remote control commands
REMOTE CONTROL LOADING DISCS
15
English
2x AA, R06, UM-3 / 1,5 V
BRIEF OPERATING INSTRUCTIONS
INSTALLATION
English
Power supply/Mains
The type plate is located on the rear of the set.
1 Check whether the mains voltage as shown on the type
plate corresponds to your local mains voltage. If it does not,
consult your dealer or service organisation.
2 Make sure all connections have been made before
switching on the mains supply.
3 Connect the mains cable supplied to AC MAINS ~ and to
the wall socket. This switches on the mains supply.
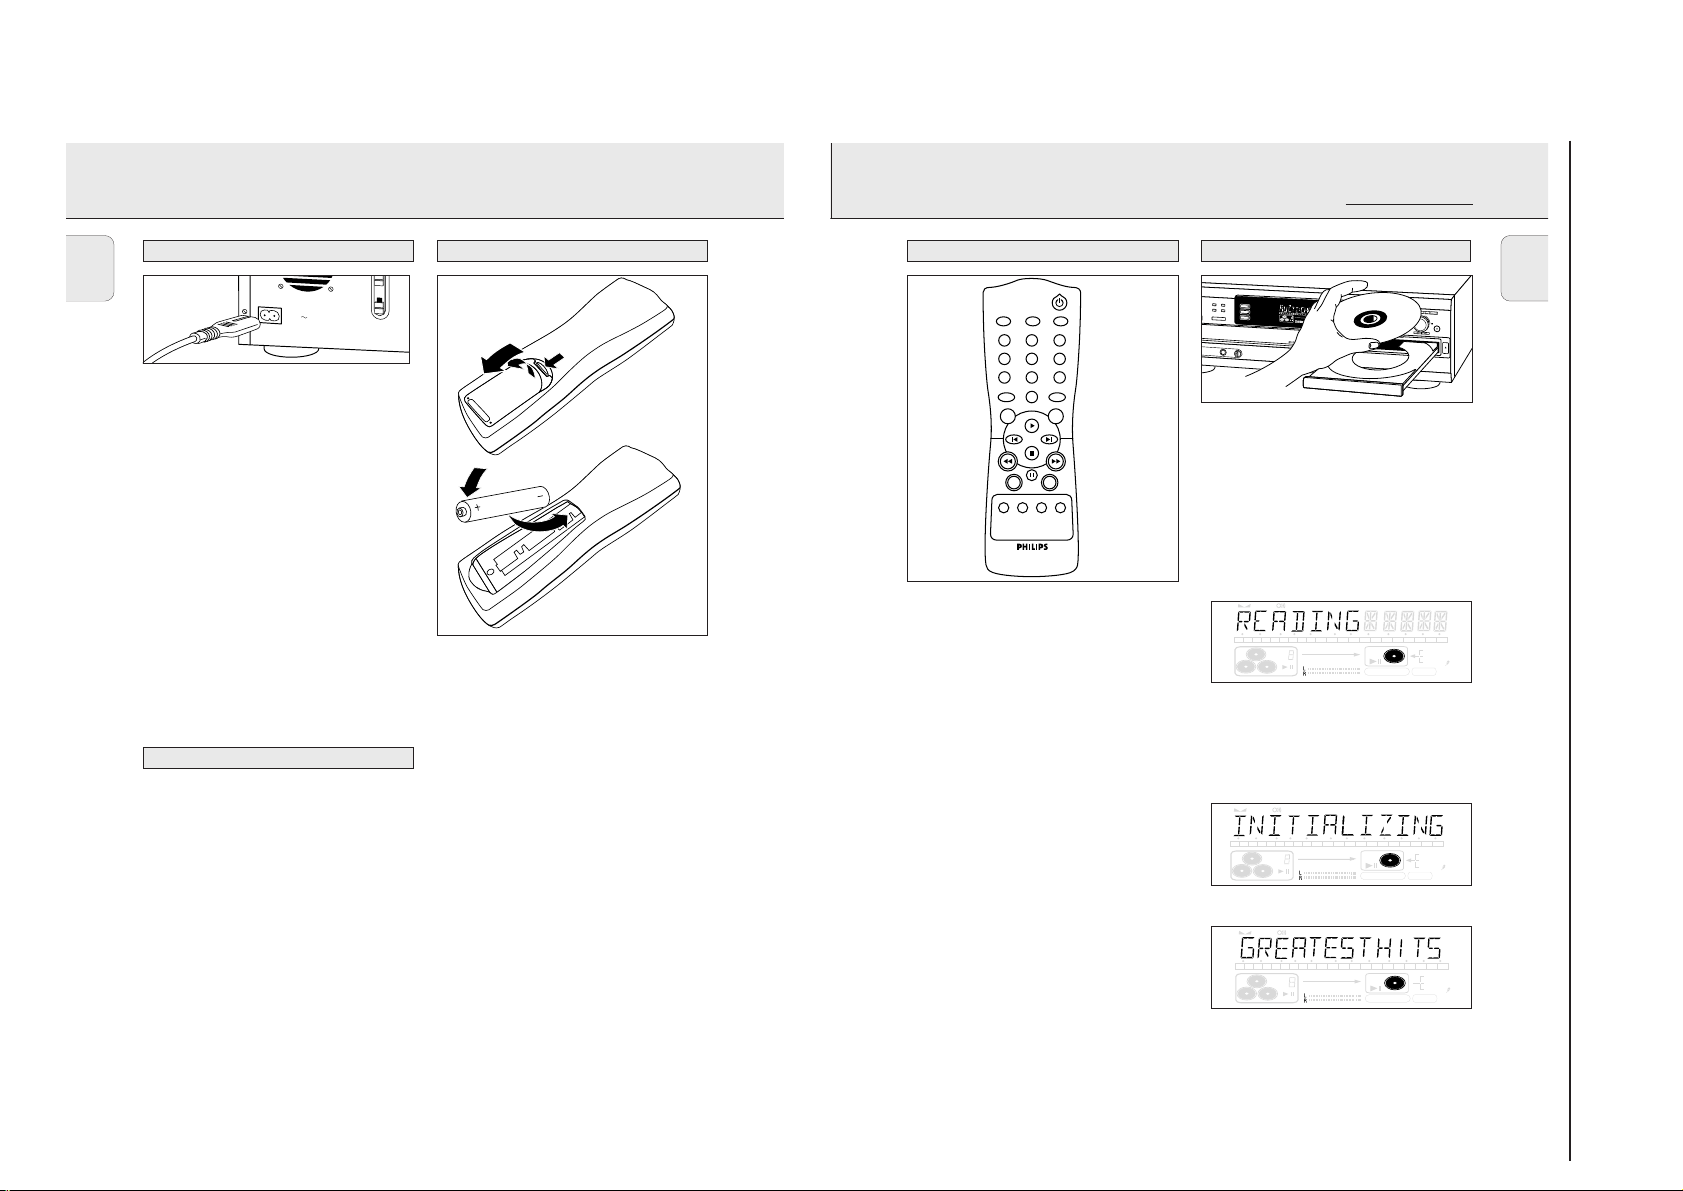
4 Press ON/OFF to switch on the set.
➜ PHILIPS CD RECORDER will be displayed.
• Press ON/OFF again to switch off the set.
• Press y on the remote control to switch the set to Standby
mode.
When the set is switched to standby, it is still consuming
some power. To disconnect the set from the mains completely,
remove the mains plug from the wall socket.
For users in the U.K.: please follow the instructions on
page 3.
Setup recommendations
– Place the set on a solid, vibration free surface.
– Make sure there is sufficient space around the set to
prevent overheating.
– Do not place the set near a source of heat or in direct
sunlight.
– Do not use the set under extremely damp conditions.
– If the set is placed in a cabinet, make sure that a 2.5 cm
space remains free on all sides of the CD recorder for
proper ventilation.
– Place the set on a solid, vibration free surface.
– Active mobile phones near to the set may cause
malfunctions.
14
A
C
M
A
I
N
S
Inserting batteries in the remote control
1 Open the battery compartment cover.
2 Insert 2 batteries (AA, R06 or UM-3; as supplied) as shown.
3 Replace the cover.
Note: We recommend you use 2 batteries of the same type
and condition.
Batteries contain chemical substances, so they should
be disposed of properly.
5
A
U
D
IO
C
D
R
E
C
O
R
D
E
R
R
E
P
E
A
T
C
D
T
E
X
TRACK INCR.
CD TEXT
BRIGHTNESS
DEF
ABC
123
MN
JKL
456
UVW
RST
789
SPACE
PROGRAM
TEXT EDIT
0
T
S
H
U
F
F
L
E
D
I
S
P
L
A
Y
C
D
C
H
A
N
G
E
R
GHI
OPQ
XYZ
STEP
STEP
STEP
TEXT TOTAL TRACK TIME TOTAL REM
TEXT TOTAL TRACK TIM
TEXT TOTAL TRACK TIM
CD 1
CD 2
123456789
123456789
123456789
C
O
M
C
C
O
O
M
M
C
D
RW
C
C
D
D
RW
RW
CD 3
S
H
U
S
S
H
H
U
U
P
H
O
N
E
S
NO YES
REPEATSHUFFLE
CD 3 CDRCD 2CD 1
STEP
TEXT TOTAL TRACK TIME TOTAL REM
123456789
CD
RW
STEP
TEXT TOTAL TRACK TIME TOTAL REM
123456789
CD
RW
C
D
T
E
X
T
E
D
I
T
I
N
E
E
TOTAL REM
TOTAL REM
1
0
1
1
1
0
0
1
1
1
1
1
1
2
1
1
1
2
2
3
1
1
1
3
3
4
1
1
4
4
P
I
L
E
P
P
D
I
I
L
L
IS
E
E
C
D
D
A
IS
IS
L
C
C
L
A
A
P
L
L
R
L
L
O
G
P
P
R
R
R
A
O
O
M
G
G
R
R
A
A
M
M
C
D
C
C
D
D
F
F
L
E
F
F
R
F
F
L
L
E
E
E
P
E
R
R
A
E
E
T
P
P
T
E
E
A
A
R
T
T
A
C
T
T
K
R
R
A
A
E
C
C
D
K
K
IT
E
E
D
D
I
I
T
T
R
E
R
R
E
E
COMPILE CD TRACK PROG
SHUFFLE REPEAT ALL EDIT
COMPILE CD TRACK PROG
SHUFFLE REPEAT ALL EDIT
G
REC TRACK TIM
REC TRACK TIME
REC TRACK TIME
E
R
E
C
O
R
D
C
D
C
D
CDR
1
5
1
1
1
5
5
6
1
1
1
6
6
7
1
1
1
7
7
8
1
1
1
8
8
9
1
1
2
9
9
0
2
2
0
0
+
+
+
C
O
M
P
I
L
E
C
RW
DIGITAL
RW
RW
DIGITAL
DIGITAL
12
12
12
OPTICAL
OPTICAL
OPTICAL
12
12
12
ANALOG
ANALOG
ANALOG
C
O
R
D
C
C
I
O
O
N
R
R
D
D
P
R
I
I
N
N
O
G
P
P
R
R
R
E
O
O
S
G
G
S
R
R
E
E
S
S
S
S
FINALIZE ALC
FINA
FINA
LIZE
LIZE
ALC
ALC
10 11 12 13 14 15 16 17 18 19 20 +
D
R
E
C
T
Y
P
E
AUX
E
R
A
S
E
F
I
N
A
C
D
R
E
C
O
R
D
E
R
CD
RW
RECORD IN PROGRESS
10 11 12 13 14 15 16 17 18 19 20 +
CD
RW
RECORD IN PROGRESS
R
E
C
L
E
V
E
L
B
A
L
A
N
C
E
J
O
G
N
O
L
I
Z
E
REC TRACK TIME
FINALIZE ALC
REC TRACK TIME
FINALIZE ALC
T
E
X
T
P
C
O
N
T
R
O
L
DIGITAL
OPTICAL
ANALOG
DIGITAL
OPTICAL
ANALOG
R
O
G
T
R
A
C
K
E
D
IT
Y
E
S
OPEN
/CLO
SE
12
12
12
12
Page 12
3-7
This feature allows the display of information such as album title
or track title contained on a specially encoded CD.
• Make sure to insert a CD with CD text.
➜
TEXT
is shown and the album title is scrolled once.
CD text when playback is stopped
• Press CD TEXT to see the following information, which will be
scrolled once (if available):
– Artist name of album
– Album title
CD text during playback
• Press CD TEXT to see the following information, which will be
scrolled once (if available):
– Artist name for track (on CD recorder only)
– Track title
Selecting a disc during play
1 Press CD 1, 2 or 3 or CDR to select a particular disc.
➜ Playback is stopped and the new disc is selected.
2 Press YES or PLAY/PAUSE 2;to start play.
Selecting a disc in STOP mode
1 Press CD 1, 2 or 3 or CDR to select the required disc number.
2 Press YES or PLAY/PAUSE 2;to start play.
➜ Play starts with the first track of the selected disc.
Selecting a track during play
1 Rotate ¡ JOG CONTROL ™ until the required track number
appears on the display.
➜ Play skips to the beginning of the selected track.
or
Select CDR or CDC (CD 1, 2 or 3) on the remote control and key
in the required track number using the numerical keys on the
remote control. For 2-digit track numbers, press the keys in rapid
succession.
➜ Play skips to the beginning of the selected track.
or
Press ¡ or ™ on the remote control one or more times.
➜ Play skips to the beginning of the present, previous or
subsequent tracks.
Note: For tracks on another disc, first select the required disc by
pressing CD 1, CD 2, CD 3 or CDR.
Selecting a track when CD play is stopped
1 Rotate ¡ JOG CONTROL ™ until the required track number
appears on the display.
2 Press PLAY/PAUSE 2;or YES to start playing.
or
1 Select CDR or CDC (CD 1, 2 or 3) on the remote control and key
in the required track number using the numerical keys.
For 2-digit track numbers, press the keys in rapid succession.
2 Press PLAY/PAUSE 2;to start playing.
or
1 Briefly press O or P on the remote control one or more times.
2 Start playback by pressing PLAY/PAUSE 2;.
NO YES
Selecting a track
Selecting a disc
CD text
PLAYING
17
English
TEXT TOTAL TRACK TIME TOTAL REM
STEP
DIGITAL
CD
RW
CD
RW
RECORD IN PROGRESS
REC TRACK TIME
123456789
10 11 12 13 14 15 16 17 18 19 20 +
12
OPTICAL
12
ANALOG
FINALIZE ALC
COMPILE CD TRACK PROG
SHUFFLE REPEAT ALL EDIT
A
U
D
IO
C
D
R
E
C
O
R
D
E
R
5
LOADING DISCS PLAYING
BRIEF OPERATING INSTRUCTIONS
English
CD changer
Note:
Only Audio CDs will be accepted in the CD changer deck If a
non-audio disc is inserted, the display shows
1 Press OPEN/CLOSE to open the disc compartment.
➜ OPEN CDC lights up.
2 Insert CDs in the two outer disc trays, label side up.
• Press CD CHANGE.
➜ The CD carousel tray will rotate until the inner tray is at
the right hand side.
3 Insert a CD in the tray, label side up.
4 Press OPEN/CLOSE to close the compartment (see also
Playing a CD).
➜ READING lights up and the display will show the type
of disc inserted.
STEP
TEXT TOTAL TRACK TIME TOTAL REM
123456789
Changing discs during play
1 Press OPEN/CLOSE to open the disc compartment.
➜ OPEN CDC lights up.
2 The CDs in the two outer disc trays can be changed while
play continues.
IMPORTMANT!
When an unfinalized disc is inserted reading may take up to 1
minute.
READING
FINALIZED
16
10 11 12 13 14 15 16 17 18 19 20 +
COMPILE CD TRACK PROG
CD
RW
SHUFFLE REPEAT ALL EDIT
will then be displayed, followed by
.
CD
RECORD IN PROGRESS
Playing
O
N
/
O
F
F
WRONG DISC.
REC TRACK TIME
12
DIGITAL
RW
12
OPTICAL
ANALOG
FINALIZE ALC
NOT
S
T
O
P
P
L
A
Y
/
P
A
U
O
P
E
N
/
C
L
O
S
E
C
D
T
E
X
T
E
D
IT
IN
CDR
AUX
CD recorder
1 Press CDR.
➜ The CDR label lights up.
2 Press PLAY/PAUSE 2;to start play.
CD changer
1 Press CD 1, 2 or 3.
2 Press PLAY/PAUSE 2;to start play.
➜ Play starts with the first track of the disc in the CD
recorder or the selected disc in the changer.
➜ The track number and track time of the track in play
appear on the display.
STEP
123456789
CD
RW
•Press DISPLAY once, twice or three times to see:
➜ remaining track time, total remaining time, permanent
CD text.
•To interrupt play temporarily, press PLAY/PAUSE 2;again.
➜ ; lights on the display.
•To continue play, press PLAY/PAUSE 2;again.
3 To stop play, press STOP 9.
➜The number of tracks and the total playing time appear
on the display.
➜ After the last track play will stop. If CDC was selected,
play will continue with the next disc.
R
E
P
E
A
T
C
D
T
E
X
T
S
H
U
F
F
L
E
D
I
S
P
L
A
S
E
Y
C
D
-
C
H
A
N
G
E
G
R
E
C
O
R
D
R
C
D
C
D
C
O
M
P
IL
E
C
D
R
E
C
T
Y
P
NO
E
E
R
A
S
E
F
IN
A
L
IZ
E
TEXT TOTAL TRACK TIME TOTAL REM
10 11 12 13 14 15 16 17 18 19 20 +
COMPILE CD TRACK PROG
SHUFFLE REPEAT ALL EDIT
CD
RW
RECORD IN PROGRESS
E
C
L
CD 1
CD 2
CD 3
E
V
E
L
B
A
L
A
N
C
E
T
E
X
T
JOG CONTROL
REC TRACK TIME
FINALIZE ALC
P
R
O
G
DIGITAL
OPTICAL
ANALOG
O
N
/
O
F
F
P
L
A
Y
/
P
A
U
S
E
O
P
E
N
/
C
L
O
S
E
T
R
A
C
K
E
D
I
T
YES
STEP
123456789
R
E
P
E
A
T
S
H
U
F
F
L
E
C
D
-
C
H
A
N
TEXT TOTAL TRACK TIME TOTAL REM
10 11 12 13 14 15 16 17 18 19 20 +
COMPILE CD TRACK PROG
CD
RW
SHUFFLE REPEAT ALL EDIT
C
D
T
E
X
T
D
I
S
P
L
A
Y
G
E
CD 1
CD 2
CD 3
REC TRACK TIME
CD
RW
RECORD IN PROGRESS
DIGITAL
OPTICAL
ANALOG
FINALIZE ALC
12
12
O
N
/
O
F
F
S
T
O
P
O
P
E
N
/
C
L
O
S
E
R
E
P
E
A
T
C
D
T
E
X
T
S
H
U
F
F
L
P
L
A
Y
/
P
A
U
S
E
C
D
CD 1
E
D
I
S
P
L
A
Y
CD 2
-
C
H
A
N
G
E
CD 3
12
12
O
N
/
O
F
F
S
T
O
P
O
P
E
N
/
C
L
O
S
E
CDR
AUX
R
E
P
E
A
T
C
D
T
E
X
T
S
H
U
F
F
L
P
L
A
Y
/
P
A
U
S
E
C
D
R
E
C
O
R
D
C
D
C
D
C
O
M
P
IL
E
C
D
R
E
C
T
Y
P
E
E
R
A
S
E
F
IN
A
L
IZ
E
CD 1
E
D
I
S
P
L
A
Y
CD 2
-
C
H
A
N
G
E
CD 3
R
E
C
L
E
V
E
L
B
A
L
A
N
C
E
T
E
X
T
P
R
O
G
T
R
A
C
K
E
D
IT
JOG CONTROL
NO
YES
Page 13
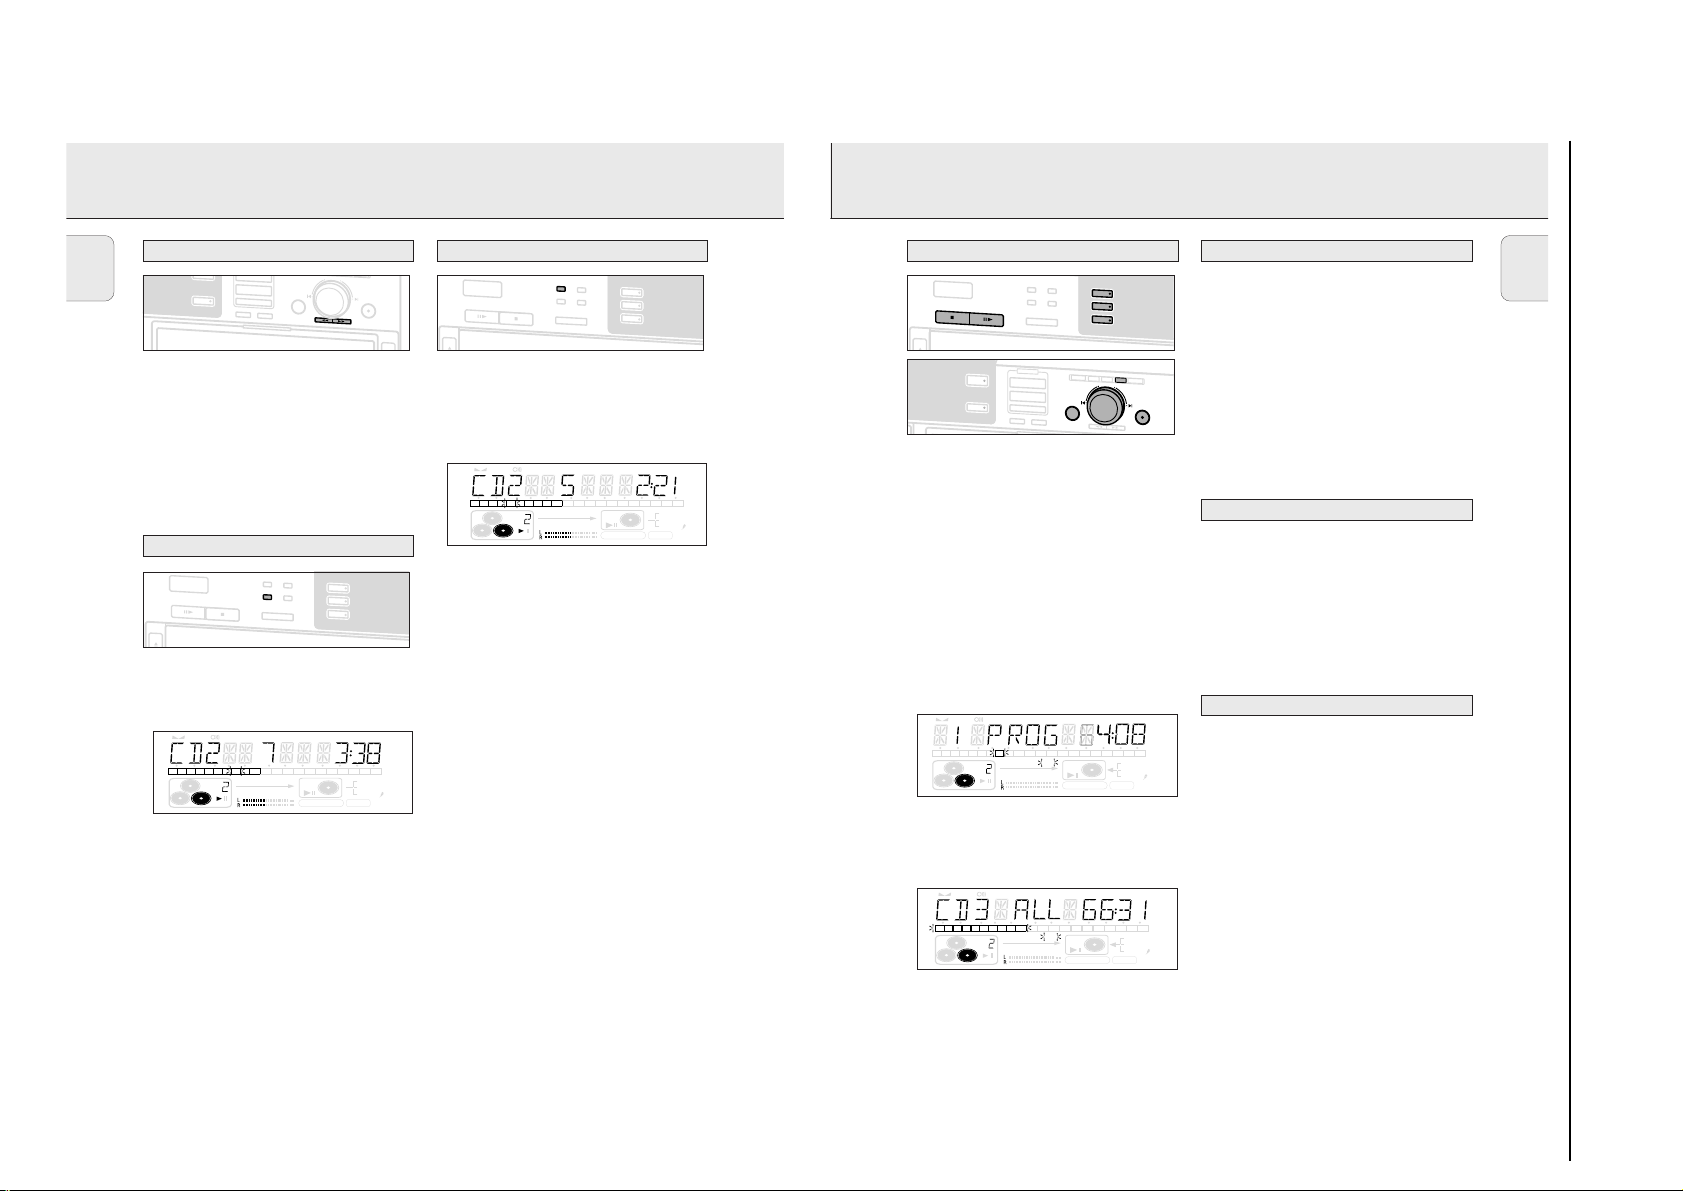
3-8
You can select tracks and store them either in the CD changer,
or CD recorder memory. If you use the program for playback
you can choose one of the two memories, else if you like to
specify tracks for recording, use the CD changer memory only!
You can store any track more than once.
1 Load the desired disc(s) in the disc tray(s).
2 Press either CD 1, CD 2, CD 3, or CDR to select the disc.
3 Press PROG(ram).
➜ PROG starts blinking and PROGRAM is displayed.
4 Rotate ¡ JOG CONTROL ™ (press the numerical keys on
the remote control; for 2-digit numbers, press the keys in
rapid succession) to select the required track numbers and
store each track by pressing YES.
➜ The number of programmed tracks (STEP), PROG and the
total program time are displayed.
CD changer only
•If you wish to program a complete CD from the CD Changer
rotate ¡ JOG CONTROL ™ to select CD1 (or 2, 3) ALL
and press YES.
➜All tracks of CD 1 (or 2, 3) will be programmed.
5 Press PROG(ram) to end programming.
➜PROG stays shown and the program is currently available.
Note: If the maximum number of programmable tracks is
reached, the display shows
PROGRAM FULL
.
1 If necessary press STOP 9.
2 Press either CD 1, CD 2, CD 3, or CDR to select the desired
memory.
3 Press PROG(ram), followed by 5 or 6 to move through the
program steps.
➜ The track number at the selected step and the total
program time are displayed.
4 Press NO to remove the track from the program.
➜ CLEARED is displayed briefly.
➜ The next programmed track number will move up to this
position and is displayed together with the step number
and the remaining total program time.
1 If necessary press STOP 9.
2 Press NO.
➜ CLEAR PROG ? is displayed.
3 Press YES to clear the program.
➜ PROG CLEARED will be displayed and PROG goes off.
Note: If you open the CD recorder or the CD changer tray the
respective program will be cleared.
See ‘High speed recording and automatic finalizing (optional)
of the current program’ under chapter ‘Internal recording’.
Making a program for recording
Clearing the program
Erasing a track from the program
Programming track numbers
PROGRAM
19
English
TEXT TOTAL TRACK TIME TOTAL REM
STEP
DIGITAL
CD
RW
CD
RW
RECORD IN PROGRESS
REC TRACK TIME
56789
10 11 12 13 14 15 16 17 18 19 20 +
12
OPTICAL
12
ANALOG
FINALIZE ALC
COMPILE CD TRACK PROG
SHUFFLE REPEAT ALL EDIT
O
CDR
E
PLAYING
BRIEF OPERATING INSTRUCTIONS
English
Search
C
O
M
P
IL
E
AUX
1 Hold down
5 or 6
➜The set first searches backwards or forwards at 10 times
normal speed with sound at low volume, then goes to 50
times normal speed with sound muted.
2 Release the button at the desired passage.
➜Play starts at the desired passage.
Note: During Shuffle, Repeat Track or Programmed play, search is
restricted to within the track being played at the time.
Shuffle (random order) play
N
/
O
F
F
P
L
A
Y
/
P
A
U
S
E
O
P
E
N
/
C
L
O
S
E
1 Press SHUFFLE before or during CD play to start shuffle play.
➜The tracks on the CD(RW) in the recorder (
tracks on the CDs in the changer (
the program (
STEP
C
R
E
C
T
Y
P
E
E
R
A
S
E
F
IN
C
D
R
.
S
T
O
P
SHUFFLE PROG
TEXT TOTAL TRACK TIME TOTAL REM
89
10 11 12 13 14 15 16 17 18 19 20 +
COMPILE CD TRACK PROG
CD
RW
SHUFFLE REPEAT ALL EDIT
JOG CONTROL
D
NO
A
L
IZ
E
R
E
P
E
A
T
C
D
T
E
X
T
S
H
U
F
F
L
E
D
I
S
P
L
A
Y
C
D
-
C
H
A
N
G
E
SHUFFLE
) play in random order.
CD
RW
RECORD IN PROGRESS
CD 1
CD 2
CD 3
Repeat CD(s), track or program
O
N
/
O
F
YES
O
P
E
N
/
C
L
O
S
E
F
P
L
A
Y
/
P
A
U
S
E
S
T
O
P
O
P
E
N
/
C
L
O
S
E
1 Press REPEAT one or more times during CD play.
➜When
REPEAT TRACK
repeatedly. When
changer or the program play(s) repeatedly.
When
or the or the recorder plays repeatedly.
lights up, the current track plays
REPEAT ALL
REPEAT DISC
lights up, the selected disc in the changer
SHUFFLE
), the
) or the tracks in
REC TRACK TIME
DIGITAL
OPTICAL
ANALOG
FINALIZE ALC
2 To return to normal play, press REPEAT one or more times until:
➜the
REPEAT
label disappears from the display.
Note:
– You can use shuffle in combination with
programmed play of the CD Changer.
–
REPEAT
is also cleared if you open the disc tray.
12
12
R
E
P
E
A
T
C
D
T
E
X
T
S
H
U
F
F
L
E
D
I
S
P
L
A
Y
C
D
-
C
H
A
N
G
E
lights up, the discs in the
REPAT ALL
O
N
/
O
F
CD 1
CD 2
CD 3
F
S
T
O
P
O
P
E
N
/
C
L
O
S
E
C
D
T
E
X
or
STEP
12345678 9
R
E
P
E
A
T
S
H
U
F
F
L
E
P
L
A
Y
/
P
A
U
S
E
C
D
-
C
T
E
D
IT
IN
G
R
E
C
O
R
D
C
D
C
CDR
AUX
D
C
O
M
P
IL
E
C
D
R
E
C
T
Y
P
E
E
R
A
S
E
F
IN
A
TEXT TOTAL TRACK TIME TOTAL REM
10 11 12 13 14 15 16 17 18 19 20 +
COMPILE CD TRACK PROG
CD
RW
SHUFFLE REPEAT ALL EDIT
C
D
T
E
X
T
D
I
S
P
L
A
Y
H
A
N
G
E
L
IZ
E
CD 1
CD 2
CD 3
R
E
C
L
E
V
E
L
B
A
L
A
N
C
E
T
E
JOG CONTROL
NO
REC TRACK TIME
CD
RW
RECORD IN PROGRESS
X
T
P
R
O
FINALIZE ALC
G
T
R
DIGITAL
OPTICAL
ANALOG
A
C
K
E
D
I
T
YES
2 Press SHUFFLE again to return to normal CD play.
Note: Shuffle is also cleared if you open the disc tray.
18
STEP
TEXT TOTAL TRACK TIME TOTAL REM
123456789
CD
RW
COMPILE CD TRACK PROG
SHUFFLE REPEAT ALL EDIT
10 11 12 13 14 15 16 17 18 19 20 +
REC TRACK TIME
CD
RW
RECORD IN PROGRESS
DIGITAL
OPTICAL
ANALOG
FINALIZE ALC
Page 14
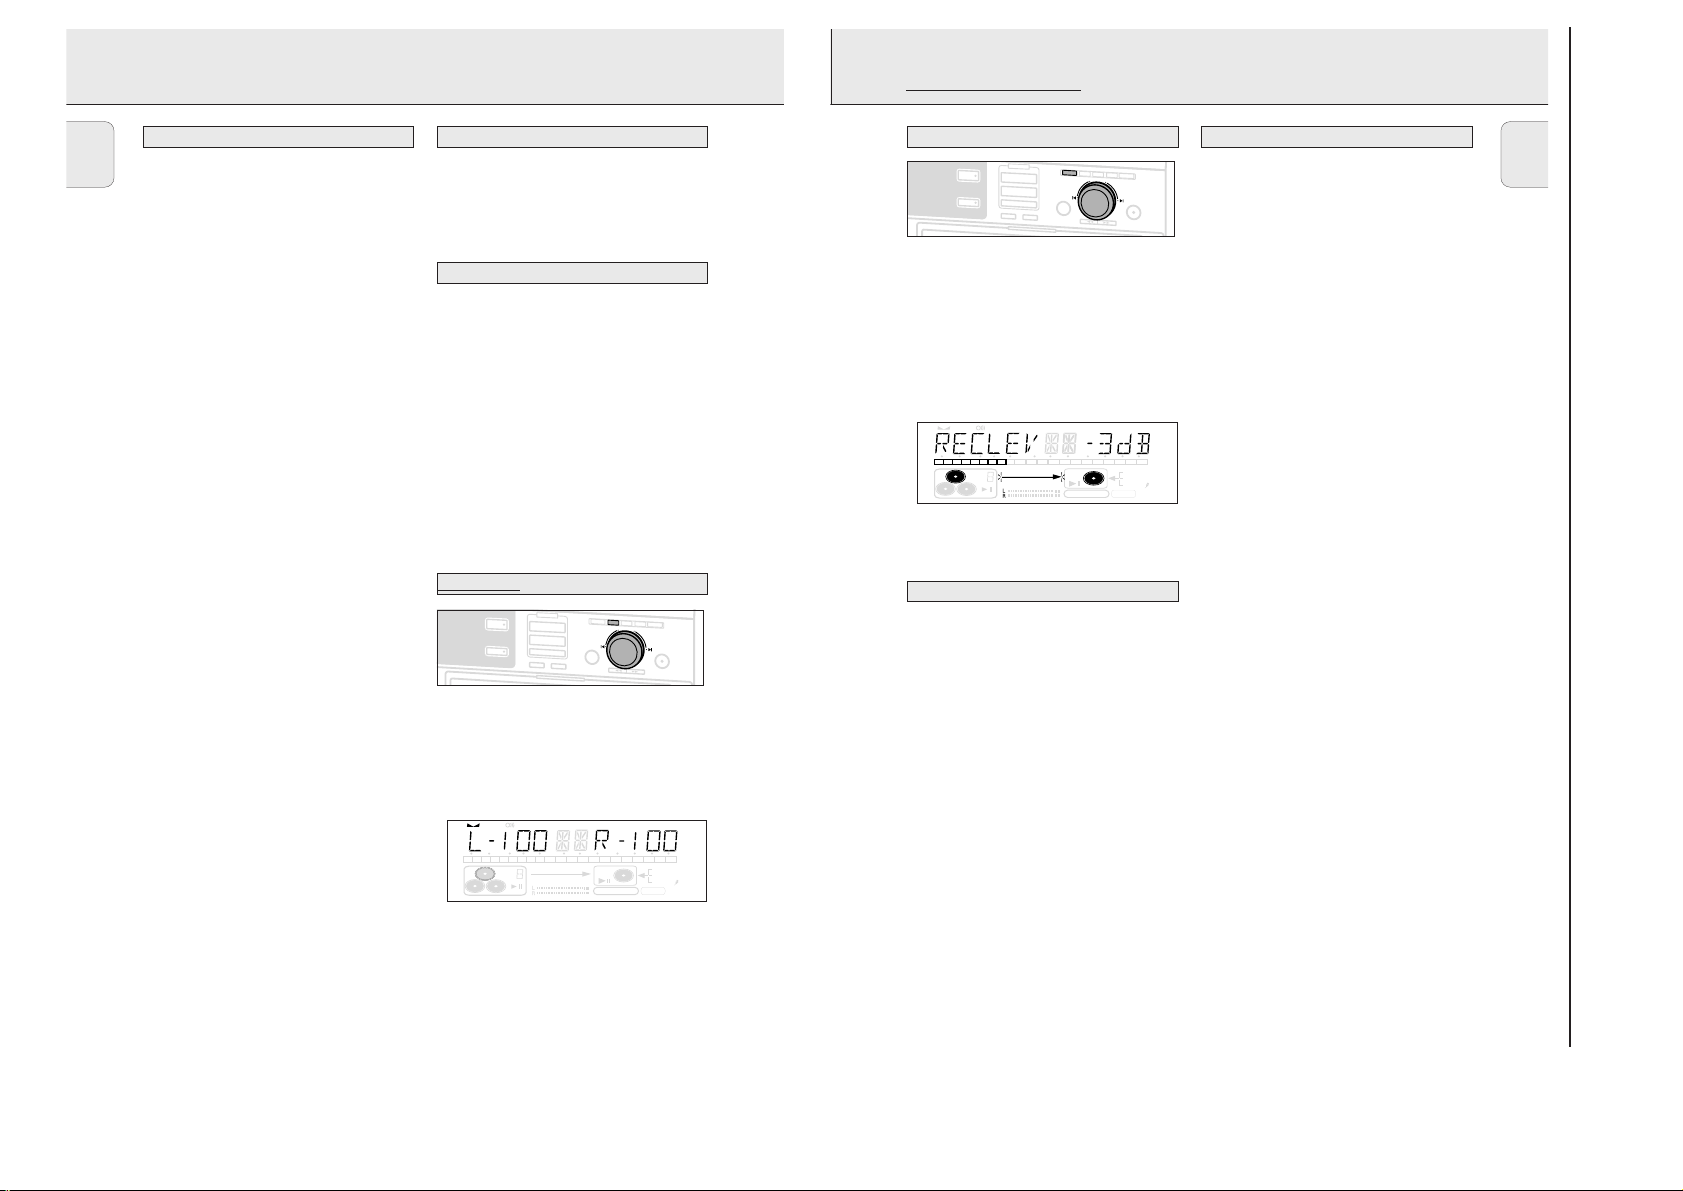
3-9
You can adjust the reference record level for both digital and
analog recordings. This is also possible when ALC is active.
This feature can be used for fading your recordings in or out.
1 Select the required recording mode (see Recording modes).
2 Keep REC LEVEL on the set pressed to enable the
¡ JOG CONTROL ™
to adjust the record level.
3
Rotate the ¡ JOG CONTROL ™
to the left to adjust the
desired record level.
➜ The actual record level (in dB) will be displayed.
•The record level is reset after the set has been switched to
standby.
– During high speed recording, the original recording quality
will be maintained.
– When Auto Track is on (default setting), track numbers will
automatically be increased during recording.
– If a finalised CDR disc is inserted in the CD recorder and
CD™CD is pressed, FINALIZED CD will be displayed.
Recording is not possible.
– If a finalised CDRW disc is inserted in the CD recorder and
REC TYPE is pressed, UNFINALIZE ? will be displayed.
If YES is pressed, the disc will be unfinalised.
Note: If during recording
ANALOG REC
appears, the track
is copy protected and will be recorded as analog, at
normal speed. All other tracks will be copied normally
(at double speed).
Warning: No more recording possible after finalizing CDR
discs!
For recording from the internal CD Changer-deck you can
choose following recording modes:
– High speed recording and automatic finalizing:
Fast and easy! Record and finalize your CDR(W) in one
quick step while the sound is muted. You can record:
– the current CD
(CD ™CD);
– a program
(COMPILE CD).
– High speed recording (REC TYPE):
Record your CDR(W) fast while the sound is muted.
You can record:
– an entire CD
(CD FAST)
;
– a track
(TRACK FAST)
,’
– a program
(COMPILE CD/ PROG FAST);
– a track edit
(AB FAST)
.
– Normal recording and listening (REC TYPE):
Listen to the recording while you are making it.
You can record:
– an entire CD
(CD LISTEN)
;
– a track
(TRACK LISTEN)
;
– a program
(PROG LISTEN);
– a track edit
(AB LISTEN).
– Microphone recording:
Mix sound from the internal CD Changer with microphone
input
(CD MIX MIC)
.
Recording modes
Remarks on recording
REC LEVEL key
RECORDING GENERAL INTERNAL RECORDING
21
English
TEXT TOTAL TRACK TIME TOTAL REM
STEP
DIGITA
CD
RW
CD
RW
RECORD IN PROGRESS
REC TRACK TIME
123456789
10 11 12 13 14 15 16 17 18 19 20 +
OPTICAL
ANALOG
FINALIZE ALC
COMPILE CD TRACK PROG
SHUFFLE REPEAT ALL EDIT
RECORDING GENERAL
BRIEF OPERATING INSTRUCTIONS
English
We will describe:
– Digital recording from internal CDC (fast or normal
recording).
– Recording from external CD player:
– Digital
– Digital (synchronized start with external CD player)
– Analog
– Finalizing discs:
Finalizing a CDR(W) disc is a simple procedure, necessary to:
– play a recorded CDR on a standard CD player
– play a recorded CDRW on a CDRW compatible CD player
• The recording procedure is the same for CDR and CDRW discs.
Make sure that the CDR(W) is absolutely free of
scratches and dust particles.
• It is advisable to use a CDRW disc for your first try.
• If the disc already contains recordings, the CD recorder will
automatically search for the end of the last track, so that
recording can start from there.
• For recordings, the minimum track length is 4 seconds. You can
record up to a maximum of 99 tracks on a disc. The minimum of
recording time left on the disc is 7 seconds. Else, NOT
FITTING is displayed and you cannot enter into the record
standby mode.
• When you try to record a copy protected material from an
external source, COPY PROTECT will be displayed. No
further digital recording is possible then.
• The Serial Copy Management System (SCMS) only allows
digital recording under specific conditions:
– This means that it is not possible to make a digital copy from
– Analog recording is always possible !
– The number of recordings from the original is unlimited.
• Recordings from DAT or DCC players will not always stop
automatically.
Important:
If you want to play the recorded CDR disc on any regular
CD player, it must first be finalised. See finalising discs.
Finalised CDRW discs play only on CDRW compatible CD
players.
For recording from external CD changers do not use
MANUAL
20
a digital copy.
, but
AUX TRACK
or
AUX CD
.
Direct Line Recording (DLR)Basic information
The CD recorder is equipped with the high-performance Direct
Line Recording technique. It ensures a perfect recording of the
source material, meaning a true “bit for bit” recording. DLR will
always become active, when you make normal recordings in listen
mode.
Auto Level Control (ALC)
Auto Level Control ensures that the tracks on the recorded disc
have a similar volume level. Always the already recorded tracks of
the CDR(W) disc will be taken as reference for the volume level of
the following recordings. ALC is active, when
Auto level control becomes active, when:
– COMPILE CD is being used,
AUX
– a disc, a track or a track edit (A-B) is being high speed
recorded and the CDR(W) has recordings on it,
– a program from the CD changer is being high speed recorded,
or
– CD™CD is being used and the CDR(W) has recordings on it.
Auto level control will not become active, when:
BALANCE key
You can set the reference record balance for both digital and
analog recordings.
1 Keep BALANCE on the set pressed to enable the
2 Rotate the ¡ JOG CONTROL ™ to set the desired balance.
•The balance is reset after the set has been switched to
– CD™CD is being used for an empty CDR(W),
– making recordings from an external source, or
– making normal recordings in listen mode.
R
E
C
O
R
D
R
E
C
L
E
V
E
C
CDR
CO
M
R
E
AUX
E
R
A
S
E
L
D
C
D
P
IL
E
C
D
C
T
Y
P
NO
E
F
IN
A
L
IZ
E
¡ JOG CONTROL ™ to set the BALANCE.
➜The set balance will be displayed.
standby.
B
A
L
A
N
C
JOG CONTROL
ALC
E
T
E
X
T
P
is shown.
R
O
G
T
R
A
C
K
E
D
YES
R
E
C
O
R
D
R
E
C
L
E
V
E
L
B
A
L
A
N
C
E
T
E
X
T
P
R
O
G
T
R
A
C
K
E
D
I
C
D
C
CDR
AUX
D
C
O
M
P
IL
E
C
D
R
E
C
T
Y
P
NO
E
E
R
A
S
E
F
IN
A
L
IZ
E
JOG CONTROL
T
YES
STEP
TEXT TOTAL TRACK TIME TOTAL REM
123456789
CD
RW
10 11 12 13 14 15 16 17 18 19 20 +
COMPILE CD TRACK PROG
SHUFFLE REPEAT ALL EDIT
REC TRACK TIME
CD
RW
RECORD IN PROGRESS
DIGITAL
OPTICAL
ANALOG
FINALIZE ALC
I
T
Page 15
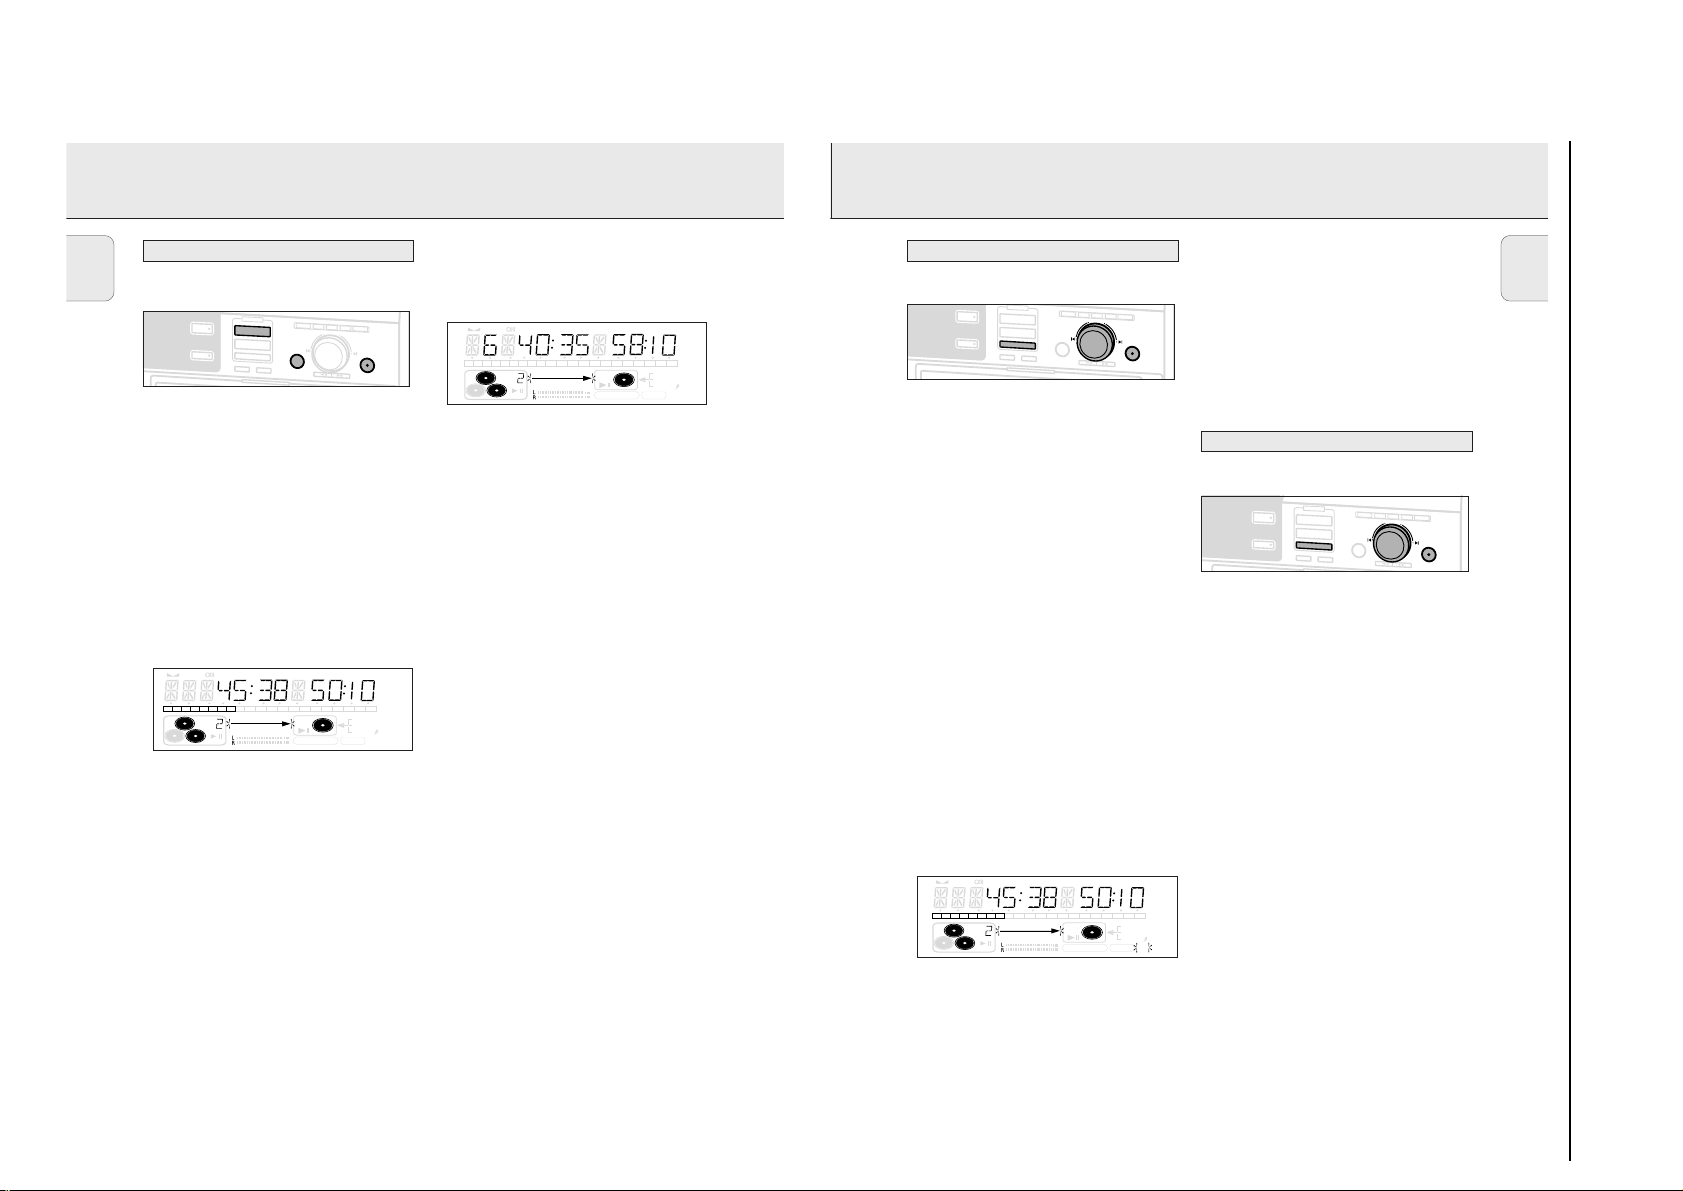
3-10
High speed recording of an entire disc, a track, a
program or a track edit
1 Make sure that the CDR(W) is absolutely free of scratches
and dust particles.
2 Press either CD 1, CD 2 or CD 3 to select the disc you wish
to record from.
3 Press REC TYPE on the set to enter into the recording menu.
4 Rotate ¡ JOG CONTROL ™ to select one of the following
high speed record modes:
If a disc from the CD changer is selected:
➜ CD FAST ?: for high speed recording of an entire disc.
• Continue with step 5.
➜ TRACK FAST ?: for high speed recording of a track.
• Press YES to confirm.
• Rotate ¡ JOG CONTROL ™ to select the track.
➜ REC TR ? and the tracknumber are displayed.
• Continue with step 6.
If CD changer program mode is available:
➜ PROG FAST ?: for high speed recording of the
selected disc or of the program.
If CD changer track edit mode is available:
➜ A-B FAST ?: for high speed recording of the A–B
track.
5 Press YES to confirm your selection.
➜ Both decks will be selected in the display, the arrow
starts blinking. The remaining recording time of the
CDR(W), the total recording time of the CDR(W) and
either RECORD CD1 (or 2, 3)?, RECORD PROG ?
or RECORD A-B ? is displayed.
6 Press YES to start high speed recording.
➜ The arrow lights, RECORDING IN PROGRESS is shown, high
speed recording starts and the actual recording time left
starts to count down.
•To check the elapsed recording time, press DISPLAY. This
can be done during recording.
•Recording will stop automatically.
•To stop recording manually, press STOP 9.
•If STOP was pressed within 3 seconds after YES, no
recording will take place.
Important:
If you want to play the recorded CDR disc on any
regular CD player, it must first be finalised. See
‘Finalising discs’.
Finalised CDRW discs play only on CDRW compatible
CD players.
Normal recording and listening of an entire disc, a
track, a program or a track edit
1 Make sure that the CDR(W) is absolutely free of scratches
and dust particles.
2 Follow step 2 and 3 of “High speed recording”.
3 Rotate ¡ JOG CONTROL ™ to select one of the following
normal record options:
If CD changer is selected:
➜ CD LISTEN ?: for listening to the entire disc during
normal recording
• Follow step 5 and 6 of “High speed recording”.
➜ TRACK LISTEN ?: for listening to the track during
normal recording
• Press YES to confirm.
• Rotate ¡ JOG CONTROL ™ to select the desired track.
➜ REC TR ? and the tracknumber is displayed.
• Continue with step 6 of “High speed recording”.
If CD changer program mode is available:
➜ PROG LISTEN ?: for listening to the program during
normal recording
If CD changer track edit mode is available:
➜ A-B LISTEN ?: for listening to the A–B track during
normal recording
4 Follow step 5 and 6 of “High speed recording”.
Note: If required the recording level can be set first, using the
REC LEVEL key. See “Rec Level key” under “Recording
General”.
CDR
AUX
C
D
C
D
C
O
M
P
IL
E
C
D
R
E
C
O
R
D
JOG CONTROL
NO
YES
R
E
C
T
Y
P
E
E
R
A
S
E
F
IN
A
L
IZ
E
R
E
C
L
E
V
E
L
B
A
L
A
N
C
E
T
E
X
T
P
R
O
G
T
R
A
C
K
E
D
I
T
C
D
T
E
X
T
E
D
IT
IN
G
Normal speed recording and listening
High speed recording
INTERNAL RECORDING
23
English
TEXT TOTAL TRACK TIME TOTAL REM
STEP
DIGITAL
CD
RW
CD
RW
RECORD IN PROGRESS
REC TRACK TIME
123456789
10 11 12 13 14 15 16 17 18 19 20 +
OPTICAL
ANALOG
FINALIZE ALC
COMPILE CD TRACK PROG
SHUFFLE REPEAT ALL EDIT
C
D
T
E
X
T
E
D
IT
IN
G
INTERNAL RECORDING
BRIEF OPERATING INSTRUCTIONS
English
High speed recording and automatic finalizing
High speed recording and automatic finalizing of the
current disc
CDR
AUX
Notes:
– During High Speed recording, the Pause function is not
operative.
– Copy prohibited tracks will be copied analog.
is displayed.
– During High Speed recording, the sound is not audible.
– When the CDR(W) already contains a recording the ALC
function will become active.
– If required the recording level can be set first, using the REC
LEVEL key. See “Rec Level key” under “Recording General”.
1 Make sure that the CDR(W) is absolutely free of scratches and
dust particles.
2 Press CD™CD to enter into the record mode.
➜ Both decks will be selected in the display, the arrow and the
YES key start blinking. The remaining recording time of the
CDR(W), the total playing time of the source CD and
RECORD CD1 (or 2, 3) ? are displayed.
STEP
TEXT TOTAL TRACK TIME TOTAL REM
123456789
CD
RW
3 Press YES to start recording and finalizing.
➜ The arrow lights,
shown, high speed recording and finalizing start and the
actual recording time left starts to count down.
• To check the elapsed recording time, press DISPLAY. This can be
done during recording.
• Recording will stop automatically.
4 To stop recording manually, press STOP 9.
• If STOP 9 was pressed within 3 seconds after YES, no
recording will take place.
Note: If a program was already available before pressing
CD ™ CD, this will be ignored.
current disc will be recorded. After finishing the recording,
PROG
is shown and the program is available again.
High speed recording and automatic finalizing (optional) of
the current program
1 Make sure that the CDR(W) is absolutely free of scratches and
dust particles.
2 Select and store all desired tracks in the CD changer memory
(see “Programming track numbers”).
22
R
E
C
O
R
D
R
E
C
L
E
C
D
C
D
C
O
M
P
IL
E
C
D
R
E
C
T
Y
P
NO
E
E
R
A
S
E
F
IN
A
L
IZ
E
ALC
then lights up on the display.
10 11 12 13 14 15 16 17 18 19 20 +
COMPILE CD TRACK PROG
SHUFFLE REPEAT ALL EDIT
CD
RW
RECORD IN PROGRESS
RECORDING IN PROGRESS
PROG
V
E
L
B
A
L
A
N
C
E
T
E
X
T
P
JOG CONTROL
ANALOG REC
REC TRACK TIME
and
goes off and the
3 Press COMPILE CD to enter into the record mode.
➜ Both decks will be selected in the display, the arrow starts
R
O
G
T
R
A
C
K
E
D
I
T
YES
DIGITAL
OPTICAL
ANALOG
FINALIZE ALC
FINALIZE
are
blinking. The remaining recording time of the CDR(W),
the total playing time of the program and
RECORD PROG ? are displayed.
• If the total time of the program is of bigger size than the
remaining recording time of the CDR(W):
➜NOT FITTING ! will be displayed briefly, followed by the
remaining recording time and RECORD PROG ?
If you still start recording, only the whole tracks of the program
that fit onto the CDR(W) will be recorded.
4 Press either:
NO to change the program.
➜
PROG
starts blinking. Now you can change the program (see
“Program”) and return to the record mode by pressing
COMPILE CD.
or
YES to confirm recording.
➜ AUTO FIN ? is displayed.
5 Press either:
YES, if the CDR(W) shall be finalized after recording,
or
NO, if the CDR(W) shall not be finalized after recording.
➜ The recording process starts. The arrow lights,
is shown, high speed recording and
PROGRESS
selected) start and the actual recording time left starts to
count down.
• To check the elapsed recording time, press DISPLAY. This can be
done during recording.
• Recording will stop automatically.
6 To stop recording manually, press STOP 9.
• If STOP 9 was pressed within 3 seconds after YES, no
recording will take place.
Note: If no program is available and you press COMPILE CD, you
enter immediately into the program menu. Start your
programming and return to the record mode by pressing
PROGRAM or COMPILE CD.
Important:
If you want to play the recorded CDR disc on any regular
CD player, it must first be finalised. See ‘Finalising discs’.
Finalised CDRW discs play only on CDRW compatible CD
players.
RECORDING IN
FINALIZE
(if
CDR
AUX
STEP
TEXT TOTAL TRACK TIME TOTAL REM
123456789
CD
RW
R
E
C
O
R
D
R
E
C
L
E
V
E
L
B
A
L
A
N
C
E
T
E
X
C
D
C
D
C
O
M
P
IL
E
C
D
R
E
C
T
Y
P
E
E
R
A
S
E
F
IN
A
L
IZ
E
10 11 12 13 14 15 16 17 18 19 20 +
COMPILE CD TRACK PROG
SHUFFLE REPEAT ALL EDIT
JOG CONTROL
NO
CD
RW
RECORD IN PROGRESS
T
REC TRACK TIME
P
R
O
G
T
R
FINALIZE ALC
A
C
K
E
D
YES
DIGITAL
OPTICAL
ANALOG
IT
Page 16
3-11
25
English
When making recordings from an external source, we
recommend to do analog recording only if digital recording is
not possible. Digital recording will usually result in better
sound quality.
For external recording you can choose following recording
modes:
–
AUX CD
- to make an automatic recording of an external
source simply by starting the source.
–
AUX TRACK
- to make an automatic recording of a single
track from an external source simply by starting the source.
–
AUX MANUAL
- to start a manual recording from an
external source.
–
AUX MIX MIC
- to start a mixed recording of microphone
and external source input.
–
MIC ONLY
- manual start of microphone recording.
In recording mode tracks will be incremented automatically
such that the track numbers are positioned on the same
position as the original.
•Press as often as necessary TRACK INCREMENT on the
remote control during stop when CDR is selected to switch
the automatic track increment function on.
➜ AUTO TR ON is displayed and the function is
switched on. Track increments are now automatically
detected from digital source material. In analog source
material a silence of 2.7 seconds or more is detected as
a track increment.
•Press as often as necessary TRACK INCREMENT on the
remote control during stop when CDR is selected to switch
the automatic track increment function off.
➜ AUTO TR OFF is displayed and the function is
switched off. Track numbers can now be incremented
manually by pressing TRACK INCREMENT on the remote
control during recording. The minimum track length is 4
seconds.
Notes:
– Track numbers cannot be changed after recording.
– The automatic track increment only works with consumer
sources with a digital output signal according to the IEC
958 (consumer part) audio standard. DAT, DVD and DCC do
not deliver this signal.
123
456
MN
DEF
TRACK INCR.
OPQ
GHI
CD TEXT
JKL
ABC
BRIGHTNESS
Automatic track increment
Recording modes
Analog or digital recording
EXTERNAL RECORDING
TEXT TOTAL TRACK TIME TOTAL REM
STEP
DIGITAL
CD
RW
CD
RW
RECORD IN PROGRESS
REC TRACK TIME
123456789
10 11 12 13 14 15 16 17 18 19 20 +
OPTICAL
ANALOG
FINALIZE ALC
COMPILE CD TRACK PROG
SHUFFLE REPEAT ALL EDIT
INTERNAL RECORDING
BRIEF OPERATING INSTRUCTIONS
English
Microphone recording
C
D
T
E
X
T
E
D
IT
IN
G
R
E
C
O
R
D
R
E
C
L
E
V
E
L
B
A
L
A
N
C
D
C
CDR
AUX
M
I
C
D
C
O
M
P
IL
E
C
D
R
E
C
T
Y
P
E
E
R
A
S
E
F
IN
A
1 Make sure that the CDR(W) is absolutely free of scratches
and dust particles.
2 Set MIC LEVEL to the minimum level to prevent acoustic
feedback (e.g. a loud howling sound) before you connect the
microphone.
3 Connect a microphone to MIC.
4 Press CD 1, CD 2 or CD 3 to select the disc you wish to mix
the microphone with.
5 Press REC TYPE on the set to enter into the recording menu.
6 Rotate ¡ JOG CONTROL ™ to select the manual record
mode for the microphone:
➜ CD MIX MIC is displayed.
7 Press YES to confirm.
➜ WAIT is displayed.
➜ RECORD ? is displayed.
8 Press YES to start recording.
9 Rotate ¡ JOG CONTROL ™ to select the desired track.
➜The disc tray number, the current track number and
playing time of the track are displayed.
10 Press PLAY/PAUSE ; 2 to start playback.
➜ The selected source is mixed to the microphone.
11 Press STOP 9 to stop recording.
•To perform microphone recording only see “Manual
recording” of the chapter “External recording”.
C
JOG CONTROL
NO
L
IZ
E
P
H
O
N
E
S
E
T
E
X
T
P
R
O
G
T
R
A
C
K
E
D
I
T
YES
R
E
C
O
R
D
R
E
C
L
E
V
E
L
B
A
L
A
N
C
E
T
E
X
T
P
R
O
G
T
R
A
C
K
E
D
I
C
D
C
CDR
AUX
D
C
O
M
P
IL
E
C
D
R
E
C
T
Y
P
NO
E
E
R
A
S
E
F
IN
A
L
IZ
E
JOG CONTROL
T
YES
24
Page 17
3-12
Manual recording from an external source
1 Make sure that the CDR(W) is absolutely free of scratches
and dust particles.
2 Press repeatedly AUX to select the input for the external
source you want to record from.
➜ AUX DIGITAL is displayed if the digital coaxial
input is selected.
➜ AUX OPTICAL is displayed if the digital optical input
is selected.
➜ AUX ANALOG is displayed if the analogue input is
selected.
3 Press REC TYPE on the set to enter into the recording menu.
4 Rotate ¡ JOG CONTROL ™ to select the record type.
➜ AUX MANUAL ?: for manual start of recording
5 Press YES to confirm your selection.
➜ WAIT is displayed.
➜ RECORD ? , AUX and the remaining recording time of
the CDR(W) are displayed.
6 Start playback on the external source in order to set the
optimal recording level on the CD recorder (see “REC LEVEL
key”).
7 Stop playback on the external source.
8 Go to the beginning of the desired track.
9 Press YES and simultaneously start playback on the external
source.
➜ The CD recorder starts to record and recording in
progress is shown. The remaining recording time left of
the CDR(W) is displayed.
Note: If
CHECK INPUT
is flashing, check the digital
connection.
10 Press STOP 9 on the set to stop recording.
➜ UPDATE is displayed and RECORDING IN PROGRESS goes
off.
Manual microphone recording
1 Make sure that the CDR(W) is absolutely free of scratches
and dust particles.
2 Set MIC LEVEL to the minimum level to prevent acoustic
feedback (e.g. a loud howling sound) before you connect the
microphone.
3 Connect a microphone to MIC.
4 Press repeatedly AUX to select the input for the external
source you wish to mix the microphone with.
➜ AUX DIGITAL is displayed if the digital coaxial
input is selected.
➜ AUX OPTICAL is displayed if the digital optical input
is selected.
➜ AUX ANALOG is displayed if the analogue input is
selected.
5 Press REC TYPE on the set to enter into the recording menu.
6 Rotate ¡ JOG CONTROL ™ to select the record type:
➜ AUX MIX MIC: the microphone is mixed to the
external source.
➜ MIC ONLY: only the microphone is recorded.
7 Press YES to confirm your selection.
➜ WAIT is displayed.
➜ RECORD ?, AUX and the remaining recording time of
the CDR(W) are displayed.
8 Set the optimal recording level on the CD recorder (see
“REC LEVEL key”).
•In addition you can also set the optimal recording level of
the microphone by turning MIC LEVEL.
9
If
AUX MIX MIC
is selected:
Press YES and simultaneously start playback on the external
source.
➜The CD recorder starts to record and recording in
progress is shown. The remaining recording time left of
the CDR(W) is displayed.
TEXT TOTAL TRACK TIME TOTAL REM
STEP
DIGITAL
CD
RW
CD
RW
RECORD IN PROGRESS
REC TRACK TIME
123456789
10 11 12 13 14 15 16 17 18 19 20 +
OPTICAL
ANALOG
FINALIZE ALC
COMPILE CD TRACK PROG
SHUFFLE REPEAT ALL EDIT
E
D
IT
IN
G
Manual recording
EXTERNAL RECORDING
27
English
TEXT TOTAL TRACK TIME TOTAL REM
STEP
DIGITAL
CD
RW
CD
RW
RECORD IN PROGRESS
REC TRACK TIME
123456789
10 11 12 13 14 15 16 17 18 19 20 +
OPTICAL
ANALOG
FINALIZE ALC
COMPILE CD TRACK PROG
SHUFFLE REPEAT ALL EDIT
EXTERNAL RECORDING
BRIEF OPERATING INSTRUCTIONS
English
Recording with automatic synchronized start
Recording of an entire disc or a track with automatic
start
Important:
– Recording from CD-changers should always be started in
the Auto-Start mode.
–
For recording from external CD changers do not use
MANUAL
, but
AUX TRACKorAUX CD
1 Make sure that the CDR(W) is absolutely free of scratches
and dust particles.
2 Press repeatedly AUX to select the input for the external
source you want to record from.
➜ AUX DIGITAL is displayed if the digital coaxial
input is selected.
➜ AUX OPTICAL is displayed if the digital optical input
is selected.
➜ AUX ANALOG is displayed if the analogue input is
selected.
.
3 Press REC TYPE on the set to enter into the recording menu.
4 Rotate ¡ JOG CONTROL ™ to select either:
➜ AUX CD ?: for recording with synchronised start of an
entire disc
➜ AUX TRACK ?: for recording with synchronised start
of a track
5 Press YES to confirm your selection.
➜ START SOURCE, AUX and the remaining recording
time of the CDR(W) are displayed.
Notes: If required the recording level can be set first, using
the REC LEVEL key. See “Rec Level key” under
“Recording General”.
6 Start playback on the selected source.
➜ The CD recorder starts to record simultaneously and
recording in progress is shown. The remaining recording
time left of the CDR(W) is displayed.
Note: If you start playback on the selected source within a
track, recording starts at the beginning of the next track
or after 2.7 seconds of silence in analogue recordings.
7
If a digital source is selected:
After the recording process, the CD recorder stops
automatically.
AUX
Note: Recordings from DAT or DCC will automatically stop
after 20 seconds silence.
If an analogue source is selected:
After the recording process, the CD recorder stops after a
silence of 20 seconds on the source material.
•To stop recording manually, press STOP 9 on the set.
➜
RECORDING IN PROGRESS goes off.
Important:
If you want to play the recorded CDR disc on any
regular CD player, it must first be finalised. See
finalising discs.
Finalised CDRW discs play only on CDRW compatible
CD players.
STEP
TEXT TOTAL TRACK TIME TOTAL REM
123456789
CD
RW
SHUFFLE REPEAT ALL EDIT
REC TRACK TIME
10 11 12 13 14 15 16 17 18 19 20 +
COMPILE CD TRACK PROG
CD
RW
RECORD IN PROGRESS
DIGITAL
OPTICAL
ANALOG
FINALIZE ALC
R
E
C
O
R
D
R
E
C
L
E
V
E
L
B
A
L
A
N
C
E
T
E
X
T
P
R
O
G
T
R
A
C
K
E
D
I
C
D
C
CDR
AUX
D
C
O
M
P
ILE
C
D
R
E
C
T
Y
P
NO
E
E
R
A
S
E
F
IN
A
L
IZ
E
JOG CONTROL
T
YES
26
Page 18

3-13
If you want to record (or erase) on (from) an finalized CDRW,
you have to unfinalize it first.
Notes:
– Unfinalizing will take approximately 2 minutes.
– After unfinalizing of the CDRW, CDchanges to
CDRW
on the
display.
– When unfinalizing a CDRW with CD text on it available, this
text will be transferred to the CD recorder memory. In case
the memory is full, you have to erase text (see “Erasing
text”) or to finalize another disc first in order to obtain
memory space.
1 Insert the CDRW you want to unfinalize in the CD recorder
tray.
2 Press CDR to select the CD recorder.
3 Press FINALIZE on the set.
➜ UNFINALIZE ? is displayed.
4 Press YES to start unfinalizing.
➜ UNFINAL is displayed and the operation time left
starts to count down.
It is possible to erase one or more tracks (starting from the
end of the last track) or the entire CDRW.
Erasing an entire CDRW
1 Insert the CDRW you want to erase in the CD recorder tray.
2 Press CDR to select the CD recorder.
3 Press ERASE to enter into the erasing menu.
4 Rotate ¡ JOG CONTROL ™ to select:
➜ ERASE DISC ?: for erasing the entire disc.
5 Press YES to confirm your selection.
➜ ERASE ? and the total number of tracks to be erased
are displayed. All track numbers are blinking in the
music calendar.
6 Press YES to start erasing.
➜ ERASE is displayed and the operation time left starts to
count down. The track number of the actual erased track
will go off in the music calendar.
Erasing one or more tracks
1 Insert the CDRW you want to erase from in the CD recorder
tray.
2 Press CDR to select the CD recorder.
3 Press ERASE to enter into the erasing menu.
4 Rotate ¡ JOG CONTROL ™ to select the track number(s)
you wish to erase:
➜ ERASE and the track number (e.g. 10 +) are displayed.
•To select more tracks to be erased repeat step 4.
Note: When erasing more tracks, the tracks to be erased
must be selected in sequence, starting from the last
recorded track. Example: The CDRW has 5 tracks
recorded on it. Now, you can erase track 5 and 4. You
can also erase track 5, 4 and 3, however you cannot
erase track 5 and 3!
➜ All track numbers selected for erasing are blinking in the
music calendar. The remaining track numbers light up.
5 Press YES to confirm your selection.
➜ ERASE ? is displayed.
6 Press YES to start erasing.
➜ ERASE is displayed and the operation time left starts to
count down. The track number of the currently erased
track will go off in the music calendar.
TEXT TOTAL TRACK TIME TOTAL REM
STEP
DIGITAL
CD
RW
CD
RW
RECORD IN PROGRESS
REC TRACK TIME
123456789
10 11 12 13 14 15 16 17 18 19 20 +
12
OPTICAL
12
ANALOG
FINALIZE ALC
COMPILE CD TRACK PROG
SHUFFLE REPEAT ALL EDIT
Erasing from a CDRW disc
Unfinalising CDRW discs
(UN)FINALIZING, ERASING
29
English
TEXT TOTAL TRACK TIME TOTAL REM
STEP
DIGITAL
CD
RW
CD
RW
RECORD IN PROGRESS
REC TRACK TIME
123456789
10 11 12 13 14 15 16 17 18 19 20 +
12
OPTICAL
12
ANALOG
FINALIZE ALC
COMPILE CD TRACK PROG
SHUFFLE REPEAT ALL EDIT
C
D
T
E
X
T
E
D
IT
IN
G
EXTERNAL RECORDING (UN)FINALIZING, ERASING
BRIEF OPERATING INSTRUCTIONS
English
If
MIC ONLY
Press YES on the set to start recording.
➜The CD recorder starts to record and RECORDING IN
10 Press STOP 9 on the set to stop recording.
➜UPDATE is displayed and RECORDING IN PROGRESS goes
Important:
If you want to play the recorded CDR disc on any
regular CD player, it must first be finalised. See
finalising discs.
Finalised CDRW discs play only on CDRW compatible
CD players.
is selected:
is shown. The remaining recording time left of
PROGRESS
the CDR(W) is displayed.
off.
28
Finalising CDR & CDRW discs
CDR
AUX
Finalizing a CDR(W) disc is a simple procedure, necessary to:
– play a recorded CDR on a standard CD player
– play a recorded CDRW on a CDRW compatible CD player
and CD recorder
– avoid further unwanted recordings on a disc
– avoid erasure of tracks on a CDRW
Notes:
– Finalizing will take about 2–4 minutes.
– After finalization of the CDR(W),
the display.
– During finalization no other operating commands can be
executed.
Auto finalizing
When you use either CD™CD or COMPILE CD, your recordings
will be finalized automatically (see.“High speed recording and
automatic finalizing”).
Manual finalizing when recording is in progress
1 Press FINALIZE on the set during recording.
➜ AUTO FINAL ? is displayed.
2 Press YES to confirm.
➜ FINALIZE is shown. The finalization will start after
recording and the actual finalizing time left will start to
count down.
Manual finalizing when recording is stopped
1 Insert the CDR(W) you want to finalize in the CD recorder
tray.
2 Press CDR to select the CD recorder.
3 Press FINALIZE on the set.
➜ FINALIZE ? is displayed.
4 Press YES to start finalizing.
➜ FINALIZE is shown, FINAL is displayed and the actual
finalizing time left starts to count down.
R
E
C
O
R
D
R
E
C
L
E
V
E
L
B
A
L
A
N
C
E
T
E
X
T
P
R
O
G
T
R
A
C
K
E
D
I
C
D
C
D
C
O
M
P
IL
E
C
D
R
E
C
T
Y
P
NO
E
E
R
A
S
E
F
IN
A
L
IZ
E
JOG CONTROL
T
YES
CDR(W)
changes to CDon
STEP
TEXT TOTAL TRACK TIME TOTAL REM
123456789
10 11 12 13 14 15 16 17 18 19 20 +
COMPILE CD TRACK PROG
CD
RW
SHUFFLE REPEAT ALL EDIT
REC TRACK TIME
CD
RW
RECORD IN PROGRESS
DIGITAL
OPTICAL
ANALOG
FINALIZE ALC
12
12
Page 19

3-14
Erasing text
1 Press TEXT to enter into the text edit menu.
➜
TEXT lights up and TEXT EDIT is displayed.
2 Rotate ¡ JOG CONTROL ™ to select the text erase menu.
➜ TEXT ERASE is displayed.
3 Press YES to confirm.
4 Rotate ¡ JOG CONTROL ™ to select either:
➜ALL TEXT: All text of the selected disc is chosen to
be erased in one step.
➜ALBUM ARTIST: CD artists name is chosen to be
erased.
➜ALBUM TITLE: CD title is chosen to be erased.
➜ARTIST TR 1 or (2, 3,…): artists name of track 1 or
(2, 3,…) is chosen to be erased.
➜TITLE TR 1 or (2, 3,…): title of track 1 or (2, 3,…)
is chosen to be erased.
5 Press YES to confirm your selection.
➜ERASE ? or ERASE ALL ? is displayed.
6 Press YES to start erasing.
➜UPDATE is displayed and the chosen text is erased.
Erasing from the memory
When the text memory of your CD recorder is full, the messages MEMORY FULL and FINALIZE DISC will be displayed. If you still want to add a new disc to the text memory,
you have either to erase another disc from the memory or you
have to finalize another disc.
1 Press TEXT to enter into the text edit menu.
➜ TEXT lights up and TEXT EDIT is displayed.
2 Rotate
¡ JOG CONTROL ™
to select the memory view
menu.
➜ TEXT MEMORY is displayed.
3 Press YES to confirm.
4 Rotate ¡ JOG CONTROL ™ to select the disc you wish to
erase from the text memory.
5 Press YES to confirm.
➜ ERASE MEMORY is displayed.
6 Press YES to confirm the text erasure of that particular disc.
Note: If there are no discs in the text memory stored
MEMORY EMPTY
will be displayed.
TEXT TOTAL TRACK TIME TOTAL REM
STEP
DIGITAL
CD
RW
CD
RW
RECORD IN PROGRESS
REC TRACK TIME
123456789
10 11 12 13 14 15 16 17 18 19 20 +
12
OPTICAL
12
ANALOG
FINALIZE ALC
COMPILE CD TRACK PROG
SHUFFLE REPEAT ALL EDIT
SPECIAL FEATURES
31
English
TEXT TOTAL TRACK TIME TOTAL REM
STEP
DIGITAL
CD
RW
CD
RW
RECORD IN PROGRESS
REC TRACK TIME
123456789
10 11 12 13 14 15 16 17 18 19 20 +
12
OPTICAL
12
ANALOG
FINALIZE ALC
COMPILE CD TRACK PROG
SHUFFLE REPEAT ALL EDIT
SPECIAL FEATURES
BRIEF OPERATING INSTRUCTIONS
English
Text edit (on CD recorder only)
C
D
T
E
X
T
E
D
IT
IN
After you have recorded your CDR(W), the TEXT EDIT feature
allows you to give names to to discs and tracks. Disc and
track names will be displayed during playback. All names will
be stored in the memory and can be called up and changed at
any time.
A maximum of 60 characters per item can be stored.
The following items can be selected:
Storing text during STOP mode
1 If necessary press STOP 9.
2 Press CDR to select the CD recorder.
3 Press TEXT to enter into the text edit menu.
4 Press YES to confirm.
5 Rotate ¡ JOG CONTROL ™ to select either:
6 Press YES to confirm the selection.
7 Rotate ¡ JOG CONTROL ™ (press the alphabet keys on the
8 Press YES to confirm the selection.
9 Repeat steps 7 and 8 for adding further characters.
10 Press TEXT to save the characters that have been selected
G
R
E
C
O
R
D
R
E
C
L
E
V
E
L
B
A
L
A
N
C
C
D
C
CDR
C
O
M
P
IL
R
E
C
T
AUX
E
R
A
S
E
ALBUM ARTIST:
ALBUM TITLE:
ARTIST TR(ack)
TITLE TR(ack)
for editing the CD artist.
for editing the CD title.
: for editing the artist of track 1, 2, 3, etc.
: for editing the title of track 1, 2, 3, etc.
D
E
C
D
Y
P
E
F
IN
A
L
E
JOG CONTROL
NO
IZ
E
➜ TEXT lights up and TEXT EDIT is displayed.
➜ ALBUM ARTIST.
➜ ALBUM TITLE.
➜ ARTIST TR 1 or (2, 3,…): for editing the artist of
track 1 or (2, 3,…).
➜ TITLE TR 1 or (2, 3,…): for editing the title of track
1 or (2, 3,…).
remote control) to select a character.
➜The cursor moves to the next character space.
and to exit to the last position in the text editing menu.
➜ UPDATE is displayed.
Storing text during recording
You can store and edit text even while recording a single
T
E
X
T
P
R
O
G
T
R
A
C
K
E
D
IT
YES
track or single CD, or when recording from an external source
or tuner. Editing text during finalizing is not possible. Make
sure, when using high speed recording and automatic finalizing, to enter the text before finalizing starts, otherwise automatic finalizing will be cancelled.
•Follow steps 3–10 of “Storing text during stop mode”.
Note: Editing text is not possible when a copy protected track
is analogue recorded. Editing is stopped, "
SAVED
" is displayed and your text is saved for later
editing."
Auto copied text
When an artists name has been stored for a track, it will be
copied automatically into the next track.
•Press either:
TEXT to confirm the copied text.
or
NO to delete the copied text and to enter a new one.
Inserting a space
1 Press 5 or 6 to move to the position where the space is
to be inserted.
➜ The position starts blinking.
2 Press YES to confirm the position of the insert character.
➜ A space will be inserted, text will move to the right.
•You can also use the SPACE button on the remote control to
insert a space.
Deleting and substituting a character
1 Press 5 or 6 to move to the characters position to be
deleted or substituted.
➜ The character starts blinking.
If you want to delete the character:
2 Press NO.
➜ The character is deleted and the text is shifted one
position to the left.
If you want to substitute the character:
2 Rotate ¡ JOG CONTROL ™ (press the alphabet keys on the
remote control) to select a new character.
Press YES to confirm the selection.
•To change another character press 5 or 6.
CD TEXT
STEP
TEXT TOTAL TRACK TIME TOTAL REM
123456789
CD
RW
REC TRACK TIME
10 11 12 13 14 15 16 17 18 19 20 +
COMPILE CD TRACK PROG
SHUFFLE REPEAT ALL EDIT
CD
RW
RECORD IN PROGRESS
DIGITAL
OPTICAL
ANALOG
FINALIZE ALC
12
12
30
Page 20
3-15
TROUBLESHOOTING
You can create a “track” by marking a passage of music
within one track on the current disc. This new “track” can be
used for recording or playing. The minimum track length is 4
seconds.
1 Press TRACK EDIT on the set.
➜ TRACK EDIT starts blinking, TRACK and the current track
number ? are displayed. The current track number is also
blinking in the track bar.
2 Rotate ¡ JOG CONTROL ™ until the desired track number
is displayed.
3 Press YES to confirm the selected track.
➜ The marker position A and the track time will be
displayed. The first 4 seconds of the track will be played
continously.
4 Press PLAY/PAUSE 2;on the set to play to the desired
start position of your new “track” (the initial position of
marker A is always the start of the chosen track).
•To fast forward to the desired start position press 5 or 6
on the set.
•To fine tune the position press first PLAY/PAUSE 2;on the
set, then rotate ¡ JOG CONTROL ™.
5 Press YES to confirm the position of marker A.
➜ The marker position B and the new “track” time will be
displayed. The first 4 seconds before marker position B
until marker position B will be played continously.
6 Press PLAY/PAUSE 2;on the set to play to the stop
position of your new “track” (The initial position of marker B
is always the position of marker A plus 4 seconds).
7 Press YES to confirm the marked passage.
➜
TRACK EDIT is shown, A-B and the track edit time are
displayed.
•Press TRACK EDIT again to leave Track Edit mode.
➜ The new “track” will be stored.
Note: If you open the CD changer tray the edit is deleted.
Clearing the track edit
1 Press NO during stop.
➜ CLEAR A-B ? is displayed.
2 Press YES to clear the markers.
➜ The markers A-B are cleared.
TEXT TOTAL TRACK TIME TOTAL REM
STEP
DIGITAL
CD
RW
CD
RW
RECORD IN PROGRESS
REC TRACK TIME
23456 789
10 11 12 13 14 15 16 17 18 19 20 +
12
OPTICAL
12
ANALOG
FINALIZE ALC
1
COMPILE CD TRACK PROG
SHUFFLE REPEAT ALL EDIT
C
D
T
E
X
T
E
D
IT
IN
G
Track editing (on CD changer only)
SPECIAL FEATURES
32
English
BRIEF OPERATING INSTRUCTIONS
CDR
AUX
STEP
1 23456 789
CD
RW
STEP
1 23456 789
CD
RW
R
E
C
O
R
D
R
E
C
L
E
V
E
L
B
C
D
C
C
O
M
P
R
E
C
T
E
R
A
S
E
TEXT TOTAL TRACK TIME TOTAL REM
COMPILE CD TRACK PROGRAM
SHUFFLE REPEAT ALL EDIT
TEXT TOTAL TRACK TIME TOTAL REM
10 11 12 13 14 15 16 17 18 19 20 +
COMPILE CD TRACK PROG
SHUFFLE REPEAT ALL EDIT
A
D
IL
E
C
D
Y
P
NO
E
F
IN
A
L
IZ
E
10 11 12 13 14 15 16 17 18 19 20 +
CD
RW
RECORD IN PROGRESS
CD
RW
RECORD IN PROGRESS
L
A
N
C
E
T
E
X
T
P
R
O
G
T
R
A
C
K
E
D
I
T
JOG CONTROL
YES
REC TRACK TIME
12
DIGITAL
12
OPTICAL
ANALOG
FINALIZE ALC
REC TRACK TIME
12
DIGITAL
12
OPTICAL
ANALOG
FINALIZE ALC
STEP
1 23456 789
CD
RW
TEXT TOTAL TRACK TIME TOTAL REM
10 11 12 13 14 15 16 17 18 19 20 +
COMPILE CD TRACK PROG
SHUFFLE REPEAT ALL EDIT
CD
RW
RECORD IN PROGRESS
REC TRACK TIME
DIGITAL
OPTICAL
ANALOG
FINALIZE ALC
WARNING
Under no circumstances should you try to repair the
set yourself as this will invalidate the guarantee. Do
not open the set as there is a risk of electric shock.
If a fault occurs, first check the points listed, before taking
the set for repair.
If you are unable to solve a problem by following these hints,
12
12
consult your dealer or service centre.
SYMPTOM
• possible solution:
No power
• ensure that the ON/OFF button is on: the set is in standby
mode, press any key to activate it
• ensure that the mains cable is plugged in correctly
• switch the set OFF and then immediately back ON
Auto track does not work
• check if auto track is selected
• check if there are 2.7 seconds silence in between the tracks
(analog recording only)
• check if the source is a consumer source with the digital
output according to the IEC audio standard
• source is DVD player (no track information)
No sound
• check the audio connections
• if using an amplifier, try using a different source
Amplifier sound is distorted
• check that the analog output of the set is not connected to
the amplifier Phono input
Play will not start
• ensure that the label of the CD is facing up
• clean the disc
• check that the disc is not defective by trying another disc
Remote control does not work
• point the remote control directly at the set
• check the batteries and replace if necessary
• select the right source first
DISC RECOVER indication
• a power failure has occurred during recording, the CD
recorder is attempting to repair the disc
• if DISC ERROR then appears on the display, the disc
cannot be recorded further, and cannot be finalised. But it
can still be played on the CD recorder or another CD
recorder.
• on a CDRW disc, the track being recorded is lost, but
further recording and finalisation can still be done
LASER SAFETY
This unit employs a laser. Only a qualified service
person should remove the cover or attempt to service
this device, due to possible eye injury.
INSERT DISC indication
• replace or clean the disc
• insert a CD(RW), label upwards
• wait until the lens has cleared
USE AUDIO CD indication
• insert a digital audio disc marked with “Digital audio” and
the special logo
CHECK INPUT indication
• select the correct input
• make sure the connection cable is properly connected
Will not record
• clean the disc
• check if CDR(W) is an unfinalised disc
• check that the disc is recordable and replace if necessary
• the disc is not an AUDIO disc (WRONG DISC)
• wrong input source chosen. Input label flashing (CHECK
INPUT)
• text memory full (MEMORY FULL / FINALIZE CD).
When a CDRW has to be unfinalised for recording. Erase
text for other disc(s) or finalise other disc(s) to obtain
memory space
Recording is distorted
• make sure the recording level is correct
20 second pause between recordings
• see “Recording with automatic synchronized start“.
Set does not react
• switch the set OFF and then immediately back ON
Recorded disc does not play in other standard CD
player
• finalize the CDR(W)
• insert the CDRW in a CDRW compatible player
English
33
Page 21
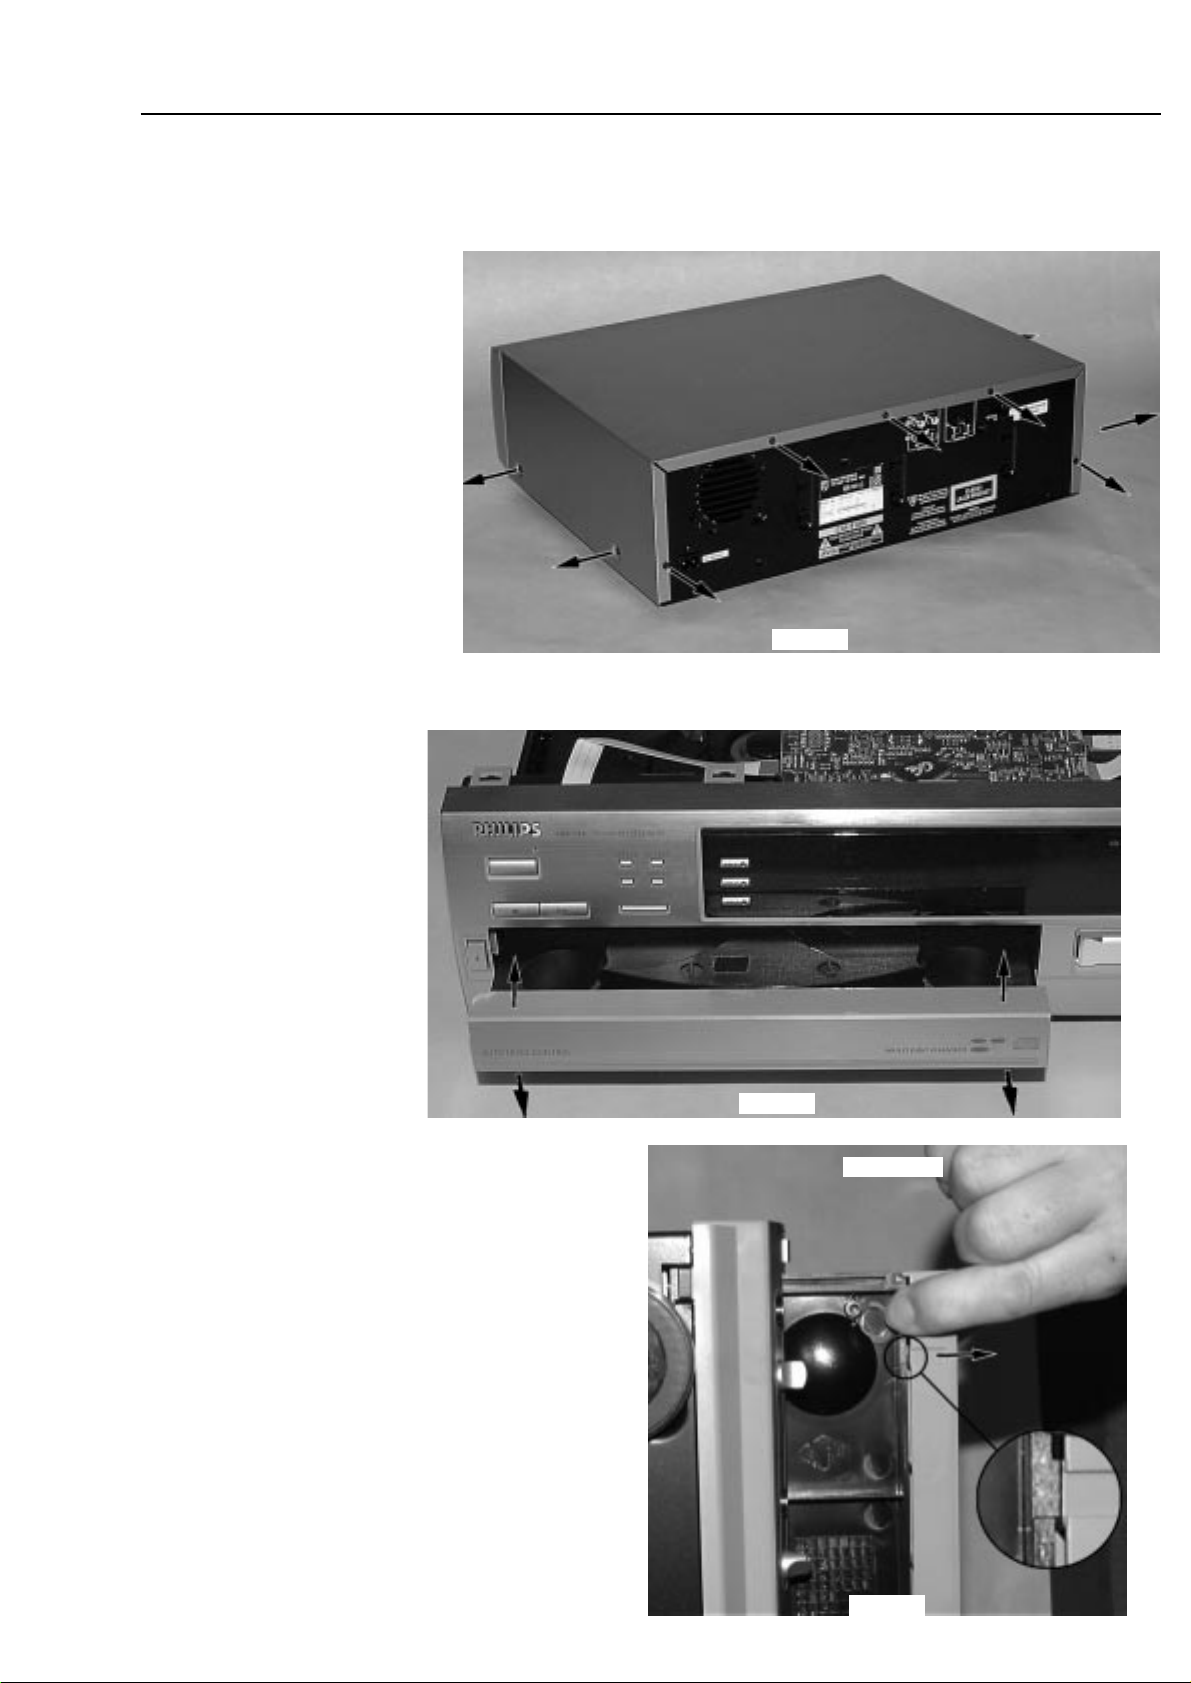
4-1
DISMANTLING INSTRUCTIONS
Dismantling the
Top Cover
picture 2
• Remove 9 screws as shown in picture 2.
• Raise top cover at the rear and pull it backwards.
Dismantling the
Tray Cover
picture 3
picture 4
bottom view
• To release the cover from the catch on the tray pull it
frontwards on bottom side as shown in picture 4.
• Pull the cover up.
Page 22

4-2
DISMANTLING INSTRUCTIONS
Dismantling the
Front Cabinet
Dismantling the
3CDC module
picture 5
picture 6
• Remove tray cover first →see description before.
• Disconnect flexfoil cables to interface board and CDR module.
• Release catches on top as shown in picture 5 and turn
front cabinet away.
Take care of the flexfoil cables connecting the key boards!
• Place front cabinet as shown in picture 6.
• Remove screw on front side first
→ see pictures 7.
picture 7
Page 23

4-3
Dismantling the
CDC module
continued
DISMANTLING INSTRUCTIONS
• Dismantle front cabinet as described before.
• Move the tray a few centimetres out to get access
to the fastening screws at the rear.
• Remove the 3 screws as shown in picture 8.
• Put the tray back and move the complete module
backwards to release catches on bottom cabinet.
→ for orientation see picture 9 and 10.
picture 8
picture 9
picture 11
• Pull the module on front side up and turn it
out as shown in picture 10.
• Put the module to a proper service position.
→ see also chapter SERVICE HINTS
• To get the set operating mount front cabinet
and connect flexfoil cables to front board
again.
picture 10
Page 24

4-4
DISMANTLING INSTRUCTIONS
Dismantling the
CDR module
• Remove 3 screws as as indicated in picture 12.
• Disconnect all cables.
• Move the module backwards to release the catch on
pos. 205 (see exploded view)
• Raise the module on the rear and turn it out.
picture 12
picture 13
Fixation by a catch on
right front-side
Page 25

4-5
DISMANTLING INSTRUCTIONS
Dismantling the
Power board
• Disconnect all cables.
• Remove 3 screws as as indicated in picture 14.
• Release the catches on the plastic supports.
• Move the board backwards to release the catch on
left front-side.
• Lift the module on the rear and turn it out.
remark: space to CDR module will be very tight
picture 14
picture 15
Fixation by a catch on left
rear-side
Page 26

5-1
SERVICE HINTS
SERVICE TOOLS
TORX T10 screwdriver with shaftlength 150mm ......................................4822 395 50423
TORX screwdriver set SBC 163..............................................................4822 295 50145
Audio signal disc SBC 429......................................................................4822 397 30184
Playability test disc SBC444...................................................................4822 397 30245
Test disc 5 (disc without errors) +
Test disc 5A (disc with dropout errors, black spots and fingerprints)
SBC 426/426A ....................................................................4822 397 30096
Burn in test disc (65 min. 1kHz signal at -30dB level without "pause")...4822 397 30155
HANDLING CHIP COMPONENTS
Page 27

5-2
SERVICE HINTS
General Service position
For repairs on: Front Board
Power Board
Interface Board
Service position
Key Boards
After dismantling the front cabinet as described in
chapter 4-2 the front unit can be placed on 3CDC- and
CDR module and be re-connected again.
picture 16
picture 17
Page 28

5-3
SERVICE HINTS
Service position
3CDC Module
Service position
Headphone/Microphone Board
picture 18
picture 20
picture 19
• Dismantle front cabinet as described in chapter 4-2.
• Dismantle Headphone/Microphone Board and put it
through the opening for the 3CDC-tray in front
cabinet.
• Mount front cabinet provisional and re-connect
flexfoil cables to Front Board.
Dismantle the 3CDC module as described
in chapter 4-2 to 4-3 and place it in the
desired service position.
Page 29

5-45-4
Display shows
version number
of the µP - software.
CDR785 servtest CDC, 070400
*
To leave Service Testprogram plug mains cord off.
SERVICE TESTPROGRAM
CD-CHANGER MODULE
The
CD PLAY TEST
is intended to be used
for continuously playing a disc in order to
detect intermittent or not reproducible
failures. The error code indicates where
the failure can be found.
1)
Y
CD PLAY TEST
1)
N
CD is in normal
PLAY
mode.
In case of failures
error codes acc. table 1
will be indicated
on the display.
MAINS CORD
plugged off?
N
Y
Display shows:
STANDBY
for 5s.
Set is switched to
Standby mode.
PLAY
button
pressed?
N
Y
Exit Service Testprogram
CD3
button
pressed?
stands for Service mode
stands for version number
of the software used in the
front µP.
To enter Service
Testprogram hold
CD yCD & NO
buttons
depressed while
plugging mainscord in.
On/Off switch in pos.
ON
VXX
S
S-CDR785-VXX
Y
Display shows
see also fig. 1
PLAY
button
pressed?
STOP
button
pressed?
NEXT
6 button
pressed?
PREV
5 button
pressed?
REC LEVEL
button
pressed?
PROG
button
pressed?
Slide moves
outside as long as
button is held
depressed.
Slide moves
inside as long as
button is held
depressed.
Disc motor turns
counter clockwise
as long as button
is held depressed.
(brake)
Disc motor turns
clockwise
as long as button
is held depressed.
(accelerate )
Y
Y
YY
YY
N
N
NN
N
NN
A
FOCUS found?
Y
N
Display shows
objective moves up&down
Display shows
NEXT
6 button
pressed?
Y
N
Display shows
→ Play mode
MUTE is switched off
(single speed)
PREV
5 button
pressed?
Y
N
CUE - mode
jumps in steps of
16 tracks forwards
as long as button
is hold depressed.
FOCUS search
RADIAL test
DISC SERVO
REVIEW - mode
jumps in steps of
16 tracks backwards
as long as button
is hold depressed.
SLIDE testDISC MOTOR test
SERVO test
Slide can be activated in FOCUS test too:
check if Focus functions over the whole disc area
PLAY
button
pressed?
Y
N
B
B A
Purpose of RADIAL test:
To check if the Audio signal is reproduced.
Subcode info is ignored during this test →
If the CD player functions well in this testmode,
but not in the normal Play mode check quality
of the eye-pattern signal.
Display shows absolute playing time of the disc
in order one can determine position of the slide.
If the playing time is not shown (display flickers)
the pickup is possibly out of the program area of
the disc. Press
Next
or
Prev
to move slide inside.
Tray (open/close button) and Carousel
(CD1, 2, 3 buttons)
work as in normal mode.
After activation of the tray or the carousel
program returns to SERVO test.
STOP
button pressed in
FOCUS- or RADIAL-test
returns to SERVO-test
Since the CD-RW reflects much less light than an ordinary CD-DA
the gain of the HF-amplifier stage and the sensitivity of the ADC inside
the Signal Processor must be increased to find the focus point.
In normal play mode high/low - gain is switched automatically.
In Service Test Mode, with the
TRACK EDIT
button, the gain/sensitivity can be
toggled manually between high or low as soon as the SERVO test has been entered.
When the set is switched to high gain, RW flag is indicated on the display.
NOTE: If sensitivity is switched to
CDRW
the set
might not work with normal Audio CDs!
In the steps
SERVO test
and
FOCUS search
the disc speed can be toggled manually
between single speed (1x) and double speed (2x) with the
TEXT
button.
Flag 1 or 2 of the music calendar indicates the actual speed.
indicates speed -
single speed
or
double speed
note: when
double speed
is set output is muted in RADIAL test
indicates sensitivity -
CD
or
CDRW
indicates the chosen disc - 1, 2 or 3
Y
N
Disc speeds up.
Display shows
CD SERVO TEST
CD1
button
pressed?
N
PLAY
button
pressed?
Single/double speed
Display shows: Display shows: Display shows: Display shows:
CD
FOC ERR
CCW CW SLD O SLD I
FOC OK
DISC OK
RDL
fig. 1
CD
RW
1 2
set continues operation, message remains on the display until next error occurs
or any key is pressed.
Error number Error type
Error type:
Error description
E1000 Focus Error
Triggered when the focus is lost for more than 250ms while playing the CD.
E1006 Subcode Error
No valid subcode for 300ms during
PLAY
.
Slide-out error
Generated when the inner-switch did not open within approx. 250ms when the pick up is
moved from the inner position outside. Inner-switch or slide motor problems.
E1002
E1003
Slide-in error
Generated when the inner-switch did not close within approx. 6s when the pick up is
moved inside. Inner-switch or slide motor problems.
W
E1020 Focus Search Error
Triggered when the focus could not be found within 4s when starting up the CD.
F
W
W
E1001 Radial error
Triggered when the radial servo is not on track for a certain time during playing the CD.
W
W
W
W
W = Warning →
F = Fatal Error
→ set stops operation, message remains on the display.
CD ERROR CODES
table 1
E1005 Jump error.
Triggered when the servo processor counts too less tracks in a defined time during JUMPS.
This can be caused by a disturbed HF-signal (the tracks cannot be recognized exactly),
slide motor problems, track servo problems or scratched discs.
E1008 Disc motor error
Generated when the CD could not reach 75% of speed during startup within 1,2s.
W
E1007 PLL lock error
When no valid subcode was found within 300ms PLL is checked. If PLL is locked E1006
will be indicated else E1007 and the servo is stopped and restarted once again to recover
(as if the user would have pressed
STOP
and then
PLAY
immediately).
Page 30

5-5 5-5
*
To leave Service Testprogram plug mains cord off.
Display shows
version number
of the µP - software.
OPEN/CLOSE
button
pressed?
FINALIZE
button
pressed?
N
Y
N
Y
NEXT
6
button
pressed?
N
Y
PREV
5
button
pressed?
N
Y
STOP
button
pressed?
N
Y
CDR MECHANICAL TEST CDR DC-ERASE MODE
FOCUS TEST
Objective moves
continuously up/down.
SLIDE TEST TRAY TEST
Display shows:
BUSY
Display shows:
BUSY
for visual inspection only
OPEN/CLOSE
button
pressed?
N
Y
Slide moves
continuously in/out.
Display shows:
OPENED
(even when tray is blocked)
Tray opens.
Display shows:
CLOSE
(even when tray is blocked)
Tray closes.
Dependent on the
moving direction,
slide moves to inner
or outer end position.
Exit Mech. Testprogram
SERVICE TESTPROGRAM
CDR MODULE
stands for Service mode
stands for version number
of the software used in the
front µP.
To enter Service
Testprogram hold
CD yCD & NO
buttons
depressed while
plugging mainscord in.
On/Off switch in pos.
ON
CDR785 servtest CDR,160200
CDR
button
pressed?
TEST O.K.?
NN
N
Y
Y
N
Y
Y
Y
Display shows for 2s each:
• Software version of DASP
(flash ROM 7703)
• Software version of
basic engine processor
(flash EPROM 7208)
CDR ELECTRICAL TEST
ERASE
button
pressed?
N
Y
Disc erased?
N
Y
N
Y
Insert CD-DA disc
before starting the test
MODULE
INFORMATION
MAIN BOARD DIAGNOSTIC
CDR - LOADER TEST
DRAM TEST 7702
Display shows:
DTST1
CHECKSUM TEST 7703
Display shows:
DTST2
ERASE TEST 7208
Display shows:
DTST3
ADC/DAC TEST 7406
Display shows:
DTST4
COMMUNICATION TEST
(DSA-BUS)
Display shows:
DTST5
Display shows:
DERR
n
n=number of failed test
Display shows next error
FFWD
6 button
pressed?
N
Y
FFWD
6 button
pressed?
Y
FFWD
6 button
pressed?
Y
FFWD
6 button
pressed?
Y
FFWD
6 button
pressed?
all errors shown?
N
N
N
N
FFWD
6 button
pressed?
Y
N
TEST O.K.?
NN
Y
Y
Display shows:
BERR 1
FFWD
6 button
pressed?
CD-DA disc
inserted?
Display shows actual
playing time.
The test is performed by
playing 5s at beginning,
5s in the middle and 5s at
the end of the disc.
N
Y
Display shows:
NO DISC
FFWD
6 button
pressed?
Exit CDR electrical Test
Complete disc will be
erased with double speed.
(starting from PMA-area
up to and including
ATIP leadout area)
The display shows the
countdown of the
remaining time required
to complete the operation:
ER mm ss
Display shows:
PASSED
mm: remaining minutes
ss: remaining seconds
STOP
button
pressed?
Exit DC-ERASE Mode
Note: With the DC-Erase mode the CD-RW can be
changed back in its original state, like a new disc.
Stopping the erase-function by switching power off
will leave the disc in an unpredictable status!
Exit CDR electrical Test Exit CDR electrical Test
S-CDR785-VXX
VXX
S
Page 31

5-65-6
*
To leave Service Testprogram plug mains cord off.
N
Y
ROTARY ENCODER
TEST
JOG CONTROL
turned ccw
?
N
Y
KEY TEST
Display shows
1)
Numbers acc. table 3
are indicated as long as a
button is held depressed.
If a button is pressed
on the Remote Control
KEY RC is shown
and the ; flag flashes.
FFWD 6
button
pressed?
CDR785 servtest, 150200
STOP
button
pressed?
N
Y
10
OPEN/CLOSE
(CDR)
FINALIZE
ERASE
CD y CD
CDR
AUX
CD3
19
20
21
22
23
24
25
26
27
29
CD2
REW 5
KEY KEY CODE
exit test
2
3
4
5
6
7
8
9
12
15
11
REC TYPE
COMPILE CD
14
13
16
17
CD1
CD TEXT
REPEAT
DISPLAY
SHUFFLE
CD CHANGE
PLAY/PAUSE
OPEN/CLOSE
(CDC)
ON/OFF
18
STOP
TRACK EDIT 1
PROGRAM
TEXT
BALANCE
REC LEVEL
YES
NO
FFWD 6
KEY KEY CODE
KEY CODES
Display shows
version number
of the µP - software.
To enter Service
Testprogram hold
CD yCD & NO
buttons
depressed while
plugging mainscord in.
On/Off switch in pos.
ON
Display shows
for 2s.
N
Y
JOG CONTROL
turned cw
?
Display shows
for 2s.
table 2
1)
If the ON/OFF switch is in the position
OFF
, all other keys
are blocked and display will show
29
all time.
SERVICE TESTPROGRAM
VARIOUS TESTS
stands for Service mode
stands for version number
of the software used in the
front µP.
JOG LEFT
KEY --
JOG RIGHT
DISPLAY
button
pressed?
STOP
button
pressed?
N
N
Y
Y
Y
N
Display shows all
segments and flags
for checking open circuits.
see figure 1
CD1, CD3, AUX
and
blue
LEDs are switched on.
Display shows figure 2.
All alternate pins (2, 4, ..)
of the display are activated
for checking shortcircuits.
CD2, CDR, YES
and
red
LEDs are switched on.
DISPLAY TEST
DISPLAY
button
pressed?
fig. 1
fig. 2
N
Y
QUARTZ TEST
Display shows
1465±44Hz can be measur.
on (pin 9 of µP).
STOP
button
pressed?
N
Y
REW 5
button
pressed?
Tact frequency µP
(divided 12MHz)
1
TEXT TOTAL TRACK TIME TOTAL REM
STEP
CD
RW
CD
RW
COMPILE CD TRACK PROG
RECORD IN PROGRESS
SHUFFLE REPEAT ALL EDIT
REC TRACK TIME
123456789
10 11 12 13 14 15 16 17 18 19 20 +
ANALOG
FINALIZE ALC
DIGITAL
OPTICAL
12
12
TOTAL TIME REM
RR
TRACK
26
FINALIZE
2
1
12M
S-CDR785-VXX
VXX
S
Page 32

6-1 6-1
1
12
1301 1302
1 16
1303
1 23
1305
111
1304
18
1307
16
1306
15
DIGITAL-IN SELECTOR
7302
HEF4052B
LOGIC
+5VD
CDR785, 220300
VSS
VEE
DIG_SW_2DIG_SW_1
EBU_OUT_CD
OPT _IN
10
8
7
4, 11
2, 15
5, 14
1, 12
4, 11
2, 15
5, 14
1, 12
9
RECORDING SELECTOR
7320
7323
LM833D
7301C
74LVU04D
HEF4052B
LOGIC
+5VS
+IC
V_AMP1+
-8V
ANA_SW_0ANA_SW_1
LINE_IN
CD
10
7
3, 13
16
86
9
VSS
VEE VDD
1312B
DIG IN
6304
OPT. IN
1311B
DIG_IN
CDTXTDQSY
CDDATA
CD_SICL
CDShSTR
CDShCLK
CDSwinfo
CDTXTin
CD_PORE
CDSILD
CDTXTCLK
CDTXTDQSY
CDDATA
CD_SICL
CDShSTR
CDShCLK
CDSwinfo
CDTXTin
KILL_L
EBU_OUT_CD
KILL_R
CD_PORE
CDSILD
CDTXTCLK
CD_L
CD_R
SUPPLY_ON
+5V EVER
NC
-F +F
-30V+5V
+5V
+12V
+5VST
LOGIC CONTROL LINES
-F +F
-30V
+5V+5VS +5VD +IC +3V3
+5VST
+12V
SUPPLY_ON
DigSw0
DigSw1
DigSw2
AnaSw0
AnaSw1
AnaSw2
MUTE
V_AMP1-
V_AMP+ V_AMP1+ -8V V_AMP- V_AMP1-
7335
7322
LM833D
V_AMP1+
V_AMP1-
Mono/
Stereo
7336
LM833D
V_AMP1+
V_AMP1-
MIC_L
MIC_R
HP_L
HP_R
Analog_REC_R
CD_R/W_Analog_L
EBU_OUT_CDR
SHIELD
SHIELD
EBU_IN_CDR
CD_R/W_Analog_R
Analog_REC_L
-8V
+12V
4, 11
2, 15
5, 14
1, 12
ANALOG SELECTOR
REC BUFFER MICROPHONE AMPLIFIER
7321
HEF4052B
LOGIC
+5VS
MUTE
KILL
KILL_OFF(CDR)
-8V
DigSw0
CD_L, R
CD_RW_L, R
AnaSw2
1079
VSS
VEE
8
13
12
DIGITAL-OUT SELECTOR
7003A
HEF4053BP
LOGIC
+5VD
+5V
DigSw0
11
7
14
15
16
9
VSS
VEE
VDD
8
1
2
LM833D
V_AMP1+
V_AMP1-
MUTE
1311A
1312A
DIGITAL
OUT
7301
74LVU04D
+IC
7301
7324
74LVU04D
+IC
3, 13
16
6
VDD
3, 13
16
6
VDD
EBU_OUT_CDR
EBU_OUT_CD
7322
DigSw2
CD
LINE
CD
DIG
OPT
CDR
CD
CDR
CD
CDR
CD
KILL
1308
21
1309
21
NTC
FAN
7371
FAN CONTROL
+12V
INTERFACE BOARD
ANALOG
OUT
ANALOG
IN
1805
23 1
CON1
CN101
CON2
1
11
7
1
7
1
(Supply) ON/OFF
+5V EVER
-F1
+F1
-38V
+5V
+5V
+5V
GND
GND
GND
GND
+12V
+12V
+12V
-8V
+5V
AUDIO SIGNAL INTERFACE
DIGITAL IN / OUTCONTROL INTERFACE
SUPPLY INTERFACE
+5V
+12V
-8V
-8V
GND
CD - CHANGER MODULE
for details see
separate block diagram
MAINS BOARD
for details see
separate block diagram
CDR MODULE
for details see
separate block diagram
HEADPHONEMICROPHONE
BOARD
LEFT
RIGHT
+5V
+10V
+3V
DAT A
SICL
SHR_STR
SHR_CL
SW_INFO
SILD
PORE
KILL_L
DQSY
SRDT
EBU_OUT
uP_CLK
KILL_R
1704 1702 1420
1501
171651
1492
1491
18
1690
+12V
-8V
HP_L
HP_R
7680
+12V
-8V
LM833D
7650
3661
3695
+12V
-8V
NJM4556AM
MIC_L
MIC_R
HEAD-
PHONE
MICROPHONE
I2C DATA
I2C CLK
REQKBE
RESET
EBU SIGNAL
OUT
EBU SIGNAL
IN
ANALOG IN (REC) L
ANALOG IN (REC) R
ANALOG OUT (PB) R
ANALOG OUT (PB) L
SHIELD
SHIELD
FRONT BOARD
KEY BOARD
right
KEY BOARD
left
7412
7413
MICROPROCESSOR
TMP88CU77ZF
7415
5VST
RC5
2
KEY MATRIX
JOG CONTROL
RESET
EEPROM
RESET
1402
1
12
1405
1430
1457
LED CON4
JOG A
JOG A
JOG B
JOG B
KEY1
KEY1
KEY2
KEY2
-30V
+F
+5V
-F
1
3
2
33 - 76 51
32
87
88
VDD
VDD-VFT
VDD-CPU
31 VAREF
30VASS
29VSS
VKK
5406
12MHz
89 91
92
+5VST
96
99
5
8
6
LED CON5
LED CON6
LED CON7
LED CON3
LED CON6
LED CON5
LED CON4
CDR AUX YES
LED CON3
LED CON7
+5V
+5V
blue
Rec/Pb indication
red
+5V
1
9
LED CON1
LED CON2
KEY0
ON/OFF
LED CON0
+5V
+5VST
+5V
+5VST
IR EYE
LED CON1
LED CON0
LED CON2
1480
1
9
KEY0
ON/OFF
1
12
1400
CDTXTDQSY
CDDATA
CD_SICL
CDShSTR
CDShCLK
CDSwinfo
CDTXTin
CD_PORE
CDSILD
CDTXTCLK
SUPPLY_ON
f
0
1401
-F +F
NC
-30V+5V+D+5VST
DigSw0
DigSw1
DigSw2
AnaSw0
AnaSw1
AnaSw2
MUTE
I2CW_DATA
I2CW_CLK
CWReqKbe
CWReset
NC (SHIELD)
NC (SHIELD)
1403
+yP
+5VST
+yP
+C
CD 3 CD 2 CD 1
STANDBY
ON/OFF
off on
KEY MATRIX
1481
1 16 1 7
1
12
TEXT TOTAL TRACK TIME TOTAL REM
STEP
CD
RW
CD
RW
COMPILE CD TRACK PROG
RECORD IN PROGRESS
SHUFFLE REPEAT ALL EDIT
REC TRACK TIME
123456789
10 11 12 13 14 15 16 17 18 19 20 +
ANALOG
FINALIZE ALC
DIGITAL
OPTICAL
12
12
BLOCK DIAGRAM
Page 33

6-26-2
CD Text
LC89170M
EXCK
SBSO
SCOR
WFCK
MCK
SRDT
DQSY
SCLK
RCK
SUB
SBSY
SFSY
CL11
7876
DQSY
3
13
SRDT
4
12
µP_CLK
2
11
DATA
SDA
VCC
KILL DOBM
1805
D1-D5
D2-D4
7807
7806
7871
7873
TDA7073A
TDA7073A
TDA7073A
HEF4094BT
TTM +
TTM -
MOT2
LD ON
LD
MON
CD R/W
HF IN
V1
D1
D2
D3
D4
R1,R2
MOT1
SLEDGE -
SLEDGE +
RAD -
RAD +
FOC -
FOC +
+5V
+10V
+10V
SHR_CL
SHR-STR
REGISTER
SHIFT
SERVO - DECODER
CD10
SAA7324 (SAA7325)
D/A
Converter
PCM1716
MOTOR
TRAY MOTOR
CAROUSEL
CD DRIVE UP/DOWN SWITCH
1881
1880
TRAY SWITCH
1882
7874
Level converter
CD POS.1 SWITCH
SL
O7
O6
O5
OO
VDD
+10V
O1
O2
O3
RA
FO
DIODES
PHOTO
D3D2
D5D1
D4
INNER SWITCH
SWITCH INFO
LASER &
MONITOR
DIODE
TURNTABLE
MOTOR
DISC
CD MECHANISM
VAM2202/01
FOCUS
MOTOR
RADIAL
MOTOR
SLEDGE
MOTOR
MOTOR
TURNTABLE
PHOTODIODE & HF AMPLIFIER - LOADER CONTROL BOARD
EN1
DATA
STB
SHR_CL
SICL
SILD
PORE
7878
MC78L05ACP
7875
7801
+3,3V
LEFT
7810
7877
RIGHT
Laser Control
&
HF AMPLIFIER
TZA1024 (TZA1025)
55
54
56
38
13
18
20
21
23
2
1
5
3
27
29
26
28
10
12
14
13
SWITCH INFO
17
5
9
7
16
15
16
42
40
39
5,17,21,52,57
59
60
64
1
13
+5V
2
4
5
7
V4
61
2
63 513234
10
11
6,14
11
12
15
2
1
3
16
13
4
5
6
7
5V1
+5V
+3,3V
KILL R
KILL L
EBU OUT
SCL
SILD
SLCK
CL16
DATA
WLCK
PORE
Blockdiagram 3CDC99-DS 2000-03-20
Closed if carrousel is in Position 1.
Closed if the tray is in one endposition.
Open during movement.
SERIAL INTERFACE
D/A
D/A
WCLK
DATA
SCLK
CL16
8,9,15
V
t
VDD (pin 16)
EN1 (pin 15)
Power on
CONNECTED VIA FLEXFOIL 8001 TO SET
BLOCK DIAGRAM
3CDC MODULE
Page 34

6-3 6-3
M
CDL 4009
LOADER ASSY
TRAY
TR+, TR-
SL+, SL-
SLEDGE
RAD
SLEDGE
FOCUS
TRAY
TRAYSW
RAD+, RADFOC+, FOC-
SIN+, SINCOS+, COS-
TRAY
SWITCH
TURN
TABLE
VRA, VFO, VSL
TRAYIN, TRA YOUT
TRAYSWF
REFSIN, SINPHI, REFCOS, COSPHI
CDM3800
7240
7225
PCS PRE-AMP
NE532D
POWER
DRIVER
BA5938FM
HALL
MOTOR
DRIVER
BA6856FP
7330
FLASH
EPROM
7208
DEMUX
7209
DASP
MCF5244
M
M
FLEX 10P
FLEX 11P
LASER
&
FORWARD
SENSE
PHOTO
DIODES
RADIAL
FOCUS
1330
FLEX 30P
1000
1220
1200
7010
AEGER
TZA1020
ANALOG
ERROR SIGNAL
GENERATOR
FOR
RECORDABLE
A1LF, A2LF, B1LF, B2LF
C1LF - C4LF
LASER
CONTROL
7016
XDAC
M62364
CAHF
IR, IW, IE
EFMDATA, EFMCLK, LWRT
HF AMP
FILTER
I2C BUS
I2C
EEPROM
M24C08
7207
EFMTIM3
LO9805
7008
RAM
7802
CONTROL
LINES
CONTROL
LINES
CONTROL
LINES
CONTROL
LINES
CONTROL
LINES
CDR60
SAA7392
DECODER
ENCODER
MOTOR CONTROL
HIN WOBBLE
7300
DRIVE, HALL FEEDBACK
OFFTRACK
LLP
CDR60PLL
ATIPSYNC
A1, A2, CALF
ALPHA0
TLN, MIRN, FEN, REN, RE
CONTROL
LINES
EFM TIMING
GENERA T OR
1704
2 WIRES
2 WIRES
FLASH
ROM
7703
DRAM
7702
DSA-CDR
DATA
BUS
ADDRESS
BUS
SUBCODE BUS
I2S BUS 1
DOBM-CDR
I2S BUS 2/4
L3 BUS
CODEC
UDA1341TS
ADC / DAC
7406
DIGITAL AUDIO
SIGNAL
PROCESSOR
MACE2
SAA7399
BASIC ENGINE
PROCESSOR
MAD0 - MAD7
MA8 - MA17
7270
7701
ADDRESS
BUS
DATA
BUS
A1 - A20 D16 - D31
I2C BUS
SYS-RESET
FLEX 7P
FRONT BOARD
1403
DIGITAL
POT
DS1807
7801
INTERFACE BOARD
EXTERNAL
DIGITAL IN
EXTERNAL
OPTICAL IN
DIGITAL OUT
EXTERNAL
ANALOG IN
ANALOG OUT
CD CHANGER
1420 1306
1702 1307
7 WIRES
5 WIRES
6 WIRES
POWER SUPPLY
UNIT
CON 2
1501
BLOCK DIAGRAM
CDR-MODULE
33.8688 MHz
1707
+5V
+5V
+12V
-8V
7405
7409
ANALOG
IN
ANALOG
OUT
EXT-DIG-IN
DIG-OUT-C
CDR MAIN BOARD
EXT-ANALOG-IN
/2
74F74D
SYS-CLK-16W (16.9344 Mhz)
SYS-CLK-BE
(8.4672 Mhz)
SYS-CLK-BE
(8.4672 Mhz)
7706A
SYS-CLK-11W
MICRO
CONTROLLER
TMP88CU77ZF
KEYS
RC5
EASY
JOG
DISPLAY
KEY BOARDS
7412
EBU CD CHANGER
CDR785, 210300
Page 35

6-46-4
BLOCK DIAGRAM
SWITCHED MODE POWER SUPPLY /
European & USA version
CN101
MAINS SOCKET
F101
T2A
Lightning
Protection
L101, L102
EMI-filter
T102
6,8V
22V
+5V EVER
overvoltage
protection
Q151
PC151
PC102
switch on/off
regulation
regulation
IC251
D251
D252
Q152
R152
C105
C251
D201
D206
C206
CON1
CON2
1
11
7
1
ON/OFF
+5V EVER
-F1
+F1
-38V
+5V
+5V
+5V
+12V
+12V
-8V
-8V
Q251
Q202
T101
15V
+12V
overvoltage
protection
D203
C204
-8V
C202
D202
C201
+5V
+5V
IC201
Q101
Q104
on/off
switching
transistor
reference
PC101
Q103
R207
R209
D204
D205
C205
-30V
+F
-F
switching
transistor
reference
Blockdiagram SMPS CDR785, 080300
Page 36

6-5 6-6
BLOCK DIAGRAM
SWITCHED MODE POWER SUPPLY /
WorldWide version
Blockdiagram SMPS CDR785WW, 040300
CN101
MAINS SOCKET
F101
T2A
Lightning
Protection
L101, L102
EMI-filter
T102
6,8V
22V
+5V EVER
overvoltage
protection
Q151
PC151
PC102
switch on/off
regulation
regulation
IC251
D251
D252
Q152
R152
C105
C251
D201
D206
C206
CON1
CON2
1
11
7
1
ON/OFF
+5V EVER
-F1
+F1
-38V
+5V
+5V
+5V
+12V
+12V
-8V
-8V
Q251
Q202
22V
22V
T101
15V
+12V
overvoltage
protection
D203
C204
-8V
C202
D202
C201
+5V
+5V
IC201
Q101
switching
transistor
reference
PC101
R209
D204
D205
C205
-30V
+F
-F
switching
transistor
sense
reference
S
3
4
6
2
I
sense
out
on/off
Vcc
GND
feedback
5
8
7
1
R
Q
Vcc
BUFFER
OVERVOLTAGE
PROTECTION
OSCILLATOR
BIAS
PWM
+
-
-
IC101
PWM CONTROLLER
Page 37

6-66-6
FRONT /
DISPLAY BOARD
CD-CHANGER MODULE
3CDC 99 DS DAC TEXT
HEADPHONE/MIC-BOARD
FFC SIDE ENTRY
EH TOP ENTRY
PH TOP ENTRY
EH SIDE ENTRY
PH SIDE ENTRY
CABLE 1 to N
DIPMATE
SPARE
FFC TOP ENTRY
LEGEND
D-GND
UP_CLK
HP_RIGHT
MIC_LEFT
MIC_GND
MIC_RIGHT
Componentside view
Copperside view
DISPLAY
HP_LEFT
A_GND
-8V
+12V
KEY 0
ON/OFF
+5VST
+5V
KEY 2
KEY 1
+5V
D_GND
D_GND
LED_CON_2
LED_CON_7
LED_CON_1
LED_CON_6
LED_CON_0
LED_CON_5
LED_CON_3
LED_CON_4
JOG_A
JOG_B
KEY_GND
KEY_GND
CDTXT_CLK
CDTXT_DQSY
CDTXT_IN
CD_PORE
D_GND
CD_SILD
CD_DATA
CD_SICL
CD_SH_CLK
D_GND
CD_SH_STR
CD_SW_INFO
-F
+F
-30V
+5V
NC
+5V_ST
D_GND
D_GND
SUPPLY_ON
DIG_SW_0
DIG_SW_1
DIG_SW_2
ANA_SW_0
ANA_SW_1
ANA_SW_2
MUTE
I2CW_DATA
D_GND
I2CW_CLK
CW REQKBE
CW_RESET
SHIELD
SHIELD
+5V
+5V
D_GND
D_GND
D_GND
+12V
-8V
DQSY
SRDT
KILL_R
EBU_GND
EBU_OUT
+3V
KILL_L
PORE
D-GND
SILD
DATA
SICL
SHR_CL
SHR_STR
SW_INFO
+10V
D-GND
+5V
RIGHT
GND-A
LEFT
ANALOG (PB) OUT L
ANALOG (PB) OUT R
ANALOG (IN)_REC_R
A_GND
ANALOG (IN)_REC_L
EBU_GND
EBU_SIGNAL (IN)
SHIELD
EBU_GND
EBU_SIGNAL (OUT)
SHIELD
CD R/W MODULE
CDR MINI 99 / CDL4009
Top view
1
1805
1690
1480
1402
1405
1430
1
8
1
9
12
116 1
1401
1400
1
7
1403
1704
1420
1702
1501
1
1
1
5
1
6
1
7
1
7
23
MIC HEADPHONE
SUPPLY-BOARD
ON/OFF
+5V ST (EVER)
-F
+F
+5V
-30V (-38V)
+5V
+5V
GND
GND
+12V
+12V
-8V
GND
GND
GND
+12V
-8V
1
11
NTC
FAN
CON 1 CON 2
8008 (340mm)
(80mm)
11p
8020 (180mm)
2p
6p
7p
2p
8015 (130mm)
fixed to front chassis
together with CDC module
8008 (380mm) Shielded
to be tied
together (4x)
8010 (90mm)
7
1
FRONT /
KEY BOARD LEFT
KEY 0
D_GND
LED_CON_2
LED_CON_1
LED_CON_0
KEY_GND
19
FRONT /
KEY BOARD RIGHT
12
12
1p
ON/OFF
+5VST
+5V
KEY 2
KEY 1
+5V
D_GND
LED_CON_7
LED_CON_6
LED_CON_5
LED_CON_3
LED_CON_4
JOG_A
JOG_B
KEY_GND
Componentside view Componentside view
FFC 12p
8001 (220mm)
(8001, part of 3CDC) (420mm)
FFC 23p
FFC 16p
8002 (220mm)
8007 (430mm)
FFC 8p
FFC 5p
8006 (120mm)
FFC 12p
8004 (105mm)
8005 (140mm)
FFC 9p
wiring CDR785, 000113
SHIELDED FFC 7p
8003 (280mm)
I2C_DATA
D_GND
I2C_CLK
REQKBE
RESET
D_GND
D_GND
+12V
INTERFACE BOARD
D-GND
CDTXT_CLK
MIC_LEFT
A_GND
MIC_RIGHT
HP_LEFT
MIC_GND
HP_RIGHT
-8V
CDTXT_CLK
CDTXT_DQSY
CDTXT_IN
CD_PORE
D GND
CD_SILD
CD_DATA
CD_SICL
CD_SH_CLK
D_GND
CD_SH_STR
CD_SW_INFO
-F+F-30V
+5VNC+5V_ST
D_GND
D_GND
SUPPLY_ON
DIG_SW_0
DIG_SW_1
DIG_SW_2
ANA_SW_0
ANA_SW_1
ANA_SW_2
MUTE
CD_RW ANALOG L
CD_RW ANALOG R
ANALOG REC_R
A-GND
ANALOG REC_L
EBU_GND
EBU_IN_CDR
SHIELD
EBU_GND
EBU_OUT_CDR
SHIELD
FAN
NTC
D_GND
GND
CDTXT_DQSY
CDTXT_IN
KILL R
EBU_GND
EBU_OUT CD
GND
KILL L
CD_PORE
D-GND
CD_SILD
CD_
DATA
CD_SICL
CD_
SHR_CL
CD_
SHR_STR
CD_SW_INFO
+12V
D-GND
+5V
CD_RIGHT
GND_A
CD_
LEFT
1303
1
1309
1308
81
1304
0050
1302
1301
1306
1307
12
116
1
51
1
6
11
1
1305
1
2
12
23
LINE IN/OUTDIG IN/OUTOPTICAL IN
SUPPLY_ON
+5V_ST
-F
+F
+5V
-30V
D_GND
D_GND
+12V
+12V
-8V
Componentside viewComponentside view
WIRING DIAGRAM
For service code numbers of flexfoil cables see mechanical partslist.
Page 38

7-1 7-1
2A 125V
USA
120/2
USA
1000p/1k
USA
100k
USA
100k
USA
470k
USA
150/200
USA
2200pF
USA
D111
USA
D112
USA
470k
USA
22
USA
Switched Mode Power Supply, EU+USA versions, 000330
(SRA952EK+SRA951UC combined)
2SC5241
USA
2SK2177
USA
ON3131 or PC817 or PS2501
USA
D111 AG01A
USA
D112 P6KE150 or Z2150U
USA
.......
USA
for USA version only
LEGEND
EU version USA version
Switched Mode Power Supply / EU + USA version (/00/17)
to Interface Board
1305
to CDR module
1501
30V
15V
6.8V
22V
150V
3V
!
!
!
!
!
!
!
!
!
!
!
!
!
!
!
!
4,4/0V
5
±
0,25V
4,1±0,4V
f
loating
5±0,25V
12
+0,6
/
-1,2
V
-29,3
±
2,2V
-8,4
±
0,8V
typ.-25V
typ.-21V
300V
300V
5V
5V
3,9V
4,9V
3,9V
2,4V
2,4V
-31,5V -29,5V
-30,2V
1,2V
0V
4,4V
300V
0,1V
0,1V
0,1V
8,5V
-0,1V
-0,1V
-0,3V
-0,3V
4,8V
6V
UNLESS STATED OTHERWISE
MAINS VOL TAGE 230V
. . . V DC VOLTAGES MEASURED IN
STOP MODE
EVM
V
for orientation only
Page 39

7-27-2
(USA only)
POWER BOARD / component side view
USA and European version
POWER BOARD / copper side view
USA and European version
C153
C201
R156
R155
R251
R212
R211
R205
R204
R203
R202
R115
R114
J9
R158R151
R153
R256
R104
R106
R253
R254
R112
R252
R255
C152
for orientation only
Page 40

7-3 7-3
Switched Mode Power Supply, World Wide version, 000330
(SRA950WW)
Switched Mode Power Supply / WorldWide version (/01)
to Interface Board
1305
to CDR module
1501
22V
3V
1kV
22V
22V
30V
15V
6.8V
on/off
IC101
45
Vcc
Out
Osc
GND
Feed
back
Osc on/off
I
sense
18
!
!
!
!
!
!
!
!
!
!
!
!
!
!
!
4,4/0V
5
±
0,25V
4,1±0,4V
f
loating
5±0,25V
12
+0,6
/
-1,2
V
-29,3
±
2,2V
-8,4
±
0,8V
typ.-25V
typ.-21V
300V/140V
300V/140V
300V/140V
5V
5V
3,9V
4,9V
3,9V
2,4V
2,4V
-31,5V -29,5V
-30,2V
0V
4,4V
0,2V/2V
0,2V/2V
8,5V/8V
-0,1V/-0,2V
0,1V
15V
2V
3,4V
1V
1V/1,4V
1,6V/3,9V
1,5V/3,8V
4,8V
UNLESS STATED OTHERWISE
MAINS VOL TAGE 230V/110V
. ../. . V DC VOLTAGES MEASURED IN
STOP MODE
EVM
V
for orientation only
Page 41

7-47-4
POWER BOARD / component side view
WorldWide version
POWER BOARD / copper side view
WorldWide version
C153
C207
R156
R155
R251
R212
C213
R213
R205
R204
R203
R210
R202
C108
C113
R113
R115
R120
R117
C106
R116
R118
R131
R132
R158
R257
R151
R153
R157
R256
R253
R254
C214
R252
R255
C214
C215
C152
J3
for orientation only
Page 42

7-5 7-5
RAM
VFT - DRIVER - CIRCUIT
VFT - DRIVER
3-STATE
I/O
ROM
3-STATE
I/O
P1 P3
3-STATE
I/O
3-STATE
I/O
P4 P5
ANALOG IN ANALOG IN
I/O
ADRESS / DATA - BUS
PE
VFT - DRIVER
P0
PD
VFT - DRIVER
P9
VFT - DRIVER
P8
VFT - DRIVER
P7
VFT - DRIVER
P6
VFT - DRIVER
PF
CPU - CLK
I/O P2
CPU
REC LED "BLUE"
GRID BUFFERS
+5VST
EEPROM
-F
12MHz
LED BUFFERS
to/from KEY BOARD RIGHT
Shield
Shield
to/from KEY BOARD LEFT
to/from CD R/W MODULE
Optional
-30V
E
F
G
K
L
M
D
E
F
FRONT BOARD
+5V
13 14 15 19
12 6 7 8
IR EYE
to/from INTERFACE BOARD
10 11 12 13 14 15 16 17 18 19
A
B
C
D
H
I
J
A
B
C
G
RESET
123456789101112 161718
345 9
+F
SUPPLY ON
H
I
J
K
L
M
REC LED "RED"
INTERFACE BOARD
to/from CD Changer via
0V
Optional
3443
1K
D
3529
270R
2416
330p
F424
F422
F423
KEY
3528
1K
D
F445
F410
3492
1K
470R
3489
D
F450
3405
22K
F406
F443
470R
F457
F428
3506
3501
1K
270R
3510
470R
3468
7405
BC847B
3507
1K
1N4148
6416
2443
47u
D
D
F404
6415
1N4148
100u
2434
D
8
9
F429
1
10
11
12
2
3
4
5
6
7
1400
FFC
D
3470
3K3
3404
22K
470R
3466
3509
470R
D
D
D
D
F439
F440
2408
100p
3526
10K
1406
CST
100n
D
F416
2417
3524
270R
1K
3497
D
KEY
3479
100R
F403
GP1U28QP
7415
3
GND
1
OUT
2
VS
D
100n
2440
10K3522
F433
1K
3525
F431
F432
D
3487
1K
470R
3486
1K
3532
270R
3512
F448
3499
1K
2K7
3540
D
F438
15p
7414
BC847B
2428
47R
3534
100p
2407
F458
F453
F435
F436
470R
3402
F411
F419
F420
D
3485
1K
10K
3537
D
F447
F437
3460
470R
1K
3493
2403
100p
F442
1K
3539
2400
100p
D
1K
3505
3503
1K
3428
2K7
D
F415
D
F455
F454
5407
2u2
270R
3511
F401
3519
2R2
F434
F430
F425
10p2411
F421
1K
3452
3533
10K
100K
3531
2406
100p
F413
F441
9
F412
11
12
2
3
4
5
6
7
8
1405
FFC
1
10
100p
2402
52 536789
KEY
D
35 36 37 38 39 40 41 42 43 44 45 46 47 48 5120 21 22 23 24 25 26 27 28 293 30 31 32 33 341 101112131415161718192
F451
7404
15-BT-66GN
100R
3476
F414
3475
1K
10K
3530
3535
470R
2442
10n
100p
2405
31
VASS
30
VDD-CPU
88
VDD-I|O
32
VDD-VFT
51
VKK
87
VSS-CPU
90
VSS-I|O
29
XIN
89
XOUT
91
73
PE074PE175PE276PE377PE478PE5
79
PE6
80
PE7
81
PF0
82
PF1
83
84
PF2
PF3
85
PF4
86
RESET
92
TEST
95
VAREF
57
P9058P91
5960
P92
P9361P9462P9563P9664P97
65
PD066PD167PD268PD369PD470PD571PD672PD7
P70
41
P71
42
43
P72
P73
44
P74
45
P75
46
P76
47
P77
48
P80
49
P81
50
P8252P8353P8454P8555P8656P87
P44
21
P4522P46
23 24
P47
P5025P5126P5227P53
28
P60
33
P61
34
P62
35
P63
36
P64
37
P65
38
P66
39
P67
40
P138P149P1510P16
11 12
P17
P20
96
P21
93
P22
94
P3013P3114P3215P3316P4017P4118P4219P43
20
7412
TMP88CU77ZF
97
P00
P01
98
P02
99
P03
100
P041P052P063P074P105P116P12
7
F426
F449
1K
3500
7409
BC847B
D
F456
1N4148
6404
15
16
2
3
4
5
6
7
8
9
D
1401
FE-ST-VK-N
1
10
11
12
13
14
1K
3480
D
2432
47u
D
F452
3498
1K
D
D
D
2R2
3411
D
100n
D
270R
3518
2436
100R
3482
BC847B
7408
100p
2401
F407
270R
3527
D
F444
2404
10p2412
100p
F408
BZX55-C3V3
6403
D
D
100R
3520
9421
D
D
2K7
3451
3449
1K
D
F405
F417
F418
2n2
3494
1K
2441
5408
F446
15p
2427
2u2
10n
270R
3516
2438
F427
3523
1K
1K3425
3495
1K
2439
4u7
100n
2431
2414
330p
F400
2
3
4
5
6
7
8
9
3
4
5
6
7
1402
FE-ST-VK-N
1
3403
1403
FE-ST-VK-N
1
2
F402
4K7
10K
1u
2437
3491
1K
3521
3488
1K
BC847B
1K
3508
7407
D
3441 1K
3545
220K
F409
1K
3504
470R
3502
1K
3483
22K
3406
3464
470R
3454
470R
7406
BC847B
4R7
3427
3
E2
6
SCL
5
SDA
8
VCC
VSS
4
7
WC_
2435
47u
D
7413
M24C01
1
E0
2
E1
P22
P20
P18
P16
P14
P12
P10
P8
P6
P4
P2
P6
P5
-F
LED_CON4
+5VST
CDTXTCLK
P21
P19
P17
P15
P13
P11
P9
P7
P5
P3
P22
P21
P20
P19
P18
P17
P16
P15
P14
P13
P12
P11
P10
P9P8P7
KEY2
P4P3P2
P1
G1
G2G3G4
G5
G6
G7
G8
G9
G10
G11
G12
G130
G140
G150
P27
P26
P25
P24
P23
I2C_CLK
+5V
+yP
+C
KEY1
LED_CON7
LED_CON6
LED_CON5
LED_CON4
LED_CON3
+5V
FAN
+F
CWReset
ON_OFF
LED_CON0
LED_CON1
LED_CON2
KEY0
LED_CON7
LED_CON6
P1
I2C_DATA
AnaSw0
AnaSw2
SPLY_ON2
SPLY_ON1
SPLY_ON2
+5VST
+5V
+yP
+C
I2CW_DATA
I2CW_CLK
MUTE
AnaSw1
DigSw2
DigSw1
G7
G3
G15
G14
G13
G1
G5
G6
SPLY_ON1
ON_OFF
DigSw0
DigSw2
DigSw1
LED_CON5
LED_CON3
MUTE
AnaSw0
AnaSw1
+yP
LED_CON2
LED_CON1
LED_CON0
G10
G12
G9
G13
G14
G15
P23
P27
CDShCLK
CD_SICL
P26
CD DATA
P25
CDSILD
P24
DigSw0
G11
AnaSw2
-30V
+D
-F
CD_PORE
-30V
CDTXTIn
CDTXTDQSY
CDDATA
G150
G140
G130
I2CW_DATA
I2CW_CLK
G8
G4
G2
+yP
FAN
CDShSTR
CWReset
CWReqKbe
KEY2
KEY1
KEY0
JOG_B
JOG_A
CDSwInfo
CDTXTIn
CDTXTCLK
CDShCLK
CDSILD
CD_PORE
CDTXTDQSY
+D
+F
+5VST
+5VST
+yP
+D
-30V
+D
-30V
+D
-30V
-30V
CDSwInfo
CDShSTR
CWReqKbe
JOG_A
JOG_B
+C
+C
+C
CD_SICL
1400 A19
1401 D19
1402 I19
1403 G19
1405 K19
1406 F4
2400 B1
2401 B2
2402 B3
2403 B1
2404 B2
2405 B4
2406 B2
2407 B3
2408 B4
2411 C17
2412 C17
2414 B17
2416 E17
2417 F3
2427 F4
2428 F5
2431 F14
2432 F15
2434 E15
2435 B12
2436 I3
2437 I4
2438 G3
2439 G2
2440 I6
2441 J6
2442 H3
2443 B5
3402 K17
3403 A17
3404 B1
3405 B3
3406 B4
3411 F15
3425 C18
3427 E15
3428 J17
3441 C18
3443 E5
3449 J11
3451 H17
3452 I11
3454 B17
3460 E17
3464 B18
3466 C18
3468 C18
3470 J17
3475 G5
3476 H13
3479 H13
3480 I6
3482 H13
3483 H5
3485 I6
3486 I7
3487 I8
3488 I8
3489 I8
3491 I9
3492 I10
3493 I10
3494 I10
3495 I11
3497 J6
3498 J7
3499 J7
3500 J8
3501 J8
3502 J9
3503 E17
3504 J9
3505 J10
3506 J10
3507 J11
3508 G5
3509 J7
3510 E4
3511 E5
3512 E4
3516 G17
3518 G17
3519 B13
3520 I5
3521 J3
3522 J3
3523 G3
3524 D7
3525 J3
3526 J5
3527 D7
3528 J6
3529 D6
3530 D6
3531 H2
3532 K3
3533 D5
3534 B6
3535 K17
3537 B6
3539 I7
3540 J17
3545 G2
5407 F15
5408 I2
6403 A6
6404 E17
6415 D3
6416 D5
7404 A6
7405 B2
7406 B3
7407 B4
7408 D3
7409 D4
7412 D5
7413 I2
7414 G3
7415 J5
9421 H18
F400 A6
F401 G5
F402 G3
F403 E15
F404 B12
F405 B6
F406 J4
F407 K4
F408 J6
F409 F14
F410 A18
F411 A18
F412 B18
F413 B18
F414 B18
F415 B18
F416 B18
F417 C18
F418 C18
F419 C18
F420 C18
F421 D18
F422 D18
F423 D18
F424 E18
F425 E18
F426 E18
F427 E18
F428 F18
F429 F18
F430 F18
F431 F18
F432 F18
F433 G18
F434 I18
F435 I18
F436 I18
F437 I18
F438 I18
F439 J18
F440 J18
F441 G18
F442 G18
F443 G18
F444 H18
F445 H18
F446 B13
F447 K18
F448 K18
F449 K18
F450 K18
F451 K18
F452 L18
F453 L18
F454 L18
F455 L18
F456 L18
F457 M18
F458 M18
Front CDR785, 130300
0/5V
0/5V
0/5V
0/5V
0/5V
-0,6V/1,8V
LEDs: off / on
5V typ.
5V
pins 33-76 measured in ServiceTestprogram - DISPLAY TEST
pins 49-50 : 2,8V
52-76
-30V
4,9V/-4V
0,7V/-0,6V
-0,6V/0,7V
3,8V/0,2V
-3,8V/4,7V
-29V
-29V typ.
5V
1,8V
1,9V
4,9V
0V
4,9V
-8,7V
0/5V
4,5V
TB 2 ms
5V
0,4V
4,1V
0V
4,5V
3,2V
5V
4,8V
5V
4,8V
-0,7V/3,8V
CD / CDR mode
4,8V
4,8V
4,1V
3,4V
4,1V +/- 0,4V
-29,3V +/- 2,2V
5V +/- 0,25V
testpattern 1 (all segments and flags on)
pins 33-35 : -26V
pins 36-47 : -24V
+5V
pins 77-79 : -0.7V / 3,8V
LEDs: off / on
3,2V
5V
4,9V
3,7/3V
0,9V
0V
3,4V
5V
Use service testprogram: QUARTZ TEST
can be measured
f
o
5V/0V
5V
2V/0,6V
3,4V/0,1V
3,8V/0,2V
oscillator frequency
5V5V5V
***
UNLESS STATED OTHERWISE
. . . V
at this point.
5V
5V
5V
5V +/- 0,25V
5V typ.
5V
5V
0,1V/3,4V
4,9V
4,9V
0V
4,8V
5V5V5V
0V
0V
5V5V5V
5V
4,4V
0/5V
0/5V
5V
**
0/5V
0/5V
CD/CDR mode
5V
*
DC VOLTAGES MEASURED IN
STOP MODE
4,9V
2V/0,6V
2V/0,6V
EVM
( 12 MHz. divided to 1465 Hz. )
5V
5V
5V
-0,6V/2V
-0,6V/1,8V
5V
5V
5V
5V
-0,7V/3,8V
-0,7V/3,8V
0V
5V
0V
Communication
LEDs on / off
V
TEXT TOTAL TRACK TIME TOTAL REM
STEP
CD
RW
CD
RW
COMPILE CD TRACK PROG
RECORD IN PROGRESS
SHUFFLE REPEAT ALL EDIT
REC TRACK TIME
123456789
10 11 12 13 14 15 16 17 18 19 20 +
ANALOG
FINALIZE ALC
DIGITAL
OPTICAL
12
12
Page 43

7-67-6
2400 B7
2401 B8
2402 B8
2403 B7
2404 B8
2405 B8
2406 B7
2407 B8
2408 B8
2411 F5
2412 F5
2414 E4
2416 D8
2417 C4
2427 D4
2428 D4
2431 C7
2436 D1
2438 D4
2440 B1
2441 B1
2442 D3
3402 E1
3403 E4
3404 B8
3405 B8
3406 B8
3425 F5
3441 F5
3449 D7
3451 D8
3452 D7
3454 E4
3460 E7
3464 E4
3466 E5
3468 E5
3470 D8
3475 D4
3476 B7
3479 B7
3480 D5
3482 C6
3483 D5
3485 D5
3486 E5
3487 E6
3488 E6
3489 E6
3492 D6
3493 D7
3494 D7
3495 D7
3497 B1
3498 D5
3499 D6
3500 D6
3501 D6
3502 D6
3503 D7
3504 D6
3505 D7
3506 D7
3507 D7
3508 D4
3509 D6
3520 B1
3521 D2
3522 D2
3523 D3
3524 C3
3525 D2
3526 B1
3527 C3
3528 B1
3529 C3
3530 C3
3531 D3
3532 D2
3533 C3
3535 E1
3539 E6
3545 D3
4401 B7
4403 E4
4404 E4
4405 C2
7405 B7
7406 B8
7407 B8
7408 C2
7409 C3
7412 C5
7413 D2
7414 D3
1400 F5
1401 F8
1402 D9
1403 F1
1405 D1
1406 D4
2432 C7
2434 C8
2435 A9
2437 D1
2439 C3
2443 C2
3411 C8
3427 C9
3428 E7
3443 D3
3491 D7
3510 D3
3511 D3
3512 D3
3516 E2
3518 E2
3519 E8
3534 E8
3537 C9
3540 E7
5407 B7
5408 C1
6403 F8
6404 D6
6415 C3
6416 C2
7404 B5
7415 A1
9401 E8
9402 E8
9403 D8
9404 D8
9405 D8
9406 C8
9407 C9
9408 C7
9409 B6
9410 D7
9411 E6
9412 E6
9413 E6
9414 F6
9415 D4
9416 E3
9417 F3
9418 F3
9419 B2
9420 D1
9421 E1
9423 B2
9425 A9
FRONT CDR785 stage .5, 220200
1406
+D
+yP
-30V1+5V
+5Vst
TEXT TOTAL TRACK TIME TOTAL REM
STEP
CD
RW
CD
RW
COMPILE CD TRACK PROG
RECORD IN PROGRESS
SHUFFLE REPEAT ALL EDIT
REC TRACK TIME
12 3456789
10 11 12 13 14 15 16 17 18 19 20 +
ANALOG
FINALIZE ALC
DIGITAL
OPTICAL
12
12
g, a, d
-
B9
-
B16
31
30
B1
-
-
-
-
-
-
-
2 (optical)
1 (optical)
2 (digital)
1 (digital)
-
-
29
28
b
c
e
B10
B11
B13
B14
B15
(right)
(left)
(right)
(left)
;
14
13
12
;
22
5h
DISPLAY CONNECTION
-
B12
-
7
6
34 35 36 37 38 39 40 41 42 43 44 45 46 47 48
G15 G14 G13 G12 G11 G10 G9 G8 G7 G6 G5 G4 G3 G2 G1
a aaaaaaaaaaa
k kkkkkkkkkkk
b bbbbbbbbbbb
f fffffffffff
mmmmmmmmmmmm
g ggggggggggg
c ccccccccccc
e eeeeeeeeeee
r rrrrrrrrrrr
n nnnnnnnnnnn
p ppppppppppp
d ddddddddddd
1 3 5 8 10 11 13 14 16 17 19 20
2 469 -12-15-18-+
- -7---- -----
- --------
:
-
- ---
:
-----
S1
- -----------
- -----------
- -----------
- -----------
- -----------
FE STEP ; TEXT TOTAL TRACK TIME TOTAL REM REC TRACK TIME
............
h hhhhhhhhhhh
j jjjjjjjjjjj
25
24
16
9
10
19
20
27
21
8
Pin
15
26
11
17
18
22
23
-
EDIT
OPTICAL
DIGITAL
CD
R
W
ANALOG
ALC
ALL
REPEAT
SHUFFLE
PROG
TRACK
CD
COMPILE
CD
R
W
B8
B7
B6
B5
B4
B3
B2
32
P4
P3
P2
P1
P14
P13
P12
P7
P6
P25
P24
P16
P9
P10
P19
P20
P27
P21
P8
P15
P26
P11
P5
P17
P18
P22
P23
(top)
(top)
REC IN PROGR.
FINALIZE
G12
G13 G14
S1
B1 B2 B3 B4 B5 B6 B7 B8
B9 B10 B11 B12 B13 B14 B15 B16
G15
G10 G9 G8 G7 G6 G5 G4 G3 G2 G1G11
a
g
g
m
hjk
n
p
r
b
b
c
c
d
d
e
e
f
FRONT BOARD
copperside view
Page 44

7-7 7-7
G
CD1
to/from Front / Display Board 1402
STANDBY
CD_1
+5V
B
C
D
E
F
G
A
1
56
OPEN/CLOSE
A
B
23456
C
D
E
F
CD_2
REPEAT
CD2
PLAY/PAUSE
CD CHANGE
KEY BOARD LEFT
CD_3
CD TEXT
DISPLAY
1234
ON-OFF
LED_CON2
+5VST
LED_CON1
LED_CON0
KEY 0
ON/OFF SWITCH
SHUFFLE
CD3
STOP
6427
64321N4148
F478
3592
270R
3593
390R
3591
220R
1461
3590
150R
1460
6428
1466
1468
1469
F472
F471
3597
1K8
F479
F460
F469
6429
1N4148
6433
64301N4148
1N4148 6431
3589
1K
3594
560R
KEYKEY
1470
4
3
6
2490
100p
KEY
1464
SPPH43
1481
2
5
1
1463
3599
10K
1462
3598
3K9
3596
1K2
F480
5
6
7
8
9
F470
1480
FE-ST-VK-N
1
2
3
4
1465
3595
820R
F476
F477
F467
F468
F465
F466
F463
F464
F462
F475
F461
F473
F474
6426
3x LTG770-LM
LST770-KL
1467
Key Board left, 140300
1460 A5
1461 A5
1462 B5
1463 B5
1464 C5
1465 D5
1466 D5
1467 E5
1468 F5
1469 E5
1470 G5
1480 A1
1481 E2
2490 G4
3589 D2
3590 A4
3591 B4
3592 B4
3593 C4
3594 D4
3595 D4
3596 E4
3597 E4
3598 F4
3599 G4
6426 B3
6427 B3
6428 B3
6429 D2
6430 B3
6431 B3
6432 B3
6433 D2
F460 A5
F461 B5
F462 C5
F463 C5
F464 D5
F465 D5
F466 E5
F467 F5
F468 F5
F469 G5
F470 A2
F471 A2
F472 A2
F473 A2
F474 B2
F475 B2
F476 B2
F477 C2
F478 C1
F479 D1
F480 E1
2V/0,6V
LEDS on/off
no key pressed
5V
5V/0V
DC VOLTAGES MEASURED IN
STOP
MODE
UNLESS STATED OTHERWISE
. . . V
5V/0V
Power
on/off
5V
V
EVM
KEY BOARD left / componentside view
1460 A9
1461 B9
1462 C9
1463 A6
1464 B6
1465 A6
1466 B6
1467 C4
1468 C2
1469 C6
1470 D1
1480 A4
1481 B2
3590 A8
3591 B8
3596 C5
6430 B9
6431 B4
6432 B4
6433 B3
9460 A4
9461 B4
9462 B5
9463 C5
Key board left CDR785 stage .5, 310300
on/off
6426 6427 6428
3592
3595 3594 3593
3597
3598
3589
6429
3599
2490
KEY BOARD left / copperside view
6429 E3 6427 D9
6428 C9
3599 C1
6426 E9
3597 C4
3598 C3
3594 D6
3595 D5
3592 D6
3593 D6
2490 B1
3589 D3
on/off
Page 45

7-87-8
KEY BOARD right / componentside view
Key board right CDR785 stage .5, 150300
1430 A5
1440 A6
1441 A7
1442 A7
1443 A8
1444 A8
1445 B6
1446 D7
1447 D8
1448 C9
1449 D9
1450 A2
1451 A3
1452 B4
1453 C4
1454 C4
1455 C3
1456 C2
1457 A7
3632 B5
3633 B5
3636 C8
3637 B8
6417 B8
6418 B3
6419 A3
9451 A4
9452 A5
9453 C4
9454 C6
36253635
2483
3634
2482
3618 3619 3620 3621
2480
3626
3624
6422
3628 3629 3630
3612
3614
3631
3615
3613
3611
6435
6424
6425
6423
6436
3622
6421
2481
3623
6420
KEY BOARD right / copperside view
2480 C6
2481 E2
2482 D7
2483 D7
3611 C5
3612 C5
3613 C5
3614 C5
3615 C5
3618 E6
3619 E7
3620 E7
3621 E8
3622 C3
3623 D2
3624 C8
3625 C7
3626 C6
3628 D4
3629 D4
3630 C4
3631 C4
3634 D7
3635 D7
6420 E2
6421 C2
6422 D9
6423 B5
6424 B4
6425 B4
6435 B4
6436 B5
REC "LED"
JOG CONTROL
red
G
AUX
PROG.
YES STORE
blue: LB T776 K1-L1
green
red
TEXT
F
56
A
34
YES
KEY1
12
56
34
B
C
D
E
F
G
A
B
C
D
CDR
OPEN/CLOSE
CD > CD
COMPILE CD
LED CON 4
LED CON 5
12
LED CON 3
LED CON 7
LED CON 6
to/from Front / Display Board 1405
E
blue
TRACK EDIT
NO CANCEL
red
red: LS T770 K-L
green: LG T770 L-M
BALANCE
REC
"LED"
red
>>
KEY BOARD RIGHT
KEY2
CDR
AUX
blue
KEY
REC LEVEL
REC. TYPE
FINALIZE
ERASE
JOG_A
red
<<
JOG_B
6422
F513
3624
1K2
3619
220R
1452
F505
F506
F507
KEY
F512
F508
3637
KEY
D
1441
560R
470R
3633
F502
F503
3622
560R
1N41486419
150R
3615
390R
3621
150R3614
150R
3618
1449
+5V
220R
3629
D
2483
10n
F493
10K
3634
F490
F501
F489
1455
KEY
1456
10n
2482
1454
10K
3635
3K9
3626
F514
6435
6436
6423
6425
2480
6424
820R
100p
1N4148
1446
3623
1443
6418
+5V
1448
+5V
6420
F486
F488
1451
F500
1450
F495
F494
220R
220R
3613
220R3611
3612
1453
6421
KEY
F511
1442
3625
1K8
6417 1N4148
F499
F491
F498
820R
3636
F510
1445
100p
2481
1444
3628
150R
270R
3620
1447
1440
F492
1
10
11
12
2
3
4
5
6
7
8
9
F518
FFC
1430
F517
F515
F516
F497
F496
F487
+5V
D
D
F484
3630
270R
F485
2
3
MT145MT2
F509
3632
1457
EC16
1
390R
3631
470R
Key Boardright, 150300
1430 A1
1440 A6
1441 B6
1442 B6
1443 C6
1444 C6
1445 F6
1446 F6
1447 E6
1448 D6
1449 E6
1450 E5
1451 A5
1452 B5
1453 B5
1454 C5
1455 C5
1456 D5
1457 E2
2480 G5
2481 E4
2482 E3
2483 E2
3611 A2
3612 A2
3613 B2
3614 B2
3615 B2
3618 B5
3619 B5
3620 C5
3621 C5
3622 D4
3623 E4
3624 E5
3625 F5
3626 F5
3628 B4
3629 B4
3630 C4
3631 C4
3632 D3
3633 E3
3634 D3
3635 D2
3636 E5
3637 D5
6417 C2
6418 C2
6419 C2
6420 C3
6421 C3
6422 B3
6423 B3
6424 B3
6425 B3
6435 A3
6436 A3
F484 A1
F485 A1
F486 A1
F487 A1
F488 B1
F489 B1
F490 B1
F491 B1
F492 B1
F493 C1
F494 C1
F495 C1
F496 D2
F497 E2
F498 B4
F499 B4
F500 C4
F501 D4
F502 D4
F503 E4
F505 B6
F506 B6
F507 C6
F508 D6
F509 D6
F510 E6
F511 E6
F512 F6
F513 G6
F514 A3
F515 A3
F516 B3
F517 B3
F518 B3
LED types:
UNLESS STATED OTHERWISE
. . . V
V EVM
5V
5V
5V
5V
DC VOLTAGES MEASURED IN
STOP
MODE
LED CON 3 1,8V -0,6V
LED CON 4 2,0V -0,6V
LED CON 5 1,8V -0,6V
LED CON 6 0,1V 3,4V
LED CON 7 0,2V 3,8V
ON OFF
LED
5V
Page 46

7-9 7-9
HEADPHONE
AMPLIFIER
6
MICROPHONE
AMPLIFIER
9
F
C
MIC
HP
LEFT
RIGHT
45 7891011
12345 78 1011
A
B
G
A
INTERFACE BOARD
B
C
D
E
D
E
F
G
RIGHT
1304
Connection
to Cabinet
123
6
F614
LEFT
to / from
HEADPHONE / MICROPNONE BOARD
10K
F632
3663
22R
3674
3666
100R
2682
1n
4
2662
3n3
LM833D
7680-A
3
2
1
8
2672
470p
F611
F627
F623
3669
10R
2666
390p
3676
1K
3695-A
10K
2
13
MIC
F630
2696
47u
3697
470R
3677
1K
3668
10K
2683
2u2
3696
470R
3683
100R
3686
2K2
2674
4u7
F631
F624
F619
2687
390p
F603
FE-ST-VK-N
1690
1
2
3
4
5
6
7
8
F607
F622
MIC
1
2
3
3681
10K
F613
HLJ1540
1492
5
6
7
3671
4K7
3
2
1
8
4
NJM4556AM
7650-B
F629
NJM4556AM
7650-A
3689
10K
3678
1K
MIC
8600
3673
10K
MIC
F608
MIC
F615
F609
2688
390p
F628
2673
4u7
3667
10K
3690
10K
MIC
2690
1u
2686
3n3
3672
4K7
2681
1n
F604
F617
2680
100n
MIC
3
3682
10K
5
46
1491
HLJ1540
1
2
MIC
3661-B
10K
2684
2u2
3684
100R
2695
47u
F601
2685
3n3
MIC
LM833D
7680-B
5
6
7
MIC
F626
2689
1u
MIC
F625
MIC
MIC
F602
2661
3n3
F618
2668
47u
F616
MIC
MIC
3665
100R
47u
2663
F620
47u
2664
F605
F621
F606
2665
390p
3685
2K2
MIC
3664
22R
3687
100R
3675
1K
3688
100R
F610
F633
3670
6R8
F634
MIC
F612
5
46
2697
100n
2667
47u
3695-B
10K
3661-A
10K
2
13
-8V
+12V
HP_L
MIC_L
MIC_R
HP_R
2671
470p
-8V
+12V
-8V
+12V
Headphone/Microphone board CDR785, 100300
1491 A1
1492 D1
1690 A10
2661 C3
2662 B3
2663 C3
2664 A3
2665 C4
2666 B4
2667 A4
2668 B4
2671 C5
2672 A5
2673 C6
2674 A6
2680 B10
2681 G2
2682 E2
2683 F3
2684 E3
2685 G4
2686 E4
2687 G6
2688 E6
2689 G7
2690 E7
2695 D7
2696 F6
2697 B9
3661 B8
3663 C2
3664 A2
3665 C3
3666 A3
3667 C4
3668 B4
3669 A5
3670 B5
3671 D5
3672 B5
3673 C6
3674 A6
3675 C7
3676 A7
3677 C2
3678 B2
3681 G3
3682 E3
3683 G4
3684 E4
3685 G4
3686 E4
3687 G5
3688 F6
3689 G6
3690 E6
3695 F8
3696 D7
3697 F7
7650A A5
7650B C5
7680A E6
7680B G6
8600 C10
F601 A2
F602 B2
F603 A2
F604 A9
F605 A9
F606 A9
F607 A5
F608 A9
F609 A6
F610 A8
F611 A10
F612 A4
F613 A9
F614 B10
F615 B9
F616 B5
F617 B5
F618 C6
F619 C8
F620 C2
F621 C4
F622 C5
F623 D6
F624 E2
F625 E4
F626 E2
F627 E7
F628 E8
F629 E6
F630 E6
F631 G5
F632 G7
F633 G8
F634 G6
MIC LEVEL
HEADPHONE
LEVEL
0V
0V
0V
0V
0V
-8,4V
-6,4V
0V
0V
0V
0V
0V
0V
10V
12V +0,6V/-1,2V
-8,4V +/- 0,8V
DC VOLTAGES MEASURED IN
STOP
MODE
UNLESS STATED OTHERWISE .
. . . V
V
EVM
12V
0V
Page 47

7-107-10
HEADPHONE / MICROPHONE BOARD / componentside view
Headphone/Microphone board CDR785 stage .5, 100300
MIC HEADPHONEMIC LEVEL HEADPHONE LEVEL
1491 B6
1492 B1
1690 B10
2663 B8
2664 A6
2667 A9
2668 B9
2673 A8
2674 B8
2683 A2
2684 A2
2689 A3
2690 A3
2695 A5
2696 B3
3661 B7
3669 A9
3670 B10
3695 B2
3696 A6
3697 A4
8600 A10
HEADPHONE / MICROPHONE BOARD / copperside view
Headphone/Microphone board CDR785 stage .5, 100300
MIC AMP.
HEADPHONE AMP.
2682
3682
3681
2681
4603
4605
4604
3689
3677
2661
3663
3664
3678
2662
3675
3672
3671 3674
2680
4601
3684
3683
3686 2686
2688
2685
2687
7680
7650
3688
3690
3685
3687
3665
3666
3676
3673
2666
2672
2697
3668
2671
2665
3667
4606
2661 A5
2662 A6
2665 B8
2666 A8
2671 B8
2672 A8
2680 A10
2681 B1
2682 A1
2685 A5
2686 A4
2687 B4
2688 A5
2697 A10
3663 B5
3664 B5
3665 A5
3666 B6
3667 B9
3668 A8
3661 B8
3672 A8
3673 B8
3674 A8
3675 A7
3676 B6
3677 A5
3678 A6
3681 B1
3682 A1
3683 B4
3684 A3
3685 B5
3686 A4
3687 B5
3688 A5
3689 B4
3690 A5
4601 A2
4603 A2
4604 A3
4605 A2
4606 B7
7650 A8
7680 A4
Page 48

7-11 7-11
LL
LH
HL
HH
L
H
L
H
LOGIC
LSBMSB
LL
LH
HL
HH
IR
-F
+F
-30V
+5V
+5V ST
uP-CLOCK
DQSY
SRDT
KILL R
EBU GND
EBU OUT
KILL L
PORE
EBU_OUT
SHIELD
SHIELD
EBU GND
EBU GND
ANA SW 0
ANA SW 1
ANA SW 2
MUTE
FRONTBOARD 1401
to/from
D GND
from SUPPLYBOARD
-30V
+F2
-F1
+5V EVER
SUPPLY ON
to/from
CD-CHANGER MODULE
D GND
SUPPLY ON
DIG SW 0
DIG SW 1
3399
F390
F391
0050
1
2
10K
-t
Interf.Board
analog part
FAN CONTROL
CD R/W MODULE
18
17
1303
10
11
12
1302
from FRONTBOARD
from/to
DIG. OUT
DIG. IN
from CD-CHANGER
EBU IN
OPTICAL IN
KILL to
Interf.Board
analog part
to
DIG SW 2
LOGIC
DIG SW 0
0CD
CD R/W1
EBU_OUT_CDR
16
DIG SW 1
00CD
OPT
+12V
+12V
D GND
SILD
DATA
SICL
SHR CLK
SHR STR
SW INFO
+5V
right
GND A
left
D_GND
to
Interf.Board
analog part
DIG SW 2
DIPMATE
1234
DIG_SW_0
DIG_SW_0
DIGITAL IN-SELECTOR
DIGITAL OUT-SELECTOR
EBU_OUT_CD
LOGIC
mounted on bottom cabinet
NC
D GND
D GND
+5V
-8V
to Fan
Temperature Sensor
INTERFACE BOARD /digital part
SOURCE
SOURCE
to Mute Control
(Analog part)
B
C
D
E
F
G
12 13 14
A
678
DIG
GND
10
01
11
to/from
GND
10V
FRONTBOARD 1400
D_GND
56789
EBU_IN_CDR
I
DIG_SW_0
p for PROVISION ONLY
+3V
q
q
q
q
q
HH
I
A
B
C
9101112345
10 11 12 13 14
D
E
F
G
DIGDIG
YKC21-3421
1312-B
5
4
3
DIG
SCN
DIG
DIG
SCN
DIG
DIG
3373
DIG
ANA2
DIG
150R
Y0
13
Y1
14
Z
100R
3374
Y1
1
Z
15
7303-A
HEF4053BP
6
E
11
S
16
Vdd
7
Vee8Vss
12
HEF4053BP
7303-B
E
6
S
10
Vdd
16
Vee7Vss
8
Y0
2
6
E
S
9
Vdd
16
Vee7Vss
8
Y0
5
Y1
3
Z
4
6373
BZX79-B3V3
HEF4053BP
7303-C
DIG
220R
3316
1K
3313
DIG
2305
100n
DIG
3363
100R
ANA2
10K
3379
F364
DIG
ANA2
3408
470R
DIG
DIG
ANA2
7371
BC547B
ANA2
2355
1u1u
2354
DIG
3365
1K
10K
2352
100n
3366
DIGANA2
2353
100n
ANA2
47u
2307
ANA2
F350
3370
22R
1312-A
YKC21-3421
5
2
1
DIG
470R
3400
DIG
3406
68K100K
3405
10K
3300
150p
56K
3329
DIG
3307
560R
2313
1n
2310
DIG
DIG
DIG
DIG
EBU2
1K
33021K
3301
EBU2
2350
10K
3318
100u
100u
2351
3364
220R
100R
3305
3402
100K
100n
2301
100K
3420
F324
100n
2302
F313
F325
F332
F326
F334
F335
F329
F337
F338
F336
F333
F349
F347
F348
F352
100u
2400
F339
F351
100u
100R
3359
2401
3358
7
8
9
390R
19
2
20
21
22
23
3
4
5
6
1
10
11
12
13
14
15
16
17
18
1303
BC847B
7341
EBU2
3320
150R
3319
150R
100u
3340
15K
7340
2340
EH-B
1308
1
2
3334
47K
BC857B
DIG
F301
F303
F307
F305
F304
F309
F306
F302
F310
F316
F312
F317
F320
F321
F315
F322
F323
F314
DIG
9
DIG
14
15
16
2
3
4
5
6
7
8
FE-BT-VK-N
1302
1
10
11
12
13
2392
DIG
DIG
470u
2391
470u
11
2
3
4
5
6
7
8
9
DIG
EH-B
1305
1
10
DIG
1309
EH-B
1
2
DIG
470u
2390
9
ANA1 ANA2
10
11
12
2
3
4
5
6
7
8
DIG
FE-BT-VK-N
1301
1
F356
DIG
F358
3309
1K
DIG
F362
F359
F355
F363
F366
F368
F369
DIG
F370
F367
ANA1
EBU2
7
14
8
DIG
EBU2
DIG
7301-D
74LVU04D
9
DIG
DIG DIG
DIG
DIG
DIG
DIG
3312
39R
DIG
DIG
220R
3303
1
2
34
6
3306
470R
3311
2K2
5301
6RG
4
5
6
47R
3317
1
7
14
2
EH-B
1307
1
2
3
74LVU04D
7301-A
10
3308
7301-E
74LVU04D
11
7
14
5
7
14
6
3K3
2
1
3
3310
100K
74LVU04D
7301-C
3304
1K
GP1F32R
6304
9
VDD
16
7
VEE
8
VSS
2311
100n
HEF4052B
7302
1
10
11
12
13
14
15
23
4
5
6
47R
3367
2309
100n
2312
100n
SCN
DIG
1u
2303
3
7
14
4
DIG
100n
2304
13
7
14
12
74LVU04D
7301-B
+5V
+5V
+5V
+3V3
DIG
7301-F
74LVU04D
DIG_IN
EBU_OUT_CD
EBU_OUT_CD
+5VD
+5VD
+5VD
KILL_OFF (CDR)
+5VS
DIG_OUT
+5VD
+5VD
V_AMP+
V_AMP-
V_AMP1-
-8V
+12V
V_AMP1+
+IC
+12V
+IC
+IC
+IC
+IC
+IC
+IC
DIG_SW_2
DIG_SW_1
+5VD
CD_PORE
CD_DATA
CD_DATA
CD_TXT_CLK
CD_TXT_CLK
CD_TXT_DQSY
CD_TXT_DQSY
CD_TXT_IN
CD_TXT_IN
EBU_OUT_CDR
EBU_IN
+12V
+5V
CD_R
CD_L
CD_SW_INFO
CD_SW_INFO
CD_SH_STR
CD_SH_STR
CD_SH_CLK
CD_SH_CLK
CD_SICL
CD_SICL
CD_SILD
CD_SILD
CD_PORE
MUTE
-30V
-30V
+F+F
+12V +12V
SUPPLY_ON
SUPPLY_ON
-F
-F
+5V_ST
+5V_ST
+IC
+IC
OPT_IN
+5V
DIG_SW_0
KILL_R
EBU_OUT_CD
KILL_L
DIG_SW_0
DIG_SW_1
DIG_SW_2
ANA_SW_0
ANA_SW_1
ANA_SW_2
Interface Board / Digital part, 130300
1301 G1
1302 G5
1303 F3
1305 G7
1307 C13
1308 G11
1309 H14
1312A E13
1312B C1
2301 B10
2302 E7
2303 G9
2304 G9
2305 B1
2307 H14
2309 C1
2310 E11
2311 E12
2312 E12
2313 E12
2340 H13
2350 I10
2351 H10
2352 I12
2353 I13
2354 I13
2355 I13
2390 I8
2391 H8
2392 G8
2400 H9
2401 I9
3300 B12
3301 A2
3302 A2
3303 G9
3304 A2
3305 B11
3306 G9
3307 E11
3308 D2
3309 D2
3310 D5
3311 D9
3312 E13
3313 G13
3316 F10
3317 C1
3318 C10
3319 G13
3320 G12
3329 C5
3334 I12
3340 H12
3358 H9
3359 I9
3363 I10
3364 H10
3365 G12
3366 I13
3367 B2
3370 G13
3373 F8
3374 F9
3379 G12
3400 E8
3402 C11
3405 D5
3406 C5
3408 B2
3420 B11
5301 E12
6304 D1
6373 F9
7301A D11
7301B D11
7301C C11
7301D E11
7301E E10
7301F F11
7302 B9
7303A D6
7303B E6
7303C C6
7340 G12
7341 H13
7371 H13
F301 F2
F302 F2
F303 G2
F304 G2
F305 G4
F306 G3
F307 G4
F309 G4
F310 H3
F312 H3
F313 H3
F314 H3
F315 H3
F316 H3
F317 I3
F320 I4
F321 I4
F322 I3
F323 I4
F324 G6
F325 G6
F326 G6
F329 H6
F332 H6
F333 H6
F334 H6
F335 I6
F336 I6
F337 I6
F338 I6
F339 I6
F347 H8
F348 H8
F349 H7
F350 H14
F351 G12
F352 I14
F355 C13
F356 C13
F358 C13
F359 C7
F362 A9
F363 C1
F364 D1
F366 B1
F367 B1
F368 D10
F369 E13
F370 E13
1,4V
1,4V
1,4V
5V
5V +/- 0,25V
-7,1V
5,6V
5V +/- 0,25V
0/3,4V
5V
5V
4,8V
0,9V
4,5V
12V +0,6/-1,2V
2,7V
5V
5V
5V
5V
5V
5V
5V
5V
5V
1,2V
0,3V
0,3V
1,2V
0,4V
5V
5V
DC VOL TAGES MEASURED
IN
STOP
MODE UNLESS STATED
OTHERWISE
. . . V
V EVM
0V
4,1V
0V
0/3,4V
0,3V
3,4V
2,7V
1,2V
0,3V
3,8V
4V
4,5V
3,8V
1,2V
1,4V
3,3V
5V
2,7V
10V
-8,4 +/- 0,8V
-7,1V
12V +0,6/ -1,2V
Fan switched off/on
11,7/11,3V
12V
0V/12V
0V/8,9V
11,8V/10V
0V/8,2V
12V/10,5V
0V/7,5V
4,1V +/- 0,4V
-29,3V +/- 2,2V
5V +/- 0,25V
4,4V
0,3V
2,3V
0V
5V
0V
3,8V
5V
Page 49

7-127-12
INTERFACE BOARD / componentside view
Interface Board CDR785 stage .5, 160300
OPTICAL IN
DIGITAL IN/OUT ANALOG IN/OUT
1301 D10
1302 E7
1303 E10
1304 E14
1305 D5
1306 E16
1307 C1
1308 E12
1309 D16
1311 B7
1312 B5
2303 B3
2307 C16
2331 B13
2332 B13
2333 B6
2334 B8
2340 E11
2350 B11
2351 B11
2361 C10
2362 B10
2371 D14
2372 E13
2390 B4
2391 C4
2392 E4
2400 D14
2401 E15
3317 C2
3335 D9
3336 D10
3348 C7
3352 C7
3353 C9
3354 B8
3357 B14
3358 E15
3359 E15
3363 B11
3364 B12
3370 B16
3380 D6
3381 D6
3383 D16
3384 D15
5301 B3
6304 B2
6325 D5
6326 D6
6370 D12
6371 D7
6372 D7
6373 C6
7302 C3
7303 D3
7320 D14
7321 C15
7371 D16
9301 D2
9302 C3
9303 E4
9304 D4
9305 C5
9306 D5
9307 E5
9309 D7
9310 C13
9311 B12
9312 C16
9313 C16
9314 E15
9316 B15
9319 D10
9320 E8
9321 E9
9322 C10
9323 D10
9324 D11
9325 D11
9326 D9
9328 D6
9329 E5
9330 E7
9331 E6
9332 E5
9333 E9
9334 D7
9335 D8
9350 D2
9353 D12
9355 D12
9359 B9
9360 B10
9361 C9
9362 D9
9363 C8
9365 E9
9371 D10
9372 D11
9373 C11
9374 C12
9375 B10
9376 E5
9378 E9
9379 D9
9380 E6
9381 E6
9382 E4
9383 C13
9384 C12
9385 C2
9386 C8
9387 E16
INTERFACE BOARD / copperside view
Interface Board CDR785 stage .5, 170300
2238 C13
2301 C2
2302 A1
2304 A2
2305 D5
2309 D1
2310 D3
2311 D3
2312 D4
2313 D4
2321 C16
2322 C13
2325 B15
2327 D15
2330 D13
2335 C13
2352 A12
2353 C16
2354 B16
2355 B16
2365 C9
2366 D10
2367 D10
2368 D9
2373 B11
2374 A14
2375 B14
2376 A13
2377 A14
2378 A13
2379 B12
2380 B13
2385 A16
2386 B15
2388 D14
2396 C15
2397 D16
2398 C14
2399 C15
3300 C2
3301 B3
3302 B3
3303 B3
3304 A4
3305 C2
3306 B2
3307 D3
3308 D1
3309 D1
3310 A3
3311 D3
3312 D4
3313 A12
3314 A15
3315 A16
3316 B9
3318 C2
3319 A12
3320 A12
3321 D16
3322 C16
3323 C15
3324 C15
3325 D15
3326 C13
3327 D15
3328 C14
3329 A2
3330 C5
3331 D14
3333 B12
3334 A12
3337 D15
3338 C15
3339 C13
3340 B11
3341 D13
3342 D14
3343 C13
3344 D13
3345 D13
3346 D13
3347 C6
3349 C6
3350 C7
3351 C6
3355 C5
3356 C6
3361 C14
3362 C15
3365 A12
3366 C16
3367 D5
3369 D9
3371 B13
3372 A13
3373 B7
3374 B6
3375 B14
3376 A13
3377 B14
3378 B13
3379 A12
3385 B16
3386 B15
3387 A14
3388 A13
3391 B16
3392 B15
3393 C14
3394 C15
3395 C14
3396 C15
3397 B8
3398 B12
3400 B1
3402 D2
3405 A2
3406 A3
3407 C5
3408 D5
3409 D10
3420 C3
4303 A3
4304 A13
4305 A15
4307 A13
4308 B15
4309 A13
4310 A16
4311 A13
4312 C11
4314 C1
4316 A2
4317 C2
4318 B3
4319 C3
4321 A4
4323 A4
4324 A7
4325 A2
4326 C3
4327 B8
4328 D12
7301 C2
7322 B13
7323 D10
7324 D14
7325 C6
7326 C7
7327 C6
7328 C7
7329 C6
7330 C6
7331 C5
7332 C6
7335 A14
7336 A16
7340 A12
7341 A12
7370 B8
6-fold INVERTER
OPTICAL IN DIGITAL IN/OUT ANALOG IN/OUT
4-fold SWITCH
MICROPHONE
AMP.
ANALOG OUT
AMP.
ANALOG IN
BUFFER
RECORDING
BUFFER
6
18
916
18
916
1
13
1307
7302
7303
11
1
1
2
15
16
1305
1302
1
2
11
12
1301
1
2
7
8
1304
7320
7321
1
12
2
23
22
1303
1308
12
1309
15
24
1306
916
18
916
18
6304
1253
4
1
2
6
5
1312 1311
Page 50

7-13 7-13
LL
LH
HL
HH
L
H
L
H
LOGIC
LSBMSB
LL
LH
HL
HH
LL
LH
HL
HH
L
H
L
H
LOGIC
LSBMSB
LL
LH
HL
HH
1690
15
LOGIC
MUTE
ANALOG OUT
from
+3V3
123456789101112
12
FRONT/DISPLAY BOARD
CD R/W
1087
V_AMP1+
V_AMP1-
ANALOG IN
BUFFER
SOURCE
SOURCE
1401
LOGIC
HP L
0
ANA SW 1
14
HEF4066BT
from DIG PART
MIC_R
CD L
MICROPHONE AMPLIFIER
8
1
(digital part)
from 7003/15
(CDR)
CD CHANGER
MUTE CONTROL
1
CD
to/from CD R/W module
14
CD L
-
GND
LINE IN
MIC R
MIC GND
1
R
INTERFACE BOARD /analog part
ANA IN LEFT
R
1302
1303
0
1303
7
from
CD R
+12V
L
1302
CD_R
STEREO
1
ANALOG OUT AMPLIFIER
to/from HP-MIC BOARD
DIG SW 0
MIC L
to 1304
ANALOG SELECTOR
L
VCC
CD changer module
-8V
A GND
0
13
3
ANA OUT LEFT
from
MONO/
RECORDING BUFFER
ANA IN RIGHT
1302
0
VDD
MIC_L
1
16
ANA OUT RIGHT
ANA SW 0
RECORDING SELECTOR
0
0
10
15
19
13
123456
HP R
1
9
to 1304
11 12 13
A
B
C
D
E
F
G
H
I
A
A GND
ANALOG IN
CD
1302
1302
MUTE
B
C
D
E
F
G
H
I
100K
3407
470p
2376
10K
3355
ANA1
ANA1
7329
BC857B
3381
10K
3380
10K
5
6
7
8
4
3392
1M
ANA1
LM833D
7336-B
F378
10u
2332
ANA1
10u
2361
ANA1
YKC21-3699
1311-B
6
4
5
7325
BC817-25
ANA1
100n
2368
3344
47K
3K3
3339
3322
6K8
2n2
2377
F383
F371
47K
3362
3398
10K
100R
10u
2362
6K8
3321
3346
ANA1
47K
3409
ANA1
1K
3353
F377
F387
F374
2386
100n
ANA1
8K2
3328
100n
2322
100n
2379
7335-A
LM833D
3
2
1
8
4
3
2
1
8
4
ANA2
220p
2397
LM833D
7324-A
3n3
2333
BC817-25
7327
11
12
13
14
15
2
3
4
5
6
9
16
VDD
7
VEE
8
VSS
2367
100n
7320
HEF4052B
1
10
BC817-25
2K2
3378
7328
HEF4066BT
7322-D
12
14
7
1110
ANA2
ANA1
ANA1
2K2
3351
2K2
3323
560p
2396
3371
100R
2385
100n
1K
3335
ANA1
ANA1
ANA1
3331
3K3
3385
10K
ANA1
ANA1
ANA1
ANA1
ANA1
8K2
3326
470p
ANA2
ANA1
2375
ANA1
10u
10u
2372
F375
2331
ANA2
2K2
3324
ANA1 ANA1
ANA1
3347
2K2
ANA1
3384
4K7
FE-ST-VK-N
1
2
3
4
5
ANA1
1306
5
147
4
3
ANA1
ANA1
ANA1
HEF4066BT
7322-B
4K7
3383
ANA1
3357
1K
3314
47R
3349
100R
3315
47R
10K
3342
330p
2366
3
2
1
8
4
2K2
3352
2325
100n
LM833D
7323-A
100R
3350
2398
220p
8K2
3393
3369
47K
2378
2n2
10K
3356
ANA1
1N4148
6326
10K
3376
ANA1
ANA1
ANA1
100R
3345
BC857B
7332
FE-ST-VK-N
1
2
3
4
5
6
7
8
ANA1
ANA1
1304
ANA1
LM833D
7323-B
5
6
7
8
4
6372
1N4148
ANA1
4
ANA1
3330
100K
LM833D
7324-B
5
6
7
8
10u
2371
ANA1
ANA1
3396
8K2
ANA1
1N4148
6370
ANA1
BC857B
7330
1K
3388
2K2
ANA1
ANA1
47K
3343
3377
1K
3336
3397
68K
7331
BC857B
3341
10K
100R
3372
6
14
7
89
3
1
2
HEF4066BT
7322-C
ANA1
3325
8K2
YKC21-3699
1311-A
100n
2321
ANA1
2327
100n
3333
1K
2330
2335
100n
100n
2238
100p
47K
ANA1
F372
3354
1K
3361
ANA1
3394
8K2
ANA1
2K2
3348
100n
2373
2388
100p
8K2
3327
6371
1N4148
3337
1M
2334
3n3
BC817-25
7326
4
5
6
916
VDD
7
VEE
8
VSS
1
10
11
12
13
14
15
2
3
4
ANA1
ANA1
ANA1
7321
HEF4052B
F382
LM833D
7335-B
5
6
7
8
ANA1
ANA1
10K
3375
1K
3387
ANA1
ANA1
ANA1
F381
F380
F379
10K
3386
ANA1
ANA1
680R
1M
3338
100n
2380
2374
7336-A
LM833D
3
2
1
8
4
8K2
3395
F386
F376
3391
1M
ANA1
2365
330p
ANA1
7370
BC857B
13
14
7
1
2
6325
1N4148
7322-A
HEF4066BT
ANA1
2399
560p
KILL_OFF
-8V
+5VS
Analog_Rec_R
ANA2
-8V
+12V
CD_R-W_Analog_L
CD_R-W_L
LINE_IN_L
CD_L
CD_R
Analog_Rec_L
V_AMP1-
+5VS
+5VS
-8V
-8V
+5VS
+5VS
V_AMP-
+5V
V_AMP+
-8V
KILL_R
KILL_L
-8V
-8V
MIC_R
MIC_L
HP_R
HP_L
ANA_SW_1
V_AMP1-
+5VS
V_AMP+
V_AMP-
V_AMP+
ANA_SW_2
V_AMP-
V_AMP+
-8V
V_AMP+
+5V
CD_R-W_Analog_R
DIG_SW_2
V_AMP-
-8V
V_AMP-
V_AMP1+
DIG_SW_0
+5VS
HP_L
+3V3
CD_R-W_R
MUTE
V_AMP1+
V_AMP1+
V_AMP1-
HP_R
V_AMP1-
-8V
+3V3
V_AMP1+
LINE_IN_R
ANA_SW_0
Interface Board / Analog part, 160300
1304 G13
1306 H1
1311A A13
1311B D1
2238 B8
2321 E5
2322 H6
2325 A6
2327 D7
2330 A8
2331 A9
2332 C9
2333 A11
2334 C11
2335 A8
2361 C4
2362 E4
2365 D2
2366 E2
2367 D3
2368 E3
2371 F10
2372 I10
2373 H12
2374 E11
2375 F10
2376 I11
2377 F12
2378 I12
2379 H11
2380 F11
2385 F3
2386 G3
2388 D8
2396 C1
2397 A5
2398 B5
2399 B2
3314 G2
3315 I2
3321 A1
3322 C1
3323 B1
3324 C1
3325 A5
3326 B5
3327 A5
3328 B5
3330 E12
3331 D8
3333 I8
3335 E7
3336 E7
3337 B8
3338 C8
3339 B8
3341 B8
3342 C8
3343 A9
3344 C9
3345 A9
3346 C9
3347 A9
3348 D9
3349 A10
3350 C10
3351 A10
3352 D10
3353 D2
3354 E2
3355 B11
3356 E11
3357 A7
3361 D4
3362 E4
3369 D2
3371 F10
3372 I10
3375 F10
3376 I11
3377 F11
3378 I11
3380 B12
3381 D12
3383 H7
3384 H7
3385 H7
3386 I7
3387 F12
3388 I12
3391 H3
3392 G4
3393 G5
3394 F5
3395 G5
3396 F5
3397 H9
3398 H10
3407 B12
3409 E2
6325 A12
6326 D12
6370 I8
6371 C12
6372 B12
7320 F6
7321 A6
7322A F13
7322B G11
7322C F9
7322D I9
7323A C3
7323B E3
7324A A8
7324B C8
7325 A10
7326 C10
7327 A10
7328 C10
7329 A11
7330 D12
7331 A12
7332 C12
7335A I10
7335B F10
7336A G3
7336B H3
7370 H10
F371 E1
F372 E1
F374 H1
F375 H1
F376 H1
F377 I1
F378 D2
F379 A13
F380 A13
F381 H13
F382 A13
F383 G13
F386 H13
F387 H13
from
FRONT/DISPLAY
BOARD 1401
from
FRONT/DISPLAY
BOARD 1401
. . . V
0V
10V
5V
EVM
-7,1V
5V +/- 0,25V
3,3V
5V
5,6V
-8,4 +/- 0,8V
-7,1V
5V
-8,4V
10V
-7,1V
0,7V
0V
3,3V
2,6V
3,2V
0V
-8,7V
5V
-7,1V
5,6V
5V
0V
-8,4V
-8,2V
-7,1V
5,6V
0,7V
0V
0V
3,3V
2,6V
0V
0V
0V
-8,4V
0V
-8,7V
5V
0V
-8,4V
0V
0V
0V
0V
-8,2V
5V
5V
0V
0V
0V
3,3V
3,3V
2,6V
2,6V
3,2V
DC VOL TAGES MEASURED IN
STOP
MODE
UNLESS STATED OTHERWISE
0V
V
5,6V
-7,1V
10V
-7,1V
0V
0V
0V
0V
0V
0V
5V
0V
0V
0V
0V
0V
0V
5V 5V
-8,4V
0V
0V
0V
0V
0V
0V
10V
-7,1V
0,7V
0V
0V
0,7V
0V
0V
0V
0V
5,6V
-7,1V
0V
0V
0V
5,6V
-7,1V
0V
0V
Page 51

8-18-1
TABLE OF CONTENTS
Dismantling Hints...............................................................8-1
Service Hints .....................................................................8-2
Lubrication Instructions ...........................................8-2 to 8-3
ESD Warnings..................................................................8-3
Blockdiagram.....................................................................8-4
Wiring ................................................................................8-4
Circuit Diagram part1.........................................................8-5
Component Layout ...........................................................8-6
Circuit Diagram part2.........................................................8-7
Exploded View.........................................................8-8 to 8-9
Mechanical Partslist...........................................................8-9
Electrical Partslist ..........................................................10-15
3CDC99-DS Module
(3 Disc Carousel Changer)
Dismantling Hints
A
C
B
B
D
E
Dismantling of Drawer
→ A Pull drawer outwards
→ B Unlock drawer with screwdriver
→ C Lift drawer to demount from chassis
Dismantling of Flex Plate
→ D Lift plate to unlock pin from bottom plate
→ E Move plate inwards to demount from bottom plate
Page 52

8-2 8-2
Replacement of CD Drive
See also exploded view of changer mechanism.
1.Dismantle printed circuit board: remove 5 screws.
2.Disconnect flexfoil cable and JST connector.
Pay attention to WARNING!
3.Loosen 2 screws (pos 107,108) and remove CD drivelockings (pos 105,106).
4.Turn gearwheel (pos 42) of disc change mechanism by
finger to move CD drive support in upper position as
shown in picture below A.
5.Dismantle CD drive support (pos 95) B.
6.Replace CD drive (pos 100). The wire tree of JST
connector has to be desoldered and resoldered on the
new CD drive again.
Service Hints
A
B
Mounting of Carousel
1.Turn gearwheel (pos 42) of disc change mechanism by finger until CD drive is in play position.
2.Mount carousel (pos 115) so that disc is positioned right on turntable. Carousel position number doesn´t matter.
Lubrication Instructions
Grease
Grease inside grove
Grease on top of rib
Grease
Grease on top
of highest ring
Grease on four
rectangular surfaces
Grease inside
groves
Grease on slide
Grease on four
profile groves
CHASSIS
DRAWER
Page 53

8-38-3
Grease
DRAWER MECHANISM
DISC CHANGE MECHANISM
Grease
Grease
Grease on first
and last tooth
Grease on first
and last tooth
Use only grease Polylub GLY 801 service codenumber 4822 390 10136
Service Position
The following steps have to be done when replacing the CD mechanism:
1. Disconnect flexfoil cable from old CD drive
2. Put a paper clip onto the flexfoil cable to short-circuit connections (fig.1)
3. Remove old CD drive
4. Remove paper clip from flexfoil cable
5. Connect flexfoil cable to new CD drive
6. Position new CD drive on its studs
7. Remove soldered short-circuit from Laserunit (see below)
CHARGED CAPACITORS ON THE SERVO BOARD MAY DAMAGE THE CD DRIVE ELECTRONICS WHEN
CONNECTING A NEW CD MECHANISM. THAT´S WHY, BESIDES THE SAFETY MEASURES LIKE
• SWITCH OFF POWER SUPPLY
• ESD PROTECTION
ADDITIONAL ACTIONS MUST BE TAKEN BY THE REPAIR TECHNICIAN.
WARNING
fig.1
Attention: The laser diode of this CD drive is protected against ESD by a solder joint which shortcircuits the laser
diode to ground.
For proper functionality of the CD drive this solder joint must be removed after connecting the drive to
the set.
Lubrication Instructions
Page 54

8-4 8-4
CD Text
LC89170M
EXCK
SBSO
SCOR
WFCK
MCK
SRDT
DQSY
SCLK
RCK
SUB
SBSY
SFSY
CL11
7876
DQSY
21
13
SRDT
22
12
µP_CLK
20
11
DATA
SDA
VCC
KILL DOBM
1805
D1-D5
D2-D4
7807
7806
7871
7873
TDA7073A
TDA7073A
TDA7073A
HEF4094BT
TTM +
TTM -
MOT2
LD ON
LD
MON
CD R/W
HF IN
V1
D1
D2
D3
D4
R1,R2
MOT1
SLEDGE -
SLEDGE +
RAD -
RAD +
FOC -
FOC +
+5V
+10V
+10V
SHR_CL
SHR-STR
REGISTER
SHIFT
SERVO - DECODER
CD10
SAA7324 (SAA7325)
D/A
Converter
PCM1716
MOTOR
TRAY MOTOR
CARROUSEL
CD DRIVE UP/DOWN SWITCH
1881
1880
TRAY SWITCH
1882
7874
Level converter
CD POS.1 SWITCH
SL
O7
O6
O5
OO
VDD
+10V
O1
O2
O3
RA
FO
DIODES
PHOTO
D3D2
D5D1
D4
INNER SWITCH
SWITCH INFO
LASER &
MONITOR
DIODE
TURNTABLE
MOTOR
DISC
CD MECHANISM
FOCUS
MOTOR
RADIAL
MOTOR
SLEDGE
MOTOR
MOTOR
TURNTABLE
PHOTODIODE & HF AMPLIFIER - LOADER CONTROL PCB
EN1
DATA
STB
SHR_CL
SICL
SILD
PORE
7878
MC78L05ACP
7875
7801
+3,3V
CD LEFT
7810
7877
CD RIGHT
Laser Control
&
HF AMPLIFIER
TZA1024 (TZA1025)
55
54
56
38
13
18
20
21
23
2
1
5
3
27
29
26
28
10
12
14
13
SWITCH INFO
17
5
9
7
16
15
16
42
40
39
5,17,21,52,57
59
60
64
1
13
+5V
2
4
5
7
V4
61
2
63 513234
10
11
6,14
11
12
15
2
1
3
16
13
4
5
6
7
5V1
+5V
+3,3V
KILL R
KILL L
EBU OUT
SCL
SILD
SLCK
CL16
DATA
WLCK
PORE
Blockdiagram 3CDC99-DS 2000-02-17
Closed if carrousel is in Position 1.
Closed if the tray is in one endposition.
Open during movement.
SERIAL INTERFACE
D/A
D/A
WCLK
DATA
SCLK
CL16
8,9,15
V
t
VDD (pin 16)
EN1 (pin 15)
Power on
CONNECTED VIA FLEXFOIL 8001 TO SET
Blockdiagram Wiring of CD Drive
Pict. 1
Pict. 2
8005
Page 55

8-58-5
SER. DATA
LOOPBACK
INTERF.
KILL
TIMING
BITSTREAM DAC
SER. DATA
INTERFACE
VERSAT.
INTERF.
EBU
INTERF.
CORR.
ERROR
CONTROL
FUNCTION
PRE-
PROCESSING
AUDIO
PROCESSOR
MICROCONTROLLER
INTERFACE
SUBCODE
PROCESSOR
ADDR
SRAM
PEAK
DET.
MOTOR
CONTROL
OUTPUT
STAGES
DIG.
PLL
EFM
DEMOD
VERSATILE
INTERFACE
ADC
VREF GEN.
FRONT
END
+
-
+
-
VDD
+
-
+
-
VDD
2x
4x
1x
V/I
V/I
Vgap
part 2
D3 (CD10)
HF-Amplifier
(CD-TEXT IC)
T-
SLIDE
to DAC (7810)
D2
F-
on
D5
D4
(uP-interface)
VCC
TRACK
#
R2 (CD10)
Servo driver
D2 (CD10)
LD
TRACK
VREF
D
dig. out circuitry
on
to
DISC
D
+
D4 (CD10)
_
VAM2202
Laser power control
Signal Processor
D1
to
D1
3CDC-mainboard
part 1
DISC
GND
D2
D4
(Quartz used)
GND
D
D5
on
CD Drive
T+
FOCUS
D
D5
FOCUS
D1
D
sheet 2
TRACK
Motor Driver
to
#.... for provision only
part 2
F+
D3
MON
D
7876
+
SLIDE
1805
D3
123456789101112131415
123456789
L
D1 (CD10)
+
10 11 12 13 14 15
A
B
C
D
E
F
G
H
A
B
C
D
E
F
G
H
D
D3
D2
only for digital out versions
_
FOCUS
_
+
DOBM
D4
R1 (CD10)
_
33K
3843
3840
100K
33R
3863
2810
3841
4K7
VSSD1
33
VSSD2
50
VSSD3
58
WCLI
35
WCLK
28
180p
25
TEST2
31
TEST3
44
V1
63
V2|V3
34
V4
61V562
VDDA1
5
VDDA2
17
VDDD1P
52
VDDD2C
57
VNEG20VPOS
21
VRIN
7
VSSA1
4
VSSA2
14
RESETn
38
RN22RP
23
SBSY
48
SCL
40
SCLI
37
SCLK
29
SDA
39
36
SDI
SELPLL
24
SFSY
47
SILD
42
SL
56
STATUS
43
SUB
46
TEST1
2
HFREF
1
IREF
6
ISLICE
3
KILL
32
LDON
64
LN18LP
19
MOTO159MOTO2
60
R1
12
R2
13
RA
54
RAB
41
RCK
45
CFLG
53
CL11|4
49
CL16
26
CRIN
16
CROUT
15
D1
8
D2
9
D3
10
D4
11
DATA
27
51
EF
30
FO
55
HFIN
100K
3839
7877
SAA7324
+10V
3847
6K8
+3.3V
3817
680K
+3.3V
4R7
3815
10K
3807
220p
2806
3849
100K
220p
2805
100R
3862
47n2835
3
4
8
11
15
7807 TDA7073A
14
10
2
1
6
7
16
13
9
12
5
3870 100R
3832
10K
3801
10K
47K
3845
18K
3811
3838 1K
2R2
3812
2828
47u
3K9
3850
2879
47n
3820 5K6
3895
10R
3889
470R
3823
1K
180p
2800
3835
3R3
9
12
5
3
4
8
11
15
3822 2K7
TDA7073A7806
14
10
2
1
6
7
16
13
3
4
5
6
7
8
9
1
10
11
12
13
14
15
2
22K
3831
1800
470R
3892
1810
TF01
2880
100n
220p
2801
3816
47K
2818
1n5
+3servo
+3.3V
1K
10n
2857
PH-S
1801
1
2
3
4
5
6
3837
3867
120R
2838
10u
2856
27p
3857
2823
47p
2842
2n2
33R
470R
3853
47u
2839
2844
270p
3866
10K
+3.3V
470R3873
3848
3800
56K
100K
2869
47n
+5V
MON
4
PWRON
7
RFEQO
10
RFFB
9
RGADJ
14
VCC2
13
VCCL
2
TZA1024
7801
CDRW
11
CFIL
3
CMFB
8
DIN
5
EQSEL
12
6
GND
LD
1
22K
3826
3728
10n
2859
1K
3825
4K7
22K
2807
330p
3709
+3.3V
3846
33K
+10V
+3.3V
3806
10K
100R
3897
22K
3828
2892 4n7
180p
2855
470p
2802
3844
4K7
47u
+3.3V
2837
2815
33n
1K3824
4u72849
33p
2834
+3servo
47u
2851
100n
2814
56K
3802
1n5
2822
2884 4u7
3834
22K
33p
10K
3805
2833
10n
1n8
2891
2825
+3servo
33R
3894
220p
2808
220p
3827
2811
3821 5K6
33K
1n5
2816
+3.3V
2850
+5V
1n
3842
47K
10K
3808
2824
47n
2888
4u7
2887 100n
3869 4R7
2840
4u7
100n
2809
0u47
2885
220p
2803
47u
2826
+3.3V
270p
3833
22K
3819
2841
470R
10K
2R2
3852
FO
DOBM
DATACL16
CL11
de_emph
KILL_R
M1M2
3803
EQSEL
WCLK
Innersw
SUB
SL
SFSY
SCLK
SBSY
RCK
RA
KILL_L
HFIN
Vref
HF
HF
Innersw
VrefCD10
VrefCD10
SDA
SILD
SICL
Vref
PORE
Vref
Vref
3CDC99-DS sheet1 2000-03-27
to DAC(part2)
to 1805 on part 2
3V
1.5V
0V 800mVpp
5V
3.2V
1.6V
3V
1.6V
10V
1.6V
3.2V
U >400mV
TB = 0.5µs/div
for CD_RW : 3V
3.3V
EYE-PATTERN
->Laser dead !
1.6V
during Focus search
3.2V
1.6V
3.1V
for CD_DA : 0V
0V
1.6V
0V
10V
3V
0V
3V
1.6V
EVM
V
...DC voltages measured
in Play mode with following conditions
'+A'=+10.5V and '+5V'=+5V
1800 D2
1801 G1
1810 C10
2800 C4
2801 C5
2802 C4
2803 C5
2805 B5
2806 B5
2807 A4
2808 A5
2809 H4
2810 A4
2811 A5
2814 D5
2815 D5
2816 B12
2818 B11
2822 F9
2823 F10
2824 F10
2825 F9
2826 G12
2828 G13
2833 C10
2834 C10
2835 F7
2837 H4
2838 E8
2839 F4
2840 G4
2841 F5
2842 F4
2844 G5
2849 C1
2850 D14
2851 B11
2855 B4
2856 D15
2857 G5
2859 H5
2869 D3
2879 H5
2880 D8
2884 E8
2885 F9
2887 B10
2888 E5
2891 F4
2892 D5
3709 C14
3728 E14
3800 C4
3801 C4
3802 C4
3803 C4
3805 B4
3806 B4
3807 A4
3808 A4
3811 B4
3812 H5
3815 E5
3816 G12
3817 H12
3819 D14
3820 D3
3821 D3
3822 D3
3823 D8
3824 D8
3825 F9
3826 F9
3827 E10
3828 G10
3831 B14
3832 D15
3833 A4
3834 A4
3835 F5
3837 F7
3838 F6
3839 G6
3840 H6
3841 G5
3842 F5
3843 F5
3844 F5
3845 F5
3846 F5
3847 F5
3848 H6
3849 H5
3850 H5
3852 H5
3853 E9
3857 C2
3862 B10
3863 H13
3866 D7
3867 B11
3869 D3
3870 E3
3873 D14
3889 D15
3892 E15
3894 E9
3895 H12
3897 E7
7801 E7
7806 G3
7807 H3
7877 D12
Page 56

8-6 8-6
This assembly drawing shows a summary
of all possible versions.
For components used in a specific version
see schematic diagram respectively partslist.
E
C
B
Transistor pinning
3CDC99DS Layout stage .3 2000 02 09
This assembly drawing shows a summary
of all possible versions.
For components used in a specific version
see schematic diagram respectively partslist.
3CDC99DS Layout stage .3 2000 02 09
3CDC99 DS Board Componentside view 3CDC99 DS Board Copperside view
E
C
B
Transistor pinning
1800 E3
1801 H5
1805 A1
1810 D3
1876 J1
1878 I1
1880 A5
1881 I2
1882 B5
2800 D2
2801 D3
2802 E2
2803 D3
2804 D5
2805 D3
2806 D3
2807 D2
2808 D3
2809 E5
2810 D2
2811 D3
2812 C2
2814 E2
2815 E1
2816 C4
2818 C3
2822 F4
2823 D4
2824 D4
2825 D4
2826 D4
2828 D5
2829 J2
2830 C2
2831 B2
2832 B2
2833 D2
2834 C2
2835 E5
2837 F4
2838 F4
2839 H4
2840 E5
2841 E5
2842 G4
2844 E5
2849 E4
2850 B4
2851 C3
2852 C5
2853 C5
2854 B3
2855 E2
2856 C4
2857 G5
2858 C3
2859 G5
2860 B3
2861 A2
2862 B4
2863 C3
2864 D5
2865 A3
2869 F2
2870 J1
2871 I1
2872 I4
2873 I2
2875 I3
2876 B3
2877 J3
2878 J3
2879 E5
2880 F2
2881 I3
2882 A3
2884 E2
2885 E3
2887 C4
2888 E1
2891 G3
2892 E2
2893 J3
3700 C5
3705 D5
3706 C5
3707 C5
3708 C5
3709 B4
3711 B5
3713 I3
3714 H2
3715 H3
3716 A2
3718 C5
3728 B5
3730 B5
3731 C5
3760 B3
3761 B3
3762 B3
3763 C4
3764 C2
3766 B3
3768 J4
3769 J4
3800 D2
3801 D2
3802 D3
3803 D2
3805 D2
3806 D2
3807 D2
3808 D2
3809 D5
3811 D2
3812 G4
3814 D2
3815 D1
3816 E5
3817 E4
3819 B5
3820 E2
3821 E2
3822 E3
3823 F1
3824 F1
3825 G3
3826 E4
3827 E3
3828 F4
3831 C2
3832 A2
3833 F2
3834 F2
3835 H4
3837 E5
3838 D5
3839 E5
3840 E5
3841 E5
3842 E5
3843 G4
3844 G4
3845 E5
3846 G4
3847 G3
3848 E5
3849 E5
3850 E5
3851 J2
3852 G5
3853 F4
3854 B2
3855 B2
3857 G4
3858 B2
3859 A2
3862 C3
3863 D5
3864 B3
3865 C3
3866 F2
3867 C3
3868 B2
3869 G2
3870 G2
3871 I3
3872 A2
3873 B5
3874 A3
3875 C1
3876 A2
3877 I3
3878 D1
3879 J3
3880 I2
3881 I2
3882 J3
3883 J2
3884 I2
3885 J3
3886 J3
3887 I3
3888 I3
3889 B5
3890 I3
3891 I3
3892 C4
3893 I3
3894 D4
3895 D5
3896 H3
3897 F1
3899 C2
5803 J1
5804 I1
5805 A5
6871 H4
6872 I4
6873 I4
6874 H4
6875 I4
6876 C1
6877 A3
7801 F2
7806 H3
7807 F5
7810 B3
7812 H3
7871 I1
7873 J4
7874 C1
7875 C2
7876 C5
7877 C4
7878 C2
9805 C1
9806 E2
9807 G5
9808 F1
9809 F4
9810 B3
9813 D1
9815 A2
9817 A5
9818 B1
9819 B2
9820 B2
9821 A4
9823 C1
9825 H1
9826 A1
9828 A5
9830 D1
9831 C4
9832 E5
9833 H1
9834 D1
9835 A1
9836 D5
9837 J3
9838 A1
9839 A1
9841 E4
9842 E4
9844 F4
9845 D5
9849 A4
9851 D5
9852 E5
9853 E4
9855 E3
9856 E3
9857 G2
9858 G3
9859 G3
9861 G5
9862 G5
9863 G2
9864 F3
9876 C1
9884 G3
9885 G2
9886 C3
9887 H4
9888 H4
9889 H4
9898 J1
9899 I1
Mapping
Page 57

8-78-7
MUTE
MD
MC
ML
AGND 2L
VOUT R
EXTR
NC
VCC 2L
AGND 1 VCC 1
VOUT L
NC 1
EXTL
ZERO
RST
CS
MODE
LRCIN
DIN
BCKIN
CLKO
XTI
XTO
DGND
VDD
VCC 2R
AGND 2R
+
-
+
-
VDD
PROTECTION
TIMING & SYNC
CHECK
CRC
INTERF
CPU
RAM
2 PORT
32 x 8
STB
D1
EN1
SRG8
M
M
TO 7801 ON PART 1
5V
5V
5V
5V
#
#
+3V
to
GNDA
GND
part1
GND
1850
uP_CLK
5.6V version only
(19 Pin)
RF-500TB
+10V
DQSY
on rear side of module
on
Output enable
delay circuitry
BASIC VERSION
1851
voltage stab.
2
KILL_L
CD-Text circuitry
DATA
2
SRDT
DIPMATE
MC78L05ACP
TRAY-MOTOR
RIGHT
part1
to/from 7877 on part 1
EBU_Out
Changer Control
(23 Pin)
8002
DIGout
11 12 13
7877
SILD
(15 Pin)
RF-500TB
PORE
SHR_CL
1
to/from 7877 on part 1
board
for provision only
CAROUSEL-MOTOR
13 14 15
DRIVE UP/
logic
SICL
DIPMATE
3CDC mainboard
DAC
DOWN
/ part 2
TRAY POS
SHR_STR
POS 1 rec.
LEFT
to connector board
CD-TEXT
on
5V1
12345678910
#.... for provision only
EBU_GND
3V-5V log. Level
or combi-
SW_INFO
from
Transformer
3
2
1
GND
FROM 7877 ON PART 1
for prov. only
123456789101112
1
7877
+5V(+5.6V)
KILL_R
8003
14 15
A
B
C
D
E
F
G
H
I
A
B
C
D
E
F
G
H
I
1K
3891
9876
47n
2852
3715
100K
3884
3K9
GNDA
3880
330R
+10V
100n
2865
3n3
2831
10K
470R
3809
3878
33R
3868
GNDA
4u7
2804
BZX79-F3V9
6877
+10V
3876
100K
3855
100R
2853
22n
10K
3731
+3.3V
3854
100R
3899
100R
33K
3730
1N4148
6876
+3.3V
3R3
3851
33R
3814
GNDA
100u5803
47n
2854
10K
3877
10K
3769
2812
47n
+4V
47K
3886
47K
GNDA
3882
9899
3864
10R
22K
3858
220u
2862
+5.6V
470R3708
100
3716
GNDA
3874 10K
BC547B
GNDA
7874
BC547B
7812
10K
3871
3718
4K7
+4V
7875
BC547B
GNDA
+3.3V
+5V
2873
47u
100K
3883
GNDA
6874
1N4148
3707 470R
GNDA
1K
3760
1880
2877
EBUGND
3885
100K
47p
2878
220p
3764
3R3
47n
2871
6875
BZX79-C5V1
1882
4u7
2881
820R
3763
GNDA
5804 100u
2829
10u
15
20
9
8
16
13
5
6
21
2882
22u
3
4
23
7
2
1811
1
27
26
28
24
25
12 17
22
PCM17167810
14
1910
3887
470R
9
22K
3713
17
18
19
2
20
21
22
23
3
4
5
6
7
8
1805
1
10
11
12
13
14
15
16
GNDA
22u
2858
10K
470R
3893
10K
3714
3888
22u
2860
+3.3V
22n
2875
470R3706
4U75805
2830
10n
2872
47n
1K
3761
1
2
DIPMATE
1878
1
2
1876
DIPMATE
2863
220u
7878
47n
2876
+3.3V
GNDA
9
Os
10
STR1
VDD16
VSS
8
7873
CP
3
D2
15
O04
5O1
O26
O37
O414
13 O5
O612
O711
GNDA
HEF4094BP
22u
3875 10K
2861
3872
3700
10K
1
EXCK
GND
7
MCK5
SBSO2
SCLK
SCLK
11
SCOR3 SRDT
SRDT
12
SW1 9
SW2 10
TEST
8
14
VDD
WFCK4
XMODE6
470R
7876
LC89170M
DQSY
DQSY
13
3881
10K
1N4148
6872
OUT1-
13
9
12
5
3
4
8
11
15
7871
TDA7073A
14
10
2
1
6
7
16
+4V
3859
22K
10K
3711
GNDA
+10V
220p
2893
10K
3766
3890
1K
1K
3762
1N4148
6871
9898
10K
3879
3865
10R
3705
220R
1N4148
6873
2870
47n
4K7
3768
1881
2832
3n3
KILL_R
SW_INFO
OE_LATCH
SHR_CL
SDA
SHR_STR
KILL_L
DOBM
WCLK
SCLK
CL16
DATA
EQSEL
de_emph
from7877 (part1)
PORE
SICL
RCK
SUB
CL11
SBSY
SFSY
SILD
3CDC99-DS sheet2 2000-03-27
only during
CD-TEXT INFO
0V
5V(5.6V)
3.3ms
7.35KHz
DQSY
0V
SRDT
5V
0V
SDA
11MHz
SCLK
TOC-reading
4,2V
0V
4V
10V
5V
4V
0V
0V
5V
3.2V
EVM
V
...DC voltages measured
in Play mode with following conditions
'+A'=+10.5V and '+5V'=+5V
1805 H15
1876 F3
1878 G3
1880 D8
1881 D8
1882 C8
2804 H4
2812 C1
2829 F5
2830 D2
2831 B8
2832 A8
2852 I2
2853 H4
2854 C5
2858 D3
2860 A7
2861 B7
2862 C2
2863 D2
2864 H12
2865 B5
2870 F3
2871 G3
2872 F10
2873 F5
2875 G5
2876 C2
2877 F11
2878 F11
2881 F8
2882 D5
2893 F12
3700 I2
3705 H4
3706 H4
3707 H4
3708 H4
3711 H5
3713 F8
3714 F8
3715 G8
3716 H12
3718 H3
3730 H2
3731 H2
3760 A3
3761 A3
3762 A3
3763 B3
3764 C1
3766 A5
3768 D7
3769 D7
3809 H11
3814 C12
3851 F6
3854 A7
3855 B7
3858 A7
3859 B7
3864 C2
3865 C2
3868 G14
3871 E11
3872 B13
3874 B13
3875 C12
3876 B12
3877 E11
3878 C7
3879 F6
3880 G6
3881 G6
3882 F6
3883 F6
3884 F6
3885 E6
3886 G6
3887 D12
3888 E12
3890 E11
3891 F11
3893 F11
3896 G10
3899 D12
5803 F3
5804 F3
5805 C11
6871 D8
6872 D8
6873 C8
6874 G7
6875 E12
6876 C13
6877 D12
7810 A3
7812 F8
7871 G5
7873 C10
7874 B12
7875 C12
7876 H3
7878 C1
9826 H14
9834 F10
9835 G11
9838 C14
9839 C14
9876 C13
9898 E3
9899 G3
Page 58

8-8 8-8
98
97
98
97
98
96
98
96
108
106
107
105
23
123
24
21
54
60
25
115
22
100
95
6x
61
82
80
73
74
70
81
83
84
POS. 60
48
39
35
38
45
43
50
51
42
52
44
53
40
41
47
46
26
POS. 25
EXPLODED VIEW /
3CDC99-DS
Drawer bottom view
Page 59

8-98-9
Printed Circuit
Board
116
117
118
115
125
9
8
3
12 13
10
2
14
7
4
6
5
EXPLODED VIEW /
3CDC99-DS
MECHANICAL PARTSLIST 3CDC99-DS MODULE
––––––––––––––––––––––––––––––––––––––––––––––––––––––––––––––––––––––––––––––––––––––––––––––––––––––––––––––––––
0003 4822 463 11235 GUIDING LEFT
0004 4822 463 11236 GUIDING RIGHT
0012 4822 466 12146 RUBBER
0013 4822 466 12146 RUBBER
0021 4822 418 10403 DRAWER
0022 4822 402 11236 BRACKET TUMBLER
0023 4822 492 11721 SPRING
0024 4822 492 11721 SPRING
0038 4822 502 12548 SCREW M2,6x3,5
0039 4822 502 12548 SCREW M2,6X3,5
0040 4822 463 11237 SLIDE
0041 4822 522 10509 CONTROL DISC
0042 4822 522 10492 GEAR WHEEL
0043 4822 528 10937 PULLEY
0044 4822 522 10493 IDLER WHEEL
0045 4822 358 10115 BELT
0046 4822 466 10735 ECCENTRIC GEAR WHEEL
0050 4822 532 12364 WASHER
0051 4822 532 12364 WASHER
0052 4822 532 12364 WASHER
0053 4822 532 12364 WASHER
0073 4822 502 12548 SCREW M2,6X3,5
0074 4822 502 12548 SCREW M2,6X3,5
0080 4822 528 10937 PULLEY
0081 4822 522 10494 GEAR DRAWER
0082 4822 358 10115 BELT
0083 4822 532 12364 WASHER
0084 4822 532 12364 WASHER
0095 4822 404 10985 SUPPORT-VAM
0096 4822 529 10387
RUBBER DAMPER CD DRIVE, FRONT
0097 4822 529 10387
RUBBER DAMPER CD DRIVE, FRONT
0100 9305 022 30201 VAM2202/01
0115 4822 466 10736 CAROUSEL
0117 4822 532 12365 BUSH DRAWER
0123 4822 402 11237 SWITCH-BRACKET
0125 4822 401 11708 DISC CLAMP VAM DRIVE 3CDC
Module top view Chassis top view
Page 60

10-1 10-1
CDR785 280300
K
EY
B
O
A
R
D
right
FRONT BOARD
MAINS BOARD
1005
CD-R/W MODULE
1004
INTERFACE BOARD
NTC
M
IC
/H
E
A
D
P
H
O
N
E
K
E
Y
B
O
A
R
D
left
3CDC- MODULE
202
2x
223
2x
222
3x
208
224
9
10
212
8
3
4
22
2x
23
2x
301
317
318
312
2x
214
11
21
24
206
205
204
207
6
1
7
3-2
3-1
4-1
4-3
M3x6
3x
M3x6
3x
M3x6
5x
T orx W asher
M3x6
4x
M3x6
2x
M3x6
2x
Pl.T orx
3x10
For safety reason rivet must not be replaced
by any screw longer than 6mm!
Pl.Torx
3x10
8x
Pl.Torx
3x10
2x
Pl.Torx
3x10
3x
Pl.Torx
3x10
Torx
M3x10
Pl.Torx
3x10
Pl.Torx
3x10
8x
Pl.Torx
3x10
3x
Pl.Torx
3x10
4x
!
215
2x
4-2
1006
1005
1004
RC283505/01
RC283506/01
123
456
789
0
S
P
A
C
E
U
VW
MN
D
E
F
T
R
AC
K
IN
CR
.
P
R
O
G
R
A
M
X
Y
Z
O
P
Q
GH
I
C
D
TE
X
T
C
D
3
C
D
R
C
D
2
C
D
1
R
E
PE
A
T
S
H
UFF
L
E
NO YES
T
E
X
T
E
D
IT
R
S
T
J
K
L
A
B
C
B
R
IG
H
T
N
E
S
S
12
3
456
78
9
0
S
P
A
C
E
UV
W
M
N
D
EF
T
R
A
C
K
IN
C
R
.
P
R
O
G
R
A
M
X
YZ
O
P
Q
GH
I
C
D
TE
X
T
C
D
3
C
D
R
C
D
2
C
D
1
R
E
PEA
T
S
HU
F
F
L
E
NO
YES
T
E
X
T
E
D
IT
R
S
T
J
KL
A
BC
B
R
IG
H
T
N
E
S
S
800
x
MECHANICAL PARTS
–––––––––––––––––––––––––––––––––––––––––––––––––––––
3 3103 307 99310
BUTTON-SET-LEFT-ASSY, black
3 3103 307 99320
BUTTON-SET-LEFT-ASSY, champag.
4 3103 307 97800
BUTTON-SET-RIGHT-ASSY, black
4 3103 307 98840
BUTTON-SET-RIGHT-ASSY, champag.
8 3103 307 99290 FLAP-CDR, black
8 3103 307 99300 FLAP-CDR, champagne
9 3103 307 97770 DISPLAY-WINDOW-PRINTED
10 3103 301 45120 SPRING, CDR FLAP
22 4822 462 42159 FOOT, silver
22 3104 124 06310 FOOT, champagne
23 4822 462 42158 FOOT, black
208 4822 459 10887 WORDMARK „PHILIPS“
212 3103 304 67690 KNOB-JOG, black
212 3103 304 69130 KNOB-JOG, champagne
214 3103 304 67670 BUTTON-ON/OFF, black
214 3103 307 98860 BUTTON-ON/OFF, champagne
215 3103 304 67680 KNOB-VOLUME, black
215 3103 304 69120 KNOB-VOLUME, champagne
224 3103 307 97820
COVER-CHANGER-PRINTED, black
224 3103 307 98800
COVER-CHANGER-PRINTED, champag.
EXPLODED VIEW /
apparatus
301 4822 321 10249 MAINS CORD, EUROPE
301 4822 321 11466 MAINS CORD, USA
312 4822 321 62401 AUDIO CABLE, STEREO CINCH
317 3103 308 92540 DIGITAL OUT CABLE, 75Ω
318 3139 228 84060 RC283505/01, black
318 3139 228 84160 RC283506/01, champagne
1004 3104 129 52580
CDR785 LOADER MODULE COMPLETE
1005 3103 308 52960
POWER BOARD-SMPS CDR785 EU /00
1005 3103 308 52970
POWER BOARD-SMPS CDR785 US /17
1005 3103 308 52980
POWER BOARD-SMPS CDR785 WW /01
1006 3103 308 52950 FAN, KD120 6PTS 3 - C112
8001 3103 308 92370 FLEXFOIL CABLE, 12P, 220mm
8002 3103 308 92380 FLEXFOIL CABLE, 16P, 220mm
8003 3103 308 92320 FLEXFOIL CABLE, 7P, 280mm
8004 3103 308 92390 FLEXFOIL CABLE, 12P, 105mm
8005 3103 308 92400 FLEXFOIL CABLE, 9P, 140mm
8006 3103 308 92420 FLEXFOIL CABLE, 5P, 120mm
8007 3103 308 92410 FLEXFOIL CABLE, 8P, 430mm
For orientation see WIRING DIAGRAM
Only those parts of which a service code number
is stated are normal service parts.
Page 61

ELECTRICAL PARTSLIST
FRONT BOARD
10-2
MISCELLANEOUS
–––––––––––––––––––––––––––––––––––––––––––––––––––––
1400 4822 267 51453
1401 2422 025 14546
1402 4822 265 11531 FFC-CONNECTOR, 9P, SIDE ENTRY
1403 4822 267 10956 FFC-CONNECTOR, 7P, SIDE ENTRY
1405 4822 267 51453
7404 3103 308 52920 VFD DISPLAY, 15-BT-66GN
7415 4822 218 11573 GP1U28QP, IR-EYE
CAPACITORS
–––––––––––––––––––––––––––––––––––––––––––––––––––––
2400©5322 122 32531 100pF 5% 50V
2401©5322 122 32531 100pF 5% 50V
2402©5322 122 32531 100pF 5% 50V
2403©5322 122 32531 100pF 5% 50V
2404©5322 122 32531 100pF 5% 50V
2405©5322 122 32531 100pF 5% 50V
2406©5322 122 32531 100pF 5% 50V
2407©5322 122 32531 100pF 5% 50V
2408©5322 122 32531 100pF 5% 50V
2411©5322 122 32448 10pF 5% 50V
2412©5322 122 32448 10pF 5% 50V
2414©5322 122 31863 330pF 5% 50V
2416©5322 122 31863 330pF 5% 50V
2417©4822 126 13838 100nF 10% 50V
2427©4822 126 13486 15pF 2% 63V
2428©4822 126 13486 15pF 2% 63V
2431©4822 126 14585 100nF 10% 50V
2432 4822 124 40433 47µF 20% 25V
2434 4822 124 41584 100µF 20% 10V
2435 4822 124 41751 47µF 20% 16V
2438©4822 122 33177 10nF 20% 50V
2439 4822 124 40769 4,7µF 20% 100V
2440©4822 126 14585 100nF 10% 50V
2441©4822 122 33127 2,2nF 10% 63V
2442©4822 122 33177 10nF 20% 50V
2443 4822 124 41751 47µF 20% 16V
RESISTORS
–––––––––––––––––––––––––––––––––––––––––––––––––––––
3402©4822 051 20471 470Ω 5% 0,1W
3404©4822 051 20223 22kΩ 5% 0,1W
3405©4822 051 20223 22kΩ 5% 0,1W
3406©4822 051 20223 22kΩ 5% 0,1W
3411 4822 052 10228 2,2Ω 5% 0,33W
3425©4822 051 10102 1kΩ 2% 0,25W
3427 4822 052 10478 4,7Ω 5% NFR
3428 4822 116 52263 2,7kΩ 5% 0,5W
3441©4822 051 10102 1kΩ 2% 0,25W
3443 4822 050 11002 1kΩ 5% 0,2W
3449©4822 051 10102 1kΩ 2% 0,25W
3451©4822 117 12955 2,7kΩ 1% 0,1W
3452©4822 051 10102 1kΩ 2% 0,25W
3454©4822 051 20471 470Ω 5% 0,1W
3460©4822 051 20471 470Ω 5% 0,1W
3464©4822 051 20471 470Ω 5% 0,1W
3466©4822 051 20471 470Ω 5% 0,1W
3468©4822 051 20471 470Ω 5% 0,1W
3470©4822 051 20332 3,3kΩ 5% 0,1W
3475©4822 051 10102 1kΩ 2% 0,25W
3476©4822 051 20101 100Ω 5% 0,1W
3479©4822 051 20101 100Ω 5% 0,1W
3480©4822 051 10102 1kΩ 2% 0,25W
3482©4822 051 20101 100Ω 5% 0,1W
3483©4822 051 10102 1kΩ 2% 0,25W
FFC-CONNECTOR, 12P, SIDE ENTRY
FFC-CONNECTOR, 16P, SIDE ENTRY
FFC-CONNECTOR, 12P, SIDE ENTRY
RESISTORS
–––––––––––––––––––––––––––––––––––––––––––––––––––––
3491 4822 050 11002 1kΩ 5% 0,2W
3492©4822 051 10102 1kΩ 2% 0,25W
3493©4822 051 10102 1kΩ 2% 0,25W
3494©4822 051 10102 1kΩ 2% 0,25W
3495©4822 051 10102 1kΩ 2% 0,25W
3497©4822 051 10102 1kΩ 2% 0,25W
3498©4822 051 10102 1kΩ 2% 0,25W
3499©4822 051 10102 1kΩ 2% 0,25W
3500©4822 051 10102 1kΩ 2% 0,25W
3501©4822 051 10102 1kΩ 2% 0,25W
3502©4822 051 20471 470Ω 5% 0,1W
3503©4822 051 10102 1kΩ 2% 0,25W
3504©4822 051 10102 1kΩ 2% 0,25W
3505©4822 051 10102 1kΩ 2% 0,25W
3506©4822 051 20471 470Ω 5% 0,1W
3507©4822 051 10102 1kΩ 2% 0,25W
3508©4822 051 10102 1kΩ 2% 0,25W
3509©4822 051 20471 470Ω 5% 0,1W
3510 4822 116 83876 270Ω 5% 0.16W
3511 4822 116 83876 270Ω 5% 0.16W
3512 4822 116 83876 270Ω 5% 0.16W
3516 4822 116 83876 270Ω 5% 0.16W
3518 4822 116 83876 270Ω 5% 0.16W
3519 4822 052 10228 2,2Ω 5% 0,33W
3520©4822 051 20101 100Ω 5% 0,1W
3523©4822 051 10102 1kΩ 2% 0,25W
3524©4822 117 11504 270Ω 1% 0.1W
3526©4822 117 10833 10kΩ 1% 0,1W
3527©4822 117 11504 270Ω 1% 0.1W
3528©4822 051 10102 1kΩ 2% 0,25W
3529©4822 117 11504 270Ω 1% 0.1W
3530©4822 117 10833 10kΩ 1% 0,1W
3531©4822 117 10837 100kΩ 1% 0,1W
3533©4822 117 10833 10kΩ 1% 0,1W
3534 4822 052 10479 47Ω 5% 0,3W
3535©4822 051 20471 470Ω 5% 0,1W
3537 4822 050 21003 10kΩ 2% 0,25W
3539©4822 051 10102 1kΩ 2% 0,25W
3540 4822 116 52263 2,7kΩ 5% 0,5W
3545©4822 117 13579 220kΩ 1% 0.1W
4401©4822 051 20008 CHIP JUMPER 0805
4403©4822 051 20008 CHIP JUMPER 0805
4404©4822 051 20008 CHIP JUMPER 0805
4405©4822 051 20008 CHIP JUMPER 0805
COILS
–––––––––––––––––––––––––––––––––––––––––––––––––––––
1406 5322 242 73686 CERAMIC RESONATOR, 12MHZ
5407 4822 157 62552 2,2µH
DIODES
–––––––––––––––––––––––––––––––––––––––––––––––––––––
6403 3198 010 53380 BZX79-B3V3
6404 4822 130 30621 1N4148
6415 4822 130 30621 1N4148
6416 4822 130 30621 1N4148
TRANSISTORS
–––––––––––––––––––––––––––––––––––––––––––––––––––––
7405©4822 130 60511 BC847B
7406©4822 130 60511 BC847B
7407©4822 130 60511 BC847B
7408©4822 130 60511 BC847B
7409©4822 130 60511 BC847B
7414©4822 130 60511 BC847B
3485©4822 051 10102 1kΩ 2% 0,25W
3486©4822 051 20471 470Ω 5% 0,1W
3487©4822 051 10102 1kΩ 2% 0,25W
3488©4822 051 10102 1kΩ 2% 0,25W
3489©4822 051 20471 470Ω 5% 0,1W
INTEGRATED CIRCUITS
–––––––––––––––––––––––––––––––––––––––––––––––––––––
7412©3103 308 84170 TMP88CU77F-CDR785.1, µ-PROC.
Page 62

MISCELLANEOUS
–––––––––––––––––––––––––––––––––––––––––––––––––––––
1460 4822 276 13775 TACT SWITCH
1461 4822 276 13775 TACT SWITCH
1462 4822 276 13775 TACT SWITCH
1463 4822 276 13775 TACT SWITCH
1464 4822 276 13775 TACT SWITCH
1465 4822 276 13775 TACT SWITCH
1466 4822 276 13775 TACT SWITCH
1467 4822 276 13775 TACT SWITCH
1468 4822 276 13775 TACT SWITCH
1469 4822 276 13775 TACT SWITCH
1470 4822 276 13775 TACT SWITCH
1480 4822 265 11531 FFC-CONNECTOR, 9P, SIDE ENTRY
1481 2422 128 02929 SWITCH, PUSH
CAPACITORS
–––––––––––––––––––––––––––––––––––––––––––––––––––––
2490© 5322 122 32531 100pF 5% 50V
RESISTORS
–––––––––––––––––––––––––––––––––––––––––––––––––––––
3589© 4822 051 10102 1kΩ 2% 0,25W
3590 4822 116 83868 150Ω 5% 0,5W
3591 4822 116 83872 220Ω 5% 0,5W
3592© 4822 117 11504 270Ω 1% 0.1W
3593© 4822 051 20391 390Ω 5% 0,1W
3594© 4822 051 20561 560Ω 5% 0,1W
3595© 4822 117 11454 820Ω 1%
3596 4822 116 52207 1,2kΩ 5% 0,5W
3597© 4822 051 20182 1,8kΩ 5% 0,1W
3598© 4822 051 20392 3,9kΩ 5% 0,1W
3599© 4822 117 10833 10kΩ 1% 0,1W
DIODES
–––––––––––––––––––––––––––––––––––––––––––––––––––––
6426© 9322 147 84685 LGT770-LM, GREEN
6427© 9322 147 84685 LGT770-LM, GREEN
6428© 9322 147 84685 LGT770-LM, GREEN
6429© 9322 147 85685 LST770-KL, RED
6430 4822 130 30621 1N4148
6431 4822 130 30621 1N4148
6432 4822 130 30621 1N4148
6433 4822 130 30621 1N4148
MISCELLANEOUS
–––––––––––––––––––––––––––––––––––––––––––––––––––––
1430 4822 267 51453
FFC-CONNECTOR, 12P, SIDE ENTRY
1440 4822 276 13775 TACT SWITCH
1441 4822 276 13775 TACT SWITCH
1442 4822 276 13775 TACT SWITCH
1443 4822 276 13775 TACT SWITCH
1444 4822 276 13775 TACT SWITCH
1445 4822 276 13775 TACT SWITCH
1446 4822 276 13775 TACT SWITCH
1447 4822 276 13775 TACT SWITCH
1448 4822 276 13775 TACT SWITCH
1449 4822 276 13775 TACT SWITCH
1450 4822 276 13775 TACT SWITCH
1451 4822 276 13775 TACT SWITCH
1452 4822 276 13775 TACT SWITCH
1453 4822 276 13775 TACT SWITCH
1454 4822 276 13775 TACT SWITCH
1455 4822 276 13775 TACT SWITCH
1456 4822 276 13775 TACT SWITCH
1457 8203 303 84420 JOG ENCODER
CAPACITORS
–––––––––––––––––––––––––––––––––––––––––––––––––––––
2480© 5322 122 32531 100pF 5% 50V
2481© 5322 122 32531 100pF 5% 50V
2482© 4822 122 33177 10nF 20% 50V
2483© 4822 122 33177 10nF 20% 50V
RESISTORS
–––––––––––––––––––––––––––––––––––––––––––––––––––––
3611© 4822 117 11503 220Ω 5% 0,1W
3612© 4822 117 11503 220Ω 5% 0,1W
3613© 4822 117 11503 220Ω 5% 0,1W
3614© 4822 117 10353 150Ω 5% 0,1W
3615© 4822 117 10353 150Ω 5% 0,1W
3618© 4822 117 10353 150Ω 5% 0,1W
3619© 4822 117 11503 220Ω 5% 0,1W
3620© 4822 117 11504 270Ω 1% 0.1W
3621© 4822 051 20391 390Ω 5% 0,1W
3622© 4822 051 20561 560Ω 5% 0,1W
3623© 4822 117 11454 820Ω 1%
3624© 4822 051 20122 1,2kΩ 5% 0,1W
3625© 4822 051 20182 1,8kΩ 5% 0,1W
3626© 4822 051 20392 3,9kΩ 5% 0,1W
3628© 4822 117 10353 150Ω 5% 0,1W
3629© 4822 117 11503 220Ω 5% 0,1W
3630© 4822 117 11504 270Ω 1% 0.1W
3631© 4822 051 20391 390Ω 5% 0,1W
3632 4822 116 83883 470Ω 5% 0,16W
3633 4822 116 83883 470Ω 5% 0,16W
3634© 4822 117 10833 10kΩ 1% 0,1W
3635© 4822 117 10833 10kΩ 1% 0,1W
3636 4822 116 52231 820Ω 5% 0,5W
3637 4822 116 52226 560Ω 5% 0,5W
DIODES
–––––––––––––––––––––––––––––––––––––––––––––––––––––
6417 4822 130 30621 1N4148
6418 4822 130 30621 1N4148
6419 4822 130 30621 1N4148
6420© 9322 147 85685 LST770-KL, RED
6421© 9322 147 84685 LGT770-LM, GREEN
6422© 9322 147 85685 LST770-KL, RED
6423© 9322 147 83685 LBT776-K1L1, BLUE
6424© 9322 147 83685 LBT776-K1L1, BLUE
6425© 9322 147 85685 LST770-KL, RED
6435© 9322 147 85685 LST770-KL, RED
6436© 9322 147 85685 LST770-KL, RED
10-3
ELECTRICAL PARTSLIST
KEY BOARD left
ELECTRICAL PARTSLIST
KEY BOARD right
Page 63

MISCELLANEOUS
–––––––––––––––––––––––––––––––––––––––––––––––––––––
1491 4822 267 31453 HEADPHONE SOCKET 6,3mm
1492 4822 267 31453 MICROPHONE SOCKET 6,3mm
1690 4822 265 11535 FFC-CONNECTOR, 8P, SIDE ENTRY
CAPACITORS
–––––––––––––––––––––––––––––––––––––––––––––––––––––
2661© 4822 122 33891 3,3nF 10% 63V
2662© 4822 122 33891 3,3nF 10% 63V
2663 4822 124 40433 47µF 20% 25V
2664 4822 124 40433 47µF 20% 25V
2665© 4822 122 33172 390pF 5% 50V
2666© 4822 122 33172 390pF 5% 50V
2667 4822 124 40433 47µF 20% 25V
2668 4822 124 40433 47µF 20% 25V
2671© 5322 122 34099 470pF 10% 63V
2672© 5322 122 34099 470pF 10% 63V
2673 4822 124 12032 4,7µF 20% 50V
2674 4822 124 12032 4,7µF 20% 50V
2680© 4822 126 14585 100nF 10% 50V
2681© 5322 122 31647 1nF 10% 63V
2682© 5322 122 31647 1nF 10% 63V
2683 4822 124 22652 2,2µF 20% 50V
2684 4822 124 22652 2,2µF 20% 50V
2685© 4822 122 33891 3,3nF 10% 63V
2686© 4822 122 33891 3,3nF 10% 63V
2687© 4822 122 33172 390pF 5% 50V
2688© 4822 122 33172 390pF 5% 50V
2689 4822 124 21913 1µF 20% 63V
2690 4822 124 21913 1µF 20% 63V
2695 4822 124 40433 47µF 20% 25V
2696 4822 124 81286 47µF 20% 16V
2697© 4822 126 14585 100nF 10% 50V
RESISTORS
–––––––––––––––––––––––––––––––––––––––––––––––––––––
3661 4822 101 21199 POTMETER 2x10KΩ
3663© 4822 051 20229 22Ω 5% 0,1W
3664© 4822 051 20229 22Ω 5% 0,1W
3665© 4822 051 20101 100Ω 5% 0,1W
3666© 4822 051 20101 100Ω 5% 0,1W
3667© 4822 117 10833 10kΩ 1% 0,1W
3668© 4822 117 10833 10kΩ 1% 0,1W
3669 4822 052 10109 10Ω 5% NFR
3670 4822 052 10688 6,8Ω 5% 0,33W
3671© 4822 051 20472 4,7kΩ 5% 0,1W
3672© 4822 051 20472 4,7kΩ 5% 0,1W
3673© 4822 117 10833 10kΩ 1% 0,1W
3674© 4822 117 10833 10kΩ 1% 0,1W
3675© 4822 051 10102 1kΩ 2% 0,25W
3676© 4822 051 10102 1kΩ 2% 0,25W
3677© 4822 051 10102 1kΩ 2% 0,25W
3678© 4822 051 10102 1kΩ 2% 0,25W
3681© 4822 117 10833 10kΩ 1% 0,1W
3682© 4822 117 10833 10kΩ 1% 0,1W
3683© 4822 051 20101 100Ω 5% 0,1W
3684© 4822 051 20101 100Ω 5% 0,1W
3685© 4822 117 11449 2,2kΩ 1% 0,1W
3686© 4822 117 11449 2,2kΩ 1% 0,1W
3687© 4822 051 20101 100Ω 5% 0,1W
3688© 4822 051 20101 100Ω 5% 0,1W
3689© 4822 117 10833 10kΩ 1% 0,1W
3690© 4822 117 10833 10kΩ 1% 0,1W
3695 4822 101 21199 POTMETER 2x10KΩ
3696 4822 116 83883 470Ω 5% 0,16W
3697 4822 116 83883 470Ω 5% 0,16W
RESISTORS
–––––––––––––––––––––––––––––––––––––––––––––––––––––
4601© 4822 051 20008 CHIP JUMPER 0805
4603© 4822 051 20008 CHIP JUMPER 0805
4604© 4822 051 20008 CHIP JUMPER 0805
4605© 4822 051 20008 CHIP JUMPER 0805
4606© 4822 051 20008 CHIP JUMPER 0805
INTEGRATED CIRCUITS
–––––––––––––––––––––––––––––––––––––––––––––––––––––
7650© 4822 209 31378 NJM4556M, 2-FOLD OP-AMP.
7680© 4822 209 30095 LM833D, 2-FOLD OP-AMP.
10-4
ELECTRICAL PARTSLIST
HEADPHONE BOARD
Page 64

MISCELLANEOUS
–––––––––––––––––––––––––––––––––––––––––––––––––––––
1301 4822 267 10732 FFC-CONNECTOR, 12P, TOP ENTRY
1302 2422 025 14526 FFC-CONNECTOR, 16P, TOP ENTRY
1303 4822 267 10757 FFC-CONNECTOR, 23P, TOP ENTRY
1304 4822 265 11535 FFC-CONNECTOR, 8P, SIDE ENTRY
1306 4822 267 10958 FFC-CONNECTOR, 5P, SIDE ENTRY
1311 4822 265 11151 CINCH SOCKET, 4-FOLD
1312 4822 267 31448 CINCH SOCKET, 2-FOLD
6304 4822 218 11487 OPTICAL CONNECTOR, GP1F32R
CAPACITORS
–––––––––––––––––––––––––––––––––––––––––––––––––––––
2238© 5322 122 32531 100pF 5% 50V
2301© 4822 126 14585 100nF 10% 50V
2302© 4822 126 14585 100nF 10% 50V
2303 4822 124 21913 1µF 20% 63V
2304© 4822 126 14585 100nF 10% 50V
2305© 4822 126 14585 100nF 10% 50V
2307 4822 124 40433 47µF 20% 25V
2309© 4822 126 14585 100nF 10% 50V
2310© 5322 122 31647 1nF 10% 63V
2311© 4822 126 14585 100nF 10% 50V
2312© 4822 126 14585 100nF 10% 50V
2313© 5322 122 33538 150pF 5% 63V
2321© 4822 126 14585 100nF 10% 50V
2322© 4822 126 14585 100nF 10% 50V
2325© 4822 126 14585 100nF 10% 50V
2327© 4822 126 13838 100nF 10% 50V
2330© 4822 126 14585 100nF 10% 50V
2331 4822 124 40248 10µF 20% 63V
2332 4822 124 40248 10µF 20% 63V
2333 4822 121 42687 3,3nF 10% 63V
2334 4822 121 42687 3,3nF 10% 63V
2335© 4822 126 14585 100nF 10% 50V
2340 4822 124 41584 100µF 20% 10V
2350 4822 124 40207 100µF 20% 25V
2351 4822 124 40207 100µF 20% 25V
2352© 4822 126 14585 100nF 10% 50V
2353© 4822 126 14585 100nF 10% 50V
2354© 4822 126 14043 1µF 20% 16V
2355© 4822 126 14043 1µF 20% 16V
2361 4822 124 40248 10µF 20% 63V
2362 4822 124 40248 10µF 20% 63V
2365© 5322 122 31863 330pF 5% 50V
2366© 5322 122 31863 330pF 5% 50V
2367© 4822 126 14585 100nF 10% 50V
2368© 4822 126 14585 100nF 10% 50V
2371 4822 124 40248 10µF 20% 63V
2372 4822 124 40248 10µF 20% 63V
2373© 4822 126 14585 100nF 10% 50V
2375© 5322 122 34099 470pF 10% 63V
2376© 5322 122 34099 470pF 10% 63V
2377© 4822 122 33127 2,2nF 10% 63V
2378© 4822 122 33127 2,2nF 10% 63V
2379© 4822 126 14585 100nF 10% 50V
2380© 4822 126 14585 100nF 10% 50V
2385© 4822 126 14585 100nF 10% 50V
2386© 4822 126 14585 100nF 10% 50V
2388© 5322 122 32531 100pF 5% 50V
2390 4822 124 80791 470µF 20% 16V
2391 4822 124 80791 470µF 20% 16V
2392 4822 124 80791 470µF 20% 16V
2396© 5322 116 80853 560pF 5% 63V
2397© 4822 122 33575 220pF 5% 50V
2398© 4822 122 33575 220pF 5% 50V
CAPACITORS
–––––––––––––––––––––––––––––––––––––––––––––––––––––
2399© 5322 116 80853 560pF 5% 63V
2400 4822 124 40207 100µF 20% 25V
2401 4822 124 40207 100µF 20% 25V
RESISTORS
–––––––––––––––––––––––––––––––––––––––––––––––––––––
2374© 4822 117 10361 680Ω 1% 0,1W
3300© 4822 117 10833 10kΩ 1% 0,1W
3301© 4822 051 10102 1kΩ 2% 0,25W
3302© 4822 051 10102 1kΩ 2% 0,25W
3303© 4822 117 11503 220Ω 5% 0,1W
3304© 4822 051 10102 1kΩ 2% 0,25W
3305© 4822 051 20101 100Ω 5% 0,1W
3306© 4822 051 20471 470Ω 5% 0,1W
3307© 4822 051 20561 560Ω 5% 0,1W
3309© 4822 051 10102 1kΩ 2% 0,25W
3311© 4822 117 11449 2,2kΩ 1% 0,1W
3312© 4822 051 20399 39Ω 5% 0,1W
3313© 4822 051 10102 1kΩ 2% 0,25W
3314© 4822 051 20479 47Ω 5% 0,1W
3315© 4822 051 20479 47Ω 5% 0,1W
3316© 4822 117 11503 220Ω 5% 0,1W
3317 4822 116 52195 47Ω 5% 0,5W
3318© 4822 117 10833 10kΩ 1% 0,1W
3319© 4822 117 10353 150Ω 5% 0,1W
3320© 4822 117 10353 150Ω 5% 0,1W
3321© 4822 117 11507 6,8kΩ 1% 0,1W
3322© 4822 117 11507 6,8kΩ 1% 0,1W
3323© 4822 117 11449 2,2kΩ 1% 0,1W
3324© 4822 117 11449 2,2kΩ 1% 0,1W
3325© 4822 051 20822 8,2kΩ 5% 0,1W
3326© 4822 051 20822 8,2kΩ 5% 0,1W
3327© 4822 051 20822 8,2kΩ 5% 0,1W
3328© 4822 051 20822 8,2kΩ 5% 0,1W
3329© 4822 117 11148 56kΩ 1% 0,1W
3330© 4822 117 10837 100kΩ 1% 0,1W
3331© 4822 051 20332 3,3kΩ 5% 0,1W
3333© 4822 051 10102 1kΩ 2% 0,25W
3334© 4822 117 10834 47kΩ 1% 0,1W
3335 4822 050 11002 1kΩ 5% 0,2W
3336 4822 050 11002 1kΩ 5% 0,2W
3337© 4822 051 20105 1MΩ 5% 0,1W
3338© 4822 051 20105 1MΩ 5% 0,1W
3339© 4822 051 20332 3,3kΩ 5% 0,1W
3340© 4822 116 83933 15kΩ 1% 0,1W
3341© 4822 117 10833 10kΩ 1% 0,1W
3342© 4822 117 10833 10kΩ 1% 0,1W
3343© 4822 117 10834 47kΩ 1% 0,1W
3344© 4822 117 10834 47kΩ 1% 0,1W
3345© 4822 051 20101 100Ω 5% 0,1W
3346© 4822 051 20101 100Ω 5% 0,1W
3347© 4822 117 11449 2,2kΩ 1% 0,1W
3348 4822 116 52256 2,2kΩ 5% 0,16W
3349© 4822 051 20101 100Ω 5% 0,1W
3350© 4822 051 20101 100Ω 5% 0,1W
3351© 4822 117 11449 2,2kΩ 1% 0,1W
3352 4822 116 52256 2,2kΩ 5% 0,16W
3353 4822 050 11002 1kΩ 5% 0,2W
3354 4822 050 11002 1kΩ 5% 0,2W
3355© 4822 117 10833 10kΩ 1% 0,1W
3356© 4822 117 10833 10kΩ 1% 0,1W
3357 4822 050 11002 1kΩ 5% 0,2W
3358 4822 116 83881 390Ω 5% 0,5W
3359 4822 116 52175 100Ω 5% 0,5W
3361© 4822 117 10834 47kΩ 1% 0,1W
10-5
ELECTRICAL PARTSLIST
INTERFACE BOARD
Page 65

RESISTORS
–––––––––––––––––––––––––––––––––––––––––––––––––––––
3362© 4822 117 10834 47kΩ 1% 0,1W
3363 4822 116 52175 100Ω 5% 0,5W
3364 4822 116 83872 220Ω 5% 0,5W
3366© 4822 117 10833 10kΩ 1% 0,1W
3367© 4822 051 20101 100Ω 5% 0,1W
3369© 4822 117 10834 47kΩ 1% 0,1W
3370 4822 052 10229 22Ω 5% 0,33W
3371© 4822 051 20101 100Ω 5% 0,1W
3372© 4822 051 20101 100Ω 5% 0,1W
3373© 4822 117 10353 150Ω 5% 0,1W
3374© 4822 051 20101 100Ω 5% 0,1W
3375© 4822 117 10833 10kΩ 1% 0,1W
3376© 4822 117 10833 10kΩ 1% 0,1W
3377© 4822 117 11449 2,2kΩ 1% 0,1W
3378© 4822 117 11449 2,2kΩ 1% 0,1W
3379© 4822 117 10833 10kΩ 1% 0,1W
3380 4822 050 21003 10kΩ 2% 0,25W
3381 4822 050 21003 10kΩ 2% 0,25W
3383 4822 116 52283 4,7kΩ 5% 0,5W
3384 4822 116 52283 4,7kΩ 5% 0,5W
3385© 4822 117 10833 10kΩ 1% 0,1W
3386© 4822 117 10833 10kΩ 1% 0,1W
3387© 4822 051 10102 1kΩ 2% 0,25W
3388© 4822 051 10102 1kΩ 2% 0,25W
3391© 4822 051 20105 1MΩ 5% 0,1W
3392© 4822 051 20105 1MΩ 5% 0,1W
3393© 4822 051 20822 8,2kΩ 5% 0,1W
3394© 4822 051 20822 8,2kΩ 5% 0,1W
3395© 4822 051 20822 8,2kΩ 5% 0,1W
3396© 4822 051 20822 8,2kΩ 5% 0,1W
3397© 4822 051 20683 68kΩ 5% 0,1W
3398© 4822 117 10833 10kΩ 1% 0,1W
3400© 4822 051 20471 470Ω 5% 0,1W
3402© 4822 117 10837 100kΩ 1% 0,1W
3406© 4822 051 20683 68kΩ 5% 0,1W
3407© 4822 117 10837 100kΩ 1% 0,1W
3408© 4822 051 20471 470Ω 5% 0,1W
3409© 4822 117 10834 47kΩ 1% 0,1W
4303© 4822 051 20008 CHIP JUMPER 0805
4304© 4822 051 20008 CHIP JUMPER 0805
4305© 4822 051 20008 CHIP JUMPER 0805
4307© 4822 051 20008 CHP JUMPER 0805
4308© 4822 051 20008 CHIP JUMPER 0805
4309© 4822 051 20008 CHIP JUMPER 0805
4310© 4822 051 20008 CHIP JUMPER 0805
4311© 4822 051 20008 CHIP JUMPER 0805
4312© 4822 051 20008 CHIP JUMPER 0805
4314© 4822 051 20008 CHIP JUMPER 0805
4316© 4822 051 20008 CHIP JUMPER 0805
4317© 4822 051 20008 CHIP JUMPER 0805
4318© 4822 051 20008 CHIP JUMPER 0805
4319© 4822 051 20008 CHIP JUMPER 0805
4321© 4822 051 20008 CHIP JUMPER 0805
4323© 4822 051 20008 CHIP JUMPER 0805
4325© 4822 051 20008 CHIP JUMPER 0805
4326© 4822 051 20008 CHIP JUMPER 0805
4327© 4822 051 20008 CHIP JUMPER 0805
4328© 4822 051 20008 CHIP JUMPER 0805
COILS
–––––––––––––––––––––––––––––––––––––––––––––––––––––
5301 2422 536 00019 TRANSFORMER, DIGITAL OUT
DIODES
–––––––––––––––––––––––––––––––––––––––––––––––––––––
6325 4822 130 30621 1N4148
6326 4822 130 30621 1N4148
6370 4822 130 30621 1N4148
6371 4822 130 30621 1N4148
6372 4822 130 30621 1N4148
6373 3198 010 53380 BZX79-B3V3
TRANSISTORS
–––––––––––––––––––––––––––––––––––––––––––––––––––––
7325© 4822 130 42804 BC817-25
7326© 4822 130 42804 BC817-25
7327© 4822 130 42804 BC817-25
7328© 4822 130 42804 BC817-25
7329© 4822 130 60373 BC856B
7330© 4822 130 60373 BC856B
7331© 4822 130 60373 BC856B
7332© 4822 130 60373 BC856B
7340© 4822 130 60373 BC856B
7341© 4822 130 60511 BC847B
7370© 4822 130 60373 BC856B
7371 4822 130 40959 BC547B
INTEGRATED CIRCUITS
–––––––––––––––––––––––––––––––––––––––––––––––––––––
7301© 4822 209 17235 74LVU04D, 6-FOLD INVERTER
7302 4822 209 10263 HEF4052BP, SELECTOR IC
7303 5322 209 10576 HEF4053BP, SELECTOR IC
7320 4822 209 10263 HEF4052BP, SELECTOR IC
7321 4822 209 10263 HEF4052BP, SELECTOR IC
7322© 5322 209 14542 HEF4066BT, 4-FOLD SWITCH
7323© 4822 209 30095 LM833D, 2-FOLD OP-AMP.
7324© 4822 209 30095 LM833D, 2-FOLD OP-AMP.
7335© 4822 209 30095 LM833D, 2-FOLD OP-AMP.
7336© 4822 209 30095 LM833D, 2-FOLD OP-AMP.
10-6
ELECTRICAL PARTSLIST
INTERFACE BOARD
Page 66

MISCELLANEOUS
–––––––––––––––––––––––––––––––––––––––––––––––––––––
0035 4822 361 10753 CAROUSEL MOTOR
0070 4822 361 10753 TRAY MOTOR
1800 4822 265 10925 FFC-CONNECTOR, 15P
1805 4822 265 11533 FFC-CONNECTOR, 23P
1880 4822 276 13503 SWITCH
1881 4822 276 13503 SWITCH
1882 4822 276 13503 SWITCH
8001 3103 308 92020 FLEXFOIL CABLE, 23P, 420mm
8005 3103 308 91820 FLEXFOIL CABLE, 15P, 95mm
CAPACITORS
–––––––––––––––––––––––––––––––––––––––––––––––––––––
2800 4822 126 10053 180pF 10% 50V
2801 4822 122 10466 220pF 10% 50V
2802 4822 126 10053 180pF 10% 50V
2803 4822 122 10466 220pF 10% 50V
2804 4822 124 40769 4,7µF 20% 100V
2805 4822 122 10466 220pF 10% 50V
2806 4822 122 10466 220pF 10% 50V
2807 4822 126 12787 330pF 10% 50V
2808 4822 122 10466 220pF 10% 50V
2809 5322 124 41948 0,47µF 20% 50V
2810 4822 126 10053 180pF 10% 50V
2811 4822 122 10466 220pF 10% 50V
2812 4822 126 12785 47nF 20% 50V
2815 4822 126 13174 33nF 20% 16V
2816 4822 126 12878 1,5nF 10% 16V
2818 4822 126 12878 1,5nF 10% 16V
2822 4822 126 12878 1,5nF 10% 16V
2823 4822 122 33848 47pF 5% 50V
2824 4822 126 12785 47nF 20% 50V
2825 4822 121 51387 10nF 20% 16V
2826 4822 124 80231 47µF 20% 16V
2828 4822 124 40433 47µF 20% 25V
2829 4822 124 21732 10µF 20% 25V
2830 4822 121 51387 10nF 20% 16V
2831 4822 122 10577 3,3nF 10% 16V
2832 4822 122 10577 3,3nF 10% 16V
2833 4822 122 33069 33pF 5% 50V
2834 4822 122 33069 33pF 5% 50V
2835 4822 126 12785 47nF 20% 50V
2837 4822 124 40433 47µF 20% 25V
2838 4822 124 40248 10µF 20% 63V
2839 4822 124 40433 47µF 20% 25V
2840 4822 126 12882 100nF 20% 50V
2841 4822 126 12702 270pF 10% 50V
2842 4822 126 12339 2,2nF 10% 16V
2844 4822 126 12702 270pF 10% 50V
2849 4822 124 40769 4,7µF 20% 100V
2850 4822 122 33197 1nF 10% 50V
2851 4822 124 40433 47µF 20% 25V
2852 4822 126 12785 47nF 20% 50V
2853 4822 126 11585 22nF 20% 50V
2854 4822 126 12785 47nF 20% 50V
2855 4822 122 33519 470pF 10% 50V
2856 4822 122 33848 47pF 5% 50V
2857 4822 121 51387 10nF 20% 16V
2858 4822 124 81151 22µF 20% 50V
2859 4822 121 51387 10nF 20% 16V
2860 4822 124 41596 22µF 20% 50V
2861 4822 124 41596 22µF 20% 50V
2862 4822 124 11912 220µF 20% 6,3V
CAPACITORS
–––––––––––––––––––––––––––––––––––––––––––––––––––––
2863 4822 124 11912 220µF 20% 6,3V
2865 4822 126 12882 100nF 20% 50V
2869 4822 126 12785 47nF 20% 50V
2872 4822 126 12785 47nF 20% 50V
2873 4822 124 12233 47µF 20% 25V
2875 4822 126 11585 22nF 20% 50V
2876 4822 126 12785 47nF 20% 50V
2877 4822 122 33848 47pF 5% 50V
2878 4822 122 10466 220pF 10% 50V
2879 4822 126 12785 47nF 20% 50V
2880 4822 126 12882 100nF 20% 50V
2881 4822 124 40769 4,7µF 20% 100V
2882 4822 124 81151 22µF 20% 50V
2884 4822 124 40769 4,7µF 20% 100V
2885 4822 124 40769 4,7µF 20% 100V
2887 4822 126 12882 100nF 20% 50V
2888 4822 124 40769 4,7µF 20% 100V
2891 4822 122 10576 1,8nF 10% 16V
2892 4822 126 11714 4,7nF 20% 16V
2893 4822 122 10466 220pF 10% 50V
RESISTORS
–––––––––––––––––––––––––––––––––––––––––––––––––––––
3700 4822 116 83883 470Ω 5% 0,16W
3705 4822 116 83872 220Ω 5% 0,5W
3706 4822 116 83883 470Ω 5% 0,16W
3707 4822 116 83883 470Ω 5% 0,16W
3708 4822 116 83883 470Ω 5% 0,16W
3709 4822 116 52257 22kΩ 5% 0,5W
3711 4822 050 21003 10kΩ 2% 0,25W
3713 4822 116 52257 22kΩ 5% 0,5W
3714 4822 050 21003 10kΩ 2% 0,25W
3715 4822 116 52234 100kΩ 5% 0,5W
3716 4822 116 52175 100Ω 5% 0,5W
3718 4822 116 52283 4,7kΩ 5% 0,5W
3728 4822 116 52283 4,7kΩ 5% 0,5W
3730 4822 050 23303 33kΩ 1% 0,6W
3731 4822 050 21003 10kΩ 2% 0,25W
3760 4822 050 11002 1kΩ 5% 0,2W
3761 4822 050 11002 1kΩ 5% 0,2W
3762 4822 050 11002 1kΩ 5% 0,2W
3763 4822 116 52231 820Ω 5% 0,5W
3764 4822 052 10338 3,3Ω NFR25
3766 4822 050 21003 10kΩ 2% 0,25W
3768 4822 116 52283 4,7kΩ 5% 0,5W
3769 4822 050 21003 10kΩ 2% 0,25W
3800 4822 116 52291 56kΩ 5% 0,5W
3801 4822 050 21003 10kΩ 2% 0,25W
3802 4822 116 52291 56kΩ 5% 0,5W
3803 4822 050 21003 10kΩ 2% 0,25W
3805 4822 050 21003 10kΩ 2% 0,25W
3806 4822 050 21003 10kΩ 2% 0,25W
3807 4822 050 21003 10kΩ 2% 0,25W
3808 4822 050 21003 10kΩ 2% 0,25W
3809 4822 116 83883 470Ω 5% 0,16W
3811 4822 116 52251 18kΩ 5% 0,5W
3812 4822 053 10228 2,2Ω 5% 1W
3814 4822 116 52191 33Ω 5% 0,5W
3815 4822 052 10478 4,7Ω 5% NFR
3816 4822 116 83884 47kΩ 5% 0,16W
3817 4822 116 52298 680kΩ 5% 0,5W
3819 4822 116 83883 470Ω 5% 0,16W
3820 4822 116 52289 5,6kΩ 5% 0,16W
10-7
ELECTRICAL PARTSLIST
3CDC99-DS MODULE
Page 67

ELECTRICAL PARTSLIST
3CDC99-DS MODULE
RESISTORS
–––––––––––––––––––––––––––––––––––––––––––––––––––––
3821 4822 116 52289 5,6kΩ 5% 0,16W
3822 4822 116 52263 2,7kΩ 5% 0,5W
3823 4822 050 11002 1kΩ 5% 0,2W
3824 4822 050 11002 1kΩ 5% 0,2W
3825 4822 050 11002 1kΩ 5% 0,2W
3826 4822 116 52257 22kΩ 5% 0,5W
3827 4822 050 23303 33kΩ 1% 0,6W
3828 4822 116 52257 22kΩ 5% 0,5W
3831 4822 116 52257 22kΩ 5% 0,5W
3832 4822 050 21003 10kΩ 2% 0,25W
3833 4822 116 52257 22kΩ 5% 0,5W
3834 4822 116 52257 22kΩ 5% 0,5W
3835 4822 052 10338 3,3Ω NFR25
3837 4822 050 11002 1kΩ 5% 0,2W
3838 4822 050 11002 1kΩ 5% 0,2W
3839 4822 116 52234 100kΩ 5% 0,5W
3840 4822 116 52234 100kΩ 5% 0,5W
3841 4822 116 52283 4,7kΩ 5% 0,5W
3842 4822 116 83884 47kΩ 5% 0,16W
3843 4822 050 23303 33kΩ 1% 0,6W
3844 4822 116 52283 4,7kΩ 5% 0,5W
3845 4822 116 83884 47kΩ 5% 0,16W
3846 4822 050 23303 33kΩ 1% 0,6W
3847 4822 116 83961 6,8kΩ 5% 0,16W
3848 4822 116 52234 100kΩ 5% 0,5W
3849 4822 116 52234 100kΩ 5% 0,5W
3850 4822 116 52276 3,9kΩ 5% 0,5W
3851 4822 052 10338 3,3Ω NFR25
3852 4822 052 10228 2,2Ω 5% 0,33W
3853 4822 116 83883 470Ω 5% 0,16W
3854 4822 116 52175 100Ω 5% 0,5W
3855 4822 116 52175 100Ω 5% 0,5W
3857 4822 116 52191 33Ω 5% 0,5W
3858 4822 116 52257 22kΩ 5% 0,5W
3859 4822 116 52257 22kΩ 5% 0,5W
3862 4822 116 52175 100Ω 5% 0,5W
3863 4822 116 52191 33Ω 5% 0,5W
3864 4822 116 52176 10Ω 5% 0,5W
3865 4822 116 52176 10Ω 5% 0,5W
3866 4822 050 21003 10kΩ 2% 0,25W
3867 4822 116 52206 120Ω 5% 0,5W
3869 4822 050 24708 4,7Ω 1% 0,6W
3870 4822 116 52175 100Ω 5% 0,5W
3871 4822 050 21003 10kΩ 2% 0,25W
3872 4822 050 21003 10kΩ 2% 0,25W
3873 4822 116 83883 470Ω 5% 0,16W
3874 4822 050 21003 10kΩ 2% 0,25W
3875 4822 050 21003 10kΩ 2% 0,25W
3876 4822 116 52234 100kΩ 5% 0,5W
3877 4822 050 21003 10kΩ 2% 0,25W
3878 4822 050 21003 10kΩ 2% 0,25W
3879 4822 050 21003 10kΩ 2% 0,25W
3880 4822 116 52219 330Ω 5% 0,5W
3881 4822 050 21003 10kΩ 2% 0,25W
3882 4822 116 83884 47kΩ 5% 0,16W
3883 4822 116 52234 100kΩ 5% 0,5W
3884 4822 116 52276 3,9kΩ 5% 0,5W
3885 4822 116 52234 100kΩ 5% 0,5W
3886 4822 116 83884 47kΩ 5% 0,16W
3887 4822 116 83883 470Ω 5% 0,16W
RESISTORS
–––––––––––––––––––––––––––––––––––––––––––––––––––––
3888 4822 050 21003 10kΩ 2% 0,25W
3889 4822 116 83883 470Ω 5% 0,16W
3890 4822 050 11002 1kΩ 5% 0,2W
3891 4822 050 11002 1kΩ 5% 0,2W
3892 4822 116 83883 470Ω 5% 0,16W
3893 4822 116 83883 470Ω 5% 0,16W
3894 4822 116 52191 33Ω 5% 0,5W
3895 4822 116 52176 10Ω 5% 0,5W
3897 4822 116 52175 100Ω 5% 0,5W
3899 4822 116 52175 100Ω 5% 0,5W
COILS
–––––––––––––––––––––––––––––––––––––––––––––––––––––
1810 4822 242 10849 CRYSTAL 8,46MHz
DIODES
–––––––––––––––––––––––––––––––––––––––––––––––––––––
6871 4822 130 30621 1N4148
6872 4822 130 30621 1N4148
6873 4822 130 30621 1N4148
6874 4822 130 30621 1N4148
6875 3198 010 55180 DIO REG BZX79-B5V1
6877 3198 010 53980 DIO REG BZX79-B3V9
TRANSISTORS
–––––––––––––––––––––––––––––––––––––––––––––––––––––
7812 4822 130 40959 BC547B
7874 4822 130 40959 BC547B
7875 4822 130 40959 BC547B
INTEGRATED CIRCUITS
–––––––––––––––––––––––––––––––––––––––––––––––––––––
7801© 4822 209 17286 TZA1024T/N1, HF-AMPLIFIER
7806 9352 628 49112 IC TDA7073A/N4, SERVO DRIVER
7807 9352 628 49112 IC TDA7073A/N4, MOTOR DRIVER
7810© 8203 303 11278 PCM1716, D/A CONVERTER
7871 9352 628 49112 IC TDA7073A/N4, MOTOR DRIVER
7873 5322 209 10421 HEF4094BP, SHIFT REGISTER
7876© 4822 209 16143 LC89170M, CD TEXT IC
7877© 9352 641 80557
SAA7324H/M2B, CD10 SIGNAL PROC.
7878 4822 209 72042 MC78L05ACP, STABILIZER
10-8
 Loading...