

Page 1
PHILIPS
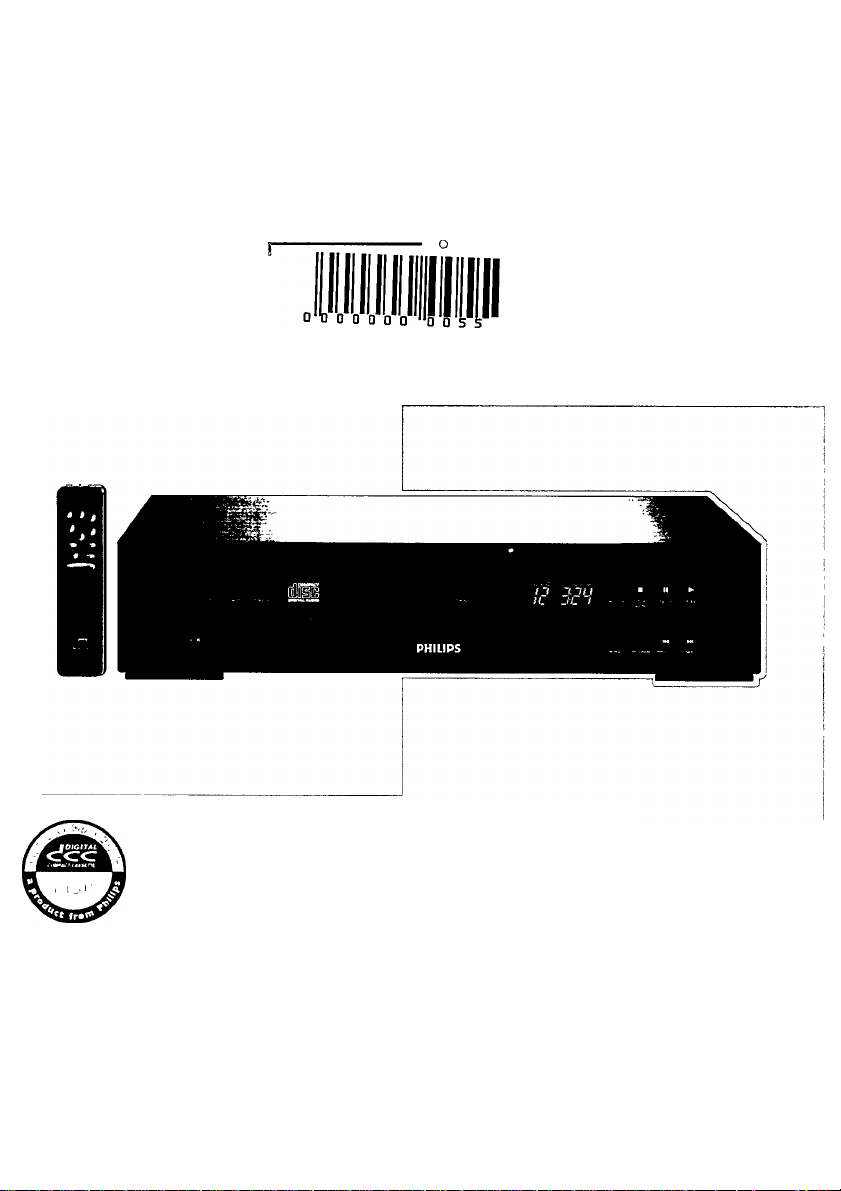
CD 163 ! CD 165 CD Player
□
Instructions for use
Mode d’emploi
Bedienungsanleitung
Gebruiksaanwijzing
Instrucciones de manejo
Istruzioni per Tuso
Bruksanvisning
Brugsanvisning
Käyttöohje
PHILIPS
Page 2
INDEX
México
Es necesario que !ea cuidadosamente su instructivo de
manejo.
Garantía pagina 75
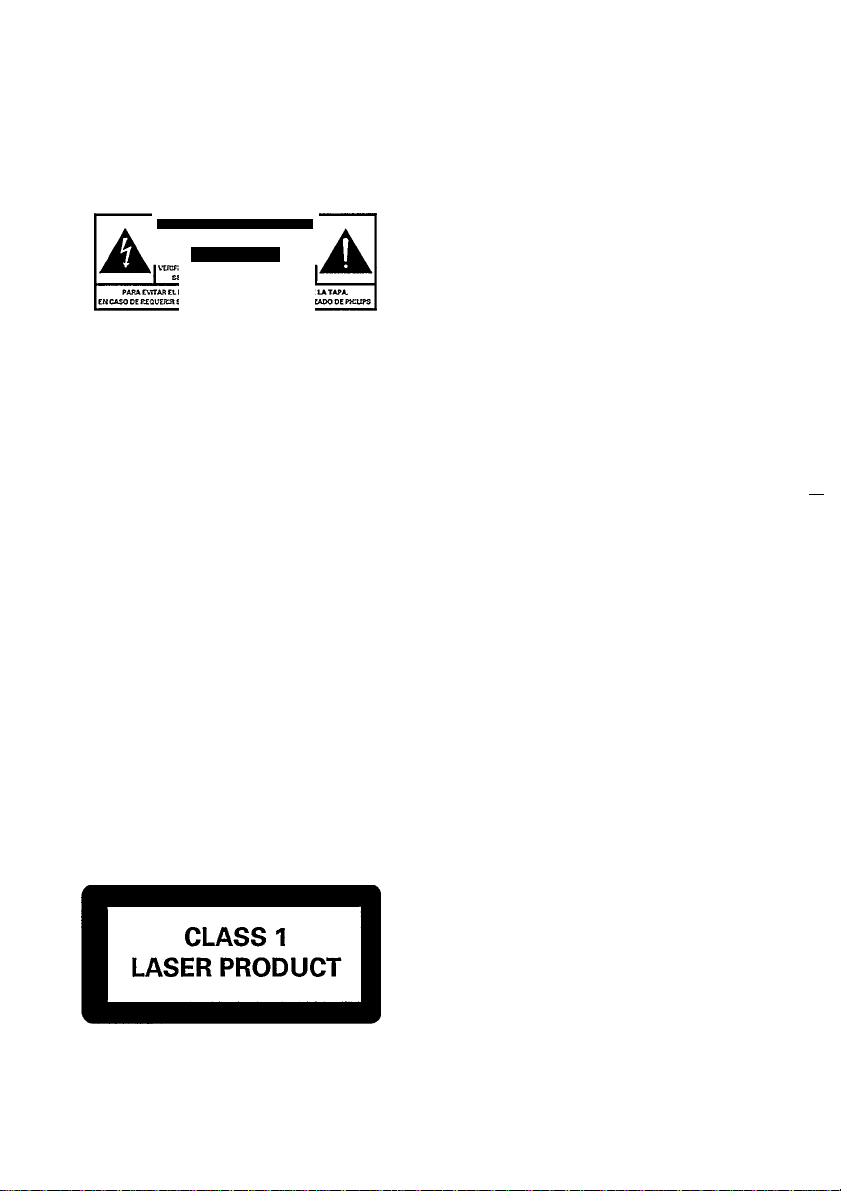
PRECAUCION > ADVERTENCIA
I NOAB»R.R£S«ODECHOQUEtl£CTR:CO I
ATENCION
KOH
NOM
@ Australia
Guarantee
page 74
(@i New Zealand
Guarantee
page 74
C§E) English
CD Français
CD Deutsch
(ÑL) Nederlands pagina 24 ^
CD Español
CD Italiano
page3 *5,
page 10 ÿ
Seite 17 -g
pagina 31
pagina 38 ^
>c
75
Q
•D
•a
2
x:
w
c
lU
«
U
Ci
t/i
O
O
O
(0
IJÜ
O
C
Dansk
CD Svenska
dE> Suomi
CD 41:$;
ùü
(O
sida 52 c
CO
Û
CO
CO
side 45 c
sivut 59 O
66 w
(0
(0
Ci
>
3
Page 3

FUNCTIONAL OVERVIEW
m
3
»■
3"
OPERATION
POWER - Switching on and off.
OPEN-CLOSE - Opening and closing the CD
compartment. The compartment also closes
when the front is pressed briefly.
I(nfra R(ed) SENSOR, (for CD165 only)
Receives the signals from the remote control.
Display - Informs you about the functioning of
the player.
SHUFFLE - PLAY in random order.
STOP/CP
- Stopping play
- Erasing a programme (CP = Clear
Programme).
PAUSE - Interrupting ptay.
PLAY
- Starting play
REPEAT - Repeating play.
9
PROGRAM - Opening and closing the memory
10
when compiling a programme.
K4 andm
11
- Selecting another track during play.
- Selecting a track to start play with.
- Fast search to a particular passage during
play.
- For reviewing of tracks in a program.
- Return to beginning of a track during play.
2 3 5 6 7 8
9 10 11
REMOTE CONTROL (for CD165 only)________________
- The life of the batteries of the remote control is
around one year. For replacement only use
batteries of the type R03, UM4 or AAA.
- The buttons on the remote control have the
same functions as the corresponding ones on
the player.
- Extra buttons:
12 SCAN - Automatically playing the beginning of
each track.
13 - VOLUME + - Adjusting the sound level when
the player is connected to an amplifier or HiR
system without its own remote control.
14 TIME-Selecting the time information you want
Page 4

FUNCTIONAL OVERVIEW
DISPLAY
SHUFFLE TRACK O))) TOTAL TRACK TIME
iTofrm m LD !i/.m m
PAUSE i±\/iMi±\i i±\i-i±\i i±\i
PAUSE - Lights up when play is interrupted.
TRACK - Indicates:
- what track is being played;
- thenumberoftracksontheCDorinaprogramme.
TRACKTIME- Indicates the elapsed playing time of
the track being played.
TOTAL TIME- Indicates the total playing time of the
CD.
REPEAT - Lights up when you repeat a CD or a
programme.
REPEAT 1 - Lights up when you repeat a track.
SHUFFLE - Lights up when the tracks are played in
random order.
PROGR - Flashes when a programme is being
compiled.
- Lights up when a programme is being played,
oil) - Lights up when the player receives a command
from the remote control.
DISPLAY MESSAGES
P C R B
Lights up when the CD’s contents list is being scanned.
fjQ msc
Lights up when there is no CD in the CD compart
ment.
«0 RUBIO BISC
Lights up when insert anon audio CD (CD-ROM, CDor CDV).
WRDWG TRRD;
Lights up if you select a non-existent track number.
GO TO PLRa
Lights up if you try to activate a function for which you
must first start play.
GO TO STOP
Lights up if you try to activate a function forwhich you
must first stop play.
UJ
O)
c
Page 5

PLAY
(Q
m
3
(fl
3"
NORMAL PLAY
NOTE! Use only audio CDs; no CD-ROM, CD-I or CDV.
• Press POWER to switch the player on.
• Open the CD compartment by pressing OPEN*CLOSE.
- OPEN lights up.
• Insert an audio CD, printed side up, and close the compartment.
CLOSE lights up, followed by READ. The number of tracks and the playing time of the CD are
shown on the display.
n nrr
L L IJJL
.Press PLAY to start play.
You can also press PLAY immediately after inserting the CD, the compartment then closes
automatically.
You can also close the CD compartment by pressing its front, PLAY will then start automatically.
- The track being played is always shown under TRACK and its elapsed playing time is shown under
TRACK TIME.
nr 11 Tl
l\LI 111 L 1 7_ _/
TMCK TMCKTIVE
1
1.11
TMCK
1
L
- Play will stop after the last track.
• Press POWER to switch the player off.
You can interrupt play by pressing PAUSE; PAUSE then lights up.
You can also restart play by pressing SCAN (on the remote control) or SHUFFLE.
You can stop play by pressing STOP/CLEAR PROG or OPEN-CLOSE.
TMCK VMS
I-JJ
I 7_ _/
Page 6

PLAY
RETURN TO BEGINNING OF A TRACK_______________
• Press r« (less than 0.5 second) during play to
replay the current track.
• This replay feature also works in SCAN and
SHUFFLE modes.
SELECTING ANOTHER TRACK (w »w)
• In PLAY mode.
- Press r« (less than 0.5 second) for 2 times
to go to the previous track.
- Press i« (less than 0.5 second) repeatedly
to go to a lower track number.
- Press ►») (less than 0.5 second) to select
next track.
- The music stops and a moment later the
selected track begins to play.
• In STOP mode.
- Press or 1« (less than 0.5 second) until
the desired track number appears under
TRACK.
SEARCHING FOR A PASSAGE (w< w)
• Hold down to search backwards to the
beginning.
• Hold dov/n to search forwards to the end.
The search speed is determined by how long a key is
pressed:
- the first 2 seconds fairly slowly, with sound;
- then at the maximum speed, with no sound.
if you reach the end of the iast track and release »w,
play will resume a few seconds before the end of the
CD.
STARTING WITH A PARTICULAR TRACK (w w)
• Press ►won« (less than 0.5 seconds) until the
desired track number appears under TRACK.
• . Press PLAY.
- Piay starts from the selected track.
PLAYING THECD IN RANDOM ORDER (SHUFFLE)
• Press SHUFFLE before or during play.
- If the CD compartment was open, it wili now
close.
- SHUFFLE lights up and all the tracks are now
played in a random order.
• Press SHUFFLE again if you wish to return to
normal play.
_______________
_______________
* •
REPEATING PLAY (REPEAT)
Repeating a track:
• Press REPEAT before or during play.
- REPEAT 1 lightsup,thetrackwillnowberepeated
continuously.
• Press REPEAT fw/ce to stop the track being
repeated.
Repeating the CD:
• Press REPEAT fw/ce before or during play.
- REPEAT lights up, the CD will now be repeated
continuously.
• Press REPEAT again to stop the CD being
repeated.
NOTE
The following functions can only be operated
using the remote control. In CDf63 the RC5-IN
must be connected to an amplifier or HIFI System
vjith 'SCAN' or TIME' on its Remote Control.
SCANNING A CD (SCAN)
• Press SCAN before or during play.
- If the CD compartment was open, it will now
close.
- SCAN lights up for 2 seconds and the first 10
seconds of each track are played in turn, 10
seconds are counted down each time under
TRACK TIME.
• When the player reaches atrack which you wish
to hear in full, press SCAN again or PLAY.
CALLING UP OTHER TIME INFORMATION
TIME
Press TIME whenever you want to know the
remaining playing time of the track being played.
Press TIME again if you wish to know the
remaining playing time of the entire CD (TOTAL
TIME).
Press time again if you wish to return to the
elapsed playing time indication of the current
track (TRACK TIME).
O)
c
lU
If you press REPEAT twice, the tracks will be re
peated in a different order each time, although the
first track played will always be the same.
Page 7

PLAY
PROGRAMMING/
SYSTEM ASPECTS
ADJUSTING THE SOUND LEVEL (-VOLUME +)
m
(for CD165 only)
3
(Q
5T
CAUTION:
3"
- Usethe-VOLUME+keys (on the remote control)
only if the player is connected to an amplifier or
HiFi system without its own remote control.
_________________________________
Note:
- The setting chosen with -VOLUME+ will be
cancelled when the player is switched off.
• Hold -VOLUME down.
- VOL lights up: the output signal from the player
will now decrease gradually.
- The successive steps are shown on the display.
• Release the key as soon as the required sound
level is obtained.
• Hold VOLUME + down.
- VOL lightsup.theoutputsignalwill nowincrease
again gradually to the maximum level.
- The successive steps are shown on the display.
• Release the key as soon as the required sound
level is obtained.
STORING A PROGRAMME (PROGRAM and w w)
You can store 30 tracks from each CD in any required sequence in a program.
FULL lights up if you exceed the maximum of 30 tracks.
PLAYING THE PROGRAMME (PLAY)
• Press PLAY.
Play starts with the first numberoftheprogramme.
All keys (except program) can be used during pro
grammed play.
Search fora particular passage is only possible within
the track being played.
REVIEWING OF TRACKS IN A PROGRAM
• If you have stored a programme, the sequence
of the programme can be reviewed by pressing
1« or key. This can only function when the CD
player is not playing (in stop mode).
ERASING A PROGRAM
(STOP/CP or OPEN-CLOSE)
• Press STOP/CP twice or, if the CD has already
stopped, just once; you can also press
OPEN-CLOSE straight away.
- The programme has now been erased.
INTERFERENCE TO TUNER
NOTE!
- To avoid unnecessary interference, always switch
off the CD player when you are in Tuner mode.
________________
•
_______________________
_______________________
rill I
I /_//_/_
In STOP mode, press PROGRAM to open the memory.
PROGR lights up and IJiMctJstarts flashing.
Press 1« or until the desired track number appears under TRACK.
Press PROGRAM again.
The track number has now been stored in the player’s memory.
Select the other track numbers required and store each track by pressing PROGRAM.
The number of tracks and the playing time of your programme will be shown under TFIACK andTOTAL
TIME.
TMCK TMCKVME
PROSft 1
L
Press STOP/CLEAR to stop programming.
1.11
1 • /_ _ /
Page 8

TROUBLESHOOTING
If a fault occurs, run through the points listed below before taking your player for repair.
If the fault remains, try to clear it by switching the player off and on again. If this also fails to help, consult your
dealer.
Under no circumstances should you repair the player yourself as this will invalidate the guarantee!
SYMPTOM
- PLAY of the CD does not
start or interruption of
PLAY
- Sound skips (at the same
part)
- The CD skips tracks. - The CD is damaged or dirty.
- Play does not start from
the first track
- No sound or bad sound - Loose or wrong connections.
- Remote control does not
function
POSSIBLE CAUSE REMEDY
- The CD has been loaded
upside down.
- No CD inserted.
- The CD is badly scratched or
dirty.
- Moisture condensation on the
lens.
- The CD is dirty.
- Program or SHUFFLE activated
- Strong magnetic fields near the
CD player.
- Batteries are empty.
- RC5-IN line not properly
connected or missing
(for CD163 only)
• Reload the the CD, label side
up.
• Insert a CD, label side up.
• Clean the CD player with a soft,
lint-free cloth.
• Leave the CD player in a warm
environment until the moisture
evaporates.
• Clean the CD with a soft,
lint-free cloth.
• Replace or clean the CD.
• Switch off SHUFFLE or clear
programme.
• Check connections.
• Find another place for the unit
or change connections.
• Replace the batteries.
• Connect the RC5-IN line
(for CD163 only)
£
O)
c
LU
- Remote control commands
are not properly received
- Recorded level of cassette
tape fluctuates or weak
(in TAPE mode).
- The distance between remote
control and CD player or HIFi
System is further than
10 metres.
- Volume +/- button has been
pressed during recording
(for CD165 only).
• Use remote control receiver
EM 2200/2201.
• Reduce the distance between
remote control and CD player.
• Switch off the set to reset the
signal level of CD player or
press volume-i- button until
maximum signal level of CD
player is reached.
(for CD165 only).
Page 9

73
Page 10

GUARANHE AND SERVICE VAUD FOR AUSTRAUA
Ths fc^nafils Qi'.eri to liiapufd^aserb/Ci'Sv.-srrant/are in addition to aliothjr
fights and rerred as. v.h ch. under the Trade Practices Act or ether Cemn-onwealth or State la.v. the purchaser or o.’.ner has in respect of the product
TheFniiips product Cannes the follQ.ningv.arranties
- C-senesHifi-systems IZtr.onihs
- Compact Disc Pf3',ers 12rronths
- HomeAudoSystems Smonths
- C'oekrados.portablerado$.c3$setterecorders,c3ssettep'a,ersandrado
recorders. S3 days
Any defect in materials or workmanship cccumng withm the specified period
fromthedateofdalaery.willberectifiedfresofchargebyUieretailerfromv.tom
Uus product V/3S purdiased
Note: Please retain \ our purchase docket to ass'st prompt sar\*ce.
Conditions of this warranty
1. All claims for warranty seance must be made to №e retailer from whom this
product was purchased All transport (¿larges incurred in connection with
vrarranty serwee or rep'acement will be pa’d by the purchaser
Z These warranties do not co'.er battenes and extend only to defects in
materials or warkman^ip occumng under normal use of the product where
operated in accordance with our instructions
Philips Consumer Products Division,
Technology Park
Hgtree Drive, Australia Centre
Homebush 2140, New South Wales
GUARANTEE AND SERVICE FOR NEW ZEALAND
Th3r'<-',ou for pjrchasmg this qua’ity Phil psp'ol.cl
Philips t.'t.vZeo’and Ltd guarantees th sprcductaoa nstd:fe:ii.eccT;:r:'>Ts.
andfau'tr v.orkmaosh pfora penedof I2rr;nihs A,n/defect inrretene’sc''
workmansh pcc-xfrin3w.thm12montfisfromthsd:teoipjrcf'3:esih,ecttothe
folio/.mgconditionswiiltarectifiedfreeoicha'geb/iiercta 'erfrcrnwhcmtii s
P'cductwaspjrchesed
Conditions.
1. Theproductnijstha.eteenpjrchastdinfve.vZea'ard Asp'cofparchece,
retain the ongnal sa’es docket md caing the date of purchase
Z TheguaranteeappliesonVtofau'tscausedb/defect.ecoTpo'ents.orfaj'ry
wortuT-ansh pen the part of the manufacturer
3. Theguaranteedoesrotco.eriailurescausedbymisuse.reg'ecLrormalwcar
and tear, acc-denta! breakage, use on the ircorrect \-oltage. use conuary to
operatinginstructions.orunauthonsedrrcdificaiiontotheprodsctorrcpa'fby
an unauthorised techn.can.
4. Reasonab’e ev.der.ee {m the form of a sa^es docket) must be supp’ ed to
ind cate that iheprcductwaspurdiasedr.orrore than 12rronthspriorto the
dateofyoufc'aim.
5. In thee.ent of afailure. Philips shall teundernoliab Jityforany injury, orany
loss or damage caused to property or products other than the prcd'.ct under
guarantee
Thjsga3r3nteedcesPOtprejudce^vurfigbtsvr:dzrcoT.Tcnf2.vsr.dst2tuti:.2r'd
is in addition to the normai respons'b hi es of the reta ferard Fi) fp$.
How to claim.
Should your Philips product faJ with n the guarantee penod, p'ease return it to
Uie retailer from whom It was purchasel Inmostcasesihereiaiferwillbeab’e
to satisfactonhy repair or rep'ace the product
Ho-.’.a.-ef.shoufdthsretailernotteab’etoconc'udethemattersatisfactorif/.cr
if you ha'.e other difficulties c’aim ng under ihs guarantee, p'ease contact
ITie Guarantee Controller,
Philips New Zealand Ltd.
B P.O.Box 41.021
Auckland
^(09)8494160
fax^(09)84978S8
74
Page 11

GARANT1APARAMEXIC0
Este epareto está fabricado con materiales de alta calidad y ha sido
codadosamente verificado Philips, por lo tanto, da a usted una garantía de 12
meses a partir de su fecha de compra
La garantía ampara la repos'Ción de las p szas defectuosas deb das a fallas en
su montaje o en los materiales, incluyendo la mano da obra recesana para su
reemp'320 en nuestras Sucursales o talleres autonzados
En caso de fallas en su aparato le rogamos se sirv'a poner en contacto con su
distribuidor
Esta garantía no cubrirá las averías que resulten como consecuencia de una
instalación incorrecta del aparato, manifiesto maltrato o uso inadecuado de!
mismo
Philips se ob'iga a reparar y de'.'O Ver a usted su aparato en un plazo no mayor
de 30 días hábiles contados a partir de la feiAa de haber ingresado su aparato
aunodanuestros talleres
Para que esta garantía sea válida, es necesario que el certificado que figura en
la parte posterior de esté instructivo haya sido debidamente llenado en el
momento de la compra del aparato
En caso de extravío del certficado con la presentación de la factura o remisión
de su aparato podrá hacer efectivá la garantía correspondiente
Si usted tiene alguna duda o pregunta que no le pueda solucionar su
distribuidor, por favor ponerse en contacto con
Oficinas Centrales de Servicio.
Av. Coyoacán No. 1051. Col. del Valle,
03100MÉXICO.D.F.
S 5-75-20-22 o 5-75-Ot'OO
75
Page 12

CD 163
CD 165
3139 116 IS0I7
TL-9664ß0-10
 Loading...