

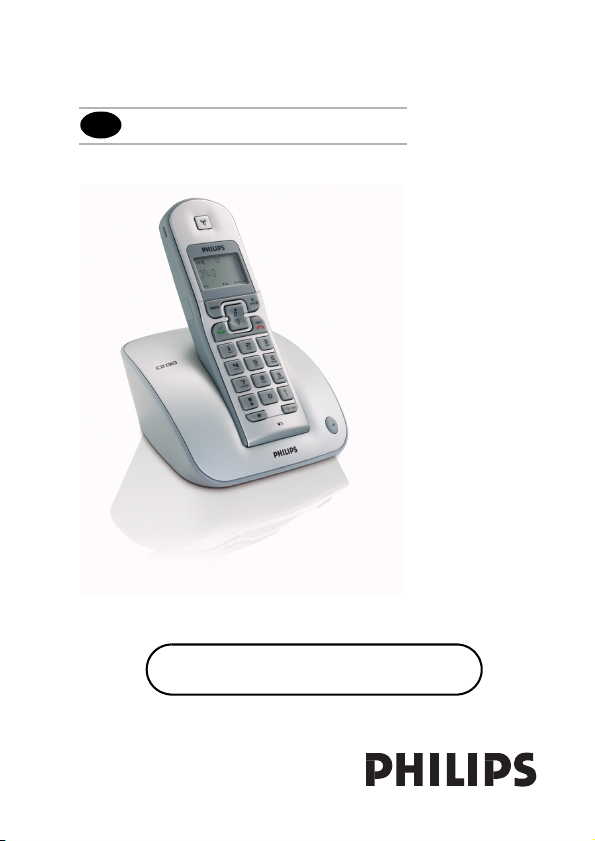
Philips CD1302S, CD1303S, CD1301S, CD1304S User Manual
EN
User manual
Charge the handset(s) for 24 hours
before use !
EN
Welcome mode
Before using your CD 130, you need to configure it according to the country of
use. Install the batteries. After a few minutes of charge, the Welcome screen
appears.
1. Press .
2. Browse through the different countries.
3. Press to confirm the country that suits you.
Your phone is ready to be used.
If you need to re-configurate your CD 130, see page 32.
Note: If BACK is pressed, the handset will show the country
selection screen again.

Contents
Welcome mode ...................................................2
Contents ..............................................................3
Important information .......................................4
What’s in the box ................................................5
Handset and base station ...................................6
Icons on the handset display ..............................8
Installing the base station ...................................9
Installing the batteries ......................................10
Using GAP standard compliance ....................10
Menu structure ..................................................12
Handset power OFF and ON ...........................13
Keypad lock / unlock .........................................13
Text or number entry ......................................13
Call ......................................................................14
Redial list ............................................................16
Phonebook .........................................................18
Call log ...............................................................21
Using the Intercom ...........................................23
Other functions .................................................24
Paging ...........................................................................24
Chain Dialing ..............................................................24
Clock and Alarm Settings .......................................24
Personal settings ...............................................25
To set the handset ringer volume
or silence mode (Ringer OFF) ...............................25
To select the handset ring melody .......................26
To activate / deactivate the key tone ..................26
To rename the handset ...........................................26
To activate / deactivate the auto answer mode 27
To change the display language .............................27
Advanced settings .............................................27
To change the recall time .......................................27
To change the dial mode ........................................28
Local area code setting ............................................28
To set or change Call Barring ................................28
To activate / deactivate Call Barring ....................29
To set or deactivate the prefix number ..............29
To set or change an SOS number ........................30
To register a handset ...............................................30
To unregister a handset ..........................................31
To change the PIN code .........................................31
To reset to default settings (base station
and handset) ...............................................................31
Country selection .....................................................32
Default settings (after Reset Unit) ........................32
Troubleshooting ................................................33
Informations ......................................................35
EN
3

EN
Important information
For your safety
Before installing your CD 130, carefully read the following informations:
Power requirements
> This product requires an electrical supply of 220-240 volts, alternating monophased
power, excluding IT installations defined in standard EN 60950. In case of power
failure, the communication can be lost.
Warning ! The electrical network is classified as hazardous according to criteria
in the standard EN 60950. The only way to power down this product is to unplug
the power supply unit from the electrical outlet. Ensure the electrical outlet is located close to the apparatus and is always easily accessible.
Telephone connection
>
Always use the line cable provided with the product otherwise you may not have a
dialling tone.
>
If you have a broadband DSL Internet connection, please make sure you have one
DSL filter plugged directly on each line socket used in the house and check the
modem and the phone are plugged in the correct filter slot (one specific for each).
Need help ?
More troubleshooting and FAQ’s :
Online help: www.p4c.philips.com
Troubleshooting : page 33 and page 34
4

One CD 130 base
station
What’s in the box
One CD 130 handset
-
+
+
-
2 NiMh AAA
550 mAh rechar-
geable batteries
EN
A power supply unit
A line cord*
One belt clip
(Country dependent)
User manual
*Note : You may find in the box the line adaptor delivered separately from the
line cable. In this case, please connect the line adaptor to the line cable
before connecting it to the line socket.
Note : In CD 130 multi handset packs, you will also find one or more additional
handsets, chargers with power supply units and additional rechargeable batteries.
Guarantee Quick Start Guide
5

EN
12
11
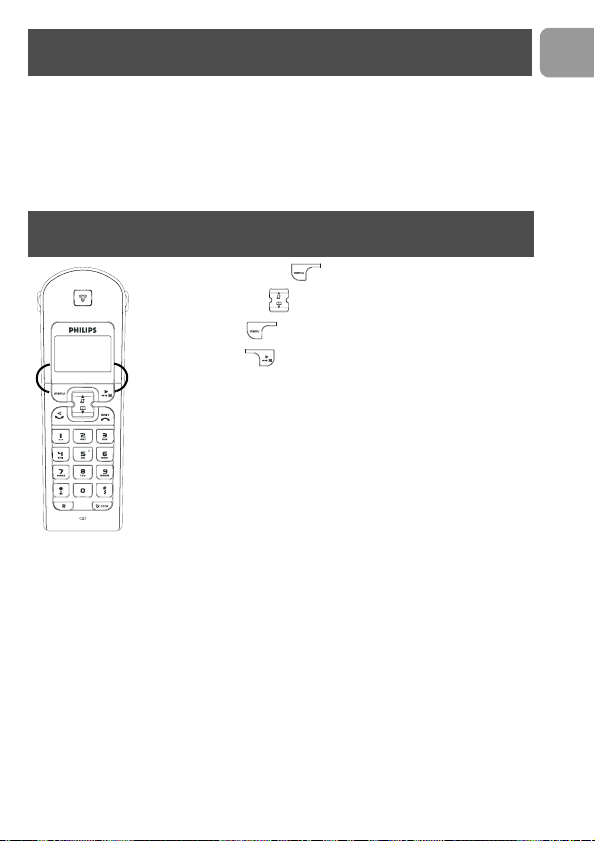
Handset and base station
CD 130 Handset
1 Earpiece
2Display
Icons see page 8
1
3 Menu key & Softkey OK
- In idle mode, short press to access
the main menu.
- Short press to select next menu level.
- In Edit & Phonebook mode, short press
2
3
4
5
6
7
8
9
10
to confirm OK.
- In Call log or Redial list to save the
selected record in the phonebook.
4 Redial list, mute key & Softkey Back
- In idle mode, short press to access the
Redial list.
- In talk mode, to mute/ unmute the
handset microphone.
- In edit mode, to cancel last digit.
- In phonebook mode, to view number
and name.
- In Call log to switch from name/number
to time/date.
5 Navigation keys
- Scroll up/down to move to the next or
previous record in the Call log, Redial
list or Phonebook.
- Scroll up to access the Call log from idle
mode.
- Scroll down to access the Phonebook
from idle mode.
6 Hang-up key
- A short press to hang-up the line or to
exit (return to idle mode).
- A long press to power off the handset.
- To exit Edit & Phonebook mode, Redial
list & Call log.
7 Ringer ON/OFF & Insert #
- Short press to insert #.
- Long press to insert a pause (P) when
dialling.
- Long press to turn the ringer ON/OFF.
6
Handset and base station
8 Intercom
- Short press to initiate an internal call.
9 Recall key
- In idle mode, long press to switch from handset name display to Date/Time display.
- To insert R for operator services when on line.
10 Microphone
11 Keypad lock & insert
- Short press to insert
- Long press to lock/unlock the keypad in idle mode.
12 Pick-up key
- In idle mode, press to take the line and answer a call.
- In Phonebook mode, Redial list and Call log press to dial the selected number.
- Handset loudspeaker* ON/OFF (press 2 times to activate the handsfree mode).
*Warning ! Handsfree activation could suddenly increase the volume in the
loudspeaker to a very high level. Make sure the handset is not too close to your ear.
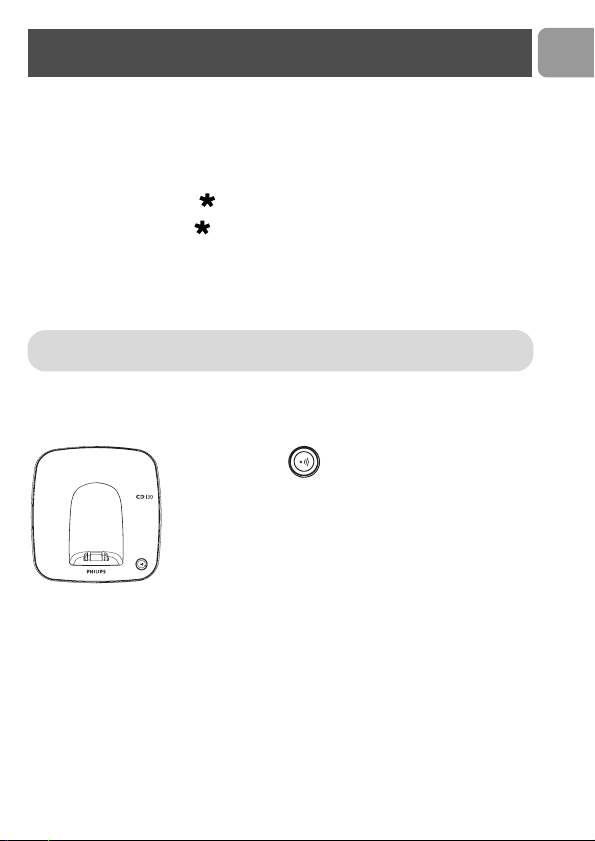
CD 130 base station
Paging key
The paging key enables you to locate a missing handset if the
handset is in range and has charged batteries. Press the key
until the handset starts to ring. Once retrieved, press paging
key again to end paging.
EN
7
EN
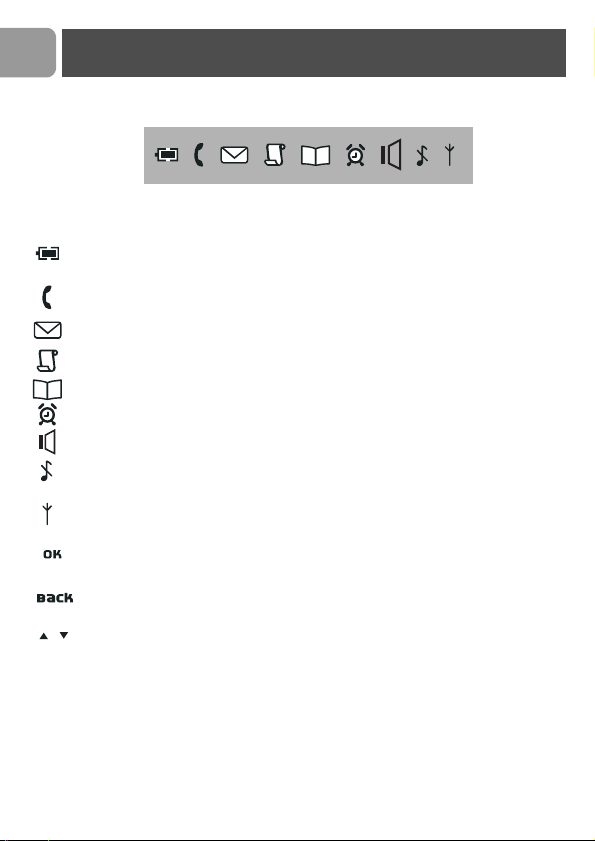
Icons on the handset display
The display gives information about the operation of your telephone. Following
icons can be shown in the headline of the display:
When being used for the first time, it is sometimes necessary to wait until the
battery is sufficiently charged before the icons appear on the display.
When ON the battery is fully charged. When blinking, this symbol indicates
that the battery needs to be charged.
An external call is in progress. When blinking, this symbol indicates that there
is an internal call in progress or that the line is already busy.
New message(s) on your voice mailbox.
New Call log records or Call log records are being reviewed.
Phonebook is accessed.
The alarm clock is activated.
The handset loudspeaker is activated.
The ringtone is deactivated.
The handset is registered and in range of the base. When blinking, this symbol
indicates that the handset is not registered to the base or out of range.
Turn ON when entering Menu mode. In Phonebook mode to enter next menu
level.
Turn ON when entering Menu mode. In Phonebook mode to return to higher
menu level. In editing mode to delete the last digit/character entered.
Indicates further options are available.
8
Installing the base station
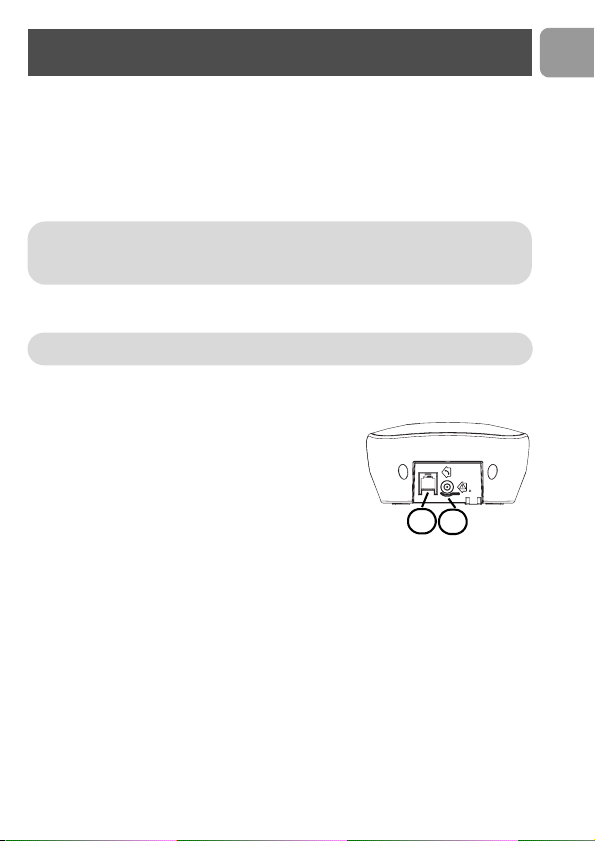
Installing the base station
Place your product close enough to the telephone and mains power sockets so that the
cables will reach. To properly install the base station, plug the line cord and the power
cable into the base station. Plug the cord and the cable into the wall. If you have a
broadband DSL Internet connection, please make sure you have one DSL filter plugged
directly on each line socket used in the house and check the modem and the phone are
plugged in the correct filter slot (one specific for each).
Warning ! The electrical network is classified as hazardous according to criteria in
the standard EN 60-950. The only way to power down this product is to unplug the
power supply from the electrical outlet. Ensure the electrical outlet is located close
to the apparatus and is always easily accessible.
Please take care that the power supply and telephone line are connected to the correct
sockets as incorrect placement could damage your equipment.
Warning ! Always use the line cable provided with the product otherwise you may
not have a dialling tone.
1 Connect the telephone line cord delivered with the
product.
2 Connect the power supply.
1
2
EN
9

EN
Installing the batteries
Installing and replacing the batteries in the handset
To insert the batteries, open the battery cover, place the batteries as
indicated and then replace the battery cover. When the battery icon is
blinking, charge is needed. Allow 24 hours for the batteries to fully charge.
On first use it may be necessary to wait for a few minutes before seeing
symbols on the display.
Warning : the base station must always be plugged into the mains
when charging or when in use. Always use rechargeable batteries.
The warranty does not apply to the batteries and any other components
which have a limited lifetime or are exposed to wear.
Warning ! Always use the line cable provided with the product
otherwise you may not have a dialling tone.
Batteries should not be disposed of with general household waste.
Battery life and range
Optimal battery life is reached after 3 cycles of complete charging & discharging. When
reaching the range limit and the conversation becomes crackly, move closer to the base.
To reach optimal range, place the base station away from electrical appliances.
Battery life in talk
time
up to 12 hours up to 150 hours up to 50 metres up to 300 metres
Battery life in
standby mode
Indoor range Outdoor range
Using GAP standard compliance
TM
The GAP standard guarantees that all DECT
with a minimum operating standard irrespective of their make. Your CD 130 handset and
base station are GAP compliant, which means the minimum guaranteed functions are :
register a handset, take the line, receive a call and dial. The advanced features may not be
available if you use another handset than a CD 130 with your base station.
To register and use your CD 130 handset with a GAP standard base station of a different
make, first follow the procedure described in the manufacturer’s instructions, then follow
the procedure described on page 30.
GAP handsets and base stations comply
10
Using GAP standard compliance
To register a handset of another make to the CD130 base station, place the base station
into registration mode (page 30), then follow the procedure in the manufacturer’s
instructions.
TM
is a Trade Mark of ETSI registered for the benefit of the implementers of the
DECT
DECT technology.
Using the menus
From idle mode, press to enter the menu. Use the
Navigation keys to go up or down in the menu list.
Press Softkey OK to confirm the selection.
OK BACK
Press Softkey BACK to exit the menu or to go back to the
previous menu level.
EN
11
 Loading...