

Page 1
BRE610-BRE652
234
1
2
5
678
9
101112
13
141516
17
18
192021
222324
25
262728
>75% recycled paper
>75% papier recyclé
© 2017 Koninklijke Philips N.V.
All rights reserved
xxxx.yyy.zzzz.a (8/8/2017)
Page 2

English
8
7
13
22
24 25
23
17
18
19
2021
14
16
15
11
2728
1
3
4
2
5
6
26
BRE652/10
BRE652/00
BRE651/00
BRE650/10
BRE650/00
BRE644/10
BRE644/00
BRE640/10
BRE640/00
BRE632/00
BRE631/00
BRE630/10
BRE630/00
BRE619/00
BRE652/10
BRE652/00
BRE651/00
BRE650/10
BRE651/00
BRE631/00
BRE652/10
BRE652/00
BRE651/00
BRE650/10
BRE650/00
BRE644/10
BRE644/00
BRE640/10
BRE640/00
BRE634/10
BRE632/00
BRE630/10
BRE630/00
BRE620/10
BRE620/00
BRE619/00
BRE610/00
BRE652/10
BRE652/00
BRE651/00
BRE650/10
BRE650/00
BRE644/10
BRE644/00
BRE640/10
BRE640/00
BRE634/10
BRE632/00
BRE631/00
BRE630/10
BRE630/00
BRE619/00
BRE611/00
BRE652/10
BRE652/00
BRE644/10
BRE644/00
BRE640/10
BRE640/00
BRE632/00
BRE631/00
BRE611/00
BRE651/00
BRE650/00
BRE650/10
BRE640/10
BRE640/00
BRE634/10
BRE631/00
BRE630/10
BRE630/00
BRE620/10
BRE620/00
BRE652/10 BRE652/00
BRE652/10
BRE652/00
BRE651/00
BRE650/10
BRE650/00
BRE644/10
BRE644/00
BRE640/10
BRE640/00
BRE634/10
BRE619/00
BRE650/00
BRE644/10
BRE644/00
BRE652/10
BRE652/00
BRE651/00
BRE650/10
BRE644/10
BRE644/00
BRE650/10
BRE650/00
BRE652/10
BRE652/00
BRE651/00
BRE650/10
BRE650/00
12
10
9
1
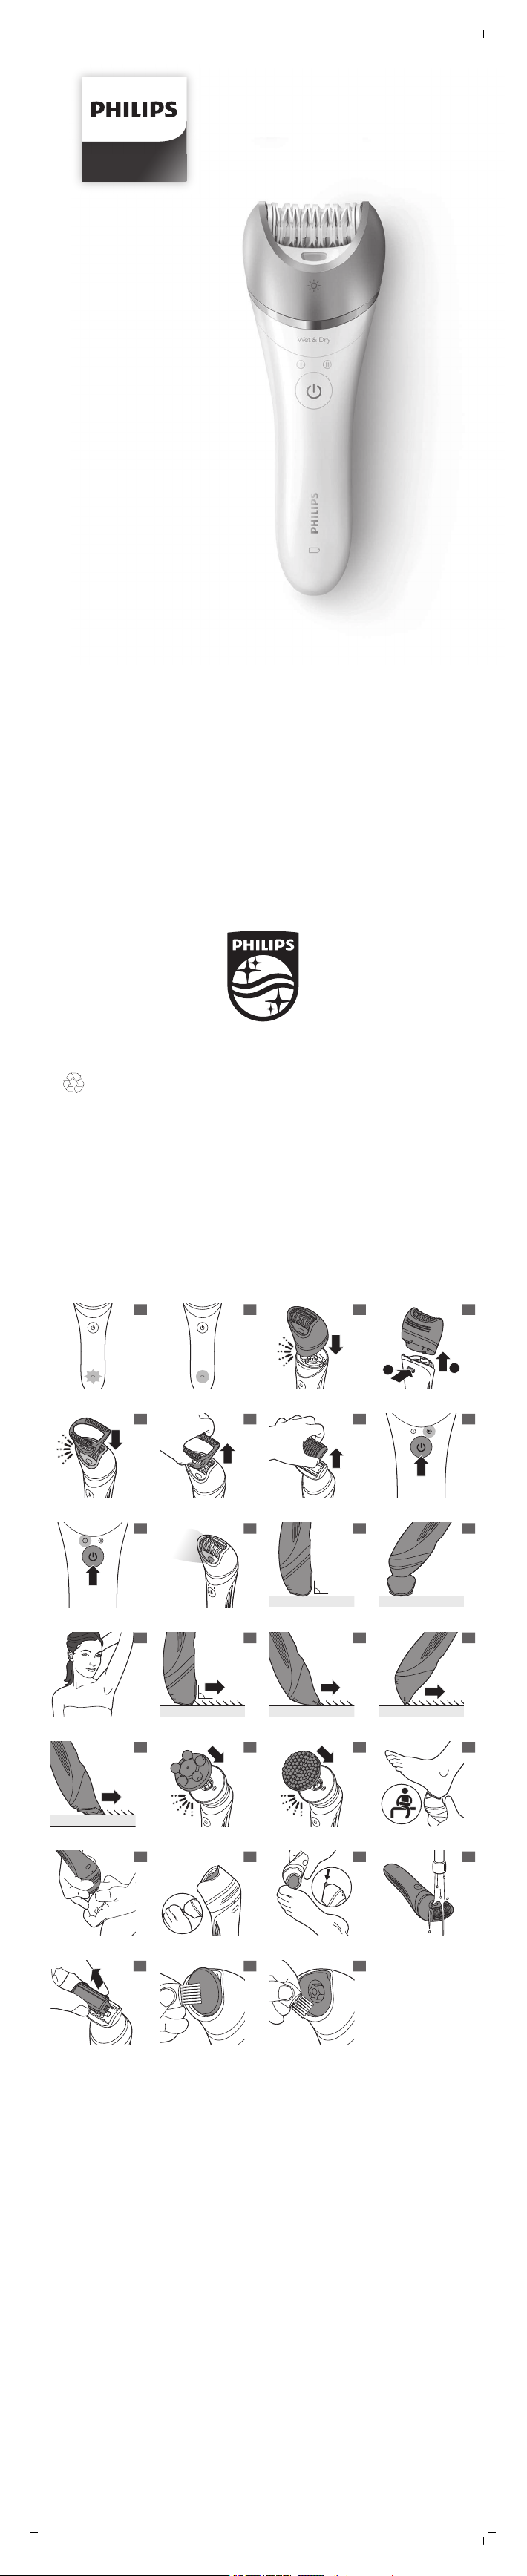
General Description Fig. 1
1 Handle
2 Speed lights (I and II)
3 On/off button
4 Battery indicator
5 Release button
6 Socket for small plug
7 Epilating head
8 Integrated light
9 Massage cap
10 Facial cap
11 Delicate area cap
12 Skin stretcher cap
13 Shaving head
14 Foil
15 Trimmers
16 Comb for shaving head
17 Trimming head
18 Comb for trimming head
19 Callus removal attachment
20 Callus removal disk
21 Protection cap
22 Coupling unit
23 Body massage head
24 Body exfoliation brush
25 Protection cap for body exfoliation brush
26 Supply unit
27 Tweezers with light
28 Tweezers
Not shown: Pouch
Not shown: Exfoliation glove
Not shown: Cleaning brush
Note: The heads and accessories supplied vary for different type numbers.
Consult the overview illustration for the heads and accessories supplied
with your particular appliance, or consult the information on the box.
Charging
Note: Charge the appliance fully before you use it for the first time.
Note: This appliance can only be used without cord.
To charge the appliance, insert the small plug into the socket in the bottom
of the appliance and put the supply unit in the wall socket.
- The charge indicator flashes white (Fig. 2): the appliance is charging.
Chargingtakes up to 1.5 hours.
- The charge indicator lights up white continuously (Fig. 3): the appliance is
fully charged and has a cordless operating time up to 40 minutes.
- The charge indicator does not light up when the appliance is switched
on: the appliance contains enough energy to be used.
- The battery indicator flashes orange (Fig. 2): the battery is almost empty
and needs to be charged. Charge the appliance when you have finished
using it.
Note: If the appliance is fully charged but still connected to the wall socket,
the battery indicator flashes a few times when you press the on/off button.
This indicates that you should disconnect the appliance from the wall
socket before you can switch it on.
Quick charge
- When the battery is completely empty and you start charging it, the
battery indicator flashes white quickly.
- After approximately 15 minutes, the battery indicator starts flashing white
slowly. At this point, the battery contains enough energy for up to 10
minutes of use.
Using the appliance
Attaching and detaching heads
1 To attach a head, press it onto the handle ('click') (Fig. 4).
2 To detach a head, press the release button on the back of the appliance
(Fig. 5).
Attaching and detaching accessories
1 To attach an accessory, simply snap it onto the head ('click') (Fig. 6).
2 To detach an accessory, grab its front and back and pull it upwards off
the head (Fig. 7). To detach a comb, pull its back upwards with a
fingernail (Fig. 8).
Switching the appliance on and off
1 To switch on the appliance, press the on/off button once. Speed 2 is
selected automatically and speed light II lights up (Fig. 9).
2 If you want to select speed 1, press the on/off button again. Speed light I
lights up (Fig. 10).
3 To switch off the appliance, press the on/off button once more.
The integrated light goes on automatically to give you a better view while
you use the epilating head (Fig. 11). If you want to switch off the integrated
light, keep the on/off button pressed for 3 seconds when you switch on the
appliance.
Epilating, shaving and trimming
The appliance is suitable for use in the bath or shower, but it can also be
used dry. If you want to use creams or body lotion, apply them after you
have used the appliance.
For gentle, less painful epilation, use the appliance on wet skin with or
without your regular shower gel.
Slight skin irritation like red skin or red dots may occur after epilation. This is
normal. We advise you to epilate before you go to bed at night, as any
redness or skin irritation usually disappears overnight.
Note: The appliance can only be used without cord.
1 When you epilate (with or without an accessory on the epilating head),
place the appliance on the skin at the angle shown in the illustration (Fig.
12).
2 When you use the appliance with other heads and accessories than the
epilating head, make sure you place the heads and accessories flat onto
the skin (Fig. 13).
3 When you use the appliance on sensitive areas, stretch the skin with
your free hand. When you use the appliance on your underarms, raise
your arm and put your hand on the back of your head to stretch the skin
(Fig. 14).
4 Move the appliance slowly against the direction of hair growth (Fig. 15).
Note: If you move the appliance over your skin too fast, you may not obtain
a smooth result.
Note: If your hairs are longer than 3-4mm, pretrim them for easier and more
comfortable epilation.
Epilating head
You can use the epilating head to epilate your legs, underarms and bikini
line.
Select speed 2 for most efficient epilation. Select speed 1 for areas with little
hair growth and for hard-to-reach areas such as knees and ankles.
Massage cap
You can attach the massage cap onto the epilating head to massage the
skin and minimize the pulling sensation of epilation during use.
Skin stretcher cap
You can attach the skin stretcher cap onto the epilating head. It keeps the
skin tight during epilation to reduce pain.
Delicate area cap
You can attach the delicate area cap onto the epilating head for more
comfortable epilation of delicate areas (e.g. the underarms and bikini line).
Page 3

Facial cap
You can attach the facial cap onto the epilating head for precise epilation of
facial hair (e.g. above your upper lip).
Do not use the appliance to epilate eyelashes, eyebrows or scalp hair.
Shaving head
You can use the shaving head to shave your legs and body.
Note: The appliance can be moved in two directions, for easier shaving of
underarms.
Note: Always check the foil before use. If it is damaged in any way, replace
the cutting unit right away (see 'Replacement').
Comb for shaving head
You can attach the comb onto the shaving head to trim hairs to a length of
3mm.
Trimming head
You can use the trimming head to trim hard-to-reach areas in the bikini
zone.
Place the trimming head flat onto the skin to trim (Fig. 16). Place the
trimming head perpendicularly onto the skin for styling and shaping (Fig. 17).
Comb for trimming head
You can attach the comb onto the trimming head to trim hairs in the bikini
area to a length of 3mm (Fig. 18).
Body massage head
The body massage head rotates firmly to relax your muscles.
Note: You have to put the body massage head on the coupling unit before
you can attach it onto the handle (Fig. 19).
Body exfoliation brush
You can use the body exfoliation brush to remove dead skin cells.
Do not use the body exfoliation brush on your face.
Note: You have to put the body exfoliation brush on the coupling unit
before you can attach it onto the handle (Fig. 20).
Callus removal head
Note: This appliance is only intended to be used on the feet.
You can use the callus removal disk in 3 different ways, depending on the
area or callus you want to treat.
1 To treat a large, flat area, Use the entire disk (Fig. 21). Make sure you
place the disk flat onto the skin for good control during use.
2 For precision treatment of smaller areas and good visibility of the treated
area (Fig. 22), use the top part of the disk that sticks out beyond the top
of the head (Fig. 23).
3 For precision treatment and for buffing away hard skin very quickly, use
the narrow edge of the protruding top part of the disk (Fig. 24).
Move the disk back and forth gently over the skin you want to treat. Do not
push too hard. When you push too hard, the disk might stop rotating.
Cleaning and storage
Keep the supply unit dry.
1 To clean the epilating head, use the cleaning brush to brush away any
hairs, hold the appliance upside down, switch it on and rinse it with cold
water for 15 seconds after every use (Fig. 25).
2 To clean the shaving head: use the cleaning brush to brush away any
hairs that have collected under the trimmers. Grab the two trimmers of
the cutting unit and pull the cutting unit out of the shaving head (Fig. 26).
Clean all parts of the shaving head with the cleaning brush, except the
foil.
Note: Lubricate trimmer teeth and foils with a drop of sewing machine oil
every six weeks for optimal performance.
3 Rinse the cutting unit, heads and accessories under the tap. Shake them
firmly to remove water drops.
4 To clean the callus removal head and disk (if supplied): clean the outside
of the head and disk with the cleaning brush supplied (Fig. 27). Then
remove the disk off the head and clean the inside of the head with the
cleaning brush supplied (Fig. 28). If you prefer, you can rinse the callus
removal head and disk under a running tap.
5 Let all parts dry completely.
6 Place the cutting unit back into the shaving head ('click').
7 Put protection caps or combs on the heads to prevent damage to the
heads when you store them.
8 Store the appliance, its heads and accessories in the pouch.
Replacement
To buy accessories or spare parts, visit www.shop.philips.com/service or go
to your Philips dealer. You can also contact the Philips Consumer Care
Center in your country (see the international warranty leaflet for contact
details).
Body exfoliation brush (if supplied): If you use the body exfoliation brush
2-3 times a week, it lasts approximately 3 months. Replace the body
exfoliation brush every 3 months with one of the original type (BRE394).
Callus removal head (if supplied): Replace the callus removal disk with one
of the original type (BCR372) when its effectiveness decreases. We advise
you to replace the disk at least once every year.
Shaving head (if supplied): For optimal performance, we advise you to
replace the cutting unit of the shaving head every two years. If you use the
shaving head twice or more times a week, replace the cutting unit more
often. Always replace the cutting unit with one of the original type (BRL384).
Troubleshooting
This chapter summarizes the most common problems you could encounter
with the appliance. If you are unable to solve the problem with the
information below, visit www.philips.com/support for a list of frequently
asked questions or contact the Consumer Care Center in your country.
Problem Solution
The appliance
does not work as
well as it should.
After charging, the
battery indicator
flashes when I
press the on/off
button, but the
appliance does not
switch on.
During use, the
appliance becomes
hot and suddenly
stops operating.
Then both speed
lights flash for 4
seconds.
My skin is irritated
after I have used
the appliance.
When you use the epilating head or the shaving
Epilation causes
ingrown hairs.
Make sure you hold the appliance at the correct
angle (Fig. 12) and move it across the skin slowly,
against the direction of hair growth.
Clean the heads and accessories after every use.
The appliance is still connected to the wall socket. In
this case, the battery indicator flashes to indicate
that you should disconnect the appliance from the
wall socket before you can switch it on.
The overheat protection has been activated. The
overheat protection switches off the appliance
automatically if it becomes too hot. To reset the
overheat protection, let the appliance cool down and
then switch it on again. To avoid overheating of the
appliance, do not press it too hard onto your skin.
When you use the epilating head or the shaving
head, slight skin irritation like red skin or red dots
may occur. This is normal. To avoid irritated skin,
make sure that you gently move the appliance
against the direction of hair growth. Do not apply too
much pressure. If the irritation lasts longer than 3
days, we advise you to consult a doctor.
head, always stretch the skin with your free hand.
When you use the appliance on your underarms,
raise your arm and put your hand on the back of
your head to stretch the skin (Fig. 14).
You can use the body exfoliation brush 24 hours
before or 48 hours after epilating, to help prevent
ingrown hairs.
Note: Do not exfoliate immediately after epilation, as
this may intensify possible skin irritation caused by
epilation.
Русский
Общее описание, рис. 1
1 Ручка
2 Индикаторы скорости (I и II)
3 Кнопка включения/выключения
4 Индикатор уровня заряда аккумулятора
5 Кнопка отсоединения
6 Гнездо для малого штекера
7 Эпиляционная головка
8 Встроенная подсветка
9 Массажная насадка
10 Насадка для лица
11 Насадка для чувствительных участков тела
12 Колпачок для разглаживания кожи
13 Бритвенная головка
14 Сетка
15 Триммеры
16 Гребень для бритвенной головки
17 Насадка-триммер
18 Гребень для насадки-триммера
19 Насадка для удаления огрубевшей кожи
20 Диск для удаления огрубевшей кожи
21 Защитный колпачок
22 Соединительное устройство
23 Массажная насадка для тела
24 Щеточка для пилинга тела
25 Защитный колпачок для щеточки для пилинга тела
26 Блок питания
27 Пинцет с подсветкой
28 Пинцет
Нет на иллюстрации: Чехол
Нет на иллюстрации: Отшелушивающая перчатка
Нет на иллюстрации: Щеточка для очистки
Page 4

Примечание. Входящие в комплект насадки и аксессуары могут
различаться в зависимости от номера модели продукта. Насадки и
аксессуары, входящие в комплект вашего устройства, показаны на
иллюстрации с его общим видом или перечислены на упаковке
изделия.
Зарядка
Примечание. Перед первым использованием полностью зарядите
аккумуляторную батарею.
Примечание. Данный прибор можно использовать, только если шнур
не подключен.
Чтобы зарядить прибор, вставьте маленький штекер в гнездо,
расположенное в нижней части прибора, и подключите адаптер
питания к розетке электросети.
- Индикатор зарядки мигает белым (Рис. 2): прибор заряжается.
Зарядкааккумулятора занимает до 1,5 часа.
- Индикатор зарядки светится ровным белым светом (Рис. 3):
аккумулятор прибора полностью заряжен и обеспечивает до
40минут автономной работы.
- Индикатор зарядки не загорается при включении прибора: заряда
аккумулятора достаточно для использования.
- Индикатор зарядки аккумулятора мигает оранжевым (Рис. 2):
аккумулятор разряжен и прибор необходимо зарядить. Закончив
использовать прибор, зарядите его.
Примечание. Если полностью заряженный прибор подключен к
розетке электросети, при нажатии кнопки включения/выключения
индикатор зарядки аккумулятора мигает несколько раз. Это указывает
на то, что для включения прибора его необходимо отключить от
розетки.
Быстрая зарядка
- Когда полностью разряженный аккумулятор начинает заряжаться,
индикатор зарядки аккумулятора быстро мигает белым.
- Примерно через 15 минут индикатор зарядки аккумулятора
начинает медленно мигать белым. На этом этапе аккумулятор уже
достаточно заряжен, чтобы прибор можно было использовать в
течение 10 минут.
Использование прибора
Установка и снятие головок
1 Чтобы установить головку, прижмите ее к ручке (должен прозвучать
щелчок) (Рис. 4).
2 Чтобы снять головку, нажмите кнопку отсоединения на тыльной
части прибора (Рис. 5).
Установка и снятие аксессуаров
1 Чтобы установить аксессуар, просто прижмите его к головке
(должен прозвучать щелчок) (Рис. 6).
2 Чтобы снять аксессуар, возьмитесь за его переднюю и заднюю
части, потяните его вверх и снимите с головки (Рис. 7). Чтобы снять
гребень, подцепите его ногтем (Рис. 8) и потяните вверх.
Включение и выключение прибора
1 Чтобы включить прибор, нажмите кнопку включения/выключения
один раз. Будет автоматически выбрана скорость2, и индикатор
скорости II начнет светиться (Рис. 9).
2 Чтобы выбрать скорость1, еще раз нажмите кнопку
включения/выключения. Индикатор скорости I начнет светиться
(Рис. 10).
3 Для выключения прибора нажмите кнопку включения/выключения
еще раз.
Встроенная подсветка включается автоматически, чтобы при
использовании эпиляционной головки (Рис. 11) вам было лучше видно.
Чтобы выключить встроенную подсветку, при включении прибора
нажмите и удерживайте кнопку включения/выключения в течение трех
секунд.
Эпиляция, бритье и подравнивание
Прибор можно использовать в душе или ванне, а также для обработки
сухой кожи. Если вы предпочитаете использовать кремы или лосьоны
для тела, наносите их после использования прибора.
Для аккуратной, менее болезненной эпиляции обрабатывайте
прибором влажную кожу. Можно предварительно нанести на кожу
ваш обычный гель для душа.
После эпиляции на коже может появиться легкое раздражение
(краснота, красные точки). Это нормально. Рекомендуется проводить
процедуру эпиляции вечером перед сном, так как краснота и
раздражение обычно проходит за ночь.
Примечание. Прибор можно использовать, только если шнур не
подключен.
1 Во время эпиляции (в том числе с применением аксессуара,
установленного на эпиляционную головку) устройство должно быть
расположено по отношению к коже под углом, представленным на
иллюстрации (Рис. 12).
2 Если на устройстве установлены другие головки и аксессуары (не
эпиляционная головка), убедитесь в том, что они плотно прилегают
к коже (Рис. 13).
3 Когда вы используете прибор на чувствительных участках,
растяните кожу свободной рукой. При использовании прибора в
области подмышек поднимите руку и положите ладонь на затылок,
чтобы растянуть кожу (Рис. 14).
4 Медленно перемещайте прибор против направления роста волос
(Рис. 15).
Примечание. Если перемещать прибор по коже слишком
быстро,результат может быть неудовлетворительным.
Примечание. Если требуется удалить волосы длиннее 3–4 мм, сначала
подровняйте их, чтобы сделать эпиляцию более простой и
комфортной.
Эпиляционная головка
С помощью эпиляционной головки можно эпилировать ноги,
подмышечные впадины и линию бикини.
Чтобы эпиляция была максимально эффективной, выберите скорость2.
Скорость1 подходит для областей с небольшим количеством волос и
труднодоступных участков, например колен и лодыжек.
Массажная насадка
На эпиляционную головку можно установить массажную насадку,
которая за счет массажа кожи снизит неприятные ощущения во время
эпиляции.
Колпачок для разглаживания кожи
На эпиляционную головку можно установить колпачок для
разглаживания кожи. Он будет разглаживать кожу во время эпиляции
для уменьшения болевых ощущений.
Насадка для чувствительных участков тела
На эпиляционную головку можно установить насадку для
чувствительных участков тела. Она сделает более комфортной
эпиляцию подмышечных впадин, линии бикини и других
чувствительных зон.
Насадка для лица
На эпиляционную головку можно установить лицевую насадку, которая
позволяет аккуратно удалить волосы с лица (например, над верхней
губой).
Не используйте прибор для эпиляции ресниц, бровей или волос на
голове.
Бритвенная головка
Бритвенную головку можно использовать для бритья волос на ногах и
на теле.
Примечание. Прибор можно перемещать в двух направлениях, чтобы
облегчить бритье в области подмышек.
Примечание. Перед использованием всегда проверяйте сетку. При
наличии любых повреждений сразу же замените режущий блок (см.
раздел "Замена").
Гребень для бритвенной головки
К бритвенной головке можно прикрепить гребень, чтобы подровнять
волосы до длины 3 мм.
Насадка-триммер
Насадку-триммер можно использовать для подравнивания
труднодоступных областей в зоне бикини.
Чтобы подровнять (Рис. 16) волосы, полностью прижмите насадкутриммер к коже. Чтобы придать волосам эффектную форму (Рис. 17),
держите насадку-триммер перпендикулярно к коже.
Гребень для насадки-триммера
К насадке-триммеру можно прикрепить гребень, чтобы подровнять
волосы в зоне бикини до длины 3 мм (Рис. 18).
Массажная насадка для тела
Массажная насадка для тела, вращаясь, расслабляет мускулы.
Примечание. Чтобы установить массажную насадку для тела на ручку
(Рис. 19), сначала ее необходимо закрепить на соединительном
элементе.
Щеточка для пилинга тела
Щеточку для пилинга тела можно использовать для удаления
омертвевших клеток кожи.
Не используйте щеточку для пилинга тела на лице.
Примечание. Чтобы установить щеточку для пилинга тела на ручку
(Рис. 20), сначала ее необходимо закрепить на соединительном
элементе.
Головка для удаления огрубевшей кожи
Примечание. Прибор предназначен для использования только для
обработки ног.
Вы можете использовать диск для удаления огрубевшей кожи 3
различными способами — в зависимости от обрабатываемой области
или вида огрубевшей кожи, которую требуется обработать.
1 Для обработки больших плоских участков используйте весь диск
(Рис. 21). Для удобного управления прибором во время
использования убедитесь в том, что плоскость диска касается
поверхности кожи.
2 Для точной обработки небольших областей и обеспечения хорошей
видимости обработанных участков (Рис. 22) используйте верхнюю
часть диска, которая выступает за пределы верхней части головки
(Рис. 23).
Page 5

3 Для точной обработки и для особо быстрого спиливания
огрубевшей кожи используйте узкий край выступающей верхней
части диска (Рис. 24).
Аккуратно двигайте диск вперед и назад по коже, которую требуется
обработать. Не нажимайте слишком сильно. При слишком сильном
нажатии диск может перестать вращаться.
Очистка и хранение
Избегайте попадания жидкости на блок питания.
1 Чтобы очистить эпиляционную головку, с помощью щеточки
полностью удалите волосы, переверните устройство, включите его и
промывайте холодной водой в течение 15 секунд после каждого
использования (Рис. 27).
2 Чтобы очистить бритвенную головку: с помощью щеточки
полностью удалите волосы, скопившиеся под триммерами.
Возьмите режущий блок за два триммера и снимите его с
бритвенной головки (Рис. 28). С помощью щеточки очистите все
детали бритвенной головки, кроме сетки.
Примечание. Для оптимальной работы прибора смазывайте сетки и
зубцы триммера каплей масла дляшвейныхмашин каждые шесть
недель.
3 Промойте режущий блок, головки и аксессуары под струей воды.
Тщательно стряхните с них капли воды.
4 Чтобы очистить головку и диск для удаления огрубевшей кожи
(если поставляется в комплекте): очистите внешнюю часть головки и
диск с помощью входящей в комплект (Рис. 25) щеточки для
очистки. Затем снимите диск с головки и очистите внутреннюю часть
головки с помощью входящей в комплект (Рис. 26) щеточки для
очистки. Если хотите, вы также можете промыть головку и диск для
удаления огрубевшей кожи под струей водопроводной воды.
5 Дайте всем частям прибора полностью просохнуть.
6 Установите режущий блок обратно в бритвенную головку (должен
прозвучать щелчок).
7 Наденьте на головки защитные колпачки или гребни, чтобы
защитить головки от повреждения во время хранения.
8 Храните прибор, его головки и аксессуары в прилагаемом чехле.
Замена
Чтобы приобрести аксессуары или запасные части, посетите веб-сайт
www.shop.philips.com/service или обратитесь в местную торговую
организацию Philips. Можно также связаться с центром поддержки
потребителей Philips в вашей стране (контактная информация
приведенана гарантийном талоне).
Щеточка для пилинга тела (если поставляется в комплекте): срок
службы щеточки для пилинга тела составляет примерно 3 месяца при
использовании 2–3 раза в неделю. Заменяйте щеточку для пилинга
тела каждые 3 месяца. В качестве замены используйте только
оригинальные щеточки (BRE394).
Головка для удаления огрубевшей кожи (если поставляется в
комплекте): Заменяйте диск для удаления огрубевшей кожи
оригинальным диском (BCR372), когда его использование становится
менее эффективным. Диск рекомендуется заменять как минимум раз в
год.
Бритвенная головка (если поставляется в комплекте): для
оптимального качества работы прибора рекомендуется заменять
режущий блок бритвенной головки каждые два года. При
использовании бритвенной головки два раза или несколько раз в
неделю режущий блок следует заменять чаще. Для замены режущего
блока выбирайте оригинальные блоки (BRL384).
Поиск и устранение неисправностей
Данный раздел посвящен наиболее распространенным проблемам, с
которыми вы можете столкнуться при использовании прибора. Если не
удается самостоятельно справиться с возникшими проблемами, см.
ответы на часто задаваемые вопросы на веб-сайте
www.philips.com/support или обратитесь в центр поддержки
потребителей в вашей стране.
Проблема Способы решения
Неудовлетвори
тельный
результат работы
прибора.
После зарядки
индикатор
зарядки
аккумулятора
мигает при
нажатии кнопки
включения/выклю
чения, но прибор
не включается.
Во время
использования
прибор
нагревается и
внезапно
отключается.
Затем оба
индикатора
скорости мигают
в течение
4секунд.
Каждый раз после
использования
прибора у меня
на коже
появляется
раздражение.
При использовании эпиляционной или
Эпиляция
приводит к
врастанию волос.
Приложите прибор к коже под правильным
углом (Рис. 12) и медленно проведите по коже
против направления роста волос.
Очищайте головки и аксессуары после каждого
использования.
Прибор все еще подключен к розетке
электросети. В этом случае мигание индикатора
зарядки аккумулятора указывает на то, что для
включения прибора его необходимо отключить
от розетки.
Сработала система защиты от перегрева. Эта
система автоматически выключает прибор, если
он перегревается. Чтобы выключить защиту от
перегрева, дайте устройству остыть и снова
включите его. Во избежание перегрева прибора
не прижимайте его к коже слишком сильно.
При использовании эпиляционной или
бритвенной головки на коже может появиться
раздражение (краснота, красные точки). Это
нормально. Чтобы избежать раздражения кожи,
аккуратно перемещайте прибор против роста
волос. Не прижимайте прибор слишком сильно.
Если раздражение не пройдет в течение 3дней,
рекомендуем обратиться к врачу.
бритвенной головки свободной рукой всегда
растягивайте кожу. При использовании прибора
в области подмышек поднимите руку и положите
ладонь на затылок, чтобы растянуть кожу (Рис. 14).
Чтобы предотвратить врастание волос, можно
использовать щеточку для пилинга тела за 24
часа до эпиляции и через 48 часов после нее.
Примечание. Не проводите отшелушивание
(пилинг) сразу после эпиляции, так как это может
усилить раздражение, вызванное эпиляцией.
Українська
Загальний опис (рис. 1)
1 Ручка
2 Індикатори швидкості (I і II)
3 Кнопка "увімк./вимк."
4 Індикатор заряду
5 Кнопка розблокування
6 Роз’єм для малої вилки
7 Епіляційна головка
8 Вбудований індикатор
9 Масажна насадка
10 Насадка для обличчя
11 Насадка для чутливих ділянок
12 Ковпачок натягувача шкіри
13 Бритвена головка
14 Сітка
15 Тримери
16 Насадка-гребінець для бритвеної головки
17 Головка тримера
18 Гребінець для головки тримера
19 Насадка для усунення мозолів
20 Диск для усунення мозолів
21 Захисний ковпачок
22 Блок з’єднання
23 Головка для масажу тіла
24 Щітка для пілінгу
25 Захисний ковпачок щітки для пілінгу
26 Блок живлення
27 Пінцет із підсвіткою
28 Пінцет
Не показано: Футляр
Не показано: Перфіс від накивання
Не показано: Щітка для чищення
Примітка. Головки та комплекти приладдя можуть відрізнятися для
пристроїв із різними артикулами. Головки та приладдя, що входять до
комплекту постачання вашого пристрою, указані на оглядовому
рисунку. Крім того, можна ознайомитись з інформацією на упаковці.
Заряджання
Примітка. Перед тим як скористатися пристроєм уперше, зарядіть його
повністю.
Примітка. Цей пристрій можна використовувати, лише коли він працює
від акумулятора.
Щоб зарядити пристрій, вставте малу вилку в роз’єм у нижній його
частині, а блок живлення підключіть до розетки.
- Індикатор заряду блимає білим (Мал. 2): пристрій заряджається.
Цеможе зайняти до 1,5години.
- Індикатор заряду світиться білим без блимання (Мал. 3): пристрій
повністю заряджено, він може працювати до 40хвилин без
підключення до мережі.
- Індикатор заряджання не світиться, коли пристрій увімкнено: заряду
пристрою достатньо для використання.
- Індикатор заряду блимає оранжевим (Мал. 2): акумулятор майже
розрядився та потребує заряджання. Зарядіть акумулятор, коли
завершите користуватися пристроєм.
Page 6

Примітка. Якщо повністю заряджений пристрій не від’єднати від
розетки, а потім натиснути кнопку вмикання, індикатор заряду
блиматиме. У такому разі, щоб увімкнути пристрій, потрібно від’єднати
його від розетки.
Швидка зарядка
- Якщо батарея повністю розряджена, індикатор заряду почне
швидко блимати білим, щойно ви підключите пристрій до мережі.
- Приблизно за 15 хвилин блимання сповільниться. Це означатиме, що
заряду батареї достатньо, щоб завершити епіляцію протягом
щонайбільше 10хвилин.
Застосування пристрою
Приєднання та від’єднання головок
1 Щоб приєднати головку, насадіть її на ручку (до фіксації) (Мал. 4).
2 Щоб від’єднати головку, натисніть кнопку розблокування ззаду
пристрою (Мал. 5).
Приєднання та від’єднання приладдя
1 Щоб приєднати приладдя, насадіть його на головку (до фіксації)
(Мал. 6).
2 Щоб від’єднати приладдя, візьміть його за обидва кінці та потягніть
вгору від головки (Мал. 7). Щоб зняти гребінець, потягніть його вгору
нігтем (Мал. 8).
Вмикання та вимикання пристрою
1 Щоб увімкнути пристрій, натисніть кнопку "увімк./вимк." один раз.
Після цього автоматично вмикається швидкість II та загорається
(Мал. 9) відповідний індикатор швидкості.
2 Щоб обрати швидкість I, знову натисніть кнопку "увімк./вимк."
Загориться (Мал. 10) індикатор швидкості I.
3 Щоб вимкнути пристрій, натисніть кнопку "увімк./вимк." ще раз.
Вбудований індикатор вмикається автоматично, щоб покращити
видимість під час епіляції (Мал. 11). Щоб вимкнути індикатор, натисніть і
утримуйте кнопку "увімк./вимк." протягом 3секунд під час увімкнення
пристрою.
Епіляція, гоління та підстригання
Цей пристрій підходить як для мокрого гоління у ванній або душі, так і
для сухого. Креми та лосьйони наносьте після використання пристрою.
Щоб забезпечити м’яку безболісну епіляцію, використовуйте пристрій
на вологій шкірі з гелем для душу чи без нього.
Після епіляції може з’явитися легке подразнення шкіри у вигляді
почервоніння або червоних цяток. Це нормально. Радимо виконувати
епіляцію увечері перед сном, оскільки протягом ночі почервоніння або
подразнення шкіри зникає.
Примітка. Пристрій можна використовувати, лише коли він працює від
акумулятора.
1 Під час епіляції (з приладдям чи без нього) прикладайте епіляційну
головку до шкіри під кутом, указаним на рисунку (Мал. 12).
2 Якщо ви використовуєте пристрій з іншими головками та
приладдям, щільно притискайте їх до шкіри (Мал. 13).
3 Під час використання пристрою на чутливих ділянках натягніть
шкіру вільною рукою. Для гоління під пахвами підніміть руку та
покладіть її на потилицю, щоб натягнути шкіру (Мал. 14).
4 Повільно ведіть пристроєм по шкірі проти росту волосся (Мал. 15).
Примітка. Якщо вести пристроєм по шкірі надто швидко, вона не стане
гладкою.
Примітка. Якщо волосся в зоні, яку потрібно поголити, довше за 3–4мм,
його спочатку потрібно підстригти, щоб забезпечити зручну й
комфортну епіляцію.
Епіляційна головка
За допомогою епіляційної головки можна голити ноги, пахви та зону
бікіні.
Обирайте швидкість II для ефективної епіляції. Швидкість I підходить
для ділянок із невеликою кількістю волосся та важкодоступних місць,
наприклад колін і щиколоток.
Масажна насадка
Ви можете встановити на епіляційну головку масажну насадку, щоб
масажувати шкіру та максимально зменшити відчуття пощипування під
час епіляції.
Ковпачок натягувача шкіри
Також на епіляційну головку можна встановлювати насадку-натягувач
шкіри, яка зменшить відчуття болю під час епіляції.
Насадка для чутливих ділянок
Ви можете встановити на епіляційну головку насадку для чутливих
ділянок, щоб комфортно епілювати делікатні зони тіла, зокрема пахви
та область бікіні.
Насадка для обличчя
На епіляційну головку можна встановлювати насадку для обличчя, щоб
точно видаляти волосся на обличчі, зокрема над верхньою губою.
Не використовуйте цей пристрій для епіляції брів, вій і волосся на
голові.
Бритвена головка
За допомогою бритвеної головки можна голити ноги та тіло.
Примітка. Пристроєм можна водити у двох напрямках для легшого
гоління пахв.
Примітка. Перш ніж використовувати пристрій, завжди перевіряйте
сітку. Якщо її пошкоджено, негайно замініть ріжучий блок (див. розділ
"Заміна").
Насадка-гребінець для бритвеної головки
Щоб підрівняти волосся до довжини 3мм, насадіть гребінець на
бритвену головку.
Головка тримера
Волосся у важкодоступних місцях зони бікіні можна підстригати за
допомогою головки тримера.
Для підстригання (Мал. 16) щільно притисніть головку тримера до
шкіри. Для моделювання (Мал. 17) тримайте головку тримера
перпендикулярно до шкіри.
Гребінець для головки тримера
Щоб підрівняти волосся в зоні бікіні до довжини біля 3мм (Мал. 18),
насадіть гребінець на головку тримера.
Головка для масажу тіла
Головка для масажу тіла щільно обертається, щоб розслабити м’язи.
Примітка. Перш ніж під’єднувати головку для масажу тіла до ручки
(Мал. 19), під’єднайте її до блока з’єднання.
Щітка для пілінгу
За допомогою щітки для пілінгу можна видаляти омертвілі клітини
шкіри.
Не використовуйте щітку для пілінгу на обличчі.
Примітка. Перш ніж під’єднувати щітку для пілінгу до ручки (Мал. 20),
під’єднайте її до блока з’єднання.
Насадка для усунення мозолів
Примітка. Цей пристрій призначений лише для використання на
ступнях.
Можна скористатися диском для усунення мозолів трьома різними
способами, залежно від оброблюваної ділянки.
1 Щоб обробити велику рівну ділянку, використовуйте весь диск (Мал.
21). Перевірте, що диск розташовано паралельно шкірі для
впевненого контролю під час використання.
2 Для досконалої обробки маленьких ділянок і їх видимості (Мал. 22),
скористайтеся верхньою частиною диска, що виступає над
верхньою частиною насадки (Мал. 23).
3 Для досконалої обробки та швидкого усунення ущільненого шару
шкіри, скористайтеся вузьким краєм верхньої частини диска, яка
виступає (Мал. 24).
Поверніть диск на місце та обережно просувайте його по шкірі, яку
необхідно обробити. Не тисніть надто сильно. Якщо натискати занадто
сильно, диск може припинити обертання.
Чищення та зберігання
Запобігайте потраплянню вологи на блок живлення.
1 Очищуйте епіляційну насадку після кожного використання (Мал. 27).
Для цього видаліть усе волосся щіткою для чищення, переверніть
пристрій і увімкнуть його, а потім промивайте холодною водою
протягом 15секунд.
2 Що очистити бритвену насадку, видаліть волоски, які зібралися під
тримерами, за допомогою щітки для чищення. Візьміть ріжучий блок
за два тримери та витягніть його з бритвеної головки (Мал. 28).
Очищуйте всі деталі бритвеної головки, окрім сітки, за допомогою
щітки для чищення.
Примітка. Для оптимальної роботи пристрою раз на шість тижнів
змащуйте зубці тримера та сітки краплею машинного мастила.
3 Промийте ріжучий блок, бритвену головку та приладдя під краном.
Енергійно струсіть їх, щоб прибрати всі краплі води.
4 Щоб очистити насадку для усунення мозолів і диск (якщо входить до
комплекту), почистьте зовнішню частину насадки та диска щіткою
для чищення з комплекту (Мал. 25). Потім зніміть диск із насадки та
очистьте її внутрішню частину щіткою для чищення з комплекту
(Мал. 26). За бажанням можна промити насадку для усунення
мозолів і диск проточною водою.
5 Дайте всім частинам висохнути.
6 Установіть ріжучий блок назад на бритвену головку до фіксації.
7 Одягніть захисні ковпачки або гребінці на бритвені головки, щоб
запобігти пошкодженню головок під час зберігання.
8 зберігайте пристрій, головки й приладдя у футлярі для зберігання,
що входить до комплекту.
Заміна
Щоб придбати приладдя чи запасні частини, відвідайте веб-сайт
www.shop.philips.com/service або зверніться до дилера Philips. Ви
також можете звернутися до Центру обслуговування клієнтів Philips у
своїй країні (контактну інформацію шукайте в гарантійному талоні).
Щітка для пілінгу (якщо входить до комплекту). Термін служби щітки
для пілінгу, яка використовується 2–3 рази на тиждень, складає
приблизно 3місяці. Кожні 3 місяці заміняйте щітку для пілінгу
оригінальним відповідником (BRE394).
Page 7

Насадка для усунення мозолів (якщо входить до комплекту). Якщо
ефективність диска для усунення мозолів зменшилася, замініть його
оригінальним відповідником (BCR372). Рекомендуємо заміняти диск
щонайменше один раз на рік.
Бритвена головка (якщо входить до комплекту). Для оптимальної
роботи пристрою рекомендуємо заміняти ріжучий блок бритвеної
головки кожні два роки. Якщо ви використовуєте бритвену головку два
або більше разів на тиждень, ріжучий блок доведеться заміняти
частіше. Завжди заміняйте ріжучий блок оригінальним відповідником
(BRL384).
Усунення несправностей
У цьому розділі розглядаються основні проблеми, які можуть виникнути
під час використання пристрою. Якщо Ви не в змозі вирішити проблему
за допомогою поданої нижче інформації, відвідайте веб-сайт
www.philips.com/support і ознайомтеся зі списком частих запитань або
зверніться до Центру обслуговування клієнтів у своїй країні.
Проблема Вирішення
Пристрій не
працює належним
чином.
Якщо після
заряджання
батареї натиснути
кнопку вмикання,
індикатор заряду
блимає, але
пристрій не
вмикається.
Під час
використання
пристрій
нагрівається й
раптово перестає
працювати. Після
цього протягом
4секунд
блимають обидва
індикатори
швидкості.
Після
використання
пристрою шкіра
подразнюється.
Під час використання насадки для епіляції або
Епіляція сприяє
вростанню
волосся.
Прикладайте пристрій до шкіри під належним
кутом (Мал. 12), а потім повільно й плавно
проводьте пристроєм проти напрямку росту
волосся.
Мийте бритвені головки та приладдя після
кожного використання.
Пристрій досі підключено до розетки. У такому
разі, щоб увімкнути пристрій, потрібно від’єднати
його від розетки.
Спрацював захист від перегрівання. У разі
перегрівання система захисту автоматично
вимикає пристрій. Щоб скинути захист від
перегрівання, дайте пристрою охолонути та
увімкніть його знову. Щоб запобігти перегріванню
пристрою, не притискайте його надто сильно до
шкіри.
Після використання насадки для епіляції або
бритвеної насадки може з’явитися легке
подразнення шкіри у вигляді почервоніння або
червоних цяток. Це нормально. Щоб попередити
подразнення шкіри, обережно переміщуйте
пристрій проти напрямку росту волосся. Не
тисніть надто сильно. Якщо подразнення не
зникає протягом трьох діб, радимо звернутися до
лікаря.
бритвеної насадки завжди натягуйте шкіру
вільною рукою. Щоб натягнути шкіру (Мал. 14) під
час гоління пахв, підніміть руку та покладіть її на
потилицю.
Можна скористатися щіткою для злущування за
24години або через 48 годин після епіляції, щоб
запобігти вростанню волосся.
Примітка. Не виконуйте злущування відразу після
епіляції, оскільки це може підсилити можливе
подразнення шкіри, спричинене епіляцією.
Қазақша
Жалпы сипаттама, 1-сурет
1 Сап
2 Жылдамдық шамдары (I және II)
3 Қосу/өшіру түймесі
4 Батарея индикаторы
5 Босату түймесі
6 Кіші ашаға арналған розетка
7 Эпилятор басы
8 Ішіне орнатылған шам
9 Массаж ұшы
10 Беттік ұшы
11 Нәзік аймақ ұшы
12 Тері созғыш қақпағы
13 Қыратын басы
14 Фольга
15 Триммерлер
16 Қыратын басының тарағы
17 Шаш кесу
18 Қыратын басының тарағы
19 Каллюс жою саптамасы
20 Каллюс жою дискісі
21 Қорғау қақпағы
22 Жалғастырғыш
23 Дене массажының басы
24 Түлеген дене қылшағы
25 Түлеген дене қылшағының қорғаныс ұшы
26 Қуат көзі
27 Жарығы бар қысқыштар
28 Қысқыштар
Көрсетілмеген: Қалта
Көрсетілмеген: Қабыршақтағыш қолғап
Көрсетілмеген: Щетка
Ескертпе: Қамтамасыз етілген ұштар мен аксессуарлар әр түрлі
нөмірлер үшін өзгеше болуы мүмкін. Белгілі бір құрылғымен
қамтамасыз етілген ұштар мен аксессуарлар үшін шолу суретін қараңыз
немесе жәшіктегі ақпаратты қараңыз.
Зарядтау
Ескерту: Құралды алғашқы рет қолданар алдында, оны толығымен
зарядтап алыңыз.
Ескерту: Бұл құрылғыны тек сымсыз пайдалануға болады.
Құрылғыны зарядтау үшін кішкене штепсельді құралдың түбіндегі ұяға
жалғап, қуат көзін қабырғадағы розеткаға жалғаңыз.
- Заряд индикаторы ақ түспен (сурет 2) жыпылықтайды: құрал
зарядталуда. Зарядтауең көбі 1,5 сағат алады.
- Заряд индикаторы ақ түсте үздіксіз жанады (сурет 3): құрылғы
зарядталып, 40 минутқа дейін сымсыз жұмыс істейді.
- Құрылғы қосулы кезде заряд индикаторы жанбайды: құрылғыда
пайдалануға жеткілікті энергия бар.
- Батарея индикаторы қызғылт сары түспен (сурет 2) жыпылықтайды:
батарея заряды бос және зарядталуы керек. Пайдаланып болған
кезде құрылғыны зарядтаңыз.
Ескерту: Егер құрал толығымен зарядталса, бірақ қабырға розеткасына
әлі де қосулы болса, қосу/өшіру түймесін басқан кезде батарея
индикаторы бірнеше рет жыпылықтайды. Бұл қосу алдында құрылғыны
қабырға розеткасынан ажырату керектігін көрсетеді.
Жылдам зарядтау
- Батарея заряды толығымен таусылып, зарядтауды бастаған кезде
батарея индикаторы ақ түспен жылдам жыпылықтайды.
- Шамамен 15 минуттан кейін батарея индикаторы ақ түспен баяу
жыпылықтай бастайды. Бұл мезетте батарея қырынуды 10 минут
қолданысқа жеткілікті қуат қамтиды.
Құрылғыны пайдалану
Бастарды бекіту және ажырату
1 Басын тіркеу үшін оны тұтқа ішіне басып кіргізіңіз («шерту») (сурет 4).
2 Басын ажырату үшін құрылғы (сурет 5) артындағы босату түймесін
басыңыз.
Қосымша бөлшектерді бекіту және ажырату
1 Қосымша бөлшекті бекіту үшін оны жай ғана бас ішіне қысыңыз
(«шерту») (сурет 6).
2 Қосымша бөлшекті шешу үшін оның алды мен артынан ұстап,
басынан (сурет 7) жоғары тартыңыз. Тарақты шешу үшін тырнақпен
(сурет 8) артынан жоғары тартыңыз.
Құралды қосу және өшіру
1 Құрылғыны қосу үшін қосу/өшіру түймесін бір рет басыңыз.
2-жылдамдық автоматты түрде таңдалып, II жылдамдық шамы
жанады (сурет 9).
2 Егер 1-жылдамдық таңдалса, қосу/өшіру түймесін қайта басыңыз.
Жылдамдық шамы I жанады (сурет 10).
3 Құрылғыны өшіру үшін қосу/өшіру түймесін тағы бір рет басыңыз.
Эпиляция басын (сурет 11) пайдалану кезінде жақсы көрініс алу үшін
біріктірілген шам автоматты түрде қосылады. Егер біріктірілген шамды
өшіру керек болса, құрылғыны қосу кезінде қосу/өшіру түймесін 3
секунд басып тұрыңыз.
Эпиляция, қырыну және кесу
Құрылғыны ваннада немесе душта пайдалануға болады, бірақ құрғақ
күйде де пайдалануға болады. Егер кремдер немесе дене лосьонын
пайдалану керек болса, оларды құрылғыны пайдаланғаннан кейін
қолданыңыз.
Тегіс, аз ауыртатын эпиляция үшін құрылғыны сулы теріге жүйелі душ
гелі көмегімен немесе көмегінсіз пайдаланыңыз.
Эпиляциядан кейін қызыл тері немесе қызыл нүктелер сияқты шамалы
тері тітіркенуі орын алуы мүмкін. Бұл қалыпты жағдай. Эпиляцияны
жатар алдында жасаған жөн, себебі әдетте таң атқанша қызару немесе
терінің тітіркенуі кетеді.
Ескерту: Құрылғыны тек сымсыз пайдалануға болады.
1 Эпиляциялау кезінде (эпиляция басындағы қосалқы бөлшек
көмегімен немесе көмегінсіз) құрылғыны теріге суретте көрсетілген
бұрышта (сурет 12) салыңыз.
Page 8

2 Құрылғыны басқа қолмен және эпиляция басынан басқа қосалқы
бөлшектермен пайдалану кезінде бастарын және қосалқы
бөлшектерін тегіс етіп теріге (сурет 13) қойылғанын тексеріңіз.
3 Құрылғыны сезгіш аймақтарда пайдалану кезінде теріңізді бос
қолыңызбен созыңыз. Құрылғыны қолтық қуысында пайдалану
кезінде қолыңызды көтеріп, теріні созу (сурет 14) үшін қолды бас
артына қойыңыз.
4 Құралды түктің өсуіне (сурет 15) қарсы баяу жүргізіңіз.
Ескерту: Егер құралды терінің бетімен өте жылдам жүргізсеңіз, кейбір
түктер алынбай қалуы мүмкін.
Ескерту: Егер шаш 3-4 мм-ден ұзын болса, оңай және ыңғайлы
эпиляция үшін алдын ала қиыңыз.
Эпилятор басы
Аяқтарды, қолтықты және бикини желісін эпиляциялауға эпиляция
басын пайдалануға болады.
Тиімді эпиляция үшін 2-жылдамдықты таңдаңыз. Түк аз өсетін
аймақтарға және тізе мен өкше сияқты қиын қол жететін аймақтарға
1-жылдамдықты таңдаңыз.
Массаж ұшы
Теріге массаж жасау және пайдалану барысында эпиляция сезімін
азайту мақсатында эпиляция басына массаж ұшын тіркеуге болады.
Тері созғыш қақпағы
Эпиляция басына тері созғыш ұшын тіркеуге болады. Ауру сезімін
азайту үшін эпиляция барысында теріні берік ұстайды.
Нәзік аймақ ұшы
Нәзік аймақтарды (мысалы, қолтық және бикини желісі) ыңғайлы
эпиляциялау үшін эпиляция басына нәзік аймақ ұшын тіркеуге болады.
Беттік ұшы
Бет түтігін (мысалы, үстіңгі ерін үстіндегі түк) дәл эпиляциялау үшін
эпиляция басына бет ұшын тіркеуге болады.
Кірпікті, қасты эпиляциялауға немесе шашты қиюға құрылғыны
пайдаланбаңыз.
Қыратын басы
Аяқтар мен денені қыру үшін қырыну басын пайдалануға болады.
Ескерту: Қолтық астын оңай қыру үшін құрылғыны екі бағытта
жылжытуға болады.
Ескерту: Фольганы пайдалану алдында әрқашан тексеріңіз. Егер белгілі
бір жолмен зақымдалса, қиып алу құралын сол мезетте (көріңіз
'Ауыстыру') ауыстырыңыз.
Қыратын басының тарағы
Ұзындығы 3 мм түкті қыруға қыратын басына қыру тарағын тіркеуге
болады.
Шаш кесу
Бикини ауданындағы қол жеткізу қиын аймақтарды қыру үшін қыратын
басын пайдалануға болады.
Қыратын басын қыру (сурет 16) үшін теріге тегіс орналастырыңыз.
Стильдеу және пішін беру (сурет 17) мақсатында қыратын басын теріге
перпендикуляр орналастырыңыз.
Қыратын басының тарағы
Бикини аймағындағы ұзындығы 3 мм (сурет 18) түктерді қыру үшін
қыратын басына тарақты бекітуге болады.
Дене массажының басы
Бұлшықеттерді демалдыру үшін дене массажы басы берік айналады.
Ескерту: Тұтқаға (сурет 19) тіркеу алдында дене массажы басын
жалғастырғыш құрылғыға салу керек.
Түлеген дене қылшағы
Өлген тері жасушаларын кетіру үшін түлеген дене қылшағын
пайдалануға болады.
Бетке түлеген дене қылшағын пайдаланбаңыз.
Ескерту: Тұтқаға (сурет 20) тіркеу алдында түлеген дене қылшағын
жалғастырғыш құрылғыға салу керек.
Каллюс жою басы
Ескерту: Бұл құрылғыны тек аяқтарға пайдалануға болады.
Аймаққа немесе емдеу керек каллюске байланысты каллюс жою
дискісін 3 жолмен пайдалануға болады.
1 Үлкен, тегіс аймақты емдеуге толық диск (сурет 21) пайдаланыңыз.
Пайдалану барысында жақсы басқару үшін теріге дискіні тегіс
қойыңыз.
2 Кішкентай аймақтарды дәл емдеу және емделген аймақтың (сурет
22) жақсы көрінісін қамтамасыз ету үшін, басының (сурет 23) үстіне
жабысатын дисктің үстіңгі бөлігін пайдаланыңыз.
3 Дәл емдеу және қатты теріні өте жылдам кетіру үшін, дискінің (сурет
24) шығыңқы үстіңгі бөлігінің тар шетін пайдаланыңыз.
Дискіні емдеу керек терімен алға және артқа жылжытыңыз. Тым қатты
баспаңыз. Тым қатты басылса, диск айналысы тоқтауы мүмкін.
Тазалау және сақтау
Қуат құрылғысын құрғақ ұстаңыз.
1 Эпиляция басын тазалау үшін кез келген түкті тарауға тазалау
қылшағын пайдаланып, құрылғыдан жоғарыдан төмен қаратып ұстап
қосып, суық сумен 15 секунд пайдаланған сайын (сурет 27) жуыңыз.
2 Құралдың қыратын ұшын тазалау үшін: триммерлер астында
жиналған түктерді тазалауға тазалау қылшағын пайдаланыңыз. Қию
құрылғысының екі триммерін ұстап, қию құрылғысын қыратын
басынан (сурет 28) тартып шығарыңыз. Фольгадан басқа қыратын
басының барлық бөліктерін тазалау қылшағымен тазалаңыз.
Ескерту: Триммер мен фольгаларды оңтайлы өнімділік үшін бір
тамшы тігін машинасының майымен алты апта сайын майлап
отырыңыз.
3 Кесу құралын, бастарын және қосалқы құралдарды су астында
шайыңыз. Су тамшыларын жою үшін дұрыстап шайқаңыз.
4 Каллюс жою басын және дискісін тазалау (берілген болса) үшін: диск
пен басының сыртын берілген (сурет 25) тазалау қылшағымен
тазалаңыз. Одан кейін дисктен басын алып, басының ішін берілген
(сурет 26) тазалау қылшағымен тазалаңыз. Қажет болғанда каллюс
жою басын және дискісін ағын су астында шаюға болады.
5 Барлық бөліктерді толығымен құрғатыңыз.
6 Кесетін бөлікті қайтадан құралдың қыратын басына («сырт» еткенше)
орнатыңыз.
7 Сақтау кезінде бастарына зақым келтірмеу үшін қорғаныс ұштарын
немесе тарақтарын салыңыз.
8 Құрылғыны, бастарын және қосымша бөлшектерін дорбада
сақтаңыз.
Ауыстыру
Қосалқы құралдар немесе қосалқы бөлшектер сатып алу үшін
www.shop.philips.com/service сайтына кіріңіз немесе Philips дилеріне
барыңыз. Сонымен қатар, еліңіздегі Philips тұтынушыларға қызмет
көрсету орталығына хабарласыңыз (байланыс мәліметтерін
дүниежүзілік кепілдік парақшасынан қараңыз).
Түлеген дене қылшағын (қамтамасыз етілген жағдайда): Егер түлеген
дене қылшағы аптасына 2-3 рет пайдаланылса, бұл шамамен 3 айға
дейін созылады. Түлеген дене қылшағын 3 ай сайын түпнұсқалы түрімен
(BRE394) ауыстырыңыз.
Каллюс жою басы (қамтамасыз етілген жағдайда): Тиімділігі төмендесе,
каллюс жою дискісін түпнұсқалы түрімен (BCR372) ауыстырыңыз. Дискіні
жылына кемінде бір рет ауыстыру ұсынылады.
Қыратын басы (қамтамасыз етілген жағдайда): Оңтайлы өнімділік үшін
қыратын басының кесу құралын екі жыл сайын ауыстыруға кеңес
береміз. Қырыну басын аптасына екі рет немесе одан жиі қолдансаңыз,
кесу құралын жиі ауыстырыңыз. Кесу құралын әрдайым түпнұсқалы
түрімен (BRL384) ауыстырыңыз.
Ақаулықтарды жою
Бұл тарауда құрылғыда жиі кездесетін мәселелер аталып өтеді.
Төмендегі ақпараттың көмегімен мәселені шеше алмасаңыз, жиі
қойылатын сұрақтар тізімін көру үшін www.philips.com/support сайтына
кіріңіз немесе еліңіздегі Тұтынушыларды қолдау орталығына
хабарласыңыз.
Мәселе Шешім
Құрылғы дұрыс
жұмыс істемейді.
Зарядтаудан кейін
қосу/өшіру
түймесі басылған
кезде батарея
индикаторы
жанады, бірақ
құрылғы
қосылмайды.
Пайдалану
барысында
құрылғы ысып,
кенет жұмысын
тоқтатуы мүмкін.
Екі жылдамдық
шамы 4 секунд
жыпылықтайды.
Құрылғыны
пайдаланғаннан
кейін терім
тітіркенеді.
Эпиляция жасайтын құрал басын немесе қыратын
Құрылғының дұрыс бұрышқа (сурет 12)
қойылғанын тексеріп, тері бойынша түк өсімі
бағытына қарсы баяу жылжытыңыз.
Бастарын және қосалқы бөлшектерін әр
қолданған сайын тазалап отырыңыз.
Құрылғы қабырға розеткасына әлі жалғанған.
Бұндай жағдайда батарея индикаторы қосу
алдында құрылғыны қабырға розеткасынан
ажырату керектігін көрсетеді.
Қатты қызып кетуден қорғау мүмкіндігі іске
қосылған. Егер қатты ысып кетсе, артық қызу
қорғанысы құрылғыны автоматты түрде өшіреді.
Қызып кетуден қорғауды қалпына келтіру үшін
құрылғыны суытыңыз, содан кейін қайта қосыңыз.
Құрылғы қызып кетпеу үшін оны теріге қатты
баспаңыз.
Эпиляция жасайтын құрал басын немесе қыратын
құрал басын пайдалану кезінде қызыл тері немесе
қызыл нүктелер сияқты шамалы тері тітіркенуі
орын алуы мүмкін. Бұл қалыпты жағдай.
Тітіркенген теріні алдын алу үшін құрылғыны түк
өсімі бағытына қарсы тегіс жылжытыңыз. Аса көп
қысым қолданбаңыз. Егер тітіркену 3 күннен асса,
дәрігерге хабарласуды кеңес етеміз.
құрал басын пайдалану кезінде бос қолыңызбен
теріңізді тартыңыз. Құрылғыны қолтық қуысында
пайдалану кезінде қолыңызды көтеріп, теріні
(сурет 14) созу үшін қолды бас артына қойыңыз.
Page 9

Мәселе Шешім
Эпиляция түбірі
терең шашқа
себеп болады.
Түбірі терең шаштың пайда болуын болдырмау
үшін түлеген дене қылшағын эпиляциядан 24
сағат бұрын немесе 48 сағат кейін пайдалануға
болады.
Ескерту: Эпиляциядан кейін бірден щетканы
пайдалануға болмайды, эпиляциядан пайда
болған тітіркенуді одан ары асқындыруы мүмкін.
 Loading...