

Page 1
PHILIPS
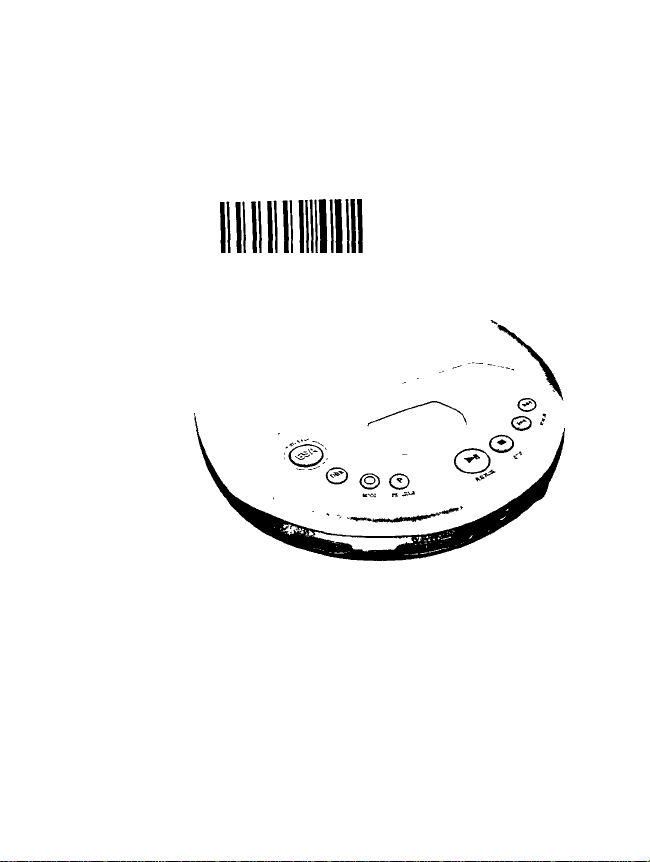
AZ 7394 Portable Compact Disc Player
AZ 7395
AZ7494
AZ 7495
G \y o a a DG ’g G Z 7 7 2
Instructions for use
Mode d'emploi
Instrucciones de manejo
PHILIPS
Page 2

Page 3
Page 4

Australia
Guarantee and Service............................................................................
Mexico
:s necesario que lea cuidadosamente su instructivo de manejo.
Garantía...................................................................................................
New Zealand
Guarantee and Service
.....................................................................................
...........
EDH
pág. 64
page 65
Page 5
English
(
Controls...............
Power Supply
Connections
Français Commandes............
Alimentation
Branchements....
\
Mandos
Español
\
.............
Alimentación
Conexiones
SfJS..................
Sü «iâ
................
fifi
.............
..........
.....
.......
.......
.....
......
6
.......
7-8
.....
9-11
.........
20
....
21-22 Généralités
....
23-25
..........
34
.....
35-36
.....
37-39
...........
48
.....
49-50
.....
51-53 KHSfgt....................
Operation
................
General information
Troubleshooting
Fonctionnement.......26-30
Recherche des
pannes
.................
Funcionamiento
Información general
Detección de
anomalías
...............
...................
............
..........
......
......
12-16 1
....
18-19
........
...32-33
.40-44 1
.....
46-47
.54-58
.....
.60-61
17
31
45
59
03
s
LU
)
1
O
O'
s
>
O
IS
es
N
«
J
Page 6

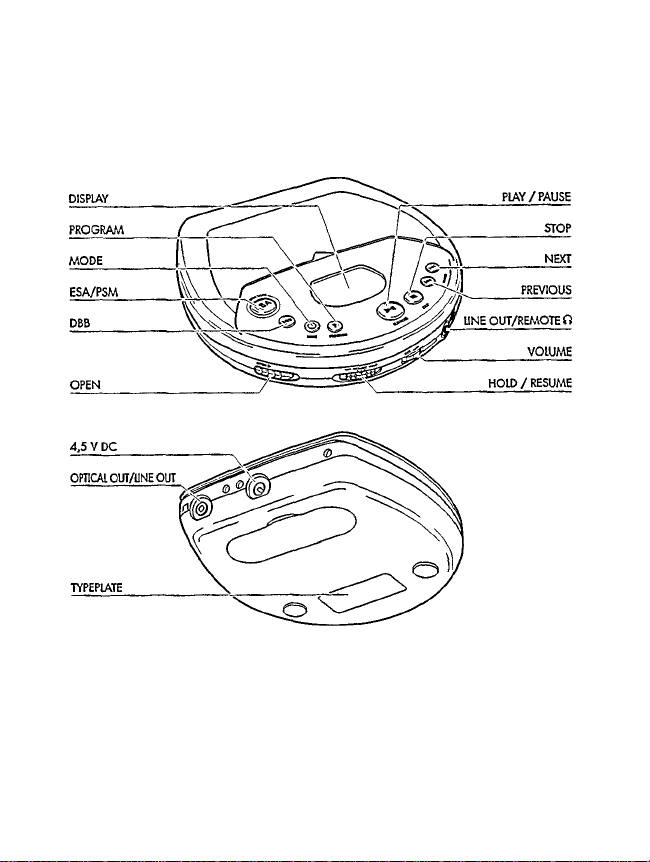
CONTROLS please refer to the illustration on page 3
DISPLAY
►H
VOLUME
RESUME/HOLD
MODE O
PROG P
DBB
STOP ■
OPEN
►ll................................starts and pauses CD play
ESA / PSM................Electronic Shock Absorption is the buffer memory for
LINE OUT/
REMOTE iTi
OPTICAL OUT
4.5 V DC
....................
...............................
................................skips and searches backward
....................
.....................
......................
...........................
shows the different playing modes, tracks, and times
skips and searches foavard
adjusts the volume level at the headphone socket
........
activates the RESUME function and/or HOLD function (locking
all buttons)
selects the different playing modes; SHUFFLE—
SHUFFLE REPEAT ALL-REPEAT-REPEAT ALL-SCAN-off
stores tracks in a program and reviews the program
Dynamic Bass Boost enhances the bass response,
DBB 1-DBB 2-DBB 3-off
Press this button for more than 3 seconds to switch
off/on acoustic feedback.
.......................
..........................
.................
Notes: -The display is backlit for several seconds after key operations.
-Status feedback (e.g. PAUSE, battery empty, etc.) and key operations are
accompanied by an acoustic signal through the headphone.
stops CD play, deletes various settings, switches off the
CD player, and activates charging.
opens the lid of the CD player
uninterrupted sound/Power Save Mode is for maximum
battery playtime. ESA—PSM—off
...............
Headphone and remote control socket (3.5 mm)
..........
connects the CD player to a (optical) digital/analog in-socket
on an amplifier or a digital recorder by means of an optical
cable or a signal lead
Socket for external power supply
This set complies with the radio interference requirements of the
European Community.
Page 7
POWER SUPPLY
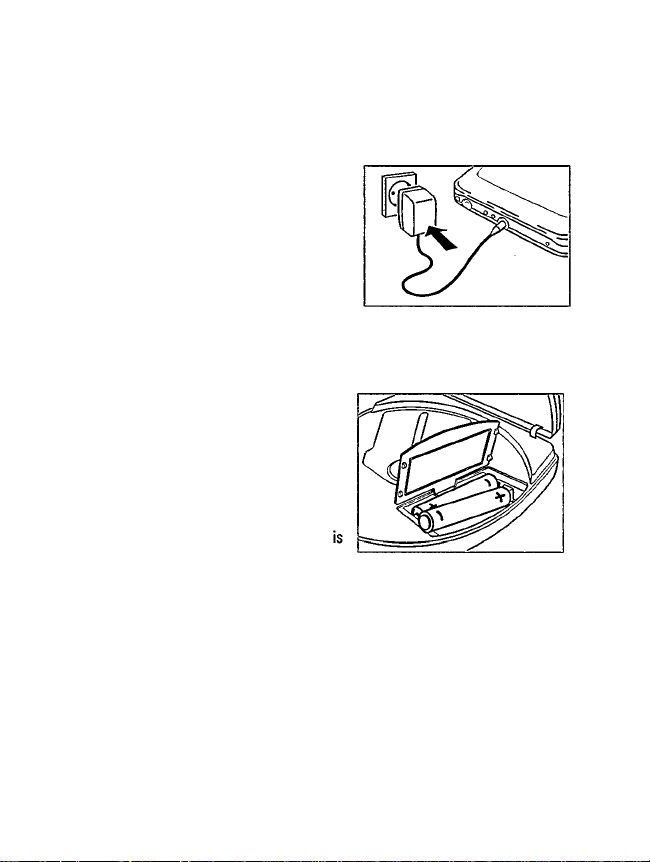
Mains adapter (supplied or optionally available)
AY 3160 mains adapter 4.5 V/400 mA direct current, positive pole to the center pin
1 Make sure that the local voltage corresponds
to the voltage of the adapter,
2 Connect the mains adapter to the player's
4.5 V DC socket and to the wall outlet.
Note: -Use only the AY 3160 adapter, other
products may damage the set.
-No acoustic feedback when using the
adapter.
-Always disconnect the adapter when you are not using it.
BaHeries, type LR6, UM3 or AA (supplied or optionally available)
Open the battery compartment and insert 2
alkaline batteries or the rechargeable battery
pack.
Typical playing times under normal conditions:
Alkaline batteries: 15 hours (ESA off)
12 hours (ESA on)
18 hours (PSM on)
Remove batteries if empty or if the CD player
not to be used for a longer period of time.
Note: The battery condition will be indicated in the display:
-Full batteries: no indication.
-Weak batteries: <s - symbol flashes. This symbol is not available when
rechargeable batteries are used.
-Empty batteries: cz -symbol flashes and the message appears.
-Replace the batteries or connect the mains adapter.
Batteries contain chemical substances, therefore they should be disposed of
properly.
Page 8
POWER SUPPLY
Recharging the Philips battery pack on board
m
3
(supplied or optionally available)
CQ
AY 3360 NiMH/AY 3361 NiCd battery pack for recharging on board
The battery pack will be recharged if the mains adapter is connected, the set is
switched off and you press the STOP ■ button.
-► Display indication during charging; rw/Jruf and
Approx, charging time: 5.5 hours (NiMH)
-► Display indication when fully charged;i and <=:
Note: - Use only the Philips battery pack, as other rechargeable batteries cannot be
recharged on board.
- To ensure a long life for your battery pack, charging will be interrupted
automatically at high ambient temperatures (Display indication: ffOt ).
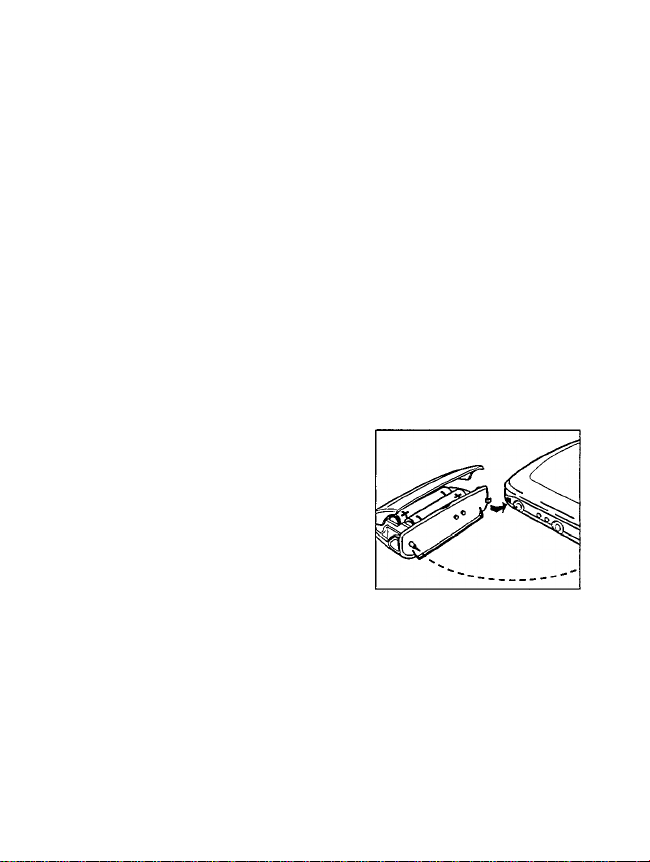
Battery Box (supplied or optionally available)
Attach the battery box AY 3770 to the CD player
and insert 2 alkaline batteries.
For maximum playtime (app. 40 hours) use new
alkaline batteries in the battery box and in the CD
Player. Do not use rechargeable batteries in
combination with alkaline batteries.
Note: - Rechargeable battery packs cannot be
used in the battery box.
3.5 hours (NiCd)
Page 9
CONNECTIONS
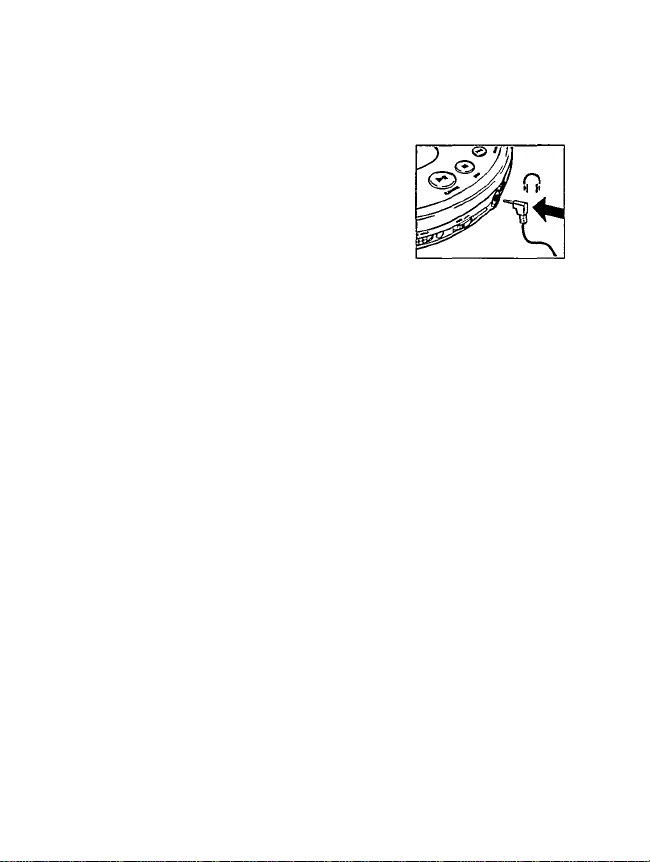
Connecting the headphones (suppHed)
Connect the supplied headphones with the
LINE OUT/REMOTE О jack.
AY 3675
Note: Use this jack also for connecting your H/R system
¡signal lead} or your car radio ¡adapter cassette or
signal lead). In both cases, the volume of the CD
player has to be set to position 8.
Use your head when using headphones
Hearing safety: Do not play your headphones at a high volume. Hearing experts
advise that continuous use at high volume can permanently damage your hearing.
Traffic safety: Do not use headphones while driving a vehicle. It may create a
hazard and it is illegal in many countries. Even if your headphones are an open-air
type designed to let you hear outside sounds, do not turn up the volume so high
that you cannot hear what is going on around you.
Page 10
CONNECTIONS
rn Connecting the remote control (supplied or optionally available)
AY 3764 cord remote control
3!'
AY 3765 LCD cord remote control
The buttons on the remote control have the same functions as the corresponding ones
on the CD player.
VOLUME: to adjust the main volume that has been preset (position 8) with the
volume control on the CD player.
1 Switch off the CD player (press STOP ■ twice).
2 Connect the remote control firmly to the LINE OUT/REMOTE ii jack of the CD
player.
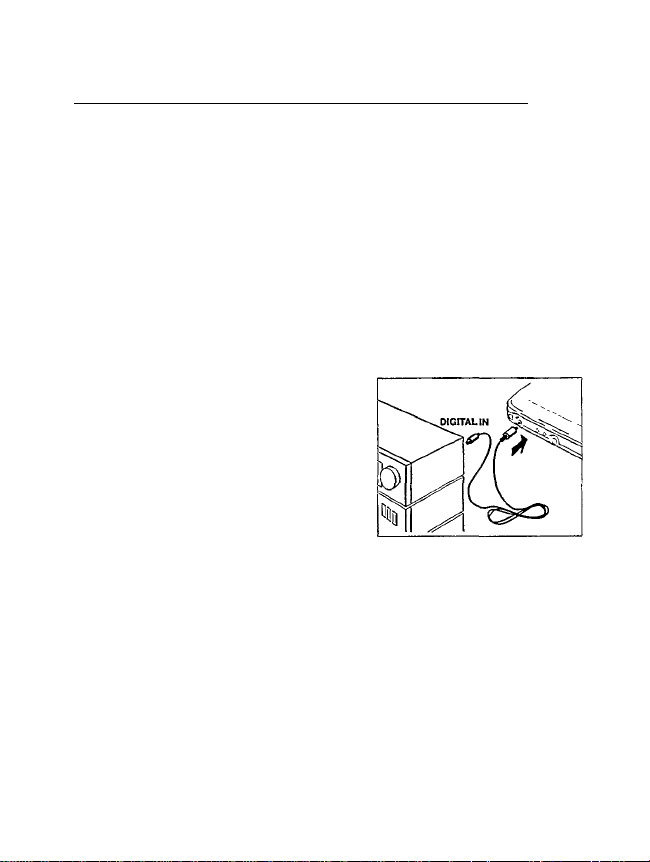
Optical Out / Line Out (not on all models)
1 Connect the set to an external power source.
2 Turn down the volume of your stereo system.
3 Connect the (optical) signal lead (supplied or
optionally available) to the OPTICAL OLTT/
LINE OUT socket of the CD player and to the
DIGITAL IN (OPTICAL) / AUX socket of the
other set (amplifier, digital cassette deck etc.).
4 Adjust the sound with the controls of the stereo system.
Note: A connection at OPTICAL OUT deactivates ESA/PSM.
-► Display indication: L iflE
10
Page 11
CONNECTIONS
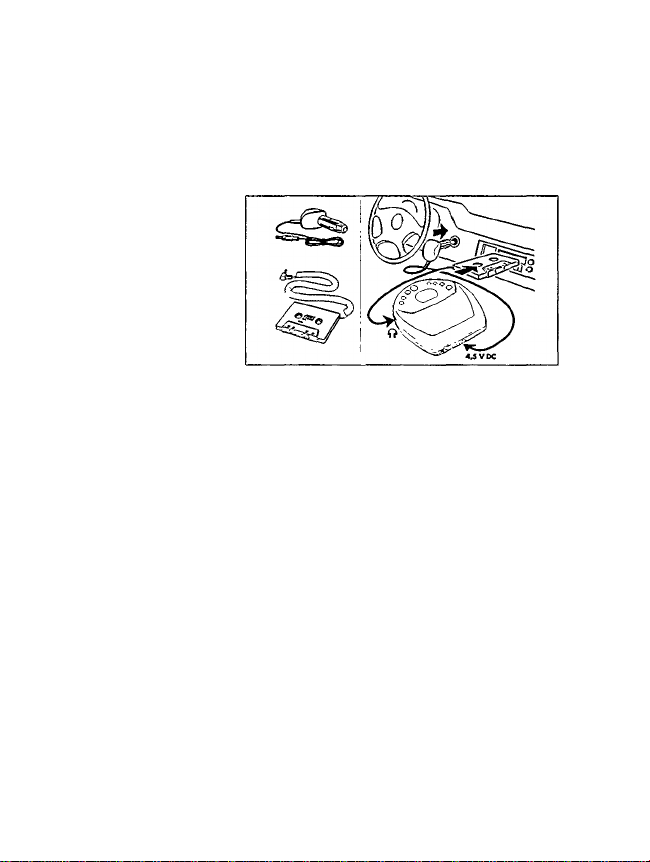
Connections for in-car use (supplied or optionally available)
AY 3545 - car voltage converter (4.5 V/600 mA, DC, positive pole to the center pin)
AY 3501 - car adapter cassette
1 Find a safe place for the
CO player on a horizontal,
vibration-free and stable
surface where it is no
danger to or in the way of
the driver or passengers.
2 Connect the DC plug of the
voltage converter to the DC
socket of your CD player
(only for a 12 V car battery, negative grounding).
3 Insert the voltage converter into the cigarette lighter socket. If necessary, clean the
cigarette lighter socket to obtain a good electrical contact.
4 Turn down the volume and switch off the autoreverse function of your car
radio cassette player.
5 Connect the adapter cassette plug to the LINE OUT/ REMOTE socket of the CD
player.
6 Insert the adapter cassette carefully into the car radio's cassette compartment.
7 Make sure that the cord does not hinder your driving.
8 Start the CD player, turn its volume to position 8 and adjust the sound with the car
radio controls.
To remove the adapter cassette press the eject button of the car radio.
Always remove the voltage converter from the cigarette lighter socket when the CD
player is not in use.
Notes on in-car use:
- Avoid excessive heat from the car heating or from direct sunlight (e.g., in a parked
car in the summer).
- If your car radio has a LINE IN jack, it is best to use it for the car radio connection
instead of the adapter cassette. Connect the signal lead to this LINE IN jack and the
LINE OUT/REMOTEn jack of the CD player.
11
Page 12
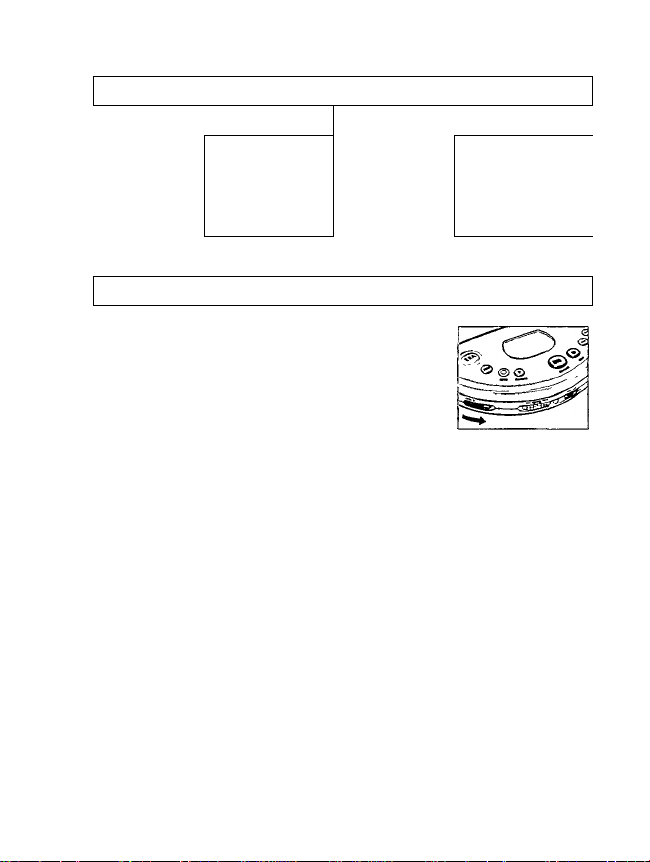
OPERATION
Inserting the CD Removing the CD
m
S3
ca
• Push gently on
the CD center
so that it fits
onto the hub.
Playing a CD
1 Open the lid by pushing the OPEN slide control to the side.|
2 Insert an audio CD, printed side up. Push down on the left-
hand side to close the lid.
3 Press the ►!! button to start CO play.
-► Display indication: (example)
1 = current track / 2:56 = elapsed time of current track
4 Adjust the sound using the VOLUME and DBB controls.
5 Interrupt CD play by pressing the ►!! button. Continue CD play by pressing the Hi
button again.
-► Display indication: time of the current position (flashing).
6 Press the STOP ■ button to stop CD play.
Display indication: (example)
17 = total number of tracks / 51:06 = total playing time
If you press the STOP ■ button again, you will switch off the set.
• Hold the CD
by its edge
and press the
hub gently.
V
II5 ¡as
I i SE
Afofes; -If no button is pressed for 10 seconds, the set will switch off automatically.
-Playing a CD-Rewriteable starts with a slight delay.
12
Page 13
OPERATION
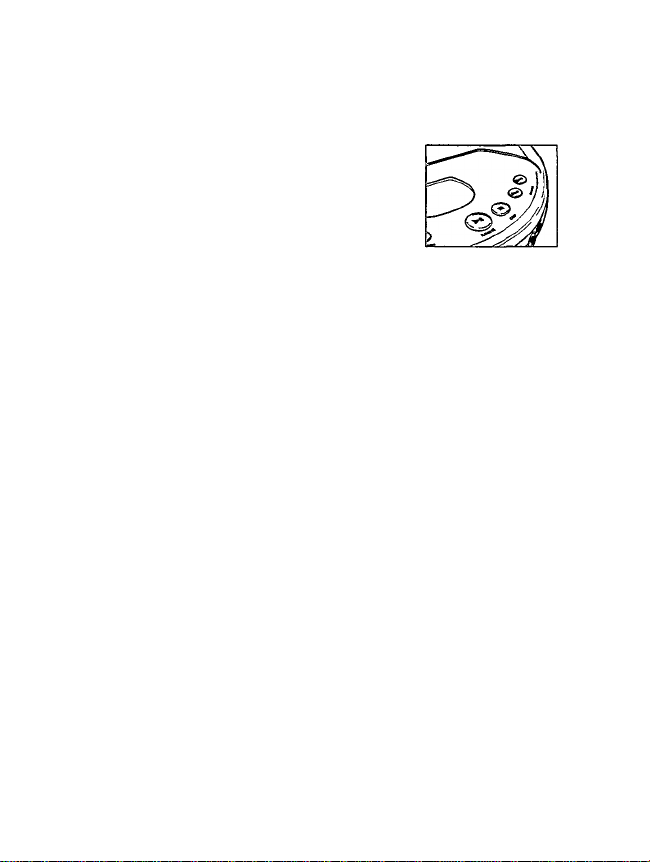
Selecting another track:
Briefly press or ►« once/several times to skip to the
beginning of the current/previous or next trackfs).
Display indication: seiected track number.
-► During play: CD play continues automaticaliy with the
selected track.
-► In stop position: press the ►!! button to start CD play.
Searching for a passage during CD play:
1 Hold down the r« or w button to find a particular passage in forward or backward
direction.
-► After 2 seconds, searching will start at high speed.
2 Release the button when you have reached the desired passage.
Note: Searching is not passible in the SCAN mode.
This CD player can play all kinds of Audio Discs including CD-Recordables
and CD-Rewriteables. Do not try to play any CD-RDMs, CD-Is, CDVs, or
computer CDs.
Note:The display message nF o' ISC indicates that this CD has to be
FINALIZED with a CD recorder before can you play it on this
CD Player.
S)
c
lU
13
Page 14
OPERATION
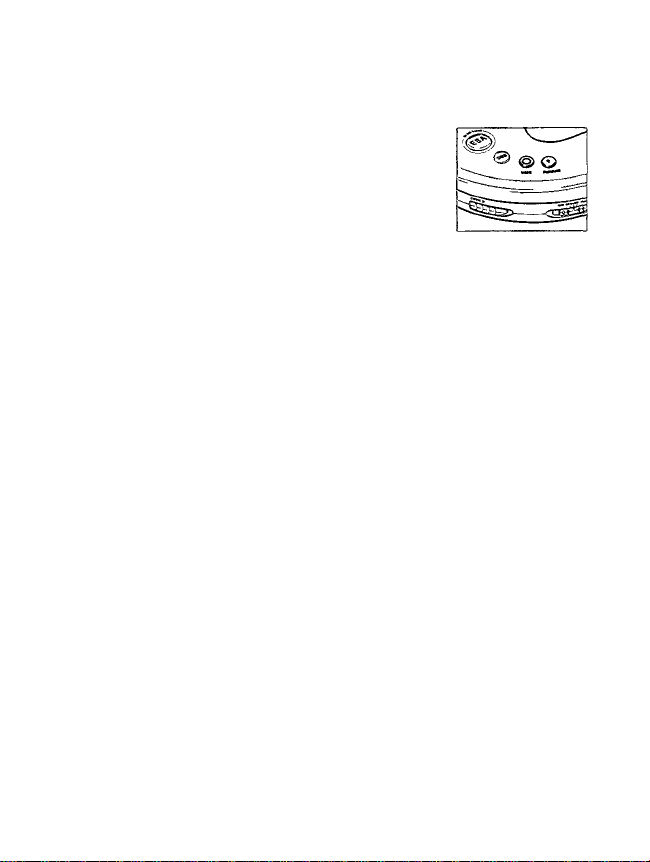
MODE o - different playing modes
By pressing the MODE O button, you can successively
activate the playing modes:
SHUFFLE; The tracks are played in random order until all of
them have been played once.
SHUFFLE REPEAT ALL; All tracks are played repeatedly in
random order until you leave this
mode.
REPEAT: The track is played repeatedly until you leave this mode.
REPEAT ALL: The CO is played repeated//until you leave this mode.
SCAN: Each track is scanned for 10 seconds until you leave this mode or all tracks
have been played once.
Press the MODE O button again to deactivate all modes.
The selected playing mode is indicated in the display.
-► During play: CD play continues automatically with the selected playing mode.
-► In stop position; press the ►!! button to start CO play.
14
Page 15

OPERATION
PROG P - programming of tracks (max. 39 tracks)
1 Select the desired track with PREV or NEXT ►«.
2 As soon as the desired track is displayed, press the PROG button to store the track
in the memory.
-► Display indication: track number
/.° / total number of stored tracks, e.g.
Note:
- When you press PROG and there is no track selected.
Playing the program:
If you have selected the tracks in STOP mode, press the PLAY/PAUSE ►!! button.
If you have selected the tracks during CO play, first press STOP ■ and then the
PLAY/PAUSE ►!! button.
Display indication: PROGRAM.
-► Your program will be played in the selected playing mode (e.g. SHUFFLE).
Reviewing the settings:
Press the PROG button for more than 2 seconds.
-+■ Display indication: each stored track successively flashes for a short moment.
Erasing the program in STOP mode:
Press the STOP ■ button to erase the program.
-► PROGRAM disappears on the display and your program is erased.
-+■ CLERT lights up briefly on the display.
R i
U r
• d
CTC I c f"i_
t-t. t.e_
Note: Interwpting the power supply or opening the lid will erase the program.
15
Page 16
OPERATION
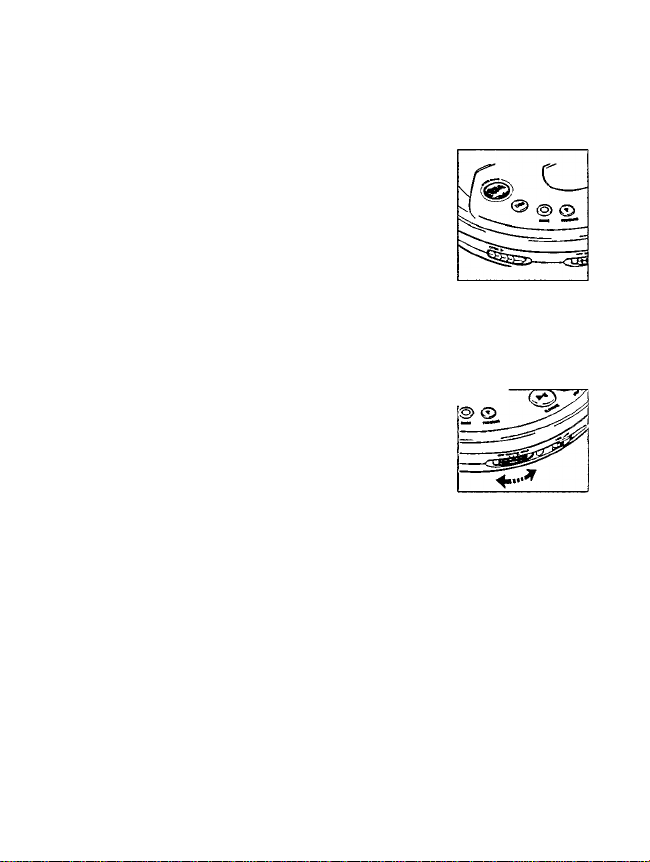
ESA - Electronic Shock Absorption Memory
m
3
PSM - Power Save Mode
en
Press the ESA button repeatedly to switch to ESA—PSM—off.
-► The ESA/PSM symbol lights up in the display.
-► The ESA memory continuously stores in advance the CD
data to be played. This is to prevent sound skipping
during play due to shock and vibration.
->■ Prolonged shocks and vibrations may empty the ESA
memory completely and CD play will be interrupted.
Note: When switching the ESA and PSM feature on and off, CD play will be delayed
or interrupted for a short time.
RESUME/HOLD
RESUME - playing from where you have slopped |
1 Activate the RESUME feature by sliding the RESUME/HOLD
switch to the center setting.
2 If you stop CD play by pressing the STOP ■ button, the last
position played will be stored.
3 Press ►!! to resume CD play from the position it was
stopped at.
HOLD - deactivating all buttons
Activate the HOLD feature by sliding the RESUME/HOLD switch to the far right.
-► Now all buttons are locked until you switch the feature off again. If you press a
button (except OPEN), the display will indicate HOLD.
Note: - In the HOLD position, the RESUME function is automatically activated.
- Opening the lid erases the information about the position played last
16
Page 17
GENERAL INFORMATION
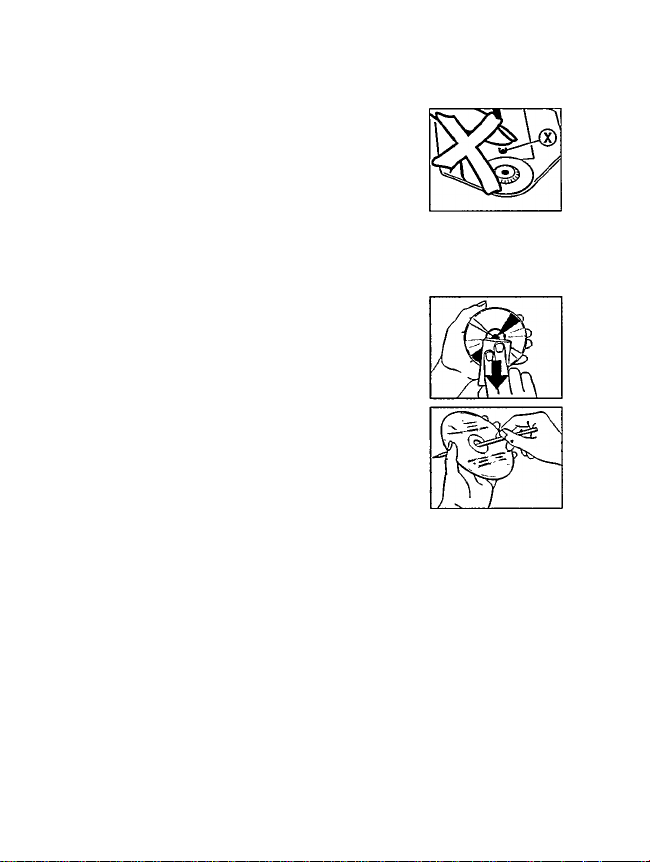
Do not touch the lens ® of the CD player!
Do not expose the CD player, batteries or CDs to rain and
dampness, sand and dust or to excessive heat caused by
heating equipment, or to direct sunlight.
The lens may cloud over when the set is suddenly moved
from cold to warm surroundings. Piaying a CD is not possible then.
Leave the CD player in a warm environment until the moisture evaporates.
You can clean the CD player with a soft and slightly dampened
chamois leather. Do not use any cleaning agents
as they may have a corrosive effect
Always pick up the CD by the edge and put it back in its
box after use.
To clean the CD, wipe it off in a straight line from the
center towards the edge using a soft, lint-free cloth.
A cleaning agent may damage the disci
When a new CD does not stay on the hub remove
the small burrs around the center hole with a pen or similar
instrument.
Active mobile phones in the vicinity of the CD player may cause malfunctions.
Environmental information
Please observe the local regulations regarding the disposal of packing materials,
exhausted batteries and obsolete equipment.
All redundant packaging material has been omitted. We have done our utmost to
make the packaging easily separable into three mono-materials: cardboard (box),
expandable polystyrene (buffer), and polyethylene (bags, protective foam sheet).
Your set consists of materials which can be recycled if disassembled by a
specialized company.
17
Page 18

TROUBLESHOOTING
If a fault occurs, please check the points listed below before taking your set for repair.
m
3
(3
If you are riot able to remedy a problem by following these hints, consult your dealer
or service facility.
PROBLEM POSSIBLE CAUSE SOLUTION
No power or no
CD play start
Display: Batteries are empty Change/recharge the batteries
no indication Contact pins are dirty Clean them with a cloth
CD play does not HOLD feature is activated Switch off the HOLD feature
start or is
interrupted Moisture condensation Leave the player in a warm
Display: no CD is not or incorrectly inserted Insert a CD, label facing up
indication CD is badly scratched Use another CD
or >'<£5 £j' ¡SC CD is dirty
Battery recharging Use of wrong batteries
on board does not
work, no CHARGE
indication
Play does not start
from the first track
Batteries
Batteries inserted incorrectly Insert the batteries correctly
Use of new batteries
Press HI
Mains adapter
Loose connection
Connect the adapter securely
In-car use
Cigarette lighter is not powbred Switch on ignition or
when ignition is switched off insert batteries
CD lid is not closed securely Close the lid securely
place until the moisture
evaporates
Clean the CO
Only a battery pack can
Contacts are dirty Clean them with a cloth
RESUME or SHUFFLE or
PROGRAM is activated
be recharged on board
Switch off RESUME, SHUFRE
or PROGRAM
18
Page 19
TROUBLESHOOTING
Under no circumstances should you try to repair the unit yourself, as this
will invalidate the warranty.
PROBLEM
General
malfunction
No sound or had
sound quality
POSSIBLE CAUSE
Electrostatic discharge from
the user via the CD player
PAUSE is activated Press ►!!
Loose or wrong connections
Volume is not turned up
Headphones worn the wrong
way
Headphone plug is dirty
Strong magnetic fields near
the CO player
In-car use
Strong vibrations Find another place for the set
Adapter cassette is
inserted incorrectly
Temperature inside car is too
hiqh/low
Cigarette lighter/socket is too
dirty
Wrong playback direction of
the autoreverse feature of the
car cassette player
Hum or noise in car Unfit car radio input socket
Malfunctions with
remote control
operation
Remote control is not firmly
connected to the LINE OUT/
REMOTE f! socket
SOLUTION
Disconnect the set from the
power supply or take out the
batteries for a few seconds
Check connections
Adjust the volume
Pay attention to the L (left)
and R (right) indications
Clean the headphone plug
Change the player's position
or connections
Insert the adapter cassette
correctly
Let the CD player adjust to
the temperature
Clean the cigarette
lighter/socket
Change the autoreverse
direction
Use the adapter cassette
Check connections
19
Page 20

AUSTRALIA
Philips product warranty for Australia
Warranty conditions valid for Colour Television, Video Cassette Recorders, Audio Systems, and
Portable Audio.
The benefits given to the purchaser by this warranty are in addition to all other rights and remedies
vriiich the purchaser has in respect of the product under the Trade Practices Act or other
Commonwealth or State Law.
Philips Sound and Vision warrants it’s products to the purchaser as follows and subject to the
stated conditions.
12 months free service
Any defect in materials or workmanship in the product occurring within 12 months from the
original date of purchase will be rectified free of charge by Philips Service or one of our authorised
service centers.
Conditions of warranty
1. All claims for warranty service should he made to your nearest Philips Service Branch or to a
Philips authorised service dealer. Reasonable evidence of date of purchase must be provided.
2. This warranty extends only to defects occurring under normal use of the product vAen operated
in accordance with the instructions.
3. Home service within the normal service area of Philips Service or one of our authorised service
centres will be provided for television receivers with screen size 59cm and above. All other
products are to be brought or sent to your nearest Philips Service Branch or to an authorised
service centre.
4. This vrarranty does not coven
a) Mileage or traveling time, pickup or delivery, cost of insurance.
b) Service costs arising from failure to correctly adjust the controls of the product or to observe
the instructions, or inspections that reveal that the product is in normal working order.
c) Product failures caused by misuse, neglect, normal v.'ear and tear, accidental breakage,
transit damage, inexpert repairs or modification by unauthorised persons, lightning strikes,
vermin intestation or liquid spillage.
d) Cleaning of video or audio heads.
e) Inadequate receiving antennae.
f) Replacement of worn or used batteries, styli or other consumables.
The conditions contained in this vrarranty replace and override the provisions of the World-Wide
Guarantee for Products sold in Australia,
62
Page 21

AUSTRALIA
Philips Service Branches
To contact your nearest Philips Service Branch call 1313 92 from anywhere in Australia.
Sydney
Technology Park
Australia Centre
3 Rgtrea Drive
HomebushNSW2140
Newcastle & Central Coast
934 Hunter Street
Newcastle West NSW 2302
Perth
1 Fredrick Street
Belmont WA 6104
Melbourne
Cnr Wellington 8:
Springvale Roads
Mulgrave VIC 3170
Service is also provided through 1,200 accredited service dealers throughout Australia. To find out
about your nearest centre, call 13 13 92.
Call us direct on the
Philips Customer Helpline
Philips customer care lasts as long as you keep the product Whenever you need any infomration
on the care or operation of your product remember it’s alvrays best to go straight to the source.
Phone Philips Helpline direct on
- your call is alvrays welcome.
Please record the following information for your records and keep in a safe place.
Brisbane
10 Graystone Street
Tingalpa OLD 4173
Also Service CetJtres:
Adelaide
348 Torrens Road
Croydon Park SA 5008
Hobart
2A Pierce Street
Moonah TAS 7009
Wollongong
1/216 Corrimal Street
Wollongong NSW 2500
Canberra
UnitF,
66-70 Maryborough Street
fyshwick ACT 2609
1313 91
7 days a week
Model No:..
Serial No:......................................................
Please retain your purchase receipt which is required to claim
service under warranty.
Philips Electronics Australia Limited
ACN 003 445 743,3 ngtree Drive
Homebush NSW 2140
Verstn2,0a/37,ffCf-O30
Page 22

NEW ZEALAND
Guarantee and Service for New Zealand
Thank-you for purchasing this quality Philips product.
Philips New Zealand Ltd guarantees this product against defective components and
faulty workmanship for a period of 12 months. Any defect in materials or workman
ship occurring within 12 months from the date of purchase subject to the following
conditions will be rectified free of charge by the retailer from whom this product was
purchased.
Conditions
1. The product must have been purchased in New Zealand. As proof of purchase,
retain the original sales docket indicating the date of purchase.
2. The guarantee applies only to faults caused by defective components, or faulty
workmanship on the part of the manufacturer.
3. The guarantee does not cover failures caused by misuse, neglect, normal wear and
tear, accidental breakage, use on the incorrect voltage, use contrary to operating
instructions, or unauthorised modification to the product or repair by an
unauthorised technician.
4. Reasonable evidence (in the form of a sales docket) must be supplied to indicate that
the product was purchased no more than 12 months prior to the date of your claim.
5. In the event of a failure. Philips shall be under no liability for any injury, or any loss
or damage caused to property or products other than the product under guarantee.
This guarantee does not prejudice your rights under common law and statute, and is
in addition to the normal responsibilities of the retailer and Philips.
Howto claim
Should your Philips product fail within the guarantee period, please return it to the
retailer from whom it was purchased. In most cases the retailer will be able to satis
factorily repair or replace the product.
However, should the retailer not be able to conclude the matter satisfactorily, or if you
have other diffi-culties claiming under this guarantee, please contact
The Guarantee Controller
Philips New Zealand Ltd,
BP.O. Box 41.021
Auckland
S (09)84 94160
fax S (09)8497858
65
Page 23
m
s
CO
Meet Philips at the Internet
http://www. philips.com
/IV
3103 3061636.1
VieCHC9815
 Loading...