

Philips AZ5738/98 User Manual
DVD Soundmachine
Register your product and get support at
www.philips.com/welcome
AZ5738
This product incorporates copyright protection technol-
ogy that is protected by method claims of certain U.S.
patents and other intellectual property rights owned by
Macrovision Corporation and other rights owners. Use of
this copyright protection technology must be authorized
by Macrovision Corporation, and is intended for home
and other limited viewing uses only unless otherwise au-
thorized by Macrovision Corporation. Reserve engineer-
ing or disassembly is prohibited.
Laser safety
This unit employs a laser. Due to possible eye injury, only
a qualified service person should remove the cover or
attempt to service this device.
Class II equipment symbol
This symbol indicates that the unit has
a double insulation system
CAUTION
Use of controls or adjustments or
performance of procedures other
than herein may result in hazardous
radiation exposure or other unsafe
operation.
2

Contents
General Information
Features .................................................................. 4
Discs for playback ................................................ 4
Region codes
Supplied accessories ............................................ 4
Environmental information ................................ 5
Care and safety information .............................. 5
Functional Overview
Controls on the system ...................................... 6
Remote control .................................................... 7
Connection
Connecting a TV set ............................................ 8
Connecting the power cord .............................. 8
Preparations
Step 1: Inserting batteries into the remote
control .................................................................... 9
Step 2: Setting the TV set ............................. 9-10
Step 3: Setting language preference ................ 10
Moving to another title / chapter and
playing from a selected point
Viewing from another angle
Playback control (PBC)
Checking the contents of DVD
MP3/Picture Disc Operations
Playing MP3/Picture disc (Kodak, JPEG) ........ 16
MP3/JPEG picture disc ...................................... 16
Kodak picture disc ............................................. 16
DVD Menu Operations
Using the menu bar ........................................... 17
Using the system setup menu ................... 17-19
Setting the TV type
Changing the password
Restricting playback by setting rating level
Restore default setting
Using the language setup menu ....................... 20
Using the audio setup menu ............................ 20
Using the speaker setup menu ........................ 20
English
Basic Operations
Switching on/off the system and selecting
sound source ....................................................... 11
Adjusting volume ................................................ 11
Switching off the volume temporarily..............11
Disc Operations
Playing discs ......................................................... 11
Using the disc menu .......................................... 11
Basic playback controls ..................................... 12
Skipping to another title (track)/chapter
To go directly to any title (track)/chapter
Fast search
Continuing playback from the last stop point
Selecting various mode functions ............. 12-13
Repeat play mode
Shuffle play mode
Repeating a section within a chapter/track
Programing favorite tracks ............................... 13
Special DVD/VCD features ........................ 14-15
Changing subtitle language
Changing the pictures scales
Changing view angle
Changing sound track language
Searching for a particular passage
Displaying the disc information during
playback
Ta pe Operation/Recording
Ta pe playback ...................................................... 21
General information on recording ................. 21
Preparation for recording ................................ 22
Disc synchro recording..................................... 22
Tuner Operations
Tuning to radio stations .................................... 22
To improve radio reception
Specifications ......................................... 23
Troubleshooting ............................... 24-25
Glossary .................................................... 26
3
General Information
English
Congratulations on your purchase and
welcome to Philips!
To fully benifit from the support that
Philips offers, register your product at
www.philips.com/welcome.
Features
Your DVD Soundmachine with 2.0-channel full
analog amplifier creates the same dynamic sound
qualities that you find in full-fledged cinemas and
incorporates some of the best features in home
theater technology.
Other features include:
Parental control (rating level)
Lets you set a rating level so that your children
cannot watch a DVD that has a rating higher
than you set.
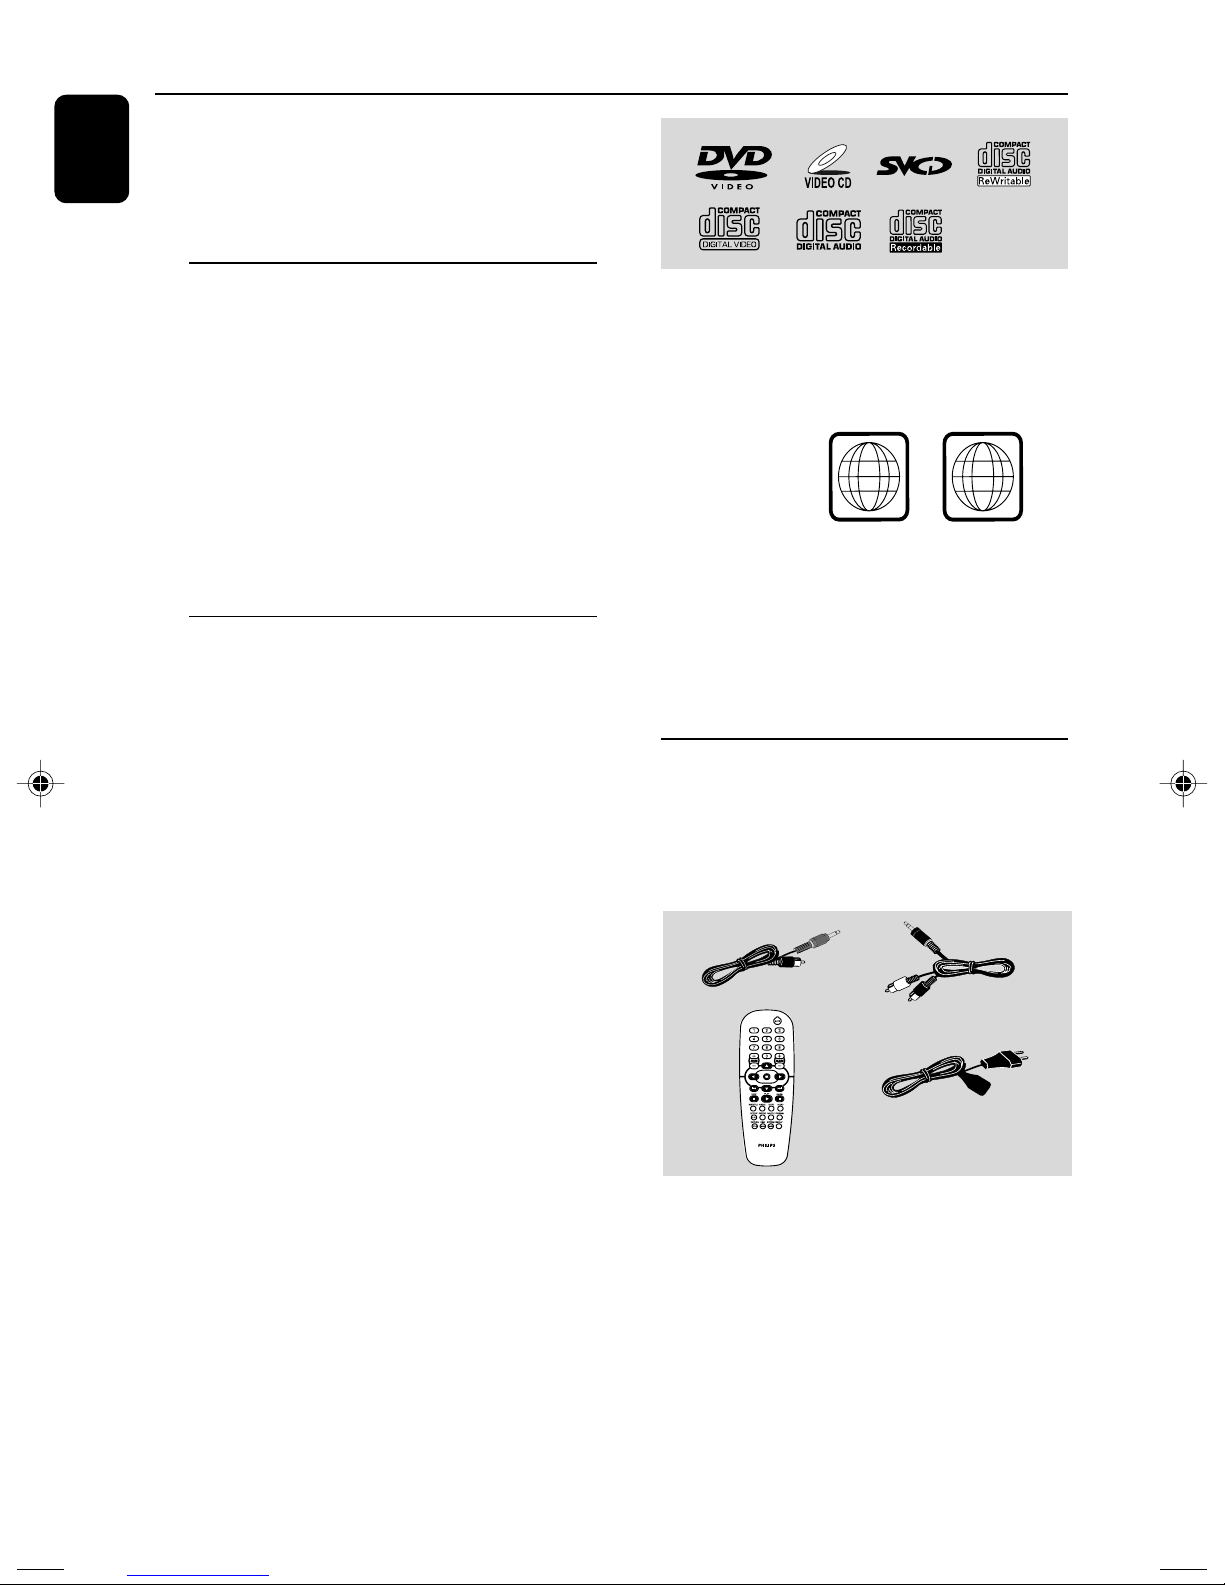
Discs for playback
Your DVD system will play:
– Digital Video Discs (DVDs)
– Video CDs (VCDs)
–Super Video CDs (SVCDs)
– Digital Video Discs + Rewritable (DVD+RW)
– Compact Discs (CDs)
- Picture (Kodak, JPEG) files on CDR(W)
– Supported MP3-CD format.
• ISO 9660 / UDF format
• Max. title/album name –12 characters
Max. title number plus album is 255.
• Max. nested director y is 8 levels.
• The max. album number is 32.
• The max. MP3 track number is 999.
• Supported sampling frequencies for MP3 disc:
32 kHz, 44.1 kHz, 48 kHz.
• Supported Bit-rates of MP3 disc are: 32, 64,
96, 128, 192, 256 (kbps).
– Following formats can’t be supported
• The files like *.VMA, *.AAC, *.DLF, *.M3U,
*.PLS, *.WAV
• Non-English Album/Title name
• The discs recorded under Joliet format
Region codes
DVDs must be labeled for ALL regions or for
Region 5 in order to play on this system. You
cannot play discs that are labeled for other
regions.
ALL
Notes:
–For mixed mode discs, only one mode will be
selected for playback according to the recording
format.
– If you are having trouble playing a certain disc,
remove the disc and try a different one. Improperly
formatted discs will not play on this system.
5
Supplied accessories
–Vedio cable (yellow)
– Audio cable (white, red)
– Remote Control
–AC power cord
4
General Information
Environmental information
Any unnecessary packaging has been omitted.
We have tried to make the packaging easy to
separate into three materials: cardboard (box),
polystyrene foam (buffer) and polyethylene (bags,
protective foam sheet).
Your system consists of materials which can be
recycled and reused if disassembled by a
specialised company. Please obser ve the local
regulations regarding the disposal of packaging
materials, exhausted batteries and old
equipment.
Care and safety information
Avoid high temperatures, moisture,
water and dust
● The apparatus shall not be exposed to dripping
or splashing.
● No objects filled with liquids, such as vases, shall
be placed on the apparatus.
● Do not expose the system, batteries or discs to
humidity, rain, sand or excessive heat (caused by
heating equipment or direct sunlight). Always
keep disc trays closed to avoid dust buildup on
the lens.
● No naked flame sources, such as lighted candles,
should be placed on the apparatus.
Avoid condensation problem
● The lens may cloud over when the player is
suddenly moved from cold to warm
surroundings, making it impossible to play a disc.
Leave the player in the warm environment until
the moisture evaporates.
Do not block the vents
● Do not operate the system in an enclosed
cabinet and allow about 15 cm (6 inches) of free
space all around the player for adequate
ventilation.
Cleaning the cabinet
● Use soft cloth slightly
moistened with a mild
detergent solution. Do not use
a solution containing alcohol,
spirits, ammonia or abrasives.
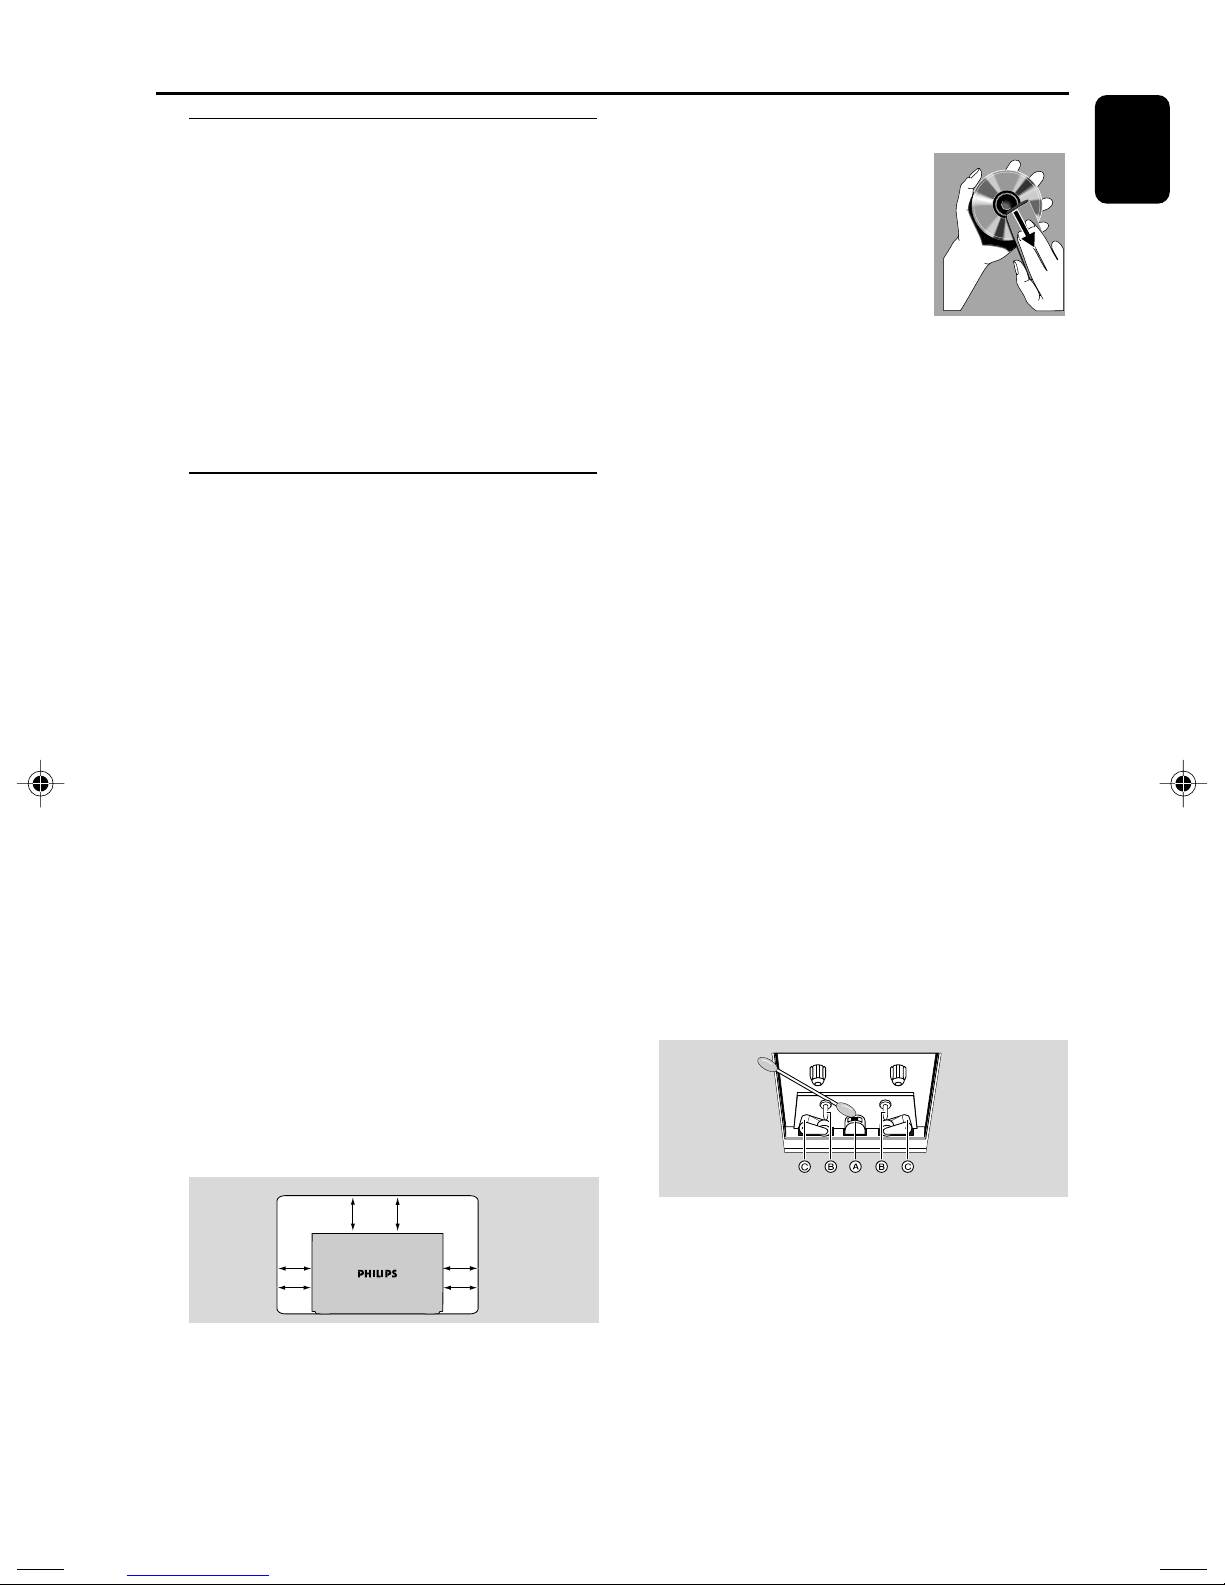
Cleaning discs
● To clean a CD, wipe it in a
straight line from the center towards the edge
using soft and lint-free cloth. A cleaning agent
may damage the disc.
● Write only on the printed side of a CDR(W)
and only with a soft felt-tipped pen.
● Handle the disc by its edge. Do not touch the
surface.
Cleaning the disc lens
● After prolonged use, dirt or dust may accumulate
at the disc lens. To ensure good playback quality,
clean the disc lens with Philips CD Lens Cleaner
or any commercially available cleaner. Follow the
instructions supplied with cleaner.
Finding a suitable location
● Place the player on a flat, hard, stable surface.
Cleaning the head and the tape paths
● To ensure good recording and playback quality,
clean the head A, the capstan(s) B, and
pressure roller(s) C after every 50 hours of tape
operation.
● Use a cotton swab slightly moistened with
cleaning fluid or alcohol.
● You also can clean the head by playing a cleaning
tape once.
Demagnetising the head
● Use a demagnetising tape available at your dealer.
English
15 cm
(6 inches)
10 cm
(4 inches)
DVD Mini Hi-Fi System
● The ventilation should not be impeded by
covering the ventilation openings with items,
such as newspapers table-cloths, curtains, etc.
10 cm
(4 inches)
● Don’t expose the system to dripping or
splashing.
● Install this unit near the AC outlet and where the
AC Power can be reached easily.
● Where the MAINS plug or an appliance coupler
is used as the disconnect device, the disconnet
device shall remain readily operable.
● To disconnect the system from the power supply
completely, remove the AC power plug from the
wall sockets.
5
Functional Overview
English
!
@
#
$
0
9
8
7
6
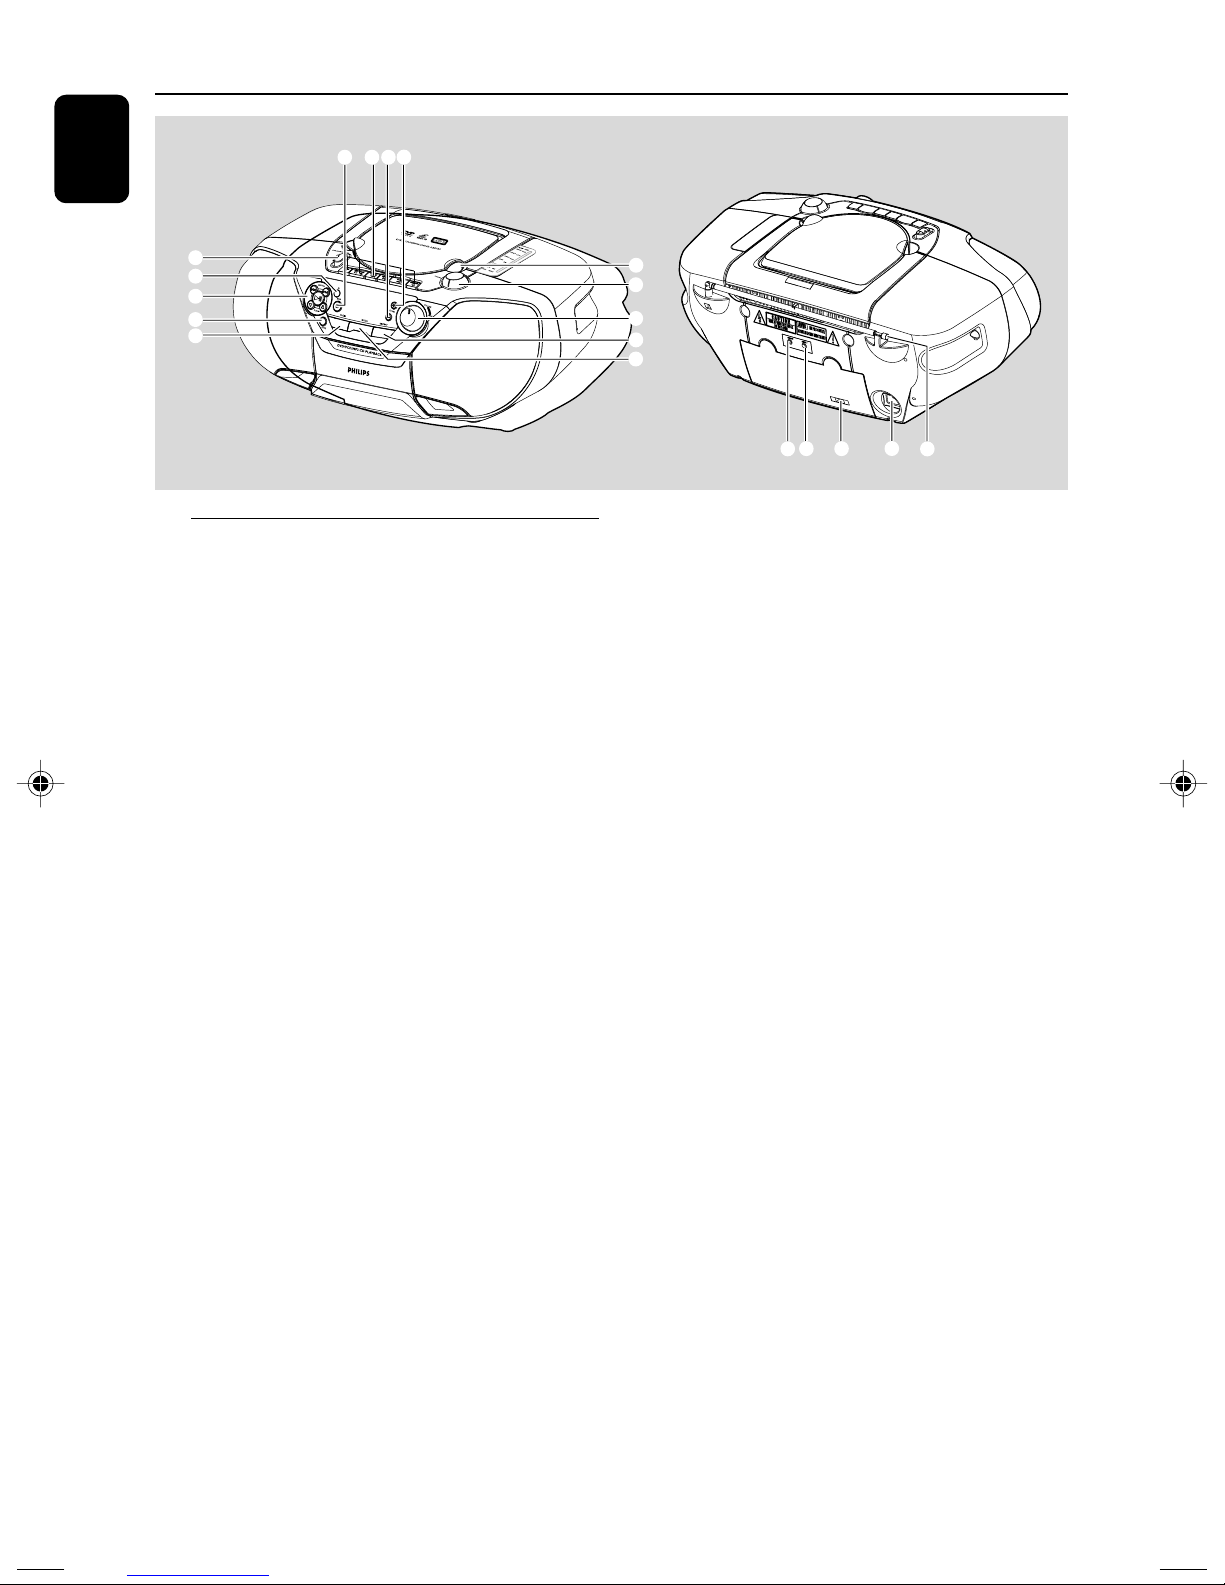
Controls on the system
1 LIFT TO OPEN
- to open the disc cover
2 TUNING
- to tune to a radio station
3 VOLUME
– to adjust master volume level
4 DISPLAY
– to display disc information during disc playback
– to select the slide show mode during picture
play
5 MODE
– to select the repeat function in disc mode
6 AUDIO
– to select preferred language for audio
– to select an audio mode when playing a SVCD/
VCD disc with different channels recorded
7 PROG
– in disc mode, to program favorite tracks
8 SEARCH
– in disc mode, press to skip to the previous/next
chapter/track.
– in disc mode, press and hold to fast reverse/
forward the disc
– in JPEG disc mode, press and hold to reduce or
enlarge picture.
PLAY/PAUSE 2;
– to start or interrupt disc playback
– to resume playback from last stop point
ALBUM 5 / 4
– to select previous/next album in MP3 stop mode
(with MENU ON)
S /T
1
2
3
4
5
*
(
^
&
%
9 iR
– point the remote control towards this sensor
0 SOURCE
- to select sound source for functions:
DVD/VCD/CD, FM, TAPE
! STOP 7
- to stop playback or to clear a programme
@ Cassette recorder keys
PA USE ;
- to pause playback or recording
STOP 7 / OPEN0
- to stop the tape
- to open the cassette compartment
SEARCH 1 / ¡
- to fast winds/rewinds tape
PLAY 2
- to start playback
RECORD 0
- to start recording
#$ZOOM-/+
- to reduce or enlarge picture in playing disc mode
% Telescopic aerial
- to improve FM reception
^ AC MAINS~
- Socket for power cord
& Vo ltage selector
- adjusts to match the local voltage
110-127/220-240V before plugging in the set
* Video out
- connects video input jack on the TV
( Audio out
- connects audio input jack on the TV
6
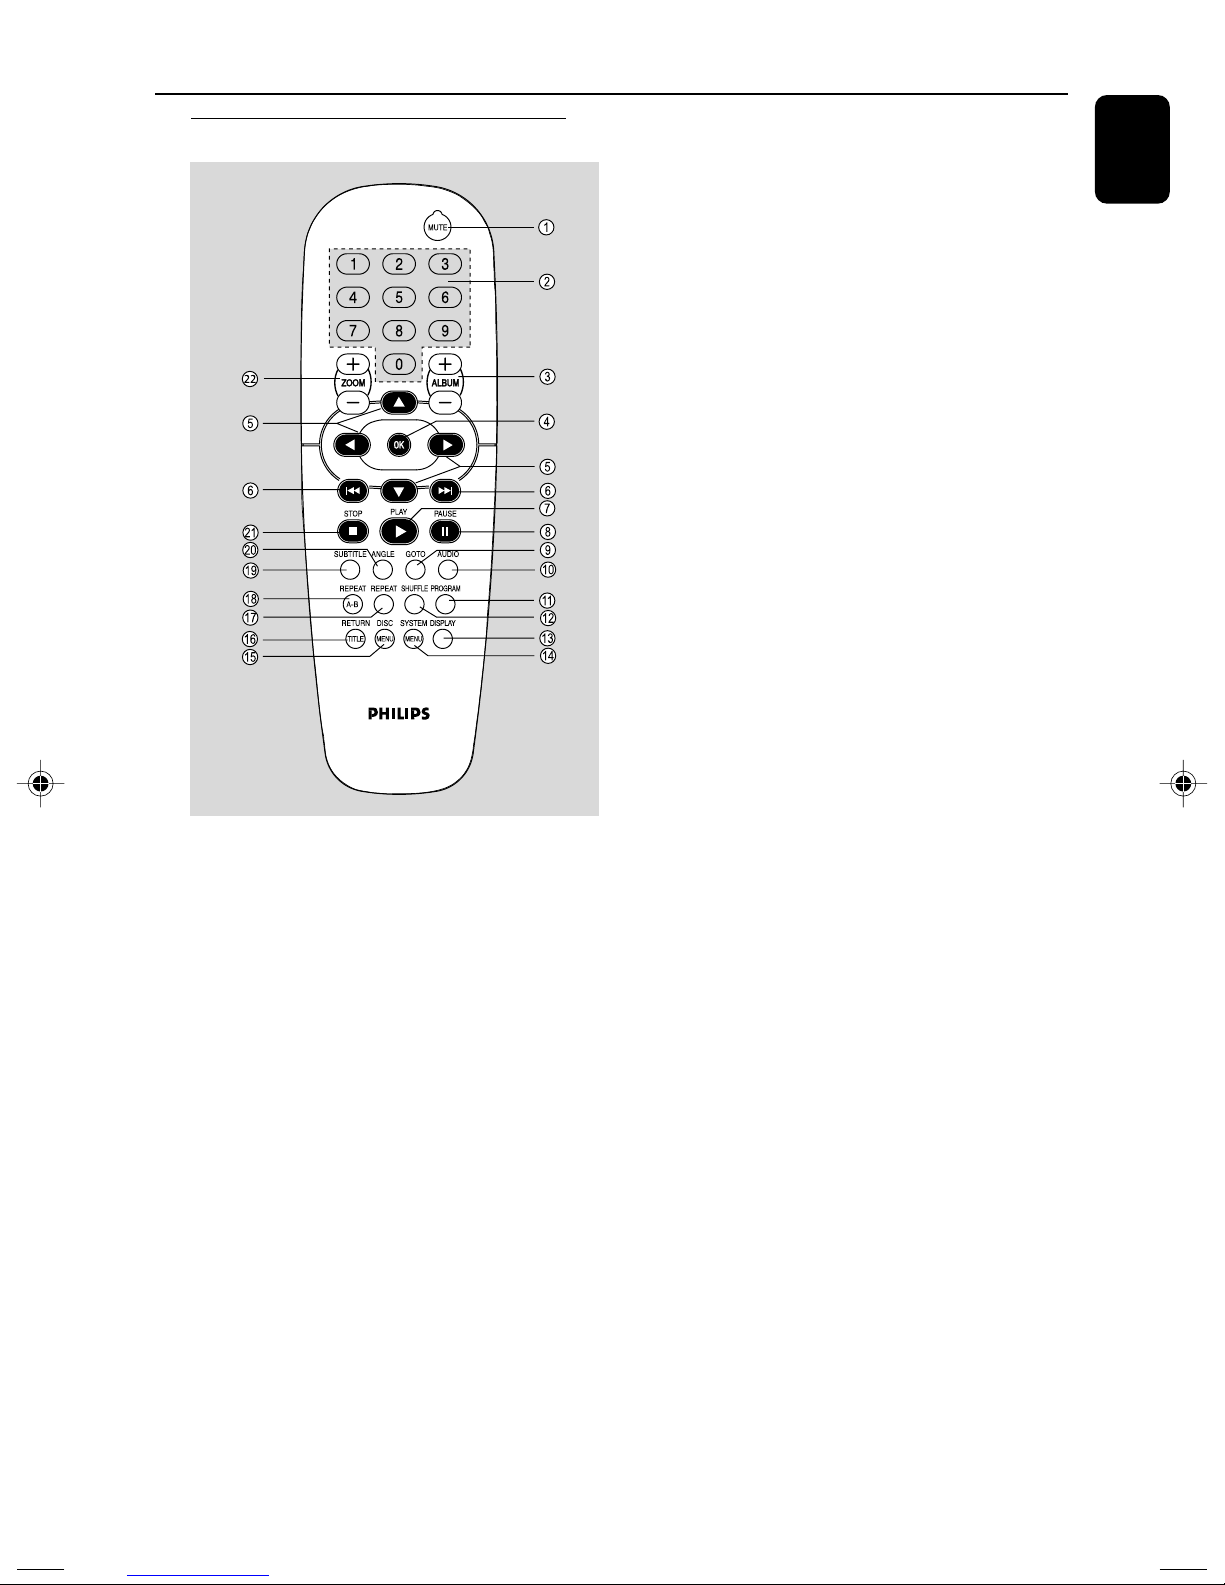
Remote control
Functional Overview
6
S / T
– in disc mode, press to skip to the previous/next
chapter/track.
English
7 PLAY
2
– to start the disc playback
8 PA USE
;
– to interrupt disc playback or resume playback
from last stop point.
9 GOTO
–for DVD/SVCD/VCD, to go direct to desired
title, chapter or time.
–for MP3, to go direct to desired album/track
0 AUDIO
–for VCD/SVCD, sets the audio mode
–for DVD, selects an audio language
! PROGRAM
– in disc mode, to program favorite tracks.
@ SHUFFLE
– to playback in random mode.
# DISPLAY (OSD)
– to display disc information during disc playback
$ SYSTEM MENU (disc mode only)
– to enter or exit the system menu bar.
Notes:
– The supplied remote control is for dics operation
only.
– First, select the disc (DVD/VCD/MP3/CD) source
on the set, then select the desired function
(
S , T
or 2 for example).
1 MUTE
– disables or enables sound output
2 Numeric Keypad (0-9)
– to enter a track/title/file number or exact point
of the disc
– to enter password
3 ALBUM +/-
– to select previous/nex album in MP3 stop mode
(with MENU ON)
4 OK
– to exit or confirm the selection.
5 5 / 4 /
A / B
– to select movement direction in disc contents
menu/system menu bar
– in JPEG disc mode, to rotate the picture for
viewing.
– in DVD/MP3/VCD/SVCD/CD disc mode, press
A / B to fast reverse/forward the disc
–moves an enlarged picture up/down/left/right
% DISC MENU (disc mode only)
– in DVD mode to enter root menu
– in VCD/SVCD mode, to select PBC ON or PBC
OFF.
^ RETURN TITLE
– to return to main page for VCD
– to return to title menu for DVD
& REPEAT
– to select variations of continuous playback
* REPEAT A-B
– to repeat a specific section within a chapter/track
( SUBTITLE
– to select desired subtitle
) ANGLE
- to select the angles cyclically
¡ STOP 9
– to stop playing the disc.
™ ZOOM +/-
- to reduce or enlarge picture in playing disc mode
7
Connection
English
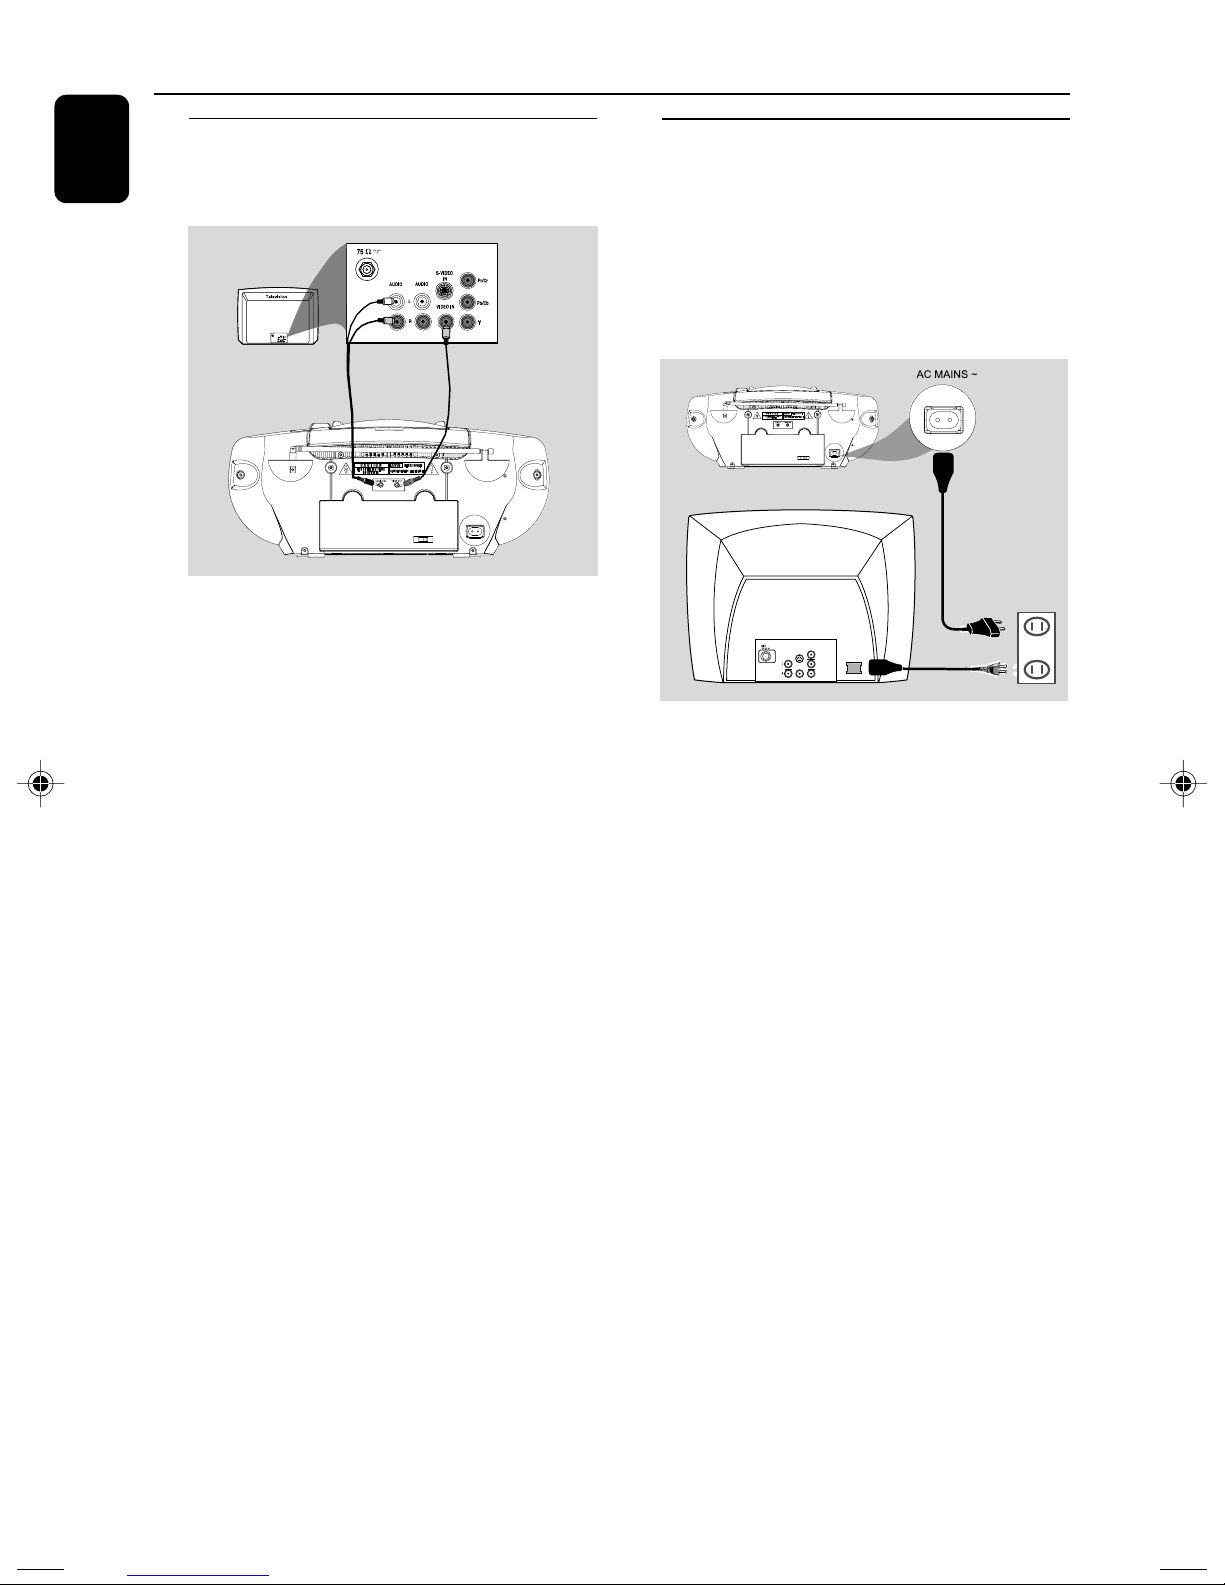
Connecting a TV set
Connecting the power cord
Note:
– Connect the system directly to the TV set.
OUT
IN
● Use the supplied composite video cable (yellow)
to connect the system’s VIDEO OUT jack to
the video input jack (or labeled as A/V In, Video
In, Composite or Baseband) on the TV set.
● To listen to disc playback of the system through
your TV, use the supplied audio cables to
connect AUDIO OUT jack (black) to the
corresponding AUDIO IN jacks ( red/white) on
the TV set.
IMPORTANT!
– If your system is equipped with a
Voltage Selector, set the VOLTAGE
SELECTOR (located on the back of the
set) to match the local power line.
– The type plate is located on the rear
of the set.
COMPONENT
VIDEO IN
S-VIDEO
IN
Pr/Cr
AUDIO
OUT
~ AC MAINS
Pb/Cb
VIDEO IN
Y
● After everything is connected properly, plug in
the AC power cord to the power socket.
The type plate is located on the bottom
of the set.
Notes:
– The set is operated on AC power only.
–Never make or change any connection with the
power on.
8
Preparations
IMPORTANT!
– Make sure to complete the
preparation procedures before operating
the system.
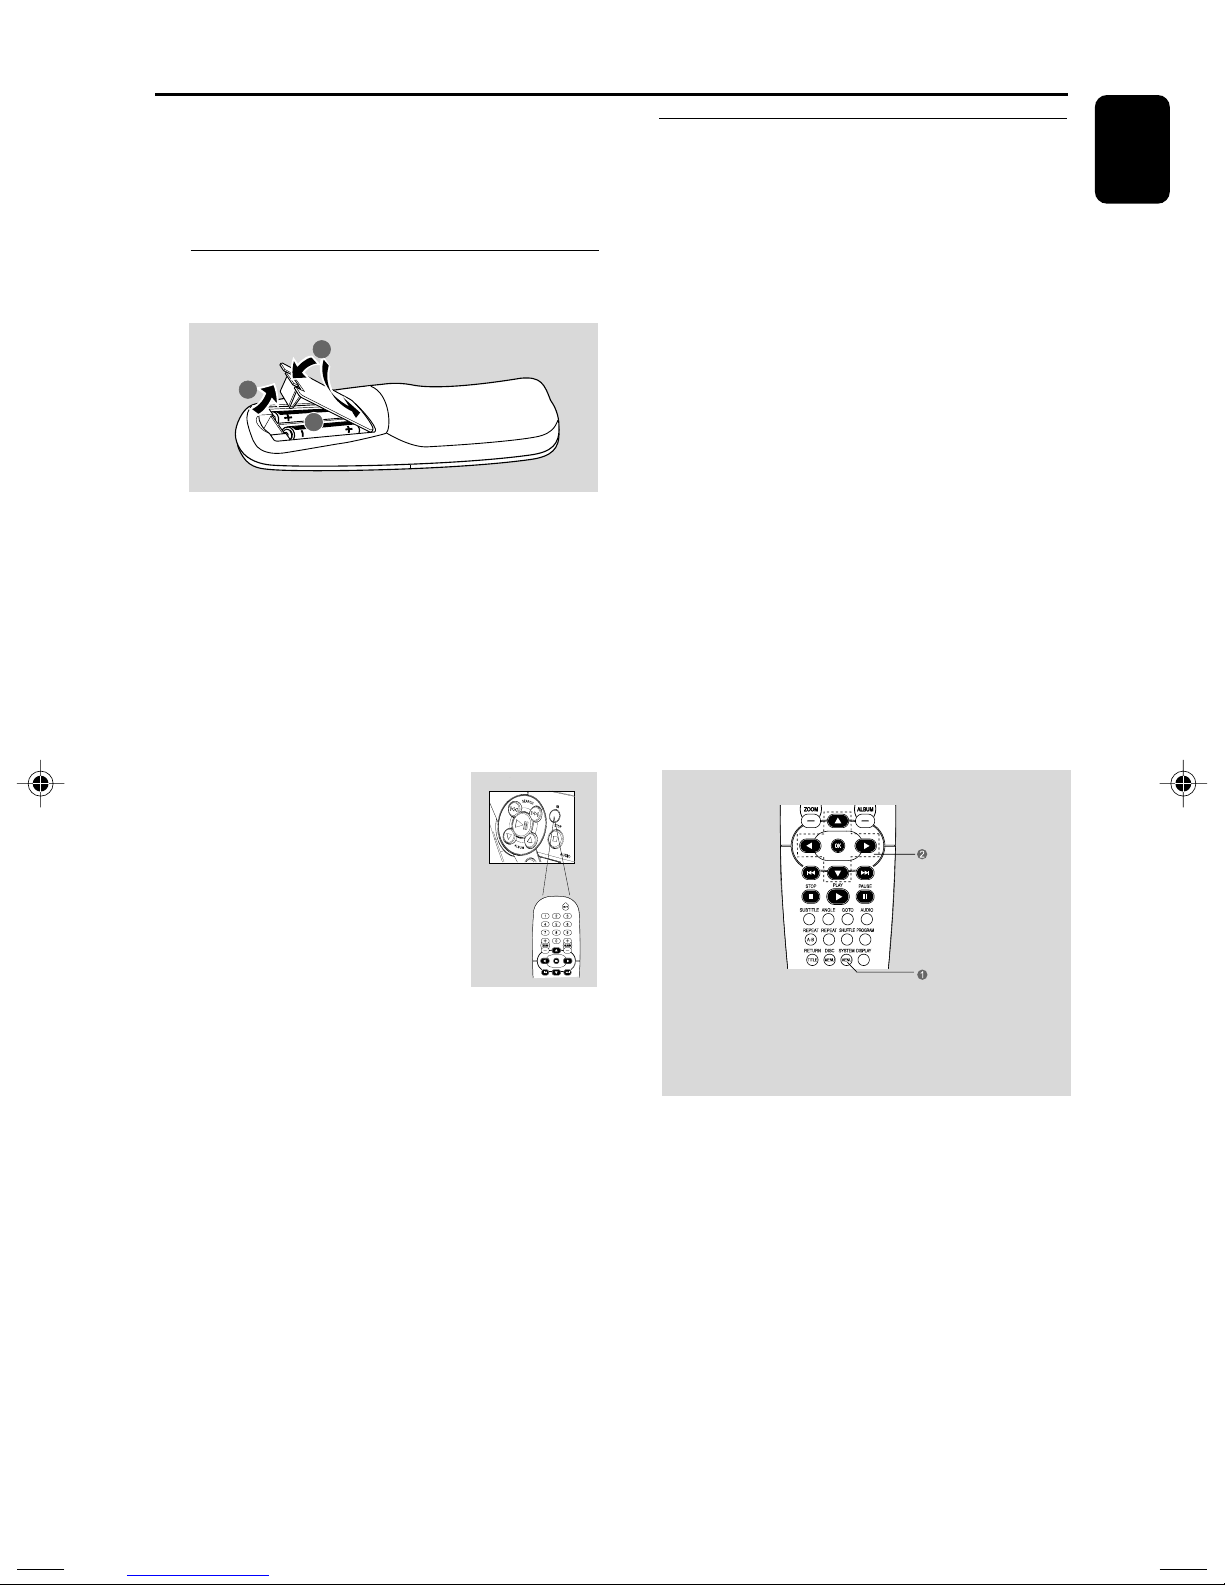
Step 1: Inserting batteries into
the remote control
3
1
2
1 Open the battery compar tment.
2 Place two batteries (Type R06 or AA) in the
compartment with the correct polarity as
indicated by “+” and “–” symbols.
3 Close the cover.
Using the remote control to operate the
system (It is only available in disc mode)
1 Adjust the source switch to
DVD/VCD/CD grade.
Step 2: Setting the TV set
IMPORTANT!
– Make sure you have completed all the
necessary connections.
1 Push the source switch to disc mode.
2 Tu rn on the TV set and set to the correct Video-
In channel. You should see the blue Philips DVD
background screen on the TV set.
➜ You may go to channel 1 on your TV set, then
press the channel down button repeatedly until
you see the Video In channel.
➜ Or, you can use the TV remote control to
select different video modes.
➜ Or, set TV to channel 3 or 4 if you are using
an RF modulator.
Selecting the color system that matches
your TV set
This DVD Soundmachine is compatible with
both NTSC and PAL. For the playback of a DVD
disc on this DVD Soundmachine, the color
systems of the DVD, TV set and DVD
Soundmachine should match.
English
2 Point the remote control directly
at the remote sensor (IR) on the
front panel.
3 Then select the desired function
(for example
CAUTION!
– Remove batteries if they are
exhausted or will not be used for a long
time.
– Do not use old and new or different
types of batteries in combination.
– Batteries contain chemical substances,
so they should be disposed of properly.
S, T or II )
9
 Loading...