

Page 1
PHILIPS
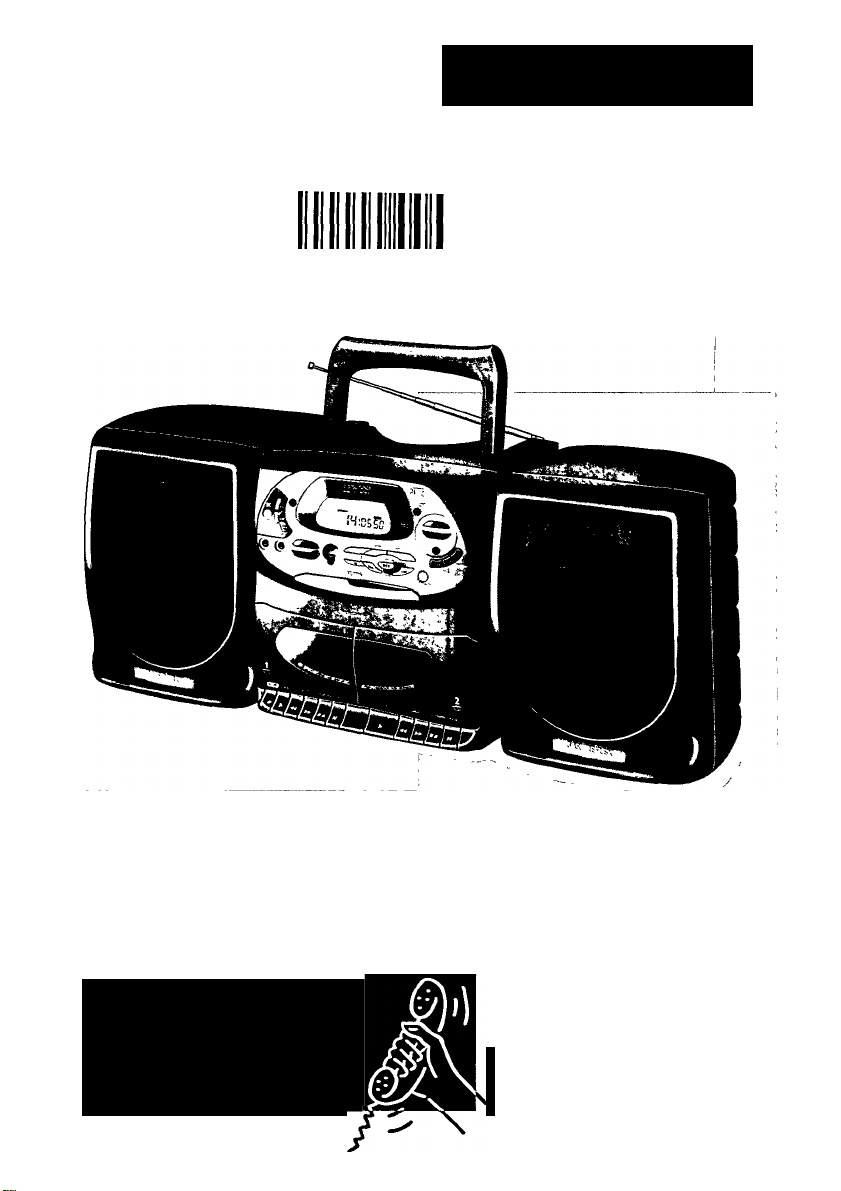
AZ2905/AZ2908 CD Radio Cassette Recorder
OBODQOO 00 5 6 4
MAGNAVOX
Owner's Manual
Mode d'emploi
Instructivo de manejo
Toll Free Help Une
Ligne d'assistance en service libre
Línea de ayuda telefonica sin cargo
800-531-0039
Page 2
"S
Ш
w
E
English
Français
V
Español
Controls
.....................
Power supply...
Loudspeakers... ... 9 CD-player
Basic functions..
Commandes
Alimentation
Haut-parleurs
Fonctions de base
Controles
.....................
Tensión de red
Altavoces
............................
Funciones básicas43-44 Magnetófono
.,7-8 Remote control.
... 8 Radio..............................
.9-10 Cassette recorder 15-17
............
23-25 Télécommande..
............
......
25 Radio
..........................
..........
......
26 Lecteur de CD...
......
27 Platine cassette ..32-34
41-42 Mando a distancia ....44
..................
42 Radio............................45-46
43 Reproductor de CD ..46-48
.....................
.............
....10
.11-12
.12-14
........
27
.........
28
..29-31
49-51
General information. 18
Troubleshooting
Informations generales
..............................................35
Recherche de pannes.,..
.......................................
Información general...52
Soluciones a posibles
anomalías
______
...................
36-37
53-54
19
/
Know these Connaissez ces
symboles de
Æ
дтмток MW MOW U ЮОМ M otee оюяоис. I
U couvBCU (И U ммсш мкяо. ш WMMOi м С0ММШ1 шам
PCS MW«KT ne ЙЕМШ NA LVnUUTIIR СОМПП SON txncm А
This “bolt of lightning“
indicates uninsulated material
within your unit may cause an
A
electrical shock. For the safety of
everyone in your household, please do
not remove product covering.
The “exclamation point“ calls
attention to features for which
you should read the enclosed
A
literature closely to prevent operating
and maintenance problems.
Cet ‘éclair à pointe de flèche'
indique qu'un maténau non
A
isolé, Situé à I mténeurde
l’unité, nsque de provoquer un choc
éleetnque. Pour la sécurrté de chacun,
nous vous pnons de ne pas retirer le
boîtier de ce produit
le ’point d'exdamation attire
votre attention sur des sujets
A
nsquant de provoquer des
problèmes de fonctionnement et
d’entretien st vous ne lisez pas les
informations s'y reportant
(япоаамошш
Conozca estos
símboles de
ЫгЫ.^Л11.1МуЧ'
U смкяп IM а HNB. pomoNL Ш1 «ммотно аягжм aten
MRI м мама кмАмм MKL мма м $а NraiANQ juuH
loves о кмисова «MATO, tumo ш naco CAuncAoa
El símbolo del 'rayo' ind ca que
algún matenal no ais'ado
dentro de su unidad podna
A
resultar en una sacud.da eléctnca. Para la
segundad de todos, fa\ or de no remo'.-er
la cubierta del producto.
El ’Signo de e<clamación' le
ll^a la atención a
caractehsticas sobre las que
A
Ud. debe leer la información adjunta
detenidamente para evitar problemas de
funcionamiento y mantenimiento
Page 3
Return your Warranty Registration card today to
ensure you receive all the benefits you’re entitled to.
' Once your Philips Magnavox purchase is
registered, you’re eligible to receive all
the privileges of owning a Philips
Magnavox product
jAfarranty I
Verification
Registering your product
within 10 days confirms
your right to maximum
protection under the
terms and conditions of
your Philips Magnavox
warranty.
^Owner I
Confirmation
Your completed Warranty
Registration Card serves
as verification of
ownership in the event of
product theft or loss.
Know these
symbols
RISK OF ELECTRIC SHOCK
A A
CAUTION: TO REDUCE THE RISK OF ELECTRIC SHOCK. DO NOT
REMOVE COVER (OR BACKJ. N0 USER^ERVICEABLE PARTS
INSIDE. REFER SERVICING TO QUAUHED SERVICE PERSONNEL
DO NOT OPEN
’ So complete and return the Warranty
Registration Card enclosed with your
purchase at once. And take advantage of
these important benefits.
^Model I
Registration
Returning your Warranty
Registration Card right
away guarantees you’ll
receive all the information
and special offers which
you qualify for as the
owner of your model.
For Customer Use
Enter below the Serial No. which is located
at the base on the set Retain this
information for future reference.
Model No.
Serial No.______________________________________
____________________________________
This “bolt of lightning”
indicates uninsulated material
A
electrical shock. For the safety of
everyone in your household, please do
not remove product covering.
A
literature closely to prevent operating
and maintenance problems.
within your unit may cause an
The “exclamation point” calls
attention to features for which
you should read the enclosed
PHILIPS
Wsit our World Wide Web Site at httpj'/www.magnavox.com
WARNING: TO PREVENT
FIRE OR SHOCK HAZARD, DO NOT
EXPOSE THIS EQUIPMENT TO RAIN
OR MOISTURE.
CAUTION: To prevent electric
shock, match wide blade of plug to
wide slot, and fully insert.
Page 4
SAFETY
WARNING
To reduce the risk of fire or electric
shock, do not expose this appliance to
rain or moisture.
CAUTION
Use of controls or adjustments or per
formance of procedures other than
herein may result in hazardous radia
tion exposure.
The set complies with the FCC-Rules. Part 15
and with 21CFR 1040.10
SAFETY INSTRUCTIONS - Read before operating equipment
This product was designed and manufactured to meet strict
quality and safety standards. There are. hotvever, some
installation and operation precautions which you should be
particularly aivare of.
1. Read Instructions - All the safety and operating
instructions should be read before the appliance is
operated.
2. Retain Instructions - The safety and operating instructions
should be retained for future reference
3. Heed Warnings - All warnings on the appliance and in the
operating instructions should be adhered to.
4. Follow Instructions - All operating and use instructions
should be follovred.
5. Water and Moisture - The appliance should not be used
near v^ter - for example, near a bathtub, vrashbowl, kitchen
sink, laundry tub, in a wet basement or near a swimming
pool, etc.
6. Carts and Stands - The appliance should be used only
with a cart or stand that is recommended by the
manufacturer.
6A. An appliance and cart combination should be
7. Wall or Ceiling Mounting - The appliance should be
mounted to a wall or ceiling only as recommended by the
manufacturer.
8. Ventilation - The appliance should be situated so that its
location or position does not interfere with its proper
ventilation. For example, the appliance should not be
situated on a bed, sofa, rug, or similar surface that may
block the ventilation openings: or, placed in a built-in
installation, such as a bookcase or cabinet that may impede
the flow of air through the ventilation openings,
9. Heat - The appliance should be situated away from heat
sources such as radiators, heat registers, stoves, or other
appliances (including amplifiers) that produce heat
10. Power Sources - The appliance should be connected to a
power supply only of the type described in the operating
instructions or as marked on the appliance.
moved with care. Quick stops, excessive force,
and uneven surfaces may cause the appliance
and cart combination to overturn.
@) Canada
This digital apparatus does not exceed the
Class B limits for radio noise emissions from
digital apparatus as set out in the Radio
Interference Regulations of the Canadian
Department of Communications.
11. Grounding or Polarization -
The precautions that should be
taken so that the grounding or
polarization means of an
mpliance is not defeated.
CAUTlON: To prevent
electric shock, match the wide blade of this plug to the wide
slot, fully insert. Do not use this (polarized) plug with an
extension cord, receptacle or other outlet unless the blades
can be fully inserted to prevent blade exposure.
1Z Power-Cord Protection - Pow'er supply cords should be
routed so that they are not likely to be w'alked on or pinched
by items placed upon or against them, paying particular
attention to cords and plugs, convenience receptacles, and
the point where they exit from the appliance
13. Cleaning - The appliance should be cleaned only as
recommended by the manufacturer.
14. Power Lines - An outdoor antenna should be located away
from power lines.
15. Nonuse Periods - The power cord of the appliance should
be unplugged from the outlet when left unused for a long
period of time.
16. Object and Liquid Entry - Care should be taken so that
objects do not fall and liquids are not spilled into the
enclosure through openings.
17. Damage Requiring Service - The appliance should be
serviced by qualified service personnel when
A. The power-supply cord or the plug has been damaged; or
B. Objects have fallen, or liquid has spilled into the
appliance; or
C. The appliance has been exposed to rain, or
D. The appliance does not appear to operate normally or
exhibits a marked change in performance; or
E The appliance has been dropped, or the enclosure
damaged.
IS.Servicing - The user should not attempt to service the
appliance beyond that described in the operating
instructions. All other servicing should be referred to
qualified service personnel.
91/8 EL 4562-1
Page 5

LIMITED WARRANTY
PHILIPS MAGNAVOX PORTABLE COMPACT DISC
This product must be carried in for an exchange.
WHO IS COVERED?
You must have proof of purchase to exchange the
product. A sales receipt or other document showing
that you purchased the product is considered proof of
purchase. Attach it to this owner’s manual and keep
both nearby.
WHAT IS COVERED?
Warranty coverage begins the day you buy your
product. For one year thereafter, a defective or
inoperative product will be replaced with a new,
renewed or comparable product at no charge to you. A
replacement product is covered only for the original
warranty period. When the warranty on the original
product expires, the warranty on the replacement
product also expires.
WHAT IS EXCLUDED?
Your warranty does not coven
• labor charges for installaoon or setup of the product,
adjustment of customer controls on the product, and
installation or repair of antenna systems outside of
the product.
• product repair and/or part replacement because of
misuse, accident, unauthorized repair or other cause
not within the control of Philips Consumer
Electronics Company.
• reception problems caused by signal conditions or
cable or antenna systems outside the unit.
■ a product that requires modification or adaptation to
enable it to operate in any country other than the
country for which it was designed, manufactured,
approved and/or authorized, or repair of products
damaged by these modificadons.
• incidental or consequential damages resulting from
the product. (Some states do not allow the exclusion
of incidental or consequential damages, so the above
exclusion may not apply to you. This includes, but is
not limited to, prerecorded material, whether
copyrighted or not copyrighted.)
• a product that is used for commercial or institutional
purposes.
WHERE IS EXCHANGE AVAILABLE?
You may exchange the product in all countries where
the product is officially distributed by Philips Consumer
Electronics Company. In countries where Philips
Consumer Electronics Company does not distribute
the product, the local Philips service organization will
attempt to provide a replacement product (although
there may be a delay if the appropriate product is not
readily available).
BEFORE REQUESTING EXCHANGE...
Please check your owner’s manual before requesting an
exchange. Adjustments of the controls discussed there
may save you a trip.
One Year Free Bcchange
EXCHANGING A PRODUCT IN U.S.A.,
PUERTO RICO OR U.S. VIRGIN ISLANDS...
Contact your dealer to arrange an exchange. Or, ship
the product, insured and freight prepaid, and with proof
of purchase enclosed, to the address listed below.
(In U.S.A, Puerto Rico and U.S. Virgin Islands, all
implied warranties, including implied warranties of
merchantability and fitness for a particular purpose, are
limited in duration to the duration of this express
warranty. But, because some states do not allow
limitations on how long an implied warranty may last,
this limitation may not apply to you.)
EXCHANGING A PRODUCT IN CANADA...
Please contact Philips ac
(In Canada, this warranty is given in lieu of all other
warranties. No other warranties are expressed or
Implied, including any implied warranties of
merchantability or fitness for a particular purpose.
Philips is not liable under any circumstances for any
direct, indirect, special, incidental or consequential
damages, howsoever incurred, even if notified of the
possibility of such damages.)
TO GET OUT-OF-WARRANTY EXCHANGE...
In U.SA, Puerto Rico or U.S. Virgin Islands, contact
Philips Service Company at (800) 851-8885 to obtain
the cost of out-of-warranty exchange. Then carefully
pack the product and ship it to the Small Product
Service Center (address listed above). In Canada, call
the phone number listed above under “Exchanging a
Product a Canada’’ to obtain the cost of out-of-
warranty exchange.
REMEMBER...
Please record the model and serial numbers found on
the product below. Also, please fill out and mail your
warranty registration card promptly. It will be easier
for us to notify you if necessary.
Small Product Service Center
Philips Service Company
907 Snapps Ferry Road, Plant 2, Building 6
Greeneville, TN 37743
1-800-661-6162 (French Speaking)
1-800-363-7278 (English Speaking)
MODEL#
SERIAL#
"u)
This warranty gives you sf>eofic legat ngbts. You may have other rights which vary from state/province to state/province.
Philips Service Company, P.O. Box 555, Jefferson City, Tennessee 37760, (423) 475-8869
EL4967E003 / MAC 4108 /1-97
Page 6

Page 7
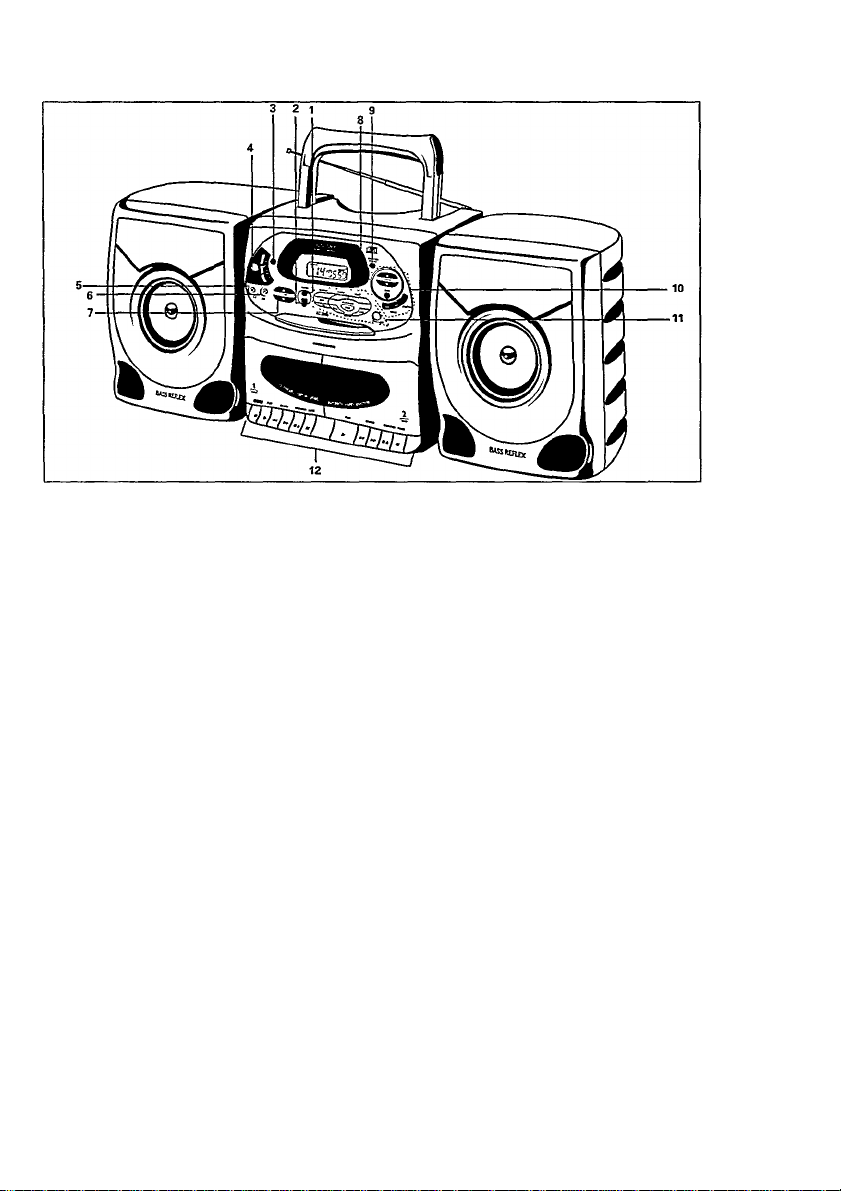
CONTROLS
lU
O)
s
BASIC FUNCTIONS:
0 CD«TAPE»TUNER-to select the source
@ POWER - to turn the set on and off
(D INCREDIBLE SURROUND - to create a
phenomenal sound effect (AZ 2908 only)
0 DSC - DIGITAL SOUND CONTROL: to
increase the bass level or to enhance
the type of music you are listening to
DBBJAZZ-POP
0 fi - 3,5 mm headphone jack
Note: Inserting the plug will disconnect the
speakers.
d) MIC - 3.5 mm microphone jack
© VOLUME
0 REMOTE SENSOR - sensor for the infrared
® HIGH SPEED DUBBING - Press to copy at high
A T
- to adjust the volume level
remote control
speed
® RADIO:
PROGRAM - to program preset stations
TUNING ►>! - to tune to radio stations
BAND - to select the wave band (FM-AM)
PRESET
A T
- to select a preset station
® CD PLAYER:
OPEN-CLOSE - to open/close the CD tray
PLAY-PAUSE HI - to start and to interrupt CD
play
STOP ■ - to stop CD play and to erase a
program
SEARCH r« »1-to skip and to search
forwards and backwards
SHUFFLE - to play in random order
PROGRAM - to program track numbers and to
review the program
REPEAT - to repeat one track or the entire CD or
the program
® CASSEHE RECORDER:
RECORD • - to start recording (deck 1 only)
PLAY ► - to start playback
SEARCH ►► - to wind or rewind the tape
STOP-OPEN* A-to stop the tape and to
open the cassette holder
PAUSE II - to interrupt the recording or
playback
Page 8
CONTROLS
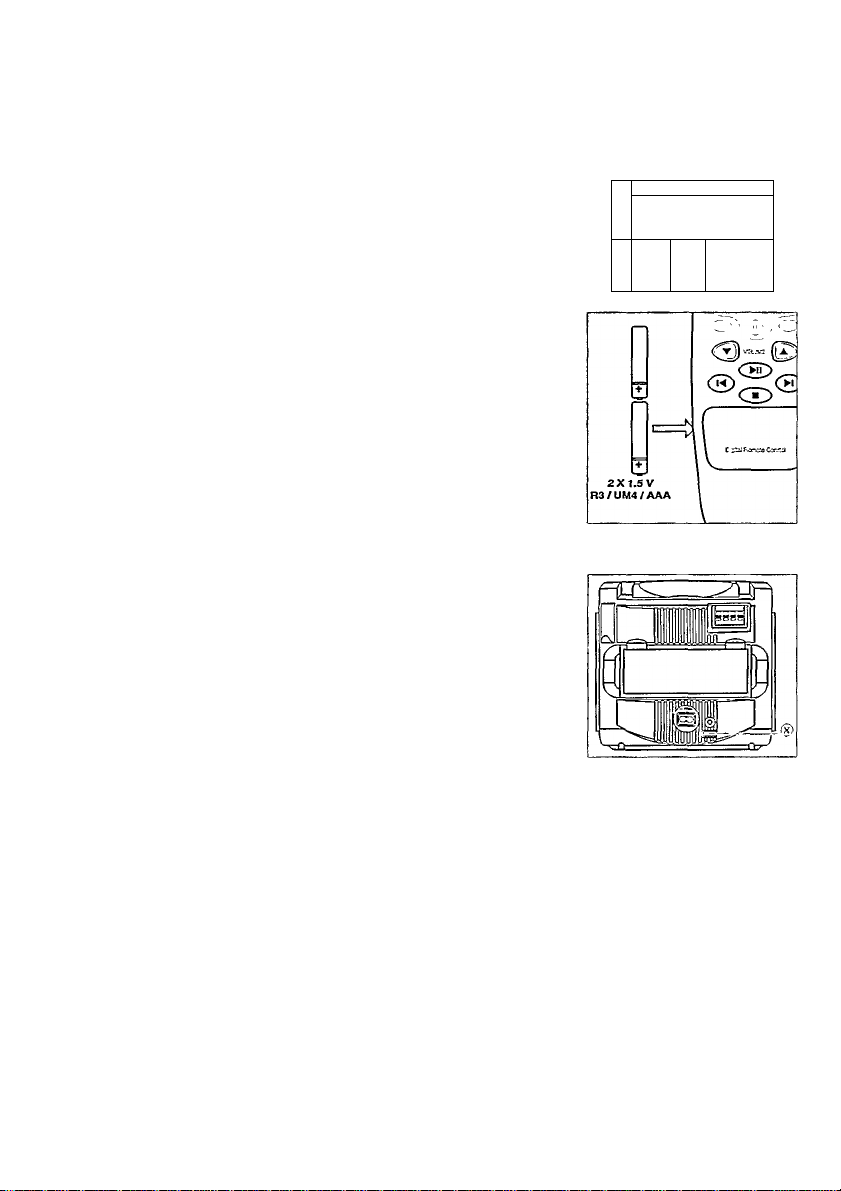
Batteries
m
3
U3
Set (R20, UM1 or D-cells):
• Open the battery compartment of the set and insert six batteries,
type R20, UM1 or D-cells (preferably alkaline).
Remote control (R03, UM4 or AAA-cells):
• Open the battery compartment of the remote control and insert
two batteries, type R03, UM4 or AAA-cells (preferably alkaline).
• Remove the batteries if they are empty or the set is not to be
used for a long time.
All kinds of batteries contain chemical substances
therefore they should be disposed of properly.
Mains
1 Check if the mains voltage as shown on the type plate
corresponds to your local mains voltage. If it does not, consult
your dealer or service organisation. The type plate is located
at the base of the set.
2 Connect the mains cable to the AC MAINS inlet and the wall
socket. The AC power supply is switched on. The mains cable
is inside the battery compartment.
The battery supply is switched off when the set is connected to the
mains. To change over to battery supply, pull out the plug from the
unit's AC MAINS socket.
To disconnect the set from the mains completely, withdraw the
mains plug from the wall outlet.
POWER SUPPLY
6
___
50
m
Page 9
LOUDSPEAKERS
Removable speakers
Connecting the speakers
Connect the right speaker to the R jack and the left speaker to
the L jack.
Note: Speakers other than supplied can be used.
They have to be 4 Ohms for type AZ2905 and 8 Ohms for
type AZ 2908.
Taking off the speakers
Keep the lever (on the back of the speakers) pressed and slide
the speaker upwards.
Attaching the speakers
Slide the speakers from above in the sleeves on the sides
of the set cabinet. The speakers will click into position.
Switching on and off/standby
Push the POWER button.
-► The display lights up (only if the set is connected to the AC
power supply).
The set is switched off when the POWER button is released.
When the set is switched off the last source selected will be
remembered, as well as the sound settings, the tuner presets and
the volume level.
In order to switch off the power supply, remove the mains plug.
Note: If the set runs on batteries, always be sure to set the POWER
button in position OFF after use. This will avoid unnecessary
power consumption.
BASIC FUNCTIONS
uu
FRONT FRONT
RIGHT LEFT
Page 10
BASIC FUNCTIONS
Adjusting volume and sound
Adjust the volume using the controls VOLUME
-► Display indication: Volume level from 0 to 32.
Adjust the sound to your taste by pressing the button DSC several
times.
-► A light indicates either DBB-JAZZ-POP.
Create a phenomenal sound effect by pressing INCREDIBLE
SURROUND (AZ 2908 only).
-► The INCREDIBLE SURROUND button lights up.
The effect of incredible surround sound may vary with different
types of music and can be improved by leaving the speakers
attached to the set.
The bass frequencies can also be emphasised if you place the set
against a wall or on a bookshelf. (Do not cover any vents and
leave sufficent room around the unit for ventilation.
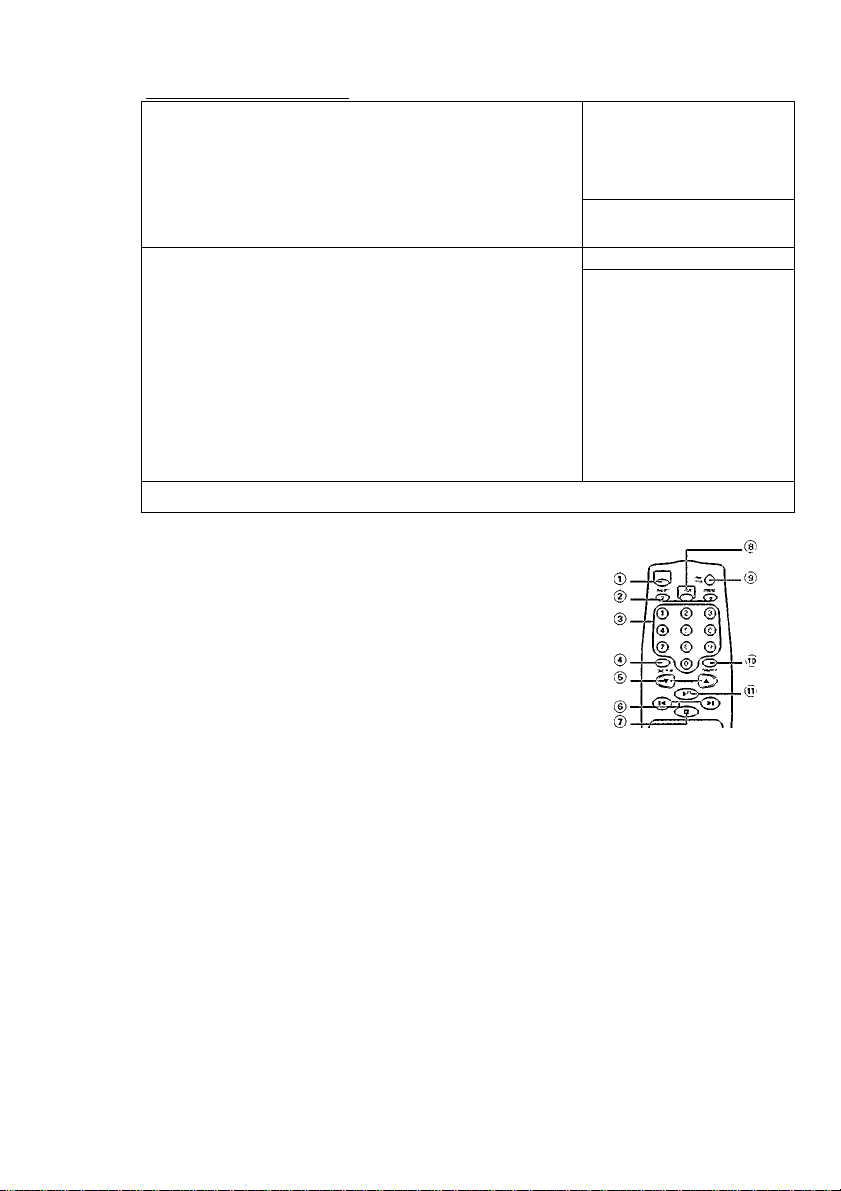
Remote control
@ CD - To select CD source.
(|)
PRESET -
(3)0-9
- To key in a CD track number.
- To key in a preset radio station.
0 LONG PLAY - Please note that this control has no correspon
ding function on this set.
0 VOLUME
© SEARCH M or W - To skip or search a passage or a track.
© STOP ■ - To stop playback or erase a program.
© TUNER - To select the tuner source.
@ TRAY OPEN - To open / close the CD tray.
® SHUFFLE - To play a CD in random order.
(S) PLAY«PAUSE ►!! - To start or interrupt CD play.
T / A
(down / up) - To select a preset station.
T A
- To adjust volume level.
T A.
REMOTE CONTROL
JJ Iini
LL uuL
ZJ
10
Page 11
RADIO
Tuning to radio stations
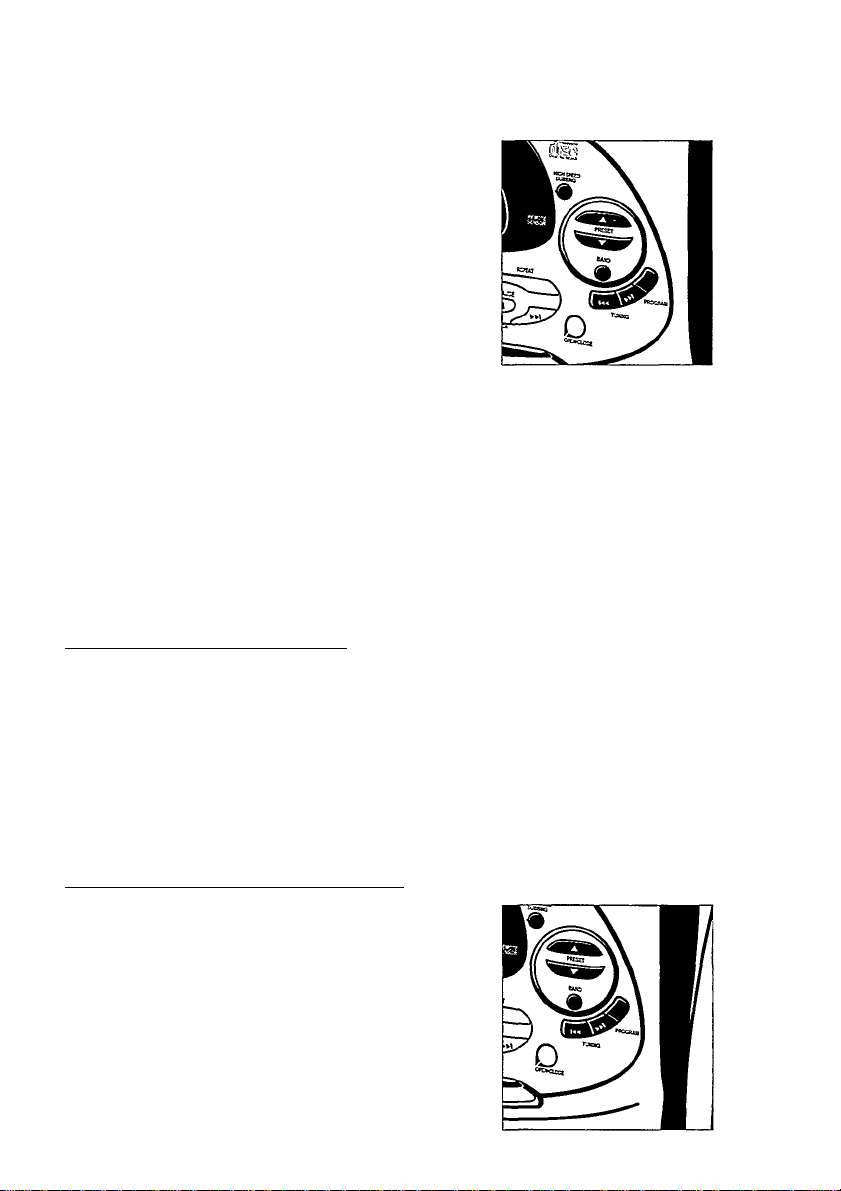
1 Select the tuner by pressing the CD«TAPE»TUNER button
several times until eeei appears on the display.
2 Select the wave band by using the BAND selector.
-► Display indication: the selected waveband
3 Press TUNING r« orw for approx, one second and then release
the button.
-► The radio automatically tunes to a station with sufficent
strength. Display indication during automatic tuning: S.- c A
4 Repeat this procedure until you find a desired station.
To tune to a weak transmitter briefly press TUNING or as
often as necessary for optimum reception, or until the correct
frequency is indicated in the display.
Improving the RADIO reception
• For FM and SW, pull out the telescopic antenna. To improve the
signal, incline and turn the antenna. Reduce its length if the
signal is too strong (very close to a transmitter).
• For AM, MW and LW, direct the built-in antenna by turning the
whole set. The telescopic antenna is not needed.
Switchable tuning grid (not all versions)
In North and South America the frequency step between adjecent
channels in the AM band is 10 kHz. In the rest of the world this
step is 9 kHz. Usually this frequency step has been preset in the
factory of your area. (/01 versions only)
In some versions the frequency step can be changed:
• Keep the BAND selector button pressed for more than 5
seconds.
-► The display shows either IS Sr !do:'3 Sr Id.
Em
»nocn
I uuuu
C_ _L
_(/ LI I
LU
B
Programming radio stations (29 preset stations)
You can store up to 29 radio stations in the memory. When tuning
to a preset station, the preset number (1 to 29) is indicated in the
display.
1 Select the tuner by pressing the CD*TAPE»TUNER button
several times until EEHa appears on the display.
2 Tune to a desired station with TUNING or^w, as described
earlier.
-► If the frequency is already stored in the memory, the preset
number will be displayed.
11
Page 12
RADIO
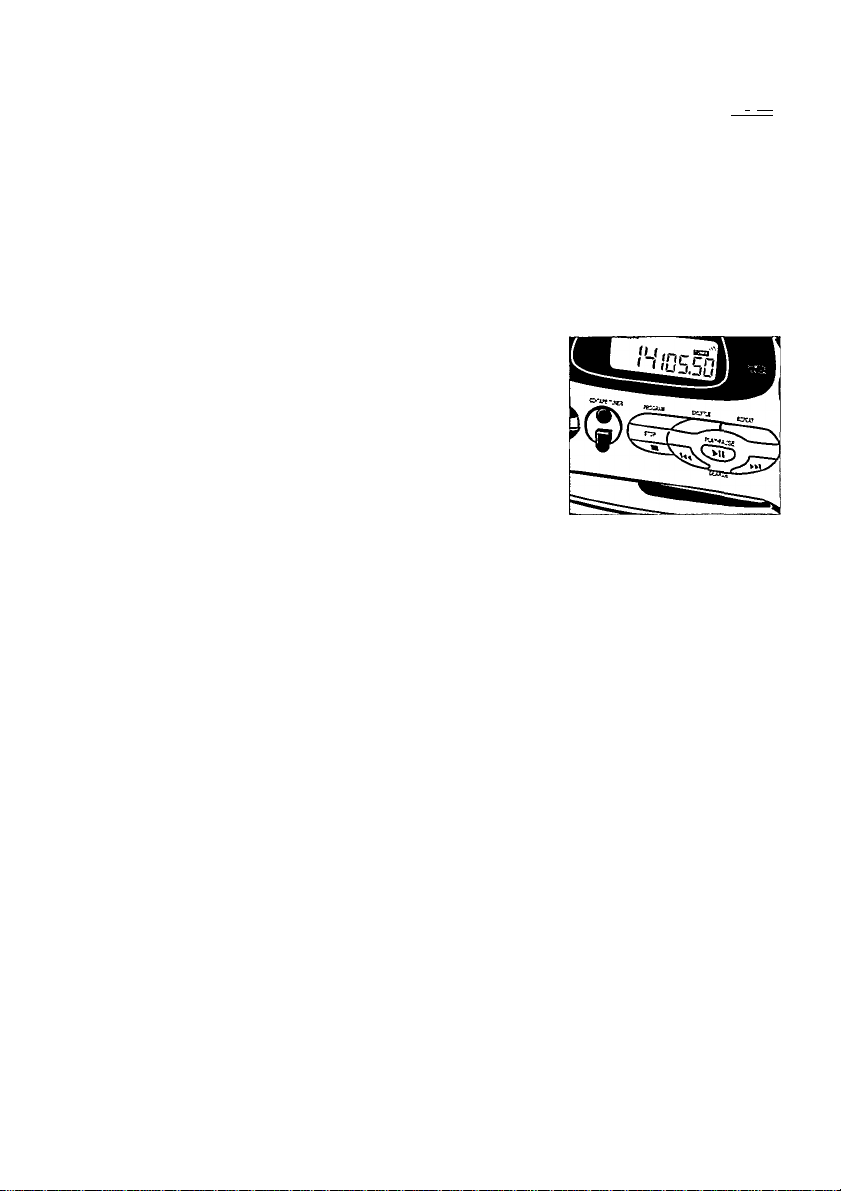
3 Press PROGRAM to enter the programming mode.
m
a
-► During programming, program flashes on the display.
(a
4 Press PRESET A or T to allocate a number from 1 to 29 to the
preset station.
5 Press PROGRAM to confirm the setting.
Tuning to preset stations
• Press PRESET A or T until the desired preset number appears
on the display.
Playing a CD
1 Select the CD player by pressing the CD«TAPE»TUNER button
several times until lan appears on the display.
2 Open the tray by pressing the OPEN-CLOSE button.
3 Insert an audio CD (printed side up) and close the tray by pushing
it gently or pressing the OPEN-CLOSE button again.
-► The CD player starts and scans the contents list of the CD.
-► Display indication: the total number of tracks and the total
playing time. After that the CD player stops.
4 Press the PLAY-PAUSE HI button to start CD playback.
-► Display indication: the current track number and the elapsed
time of the current track.
5 Press the STOP ■ button to stop CD playback.
-► Display indication: the total number of tracks and the total
playing time.
6 You can interrupt CD playback by pressing PLAY-PAUSE ►!!.
Continue CD playback by pressing the button again.
-► Display indication: the time of the current position flashes.
Notes: CD playback will also stop If:
- you open the tray;
- you push the POWER button or
- the end of the CD is reached.
When you make a mistake in operating the CD player or the CD
player cannot read the CD.
-► the display indicates (see TROUBLESHOOTING).
CD PLAYER
t
___
nu ir
I 11: lb
U D.n 1
i l_-U I
I—
—i lio-uuf
C
ITirTTp^'^
inn
I.UU
rror
12
Page 13
CD PLAYER
Search backwards and ►h forwards
Selecting another track
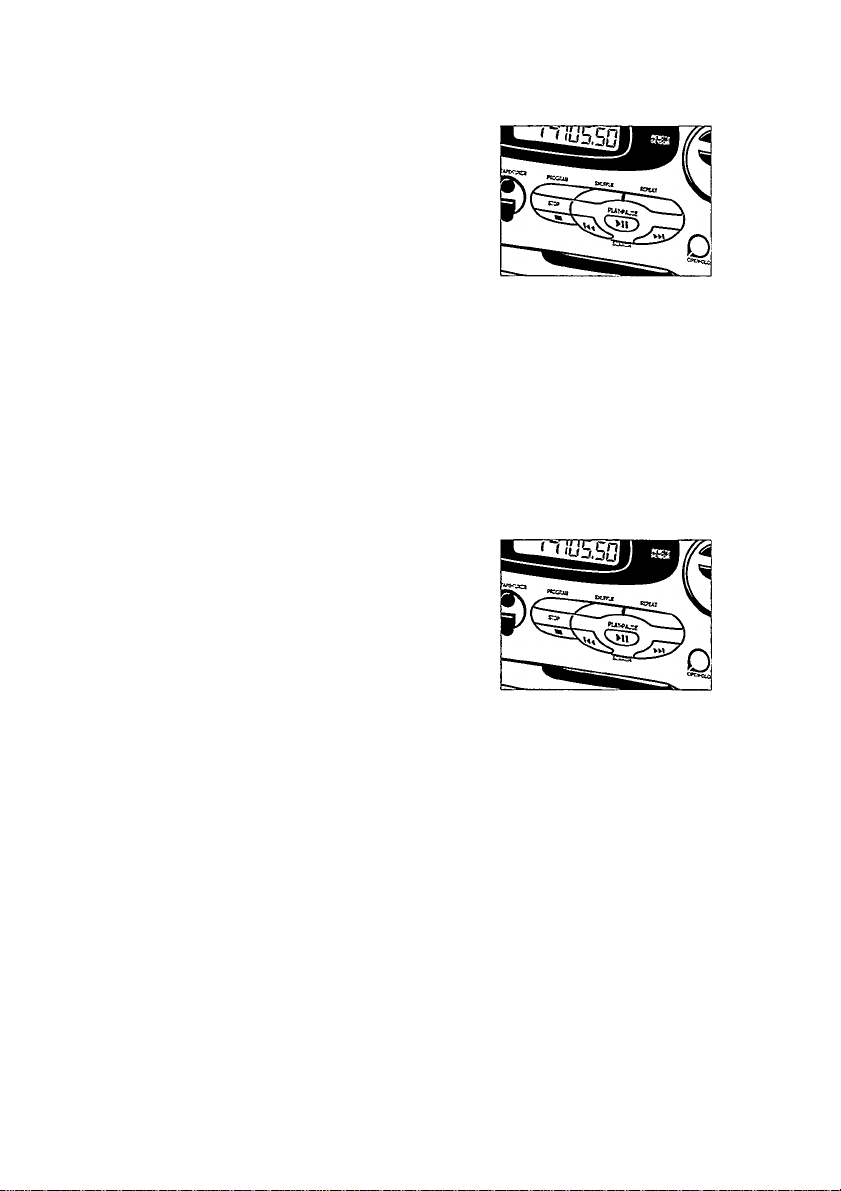
Briefly press the SEARCH r« or^w button once/several times to
skip to the beginning of the current/previous or subsequent track(s).
- During play: CD playback continues automatically with the
selected track.
- In stop position: press PLAY-PAUSE Hi to start CD playback.
-► Display indication: the selected track number.
Searching for a passage during CD playback
1 Hold down the SEARCH r« or button to find a particular
passage in forwards or backwards direction.
-► CD playback continues at low volume.
2 Release the button when you have reached the desired passage.
Note: In the SHUFFLE and REPEAT-1 mode and when playing a
program, searching is only possible within the particular
track.
Different playing modes: SHUFFLE/REPEAT
SHUFFLE-playing in random order
1 Press SHUFFLE before or during CD playback.
-► All the tracks of the CD (or program if available) will now be
played in random order.
2 To return to normal CD playback, press SHUFFLE again.
o>
s
Ш
REPEAT - Repeating the entire CD or one track of the CD
1 Before or during CD playback, press repeated REPEAT to cause
the display showing the different repeating modes.
- repeat: the current track is played repeatedly.
- REPEAT all: the entire CD or programm is played repeatedly.
2 To return to normal CD play press REPEAT until the display
indication disappears.
Note: You can activate the different playing modes at the same
time, e. g. you can repeatedly play the entire CD or program
in random order (shuffle repeat all).
SHUFTU REPEAT Ml
-/ O-J J
J
O-JJ
_C_IC
13
Page 14
CD PLAYER
Programming track numbers
You may select a number of tracks and store these in the memory
in the desired sequence. You may store any track more then once.
At most, 20 tracks can be stored in the memory.
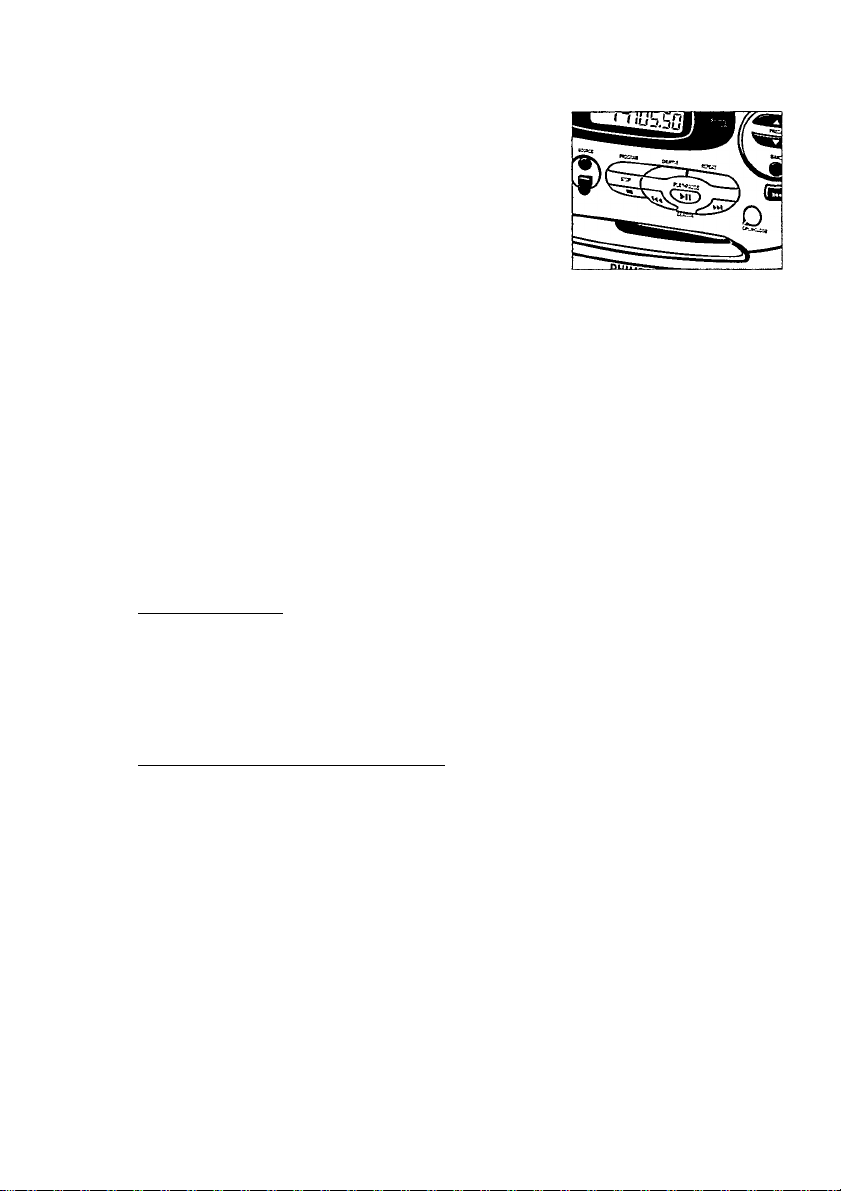
1 Select the desired track with SEARCH !♦< or ►«.
2 As soon as the desired track is displayed, press the PROGRAM
button to store the track in the memory.
-► On the display program appears. The number of the stored
track, Pr and the total number of stored tracks is shown.
3 Select and store in this way all desired tracks.
4 You can review your settings by pressing the PROGRAM button
for more than 2 seconds.
-► The display shows all stored track numbers in sequence.
BPr:
H
Notes: - When you try to store more than 20 tracks the display
shows'rUi L.
- When you press PROGHAM and there is no track selected
the display shows 5 E i £ C E.
Playing the program
If you have selected the tracks in the stop position, press
PLAY-PAUSE HI.
If you have selected the tracks during CD playback, press first
STOP* and then press PLAY-PAUSE HI.
Erasing the program from the stop position
From the stop position, press STOP«.
-► CLEPlr lights up briefly, PROGRAM disappears and your
program is erased.
Notes: The program will also be erased if you:
- interrupt the power supply,
- open the tray,
- press the POWER button.
ri II I
rULL
L L ) CTL
t_ C L- t
lU B3SB
L LEFIr
14
Page 15

CASSEHE RECORDER
Playing a cassette
1 Select the tape by pressing the CD»TAPE«TUNER button
several times until appears on the display.
2 Press STOP-OPEN ■ 4 to open the casette compartement.
3 Insert a recorded cassette with the full reel on the left hand side.
4 Press PLAY ► to start playback.
5 By pressing or^>- fast winding of the tape is possible in both
directions.
6 To stop the playback or fast winding press STOP.OPENh 4.
Notes: - The keys are automatically released at the end of the tape.
-As long as the PLA Y or HECOPD keys of the tapedeck are
depressed it is not possible to switch to another source.
General information on recording (on deck 1 only)
Recording is permissible insofar as copyright or other rights of third
parties are not infringed.
For recording on this set you should use a casette of the type
NORMAL (lEC type I). This deck is not suited for recording on
cassettes of the type CHROME (lEC type n) or METAL (lEC
type TV).
The recording level is set automatically. The controls VOLUME,
DSC and INCREDIBLE SURROUND (AZ 2908 only) do not affect the
recording.
At the very beginning and end of the tape, no recording will take
place during the 7 seconds when the leader tape passes the
recorder heads.
15
Page 16
CASSEHE RECORDER
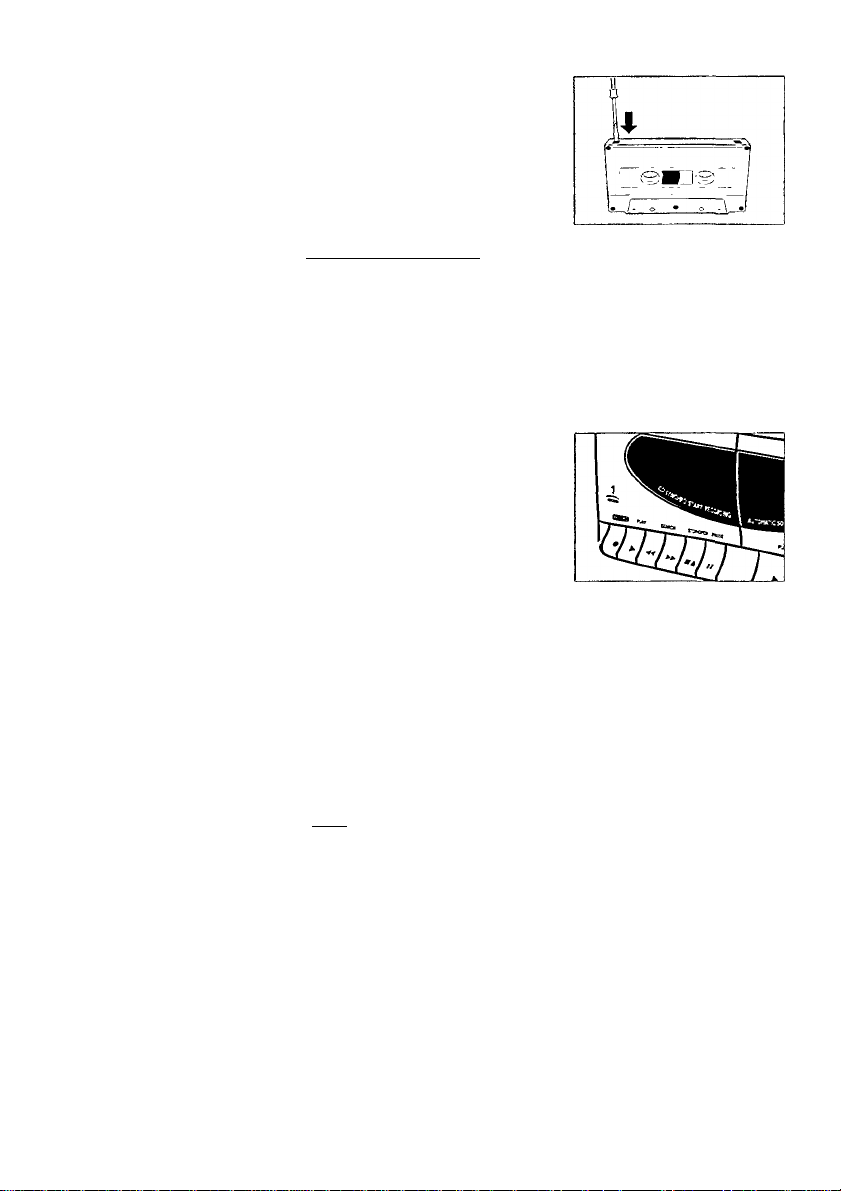
Protecting tapes from accidential erasure
m
3
• Keep the casette side to be safeguarded in front of you and
IS
break out the left tab. Now, recording on this side is no longer
possible.
• To record again on this side of the casette, cover the aperture
with a piece of adhesive tape.
Recording from the CD player - CD synchro start
1 Select the CD by pressing the CD »TAPE^TUNER button several
times until na appears on the display.
2 Insert a CD and if desired, program track numbers.
3 Press STOP.OPEN ■ A to open the cassette compartement.
4 Insert a blank cassette with the full reel on the left.
5 Press'RECORD • to start recording.
-► Playing of the CD or program starts automatically. It is not
necessary to start the CD player separately.
6 For brief interruptions, press PAUSE II. To resume recording,
press the PAUSE II key once more.
7 To stop recording, press STOP.OPEN ■ A.
Notes: The recording can be started from different positons:
- if the CD player is in the pause position, recording will
start from this very position ¡use SEARCH or »i);
- if the CD player is in the stop position, recording will
start from the beginning of the CD or program.
4 861
Recording from the radio or with the microphone
1 (Selecting and preparing the source)
RADIO: Select the radio by pressing the CD»TAPE»TUNER
button several times until linrmi appears on the display.
MICROPHONE: Select the tape by pressing the
CD»TAPE»TUNER button several times until EESi appears on
the display.
Connect a microphone with a 3.5 mm plug to the MIC jack
and set the VOLUME control to zero (monitoring during
microphone recording is not possible).
16
Page 17
CASSEHE RECORDER
2 Press STOP-OPEN ■ A to open the cassette compartement.
3 Insert a unprotected blank cassette with the full reel on the left
hand side.
4 Press RECORD • to start recording.
5 For brief interruptions press PAUSE II. To resume recording press
the PAUSE II key once more.
6 To stop recording, press STOP-OPEN ■ A.
Note: When recording from the radio ora CD. you can connect a
microphone and mix the sounds. Otherwise, be sure there is no
microphone connected that could disturb your recording.
Dubbing - copying from deck 2 to decki
When dubbing, it is recommended to use new batteries or to
connect the set to the AC power supply.
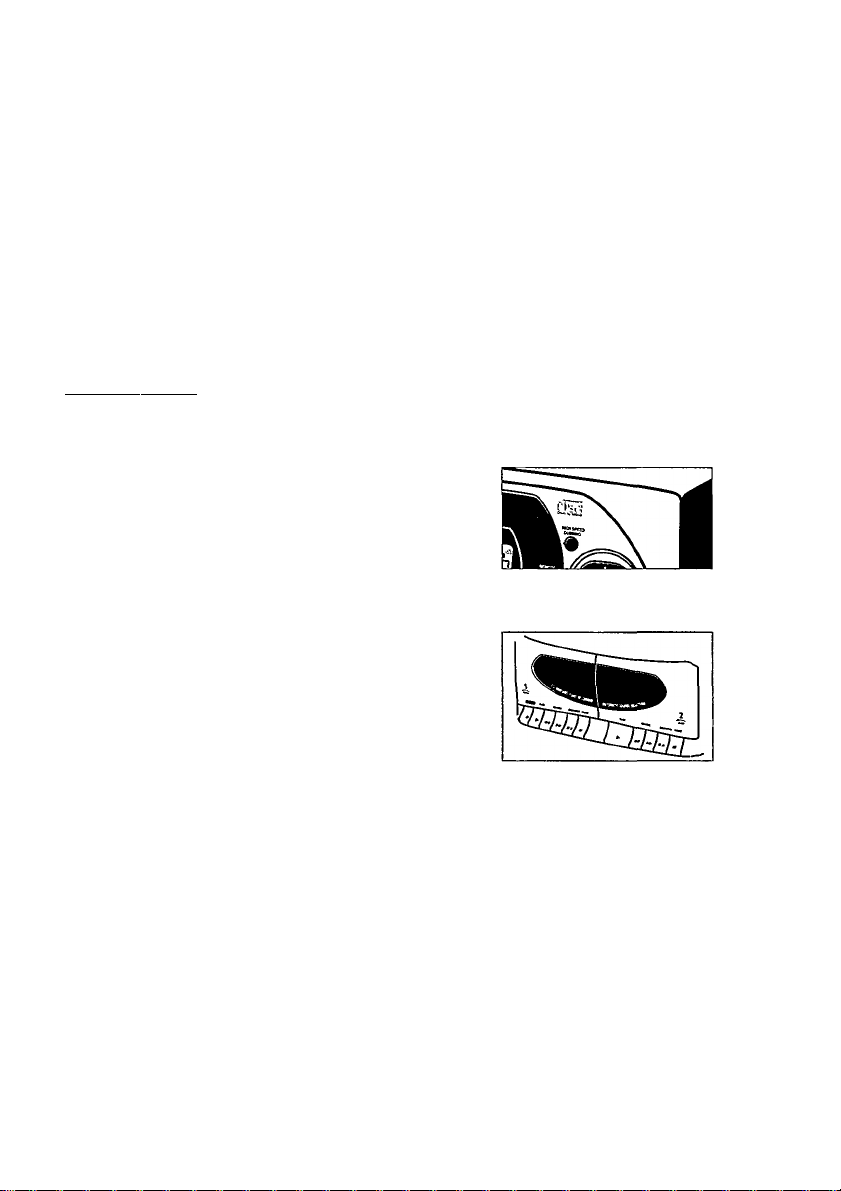
1 Press the HIGH SPEED DUBBING button for high speed copying.
Do not switch this selector during dubbing.
2 Insert a recorded cassette into deck 2 and a cassette which is
suited for recording into deck 1.
3 Press PAUSE II followed by RECORD • on decki.
4 To start dubbing, press PLAY ► on deck 2.
5 To stop dubbing, press both STOP-OPEN buttons ■ A.
Press PAUSE II on deck 1 if you wish to omit undesired passages.
The playback in deck 2 will continue. To restart dubbing, press
PAUSE II again.
By pressing PAUSE II in deck 2 during dubbing, a blank part will be
recorded in decki.
To avoid overheating of the set a safety circuit has been built in. Therefore your set may switch off
under extreme conditions. If this happens, release the power button and let the set cool down
before reusing it.
Environmental information
All redundant packing material has been omitted. We have done our outmost to make the
packaging easy separable into three mono materials: cardboard (box), expandable polystyrene
(buffer) and polyethylene (bags, protective foam sheet).
Your set consists of material which can be recycled if disassembled by a specialized company.
Please observe the local regulations regarding the disposal of packing materials, exhausted
batteries and old equipment.
17
Page 18
GENERAL INFORMATION
General maintenance
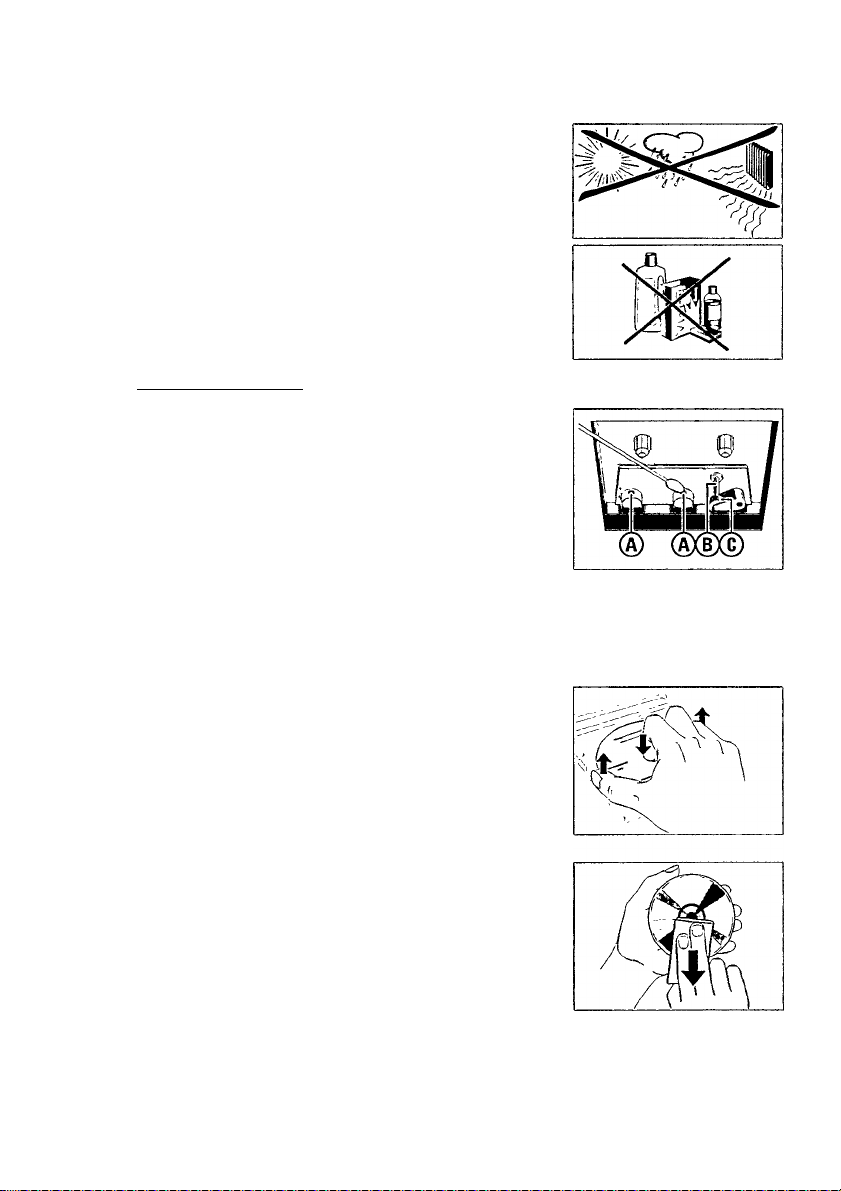
Do not expose the set, batteries, CDs or tapes to humidity, rain,
sand or excessive heat (caused by heating equipment or direct
sunlight).
The mechanical parts of the set contain self-lubricating bearings
and must not be oiled or lubricated!
You can clean the set with a soft, slightly dampened chamois
leather. Do not use any cleaning agents as they may have a
corrosive effect.
Tape deck maintenance
To ensure a good recording and playback quality of the tape deck,
clean the parts ® (D (c) after approx. 50 hours of operation. Use a
cotton bud slightly moistened with alcohol or a special head cleaning
fluid.Press PLAY ► and clean the rubber pressure rollers ©.
Press PAUSE II and clean the capstans ® and the heads ®.
Note: Cleaning of the heads® can also be done by playing a
cleaning tape through once.
CD player and CD handling
The lens may cloud over when the set is suddenly moved from cold
to warm surroundings. Playing a CD is not possible then. Leave the
CD player in a warm environment until the moisture evaporates.
To take the CD out of its box easily, press the centre spindle while
lifting the CD.
Always pick up the CD by the edge and put it back in its box
after use.
To clean the CD, wipe it off in a straight line from the center
towards the edge using a soft, lint-free cloth. A cleaning agent may
damage the disc!
Never write on a CD or attach stickers to it.
18
Page 19

TROUBLESHOOTING
WARNING
Under no circumstances should you try to repair the set yourself, as this will invalidate
the guarantee.
If a fault occurs, first check the points listed below before takeing the set for repair.
If you are unable to remedy a problem by following these hints, consult your dealer or service centre.
Problem Possible cause Solution
No sound / no power -VOLUME is not adjusted
-Headphones are connected • Disconnect headphones
- Speakers are not or wrongly connected
- Mains cable is not securely connected • Connect the mains cable properly
-Batteries are exhausted
-Batteries are incorrectly inserted • Insert the batteries correctly
-Changing over from mains to battery
supply without removing the plug
No reaction to - Electrostatic discharge
operation of any keys
Poor radio reception -\Weak radio antenna signal •Aim the antenna for optimum
- Interference caused by the vicinity of • Keep the radio away from electrical
electrical equipment like TVs, video
recorders, computers, engines, etc.
no o'/Si or -The CD is badly scratched or dirty • Replace or clean the CD, see
Error indication maintenance
-No CD is inserted
-The CD is inserted upside down • Insert a CD with label upwards
-The laser lens is steamed up • Wait until the lens has cleared of
The CD skips tracks -The CD is damaged or dirty
-shuffle or program is active
Poor cassette sound
quality
Recording does not
work
Remote control does
not function properly
- Dust and dirt on the heads, capstan
or pressure roller
- Use of not suited cassette types
(METAL or CHROME)
- Cassette tab(s) may be broken out
the missing tab space
-Batteries are incorrectly inserted
-Batteries are exhausted
-Distance to the set is too large
•Adjust the VDLUME
• Check speaker connection
•Replace batteries
• Pull out the power plug from the
unit's AC MAINS inlet
• Disconnect the set from power supply
reconnect it after a few seconds
reception;
- FM/SW: incline and rotate telescopic
antenna
- AM/MW/LW; rotate the entire set
equipment
•Inserta CD
•Replace or clean the CD
• Switch off shuffle or program play
-Clean the heads, capstan and pressure
roller, see maintenance
• Only use NORMAL cassettes for
recording
•Apply a piece of adhesive tape over
• Insert the batteries correctly
•Replace batteries
•Reduce the distance
O)
c
LU
19
Page 20

Page 21

MAGNAVOX AZ 2905/2908
CD Radio Cassette Recorder
PHILIPS CONSUMER ELECTRONICS COMPANY
A Division of Philips Electronics North America Corporation
Knoxville, Tennessee 37914-1810, U.S.A.
31401152487.1
TCtext/RB/JW/9752
 Loading...