

Philips AZ2605 User Manual
PHILIPS
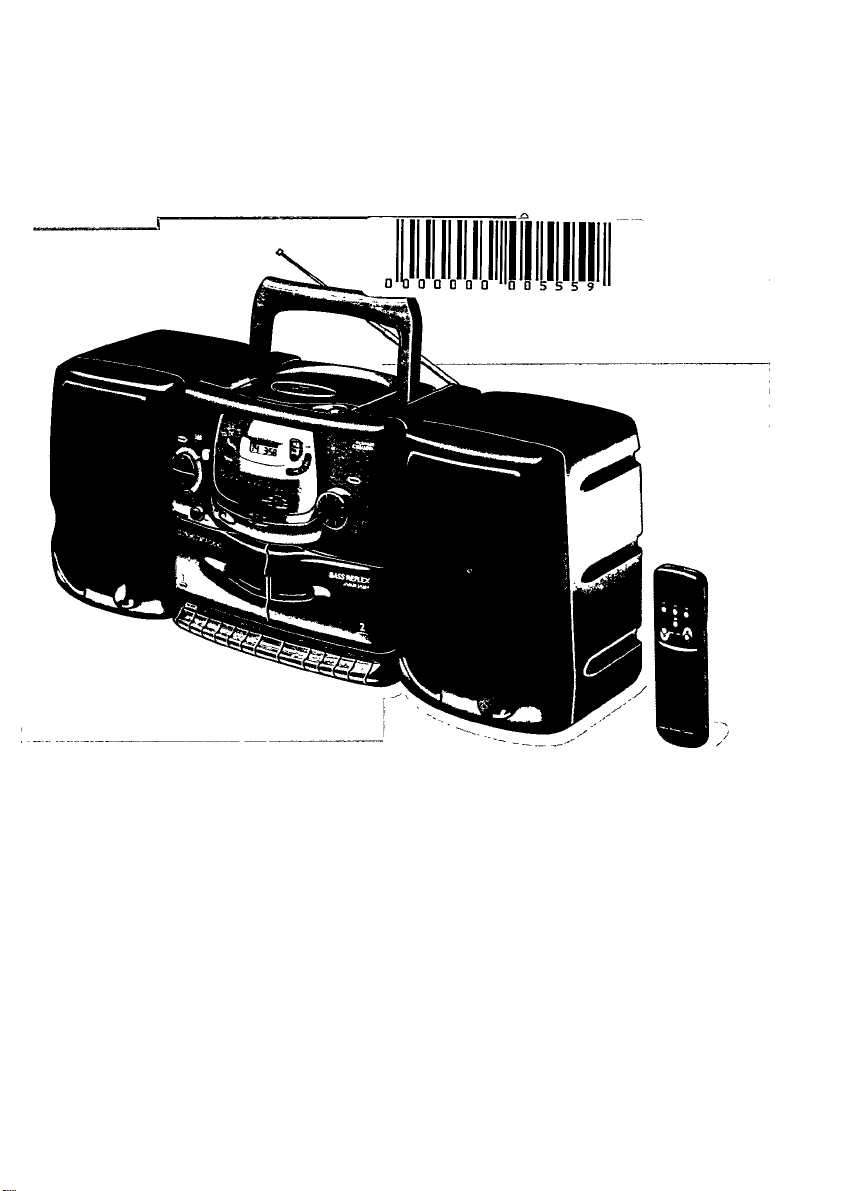
AZ2605 Portable CD Mini System
instructions for use
ИНСТРУКЦИИ no ЭКСПЛУАТАЦИИ
Instrukcja obstugi
Navod na pouzitie
Navod к pouziti
Hasznalati utasitas
PHILIPS

/
English.................
/
Русский
'
..............
Polski...................
г
Slovencina
к
Cesky
.
magyar
.
..........
...................
................
...........................
.........................
........................
........................
.......................
........................
.44
4
)
N
14
Ч
24
ч
34
54
_ç
с/:
\
ш
>о
)
\
)
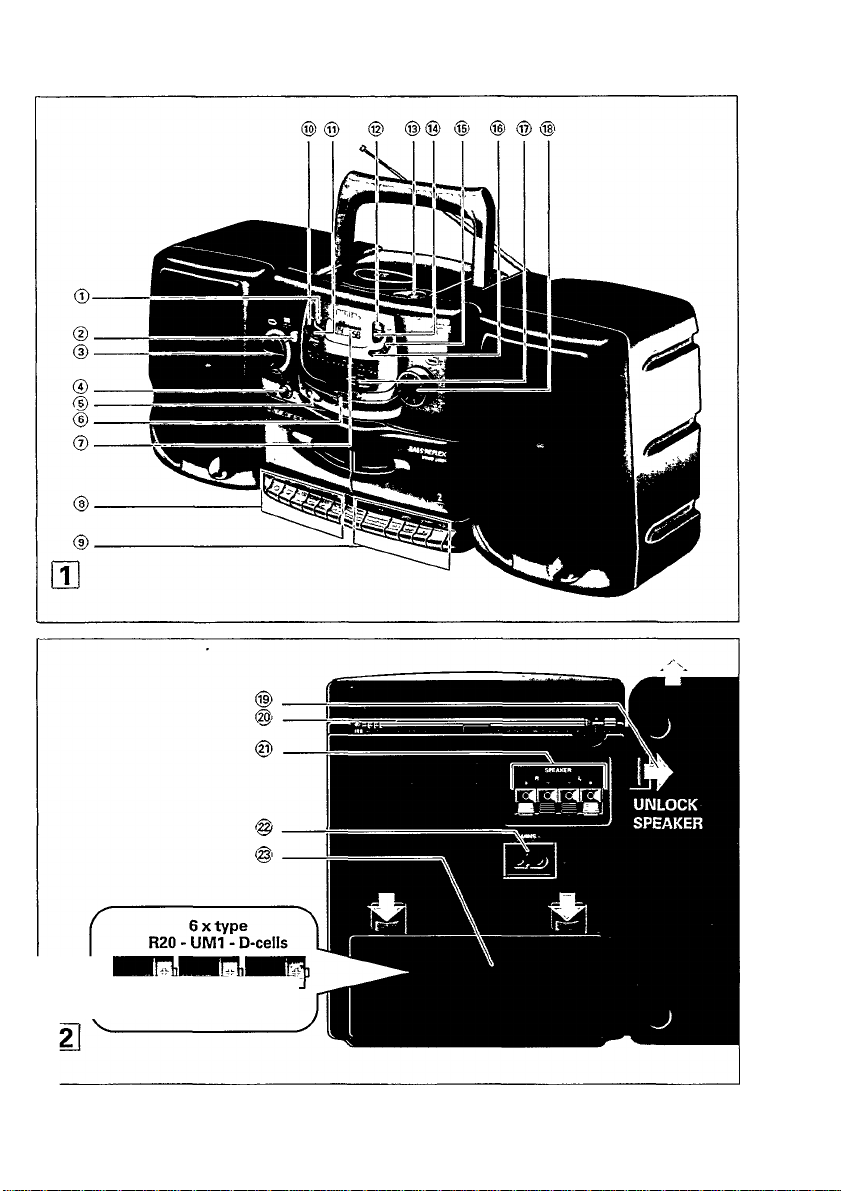
CONTROLS
TOP and FRONT PANEL BACK PANEL
m
3
(fl
® IR SENSOR - Infrared remote sensor for remote
control reception.
(D DBB Dynamic Bass Boost - To increase the bass
level.
©VOLUME A ▼ - To adjust the volume level.
©TONE CONTROL - To adjust the emphasis on high
or low tones.
® ii - 3.5 mm headphone socket.
® SOURCE SELECTOR - To select the source of
sound: CD-TUNER-TAPE/OFF and to switch the
POWER ON/OFF.
@ DISPLAY
CASSEHE RECORDER ®DECK1
RECORD • - To start recording.
PLAY ►- To start playback.
■« - To fast rewind the tape.
- To fast forward the tape.
STOP»OPEN ■ A - To stop playback and open
the cassette compartment.
PAUSE II - To interrupt recording or playback.
®DECK2
PLAY ► - To start playback.
-♦4 - To fast rewind the tape.
- To fast forward the tape.
STOP»OPEN ■ A - To stop playback and open
the cassette compartment.
PAUSE II - To interrupt recording or playback.
® SPEAKER LEVERS -
©TELESCOPIC AERIAL-
@ SPEAKERS - Loudspeaker terminals. j
@ AC MAINS - Socket for mains lead.
© BATTERY DOOR -To open the battery compart
© ►!! - To Start or interrupt CD play.
® M or W - To skip or search a passage/track.
® ■ - To stop playback or erase a program.
© VOLUME A T - To adjust volume level.
- To unlock the loudspeaker
boxes.
- To improve FM recep-
tion.
ment.
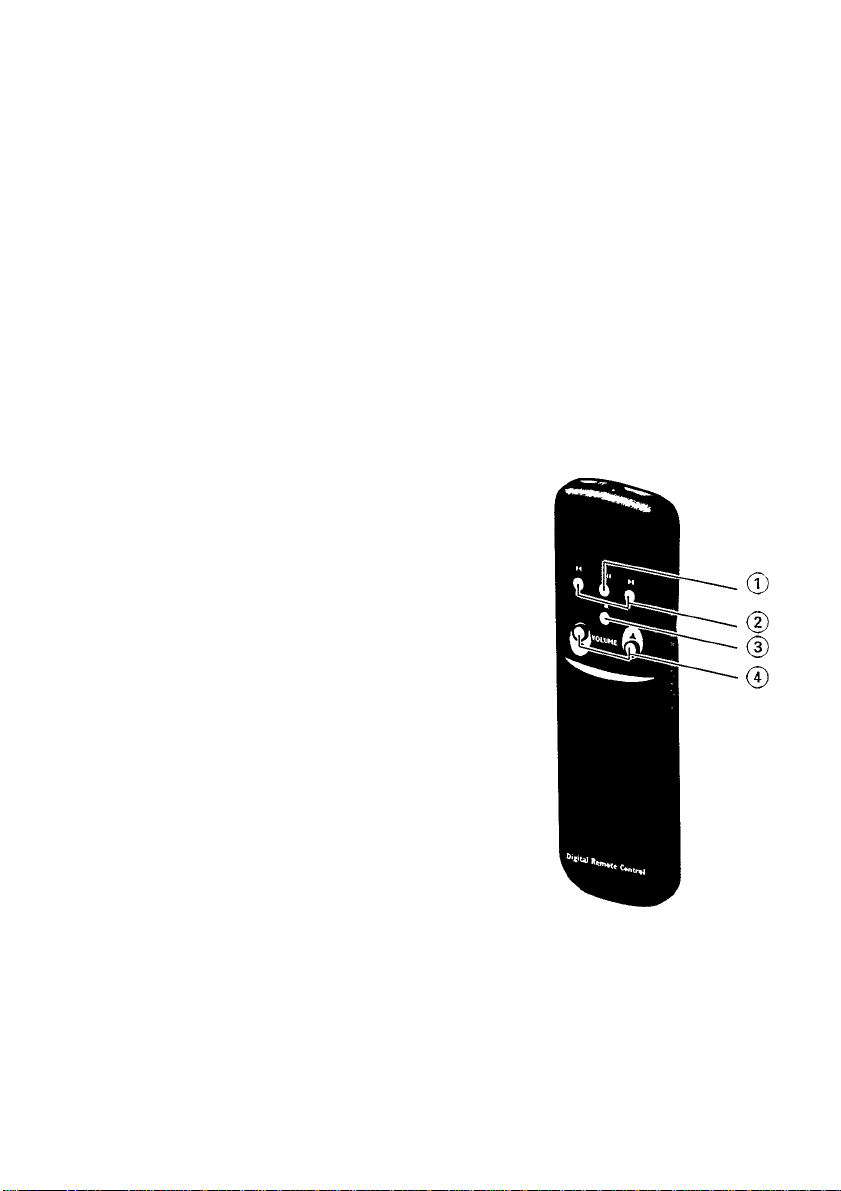
REMOTE CONTROL
CD PLAYER
@ MODE - e.g. to SHUFFLE or REPEAT playback.
® PROGRAM - To program track numbers and to
review the program.
® STOP ■ - To stop playback or erase a program.
® OPEN - To open the CD door.
® PLAY*PAUSE ►!! - To start or interrupt CD play
back.
® SEARCH - To skip or search fonwards to a pas
sage or a track.
® SEARCH M4 - To skip or search backwards to a
passage or a track.
RADIO
® BAND - To select the wave band (FM/MW/LW).
® TUNING - To tune to radio stations.
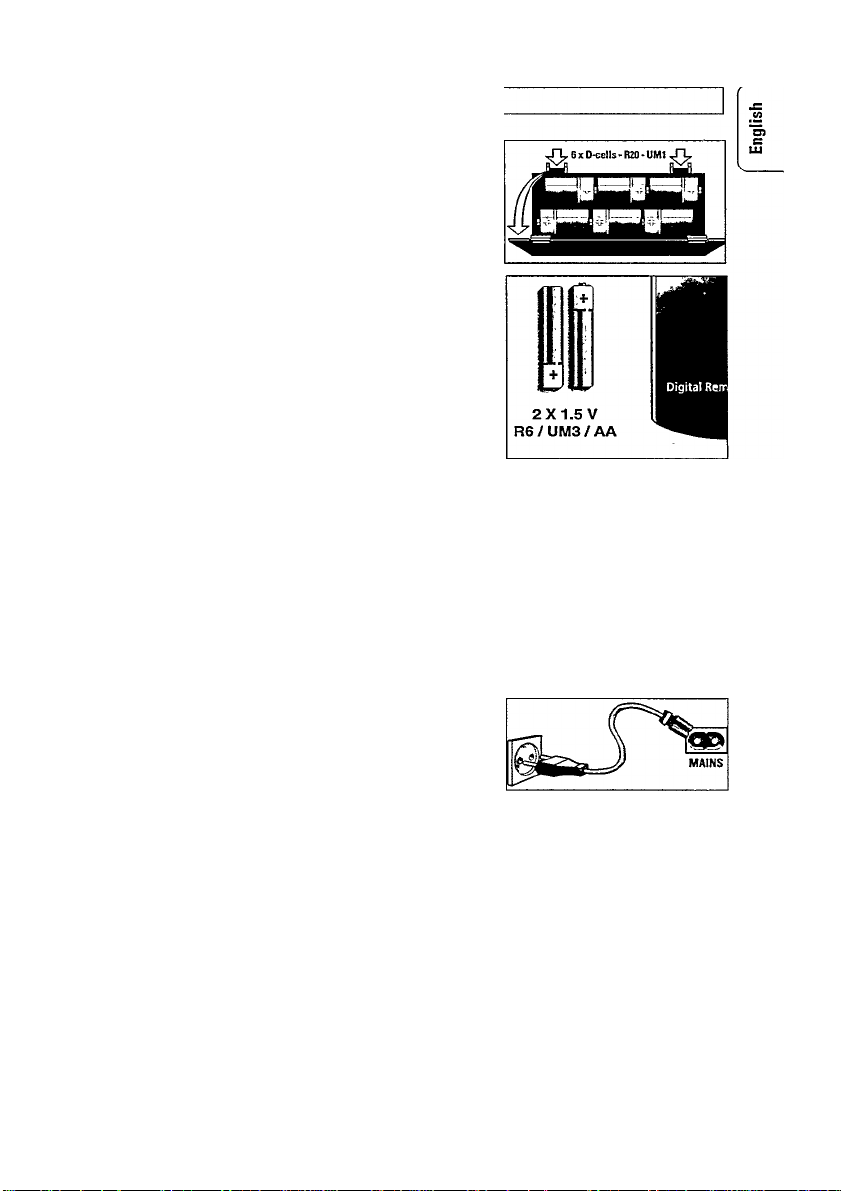
BAHERIES
Whenever convenient, use the mains supply if you want to conserve
battery life. Make sure you remove the mains plug from the set and wall
socket before inserting batteries.
Batteries (optional)
1. Open the battery compartment and insert as shown six batteries,
type R20, UM1 or D-cells.
Remote control batteries (included)
1. Open the battery compartment and insert as shown two batteries,
type AA, R6 or UM3.
2. Replace the compartment door, making sure the batteries are firmiy
and correctly in place.
3. Remove the batteries if exhausted or if they will not be used again for
a long period.
- The incorrect use of batteries can cause electrolyte leakage and will
corrode the compartment or cause the batteries to burst. Therefore:
- Do not mix battery types, e.g. alkaline with zinc carbonate.
- When inserting new batteries, replace all at batteries the same time.
Note:^he battery supply is switched off when the set is connected to
the mains.
MAINS
1. Check if the mains voltage as shown on the type plate (on the base of
the set) corresponds to your local mains voltage. If it does not, consult
your dealer or service organisation.
2. If your set is equipped with a voltage selector, set it to the local mains
voltage.
3. Connect the mains lead to the MAINS - socket and the wall socket.
- The set is now ready to use.
4. To switch off the mains supply completely, pull the mains plug out of
the wall socket.
- Disconnect the mains lead when you change over to battery supply, or
to protect the set during heavy thunderstorms.
POWER SUPPLY
Environmental information
All redundant packaging material has been omitted. We have done our utmost to make the packaging easily
separable into three mono materials: cardboard (box), expandable polystyrene (buffer) and polyethylene (bags,
protective foam sheet).
Your set consists of materials which can be recycled if dissassembled by a specialized com
pany. Please observe the local regulations regarding the disposal of packaging materials,
exhausted batteries and old equipment.
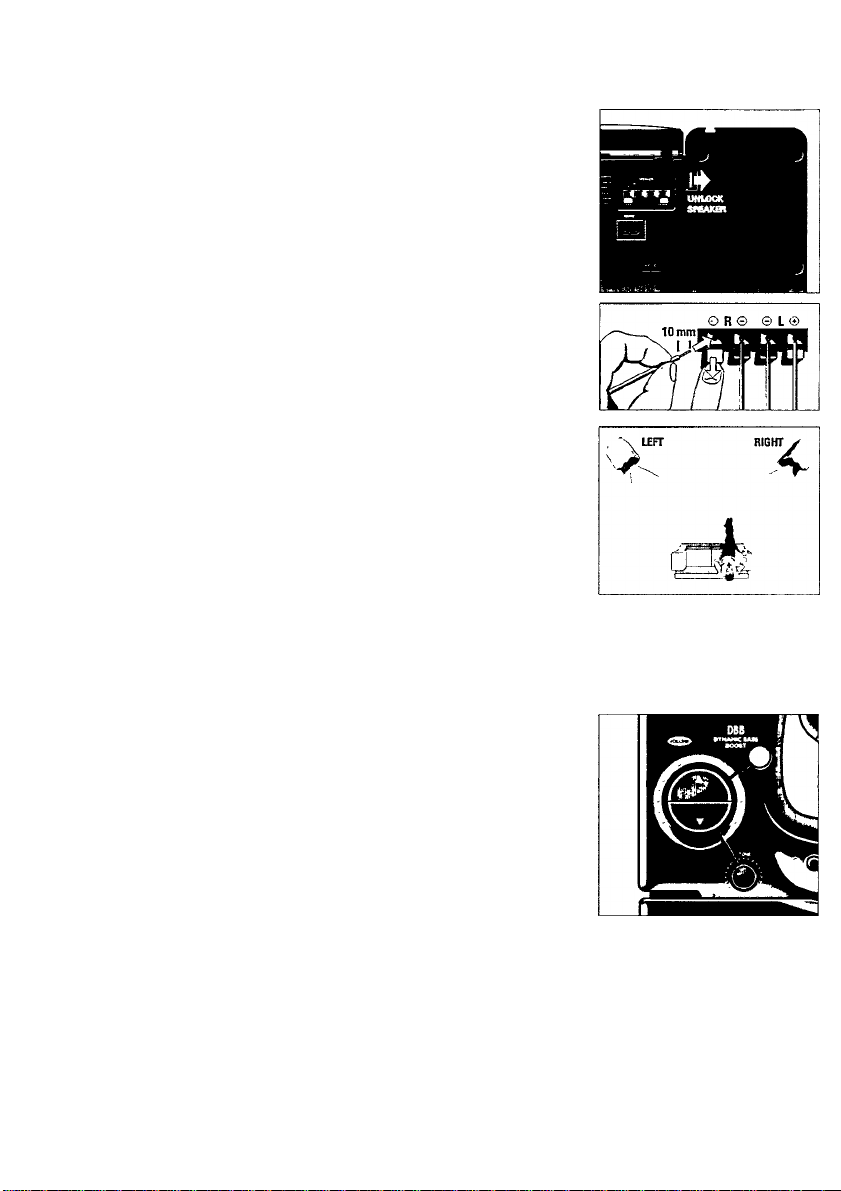
SPEAKERS
REMOVABLE SPEAKERS
Attaching the speakers
• Slide the speakers down into the sleeves on the sides of the set
cabinet. The speakers will click into position.
Taking off the speakers
• Keep the lever (found on the back corner of the speaker) pressed and
slide the speaker upwards.
Connecting the speakers
1. Connect the right speaker to the terminal R, with the red marked wire
to + and the black wire to -.
2. Clip the exposed portion of wire into the corresponding colour terminal.
3. Repeat the wiring procedure for the left speaker to terminal L, making
sure that you connect the red wire to + and the black wire to -.
Positioning the speakers
The ideal position is obtained when the 2 front speakers and the listening
position build an equilateral triangle and the speakers are at ear-height.
Note:
- Speakers with an impedance of 4 ohms or higher other than as
supplied may be used instead. Do not, however, use speakers with a
lower impedance as this will result in damage to your set.
- When headphones are connected with the headphone sockets
the speakers are disconnected.
OPERATION
OPERATION
General operation
7. To switch on the set, set the source by using the source selector®.
2. Adjust the sound using the VOLUME AT®, TONE @ and DBB @
controls.
3. To switch off the set, set the source selector® to TAPE/OFF position,
with the cassette keys released.
 Loading...