

Page 1
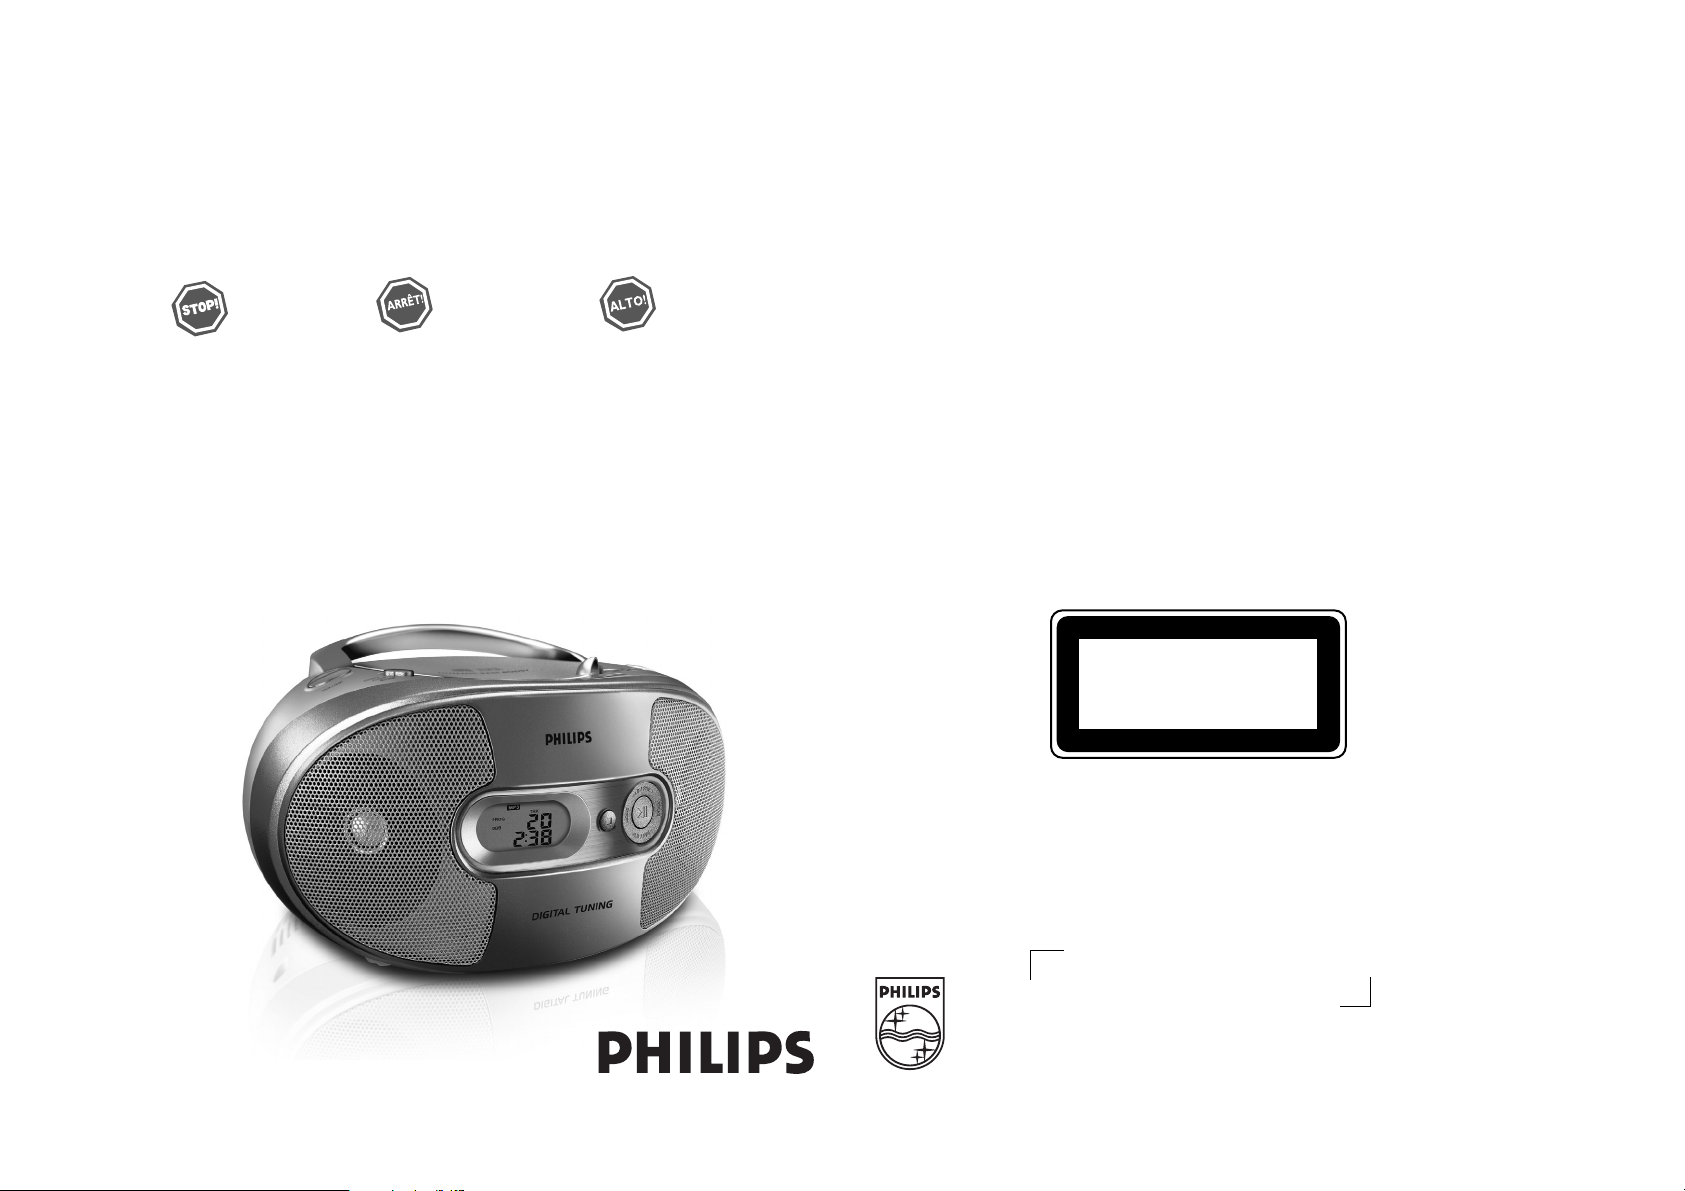
AZ1308
MP3-CD Soundmachine
Thank you for choosing Philips.
Need help fast?
Read your Quick Use Guide and/or
Owner's Manual first for quick tips
that make using your Philips product
more enjoyable.
If you have read your instructions
and still need assistance,
you may access our online help at
www.philips.com/support
or call
1-888-PHILIPS (744-5477)
while with your product.
(and Model / Serial number)
Philips vous remercie de
votre confiance.
Besoin d'une aide
rapide?
Les Guide d'utilisation rapide et Manuel de
l'utilisateur regorgent d'astuces destinées à
simplifier l'utilisation de votre produit Philips.
Toutefois, si vous ne parvenez pas à résoudre
votre probléme, vous pouvez accéder à
notre aide en ligne à l'adresse
www.philips.com/support
ou formez le
1-800-661-6162 (Francophone)
1-888-PHILIPS (744-5477) (English speaking)
Veillez à avoir votre produit à
portée de main.
(et model / serial nombre)
Gracias por escoger Philips
Necesita ayuda
inmediata?
Lea primero la Guía de uso rápido o el
Manual del usuario, en donde encontrará
consejos que le ayudarán a disfrutar
plenamente de su producto Philips.
Si después de leerlo aún necesita ayuda,
consulte nuestro servicio de
asistencia en línea en
www.philips.com/support
o llame al teléfono
1-888-PHILIPS (744-5477)
y tenga a mano el producto.
(y número de model / serial)
PHILIPS CONSUMER ELECTRONICS COMPANY
Marietta, GA 30006-0026, U.S.A.
Printed in China PDCC-JH-0604
W
AZ1308
Meet Philips at the Internet
http://www.philips.com
CLASS 1
LASER PRODUCT
Page 2
Return your Product Registration Card today
to get the very most from your purchase.
Registering your model with PHILIPS makes you eligible for all of the valuable benefits listed below, so
don't miss out. Complete and return your Product Registration Card at once to ensure:
IMPORTANT SAFETY INSTRUCTIONS
*Proof of
Purchase
Returning the enclosed card
guarantees that your date of
purchase will be on file, so no
additional paperwork will be
required from you to obtain
warranty service.
*Product Safety
Notification
By registering your product, you'll
receive notification - directly from
the manufacturer - in the rare
case of a product recall or safety
defect.
Know these
safetysymbols
CAUTION
RISK OF ELECTRIC SHOCK
CAUTION: TO REDUCE THE RISK OF ELECTRIC SHOCK, DO NOT
REMOVE COVER (OR BACK). NO USER-SERVICEABLE PARTS
INSIDE. REFER SERVICING TO QUALIFIED SERVICE PERSONNEL.
shock. For the safety of everyone in your
household, please do not remove
product covering.
DO NOT OPEN
This “bolt of lightning” indicates
uninsulated material within your
unit may cause an electrical
*Additional
Benefits of
Product
Ownership
Registering your product
guarantees that you'll receive
all of the privileges to which
you're entitled, including special
money-saving offers.
For Customer Use
Enter below the Serial No. which is
located on the rear of the cabinet.
Retain this information for future
reference.
Model No. ______________________
Serial No.
WARNING: To reduce the risk of fire
or electric shock, this apparatus should
not be exposed to rain or moisture, and
objects filled with liquids, such as vases,
should not be placed on this apparatus.
______________________
Clean only with a piece of dry cloth.
materials
The “exclamation point” calls
attention to features for which
you should read the enclosed
literature closely to prevent operating
and maintenance problems.
CAUTION: To prevent electric shock,
match wide blade of plug to wide slot,
fully insert.
Class II equipment symbol
This symbol indicates that the unit has
a double insulation system
Page 3
1
1
@
#
2
3
4
5
6
7
8
9
0
!
6 x R14 • UM-2 • C-CELLS
TUNER
FM
MHz
PRESET
DBB
CD
PROG
TRK
CD
DBB
TRK
CD
REP
ALL
TRK
CD
SHUF
TRK
CD
PROG
X
CD MP3
DBB
TRK
ALB
DBB
DBB
2
3
4
5
6
7
8
9
Page 4

English Controls Power Supply Basic Operation
Power Supply
Whenever convenient, use the power supply
cord if you want to conserve battery life.
Make sure you remove the plug from the set
and wall outlet before inserting batteries.
Batteries (not included)
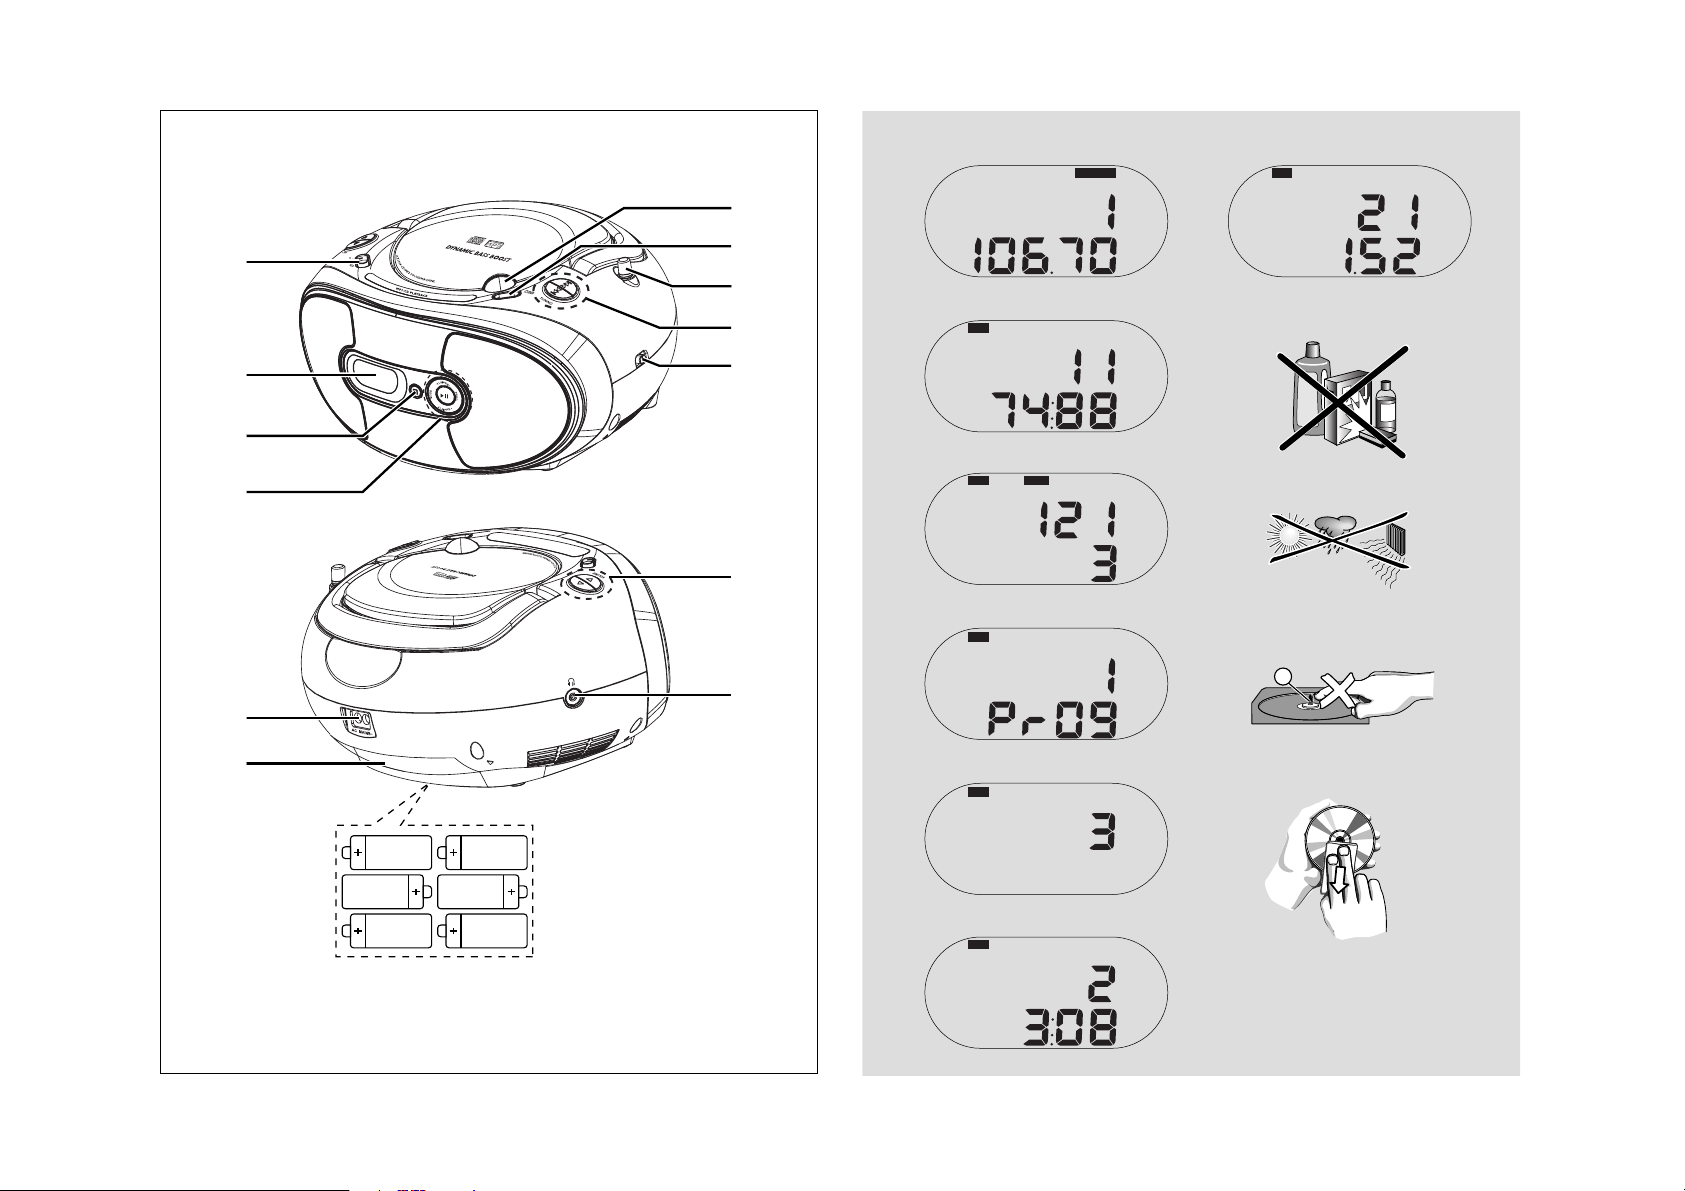
1 Open the battery door and inser t 6 batteries,
typed R-14, UM-2 or C-cells, (preferably
alkaline) with the correct polarity as indicated
by the "+" and "–" symbols inside the compartment. (See 1)
2 Replace the battery door, making sure the bat-
teries are firmly and correctly in place. The set is
now ready to operate.
Batteries contain chemical substances, so
they should be disposed of properly.
• Incorrect use of batteries can cause
electrolyte leakage and will corrode the
compartment or cause the batteries to burst:
• Do not mix battery types: e.g. alkaline with carbon zinc. Only use batteries of the same type
for the set.
• When inserting new batteries, do not try to mix
old batteries with the new ones.
• Remove the batteries if the set is not to be used
for a long time.
Using AC power
1 Check if the power voltage, as shown on
the type plate located on the
bottom of the set, corresponds to your
local power supply. If it does not, consult your
dealer or service center.
2 Connect the power cord to the
AC MAINS~ inlet and the wall socket.The
set is now connected and ready for use.
3 To switch the set off completely, withdraw the
power cord from the wall socket.
4 Install the unit near the AC outlet and where
the AC power plug can be easily reached.
• Disconnect the power cord from the wall
socket to protect your set during heavy
thunderstorms. Children could seriously injure
themselves as the free end of the cable may
still be live if only the connector is removed
from the MAINS socket at the back of the
unit.
The type plate is located on the
bottom of the set.
Helpful hints:
– To avoid unnecessary energy consumption,
always adjust the
Source selector
to
OFF
after using the set.
Basic operation
Switching on and off and selecting the
function
1 To select your sound source, adjust the
Source selector to: CD/MP3 or
TUNER
.
2 To switch off the set, adjust the
Source selector to
OFF
position.
Adjusting volume and sound
1 Adjust the volume with the VOLUME
3, 4
controls.
➜ Display briefly shows
UUooLL
and the vol-
ume level in number from 00-32.
2 Adjust DBB to select dynamic bass boost on
or off.
➜ Display shows “DBB” when activated.
Supplied Accessories
– AC power cord
Top/front panels (See 1)
1
Source selector: CD/MP3,TUNER, OFF
–
selects CD/MP3, or radio (FM/AM) source
of sound
–
power off switch
2
Display–shows the status of the disc/tuner
3 9–stops CD/MP3 playback;
–
erases a CD/MP3 program
4
2 ; –starts or pauses CD/MP3 playback
MODE
– selects different play modes:
e.g. REPEAT or SHUFFLE (random order)
PROG
CD/MP3: – programs tracks and reviews the
program
TUNER: – programs preset radio stations
ALB/PRESET +/-
For MP3: – selects albums (up, down)
TUNER: –
selects a preset radion station
5 LIFT TO OPEN – opens/ closes the CD
door.
6
DBB (Dynamic Bass Boost)
–
turns the bass enhancement on/off.
7 Telescopic antenna - improves FM
reception.
8 TUNING
§ ∞
TUNER: – tunes to radio stations
CD/MP3: –
selects the next/previous track
– fast searches forwards/backwards
(press and hold the button) within the current track
9
BAND –
selects waveband: FM or AM
Back/bottom panels (See 1)
0
VOLUME–adjusts volume level
! p – 3.5 mm stereo headphone socket
Helpful hints: The speakers will be muted
when headphones are connected to the set.
@ AC MAINS~ – inlet for power cord.
# Battery door – open to insert 6 x 1.5V
R-14/ UM-2/ C-cells
CAUTION
- Visible and invisible laser radiation.
If the cover is open, do not look at
the beam.
- High voltage! Do not open.You run
the risk of getting an electric shock.
The machine does not contain any
user-serviceable parts.
- Modification of the product could
result in hazardous radiation of
EMC or other unsafe operation.
This product complies with the FCC-Rules, Part 15 and with 21 CFR 1040.10. Operation is subject to
the following two conditions:
1. This device may not cause harmful interference, and
2. this device must accept any interference received, including interference that may cause undesired operation.
Page 5

Digital Tuner
Digital tuner
Tuning to radio stations
1 Push the source selector to TUNER.
➜
ttuu
is displayed briefly, then the radio station frequency, waveband and, if programmed, a preset number are shown.
(See 2)
2 Push BAND to FM or AM to select
desired waveband.
3 Press and hold TUNING ∞ or § until the
frequency in the display starts running.
➜ The radio automatically tunes to a station
of sufficient reception. Display shows
SSrrcchh
during automatic tuning.
4 Repeat step 3 if necessary until you find the
desired station.
•To tune to a weak station, press TUNING
∞ or § briefly and repeatedly until you have
found optimal reception.
To improve radio reception:
• For FM, extend, incline and turn the tele-
scopic antenna. Reduce its length if the signal
is too strong.
• For AM, the set uses a built-in aerial. Direct
this aerial by turning the whole set.
Programming radio stations
You can store up to a total of 20 radio stations in the memory (10 FM and 10 AM),
manually or automatically (Auto store).
Manual programming
1 Tune to your desired station (see Tuning to
radio stations).
2 Press PROG to activate programming.
➜ Display: PROG flashes.
3 Press ALB/PRE +/- once or more to allo-
cate a number from 1 to 10.
4 Press PROG to confirm.
5 Repeat steps 1-4 to store other stations.
Helpful hints:
–You can erase a preset station by storing
another frequency in its place.
Autostore
Autostore automatically starts programming
radio stations from preset 1. Any previous
presets e.g. manually programmed will be
erased.
1 Push BAND to FM or AM to select
desired waveband.
2 Press PROG until
AAuuttOO
displays and flashes.
➜ Available stations are programmed (AM
or FM). After all stations are stored, the
first autostore preset station will then
automatically play.
To listen to a preset or autostore station
Press the ALB/PRE +/- buttons once or
more until the desired preset station is displayed.
CD/MP3 Player
About MP3
The music compression technology MP3
(MPEG1 Audio Layer 3) significantly reduce
the digital data of an audio CD while maintaining CD quality sound.
• Getting MP3 files: you can either download legal music files from the internet to
your computer hard disc, or create such files
by converting audio CD files in your computer through appropriate encoder software.
(128kbps bit rate or higher is recommended
for MP3 files.)
• Creating a MP3 CD: burn the music files
from your computer hard disc on a CDR or
CDRW using your CD burner.
Helpful hints:
– Make sure that the file names of the MP3 files
end with .mp3.
– Total number of music files and albums: around
350 (with a typical file name length of 20 characters)
– The length of file names affects the number of
tracks for playback.With shorter file names,
more files can be burned on a disc.
Playing a disc
• This CD player plays Audio Discs including
CD-R/CD-RW and MP3-CD. Do not try to
play a CD-ROM, CD-I, CDV,VCD, DVD or
computer CD.
IMPORTANT!
• CDs encoded with copyright protection
technologies by some record companies may
be unplayable by this product.
1 Adjust the Source selector to CD/MP3.
2 Open the CD door, and insert a CD/MP3
with the printed side facing up, then press
the CD door gently to close.
➜ Display shows flashing
rrEEAAdd
, indicating
the disc reading, then the total track number and playing time. “CD” is also display
(See 3).
➜ For MP3: “MP3” and the total album
number are also displayed (See 4).
3 Press
2;
to start playback.
➜ Display shows current track number and
the elapsed time of the track.
4 To pause playback, press2;.
➜
Display:The elapsed playing time flashes.
5 To resume, press2;again.
6 To stop CD playback, press9.
Helpful hints:
CD play will also stop when:
– you open the CD door ;
– you select
TUNER
or
OFF
;
– the CD has reached the end.
Selecting a different track
• Press TUNING
∞/ §
once or repeatedly
until the desired track number appears in the
display.
For MP3: First press ALB/PRE +/- once or
more to find your album.
• In the pause/stop position, press 2; to start
playback.
Finding a passage within a
track
1 During playback, press and holdTUNING
∞/ §
.
➜ The CD/MP3 is played at high speed and
with reduced volume.
Page 6

CD/MP3 Player
2 When you recognize the passage you want,
release TUNING
∞/ §
to resume normal
playback.
Helpful hints:
– When your searching reaches the end of the
last track, the CD/MP3 goes to stop mode.
Programming track numbers
You may store up to 20 tracks (for MP3: 10
tracks) in the desired sequence. If you like,
store any track more than once.
1 In the stop position, pressTUNING ∞or
§
to select your desired track number.
For MP3: First press ALB/PRE +/- once or
more to find your album.
2 Press PROG to store the desired track
number.
➜ “PROG” is displayed, and display briefly
shows current program sequence, then
the currently stored track number.
(see 5 6)
➜ “For MP3: The current album number is
also displayed.
• If you attempt to program without first
selectig a track, display will show
NNOOSSEE
briefly,
then the total track number.
3 Repeat steps 1 to 2 to select and store all
desired tracks in this way.
➜ If you attempt to store more than 20
tracks (for MP3: 10 tracks), no track can
be stored and the display shows
FFuuLLLL
.
4 To play your program, press
2;
.
To review your program
In the stop position, press PROG to view the
first program information, then press PROG
again to view the next program information.
Repeat the above to view all the program
stored.
➜ Each time the display shows the program
sequence (
PPrrOOgg
X) briefly, then the program
track number (see 5 6).
To erase a program
You can erase a program by:
– pressing
9
(twice during playback or once in
the stop position);
– selecting TUNER or OFF position;
– opening the disc door.
➜ Display: PROG disappears.
Different play modes:
REPEAT and SHUFFLE
(See 7 8)
You can play the current track or the whole
disc repeatedly, and combine REPEAT modes
with PROGRAM.
REP – plays the current track continuously.
REP ALL – repeats the entire CD/program
SHUF – plays all the tracks in random order
• Selection of shuffle play is not available in the
program mode.
1 To select play mode, press MODE once or
more.
➜ The display shows selected play mode.
2 Press 2; to star t playback if in the stop/pause
position.
➜ The disc will play automatically around
few seconds later when SHUF mode is
selected.
3 To return to normal playback, press
MODE
repeatedly until the modes are no longer displayed.
– You can also press 9 to cancel your play
mode.
Maintenance & safety
(See 9)
CD player and CD handling
• If the CD player cannot read CDs correctly,
use a cleaning CD to clean the lens before
taking the set to repair.
• The lens of the CD player should never be
touched!
• Sudden changes in the surrounding
temperature can cause condensation on the
lens of your CD player. Playing a CD is then
not possible. Do not attempt to clean the
lens but leave the set in a warm environment
until the moisture evaporates.
•Always close the CD-tape door to avoid dust
on the lens.
•To clean the CD, wipe in a straight line from
the center towards the edge using a soft,
lint-free cloth. Do not use cleaning agents as
they may damage the disc.
• Never write on a CD or attach any stickers
to it.
Safety information
• Place the set on a flat, hard and stable surface
so that the system does not tilt.
• Do not expose the set, batteries, CDs to
humidity, rain, sand or excessive heat caused
by heating equipment or direct sunlight.
• The apparatus shall not be exposed to dripping or splashing.
• Adequate ventilation with a minimum gap of
15cm (6 inches) between the ventilation
holes and surrounding surfaces is necessary
to prevent heat build-up.
• Do not cover the ventilation openings with
items such as newspapers, table-cloths, curtains, etc.
• No objects filled with liquids, such as vases,
shall be placed on the apparatus.
• No naked flame sources, such as lighted candles, should be placed on the apparatus.
• The mechanical par ts of the set contain
self-lubricating bearings and must not be oiled
or lubricated.
•To clean the set, use a dry cloth. Do not use
any cleaning agents containing alcohol,
ammonia, benzene or abrasives as these may
harm the housing.
Page 7

Environmental information
All unnecessary packaging material has been omitted.The packaging can be easily separated
into three materials: cardboard, polystyrene and plastic.
Your set consists of materials which can be recycled if disassembled by a
specialized company. Please observe the local regulations regarding the
disposal of packaging, dead batteries and old equipment.
Problem
– Possible cause
• Remedy
No sound /power
– Volume not adjusted
• Adjust the VOL
– Power cord not securely connected
• Connect the AC power cord properly
– Batteries dead/ incorrectly inserted
• Insert (fresh) batteries correctly
– Headphones connected to the set
•
Disconnect headphones.
– CD contains non-audio files
• Press
TUNING ∞ , §
once or more to skip to
a CD audio track, instead of the data file.
Display does not function properly / No
reaction to operation of any of the controls
– Electrostatic discharge
• Switch off and unplug the set. Reconnect after a
few seconds
Poor radio reception
– Weak radio signal
• FM: Adjust the FM telescopic aerial
Nocd indication
– No CD inserted
•
Insert a CD
– CD badly scratched or dirty
•
Replace/ clean CD, see Maintenance
– Laser lens steamed up
•Wait until lens has cleared
– CD-R/CD-RW is blank or not finalized
•
Use a finalized CD-R/CD-RW or suitable CD
Audio disc only
Note:
Make sure the CD is not encoded with
Copyright protection technologies, as some
do not conform to the Compact Disc standard.
The CD skips tracks
– CD damaged or dirty
• Replace or clean CD
– Program/Shuffle is active
• Quit program/shuffle mode
Sound skips during MP3 playback
–
MP3 file made at compression level exceeding
320kbps
• Use a lower compression level to record CD
tracks into MP3 format
– Disc damaged or dirty
• Replace or clean disc
The MP3-CD skips albums
–
CD contains non-MP3 file folders
• Check your disc contains suitable file folders.
Troubleshooting
If a fault occurs, first check the points listed below before taking the set for repair.
If you are unable to remedy a problem by following these hints, consult your dealer or service centre.
WARNING: Do not open the set as there is a risk of electric shock. Under no
circumstances should you try to repair the set yourself, as this will
invalidate the guarantee.
Canada
English:
This digital apparatus does not exceed the Class B limits for radio noise emissions from digital apparatus as
set out in the Radio Interference Regulations of the Canadian Department of Communications.
Français :
Cet appareil numérique n'émet pas de bruits radioélectriques dépassant les limites applicables aux appareils
numériques de Classe B prescrites dans le Règlement sur le Brouillage Radioélectrique édicté par le
Ministère des Communications du Canada.
Page 8

PHILIPS LIMITED WARRANTY
One (1) Year Free Product Exchange
PHILIPS CONSUMER ELECTRONICS warrants this
product against defect in material or workmanship, subject to
any conditions set forth as follows:
PROOF OF PURCHASE:
Yo u must have proof of the date of purchase to exchange the
product.A sales receipt or other document showing the product, the date that you purchased the product, as well as the
authorized retailer included, is considered such proof.
COVERAGE:
Warranty coverage begins the day you buy your product. For a
period of one (1) year from the date of purchase, if the product
is determined to be defective, Philips will exchange the defective
product with a new or renewed product, at its option, at no
charge.The replacement product is covered only for the warranty period of the original product.When the warranty on the
original product expires, the warranty on all replaced products
also expires.When it is necessary for you to ship the product
to Philips for exchange, you will pay the shipping cost for shipment to Philips. Philips will pay the shipping costs when returning a product to you.
Note:The exchange model supplied will be the most comparable one in Philips current inventory. Shipping of your product to
Philips implies intent to follow the specified requirements of the
warranty and exchange program. Product received by Philips
cannot be returned. Replacement product can only be sent if all
warranty requirements are met. Failure to follow all requirements can result in delay of exchange process.
EXCLUDED FROM WARRANTY COVERAGE
Your warranty does not cover:
• Shipping charges to return defective product.
• Labor charges for installation or setup of the product, adjustment of customer controls on the product, and installation
or repair of antenna systems outside of the product.
•Pro duct repair and/or part replacement because of improper
installation, connections to improper voltage supply, abuse,
neglect, misuse, accident, unauthorized repair or other cause
not within the control of Philips.
• Damage occurring to product during shipping when improperly packaged or cost associated with packaging.
•A product that requires modification or adaptation to enable
it to operate in any country other than the country for
which it was designed, manufactured, approved and/or authorized, or repair of products damaged by these modifications.
•A product used for commercial or institutional purposes
(including but not limited to rental purposes).
•Products lost in shipment and no signature verification of
receipt can be provided.
•Products sold AS IS or RENEWED.
WHERE WARRANTY EXCHANGE IS AVAILABLE:
Exchange is available in all countries where Philips officially distributes the product. In countries where Philips does not distribute the product, the local Philips organization will attempt to
exchange the product, although there may be a delay if the
appropriate product is not readily available, or special customs
processes are implied.
FOR EXCHANGE IN THE U.S.A., PUERTO RICO,OR
U.S.VIRGIN ISLANDS…
Contact Philips Customer Care Center at:
1-888-PHILIPS (1-888-744-5477)
FOR EXCHANGE IN CANADA…
1-800-661-6162 (French Speaking)
1-888-PHILIPS (1-888-744-5477) - (English or Spanish
Speaking)
REPLACEMENT AS PROVIDED UNDER THIS WARRANTY IS
THE EXCLUSIVE REMEDY OF THE CONSUMER. PHILIPS
SHALL NOT BE LIABLE FOR ANY INCIDENTAL OR CONSEQUENTIAL DAMAGES FOR BREACH OF ANY EXPRESS OR
IMPLIED WARRANTY ON THIS PRODUCT. EXCEPT TO THE
EXTENT PROHIBITED BY APPLICABLE LAW,ANY IMPLIED
WARRANTY OF MERCHANTABILITY OR FITNESS FOR A
PARTICULAR PURPOSE ON THIS PRODUCT IS LIMITED IN
DURATION TO THE DURATION OF THIS WARRANTY.
Some states do not allow the exclusions or limitation of incidental or consequential damages, or allow limitations on how
long an implied warranty lasts, so the above limitations or exclusions may not apply to you. In addition, if you enter into a service contract agreement with the PHILIPS partnership within
ninety (90) days of the date of sale, the limitation on how long
an implied warranty lasts does not apply.
This warranty gives you specific legal rights. You may have other rights which vary from state/province to state/province.
Philips, P.O. Box 671539,Marietta, GA. 30006-0026
(Warranty:4835 710 27325)
 Loading...