

Page 1
PHILIPS
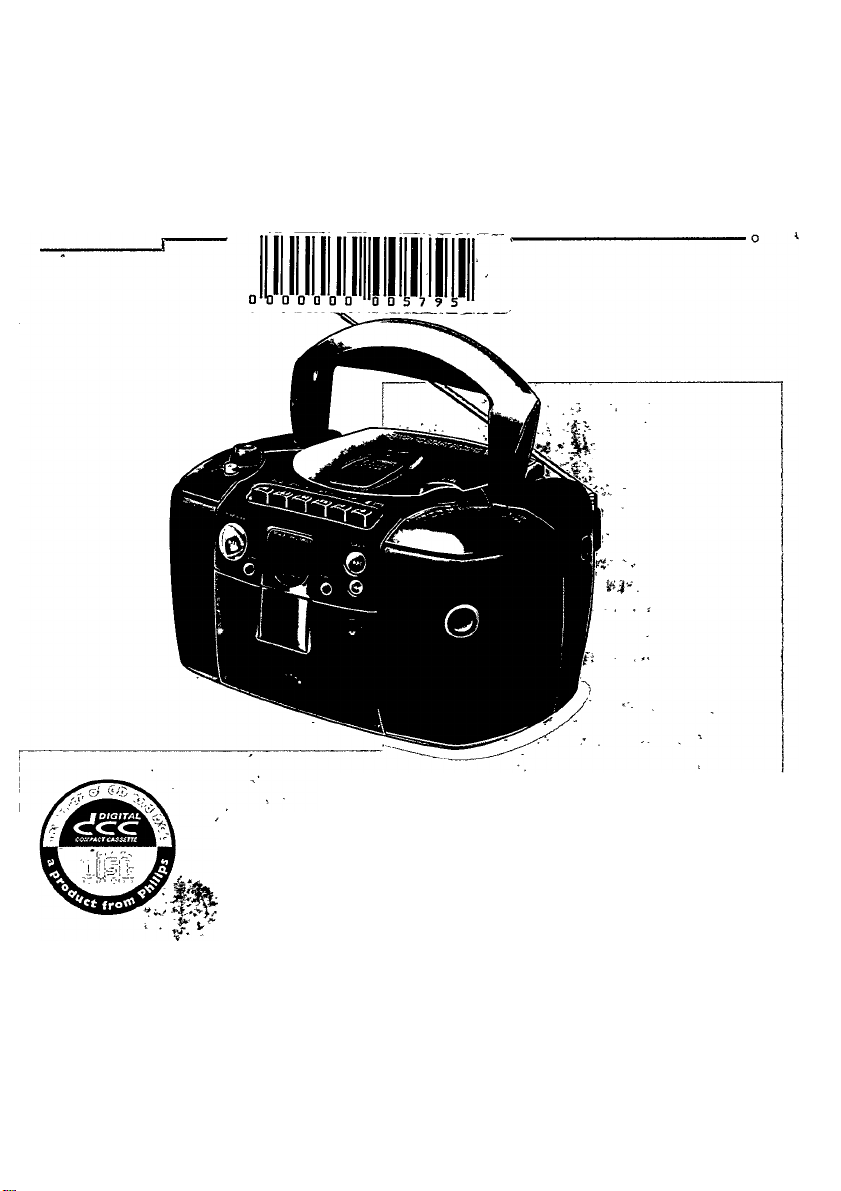
AZ nOO-AZ 1101 -AZ 1102 CD Radio Cassette Recorder
Instructions for use
Mode d'emploi •
Itistrucciones de minejo
PHILIPS
Page 2
^ México HIM
Garantía
........................................................
Página 42
New Zealand
Guarantee........................................................Page 42
(|r) Brasil
Garantía
........................................................
Página 43
@ Australia
Guarantee........................................................Page 43
English.....................................4
Frangais
Español
.................................
..................................
13
23
.33
México
Es necesario que lea cuidadosamente su instructivo de
manejo.
PRECAUCION - ADVERTENCIA
No abrir, riesflo de choque elécttíco
Verifique que el volteje de elimenteciónl
A
sea el requerido per» su «pareto |
I
Para evitar el riesgo de choque eléctrico, no quite la tapa.
En caso de requerir servicio, dirijase al personal calificado.
Page 3
© © ©
© 0 0 ©©© ©
Page 4

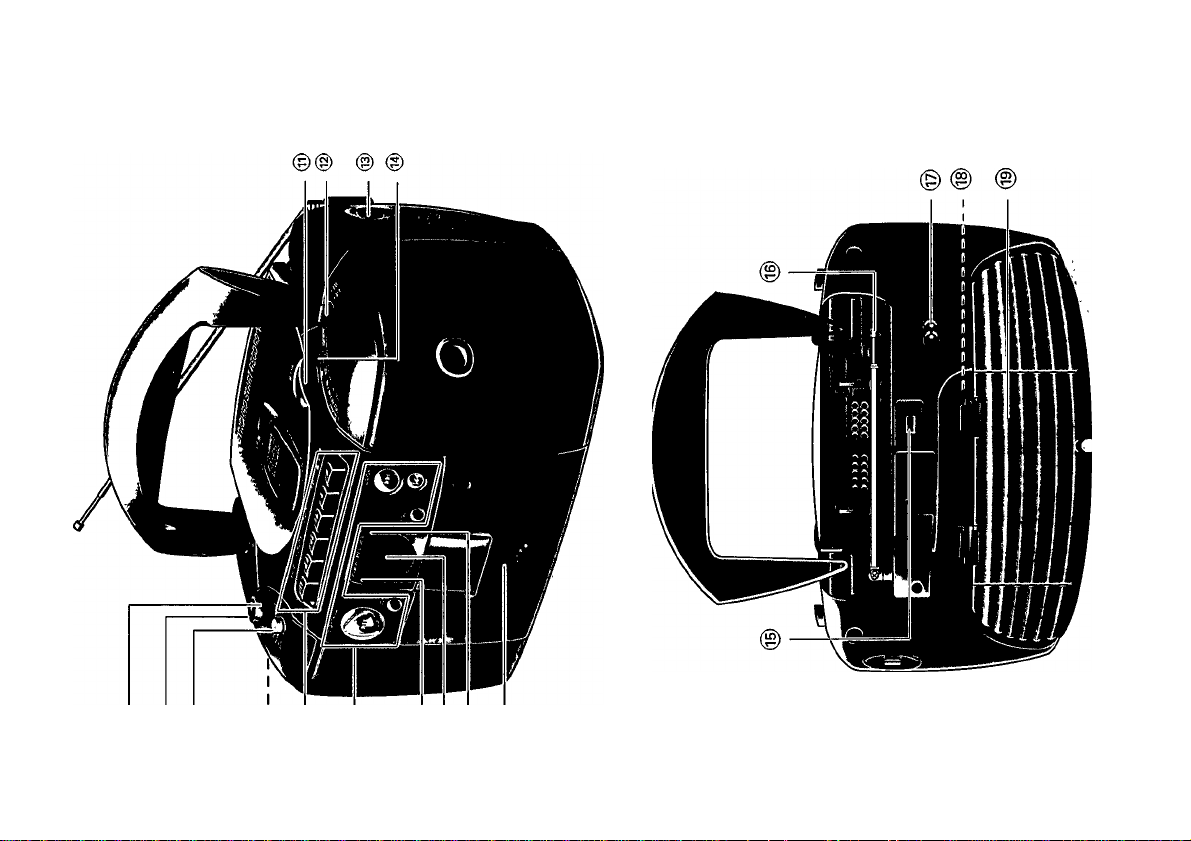
CONTROLS
TOP and FRONT PANEL
(T) VOLUME - to adjust the volume level
(D Source selector - POWER ON/OFF switch and to select the sound source: CD - TUNER - TAPE
(D DBB (Dynamic Bass Boost) - to increase the bass level
0 O - 3.5 mm headphone socket
0 Cassette keys
PAUSE II - to interrupt playback
STOP* OPEN ■ A - to stop playback and open the cassette compartment
SEARCH - to fast forward the tape
SEARCH - to fast rewind the tape
PLAY ◄ - to start playback
RECORD • - to start recording
0 CD buttons
PLAY*PAUSE HI-to start or interrupt CD playback
STOP ■ - to stop playback
SEARCH H« - to skip or search a passage or a track
MODE - to select a different playback mode e.g". to SHUFFLE or REPEAT and to program track
numbers
0 POWER indicator - lights up when power supply is on
0 CD display-to indicate CD functions
0 FM stereo indicator - lights up when receiving FM STEREO
@ Cassette compartment
® LIFT TO OPEN-to open the CD door
® Band selector - to select the wave band (FM-MW)
® TUNING - to tune to radio stations
0 Tuning dial pointer
BACK PANEL
@ BEAT CUT switch - for eliminating possible whistle tones during MW (AM) recordings
® Telescopic aerial - to improve FM reception
@ MAINS - for mains lead
® Voltage selector - (inside battery compartment)
® Battery door - to open the battery compartment
Both model and production number can be found on the back of the set.
Page 5
BATTERIES
Whenever convenient, use the mains supply if you want to conserve
battery life. Make sure you remove the mains plug from the set and wall
socket before inserting batteries.
Batteries (optional)
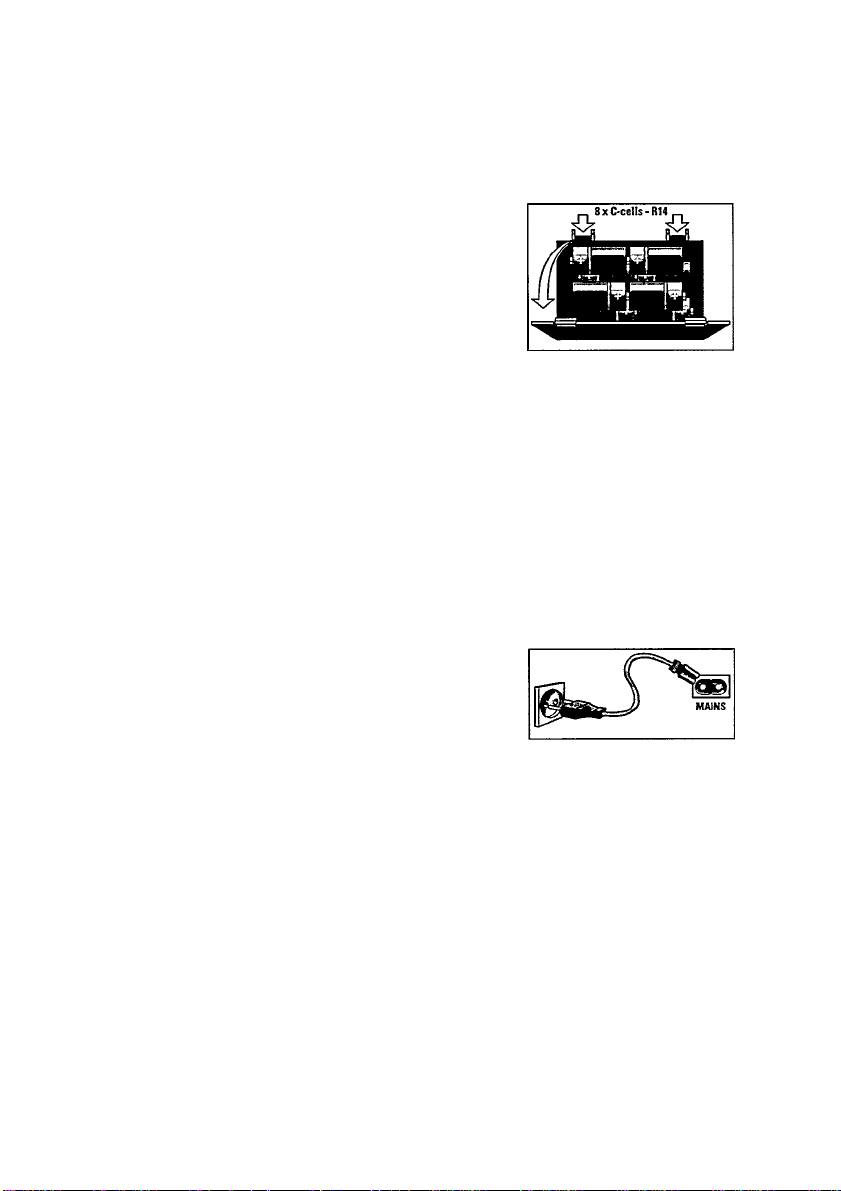
1. Open the battery compartment and insert as shown eight batteries,
typeRM, orC-cells.
2. Replace the compartment door, making sure the batteries are firmly
and correctly in place.
3. Remove the batteries if exhausted or if they will not be used again for
a long period.
- The incorrect use of batteries can cause electrolyte leakage and will
corrode the compartment or cause the batteries to burst. Therefore:
- Do not mix battery types, e.g. alkaline with zinc carbonate.
- ■ When inserting new batteries, replace all batteries at the same time.
WoferThe battery supply is switched off when the set is connected to
the mains.
MAINS
1. Check if the mains voltage as shown on the type plate (on the back of
the set) corresponds to your local mains voltage. If it does not, consult
your dealer or service organisation.
2. If your set is equipped with a voltage selector, set it to the local mains
voltage.
3. Connect the mains lead to the MAINS socket and the wall socket.
- The set is now ready to use.
4. To switch off the mains supply completely, pull the mains plug out of
the wall socket.
- Disconnect the mains lead when you change over to battery supply, or
to protect the set during heavy thunderstorms.
POWER SUPPLY
Environmental information
All redundant packaging material has been omitted. We have done our utmost to make the packaging
easily separable into three mono materials: cardboard (box), expandable polystyrene (buffer) and polyethy
lene (bags, protective foam sheet).
Your set consists of materials which can be recycled if dissassembled by a specialized
company. Please observe the local regulations regarding the disposal of packaging mate
rials, exhausted batteries and old equipment.
Page 6
OPERATION
GENERAL OPERATION
7. To switch on the set, use the source selector®
2. Adjust the sound using the VOLUME control ® and DBB switch
3. To switch off the set, set the source selector ® to TAPE/OFF posi
tion, with the cassette keys reieased.
TUNER
7. Set the source selector @ to TUNER.
Z Adjust the sound using the VOLUME control ® and the
DBB switch
3. Select the wave band using the FM-MW band seiector ®.
4. Tune to a radio station using the TUNING knob ®.
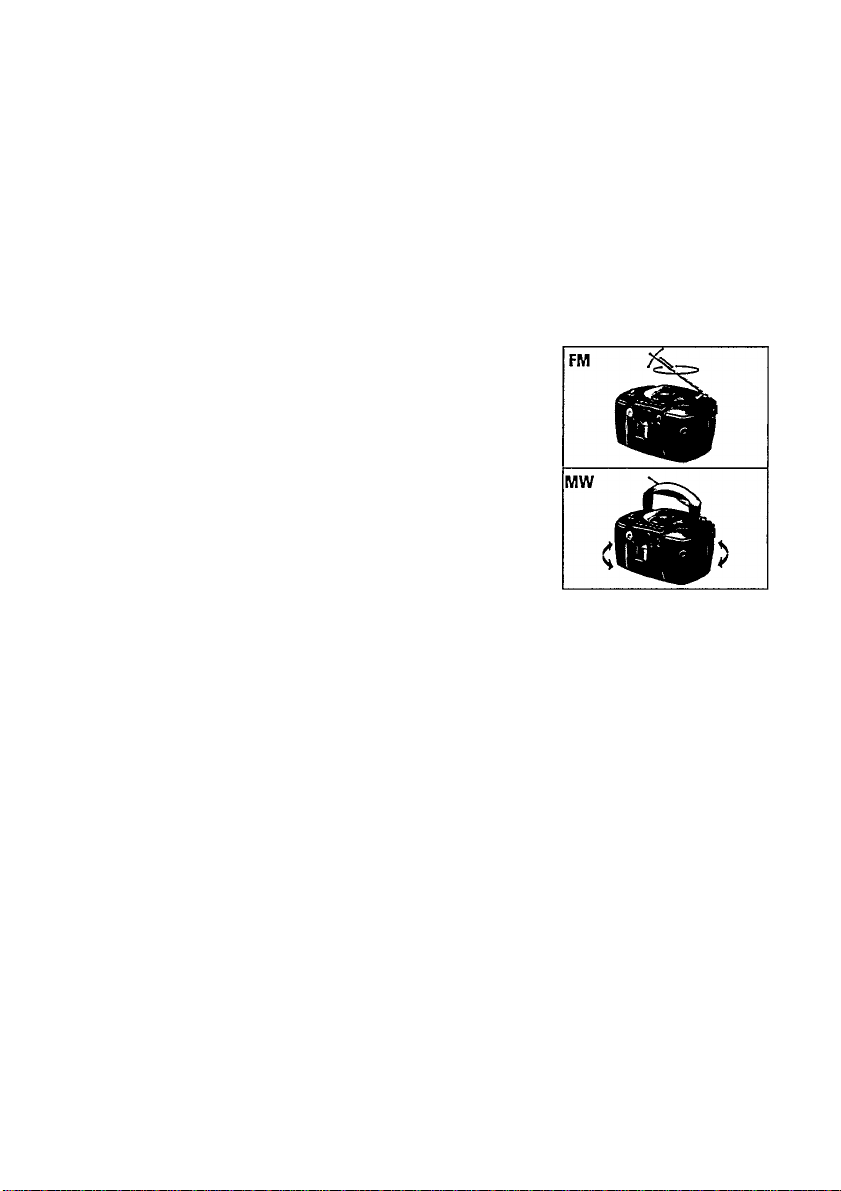
- For FM, pull out the telescopic aerial. To improve FM-reception,
incline and turn the aeriai. Reduce its length if the FM-signal is
too strong (very close to a transmitter).
- For MW the set is provided with a built-in aerial, so the telescopic
aerial is not needed. Direct the aerial by turning the whole set.
- The FM STEREO indicator® lights up when you are receiving a
FM stereo transmitter in stereo.
5. To switch off the set, set the source selector @ to TAPE/OFF posi
tion, with the cassette keys released.
TUNER
Page 7
CD DISPLAY INDICATION
• Total track number: in stop position.
■ Current track number: during CD play.
• II and current track number: in PAUSE mode.
■ SHUFFLE/REPEAT mode: the respective mode is activated.
■ PROG; program function is active or when you store a track.
■ No display: error in CD operation or with the CD
(see Troubleshooting).
PLAYING A CD
1. Set the source selector® to CD.
2 To open the CD compartment, lift the CD door on the edge
(marked LIFT TD OPEN®).
3. Insert the audio CD, printed side facing up.
4. To close the CD compartment, push the door down.
- The CD player scans the contents of the CD and the total number of
tracks is displayed
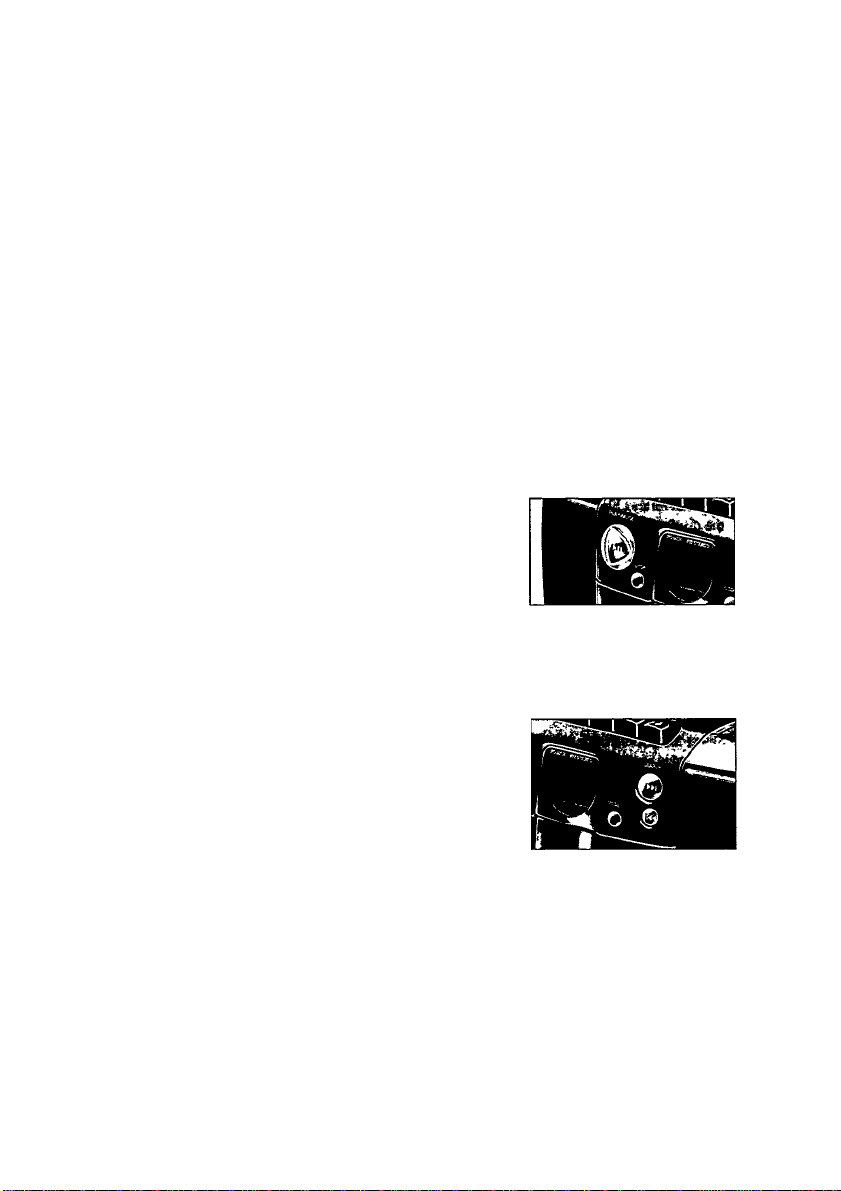
5. Press PLAY»PAUSE ► II® to start playback.
6. Adjust the sound using the VOLUME control ® and the DBB switch @.
7. To interrupt playback, press PLAY»PAUSEMl®.
Press PLAY• PAUSE Ml ® again to continue playback.
8. Press STOP M ® to stop CD playback.
9. Set the source selector @ to TAPE/OFF position to switch off the set.
(Vote; CD playback will also stop when:
-the CD has reached the end;
-the CD door is opened;
-the source selector is in the TUNER or TAPE/OFF position.
CD PLAYER
SHUFFLE
REPEAT 1
AaPROG
PROG
o o
HI u u
SEARCH FM or^M
Selecting a different track during playback
- You can jump to the next track by pressing SEARCH ® once. If
you want to skip more than one track, press SEARCH ® more
than once until the display shows the desired track number.
- If you want to repeat the running track from the beginning, press
1« SEARCH ® once. If you want to repeat one of the previous
tracks, press SEARCH ® more than once until the display shows
the desired track number.
Starting with a particular track
1. In the STOP position you can select a desired track using the
FM SEARCH or SEARCH button ®.
2. Press PLAY• PAUSE ► !! ® to start playback.
Page 8
CD PLAYER________________________
Searching for a passage within a track
You can search for a passage within a track. The CD is played at low
volume and at high speed, however, the sound is stiii recognizabie.
1. Keep the SEARCH or SEARCH button ® pressed during
playback, and release the button as soon as you recognize the
desired passage:
- Normal CD playback will resume from this point.
SHUFFLE/REPEAT
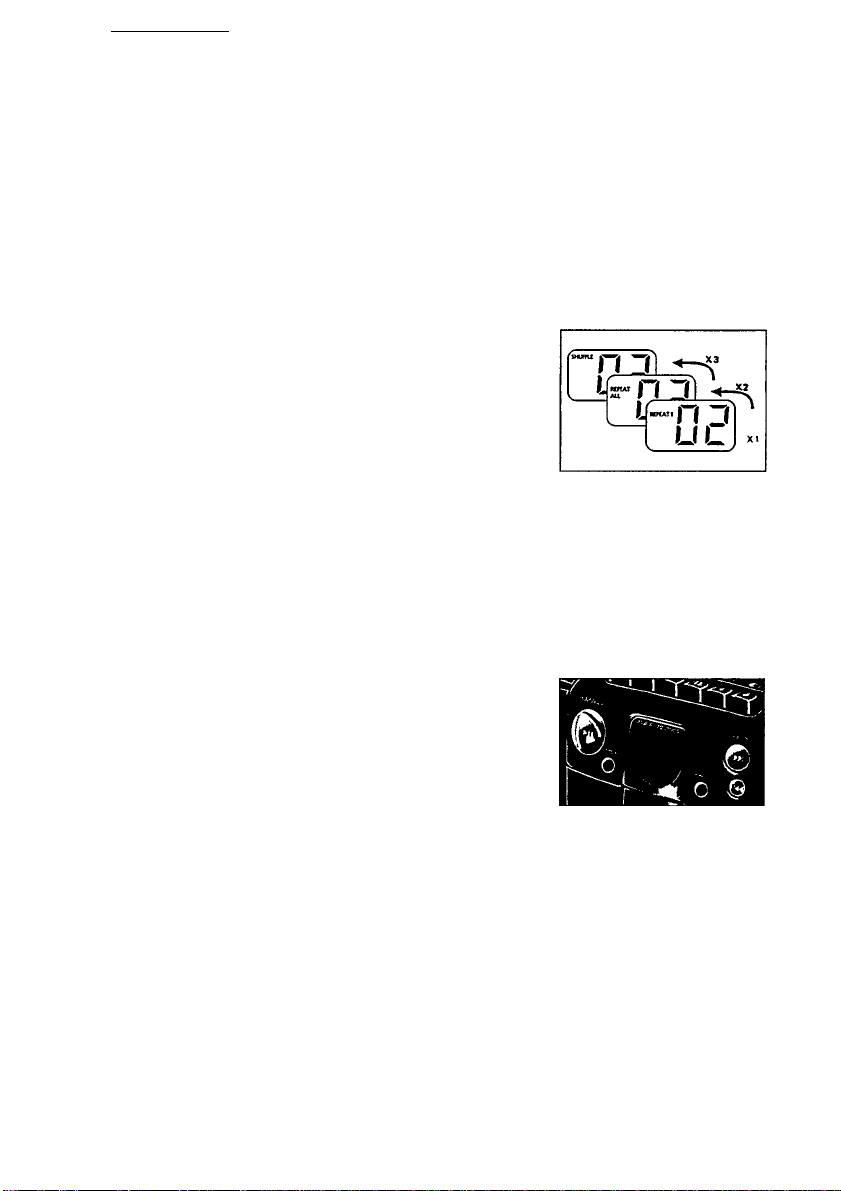
The MODE button ® allows you to select four different modes. The
modes can be selected or changed during playback.
1. During playback only, press MODE® until the desired function
appears on the display.
REPEAT 1 - Continuous playback of the current track.
REPEAT ALL - Repeats the entire CD.
SHUFFLE - Tracks are played in random order.
- During playback you can use i« SEARCH or SEARCH ® to
skip tracks.
- The REPEAT mode can also be further combined with PROGRAM.
2. To leave the SHUFFLE mode, press the MODE button ® repeatedly
until the various SHUFFLE/REPEAT modes are no longer shown on
the display. You can also press STOP ■ ® to quit playback.
PROGRAMMING TRACK NUMBERS
You may store at most 20 tracks in the memory in the desired sequence.
You may store any track more than once.
Programming track numbers
/. Press MODE® in CD stop mode
- The display shows DO.
2. Select the desired track using SEARCH or SEARCH ® until
the display shows the desired track number.
3. Store the desired track by pressing MODE® once.
- The display instantly reverts back to OG.
4. Select and store all desired tracks of a CD in this way.
Checking a program
1. To review the set program, press MODE ®.
- The display will show the track numbers you have selected in
sequence and ends with showing DO.
2. To start playback of the program, press MODE ® again until the
display shows PROG.
3. Press PLAY*PAUSE HI®.
- Playback starts with the first track of the program. After the last
track, playback stops and the display shows the CD's total
number of tracks.
Page 9
CD PLAYER CASSEHE RECORDER
PROGRAMMING TRACK NUMBERS
Note: If you have pressed MODE but failed to select any tracks, CD
playback will not start (see Troubleshooting).
Erasing a program
You can erase a program by;
- opening the CD door.
- setting the source selector® to the TAPE or TUNER position.
CASSETTE PLAYBACK
1. Set the source selector @ to TAPE.
2. Press ST0P«0PEN ■ A ® to open the cassette holder.
3. Insert a recorded cassette.
4. Press PLAY ◄ ® and playback will start.
5. Adjust the sound using the VOLUME ®, and DBB ® controls.
6. For brief interruptions, press PAUSE II®. Press PAUSE II® again
to resume playback.
7. By pressing •« or ► ► ®, fast winding of the tape is possible in both
directions.
8. To stop playback, press STOP»OPEN BA®.
- The keys are automatically released at the end of the tape.
9. Set the source selector® to TAPE/OFF position (with the cassette
keys released) to switch off the set.
- The power indicator goes out.
CASSETTE RECORDING
General information on cassette recording
- Recording is permissible insofar as copyright or other rights of third
parties are not infringed.
- This deck is not suited for recording on CHROME (lEC II) or METAL
(lEC IV) type cassettes. For recording you should use NORMAL type
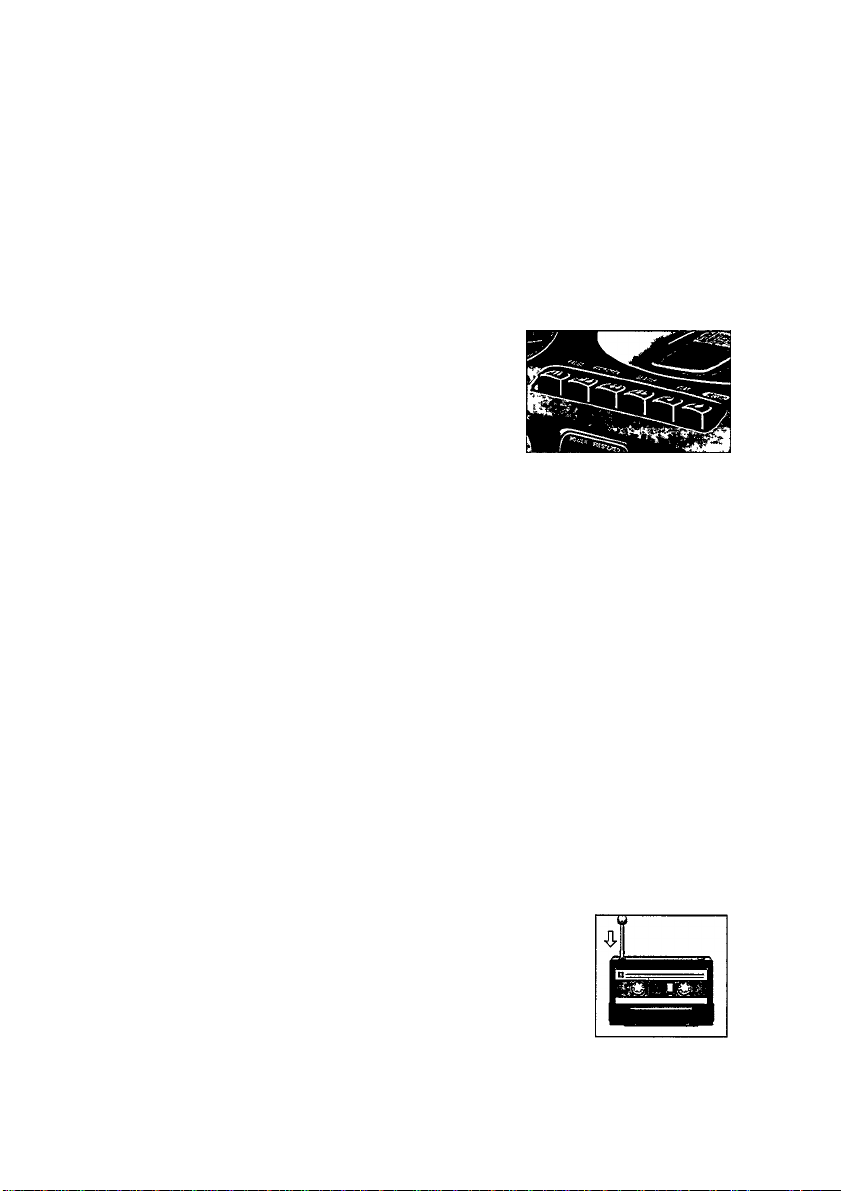
cassettes (lEC I) on which the tabs have not been broken.
- The recording level is set automatically. Altering the VOLUME
control ® or, DBB switch ® will not affect the recording in
progress.
- No recording will take place during the first 7 seconds, when the
leader tape passes the recorder heads.
- To prevent the accidental erasure of a recording, keep the cassette
side to be safeguarded in front of you and break out the left tab.
Recording on this side is no longer possible.
Page 10
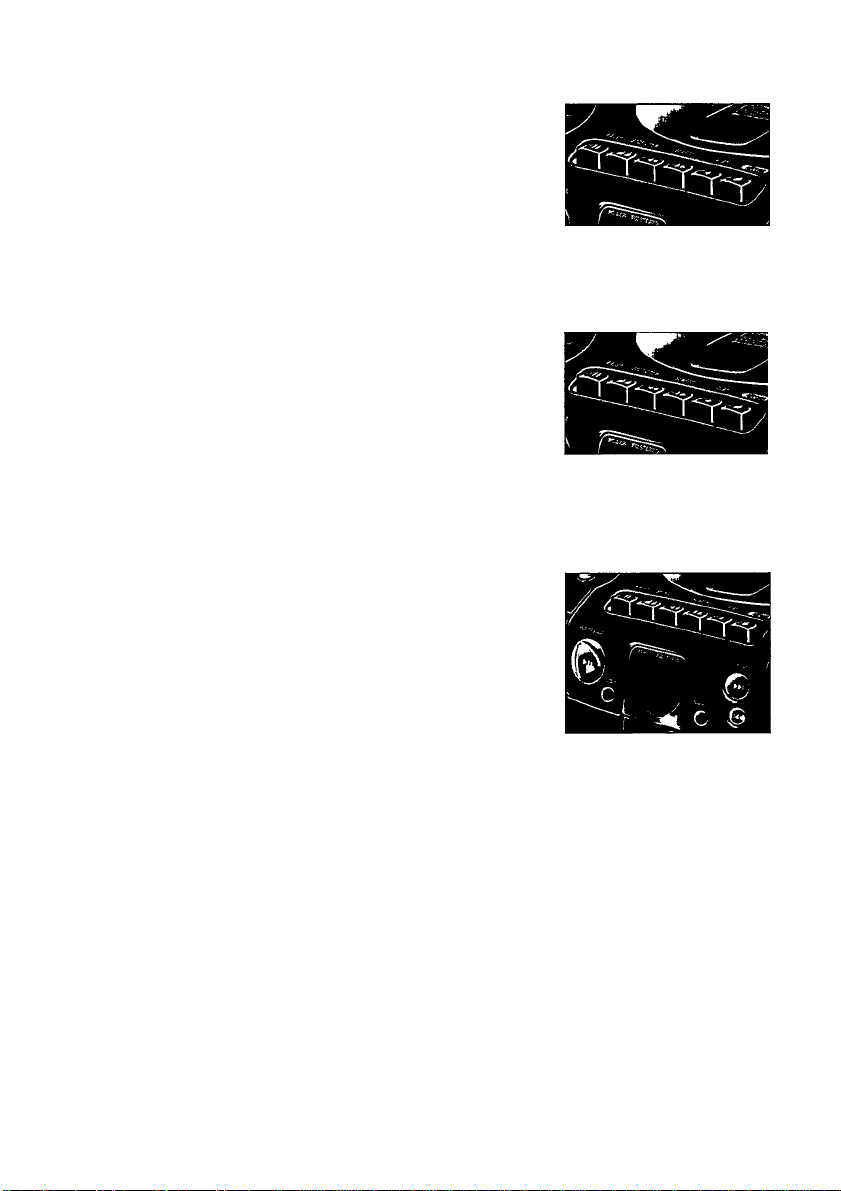
CASSEHE RECORDER
RECORDING FROM THE TUNER
1. Set the source selector® to TUNER.
2. Tune to the desired radio station using the TUNING knob ®.
3. Press STOP* OPEN BA ® to open the cassette holder.
4. Insert a blank cassette.
5. Press RECORD • ® to start recording.
6. For brief interruptions, press PAUSE II®. To resume recording,
press PAUSE II® again.
7. To stop, press STOP »OPEN BA®.
CD SYNCHRO - RECORDING FROM THE CD PLAYER
1. Set the source selector® to CD.
2. Insert a CD and if desired, program track numbers.
3. Press STOP»OPEN B A ® to open the cassette holder.
4. Insert a blank cassette.
5. Press RECORD • ® to start recording.
- Playing of the CD program starts automatically from the beginning
of the program. It is not necessary to start the CD player
separately.
6. For brief interruptions, press PAUSE II®. To resume recording,
press PAUSE II® again.
7. To stop recording press ST0P»0PEN BA®.
To select and record a particular passage within a track
1. Press r« SEARCH or SEARCH ® to select a passage.
2. Put the CD player in PAUSE II ® position at the selected passage.
- Recording will start from this exact point when you press
RECDRDB®.
10
Page 11
PRECAUTIONS & GENERAL MAINTENANCE
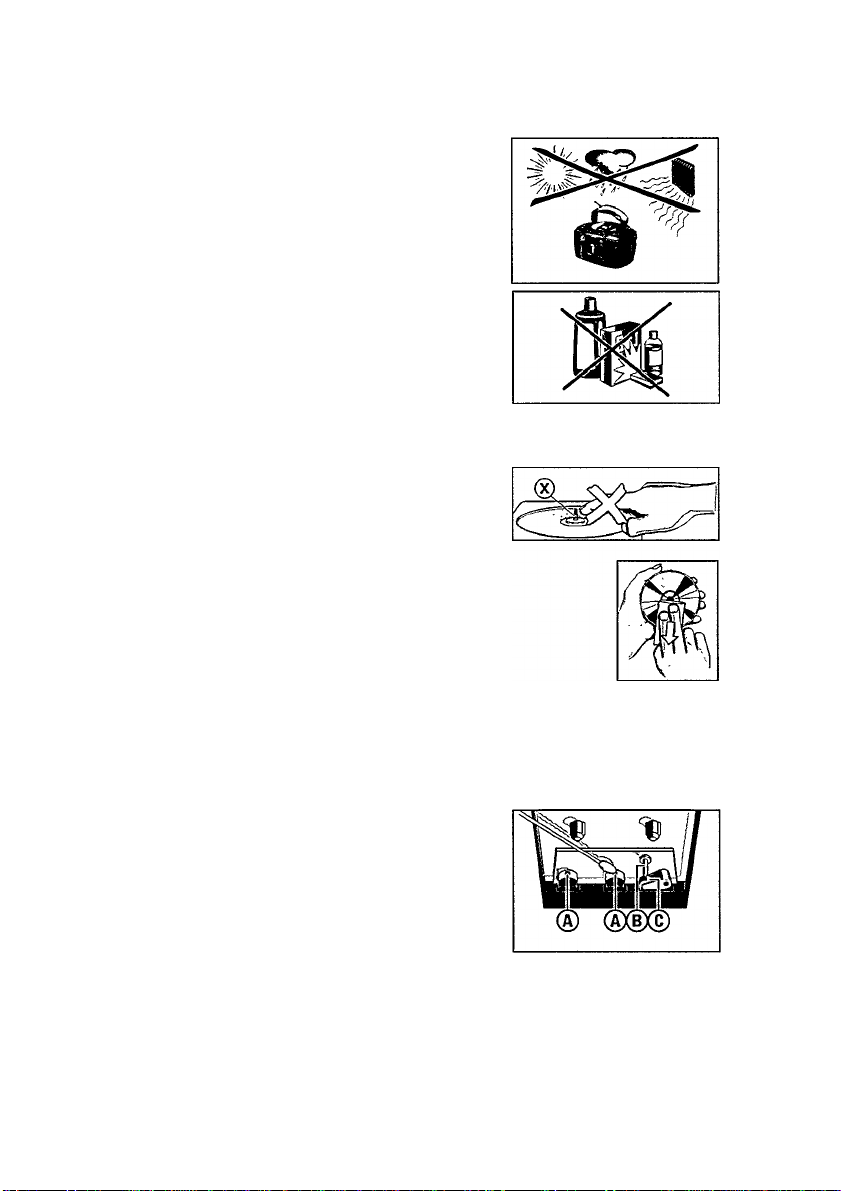
Place the set on a hard, flat surface so that it does not tilt.
Do not expose the set, CDs, batteries or cassettes to humidity, rain,
sand, direct sunlight or other places where high temperatures can
occur, such as in the vicinity of heating apparatus or in motor cars
parked in the sun.
Do not cover the set. The amplifier produces heat which must dis
sipate freely, so make sure that there is sufficient ventilation around
the set. A minimum gap of 15 cm is necessary.
• The mechanical parts of the CD player and the cassette deck contain
self-lubricating bearings and must not be oiled or lubricated.
■ A chamois leather slightly moistened with water is sufficient for
cleaning the housing. Do not use cleaning agents containing
alcohol, spirits, ammonia or abrasives as these may harm the
housing.
CD MAINTENANCE
The lens of the CD player should never be touched.
The lens may cloud over if the CD player is moved from cold to
warm surroundings. The CD player will not start. Give the player
some time to acclimatise.
To take a CD out of its box, press the centre spindle while lifting the
CD. Always pick up the CD by the edge and replace the CD back in
its box after use to avoid scratching and dust.
To clean the CD, wipe in a straight line from the centre towards the
edge using a soft, lint-free cloth. Do not use cleaning agents as they
may damage the disc.
Never write on a CD or attach stickers to it.
MAINTENANCE
RECORDER MAINTENANCE
To ensure a good recording and playback quality, clean the indicated
parts ®,(f) and (c) after every 50 hours of operation or, on average,
once a month. Use a cotton bud slightly moistened with alcohol or a
special head cleaning fluid.
• Press PLAY ◄ ©and clean the rubber pressure roller©.
• Then press PAUSE II® and clean the capstan ® and the heads ®.
• After cleaning, press STOP»OPEN BA®.
Cleaning of the heads ® can also be done by playing a cleaning
cassette through once.
11
Page 12

TROUBLESHOOTING
If a fault occurs, first check the points listed below before taking the set for repair.
If you are unable to remedy a problem by following these hints, consult your dealer or service centre.
WARNING: Under no circumstances should you try to repair the set yourself, as this would invalidate the
guarantee.
PROBLEM
Set does not react to
operation of any control.
Display does not function
properly.
No sound.
Bad sound.
Severe radio hum or noise.
Poor radio reception.
Poor cassette sound quality.
Recording does network.
CD playback does network.
The CD skips tracks.
POSSIBLE CAUSE
- Electrostatic discharge.
- Electrostatic discharge.
- VOLUME is not adjusted.
- Headphones are connected. • Disconnect headphones.
- Batteries are exhausted.
- Batteries are incorrectly
inserted.
- Mains lead is not securely
connected. properly.
- Batteries are exhausted.
- Set too close to TV. VCR or
computer.
- Weak radio signal. • FM: aim and extend the
- Dust and dirt on the heads. • Clean the heads etc., see
capstan or pressure roller.
- Cassette tab(s) may be broken
out.
- CD is badly scratched or dirty. • Replace or clean the CD, see
- No CD inserted. • Insert CD.
- CD inserted upside down. • Insert CD with printed side
- Laser lens is steamed up. ■ • Wait until lens has
- MODE pressed but.no tracks
selected during programming.
- CD is damaged or dirty. • Replace or clean the CD.
- PROGRAM/SHUFFLE is active. • Switch off the PROGRAM/-
REMEDY
• Switch off the set, disconnect
the mains plug and reconnect
after a few seconds.
• Switch off the set, disconnect
the mains plug and reconnect
after a few seconds.
• Adjust the VOLUME.
• Insert fresh batteries.
• Insert the batteries correctly.
• Connect the mains lead
• Replace batteries.
• Increase the distance.
telescopic aerial for best
reception;
• MW: rotate the entire set.
Maintenance.
• Apply a piece of adhesive tape
over the missing tab space.
Maintenance.
facing up.
acclimatized.
• Select tracks or erase program.
SHUFFLE function.
12
Page 13

(^) Australia
New Zealand
GUARANTEE FOR AUSTRALIA GUARANTEE FOR NEW ZEALAND
The benefits given to the purchaser by this warranty
are in addition to all other rights and remedies,
which, under the Trade Practices Act or other
Commonweaith or State law, the purchaser or
owner has in respect of the product.
The Philips product carries the following warranties:
- C-series HiFi-systems 12 months.
- Compact Disc Players: 12 months.
- Home Audio Systems: 6 months.
- Clock radios, portable radios, cassette recorders,
cassette piayers and radio recorders: 90 days.
Any defect in materials or workmanship occurring
within the specified period from the date of deiivery,
wiil be rectified free of charge by the retailer from
whom this product was purchased.
Note: Please retain your purchase docket to assist
prompt service.
Conditions of this warranty
1. All claims for warranty service must be made to
the retailer from whom this product was pur
chased. All transport charges incurred in connec
tion with warranty service or replacement will be
paid by the purchaser.
2. These warranties do not cover batteries and
extend only to defects in materiais or
workmanship occurring under normal use of the
product where operated in accordance with our
instructions.
Philips
Consumer Products Division
Technology Park
Figtree Drive, Australia Centre
Homebush 2140
New South Wales
Thank-you for purchasing this quality Philips
product.
Philips New Zealand Ltd guarantees this product
against defective components and faulty
workmanship for a period of 12 months. Any defect
in materials or workmanship occurring within 12
months from the date of purchase subject to the
following conditions wiil be rectified free of charge
by the retailer from whom this product was
purchased.
Conditions
1. The product must have been purchased in New
Zealand. As proof of purchase, retain the original
sales docket indicating the date of purchase.
2 The guarantee applies oniy to faults caused by
defective components, or fauity workmanship on
the part of the manufacturer.
3. The guarantee does not cover faiiures caused by
misuse, neglect, normal wear and tear, accidental
breakage, use on the incorrect voltage, use con
trary to operating instructions, or unauthorised
modification to the product or repair by an
unauthorised technician.
4. Reasonable evidence (in the form of a sales
docket) must be suppiied to indicate that the
product was purchased no more than 12 months
prior to the date of your claim.
5. In the event of a failure. Philips shall be under no
liability for any injury, or any loss or damage
caused to property or products other than the
product under guarantee.
This guarantee does not prejudice your rights under
common law and statute, and is in addition to the
normal responsibilities of the retailer and Philips.
How to claim
Shouid your.Philips product fail within the guarantee
period, please return it to the retailer from whom it
was purchased. In most cases the retailer will be
able to satisfactorily repair or replace the product.
However, should the retailer not be able to conclude the
matter satisfactorily, or if you have other difficulties claim
ing under this guarantee, please contact
The Guarantee Controller
Philips NewZeaiand Ltd.
S P.O.Box 41.021
Auckland
Q (09)8494160
faxS (09)8497858
42
Page 14

México
GARANTIA PARA MEXICO
Este aparato está fabricado con materiales de alta
calidad y ha sido cuidadosamente verificado. Philips,
por lo tanto, da a usted una garantía de 12 meses a
partir de su fecha de compra. La garantid ampara la
reposición de las piezas defectuosas debidas a fallas
en su montaje o en los materiales, incluyendo la mano
de obra necesaria para su reemplazo en nuestras Su
cursales o talleres autorizados.
En caso de fallas en su aparato le rogamos se sirva
poner en contacto con su distribuidor.
Esta garantía no cubrirá las averías que resulten como
consecuencia de una instalación incorrecta del apara
to, manifiesto maltrato o uso inadecuado del mismo.
Philips se obliga a reparar y devolver a usted su apa
rato en un plazo no mayor de 30 días hábiles contados
a partir de la fecha de haber ingresado su aparato a
uno de nuestros talleres.
Con la presentación de la factura o remisión de su
aparato podrá hacer efectiva la garantía.
Si usted tiene alguna duda o pregunta que no le pue
da solucionar su distribuidor, por favor ponerse en
contacto con:
Oficinas Centraies de Servicio,
Av. Coyoacán No. 1051,
Coi. del Valle,
03100 México, D.F.
Q 5-75-20-22 o 5-75-01-00
CERTIFICADO DE GARANTIA
INTERNACIONAL
Este aparelho é garantido pela Philips da Amazonia
Industria Eletrónica LTDA, por um período superior ao
estabelecido por lei. Porém, para que a garantia tenba
validada, é imprescindível que, além deste certificado,
seja apresentada a nota fiscal de compra do produto.
7. Philips da Amazonia Indùstria Eletrónica LTDA
assegura ao proprietàrio consumidor deste
aparelho a garantia de 365 dias (90 dias legal e 275
dias adicional) contados a partir da data de entrega
do produto, conforme expresso na nota fiscal de
compra, que passa a fazer parte deste certificado.
2. Esta garantia perderá sua validada se:
a. O defeito apresentado for ocasionado por uso
indevido ou em desacordó com o seu manual de
instrugóes.
(BR) Brasil
b. O produto for alterado, violado ou consertado por
pessoa nao autorizada pela Philips.
c. O produto for ligado a fonte de energia (rede
elétrica, pilhas, bateria, etc.) de características
diferentes das recomendadas no manual de
instrugóes e/ou no produto.
d. O numero de série que identifica o produto
estiver de alguma forma adulterad ou rasurado.
иом
3. Estao excluidos desta garantia defeitos decorrentes
do descumprimento do manual de instmgóes do
produto, de casos fortuitos ou de forga maior, bem
como aqueles causados por agentes da natureza e
acidantes.
4. Excluem-se igualmente desta garantia defeitos
decorrentes do uso dos produtos, em servigos nao
doméstico/residencial regular ou em desacordó
com o uso recomendado.
5. Nos municípos onde nao exista oficina autorizada
de setvigo Philips, as despesas de transporte do
aparelho e/ou técnico autorizado, correm por conta
do sr. consumidor requerente do servigo.
6. Este produto tem garantia internacional. 0 setvigo
técnico (durante ou após a garantia) é disponível
em todos os países onde este produto é
oficialmente distribuido pela Philips. Nos países
onde a Philips nao distribui este produto. o servigo
técnico da Philips local poderá prestar tal setvigo,
contado poderá ocorrer algum atraso no prazo de
atendimento se a devida pega de reposigao e o
manual técnico nao forem prontamente disponíveis.
7. A garantia nao será válida se o produto necessitar de
modificagóes ou adaptagóes pata habilitá-lo a opetar
em qualquer outro país que nao aquele para o qual foi
designado, fabricado, aprovado e/ou autorizado, ou ter
sufrido qualquer daño decorrente deste tipo de
modificagâo.
Philips da Amazónia Indùstria Eletrónica LTDA.
Dentro do Brasil, para informagóes adicionáis sobre о
produto ou para eventual necessidade de utilizagâo da
rede de oficinas autorizadas, ligue para о centro de
informagóes ao consumidor, tel 0800-123123
(discagem direta gratuita) ou escreva para a:
caixa postai 21462 - СЕР 04698-970
Sao Paulo - Sp.
Horàrio de atendimento: de segunda à sexta-feira, das
08:00 às 19:00 h; aos sábados das 08:00 às 13:00 h.
Para atendimento fora do Brasil contate a Philips local
ou a: Philips Consumer Service
Beukenlaan 25651 CD Eindhoven,
The Netherlands
43
Page 15

Notes
44
Page 16

Notes
45
Page 17

AZ 1100/AZ1101/AZ1102 - CD Radio Cassette Recorder
/XV
TCtext/RB/9617
 Loading...